Jul 28, 2026
How to set up Google Analytics 4 tracking on Shopify
Written by
Maryna Semidubarska
Updated Sep 17, 2026 comments
Key takeaways
- Shopify's Google & YouTube sales channel is the easiest way to connect a store with Google Analytics 4 (GA4) and collect eCommerce events.
- A complete setup should track the full shopping journey, from product views and cart actions to checkout, purchases, and refunds.
- Make sure each action, such as a purchase, is sent to GA4 only once. If several apps, pixels, or Google Tag Manager setups send the same event, GA4 can count one order two or more times.
- Server-side tracking lets you check and adjust data before it reaches GA4. You can filter out information, add details, and control exactly what GA4 receives.
- Shopify remains the main source for confirmed orders and payments, while GA4 helps you analyze customer behavior, traffic sources, and campaign performance.
Shopify reports focus on activity inside your store. While in GA4, you can follow the full path to a sale, including where shoppers came from, which products they viewed, where they left the funnel, and which campaigns brought customers.
You can complete a basic tracking setup in a few minutes through Shopify's Google & YouTube sales channel. But reliable data analytics in eCommerce still requires complete product data, accurate purchase values, consent settings, and protection against duplicate events. If you need more control, server Google Tag Manager (sGTM) lets you check and adjust the data before sending it to GA4.
What is Shopify tracking in GA4?
Shopify tracking in GA4 means sending customer actions from your Shopify store to a GA4 property as events.
GA4 is event-based. Instead of recording only page loads, it records actions such as:
- Viewing a product.
- Adding an item to the cart.
- Starting checkout.
- Adding shipping or payment information.
- Completing a purchase.
- Receiving a refund.
Each eCommerce event can also carry product details. These details include product identifier (ID), product name, variant, quantity, price, discount, currency, and transaction ID. GA4 uses this information to build eCommerce reports and funnel analysis.
Events can reach GA4 through Shopify's Google & YouTube sales channel, GTM, or a server-side Google Analytics 4 setup for Shopify. The method you choose for how to set up GA4 determines how much control you have over the collected data.
Shopify and GA4 answer different questions. Shopify is the main source of information about orders, payments, refunds, and store operations. GA4 helps you analyze traffic sources, customer journeys, campaign performance, audiences, and behavior before the order.
Benefits of Shopify Google Analytics tracking
- Understand the eCommerce funnel and product performance. Compare product views, cart, checkout, purchases, and item revenue to find where shoppers leave and which products sell.
- Compare marketing channels. Review users, revenue, purchase rate, and average order value from Google Ads, search, email, social media, referrals, and direct visits.
- Build useful audiences. Create groups of users who viewed a product, added it to the cart, started checkout, or bought something. After linking GA4 with Google Ads, you can use eligible groups for remarketing when consent allows it.
- Improve campaign measurement. In GA4, mark
purchaseas a key event and connect it to Google Ads, so you can see which ads brought sales and let Google Ads use this data for reporting and optimization.
How to set up GA4 on Shopify
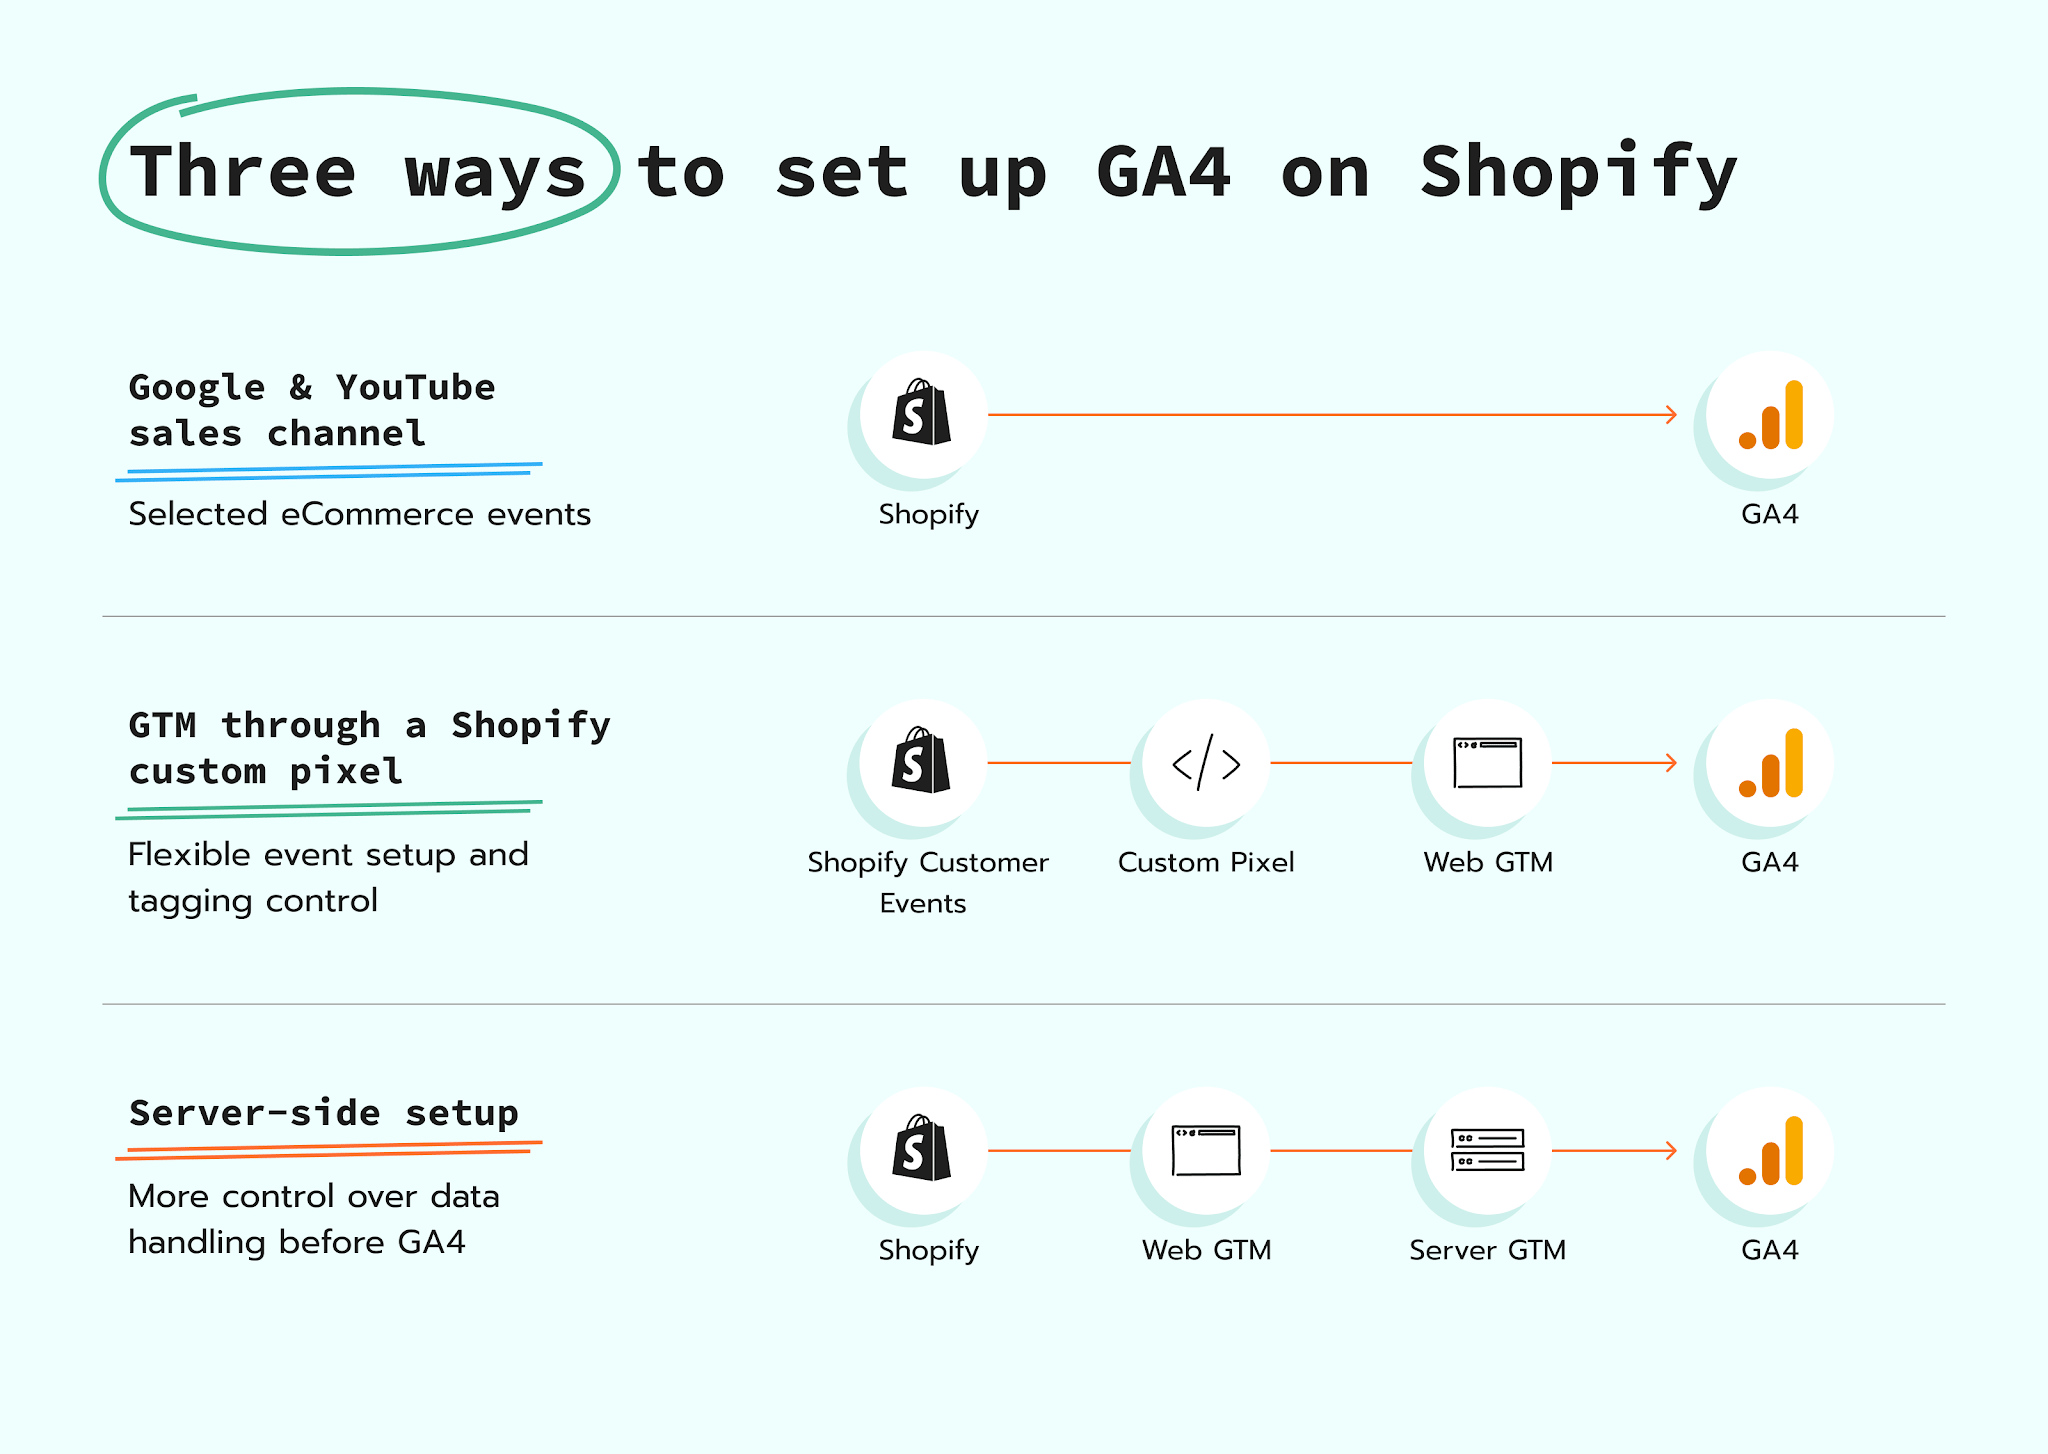
There are three common setup paths. The right one depends on how much control your store needs.
Option 1: use Shopify's Google & YouTube sales channel
This option connects your Shopify store to GA4 through Shopify's Google & YouTube sales channel. Shopify then sends selected eCommerce events to GA4 automatically, giving you a base for store and marketing reports.
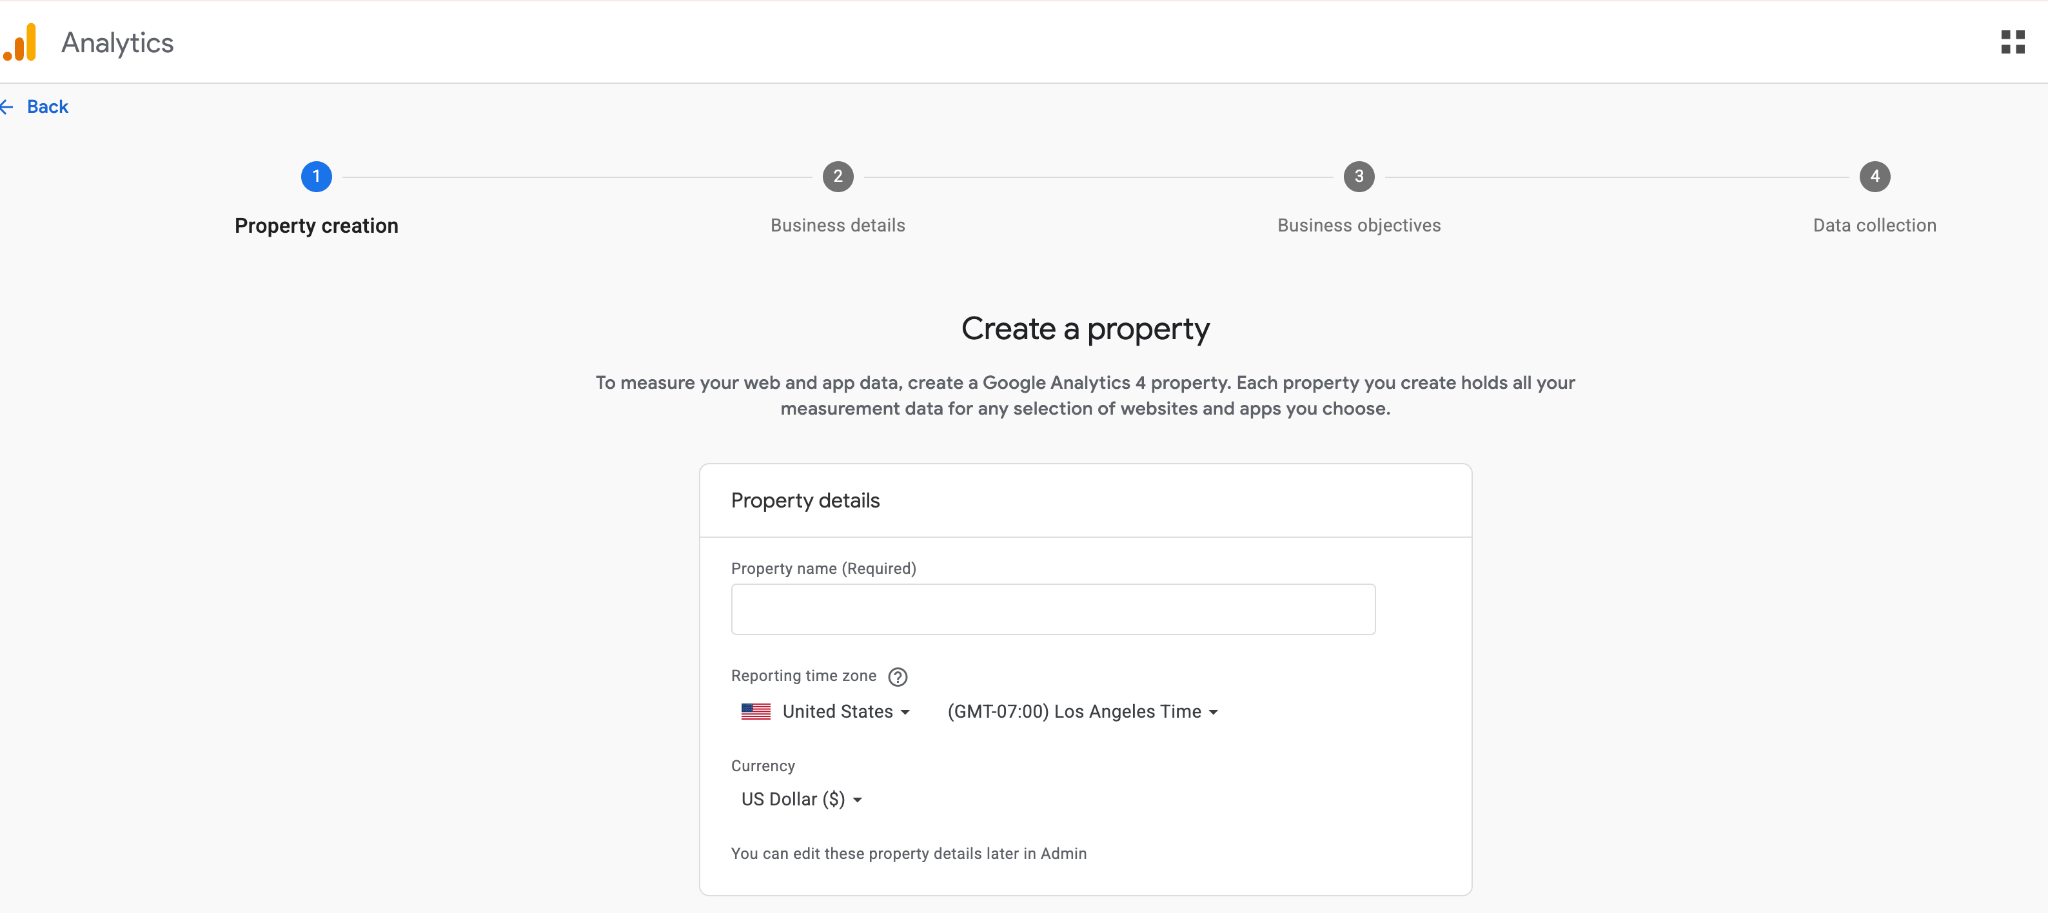
1. Create a Google Analytics account, then create a GA4 property and web data stream.
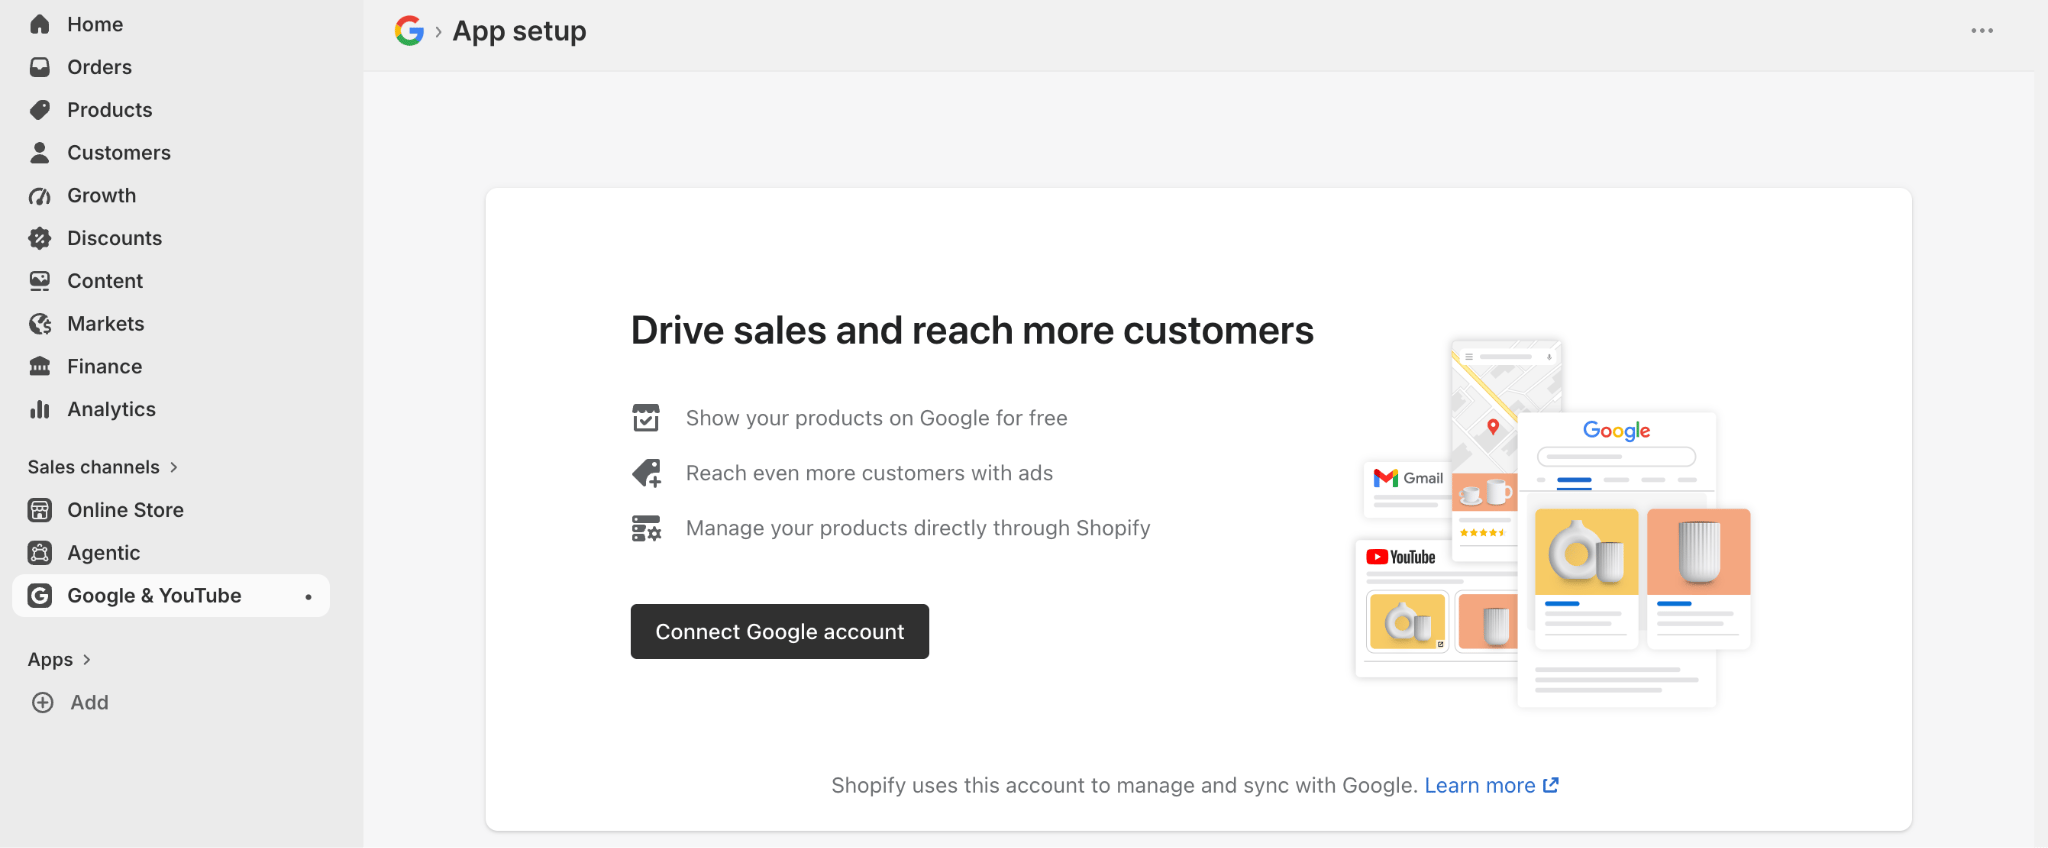
2. Install the Google & YouTube sales channel from the Shopify App Store if your store does not have it yet.
3. In Shopify Аdmin, open Sales channels → Google & YouTube (or install it from the same window) and connect the Google account that has administrator access to your GA4 property.
4. In the Looking only to set up Google Analytics 4? banner, click Get started, select your GA4 property, and click Connect.
5. Remove storefront password protection before testing because GA4 cannot collect store events while the storefront is protected.
When the connection is active, Shopify tracks selected eCommerce events automatically. Google lists add_to_cart, begin_checkout, and purchase among these events. You can add other recommended GA4 events through another tracking setup when your store needs them.
Test the full shopping journey because apps, consent settings, theme changes, and checkout updates can affect the data GA4 receives.
Option 2: add Google Tag Manager through a Shopify custom pixel
GTM gives you more control over events, parameters, and marketing tags. When figuring out how to install Google Tag Manager on Shopify, the most reliable current method is to add GTM through a custom pixel, which runs inside Shopify's sandbox. GTM can then load and manage GA4 and other tracking tags from that environment.
2. In Shopify Admin, open Settings → Customer events and create a custom pixel.
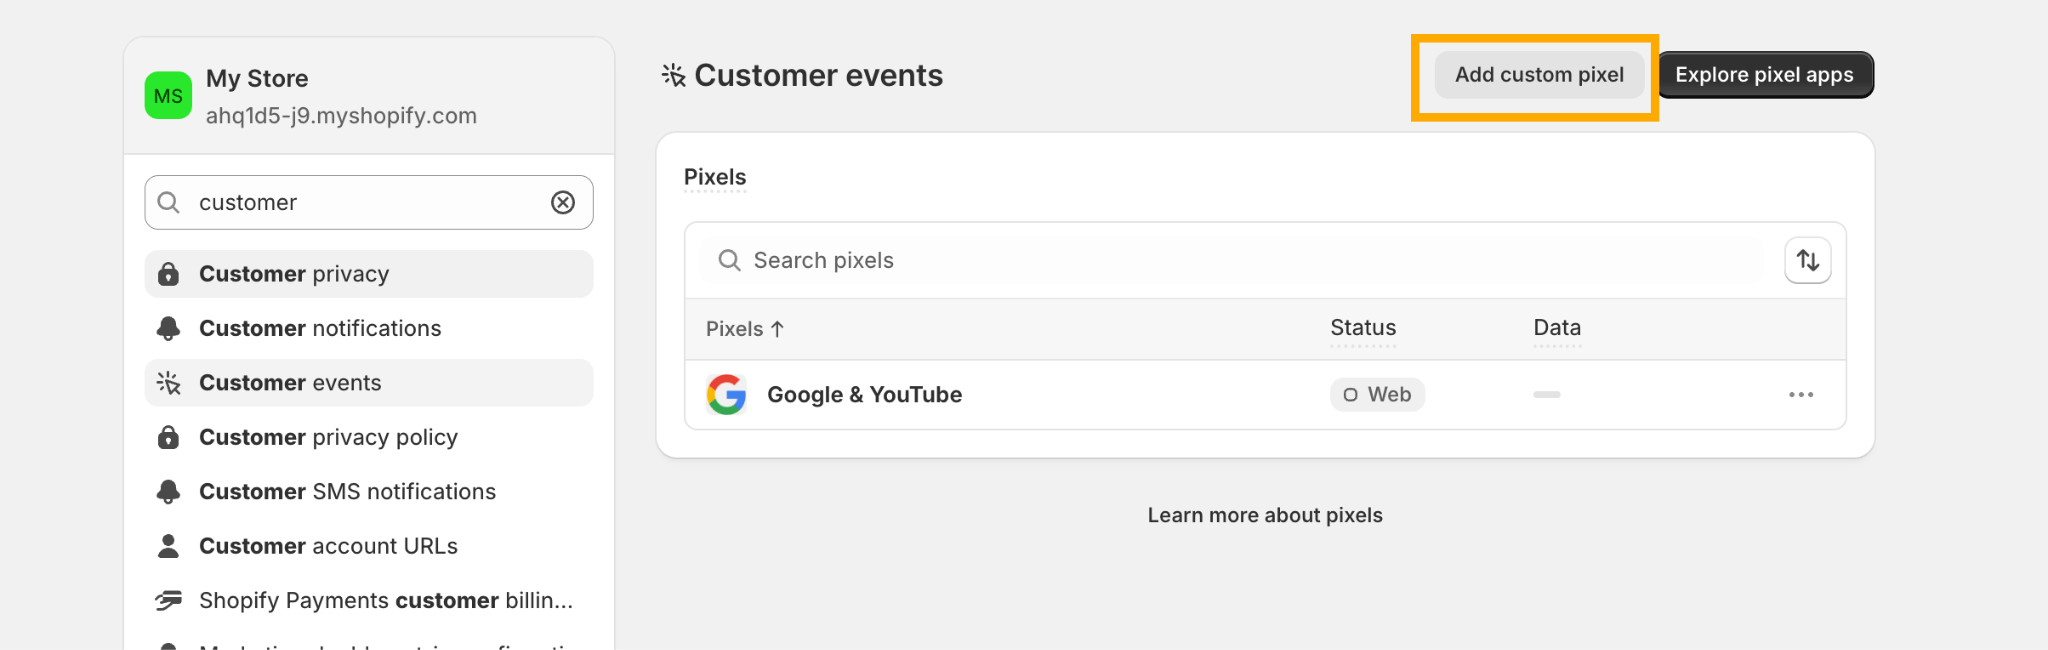
3. Add the GTM code without the outer <script> tags.
4. Subscribe to Shopify customer events and push them into dataLayer.
5. Create the GA4 event tags, add triggers and variables.
The sandbox limits how some GA4 features work. Enhanced measurement and cross-domain measurement might not work correctly. Tag Assistant might not detect the tags loaded through the custom pixel, while Tag Diagnostics might report them incorrectly.
Use this method when Shopify's GA4 connection through the Google & YouTube sales channel lacks the detail you need. Do not install the same GA4 property through the Google & YouTube app, theme code, and GTM unless your setup stops the same events from being sent more than once. Another option is server-side tracking, which we cover in the next section.
Option 3: use a server container (server-side GA4 tracking for Shopify)
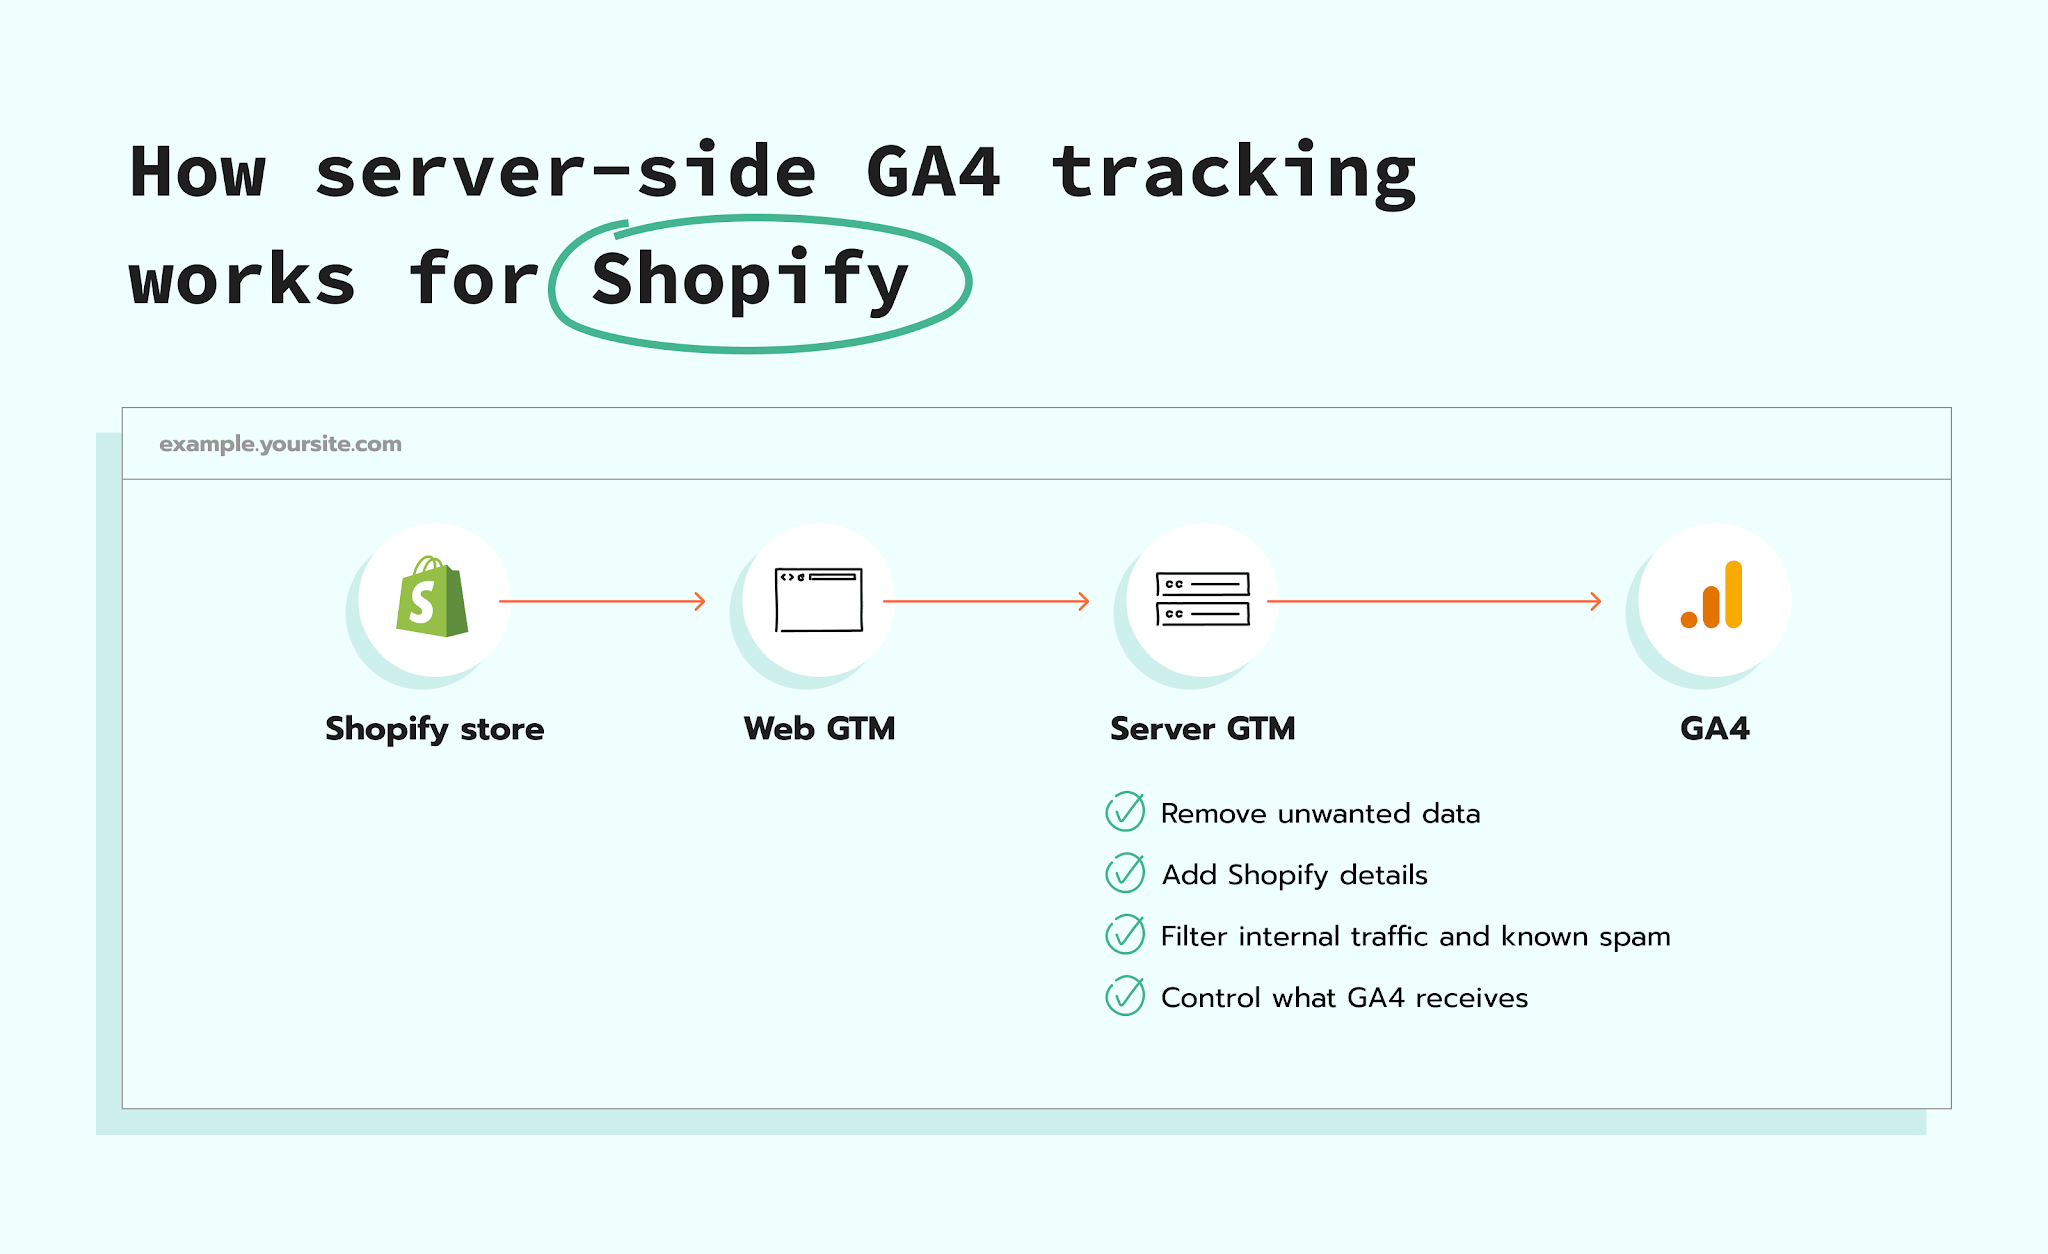
With this option, Shopify data goes through two GTM containers. The web GTM container collects actions from the store and sends them to the server GTM container. The server container then handles the data according to the rules you set. Depending on the setup, it can remove or change information, add useful details, decide where each event should go, and send the final data to GA4.
You can configure this setup with the Conversion Tracking app for Shopify and Setup Wizard. The main steps include:
1. Create a server GTM container and host it on Stape.
2. Add a first-party tagging domain.
3. Install Stape's Conversion Tracking app for Shopify and add your web GTM container.
4. In the app's Data Layer tab, activate Add ecommerce Data Layer events, save the changes, and add the custom pixel so Shopify actions can be used in GTM.
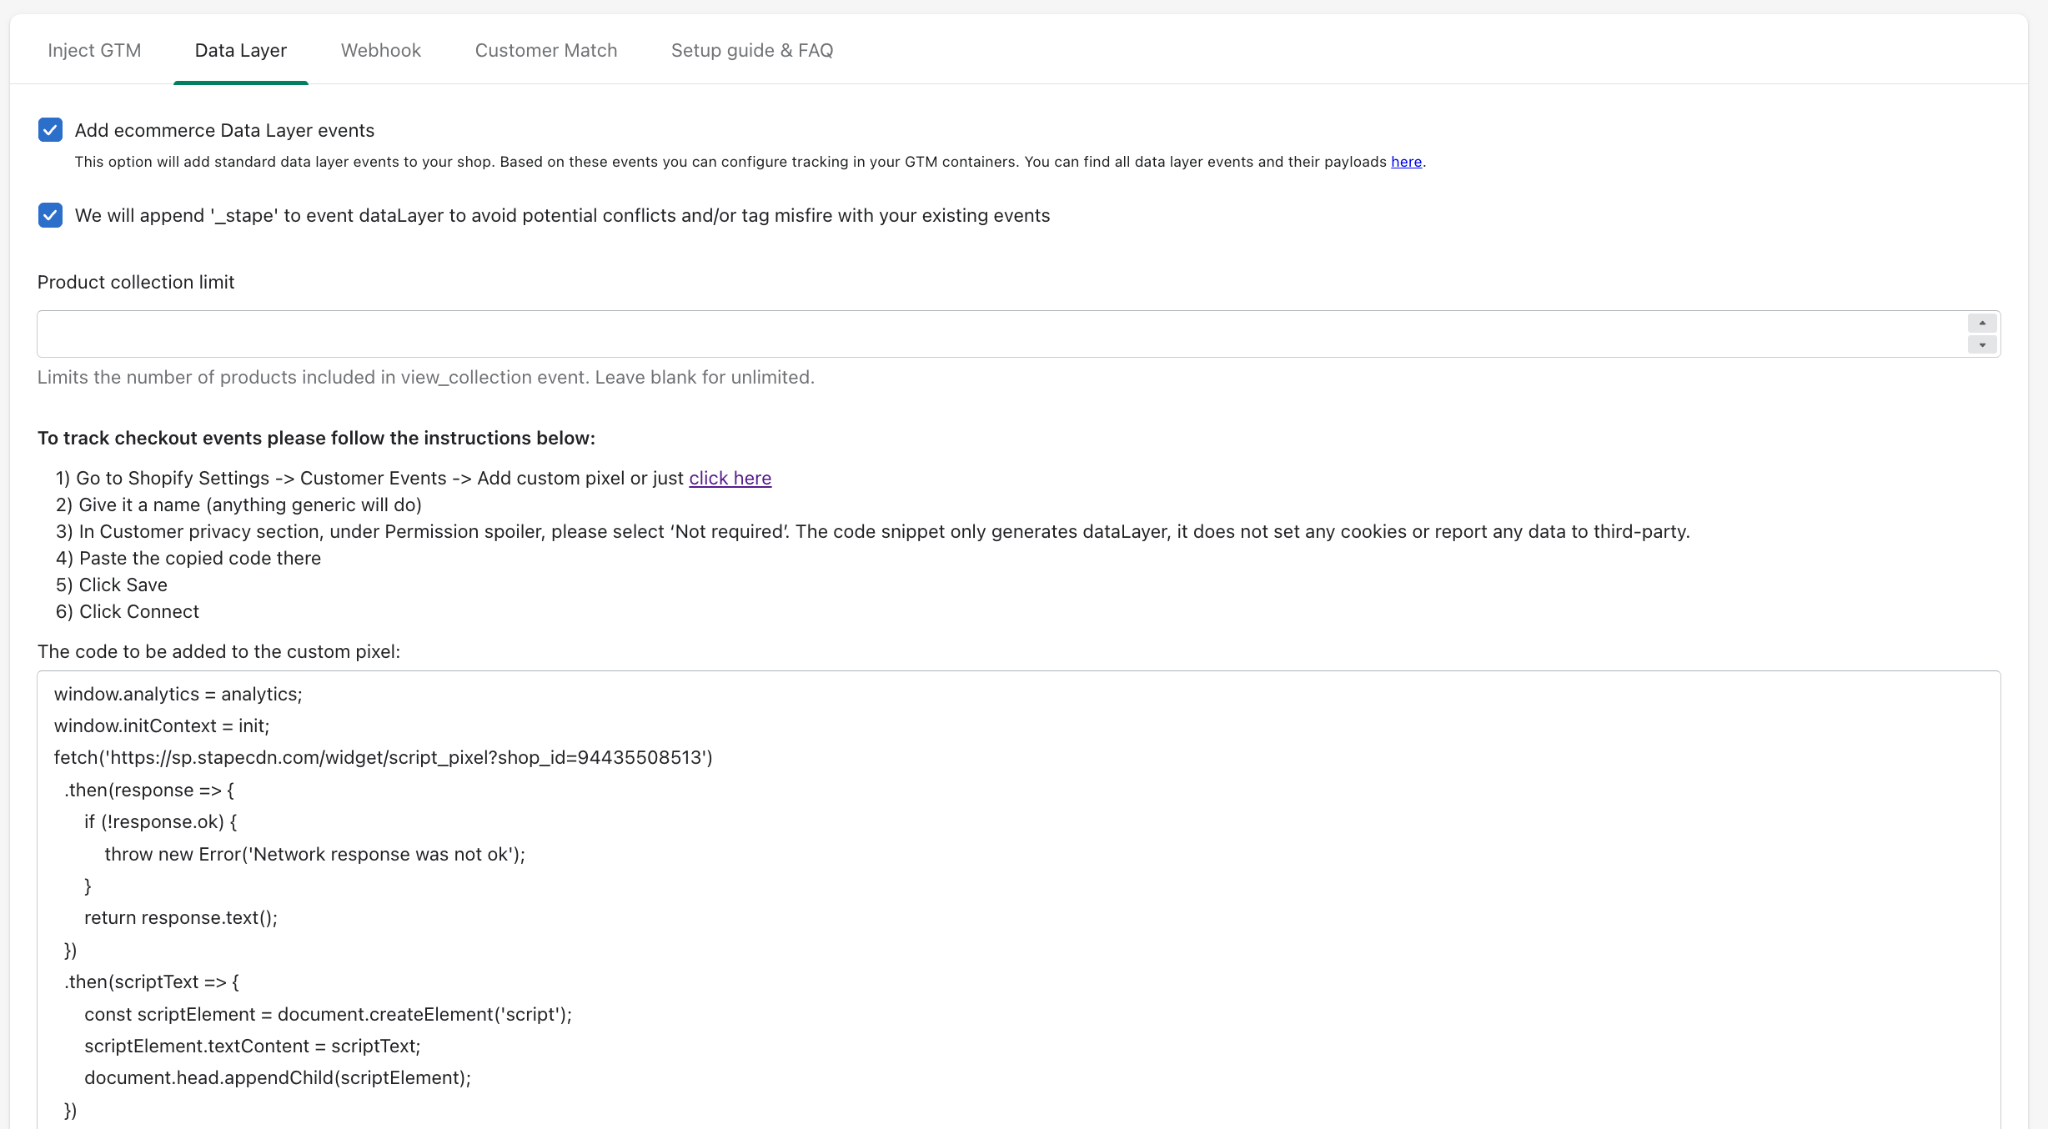
5. Configure webhooks when you need events from Shopify's backend, such as purchases or refunds.
6. Send data from the web container to the server container using either a Google tag with a GA4 Client or Stape's Data Tag with a Data Client, then add a GA4 tag to the server container.
7. Apply the shopper's consent choice to both the web and server setup.
8. Test each event in the web container, server container, and GA4 before publishing.
The exact settings depend on which events, product details, and platforms your store needs.
For the complete setup, follow Stape's guide to server-side tracking for Shopify.
Best practices for GA4 eCommerce tracking on Shopify
Send each event only once. Decide whether each GA4 event comes from the Google & YouTube app, a GTM through a Shopify custom pixel, or a server-side flow. Two purchase sources can create duplicate revenue data.
Keep product identity stable. Decide whether item_id should identify the main product or the exact version a shopper chose, such as a blue shirt in size M, for example. Use the same choice for every event, from viewing the product to completing the purchase. Do not send the main product ID at one step and the blue size M ID at another, because GA4 can treat them as two different items.
Send clean financial values. value, price, tax, shipping, and discount fields must use numbers without currency symbols. Send the currency separately with an internationally approved three-letter code.
Use the Shopify order number as transaction_id. Each order should send its own order number to GA4. If the same purchase event is sent twice, GA4 can recognize the matching number and avoid counting the order twice.
Track refunds from a reliable source. A customer does not always return to the site after a refund. For complete refund reporting, use Shopify backend data, an app, or a webhook.
Respect consent. Connect your consent banner with Shopify's Customer Privacy application programming interface (API), then use Google Consent Mode V2 to tell GA4 and Google Ads whether the shopper accepted or rejected analytics and advertising cookies. Check the setup again after moving or replacing any pixels.
Test more than one successful purchase. Check discount codes, free products, multiple currencies, Shopify Markets, Shop Pay, alternative payment methods, subscriptions, upsells, partial refunds, and repeat visits.
Optimization tips for GA4 tracking on Shopify
Start with data quality before creating complex reports.
Create a weekly check that compares:
- Shopify order count with the number of unique GA4 purchase transaction IDs.
- Shopify revenue with GA4 purchase revenue.
- The number of checkout starts with the number of purchases.
- The number of browser events with the number of server events when both paths are used.
Mark only important actions as GA4 key events. purchase is the main eCommerce key event for most stores. Account creation or subscription signup can also qualify when they have clear value.
Use GA4 Explorations to build a funnel from view_item to add_to_cart, begin_checkout, and purchase. Break it down by device, country, traffic source, landing page, product category, and new versus returning users.
Add custom report details only when they are useful. If you send an extra detail that GA4 does not show automatically, create a custom dimension to use it in reports. Avoid adding fields you will never analyze because each one needs setup and maintenance.
Test after every major theme update, checkout change, consent platform update, app installation, and GTM publication. Shopify tracking is part of the store system, so store changes can affect it.
FAQs
Want to start on the server side?
Try for freeRecommended for you
Blog
Set up Google Ads conversion tracking for Shopify
Configure Google Ads conversion tracking for a Shopify store using the standard client-based approach or more modern server-side tracking technology.
Sep 17, 2026

Comments