Set up Google Ads conversion tracking for Shopify
Tymofii Sankov
AuthorIf you run a store on Shopify, you will not succeed without a clear idea of how your campaigns perform. Conversion tracking is a key to success, and if you do not set it up properly, you will miss valuable data and might move in the wrong direction in the future.
Setting up Google Ads conversion tracking for Shopify comes down to a few essential steps:
- Create a GTM account and add the container code to your Shopify theme.
- Install the Google & YouTube App from the Shopify App Store and link it to your Google Ads account.
- Define the key conversion events you want to track (sign-ups, add to cart, purchases, etc.).
- Set your most important conversion as Primary in Google Ads.
- Enable Enhanced Conversions for better tracking accuracy.
- Add UTM parameters to your ad URLs.
- Test your setup using GTM Preview and GA4 real-time reports.
The full detailed guide with step-by-step instructions for each method is available further in this article.
What is Shopify conversion tracking?
Conversion tracking on Shopify is the process of collecting information about specific customer actions that take place on your Shopify store after people click on an ad. Actions can be of various types, and which exactly you track depends on the settings of your tracking setup:
- purchases: the most important and basic conversion for any online store, it is almost always tracked by default;
- adding an item to a cart: a vital action, as it shows that a customer is interested in your goods, and if it often does not lead to a purchase, it is a serious sign to review the funnel;
- viewing a specific product page: an action that allows you to understand which products are more popular than others and which are just a “dead weight” on your website;
- signing up for a newsletter: an action that helps you to build your marketing list and know what types of newsletters are more effective than others.
Obviously, the list of actions you can track is much longer, and which ones to configure depends only on your business's needs and personal decisions.
When you use Google Ads conversion tracking on a Shopify website, you link the results from the former with the campaigns at the latter. In such a way, you can measure your ad performance, calculate ROI, improve customer experience in your shop, and optimize your campaigns.
If you think now that Shopify can do all the analytics itself, you are partially right. It can provide you with some insights into how your business is doing. Google Ads, however, provides a more detailed view of your performance and significantly more opportunities for Google Ads conversion tracking on Shopify.
Benefits of AdWords conversion tracking on Shopify
If you want to develop a data-driven marketing strategy for your business, setting up Google Ads tracking on Shopify (formerly known as AdWords) is the foundation for all your further steps. There are several significant advantages of such a setup:
- it will show you specific keywords, advertising creatives, and categories of customers that drive conversions;
- precise conversion data will allow you to use automated bidding strategies offered by Google Ads to their maximum;
- overall profitability is very likely to increase thanks to better targeting.
All this is achieved in two simple steps: defining the needed events and placing the Google Ads Pixel for Shopify on your website. The pixel fires, the data is transferred to Google Ads, and you get your profit.
Best Google Ads conversion tracking practices for a Shopify store
If you need an accurate and precise way for Google Ads Shopify conversions tracking, you must be aware of several tricks and approaches that can simplify your life and work significantly.
- Use the Google and YouTube App, which can be downloaded from the official Shopify store. It automatically syncs all the basic events (for instance, add to cart or purchase). This greatly simplifies the setup and maintenance process.
- Always choose the most important conversion for your business and set it up as Primary in your Google Ads account.
- Use Google Tag Manager to have all your tags in one place. This will make it easier to review, modify, and maintain your tracking setup.
- Add UTM parameters to your links; this will make all the data you sent to analytics more specific and focused.
- Enable Enhanced Conversions for Google Ads; this will increase your conversion tracking accuracy.
- Do not hesitate to integrate Google Analytics with your Shopify store and enable Enhanced eCommerce tracking for a better understanding of your clients’ behaviour.
Conversion tracking with Google Tag Manager on Shopify is something we would recommend everyone try, as it gives you more control over your store’s conversion tracking without any need to dive into the code and change something there. If you want relative autonomy from the developers (who doesn’t?), this is a must-have.
How to set up Google Ads conversion tracking in Shopify
There are several primary methods on how to set up Google Ads conversions tracking on Shopify: on the client’s side (using the GTM container or Google & YouTube app) and on the server (using the server GTM container).
How to set up GTM on Shopify?
First of all, let’s cover the creation of the Google Tag Manager container in the context of Shopify Google Ads integration. We have already mentioned that its container is a warehouse for all your tags, even those that are not connected to Google.
If you want to add conversion tracking to a Shopify store, having a GTM container is not a requirement, but it is a must if you want to get reliable and complete information. That is why we are discussing this topic before giving you a guide on how to set up Google Ads conversion tracking on Shopify. So, here is what you need to do to prepare for getting reliable and trustworthy information on conversions.
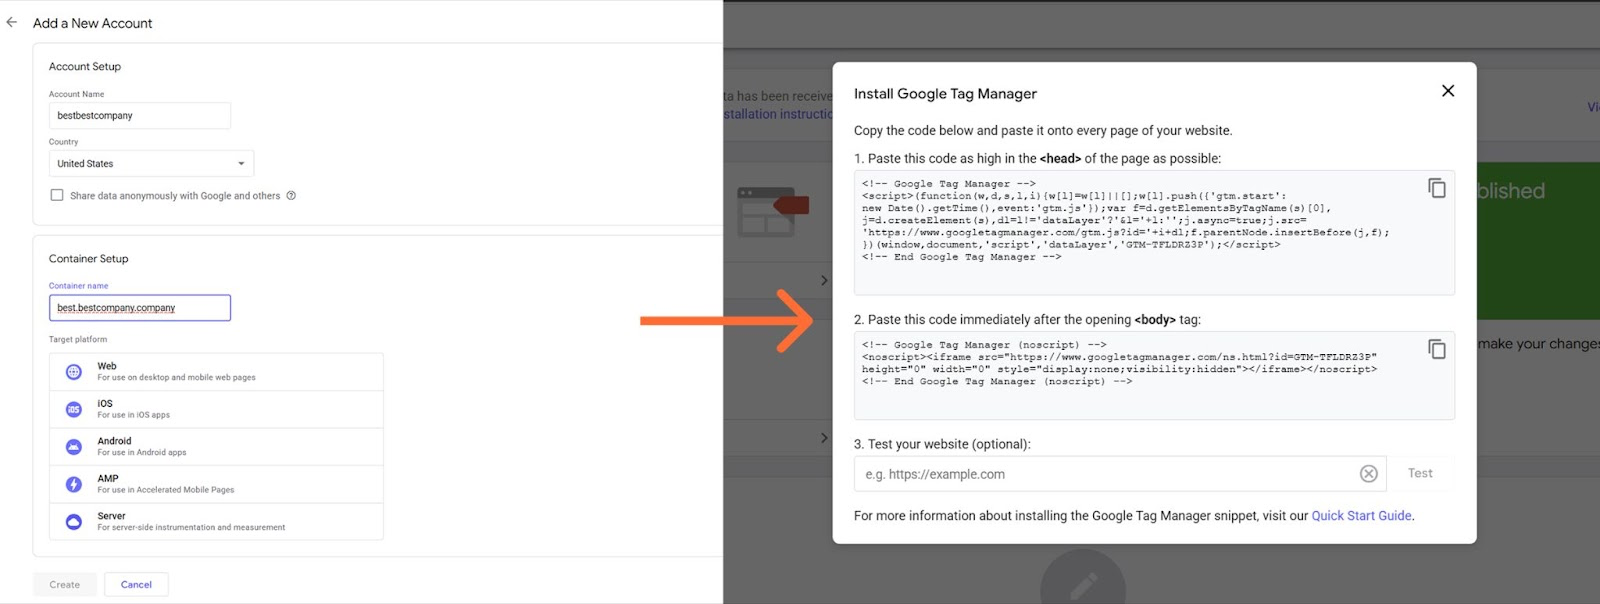
1. Create the container via the official Google service. Register a GTM account, create a container there (select Web or Server as the target platform), and save the two pieces of code you get after that for later.
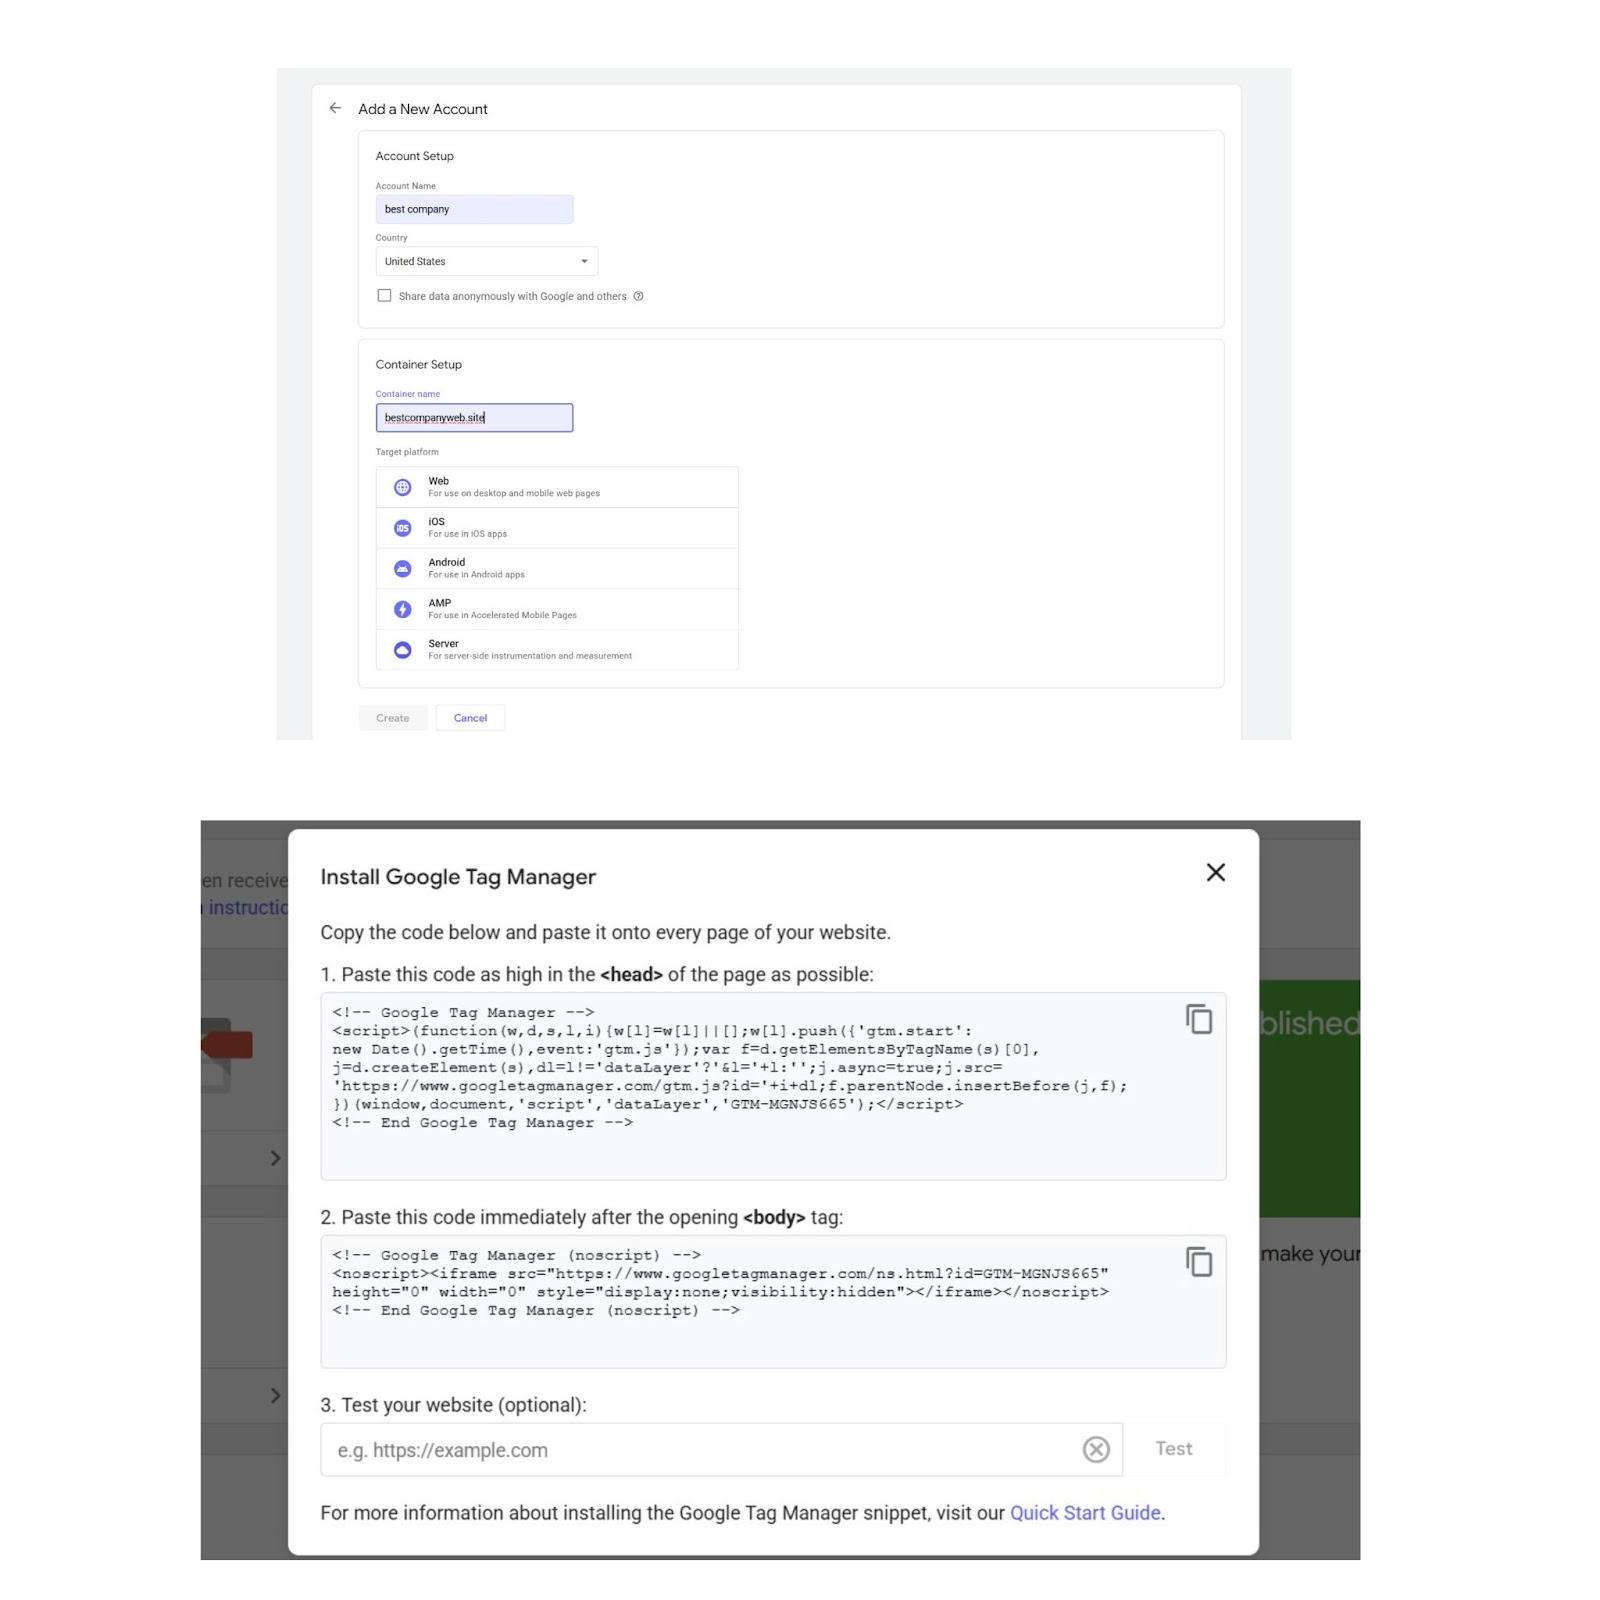
2. Add your GTM container to your Shopify store. Proceed to the Online Store section, and access the Themes menu there. Select the theme you want to use, and enter the code editing mode. There, you need to paste the first piece of code from the previous step to the head section, and the second one to the body.
3. Check that everything is working correctly. Get to your GTM dashboard and click Preview. When you are asked for a link, paste your Shopify store’s URL and proceed. After that, you must see on the GTM preview tab that your container is connected.
When you finish with this procedure, you can start adding tags for Shopify Google Ads conversion tracking to your container.
The standard client-based approach
If you feel the power in yourself and you know how to add Google Ads conversion tracking to Shopify, you can set up the GTM container for your store manually, as we described above. A more standard approach, however, is using the Google & YouTube app we have already mentioned above. It works independently of the GTM container and does not require you to edit the code manually.
- Install the Google & YouTube App. Find it in the Shopify store and follow the instructions you get after you click the AddApp button.
- Connect your Google Account. When setup is finished, you will be redirected to the setup page. There, you must go through the Shopify Google Ads setup procedure - link your store with your Google account that has access to Google Ads. Follow the instructions, provide all the required permissions, and you are done.
- Configure the GA property. Select the property from the drop-down list and complete the setup. All the needed code will be added to your website automatically.
- Test your configuration. Check the real-time report on your GA dashboard. Open your store in another tab and perform some actions there, pretending you are a customer. All the events should be displayed on the dashboard.
Despite its ease of use, we must mention some Google Ads tracking issues on a Shopify website you may face if you stick to this method. First of all, as all the tracking happens on the client’s side, it is vulnerable to ad blockers and browser security protocols. They often tend to block tracking scripts, which results in wrong data about conversions. Moreover, the question of compliance with privacy policies also remains open, as there are lots of nuances about sharing data with third-party platforms nowadays.
Server-side tracking for Shopify - advanced approach
Server-side Shopify Google Ads integration solves most of the problems its client-side colleague has. As you establish a cloud server for this approach, all the tracked data is gathered there first. On the server, the gaps in the tracked information are filled as much as possible, and private data that should not be shared with analytics is hashed or removed. In addition to that, you can extend the cookie lifetime, which boosts the quality of Google Ads conversion tracking even more.
| We've also got a full step-by-step guide on server-side Google Ads conversion tracking for Shopify that covers everything from container setup to advanced configuration. |
Here is how you can set up Google Ads conversion tracking on Shopify using Stape’s infrastructure.
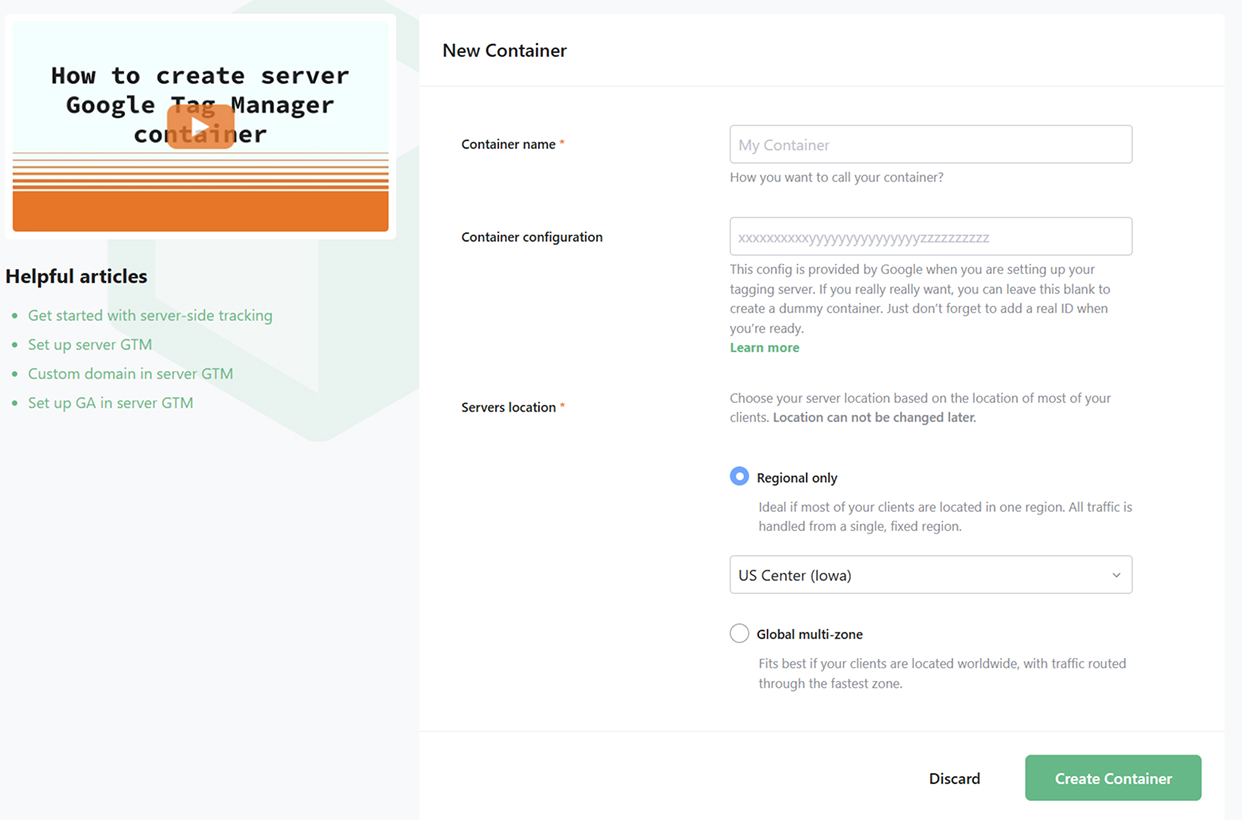
1. Create a server GTM container on the official Google Tag Manager website and copy its config.
2. Create an account with Stape and host the newly-created container there, using the earlier copied config.
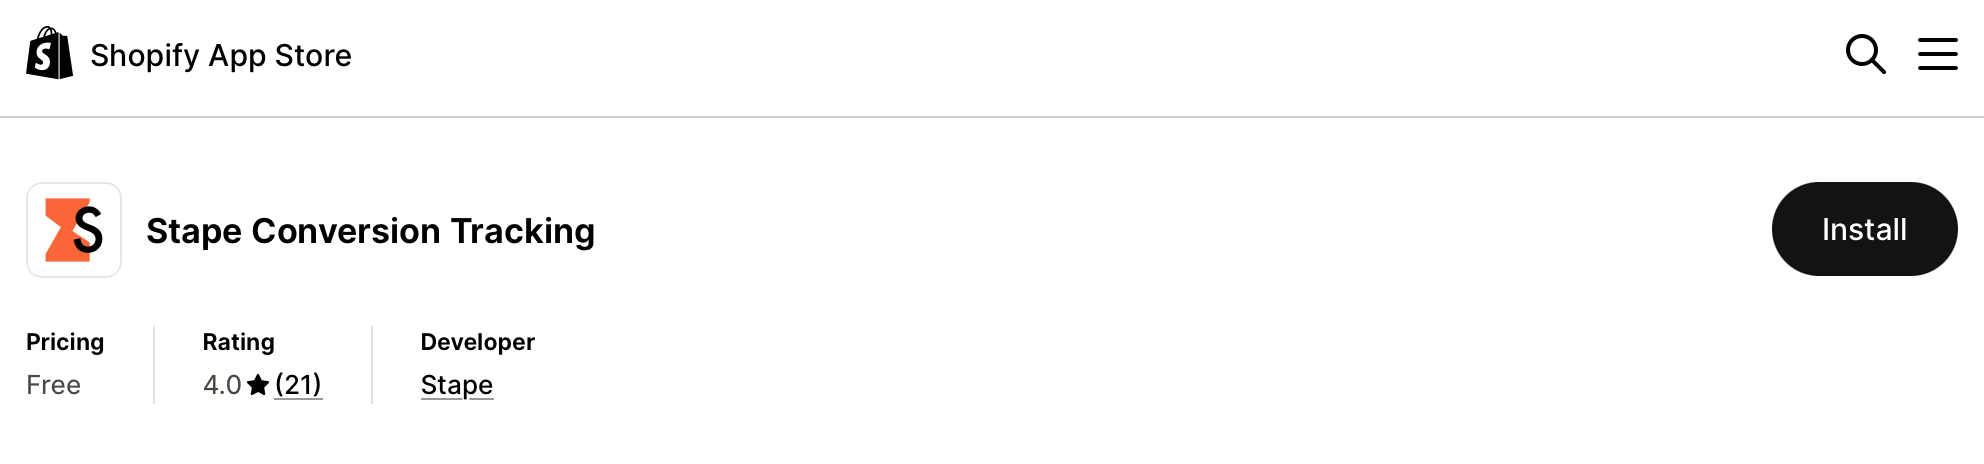
3. Find the Stape Conversion Tracking app in Shopify’s store and add it to your store. There are several steps you need to take: get to the Sales channels and activate the app → proceed to Online Store → find your active theme → click Customize → switch to App embeds tab → activate Stape Conversion Tracking app. Do not forget to click Save when you finish.
4. If you already have GA4 events configured in your web container - great, you only need to switch them to the server one. If not, you need to set up the events in the web container manually.
5. In your server container, configure the Conversion Linker tag to trigger on all events you want to be sent to GA4.
Regularly review that all the tags fire correctly, keep an eye on GA4 updates, and you will be all good, getting the fullest possible information about your conversions.
Optional step. Consider using POAS Data Feed to optimize Google Ads around profit, not only order value, and pass margin-based data through your server-side setup.
How to import your Shopify customer data to Google Ads
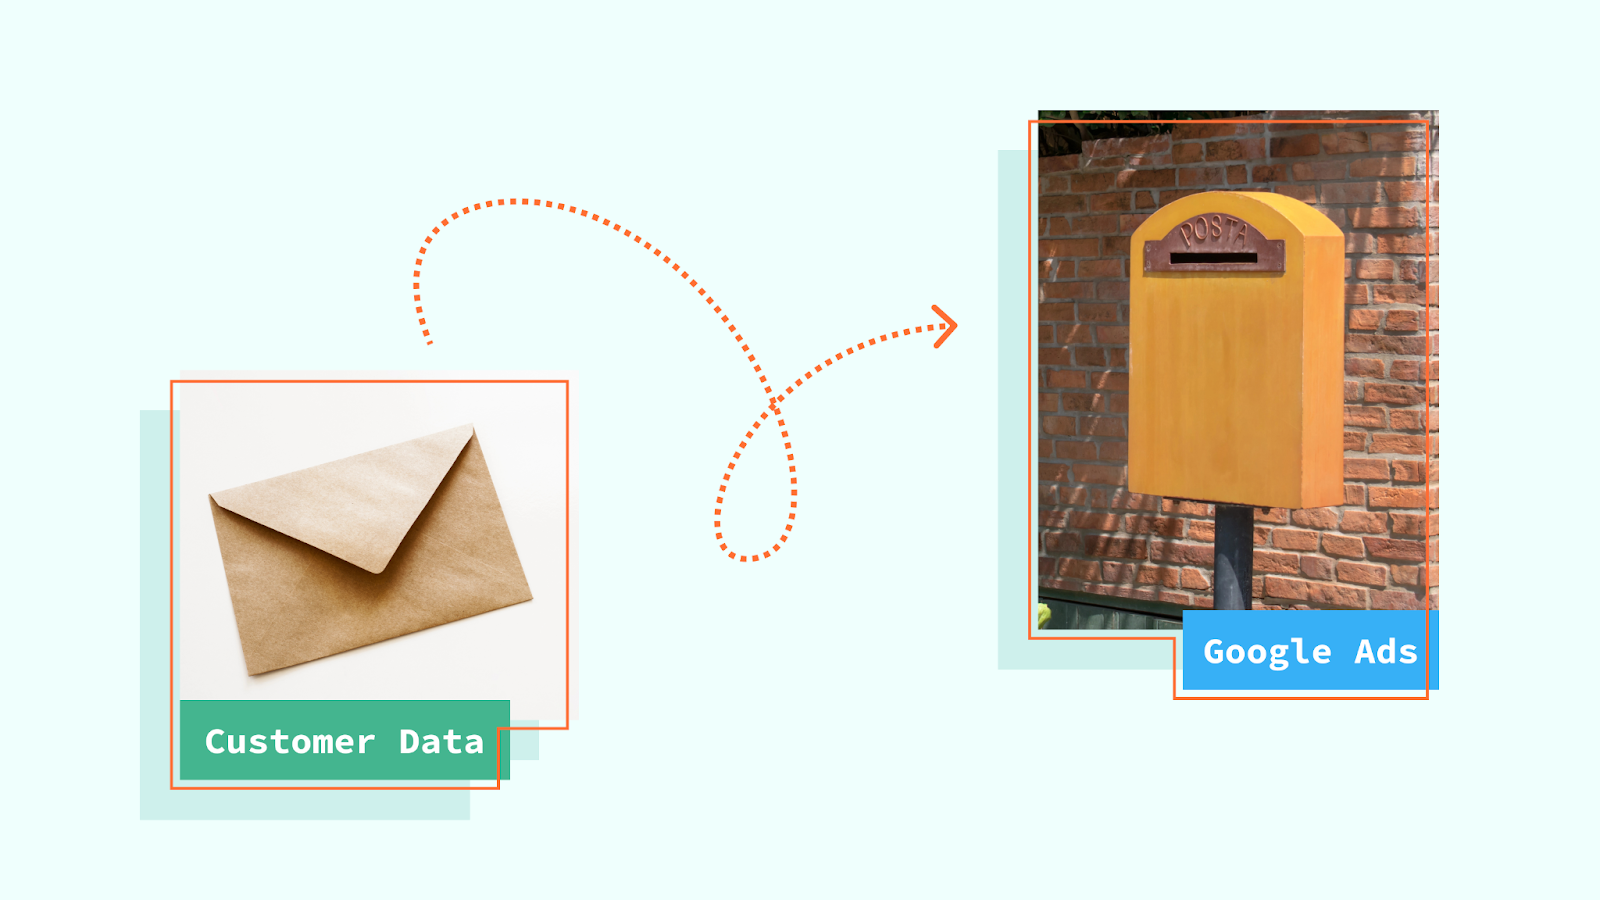
One of the best practices for Shopify Google Ads integration is to send customer data to the analytical platform. It is also known as “Customer Match”, and it is a powerful tool that allows you to use all the advantages of first-party data to improve your ad targeting. Considering that third-party data has been falling out of favor lately, such a switch is an excellent solution for any Shopify business. Here is how you can do that with our help.
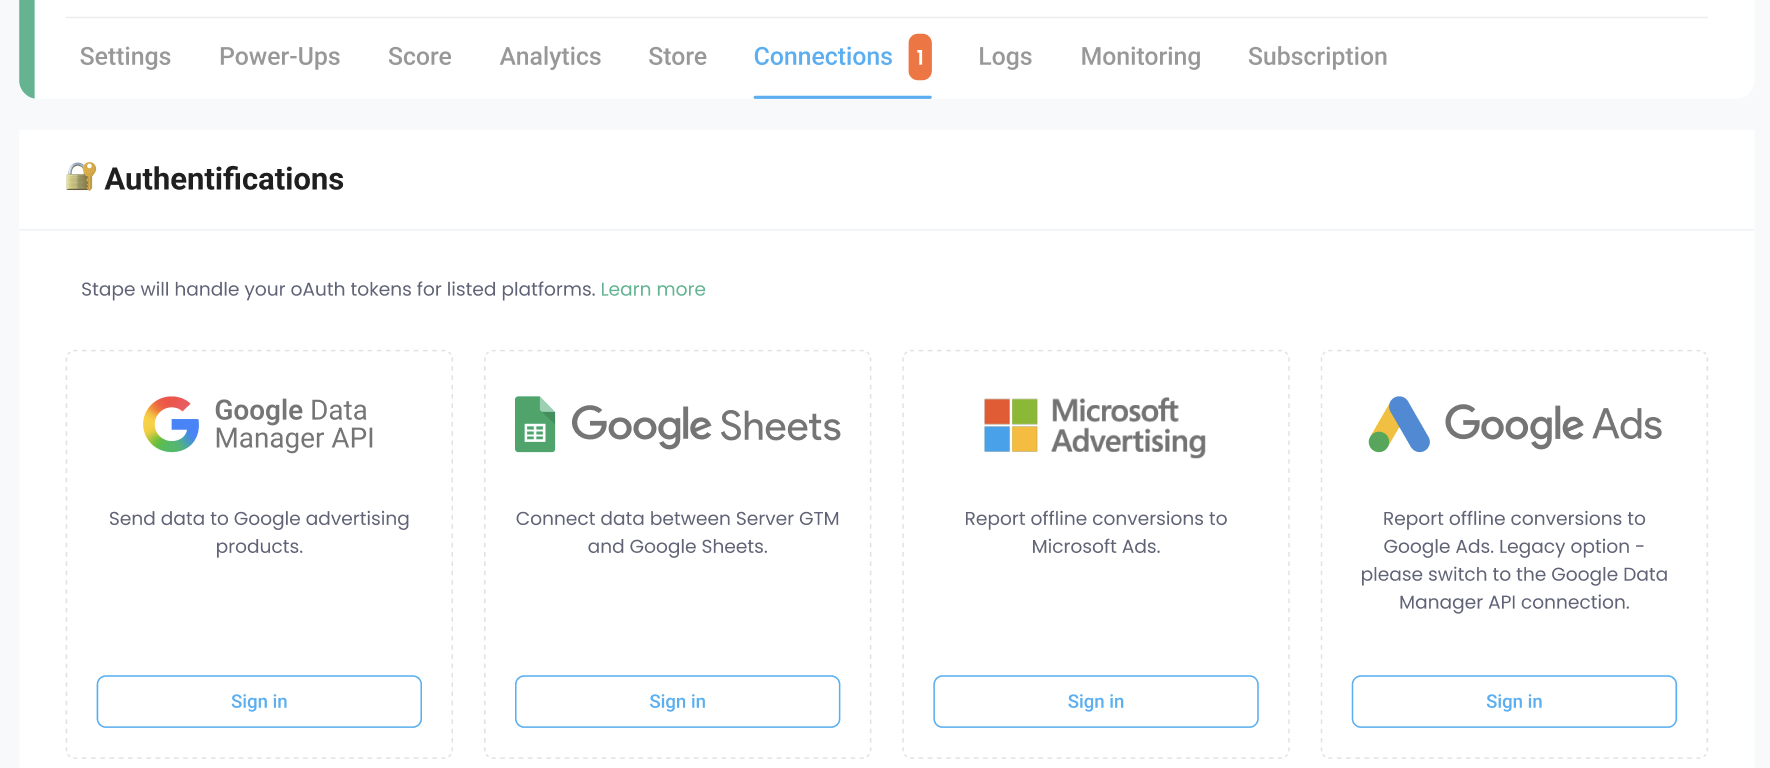
1. Preparation step. Open the required container in your Stape account. Proceed to the Connections tab and sign in with your Google Ads account linked to the Google Ads to the Data Manager API.
2. Install Stape Conversion Tracking. You can download it from Shopify’s App Store. Fill in all the fields on the Customer Match tab in the Shopify app.
- Get the API key in the Stape Admin panel, sGTM section. The key will be on the settings tab.
- Google Ads Operating customer ID is located in your Google Ads admin panel, top right corner. Just click on the picture to copy the value.
- Google Ads customer ID. It is the ID of your Google account. Depending on its type, you need a customer or manager ID.
- User Data. Select the data you want to be on the list here.
- Consent. Choose manually from the drop-down menu or inherit it from the customer’s choices.
- Backfill. Tick it if you want to upload the existing users, not only the new ones.
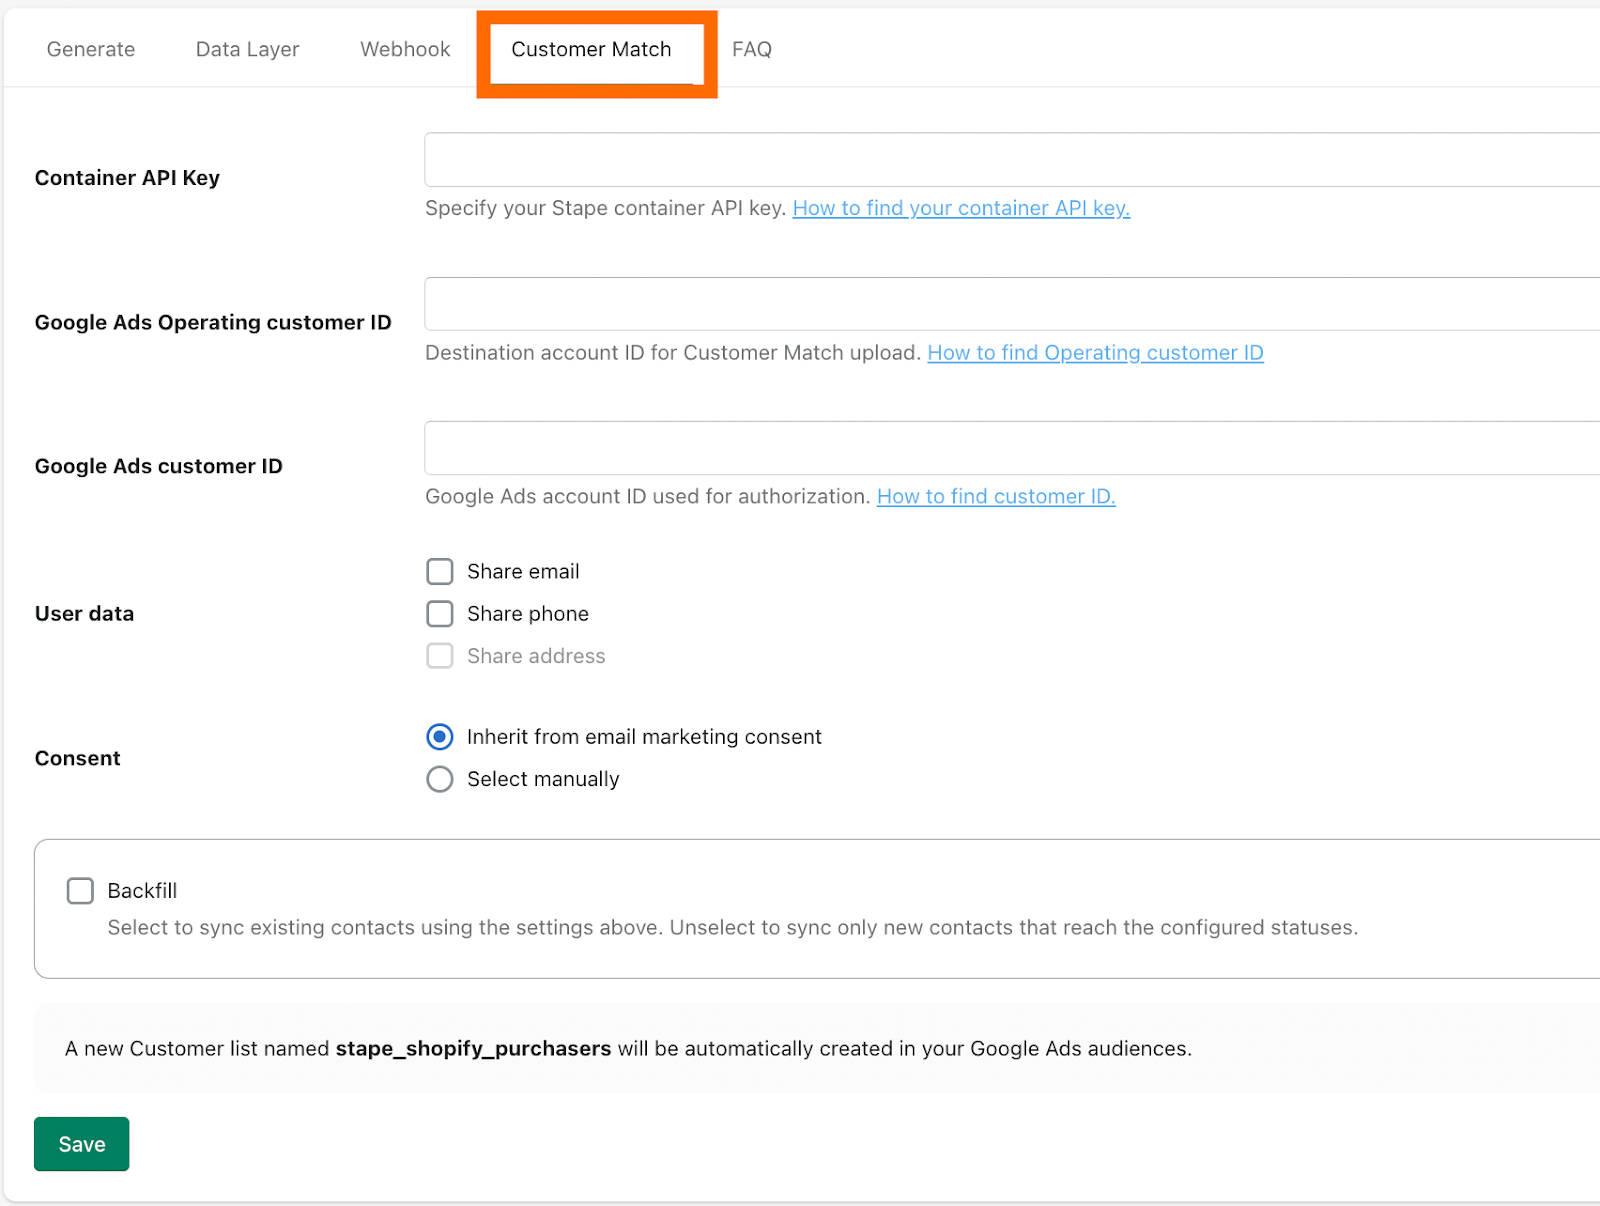
This method will update your customer lists automatically, improving your Google Shopping conversion tracking even more.
Shopify Google Ads tracking issues solved
Conversion tracking with Google Ads on Shopify has certain issues when done via the client’s browser. Many of them are solved by server-side tracking for Shopify, but there are still some points to pay attention to and keep in mind.
One of the most common problems you may encounter, even after switching to server-side tracking, is that the data sent from the web container may not reach the server. To fix this, you need to ensure that your web GTM container captures the Google Click ID (which is responsible for matching the click with the conversion) and passes it to the server container.
Another thing that often bothers those who prefer to track conversions via a server is data duplication. It happens when the same event is tracked on the server and on the client’s side. The solution here is simply to review that for the needed destination, there is only one source of data.
Overall, no matter what problems you may face using a server-side tracking setup, you still will get better and more reliable conversion data compared to client-side tracking, especially considering that the overall approach to conversion tracking on Shopify is regularly updated.
| If your tracking setup still isn't behaving as expected, don't rely on GTM preview alone – Shopify's sandboxed checkout means it won't reflect production reality. For a step-by-step process to diagnose issues across both web and server GTM, read: Debugging Shopify tracking with web and server GTM: a complete guide. |
FAQ
How to check the conversion rate in Shopify?
Shopify shares the conversion data in its built-in analytics, which can be accessed from the admin dashboard. If you use GA4 for Shopify, log into your property, proceed to Reports, click on Engagements, and switch to Conversions.
How to add a tracking UTM in Shopify?
You need to use the UTM builder tool to add the needed parameters to your Shopify link. Using such a tool will prevent you from making syntax errors in the link.
What is Google Shopping conversion tracking?
It does not matter if you know how to set up Google Ads conversion tracking for Shopify, if you do not clearly understand what conversion tracking is, right? Well, talking about conversion tracking, we mean getting information about what happens after your client clicks on your ad; if they buy your product (a conversion), or not.

Comments