How to set up Google Ads Conversion Adjustments tag via server GTM
To set up the Google Ads Conversion Adjustments tag, please follow the steps below:
- Configure server GTM container and webhooks.
- Upload Google Ads Conversion Adjustments tag in server GTM container.
- Set up the tag and add a trigger.
- Test the setup.
In this article, we describe these steps in more detail with step-by-step instructions and examples.
Google Ads Conversion Adjustments API and its use cases
Google Ads Conversion Adjustment API is a tool for modifying conversion data after it has been initially tracked. It is useful when conversion information needs to be adjusted due to returns, order cancellations, or data errors.
This can often be useful for ecommerce shops that accept payment on receipt or through third-party services with a long confirmation window (e.g., credit services). Because of this, a significant number of purchases can often be canceled for one or another reason, even though conversions in Google Ads have already been sent.
Modifying conversion data in the abovementioned cases ensures accurate analytics and improves campaign performance. This allows you to optimize spending based on up-to-date data.
What is Google Ads Conversion Adjustments tag?
The Google Ads Conversion Adjustments tag developed by the Stape team allows you to easily make changes to Google Ads conversions on your Google Ads account. The tag works on the server GTM container; in the section below, we describe in detail what you need to start using it.
Pre-requirements
- You must have a server GTM container. We won't go into setting it up in this article; if you don't have it yet, you can find more information about the server GTM configuration process in our other article.
- Webhooks. Your server GTM container must receive a signal that is necessary to cancel or change some conversions in Google Ads. Since this is not happening online on a website, you can't send this data using a web container and data layer method. Instead, you need to set up a mechanism for your backend/CMS to send this data when the desired event occurs. In our case, the "desired event" is when a purchase is canceled, for example. Your backend should send a webhook with data about the canceled order to your sGTM container.
If you haven't used webhooks yet, check our related blog posts about setting them up and testing:
How to set up Google Ads Conversion Adjustments tag
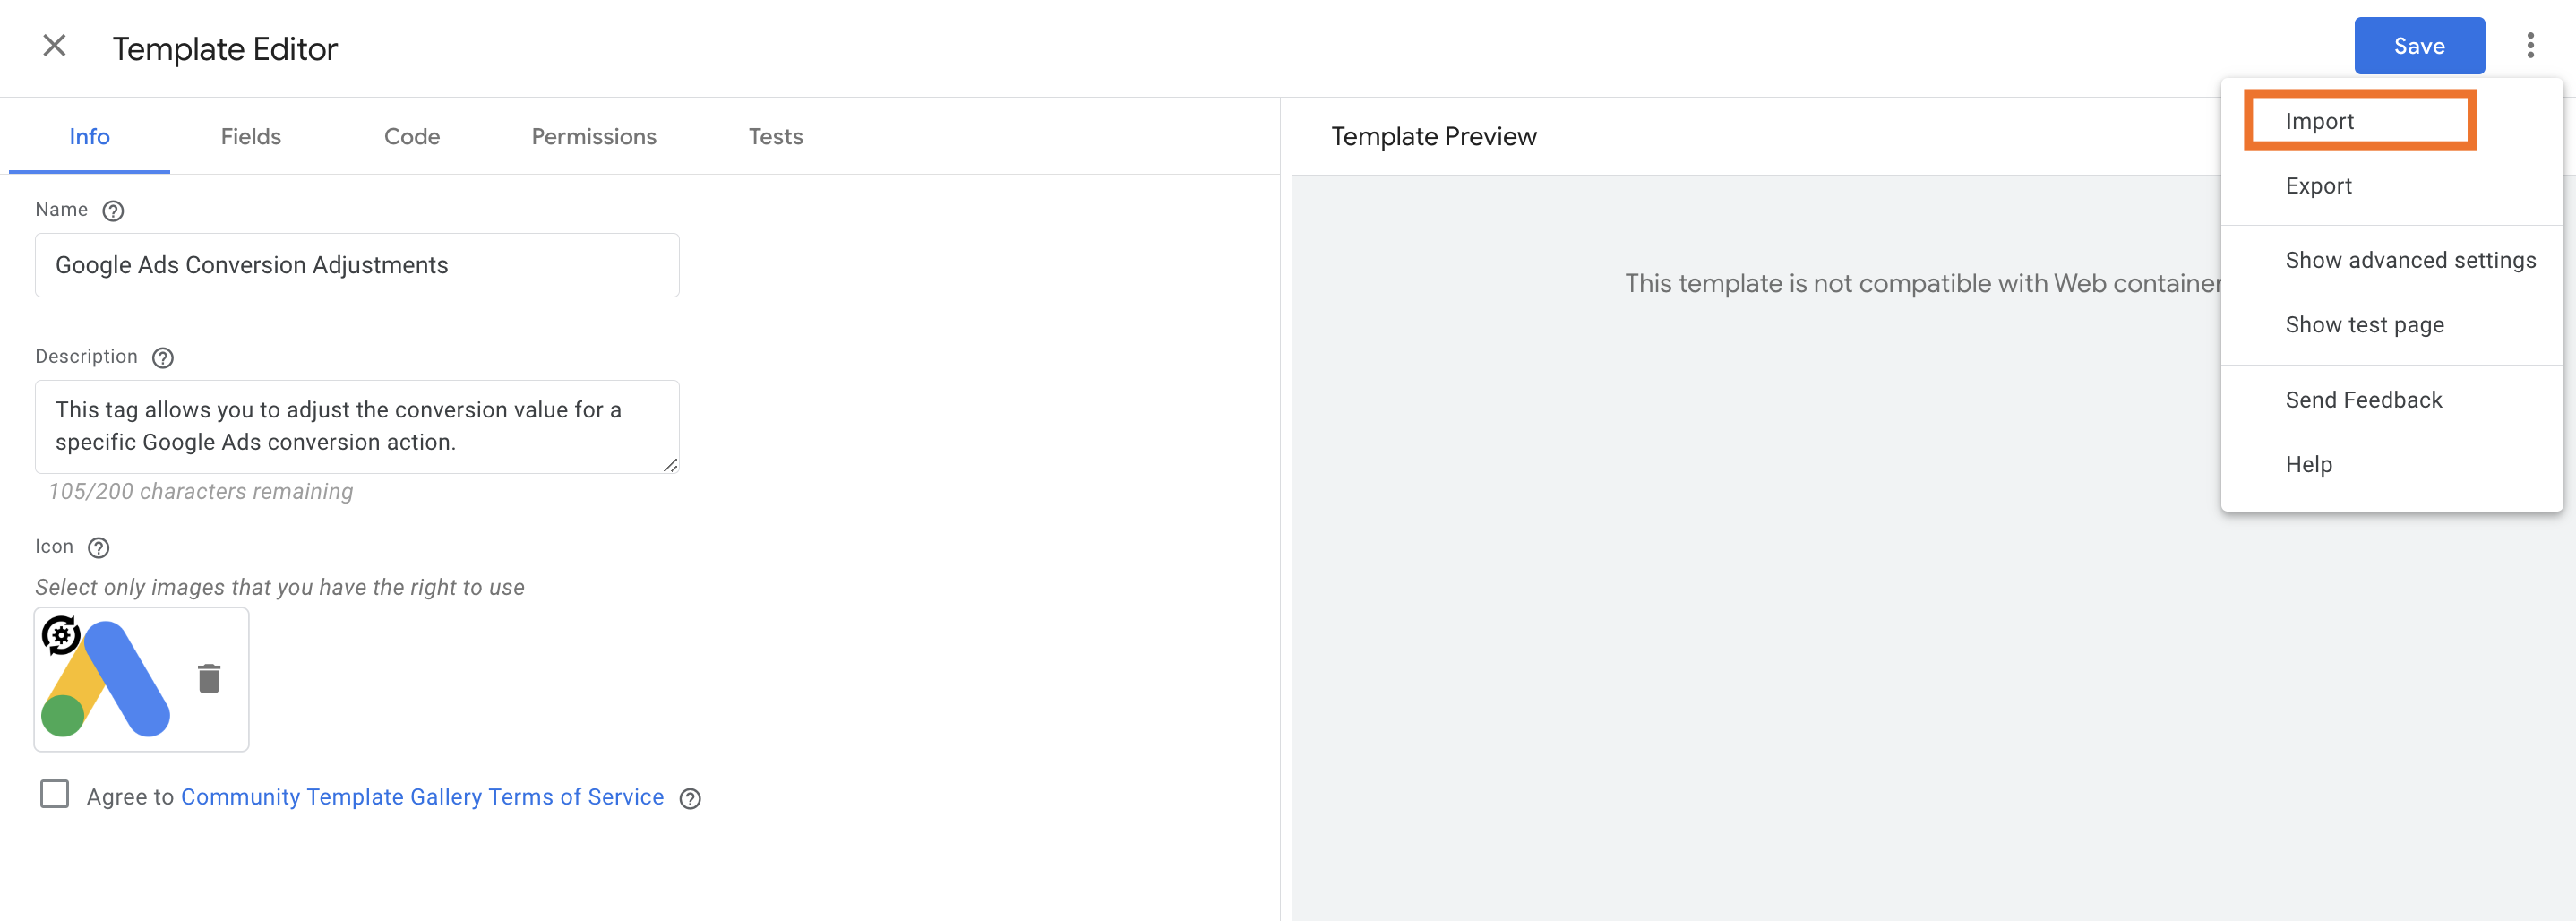
1. Download the Google Ads Conversion Adjustments tag on GitHub or in the Template Gallery and add it to your server GTM container.
2. Set up a Google Ads connection in your Stape account.
In your Stape account, go to the needed server GTM container → Connections tab → click "Sign In" on the Google Ads section.
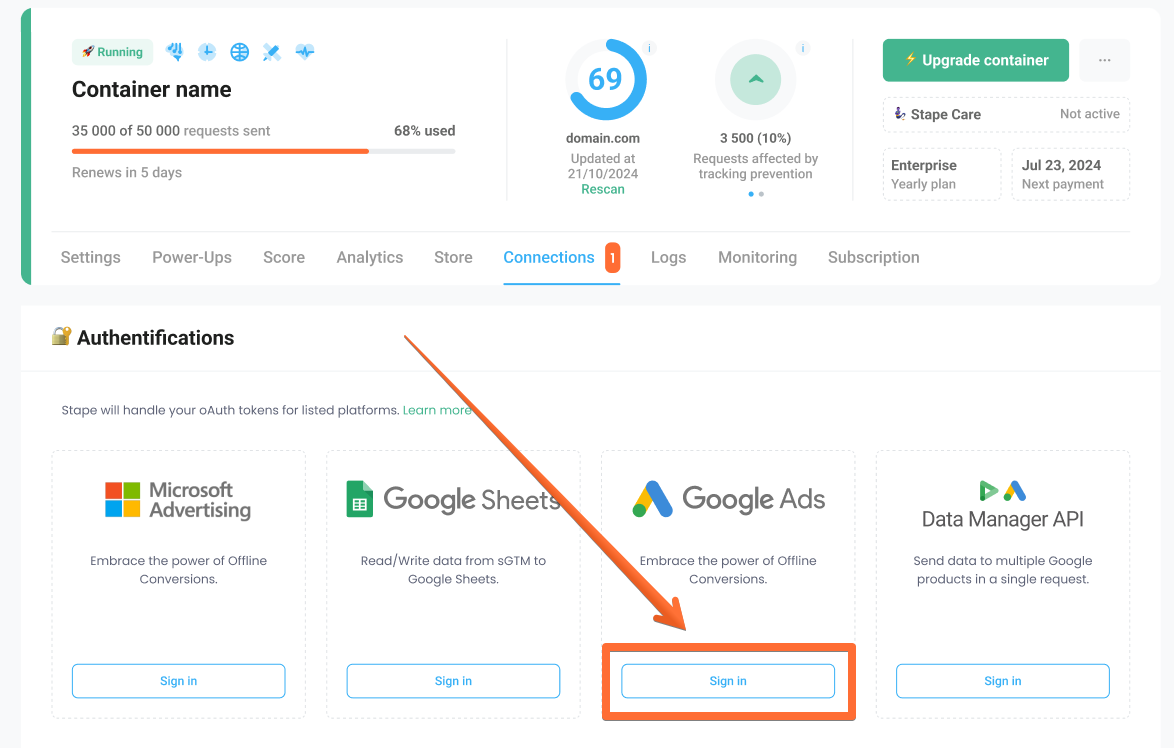
To connect, sign in to a Google account with admin access to the Google Ads account containing the conversions you want to modify. If you use a manager account - you can be authorised via your MCC account.
This way, your server GTM container via Stape will be able to send data to Google Ads.
3. Create a new tag and configure the required parameters.
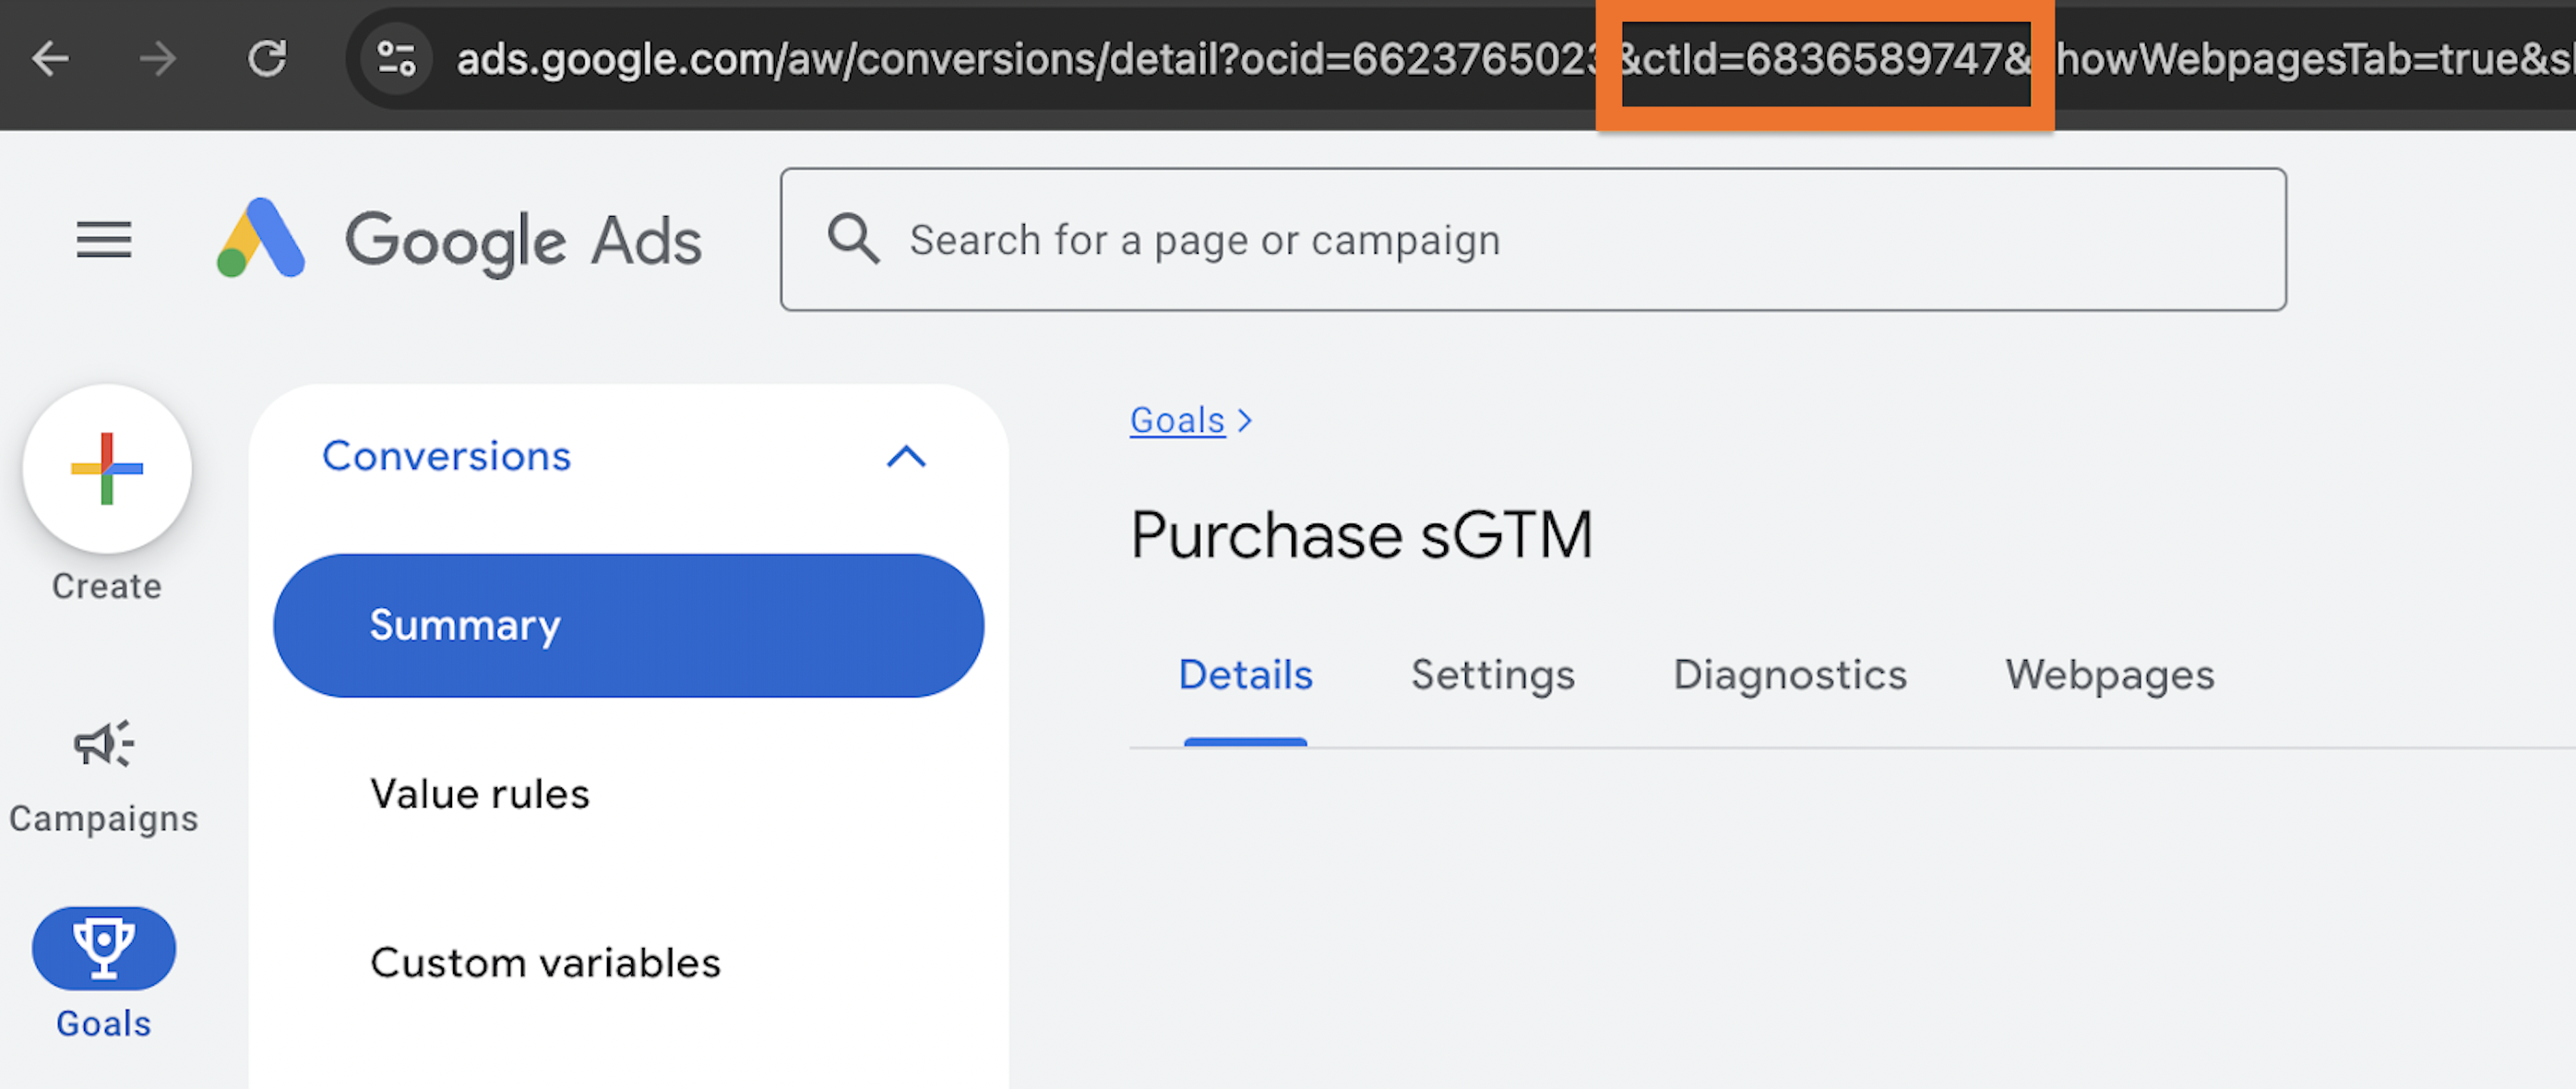
3.1 Conversion Action ID - this should contain the ID of the conversion you want to modify.
Note:
You can find the conversion action ID in the URL when viewing conversions in your Google ads account. You need to copy the data from the "ctId" parameter in the URL.
3.2 Conversion Adjustment Type - here, you need to select the desired type of tag operation.
RETRACTION - cancellation of conversion.
RESTATEMENT - change of conversion amount/currency.
ENHANCEMENT - supplement an existing conversion with provided user identifiers and user agents, which Google can use to enhance the conversion count.
3.3 Authentication Credentials - here, you need to specify the IDs of Google Ads accounts (without dashes).
If you have made a connection to a Stape account that has been added as a user to the required Google Ads account - both fields, Customer ID and Operating Customer ID, should be the same.
If the connection is made by an account that is linked to the required Google Ads account as a manager account:
- Customer ID should contain the ID of your manager account;
- Operating Customer ID should contain the ID of the account where the desired conversion is located.
3.4 Conversion Information - here, you need to specify the conversion data.
The most convenient option to identify the desired conversion is order ID, but you can also use click ID identification (gclid field). Keep in mind that to use click ID, you must save the Google click ID on your backend so that it is available in the webhook.
3.4 User Data - here, you can specify user data when using the ENHANCEMENT type of tag operation.
4. After setting the tag, add the trigger.
Example of tag configuration
In our example, we want to cancel a conversion based on order ID. It is important to ensure that the order ID used in your webhook matches the one used when reporting online conversions in Google Ads. In our case, the tag setting is as follows:
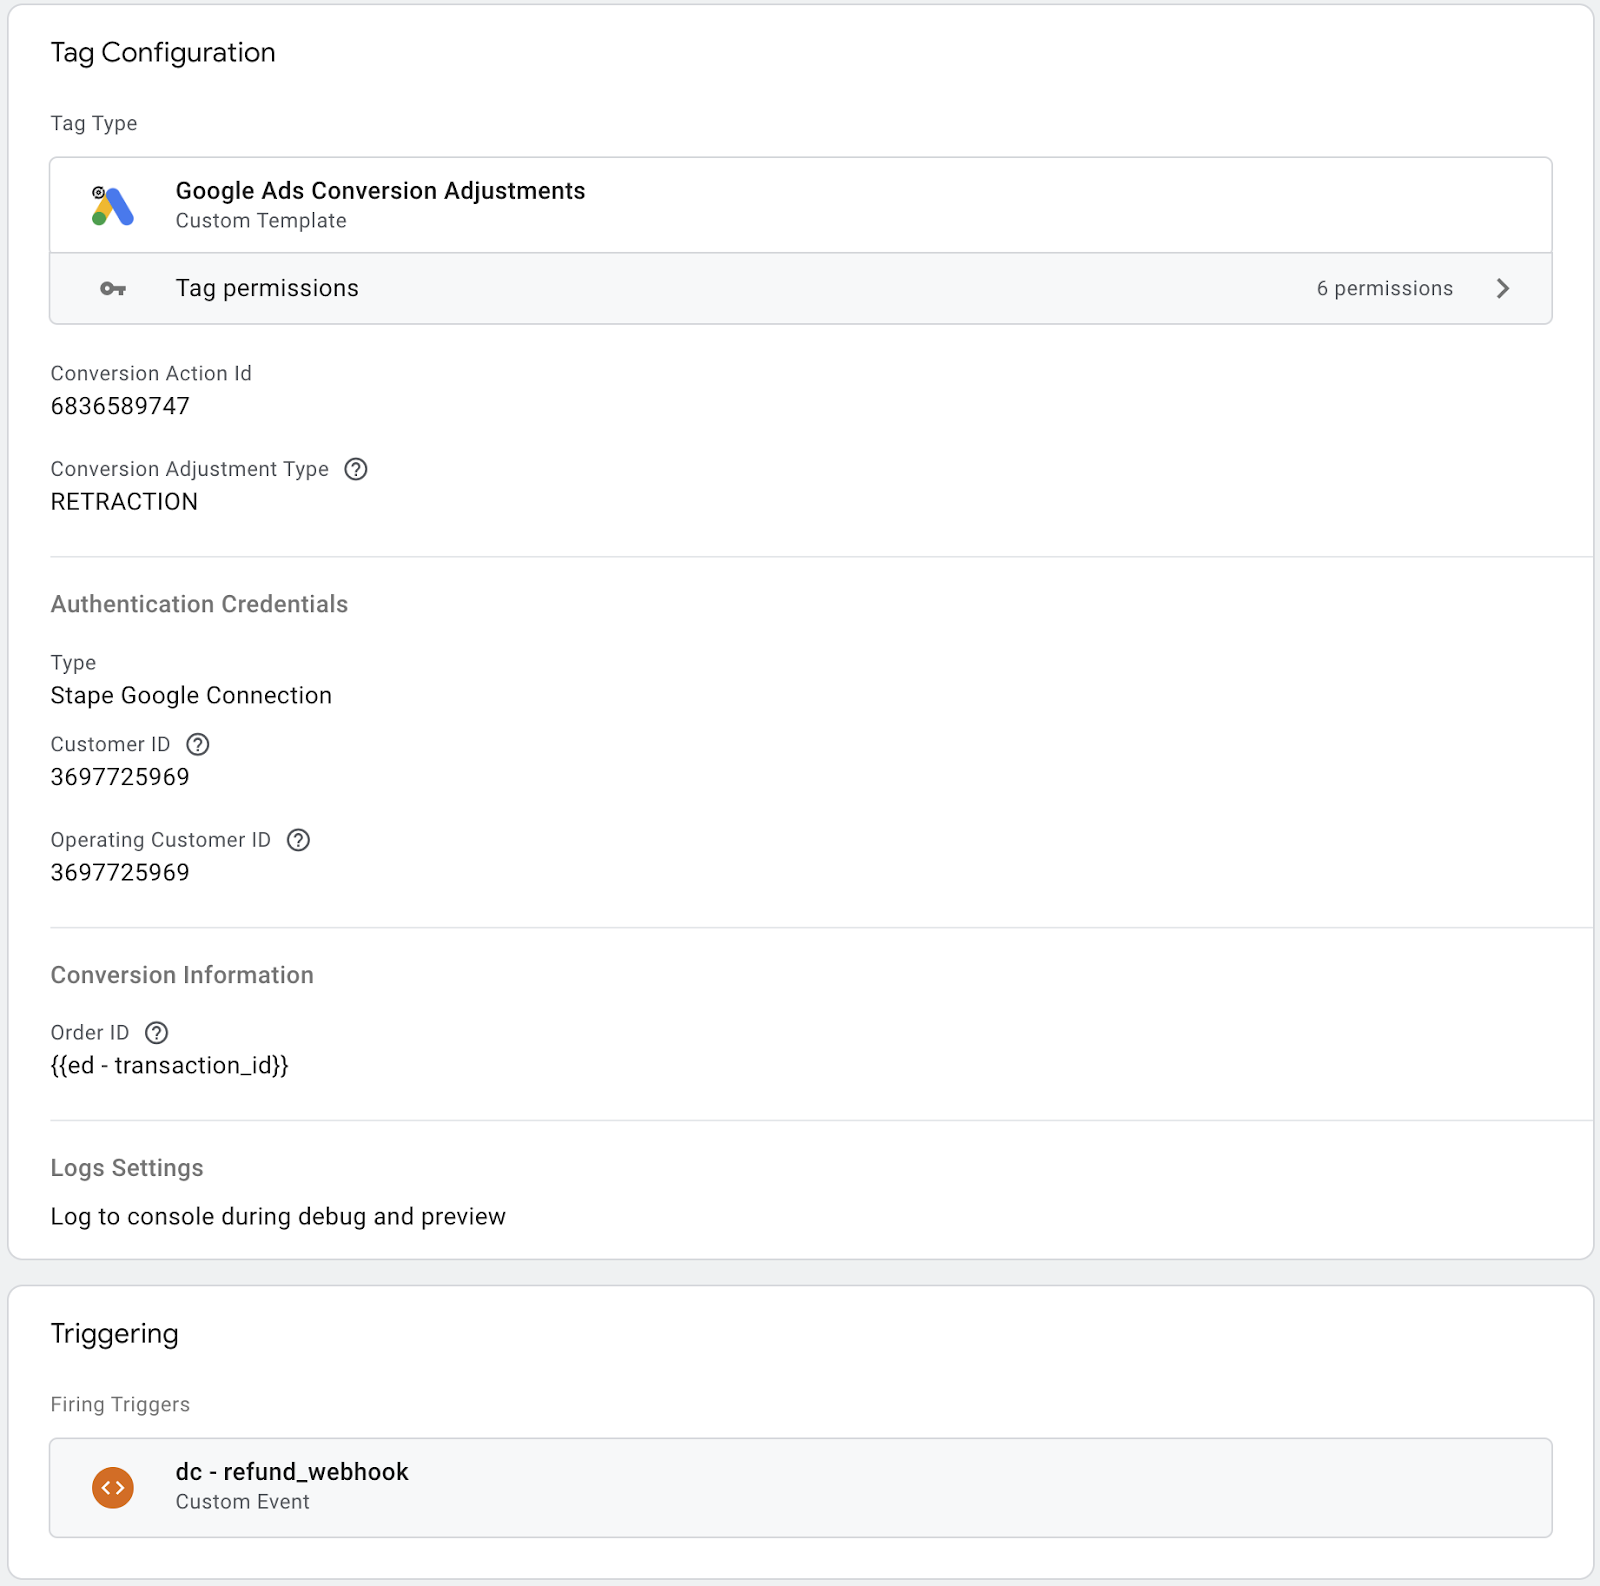
So, in this case, your webhook can only contain the order ID for which you need to cancel a conversion.
If the tag works in RESTATEMENT format, you also need to specify the value and currency to which you want to change the value in the conversion. This is all that differs in the configuration.
Test the setup
Run the server preview and trigger the right event for the Conversion Adjustment tag to fire. Go into the details of the tag and be sure to check the details of the outgoing request.
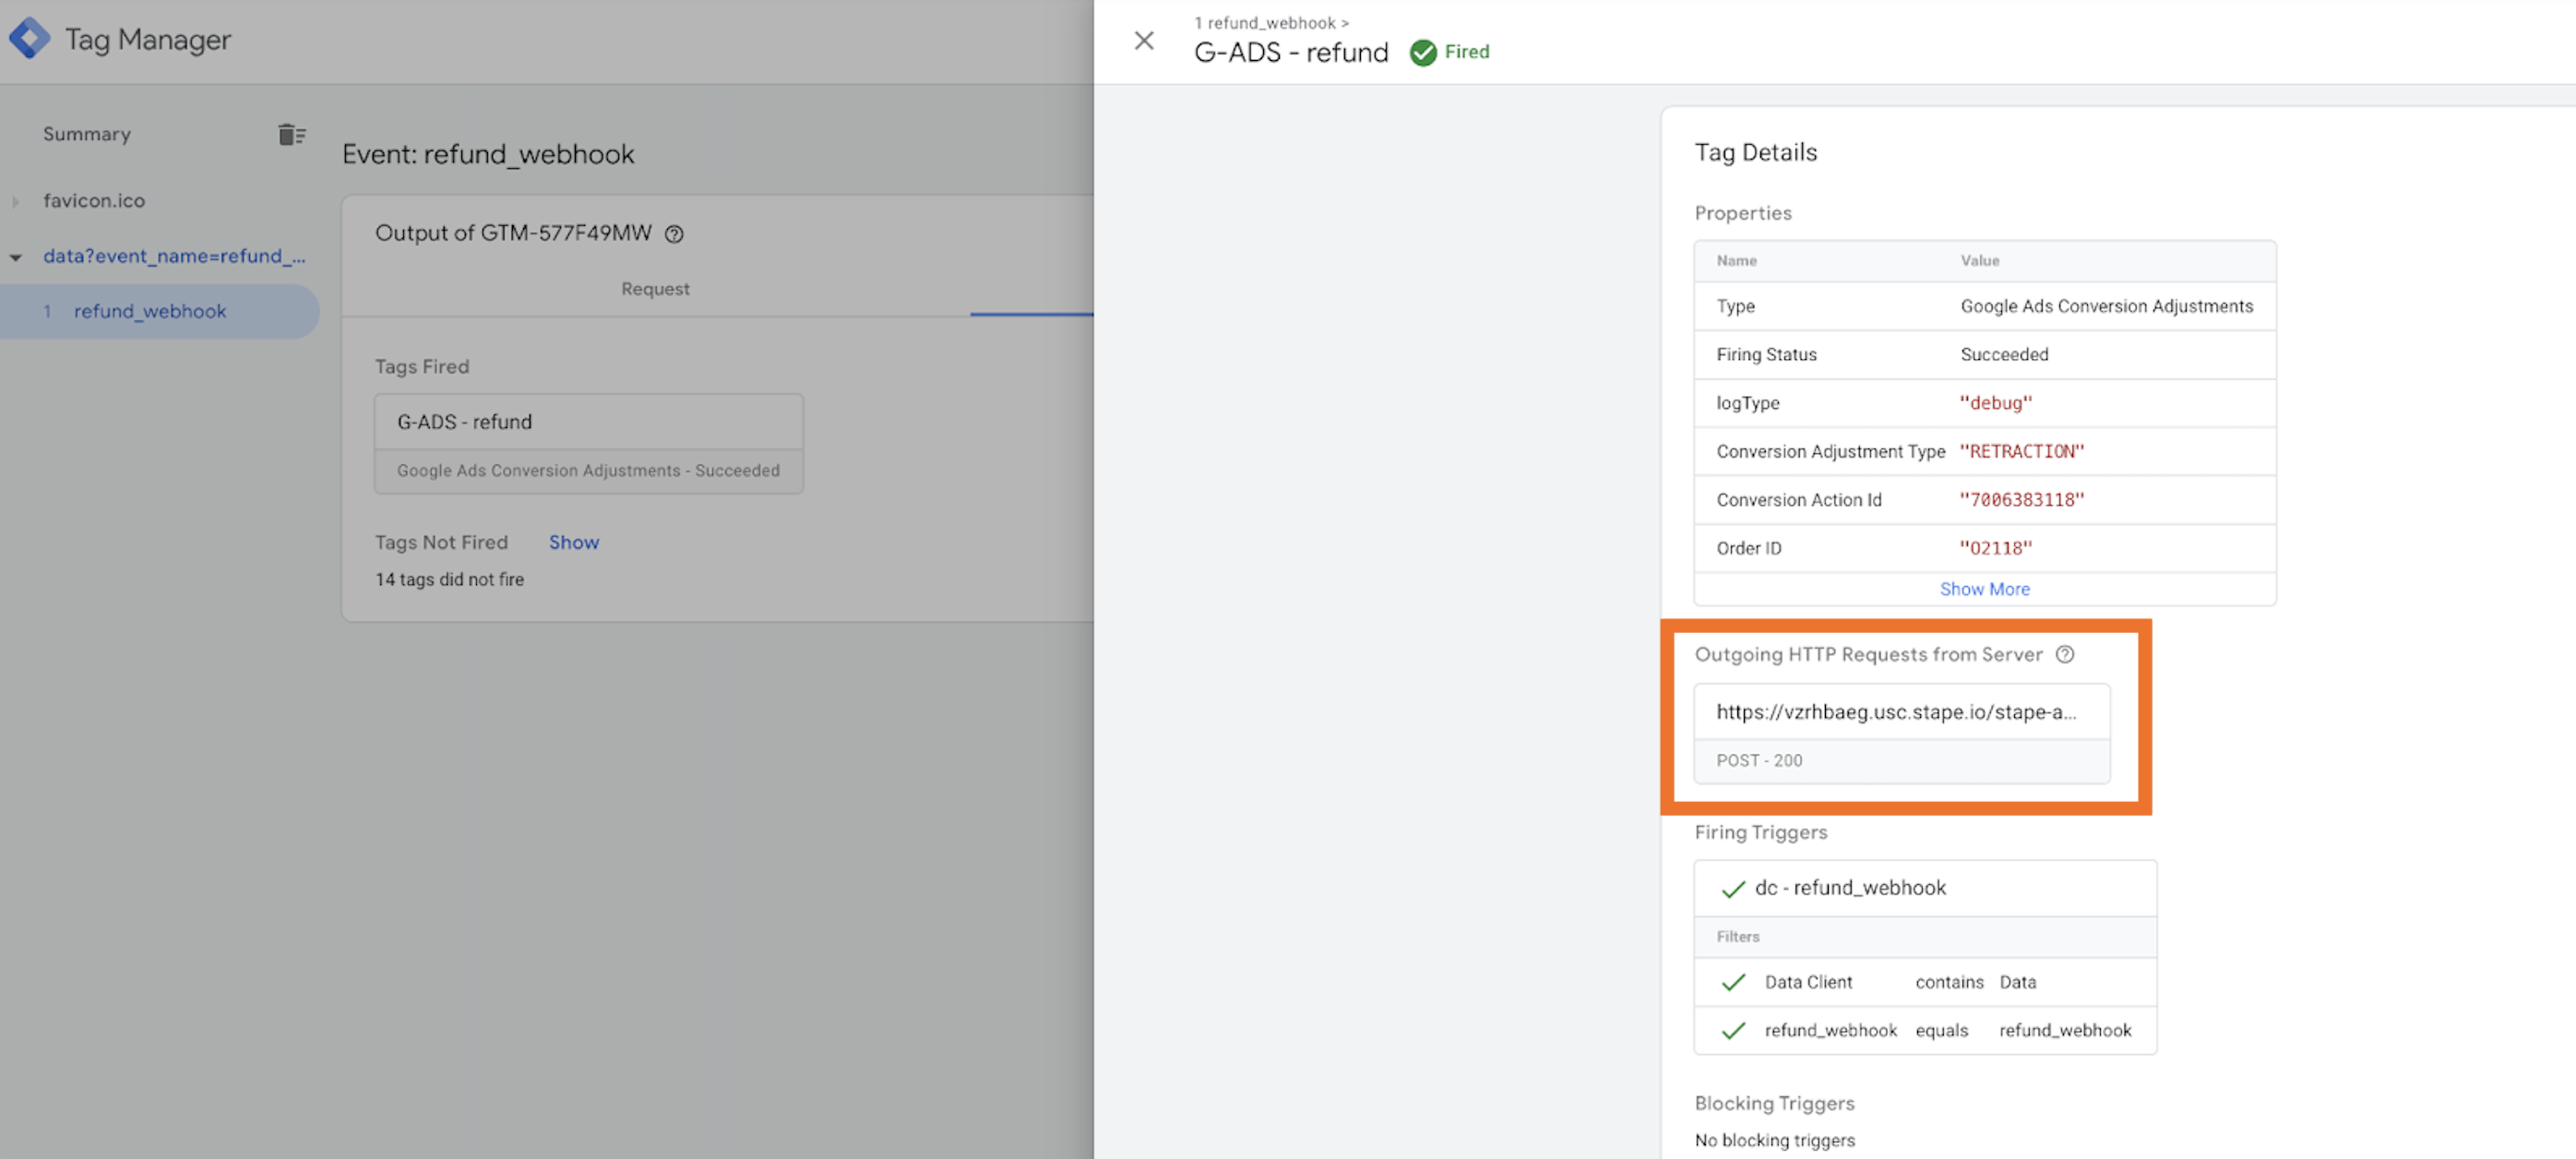
It is important to check the details of the outgoing request as a response of 200 does not guarantee that the request has been successfully processed.
You can verify this in the details of the response:
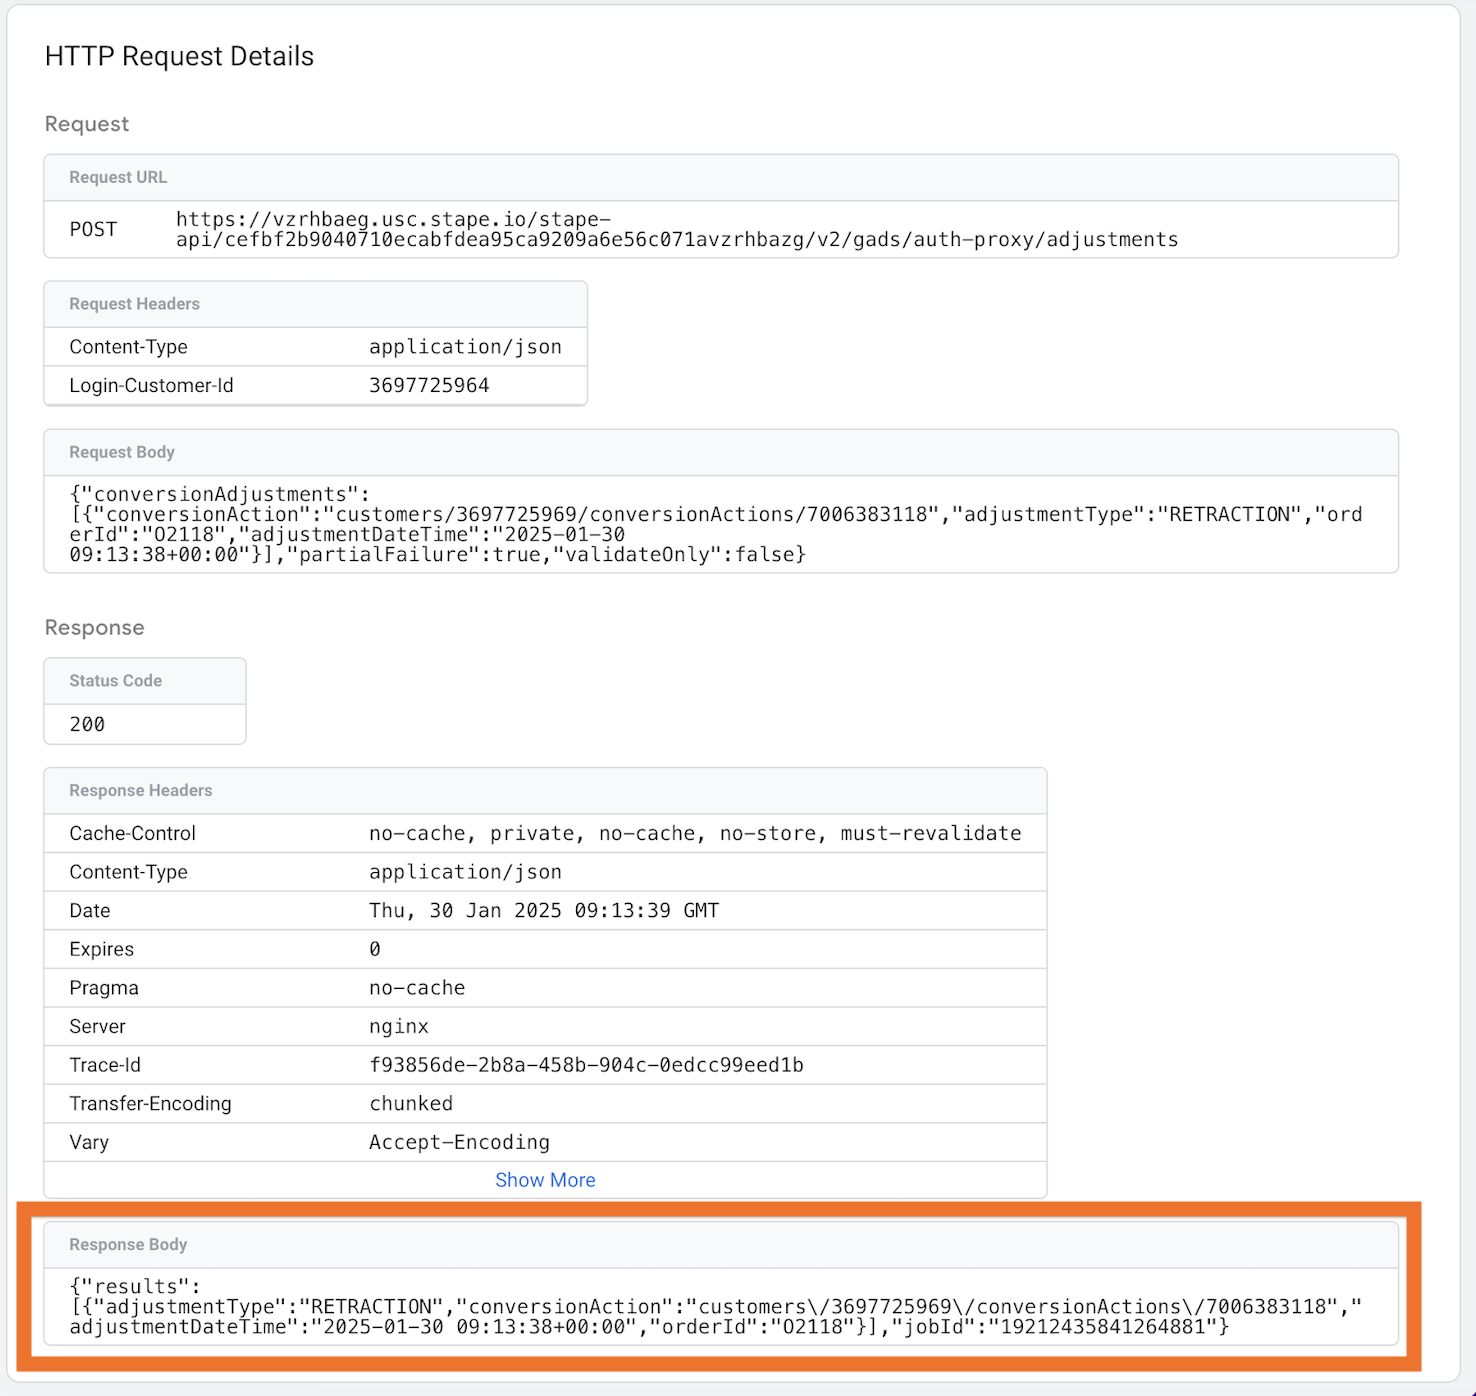
In case of any errors, you will see a description of the problem in the response body. For example, if the order ID you sent was not found in the conversion (note that the status code will be 200):

While most conversions are tracked online, some - like phone orders or in-store purchases - happen offline. The Google Ads Offline Conversion tag lets you send this data from your server GTM to Google Ads, ensuring campaigns reflect all conversions without extra manual work.
Troubleshooting tag configuration problems
When a tag (as in the example above) has a problem, Google Ads API sends well-described and understandable errors in the response body. You should check the error text and make changes to fix it.
Two common problems are:
Authorisation problems
If you encounter authorization errors (status code 4xx), it means that either you have made a connection to Stape with an account that does not have access to or does not have enough access to the Google Ads account specified in your tag, or you have defined the wrong or incorrect account ID in the tag settings.
Poor tag performance
If the expected conversion changes aren’t occurring, most likely, your webhooks do not contain the same order ID used for reporting conversions in Google Ads. To isolate this problem and find the cause, you need tag logs and/or a Logger tag for incoming hits.
The tag is entirely powered by the official Google Ads Conversion Adjustment API, and you can always navigate to the official Google documentation with problems.
Conclusion
The Google Ads Adjustments tag is a powerful tool for improving the accuracy of your campaign tracking. Additionally, it helps refine conversion efficiency and results by allowing you to modify or remove original conversions.
Want to try server side?
We're happy to hear that! Click on Try for free to register and check Stape's benefits.

Comments