End-to-end guide on data layer in Google Tag Manager
Google Tag Manager (GTM) is a great tool for elevating website analytics and tracking. And the data layer is one of the features that helps bring tracking to the next level.
A data layer is a JavaScript object that collects details about user interactions on your website. With its help, you can collect virtually any data, starting with product views and up to the user's operating system. Utilizing data layers in GTM enables you to configure more targeted tracking tags and triggers, providing richer insights into user behavior.
So, we created a comprehensive guide on the data layer that will cover many aspects of its implementation and use in Google Tag Manager. We will explain what a data layer is, its use cases, data layer implementation on the website, how to create a data layer in Tag Manager, test the setup, and common mistakes with setting up.
Let's get started!
What is the data layer in Tag Manager?
The data layer is a JavaScript object used to pass data to tags. It allows you to transfer events or variables and set triggers based on specific variable values. The data layer is used in both Google Tag Manager and gtag.js.
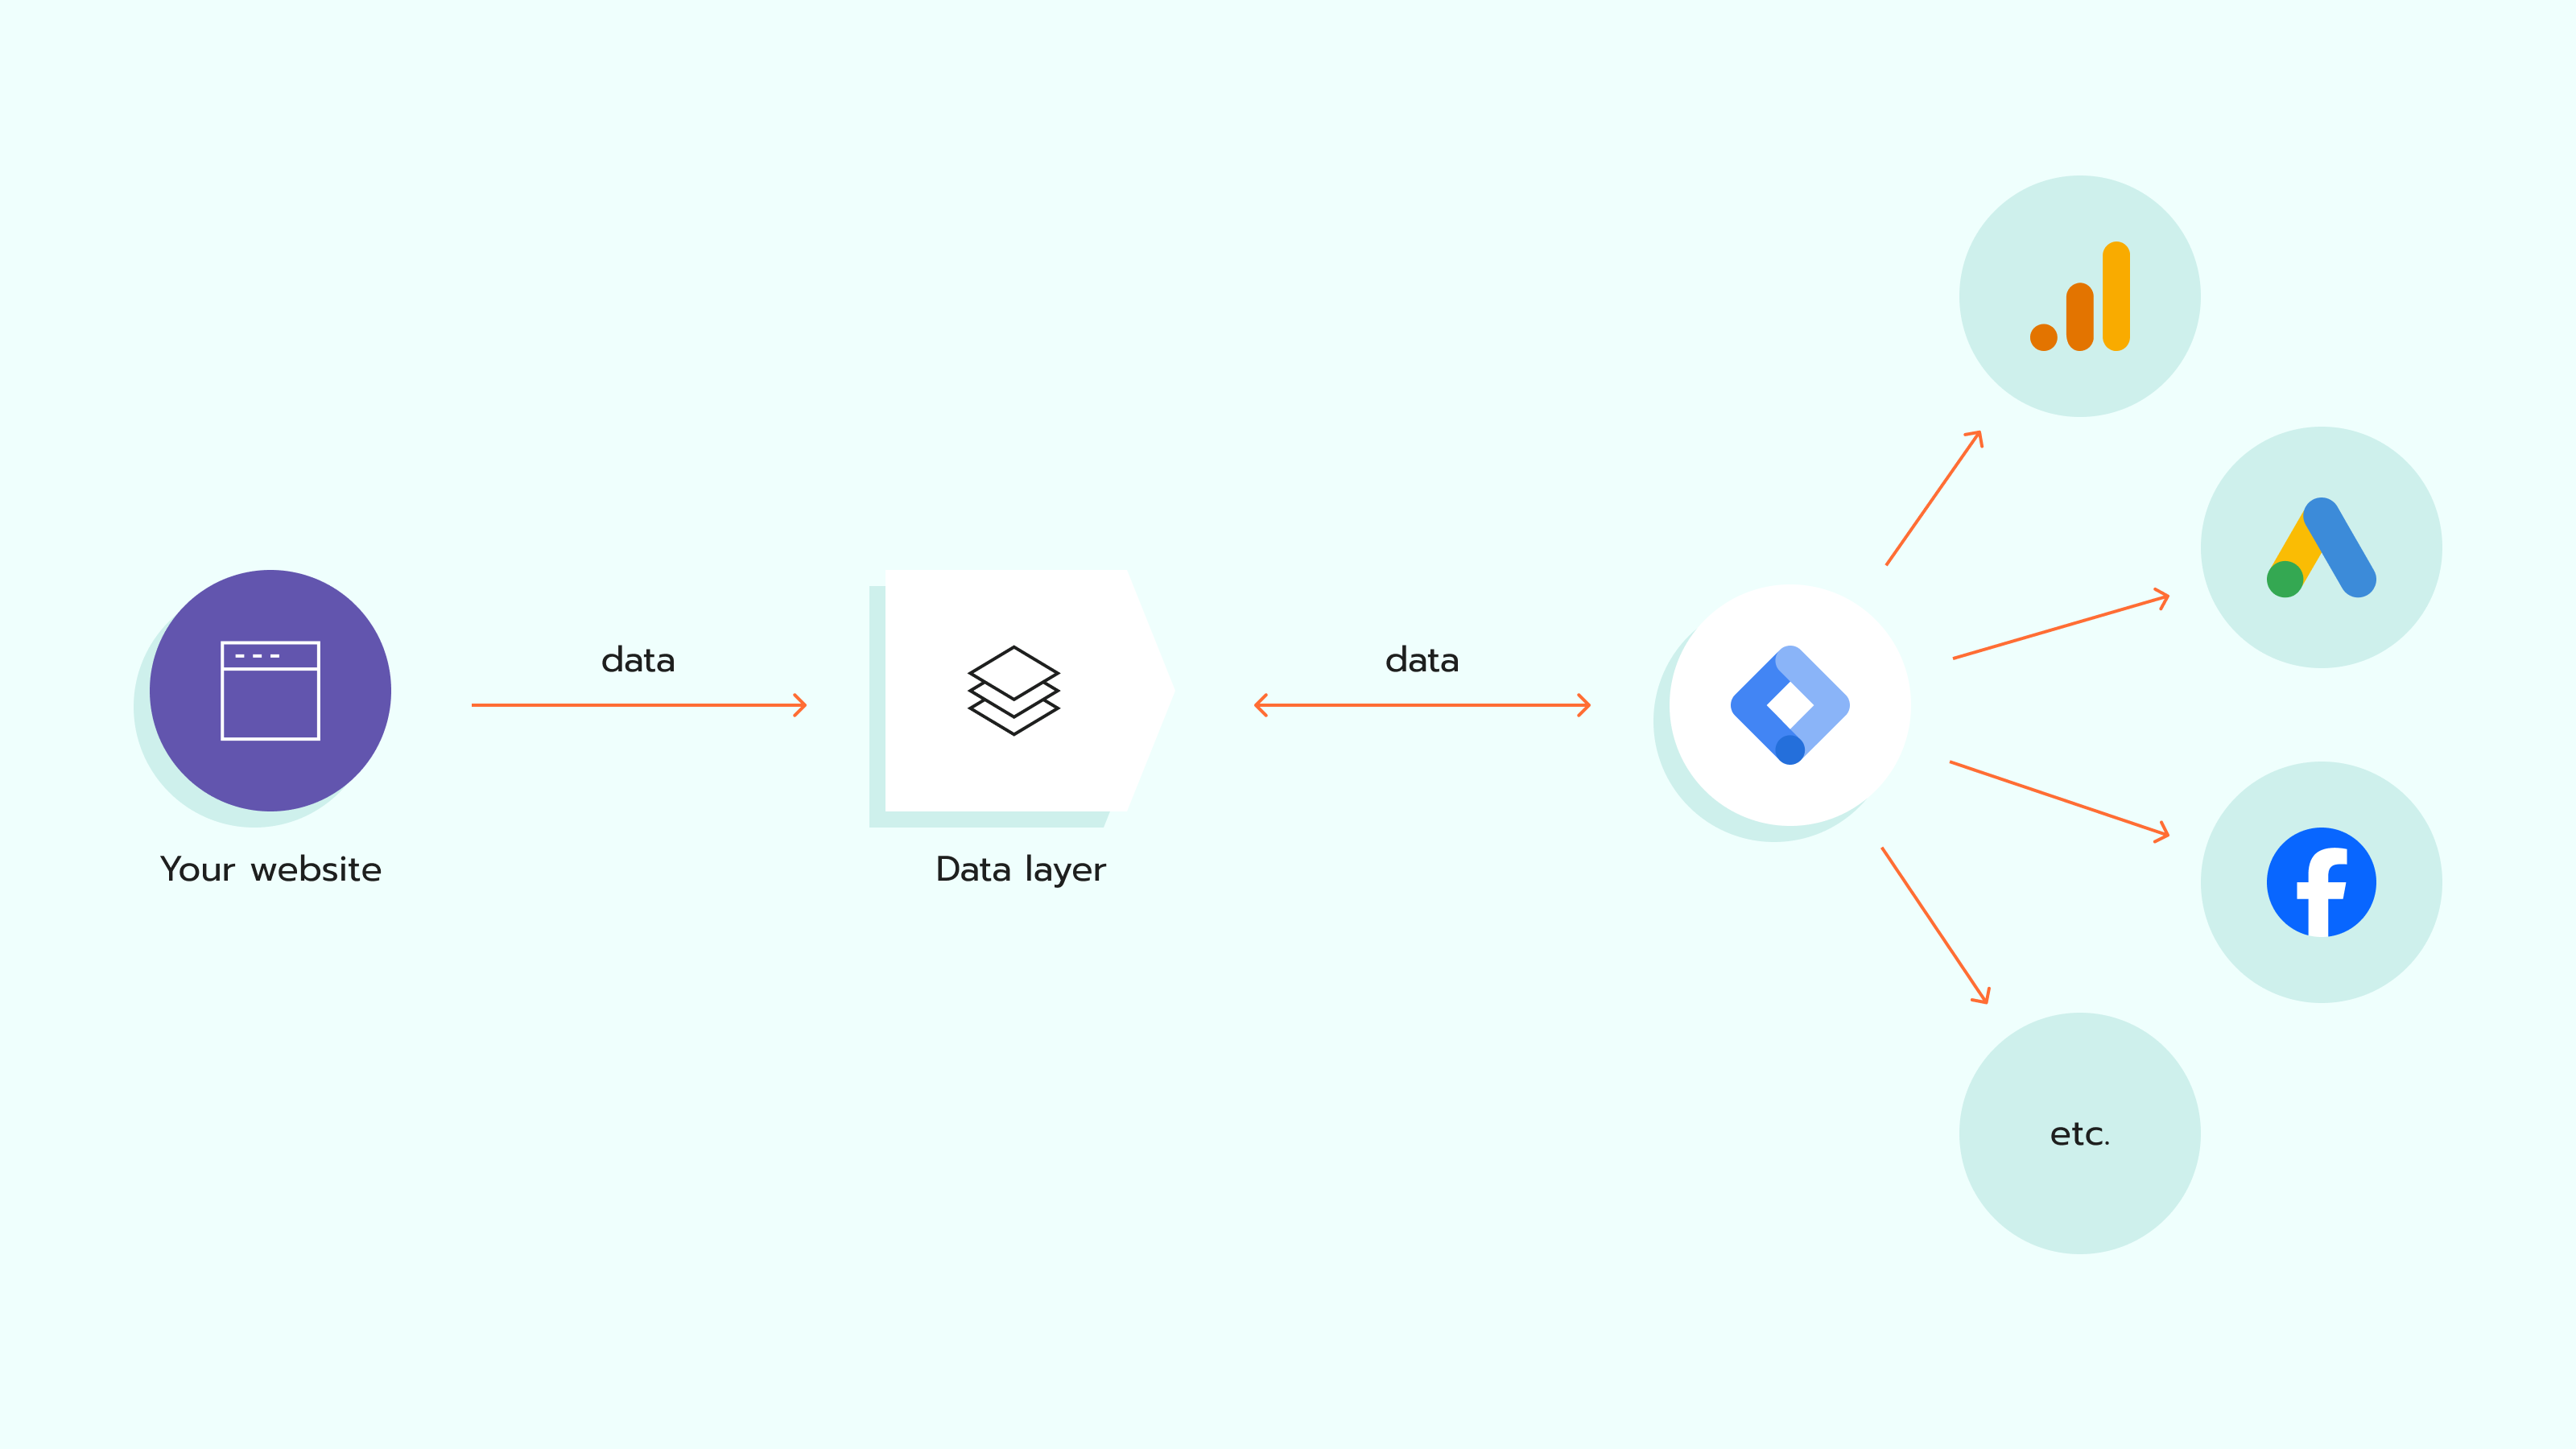
The data layer is an intermediary between your website and Google Tag Manager, functioning as a hub to store structured data for your container.
Data layer's use cases
You need to create a data layer if you want to:
- Set up reliable tracking. Without a data layer, you pull data directly from HTML DOM (the standard used to add, get, modify, or delete HTML elements on your website) and then send data directly to the GTM container. The problem is that HTML DOM may change, leading to stopping the firing of tags and the data collection.
You won't encounter such a problem with the data layer since the GTM container pulls data from the page's data layer, which is way more stable than HTML DOM. The data stops recording only if someone breaks the page's data layer.
- Enrich tag data on specific conditions. Let's say you want to send data on the value of the purchase event only if the user paid more than $50. Instead of searching through scattered variables, transaction details, page categories, and other signals across your page, using a data layer filled with relevant variables and their values (in our case, purchase value > $50) helps ensure that the necessary data is readily accessible whenever your tags need it.
How does the data layer work?
You can specify what data exactly you want to store in this layer. There are two methods of creating the data layer and filling it with the necessary parameters to track, which we will review in the next section.
GTM reads and takes the necessary values from the data layer and sends them to analytics tools such as Google Analytics, Google Ads, Facebook Pixel, etc.
Data layer syntax and examples
In Google Tag Manager, the dataLayer is an array, as indicated by the "[]", and it contains an object, represented by the "{}" as it is shown in the script below:
dataLayer = [{}];The elements within a data layer are referred to as variables and are formatted as ‘key’ : ‘value’ pairs (placed in "{}").
GTM uses a data layer variable called "event," which is also used by JavaScript event listeners to trigger tags when a user interacts with elements on a website. So, based on the example below, 'event' is 'key' and 'register' is 'value'.
dataLayer = [{'event' : 'register' }];For variables, the syntax is the same as with events. In the example below, we take the desired country for tracking - 'country' ('variable_name') is 'key' and 'united states' is 'value' ('variable_value').
dataLayer = [{'country' : 'united states' }];Initialize the dataLayer
There are two methods for data layer implementation: declaration and push of data layer. We’ll describe how to use both methods, but you may jump directly to the one that suits you best.
In a nutshell, we recommend using dataLayer.push as it is more popular and covers most needs. Additionally, this method is safer to use, as it won't disrupt events in Google Tag Manager, whereas improper setup of data layer declarations can easily cause issues.
| Data Layer declaration | dataLayer.push | |
| Best works for | Values needed before the page loads | Pushing information into the dataLayer for events other than the page load event |
| Push time of data layer variable | Before runtime | During runtime |
| Placement in code | Above the Google Tag Manager container snippet | Anywhere in the code |
| Jump to Data Layer declaration | Jump to dalaLayer.push |
Method 1: Data layer declaration
To use this method, the data layer snippet should be placed above the Google Tag Manager container snippet. In this case, the data layer initializes before the Tag Manager is initialized.
Overall, this isn’t a popular or recommended way to create a data layer, but it will work if you want to create data points before the GTM container loads and use these data points for tag management.
Changed 'variable_name': 'variable_value' to the needed parameters and pasted the code on the website page before the GTM snippet.
dataLayer = [{

'variable_name': 'variable_value'

}];


...
Note: Use "=" operator to assign the object's values to the dataLayer array.
Method 2: dataLayer.push
The push method adds object elements to the data layer dynamically. Unlike the data layer declaration method, with push data, you can place the data layer snippet anywhere in the code.
It can be a bit confusing, but 'dataLayer' is also a JavaScript variable that can be accessed by any function interacting with the window object. So, to avoid conflicts with any other local JavaScript array named 'dataLayer,' the best way is to use the ‘window.dataLayer’ prefix.
So, you will need to use the code below for the dataLayer.push method. Instead of 'variable_name' : 'variable_value', add the required parameters.
window.datalayer = window.dataLayer || [];

window.dataLayer.push({

'variable_name' : 'variable_value'

});
In the code block above, the dataLayer is set to an existing dataLayer if it already exists; otherwise, a new dataLayer is created as an empty array. The || (OR) operator ensures that the assignment happens if either of these conditions is met.
In this way, you will avoid creating multiple declarations, which can overwrite dataLayer.
Example and documentation on eCommerce data layer
For many ecommerce CMS's there are plugins (including plugins from Stape) that can create you a data layer for standard ecommerce events. In some cases this may not be enough. For example, if you need additional events or additional data in data layer events. Or if you are using a fully customized platform.
In this case you need to contact your developers to create data layer events with the payload you need. This is usually a fairly simple task for developers and doesn't take long, although it depends on the architecture of your site or platform.
| Here is an example of such documentation for developers that you can copy, edit to your needs and pass on to your developers. |
A few useful guidelines:
- Make a copy of the document, remove the events you don't need and/or add the events you do need and sample payload.
- Use the same data format in all events. It is best to follow the GA4 format.
- If it is not an obvious event (e.g. view item or add to cart) describe in detail when it should be triggered. This will avoid unnecessary back and forth between you and the developers.
- User data can be used in virtually all marketing platforms, it is important that it is available in the data layer - using it will greatly improve your tracking results.
- Try to avoid data layer events that are sent before the user redirects to another page. This can lead to loss of this data, as the events may not actually be sent before the redirect. For example, if you want to send a Lead event after a user submits a form, and then the user is sent to the thank you page - the best practice is to send this event in the data layer on the thank you page, rather than when the user actually submits the form.
- If you already have some data layer events on your site, it is better to use some custom names for new data layer events and not to modify old events in order not to affect the existing tracking in the process. That is, if you already have for example add_to_cart in the data layer it is better to create a new event add_to_cart_v2 instead of changing the old one and then reconfigure the tags to the new events.
- Be sure to check the data layer after the developers have implemented this. Sometimes even small errors in payload can cause tracking problems.
How to create a data layer in Tag Manager?
You can access the elements from your data layer array in Google Tag Manager differently. To leverage the data within Google Tag Manager, assign it to a variable or use it as an event trigger. These variables or events can then be incorporated into your tags, triggers, or other variables.
Below, we provide three use cases of the data layer and their setup in GTM:
Use case 1: Data layer variables as data points
Code example
As an example, we take the purchase value of orange T-shirts.
window.dataLayer = window.dataLayer || [];

window.dataLayer.push({

‘product_name’ : ‘orange t-shirt’,

'purchase_value' : '5',

‘purchase_currency’ : ‘EUR’

});
GTM setup
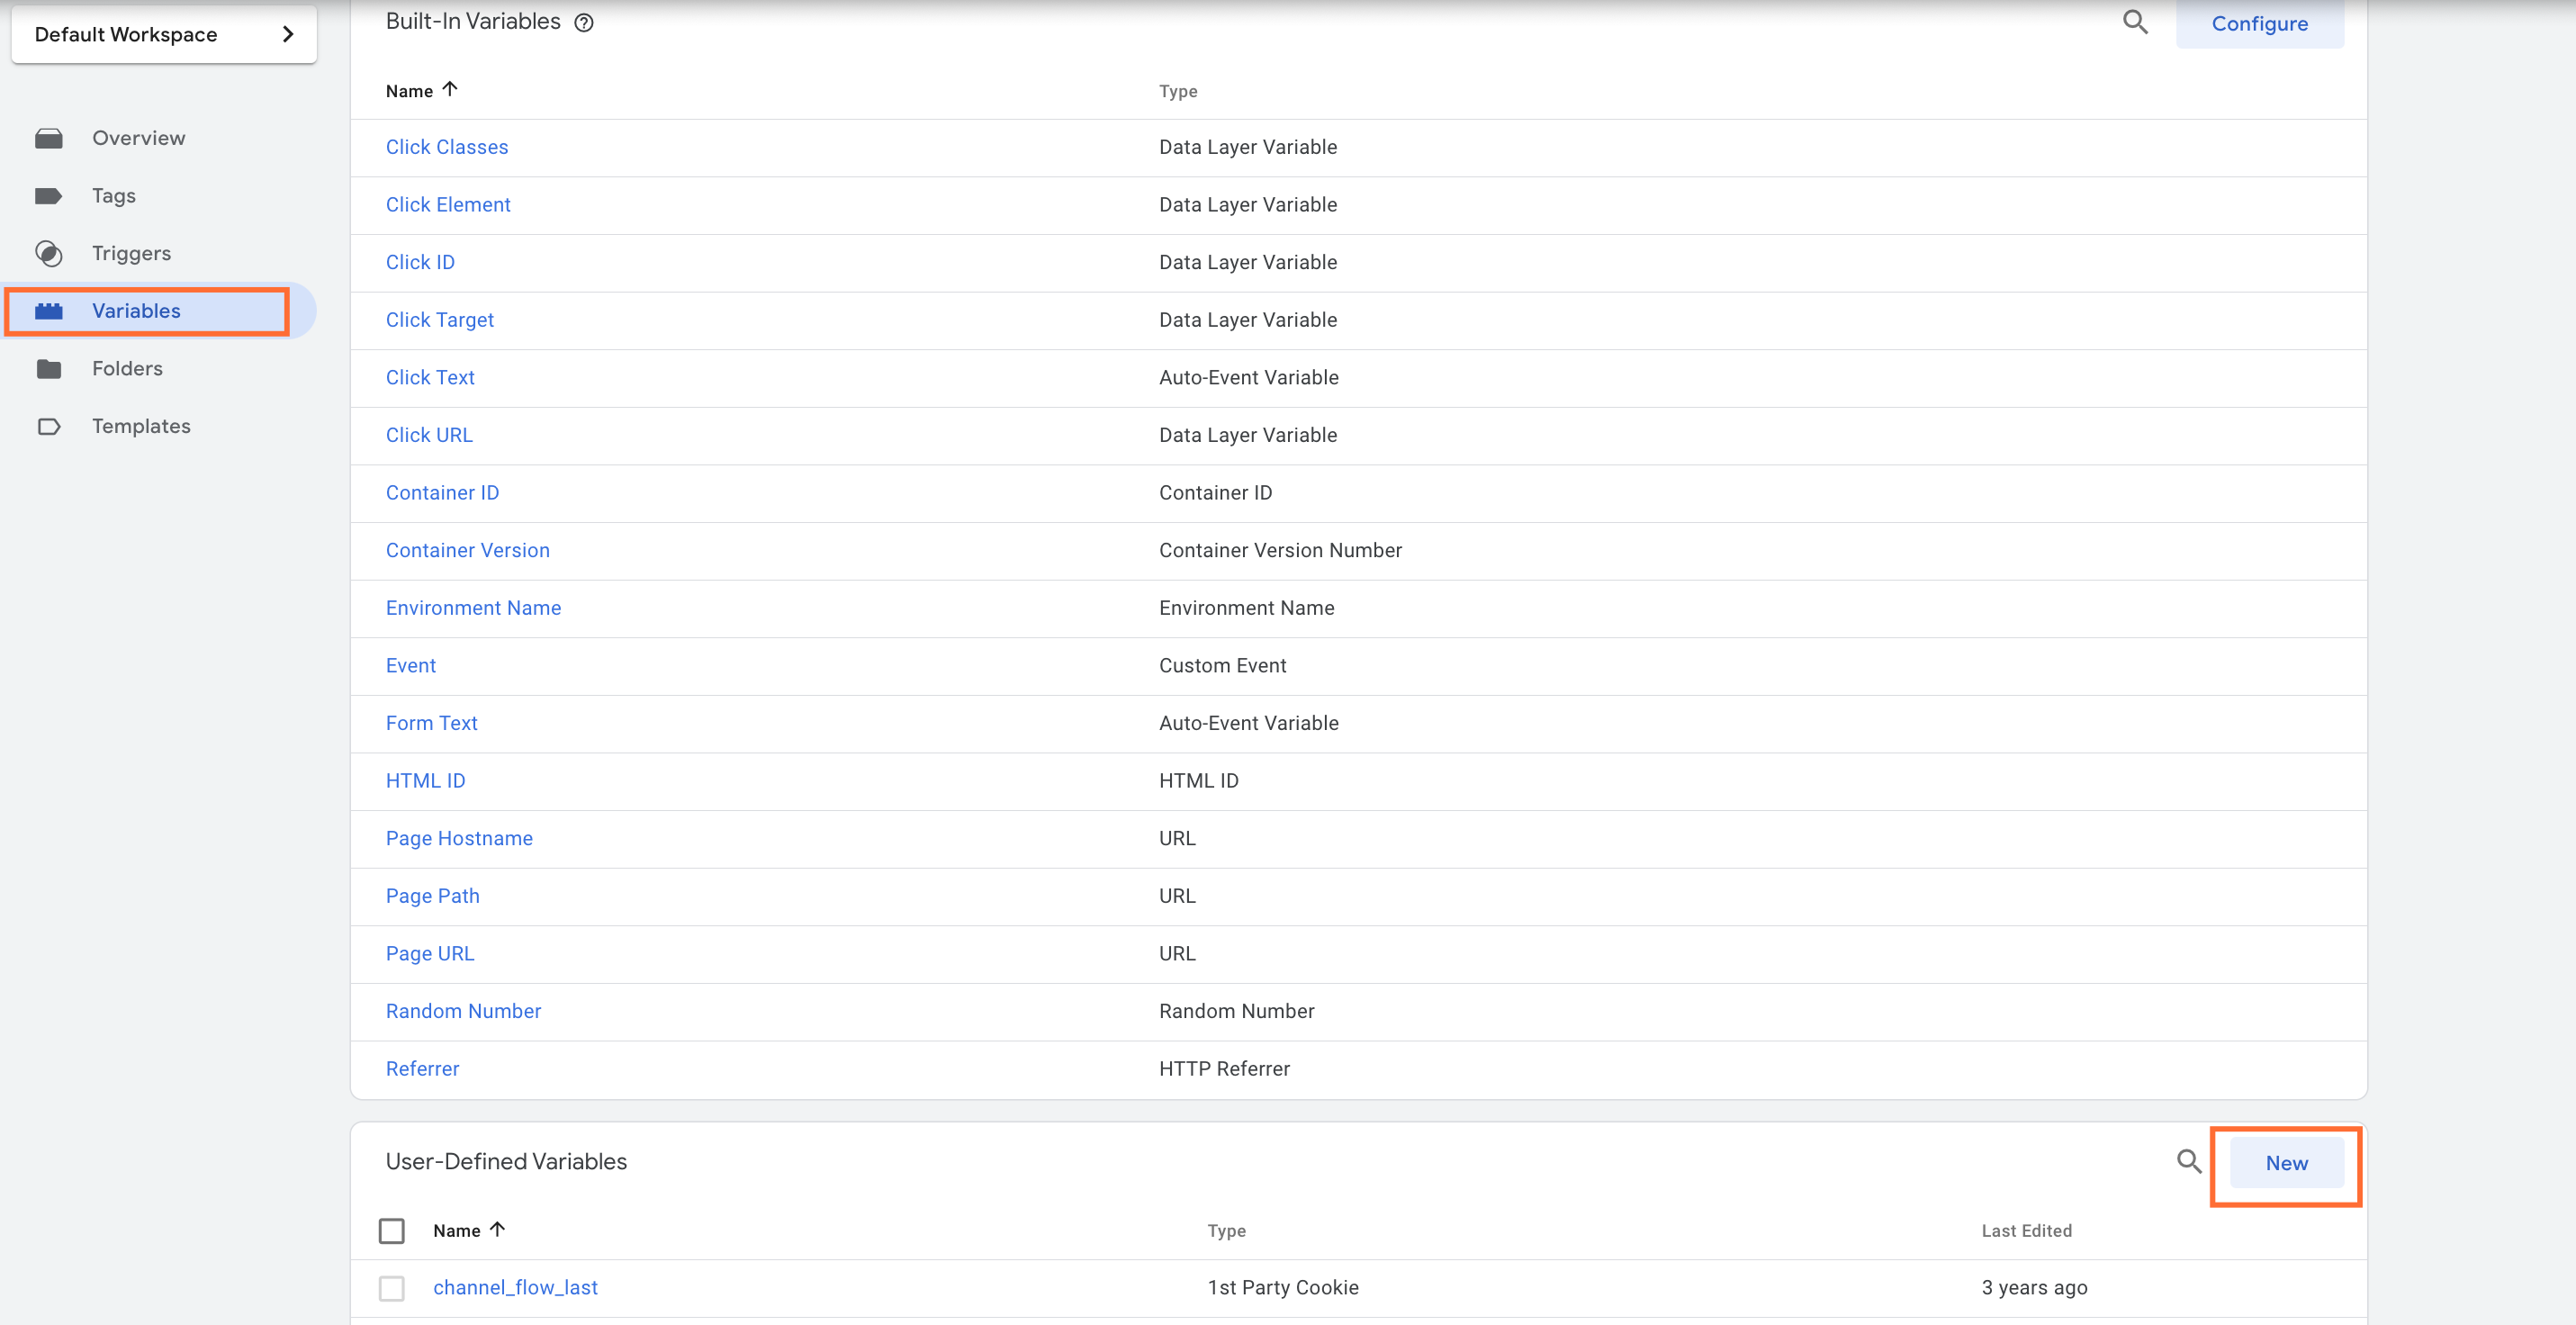
- For variable configuration, in the GTM container, go to Variables → click "New" in User-Defined Variables.
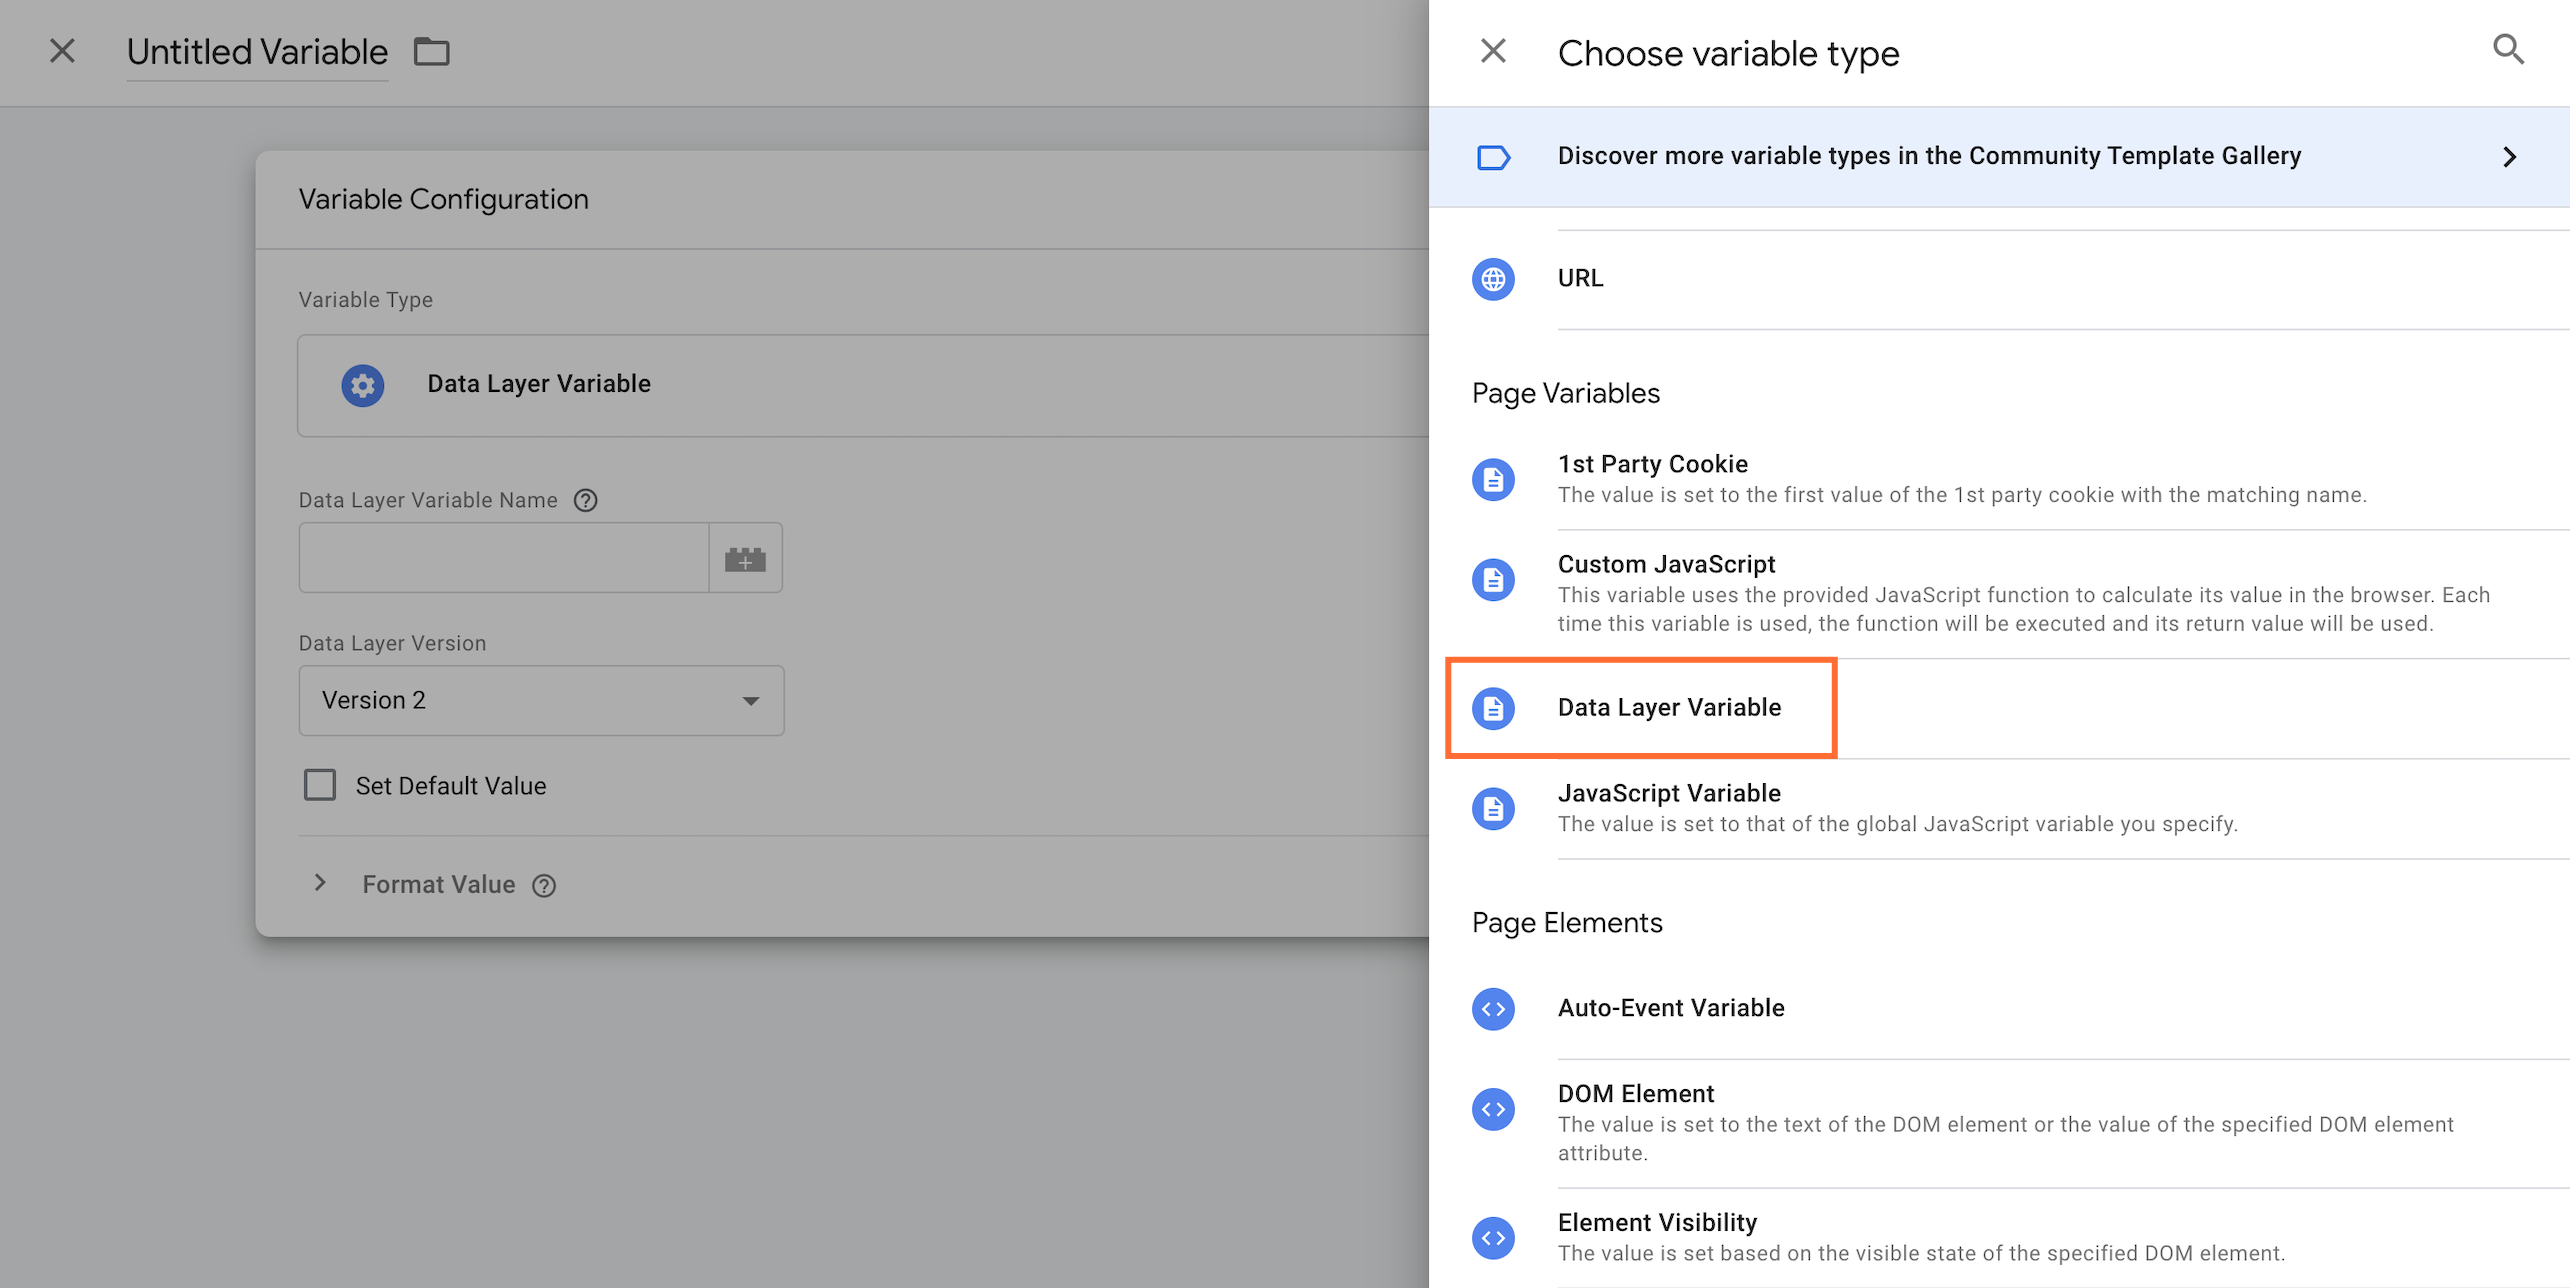
2. Choose "Data Layer Variable" as the variable type.
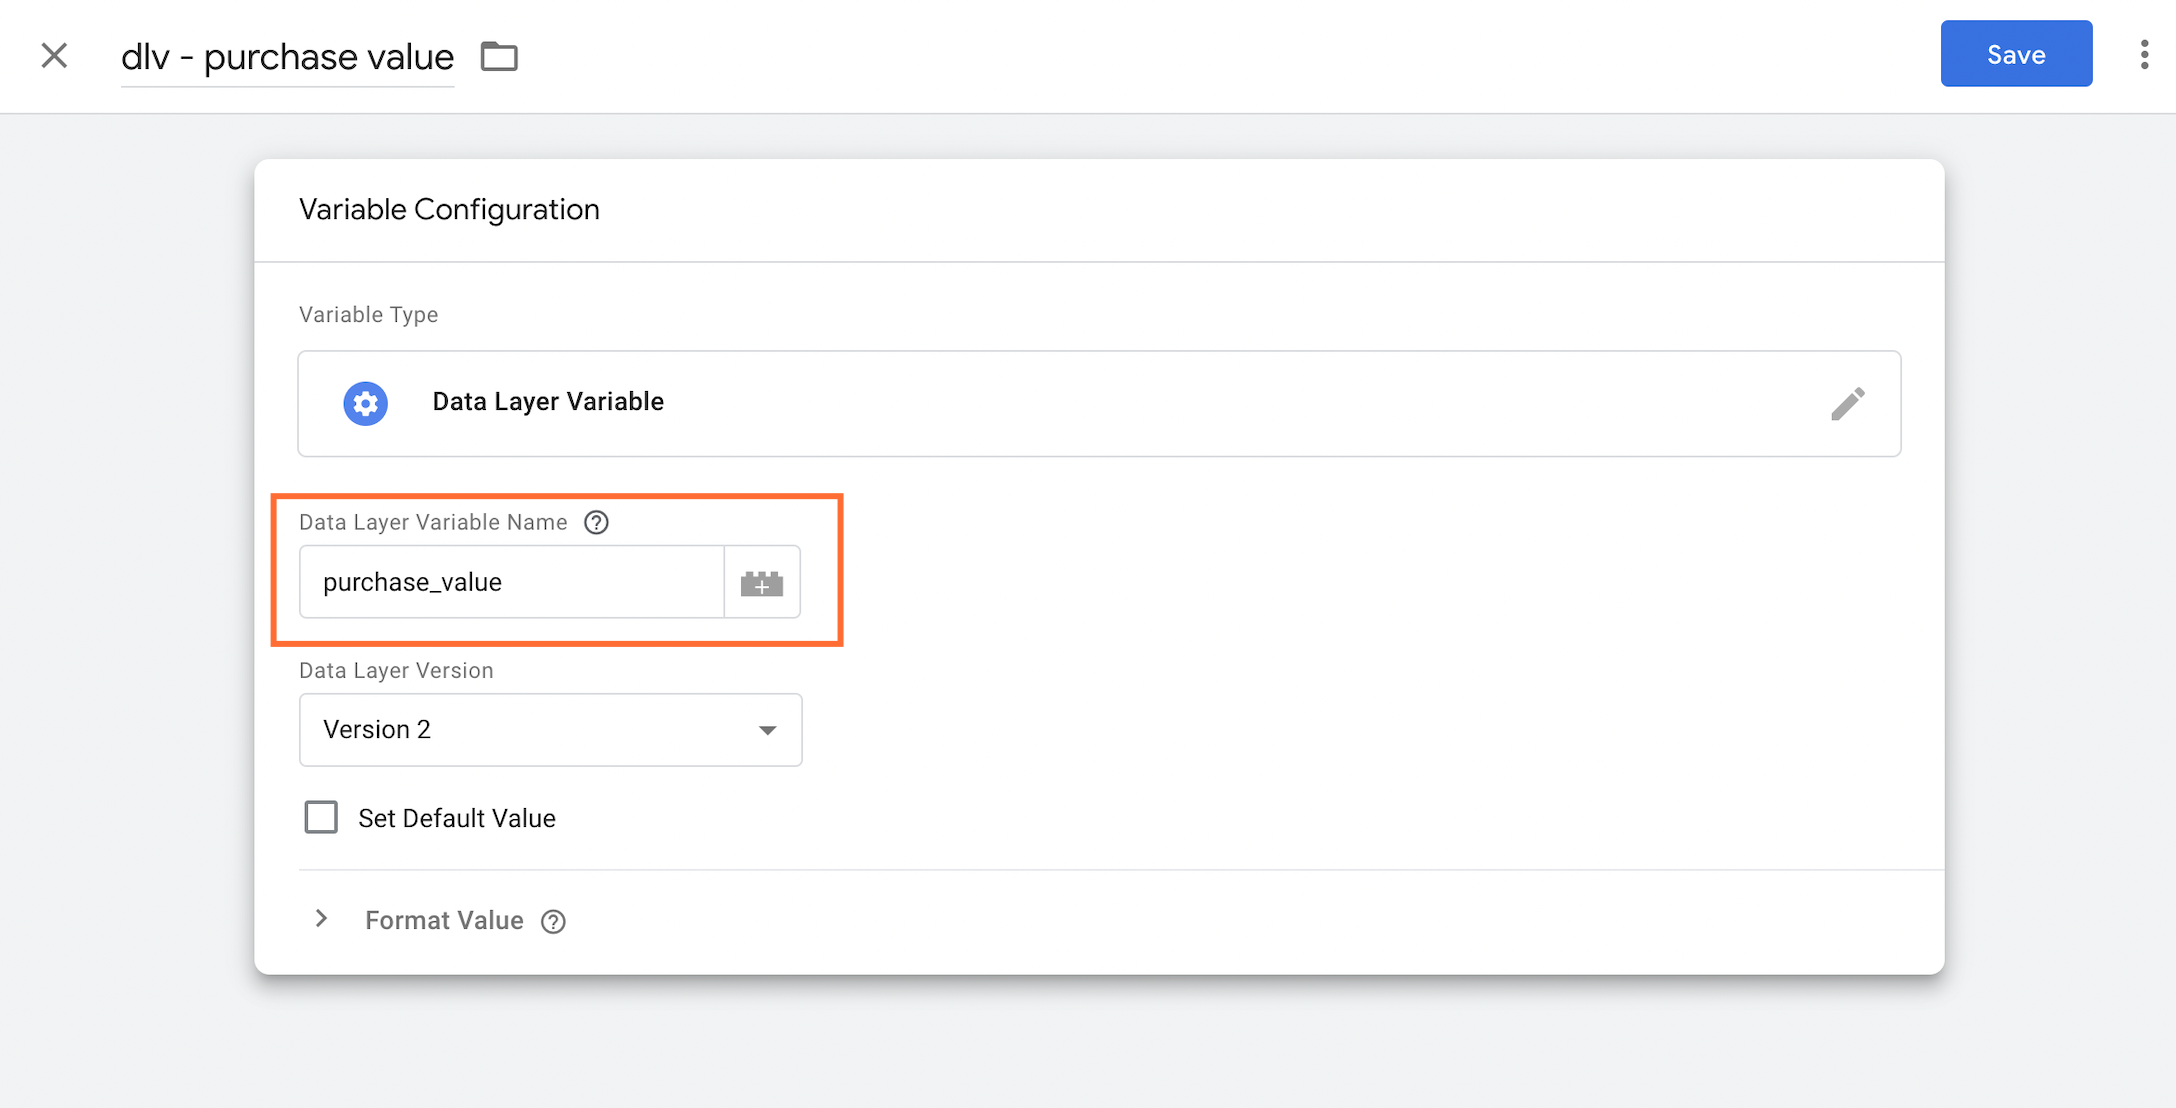
3. Add the data layer variable name and click "Save".
Please note: the field is case-sensitive, so make sure the name matches the value name in the code you added to the page. In our case, it is "purchase_value".
Use case 2: Data layer to trigger events
Code example
As the code example, we take the dataLayer variable that triggers the “register” event when a person fills in the data required for registration and clicks “Register.”
window.dataLayer = window.dataLayer || [];

window.dataLayer.push({

'event' : 'register'

});
GTM setup
1. Go to the Google Tag Manager Triggers → click "New."
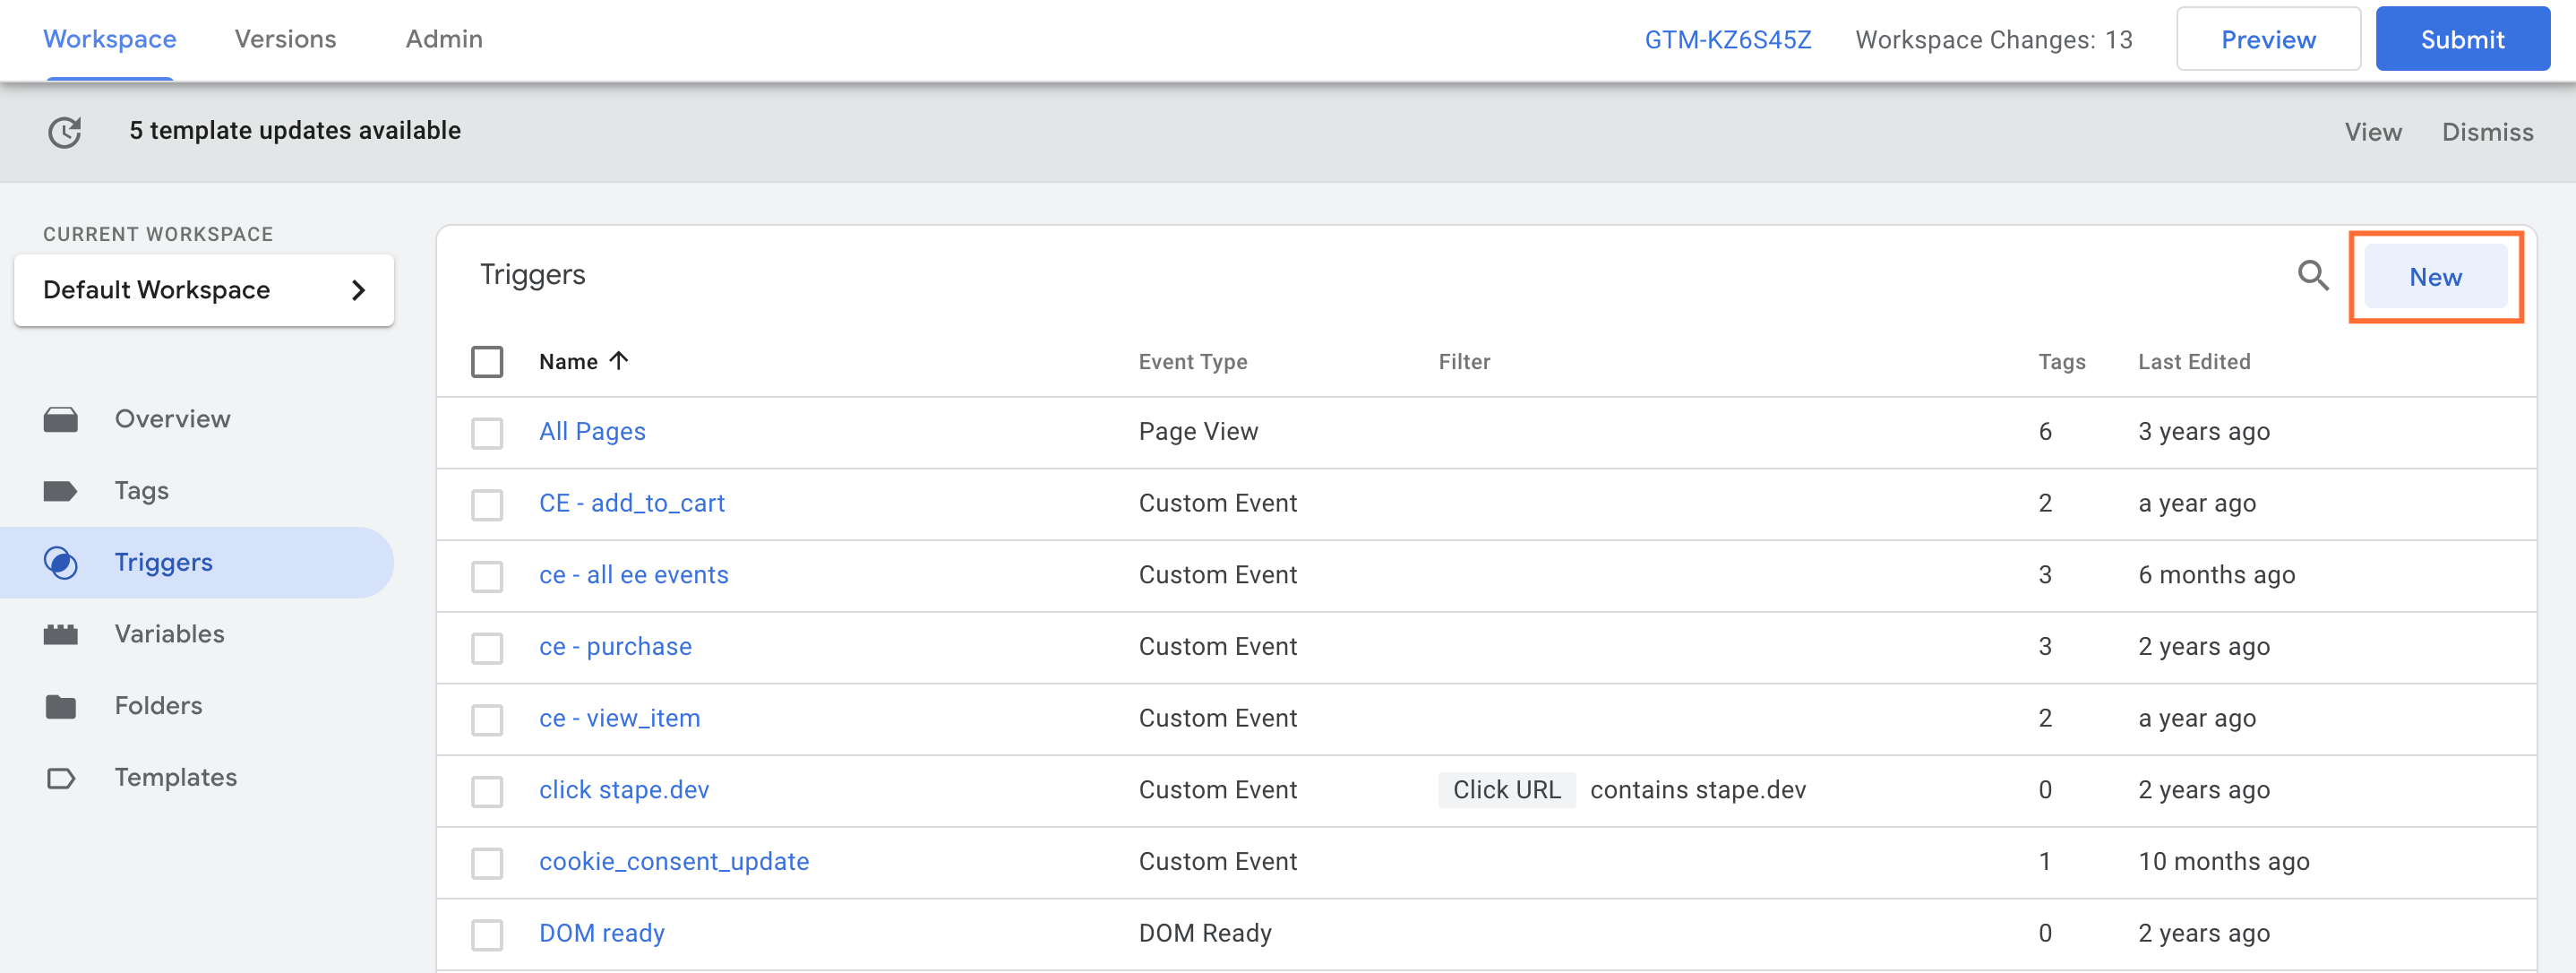
2. Choose the "Custom Event" trigger type.
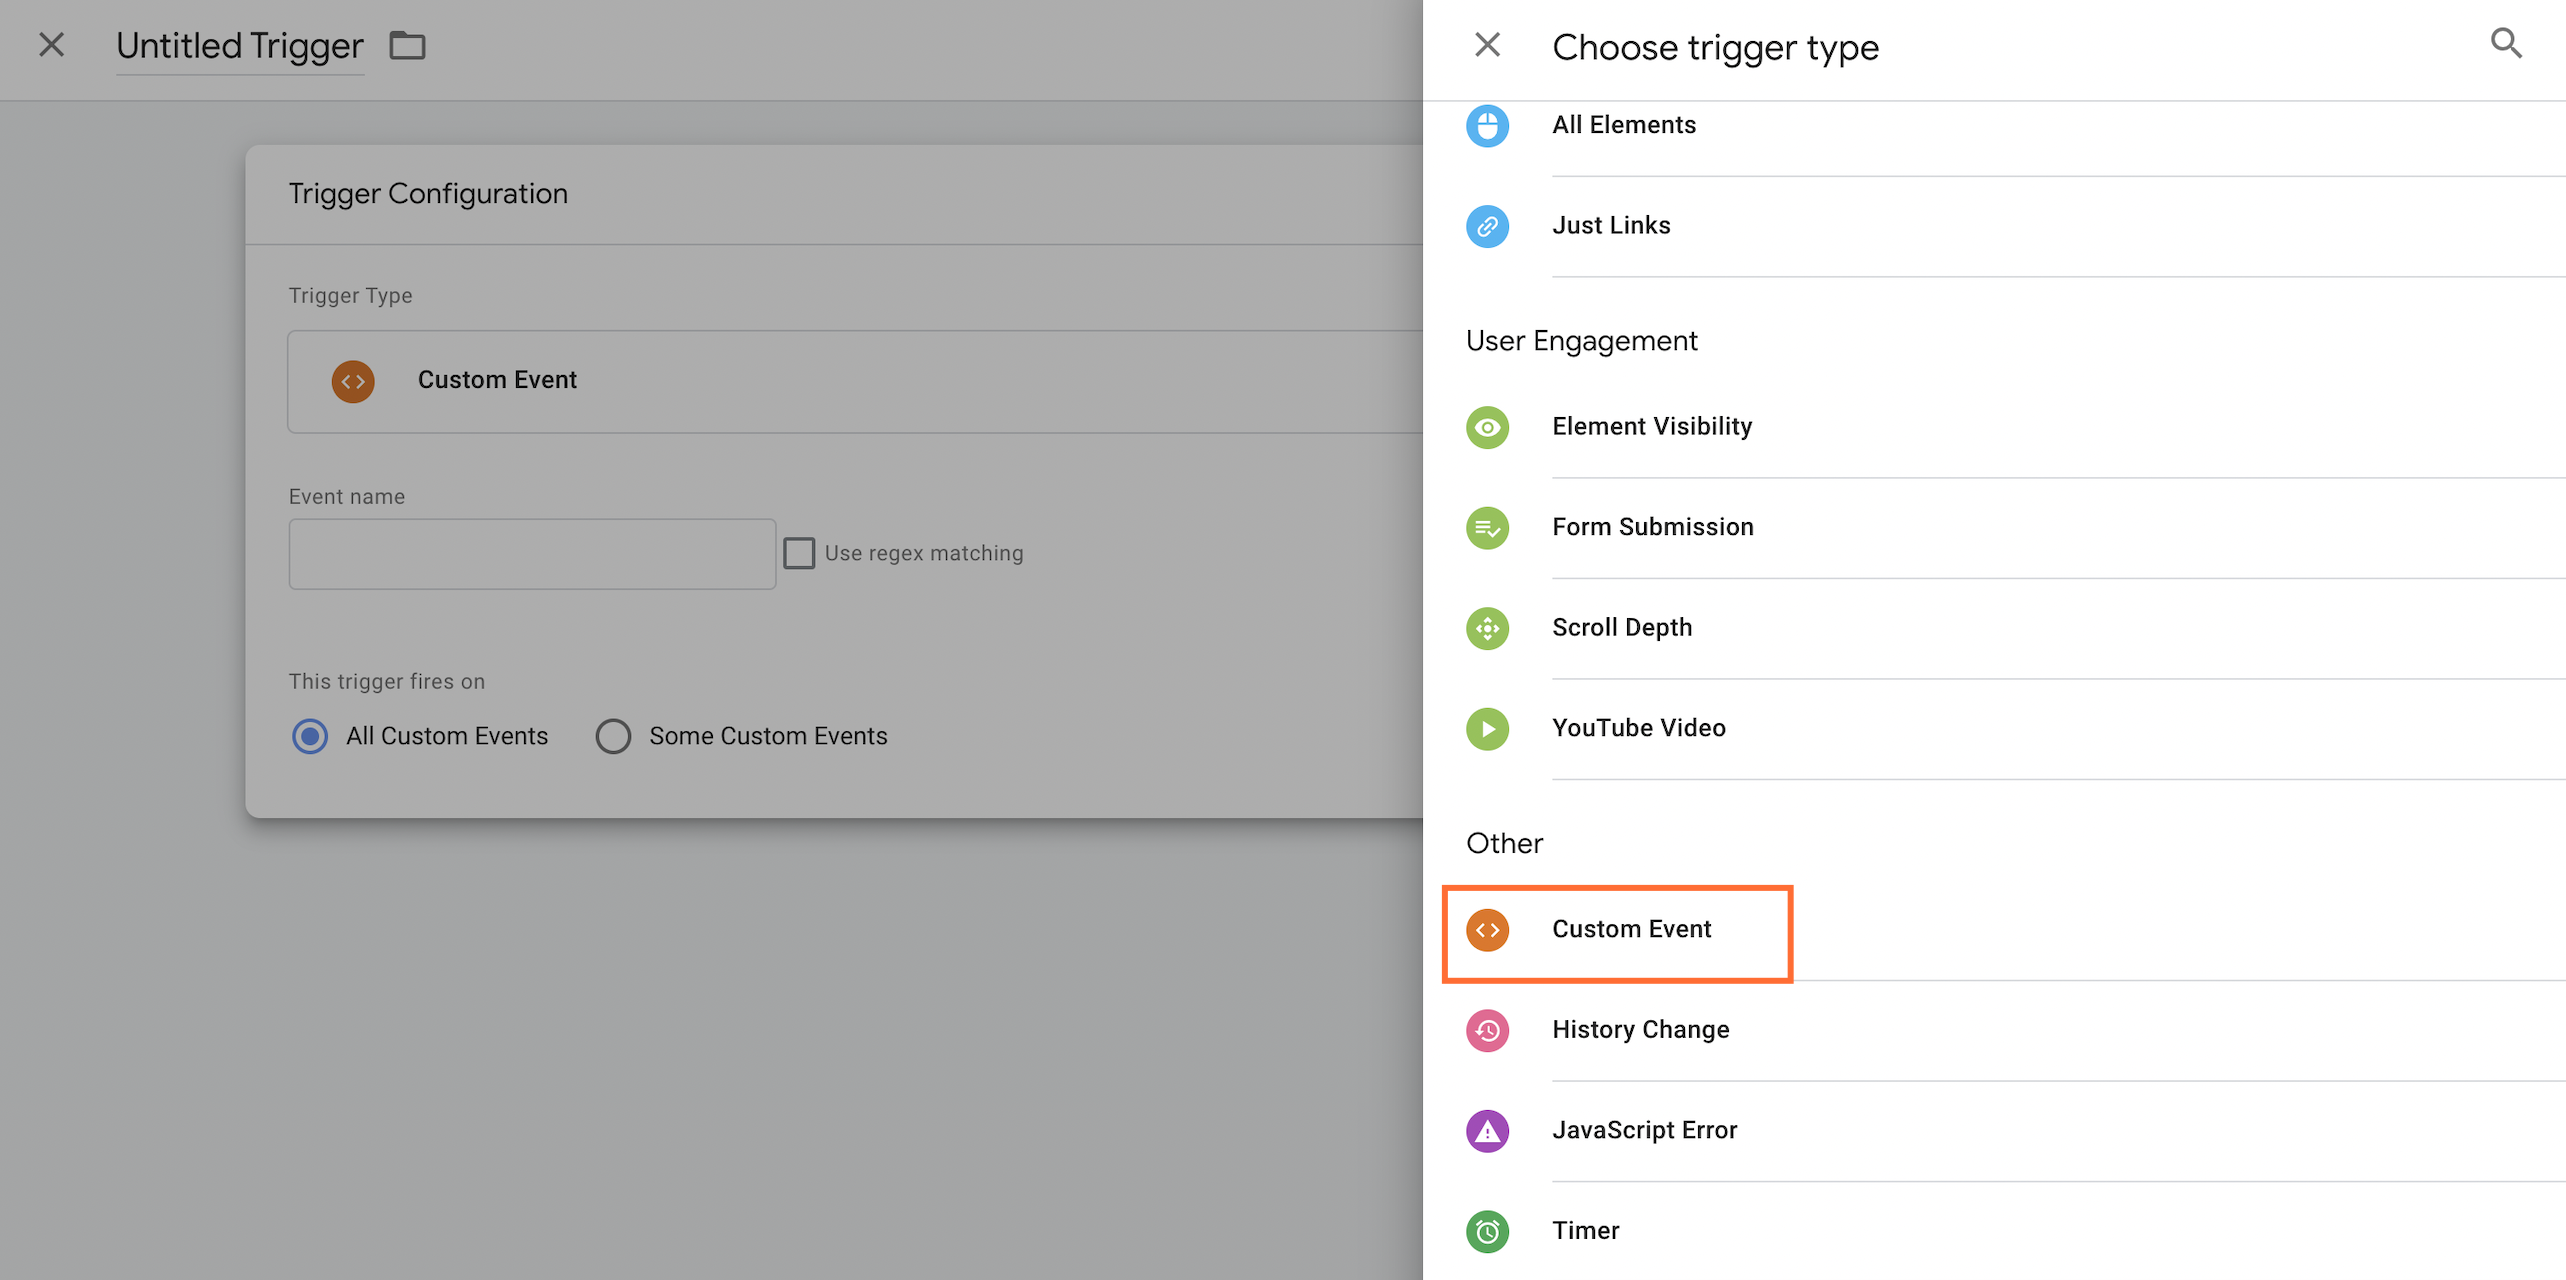
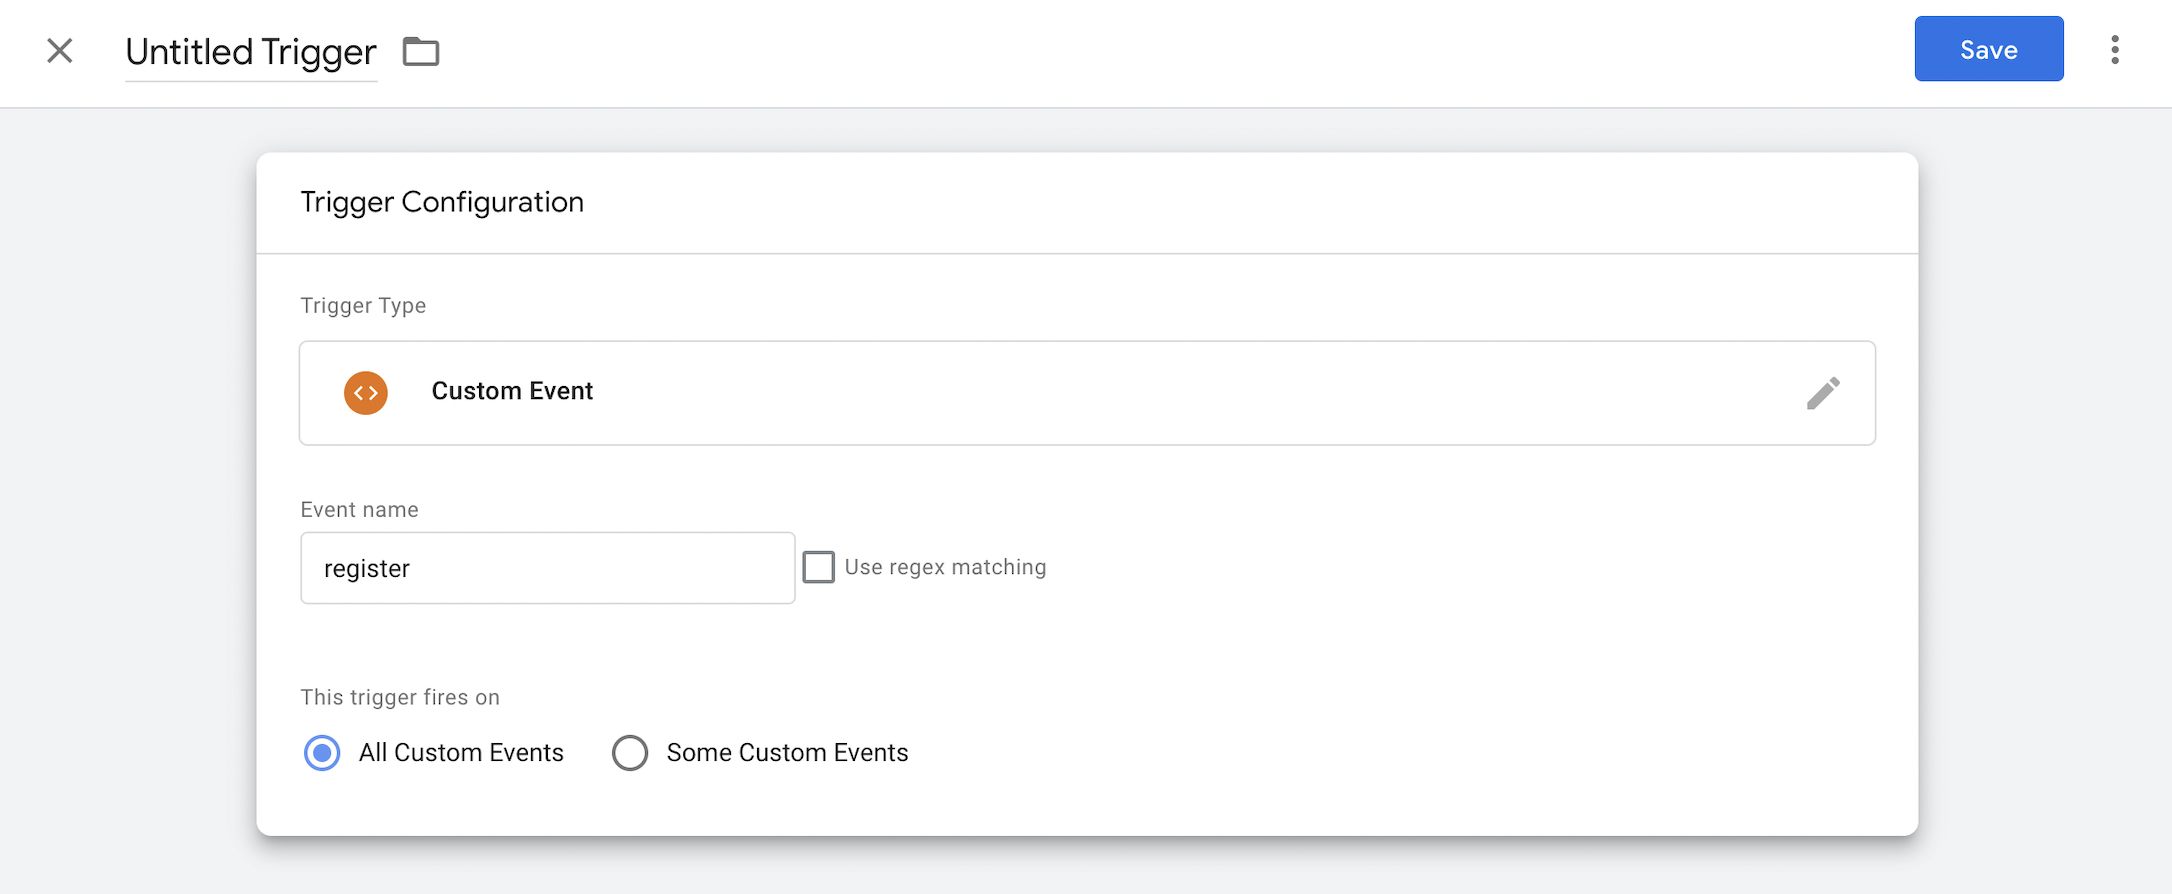
3. In the "Event name," add the name in the same way as the value name in the code since this field is case-sensitive. Click "Save".
Use case 3: Data layer variable as variables and event triggers
Code example
The data layer variable’s example below triggers purchase events and creates purchase info.
dataLayer = [{
'event': 'purchase',
'purchase_info': {
'purchase_amount': 5,
'purchase_curency': 'EUR'
}
}];
GTM setup
You can use variables from the code as both variables and event triggers in Google Tag Manager. Check the setup process from the previous steps for variables and events.
How to send data layer's parameters from client- to server-side GTM?
The data layer doesn't exist in server-side Google Tag Manager as it does in client-side GTM.
However, sGTM has an object called Client that checks HTTP requests from web GTM. If the request contains specific data, the Client transforms the request data to event data. Tags are also used to send the data from the web GTM container to the GTM server.
To populate data points the server GTM container, you need to choose the method you will use to send data from the web to server GTM; among the popular are:
Using Google Analytics 4
This method is particularly effective if you're setting up server-side tracking for Google Ads or Floodlight, as both rely solely on GA4 tags.
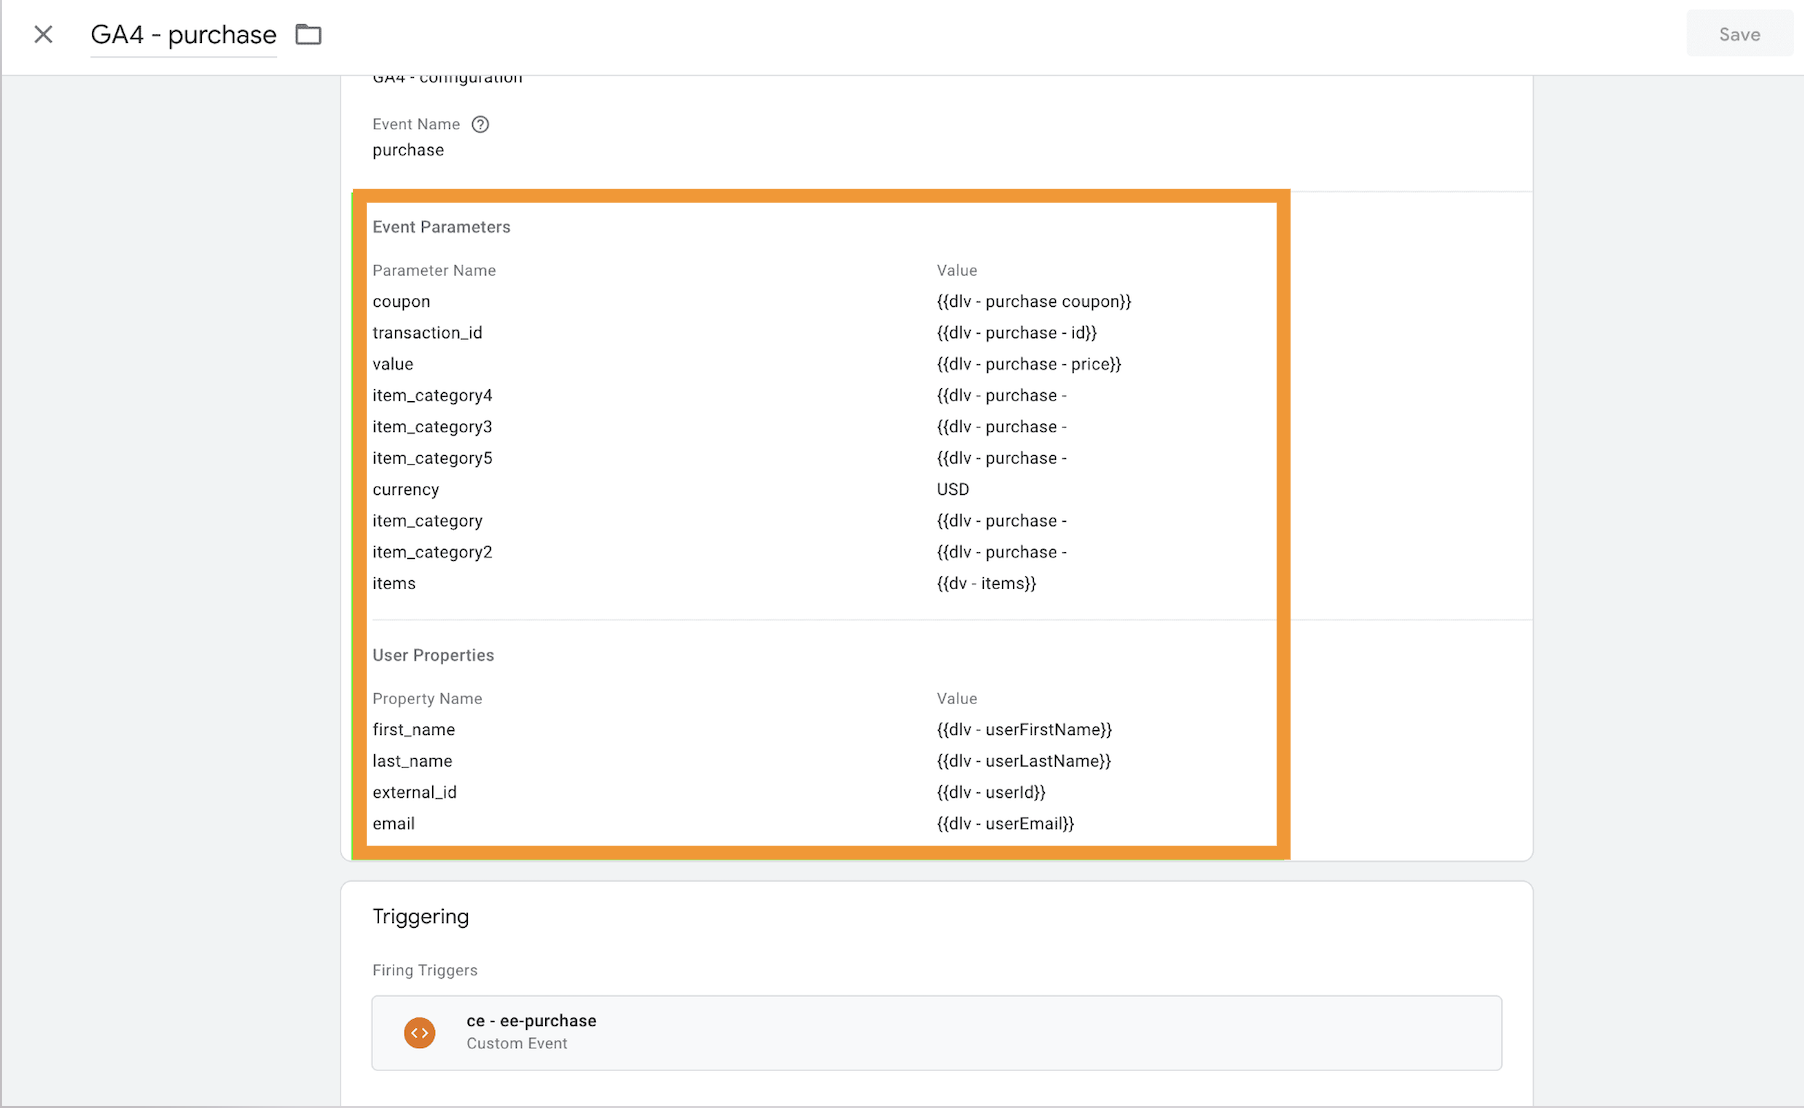
1. In web GTM create a tag with configuration "Google Analytics: GA4 Event".
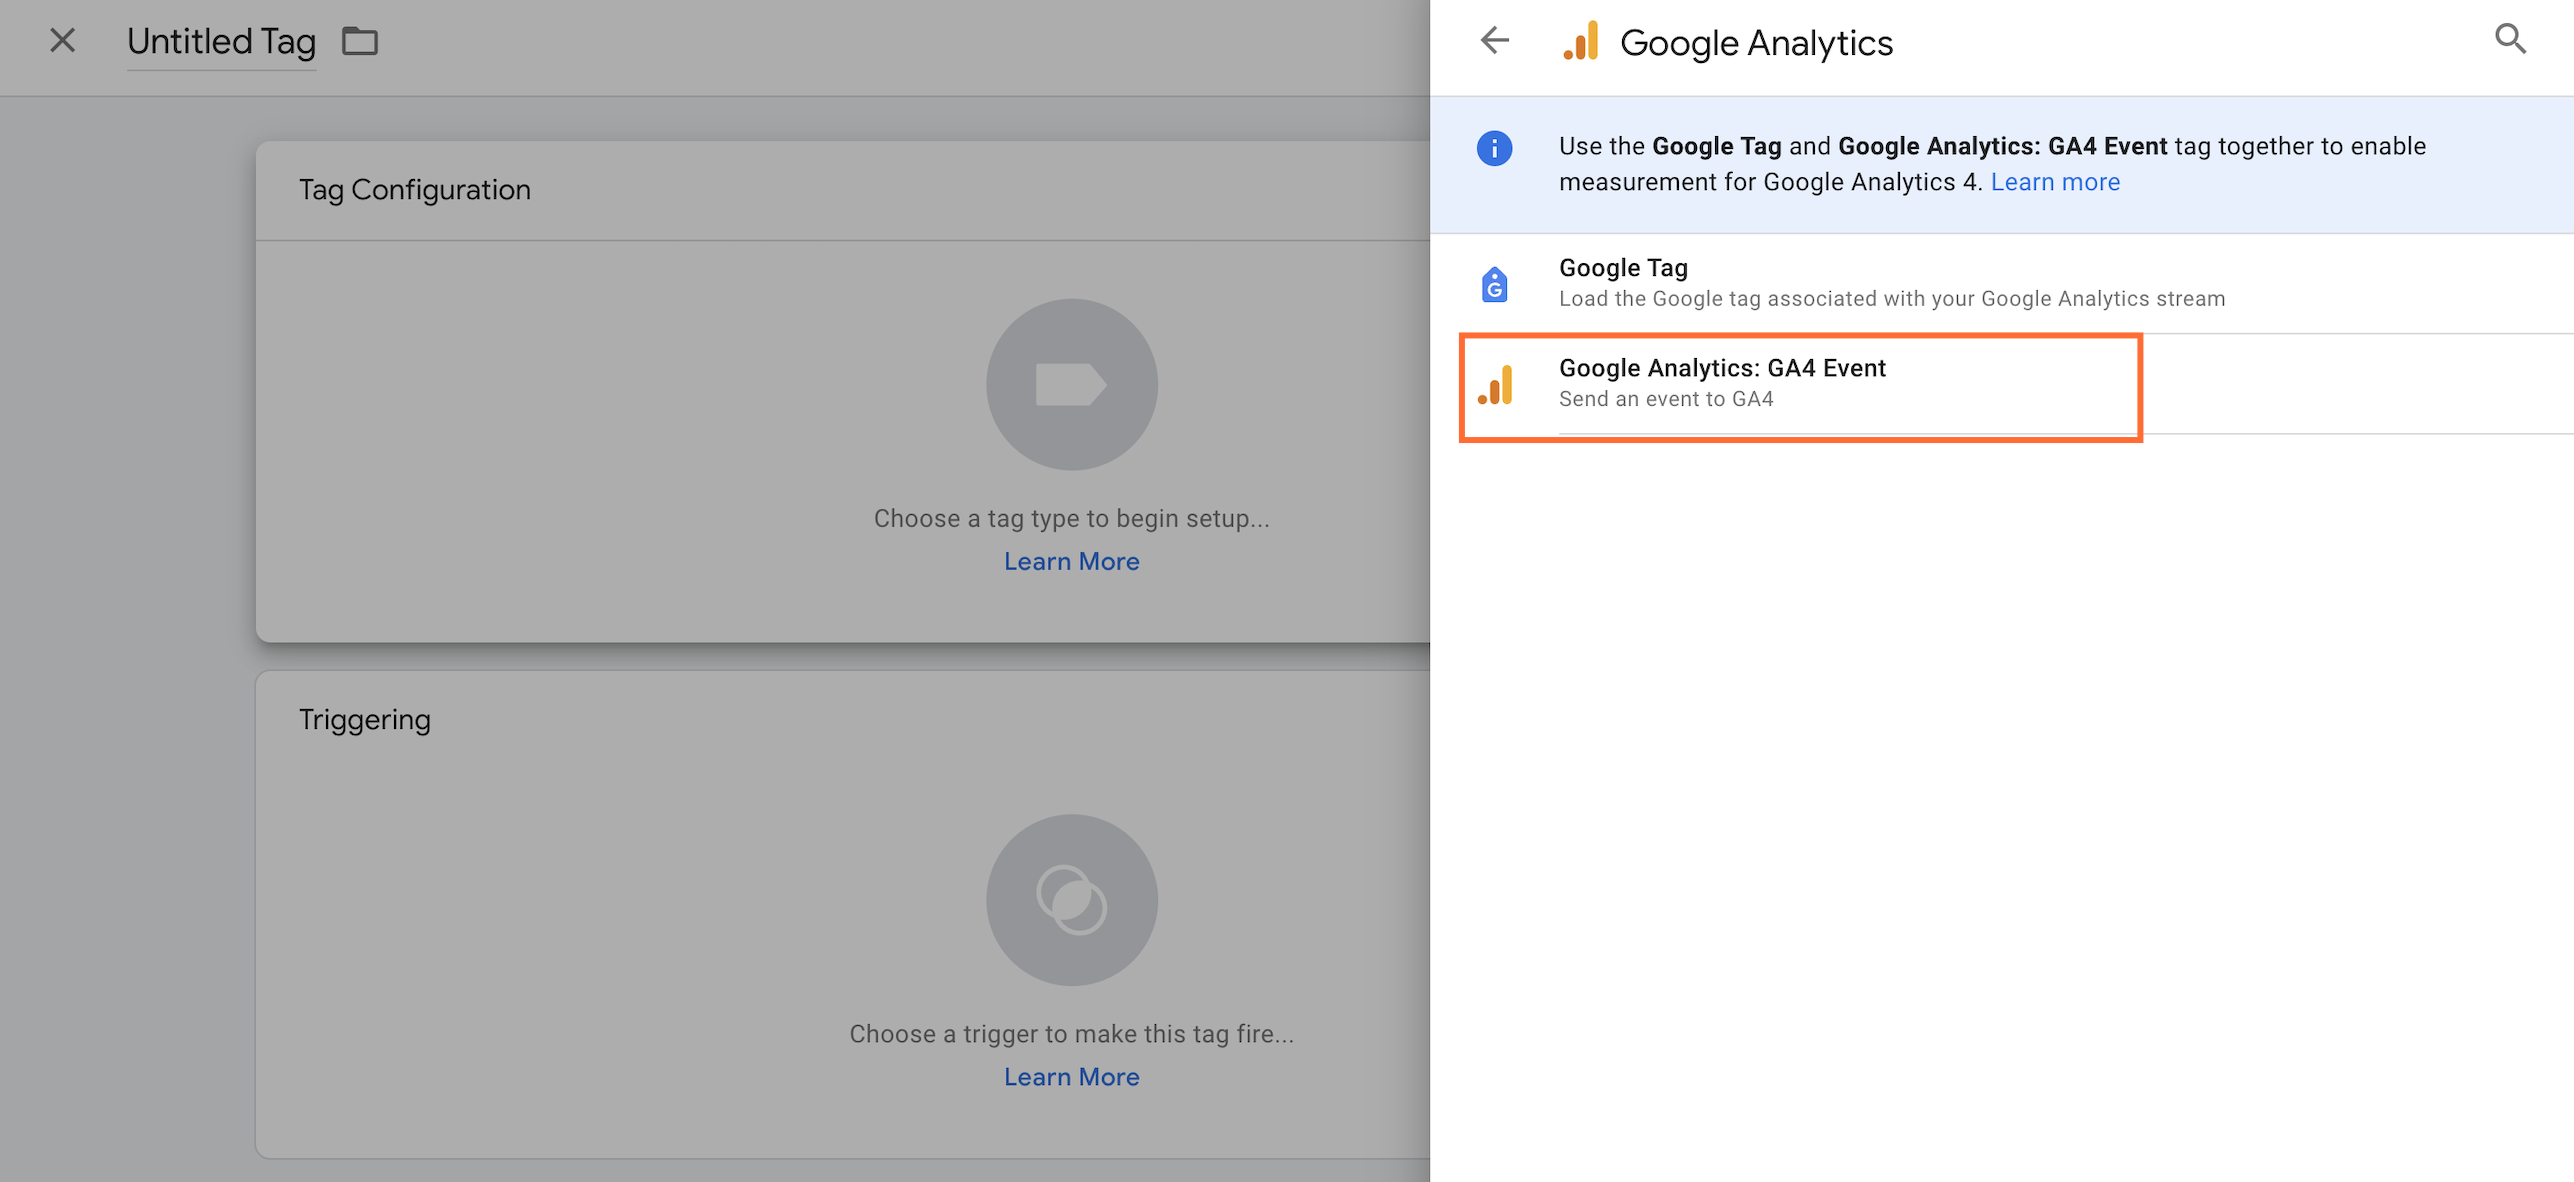
2. You'll find predefined fields for this data, and you can assign data layer variables to each parameter individually.
Using Data Tag/Data Client
The key advantage of using Data Tag/Data Client is that it automatically sends the data layer and other common data from the web to the GTM server.
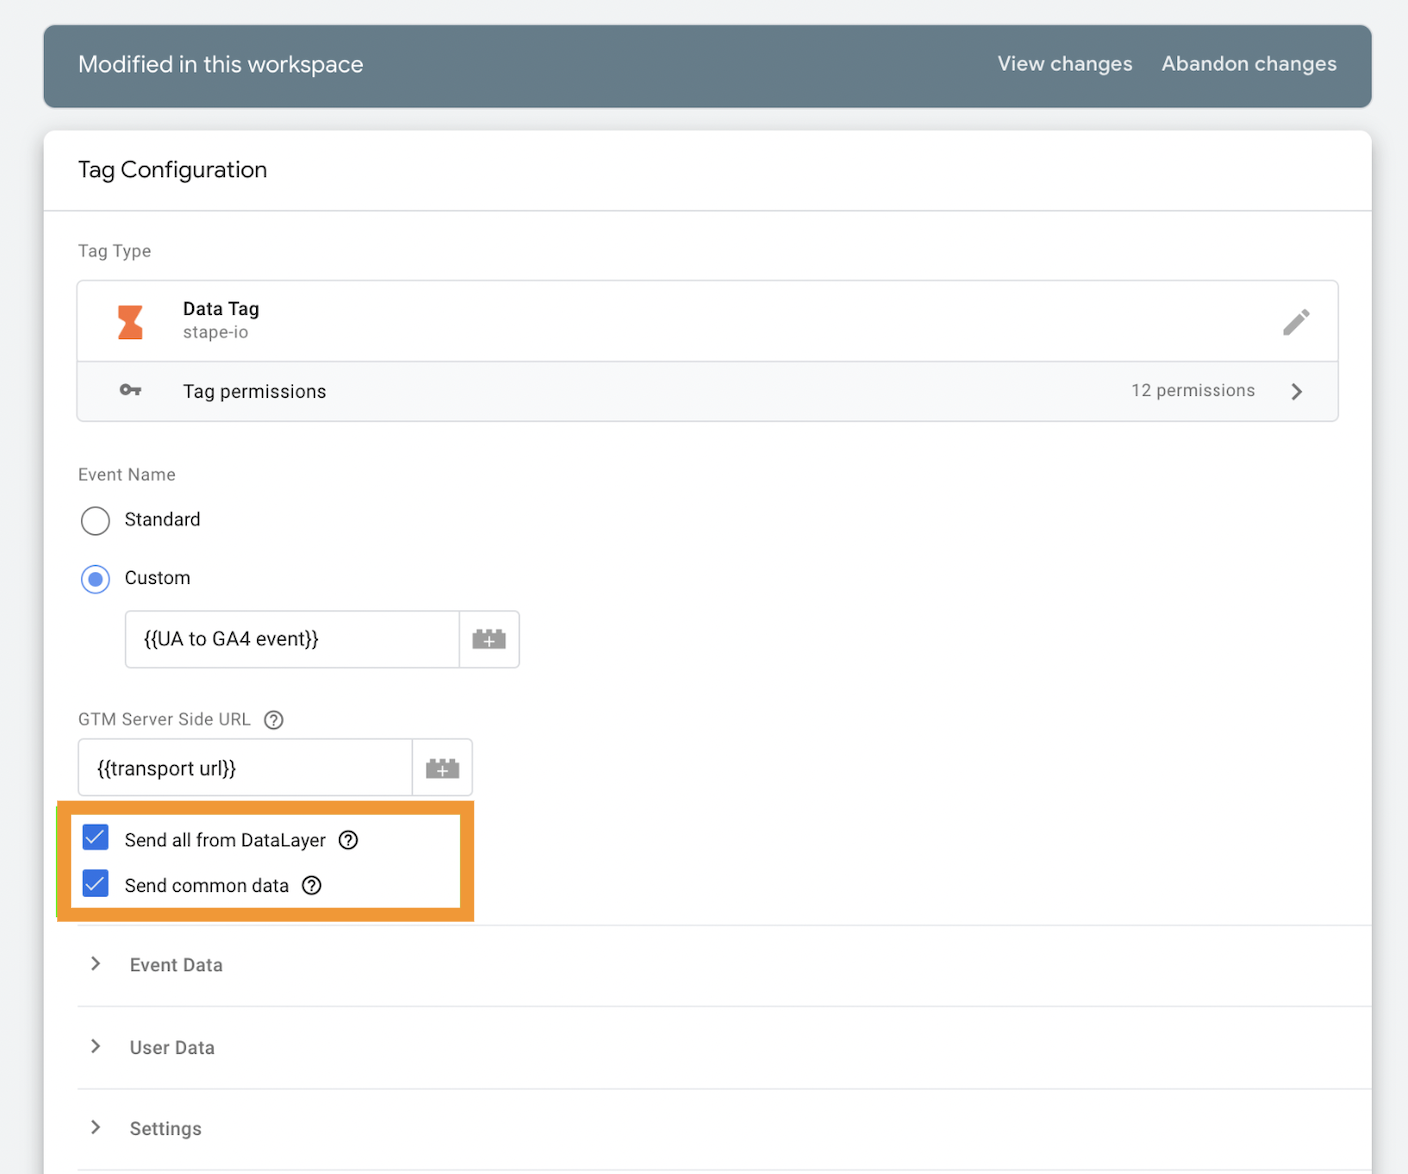
1. Create a new tag in the web GTM container and choose "Data Tag" as the tag configuration.
Please note: You need to add the Data Client to the GTM gallery.

2. In tag configuration, enable the two checkboxes "Send common data" and "Send all from DataLayer."
The system will automatically parse the data in the web GTM and forward all available information to the server GTM.
| Check out our blog post on creating a data layer for server-side Google Tag Manager to learn more about the setup process. |
Push data layer variable to Google Analytics 4
Note: Below, we describe how to set up Google Tag to send data; if you already have configured Google Tag, there is no need to create a new tag. Just skip the steps below and jump directly to the section on creating a custom dimension.
In this case, you only need to add parameters as in the code for the data layer in the section "Shared event settings."
Configure Google Tag in GTM
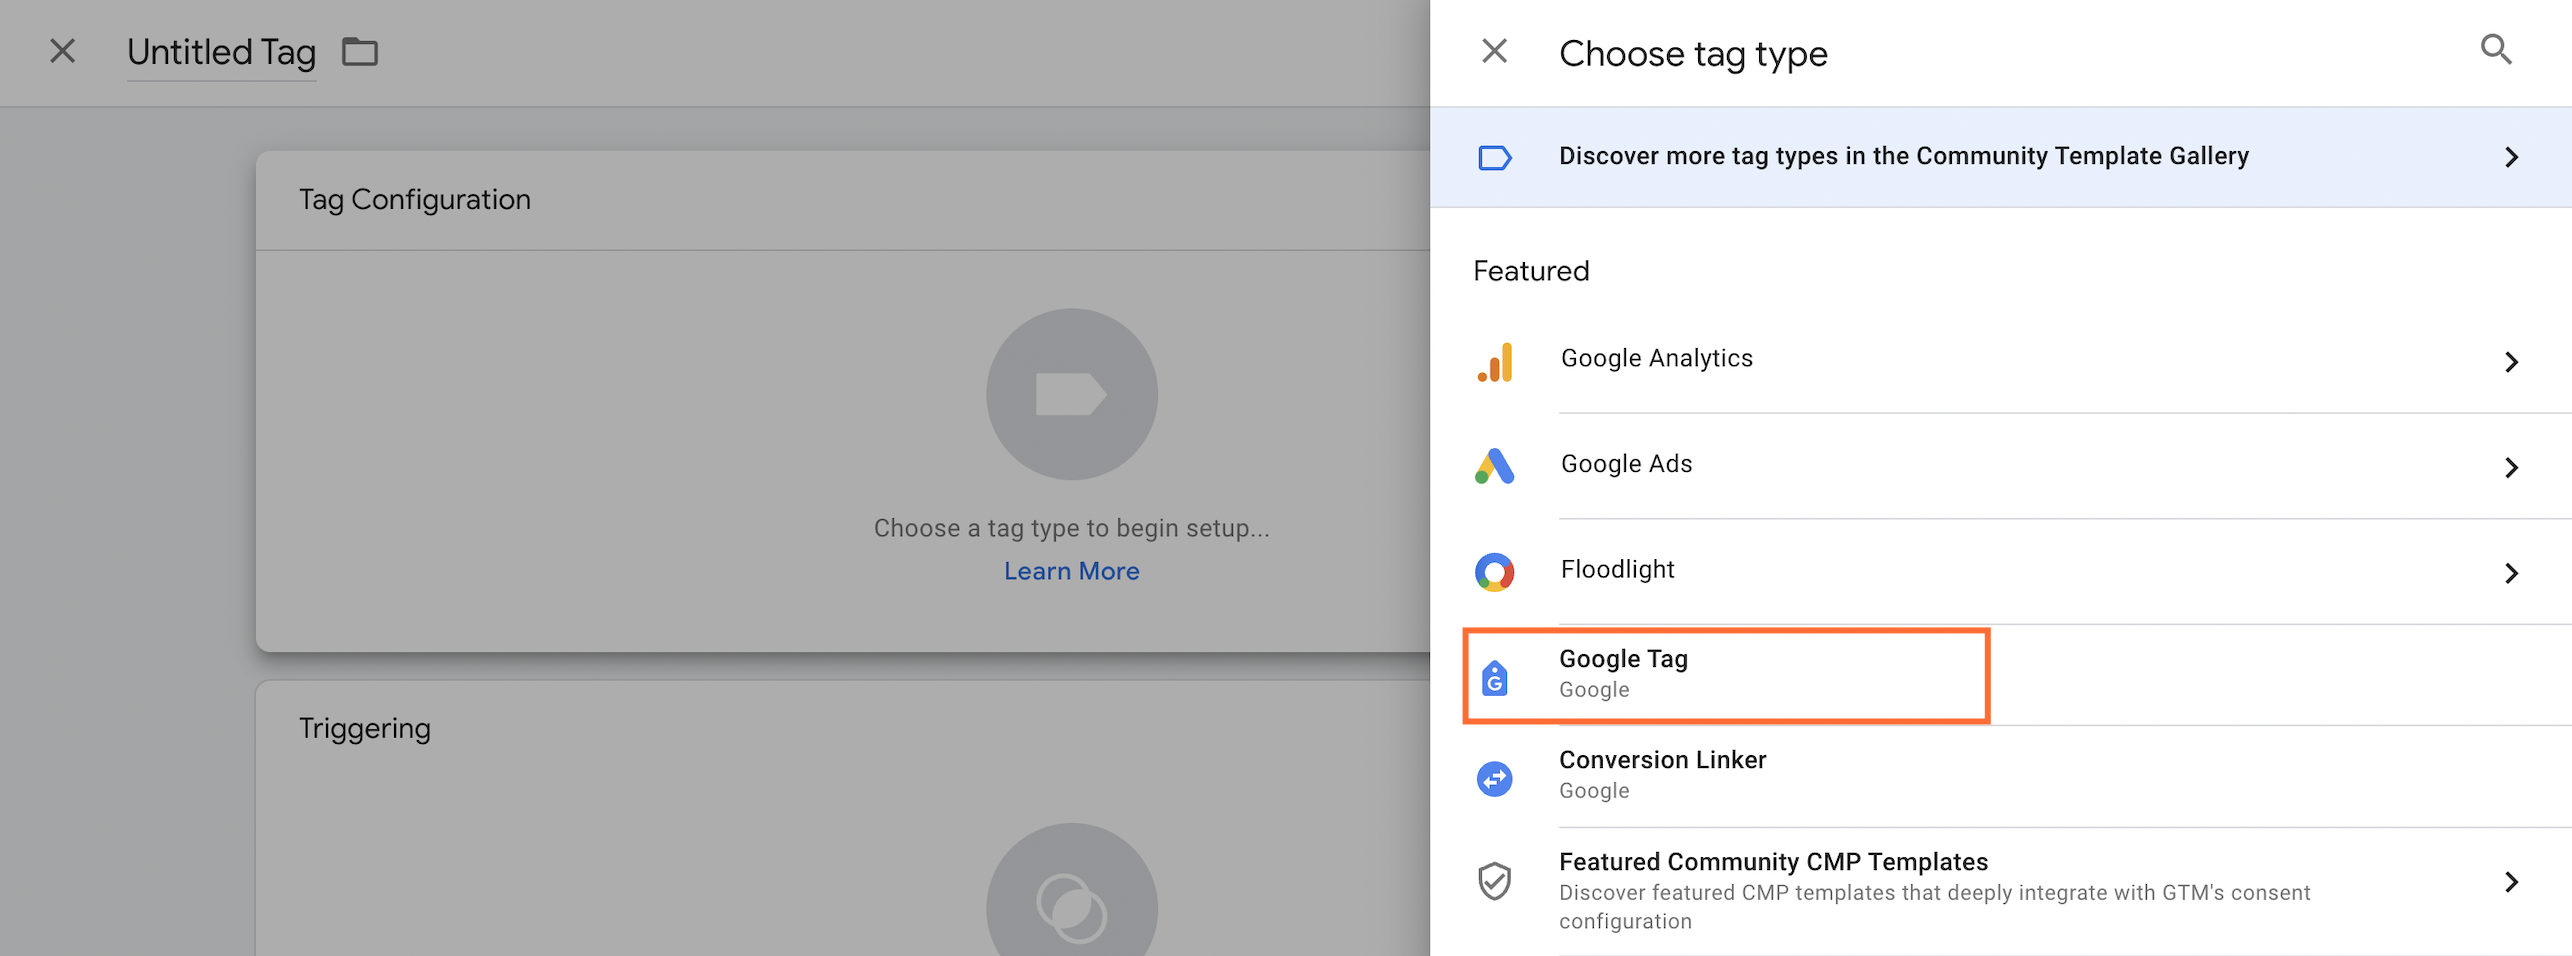
1. In the "Tags" section of GTM, click "New" and choose "Google Tag" as tag type.
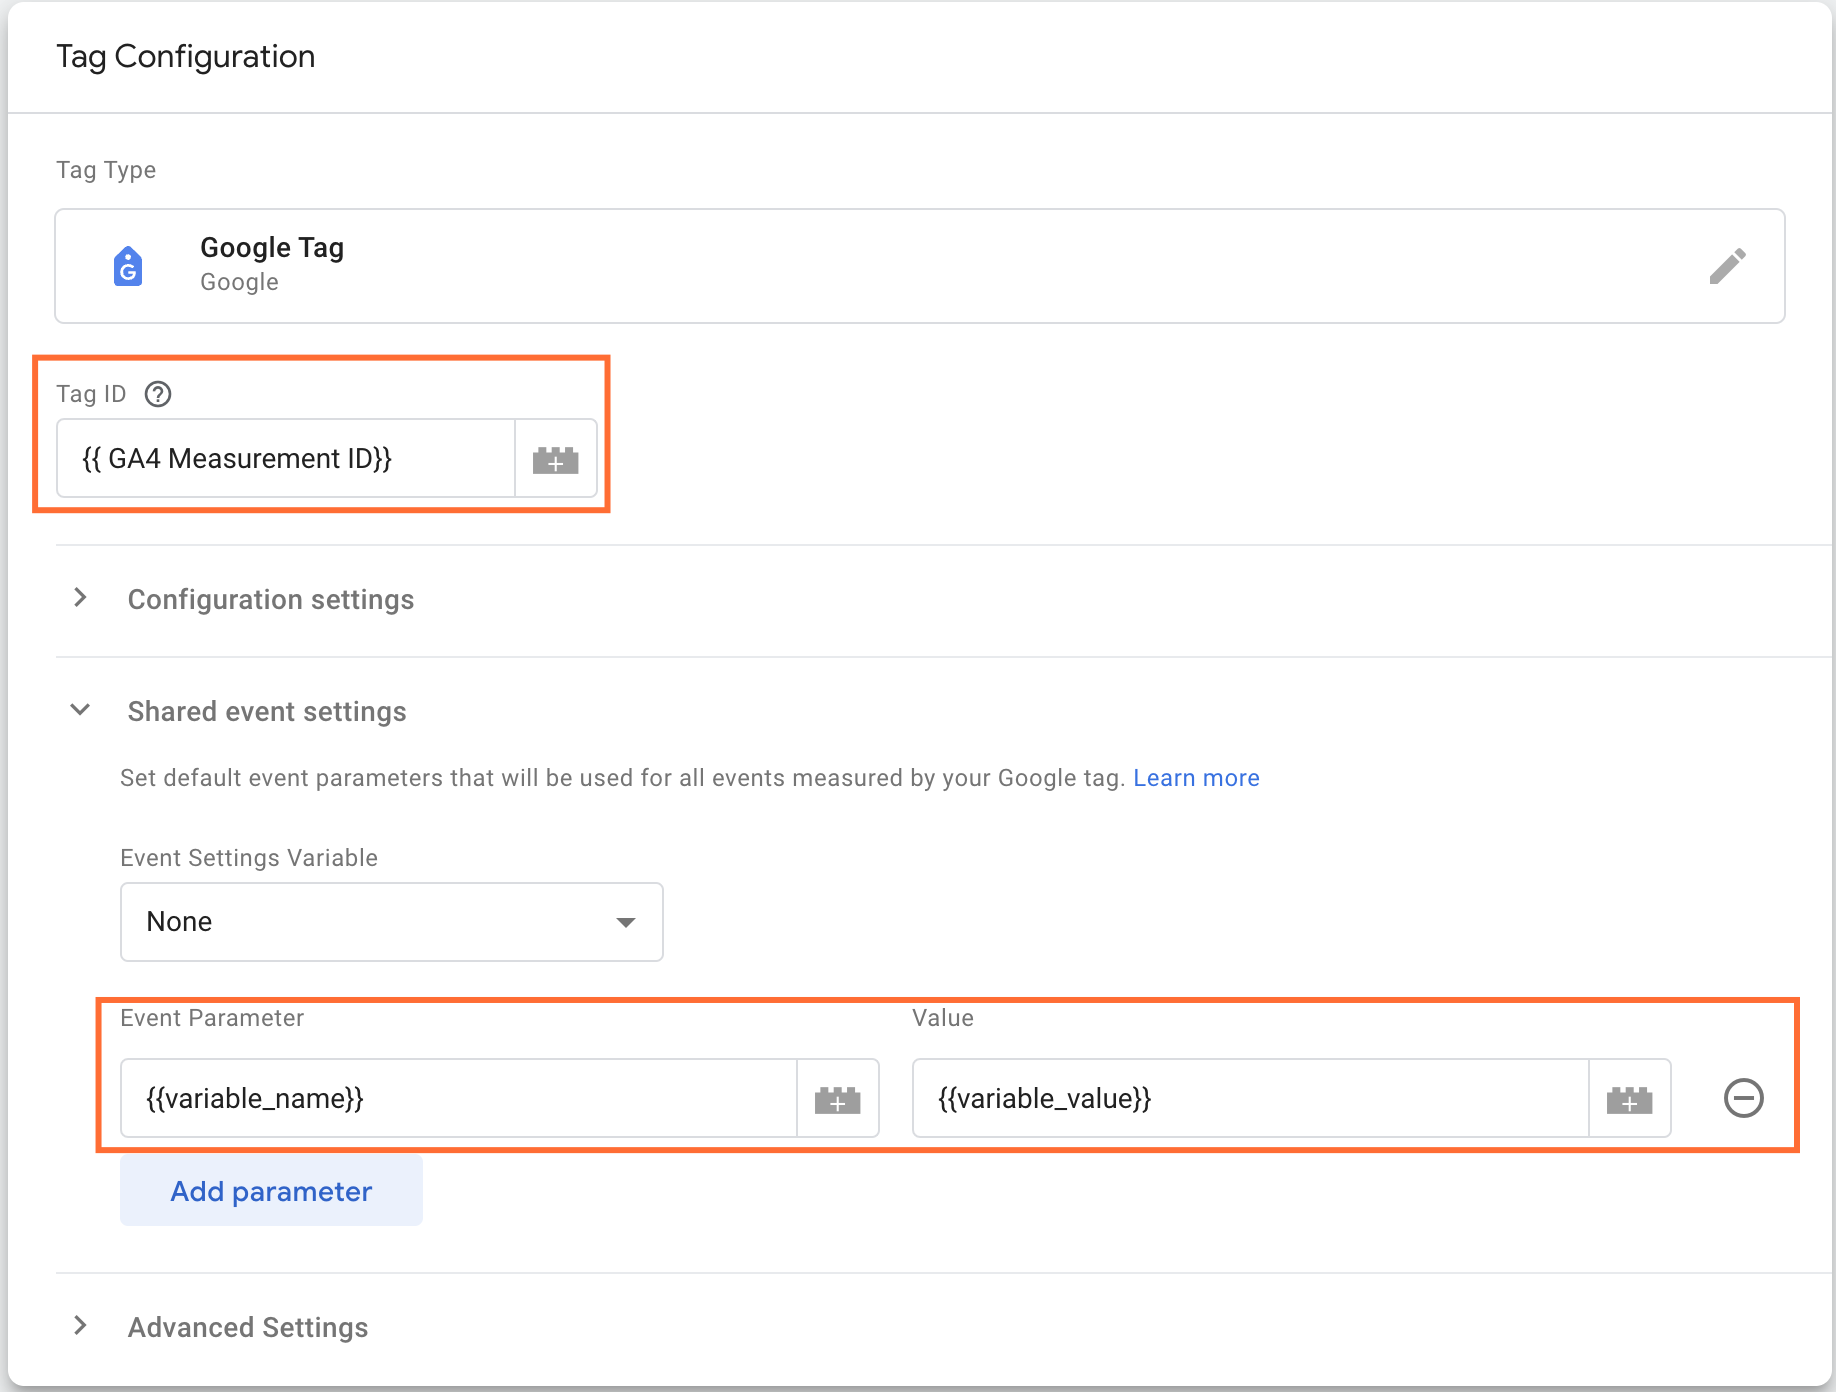
2. Add your GA4 Measurement ID, and in the section "Shared event settings," list the parameters you added to your code.
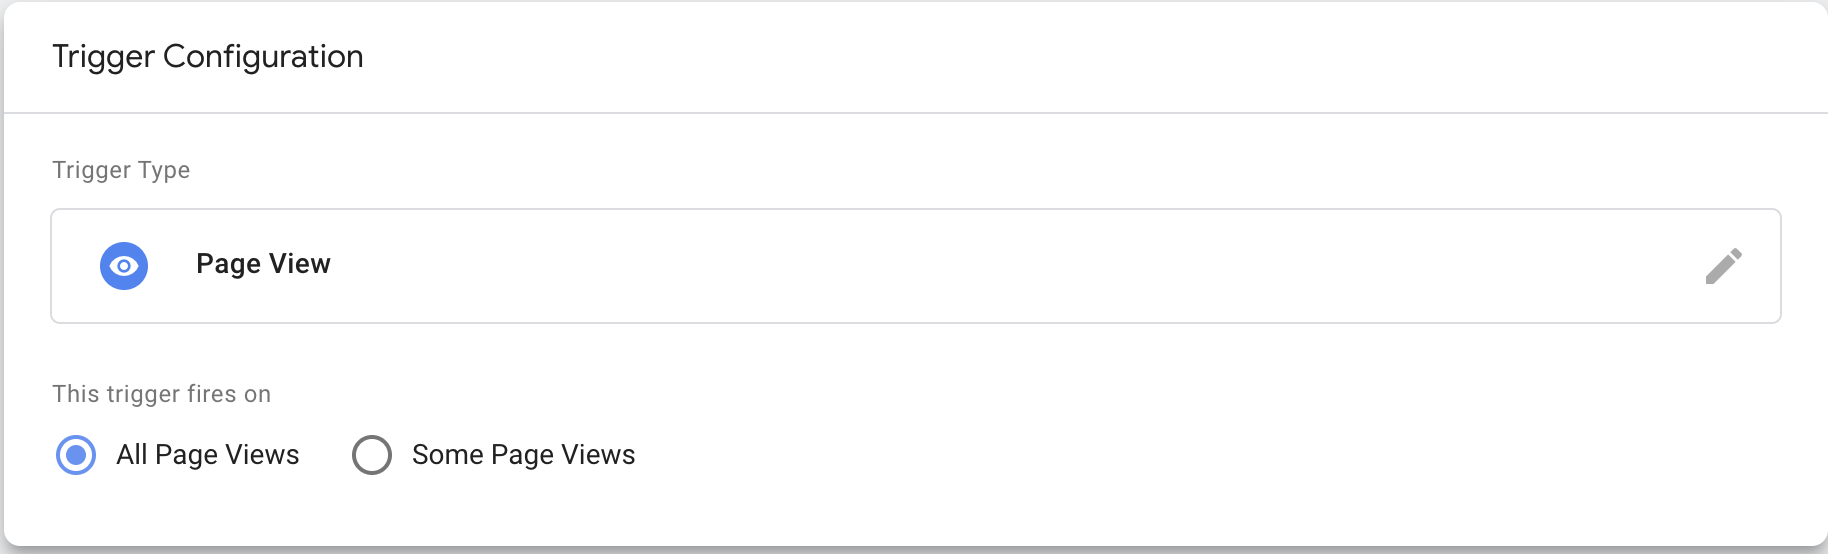
3. As a trigger choose "Page View – All Pages".
Create custom dimension in GA4
There is a list of standard parameters. If the data you want to track with the help of the data layer isn’t present in the recommended events from Google Analytics, then you need to add it manually in your GA4 account as custom dimensions. After adding it, it will appear in GA4 reports.
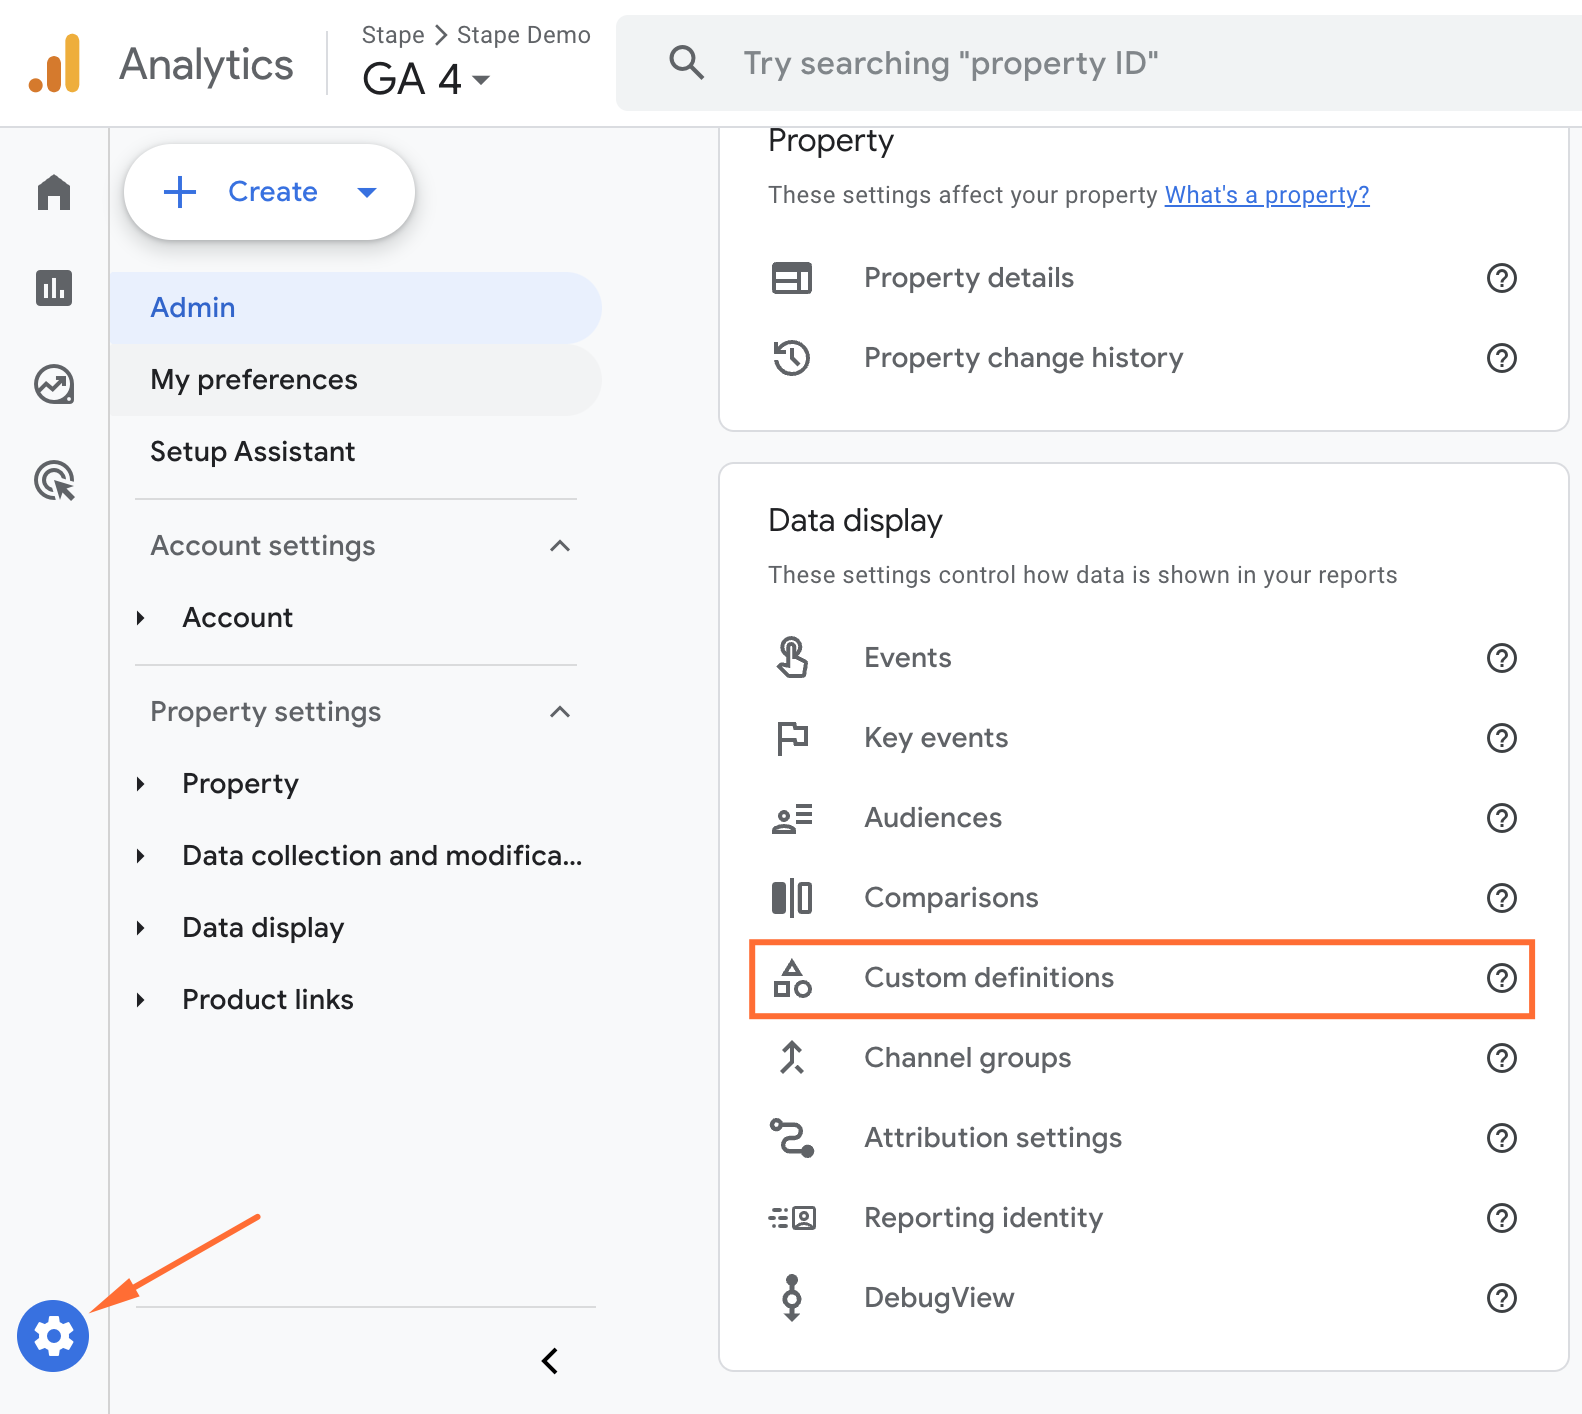
1. In the Google Analytics account, click "Admin" → "Custom definitions."
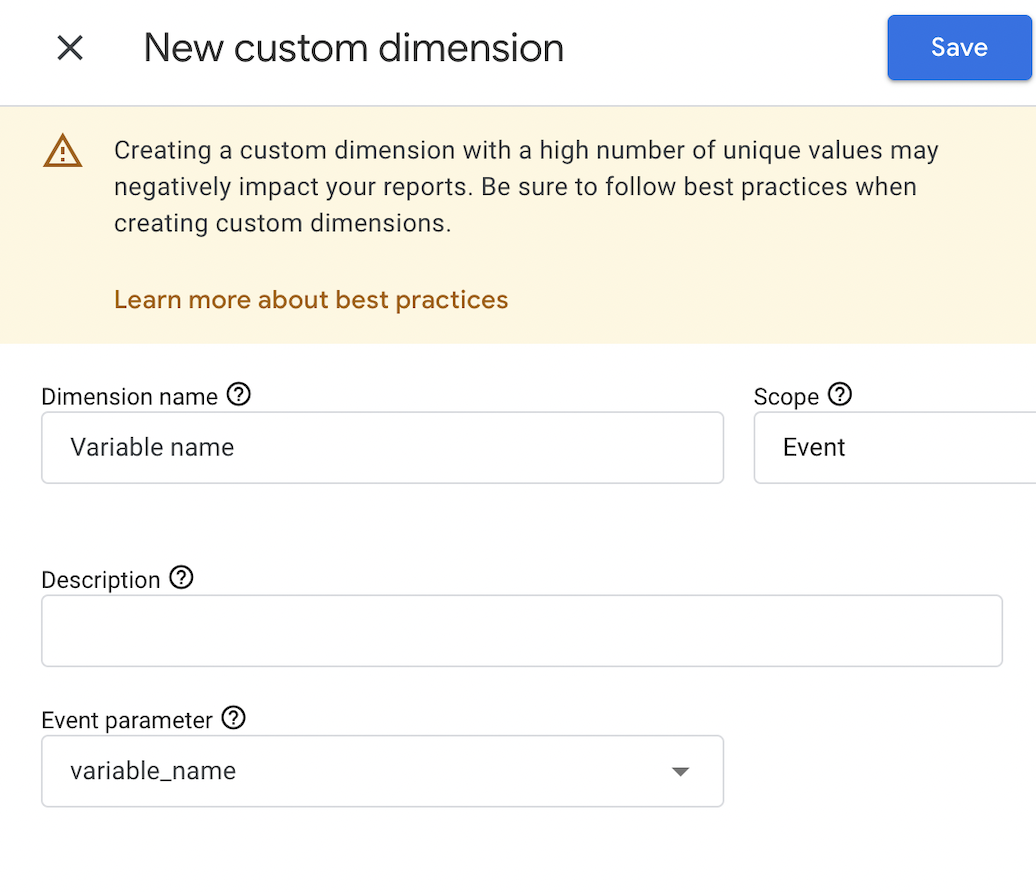
2. Click "Create custom dimension" and fill in the required parameter:
- Dimension name - the name you want to see in the reports.
- Scope - choose an event, user, or item scope.
- Event parameter - add the variable's name or event as specified in the data layer snippet (please note that the data in the field is case-sensitive).
Click "Save".
Test data layer setup
| Get a better GTM preview and formatted server requests for easier inspection for your clients or your own large GTM container thanks to Stape GTM Helper. |
GTM Debug Mode
To check if the Google Tag Manager catches the variable, you need to take a few simple steps similar to regular debugging in GTM.
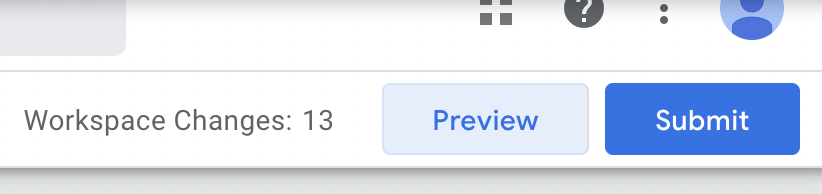
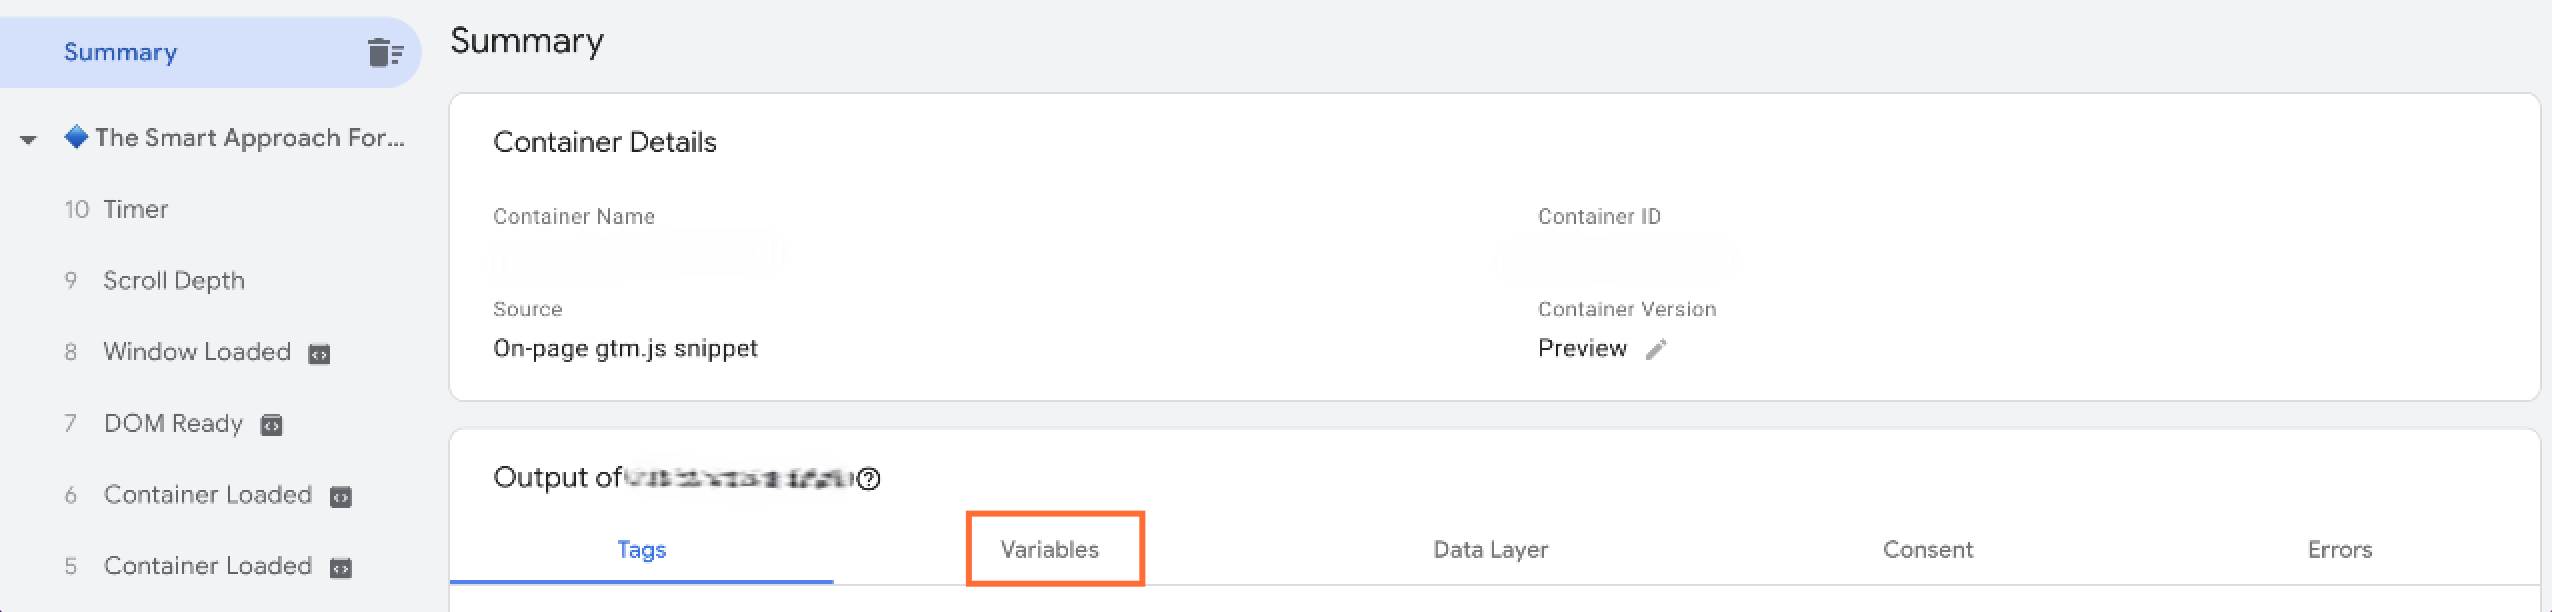
1. Click "Preview" and add the website's URL you are debugging.
2. Switch to the tab "Variable" section, and if everything works, you will see the needed data in this tab.
If you’ve got problems with the Debug Mode in GTM, check our guides:
Google Analytics 4
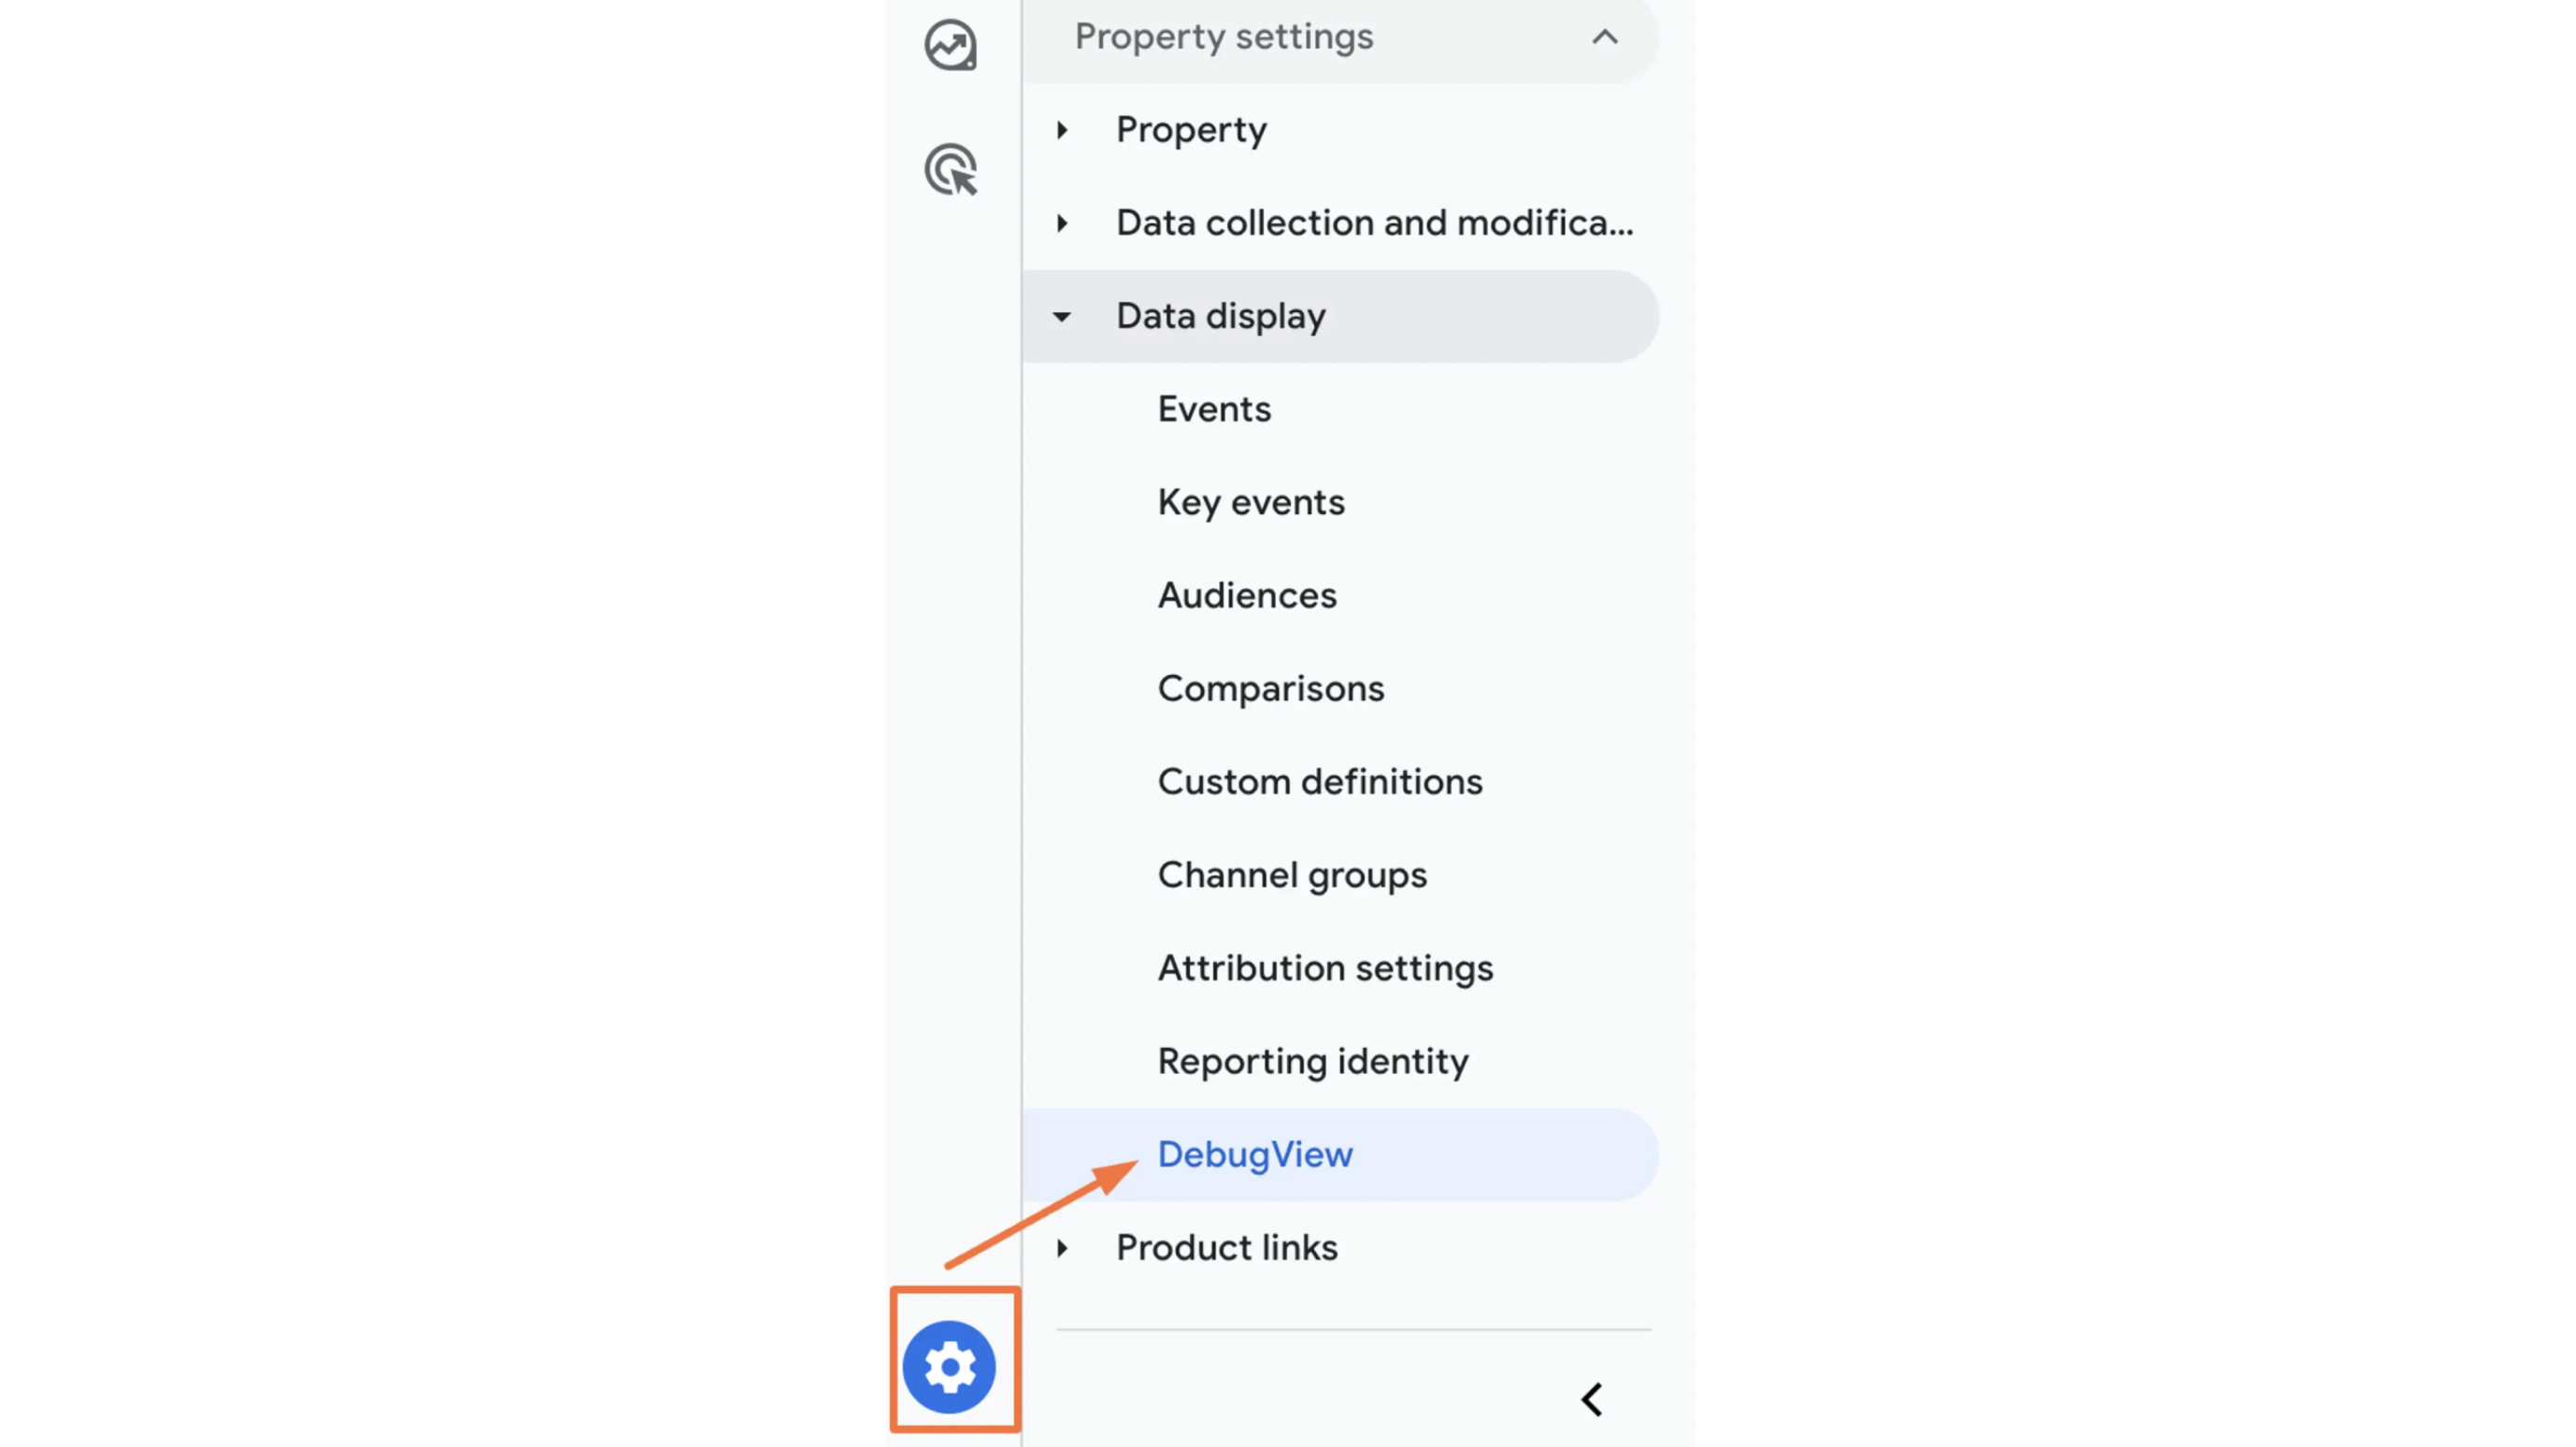
To check if Google Analytics captures the data, go to "Admin" → DebugView.
Troubleshooting data layer
Problem 1: Data layer push doesn’t work
If you see that variables or events fail to push, you most likely don’t use proper casing for object names or missed quotes.
Solution: proper casing for object names and quotes
- Check whether "dataLayer" is in the camel case.
Good example:
dataLayer.push({'variable_name': 'variable_value'});Bad example:
datalayer.push({'variable_name': 'variable_value'});- Make sure all the variable names are enclosed in quotes.
Good example:
dataLayer.push({'variable_name': 'variable_value'});Bad example:
dataLayer.push({variable_name': 'variable_value'});Problem 2: Tags don’t fire
If you can't fire tags in all needed locations on the website, check the variable names on different pages.
Solution: consistent variable names
The most frequent mistake is inconsistent casing in the variable names on different pages, so you need to review the names.
Good example:
// Homepage:

dataLayer.push({'variable_name': 'variable_value'});

// Product page:

dataLayer.push({'variable_name': 'variable_value'});
Bad example:
// Homepage:

dataLayer.push({'variable_name': 'variable_value'});

// Product page:

dataLayer.push({'variable Name': 'variable_value'});
Recap
The Google Tag Manager (GTM) data layer is a crucial component of GTM. It allows us to capture users' interactions with your website while also providing additional data about the interaction or its context. The data layer is essential to use if you want to create a better data structure.
The concept of a data layer is pretty challenging to implement, and developers will most likely be needed to build a complex tracking infrastructure.
Here is a quick recap:
- We recommend using dataLayer.push method to implement the data layer.
- After data layer implementation, you can use the data layer as data points, event triggers, or as both.
- If you're using server-side tracking, send data layer's parameters from client- to server-side GTM container.
- Always check the setting in GTM Debug Mode.
- Add custom dimensions in GA4 (if you use this tool) to see the data in GA4 reports.
Switching to server GTM?
Stape has lots of solutions! Click on Try for free to register and check them all.

Comments