Server-side Google Ads conversion tracking for BigCommerce
Ivanna Holubovska
AuthorBigCommerce is a powerful eCommerce platform designed to help businesses of all sizes easily create and manage their online stores. Known for its user-friendly interface and robust features, BigCommerce allows merchants to customize their stores, integrate with various payment gateways, and scale their operations seamlessly. It’s a go-to platform for businesses looking to provide a smooth shopping experience while managing the complexities of online retail with ease.
When it comes to optimizing your marketing efforts, implementing server-side Google Ads conversion tracking can offer a significant advantage.
In this article, we’ll walk you through the step-by-step process of setting up Google Ads server-side conversion tracking for your BigCommerce store. Whether you’re new to server-side tracking or looking to enhance your current setup, this guide will help you get the most out of your Google Ads campaigns while ensuring accurate and compliant data collection.
Key reasons to adopt server-side tracking
Switching to server-side tracking for your BigCommerce site offers several advantages that can significantly improve your data accuracy and overall website performance.
One of the primary reasons is increased data accuracy. You can reduce the risk of data being blocked or lost due to factors like ad blockers, browser limitations, or connection issues. Gather more complete and reliable information about user behavior, ensuring that key actions like purchases, form submissions, and interactions are accurately tracked, which directly supports the precise measurement of every critical eCommerce KPI.
Another critical factor is the enhanced page load speed. Since much of the data processing happens on the server rather than the user’s browser, your site becomes less burdened with third-party scripts. This reduces the load on the client side, leading to faster page loads and a better overall user experience.
Improved data security and privacy is also a major benefit. With server-side tracking you are able to handle sensitive user data, like personal information or consent preferences, in a more secure manner. By controlling how and where data is processed, you can ensure that it complies with privacy regulations like GDPR or CCPA.
Greater flexibility is another reason to consider server-side tracking. It is possible to have more control over how data is collected and processed; to customize tracking to fit the unique needs of your business. For instance, you can filter, modify, or enrich data before sending it to your analytics or advertising platforms, giving you better insights for optimizing your marketing strategies.
Finally, better resilience to cookie restrictions. As browsers increasingly limit third-party cookies, traditional client-side tracking becomes less effective. Server-side tracking, however, can use first-party cookies that are less affected by these restrictions, ensuring your tracking continues to function properly.
How to set up Google Ads conversion tracking for BigCommerce
| Before the implementation make sure you have set up server Google Tag Manager container on Stape. |
1. Install Stape Conversion Tracking app for BigCommerce.
1.1. Open BigCommerce store and find the Conversion Tracking app. Click Get this app → log in to your BigCommerce account → Install.
Next, you’ll need to configure the settings in three tabs: General, Data Layer, and Webhooks.
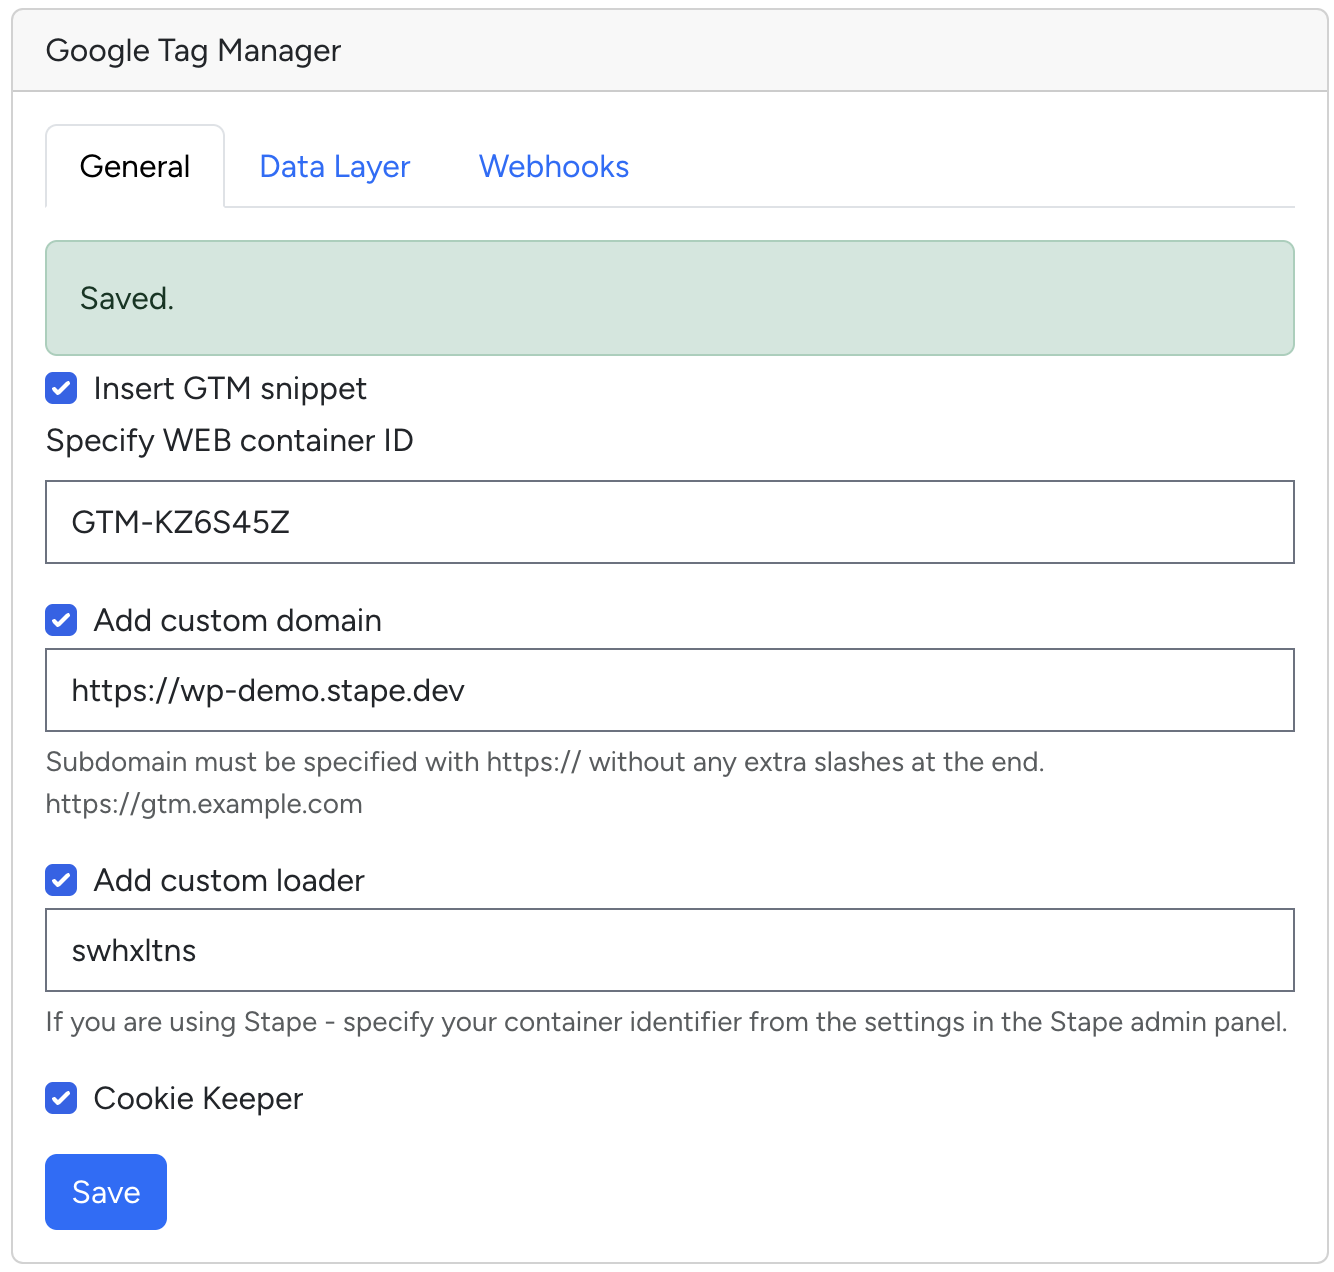
1.1. General tab
Here, you need to add the following data:
- GTM Web container ID - add the ID of Web container in the format GTM-XXXXXXX. You can find it in your GTM account in the tab “Accounts”. Click “Insert GTM snippet” to automatically add the snippet with JavaScript code to every page on your website.
- Custom domain - use your subdomain created for first-party cookies for the most precise tracking.
If you haven’t created a subdomain yet, please see our guide on adding a custom domain to sGTM container.
- Custom Loader - this feature will help increase protection against ad blockers, resulting in better data quality. Add in the field Stape container identifier. Check this quick guide to find your container identifier.
- Cookie Keeper - it helps prolong the cookies' lifetime by bypassing the browsers’ restrictions.
After setting all the necessary fields, click Save.
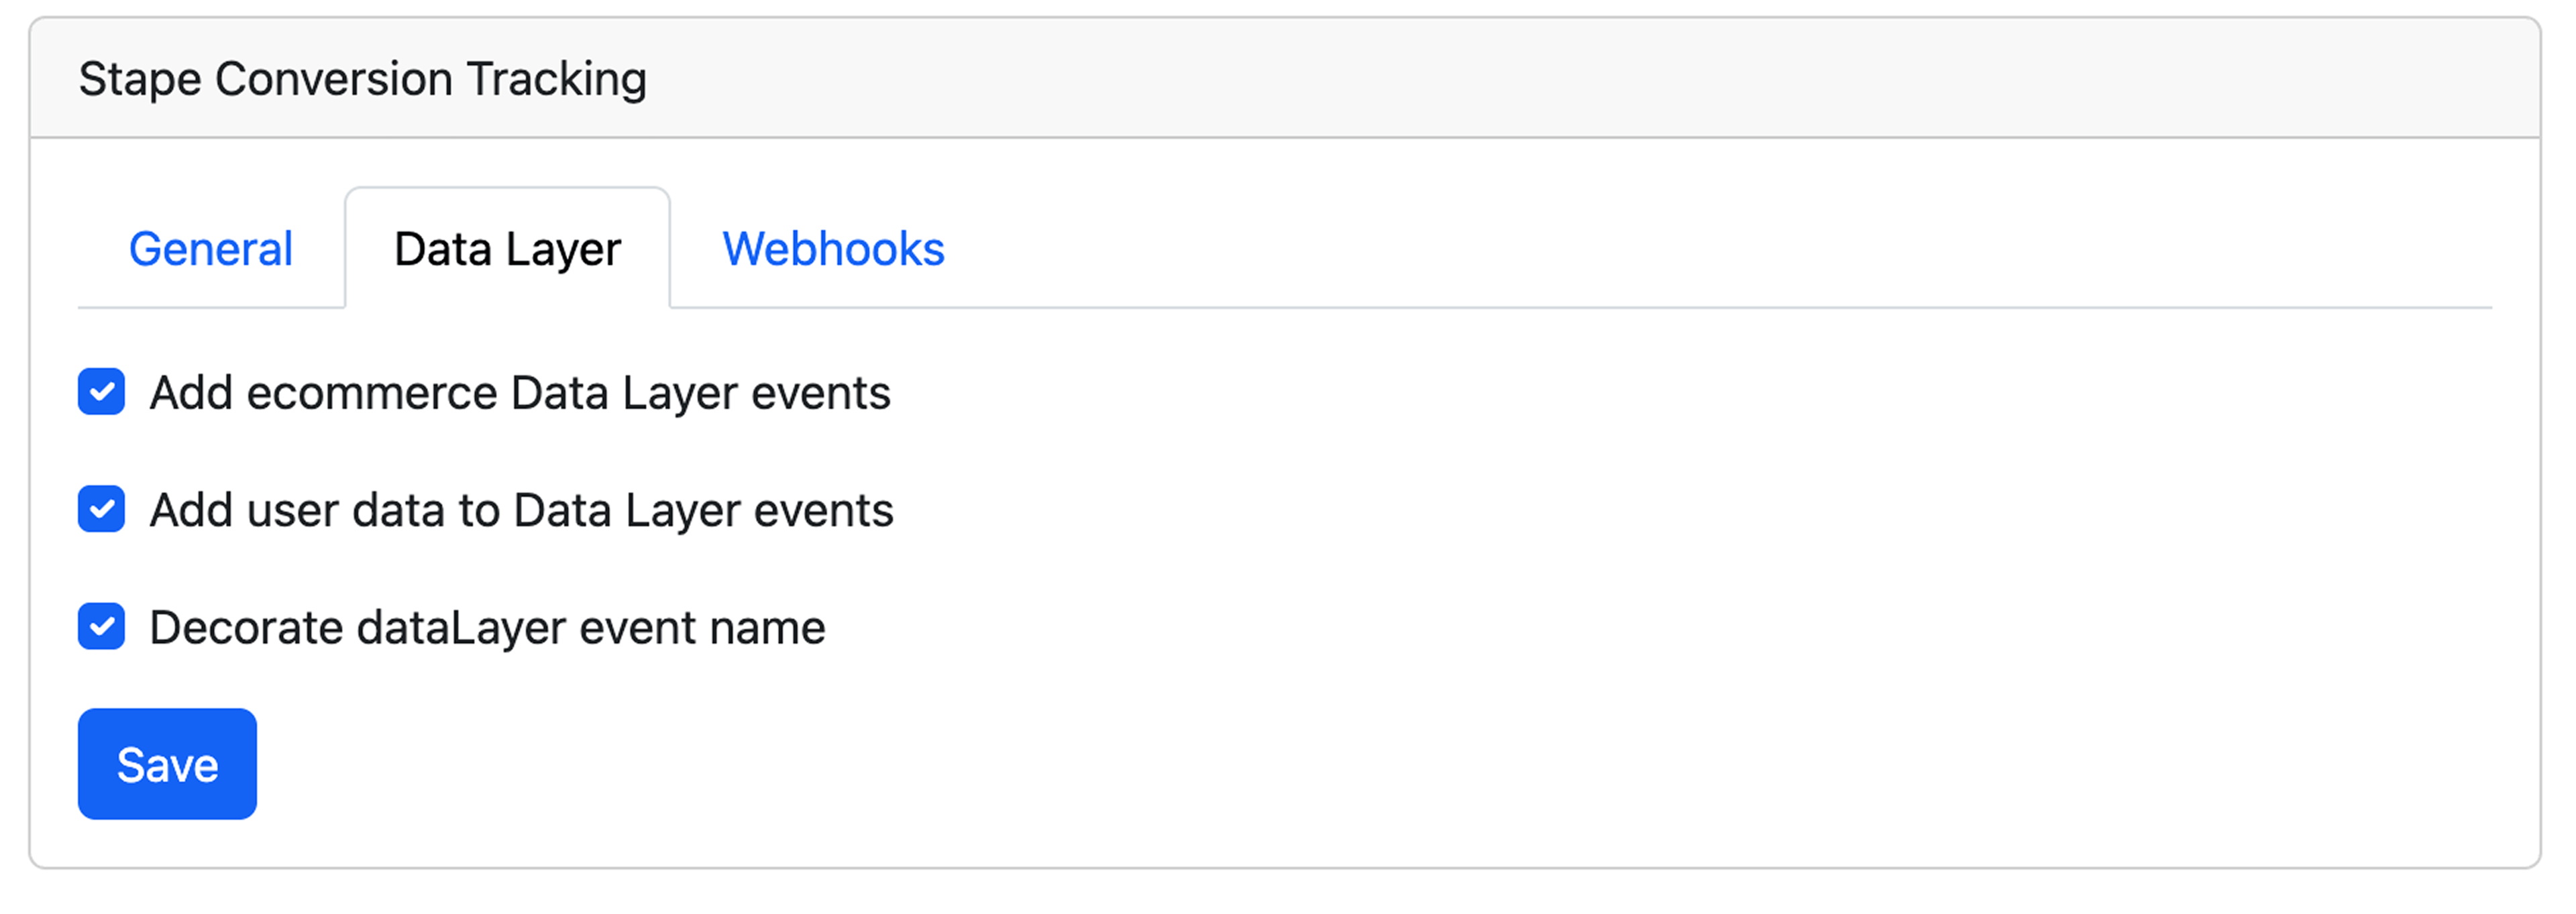
1.2. Data Layer tab
In this tab, you can add two points to the settings:
- Add ecommerce Data Layer events - it will add standard Data Layer, based on them you can configure tracking in GTM container.
- Add user data to Data Layer events - with this feature, events will include user data. You can configure the data you want to collect from your website visitors in the GTM container.
- Decorate DataLayer event name - lets you decide whether to add the _stape suffix to event names to avoid conflicts with your existing GTM setup; when it’s turned off, events keep their standard names.
Click “Save”.
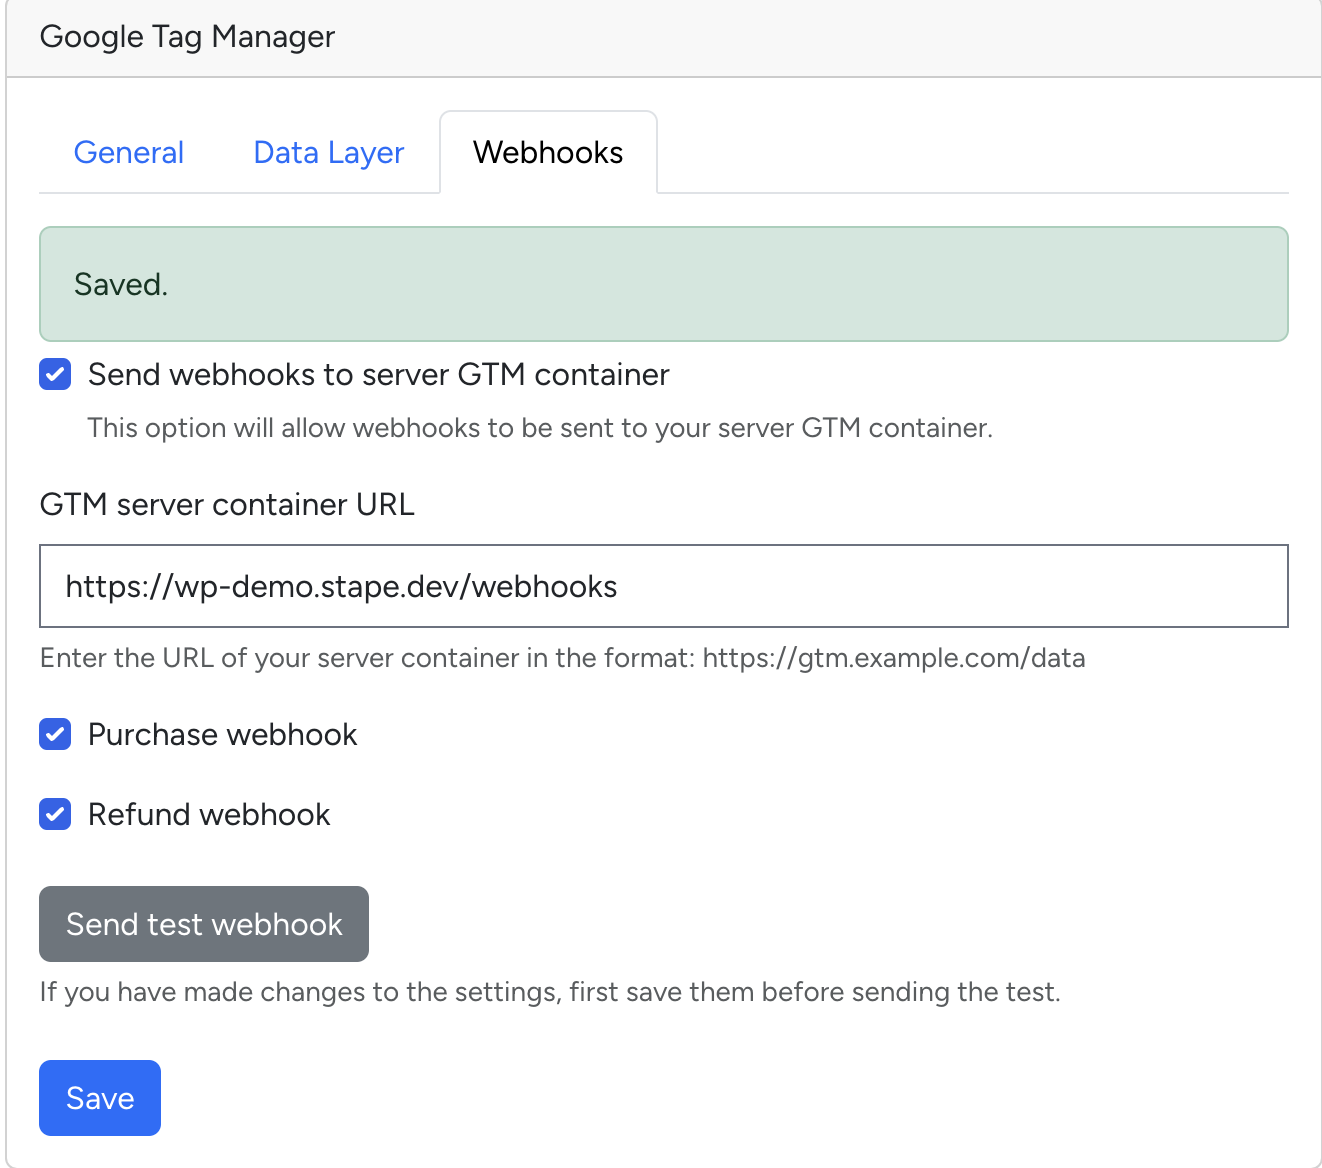
1.3. Webhooks tab
The webhooks feature will be handy if you want to track events outside your website, such as sales made by phone or in offline stores. You just add or update information on a user in CRM or CMS, and the webhook sends data in GTM.
To activate a webhook, you need to choose the type of webhook, “Purchase” or “Refund” (or both), and then you can click on “Send webhooks to server GTM container”. Then, add your GTM server container URL (the path where the webhook will be sent).
Click “Save”.
Note: If you encounter problems setting webhooks, see our blog post on debugging incoming webhooks in GTM server preview.
2. Send data to Google Analytics 4 with the server GTM.
There can be two scenarios:
2.1. If you already have GA4 events configured in your web GTM container and you just want to switch them to work through the server side.
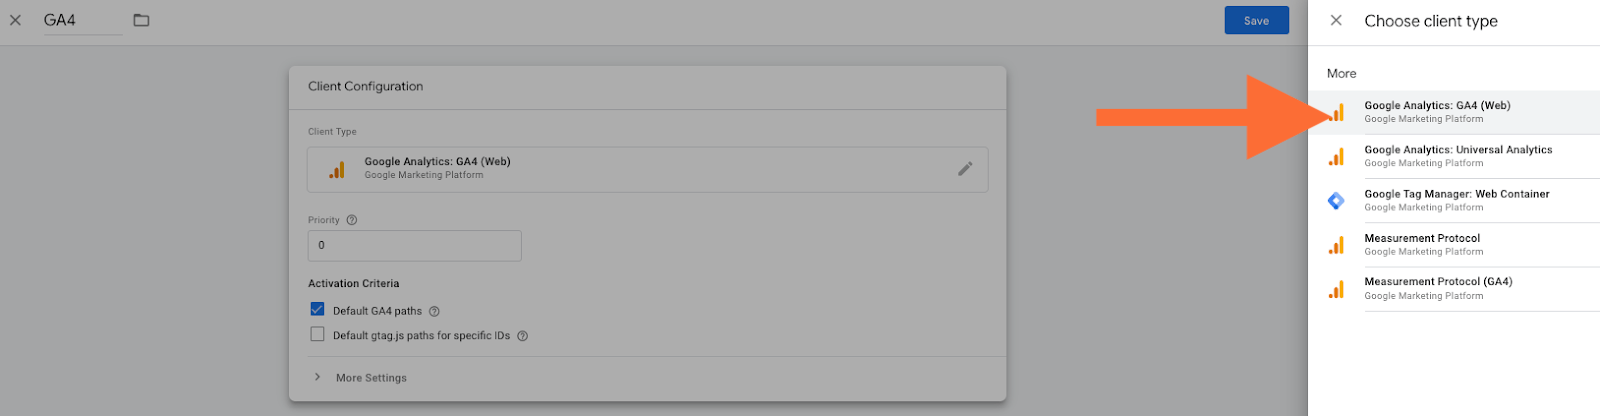
a. Open your server GTM container. In the 'Clients' section, check if you have a GA4 client there. If not, create new one:
Choose Google Analytics: GA4 (web) and click Save.
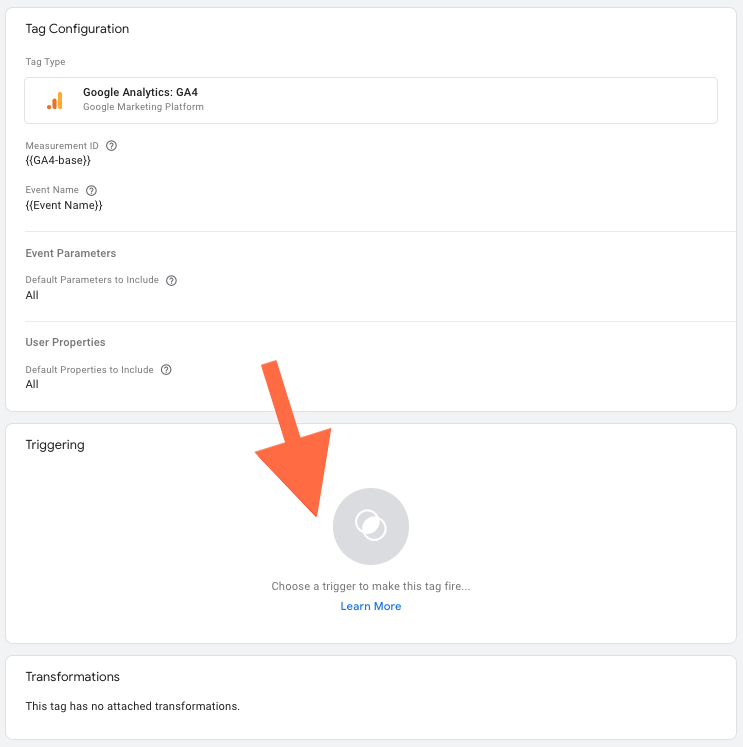
b. Create GA4 tag on server GTM container.
Go to Tags and click New.
Choose Google Analytics: GA4.
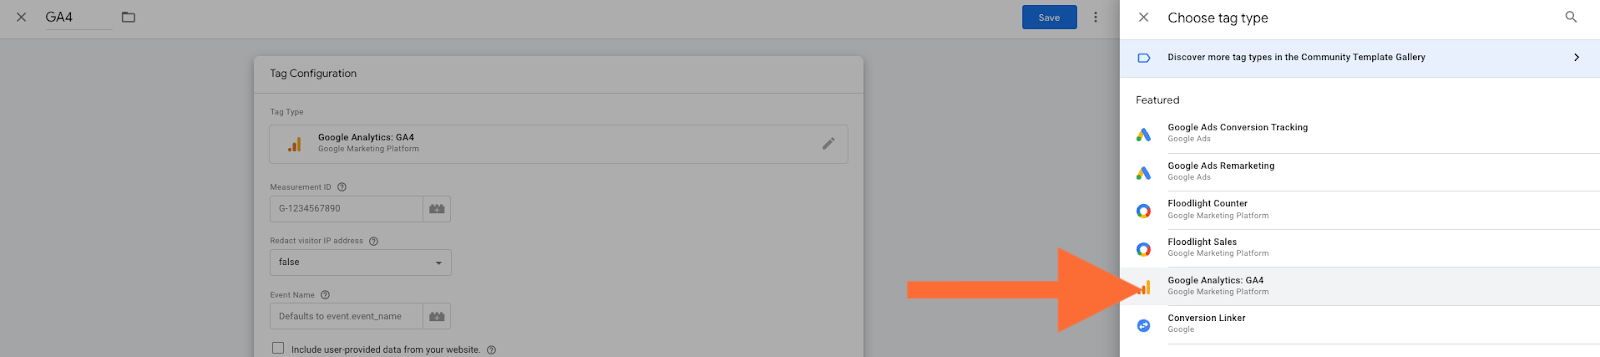
Standard tag settings:
Measurement ID - Leave blank, the same measurement id that is in your web events will be used
Event Name - leave blank, the same event name you use in web tags will be used.
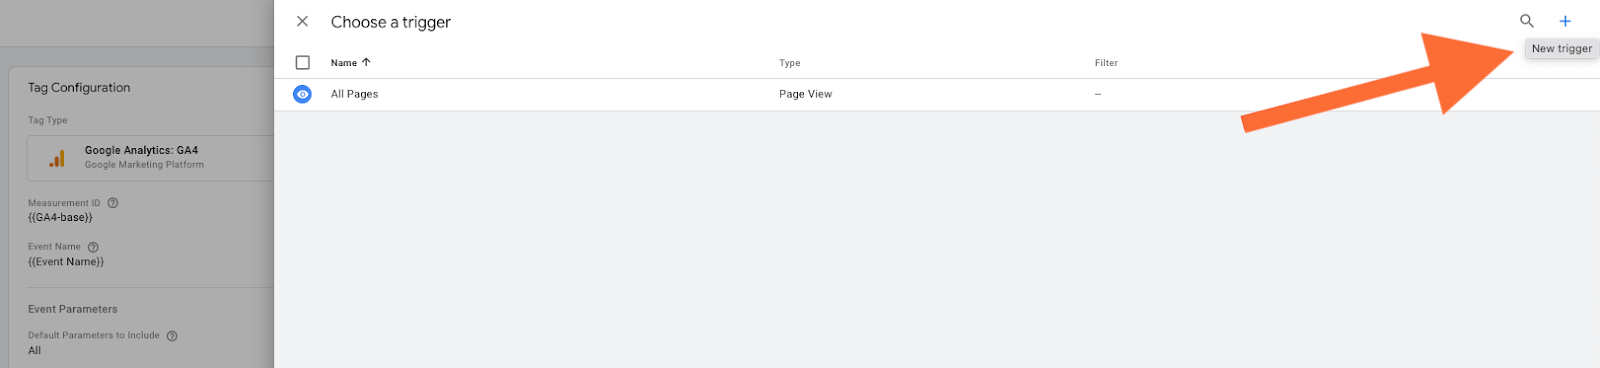
c. Add trigger.
Click Triggering.
Create triggers for the tag.
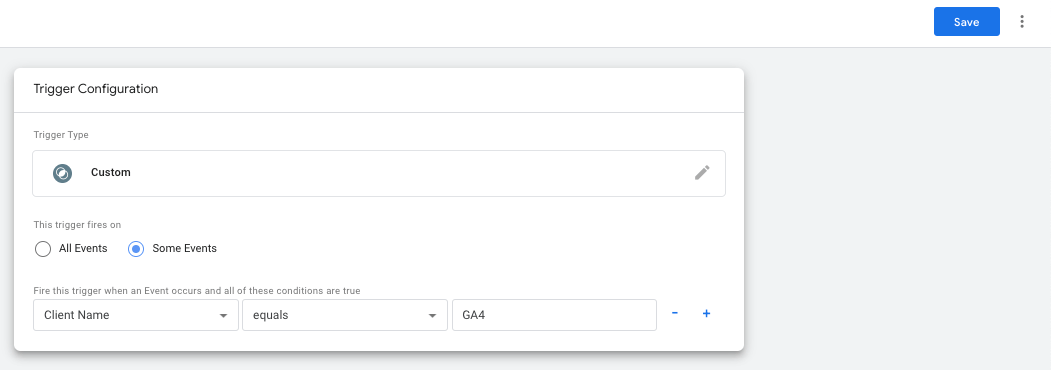
Client name should equal GA4. Click +
d. Choose Custom type → click Some events → choose Client Name in built-in variables → set Equals GA4 (the name of your GA4 client) → click Save.
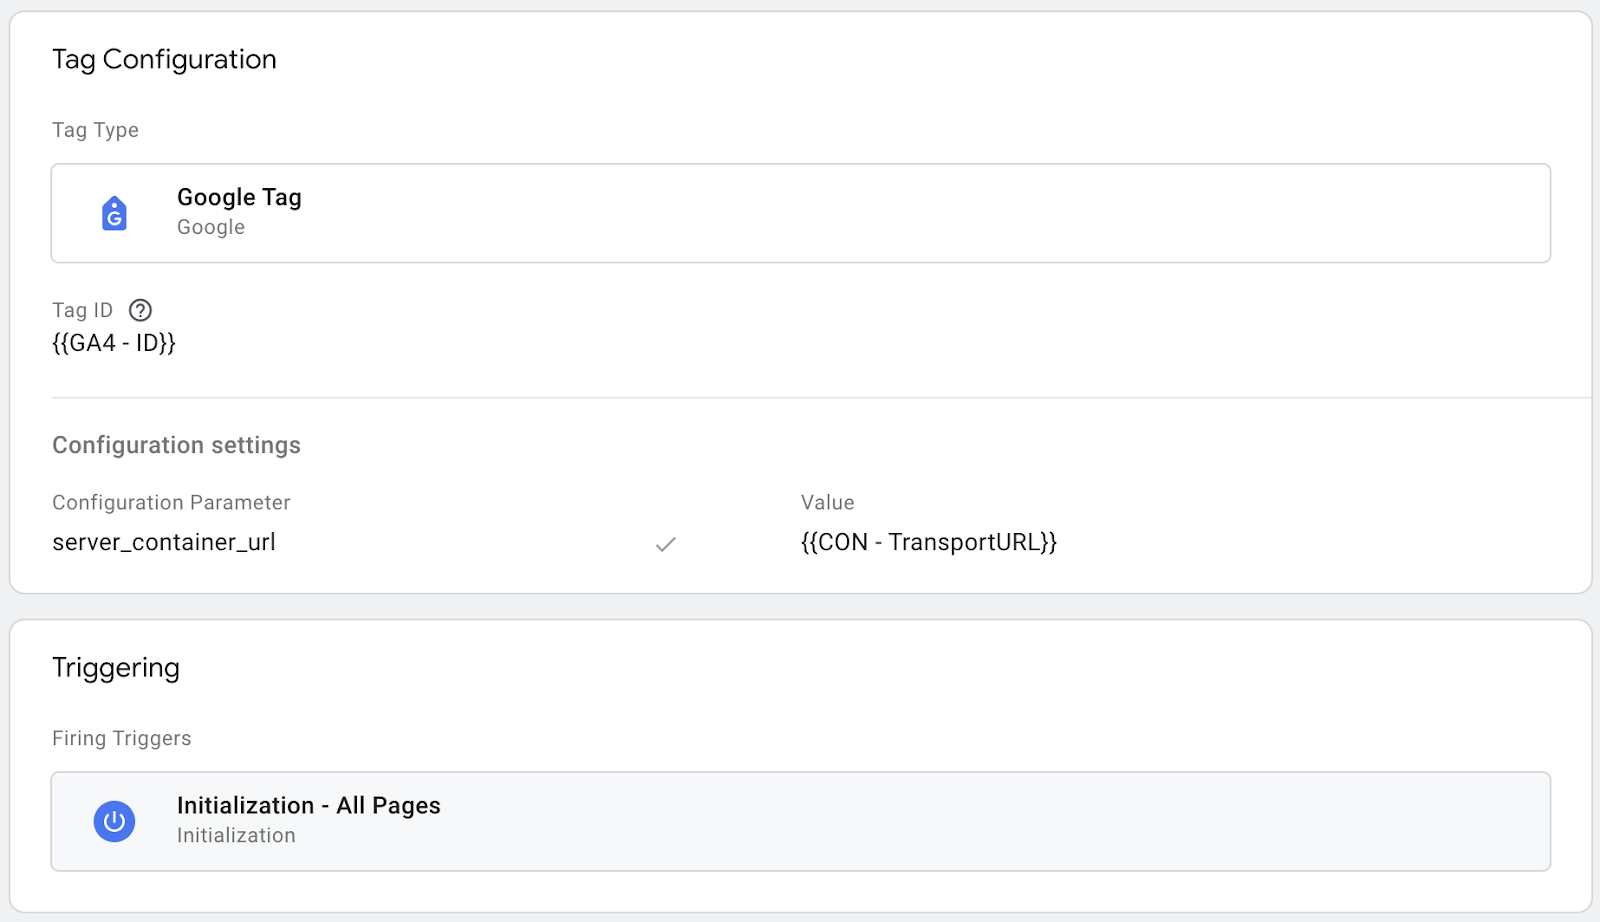
e. Add your server container URL to Google Tag settings. In the configuration settings, add the configuration parameter server_container_url and add your tagging server URL as a value.

2.2. If you do not have GA4 configured.
a. Inside the Web container, create a new tag of the tag Type Google Tag. Add your Google Tag ID.
In the section Configuration settings add the following parameters:
- Name: server_container_url
- Value: Enter the URL you've created
Add trigger to GA4 tag. Normally it should trigger on all page views.
Google tag itself will generate standard GA4 events like page_view, session_start, user_engagement, etc.
b. Setting up additional eCommerce events.
Each event you want to configure must be configured with a separate GA4 event tag, use its own trigger and have its own payload.
Below is an example of configuring the tag for the add_to_cart event with standard parameters. You can repeat this for any other events you want to configure.
You can also use any custom events if you want to track them in your GA4.
c. Set up trigger.
d. Set up variables for GA4 events payload.
You can find the standard and mandatory payload eCommerce GA4 events in the official documentation: https://developers.google.com/tag-platform/gtagjs/reference/events
A minimum of three parameters need to be sent with each eCommerce event:
- value
- currency
- items
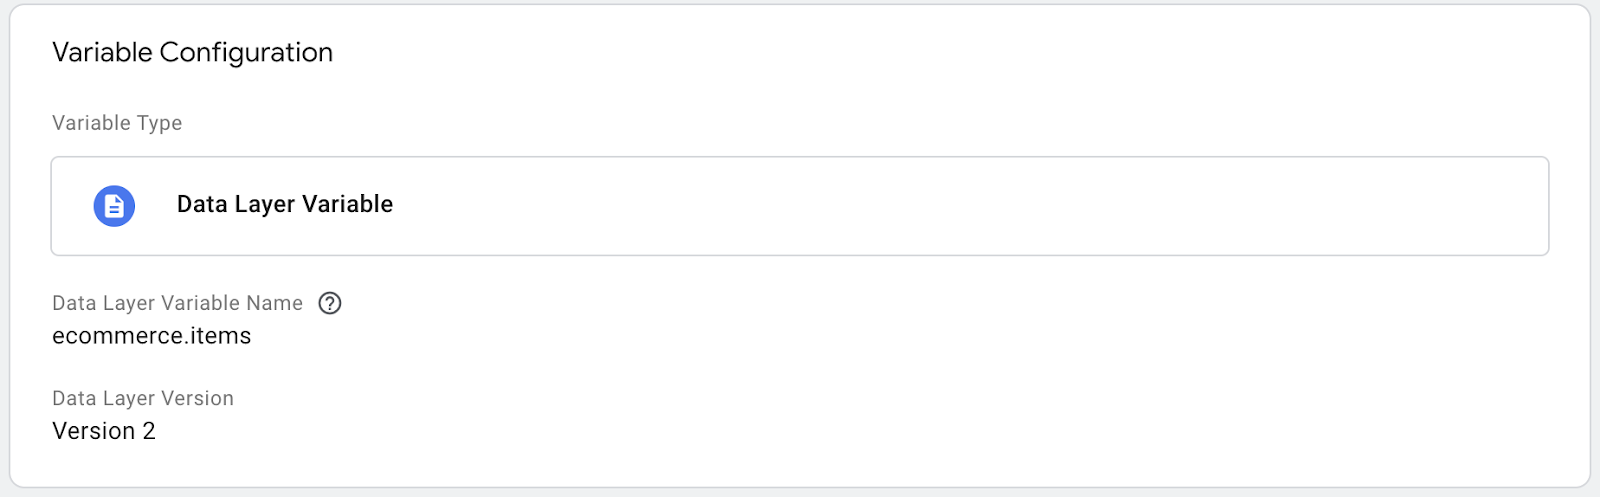
To add these parameters to an event, you must first create variables for them.
To do this, go to Variables section in your web container → create a new one → select Data Layer Variable type → specify the path to the required value as per how they are in the data layer.
for value path: ecommerce.value
for currency: ecommerce.currency
for items: ecommerce.items
Сreate these three variables:
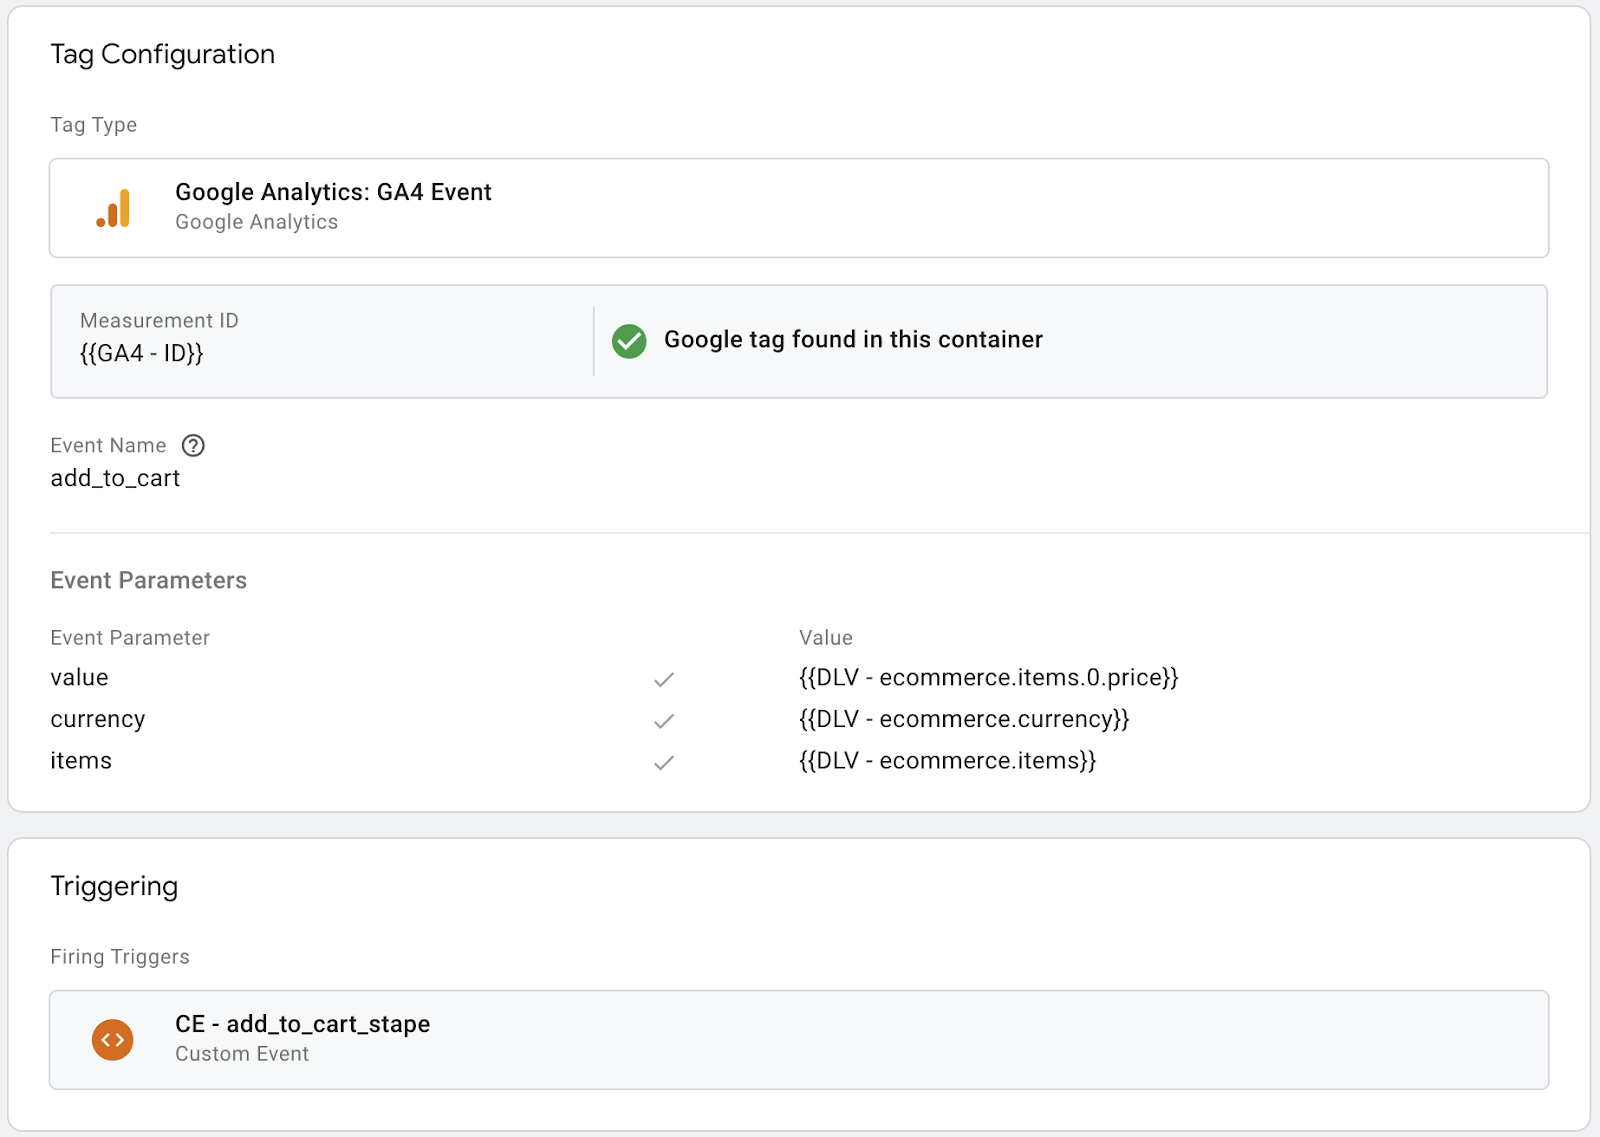
e. Set up GA4 event tag.
Go to the tags section in your web GTM container and create a new tag with the tag type Google Analytics: GA4 Event.
In the tag, specify:
- Measurement ID: your GA4 measurement id
- Event name: add_to_cart (or other if you are setting up another event)
- On GA4 event tag ‘Event parameters’ section add three parameter: value, currency and items. Use the variables you created in the previous step as the value for them.
- Add to the tag the add_to_cart_stape trigger we created earlier.
Similarly, configure any other events you want to track in your GA4.
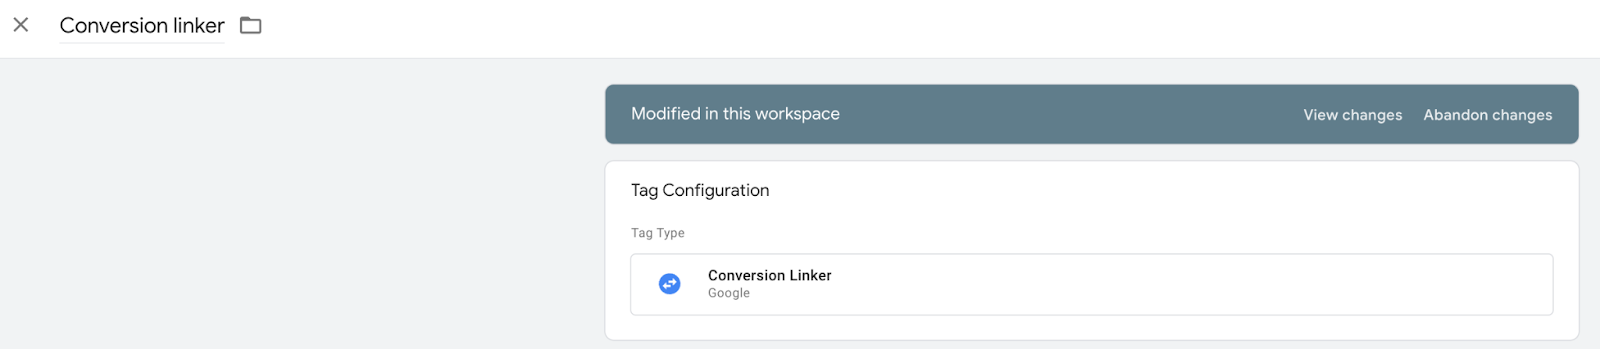
3. Set up Conversion Linker tag + Google Ads Conversion Tracking tag.
3.1. In the Server container set up the Conversion Linker tag. This tag should trigger on all events claimed by the GA4 client (the same trigger that is used for GA4 server tag, on the screenshot above).
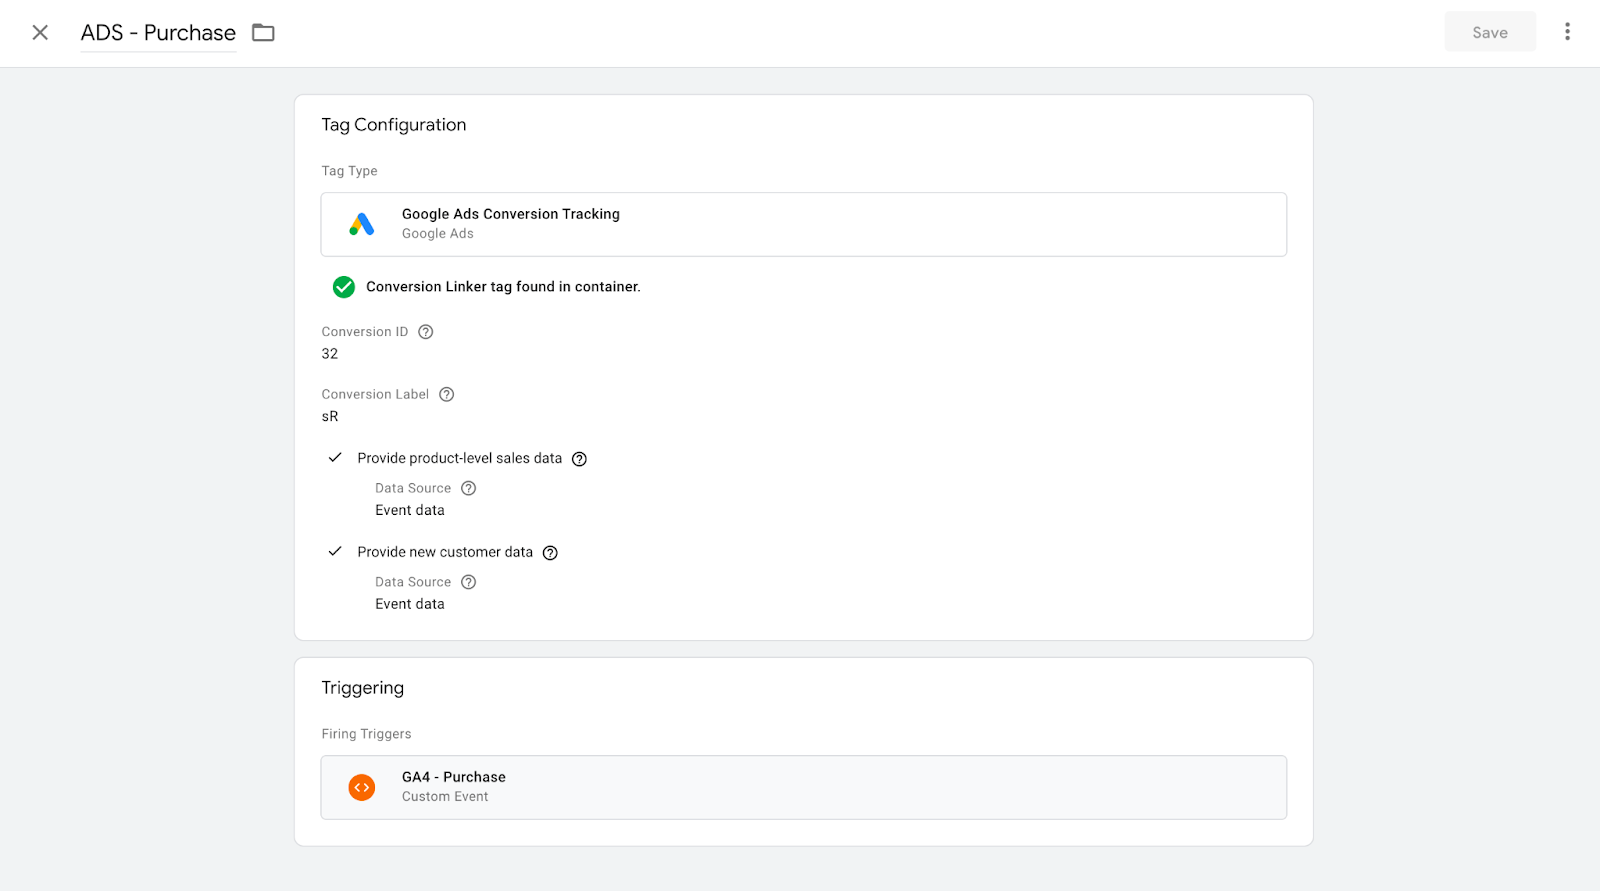
3.2. In the Server GTM container click New Tag → click Tag configuration → Google Ads → Google Ads Conversion Tracking tag. Add Conversion ID and Conversion Label similarly to the web Adwords tag setup.
3.3. Then you have an option to add product and user data. If you send user and product data from the web to the server, then you can enable these checkboxes and select event data as a data source. If product and user info are properly sent from the web using standard dimensions and are available in the event data - the tag will parse this information automatically and report to Google Ads. You also have an ability to override the data sent from the web if needed. In our case Adwords server conversion triggers on the purchase event.
Conclusion
Implementing Google Ads conversion tracking for your BigCommerce site is crucial for anyone looking to take advantage of the power of online advertising. In today’s competitive world, having precise insight into which ads drive conversions is essential for staying ahead and optimizing your return on investment (ROI).
Whether you're a marketing veteran or just starting out, setting up conversion tracking on your BigCommerce site ensures that you’re making the most of every advertising cent. This tool allows you to track the performance of your campaigns, understand user behavior, and adjust your strategies to maximize impact and boost sales.
If you have any questions about the setup - don’t hesitate to leave a ticket. And if you’d like a setup from us - here’s a free quote!
Interested in server-side?
We are happy to hear that! Click on Try for free to register and check all the possibilities.

Comments