How to migrate to Stape?
Updated Apr 21, 2026
Moving your server-side tracking setup to Stape means adopting a simpler, faster, and more cost-efficient way to run Google Tag Manager. Instead of maintaining complex server configurations on your own, you hand over the heavy lifting to Stape’s automated tools.
This transition involves exporting or recreating your existing server-side GTM container and directing your tracking scripts to use Stape’s infrastructure. Once that’s done, you can enjoy reliable performance and enhanced tracking features, all while saving time and money.
Benefits of migrating to Stape
- Cost-effective - Stape is times cheaper than traditional providers. You can maintain robust server-side tracking without breaking your budget.
- Easy setup & maintenance - swift server creation and straightforward container configurations eliminate the need for technical deep dives, allowing you to focus on your marketing and analytics.
- Reliable support & expert guidance - Stape’s team of server-side tracking specialists can help with advanced setups, ensuring your container meets complex tracking needs.
- And much more! Check out the whole list of Stape benefits.
How to migrate to Stape
To ensure a seamless switch from your previous provider to Stape and to avoid disruptions or downtime, follow these steps.
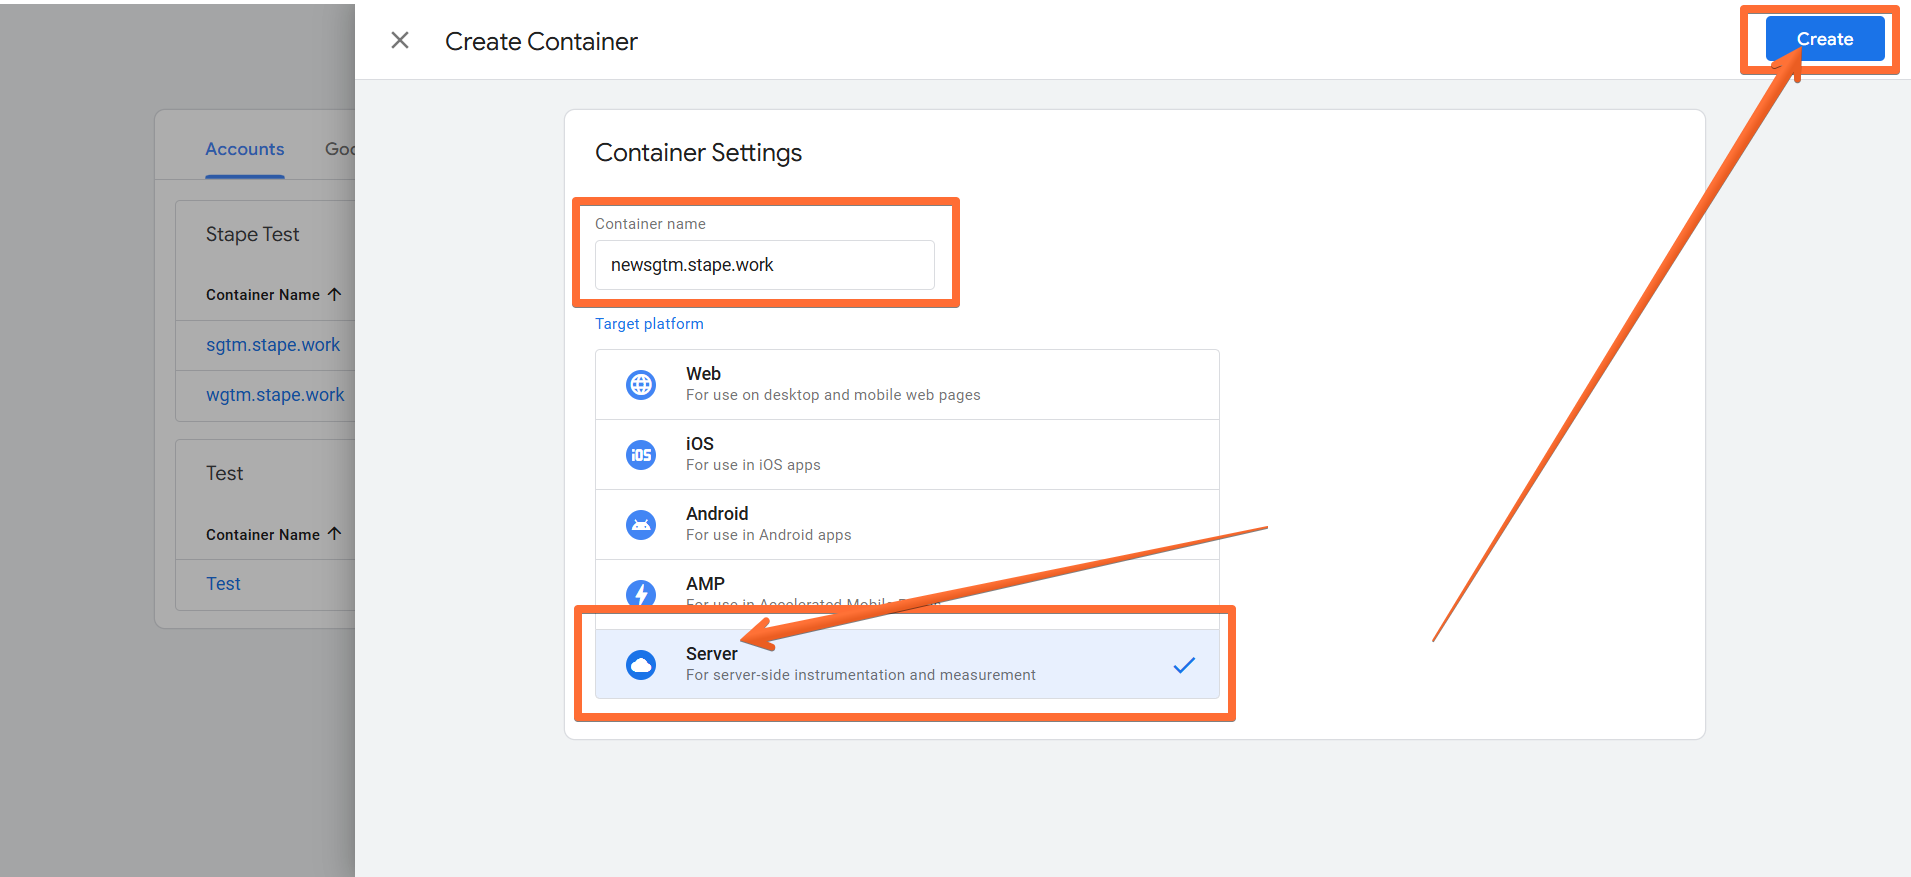
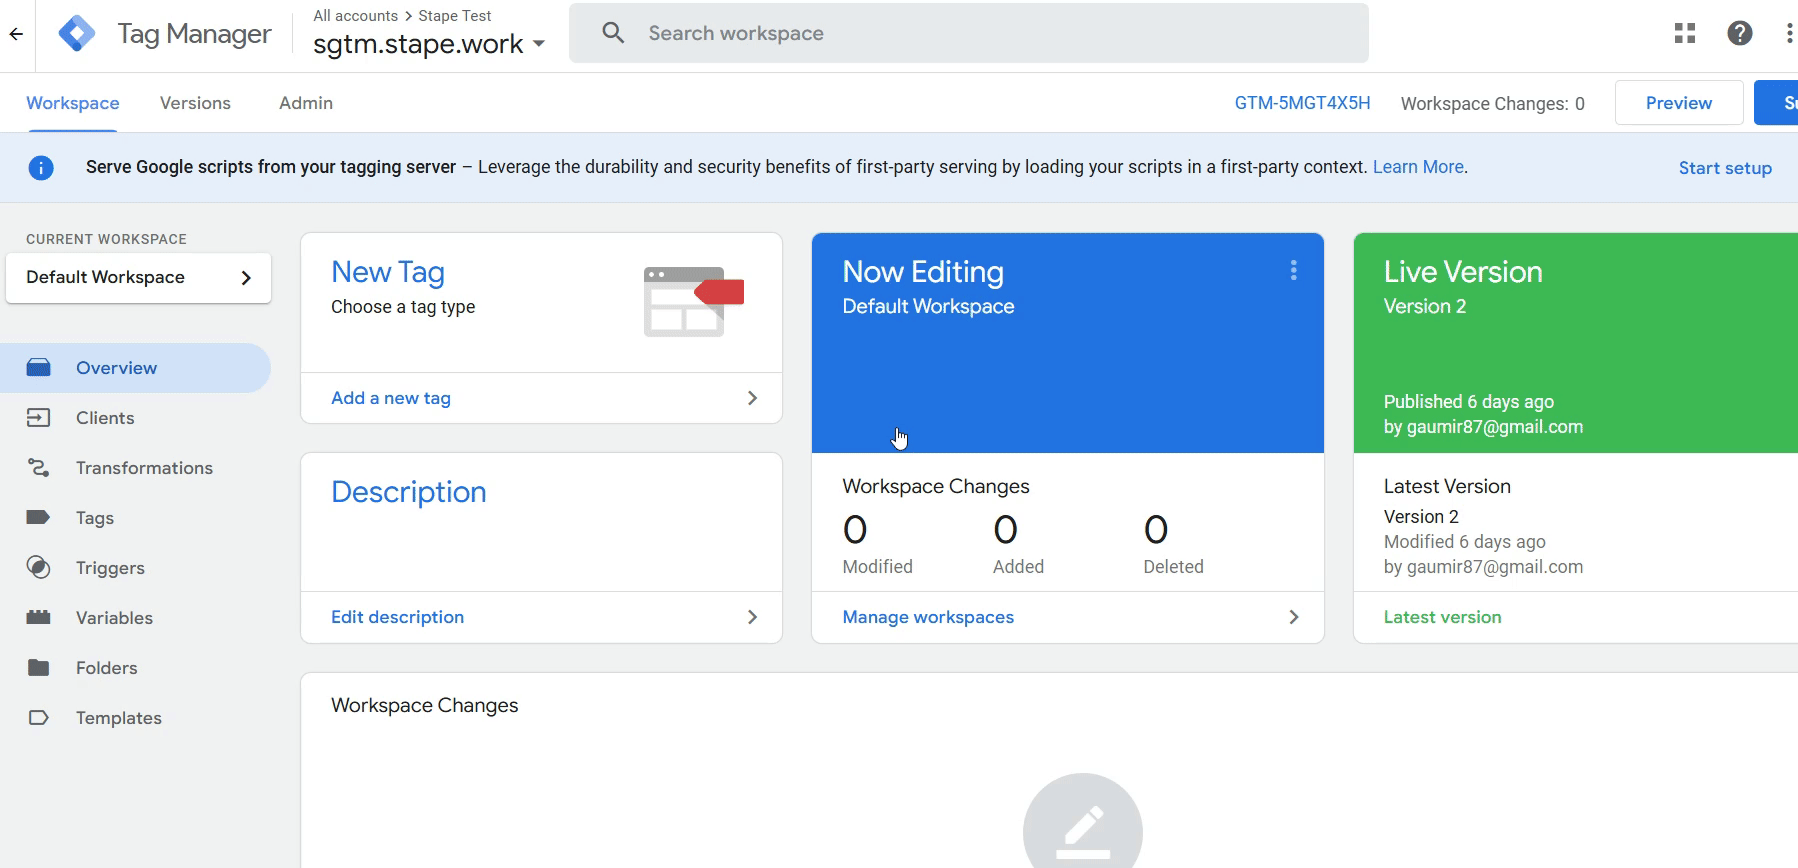
1. Create a new server-side GTM container in Google Tag Manager. This fresh sGTM container will serve as your new tracking environment. In case you need a refresher, we have a guide on creating an sGTM container.
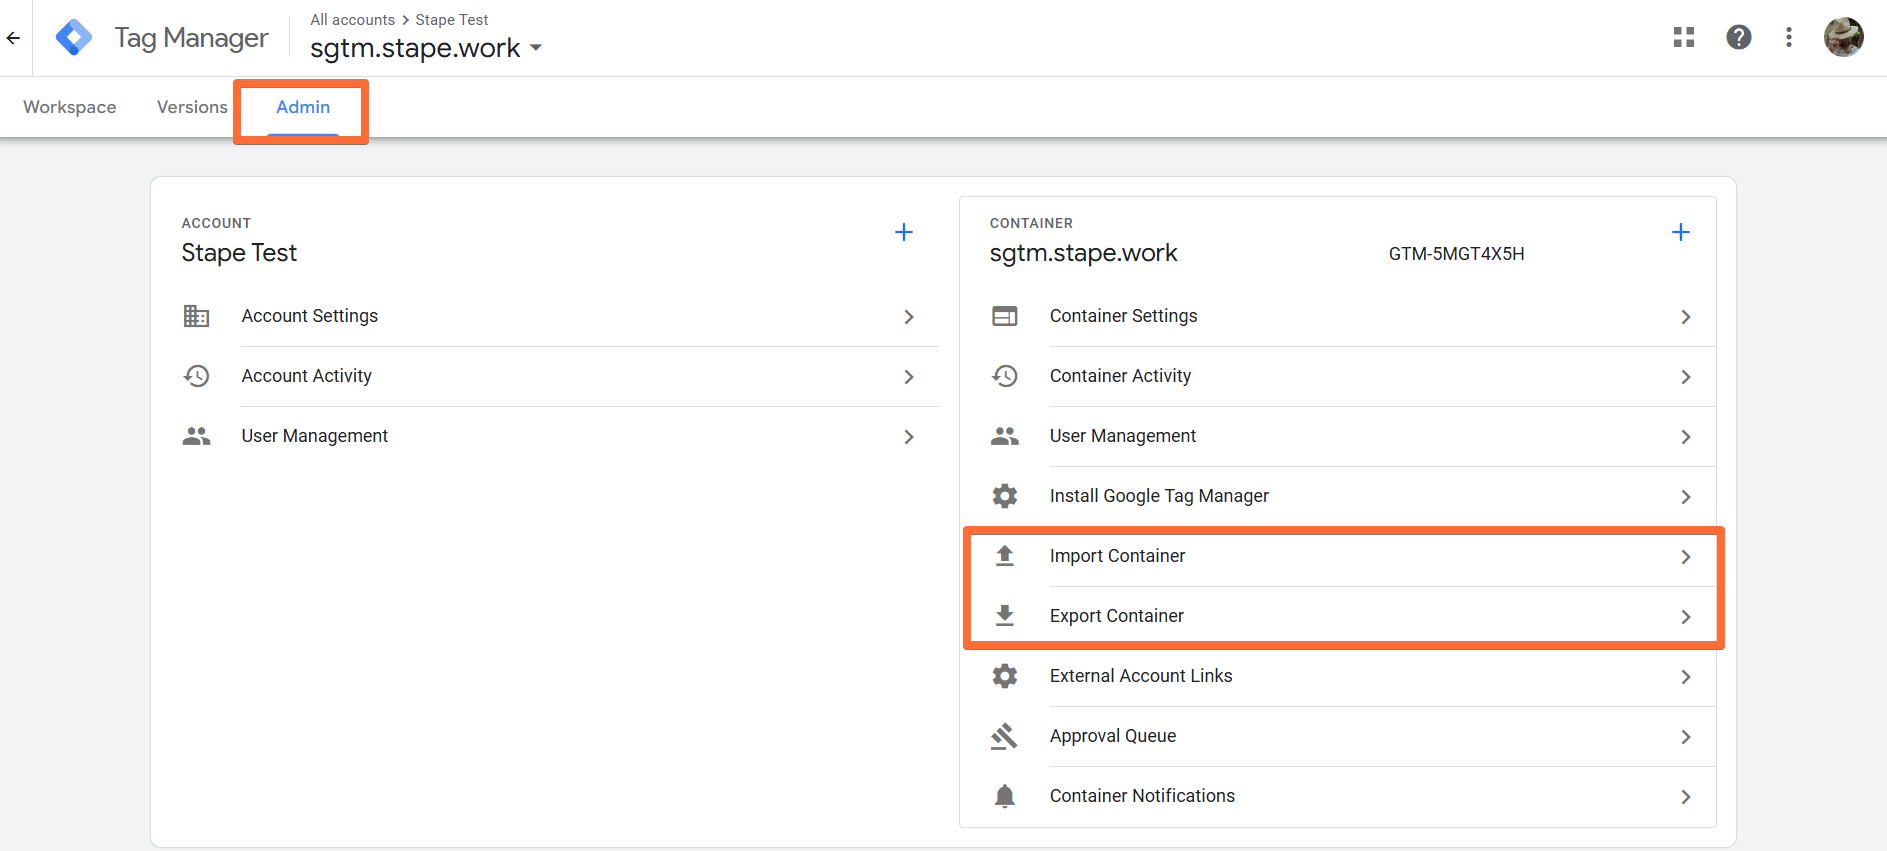
2. Export your old sGTM container, then import it into the new one. This will preserve your existing tags and triggers.
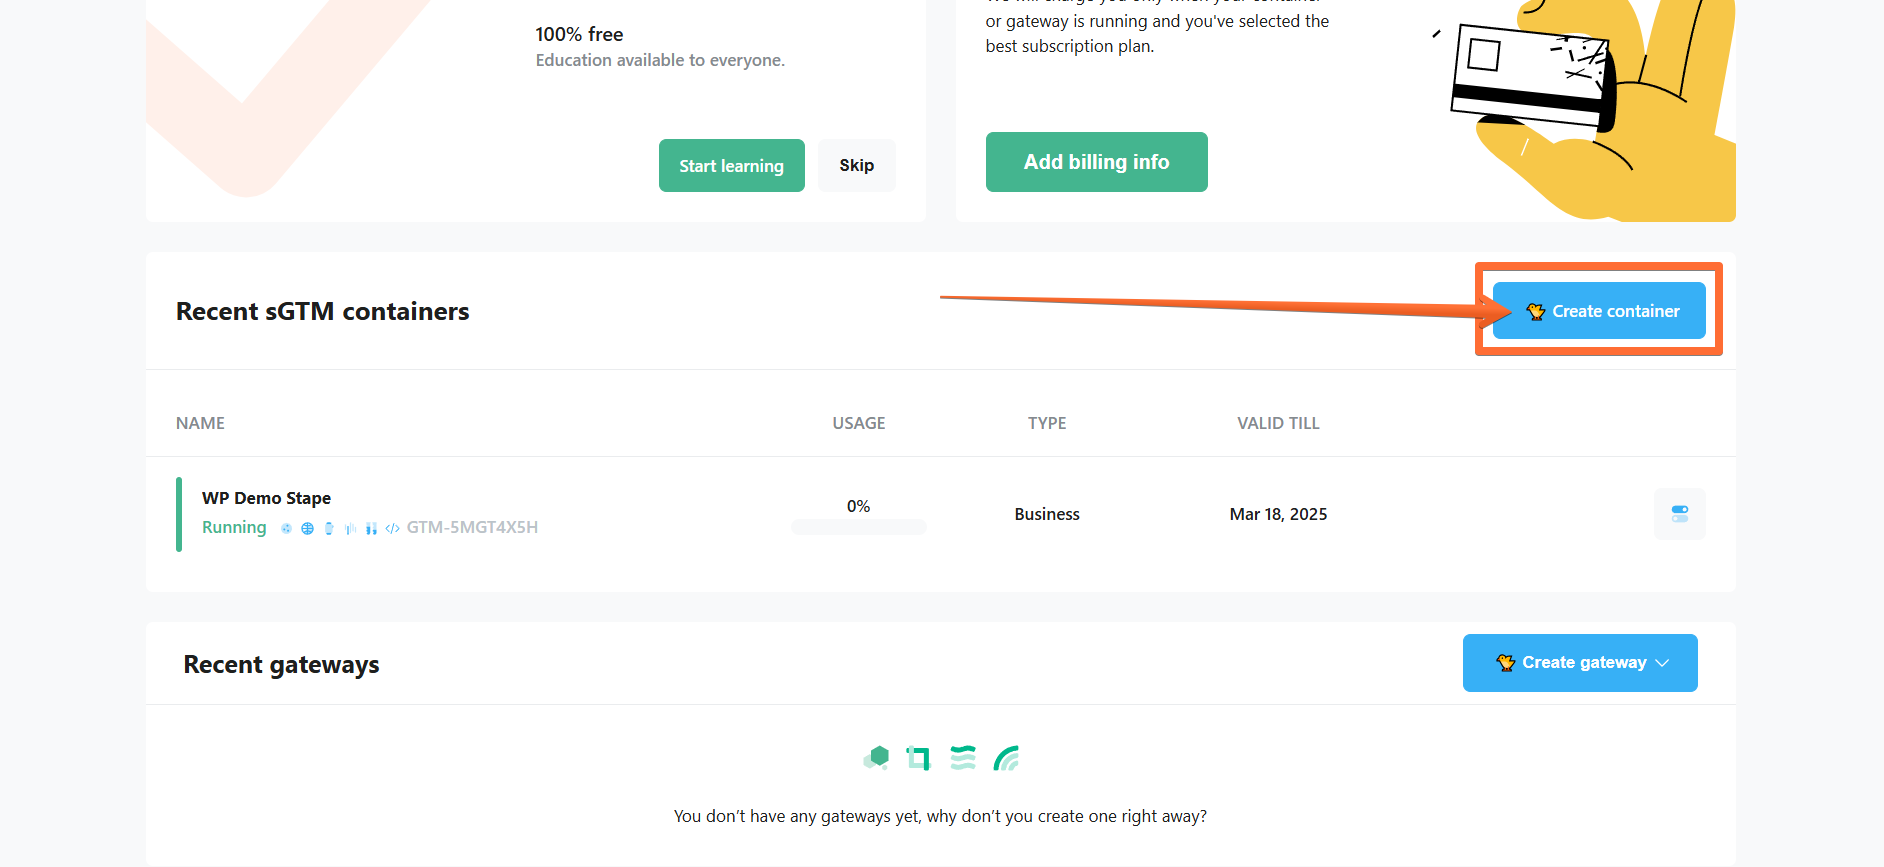
4. Set up a new Stape sGTM container and add to it your new Google Tag Manager container’s configs. See our detailed guide on creating a new container in your Stape account. Stape automates the essential configurations so you can get started quickly, even if you don’t have deep technical knowledge.
5. Create a new subdomain (don’t reuse the old one!), verify it on Stape, and update DNS records. This approach is vital to ensure no downtime. Point your new subdomain to Stape and finalize any required DNS changes. See our detailed guide on creating a new custom domain.
6. In your web container’s tag settings (e.g. Google tag) and webhooks, or other places where you send data to sGTM, replace the server container URL with the new one you verified on Stape. Check that everything is working by testing the new setup in Preview mode.
7. Publish your changes in each container once testing looks good.
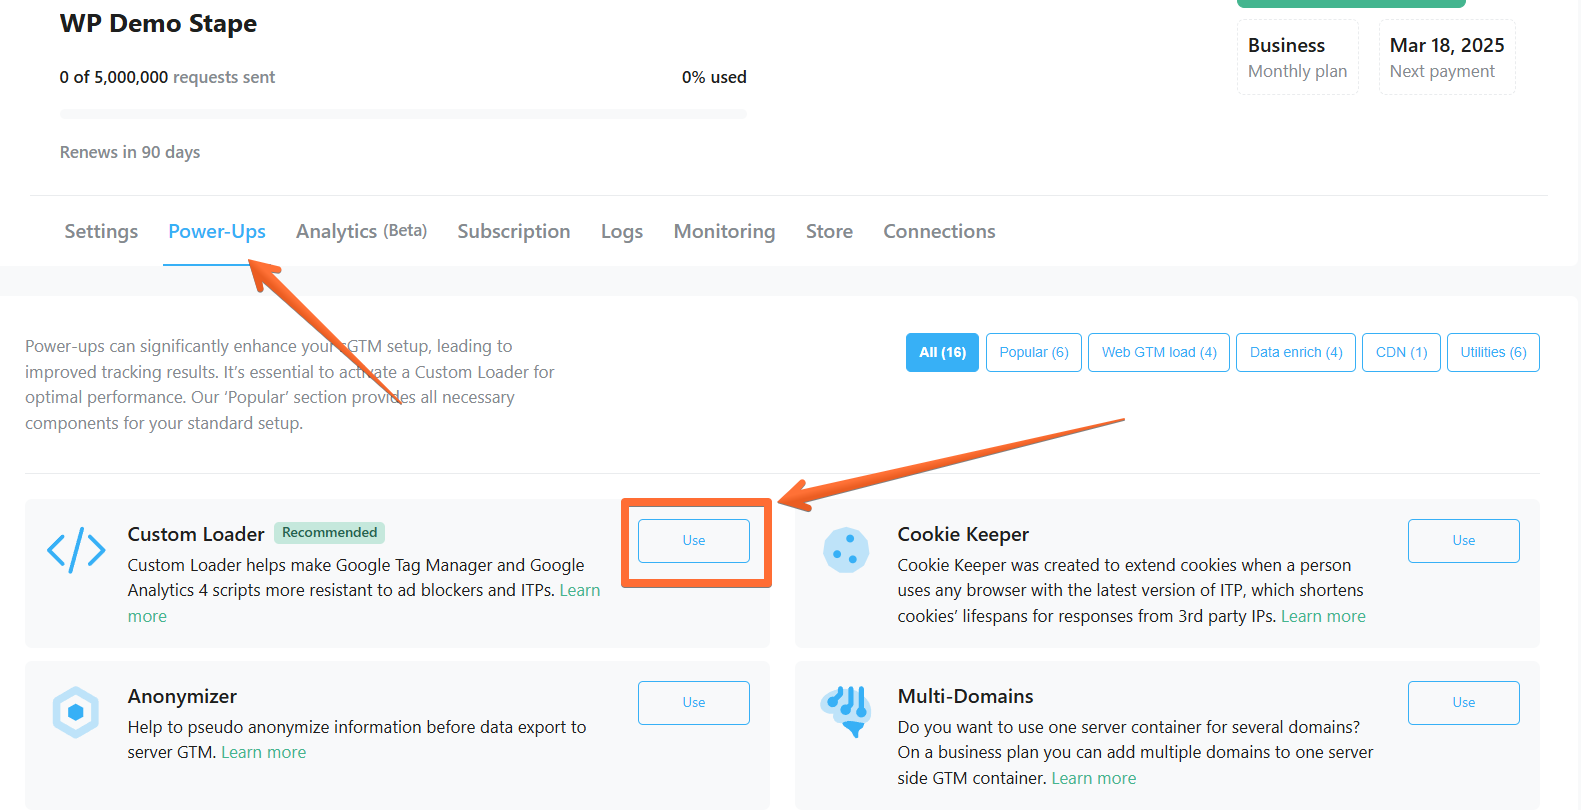
8. Replace the default GTM loader script with Stape’s Custom Loader. This makes your tracking scripts more resistant to ad blockers and improves data accuracy. See our detailed guide on configuring Custom Loader.
9. You’re all set! Once you’ve published all the changes, check that everything is working correctly and the data flows.
Also, don’t forget to disable your old hosting and sGTM environment to avoid data duplication or extra charges.
10. Optimize your setup with Stape’s features and power-ups. You may find that some of them greatly benefit your particular business and setup. Stape handles scaling, caching, and specialized functions behind the scenes. For some ideas on what to do next, check out this article.
Was this article helpful?
Comments