Sep 28, 2026
Base44 analytics setup in 3 prompts: GA4, GTM, and Meta CAPI done by Stape MCP
Written by
Ieva Dubricke
Published Nov 9, 2026 comments
Key takeaways
- Base44 correctly tracks visitor activity, user behavior, and Stripe revenue within the organization, but it doesn’t automatically share this data with GA4, Meta, or Google Ads for the purpose of campaign attribution or ad optimization.
- Since Base44 doesn’t have built-in GTM integration fields, Google Tag Manager has to be embedded directly into the codebase of your app, and server-side tracking depends on a separate server container host.
- Base44 is able to manage the whole tracking process by linking the Stape and GTM MCP servers, including the creation of both GTM containers, hosting the server-side tracking on Stape, and automatically preparing your GA4 and Meta tags.
If you are a builder, marketer, or founder with a live Base44 app, it matters to track performance in Google Analytics 4 and Meta to drive growth. When configuring analytics for apps built with Base44, setting up proper measurement ensures accurate attribution across all your marketing channels. In this guide, we’ll show you how to set up solid server-side tracking for Base44 right from within the chat and how to add the Meta Pixel to a Base44 app, therefore avoiding the need for manual configuration in Google Tag Manager.
What is Base44 and what analytical capabilities does it already have for you?
Base44 is an app builder powered by AI that converts natural language prompts into fully functional apps. Whether you need landing pages and waitlists or complete SaaS products and internal tools, you can design, build, and publish all of them straight from the chat in the editor.
When the apps are first published, they come with built-in website analytics. To gain access to these insights, you just need to go to Dashboard → Analytics in the editor:
- Traffic Overview – shows total visits, unique visitors, average visit duration, and live visitors.
- Sales Overview – monitors Stripe payments, successful transactions, active customers, and refunds.
- Custom events – allows you to monitor specific user actions, like sign-ups or button clicks.
For early-stage applications, built-in analytics provide an excellent way to assess user engagement and activity. But as soon as you launch paid advertising campaigns, your tracking requirements jump to another level.
When built-in tracking isn't enough?
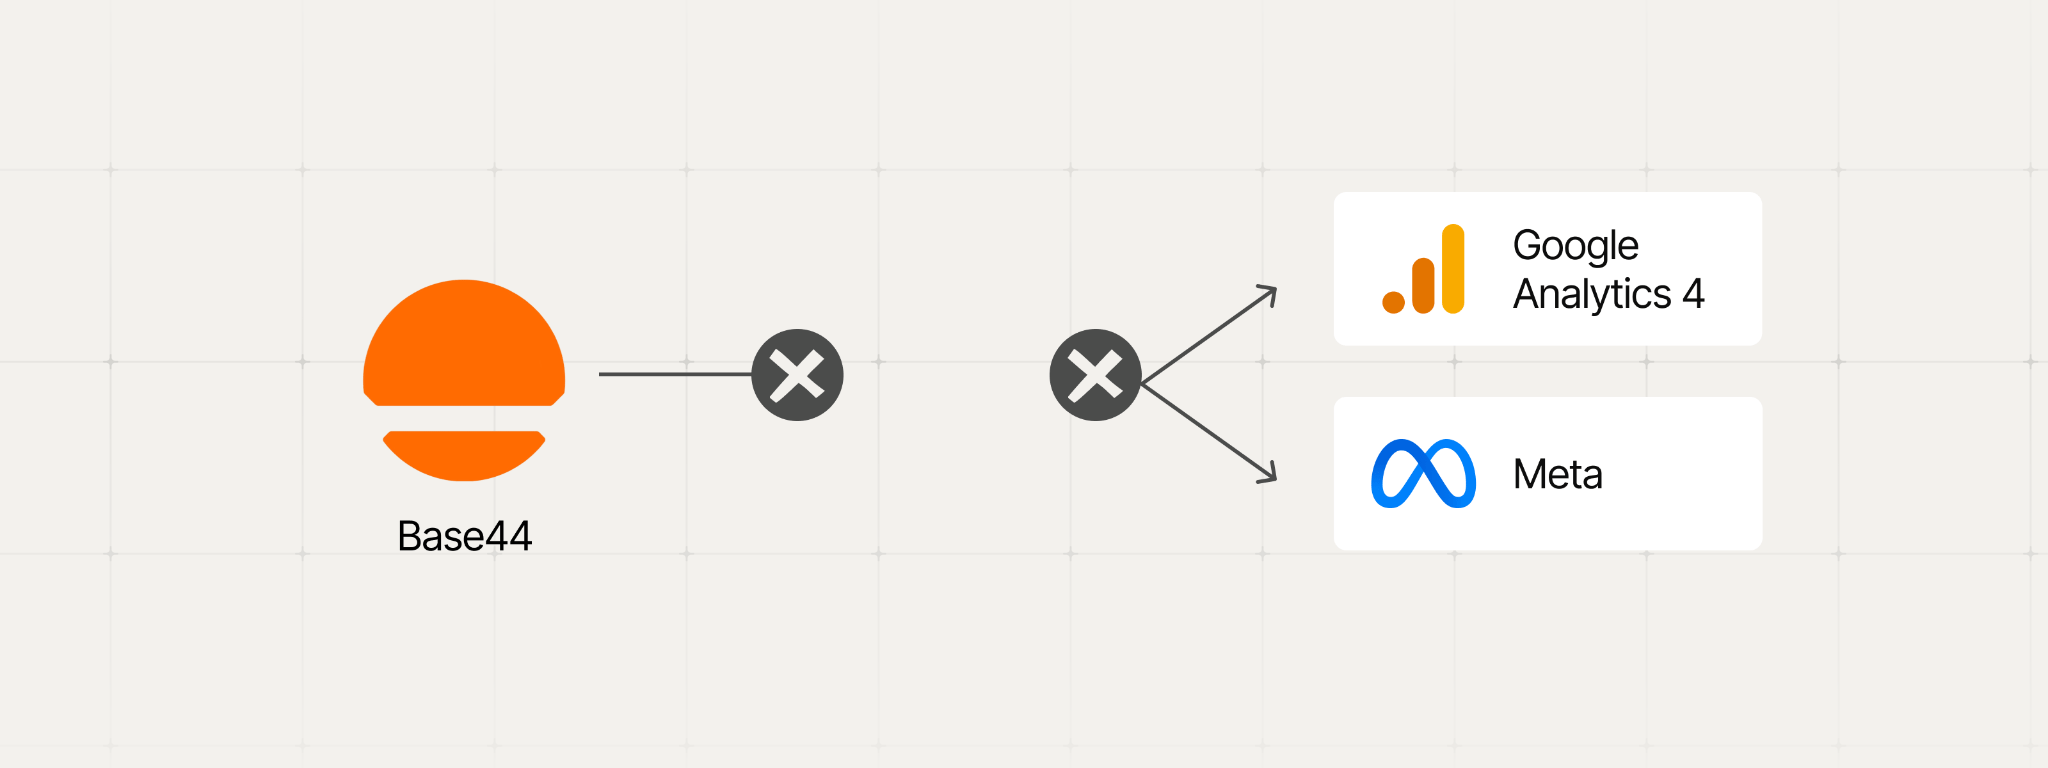
Although Base44’s built-in dashboard is good for obtaining quick internal insights, ad platforms have no means of accessing or reading the data it provides. To run effective ad campaigns, Google Analytics 4 needs direct hits to its property, Meta must use Pixel and Conversions API events to record browser conversions, and Google Ads requires data that can be linked back to specific ad clicks. Any interactions tracked only within Base44 remain invisible to these networks and therefore can’t be properly attributed or optimized in your marketing campaigns.
These limitations typically become noticeable once you prepare to run ad campaigns:
- Custom events that are isolated — when a "join waitlist" submission increases the counter in Traffic Overview, Meta and GA4 don’t receive these events unless you actively send the corresponding GA4 events and Meta Leads.
- Read-only Google Analytics integration – you can use the built-in connector to integrate GA4, but installing the actual tracking tag remains a separate task.
- Client-side data loss – browser-only tracking is heavily throttled by ad blockers, Intelligent Tracking Prevention (ITP) in Safari, and strict cookie limits.
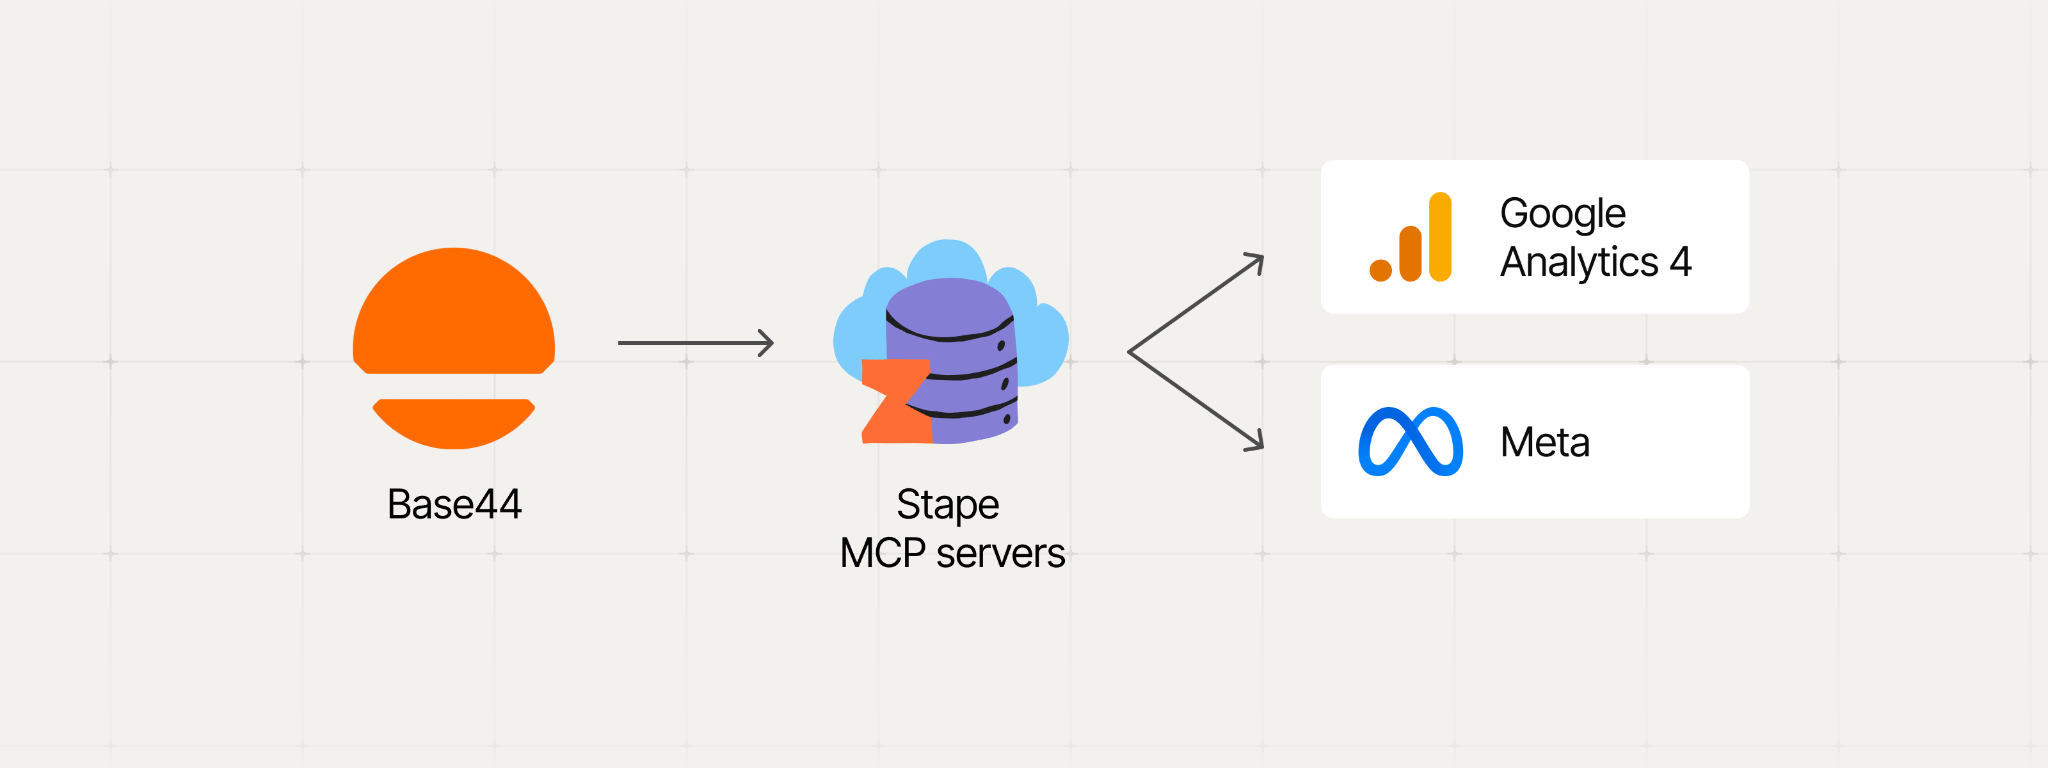
Putting GTM together with server-side tracking fully removes these limitations. The application loads one GTM script and pushes clean events into the data layer, with all the management remaining within GTM. The data then flows securely through your dedicated tagging server on Stape and is sent directly to GA4 and Meta using the Conversions API.
Although manual GTM setup takes time, Stape makes server-side tracking for Base44 far easier with free MCP servers you can connect to the project.
Stape MCP servers for Base44 Google Tag Manager setup
The Base44 editor chat goes far beyond simply writing application code – it integrates with external tools using MCP connections. The Model Context Protocol (MCP) is an open standard that allows remote actions for your AI assistant, from inspecting containers to building and configuring tags. Stape provides free MCP servers for Google Tag Manager, Google Analytics 4, and the Stape platform itself. Check out our comprehensive guide to Stape’s AI Assistant and free MCP servers to discover everything they can do.
In Base44, you add MCP connections at the account level. You set each server up once, and the chat can use it in every app you open. Two connections cover the tracking setup:
- GTM MCP signs in with your Google account. It works inside Google Tag Manager to create containers, tags, triggers, and variables, and it publishes versions when you ask.
- Stape MCP authenticates with your Stape API key. It creates the hosted server container and returns its tagging server URL.
Once both are connected, a few prompts in the project chat replace an afternoon of manual setup. Base44 can:
- Create a web GTM container and a server GTM container
- Create a Stape container and connect it to the server GTM container
- Draft the GA4, Meta Pixel, and Meta Conversions API tags
- Add the GTM snippet and events to the Base44 app code
These connections only exist in the editor. Base44 uses them while you build, but the published app never calls them, and neither your API key nor your Google sign-in is added to the site.
The tracking itself runs as ordinary server-side tagging. The browser transmits events directly to your dedicated Stape server container, which then securely routes them to GA4 and Meta. Because data reaches a server under your full control before being forwarded to third-party vendors, you bypass strict ad blockers and browser privacy restrictions – giving you complete authority over exactly which parameters are shared with each platform.
How to add Google Analytics, Google Tag Manager, and Meta Pixel to Base44
Before you begin
You’ll need to have the following:
- A Base 44 account with a project and Builder plan of higher.
- A Stape account, and you’ll need to obtain your Stape API key. For the API key instructions read the Account API keys article
- An account in Google Tag Manager
- A Meta Pixel ID. You'll also need a Conversions API access token from Meta Events Manager
Step 1. Connect the MCP servers
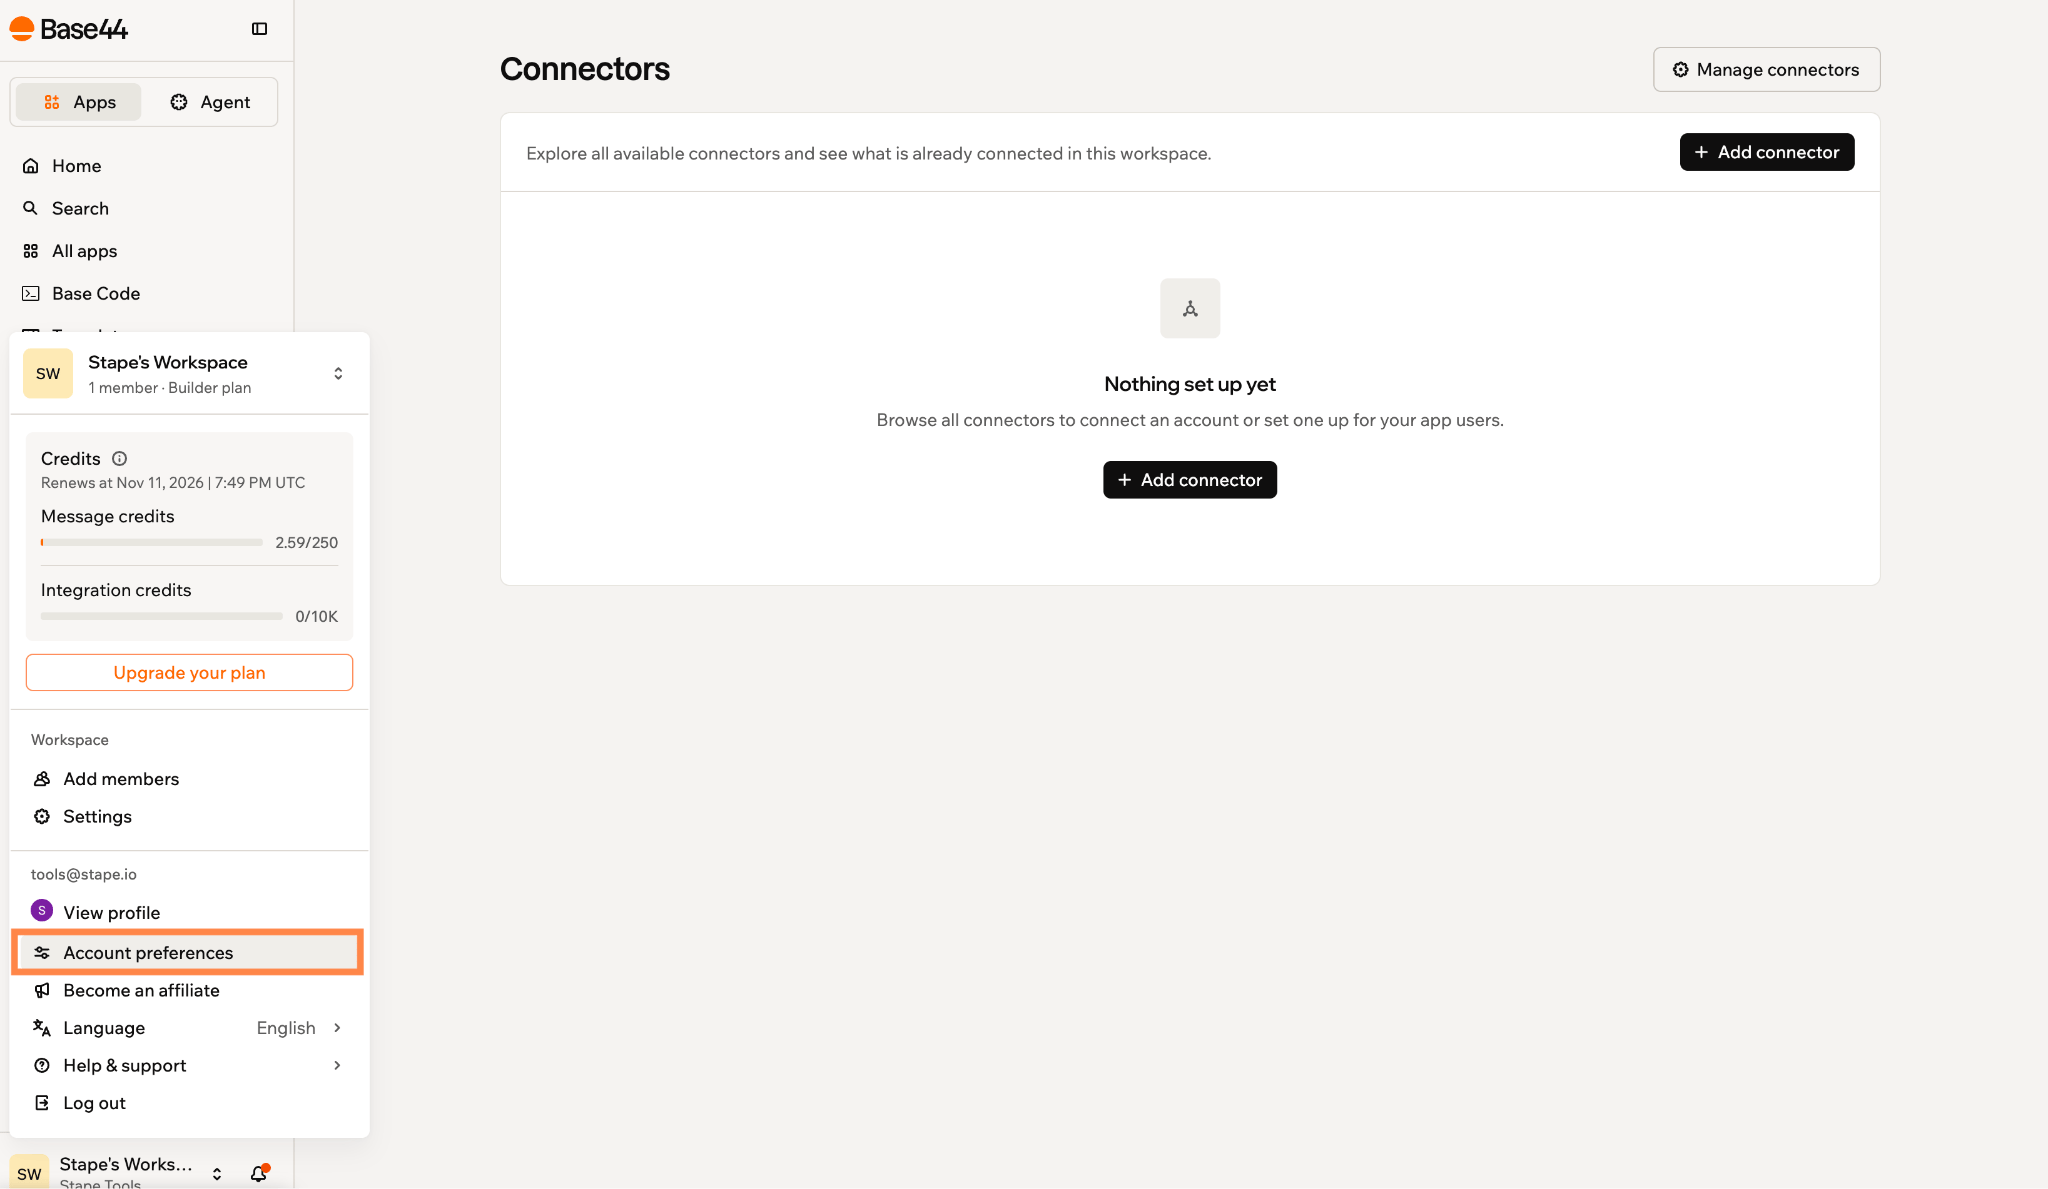
1. In Base44, at the bottom of the screen click on your account → Account preferences.
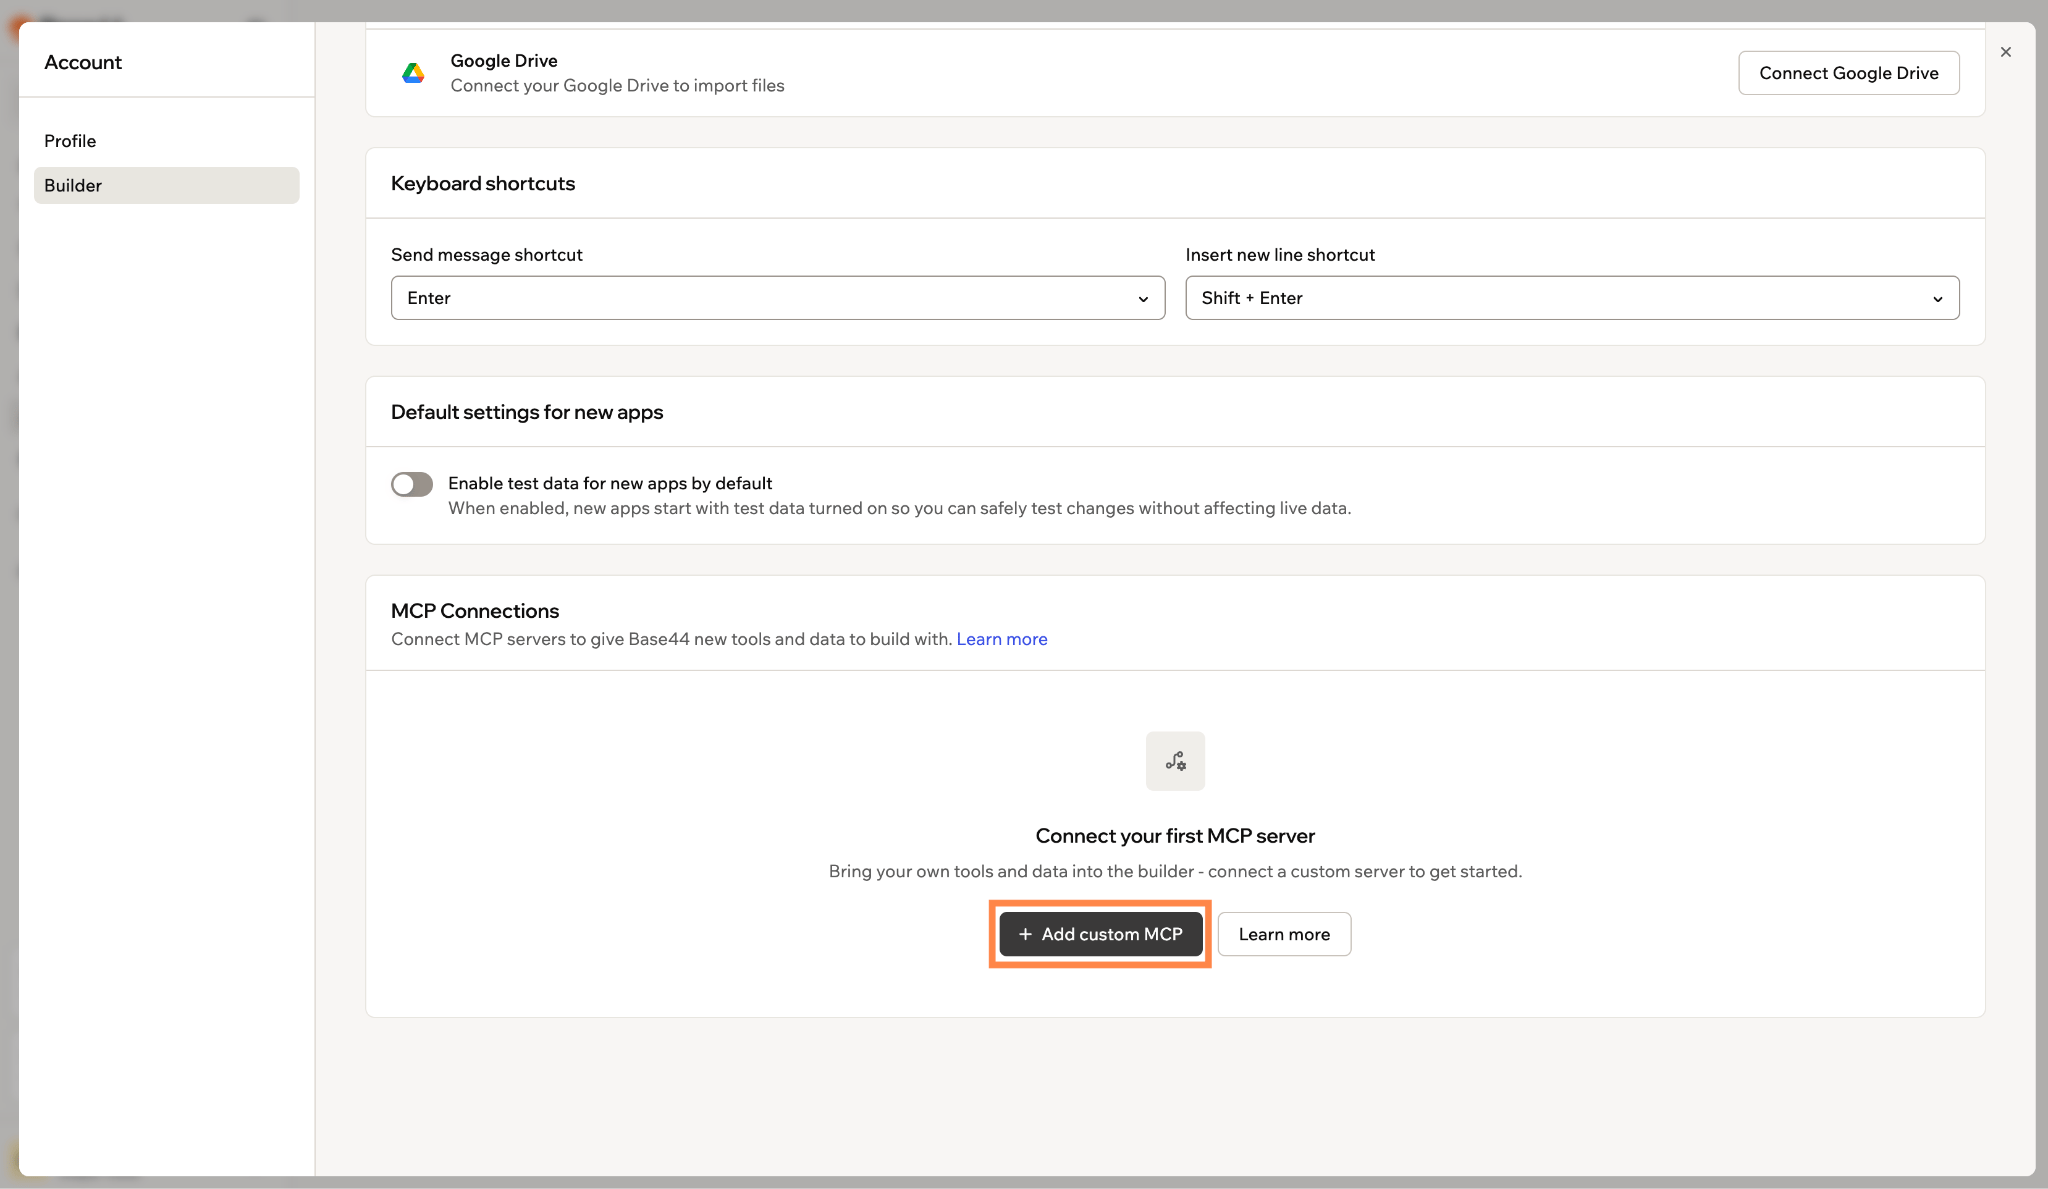
2. Under MCP connections click Add custom MCP.
3. Fill in the following:
- Name –
GTM - URL –
https://gtm-mcp.stape.io/mcp - Authentication –
OAuth
4. Click Authorize & Add and sign in with the Google account that has access to GTM.
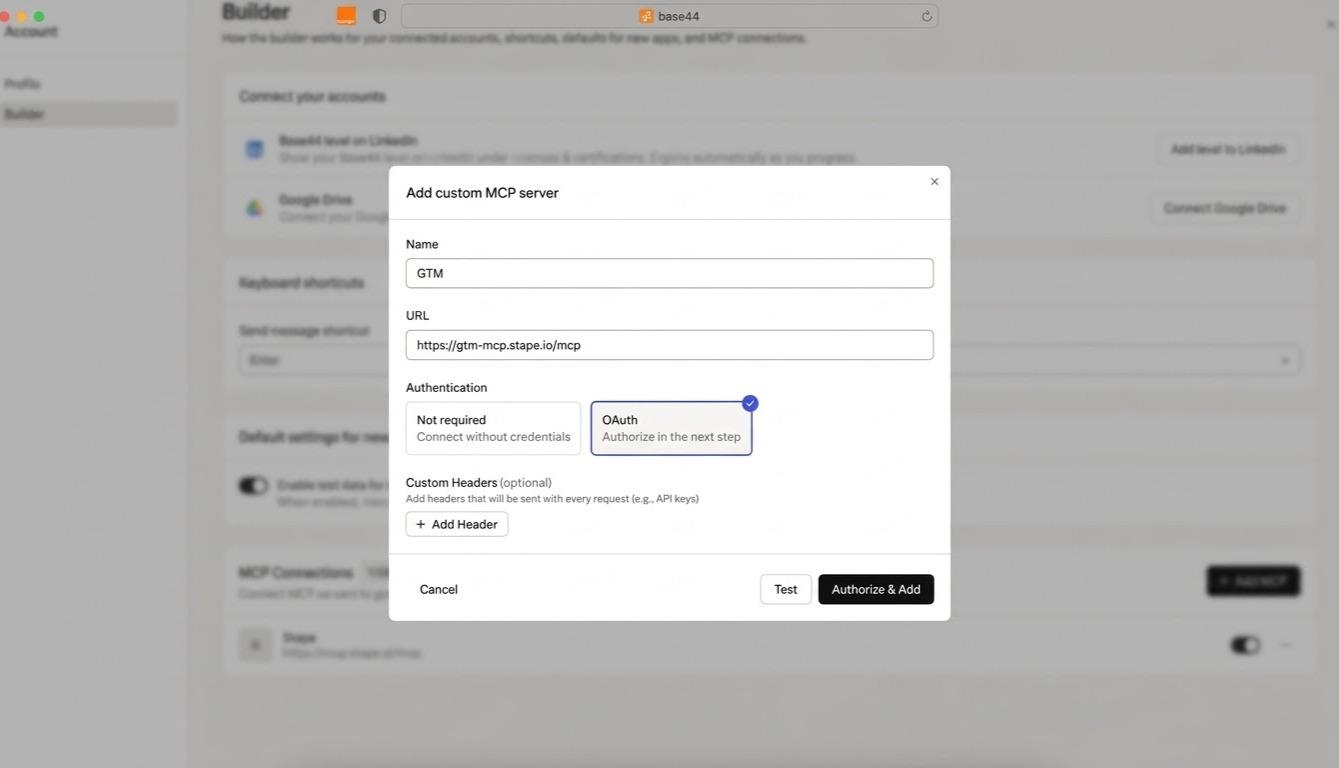
5. Repeat steps 1-2 and now add a Stape MCP:
- Name –
Stape - URL –
https://mcp.stape.io/mcp - Authentication –
Not required. - Custom headers – Enter your Stape API key.
6. Click Test & Add.
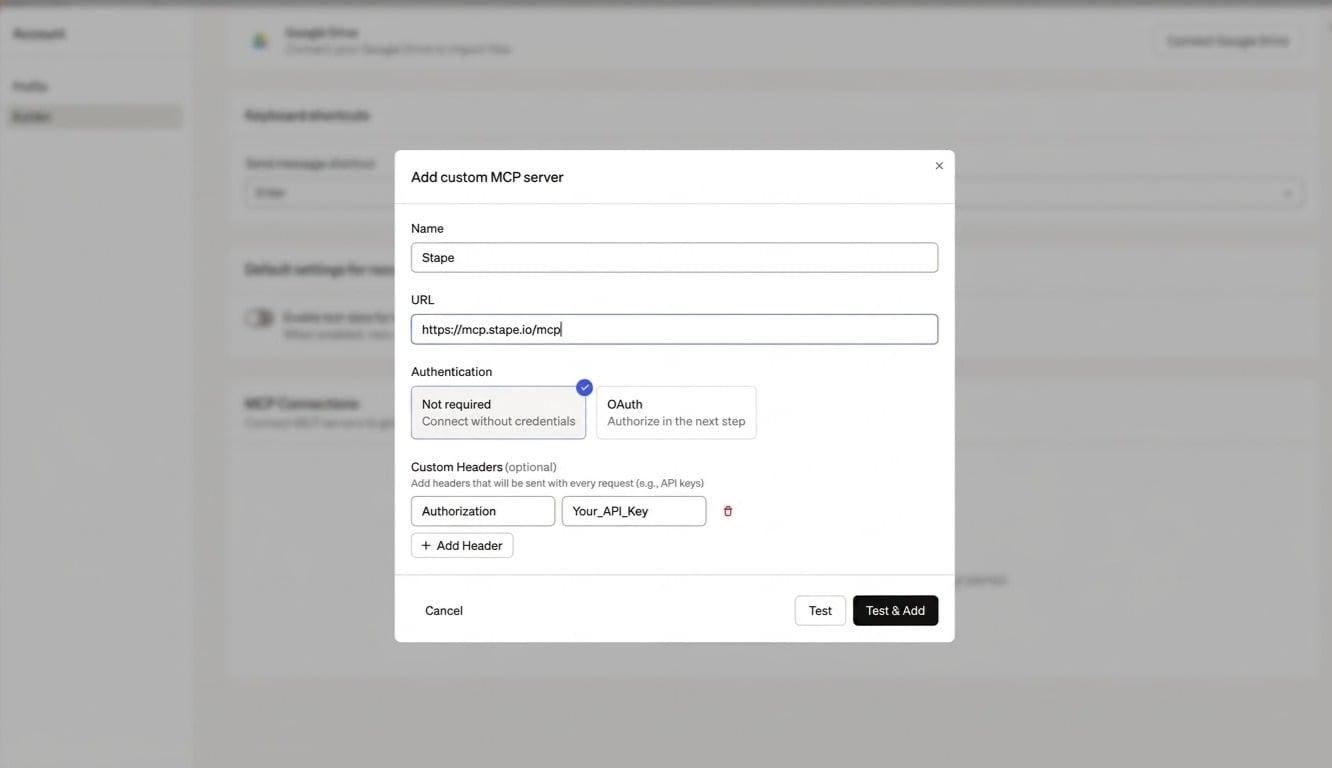
7. To check the connections, ask in the project chat:
Create a web GTM container for this project. Then create a server GTM container and host it on Stape in the EU zone. Configure GA4 server-side and the Facebook pixel <your pixel ID> with CAPI.
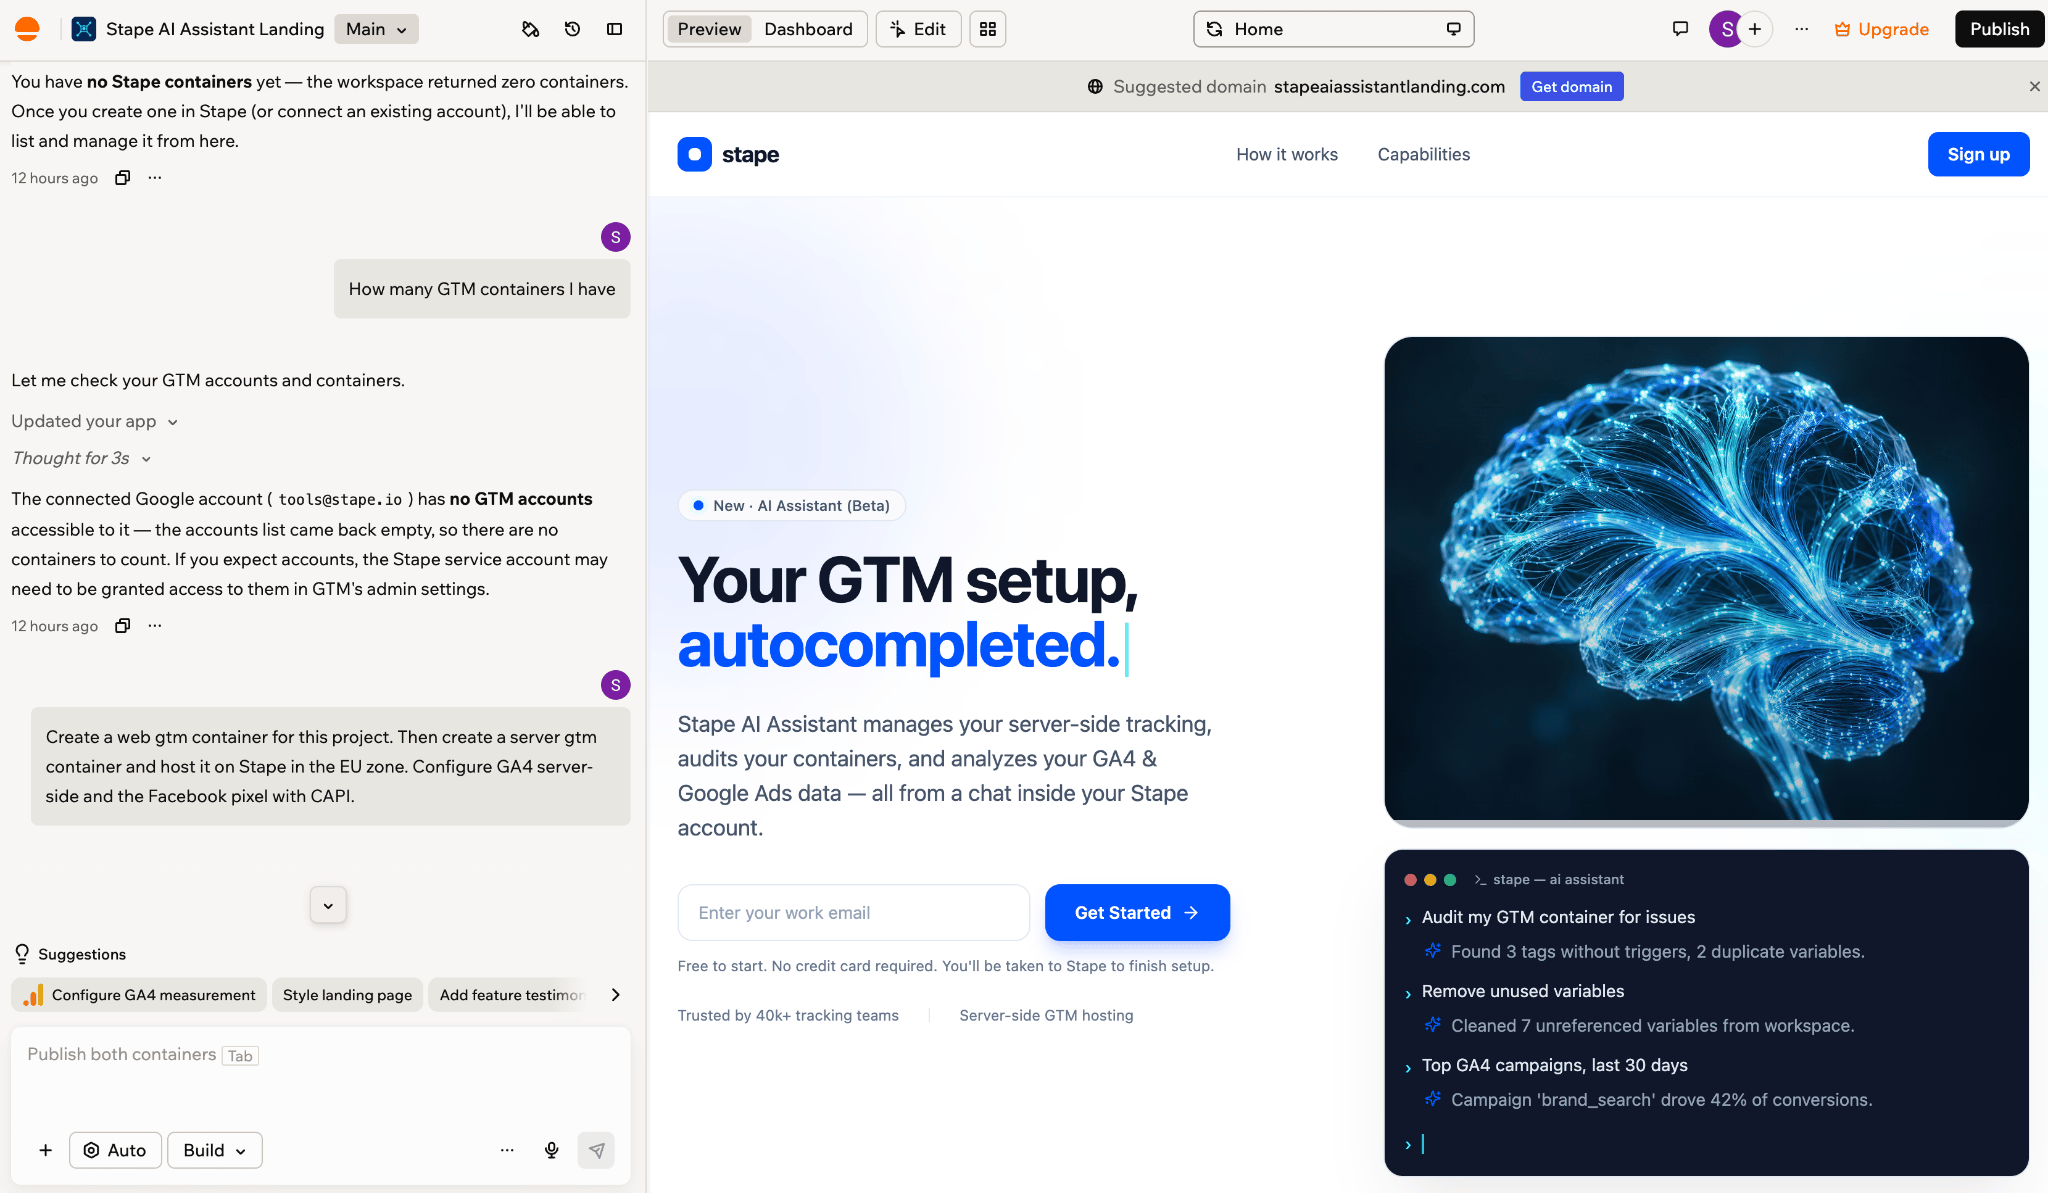
Tip:
You can go to your GTM and Stape accounts and watch how everything appears in real-time.
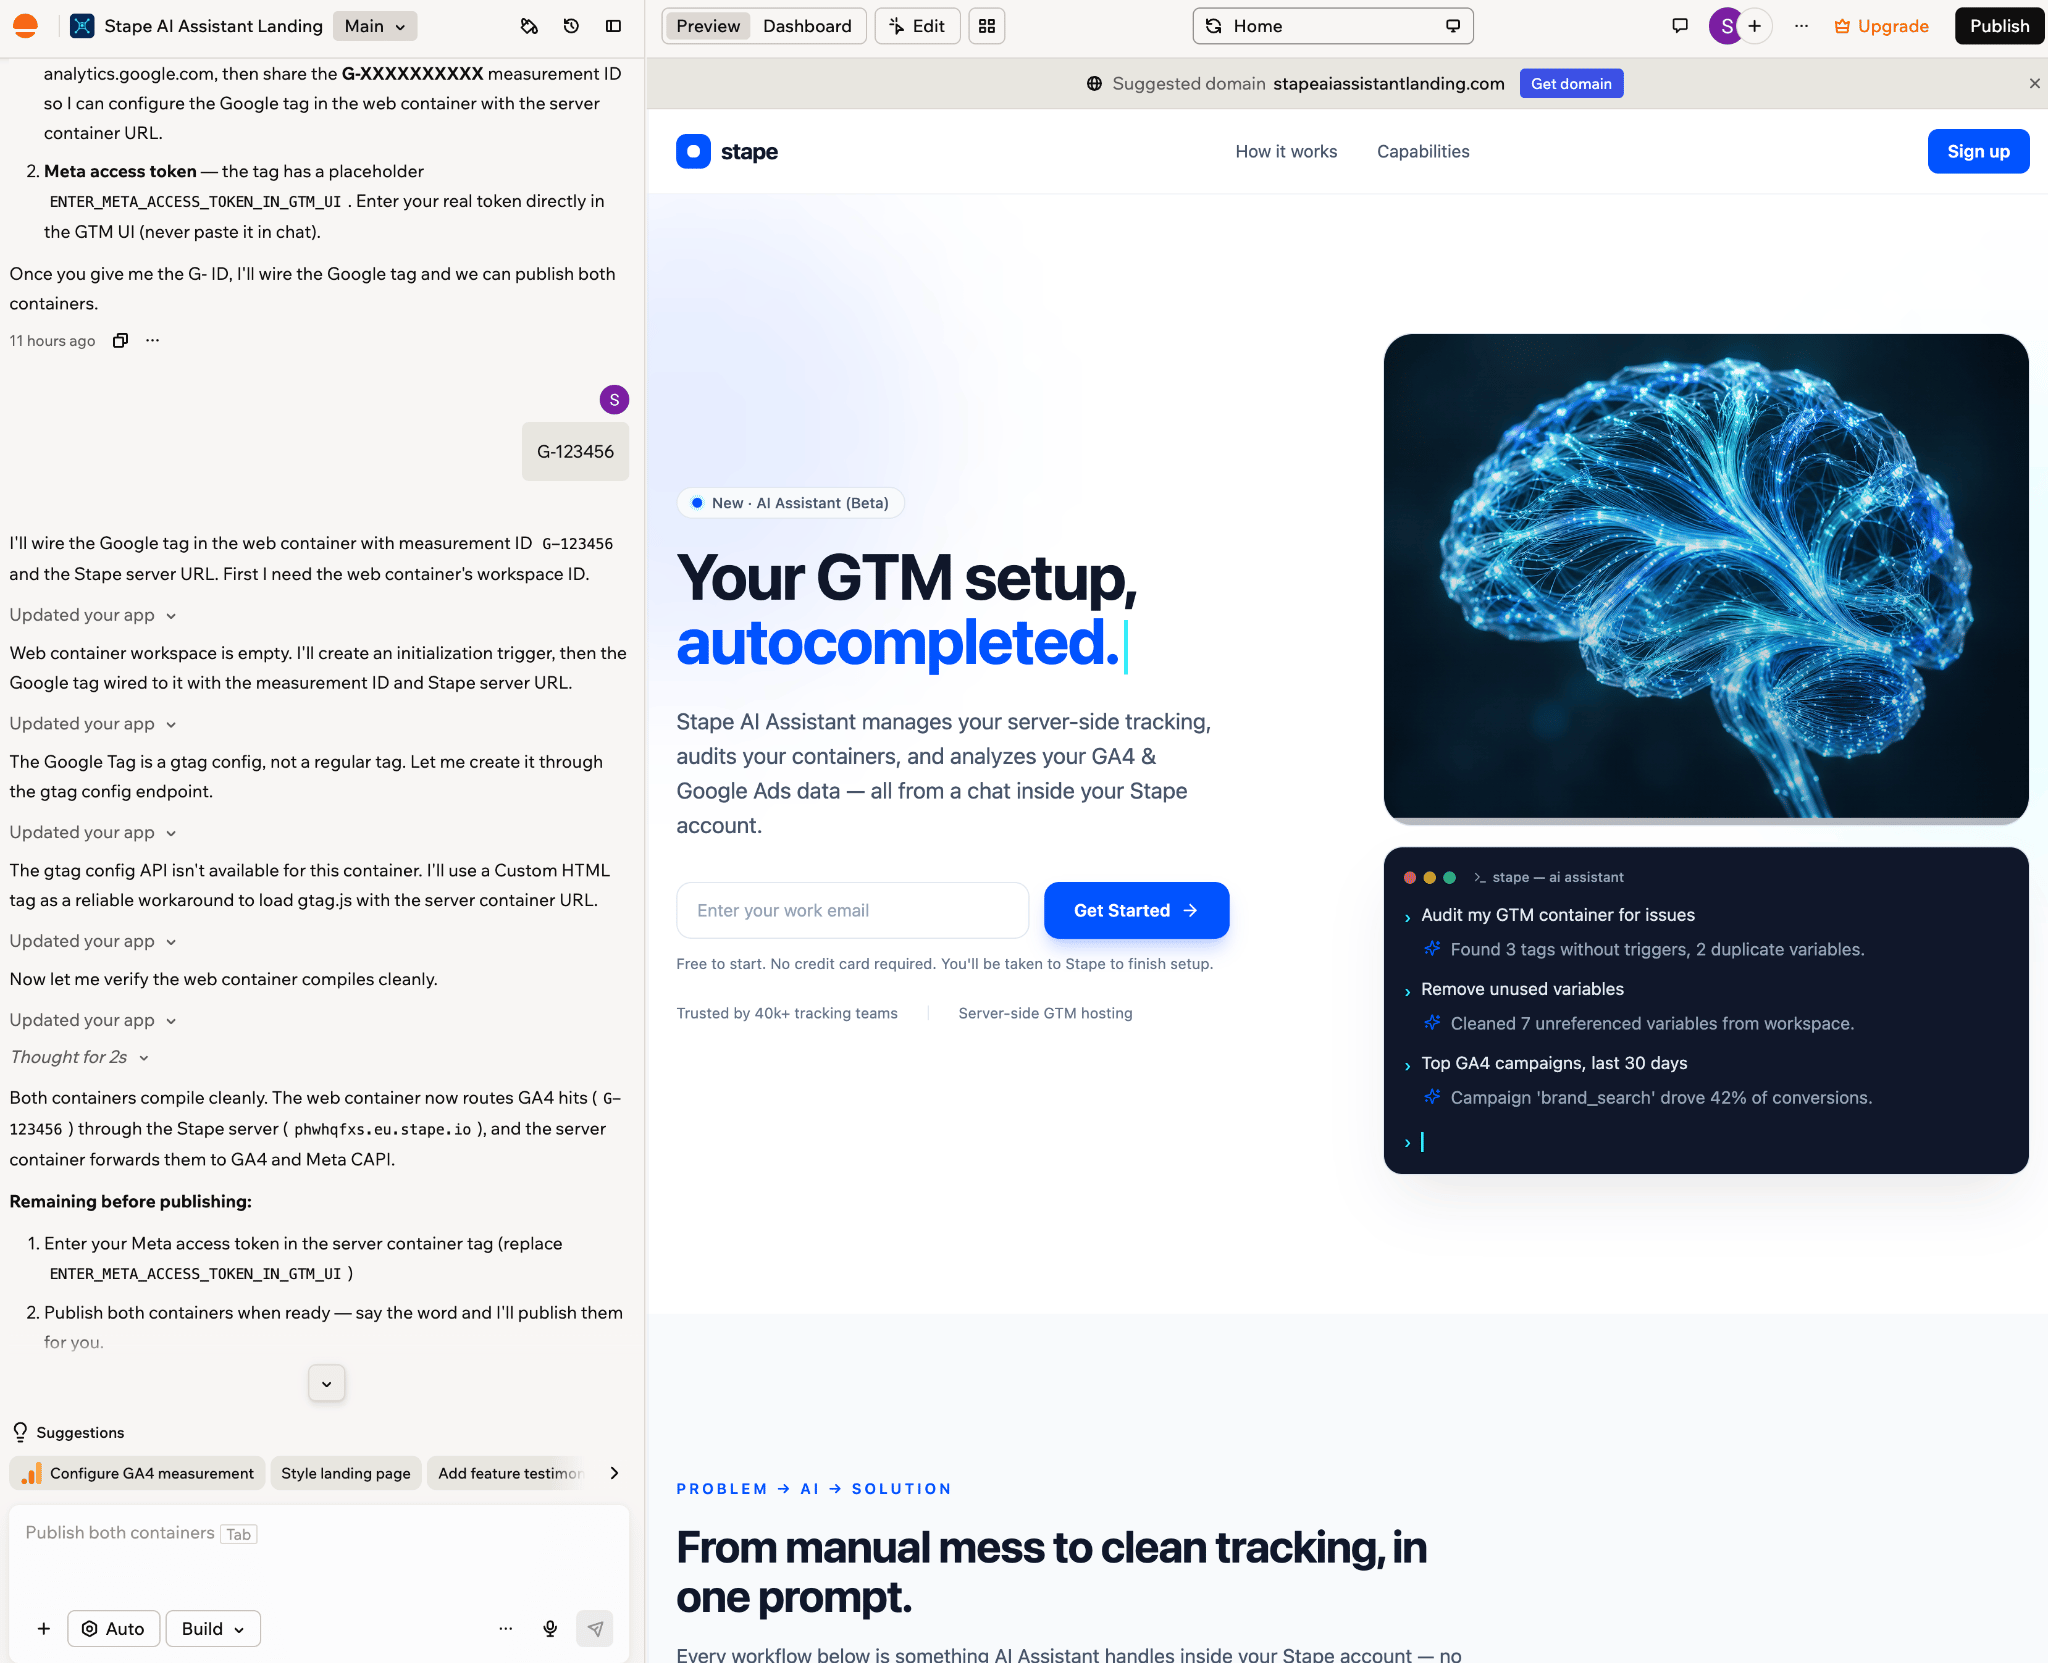
2. Base44 takes a few minutes, then replies with a summary like this:
- Web container ID (GTM-XXXXXXX) and server container ID
- Stape container hosting the sGTM container, with its tagging server URL
- A short list of what needs your input (measurement ID and access token)
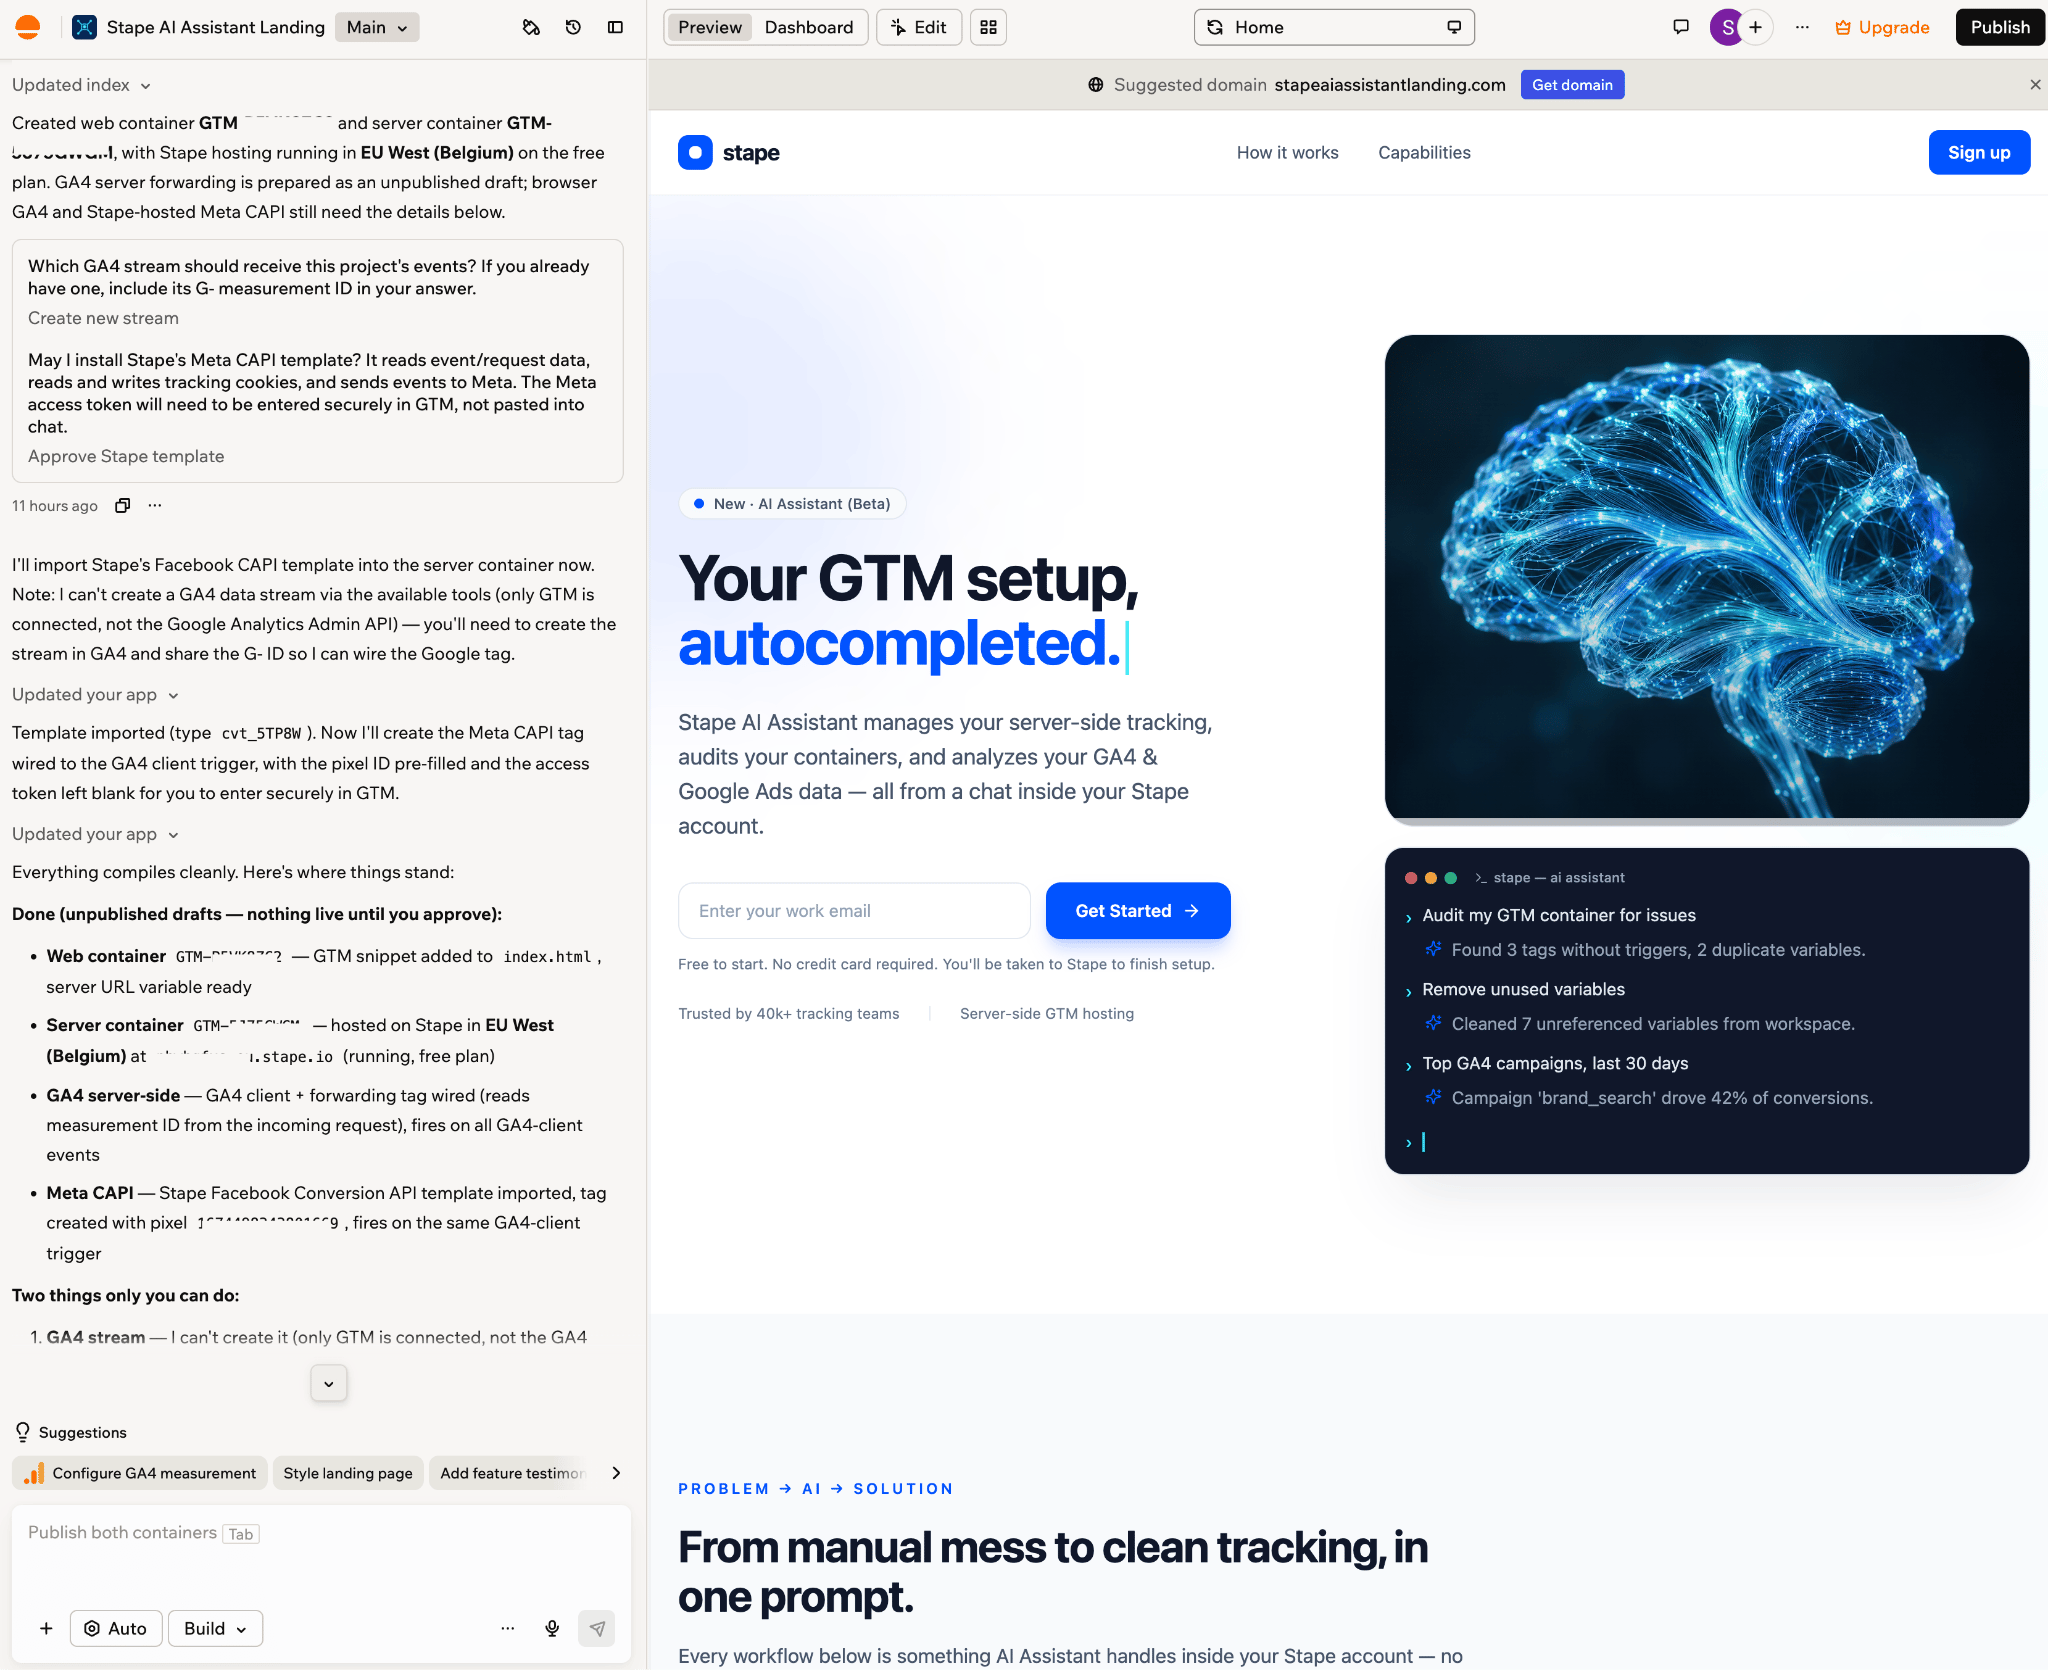
3. Reply with your measurement ID.
Step 3. Add Meta Conversion API Access Token in GTM
Access tokens are sensitive information, and you should add this yourself.
1. Go to Google Tag Manager → your server container.

2. Click Variables → Meta Access Token.
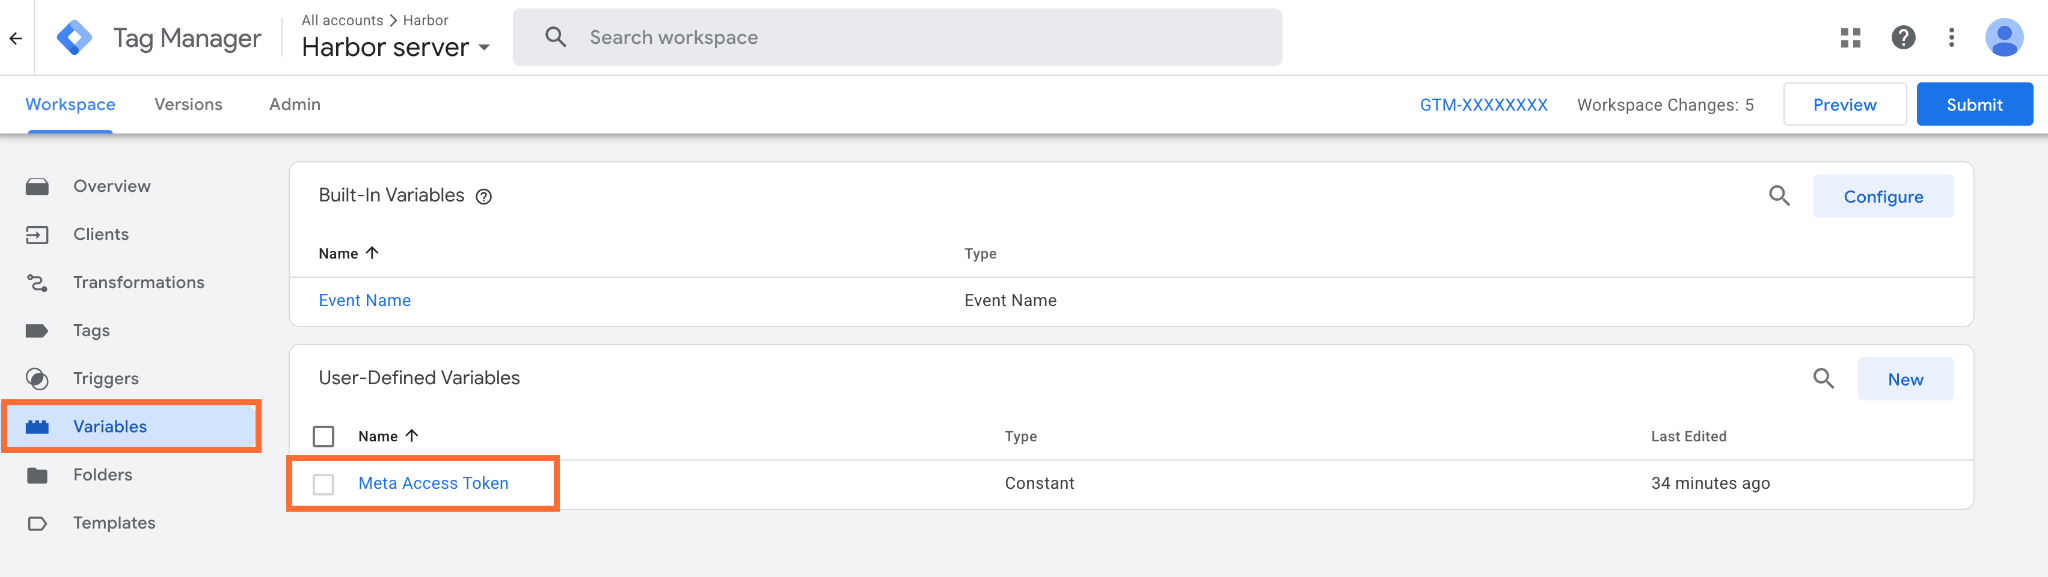
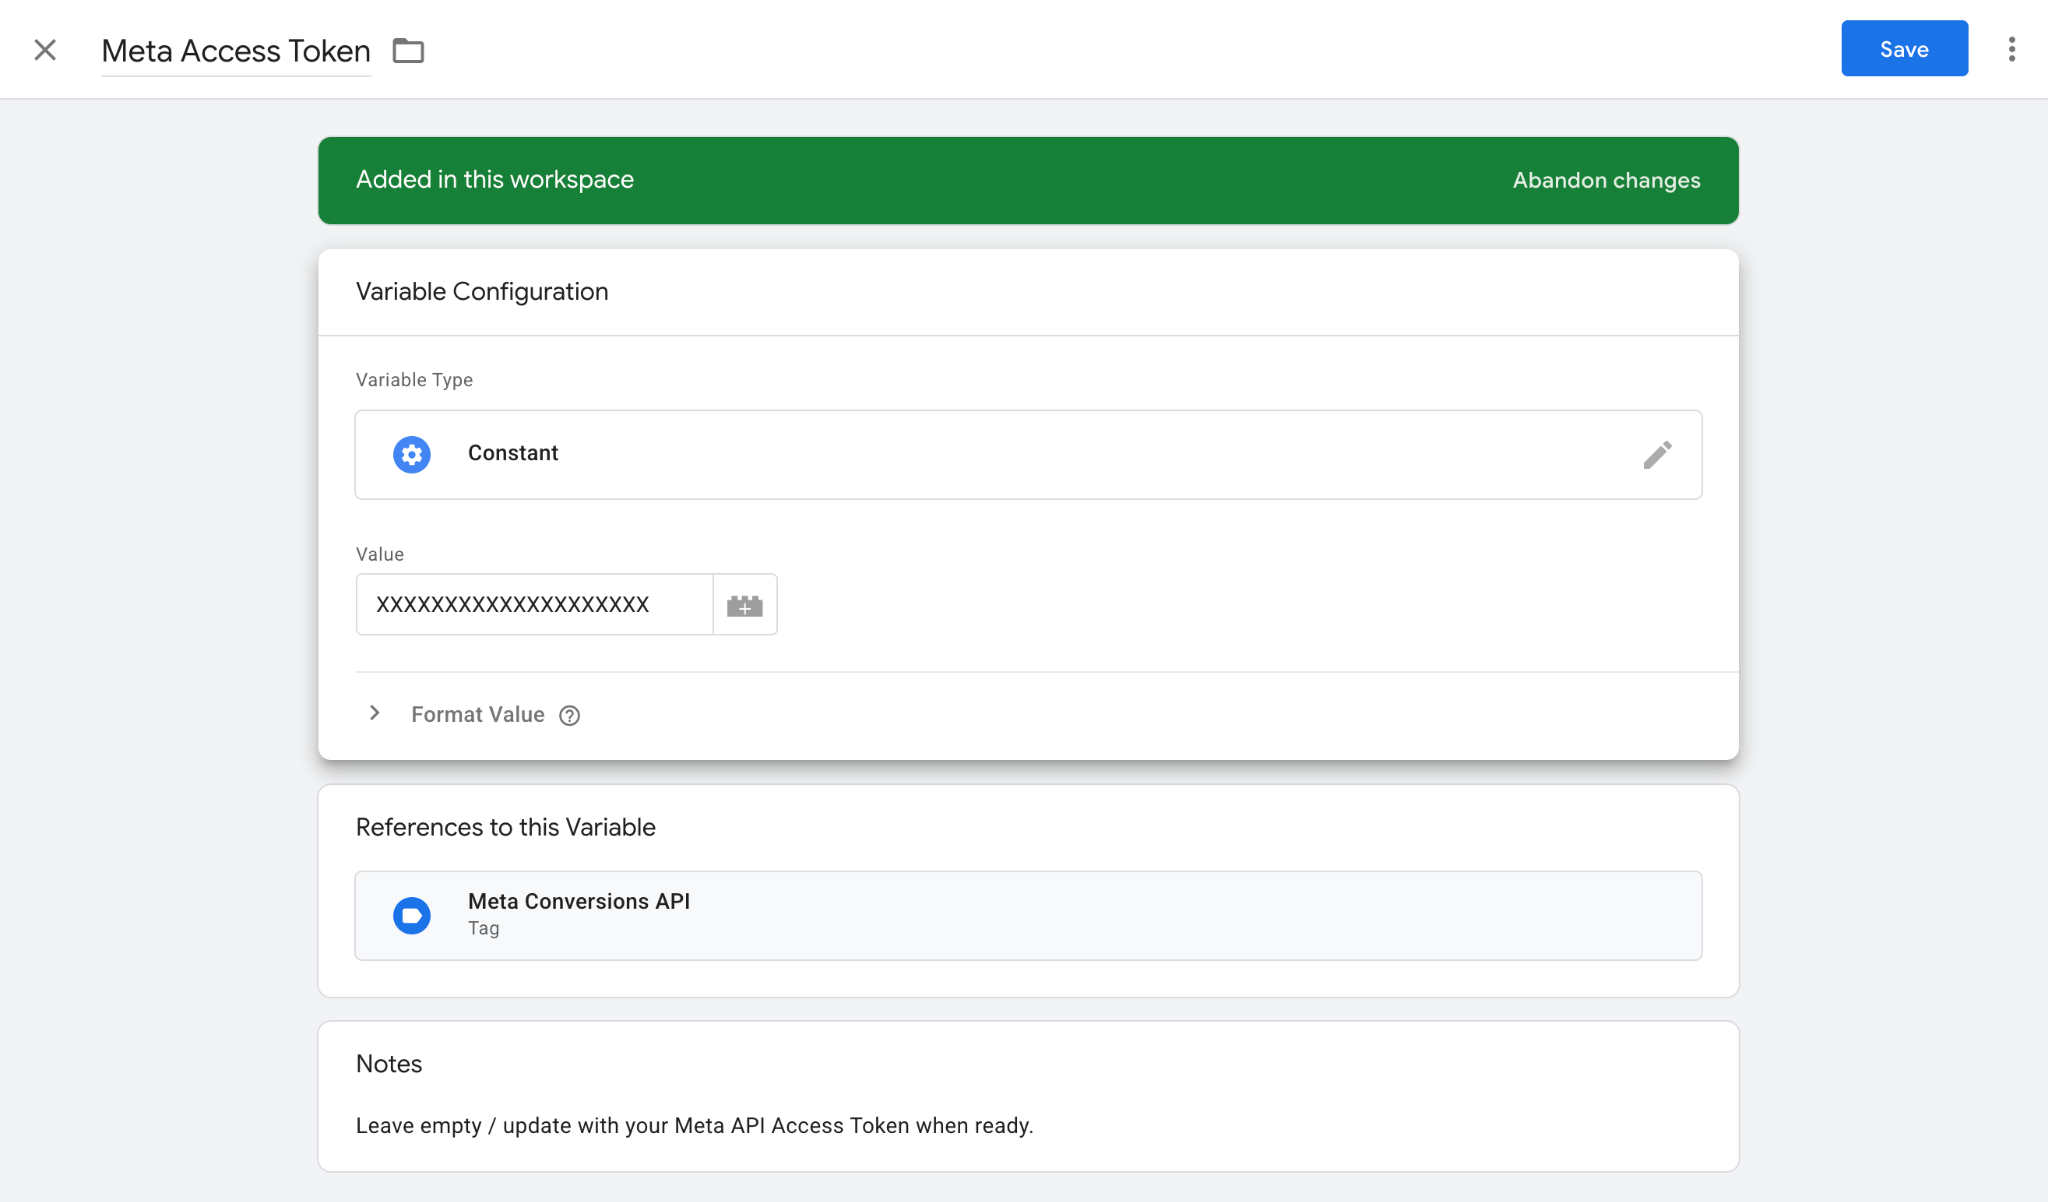
3. Enter the Value that you copied earlier from the Meta Events Manager.
Step 4. Add Google Tag Manager to the Base44 app and publish
1. Now that the containers exist, ask Base44 to connect the app to them and set up some events that you’d like to fire. The following text is an example of what you could ask:
Add my web GTM container to this app, then set up these two things:
1. Track page views. Record a page view when someone opens a page and when they move to another page within the app.
2. Track signups. When someone successfully submits the signup form, record it as a "generate_lead" event. Tag it with the name "waitlist", give each signup a unique ID, and include the person's email.
Send this data to both GA4 and Meta:
- Send it to GA4 through my server container.
- Send it to Meta two ways: once from the browser with the Meta Pixel, and once from the server container with the Meta Conversions API.
- Use the same unique ID in both the browser and the server versions, so Meta counts each signup once instead of twice.
Set everything up, but do not publish the GTM containers.
Here we’re asking Base44 to connect the app to the containers and set up firing events. We’ll need to ask to add a unique event ID. When we track the same conversion in two places, the Meta Pixel in the browser and the Facebook Conversions API on the server, Meta receives two events for one lead. The event_id is how Meta knows they're the same action: when the browser event and the server event carry an identical ID, Meta merges them and counts as one conversion instead of two. This is called event deduplication, and without it your Lead numbers will inflate. For more information about deduplication you can read How to set up Facebook event deduplication in Google Tag Manager.
When passing personal data to ad platforms, check whether it’s acceptable for your business and you have a legal basis and consent for it. You can include that data to raise Event Match Quality (EMQ). The best way to do it is to pass the values to the server container and let the Meta Conversions API tag hash them (SHA-256) before they reach Meta. The Meta Conversions API tag automatically hashes the applicable parameters.
2. On the top-right of the screen, click Publish to publish your app.
Step 5. Add a custom subdomain (highly recommended)
By default, your server container runs on a Stape domain. Routing it through a custom subdomain of your own website (such as metrics.yourdomain.com) incorporates the tagging server directly into your site's traffic flow rather than treating it as a third-party service.
You get two benefits from this:
- Extended cookie lifetimes – browsers heavily restrict cookies created through client-side scripts – for example, Safari’s ITP caps them at just 7 days, causing returning visitors to be misidentified as new users. When your custom tagging server sets cookies under your own subdomain, they become true first-party cookies that last significantly longer, ensuring far more reliable user tracking and accurate attribution windows.
- Higher tracking accuracy and fewer blocked requests – data sent through your custom subdomain blends right in with regular site activity. As a result, ad blockers and strict browser privacy filters are far less likely to drop these requests, ensuring a significantly higher percentage of your conversion events successfully reach GA4 and Meta.
Before getting started, make sure you know who manages your domain's DNS records (Base44 itself, or the external registrar). The Stape MCP server handles the Stape side of the setup by linking the domain to your container and generating the required DNS entries. If your DNS is managed externally (such as through Cloudflare or your domain registrar), you’ll just need to add those records there manually.
To kick off the process, send this quick prompt in your project chat and follow the conversation:
Using Stape connector, connect a custom subdomain.
Once you’ve added the records at your DNS provider, head back to the chat and ask it to verify the domain status in Stape and update the server container URL inside your web GTM container. Finally, hit publish on your web container again once the domain verification is complete.
Testing
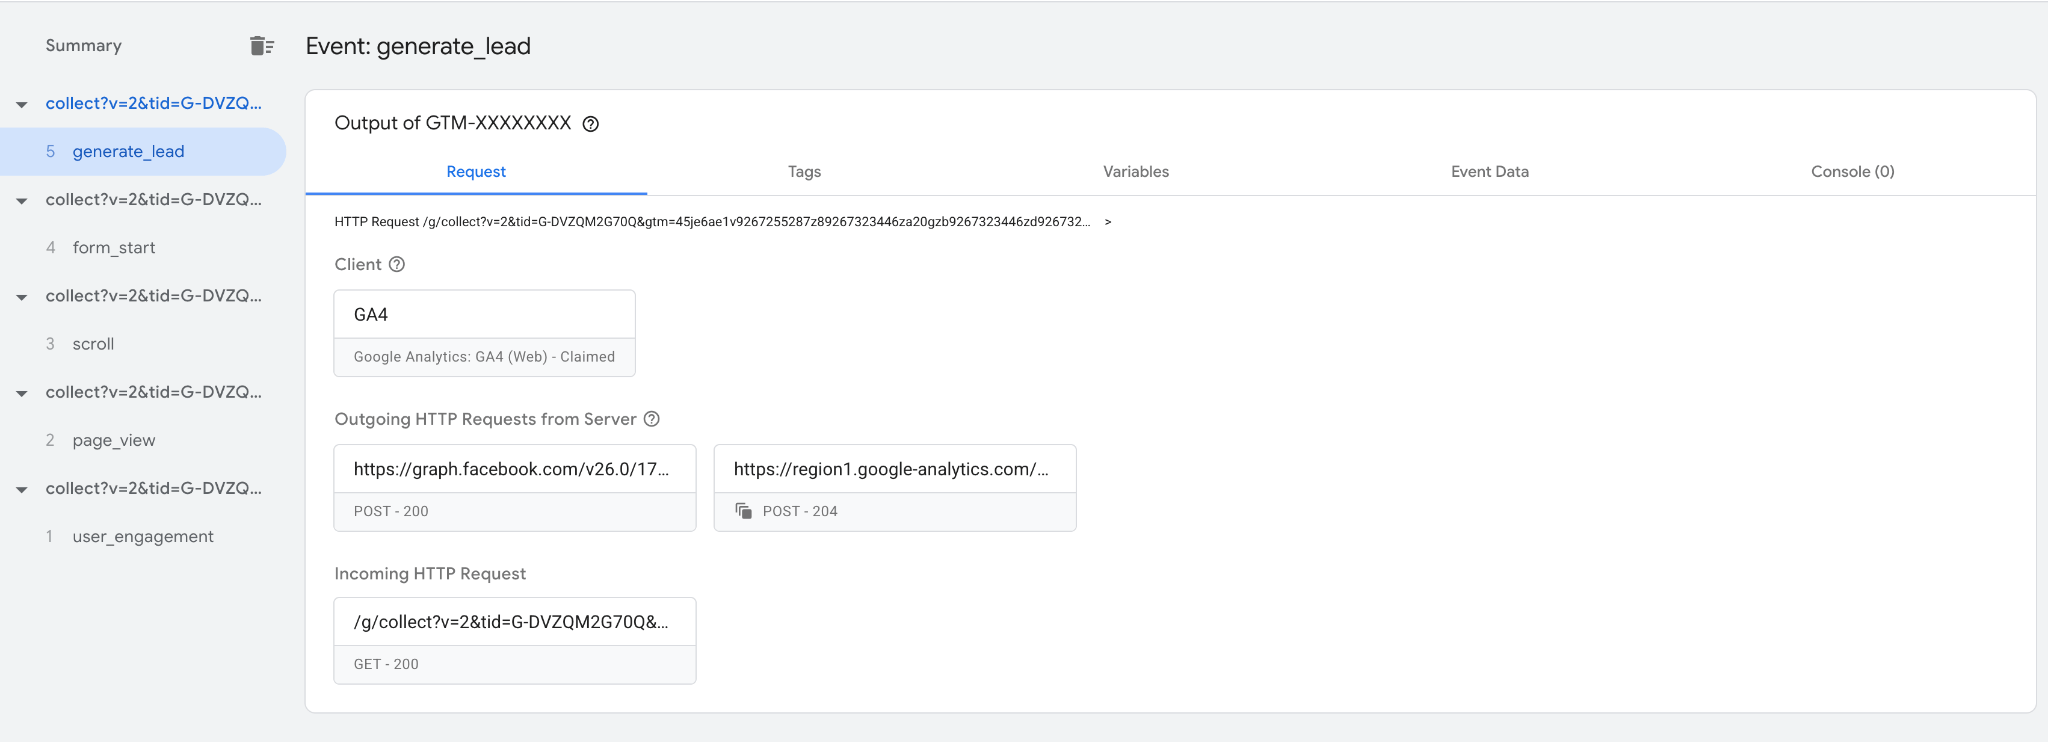
1. In Google Tag Manager, go to your server container, and click Preview. Then, go to your web container, and click Preview as well. Enter the live site URL when asked. You’ll get a new screen with the Tag Assistant.
2. In the Tag Assistant screen do some actions on your site that would trigger the events. In web preview, your event should appear, click on it to check whether GA4 and Meta tags have successfully fired.
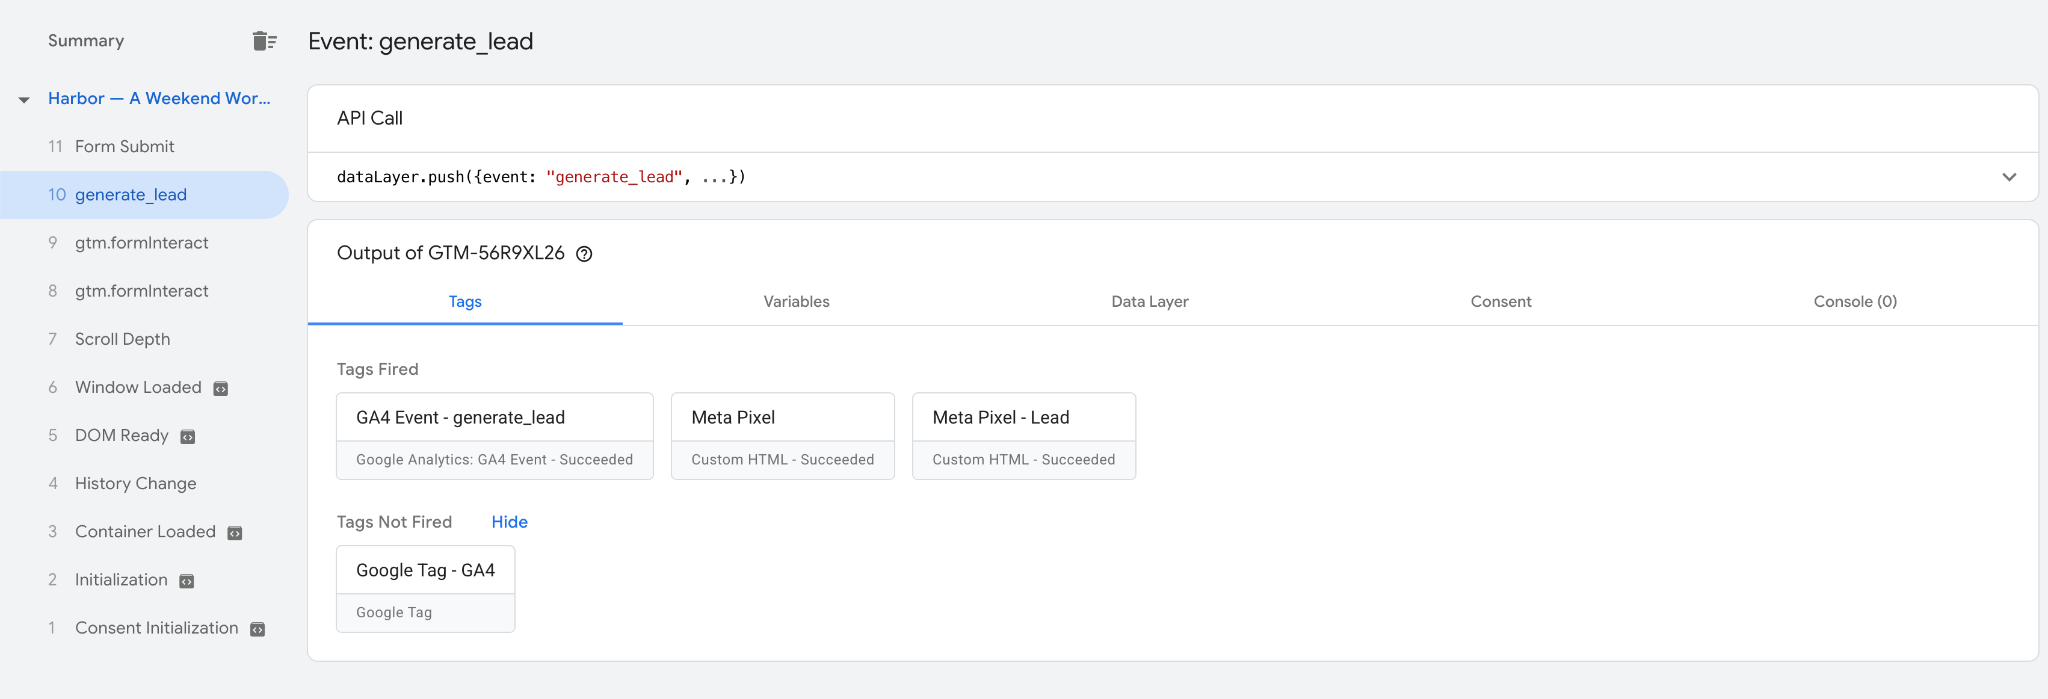
3. In the server container preview, open your event. Check the incoming request from the web container and the outgoing HTTP requests. Everything should have 200 status.
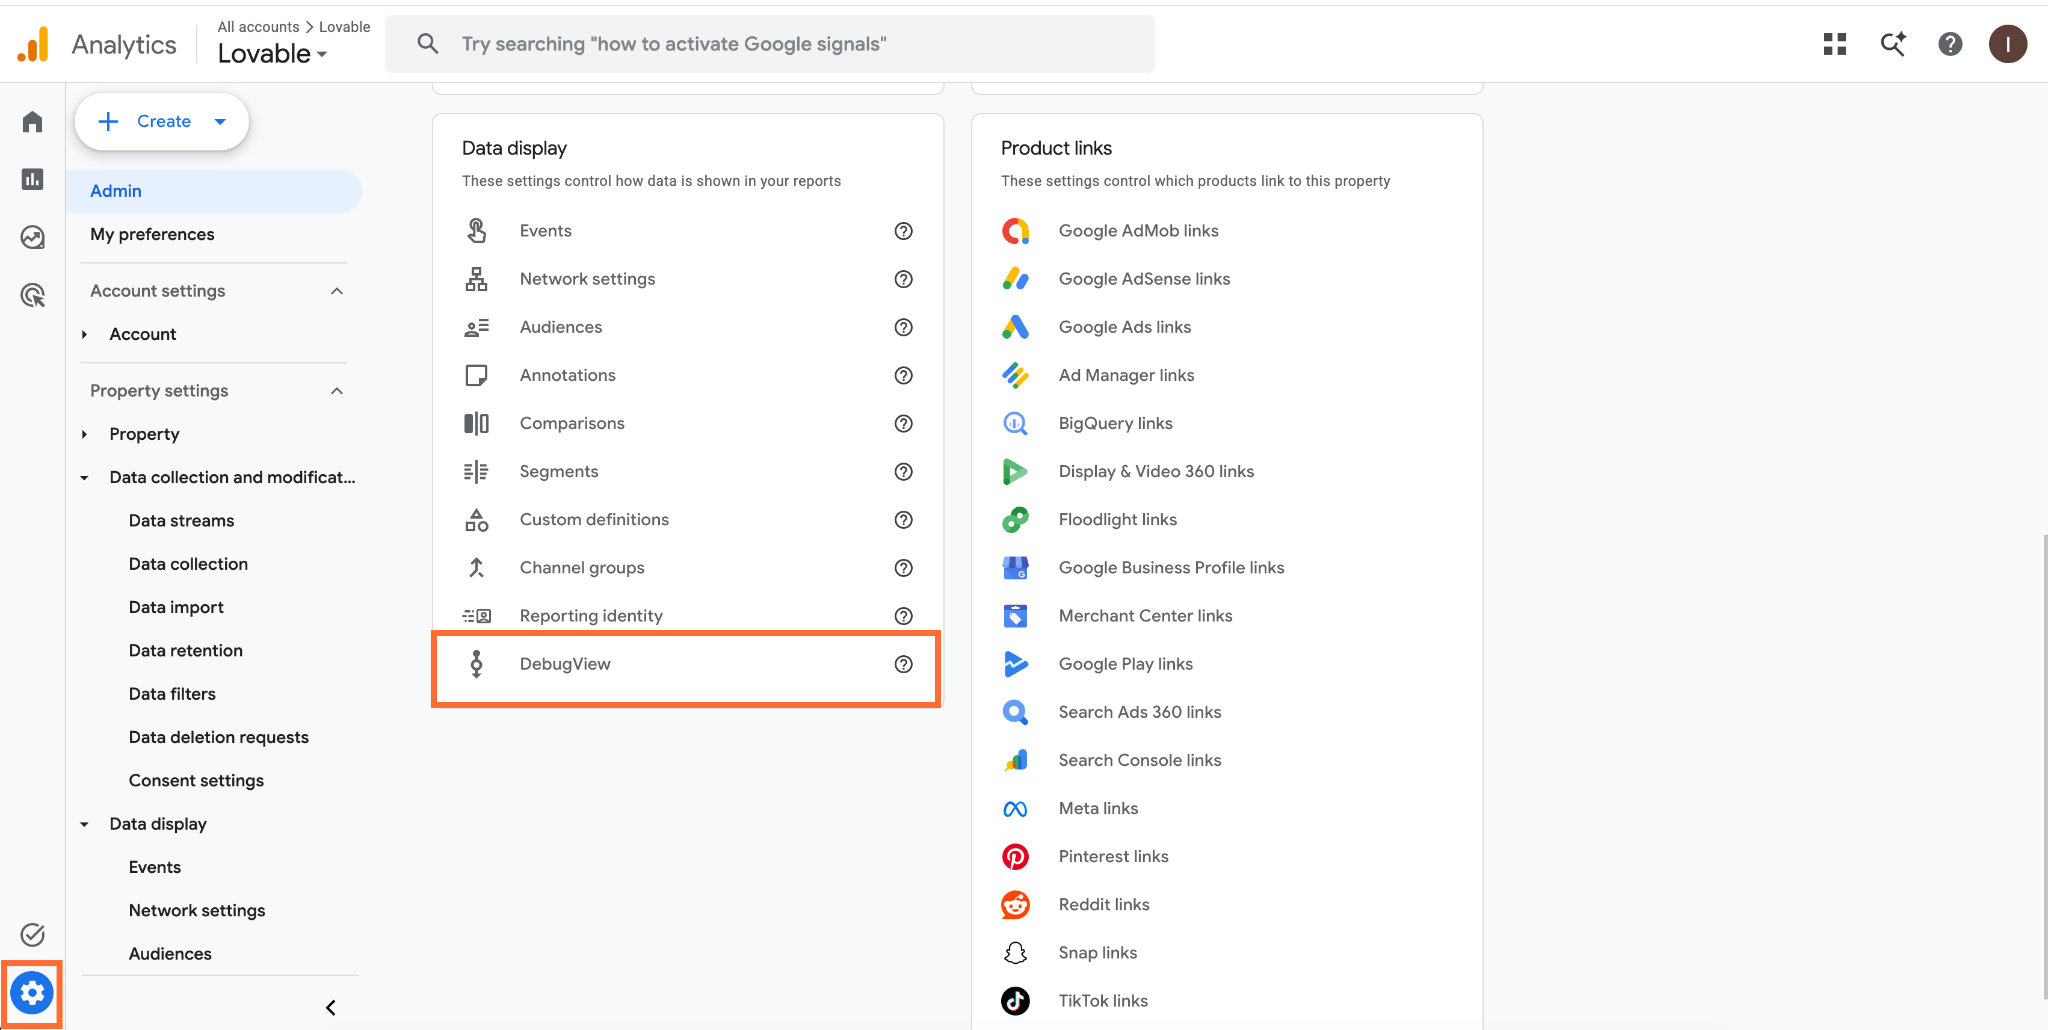
4. Go to GA4 → Admin → Debug view.
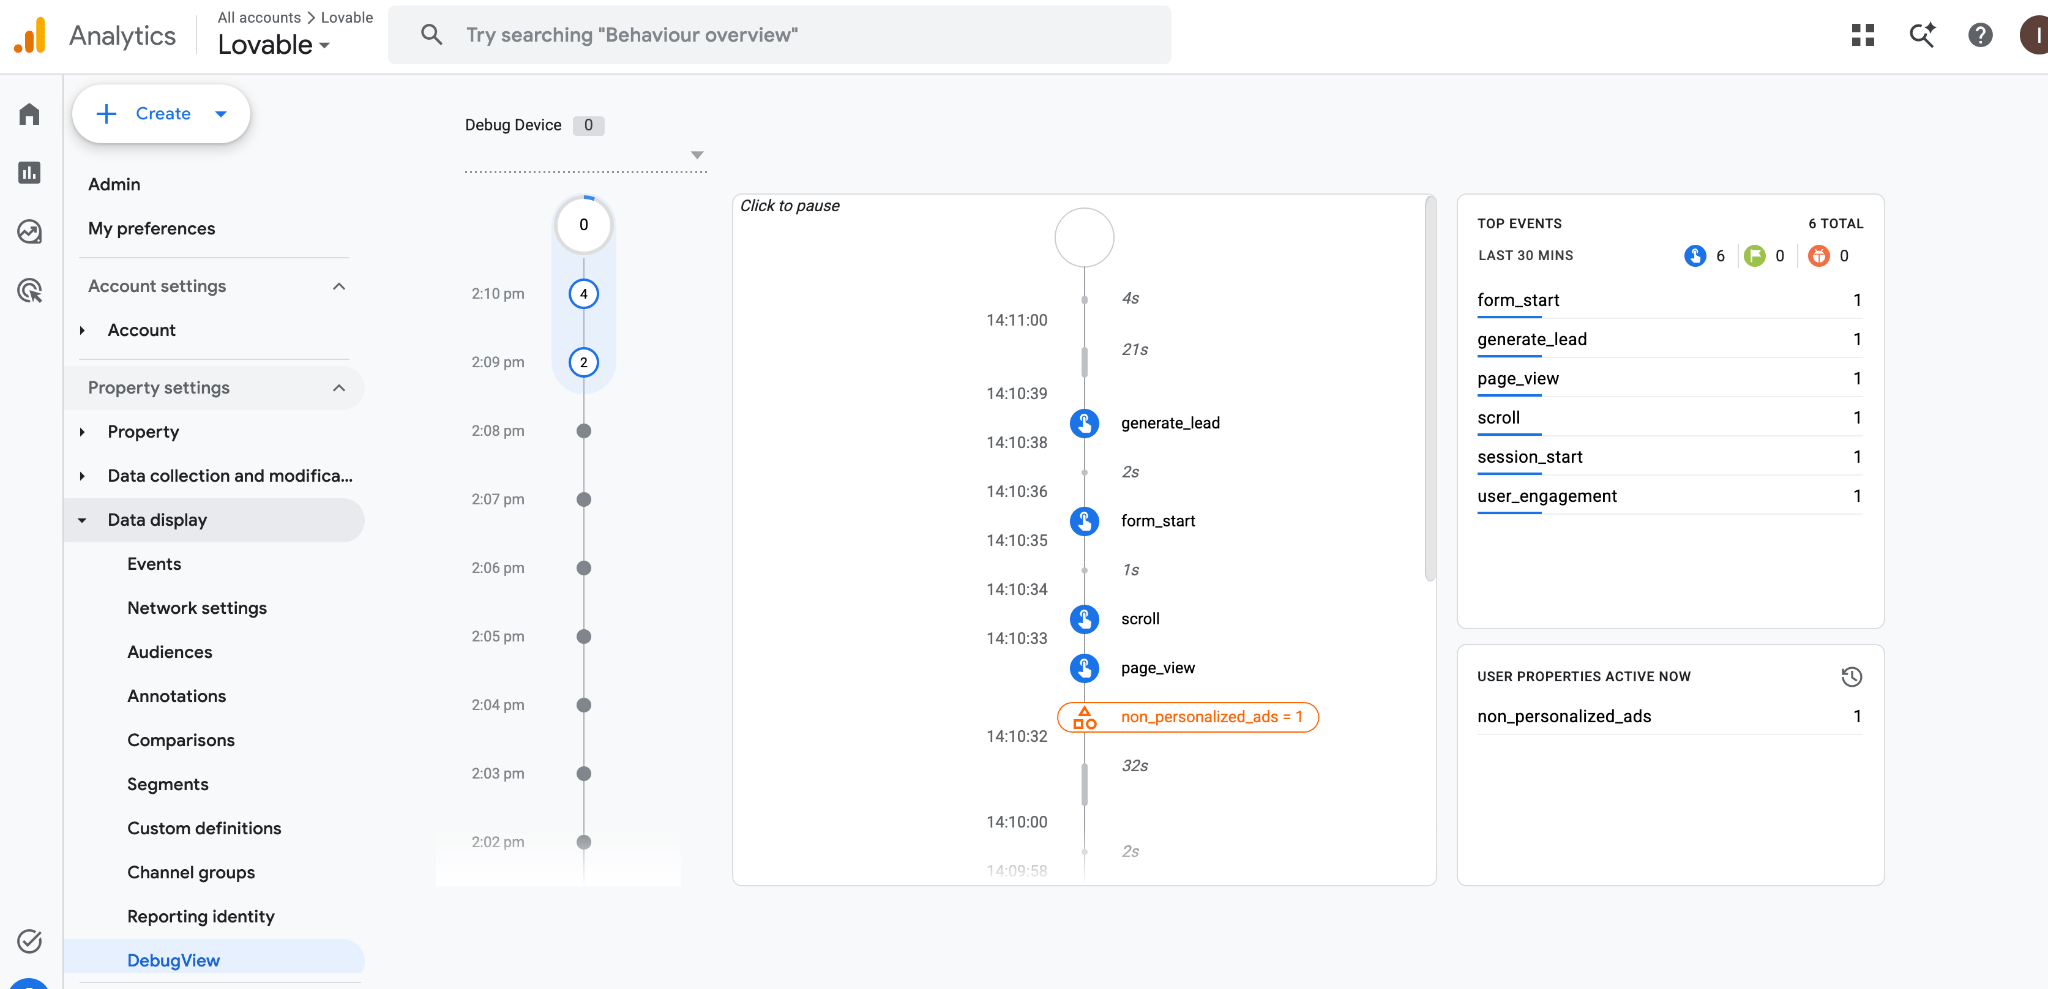
5. You should see your events.
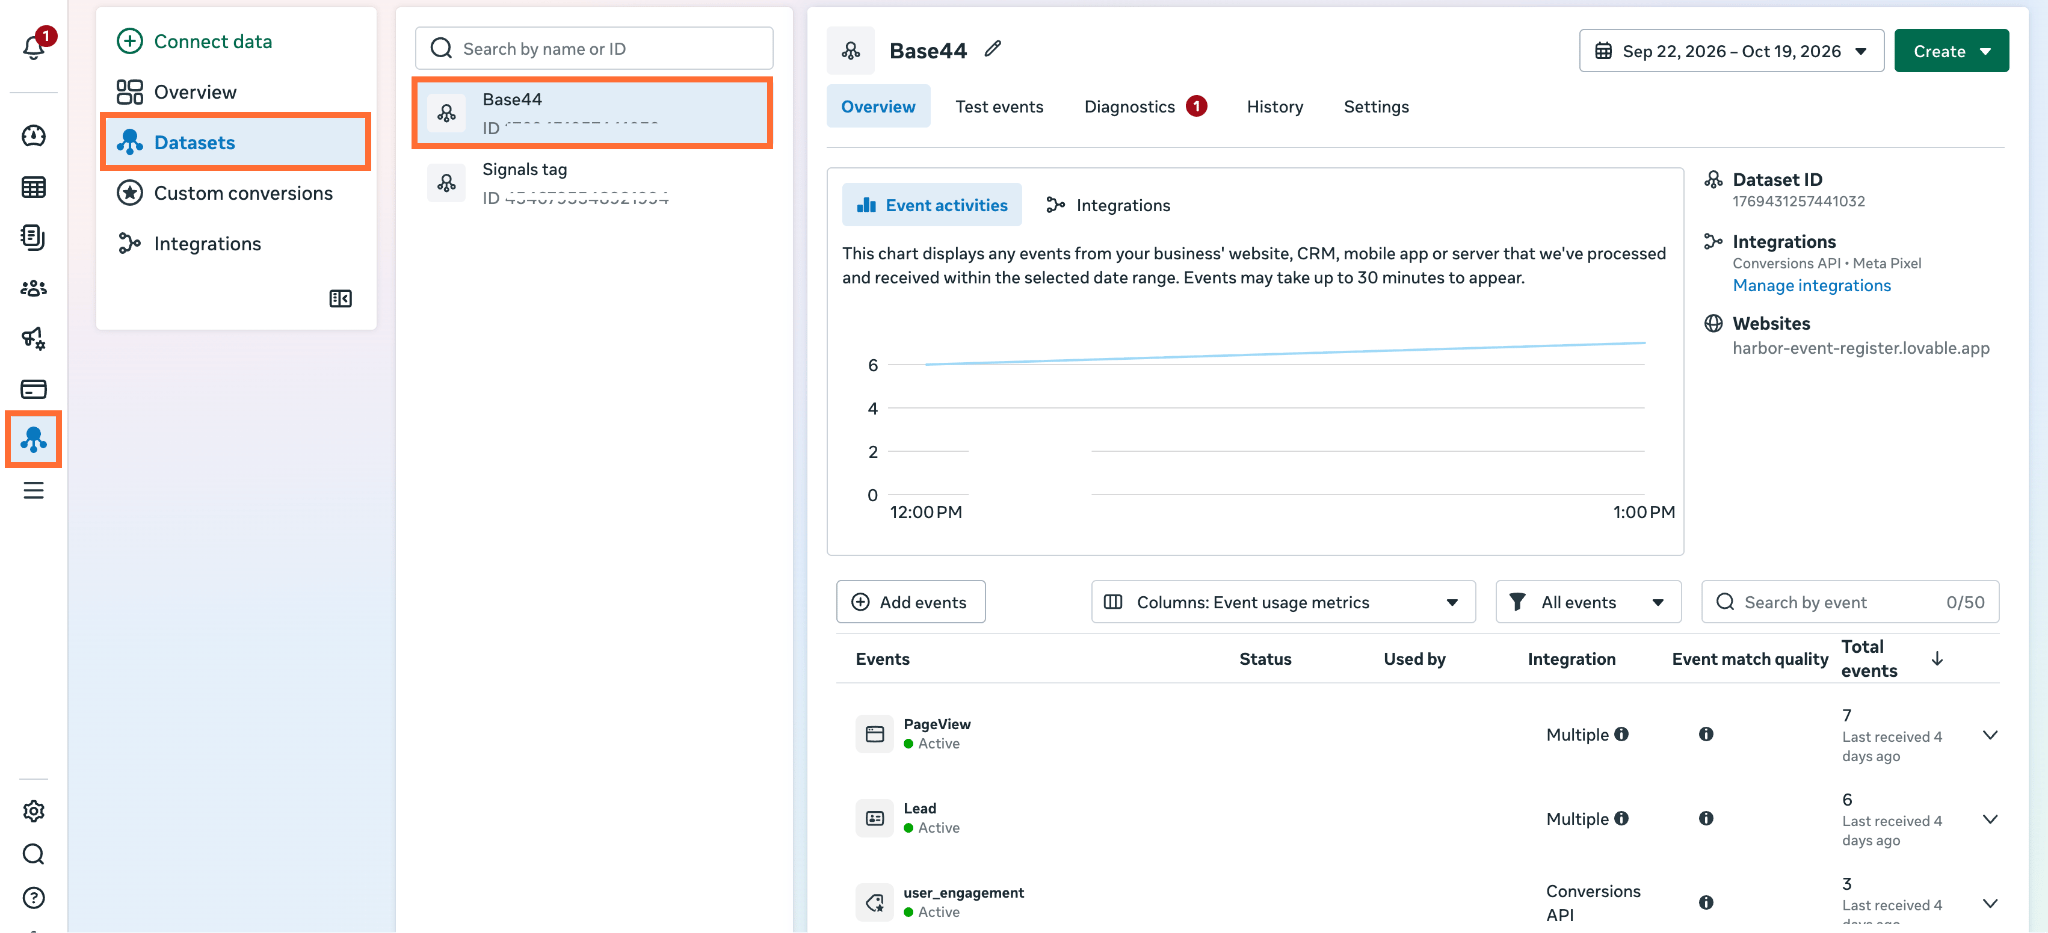
6. Go to Meta Events Manager → Datasets → select your dataset. You should see your events.
7. Go back to Base44, and ask to publish the GTM containers:
Publish both GTM containers.
Tips:
- The Stape GTM Helper Chrome extension makes requests in sGTM preview easier to read, which helps when you're checking parameters.
- Once the basic setup works, an upgrade is worth considering: Stape power-ups such as Cookie Keeper or for longer cookie lifetimes, or Custom Loader for reducing ad blocker impact. You could say this:
Using the Stape connector, enable the Custom Loader, select 'Other' as the platform, enter web GTM container ID, and add the generated code to this project.
FAQ
Final words
Even though Base44 greatly speeds up app development, setting up analytics and tracking might slow that progress. Since Stape and GTM have now been incorporated directly into the Base44 chat interface, configuring your analytics becomes part of a natural conversation. All you have to do is describe your requirements in order to set up GA4, Meta Pixel, and the Conversions API.
Beyond the initial setup, the chat assistant can keep refining your tracking architecture. You can easily add new conversion events for forms or checkout flows and integrate additional marketing platforms.
Want to start on the server side?
Try for freeRecommended for you
Blog
AI in Google Tag Manager: give it access, not control
Learn how to safely connect AI to Google Tag Manager with six key controls – from permission scoping to consent verification – before you publish live.
Aug 11, 2026

Comments