Set up Google Tag Manager in 5 minutes
Google Tag Manager is a powerful tool for managing all your tracking tags in one place — whether you're running a basic web setup or a more advanced server-side configuration. Getting started comes down to a few straightforward steps:
- Sign in to tagmanager.google.com and create a GTM account and container.
- Accept the data processing terms.
- Add the GTM code snippets to your website's head and body sections.
- Configure your tags, triggers, and variables inside the container.
- Test your setup using GTM Preview and submit the changes.
The full detailed guide with step-by-step instructions for both web and server container setups is available further in this article. And if you're looking to speed things up, also check out the Setup Assistant, a free tool developed by Stape that automatically adds pre-built tracking templates to your GTM containers based on the platforms you select.
What is Google Tag Manager?
Google Tag Manager (GTM) is a tag management solution developed by Google that makes it easier to handle tracking codes on your website. It allows you to manage all your tags in one centralized interface. Using GTM eliminates the need for adding code manually to your website's HTML, making it simpler to manage the data tracking process.
Key Google Tag Manager concepts
Containers
A container is a small piece of code that you add to your website. It's responsible for loading all the tags you configure in the Google Tag Manager interface.
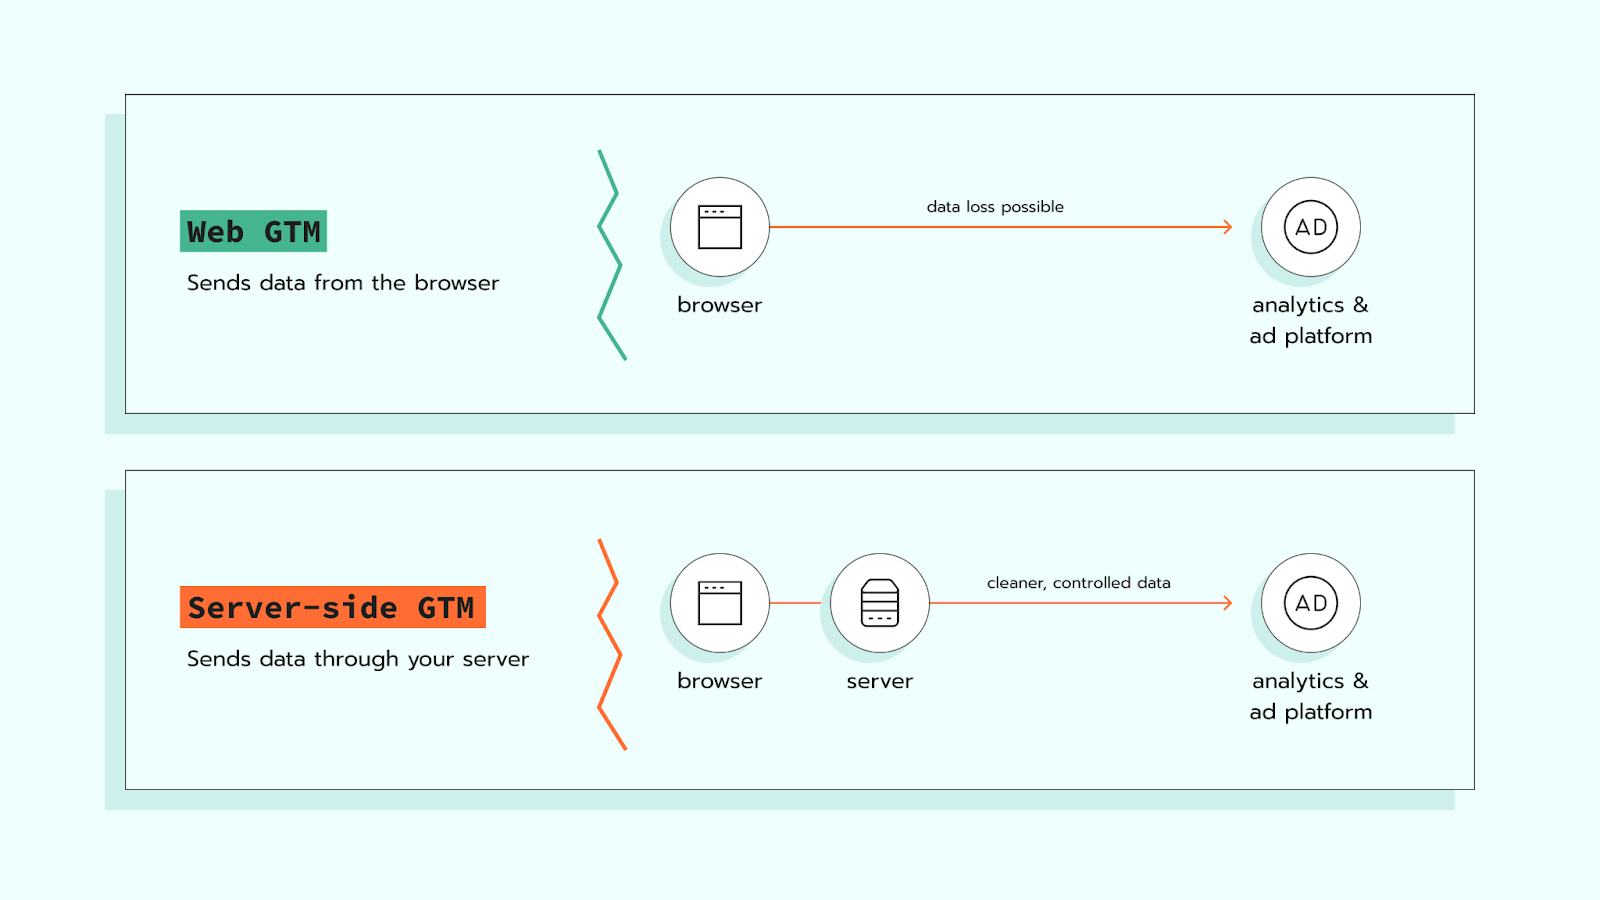
There are two types of containers in GTM - web and server. A web and a server GTM containers are both used for managing tracking tags, but they operate in different ways. The key difference lies in where the processing of data occurs: in the user's browser (client-side) or on a cloud server (server-side).
Web GTM runs directly in a visitor's browser. When someone lands on your site, their browser loads tracking scripts such as Google Analytics, Meta Pixel, or TikTok tags. Each of these scripts then sends data straight to its respective platform. The benefit of this method is that it is fast to set up. The drawback is its limitations. They include blocking or restricting tracking codes by ad blockers and browser restrictions (such as ITPs). This leads to data loss.
Server GTM sends events to a cloud server where your GTM server container is hosted. From there, you can clean, filter, or enrich the data before forwarding it to each platform. This reduces data loss, bypasses browser restrictions, and limits direct exposure to third-party scripts.
Server-side tracking doesn't fully replace browser tracking. The browser still collects most of the data; the difference is that it passes through your server first, ensuring higher data quality and secure delivery.
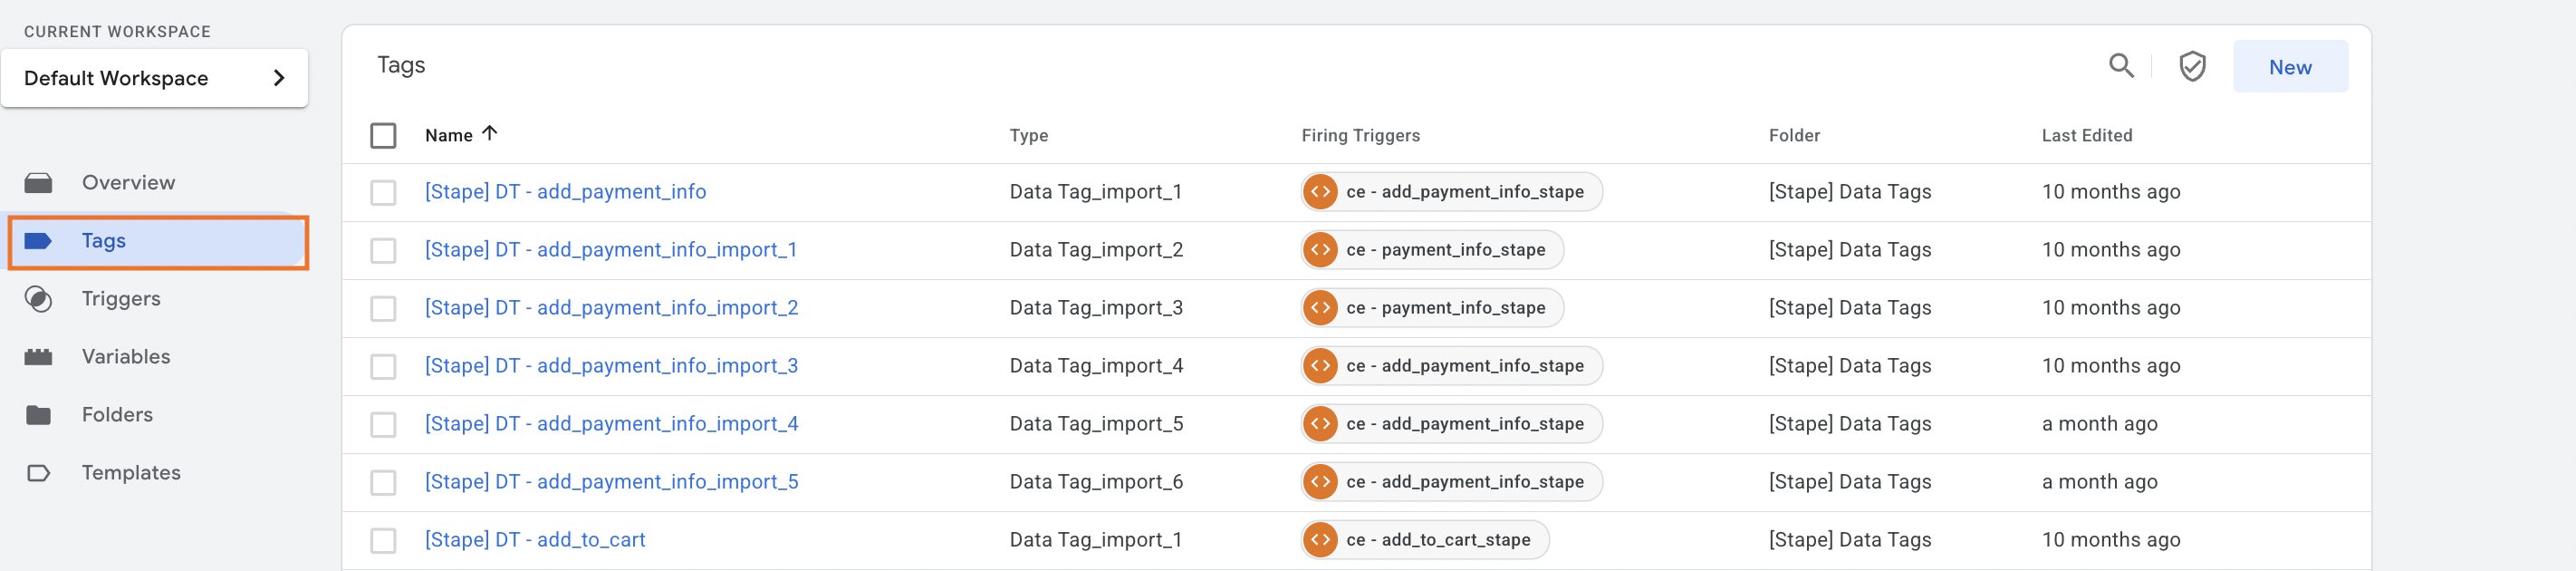
Tags
A tag is a piece of code that transmits data to other platforms (such as Google Analytics 4, Meta, Google Ads, TikTok, etc.). The purpose of tags is to capture an event data object, format it appropriately, and then send it to the designated platform's servers.
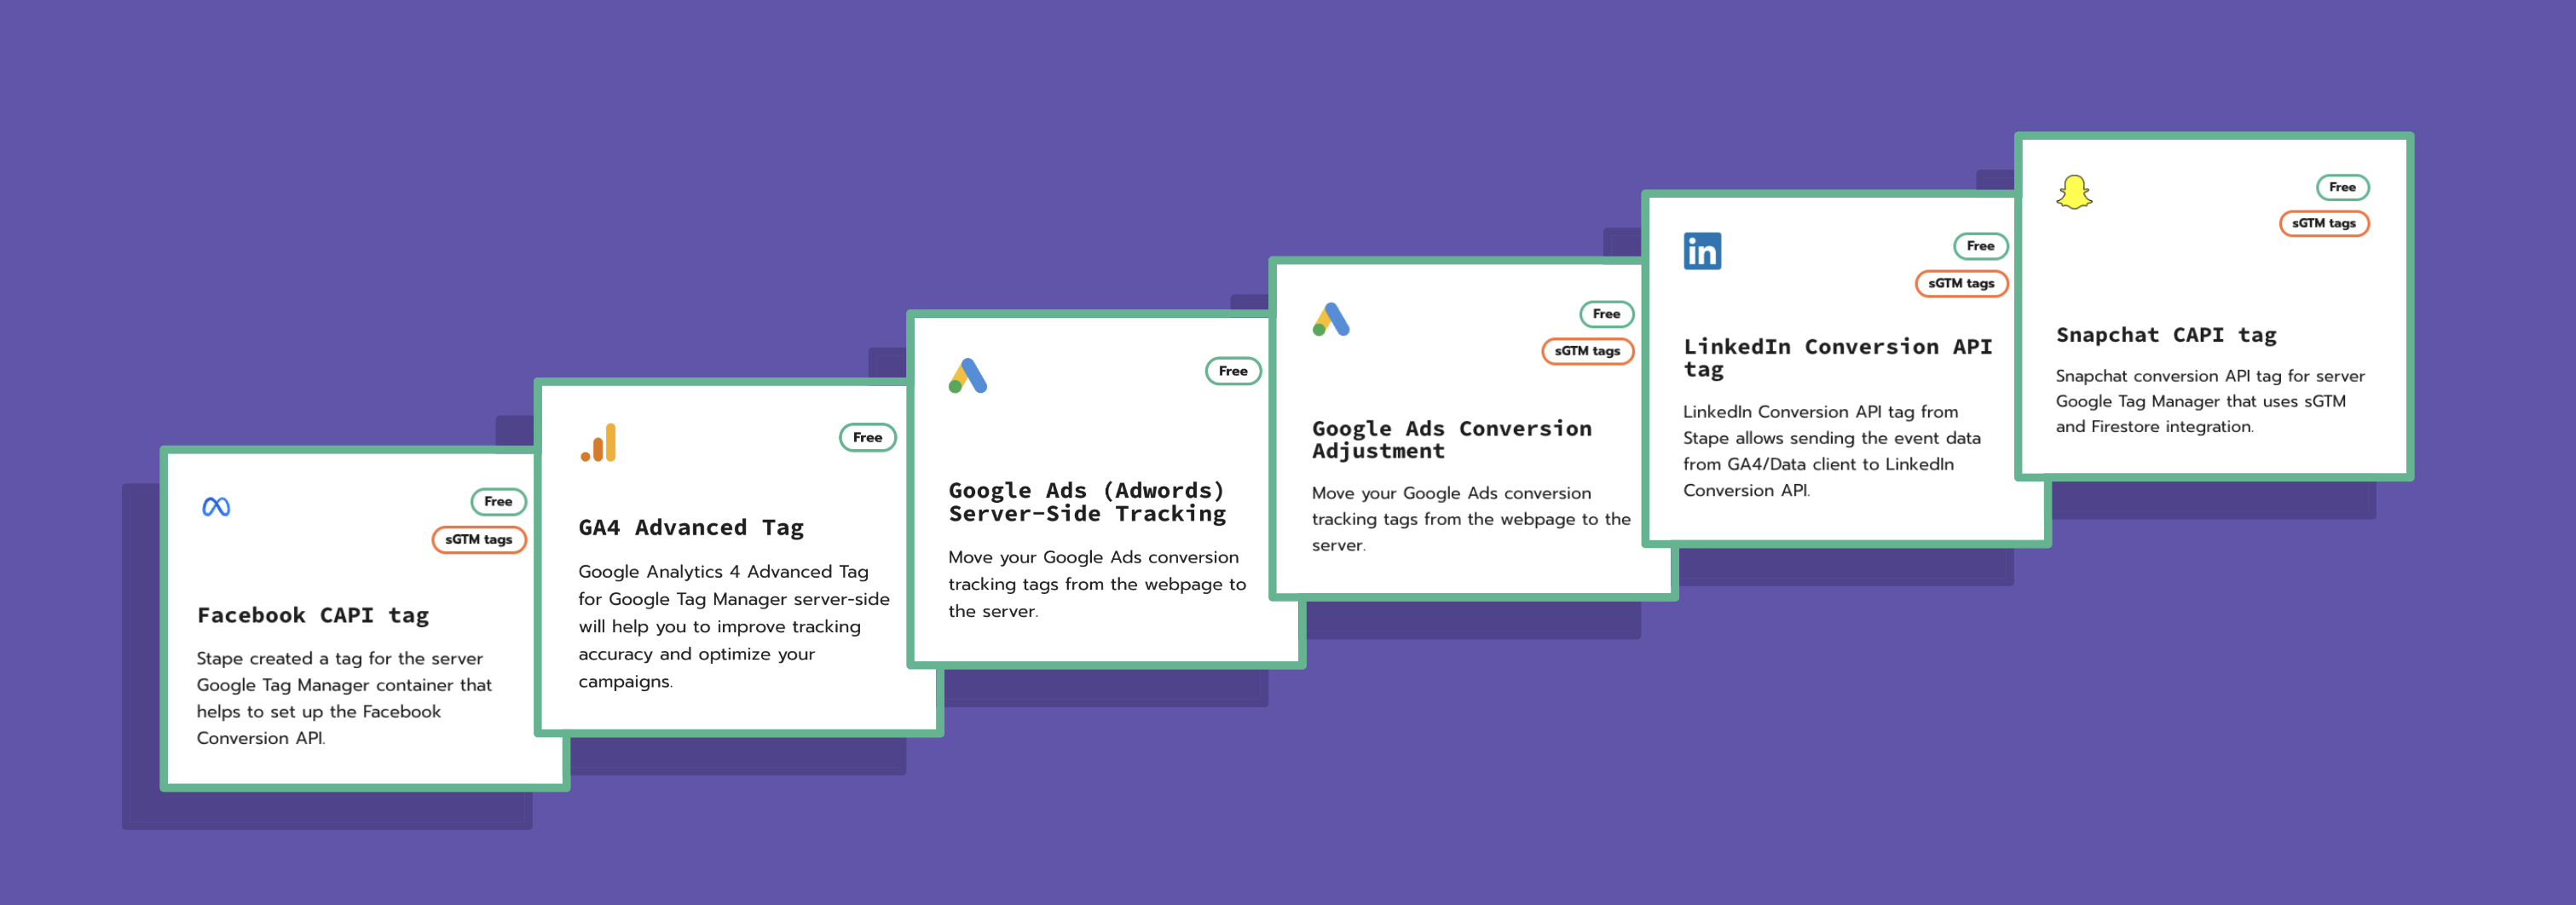
Stape is the largest contributor to the tag library. Over 100 tags were approved and added to the web and server GTM library. Check Stape's tags in the GTM template gallery or on GitHub.
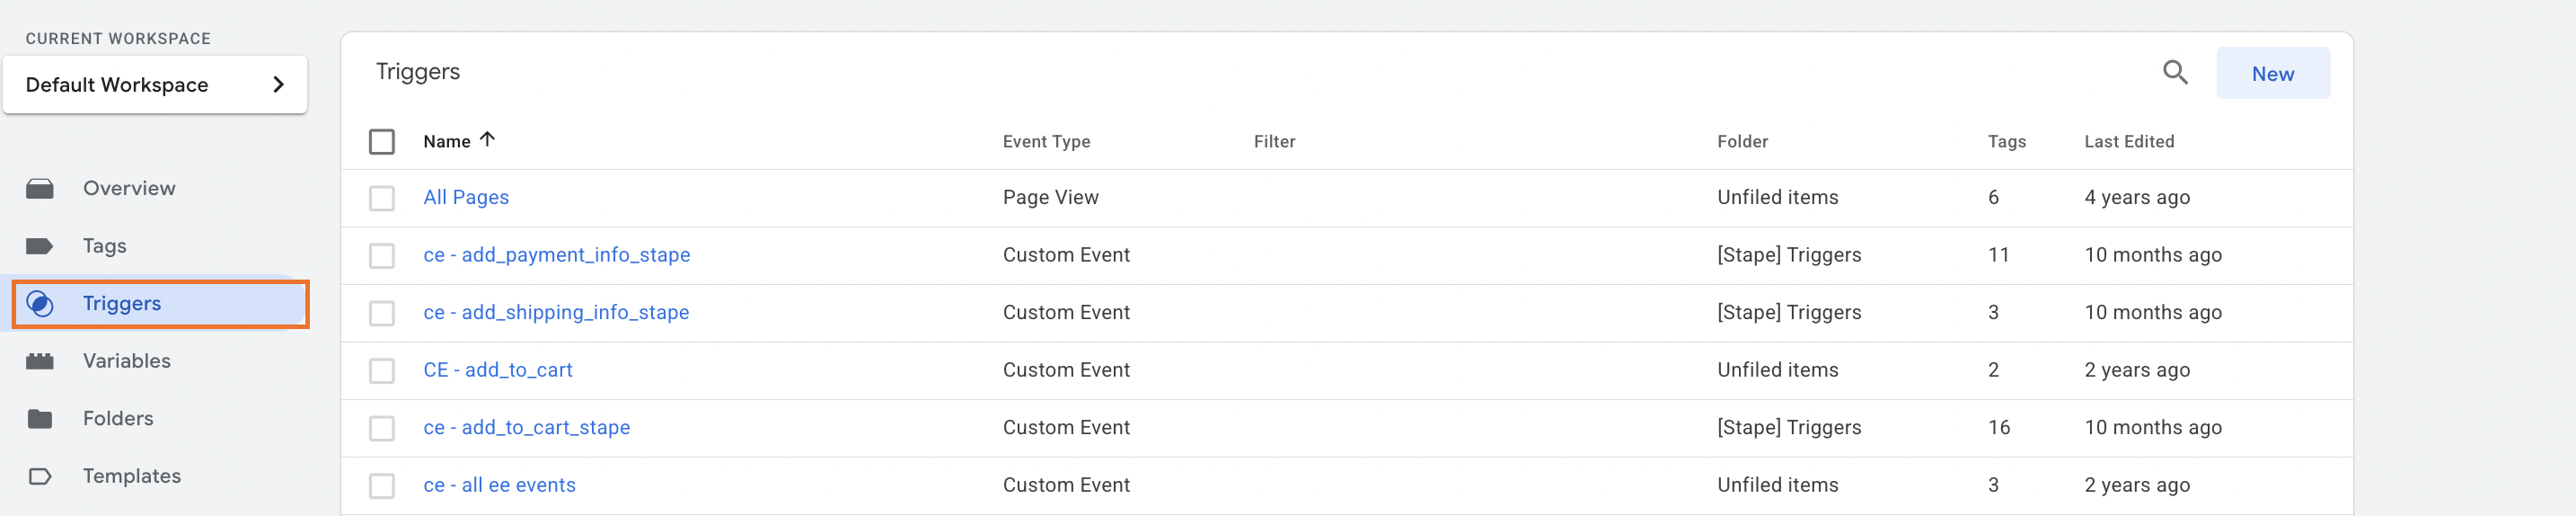
Triggers
Triggers control when and how tags are activated. They specify the conditions that must be met for a tag to run. By configuring triggers, you make sure the correct tags fire at the appropriate moments, allowing you to capture the intended user interactions.
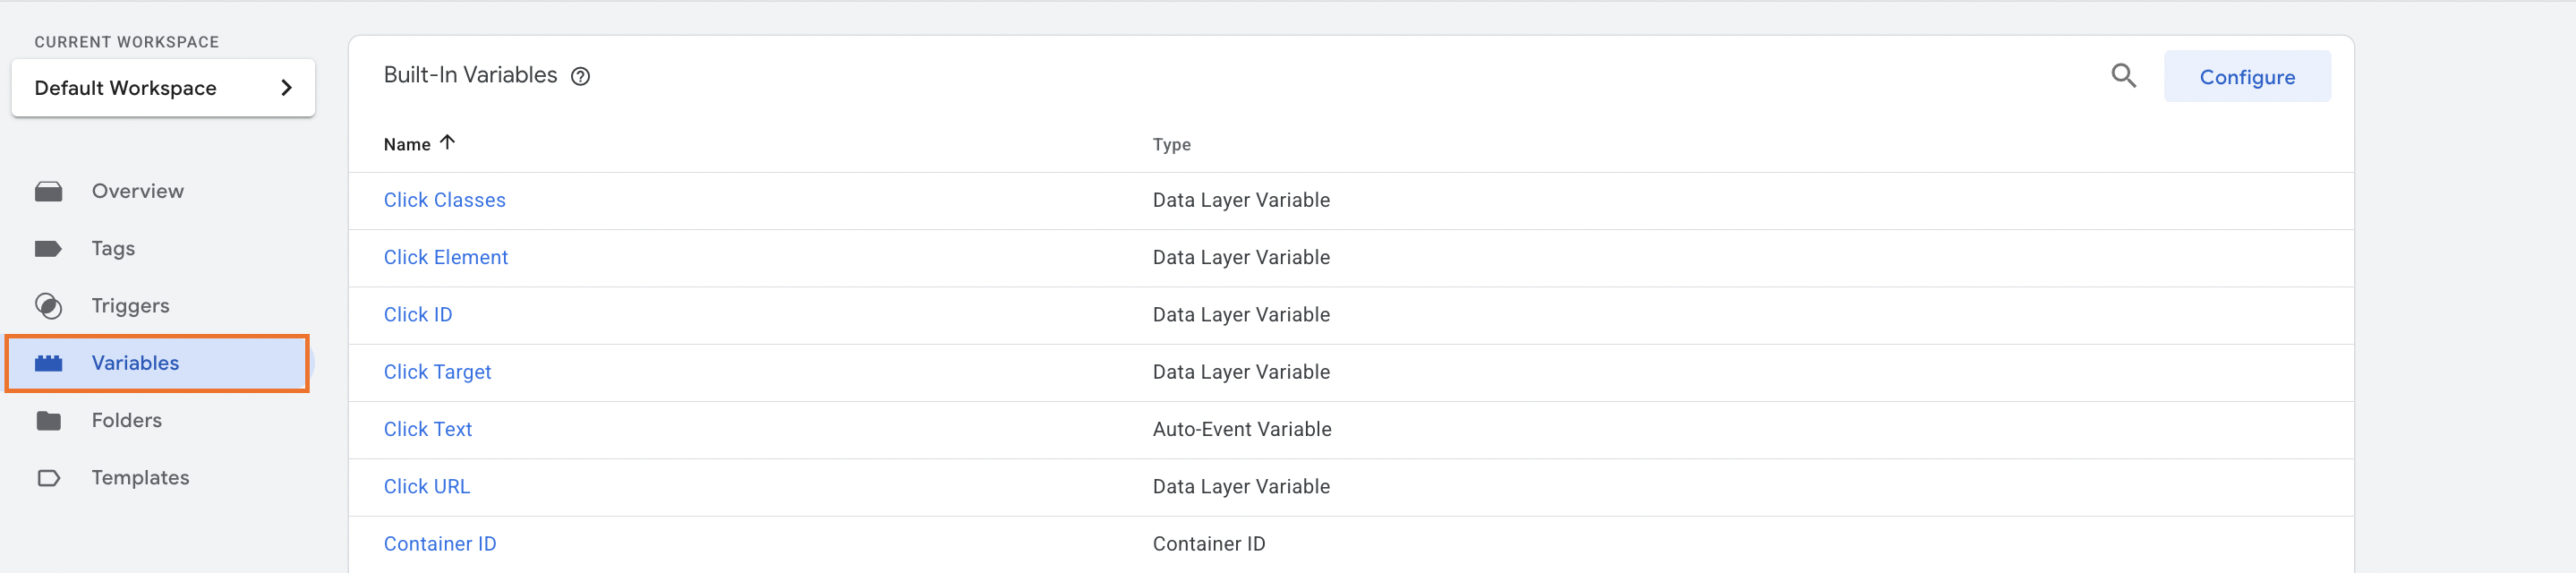
Variables
Variables extract specific information from incoming HTTP requests and make that data available to other components of the GTM container (tags, triggers, and clients). Variables can be used not only in tags and triggers but also within other variables.
A variable can also contain some data or settings, for example, Meta Pixel ID or Google Analytics 4 Measurement ID. While configuring the tags, you can use the variables with required data to avoid adding it manually every time.
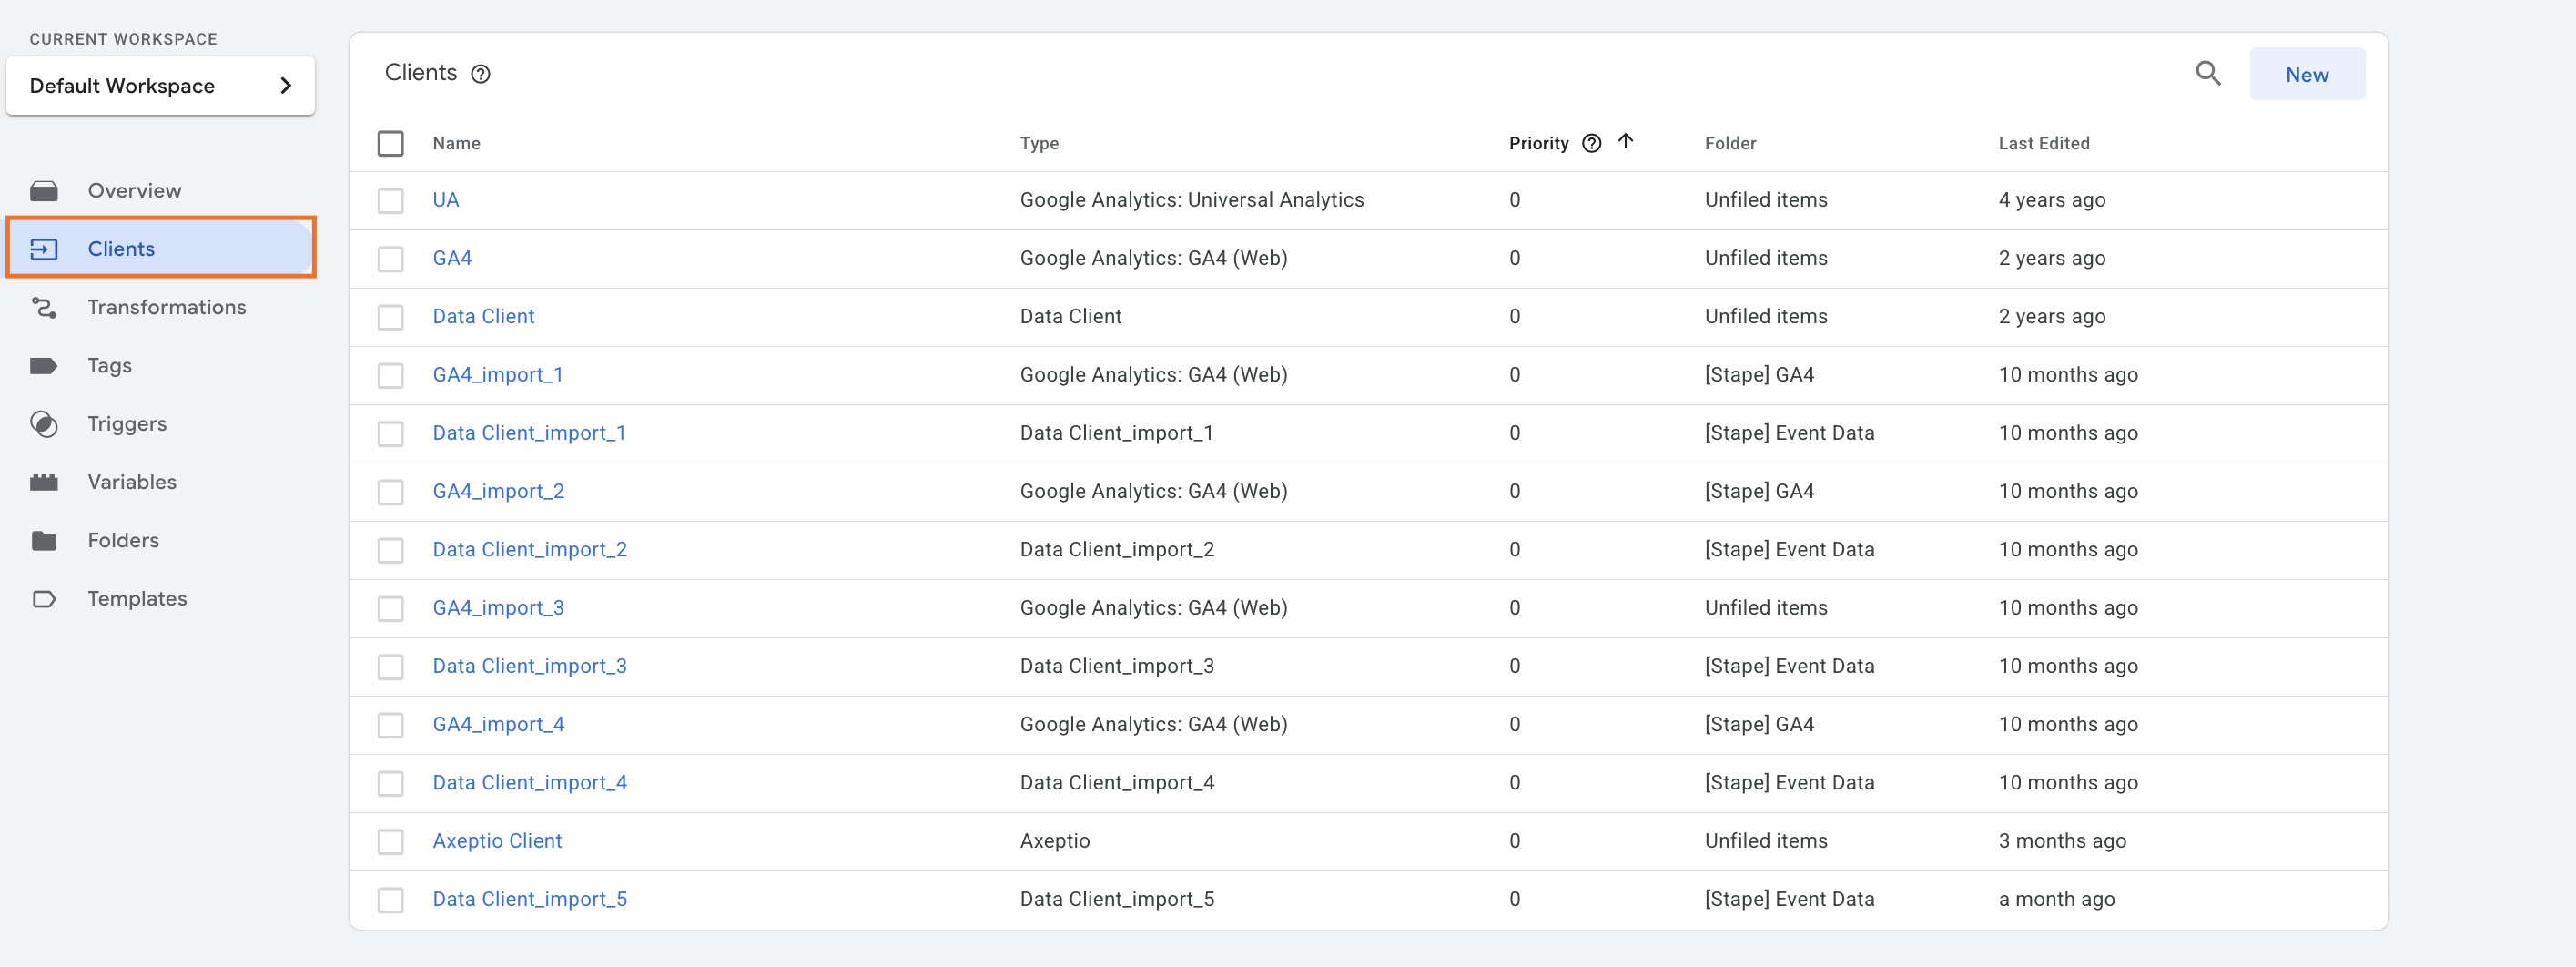
Clients
The Clients section is present in the server GTM container only. Client is responsible for receiving incoming HTTP requests, transforming them into event data, and returning a response. After processing the request, the Client makes the data within it accessible for tags and triggers in the Google Tag Manager server container.
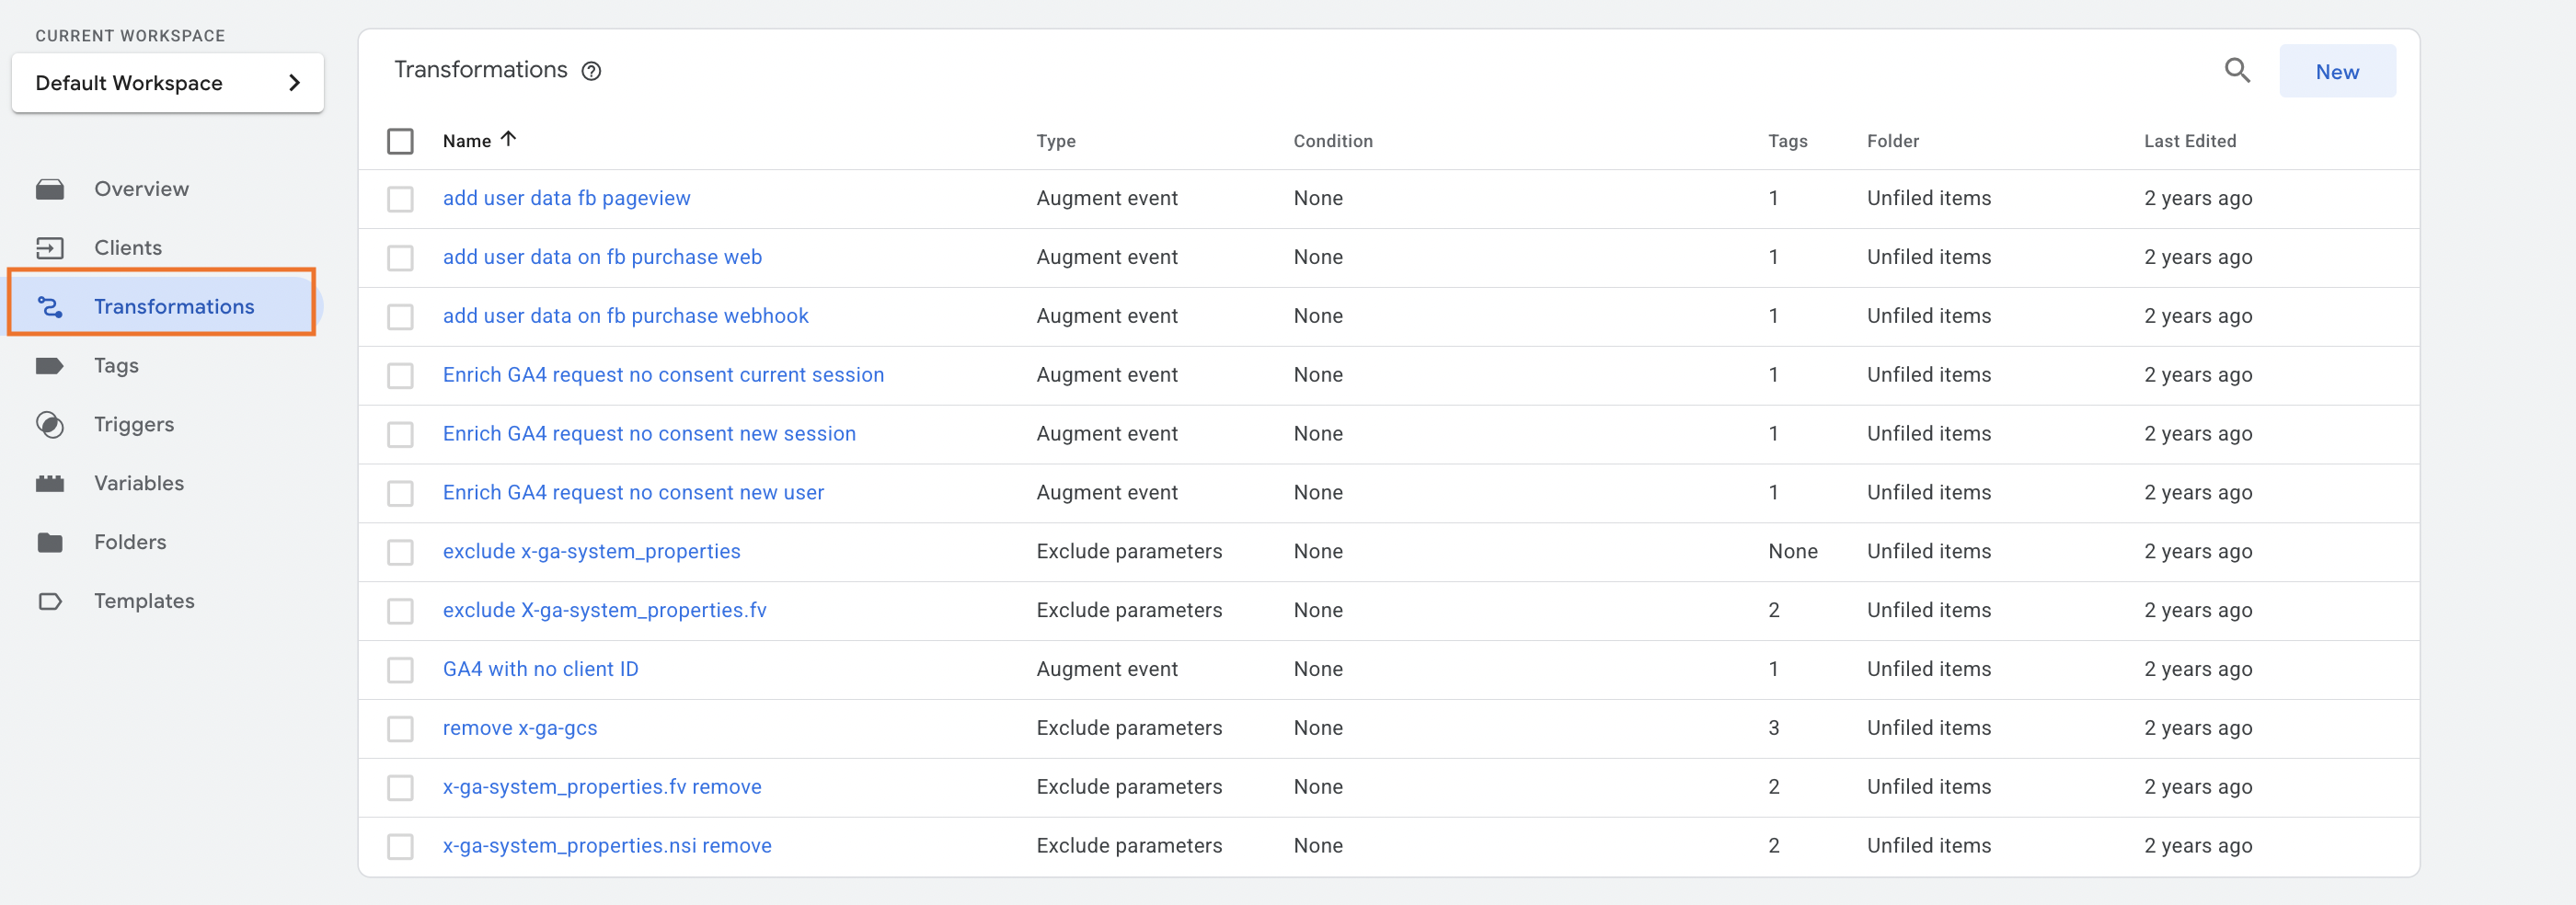
Transformations
The Transformations section is also present in the server GTM container only. Transformation is an entity that serves as an intermediary between the client and the tag.
Data is sent to the sGTM container via an incoming HTTP request. When a client processes this request, it converts the data into event information that tags, triggers, or variables can use within sGTM.
Transformations allow you to add, remove, or modify event parameters after the Client has processed the incoming HTTP request but before the tag accesses the data.
How to set up Google Tag Manager?
How to set up a web GTM container
1. Go to Google Tag Manager and sign in to your Google account.
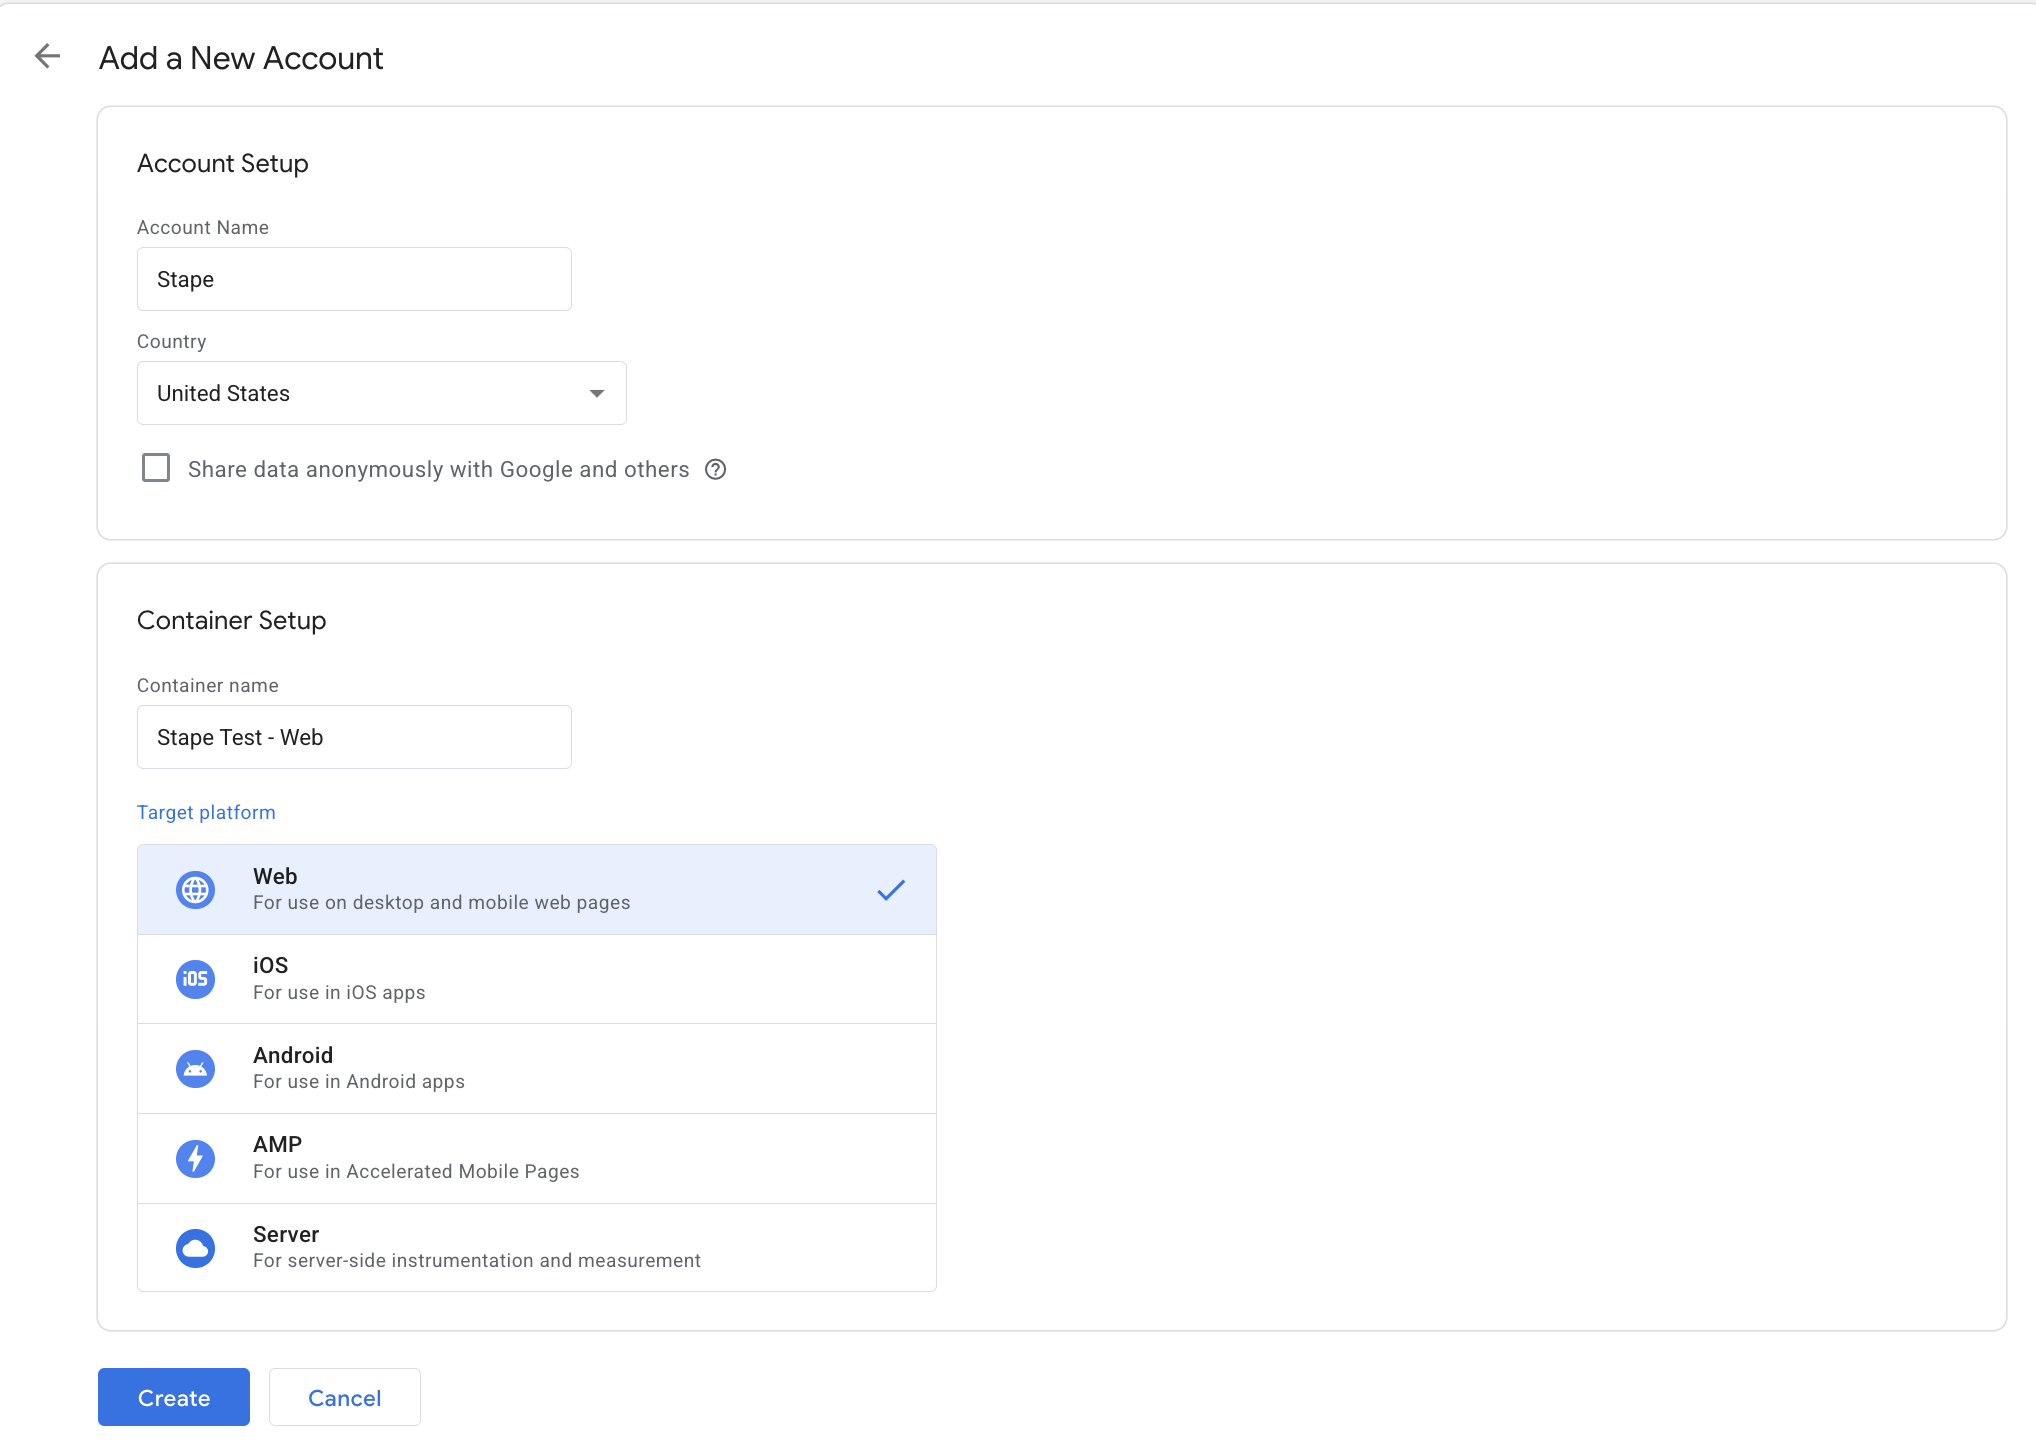
2. In the tab Accounts, click Create account.
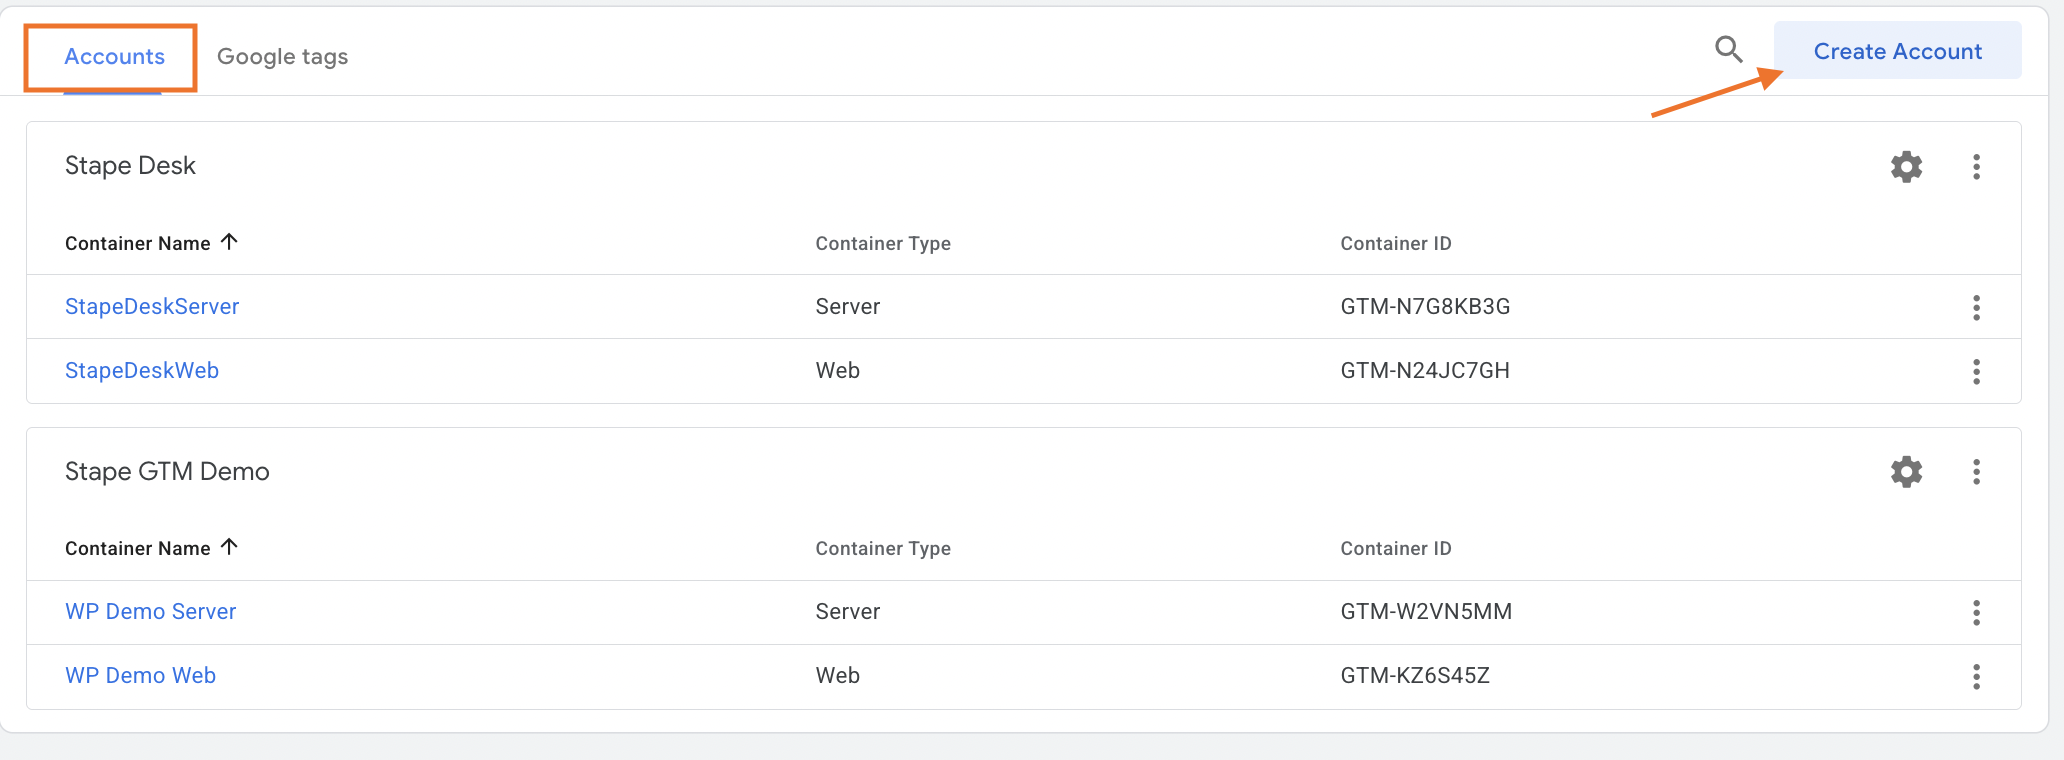
3. Add a name for the account, choose the country location for it, name the container, and select the target platform (in this case, it is web). Click Create.
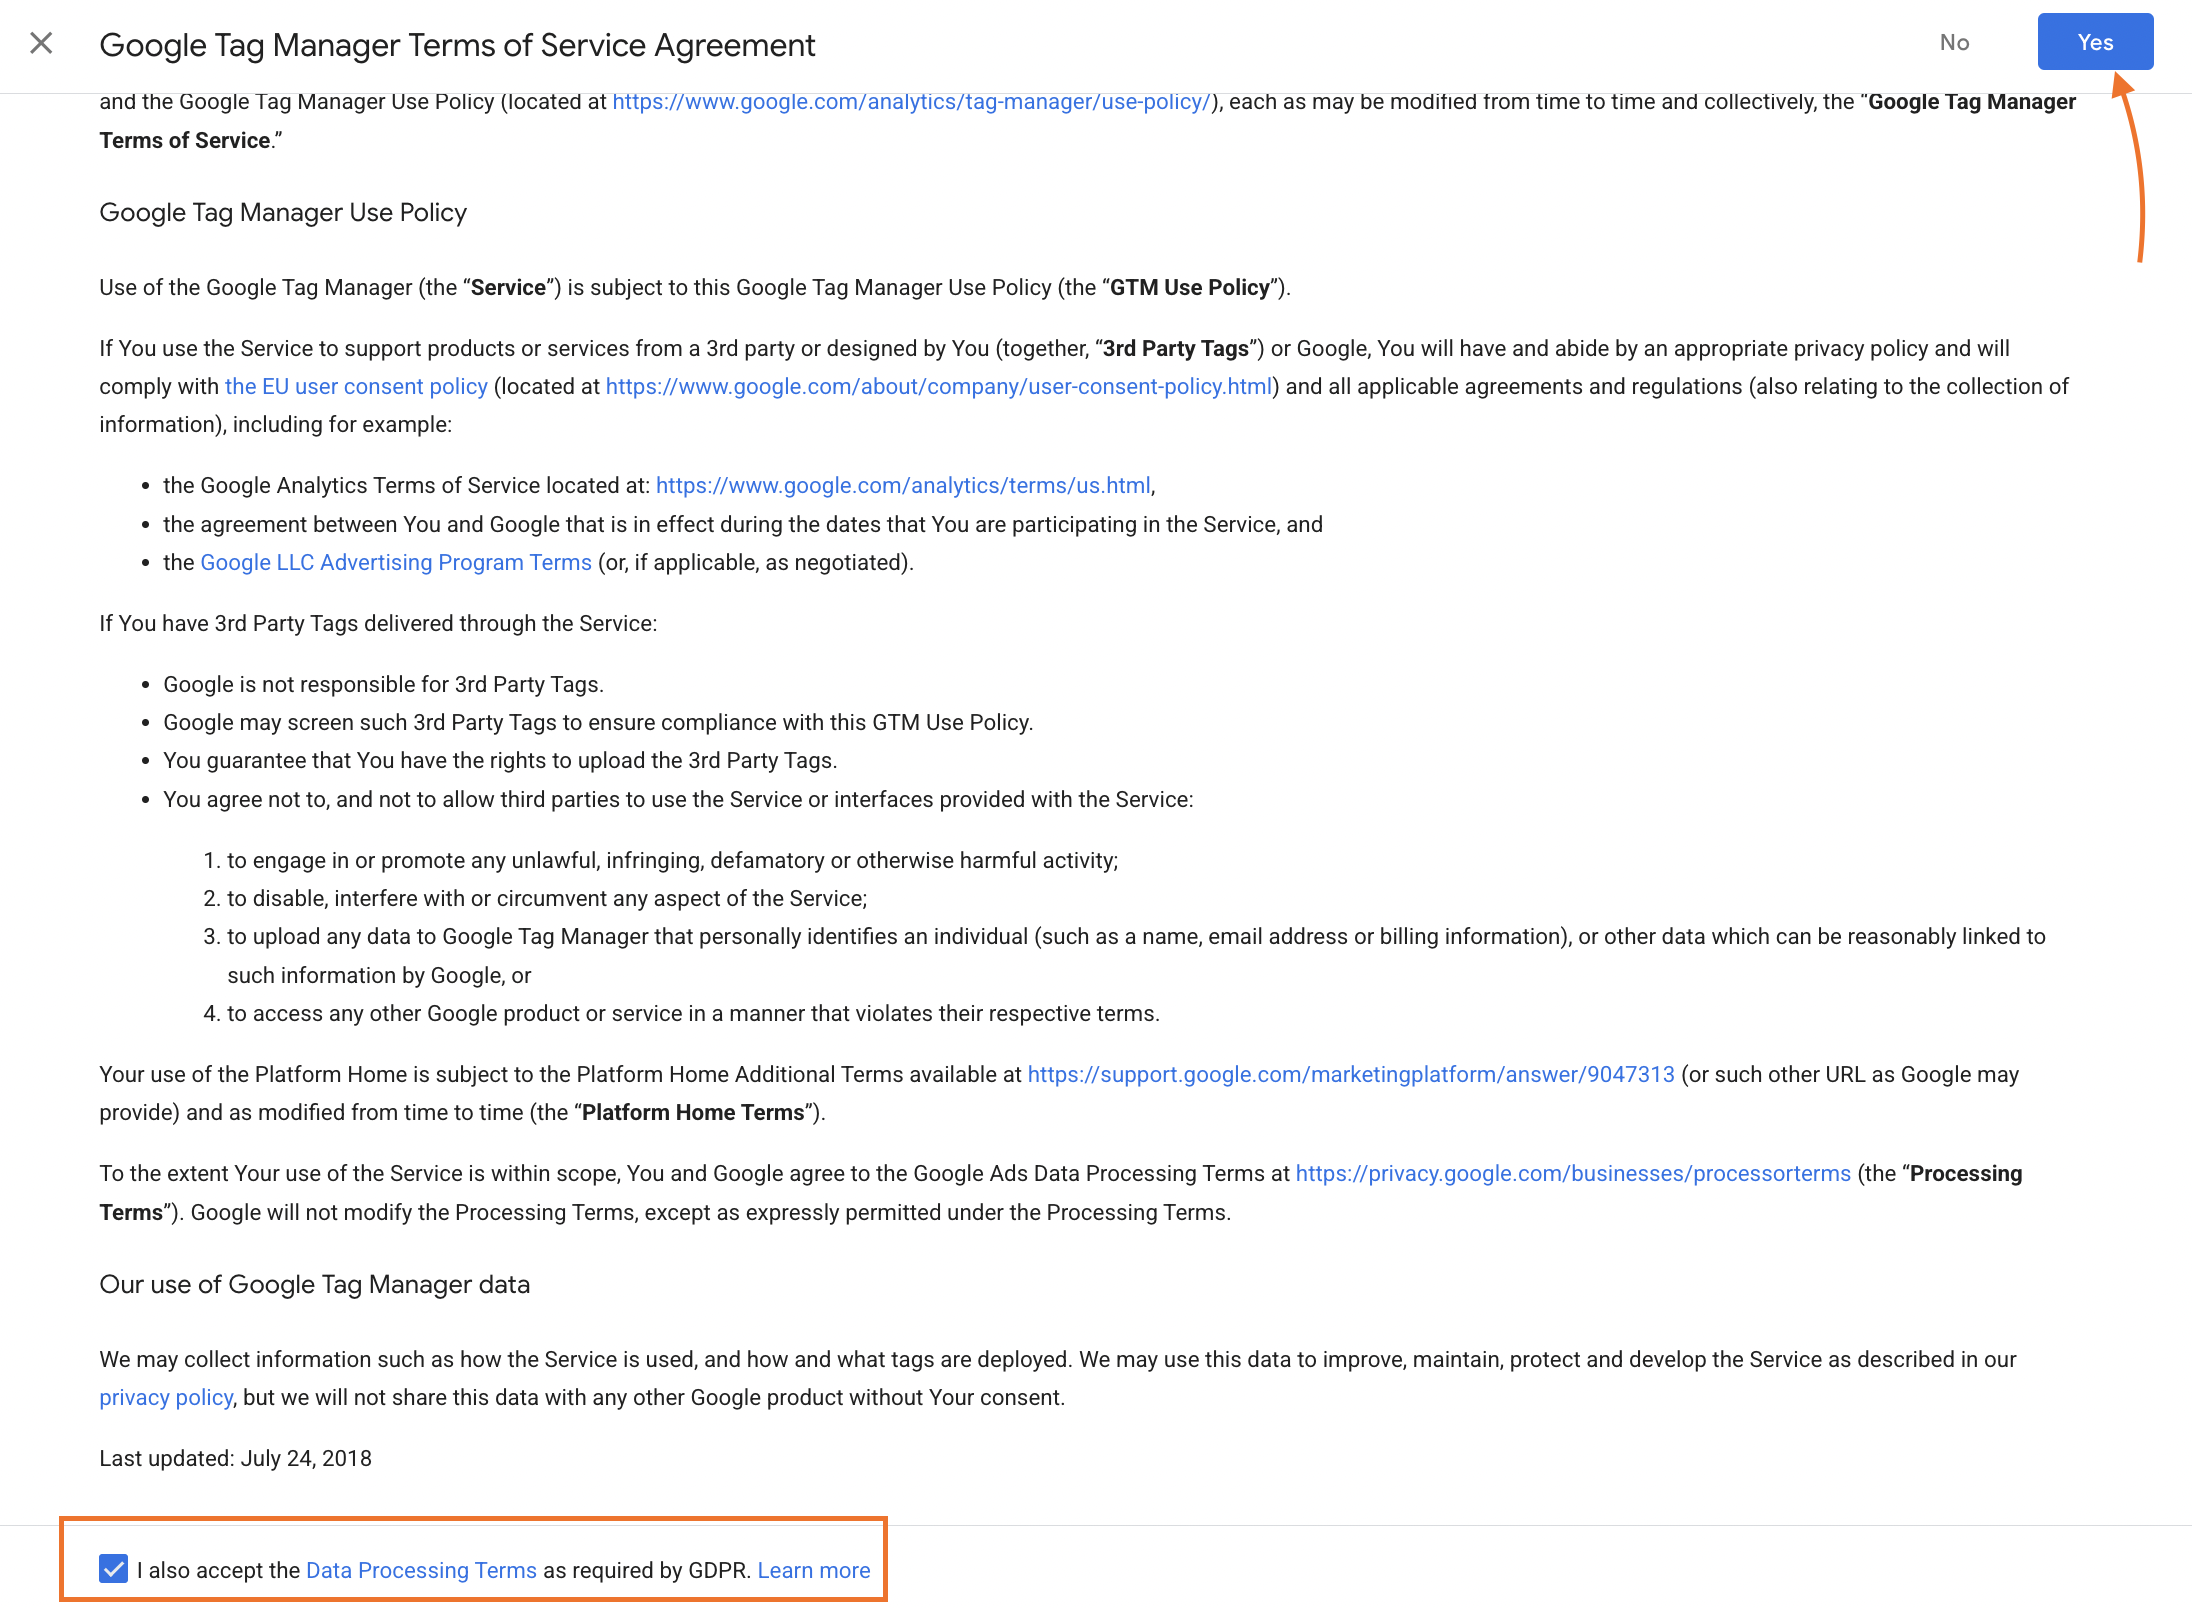
4. Accept data processing terms.
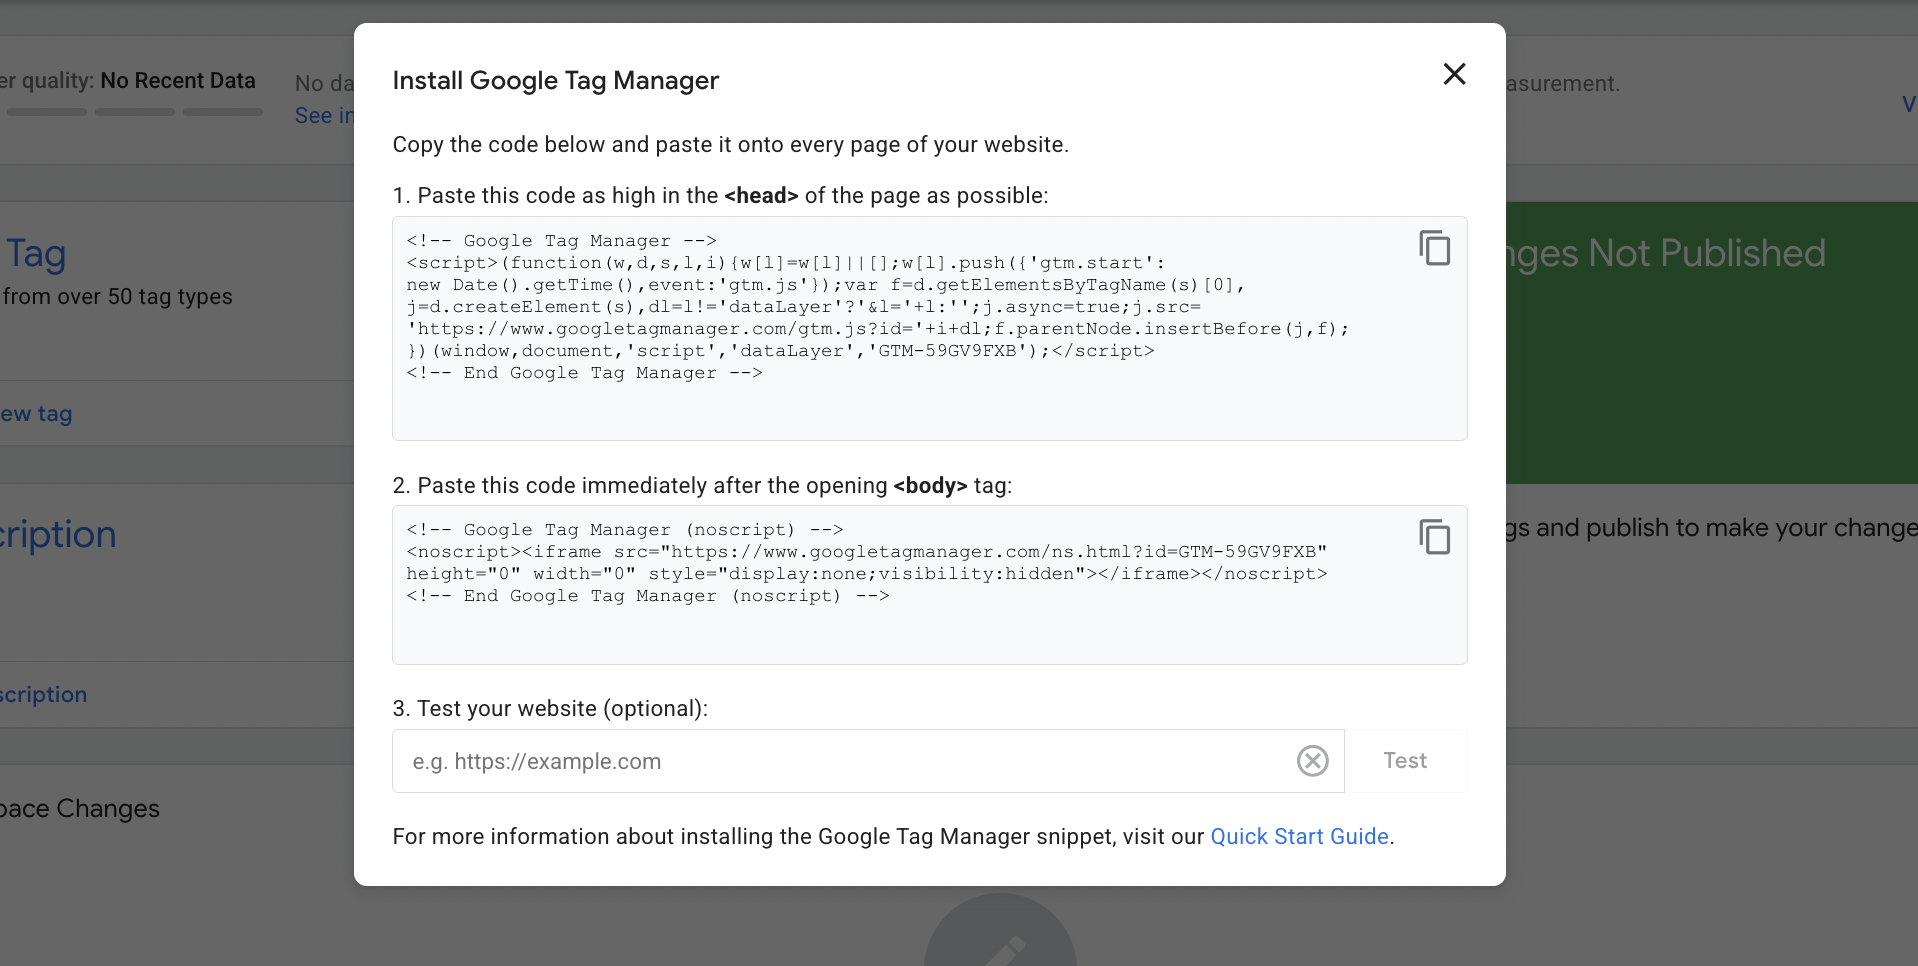
5. Install Google Tag Manager on your website according to the given instructions.
Please note: The GTM code snippet must be placed into every page of your website. It can be done manually, but it takes too much time if you have a lot of pages. For this purpose, you can use plugins on the marketplace of the CMS you use or one of Stape's apps. They are primarily aimed at configuring server-side tracking, but with their help, you can also add a GTM snippet automatically:
Here is an example of how to activate the automatic addition of the GTM snippet to every page of the website using a WordPress plugin
- Download Stape's WordPress plugin.

- Log in to your WordPress Admin and go to the plugins section. Then, click Add plugin, click Upload plugin, and select the file you downloaded.
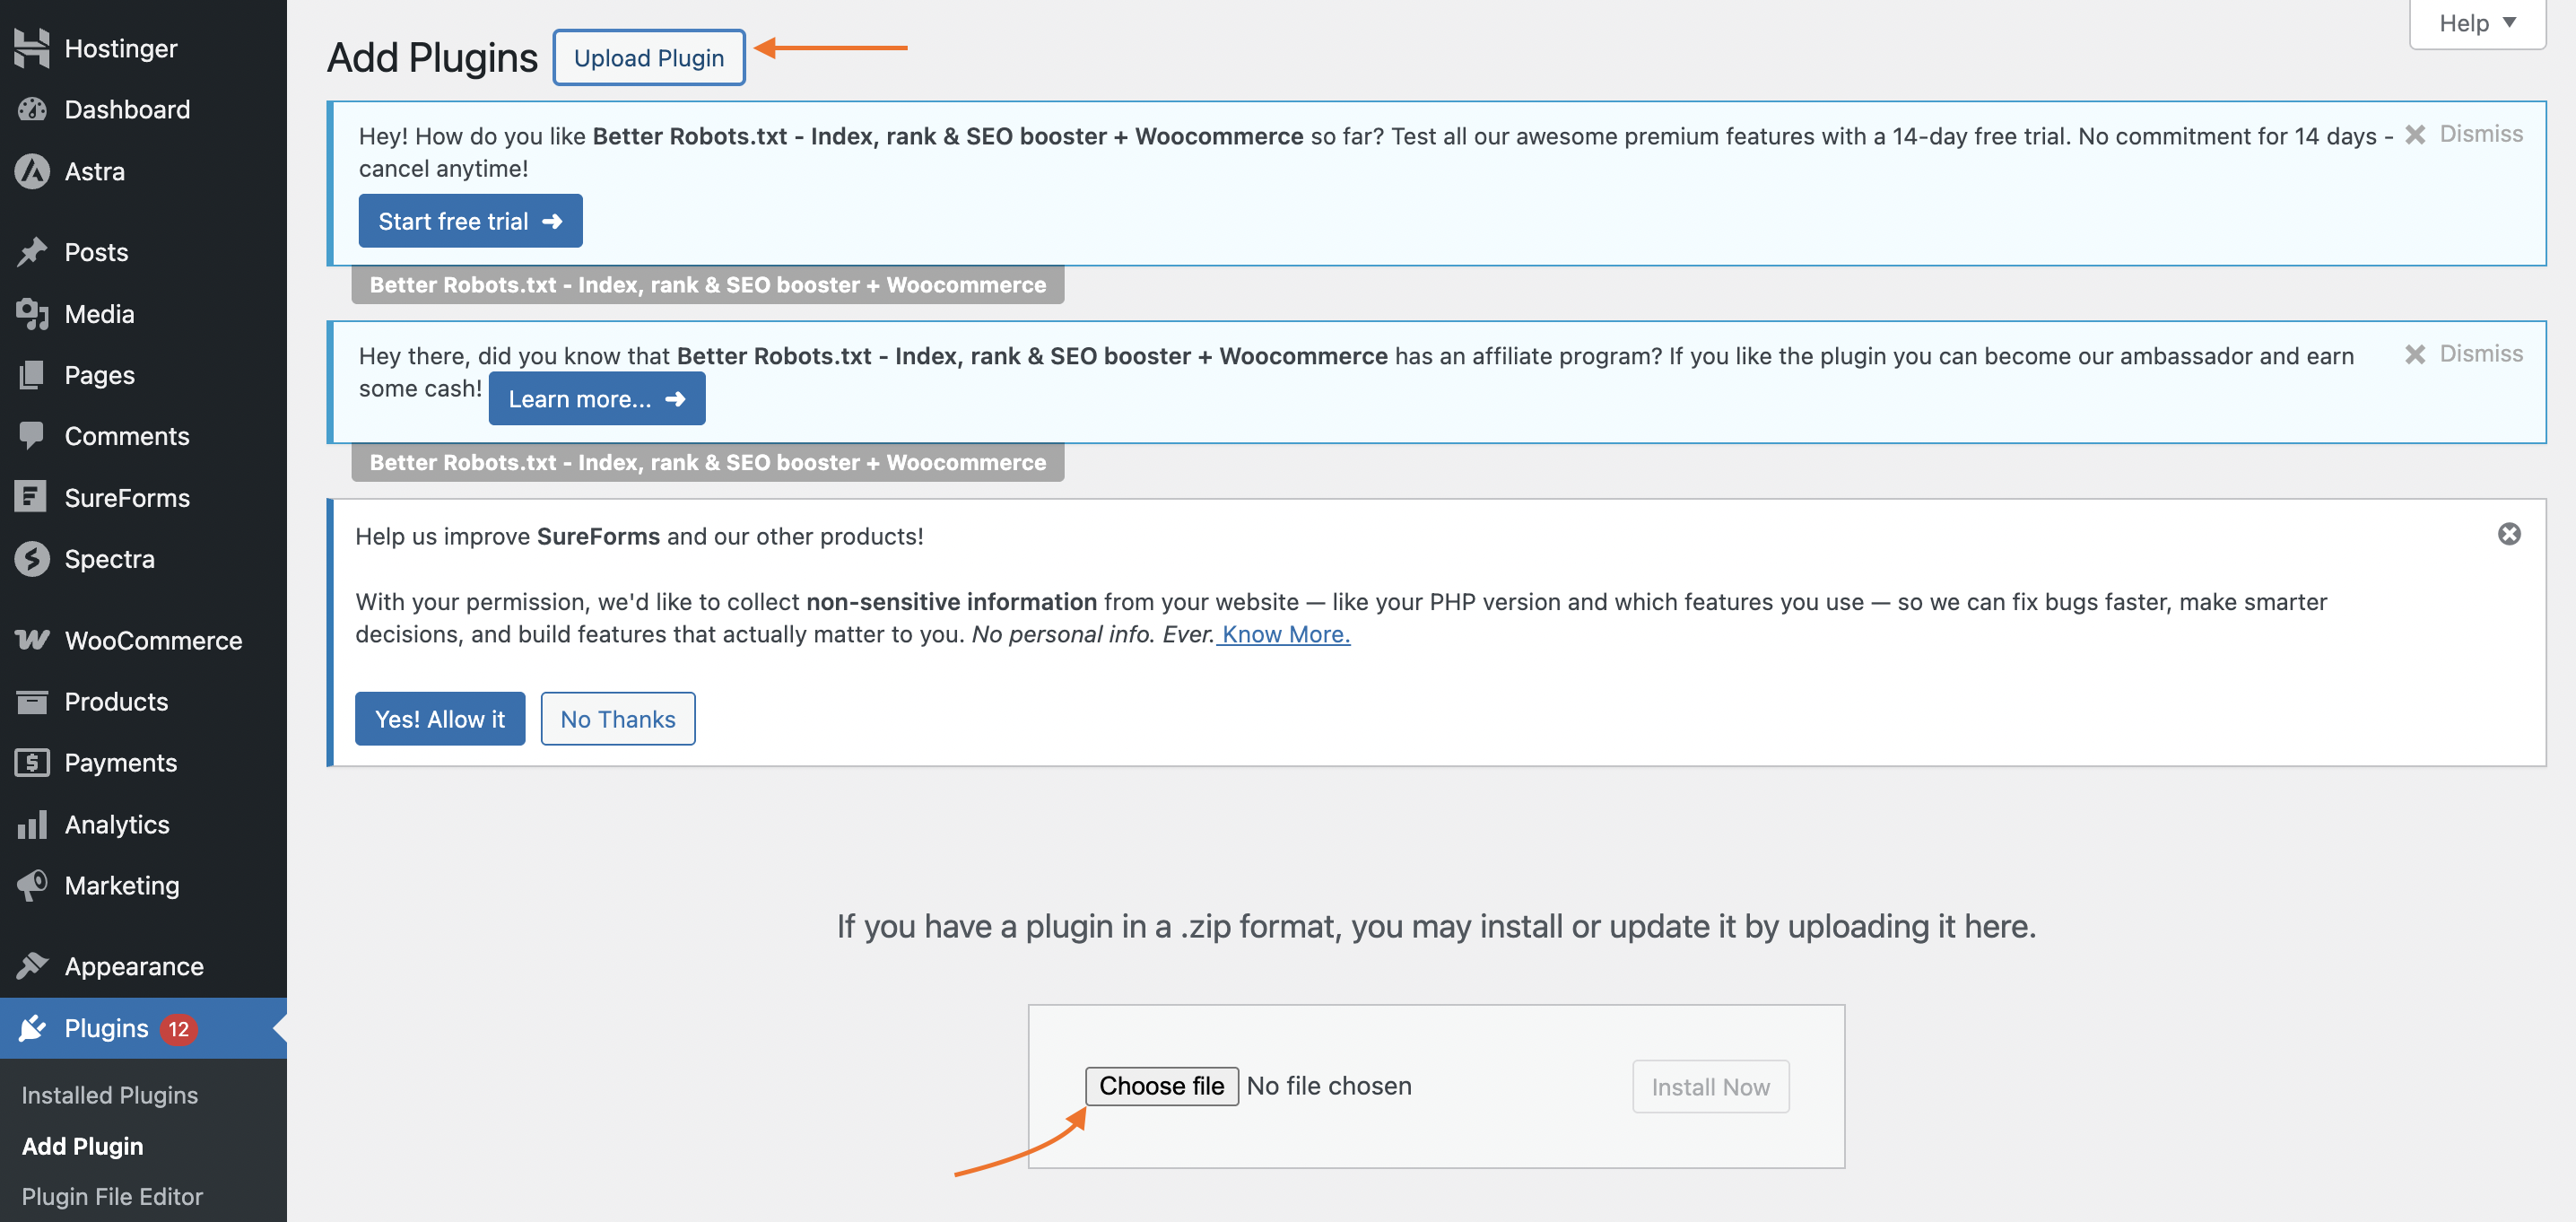
- Once uploaded, click Install now and then Activate plugin.
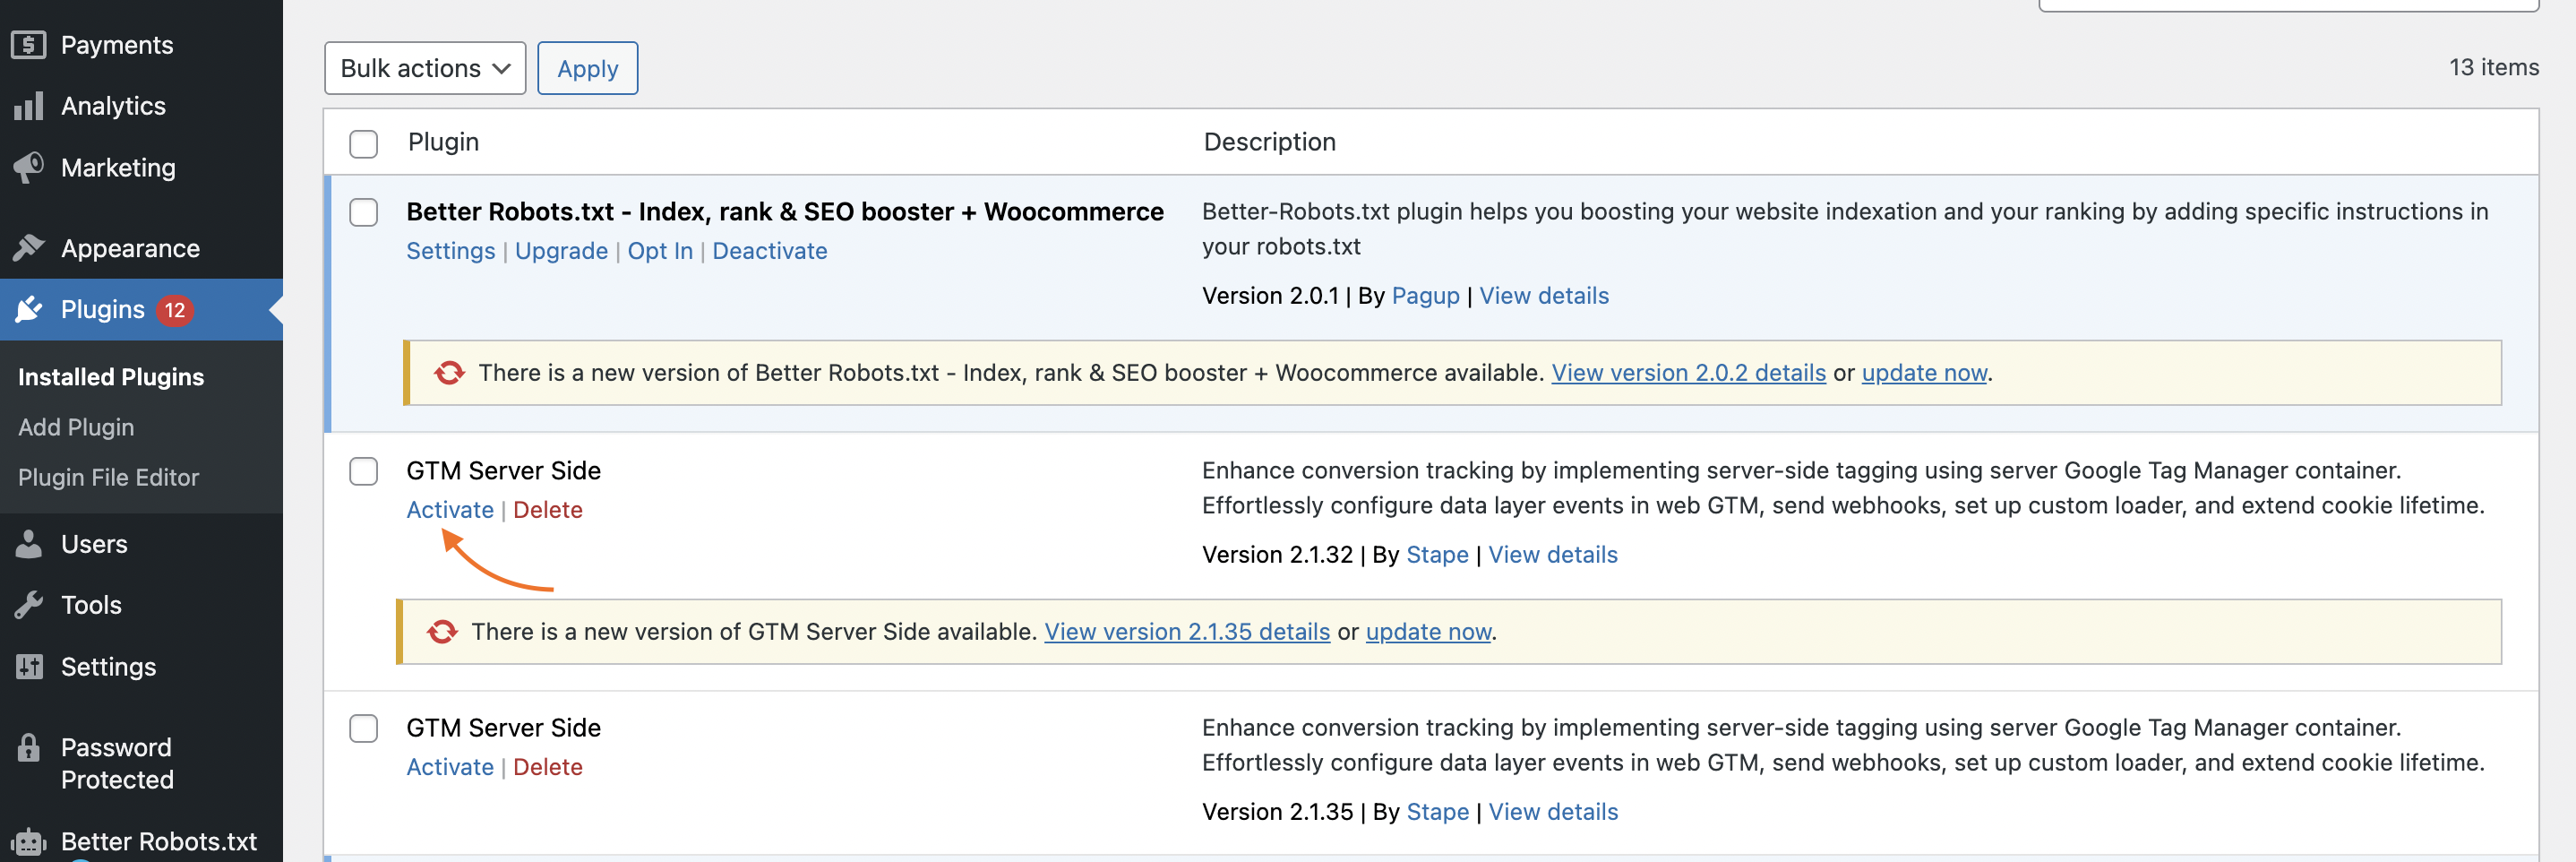
Click on Settings below the plugin name. Activate the option of adding the web GTM snippet code onto every page of your website and add the GTM container ID.
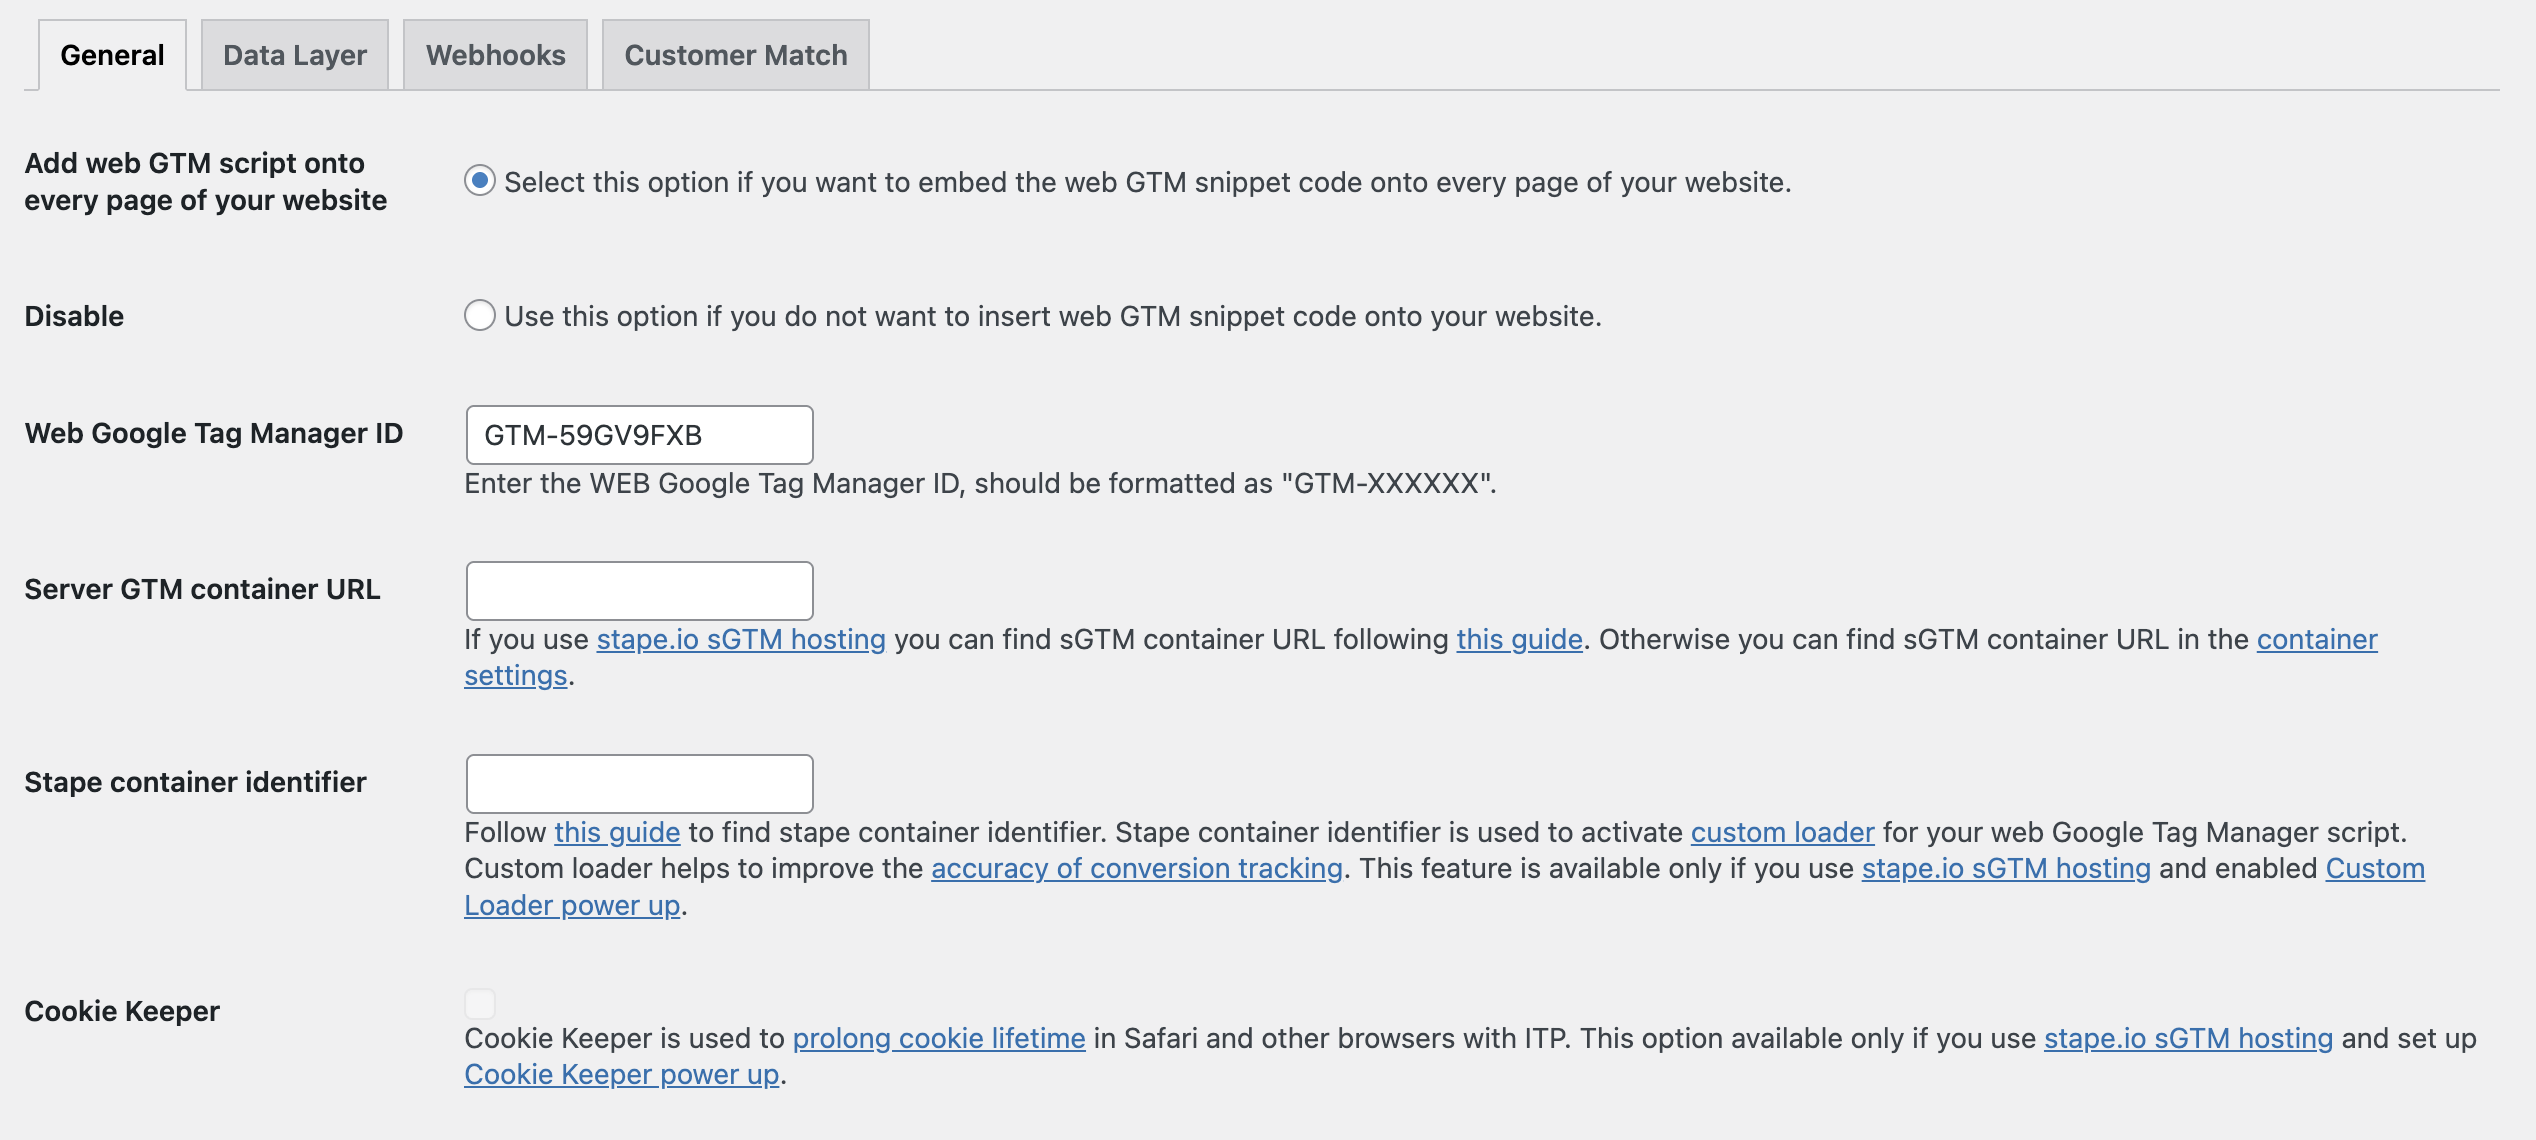
You can find the web GTM ID in your container:

How to configure the server GTM container
To configure the server GTM container, you will need:
- Configured web GTM container as we showed above;
- Hosting provider for the server GTM container. One of the popular options is hosting directly on Google Cloud Platform (GCP), but it may end up being a more expensive and harder-to-use solution, especially for new users. So, Stape is a more affordable and user-friendly alternative to GCP.
Server GTM container configuration is a more complex process compared to the web container. It includes the following steps:
- Creating a server GTM container within Google Tag Manager.
- Hosting the container on Stape.
- Configuring a custom tagging server URL to set up first-party cookies.
- Creating a Google Tag inside the Web GTM container.
- Configuring the GA4 Client inside the server GTM container to send data from the web to the server GTM container.
- Activating Stape's power-ups, such as Custom Loader and Cookie Keeper, to make tracking codes less affected by ad blockers and browser restrictions.
We have a comprehensive guide on server GTM container configuration. In this article, we will briefly describe the steps. For the detailed instructions, please refer to that guide.
Manual vs. plugin GTM setup: a quick comparison
| Manual setup | Plugin/app setup | |
|---|---|---|
| How it works | GTM snippets are added directly to the website's source code | A CMS plugin or app adds the GTM snippet automatically to every page |
| Technical knowledge required | Requires access to and familiarity with the site's code | Minimal, managed through the CMS admin panel |
| Time to implement | Longer, especially on large sites with many pages | Fast a few clicks after plugin installation |
| Risk of errors | Higher, snippets can be misplaced or applied inconsistently | Lower, the plugin handles placement consistently across all pages |
| Suitable for | Developers and technically experienced users | Beginners and non-technical users |
| Compatibility | Any website | Requires a supported CMS (WordPress, Shopify, Magento 2, BigCommerce, Wix, PrestaShop, Salla) |
| Maintenance | Manual updates if the snippet needs to change | Plugin handles updates automatically |
💡 Configuring tags for multiple platforms can be time-consuming. The Setup Assistant is a free Stape tool that automatically generates and imports pre-built GTM templates based on the platforms you select, all without touching a single line of code. It works with the most popular CMS platforms and supports Google Analytics 4, Google Ads, Meta, TikTok, LinkedIn, and more. Check out our guide on how to set up the Setup Assistant to get started.
FAQs
Where to add Google Tag Manager code?
The <script> part of Google Tag Manager code should be placed in the <head> section of your website, and the <noscript> part should be added within the <body> section, ideally right after the opening <body> tag.
When to set up GTM?
It is recommended that you set up Google Tag Manager before launching the website. In this way, you can start tracking data from the first day and avoid gaps in your analytics.
What is the difference between Gtag and GTM?
GTM is a tag management system where you can configure data tracking for various platforms. Gtag.js is a library that, after installation on the website, can load tracking codes for a limited number of platforms - Google Analytics 4 and Google Ads.
What is a GTM tag?
A GTM tag is a snippet of code that sends data to external platforms (like Google Analytics 4, Meta, Google Ads, Snapchat, etc.). Its role is to capture event data, format it correctly, and deliver it to the servers of the specified platform.

Comments