How to set up PrestaShop module
Updated Jul 6, 2026
1. Set up server GTM container and host it on Stape.
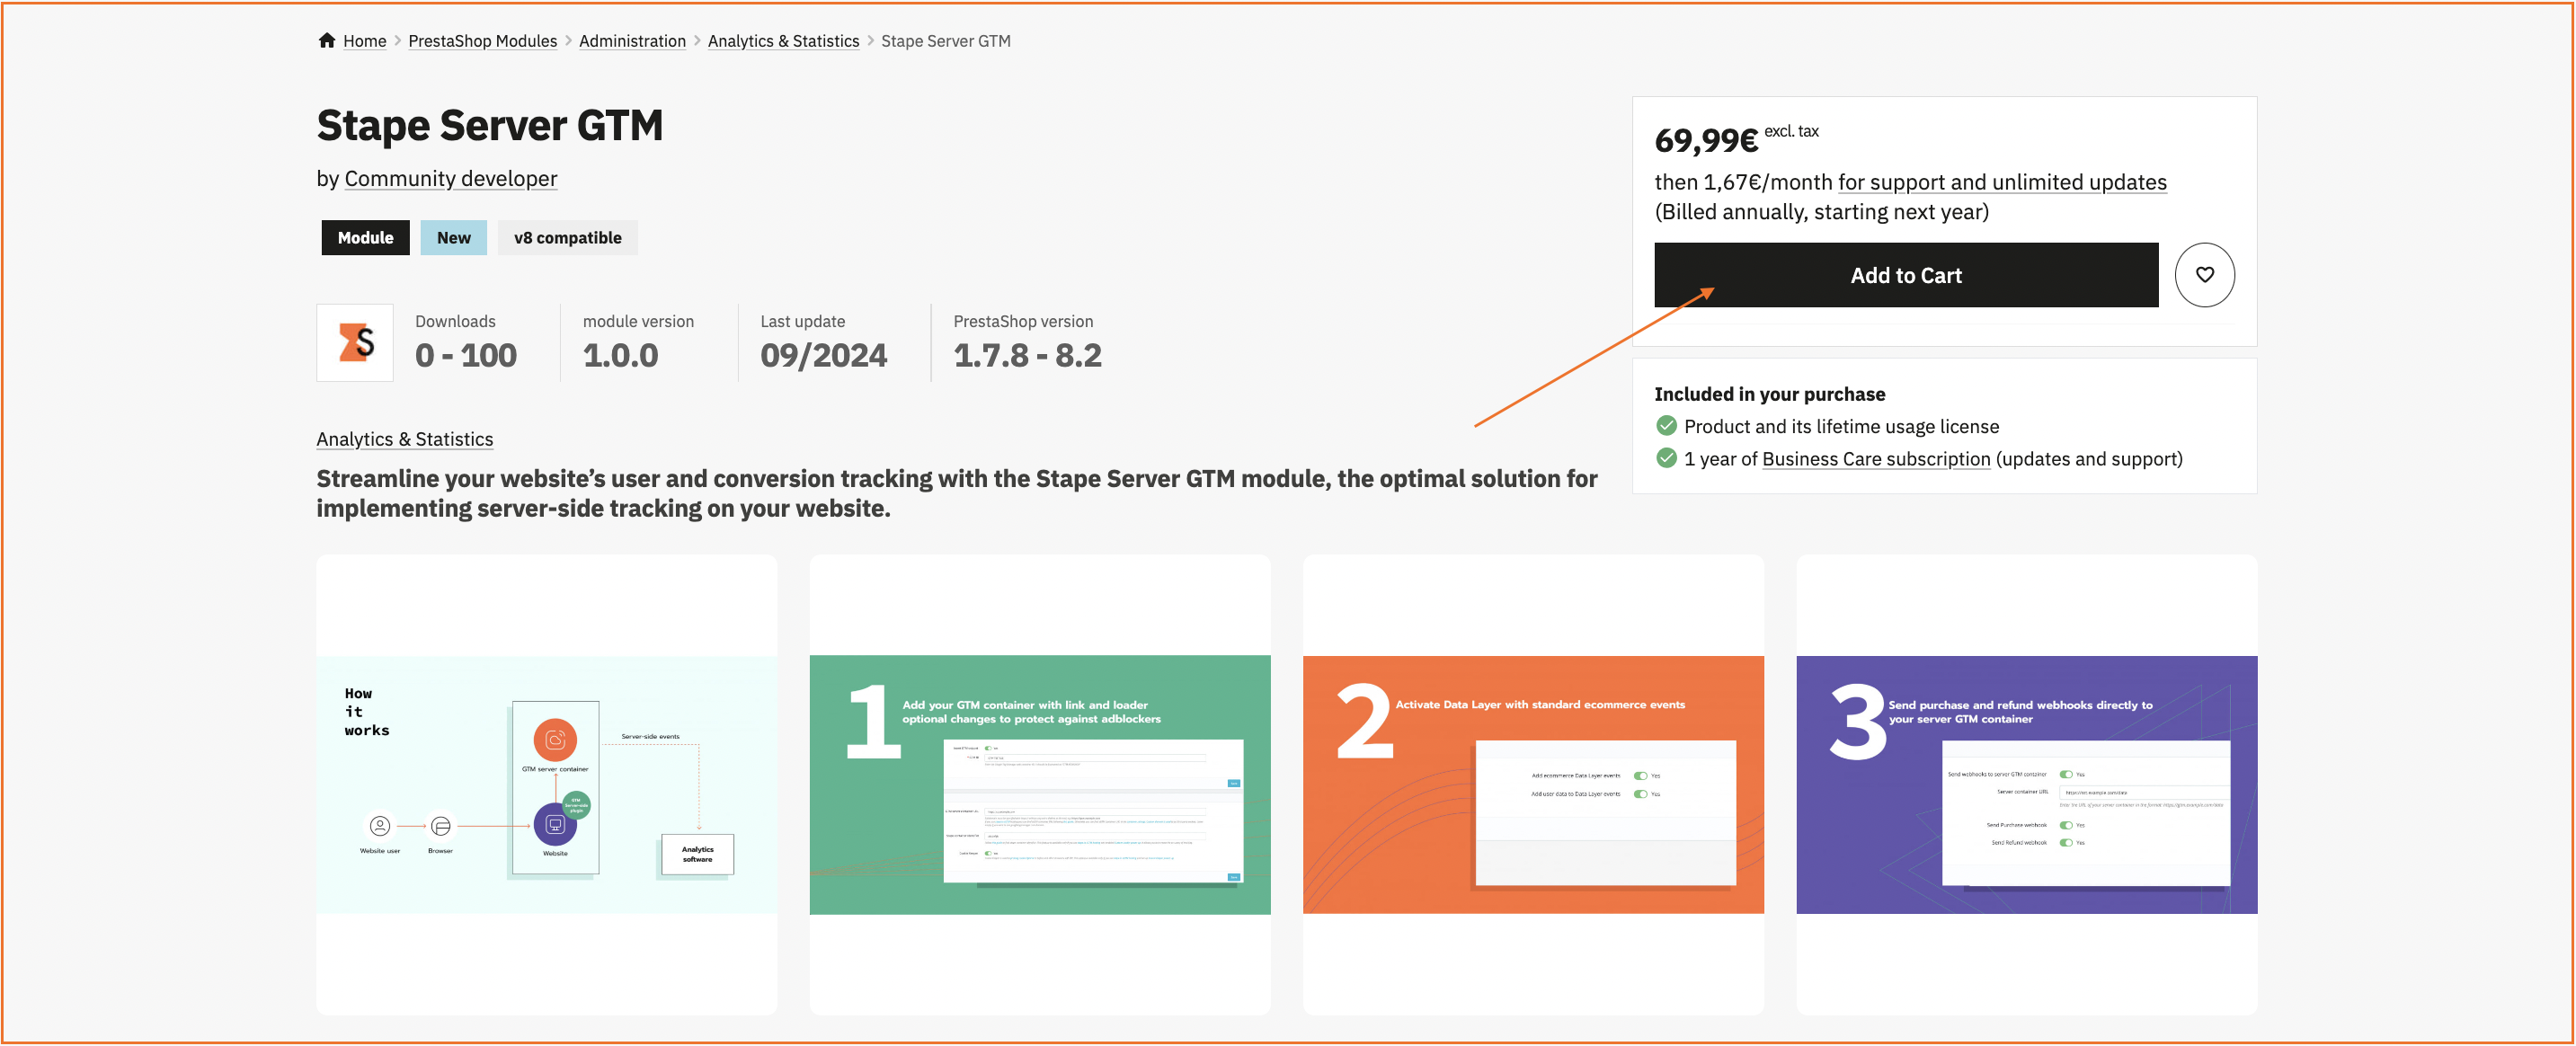
2. To start installing, you need to buy the module on the PrestaShop platform.
3. Configure settings in three tabs: General Settings, DataLayers, and Webhooks.
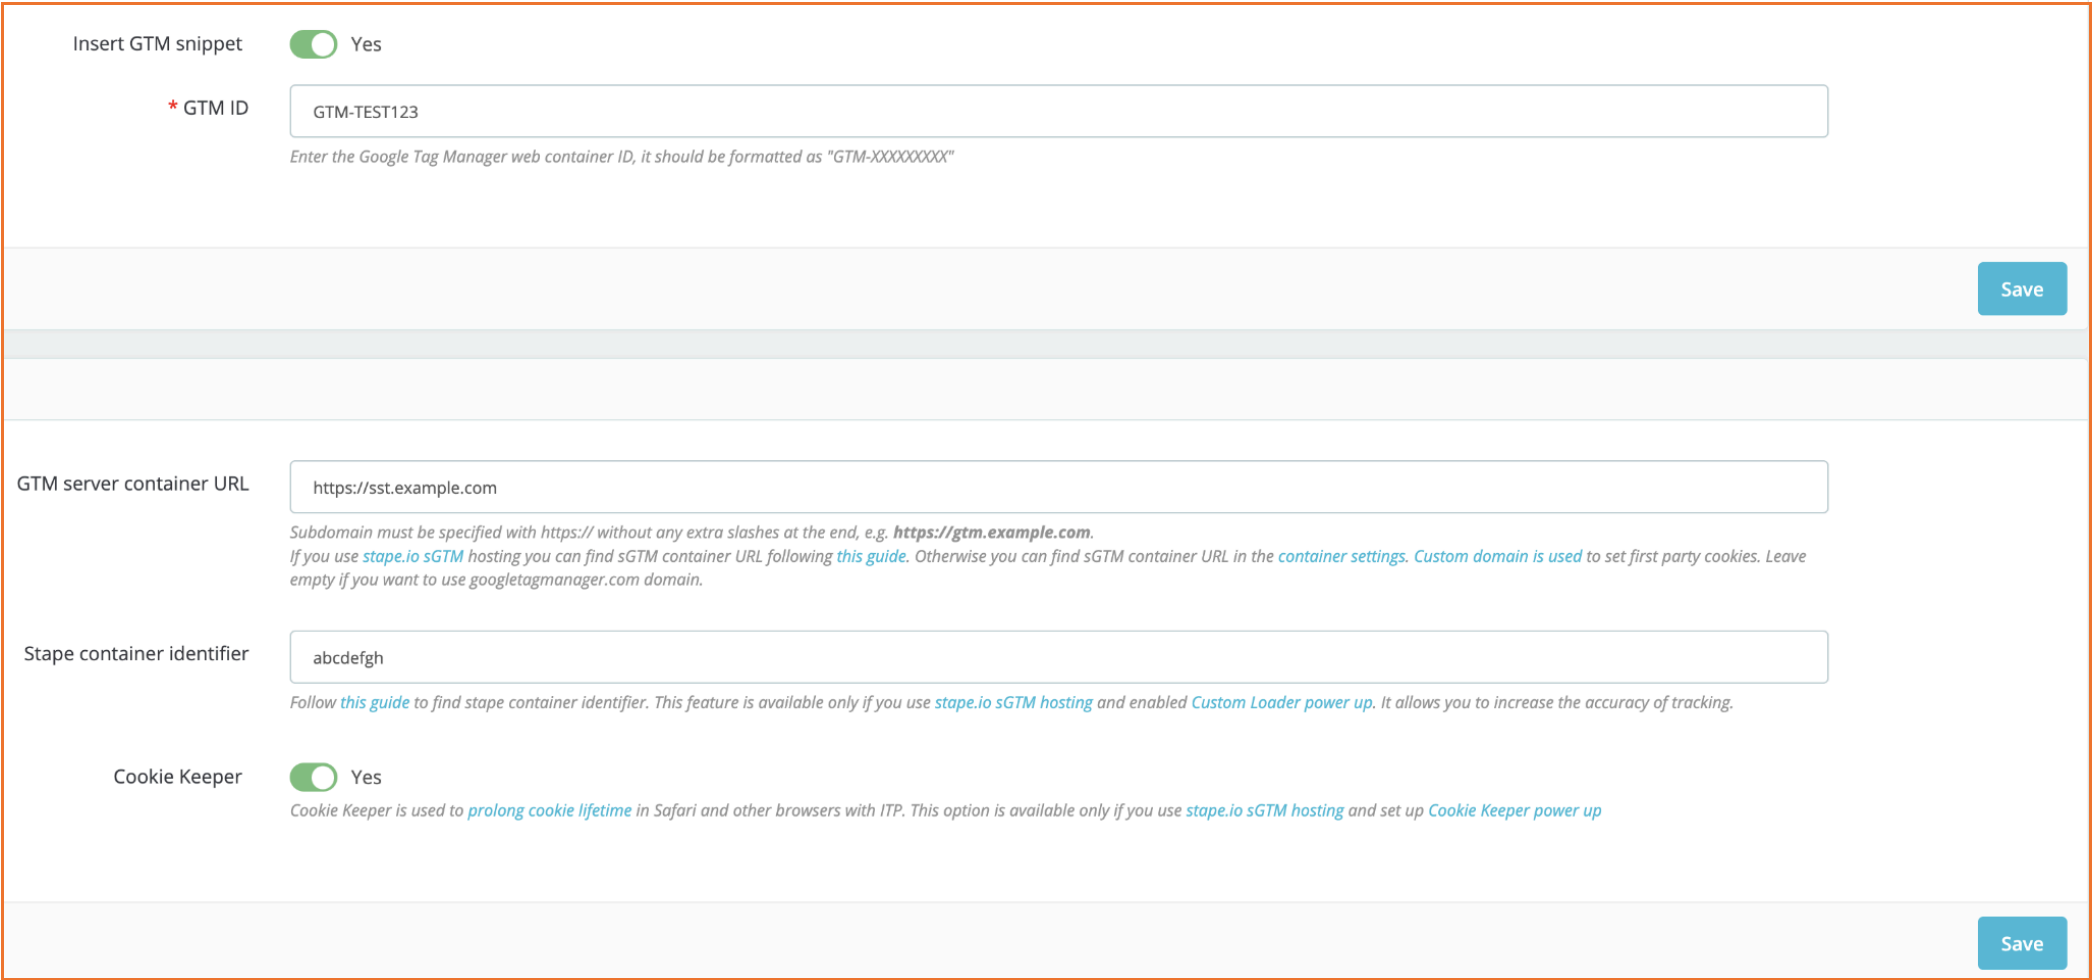
3.1 General Settings tab
This tab contains all the options for configuring the GTM snippet installation on every page of your PrestaShop site.
Add the following data:
- Insert GTM snippet - enable this field to add the GTM snippet to every page on your PrestaShop store. And add the GTM web container ID (you can find it in your GTM account in the tab “Accounts”). The format should be the following: GTM-XXXXXXX.
- GTM server container URL - use the subdomain you created for server-side tracking.
| If you don’t have a subdomain, please follow the instructions to add a custom domain to the sGTM container. |
- Stape container identifier - that’s an optional parameter, but we highly recommend adding it as it increases protection against blockers. You can find the container identifier in the container section in Stape’s admin. For more detailed instructions, follow Stape’s guide on how to find the Stape container identifier.
- Cookie Keeper - also optional; if you turn it on, you will minimize the impact of Safari ITP restrictions.
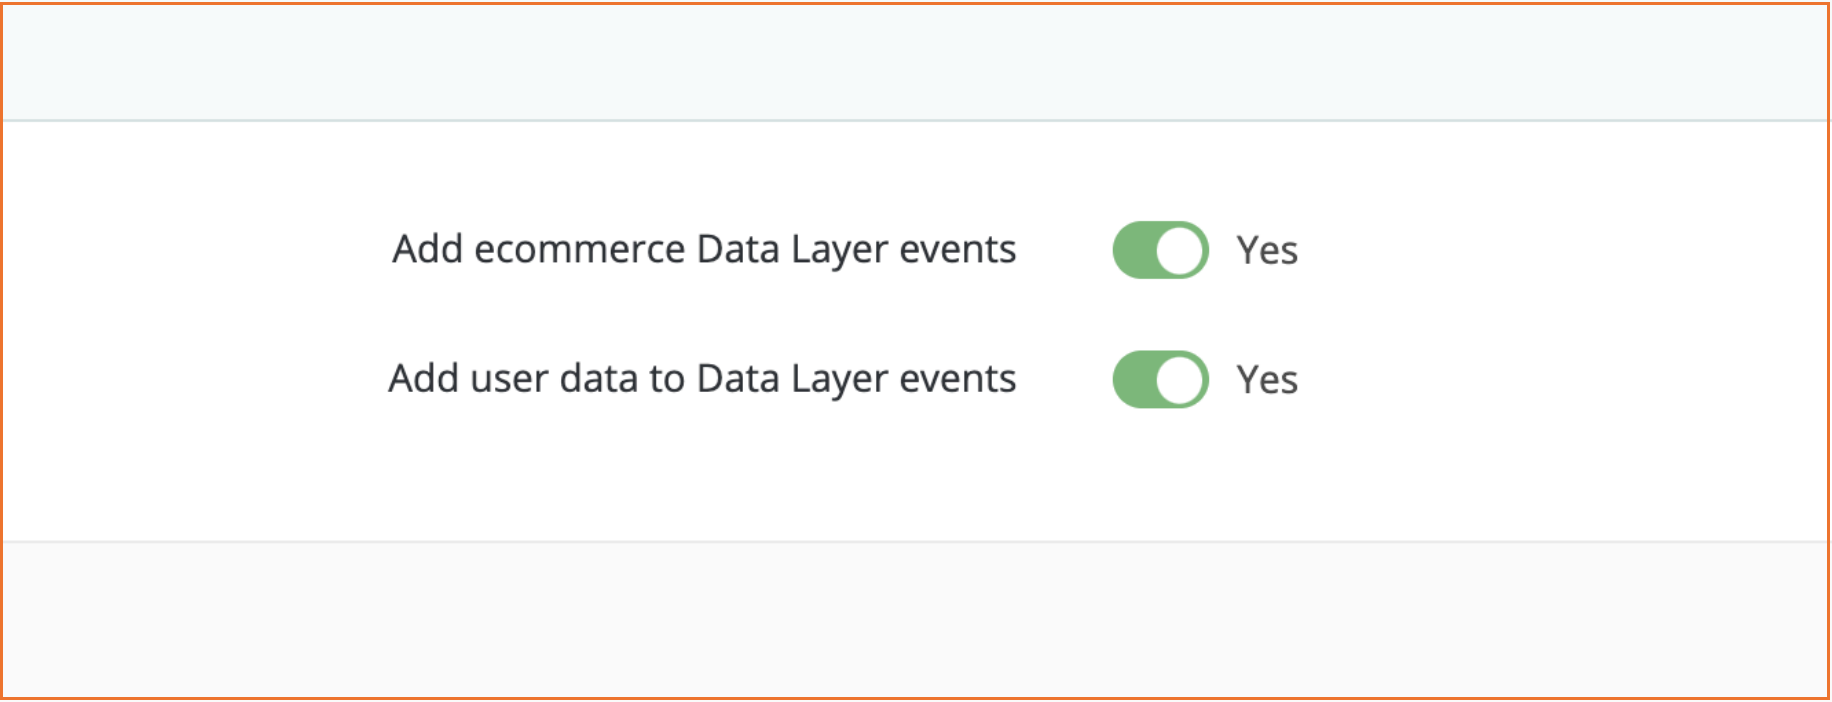
3.2 DataLayer tab
Here you can find a list of events and their payload, which are added via the module for PrestaShop.
In this tab, you can find toggles that enable dataLayer events. With their help, you can enrich the data by adding product and user information.
See the list of events that the module will push:
- view_collection
- view_item
- add_to_cart
- view_cart
- remove_from_cart
- begin_checkout
- add_shipping_info
- add_payment_info
- purchase
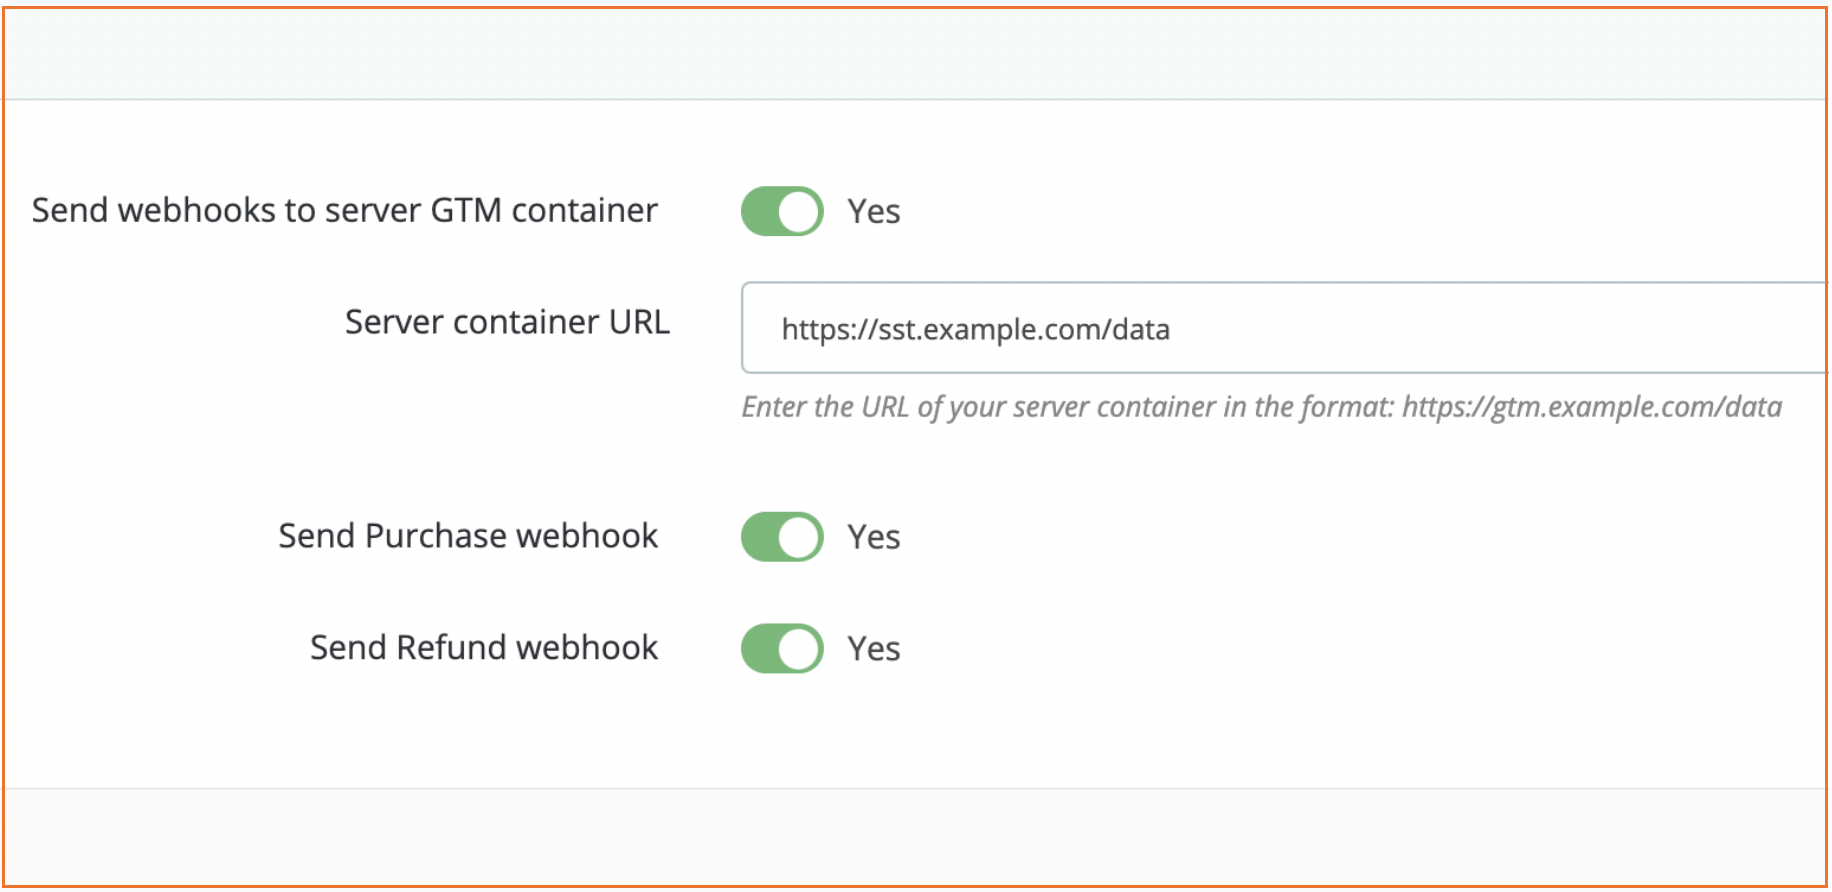
3.3 Webhooks tab
Please note:
Here, you can configure the webhooks to be sent to a specified URL for different events, such as purchases and/or refunds.
To activate webhooks configuration, turn on “Send webhooks to server GTM container”. Then you need to add the URL of your server container (format: https://gtm.example.com/data).
Turn on the fields according to the type of event - purchase and/or refund.
Check out the blog posts on using and debugging webhooks:
Click “Save”.
4. Send data to the server Google Tag Manager container. The two most common methods to achieve this are:
5. Set up tracking within the server Google Tag Manager container.
Most major marketing and analytics tools already offer support for server-side tagging and include tags for sGTM.
Also, you can find guides on how to implement event tracking on the server-side:
Additionally, you can enhance sGTM data using Firestore or Google Sheets. Another useful feature of sGTM is its ability to send offline conversions to Facebook and AdWords.
| Check out the list of platforms that support Google Tag Manager server-side tagging in our blog post. |
Test PrestaShop module setup
Check the configuration on the website
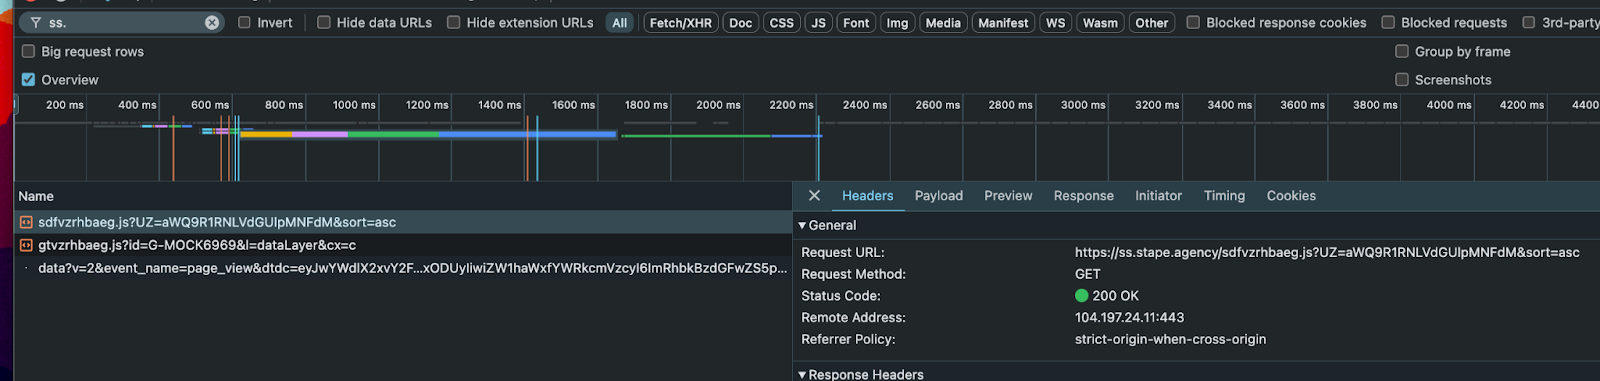
To check your configuration, visit any website page and open your browser's console. Go to the network tab and search for your subdomain. If you find a request with a 200 status code, it means that the setup works properly.
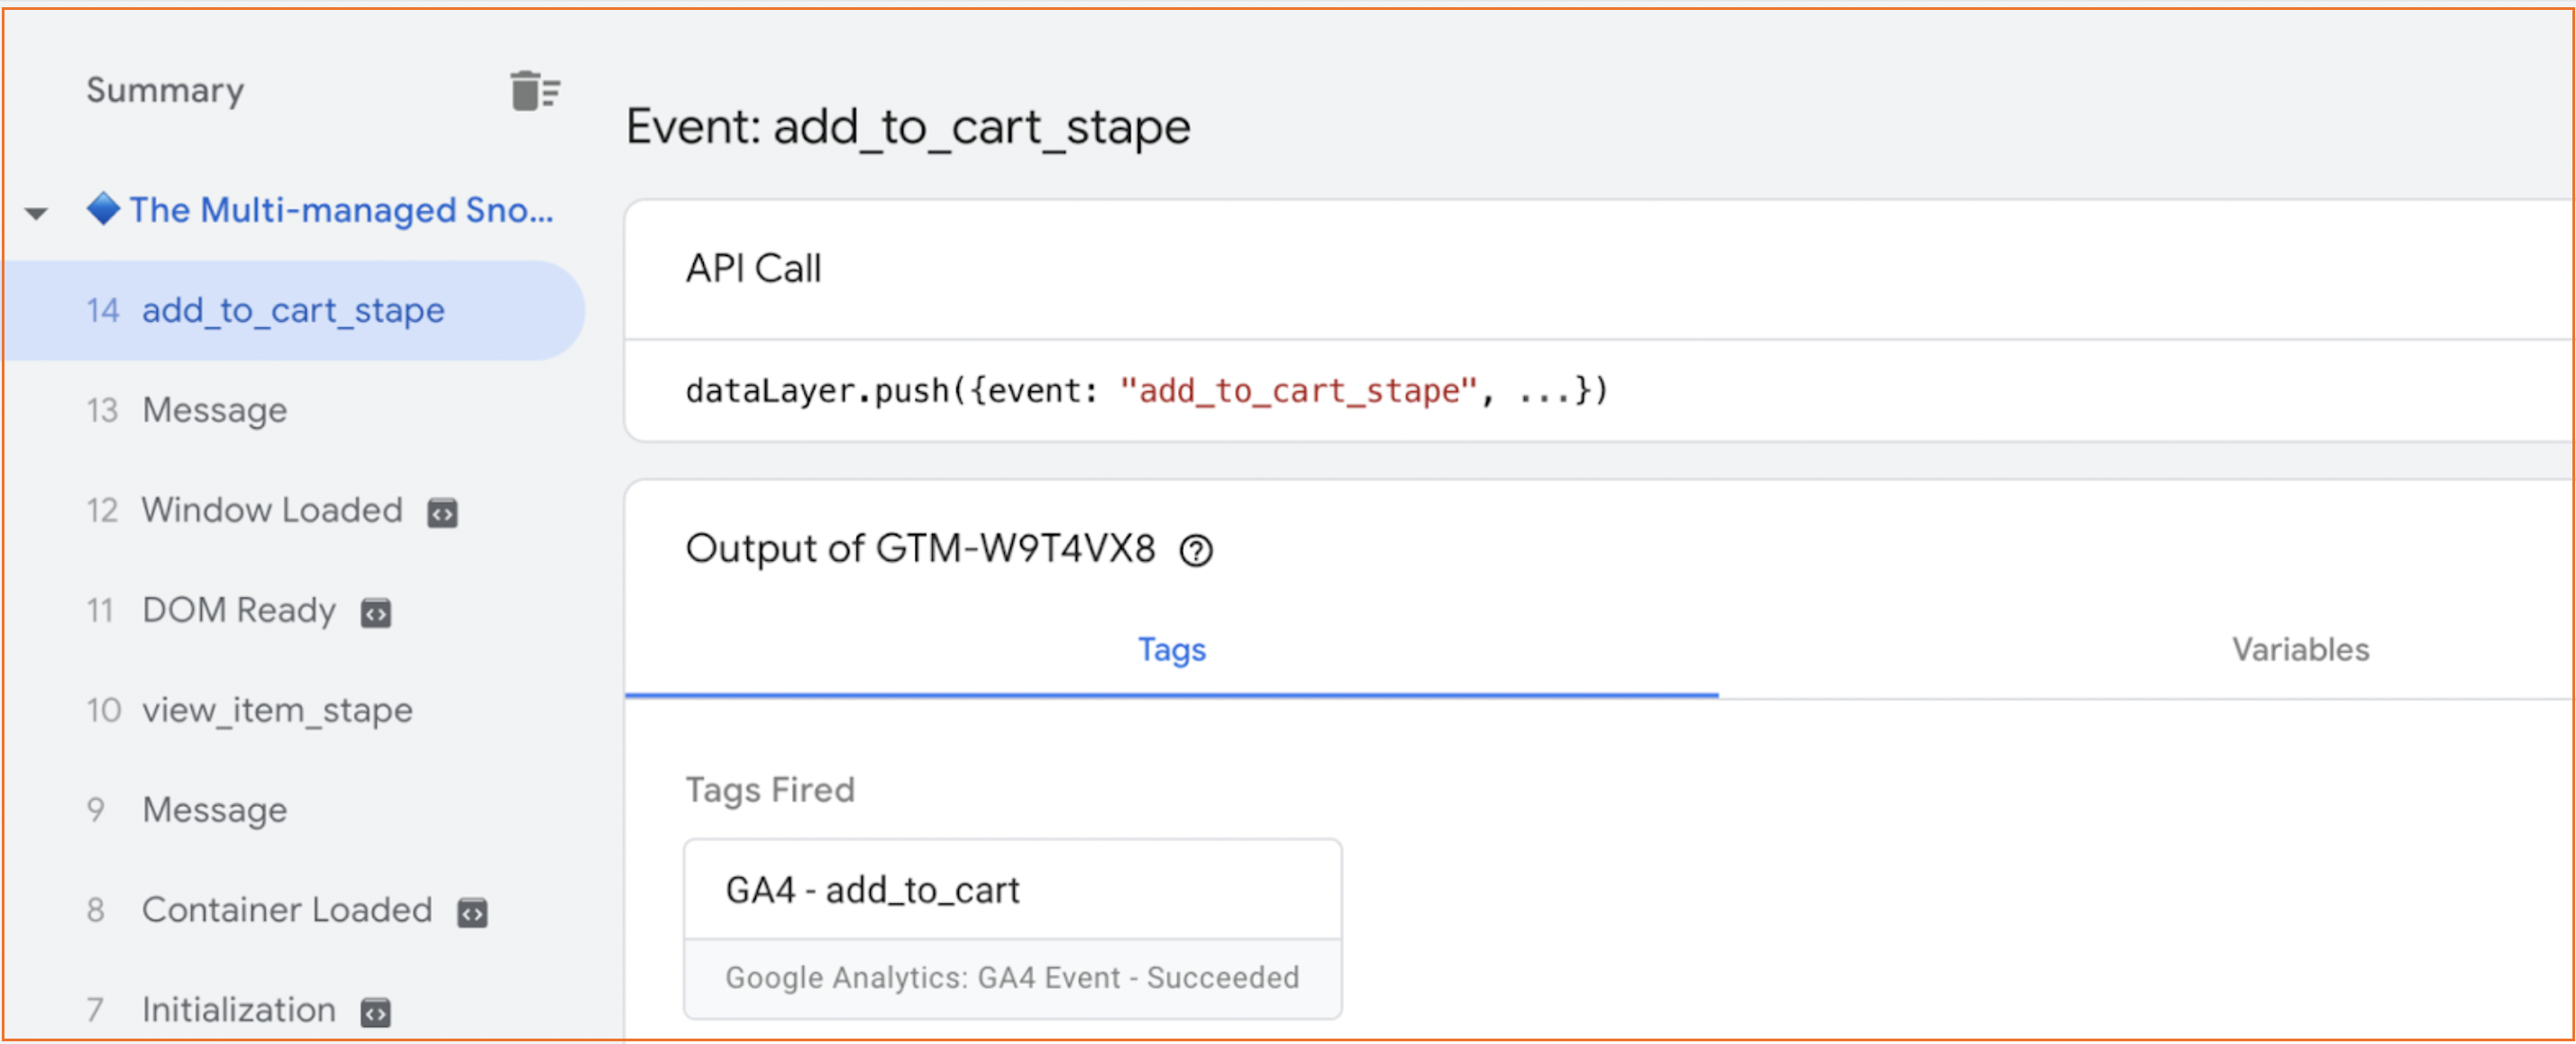
Debug triggered events in GTM
Debugging in GTM for the PrestaShop website works the same way as for any other platform. To check whether the events you configured in dataLayer are triggered, you need to launch a preview in the web GTM container and take the required actions (e.g., add an item to the cart) on the website and check whether the tags fired in GTM.
Was this article helpful?
Comments