How to set up Wix app
Updated Sep 28, 2026
Before you begin
If you want to use functionalities such as the Custom Loader power-up, you need to have an sGTM container hosted on Stape. You will also need GA4 or Data tags configured in a web GTM. If you don’t have this, follow the Get started with sGTM hosting instructions.
How to set up the app
- 1.Log in to your Wix account.
- 2.Go to Apps → Manage Apps and search for the Stape Conversion Tracking app.
- 3.Click Add to site and install.
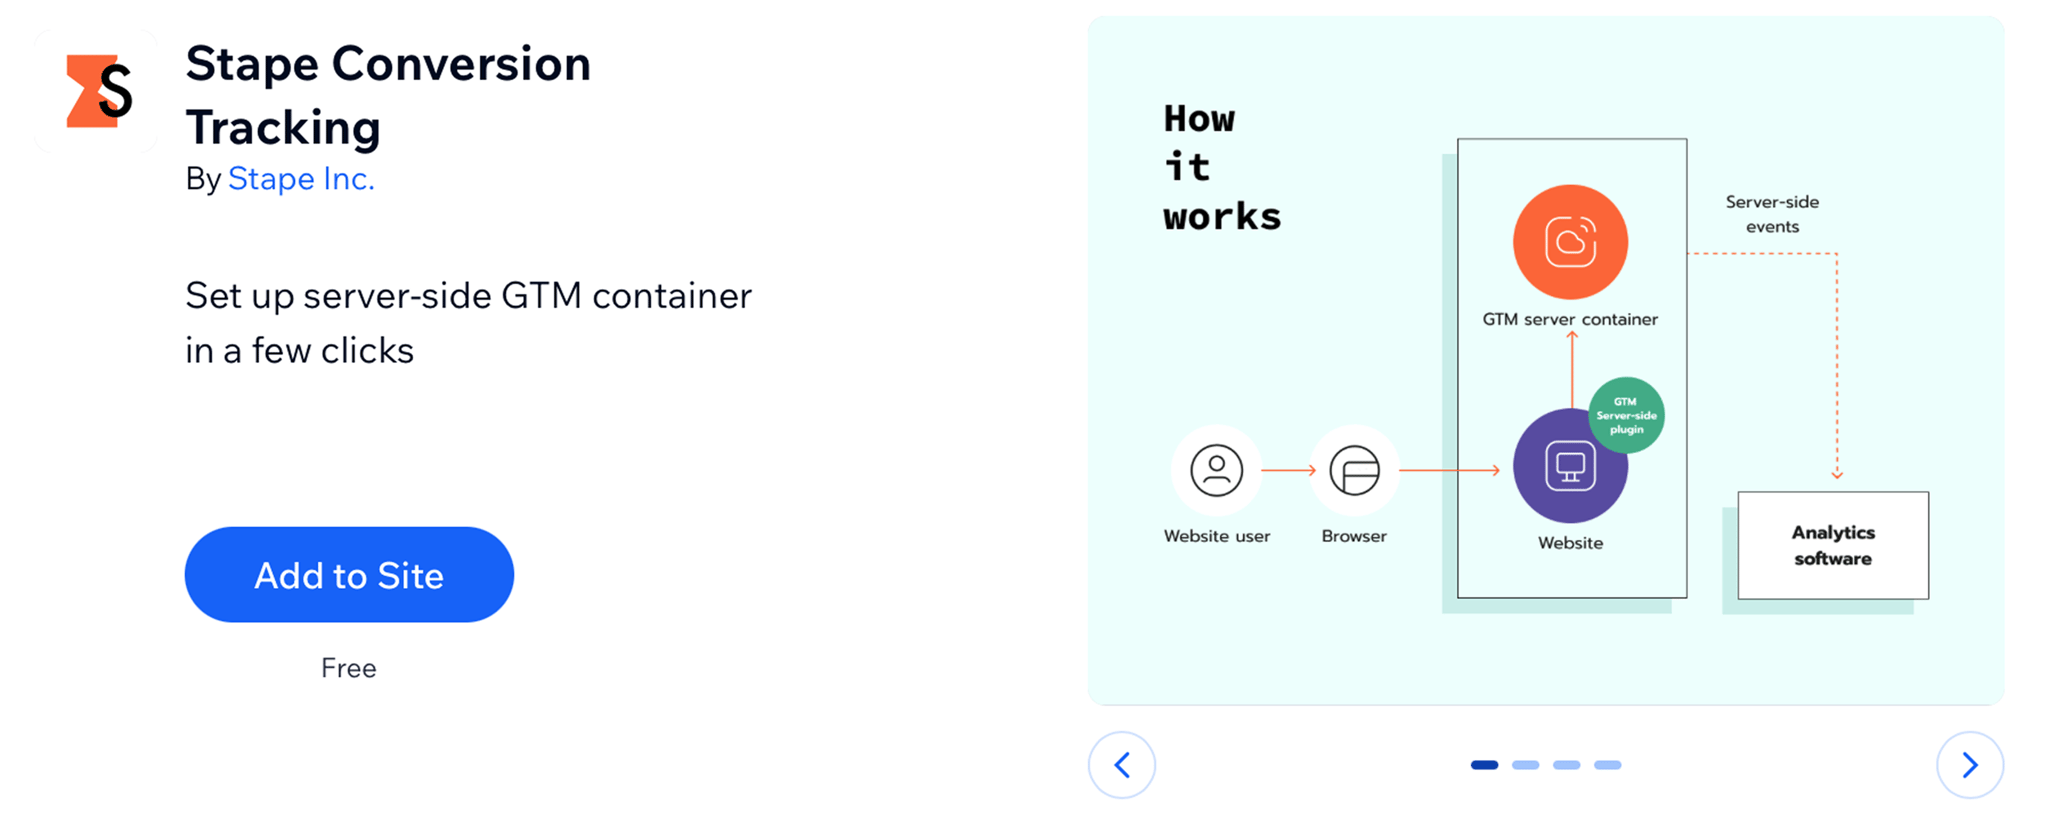
General
- 1.Open the app and configure the General tab:
- Specify WEB container ID – enter your web container ID.
- Add custom domain (optional) – specify the custom domain (optional). In this case requests go through your tagging subdomain, so cookies stay first-party.
- Stape container identifier or custom loader (optional) – specify Stape container identifier (optional). The
gtm.jsscript loads from your domain instead of Google’s, which helps the script get past ad blockers. Custom Loader needs to be turned on in your Stape account to use it.
2. Click Save.
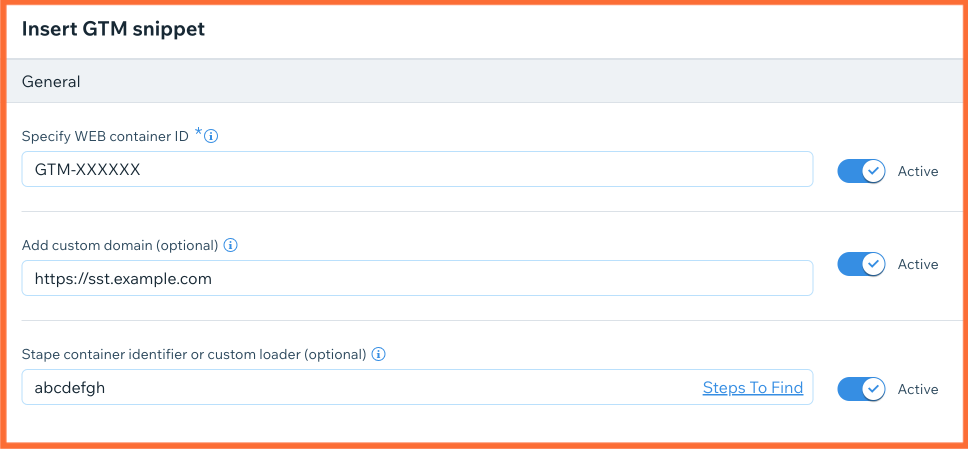
Data Layers
- 1.Configure the Data Layers tab:
- Enable Ecommerce Data Layer events – add standard data layer events to your site.
- Enable User Data in Data Layer events – add user data layer events to your site.
- Append "_stape" suffix to events – adds
_stapeto event names so they don’t clash with existing dataLayer pushes, potentially triggering your tags twice. When it’s unchecked, event names are pushed as per GA4 schema.
2. Click Save.
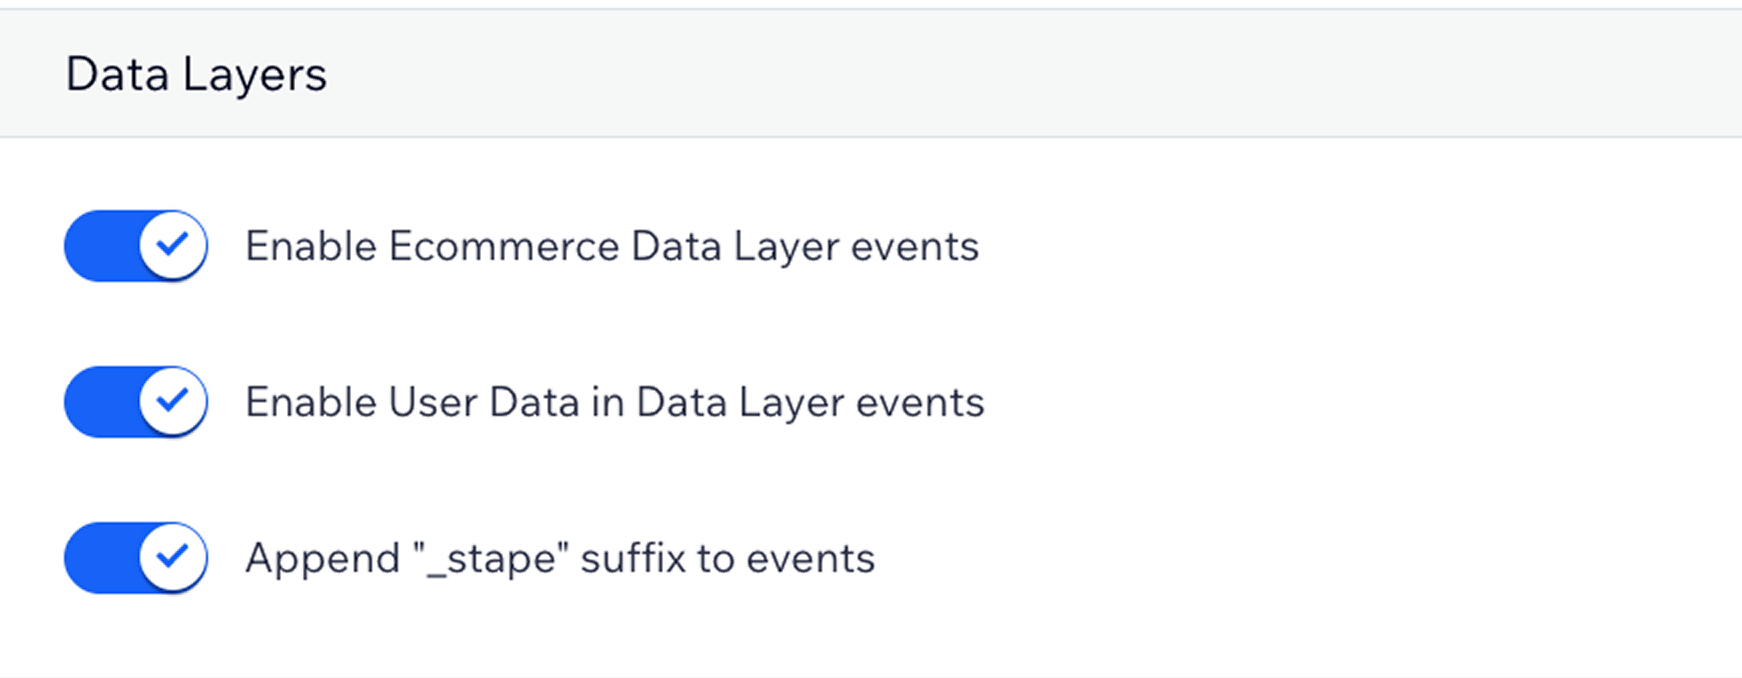
Webhooks
- 1.Configure the Webhooks tab. Webhooks are useful for events outside the website (for example, phone or offline sales).
- Add your GTM server container URL.
- Choose the webhooks:
- Purchase webhook – send a purchase event when a new order is created.
- Refund webhook – send a refund event when an order is refunded.
2. Click Save.
Testing
- 1.Open any site page, open the Developer Tools, and in the Network tab filter by your tagging server URL. If you didn’t set up a custom domain, search by
gtm.js. You should see the web GTM script served through that URL, with status 200.
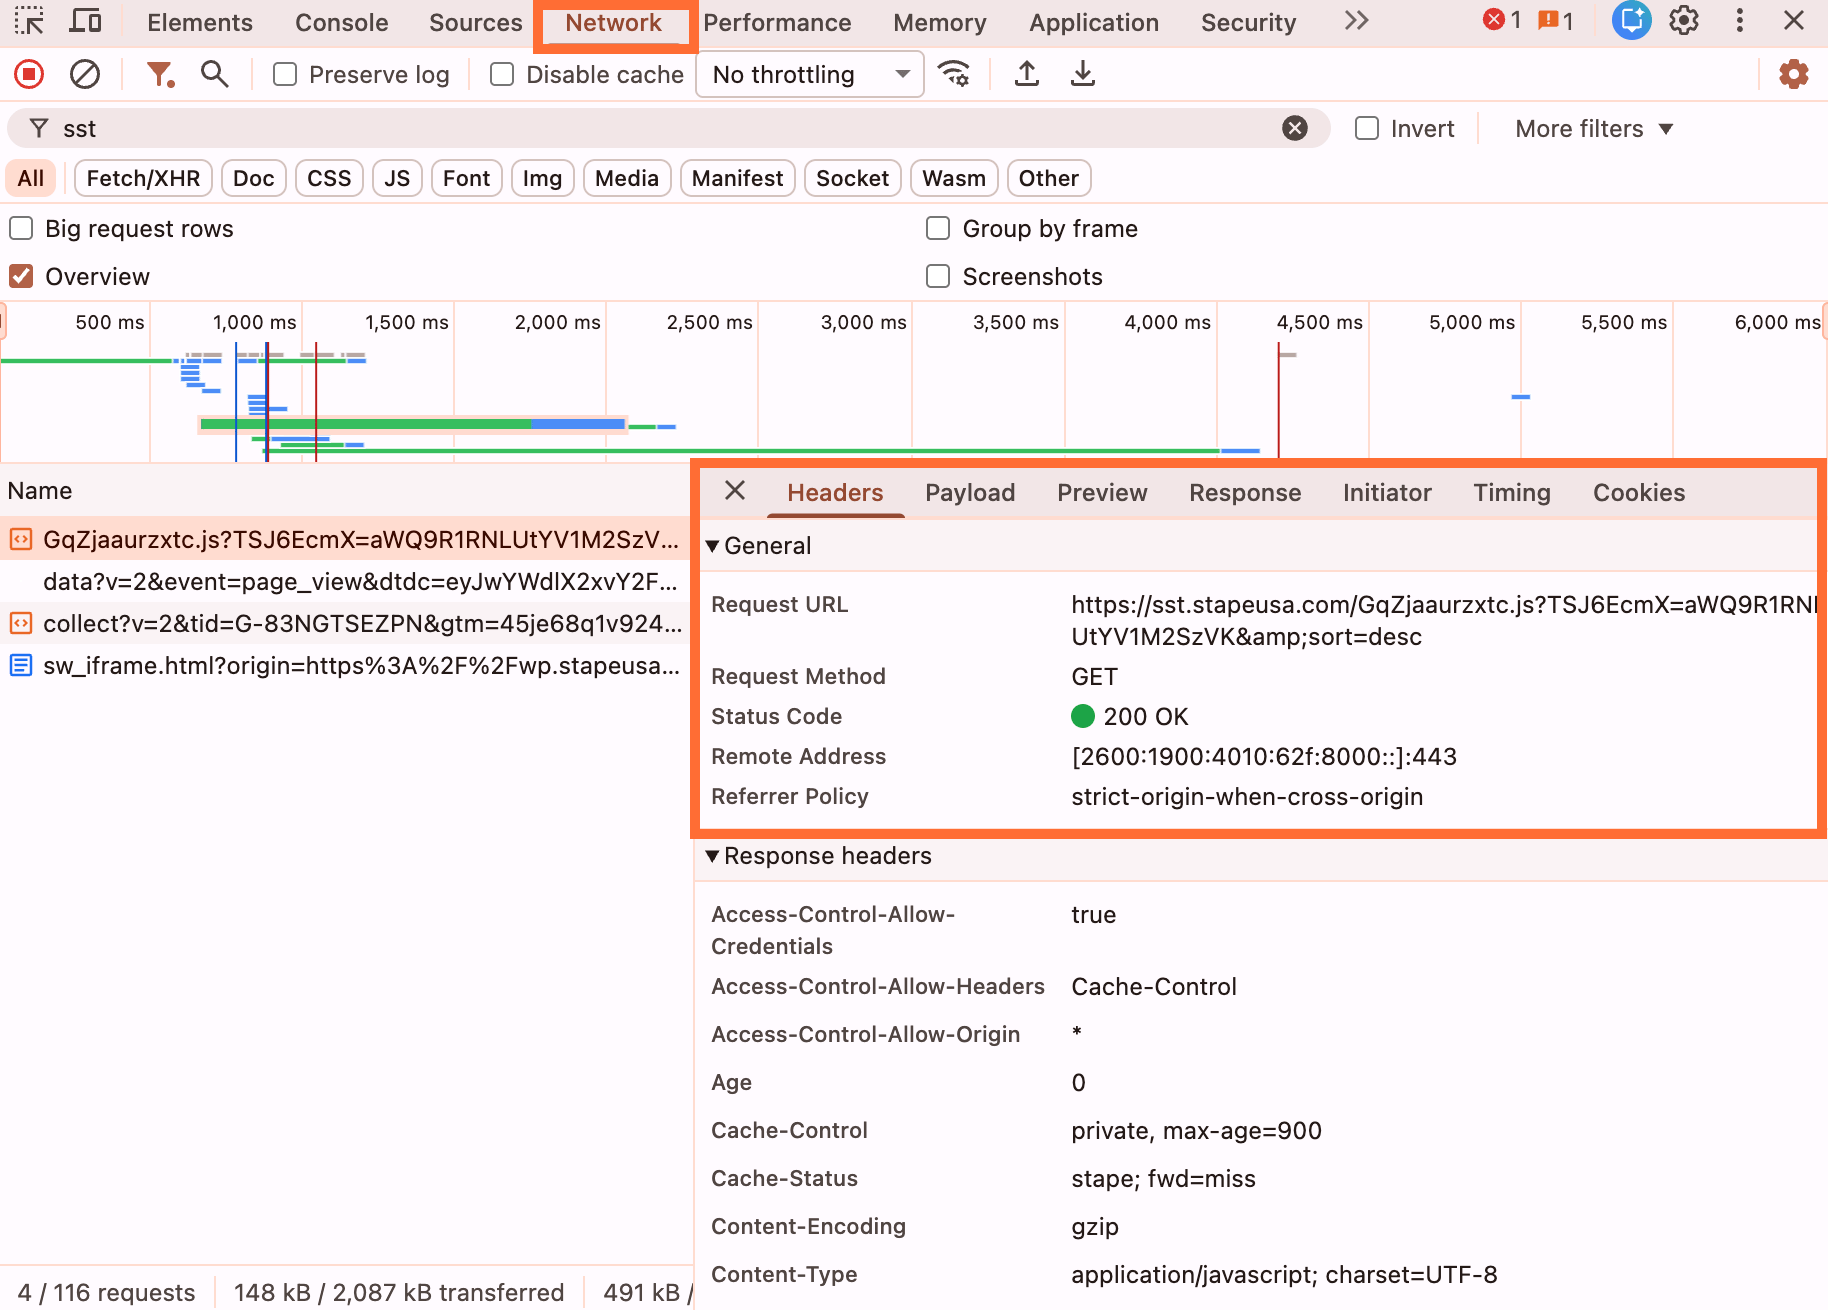
2. In the same Developer Tools, go to Console and do some actions on your site (for example, add to cart). Type in dataLayer and press Enter. Confirm that the dataLayer is being filled.
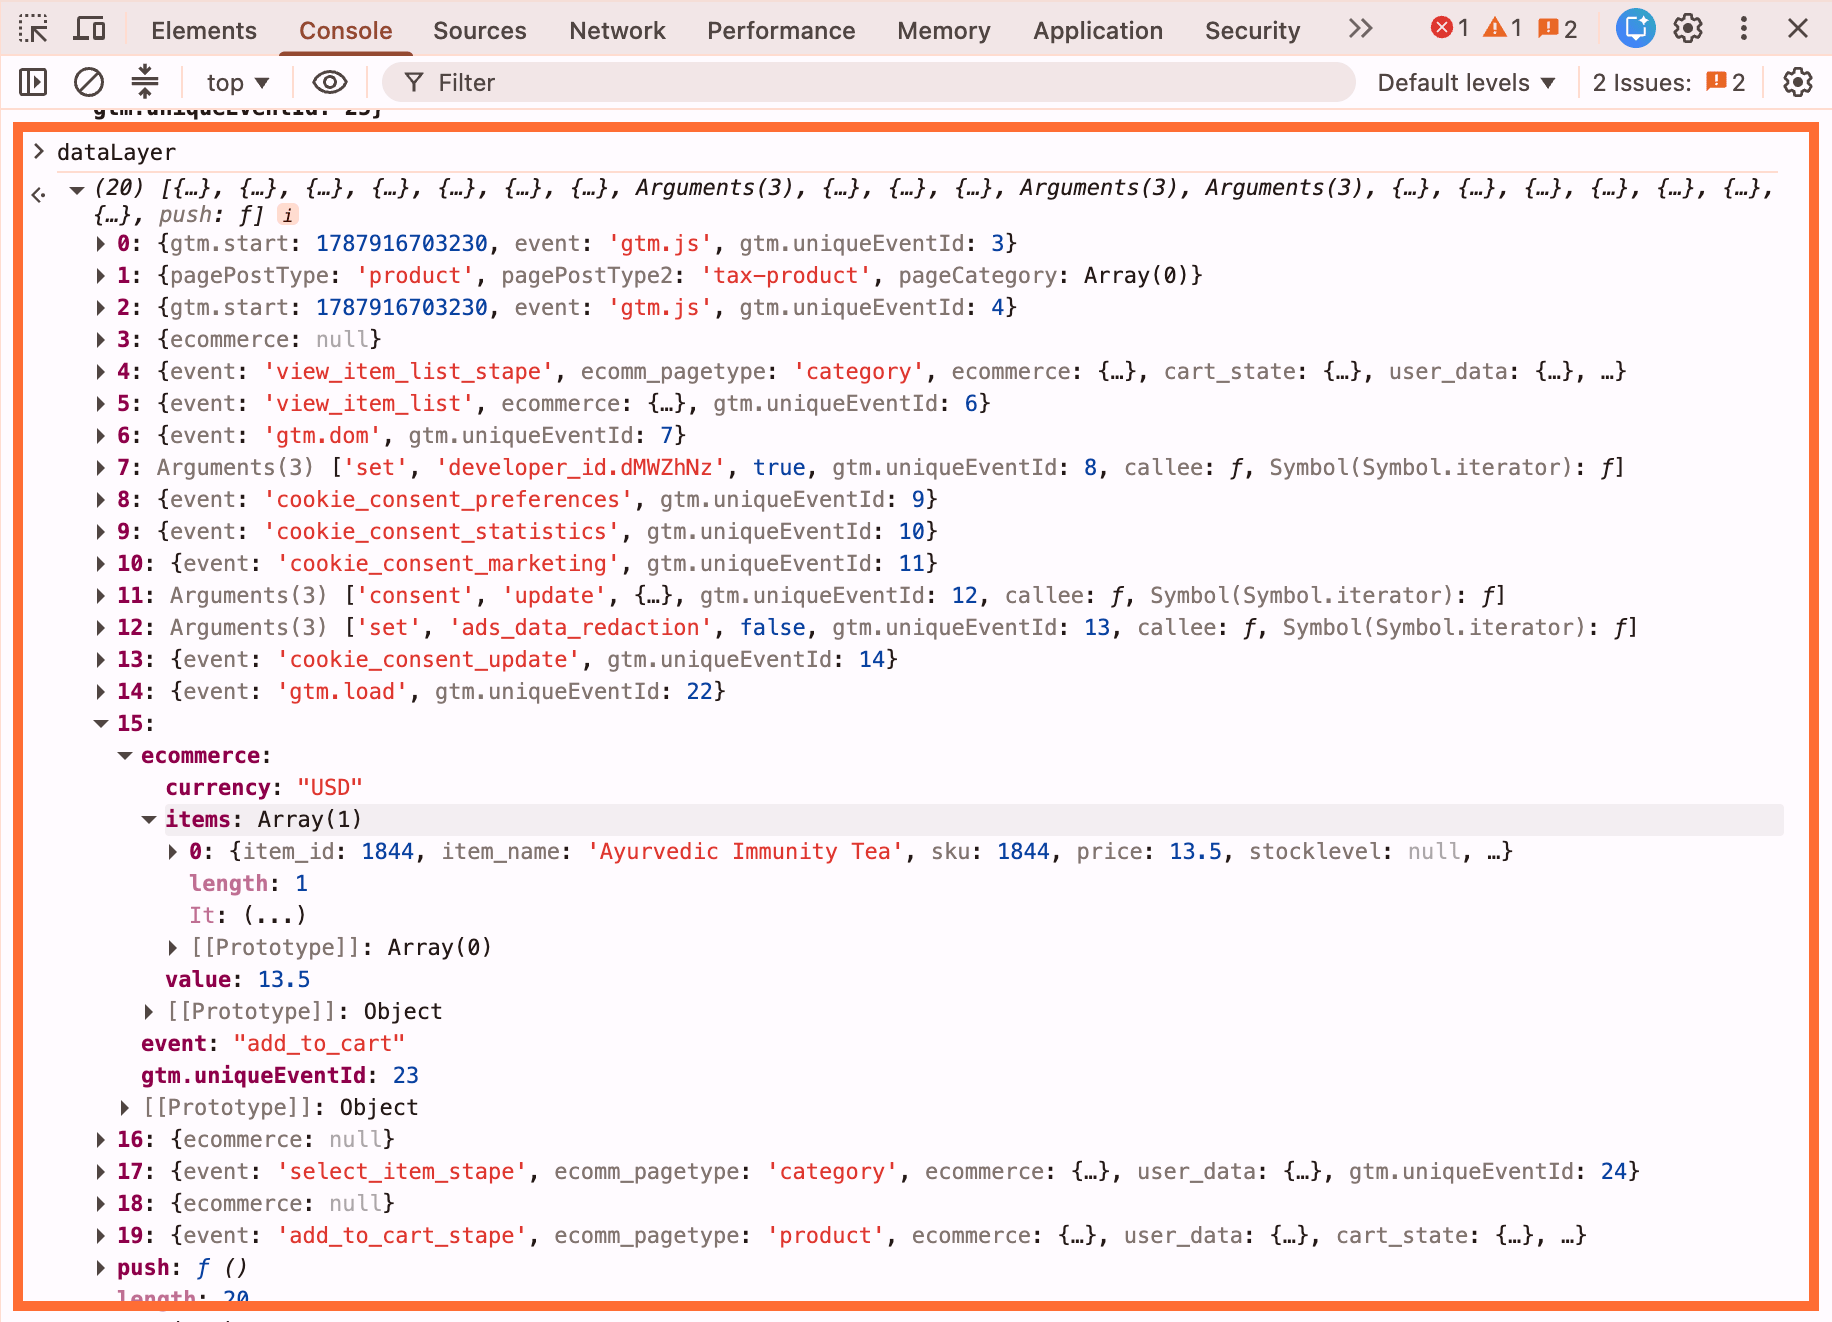
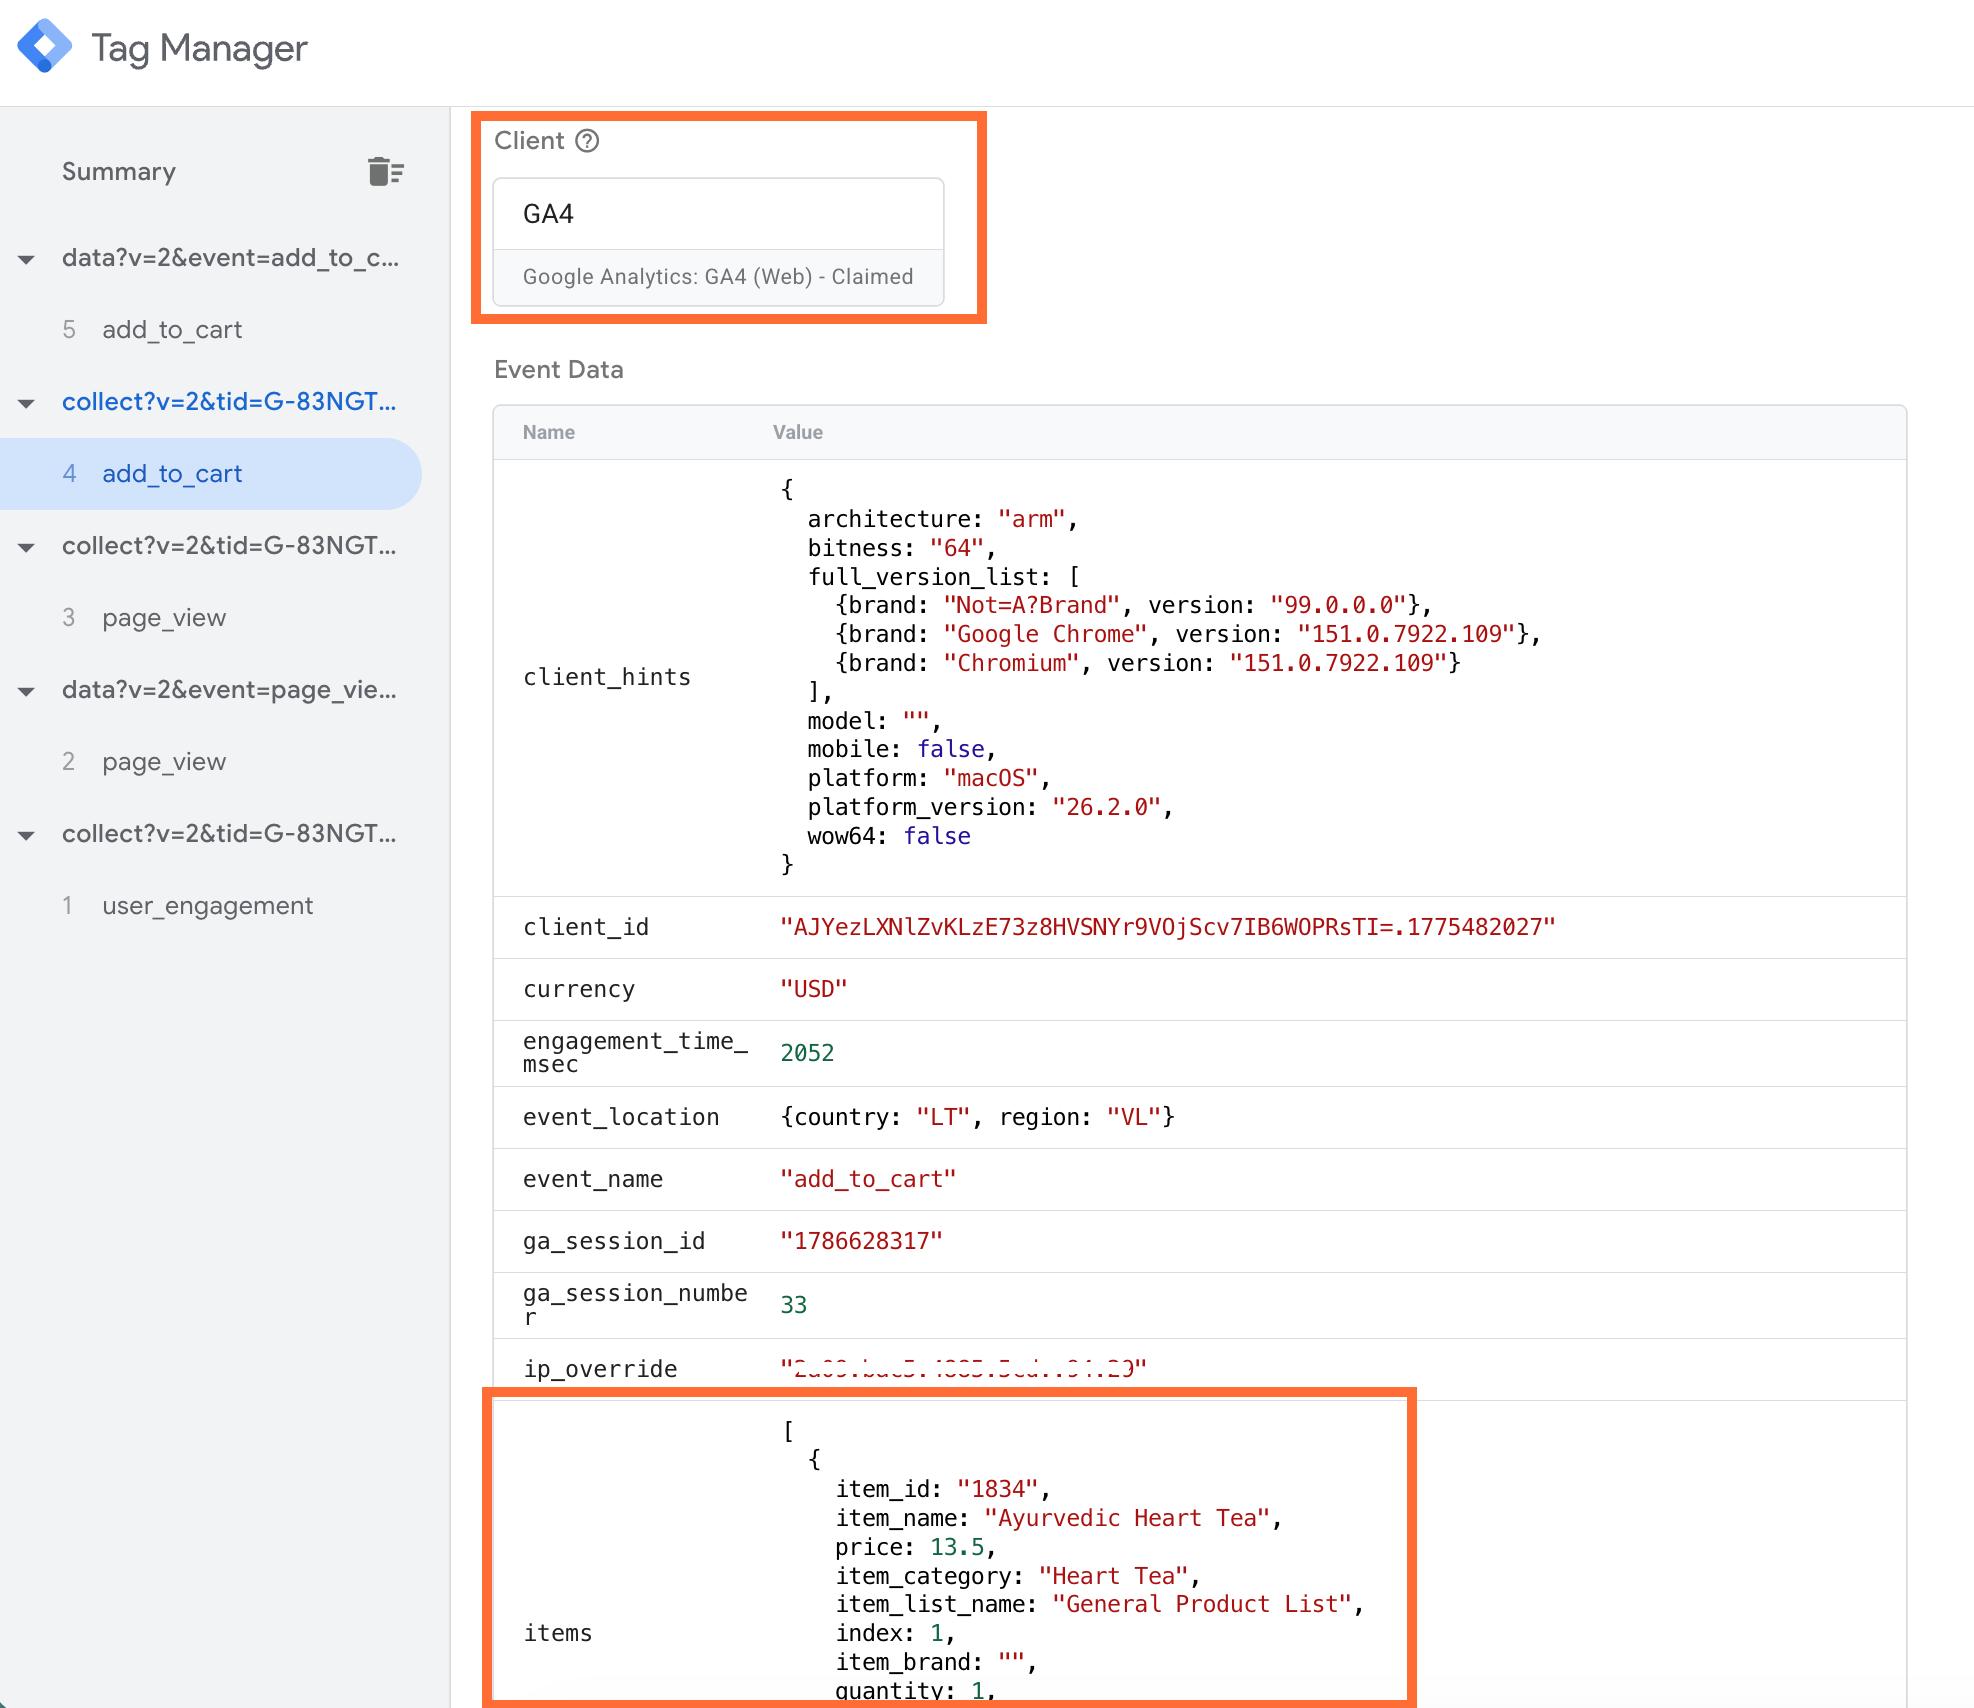
3. Test in Google Tag Manager:
3.1. Open your sGTM container → click Preview.
3.2. In a separate tab, open your web GTM container → click Preview and enter your site URL.
3.3. Perform test actions on your website (such as add to cart).
3.4. In the sGTM debug window, verify that incoming requests arrive at your sGTM and are claimed by your Client (GA4 Client or Data Client).
Was this article helpful?
🍽 Table of content:
Comments