How to integrate Facebook Pixel with a web GTM container
Uliana Lesiv
AuthorStape has developed a tag for web GTM containers that allows you to add Facebook Pixel to GTM and efficiently manage data collection. In this article, we consider the benefits of integrating Facebook Pixel with GTM, and show you how to do it using the Meta Pixel tag by Stape.
What are the benefits of integrating Facebook Pixel with GTM?
Google Tag Manager is a handy hub for data tracking management without directly modifying your website's code. Integrating Facebook Pixel with GTM allows you to track the events you need easily; besides the standard ones, you can set custom event tracking.
GTM integration offers a convenient way to send event data to the Meta platform. With its help, you can keep all the tracking solutions you use besides Facebook Pixel in one place (e.g., Google Analytics 4, Google Ads). Accurate event tracking is what makes KPIs for eCommerce reliable: without it, the numbers you measure won't reflect reality.
Stape's Facebook Pixel tag vs Meta’s Facebook Pixel tag
Stape's tag provides the following advantages compared to Meta’s Facebook Pixel tag:
Supporting GA4 data layer. Instead of manually pulling data, Stape's Facebook Pixel tag allows the Pixel to automatically read parameters like event_names and items directly from the datalayer. The items array is converted into the format the Meta Pixel needs for its tracking. Stape's tag parses both Google Analytics 4 and EEC format. At the moment, Meta's tag supports only the Enhanced Ecommerce (EEC) data layer, which was used for Universal Analytics, and GA4 data layer parameters must be configured manually (writing custom code to take data from the GA4 data layer and pass it to the Meta Pixel).
Pushing events to the data layer with a unique ID. Our new Meta pixel tag provides an option to easily push a new event with the unique event ID value in the dataLayer. In an advanced setup where you need to use tag sequencing, you may have noticed that the unique event ID variable may resolve differently, although all the tags fire on the very same event. That's how GTM works, and we cannot do anything about it, but with this option, there is a solution to that problem. Just push a new event name, and a consistent, unique event ID will be available as a dataLayer value you can use in all your tags.
| If you are using tag sequencing in your setup and face an event_id mismatch, refer to our guide on fixing inconsistent event IDs using the Meta Pixel tag by Stape. |
Storing to Local Storage and reusing data across sessions. The tag has an option "Enable Event Enhancement" which allows you to store user data in Local Storage. You can activate this option only if Advanced Matching (sending users' personal information, such as email addresses, etc., to Meta) is enabled. Whenever there is a stored item in local storage, user data will be included in the payload of every event sent to Meta, which will allow you to increase Event Match Quality.
Certain user information, like a user's unique ID or other relevant data, is saved locally in the user's browser. The data persists even after they close the browser window or navigate away from the site. In this way, the Facebook Pixel can identify that user across different browsing sessions. This is particularly useful for tracking multi-session conversion paths.
You are free to decide whether to store plain user data or already hashed. Regardless of this choice, user data will always be sent hashed to Meta. For your convenience, you may also use a standard User-Provided Data variable to populate user data parameters in a tag.
Supporting GTM Consent Mode. Stape's tag provides an option to adapt the tag's behavior based on a user's consent choices as communicated by a consent management platform (CMP) you use.
How to configure Facebook Pixel using the web GTM tag
Create Facebook Pixel
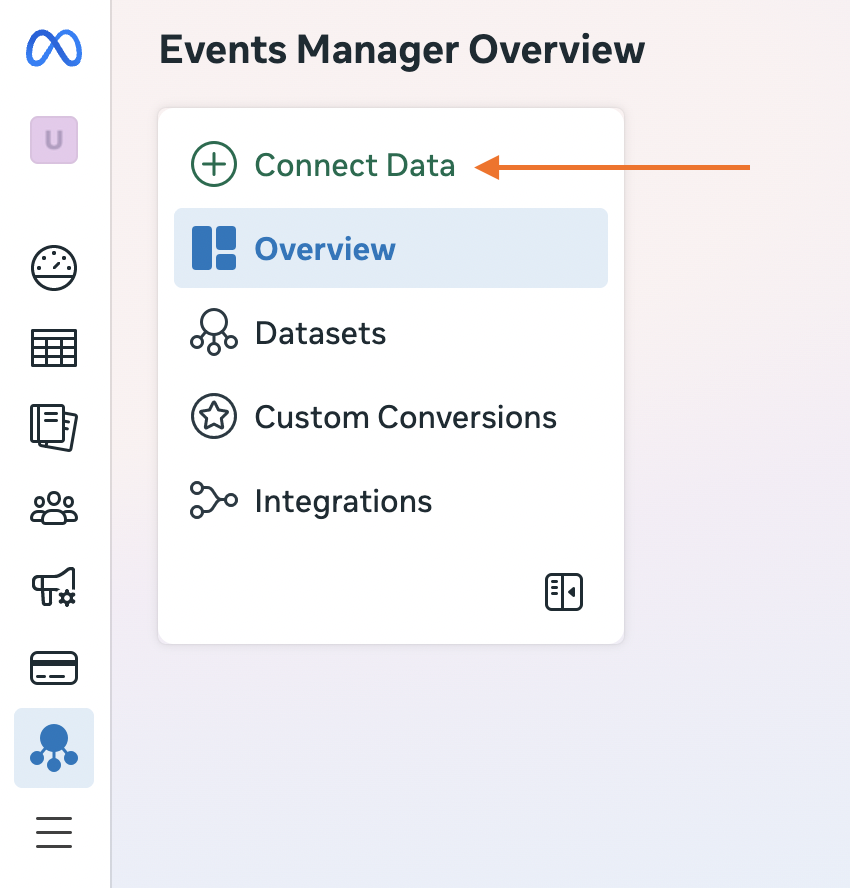
1. Log in to Meta Events Manager.
2. Click Connect Data.
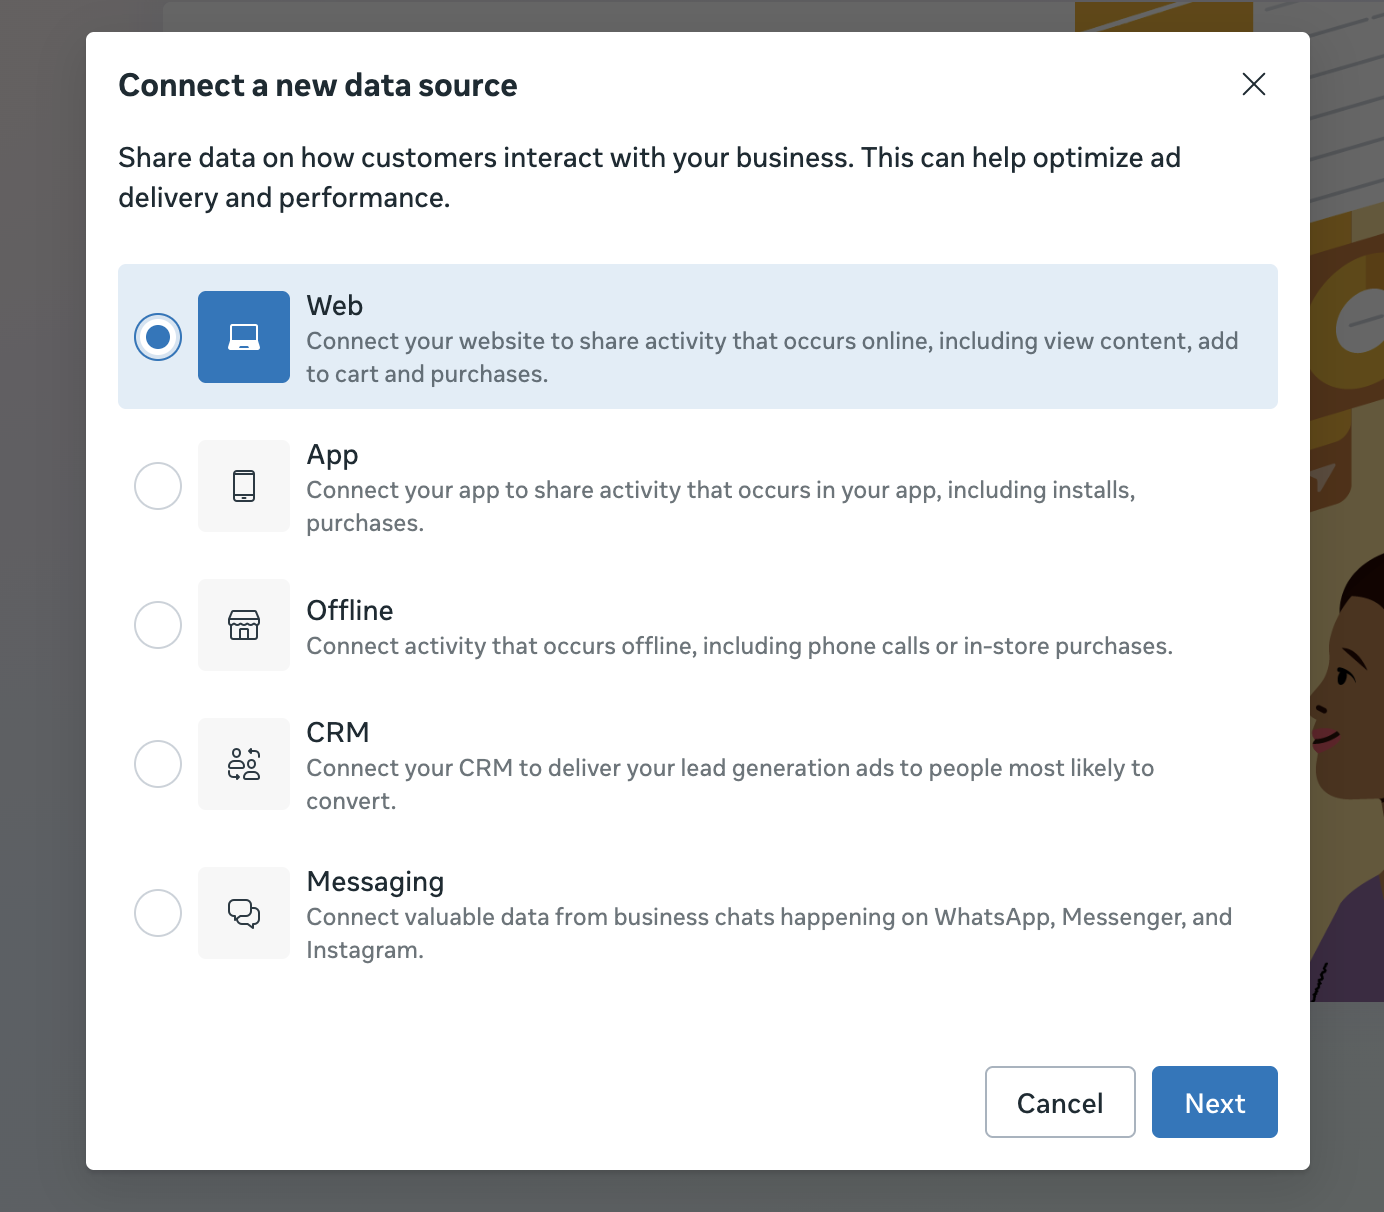
3. Select Web as a data source → click Next.
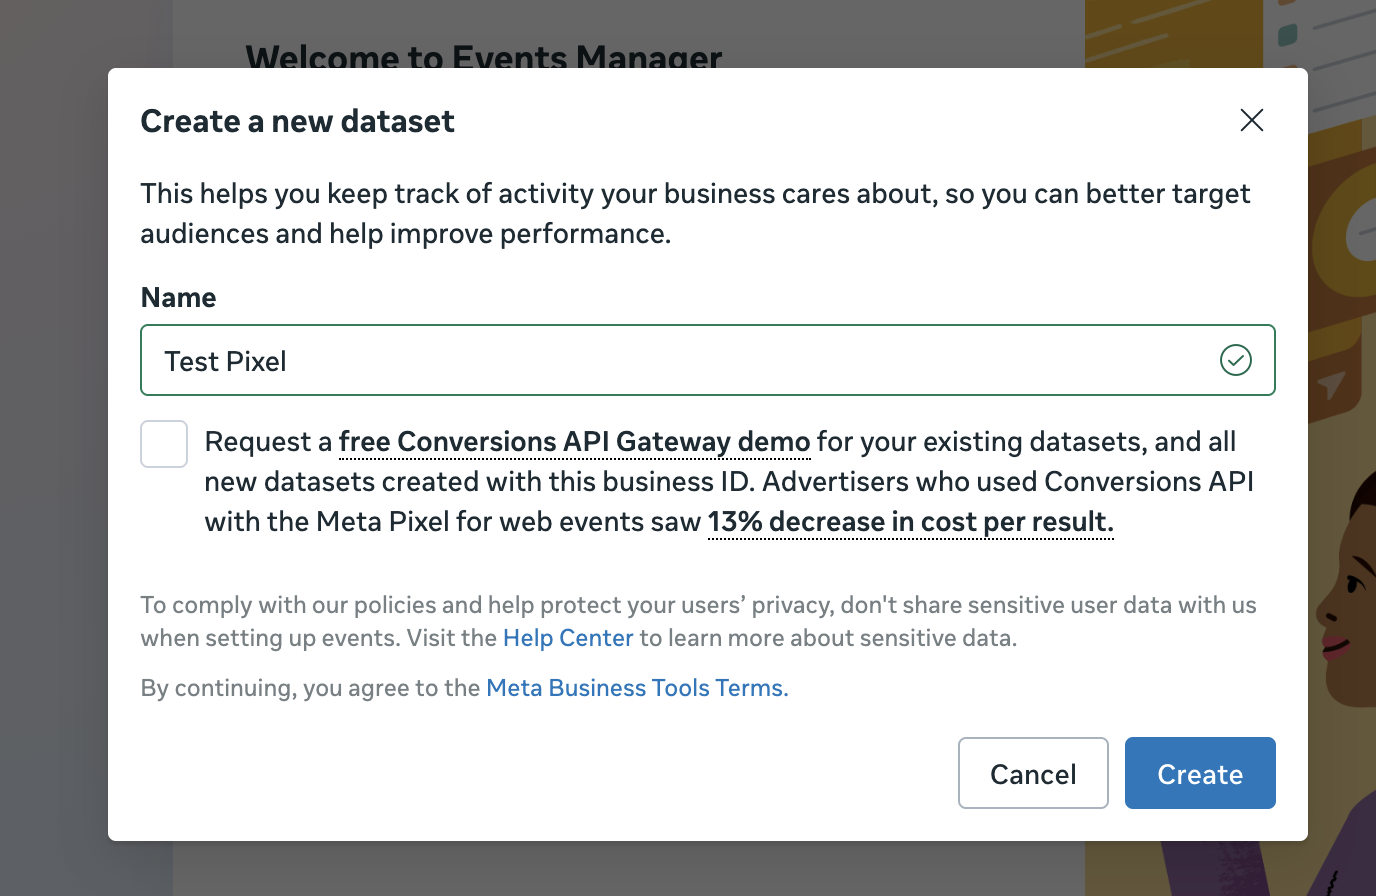
4. Add a name for your Pixel and click Create.
| Please note: By default, Meta offers a free Conversions API Gateway demo - that's a solution which allows you to track data more accurately using server-side tracking, you can deselect this option. It's just one of several setup solutions available. For a detailed overview of Meta's tracking solutions and a comparison of the different approaches, refer to our guide on Facebook tracking. |
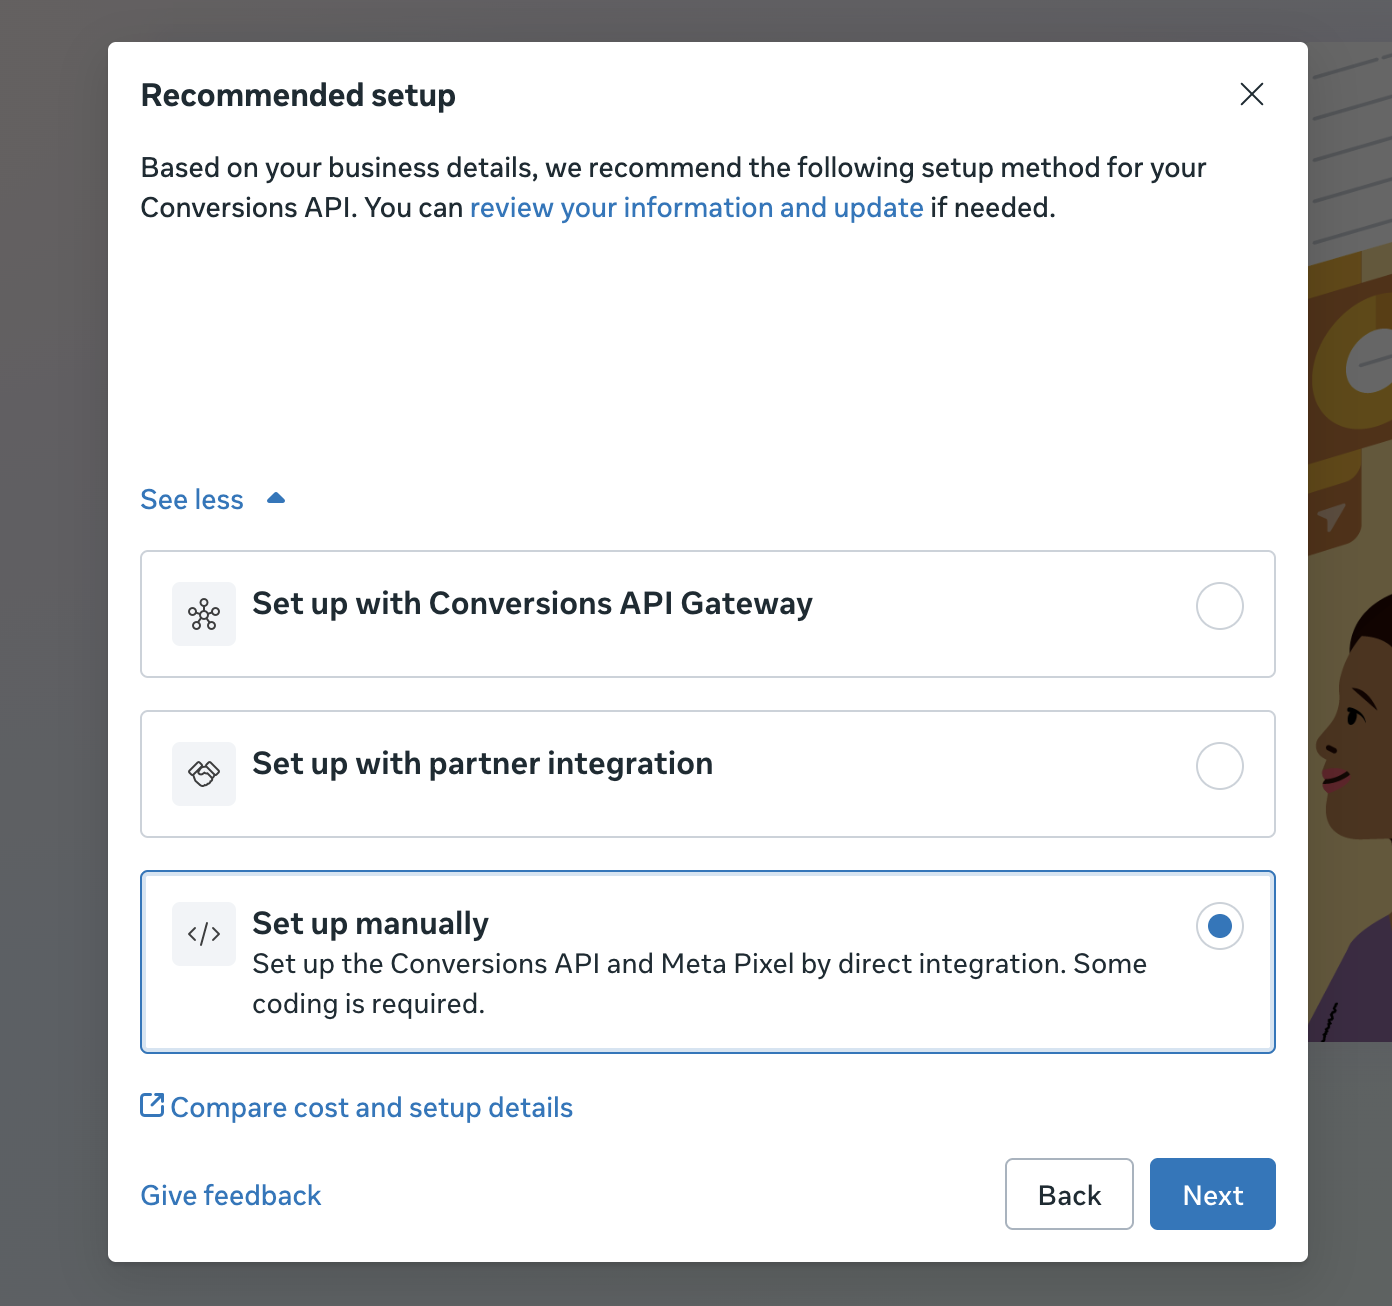
5. As a setup option, select Set up manually.
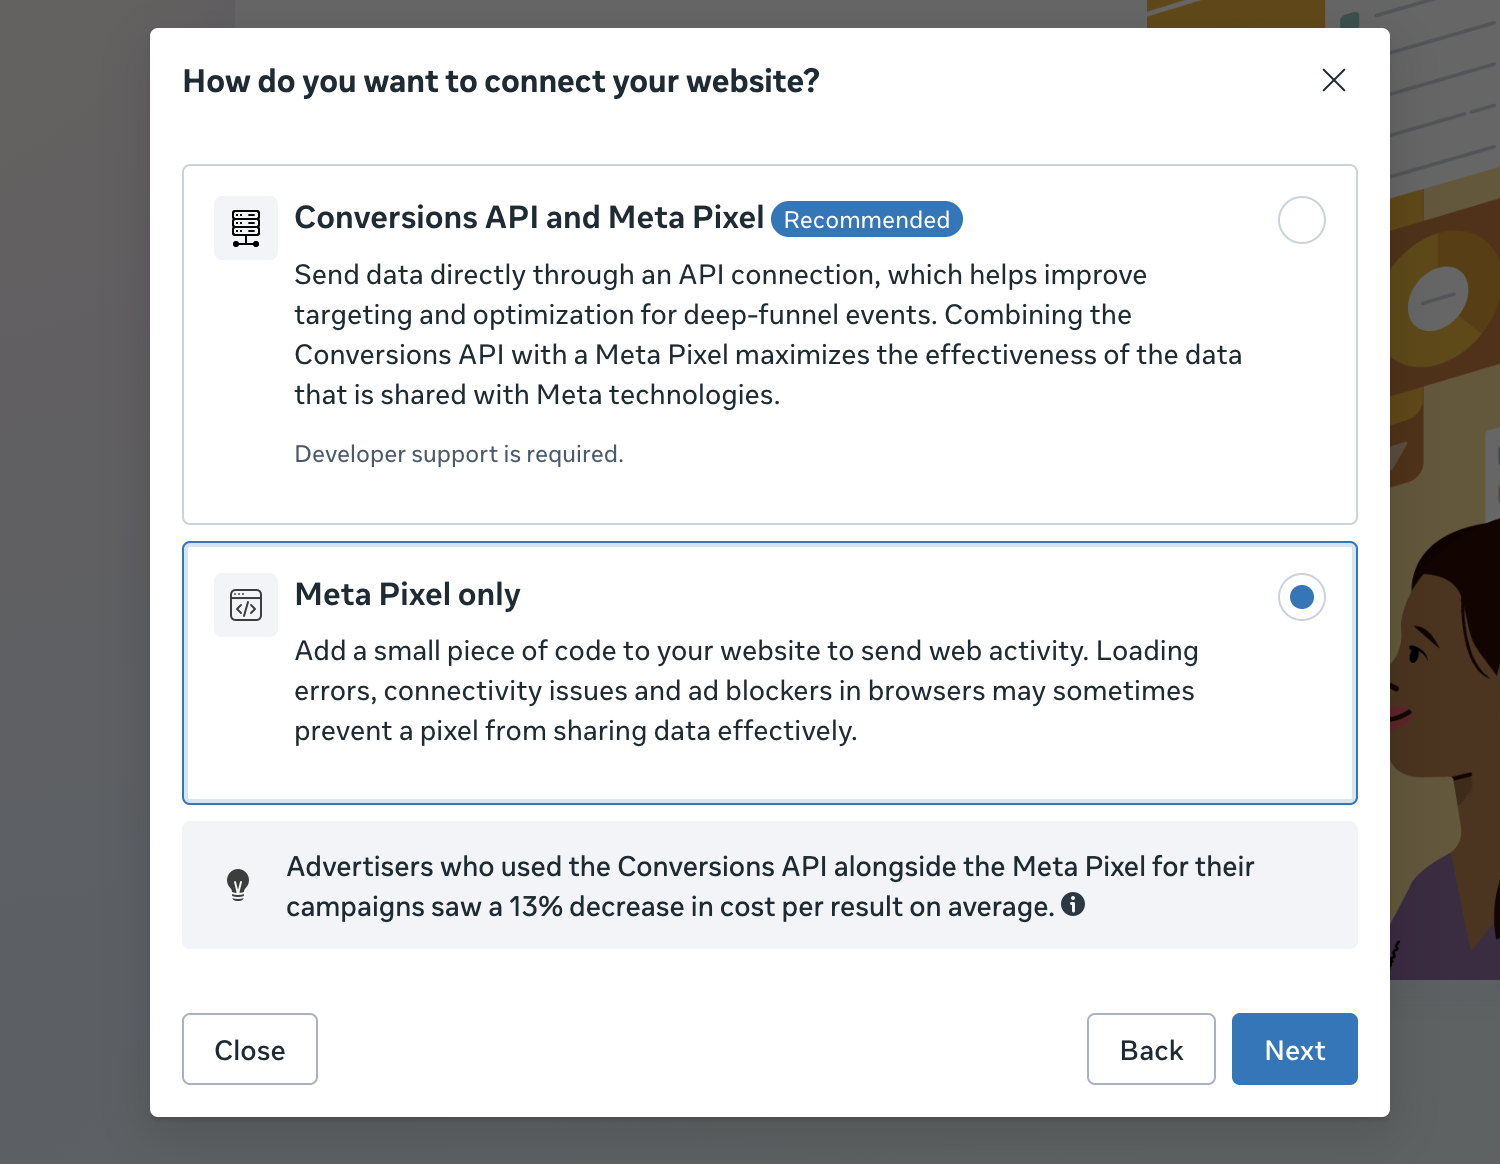
6. On the next step, Meta recommends using Conversions API and Meta Pixel. Meta Conversions API (CAPI) is another way to configure more accurate data collection using server-side tracking. Compared to the Meta Conversions API Gateway, CAPI is a more complex way to configure server-side tracking, but it provides greater flexibility and customization.
In this article, we focus on client-side tracking, so we select Meta Pixel only.
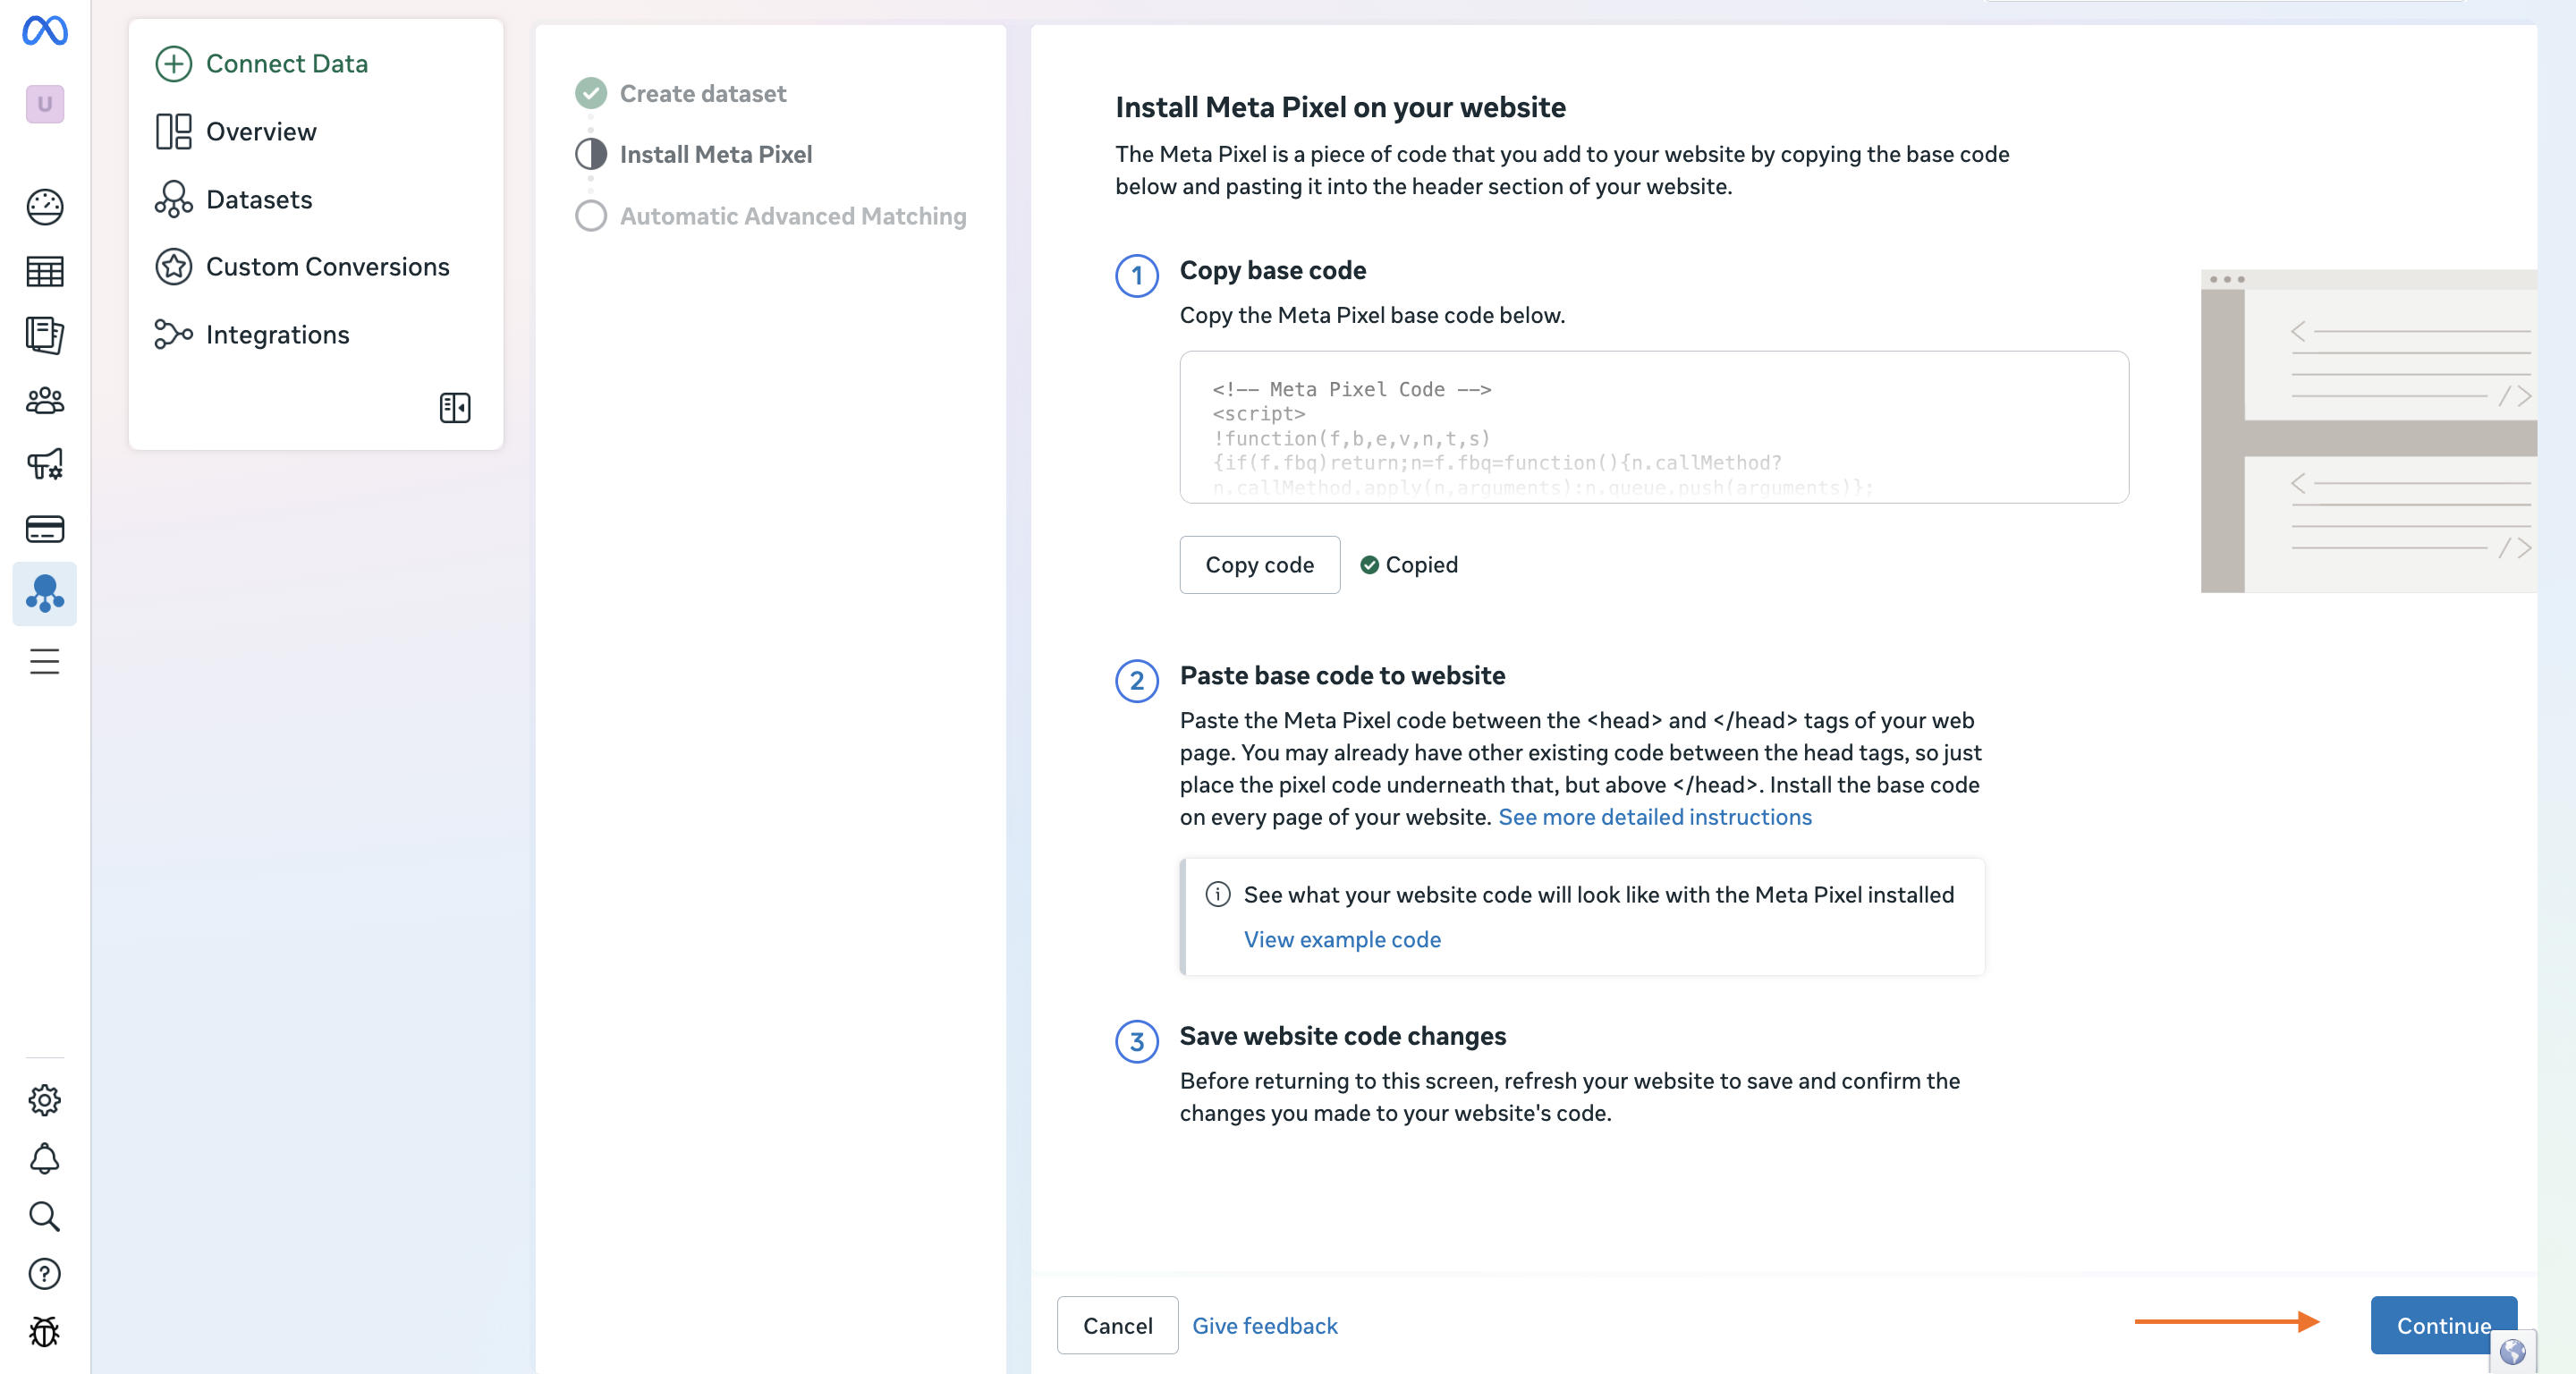
7. If you integrate Facebook Pixel with a web GTM tag, you don't need to insert the code that Meta generates into your website. On this point, you just need to click Copy code and then click Continue.
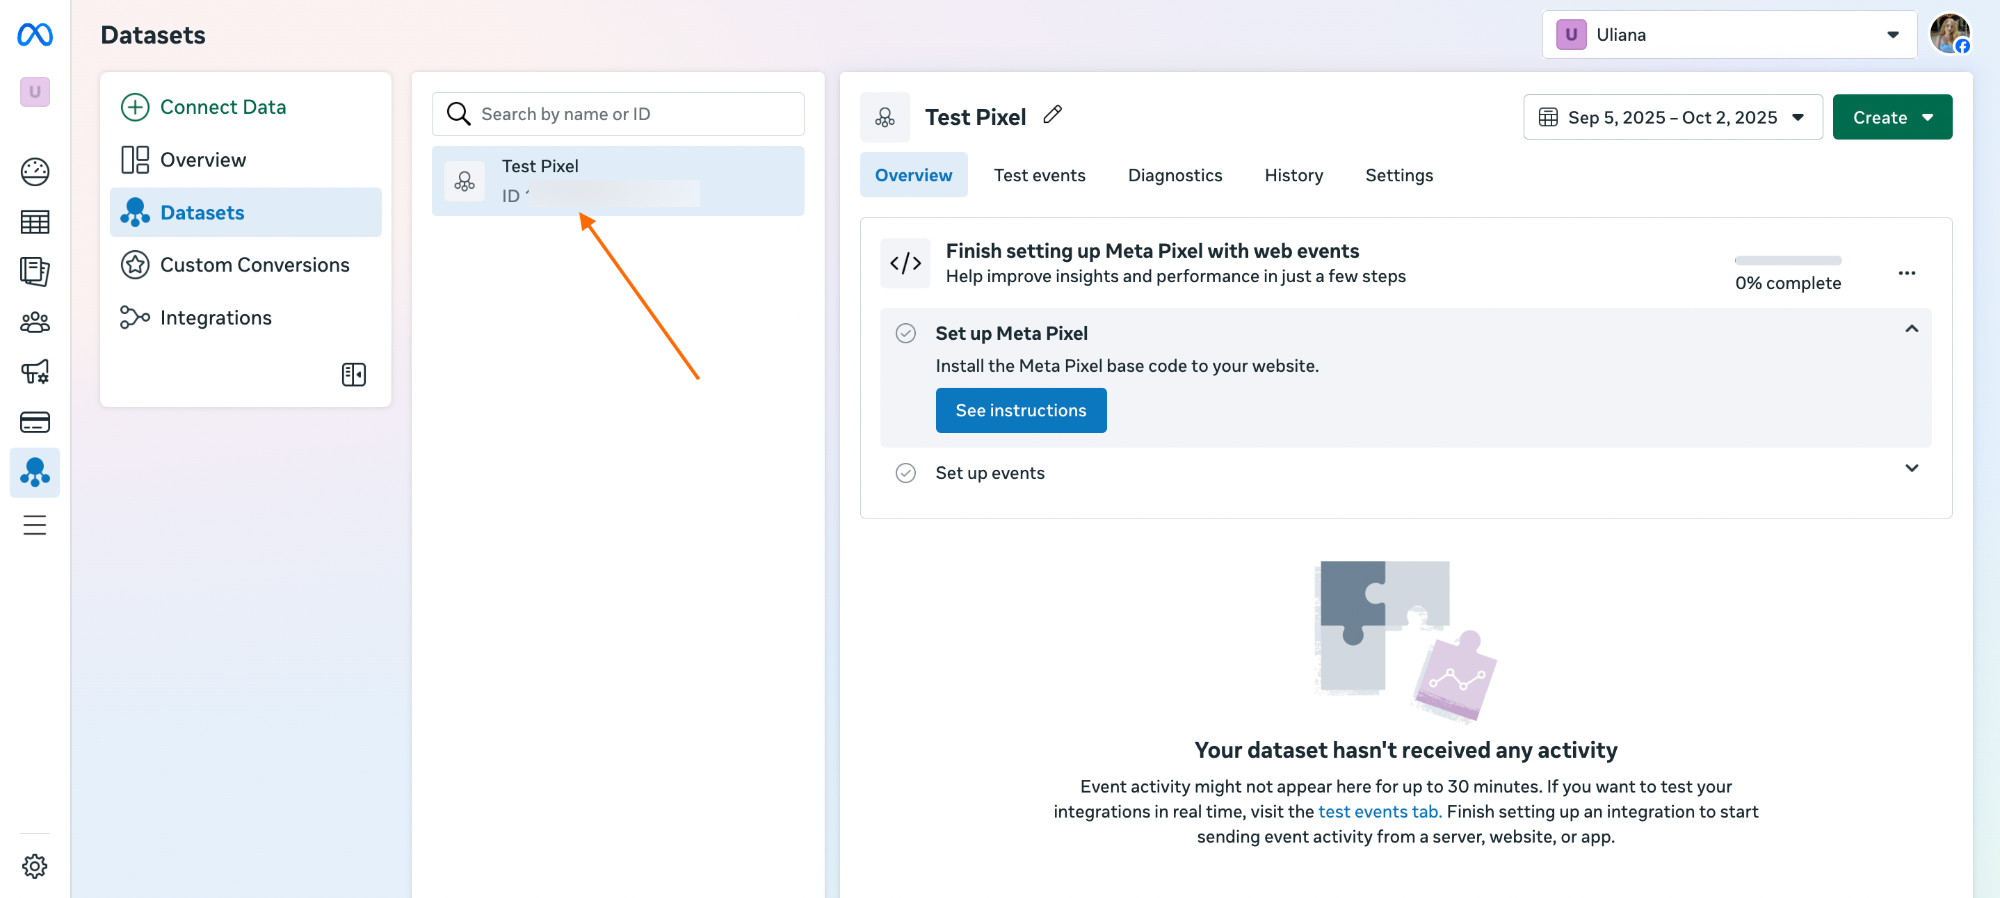
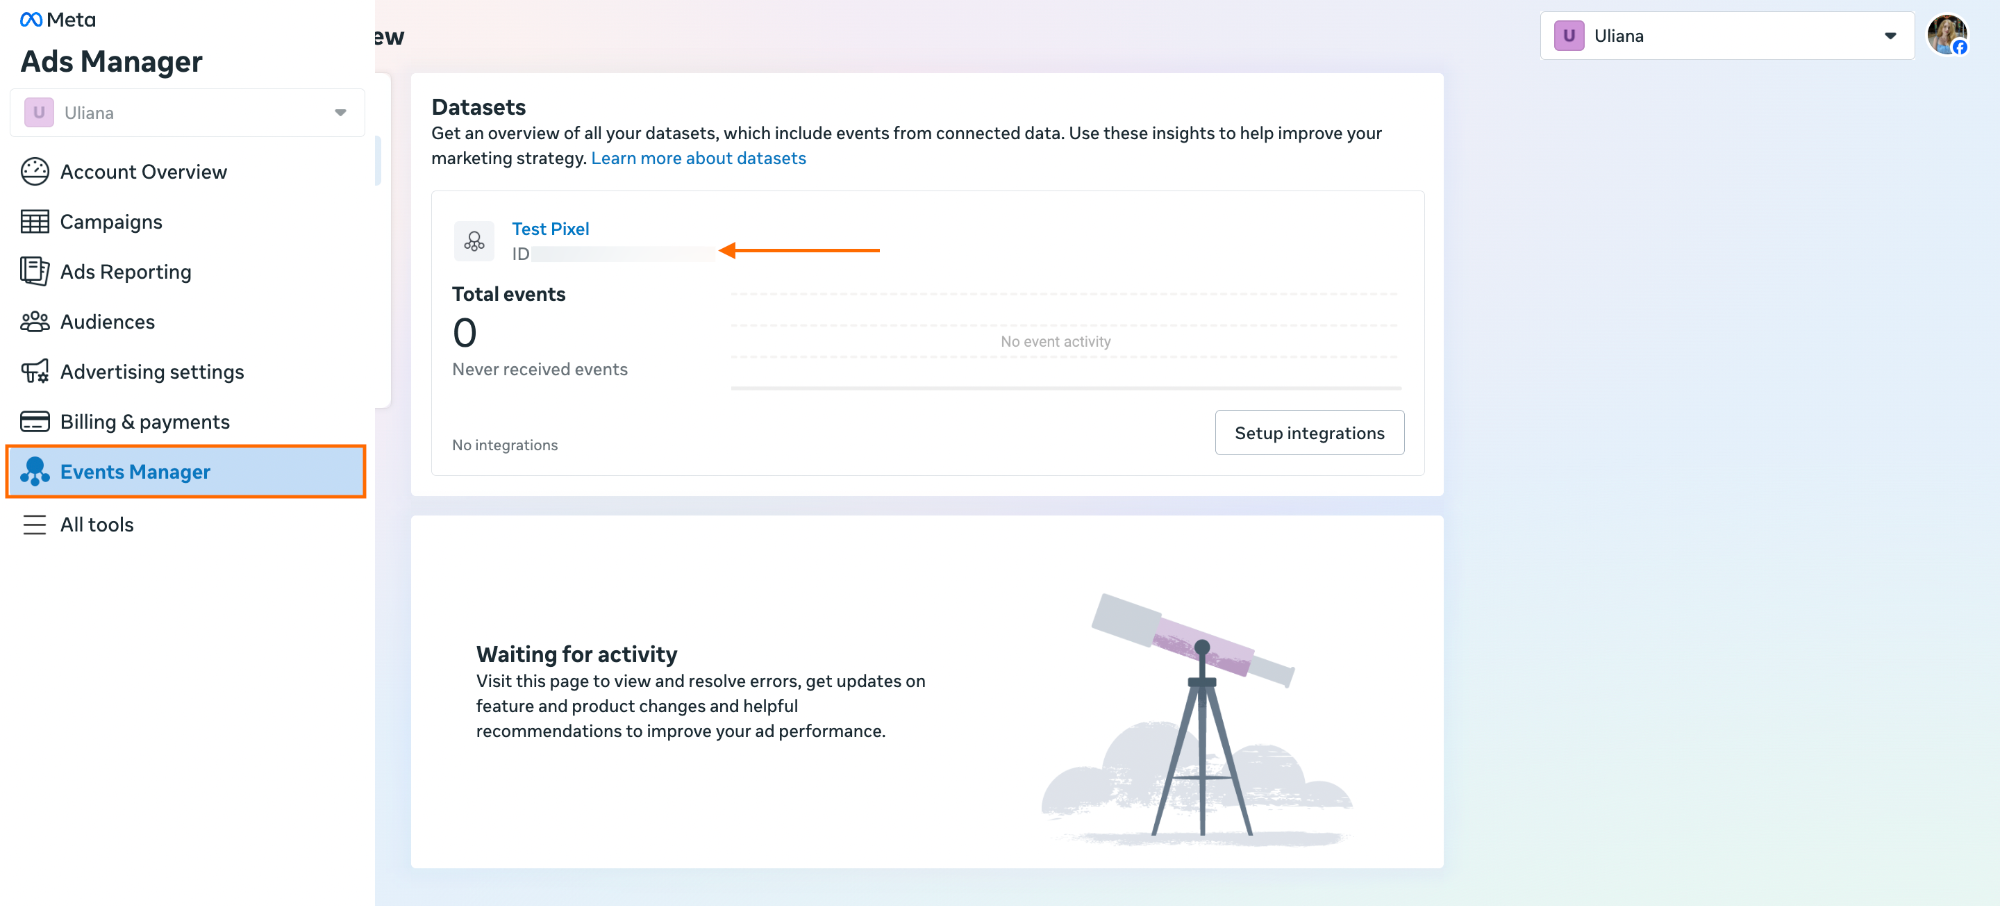
8. After passing these steps, you will be redirected to the Datasets page. Here, you need to copy the Pixel ID. It will be required for the GTM tag configuration, which we explain below.
Integrate Facebook Pixel with GTM
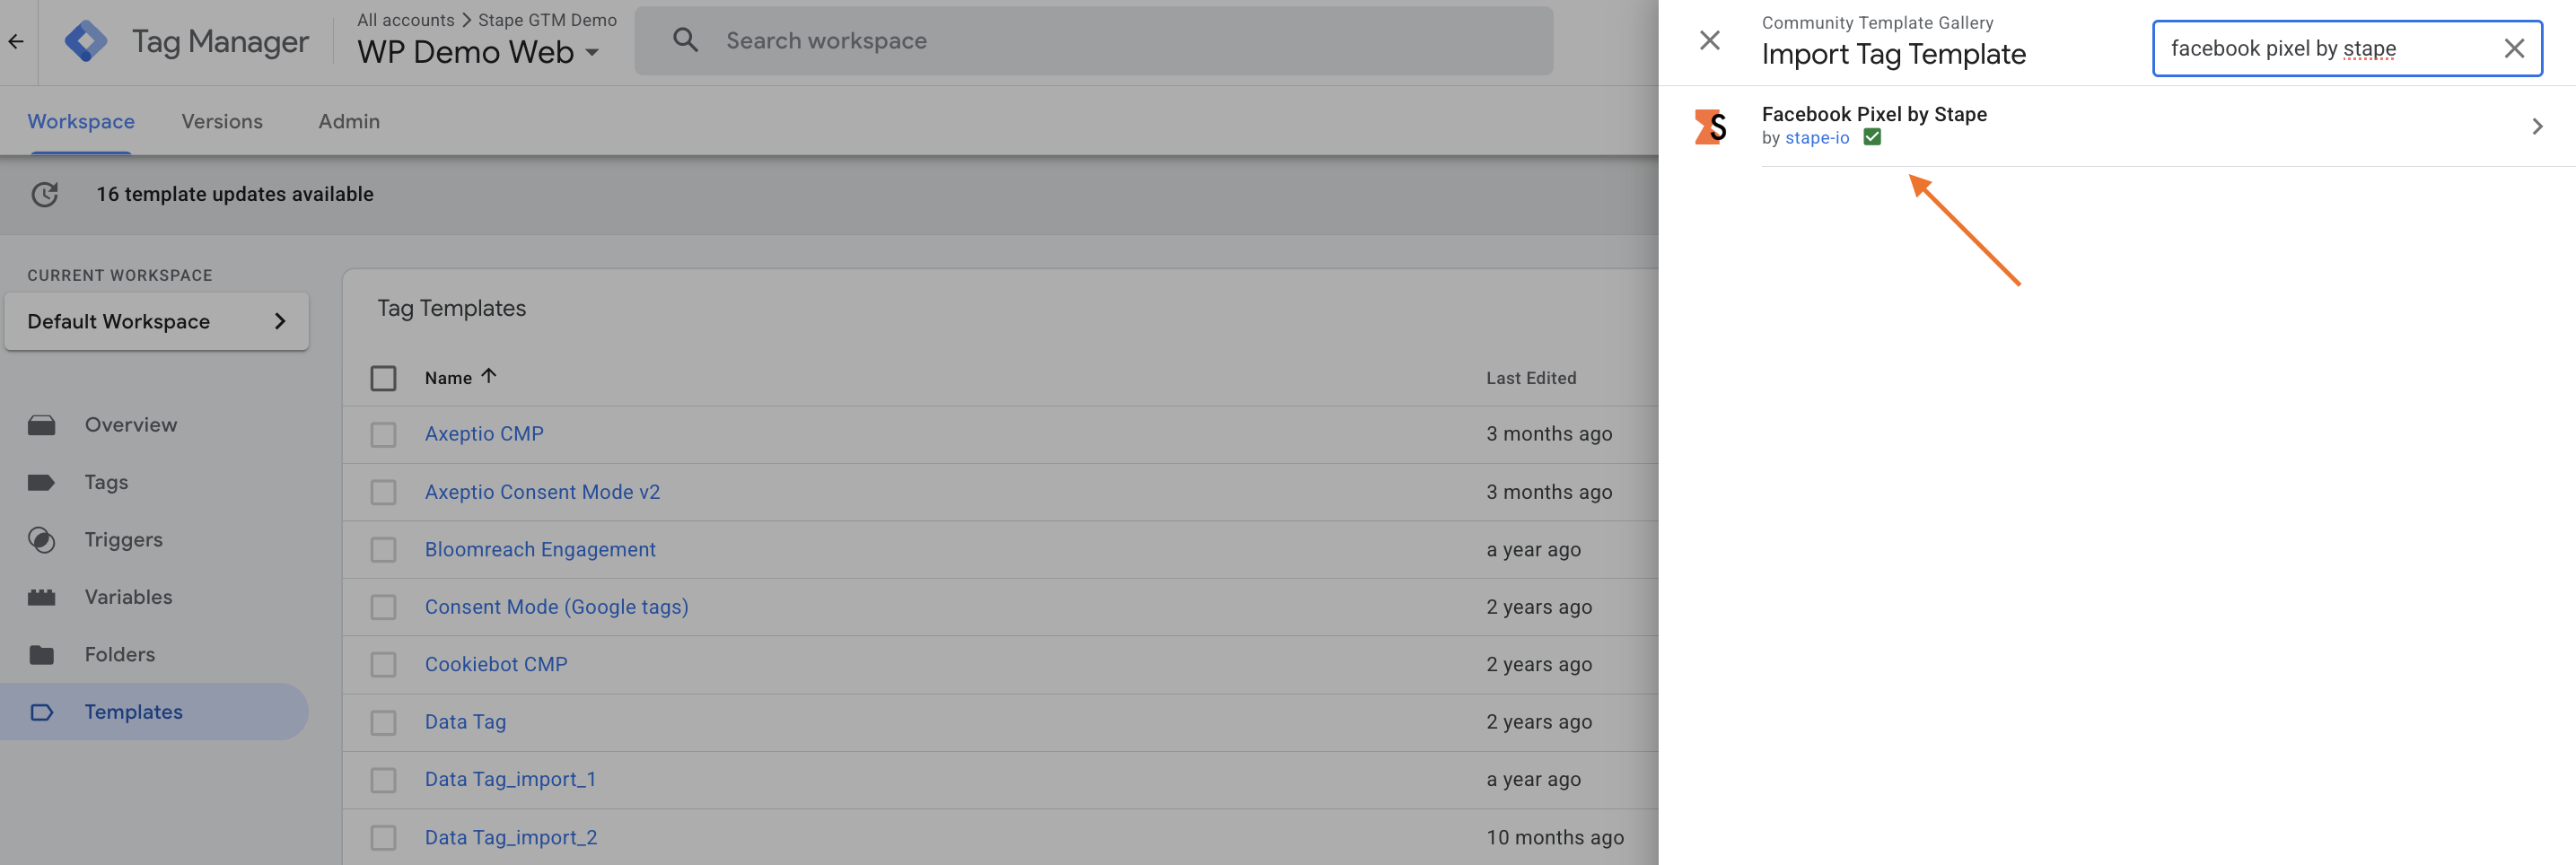
1. Add the Facebook Pixel tag by Stape to your workspace. Go to your web GTM container → Templates section → Search Gallery → search for Facebook Pixel by Stape → click Add to workspace.
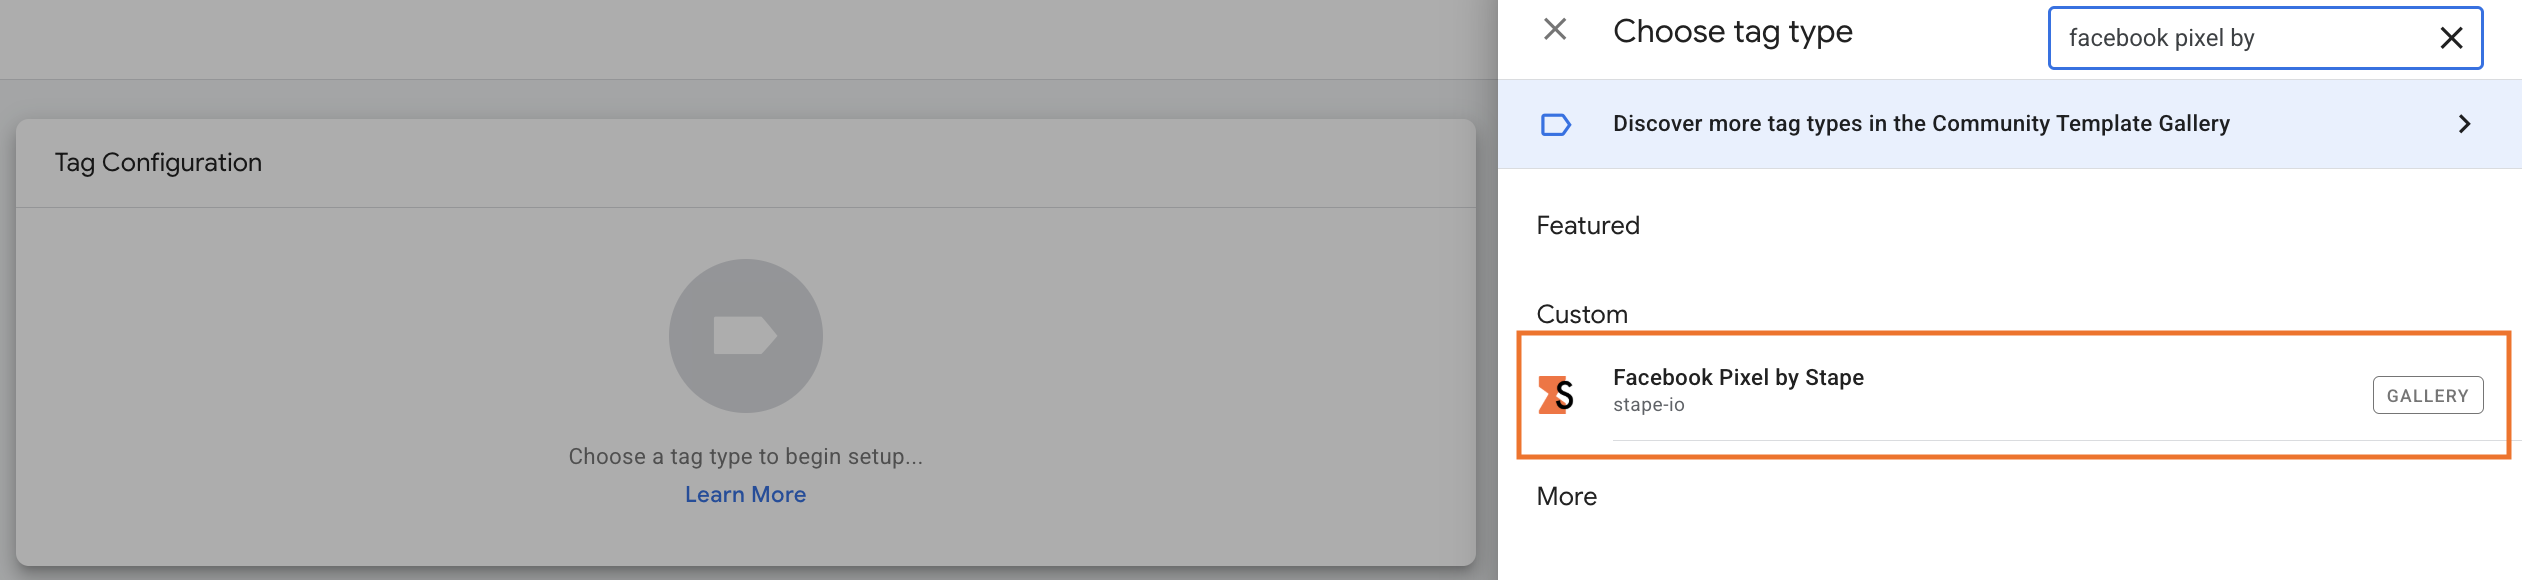
2. In the "Tags" section of the web GTM container, click "New" and choose "Facebook Pixel by Stape" as the Tag Configuration.
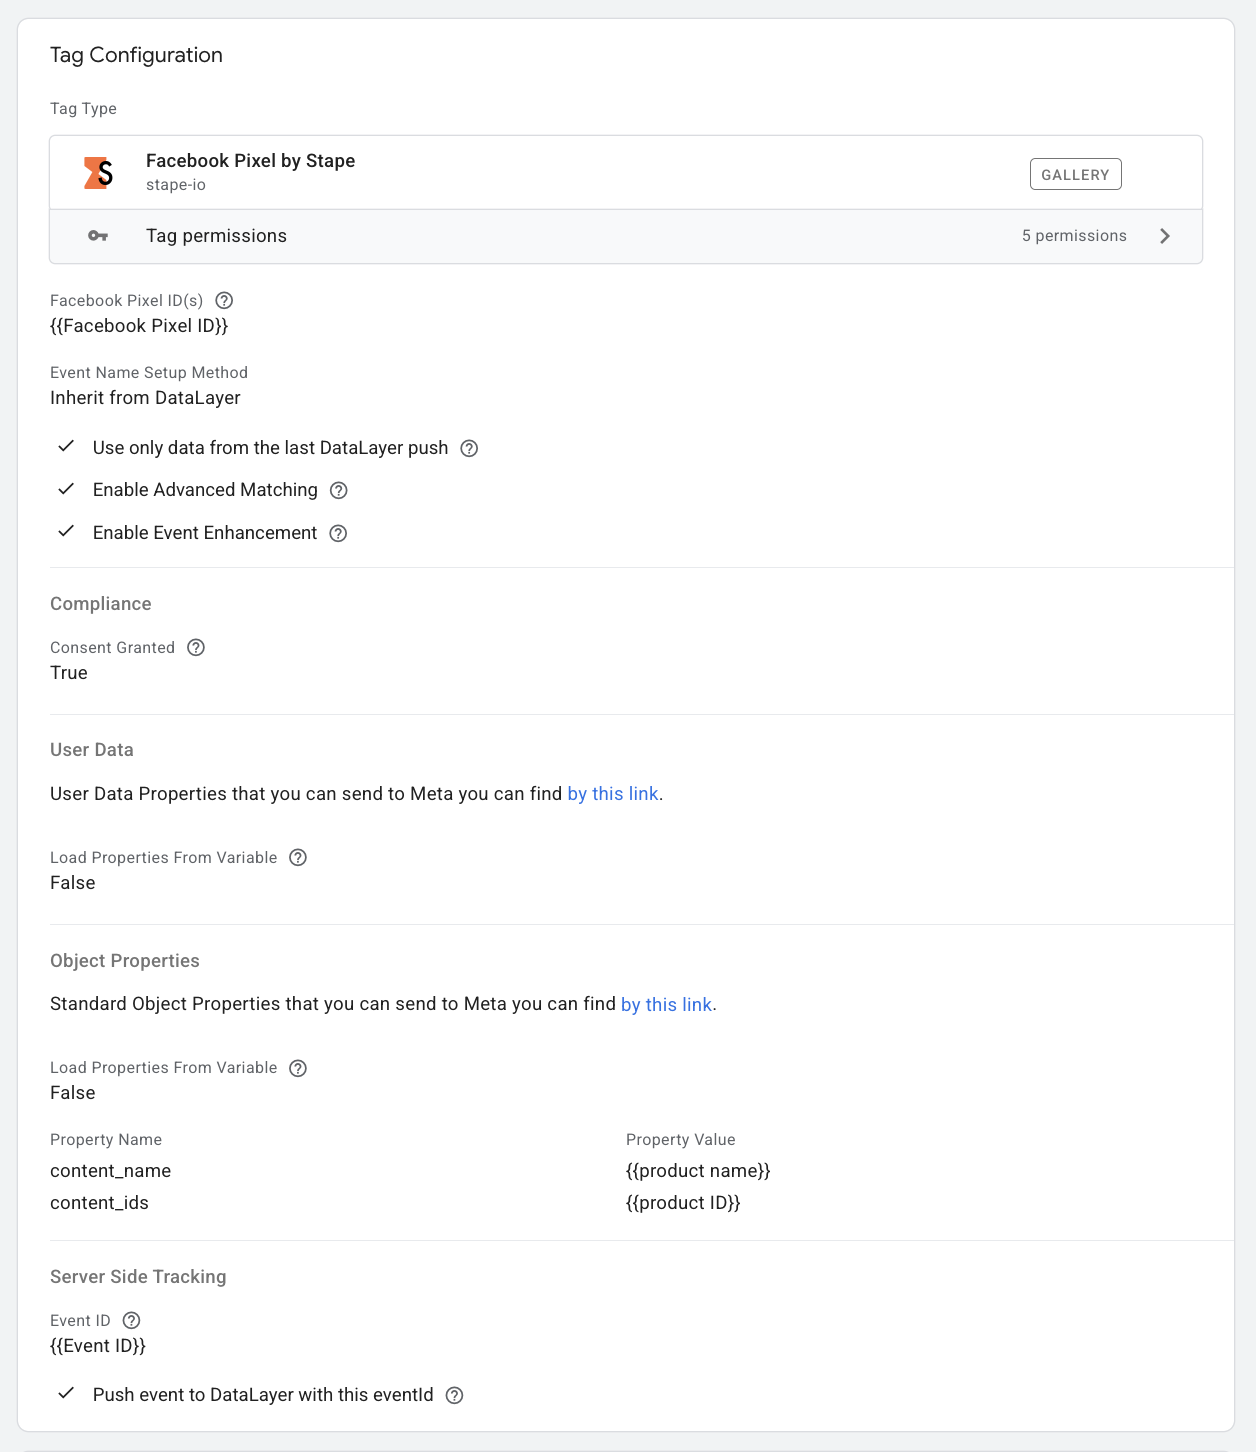
3. Configure the tag.
3.1 Add Facebook Pixel ID.
If you haven't copied the ID while creating Pixel, you can find it in Facebook Business Manager → Event Manager → Data Sources.
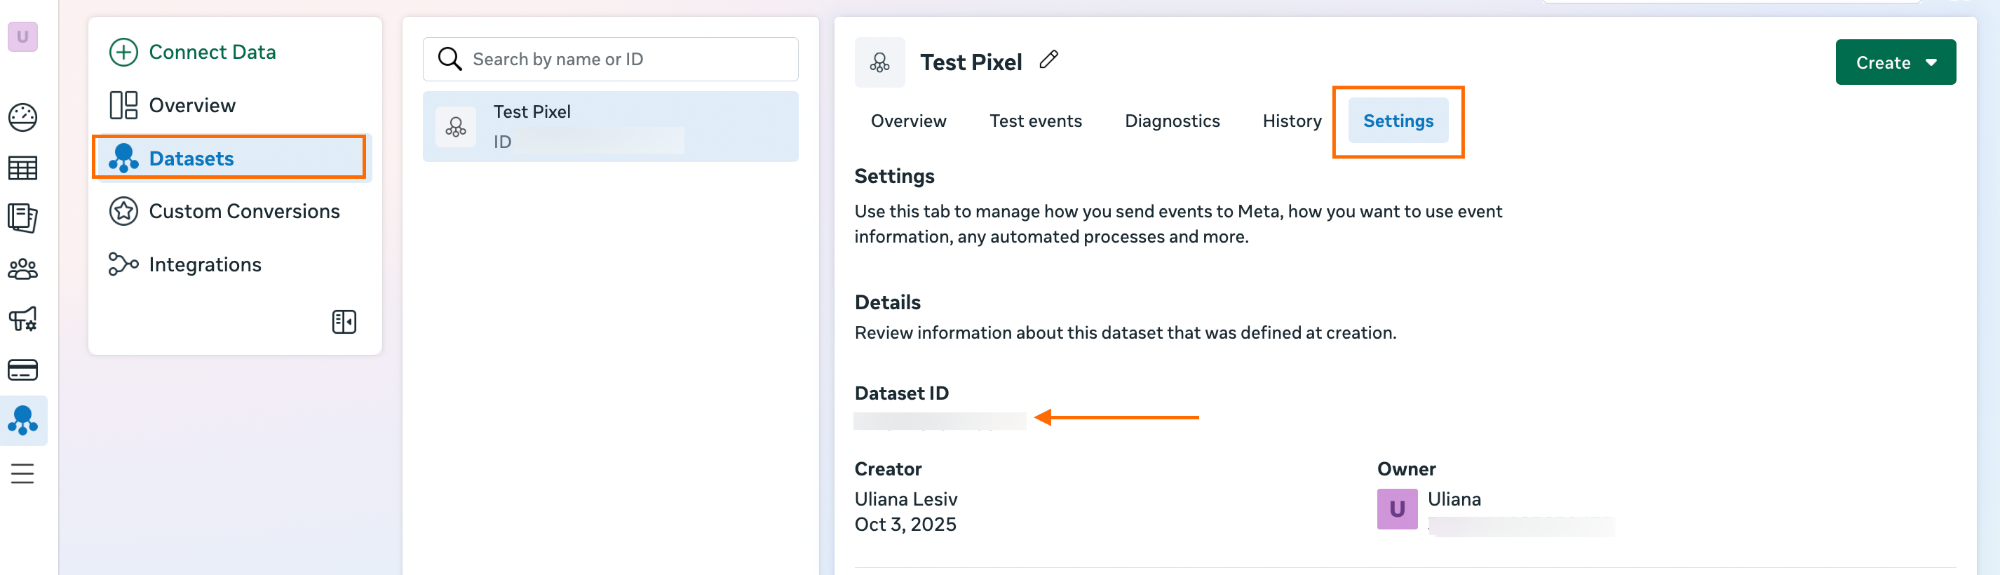
On the same page click Datasets → navigate to the Settings tab → copy the Dataset ID.
If you add several Facebook Pixel IDs, separate them by commas.
| Tip: Use a constant variable for Pixel ID to avoid retyping the ID whenever it is required. |
3.2 Select Event Name Setup Method:
- Inherit from DataLayer - with this option, the tag maps GA4 event names (add_to_cart, sign_up, etc.) to Meta equivalents.
- Override - choose from standard events or provide a custom event name.
3.3 (If selected "Override" as event name setup method) Choose the Event type you want to track: standard from the list of available events or a custom one.
3.4 Check the boxes if it meets your tracking needs:
- (Recommended) Enable automatic data population from the Data Layer - if you check this, the tag will automatically populate standard Object Properties and User Properties from the DataLayer. Tag parses Google Analytics 4 and Common Event Data formats.
- (Optional) Use only data from the last DataLayer push - in this case, the tag will take data only from the current DataLayer event if enabled. So, only data pushed to the DataLayer last will be used.
- (Optional) Enable Advanced Matching - with this option, you allow sending users personal information such as email addresses, names, etc. to Meta. Find more details in Meta's documentation.
- (Optional) Enable Event Enhancement - by clicking this check box, you enable the use of LocalStorage to store and reuse data across sessions for enhanced event tracking.
3.5 Configure Compliance section:
- Consent Granted - if you set Consent Granted to false, it will prevent the Pixel from sending hits until the tag is fired with Consent Granted true.
- Enable GTM consent mode support - if enabled, the tag will check for ad_storage, and if it is not granted, it will set the Facebook pixel consent to revoke. After the consent is granted, it will automatically execute fbq('consent', 'grant').
- Limited Data Use (LDU) is an option for those needing to comply with various USA privacy regulations. When Meta receives data with this setting enabled from individuals, the platform will process it as a service provider or processor, as appropriate, and restrict its use as outlined in Meta's State-Specific Terms.
3.6 (Optional) Object Properties - list the properties that will be sent to Meta with an event. See the list of Object Properties in Meta's documentation.
You can define a variable that returns a JavaScript object containing the desired properties. This object will then be combined with the additional properties listed in the table in this section. Any conflicts will be resolved in favor of the table.
3.7 Server-side tracking - if you track the same event on the server side, configure this section by adding the Event ID parameter. It will allow deduplication of the same event if sent from multiple sources. Learn more about event deduplication in our blog post.
Enable DataLayer push using a matching event name and object to ensure synchronization.
4. Add a trigger for a tag.
Click on Preview in the web GTM container. Trigger the event, and check whether it is fired.

Meta platform and server-side tracking
Server-side tracking helps track data more accurately, improving the conversion attribution as you can send data directly from your server to Meta's server in our context. There are a few options for setting up server-to-server tracking:
- Meta Conversions API (Meta CAPI). Stape has pre-built templates for CAPI via server GTM setup: choose your CMS and download the template. Follow our step-by-step guides for a smooth setup.
- Meta Conversions API Gateway (Meta CAPIG).
Both methods require cloud services for data processing and provide similar benefits in terms of data accuracy. The key difference is that Facebook CAPI provides higher flexibility, as besides Meta, you can set up server-side tracking for a list of other platforms. Facebook CAPIG is an easy-to-set-up solution that will be a great fit for those who need to track conversions only from Meta.
| Read more about the differences between Meta CAPI and Meta CAPIG in our blog post. |
Summary
Integrating Facebook Pixel with GTM simplifies event tracking, allowing businesses to manage data collection from a single interface. Stape’s custom Facebook Pixel tag offers inheriting event data from the DataLayer or allowing manual overrides for precise customization. The tag's configuration is straightforward; you can integrate Meta Pixel with Google Tag Manager in a few simple steps.
Want to start using server-side tags?
Stape has lots of options! Click on Try for free to register and check all the benefits.

Comments