Google Sheets Tag
Updated Sep 8, 2026
The Google Sheets tag by Stape allows you to send data to a selected Google Sheet directly from your Google Tag Manager server container. It can be used to log events, store form submissions, save other server-side data for analysis, reporting, and further processing, and more.
- The tag supports Append and Update actions, allowing you to either add new data to the next available row or overwrite values in a specific cell or range.
- It lets you define the target spreadsheet, sheet, range, and data orientation, with support for writing values horizontally as rows or vertically as columns.
- You can use Stape’s Google Sheets Connection for simplified authentication or connect your own Google credentials, and enable Force new rows to prevent overwrites when multiple append operations use overlapping ranges.
Before you begin
Please ensure that you already have Google Tag Manager web and server containers, as well as a configured server container and custom domain in Stape. Please follow these guides if you don’t have any of those:
How to set up the Google Sheets tag
1. Configure sending data to the server GTM container. The most popular options for sending data to sGTM are Google Analytics 4 and Data Tag/Data Client. For more information, read the Send data to server container article.
2. Add the Google Sheets tag template in the server GTM container by importing it from the Template gallery:
- Search for the Google Sheets tag by Stape in the Google Tag Manager Template Gallery.
- Click Add to workspace.
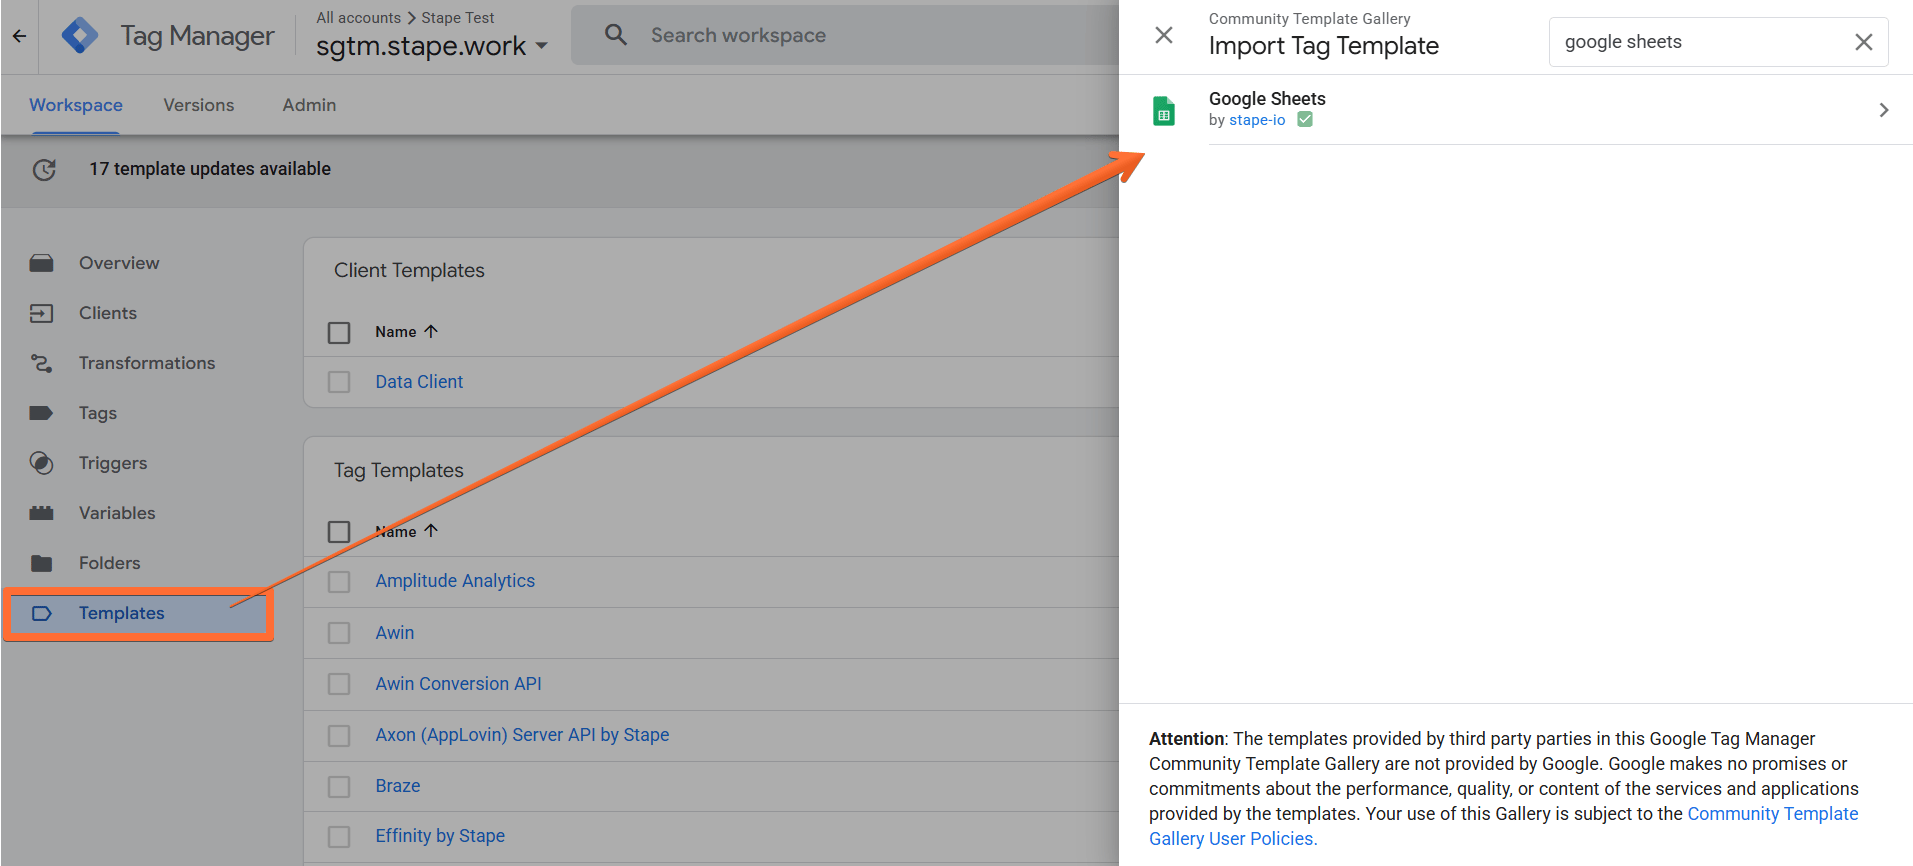
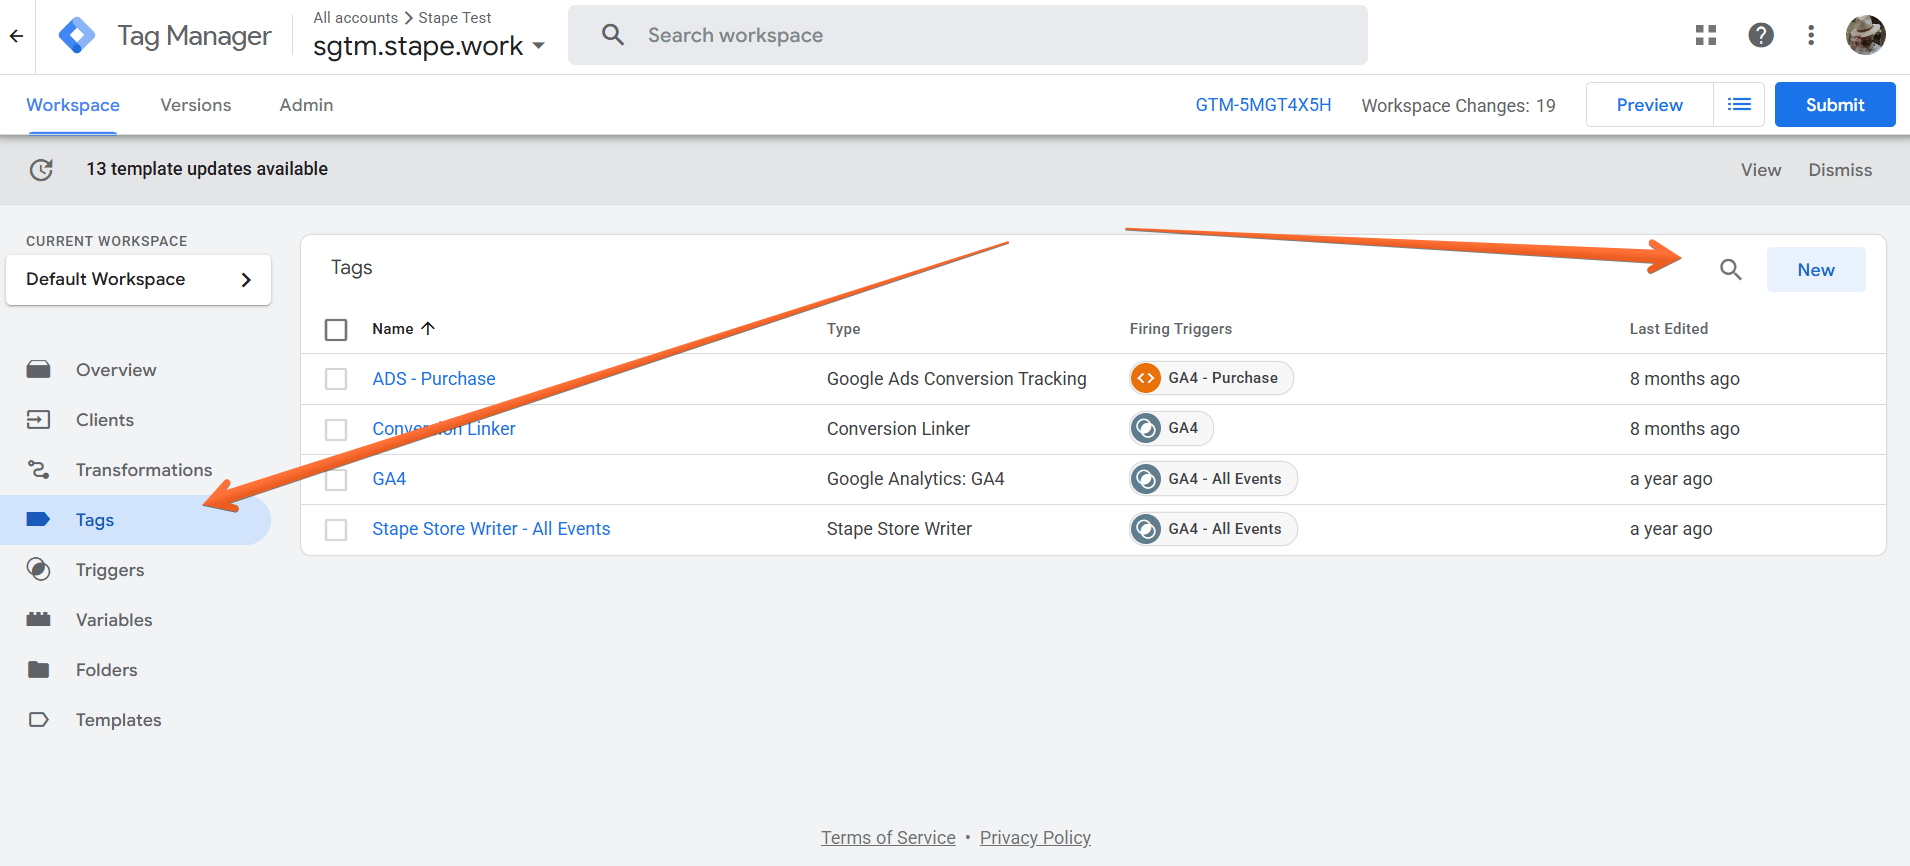
3. Create the Google Sheets tag:
- Go to the Tags menu → click New.
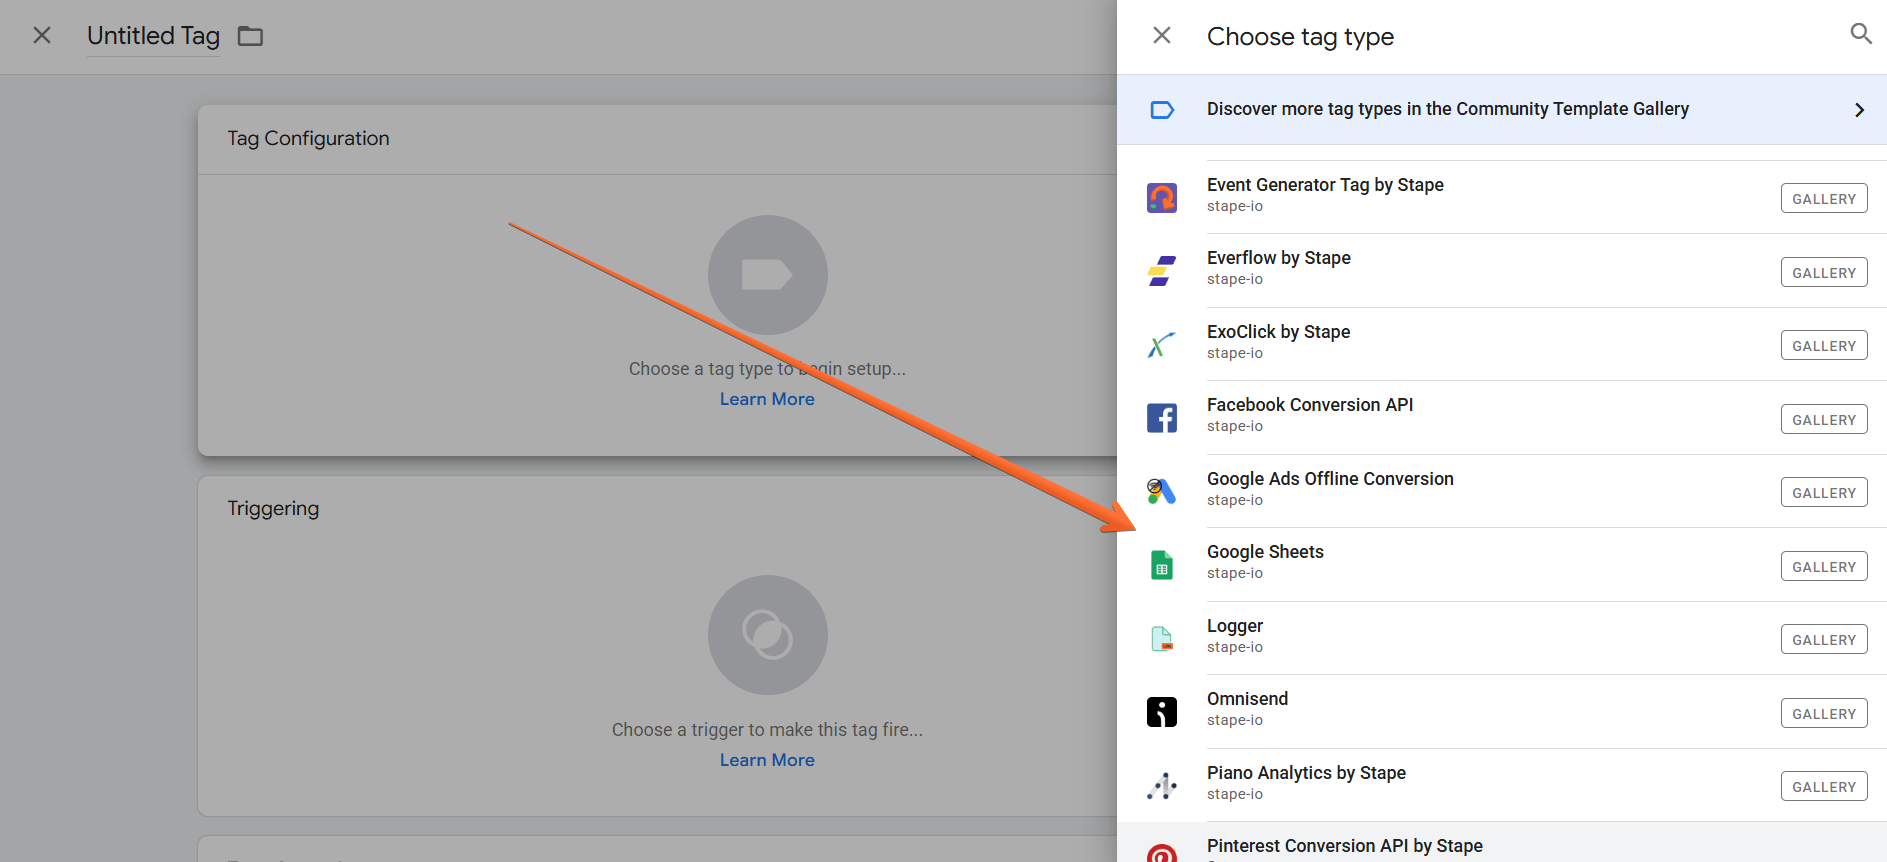
- Click Tag Configuration → select Google Sheets.
4. Configure the Google Sheets tag:
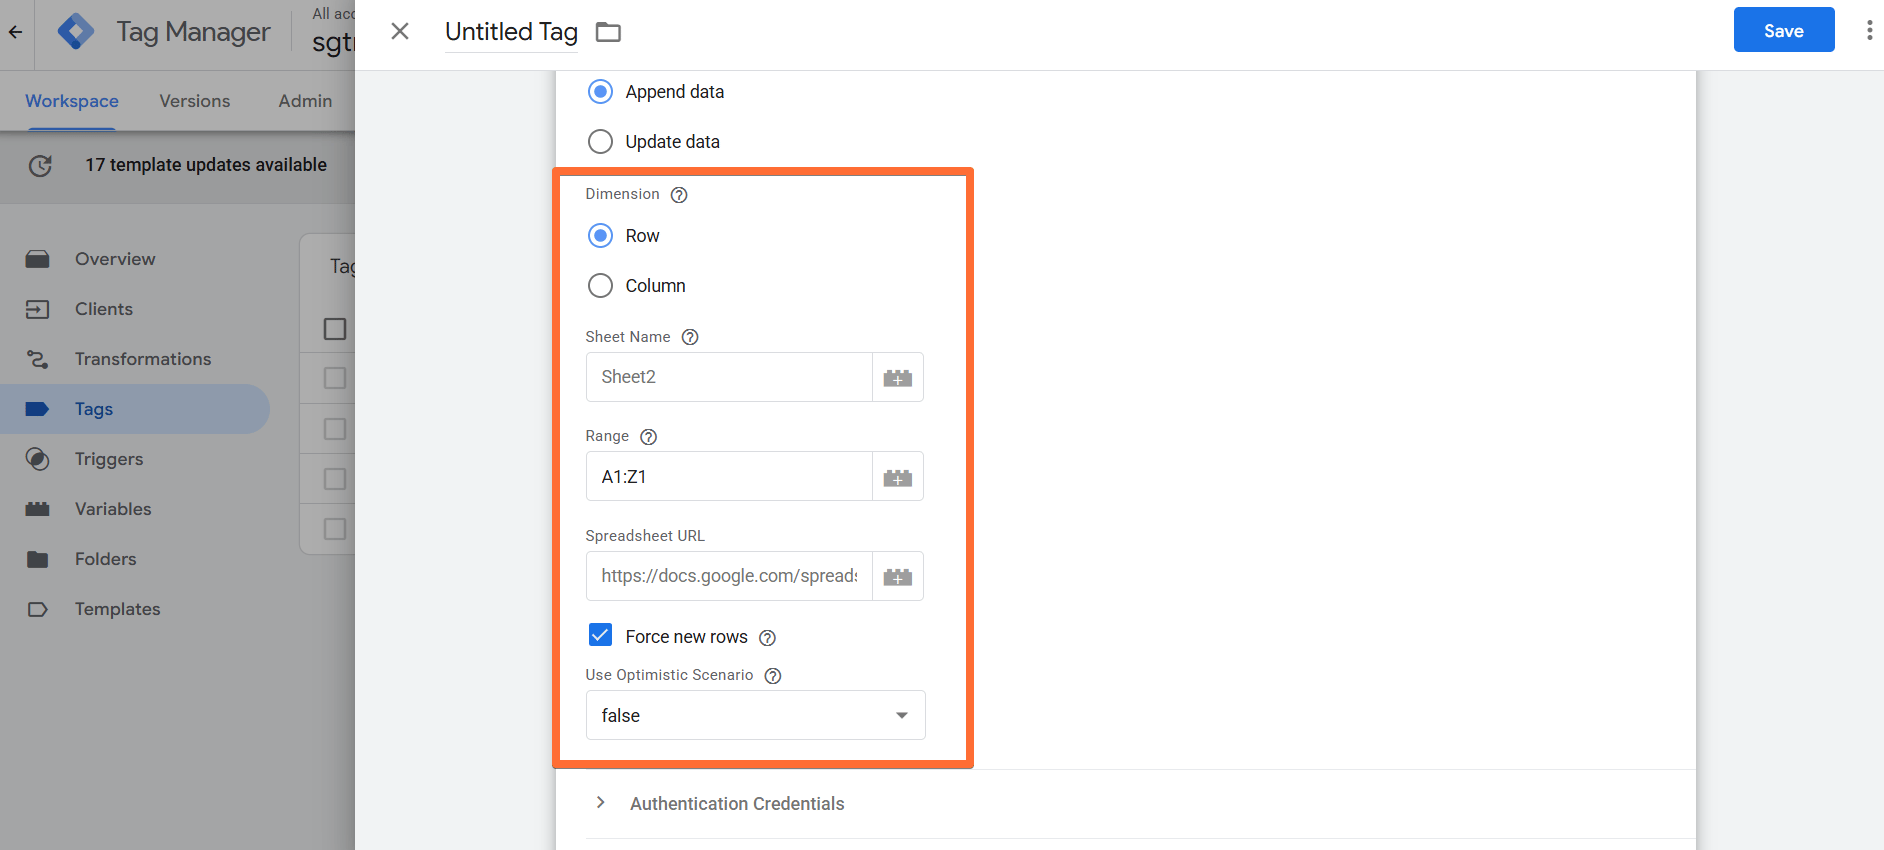
- Type - choose which action you wish the tag to perform:
- Append data - the tag will append a new row/column with your data to the end of the range you select.
- Update data - the tag will overwrite the data in a specified cell or cell range.
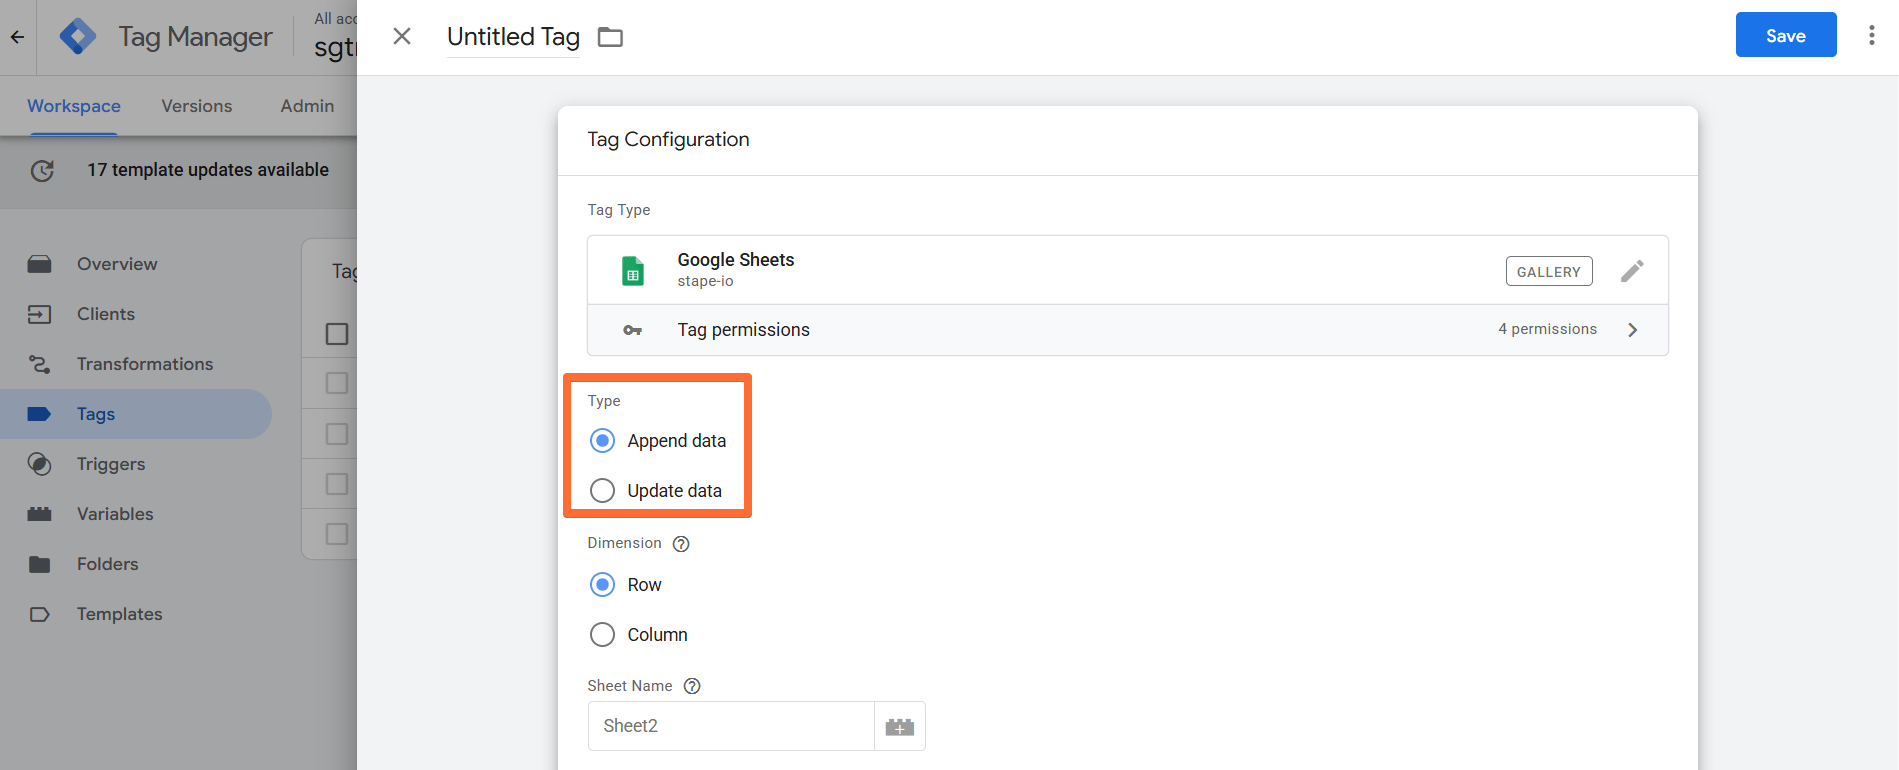
- Dimension - choose whether to insert values as a Row (horizontally) or a Column (vertically) into the specified range. For Append operations, selecting Column adds the data vertically into the next empty row of your range, instead of adding a new column to the side.
- Sheet Name - enter the name of an existing Sheet in the Google Spreadsheet file that you want to interact with. If left blank, it will interact with the first visible Sheet in the Spreadsheet. Alternatively, you can specify the Sheet Name in the Rows range field below using A1 Notation.
- Range - enter the Row/Column Range using A1 Notation that will be appended/updated. You can also specify the Sheet Name here, although it’s preferred that you do it in the Sheet Name field above. If left blank, it will interact with the first visible Sheet in the Spreadsheet.
- Spreadsheet URL - provide the URL of the Google Sheet you want to work with.
- Force new rows (only available for the Append data type) - force the spreadsheet to always write the data in a new row when appending values. This solves a problem of cells being overwritten in a scenario where multiple requests are sent in a short time frame with overlapping ranges.
- Use Optimistic Scenario - the tag will call
gtmOnSuccess()without waiting for a response from the API.
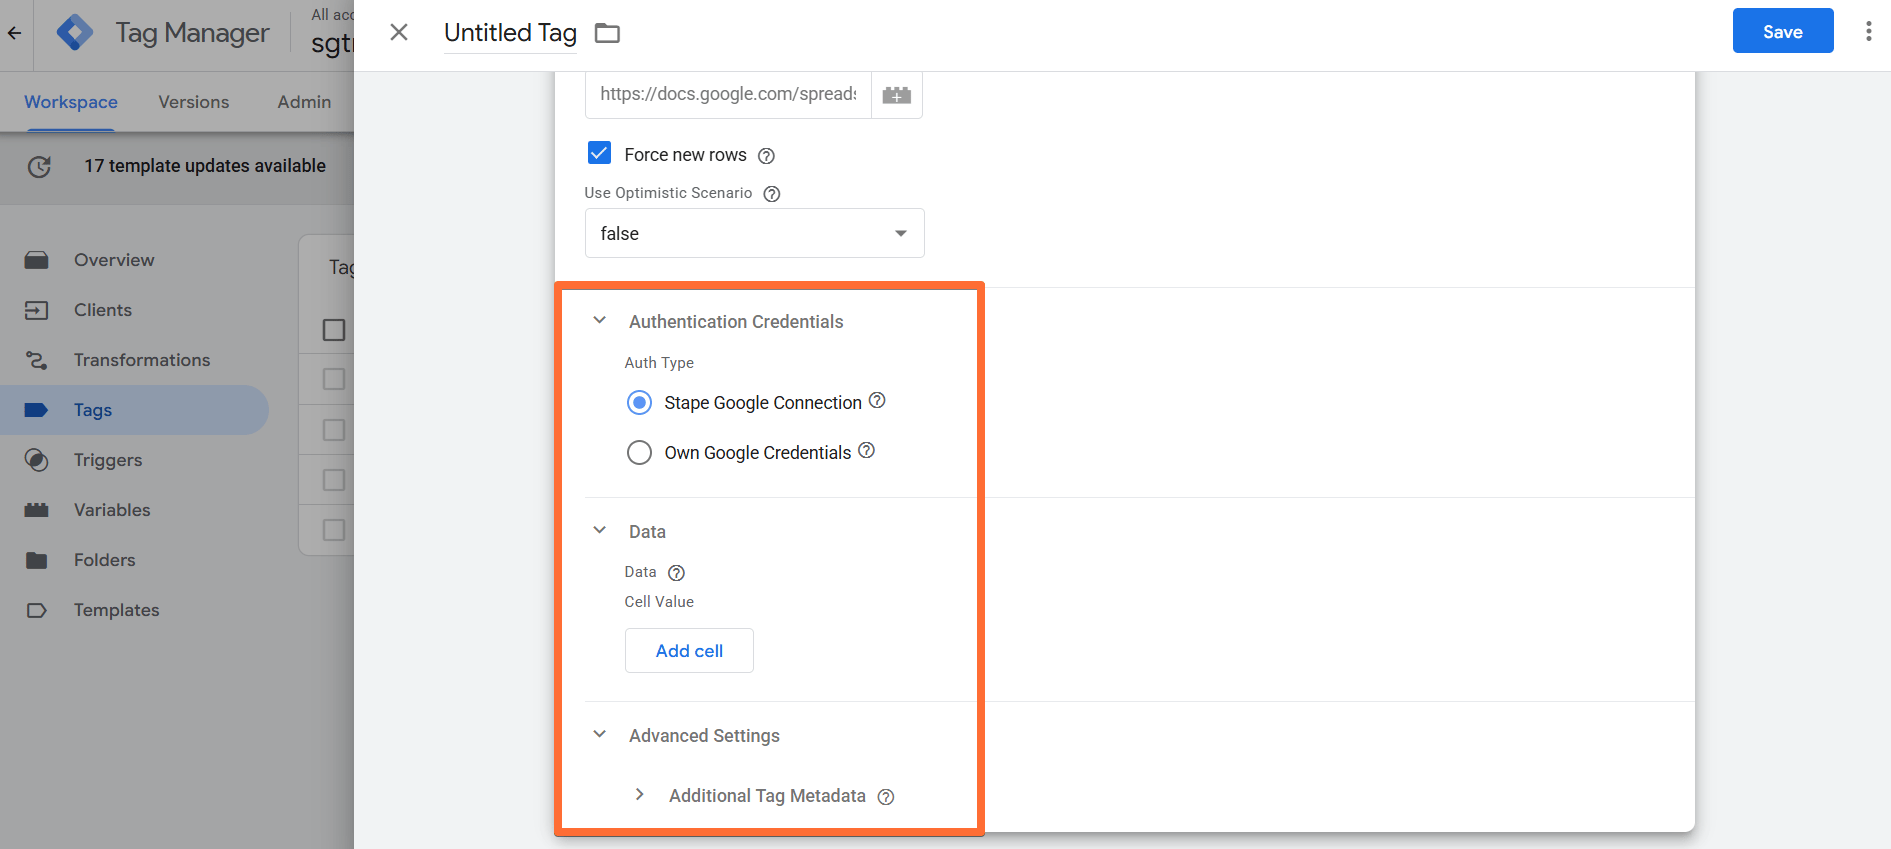
- Authentication Credentials - Choose your authentication method:
- Stape Google Connection - a simplified setup via Stape's Google Sheets Connection.
- Own Google Credentials - uses Application Default Credentials from your GCP environment. Learn more in the guide on Application Default Credentials.
- Data - map the values you want to send to the sheet. Each line here corresponds to a cell in the Sheet. Depending on the Dimension chosen, the cells will be treated as a Column or Row.
- Advanced Settings (Additional Tag Metadata) - specify additional tag metadata to be included in the event data when the tag is fired.
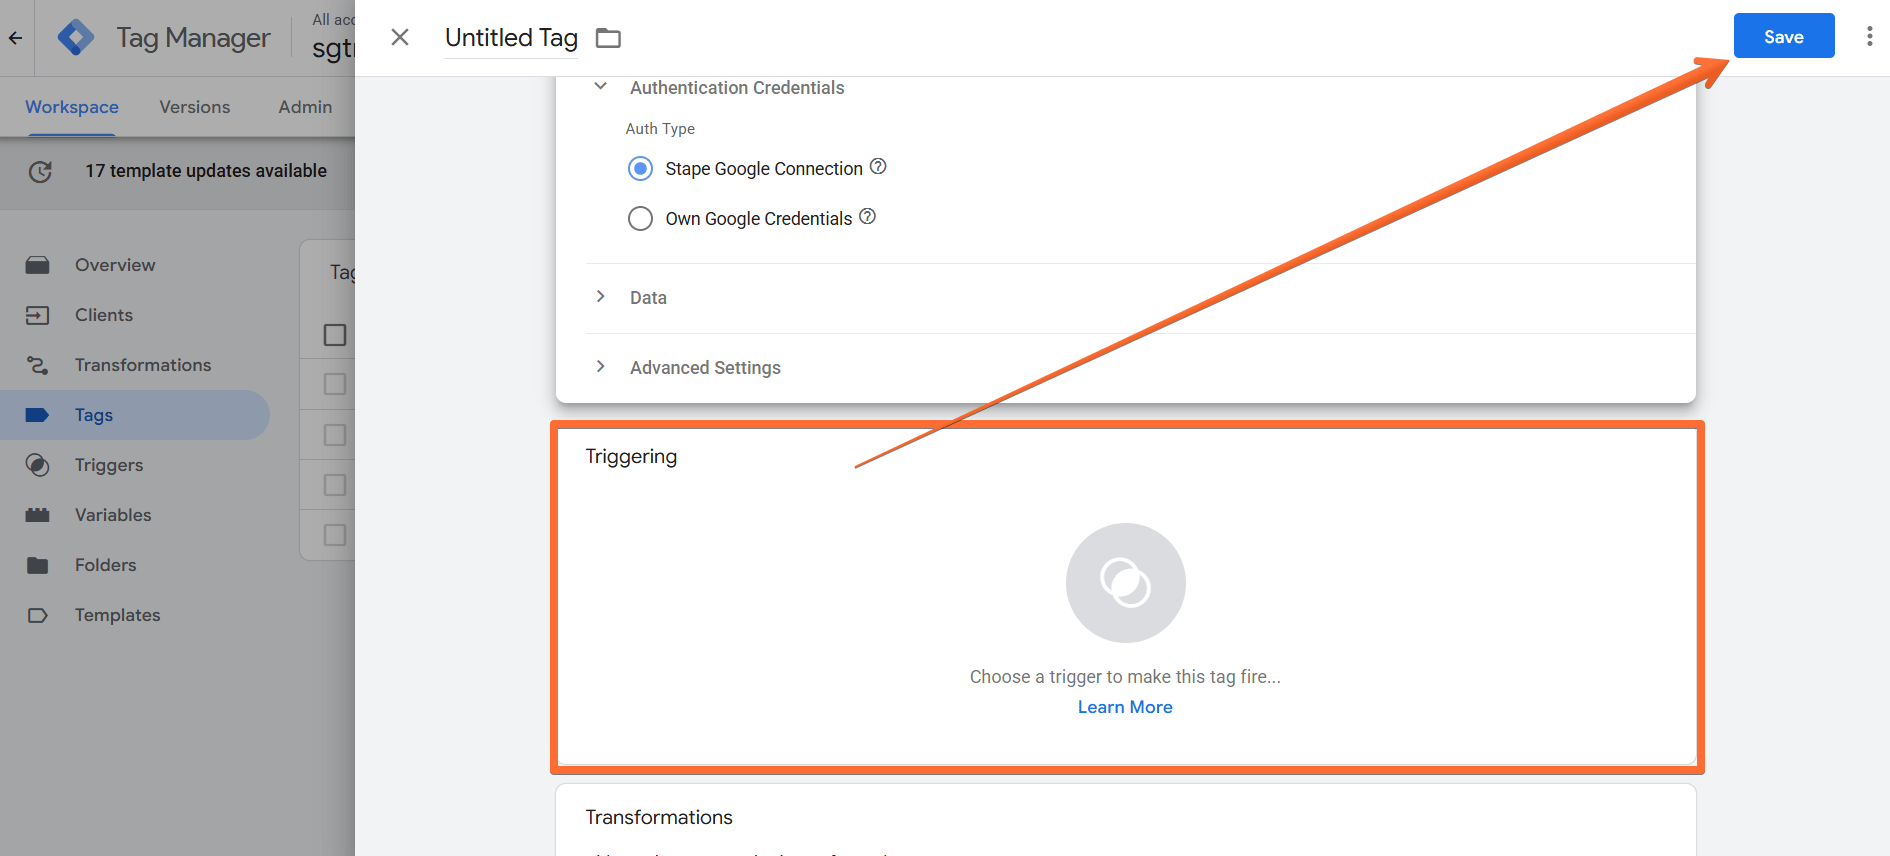
5. Add the Trigger for the tag, give it a descriptive name, and click Save.
Testing
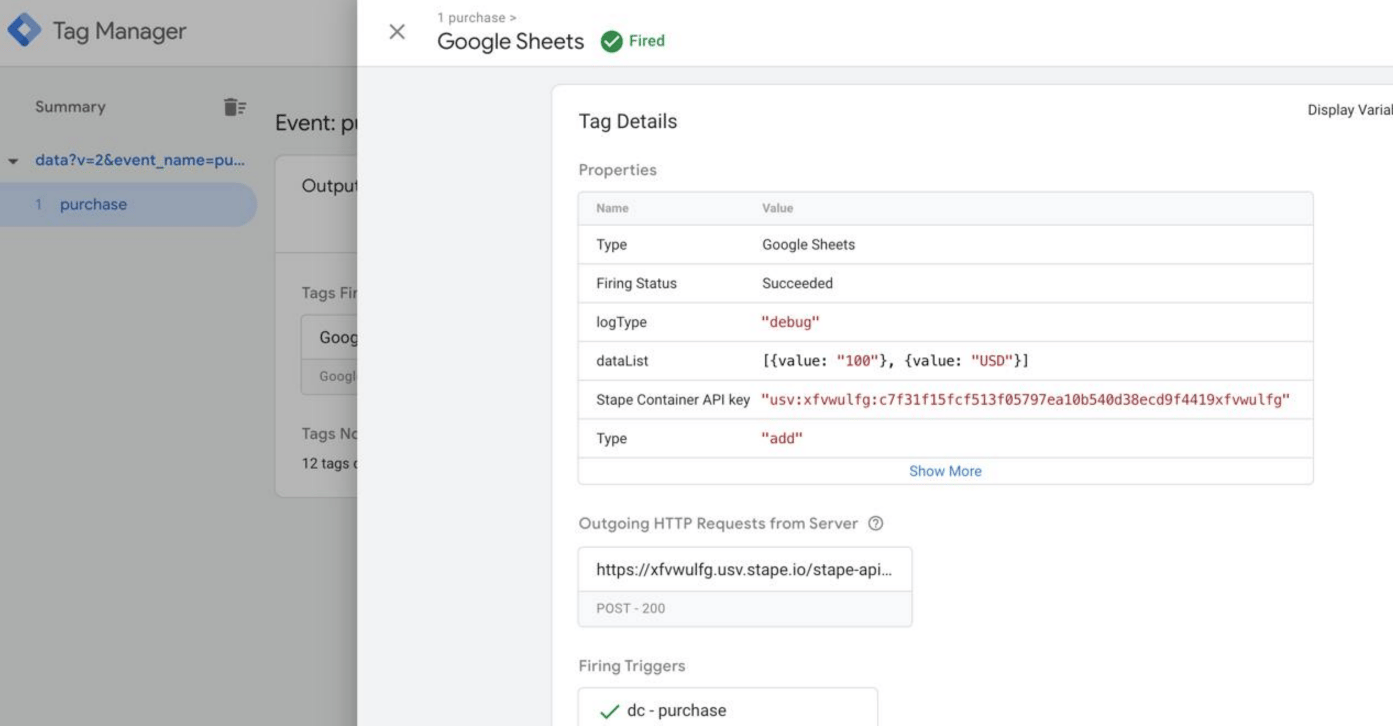
You can test the configurations in Google Tag Manager. Click on Preview, trigger the event on your website with actions like viewing a page or completing a transaction, and check whether the tag has fired.

You should see it triggered correctly in the server GTM debugger.
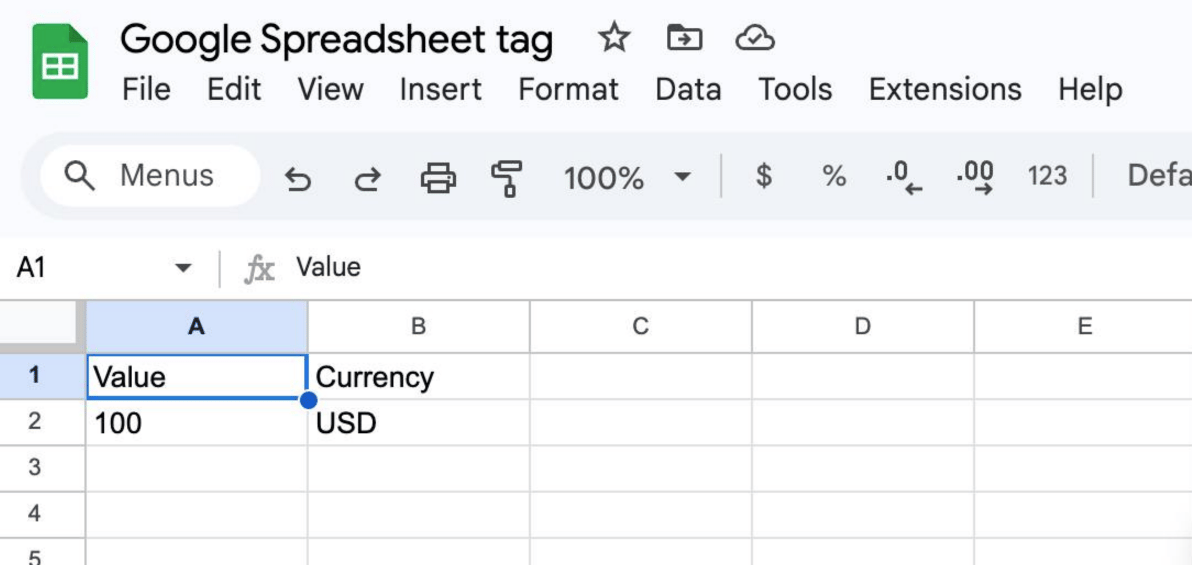
And the data should be added to the Google Sheets:
Find out more about debugging and monitoring server-side tracking configuration in our guide.
Was this article helpful?
🍽 Table of content:
Comments