/Documentation

Omnisend tag

Omnisend tag by Stape allows you to send contact and event data from your server Google Tag Manager (sGTM) container directly to Omnisend using the Omnisend API. It supports event tracking, contact creation and updates, as well as mapping standard eCommerce and GA4 events to Omnisend events.

The Omnisend tag supports multiple action types, including Track Event, Create Contact, and Update Contact. It also includes flexible event name mapping, optional optimistic responses for faster execution, and the ability to store Omnisend Contact IDs for future requests.

i

Please note that the Omnisend API has a limit of 400 requests per minute. Because of this, high-volume events such as product views or add-to-cart actions are often better handled through a client-side JavaScript snippet.

Requirements for setting up the Omnisend tag

Please ensure that you already have Google Tag Manager web and server containers, as well as a configured server container and custom domain in Stape. Please follow these guides if you don’t have any of those:

How to set up the Omnisend tag

1. Configure sending data to the server GTM container. The two most popular options for sending data to sGTM are Google Analytics 4 and Data Tag/Data Client. Here is a step-by-step guide on sending data to sGTM.

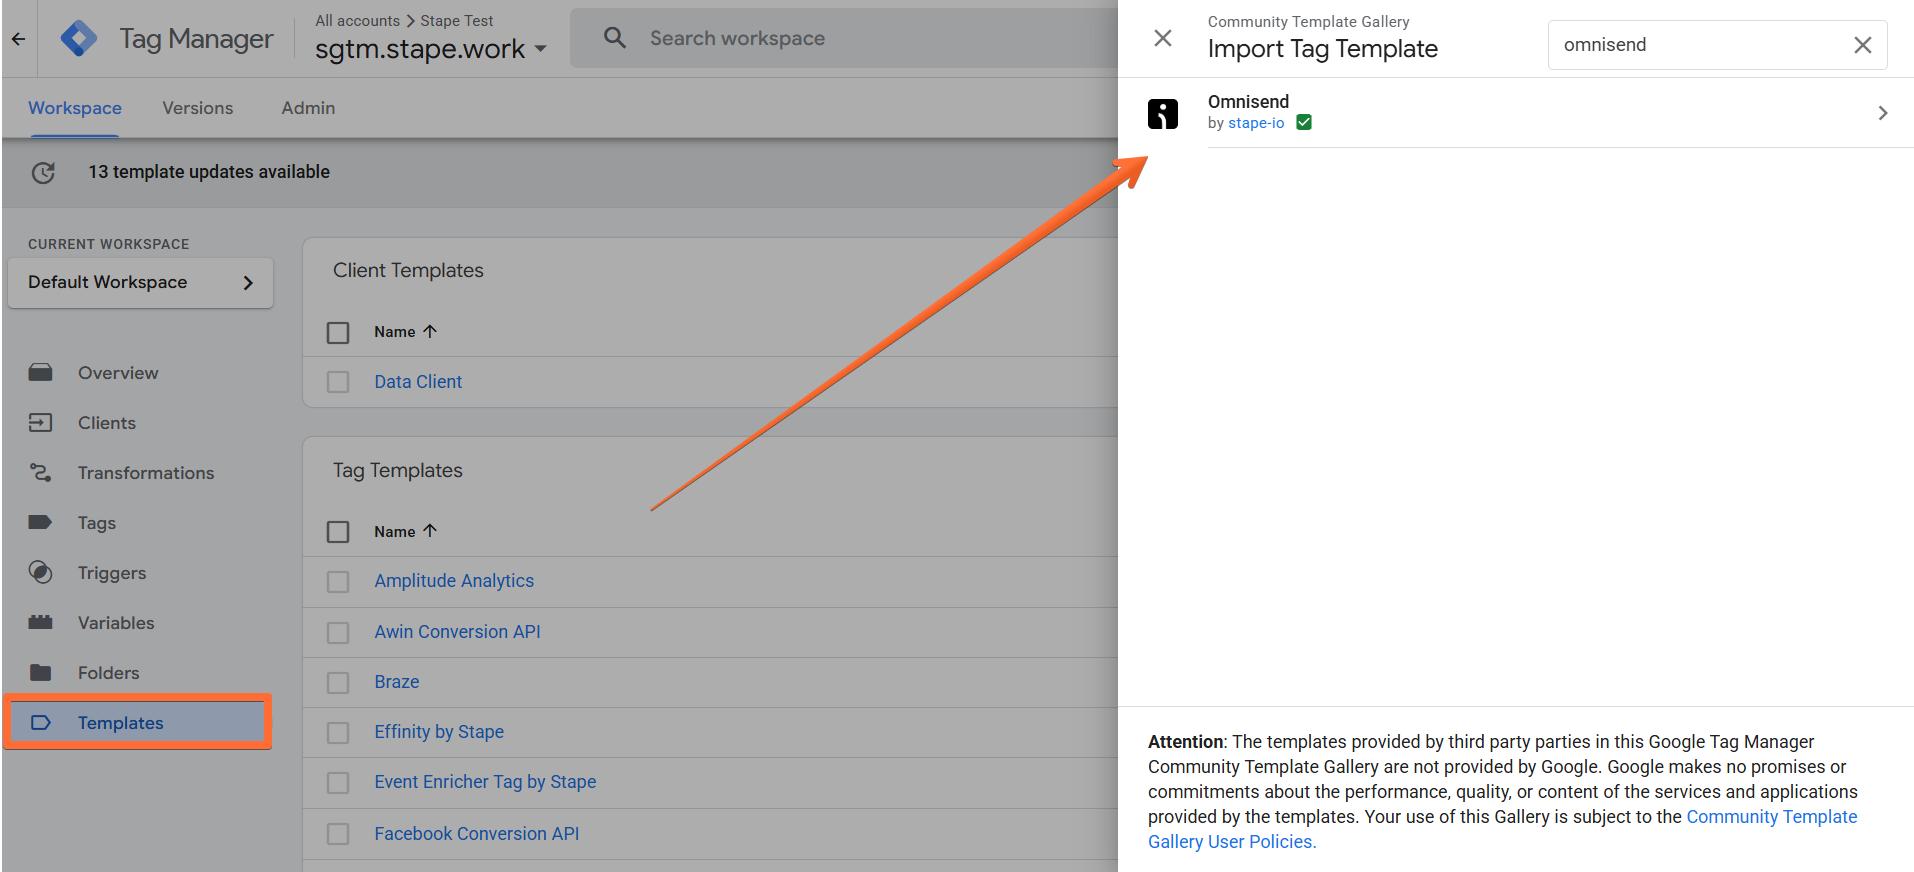
2. Add the Omnisend tag template in the server GTM container by importing it from the Template gallery:

  • Search for the Omnisend tag by Stape in the Google Tag Manager Tag Template gallery.
  • Click Add to workspace.
Add the Omnisend tag template

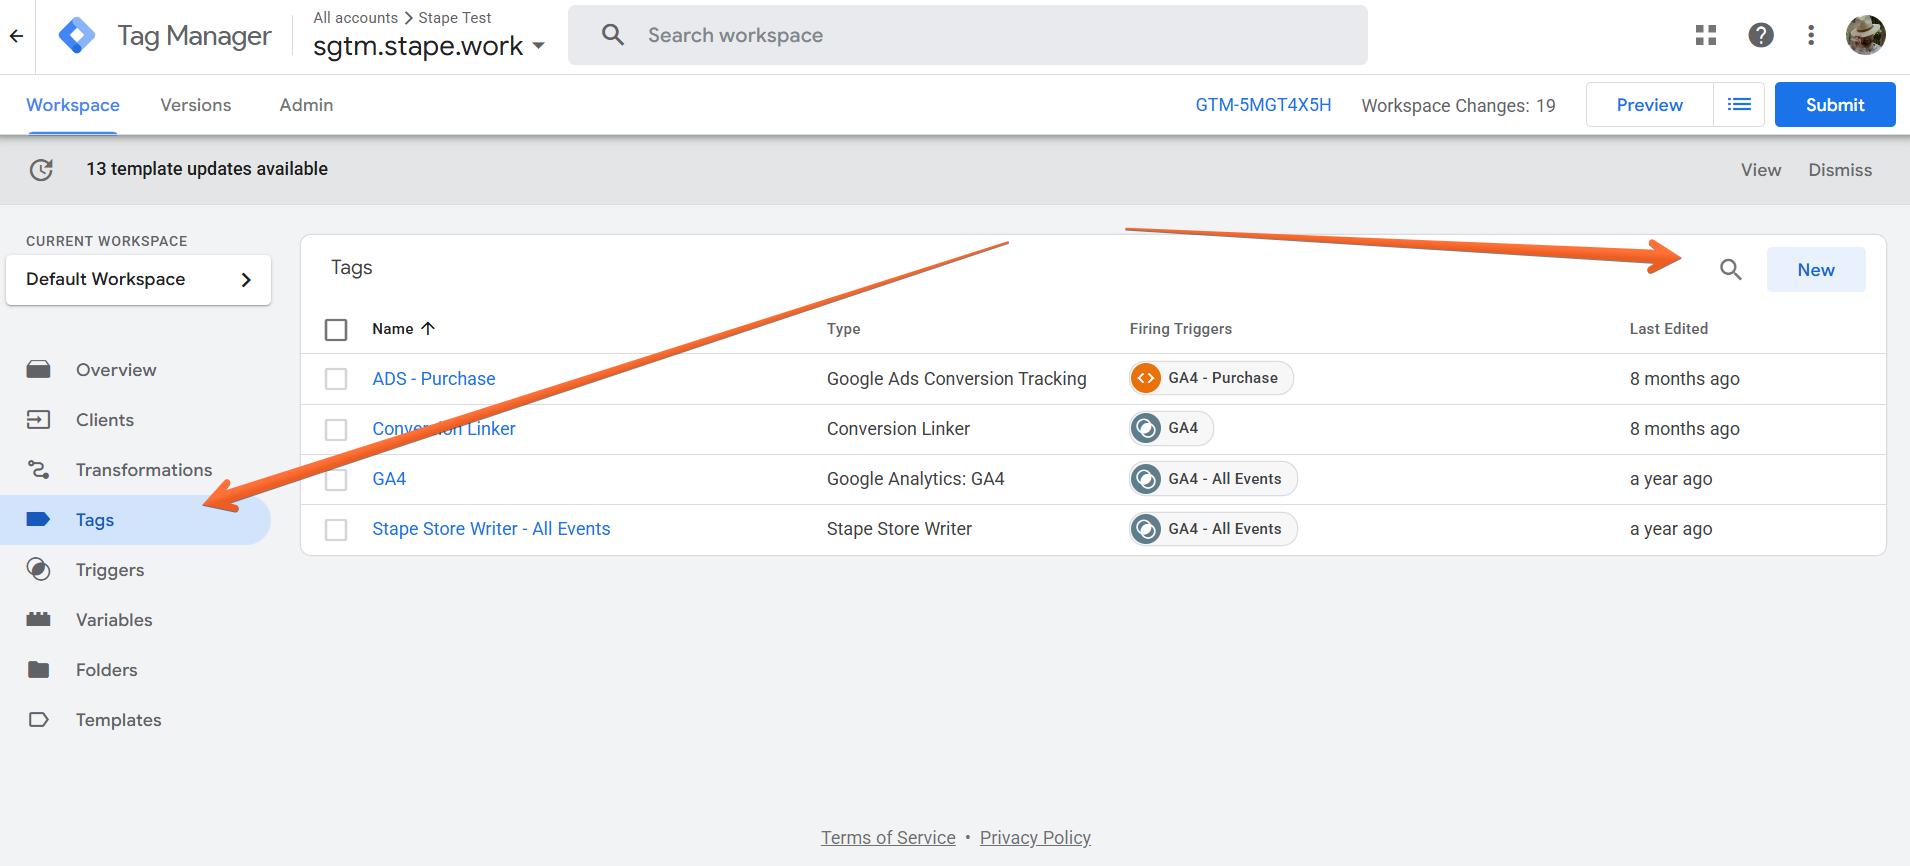
3. Create the Omnisend tag:

  • Go to the Tags menu → click New.
Tags menu
  • Click Tag Configuration → select Omnisend.
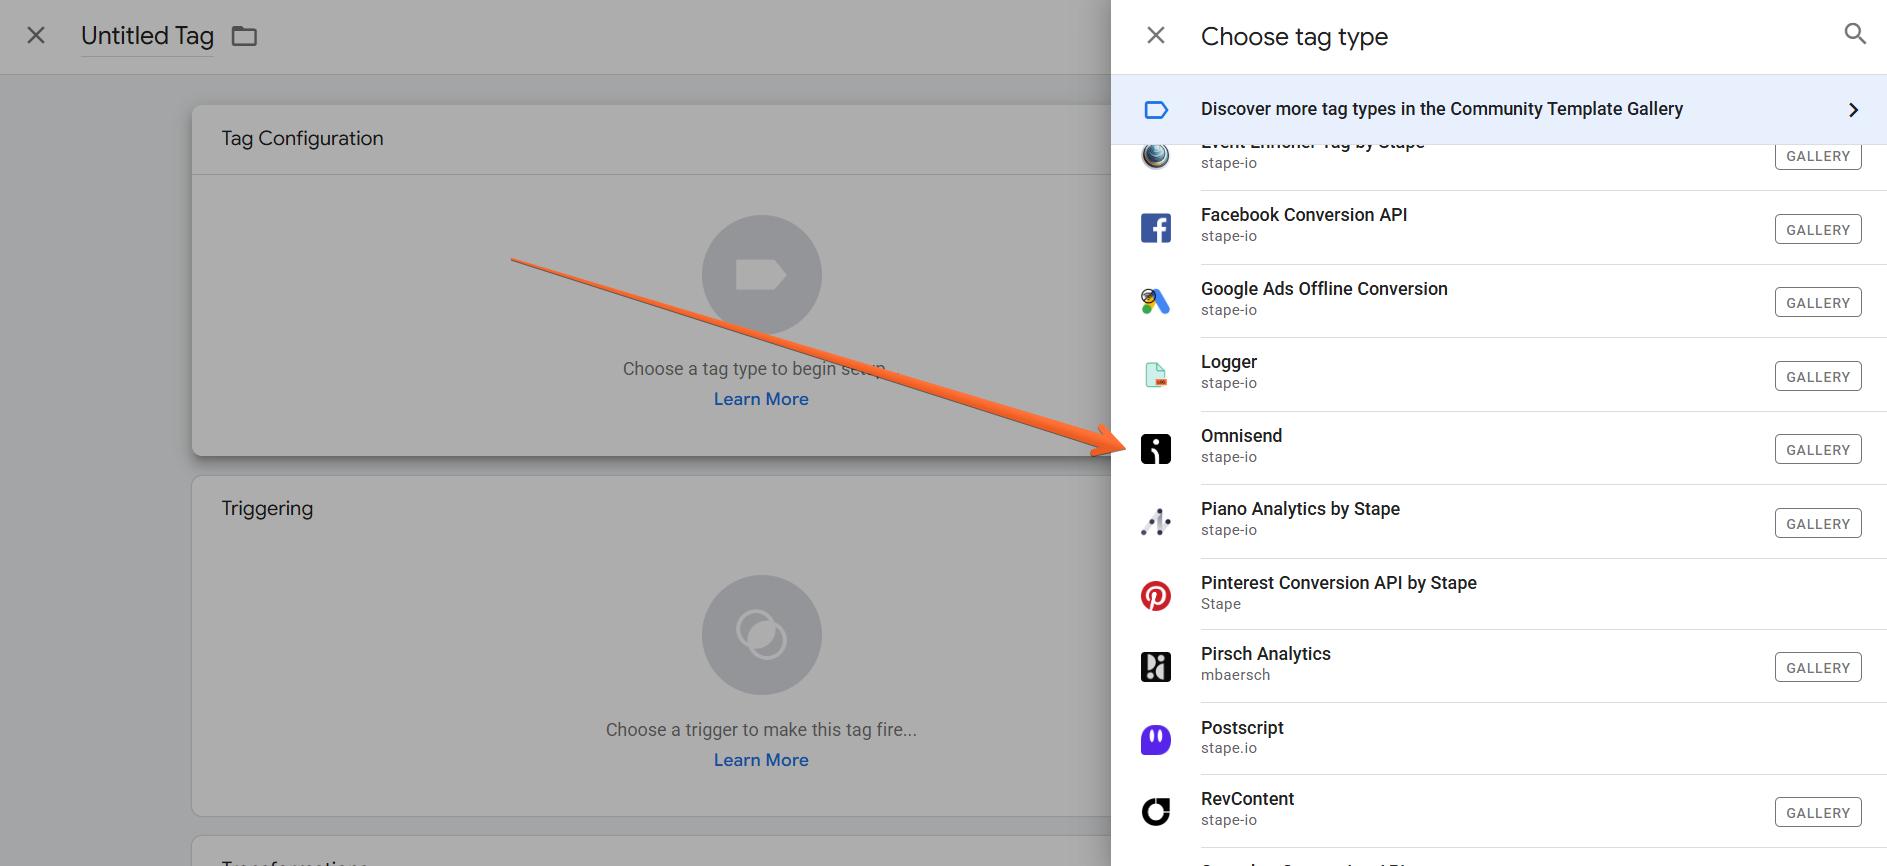
select Omnisend

4. Configure the Omnisend tag:


  • Action Type - select what kind of data you want to send to Omnisend.
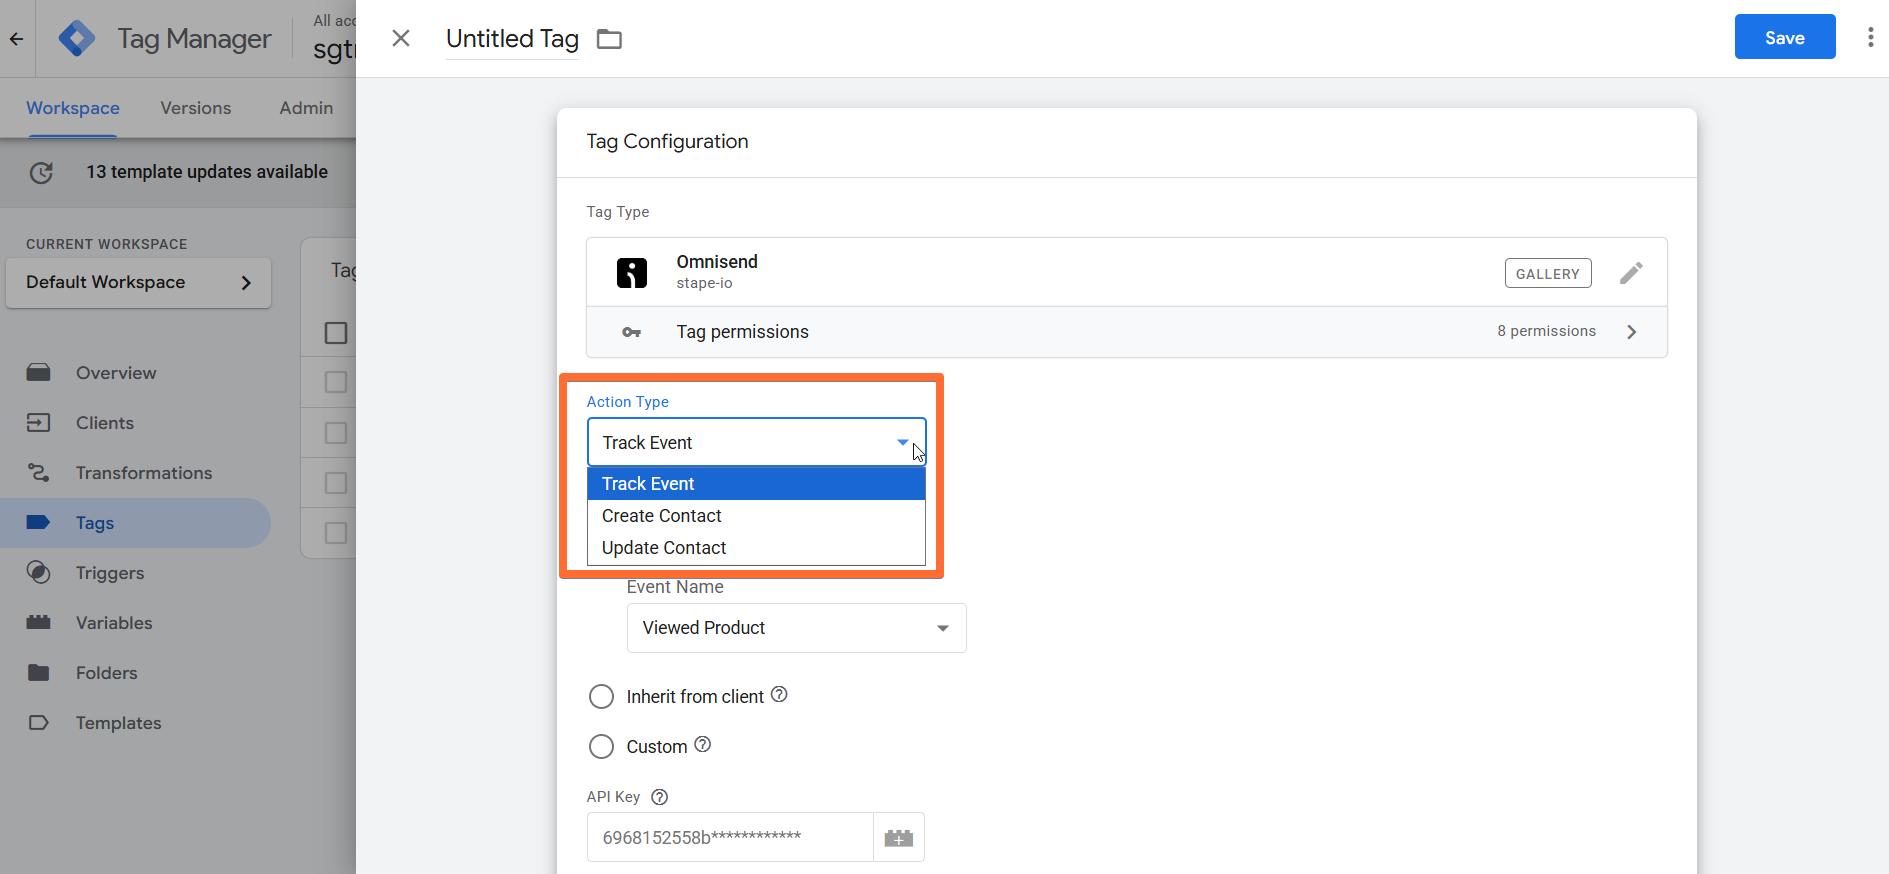
Action Type
  • If you selected Track Event as Action Type, choose an Event Name Setup Method:
    • Standard: Predefined list (e.g., viewed product, placed order).
    • Inherit: Maps GA4 events (e.g., purchase → placed order).
    • Custom: Your own event name.
Event Name Setup Method
  • API Key - can be found on Omnisend in Store Settings → API → API Keys. The key must have permissions for Contacts and Events.
  • Use Optimistic Scenario - if enabled, the tag returns gtmOnSuccess() immediately without waiting for the API response.
API Key and Optimistic Scenario
  • If you selected Track Event as Action Type, then for Contact Identifiers, provide:
    • Either Omnisend Contact ID, Email Address, or Phone Number. This action creates a new contact if it doesn't exist or, if the contact exists, updates the contact information.
Contact Identifiers for Track Event
  • If you selected Create Contact as Action Type, then for Contact Identifiers, provide:
    • Unique contact ID (either Email or Phone). The system handles partial duplicates (merges unique IDs) and rejects total duplicates or existing single identifiers.
    • You can also choose to Store the created Omnisend Contact ID in cookie (omnisendContactID).
Contact Identifiers for Create Contact
  • If you selected Update Contact as Action Type, then for Contact Identifiers, enter one of the following:
    • Update Contact Search Key: Choose Omnisend Contact ID to allow email updates, or Email (ID remains unchanged).
    • Specific fields (Omnisend Contact ID, Contact Email, or Contact Phone) if you want to update them separately.
Contact Identifiers for Update Contact
  • Contact Properties - provide contact information. Be sure to follow Omnisend’s naming conventions. When updating contact information, only provide the updated properties. You can also use the Tags section to enter string tag values for user segmentation or filtering.
  • Contact Custom Properties - same as above, but you provide your own custom names.
Contact Properties
  • Server Event Data (optional, and available only if you selected Track Event as Action Type) - if Event ID is not set, it will be generated automatically by the API. However, you can provide a specific Event ID along with Event Timestamp to deduplicate events.
  • Event Properties (optional, and available only if you selected Track Event as Action Type) - you can provide your own event properties or choose to Automap Event Properties.
  • Event Custom Properties (optional, and available only if you selected Track Event as Action Type) -  same as above, but you provide your own custom properties.
Optional Track Event properties
  • Advanced parameters:
    • Tag Execution Consent Settings - choose if you wish for the tag to wait for marketing consent from the user before firing.
    • Logs Settings - choose if you want to log requests to your account. This feature is handy when setting up server-side tagging since it allows seeing incoming and outgoing requests and network responses.
    • BigQuery Logs Settings - allows you to configure BigQuery logging.
    • Advanced Settings (Additional Tag Metadata) - specify additional tag metadata to be included in the event data when the tag is fired.
Advanced parameters

5. Add the Trigger for the tag, give it a descriptive name, and click Save.
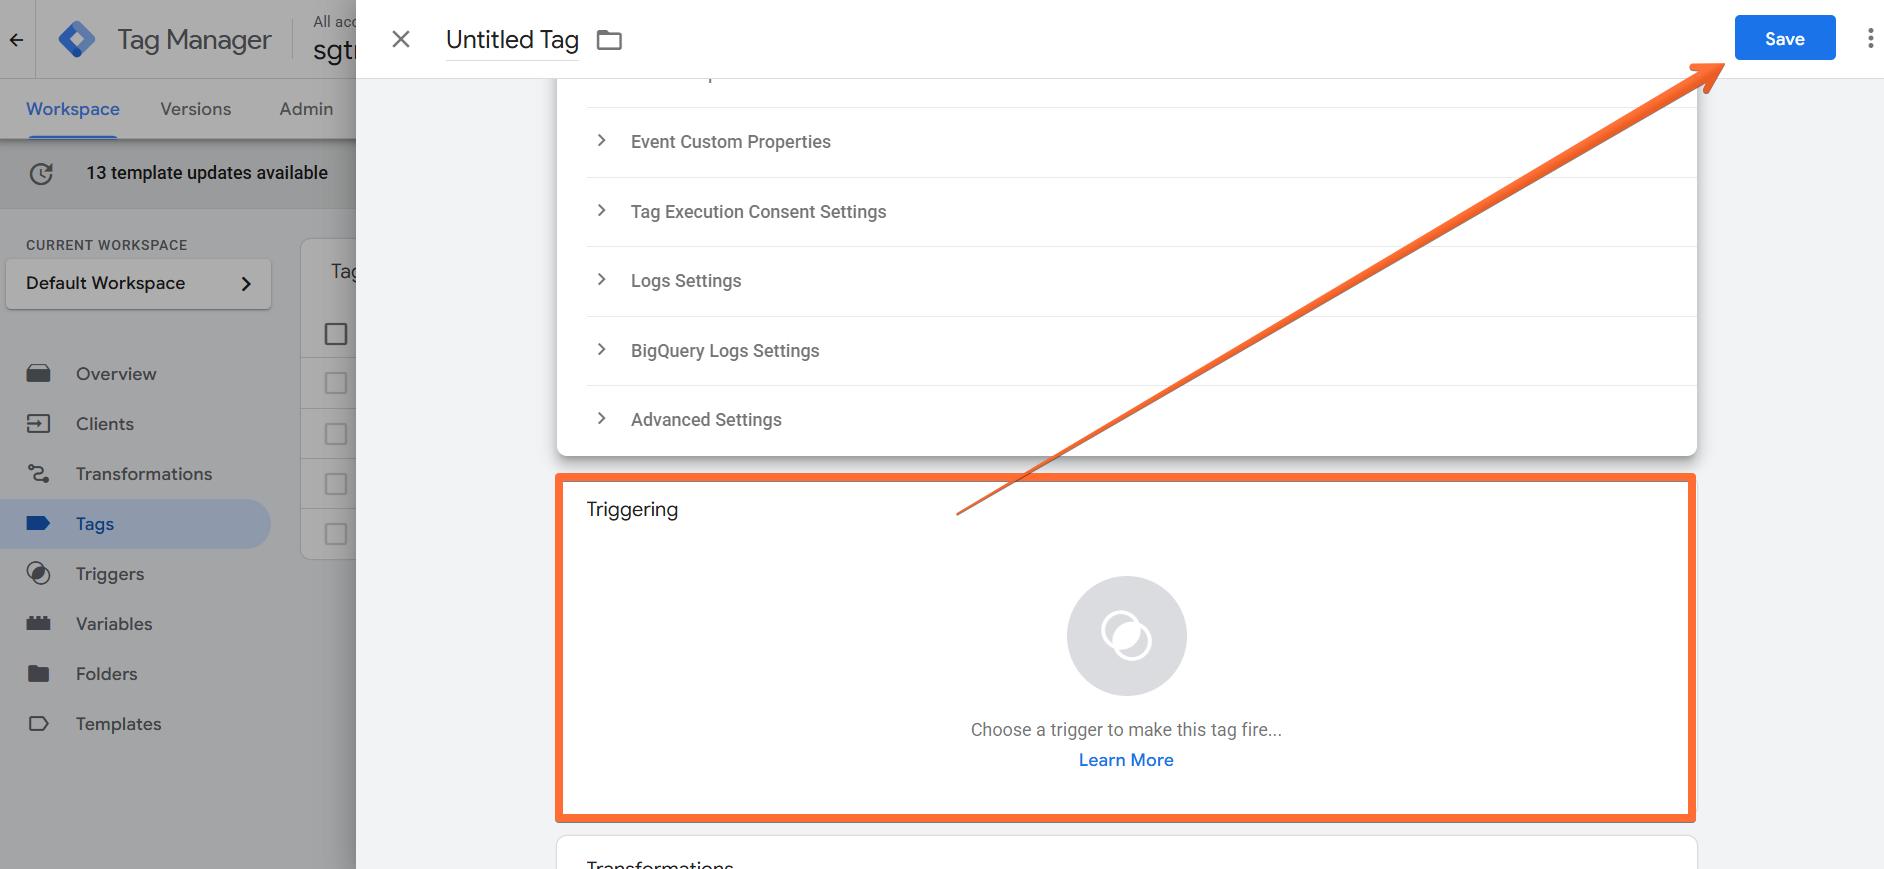
Add the Trigger for the tag

How to test and troubleshoot the Omnisend tag setup

You can test the configurations in Google Tag Manager. Click on Preview, trigger the event, and check whether the tag has fired.

Test and troubleshoot the Omnisend tag

Comments

Can’t find what you are looking for?