OpenAI Ads Events API tag
Updated Aug 3, 2026
This guide explains how to configure the OpenAI Ads Events API by Stape in a server GTM container. Find out how to install and configure the tag, authenticate requests, map event and user data, set up event deduplication between web and server containers, and test your implementation to ensure accurate conversion tracking.
Before you begin
- Configure the OpenAI Ads Pixel tag for the web GTM container.
- Set up the server GTM container.
- Set up data sending from the web to the server GTM container. You can set it up using server-side Google Analytics 4 or Data Tag/Data Client.
How to set up OpenAI Ads Events API tag for server GTM
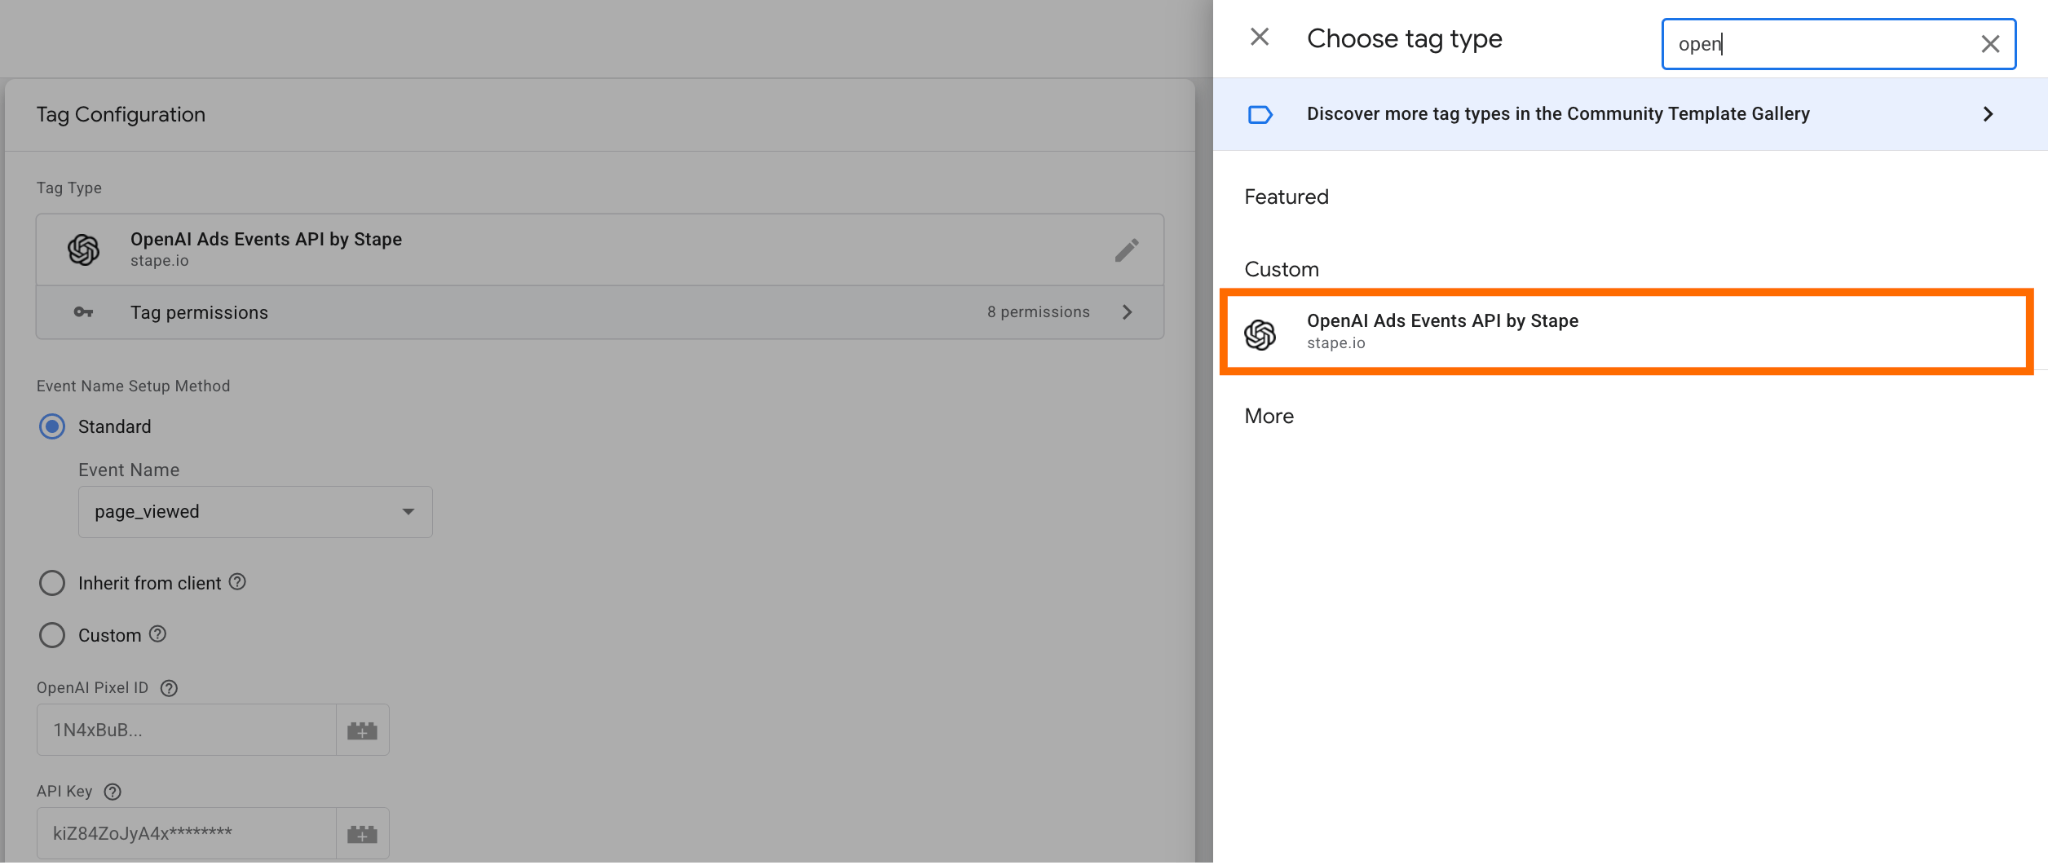
1. Add the OpenAI Ads Conversions API by Stape to your workspace in the server GTM container.
2. Create a new tag.
As Tag Configuration, select “OpenAI Ads Events API by Stape”.
3. Configure the tag.
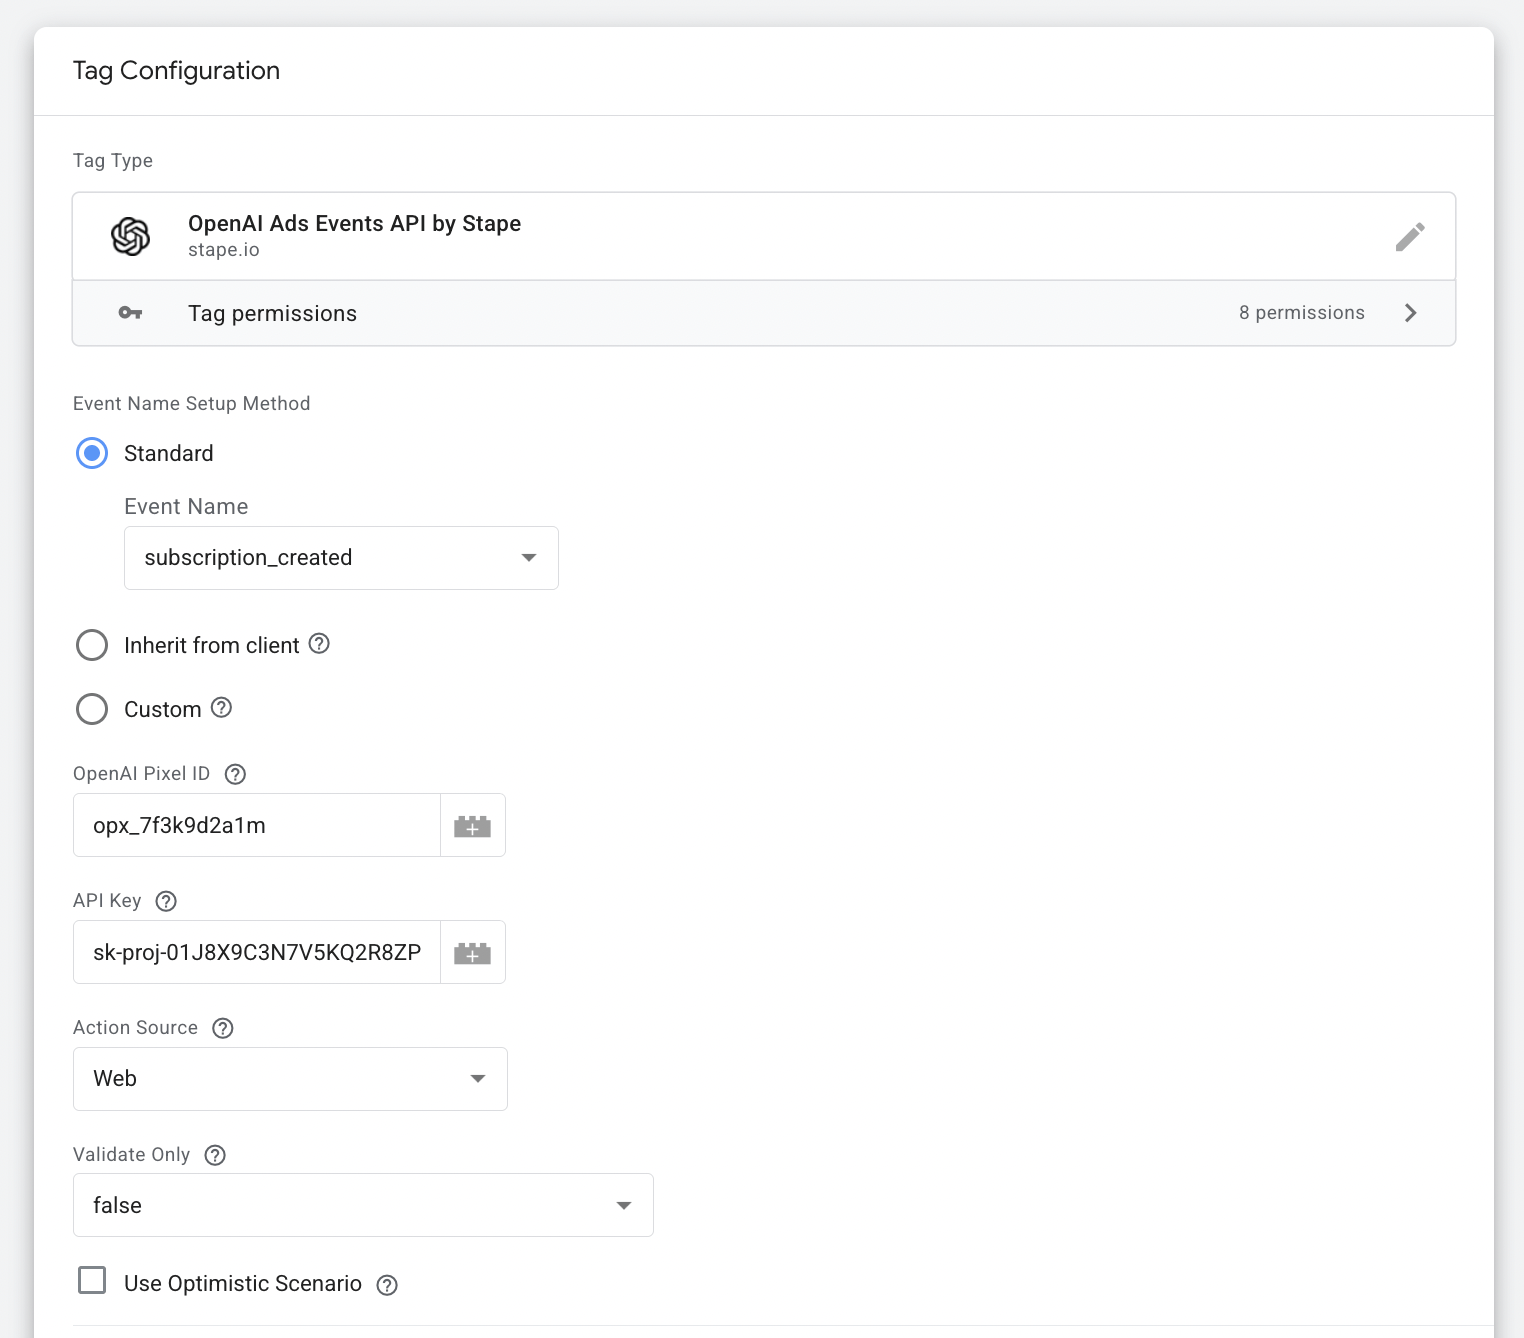
- Event Name Setup Method - select the method:
- Standard - choose from the list of events.
- Inherit from the client - with this option, the tag maps GA4 event names (add_to_cart, sign_up, etc.) to ChatGPT equivalents.
- Custom - provide your own event that you want to track.
Note:
If you opt for the Custom event name method, be sure to use lowercase letters, numbers, underscores, or dashes. Keep the name between 1 and 65 characters and don’t use built-in names.
- OpenAI Pixel ID - you can find it in your ad account in ChatGPT.
- API Key - ask your OpenAI Account team to provide an API Key.
- Action Source - select where your events will be coming from.
- Set Click ID cookie - enabled by default. If false, and if an existing Click ID is found on the sources below, it will still be sent in the request, but not stored as a cookie. If true, the Click ID will be sent in the request and stored as the __oppref cookie by server GTM.

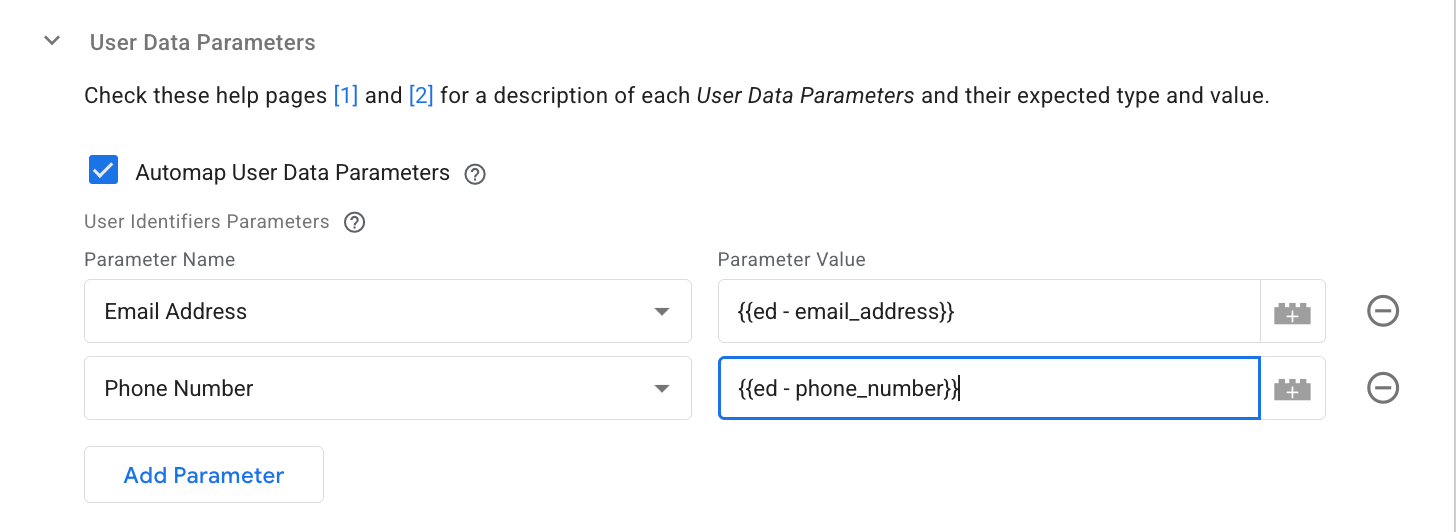
- User Data - select from a list of user data if you want to enrich the conversions with data on the user.
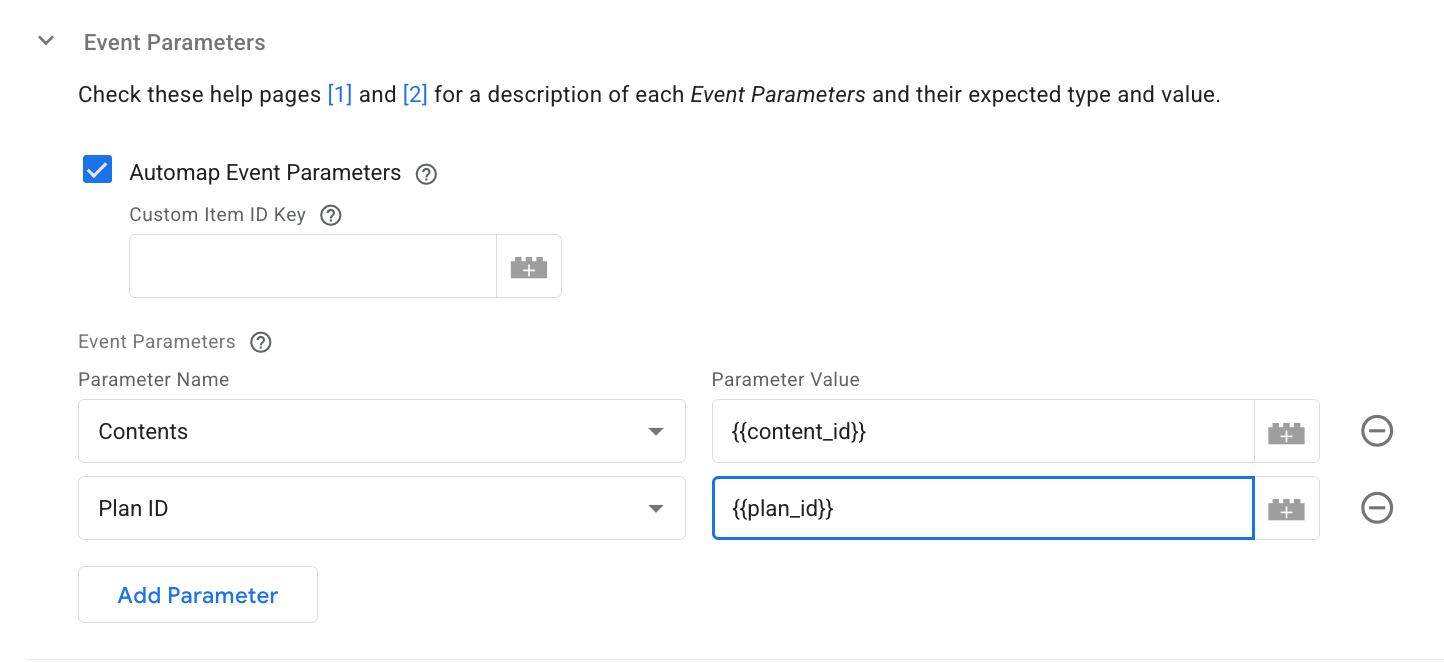
- Event Data - list the properties that will be sent to OpenAI with an event. See the list of supported events in OpenAI’s documentation.
4. Configure events deduplication.
Since you send data to ChatGPT from both web and server containers, you need to be sure that the events won’t be duplicated and that the platform receives only accurate data.
Stape’s tags provide the solutions for you, so you can easily configure event deduplication. So, you need to do the following configurations:
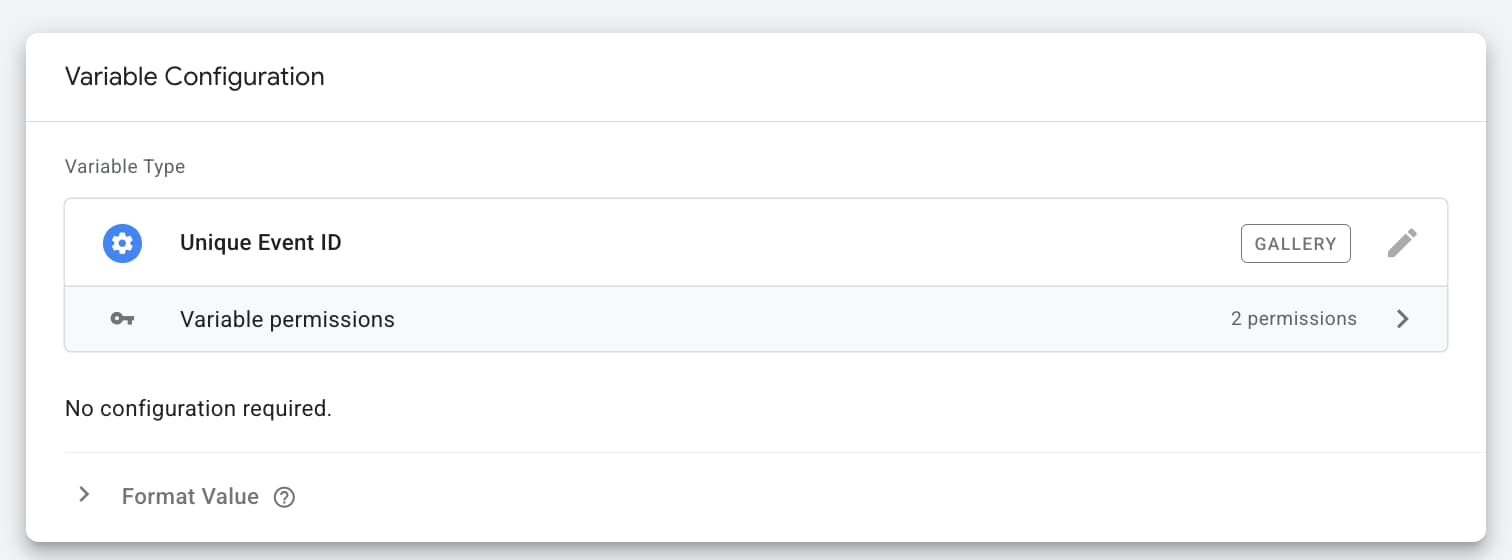
- Add Unique Event ID Variable.
We created a custom GTM variable that generates a unique event ID that you can use in your web and server ChatGPT events. With its help, you can track users both from the browser and server and deduplicate events.
Just add it (search for Unique Event ID variable in your containers); no additional configuration is required.
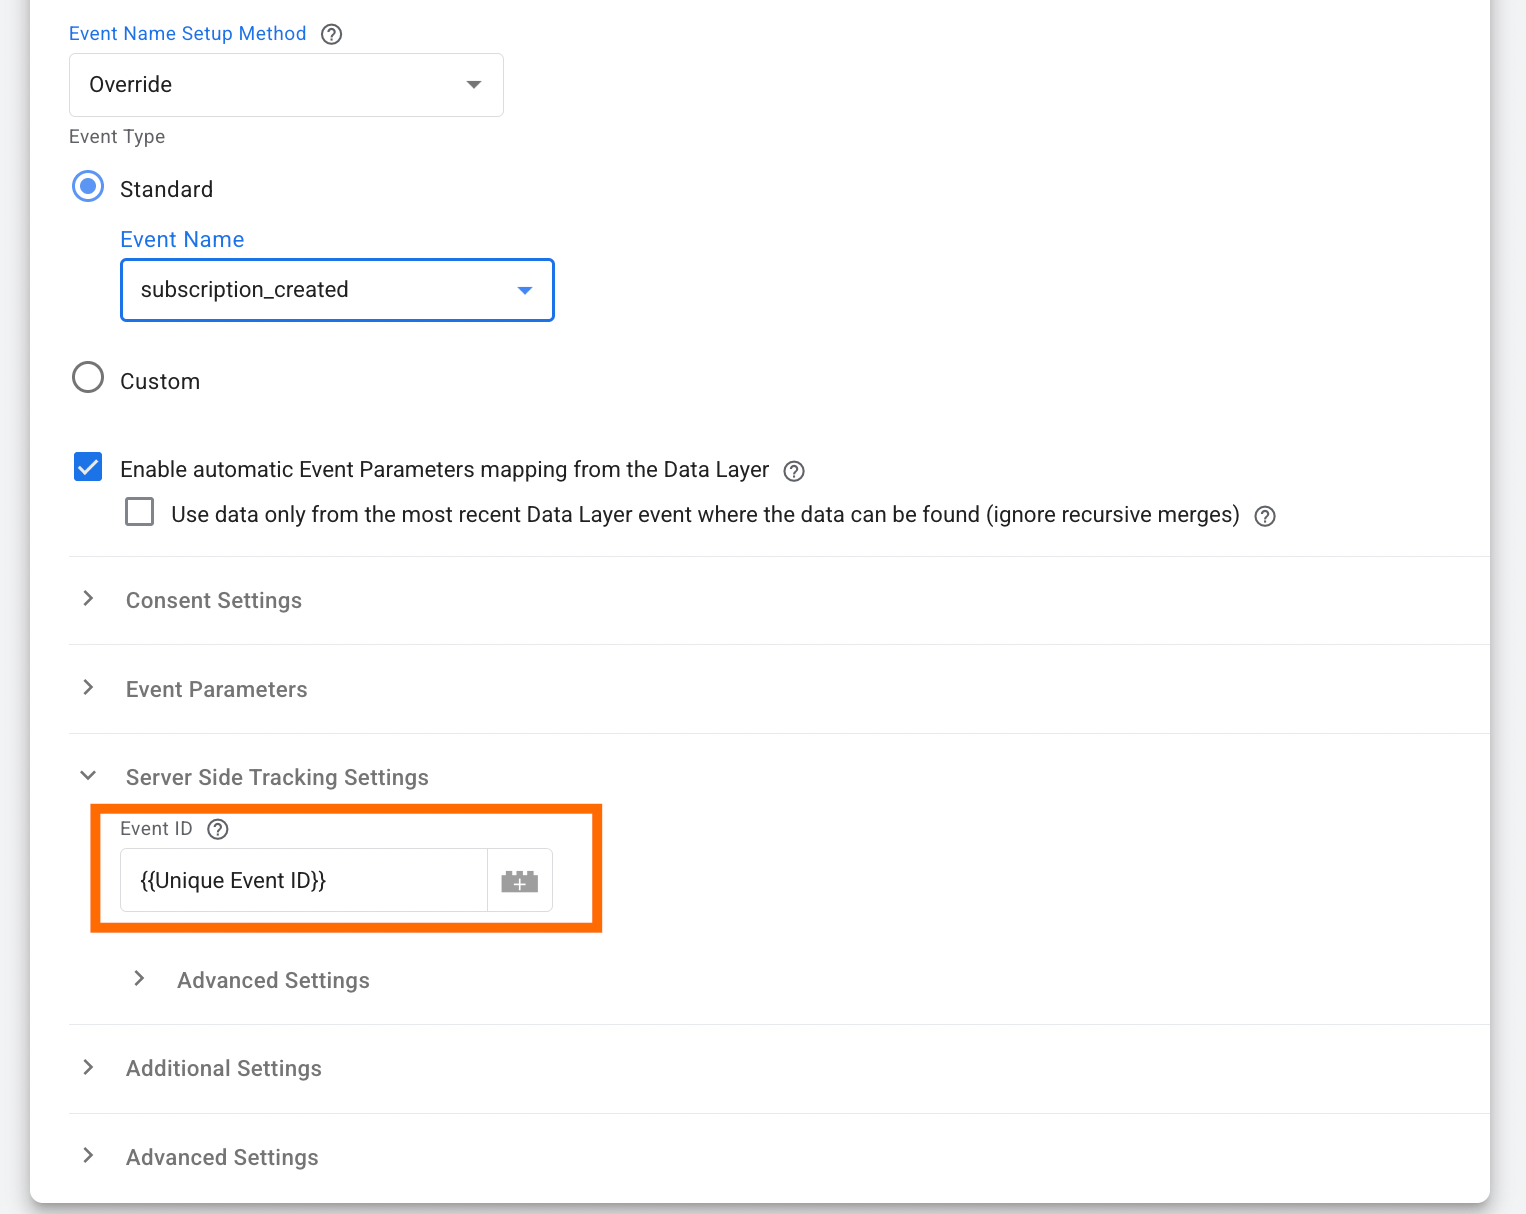
- Add the variable in the OpenAI Ads Pixel tag for the web GTM.
Scroll to the Server-Side Tracking Settings section and add the variable.
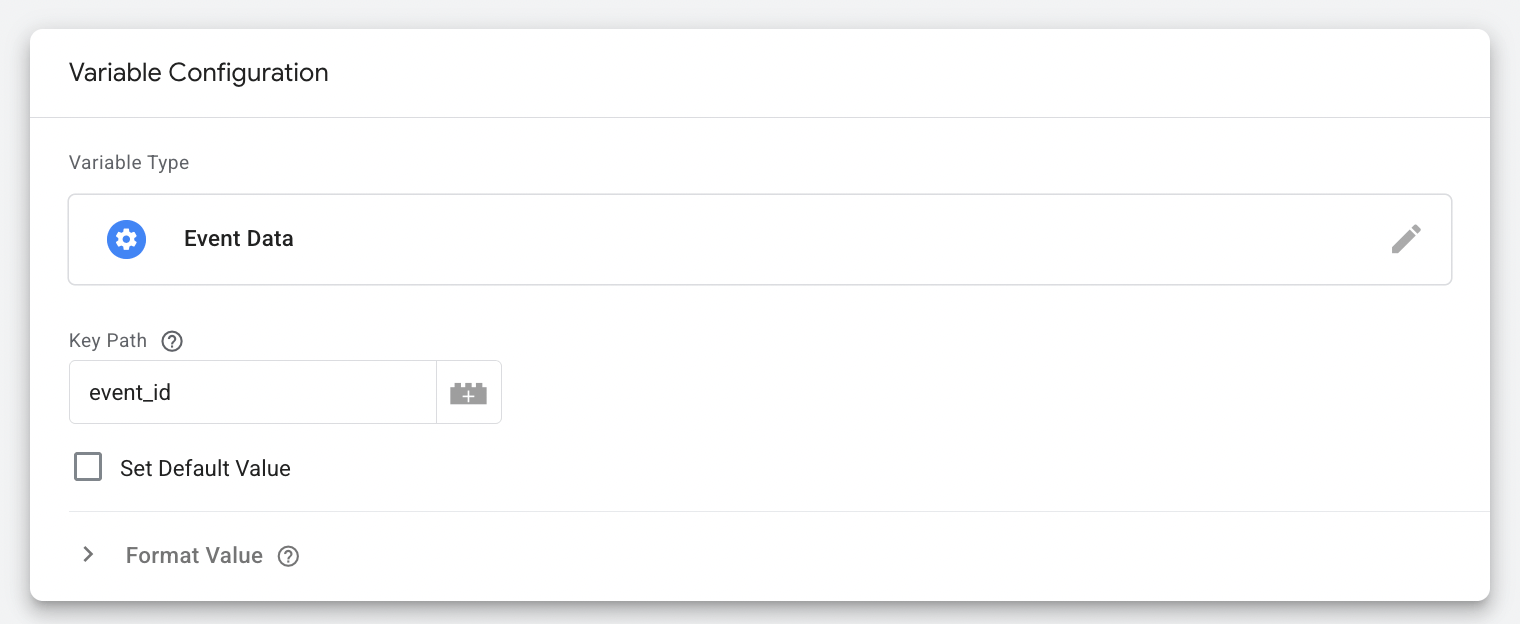
- In the server GTM container, add the variable that will catch the event ID.
Use the configurations as shown in the screenshot:
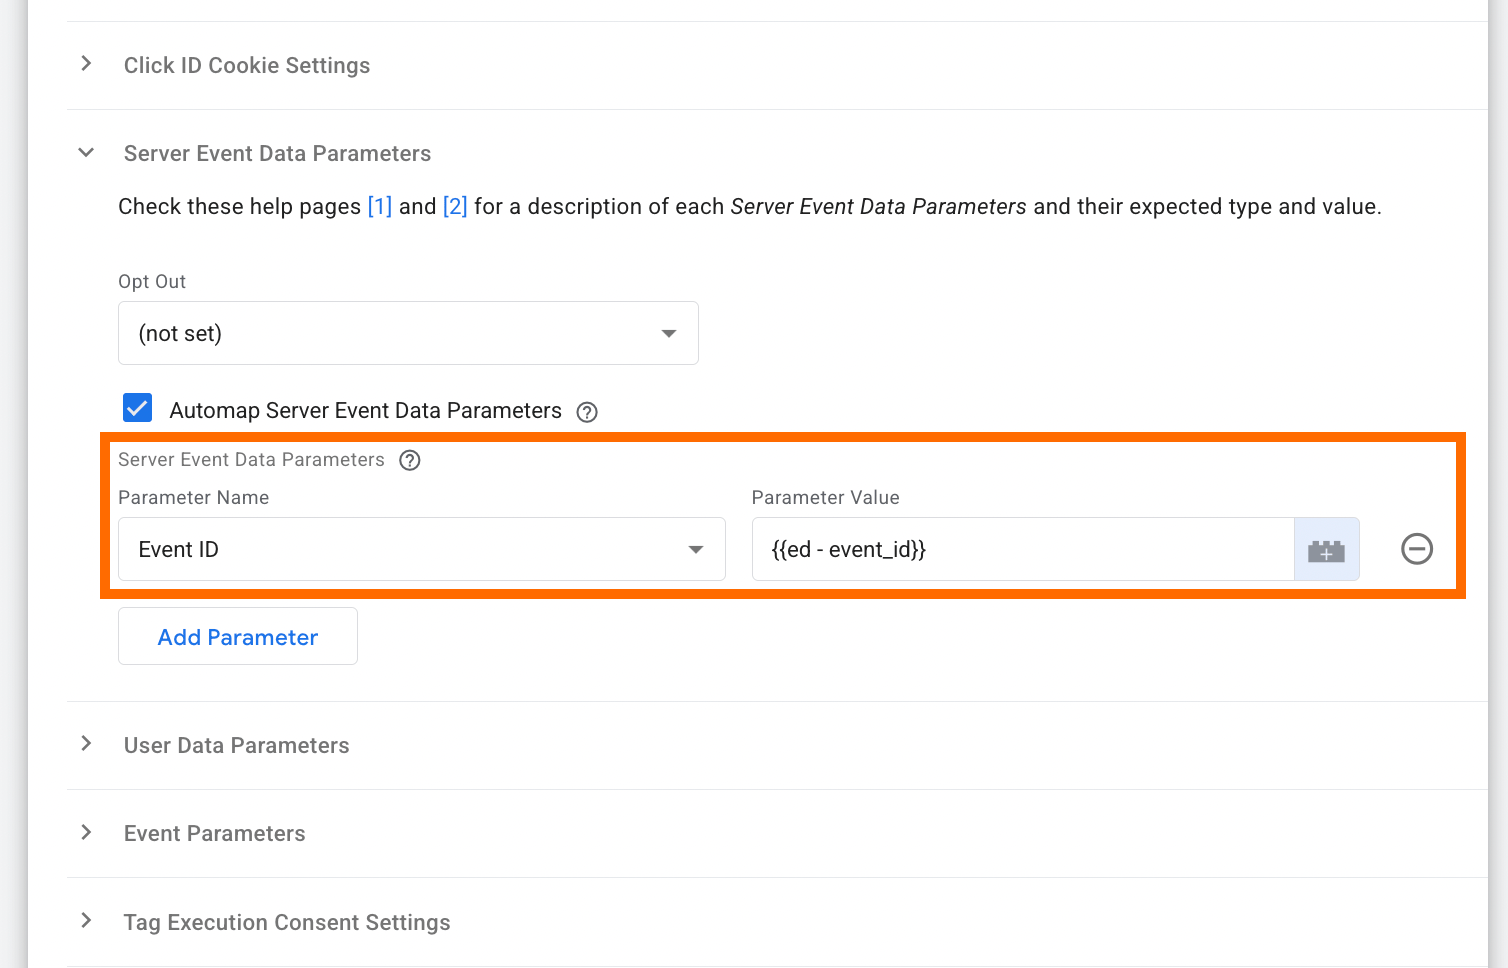
- Add the variable in the server GTM tag.
Expand the section Server Event Data Parameters and select Event ID as Parameter Name, as Parameter Value, and add the variable you’ve created earlier.
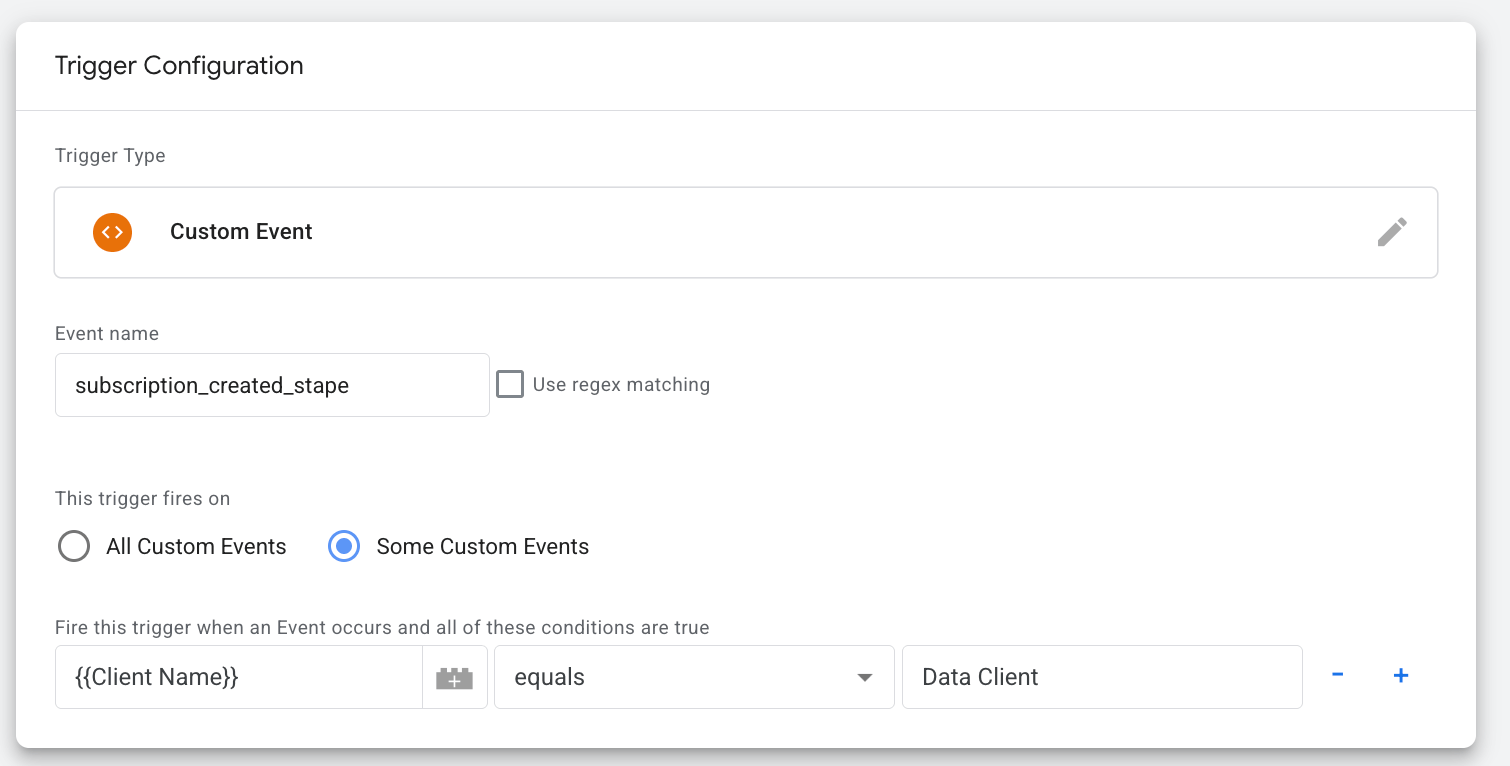
5. Add a trigger for a tag.
It should have the following configurations:
- Trigger Type: Custom Event
- Event name: select the one you specified in tag configuration (in our case, it’s subscription_created)
- This trigger fires on Some Custom Events
- Add the variable with the client name and specify the client you use (in our case, it is the Data Client)
Test and troubleshoot the OpenAI Ads Events API tag
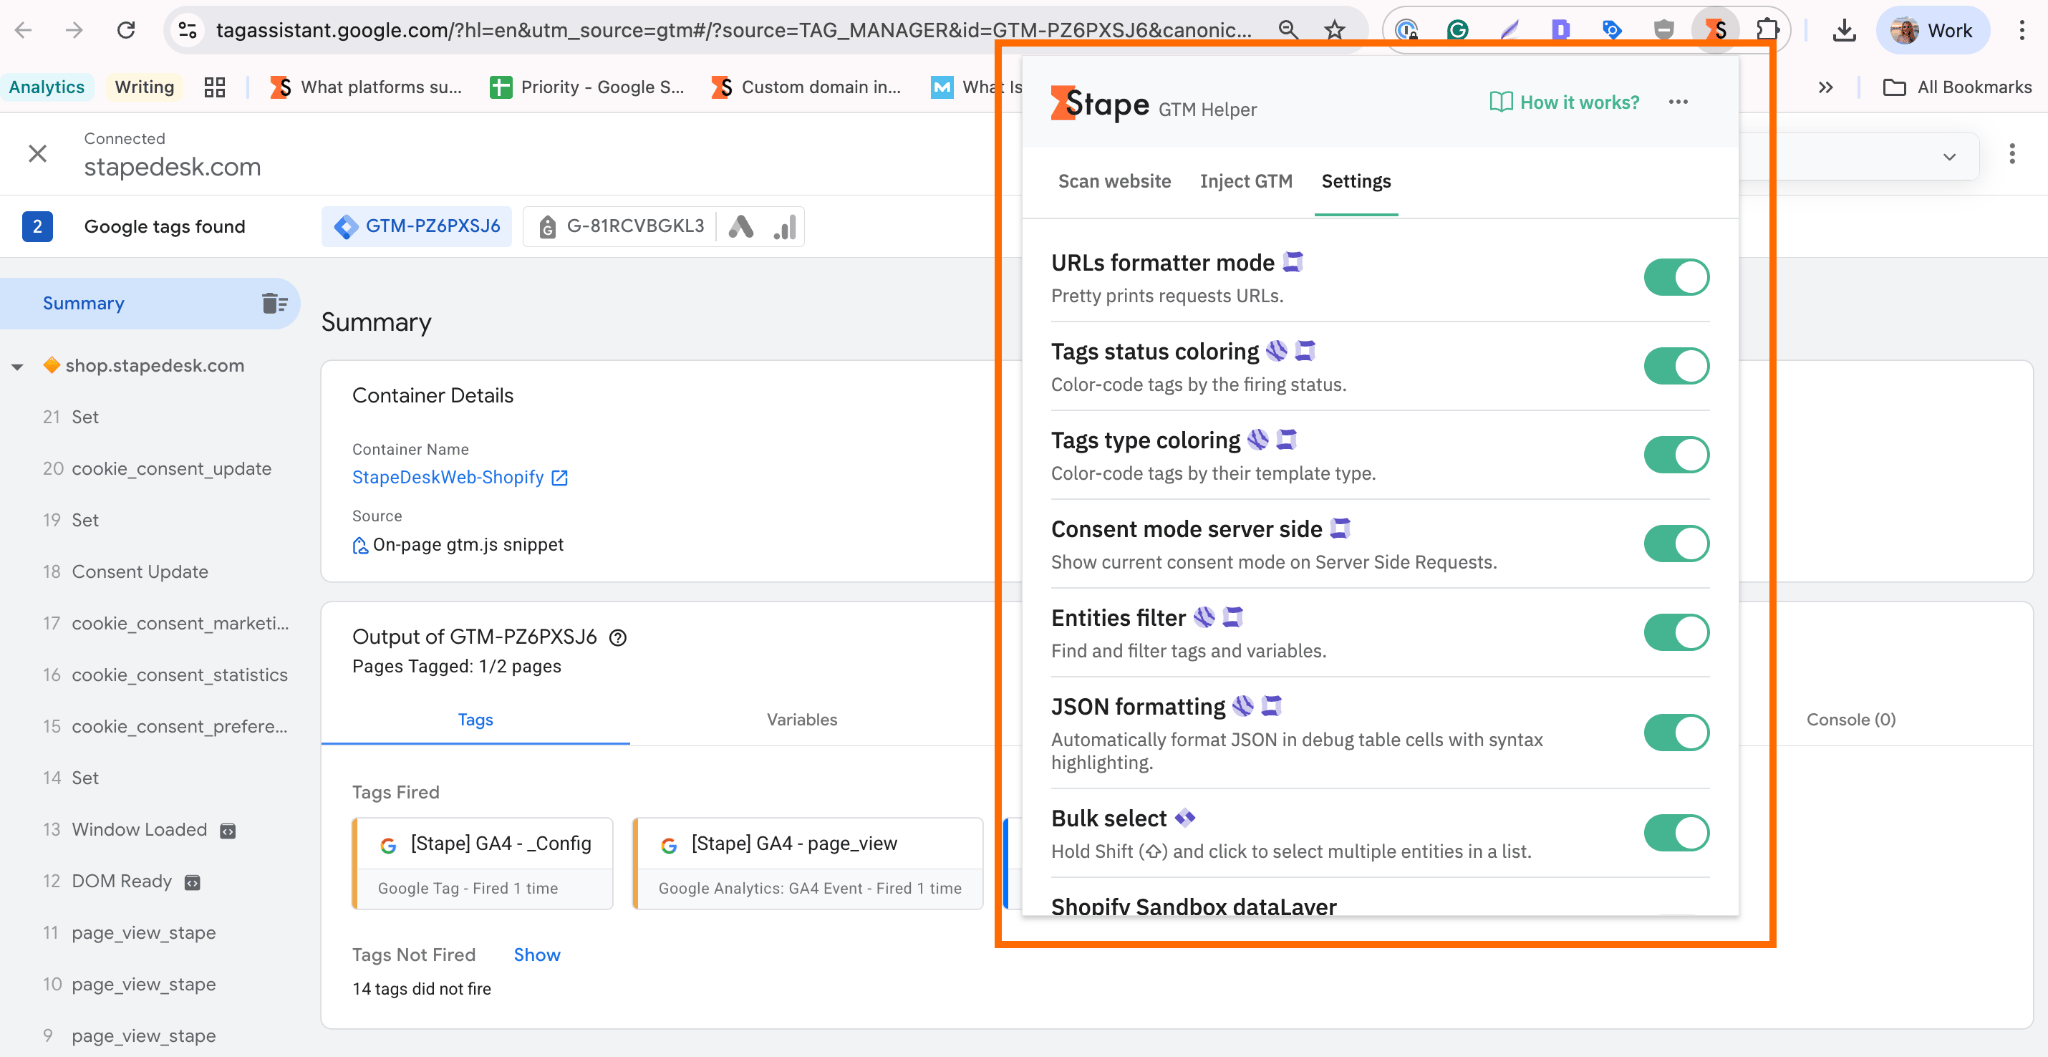
Open the GTM debugger in both web and server containers. Enable the Stape GTM Helper extension for easier navigation during debugging.
Navigate through your website as a real user would, and trigger the actions you’ve implemented (in our case, subscription_created).
After completing the test journey, switch back to the debugger panel to review the results and confirm that the events were recorded correctly.
In case of any issues while troubleshooting the setup, please refer to our guide on debugging and monitoring server-side tracking configuration.
Was this article helpful?
🍽 Table of content:
Comments