Customer.io tag
Updated May 10, 2026
The Customer.io tag is a custom tag template for the Google Tag Manager (GTM) server container. It allows you to send events, page views, screen views, and user profile updates directly to Customer.io using their Data Pipelines API.
Prerequisites
To set up the Customer.io tag, you will need the following:
- Configured data-streaming to the server GTM container (it can be done through server-side Google Analytics 4 or Data tag/Data Client).
- Customer.io account with an API Key (find it in your Customer.io Workspace settings).
How to set up server-side tracking for Customer.io
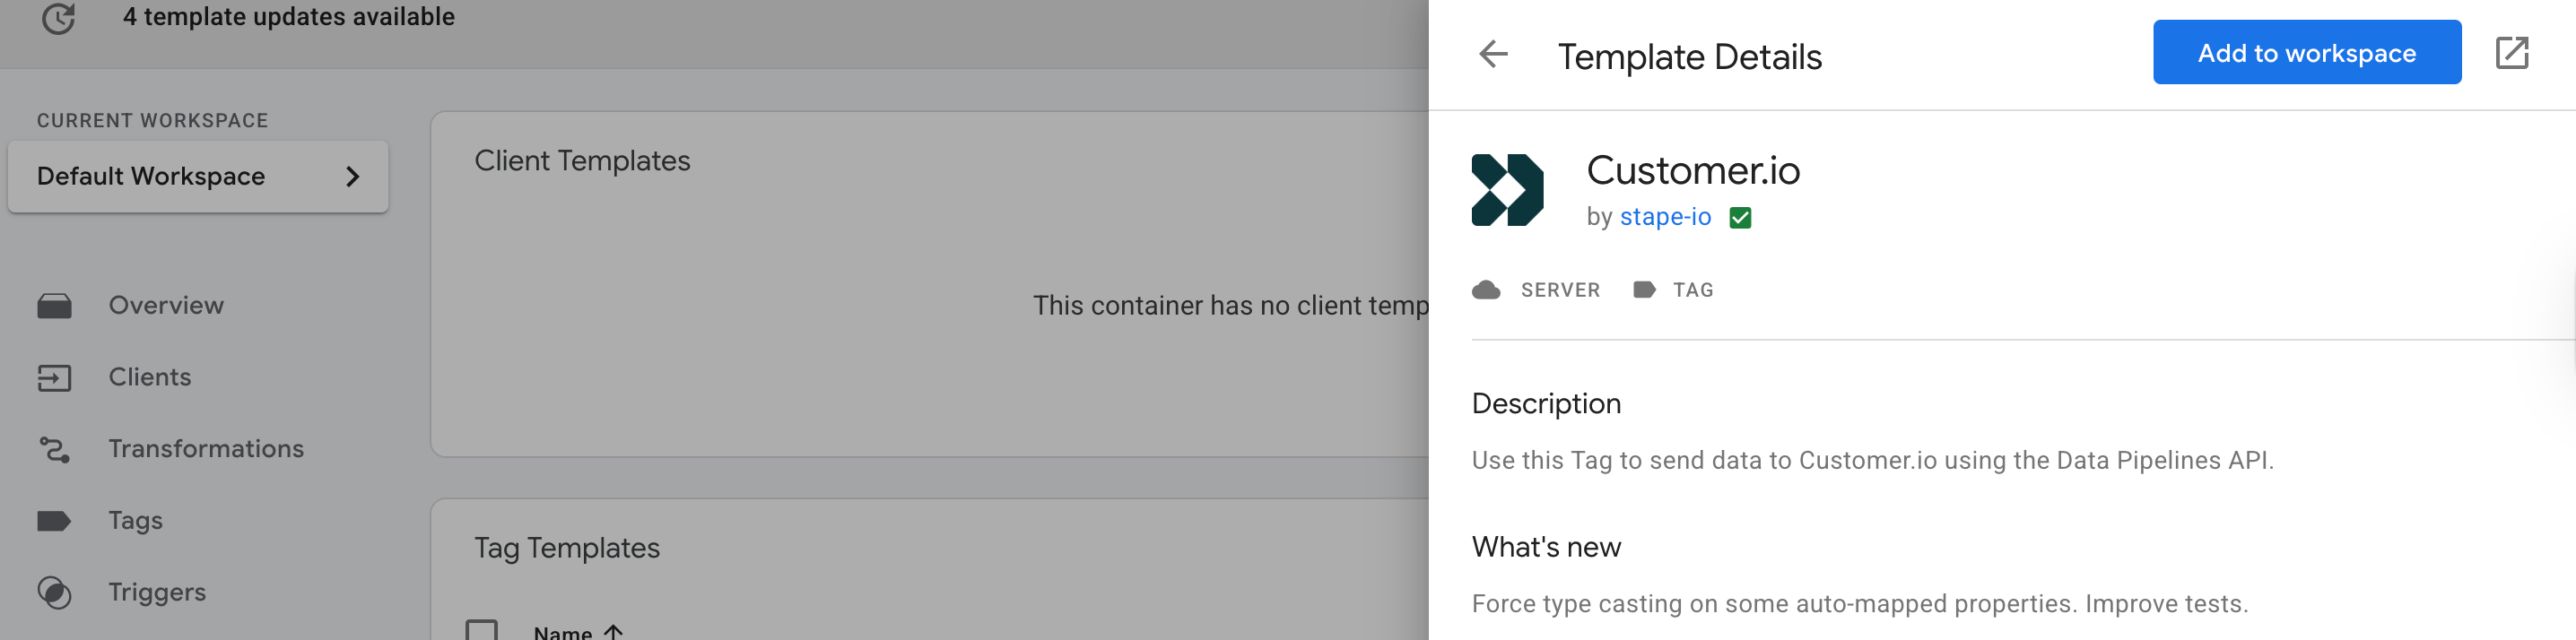
1. Add the Customer.io tag by Stape to your GTM workspace. Go to your server GTM container → Templates section → Tag Templates → click Search Gallery → type Customer.io → choose the template by Stape → click Add to workspace.
2. Create a new tag. Go to the Tags section → click New → as tag type select Customer.io.
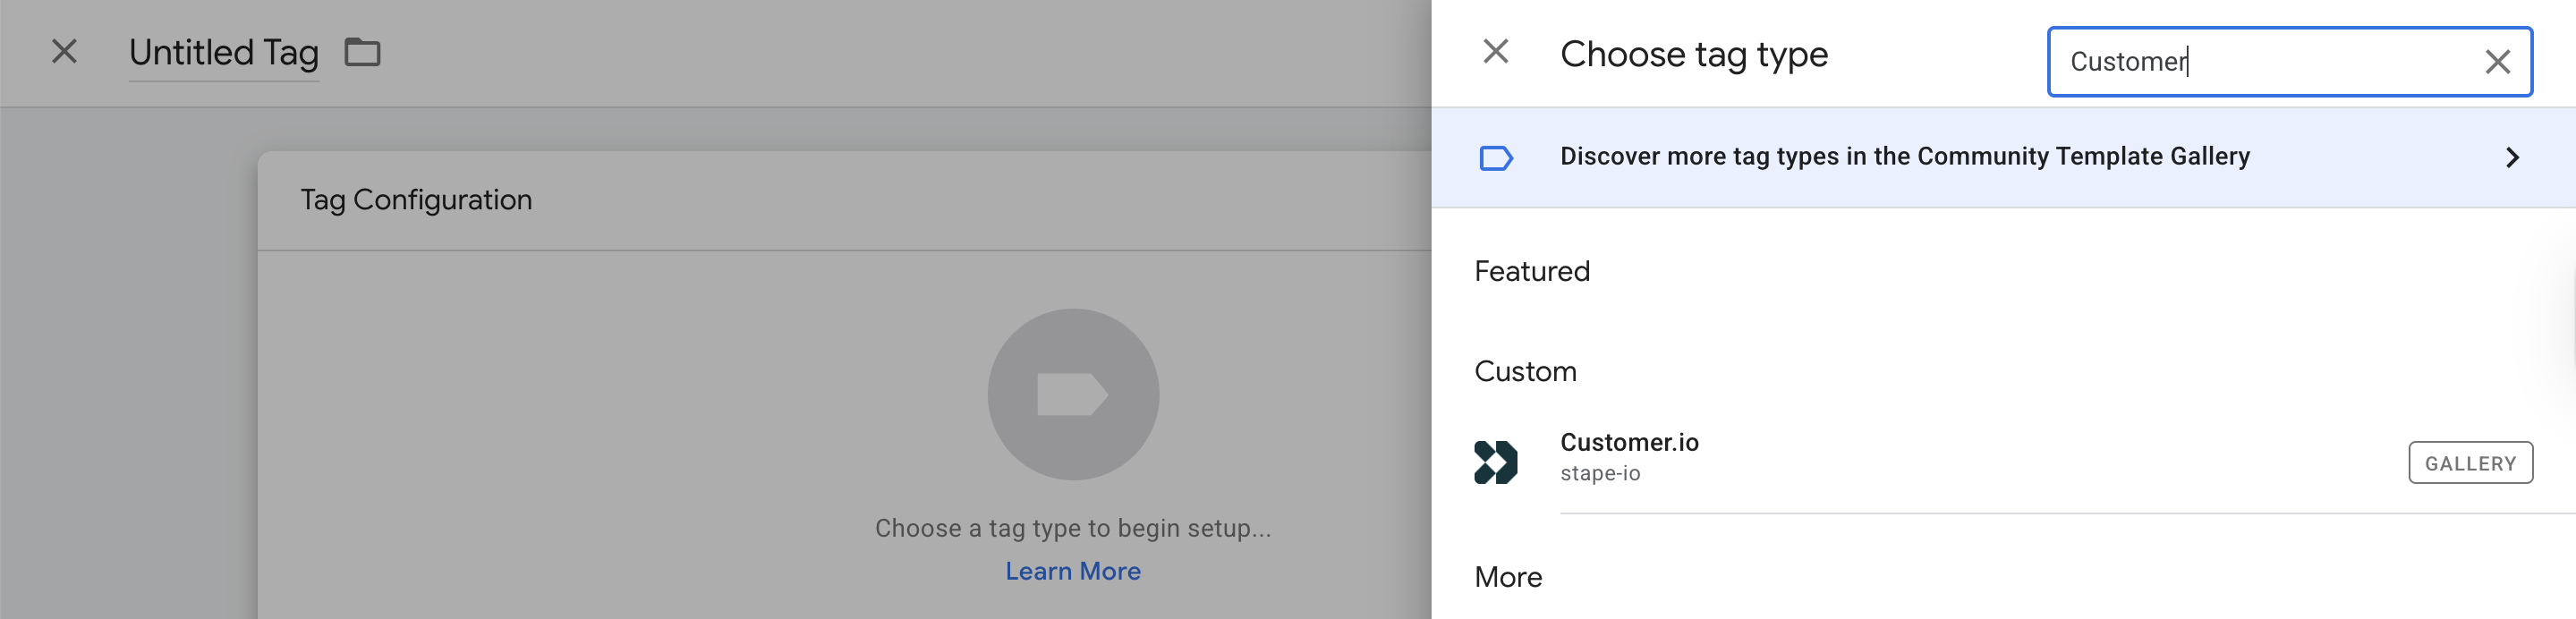
3. Select the specific action Type this tag should perform: Track Event (3.1), Track Page View (3.2), Track Screen View (3.3), Identify User (3.4), Add User to Group (3.5).

3.1 Track Event
Use this action to send custom or semantic events to Customer.io.

Check the next fields:
⦿ Select Event Name setup method → choose between:
- Standard (has 35 pre-defined semantic events like Promotion Viewed, Cart Viewed, Checkout Step Completed, and other).
- Inherit from client (auto-mapped from GA4/Client events; but not all GA4 events can be mapped to Customer.io events - you can map core GA4 events like
purchase,begin_checkout,add_to_cart,view_item, andselect_itemdirectly to Customer.io's event tracking). - Custom (here you can choose from Semantic Events or enter a custom event name).
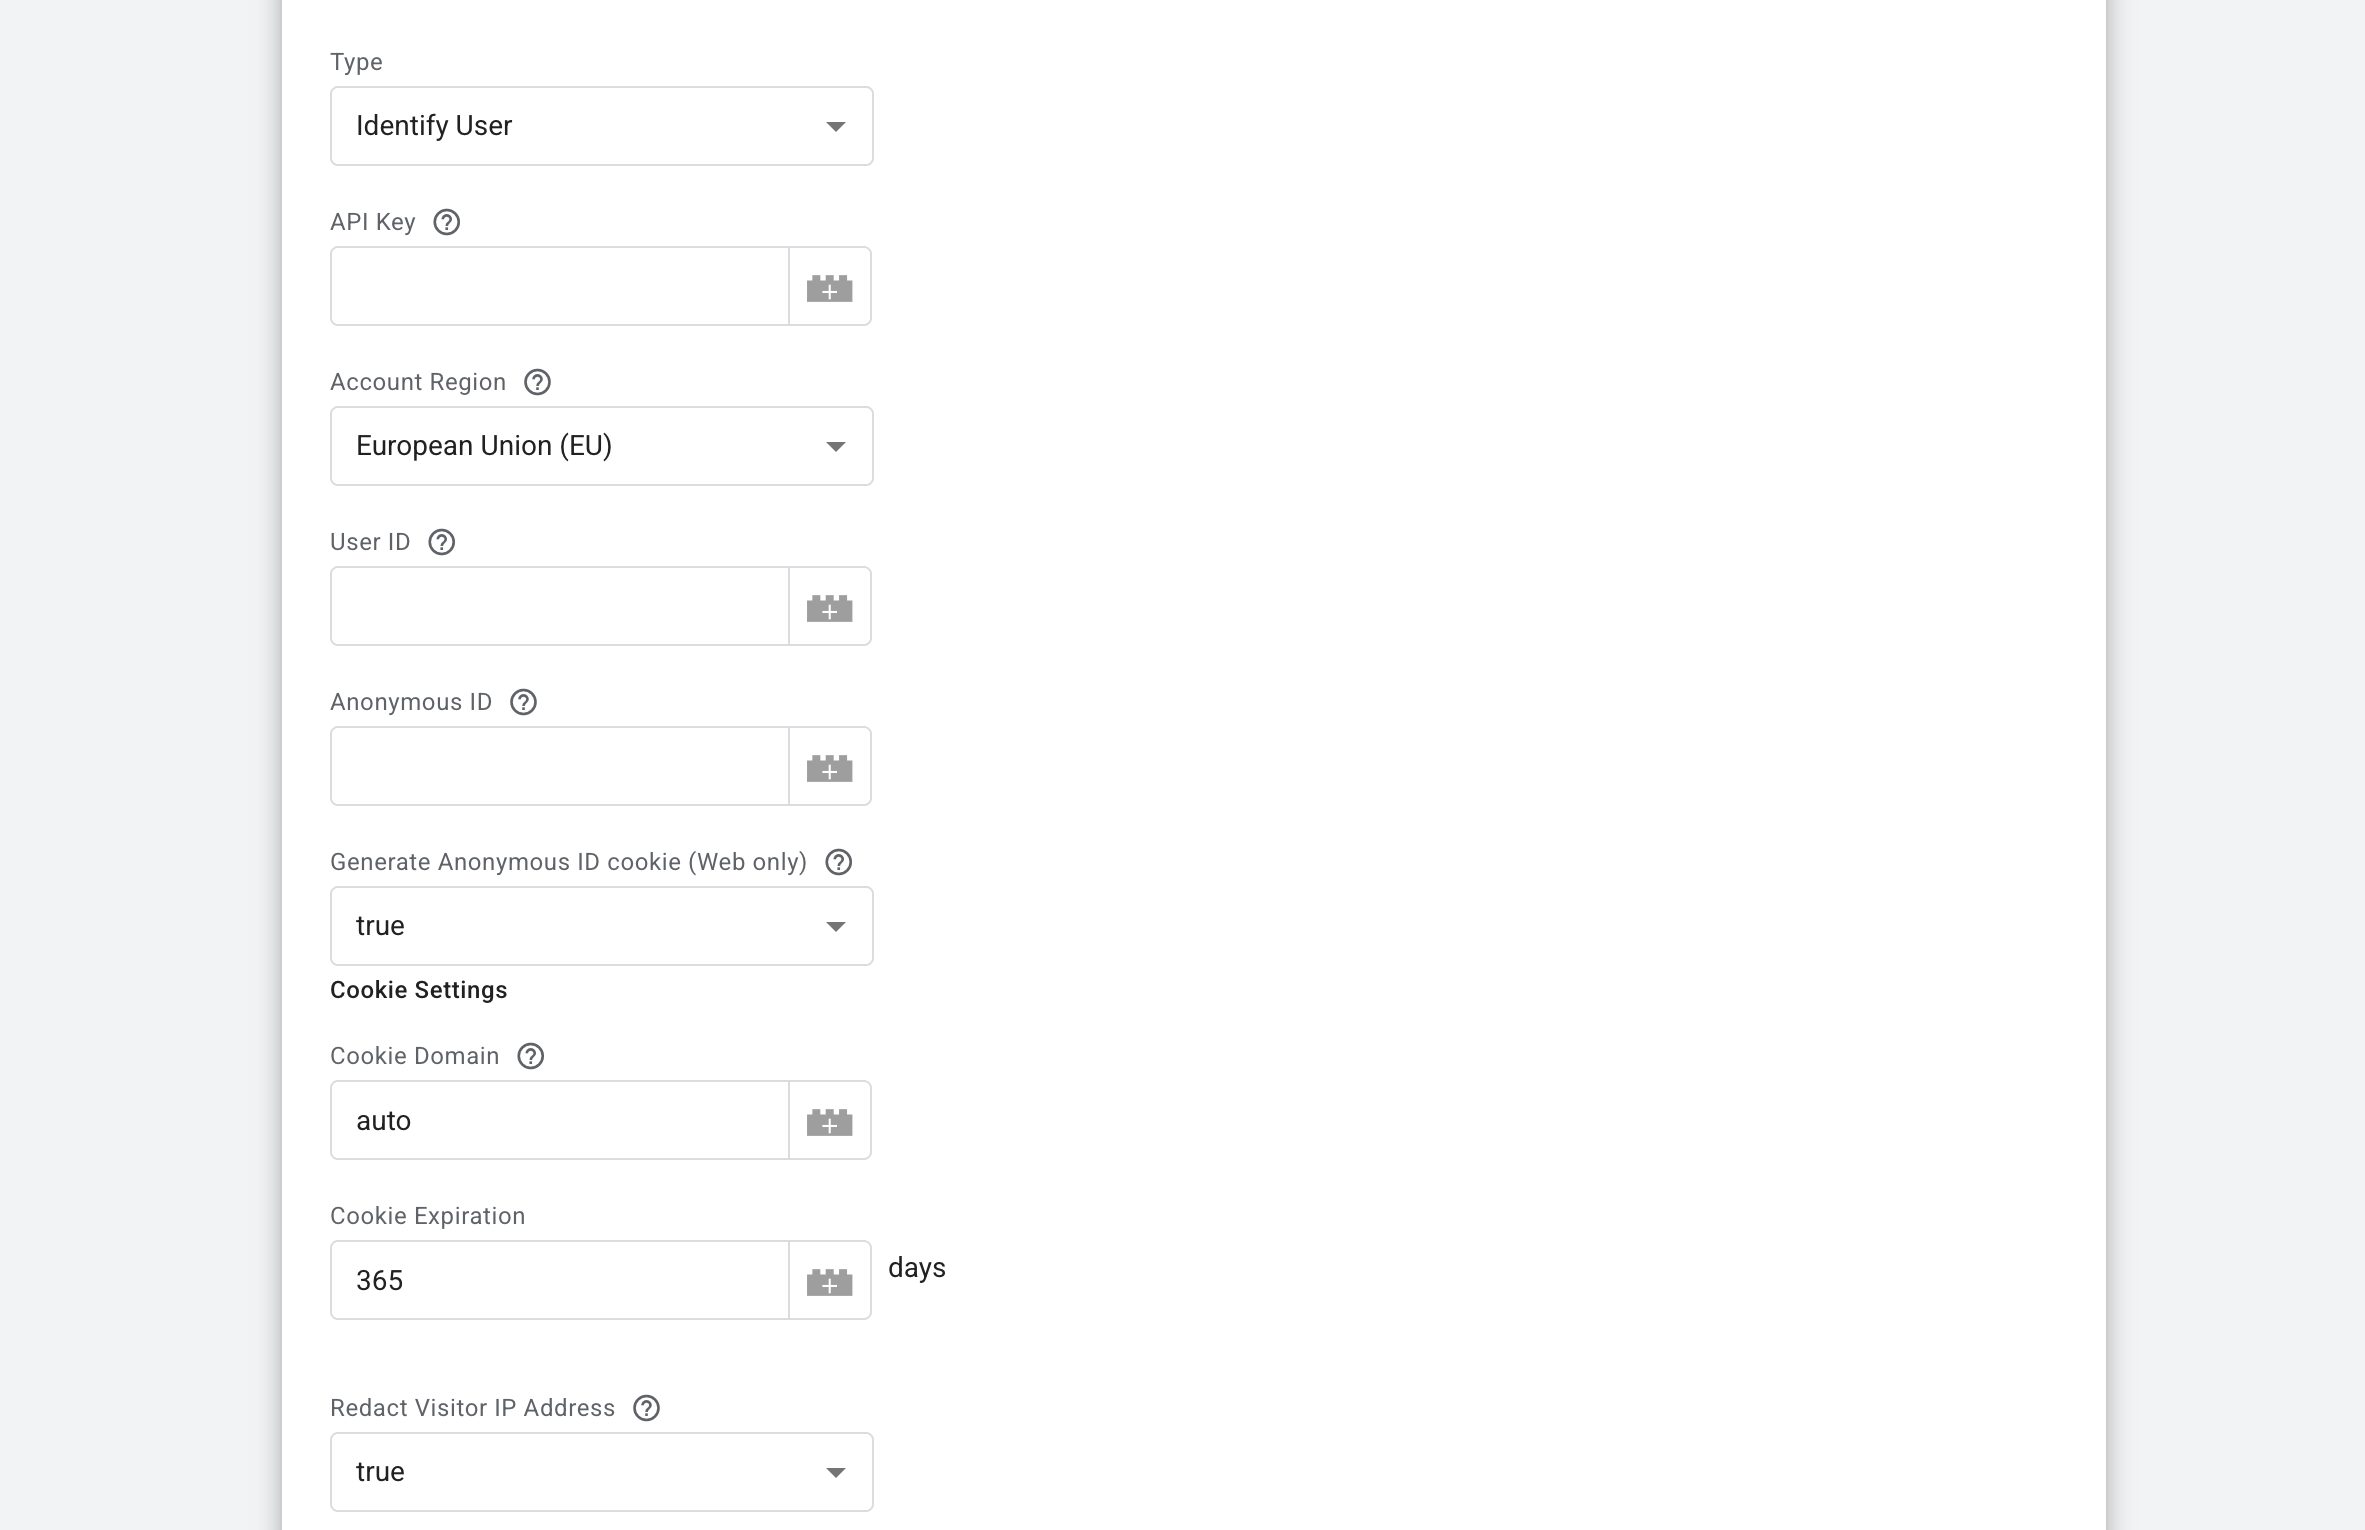
⦿ Enter your API Key → insert your Customer.io API authentication token.
⦿ Select Account Region → choose between the US/EU region, depending on your Customer.io account location. If you don't know your account's region, you can find it on your account's privacy page, or get your region using the API.
⦿ User/Anonymous ID → provide a User ID - a unique identifier for a person (you can use User Email here, as well). Or let the tag manage an Anonymous ID via cookies - a unique substitute for a User ID in cases when you don't have an absolute unique identifier. Usually this is a Browser ID or a Device ID or a Pseudo ID, like a GA4 _ga Client ID cookie or Stape Data Client _dcid cookie.
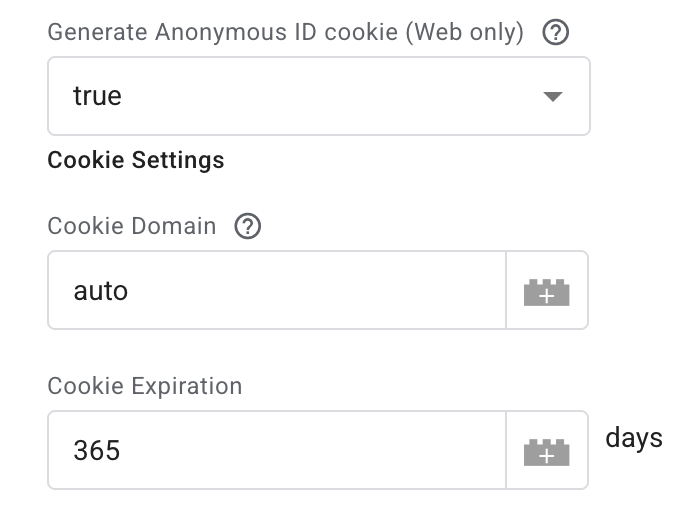
⦿ Generate Anonymous ID cookie (for web only). It ensures that when an anonymous visitor eventually signs up or logs in, Customer.io can connect their past "anonymous" actions to their new "identified" profile. If no Anonymous ID is set in the template, use the Anonymous ID from Customer.io JS SDK ajs_anonymous_id, if the cookie exists. Or, if the cookie doesn't exist, generate a new Anonymous ID value and save it in the cookie.
You can decide how the tag creates this ID by choosing one of 4 options.
- If true, the tag will automatically generate a unique ID for every new visitor.
You can define Cookie Settings, such as Cookie Domain. Enable this option to override the cookie domain. Enter your website's top-level domain as a fixed value example.com. If left unchecked, the top-level domain will be automatically determined using the following priority - Top-level domain of the Forwarded header if present, then Top-level domain of the X-Forwarded-Host header if present, only then Top-level domain of the Host header.
Choose Cookie Expiration in days.
- If false, the tag will not create an anonymous ID.
- Built-in Variables - use specific technical data from the visitor's request to form the ID:
Event Name: uses the name of the activity (e.g., page_view).
Request Path: uses the specific page URL (e.g., /pricing).
Request Method: uses the technical method of the request (e.g., GET or POST).
Query String: uses the parameters at the end of a link (e.g., ?ref=blog).
Container Version / ID: uses the version or ID of your GTM setup.
Debug Mode: checks if you are currently testing the setup.
Random Number: creates a completely unique, random number for each user.
Client Name: uses the name of the GTM Client that sent the data.
Visitor Region: uses the visitor's geographical location - US or EU.
- New Variable - choose this if you have a custom variable already set up in GTM (like a specific ID from your own database) that you want to use instead of the standard options.

⦿ Redact Visitor IP Address → Set true/false/Built-in Variables/New Variable. It removes the visitor's IP address from the event data. Use with caution, enabling this may negatively impact reporting accuracy and data quality.
⦿ Checkmark the box Use Optimistic Scenario if you want your tag to call gtmOnSuccess() without waiting for a response from the API. It speeds up sGTM response time however your tag will always return the status fired successfully even in case it is not.
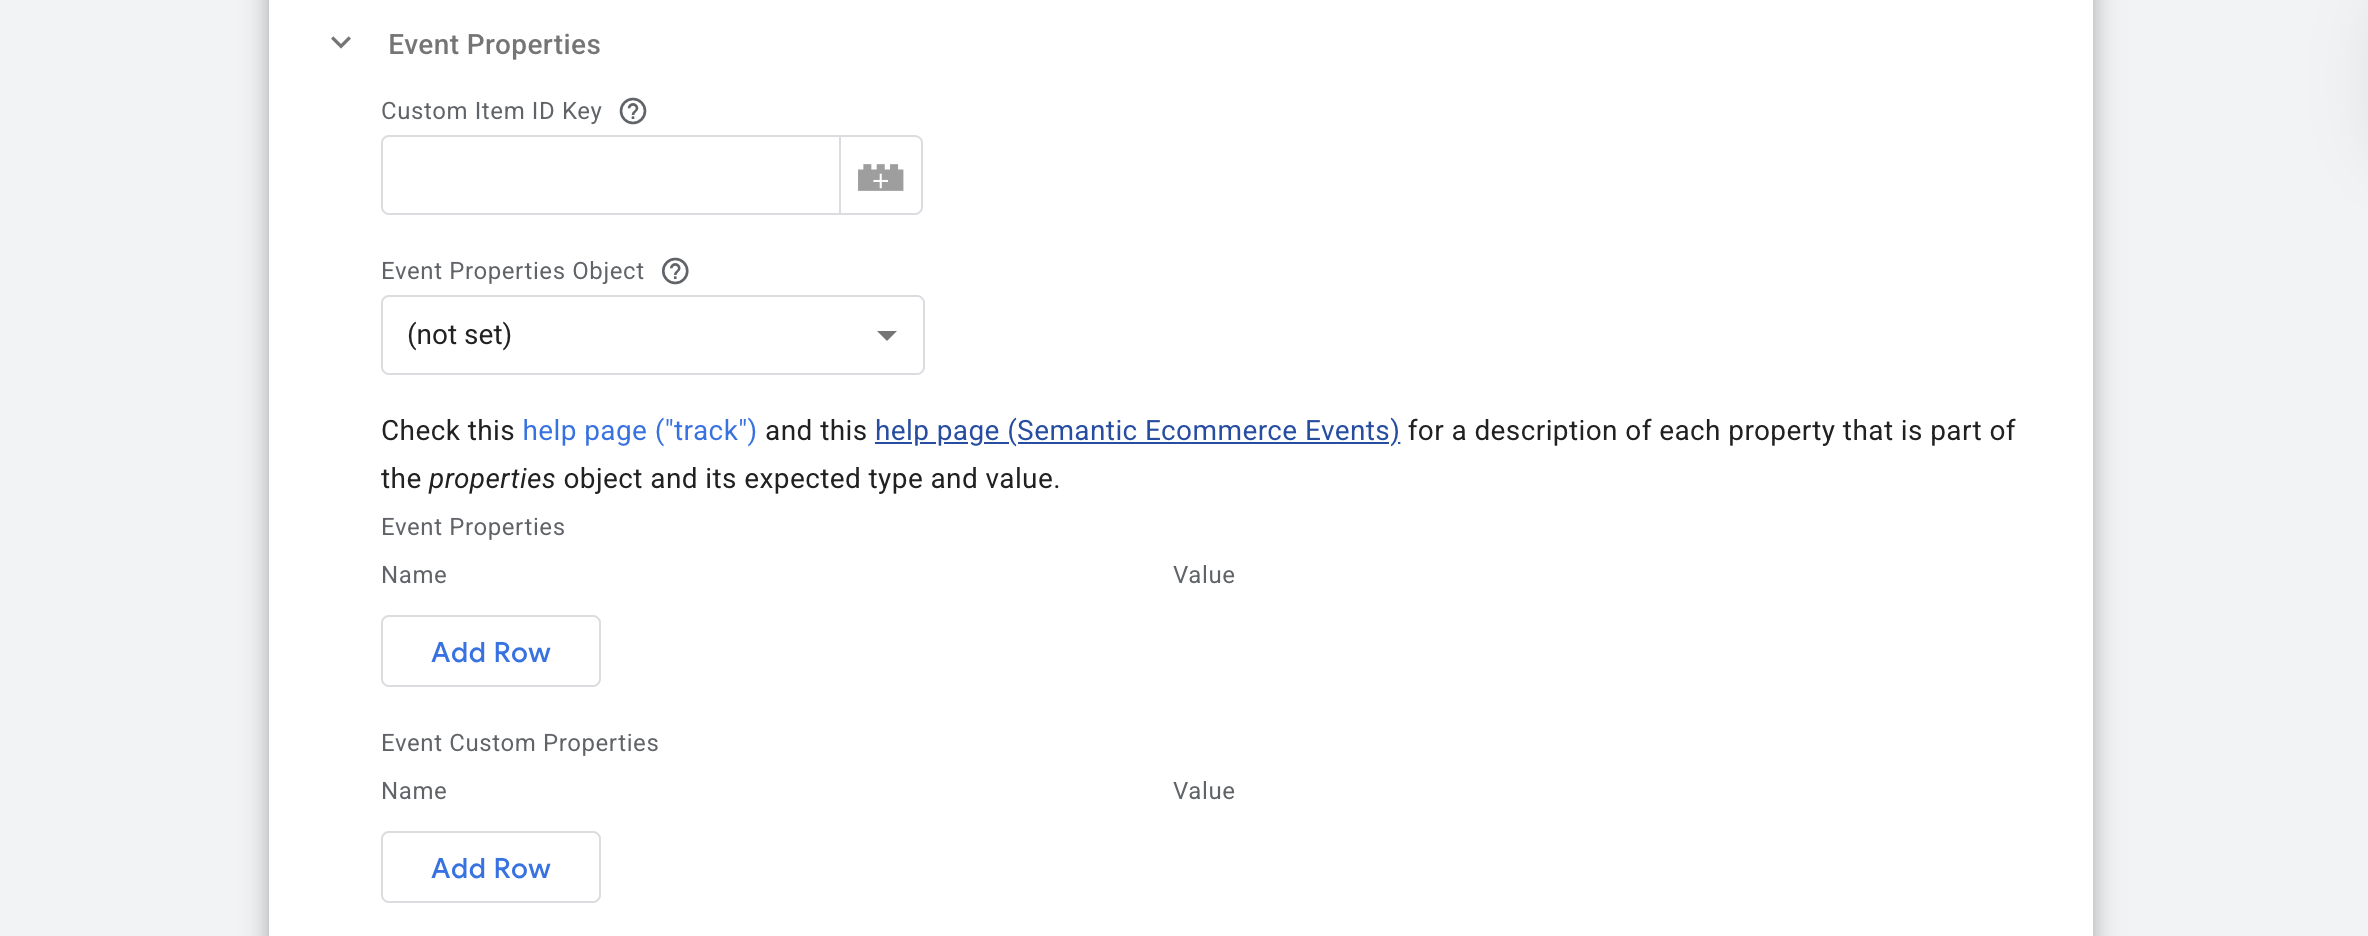
⦿ Then, move below to the Even Properties section → fill it out with Custom Item ID Key (you can specify a custom key, which will be used to set the content Item ID, by default item_idwill be used. This may be useful if you are using WooCommerce extensions), Event Properties Object (provide an object with Event Properties to merge with the fields below - any conflicting properties will be overwritten).
⦿ Check the Track help page and the Semantic Ecommerce Events help page for a description of each property that is part of the properties object and its expected type and value → fill in Event Properties/Event Custom Properties with their Names and Values.
3.2 Track Page View
These actions track user navigation across web apps.
Check the next fields:
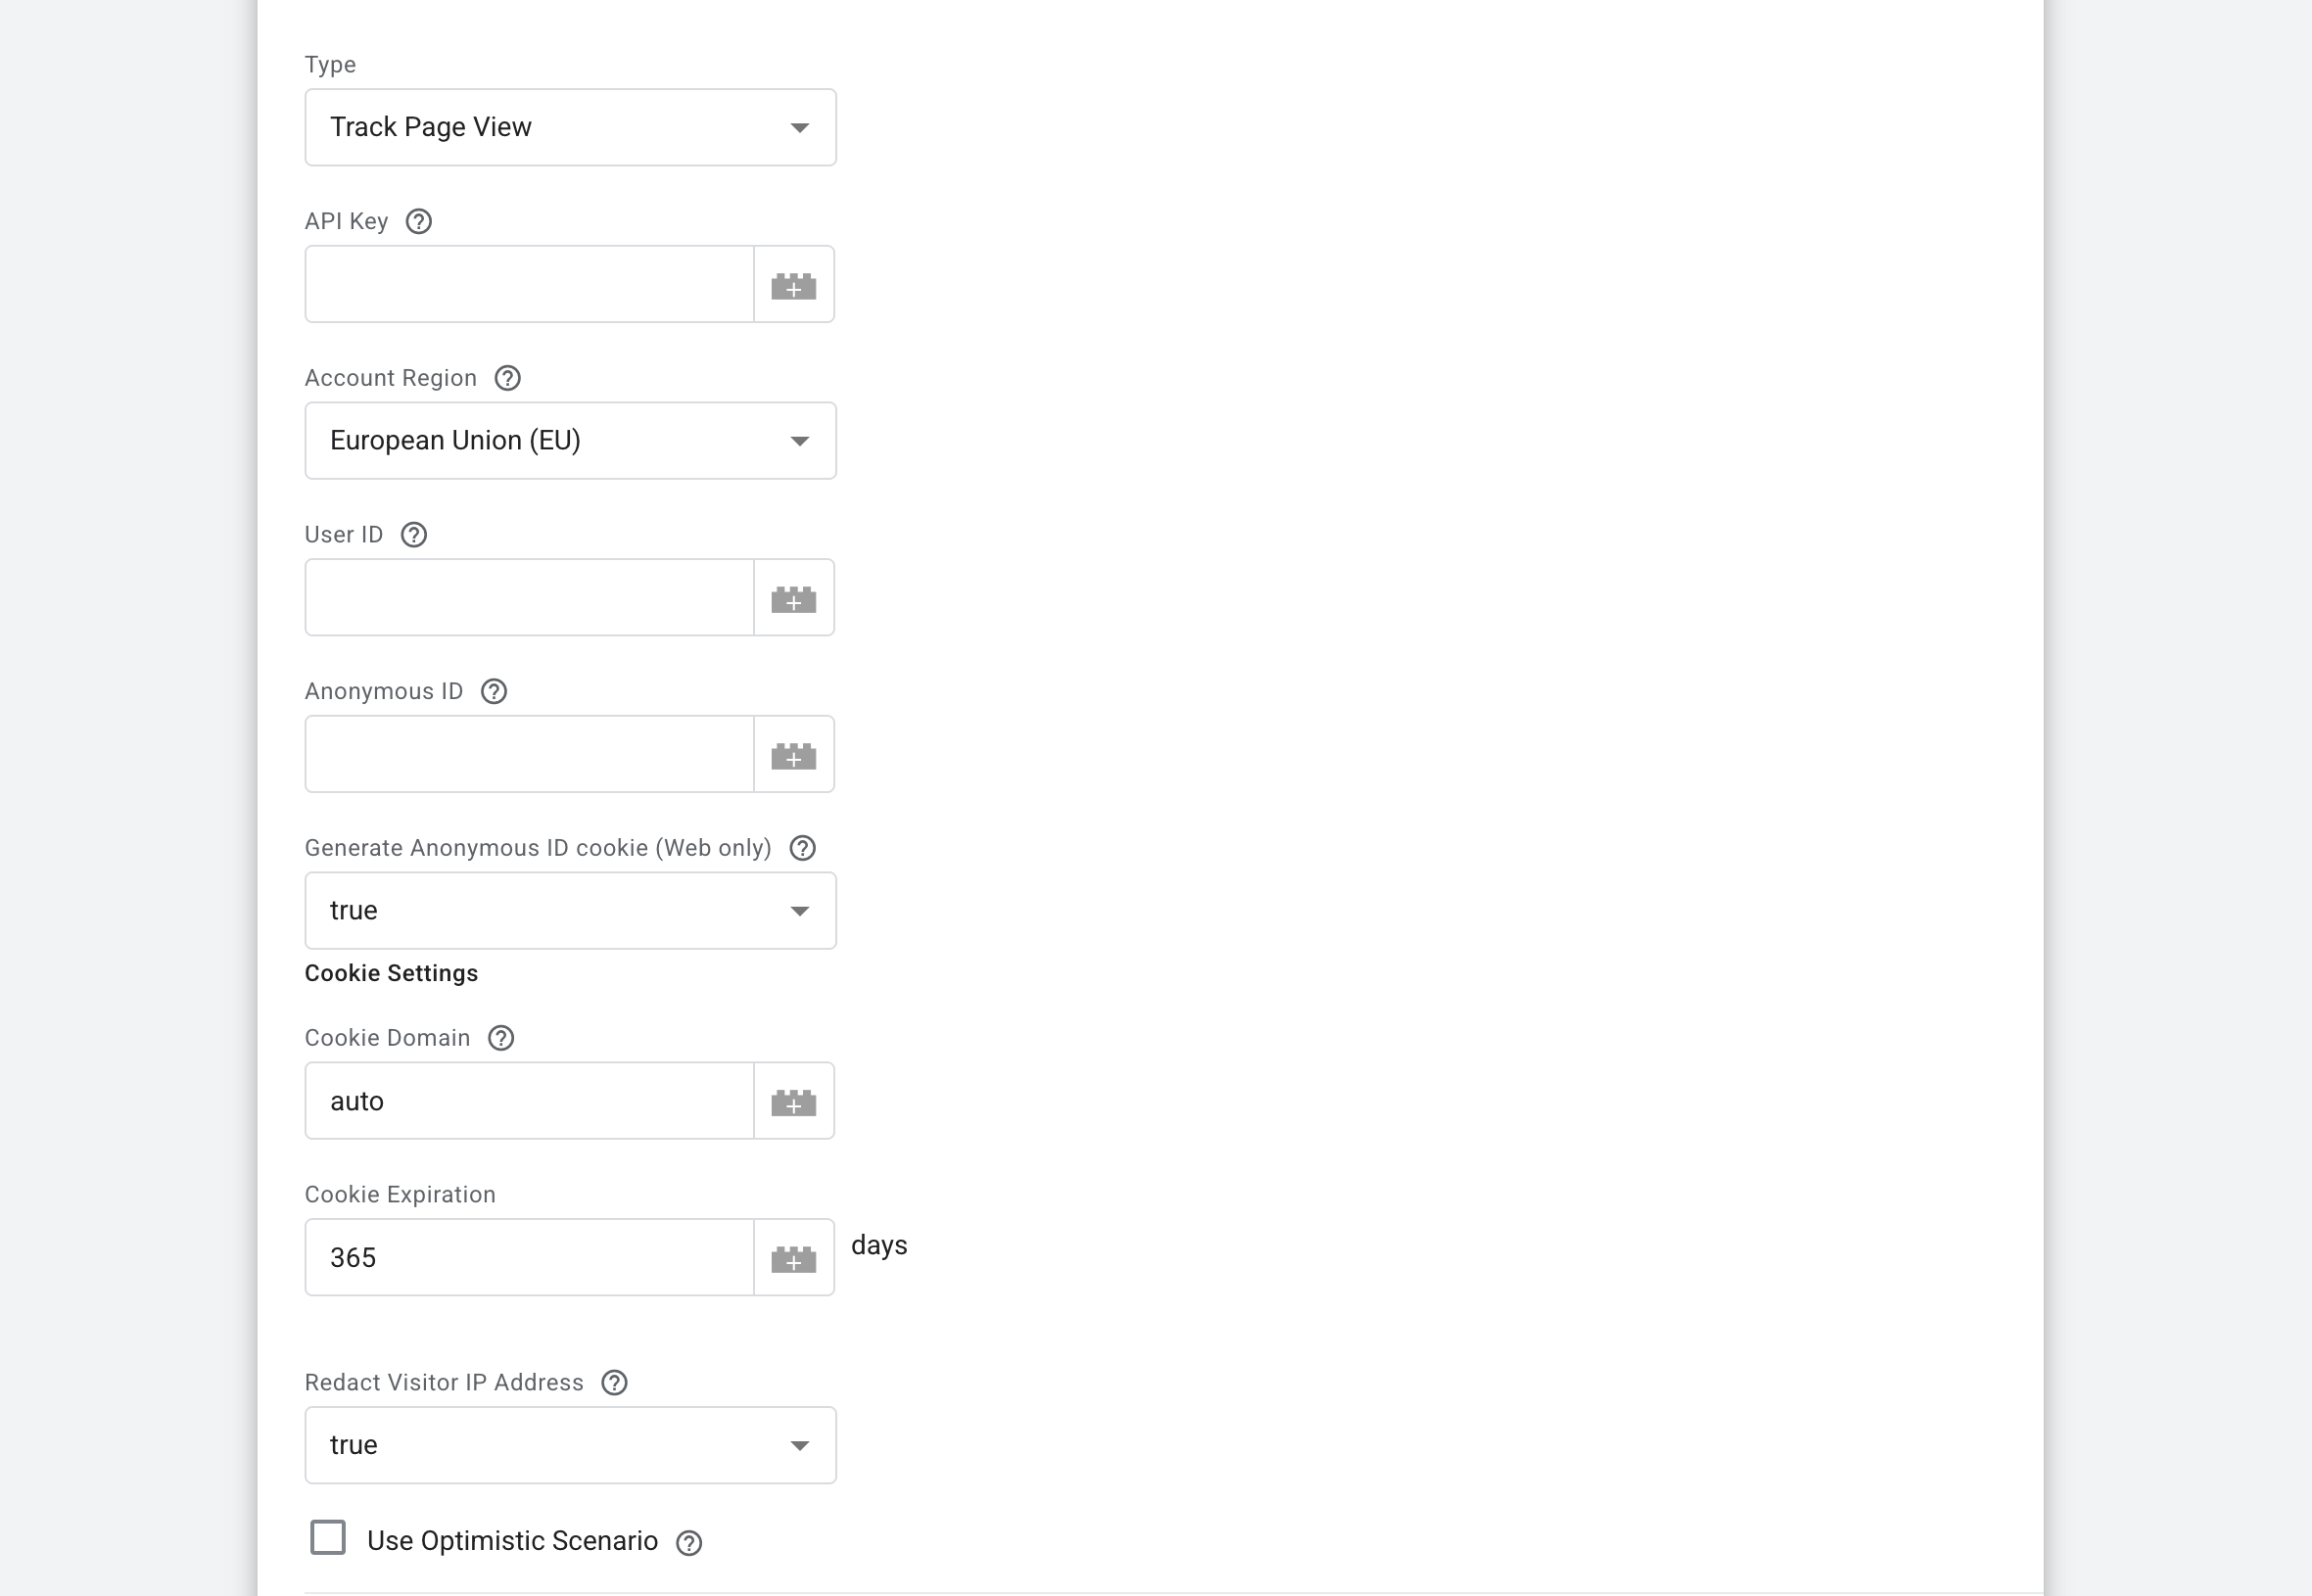
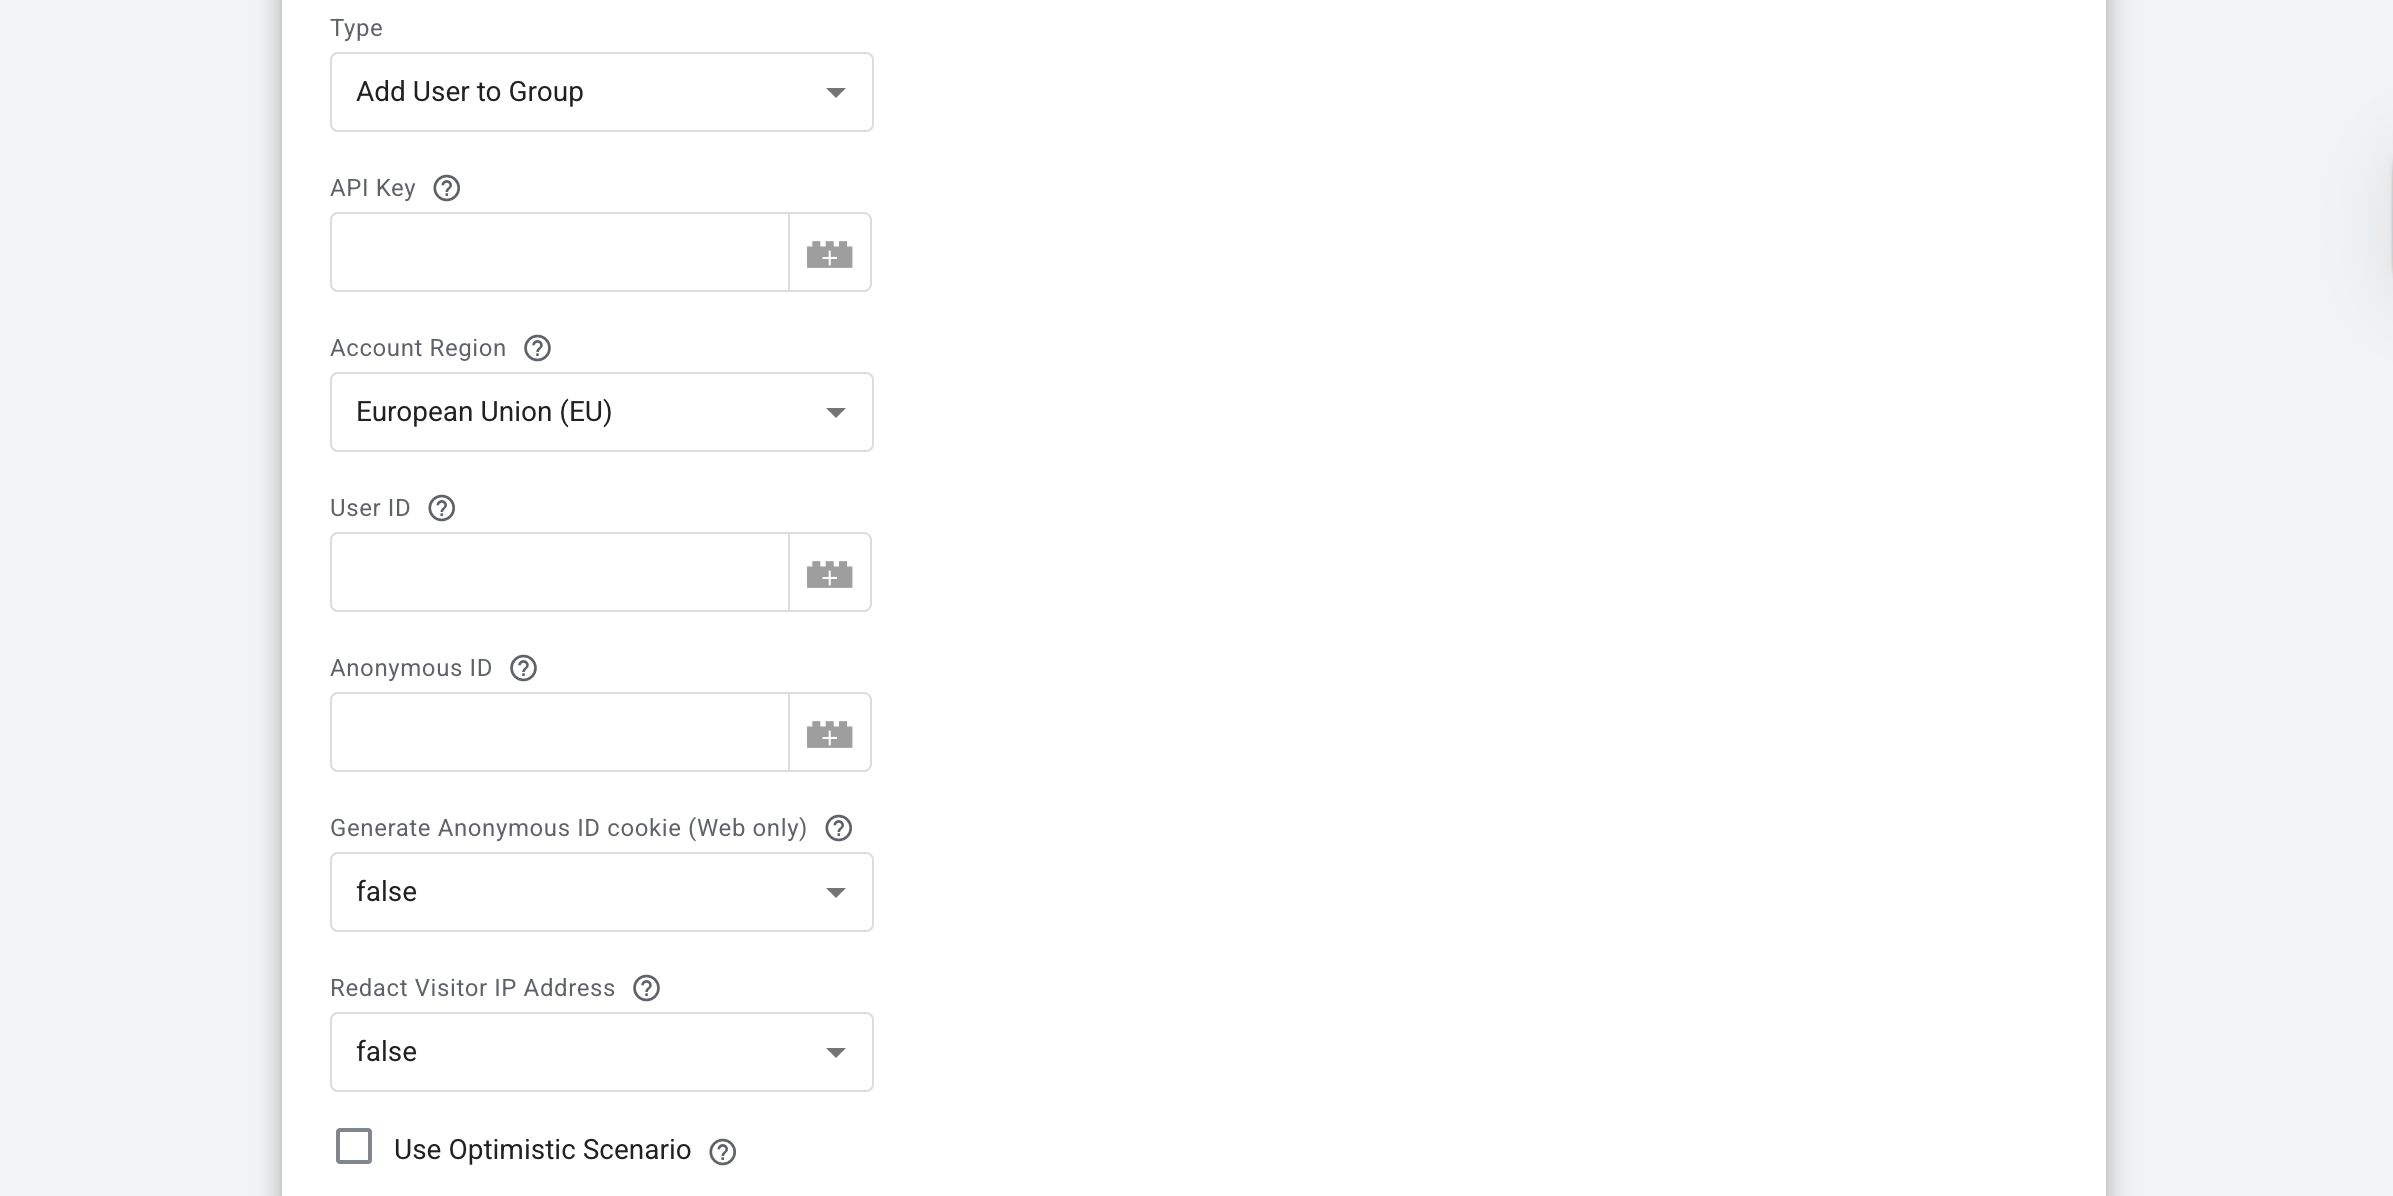
⦿ Enter your API Key → insert your Customer.io API authentication token.
⦿ Select Account Region → choose between the US or the EU, depending on your Customer.io account location. If you don't know your account's region, you can find it on your account's privacy page, or get your region using the API.
⦿ User/Anonymous ID → provide a User ID - a unique identifier for a person (you can use User Email here, as well). Or let the tag manage an Anonymous ID via cookies - a unique substitute for a User ID in cases when you don't have an absolute unique identifier. Usually this is a Browser ID or a Device ID or a Pseudo ID, like a GA4 _ga Client ID cookie or Stape Data Client _dcid cookie.
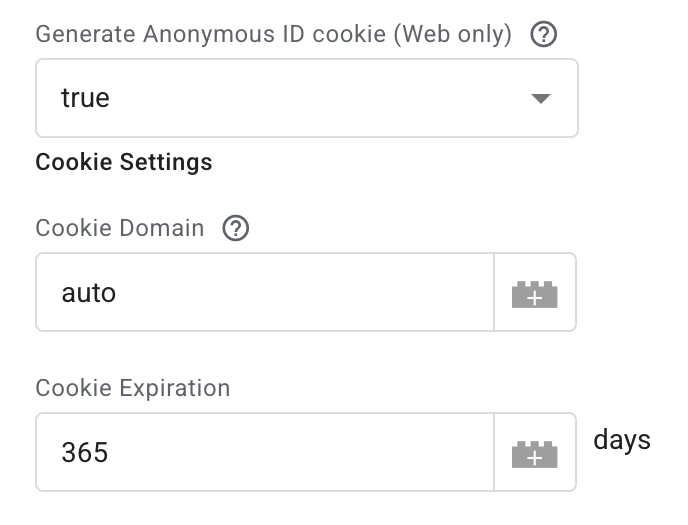
⦿ Generate Anonymous ID cookie (for web only). It ensures that when an anonymous visitor eventually signs up or logs in, Customer.io can connect their past "anonymous" actions to their new "identified" profile. If no Anonymous ID is set in the template, use the Anonymous ID from Customer.io JS SDK ajs_anonymous_id, if the cookie exists. Or, if the cookie doesn't exist, generate a new Anonymous ID value and save it in the cookie.
You can decide how the tag creates this ID by choosing one of 4 options.
- If true, the tag will automatically generate a unique ID for every new visitor.
You can define Cookie Settings, such as Cookie Domain. Enable this option to override the cookie domain. Enter your website's top-level domain as a fixed value example.com. If left unchecked, the top-level domain will be automatically determined using the following priority - Top-level domain of the Forwarded header if present, then Top-level domain of the X-Forwarded-Host header if present, only then Top-level domain of the Host header,
Choose Cookie Expiration in days.
- If false, the tag will not create an anonymous ID.
- Built-in Variables - use specific technical data from the visitor's request to form the ID:
Event Name: uses the name of the activity (e.g., page_view).
Request Path: uses the specific page URL (e.g., /pricing).
Request Method: uses the technical method of the request (e.g., GET or POST).
Query String: uses the parameters at the end of a link (e.g., ?ref=blog).
Container Version / ID: uses the version or ID of your GTM setup.
Debug Mode: checks if you are currently testing the setup.
Random Number: creates a completely unique, random number for each user.
Client Name: uses the name of the GTM Client that sent the data.
Visitor Region: uses the visitor's geographical location - US or EU.
- New Variable - choose this if you have a custom variable already set up in GTM (like a specific ID

⦿ Redact Visitor IP Address → set true/false/Built-in Variables/New Variable. It removes the visitor's IP address from the event data. Use with caution, enabling this may negatively impact reporting accuracy and data quality.
⦿ Checkmark the box Use Optimistic Scenario if you want your tag to call gtmOnSuccess() without waiting for a response from the API. It speeds up sGTM response time however your tag will always return the status fired successfully even in case it is not.
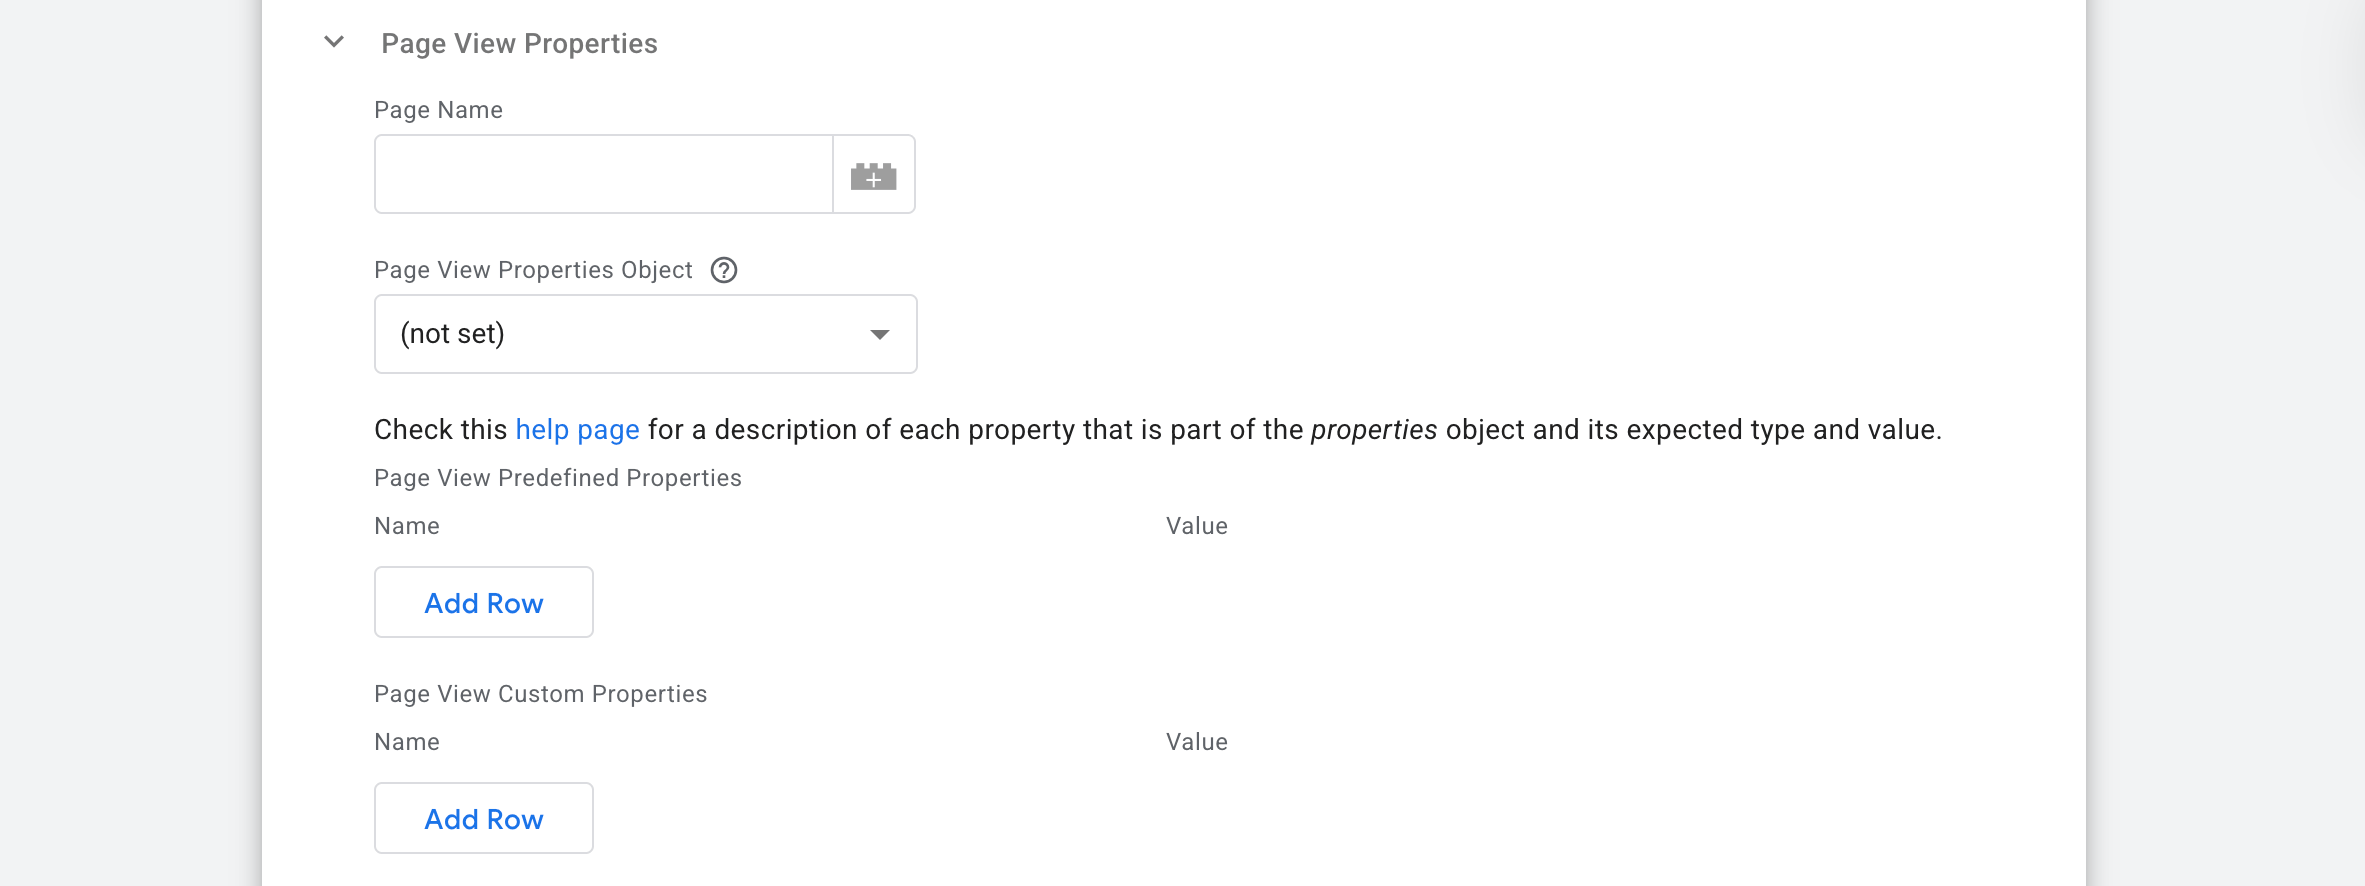
⦿ Then, move below to the Page View Properties section → fill it out with Page Name, Page View Properties Object (provide an object with Page View Properties to merge with the fields below - any conflicting properties will be overwritten).
⦿ Check the Page properties help page for a description of each property that is part of the "properties" object and its expected type and value → fill in Page View Predefined Properties/Page View Custom Properties with their Names and Values.
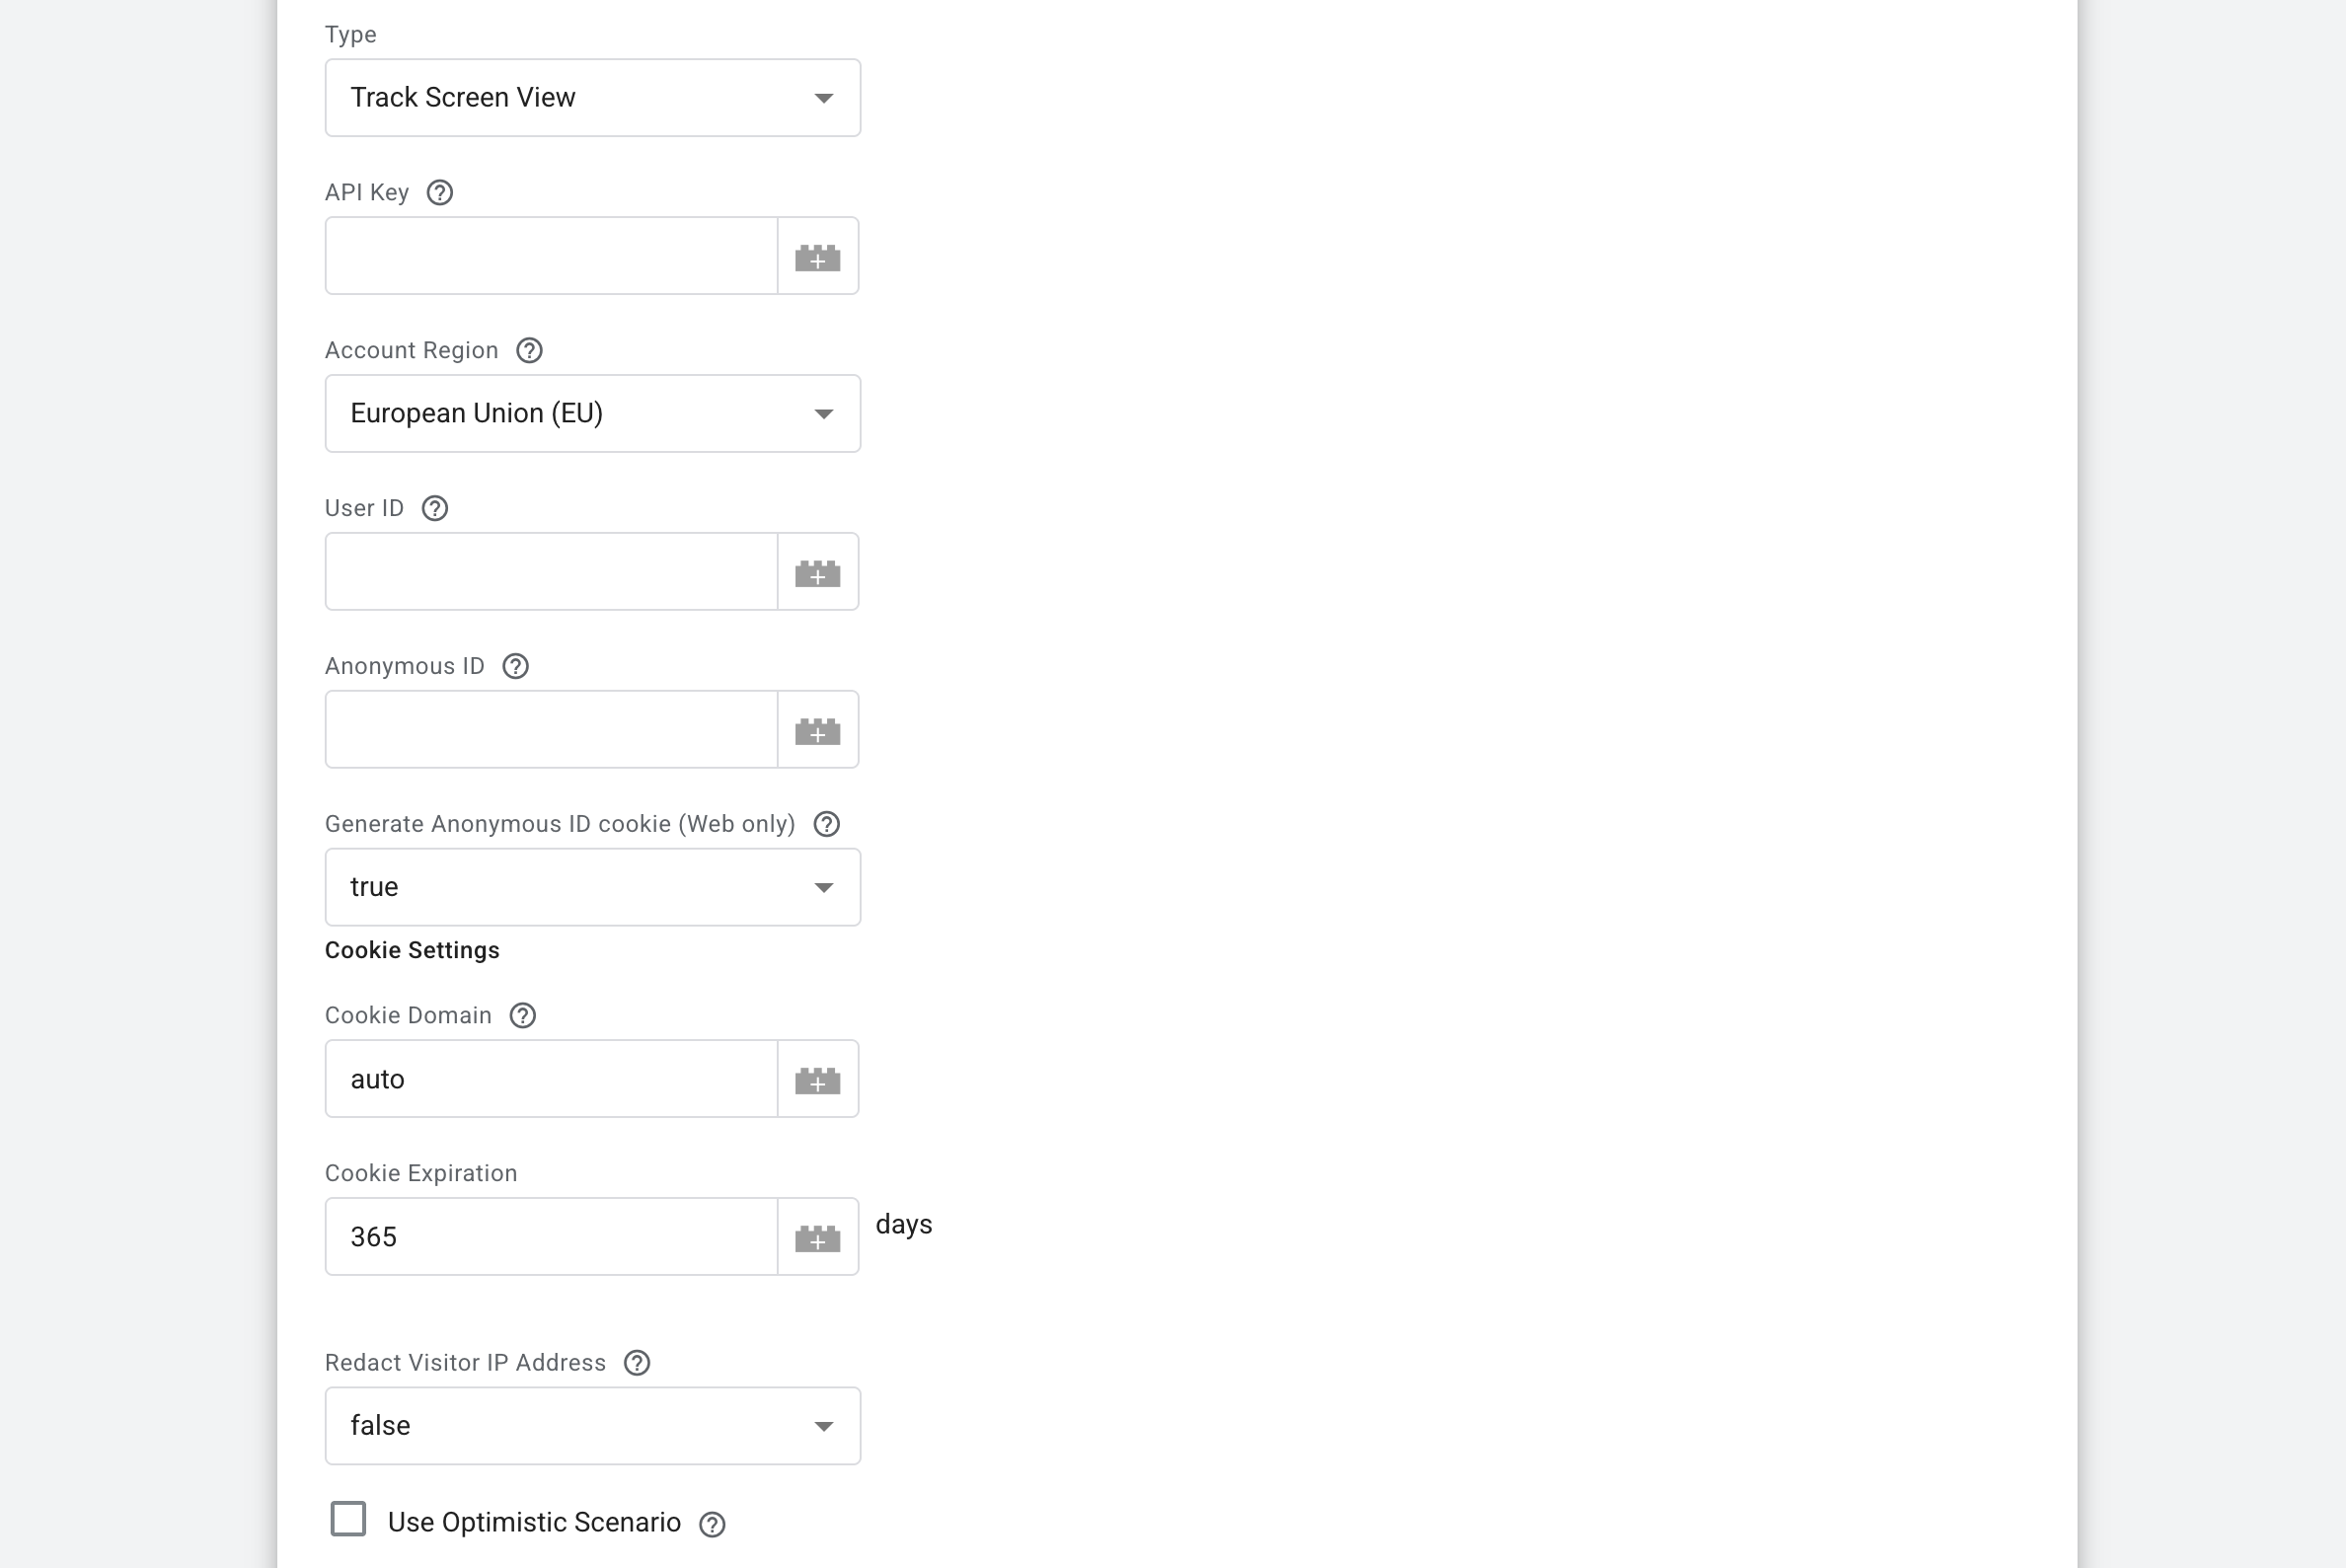
3.3 Track Screen View
Use this action to track user navigation across mobile apps. This form has the same fields as Track Page View (3.2).
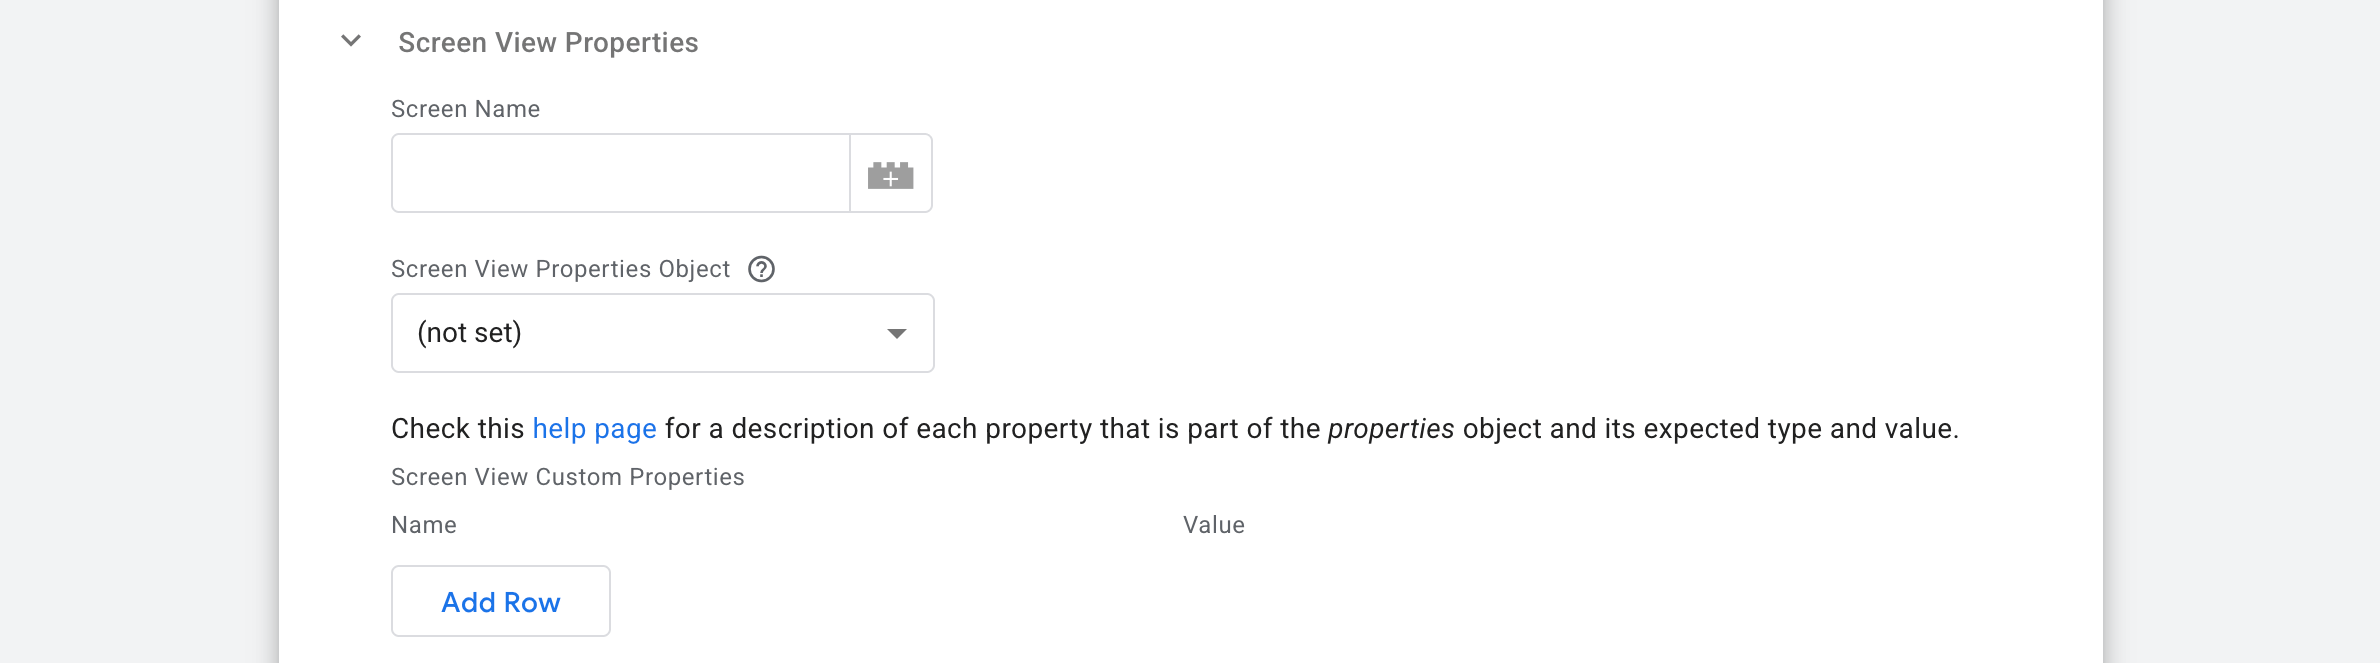
What differs is the Screen View Properties section → fill it out with Screen Name, Screen View Properties Object (provide an object with Screen View Properties to merge with the fields below - any conflicting properties will be overwritten).
Check the Screen help page for a description of each property that is part of the “properties” object and its expected type and value → fill in Custom Properties with their Names and Values.
3.4 Identify User
The action updates user profile traits in Customer.io. This form has the same fields as Track Page View (3.2) and Track Screen View (3.3).
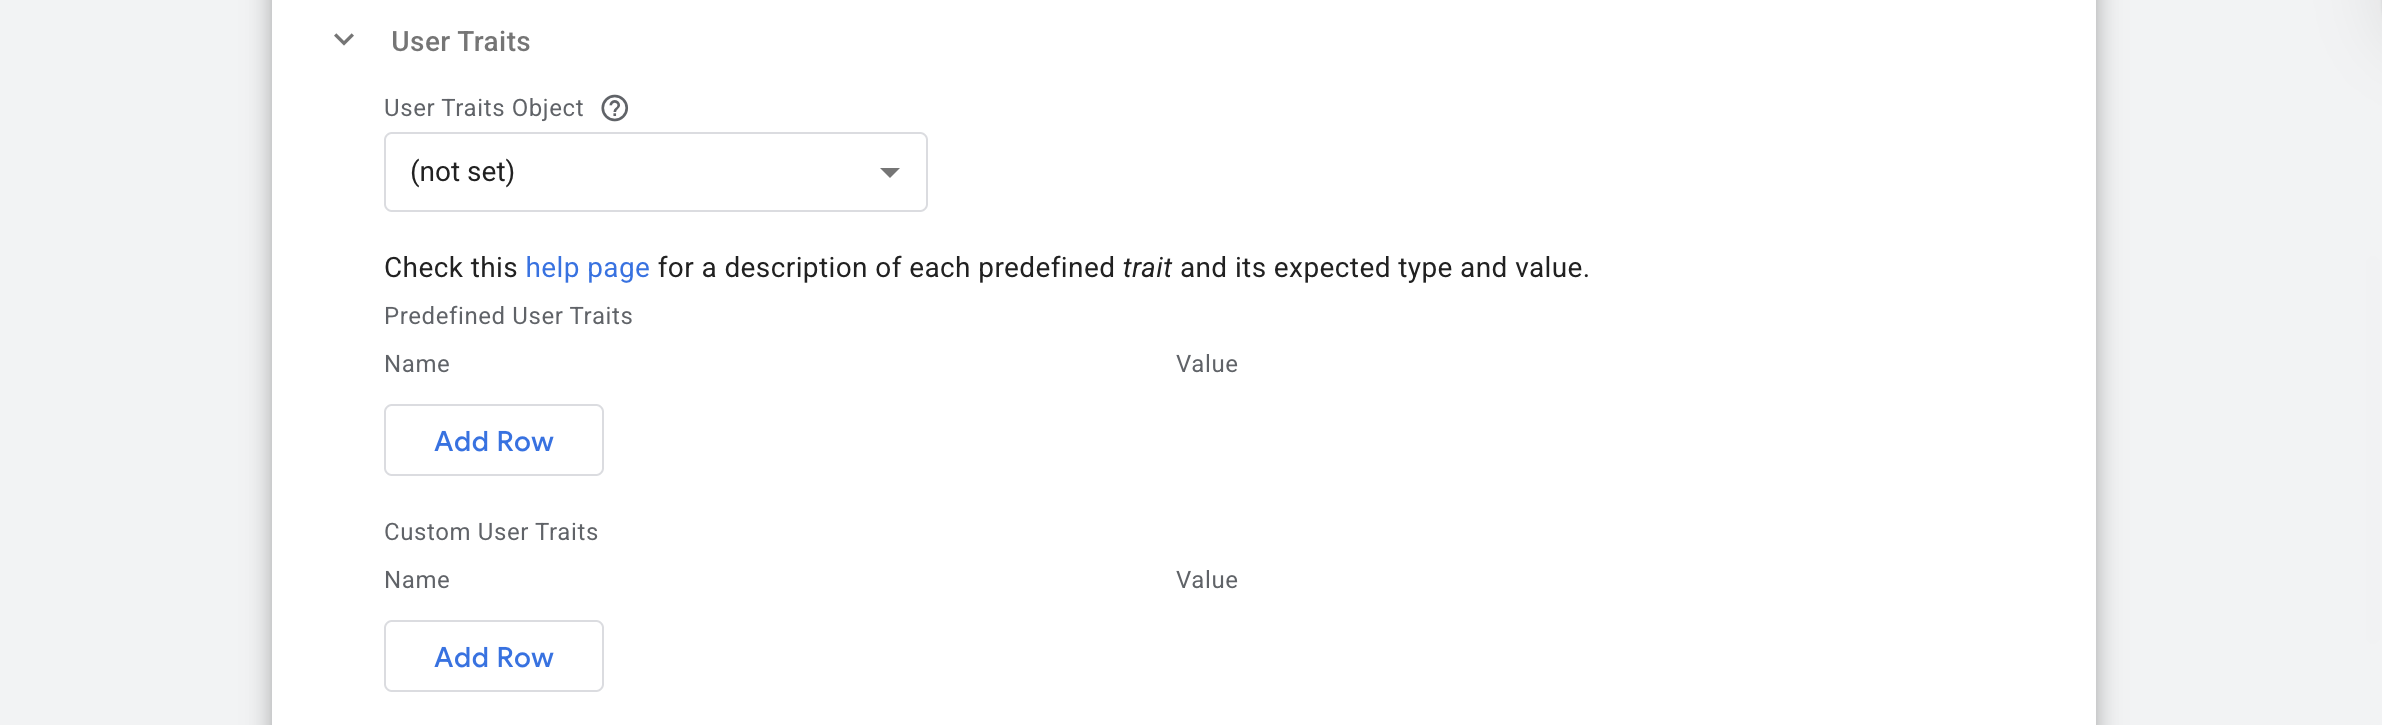
What differs is the User Traits section → fill it out with User Traits Object (provide an object with User Traits to merge with the fields below - any conflicting traits will be overwritten).
Check the Traits help page for a description of each predefined trait and its expected type and value. → fill in Predefined User Traits/Custom User Traits with their Names and Values.
3.5 Add User to Group
Use this to associate users with specific groups, like organizations or teams. This form has the same fields as Track Page View (3.2), Track Screen View (3.3), and Identify User (3.4).
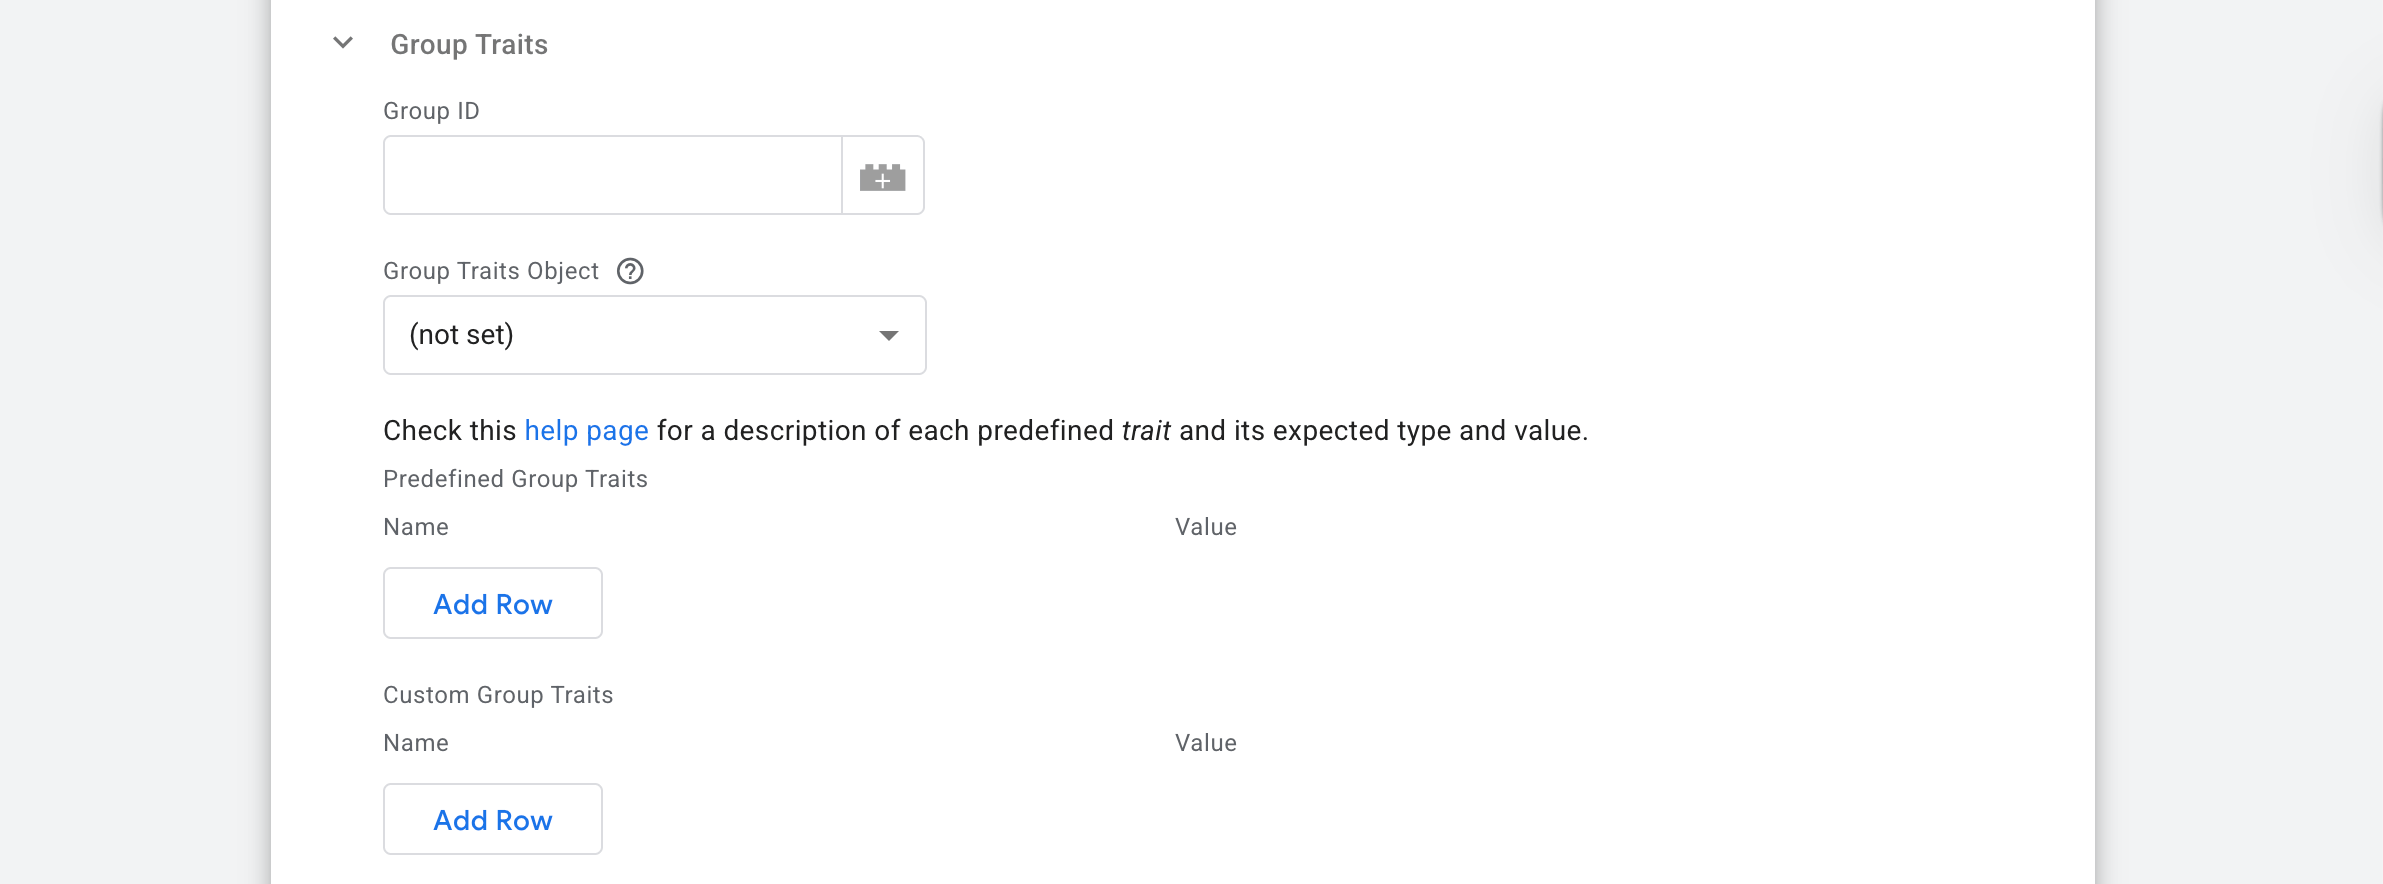
What differs is the Group Traits section → fill it out with Group ID, Group Traits Object (provide an object with Group Traits to merge with the fields below - any conflicting traits will be overwritten).
Check the Traits help page for a description of each predefined trait and its expected type and value → fill in Predefined Group Traits/Custom Group Traits with their Names and Values.
4. Additional Settings
Additional Settings of this tag include such sections as Common Properties, Context Properties, Consent Settings, Logs Settings, BigQuery Logs Settings, and Advanced Settings.
4.1 Common Properties
This section handles the unique identification and timing of your events. Enter a unique identifier for each call and a GTM variable that contains the event time.
Fill in here:
- Message ID, a unique identifier for a Data Pipelines call. It's helpful if you want to deduplicate events. The 1st event with a given Message ID received will be accepted, and any other event with the same Message ID will be ignored for the next 12 hours. If you leave this empty, the tag will automatically generate one for you.
- Timestamp. Specify the client event property in ISO-8601 format. It tells Customer.io exactly when the event happened. If left empty, the system will simply use the current time when the data reaches the server.

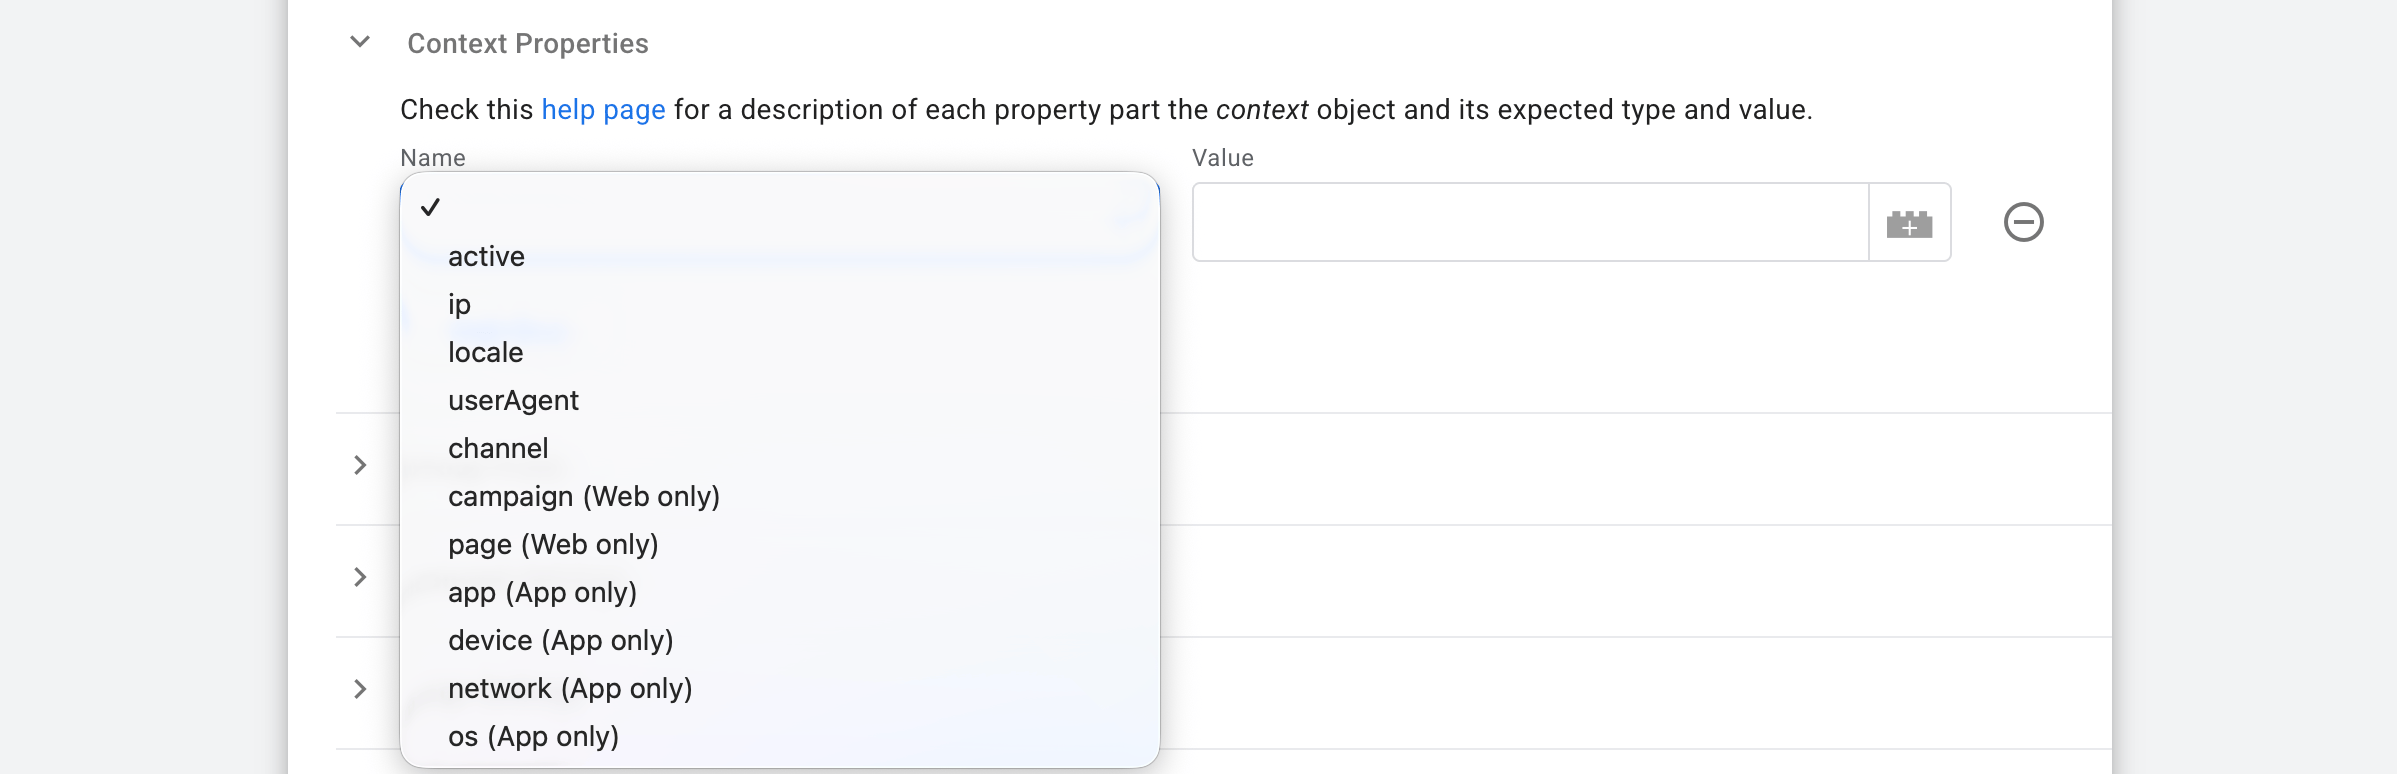
4.2 Context Properties
This section enriches your events with environmental data about the user.
Check The context object help page for a description of each property part of the context object and its expected Name and Value.
Simply check the boxes for the properties you want to include, such as Campaign, Page, App, Device, Network, OS, Locale, or other. By checking these boxes, the tag automatically pulls metadata from the GTM server (like the user's browser version, device type, or marketing UTM tags) and sends it to Customer.io.
4.3 Consent Settings
Choose here how to deal with user data:
- Send data always. Choose this if you want to track all users regardless of their consent signals. This is typically used if you have alternative legal grounds for tracking.
- Send data in case marketing consent is given. The tag will only fire and send data to Customer.io if the required marketing consent (like
ad_storageoranalytics_storage) is detected as granted.

4.4 Logs Settings
This section allows you to control how much technical information is recorded during the data transfer process. Choose one of the following logging levels:
- Do not log. No technical data will be recorded. Use this for a clean production environment once testing is finished.
- Log to console during debug and preview. Technical details will only appear in the GTM Preview mode console. This is the recommended setting for initial setup and testing.
- Always log to the console. The tag will always record data to the console, even outside of preview mode. Use this only for temporary, deep troubleshooting.
These logs are important for seeing the exact "message" (request) your server sends to Customer.io and the "reply" (response) the server sends back. They help you verify that events are being accepted and identify the cause of any errors.

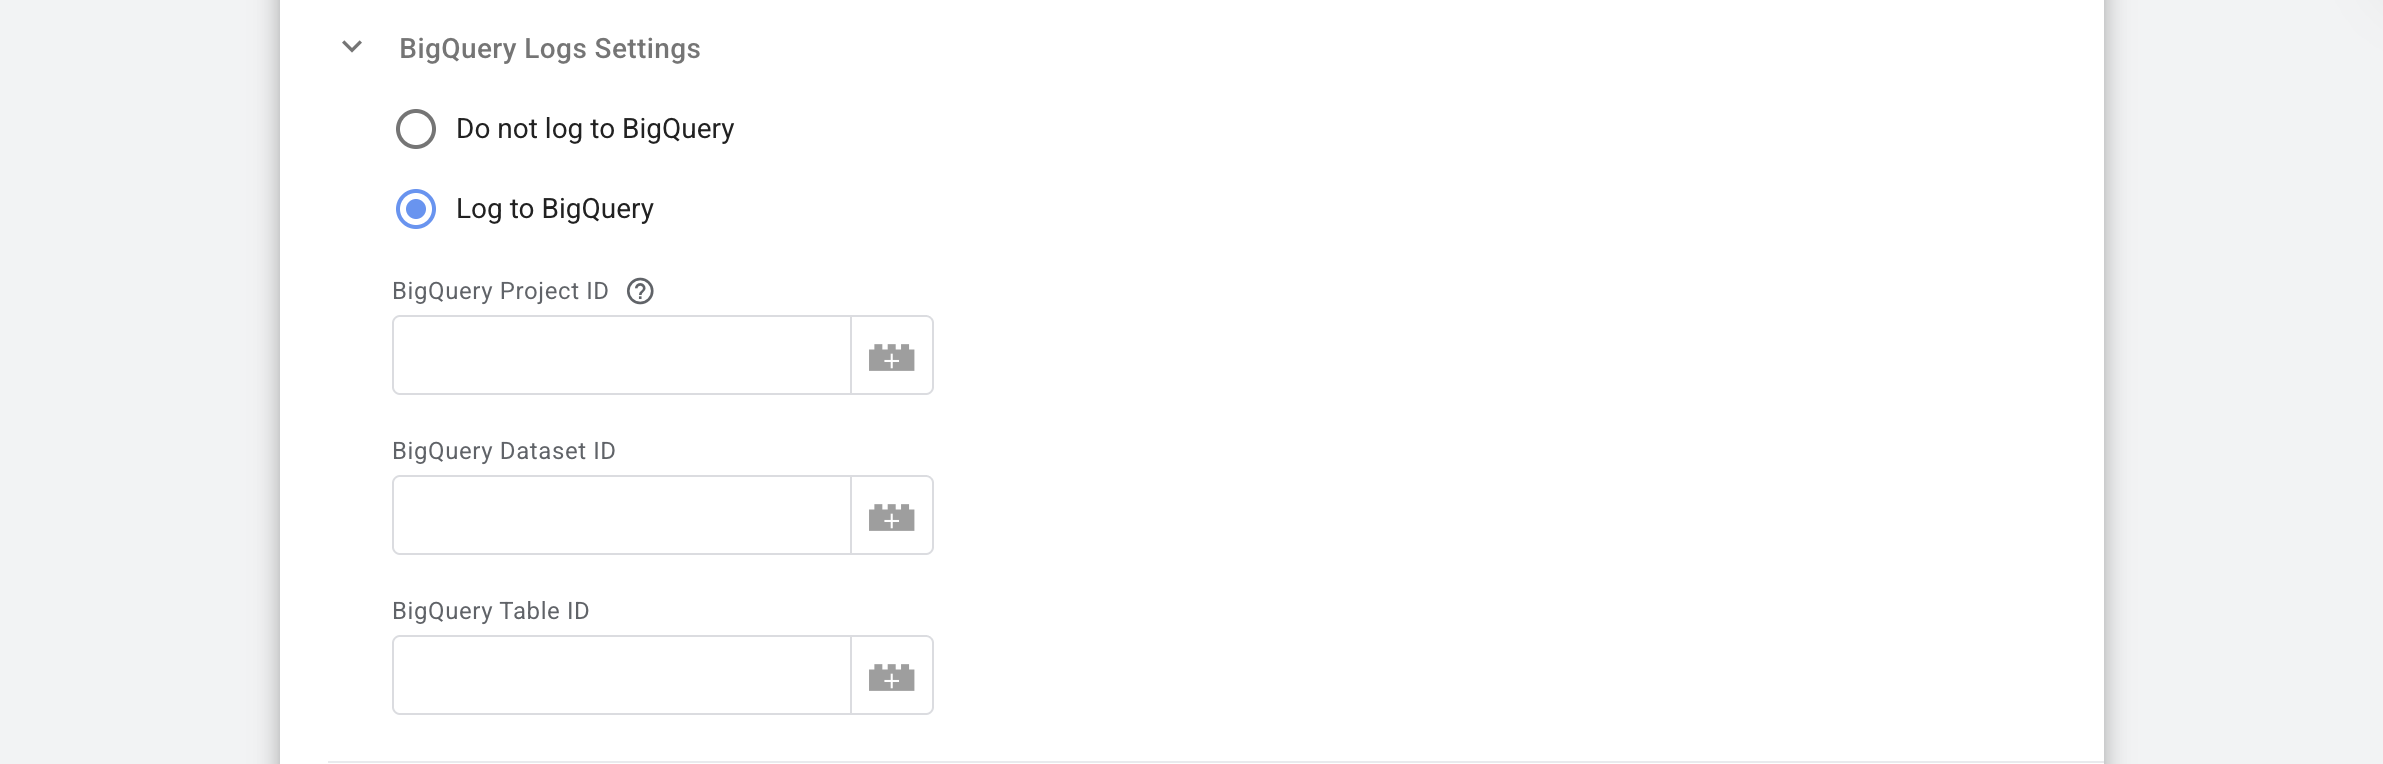
4.5 BigQuery Logs Settings
This section allows you to automatically save every request and response sent by the tag into your own Google BigQuery database. This is important for long-term audits and data monitoring.
- Choose Do not log BigQuery or Log to BigQuery.
When Log to BigQuery is enabled, enter:
- BigQuery Project ID (the ID of your Google Cloud project where the logs should be stored).
- BigQuery Dataset ID (the name of the specific dataset within your project).
- BigQuery Table ID (the name of the table where the log entries will be recorded).
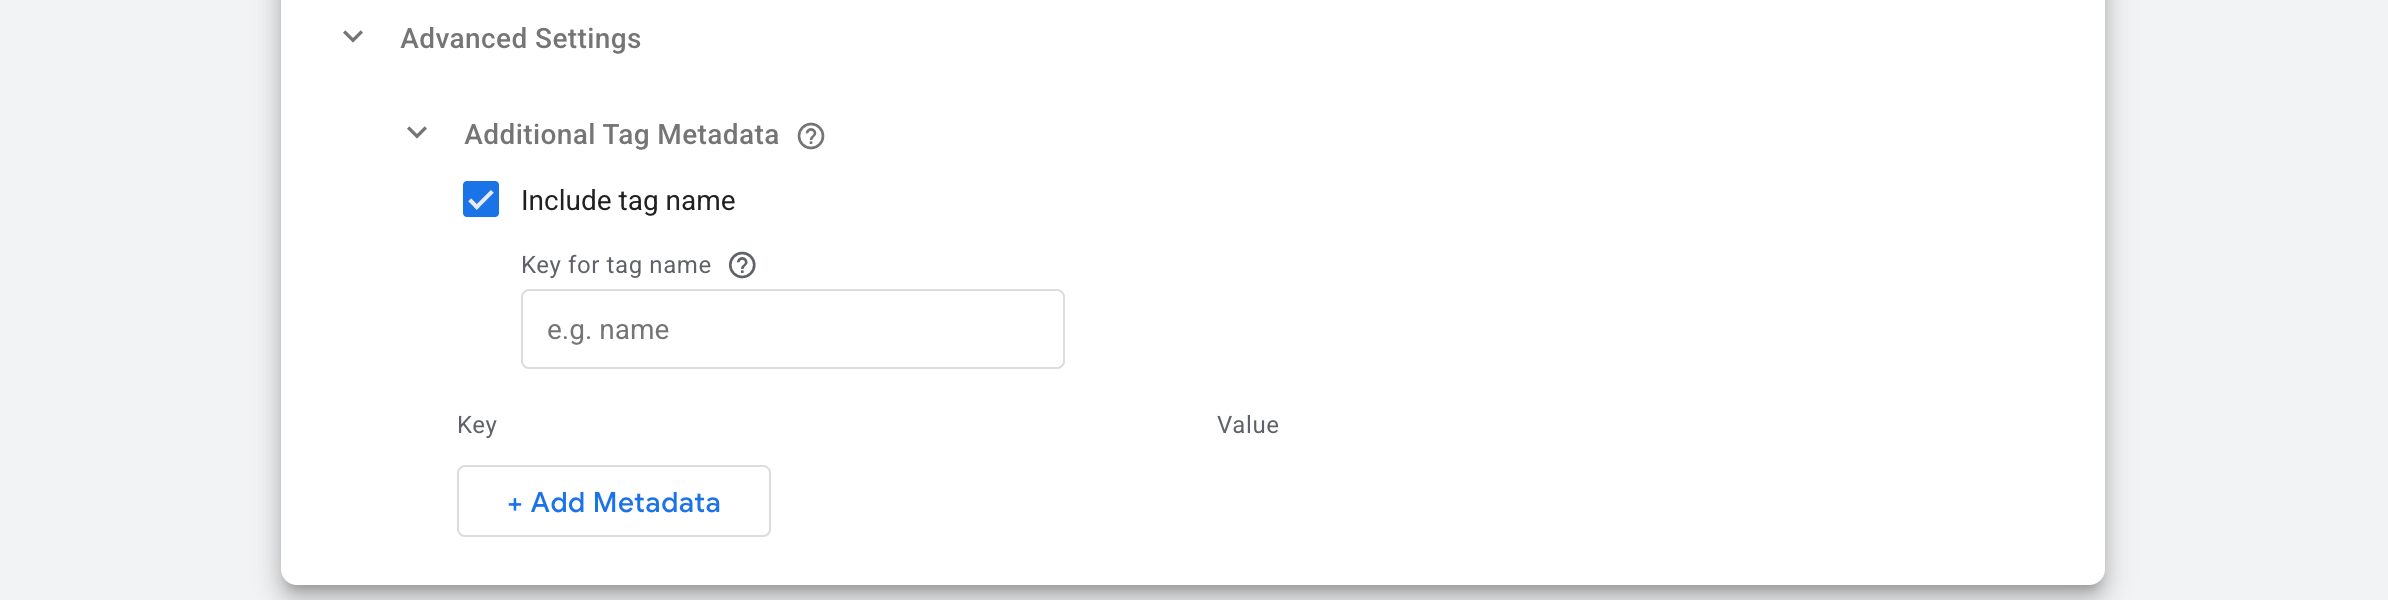
4.6 Advanced Settings
This section allows you to include technical metadata and control how the tag reports its activity within your server environment.
- Include tag name. Check this box if you want the name of this specific GTM tag to be included in the event data sent to Customer.io. Then, assign Key for tag name. Enter the label you want to use for the tag name (e.g.,
gtm_tag_name). This key will be used to retrieve and identify the tag name within your data.
- Add Metadata, Key and Value. Click Add to include custom rows of metadata. Use this to attach internal server information or static labels to every request, such as
environment: productionorversion: 1.2.0, without adding them as user traits.
5. Assign the appropriate trigger (for example, All Pages for Page Views or Purchase for custom events).
6. Open GTM Preview mode to verify the tag fires.
7. Check the Console tab in GTM Preview to ensure the Customer.io API returns a 200 Success status.
Refer to our guide on debugging and monitoring server-side configuration.
Was this article helpful?
Comments