HubSpot tag
Updated May 10, 2026
The HubSpot Tag for server-side Google Tag Manager (sGTM) is a beneficial solution for data tracking and CRM integration. It allows its users to move beyond client-side tracking limitations such as ad blockers and browser restrictions.
Benefits of using the HubSpot tag for sGTM
- Secure and reliable data sending. The server-side connection ensures data is sent to the HubSpot API securely, without relying on potentially blocked browser-side JavaScript.
- Centralized customer data. With the tag, you can collect all relevant customer information in one place.
- High data quality. The server-side connection helps minimize the impact of browser restrictions and ad blockers.
- Integration options. Integrations with platforms like Google Analytics and Facebook allow for attributing ad interactions directly to HubSpot contacts.
Tag’s functionality
You can use this tag to:
- Track custom behavioral events.
- Track ecommerce events.
- Create new contacts.
- Update existing contacts.
- Associate custom objects with contacts.
- Send visitor information.
For example, personalize the user experience by identifying logged-in users (passing their name and email to HubSpot for chat) and using that identification for targeted actions (like displaying pop-ups only to users who are not logged in).
Prerequisites for setting up the HubSpot tag
To set up the tag, you need to have both Google Tag Manager web and server containers set up, along with a configured server container and custom domain in Stape.
If you haven’t set these up yet, refer to the following guides:
How to set up the HubSpot tag
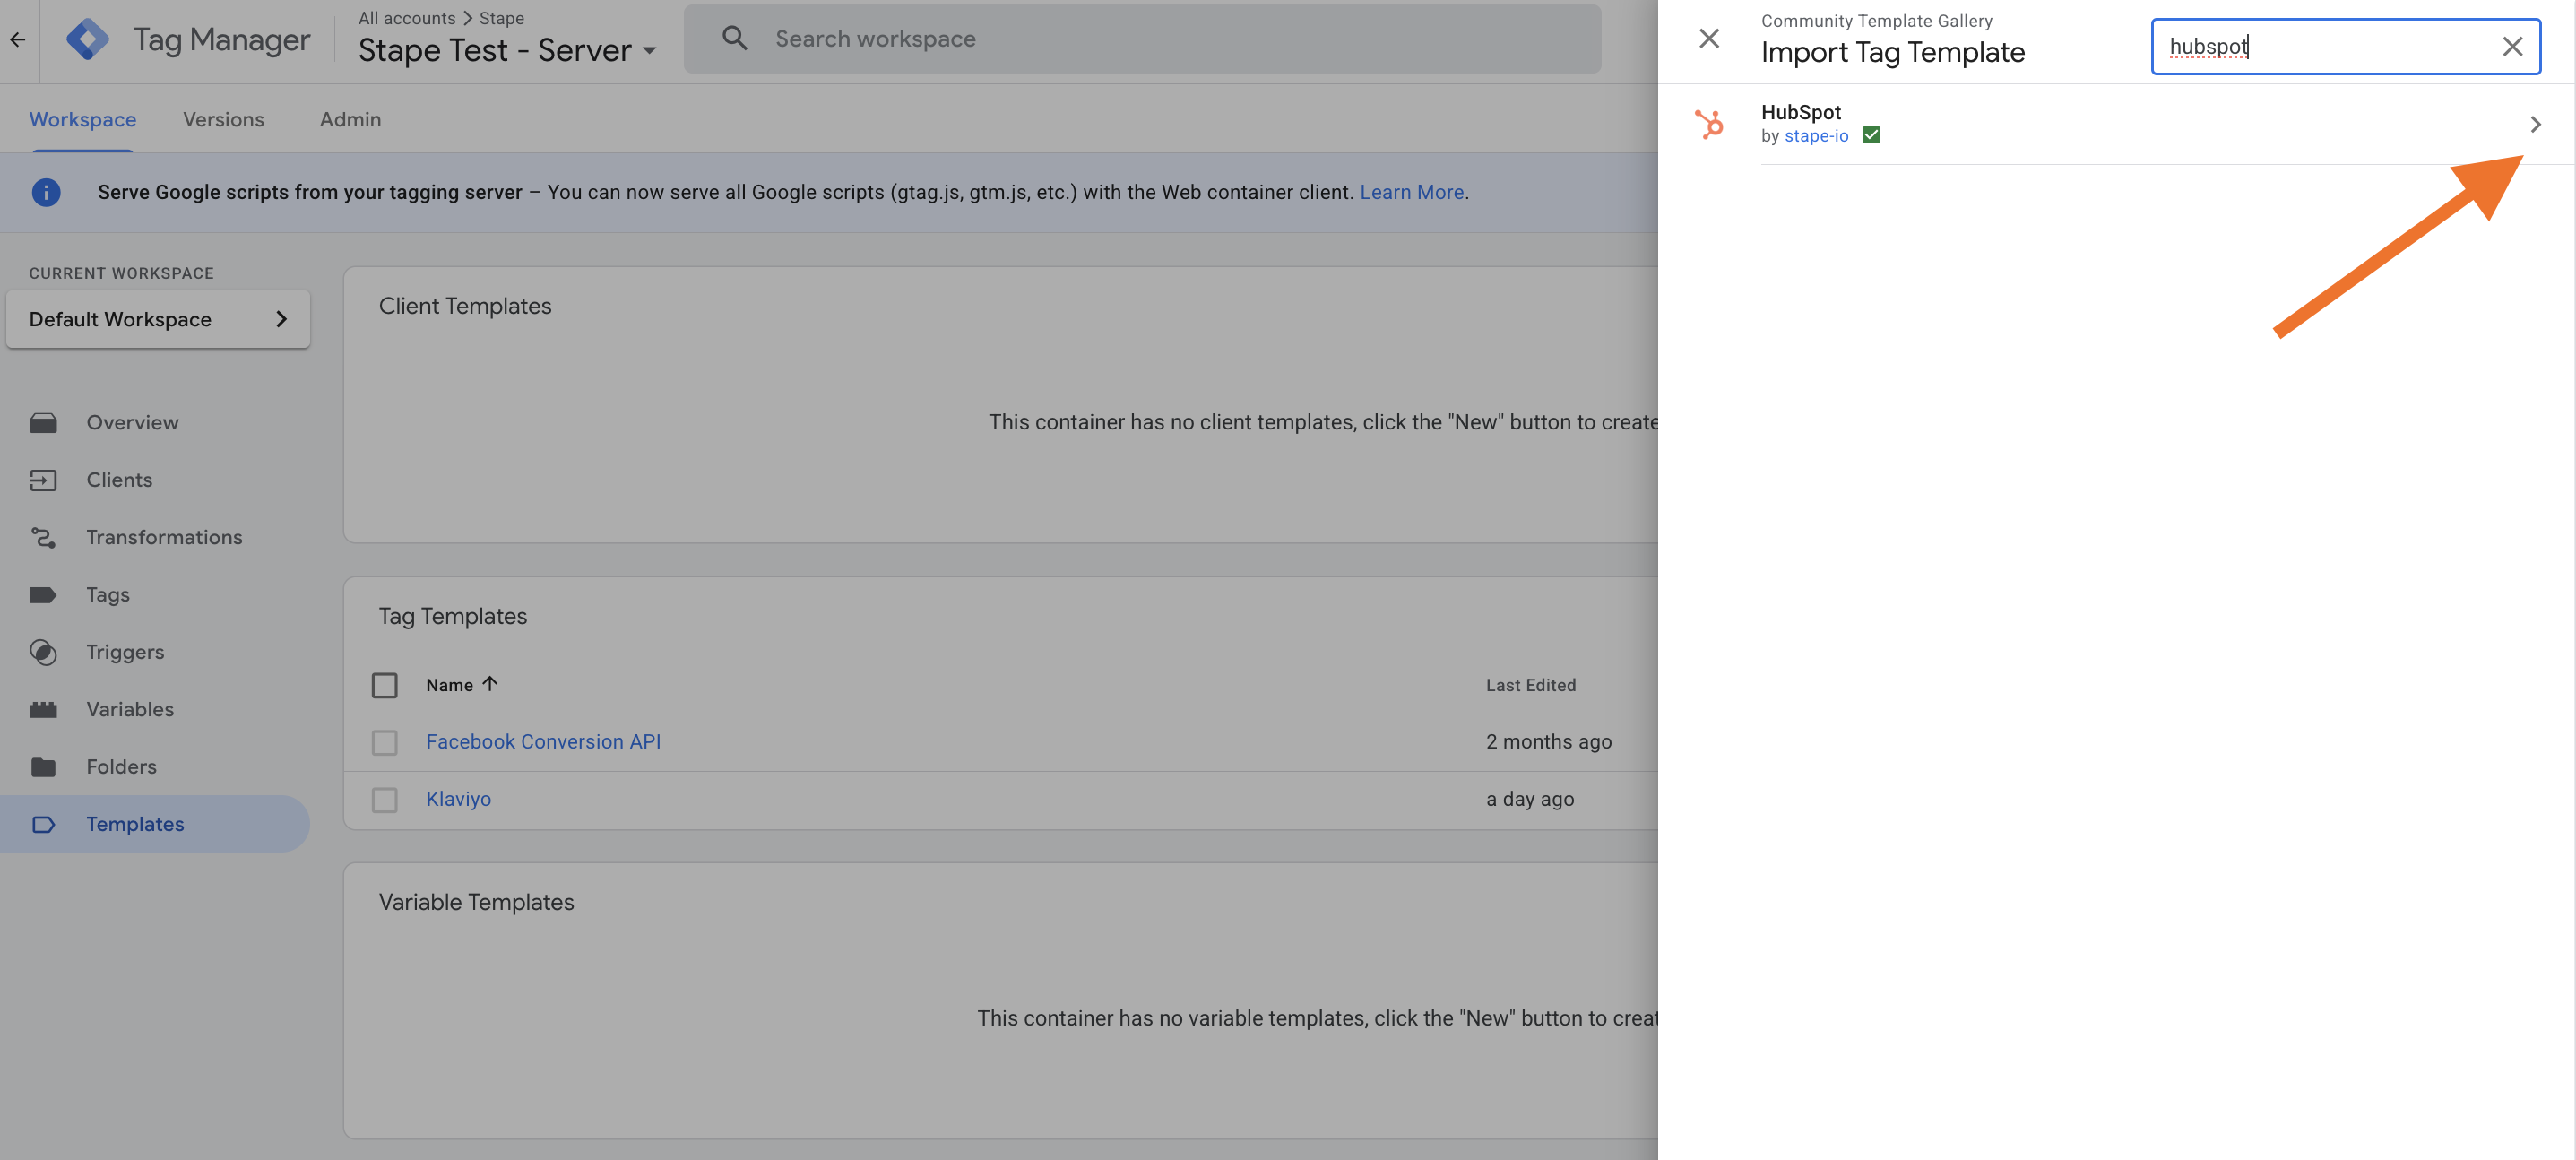
Add the HubSpot tag to your server GTM container.
In the server GTM container, go to Templates → Tag Templates → Search Gallery → search for HubSpot → add a tag to your workspace.
Configure the tag based on your tracking needs:
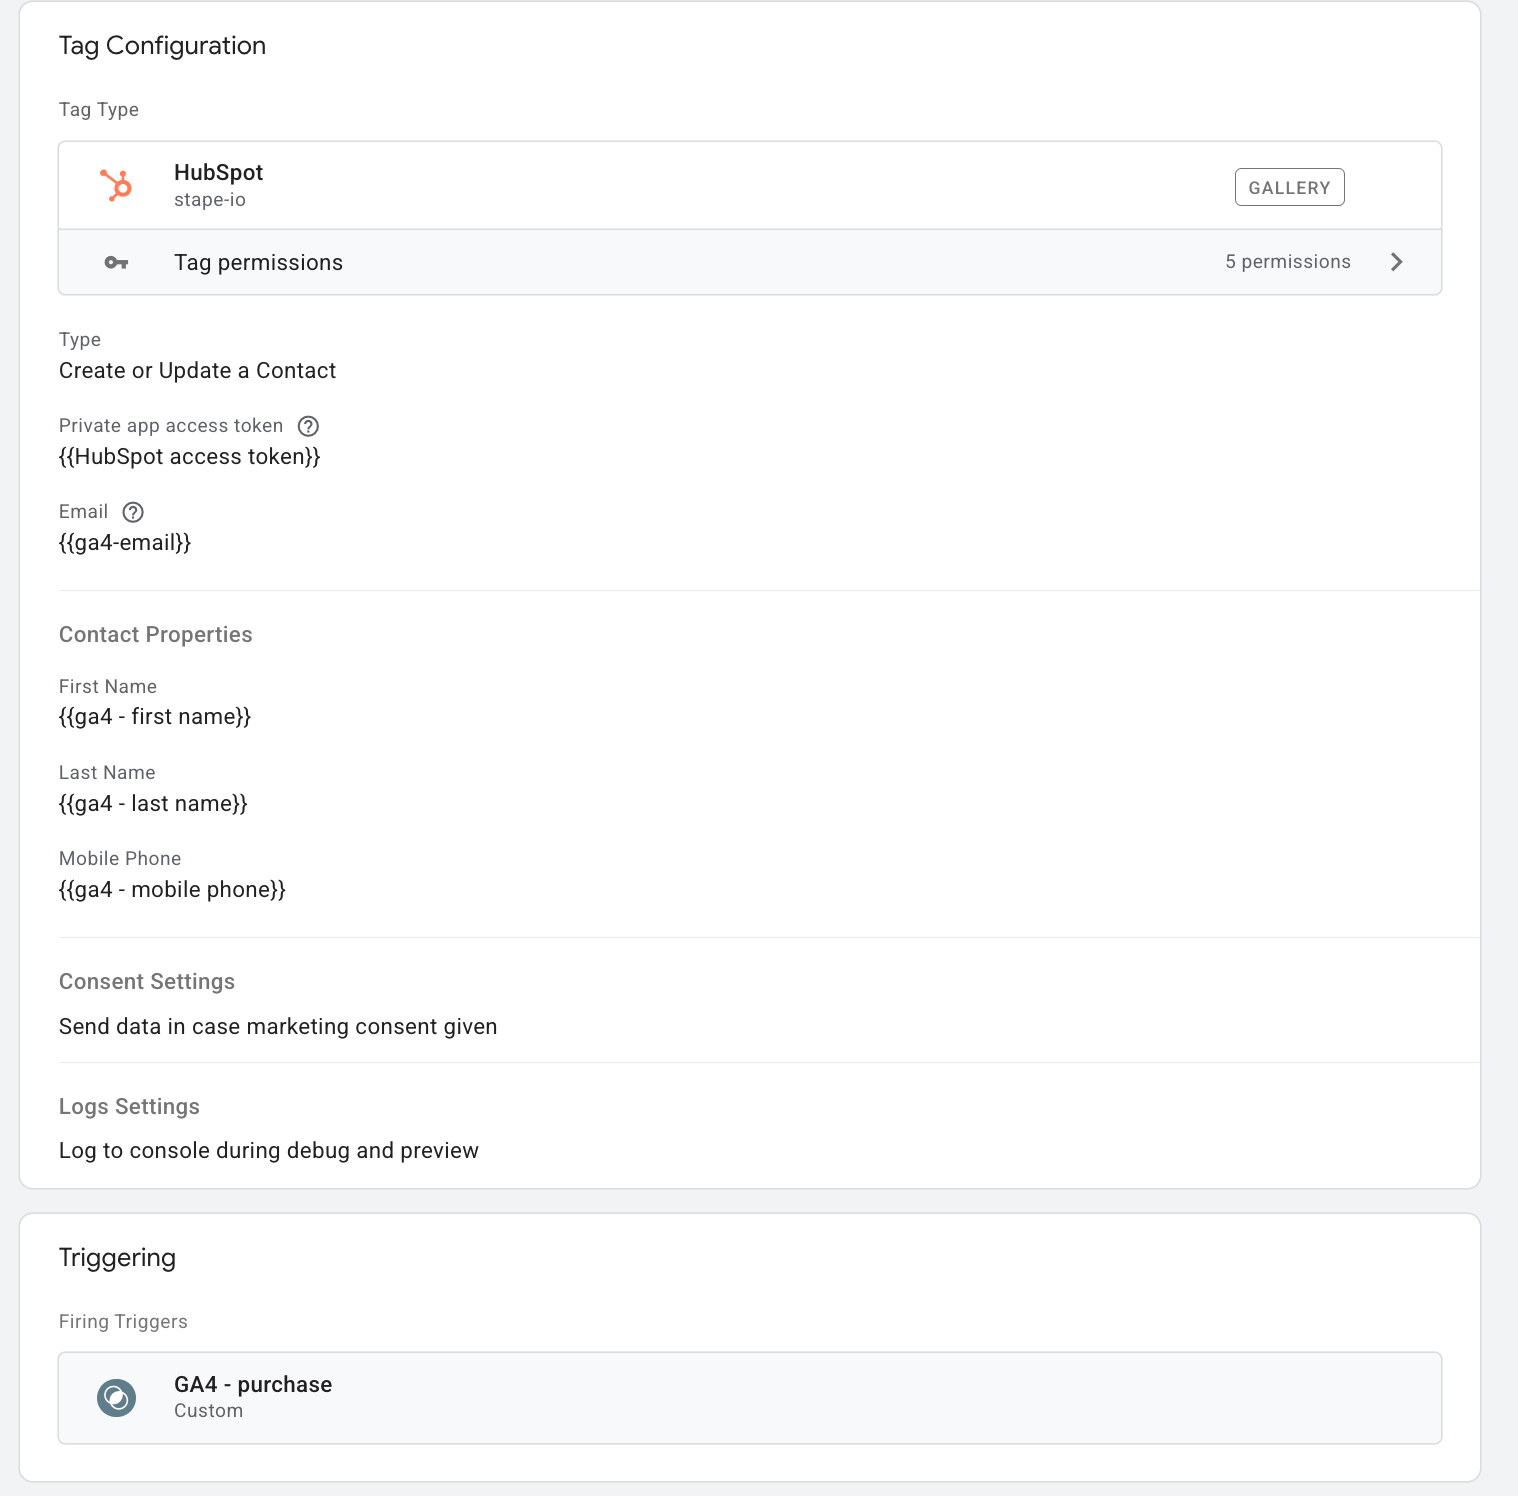
Create or update a HubSpot contact
1.1 Create a new tag in the server container → Select tag type HubSpot → Select action type → select Create or Update a contact.
1.2 Add Private app access token (check HubSpot documentation on access tokens) and user email variable.
1.3 You can also add event information and send custom parameters within a tag. Refer to this HubSpot documentation for assigning custom parameters.
1.4 Add a trigger to this tag and save.
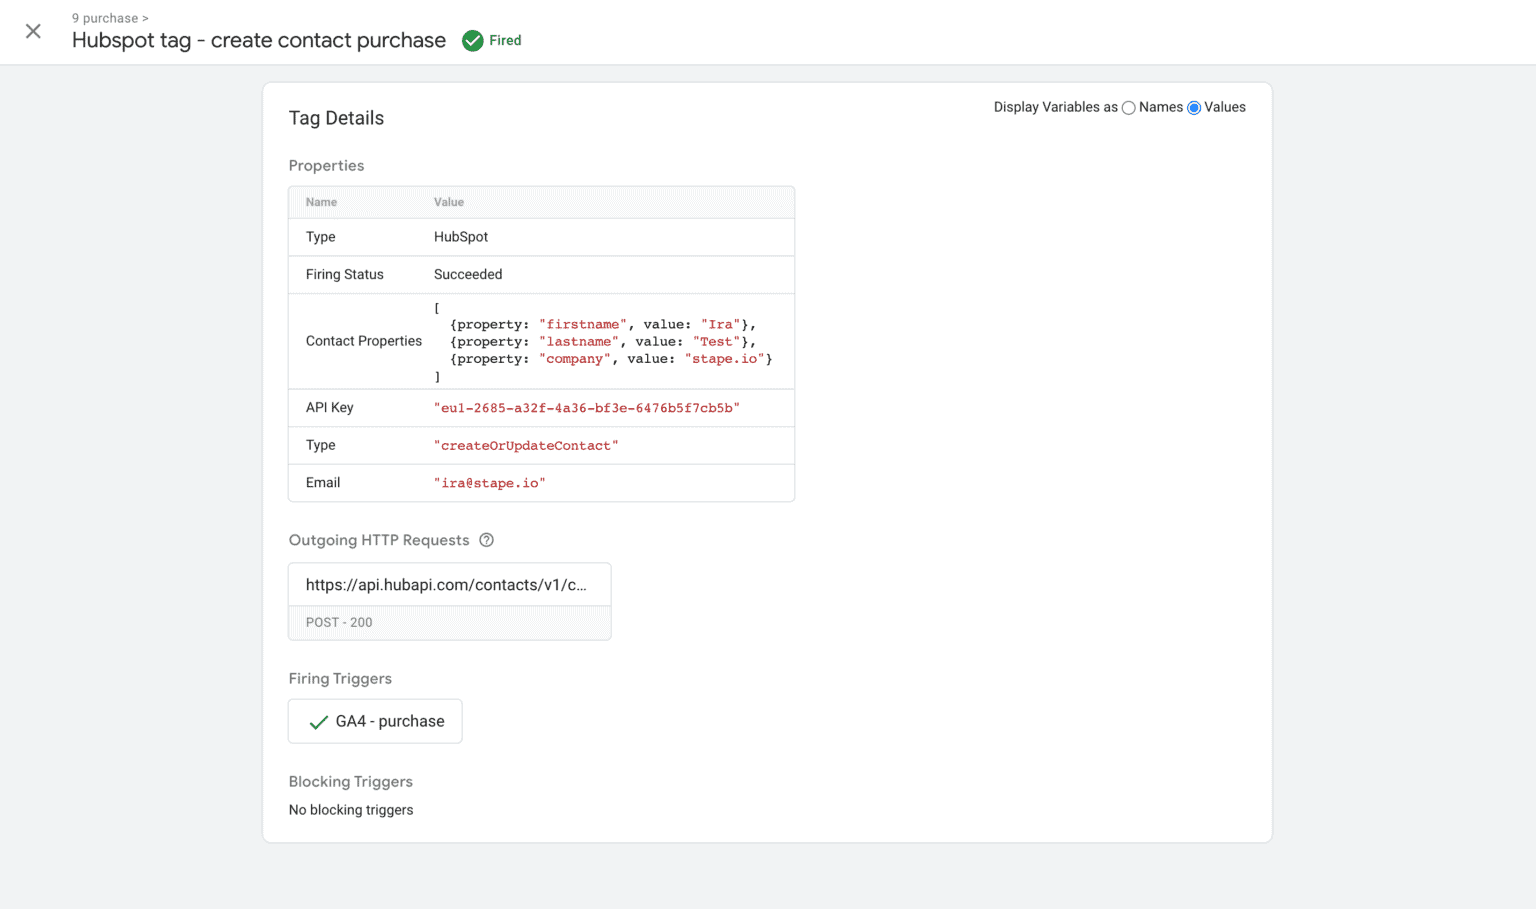
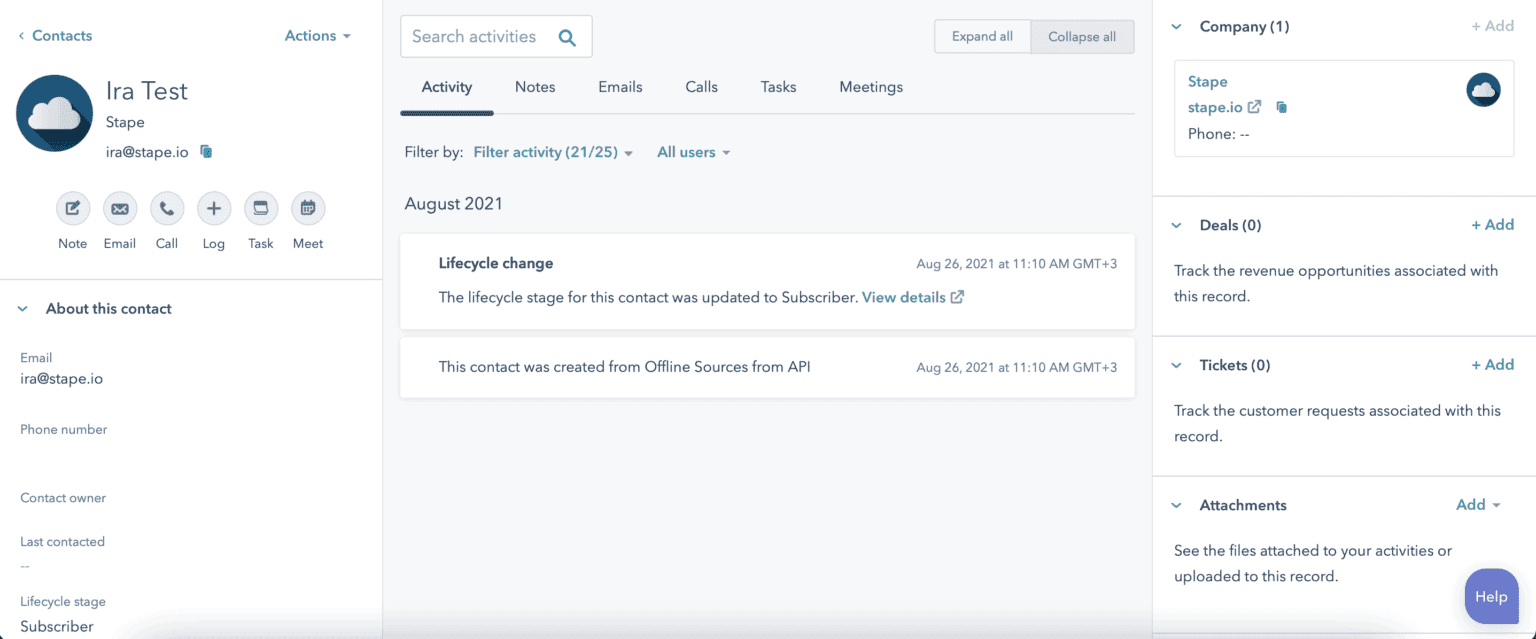
1.5 Open the preview mode in GTM and test the event. Check that the contact was created in HubSpot.
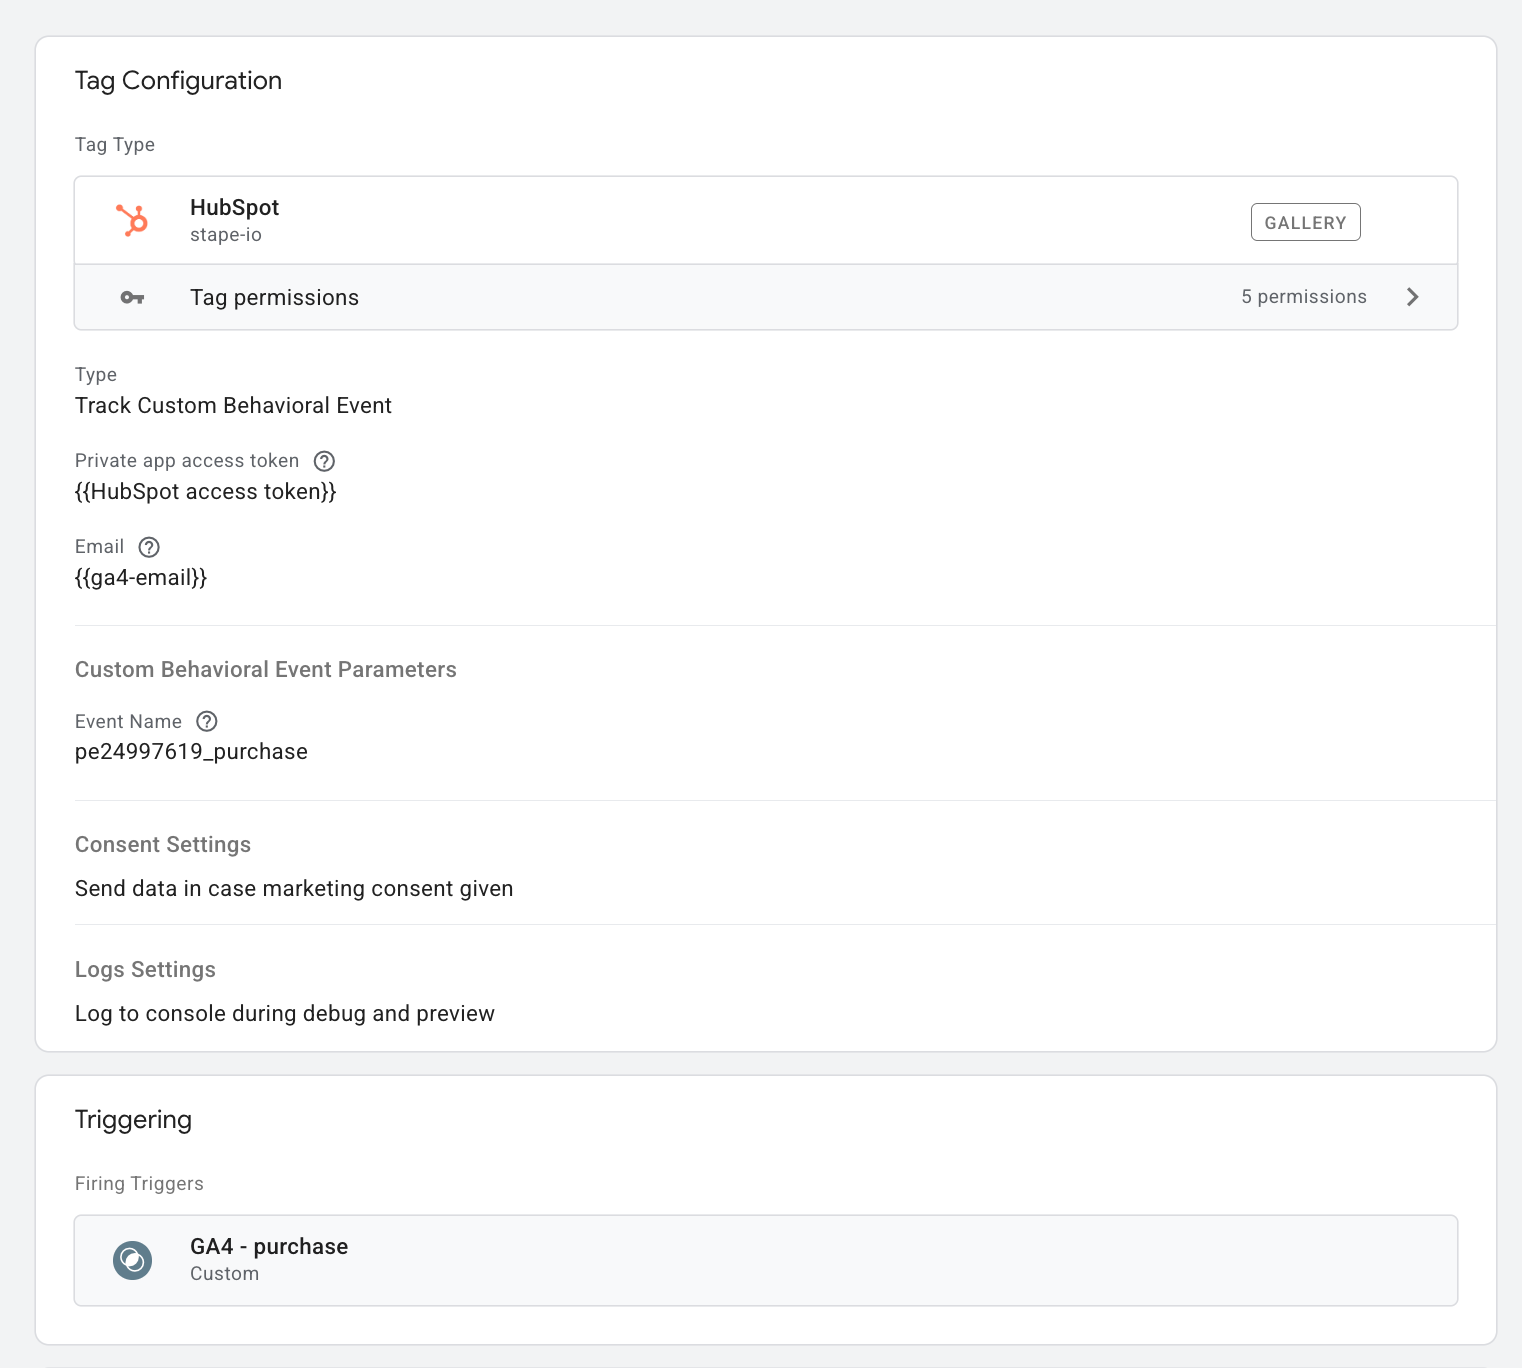
Track custom behavioral events
1.1 Create a new HubSpot tag → Select Track Custom Behavioral Event.
1.2 Add Private app access token (check HubSpot documentation on access tokens) → Add a variable that contains contact email
1.3 Add Custom Behavioral Event Parameters.
Note: To use custom behavioral event parameters, you must first create the corresponding behavioral events in HubSpot.
Key Steps:
- Follow the provided instructions to create the behavioral events.
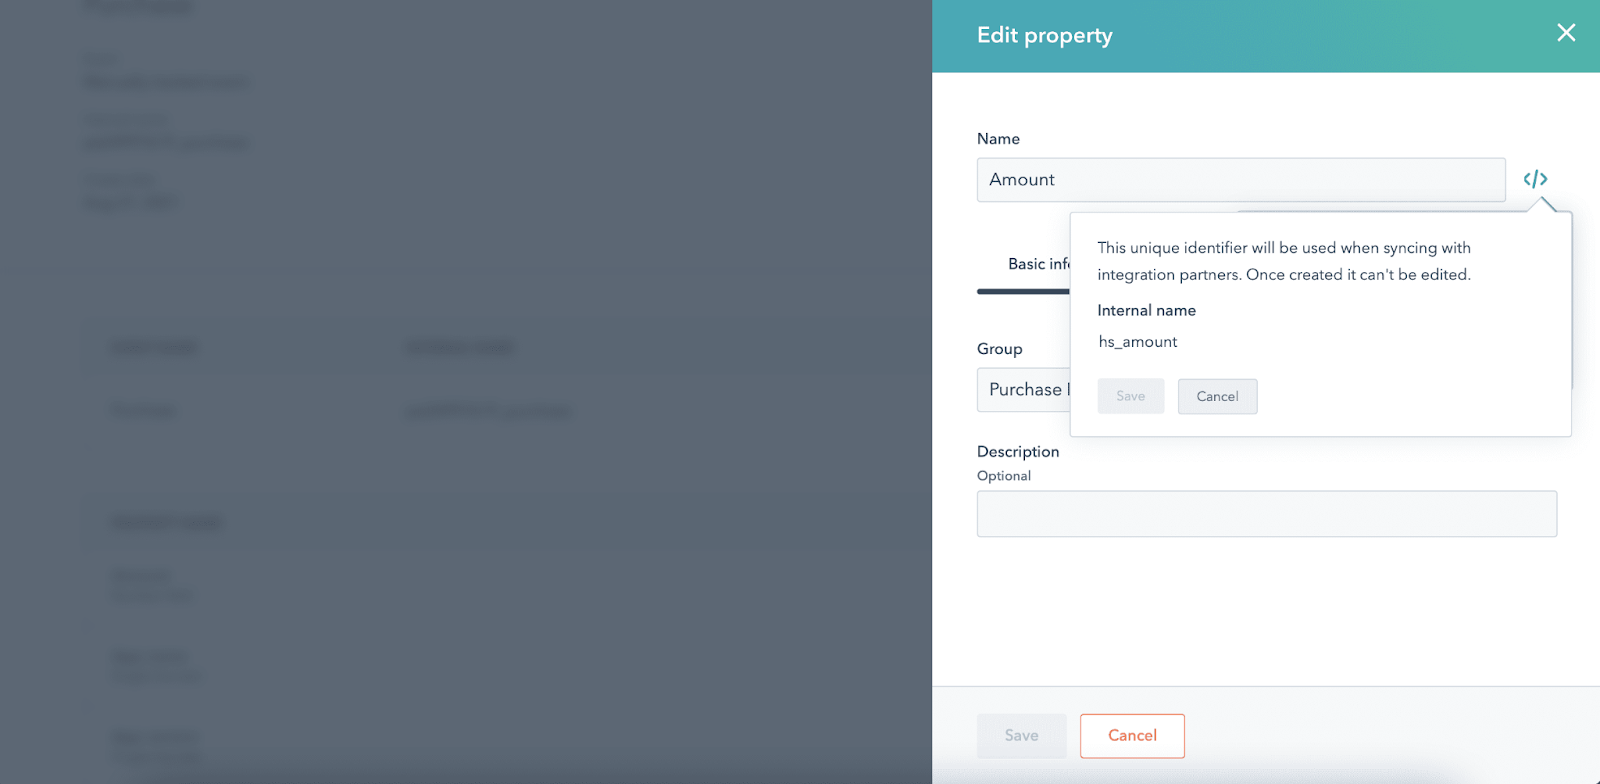
- Enter event names and property names using the Internal name format.
- To find a property's internal name, click the icon on the right.
Check the instructions on how to create behavioral events in HubSpot.
Please note: if you opt for the “Use visualizer” option (as recommended in HubSpot documentation), you will be able to set up Visited URL or Clicked element event types only. If you need to configure other types of events, select the “Send via API” option.

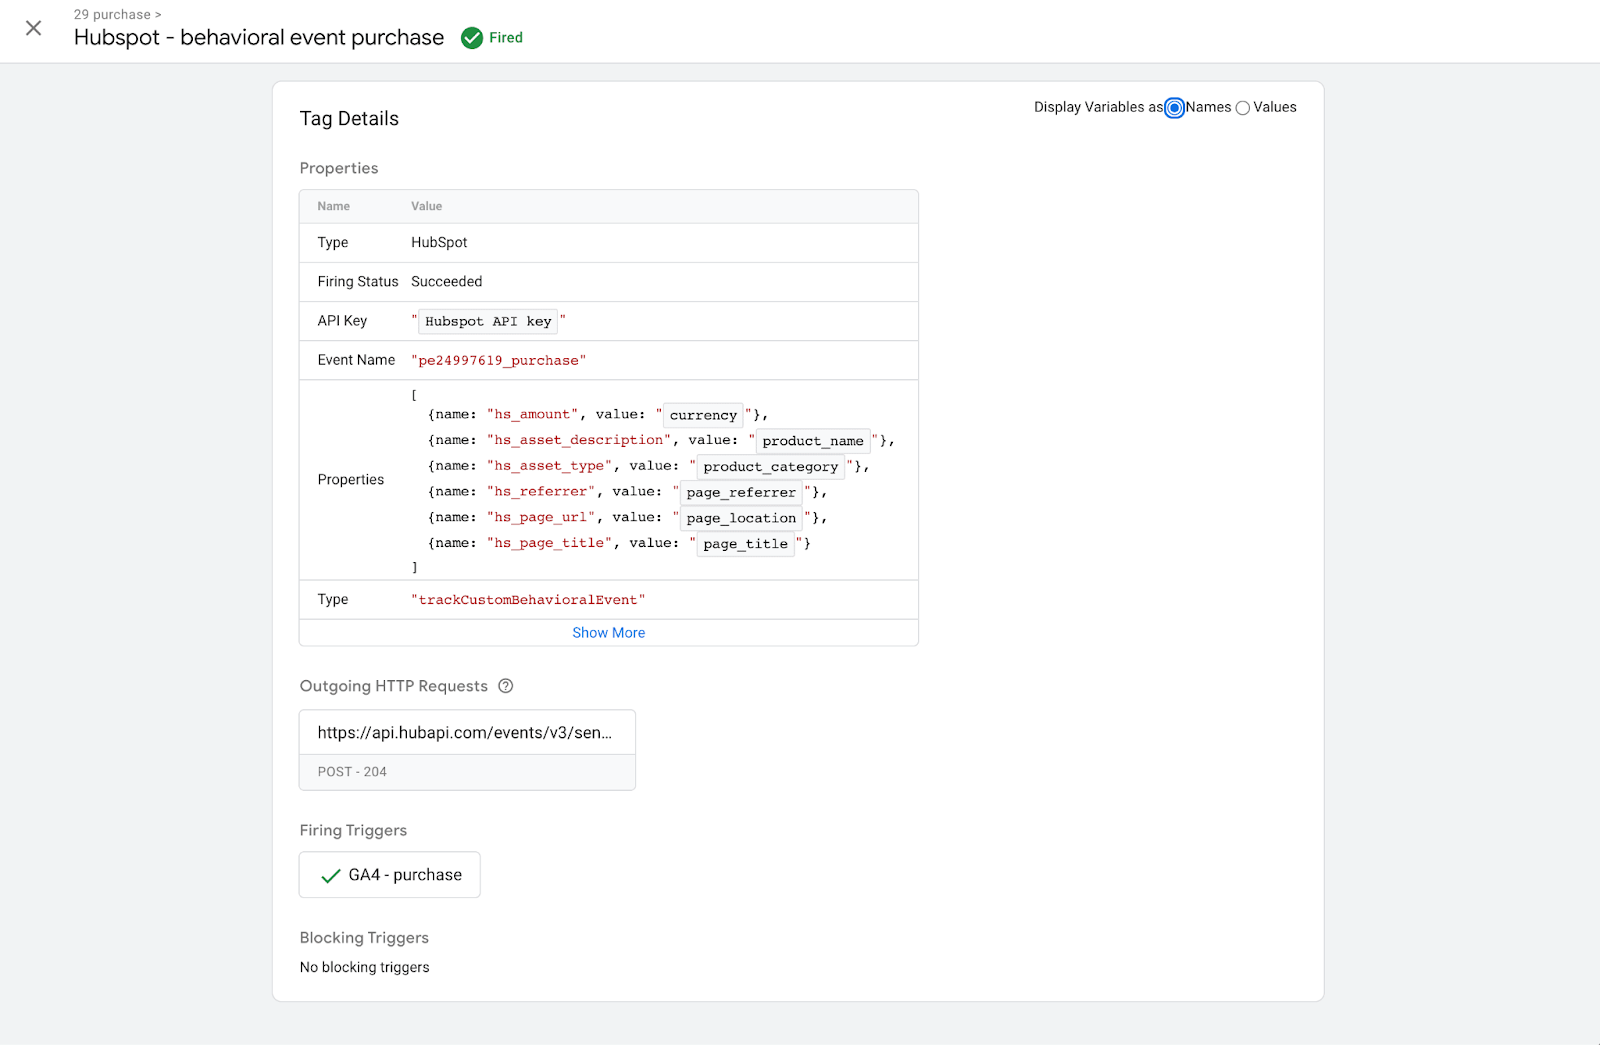
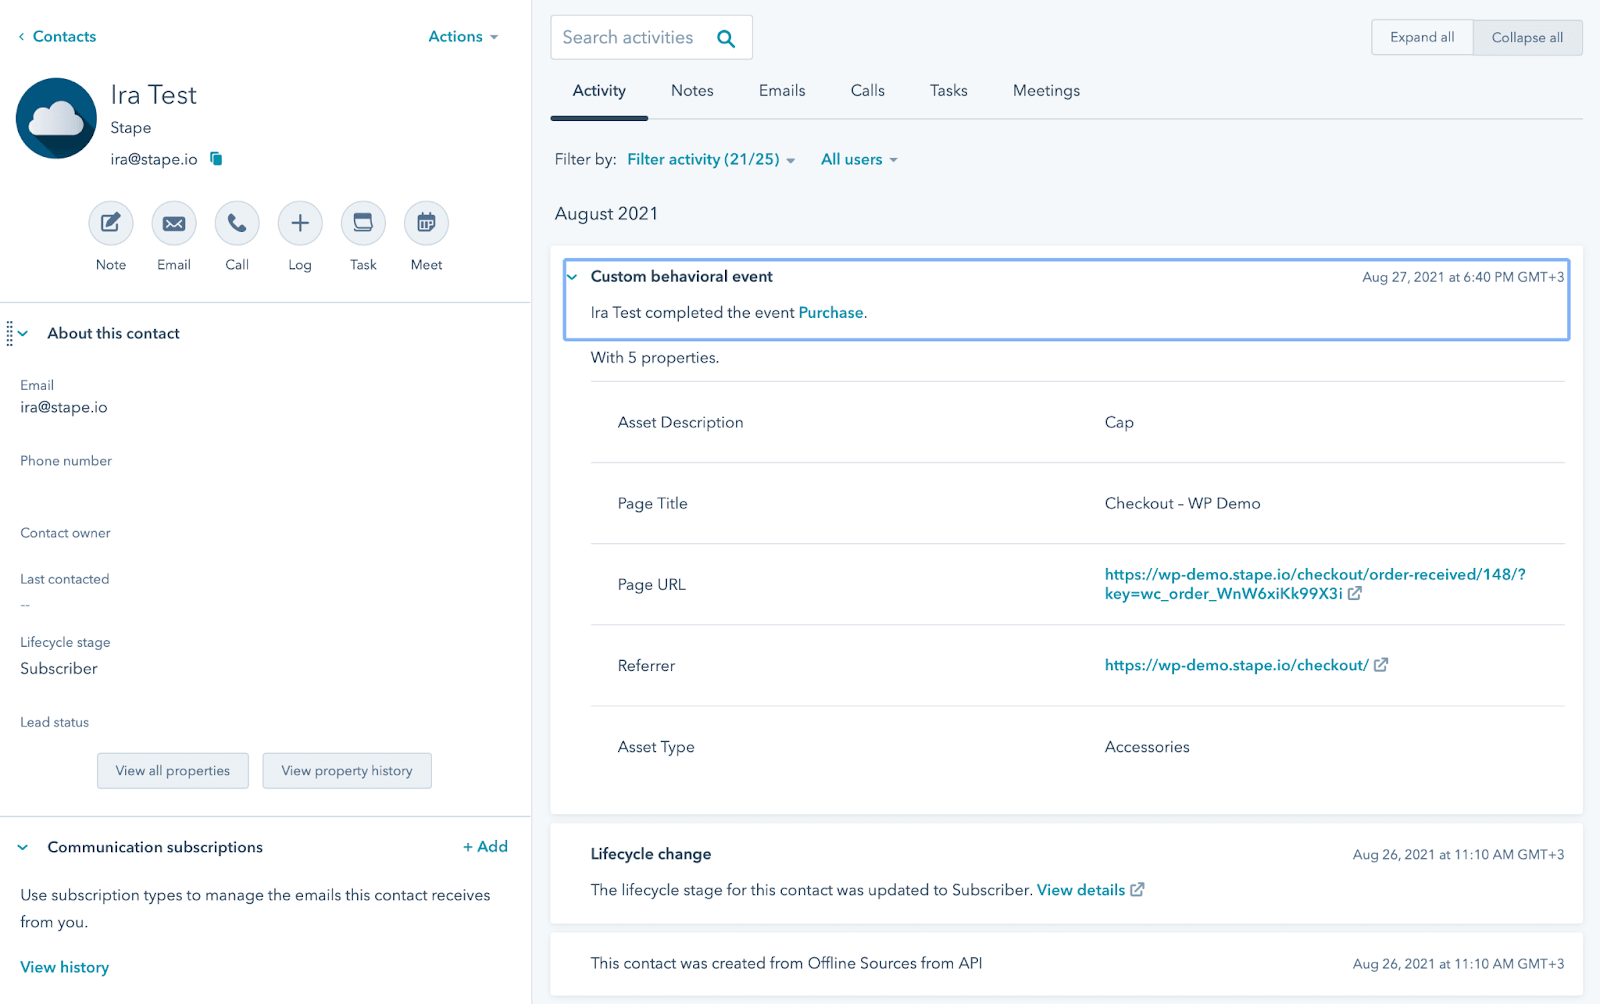
1.4 Test the HubSpot behavioral event tag that you’ve recently set up. You should see that the tag triggers in the GTM server container and events are associated with the contact in HubSpot.
Identify logged-in users on external websites
1.1 To set up logged-in users' identification, choose “Visitor Identification” as a tag type
1.2 Add Private app access token (check HubSpot documentation on access tokens) → Add a variable that contains the contact email
1.3 Add variables with the first and last name of a visitor.
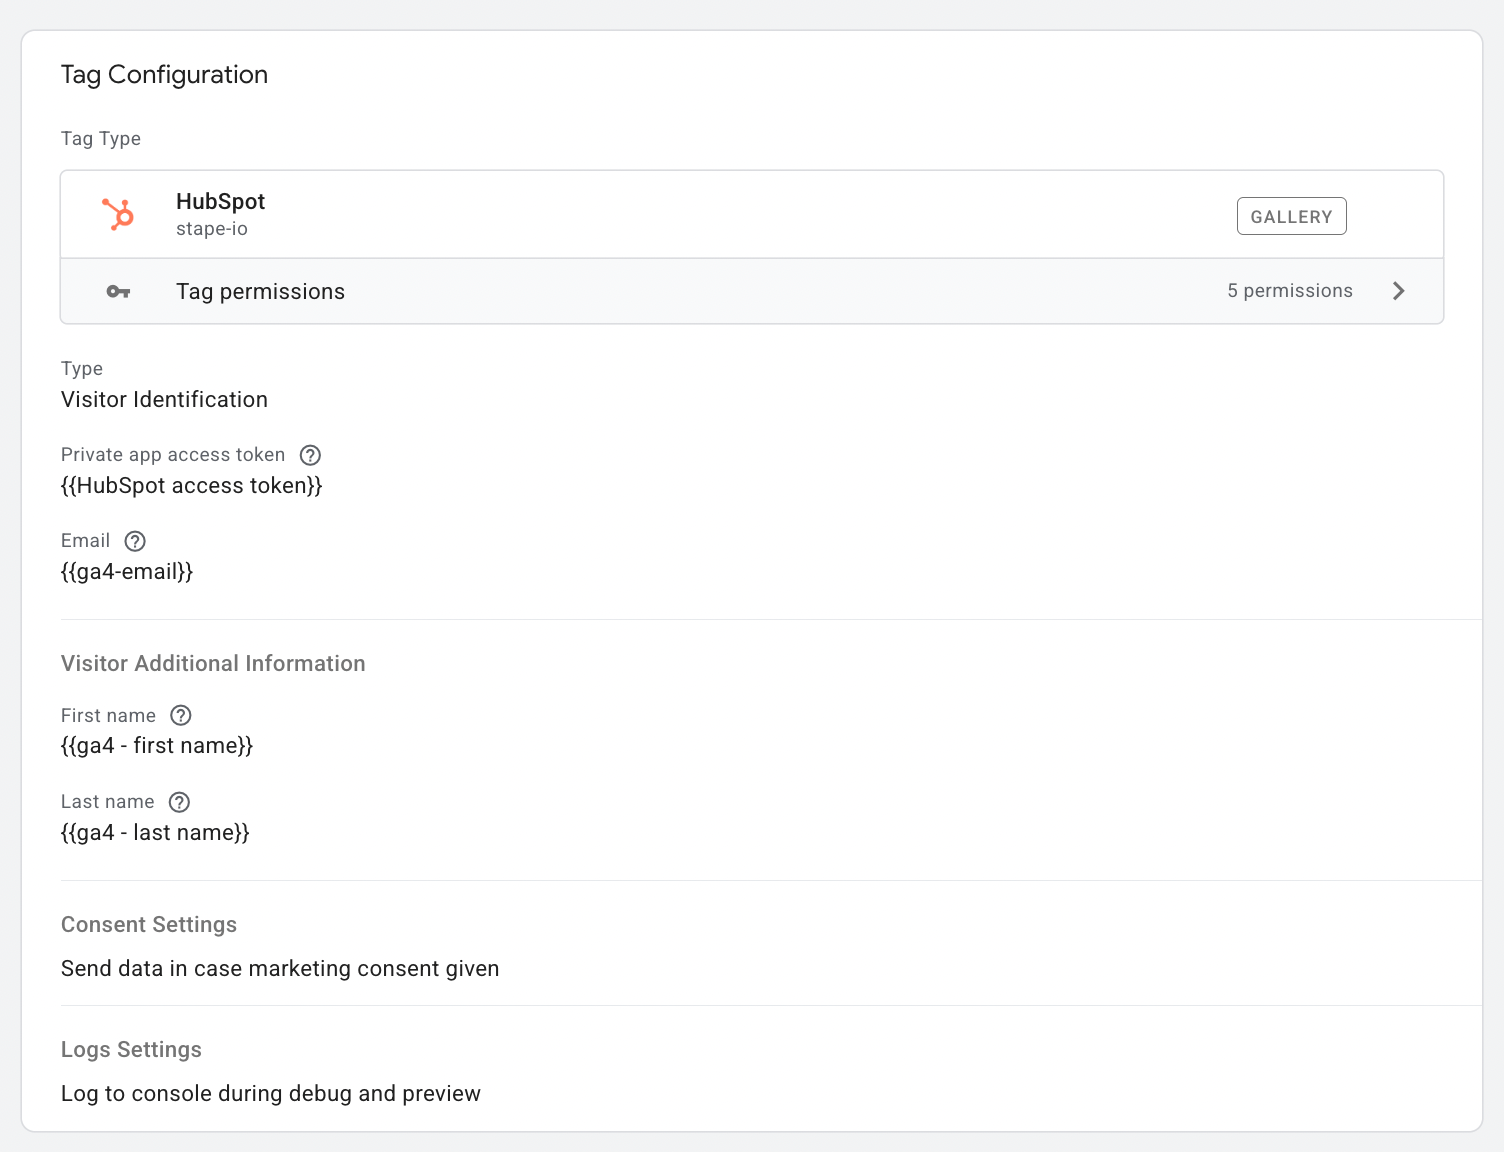
1.4 Add a trigger for a tag and test the setup.
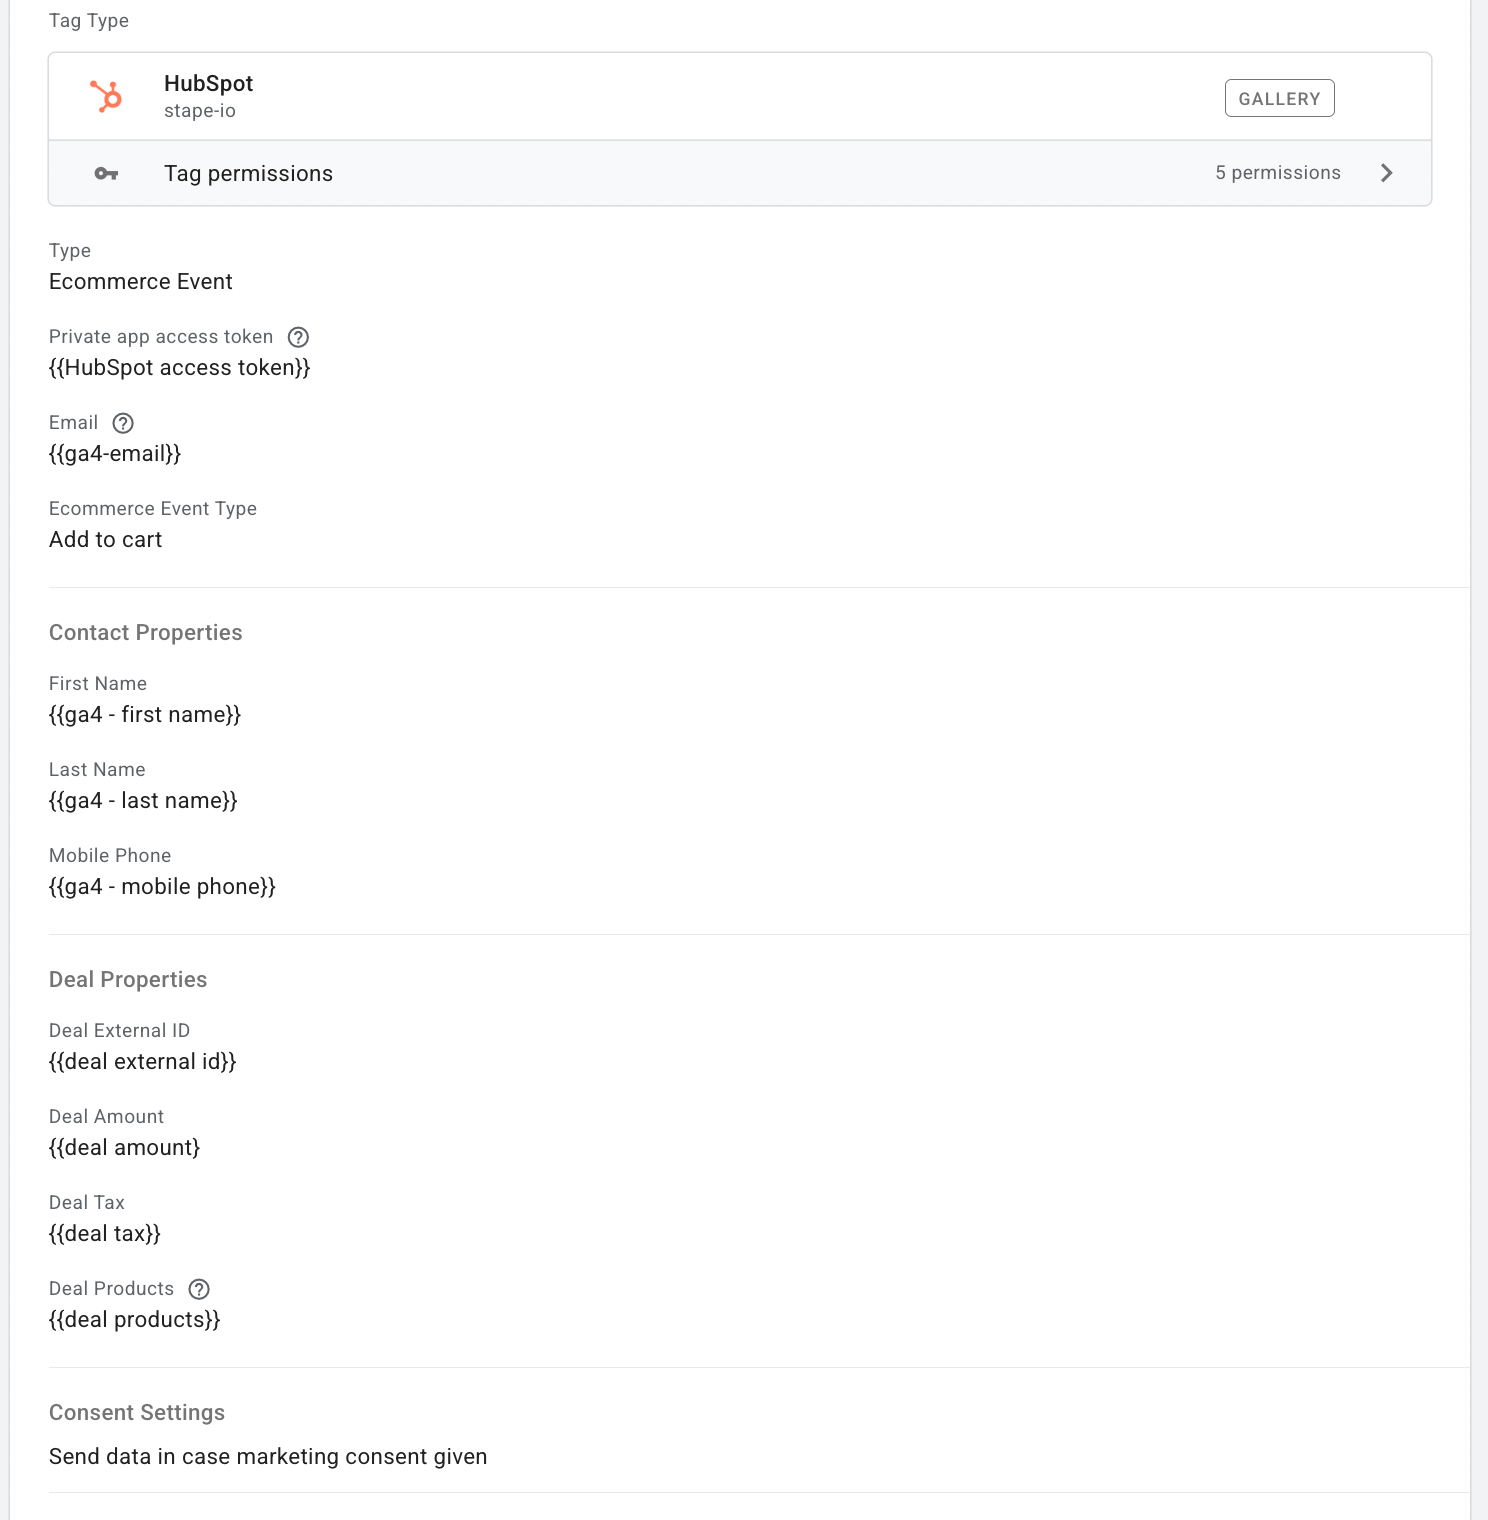
Track ecommerce events in HubSpot
You can track the following five e-commerce events using a tag: Log in, Checkout, Purchase, Remove from cart, and Add to cart.
To configure the tracking tag:
1.1 Create a new tag.
1.2 Set the tag type to HubSpot.
1.3 Select Ecommerce Event.
1.4 Enter your Private app access token (refer to HubSpot documentation for details).
1.5 Add a variable containing the contact's email address.
1.6 From the drop-down list, select the specific e-commerce event you wish to track.
1.7 To ensure the user triggering the event is identified, fill out Contact Properties and/or Deal Properties (depending on the target user type). You may use pre-configured properties or add custom ones.
1.8 Finally, add a trigger for the tag.
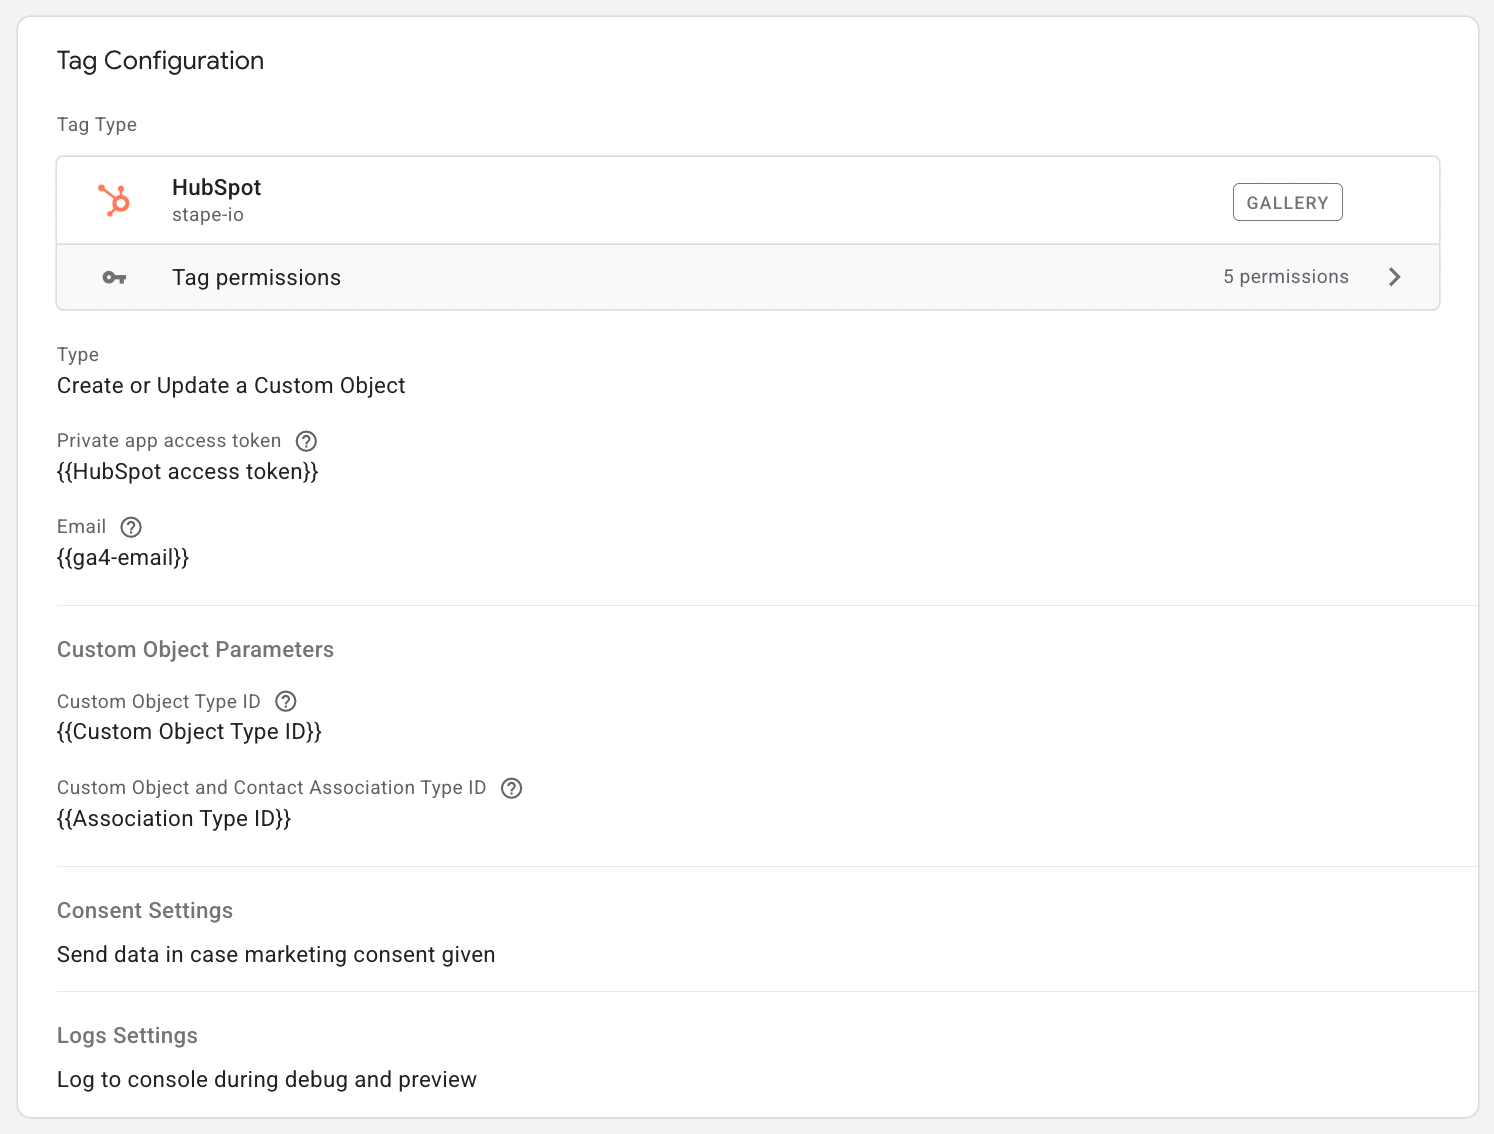
Create or update a HubSpot custom object
1.1 Create a new tag and select HubSpot as the tag type, then select Create or Update a Custom Object.
1.2 Add your Private app access token (refer to HubSpot documentation).
1.3 Add a variable for the contact email.
1.4 Configure Custom Object Parameters using two key IDs:
- Custom Object Type ID: Find this unique ID in your custom object's URL, located right after /objects/ (e.g., 2-1234567).
- Custom Object and Contact Association Type ID: This ID links the custom object to the Contact object; look it up in
1.5 Add a trigger for the tag and test the setup.
Was this article helpful?
Comments