Step 1. Сreate a server container in Google Tag Manager
Updated Jun 26, 2026
➡️ Note
Before setting up your server-side Google Tag Manager container, it’s important to have web GTM container configured, because:
- The web container collects events, parameters and user interactions on your website.
- And sends this data to your server-side container.
Please follow the official Google documentation.
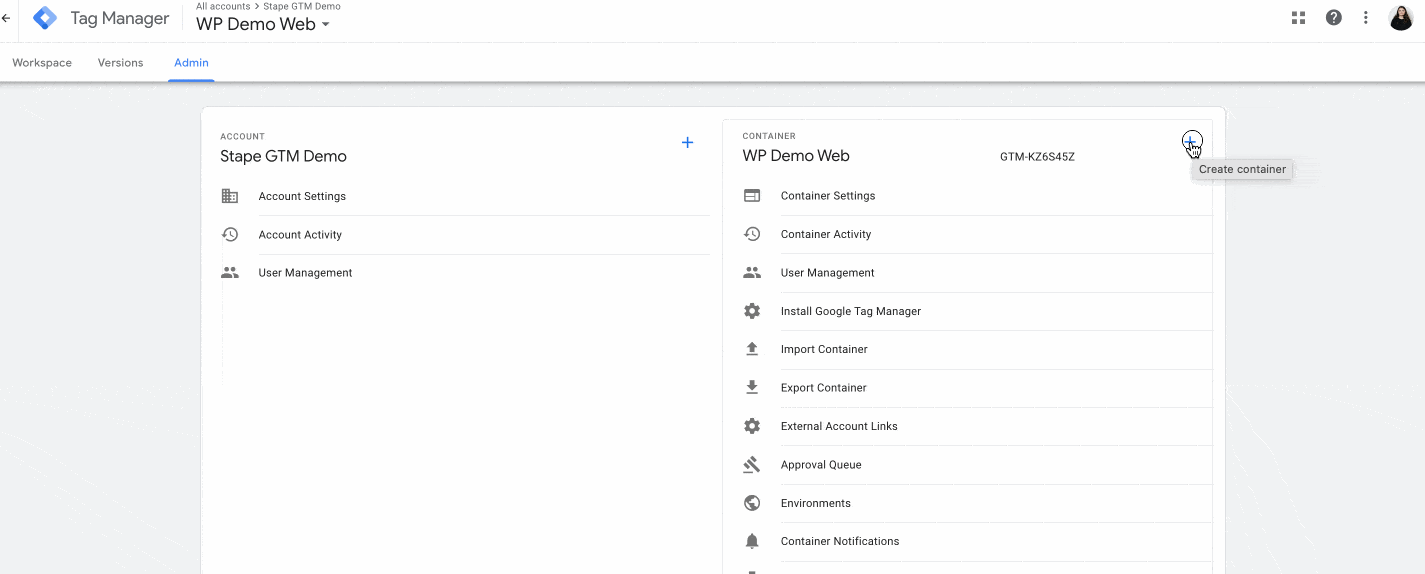
1. Select your GTM account → Click Admin → Click + next to the Container name.
2. Add Container Name → Under Target platform, choose Server. Click Create.
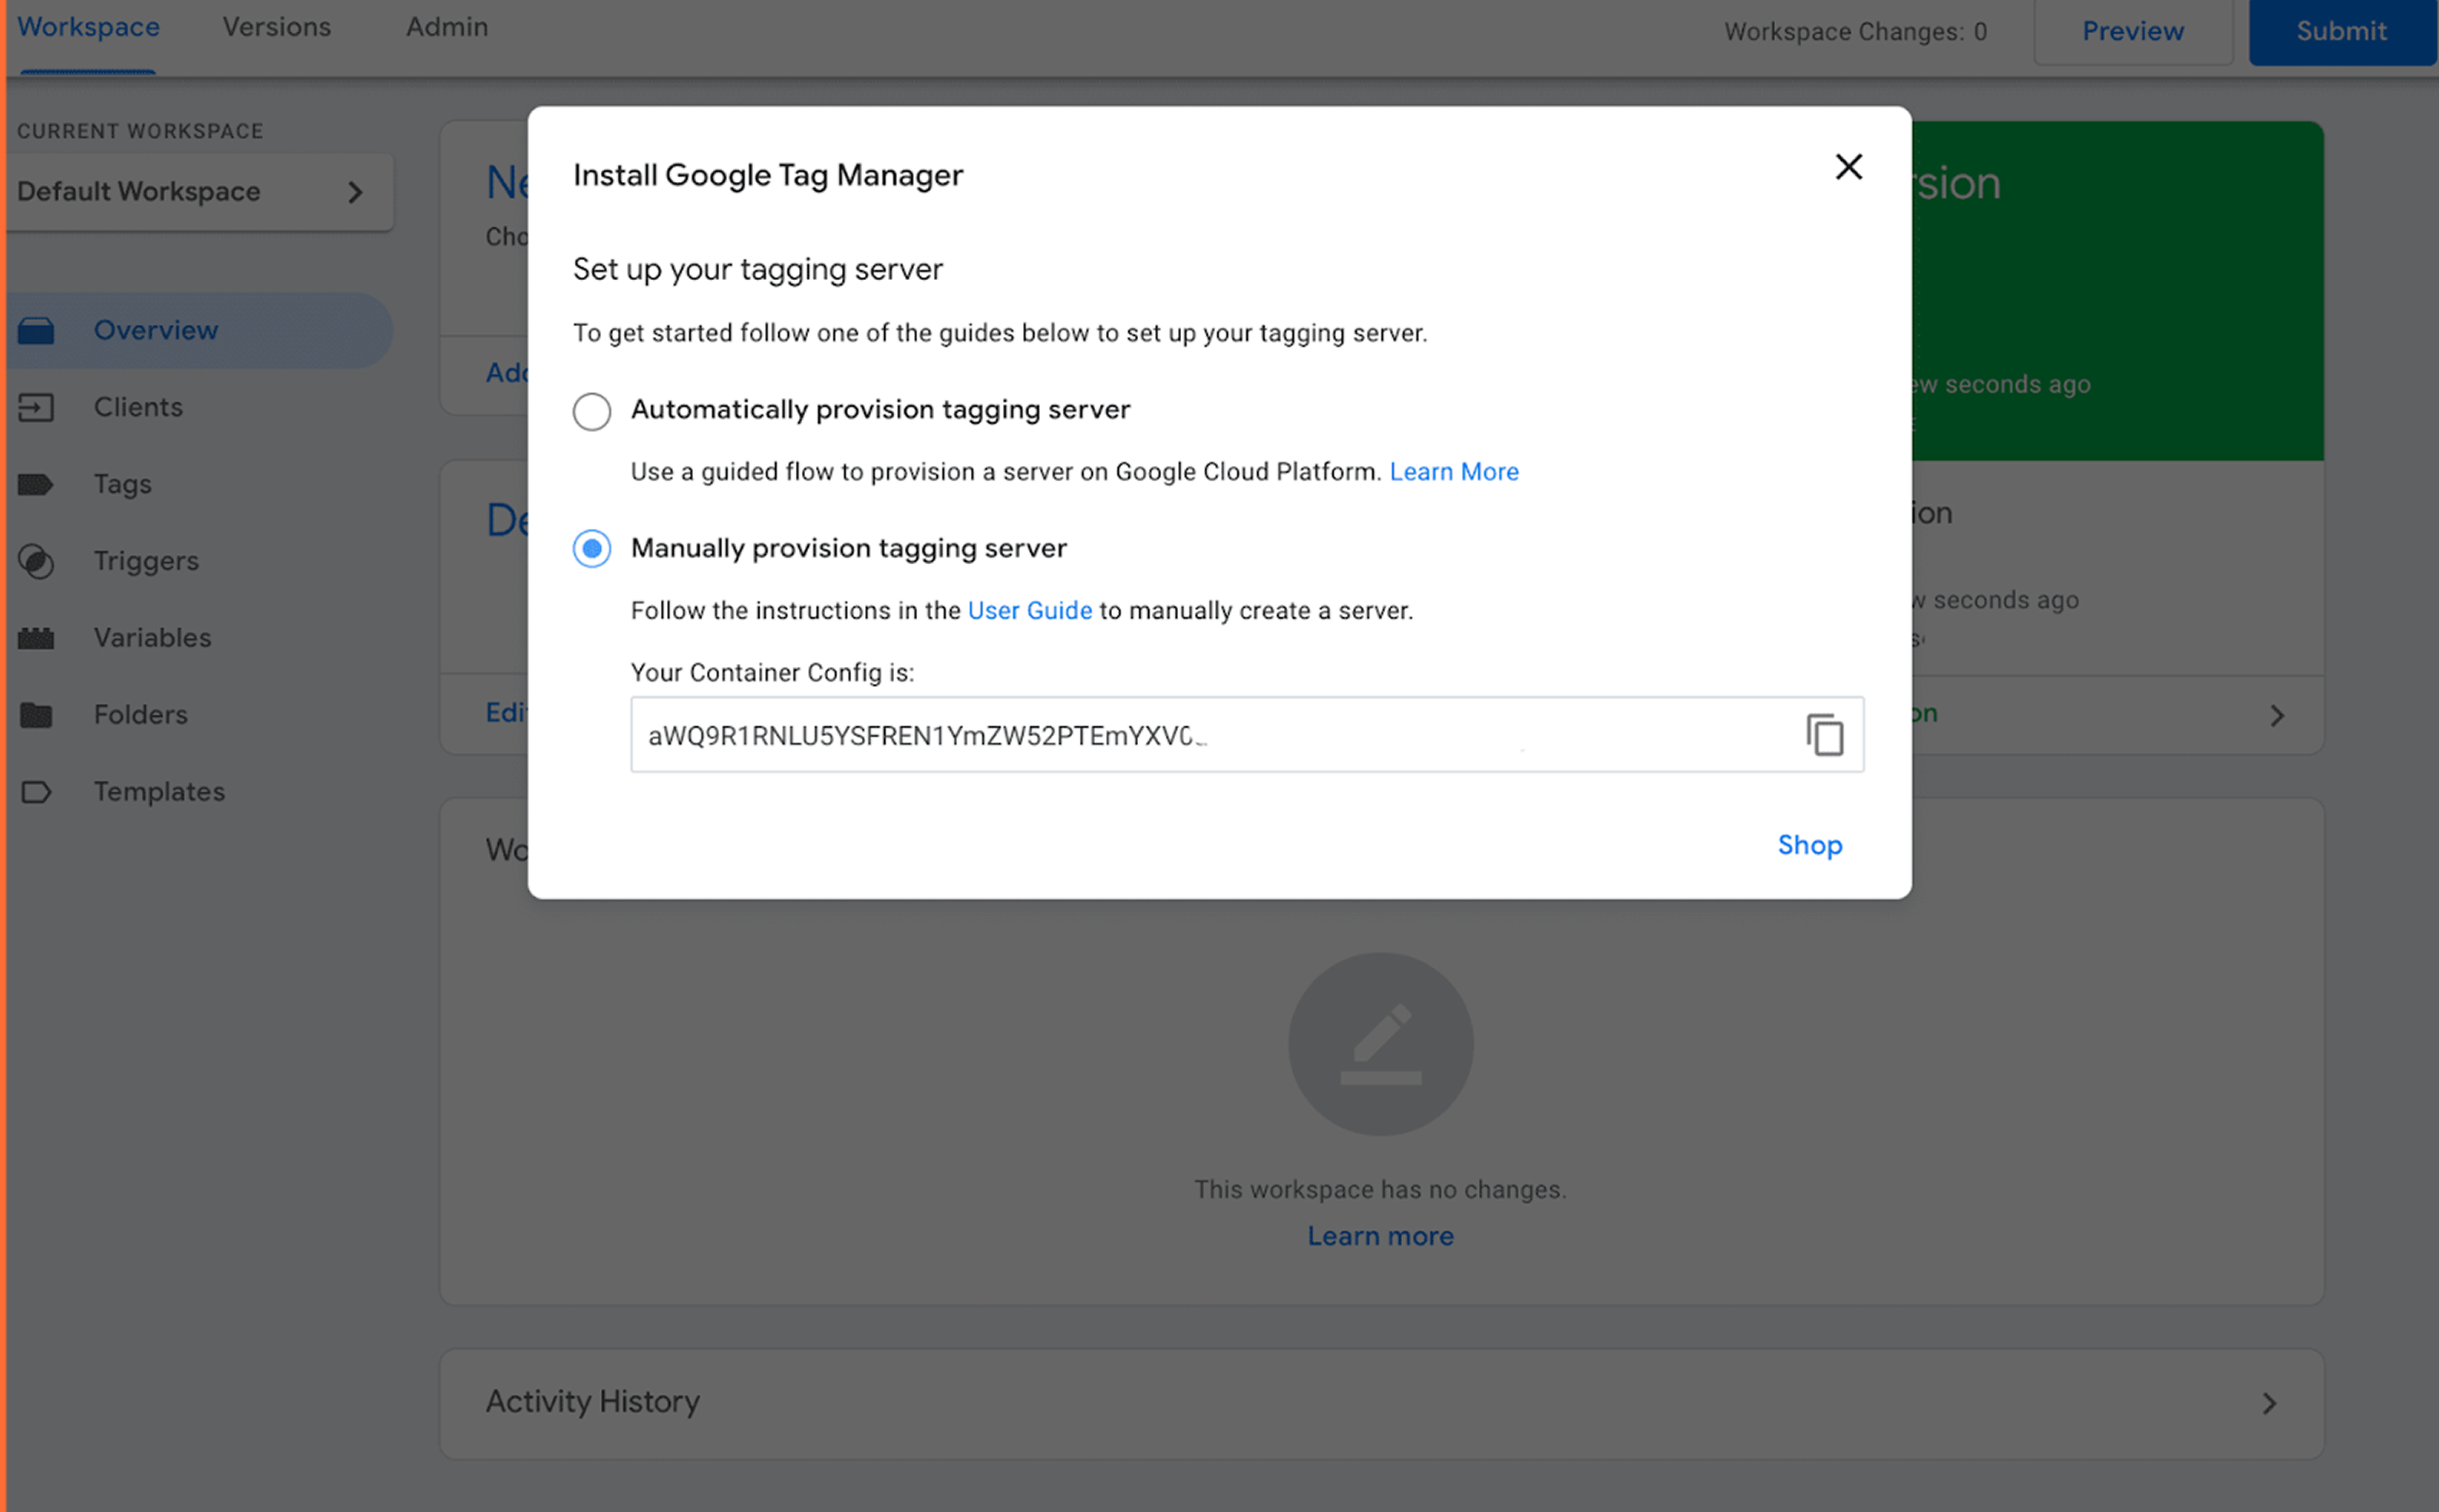
3. Choose Manually provision tagging server. Copy your container config. We will need it in the following steps.
Was this article helpful?
Subscribe to product updates:
Can’t find what you are looking for?
Comments