Step 4. Send data to server container
Updated Jun 26, 2026
The server container has no direct access to browser-side data – such as the data layer, cookies, or page context – so this data must be explicitly sent from the web container. Two methods are available for this:
- Data Tag, paired with Data Client in the server container to receive and parse its requests, sends data layer variables and other parameters independently of any specific platform;
- Google Analytics 4, which sends data via a Google Tag configured with the server container's URL. Both methods are covered below.
Send data from web to server container via Data tag
Step 1. Install the Data Tag template:
- Click on the Tags menu.
- Click New.
- Open your web Google Tag Manager container's Templates section → add Data Tag from the template gallery.
- Click on the Tag Configuration tab.
- Click Discover more tag types in the Community Template Gallery → search for Data Tag → click Add to workspace → click Add.

Step 2. Next, we’ll configure Data Tag for the pageview event:
- Under Event Name, you can select a standard event name, add a custom event name, or add a dynamic event name using {{Event}} variable.
- Enter your GTM Server Side URL (you can find your GTM server-side URL inside the stape.io account by opening the sGTM container and checking the Domain section.)
- Tick how you would like the data to be sent:
- Send all from the DataLayer - will send all the information you have in the web GTM data layer to server GTM events data.
- Send common data - adds to the request page_location, page_path, page_hostname, page_referrer, page_title, page_encoding, screen_resolution, viewport_size.
- Add consent state - adds consent_state object to the request. Including following properties: ad_storage, analytics_storage, functionality_storage, personalization_storage, security_storage.
- Add Common Cookie - the tag will send common cookies in eventData to avoid some e-commerce platform’s limitations. For example, this is required for events that work on Shopify checkout pages.
- Under Event Data, you can add any manual data to the request. You can also apply transformation (like hashing, trimming, etc) or store data.
- Under User Data, you can send user parameters and apply transformation or store data.
- Under Settings and Advanced Settings, you will find exactly that - advanced configuration options. Unless you know what you’re doing, it’s best not to modify these settings.
- Give your tag a descriptive name and click Save.
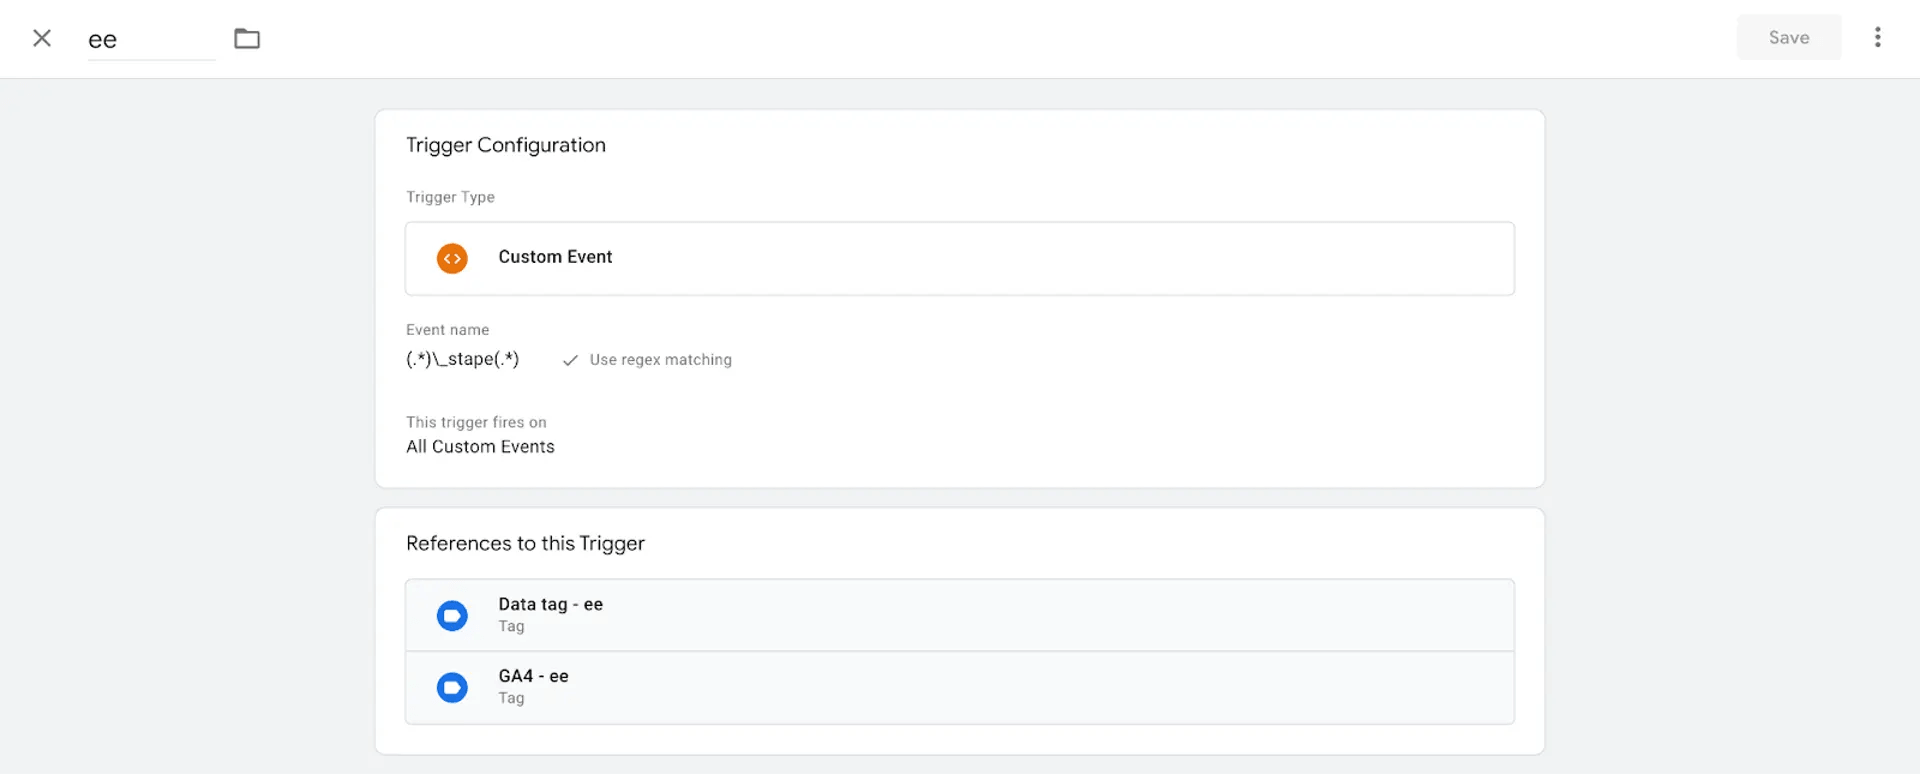
Step 3. Next, you can configure the Data Tag for other events. The example below shows how to configure e-commerce events when Data Layer is available.

This tag triggers each e-commerce event in the Data Layer. In this example, all e-commerce events end with _stape, so we’re using a regex that includes all events that contain _stape.
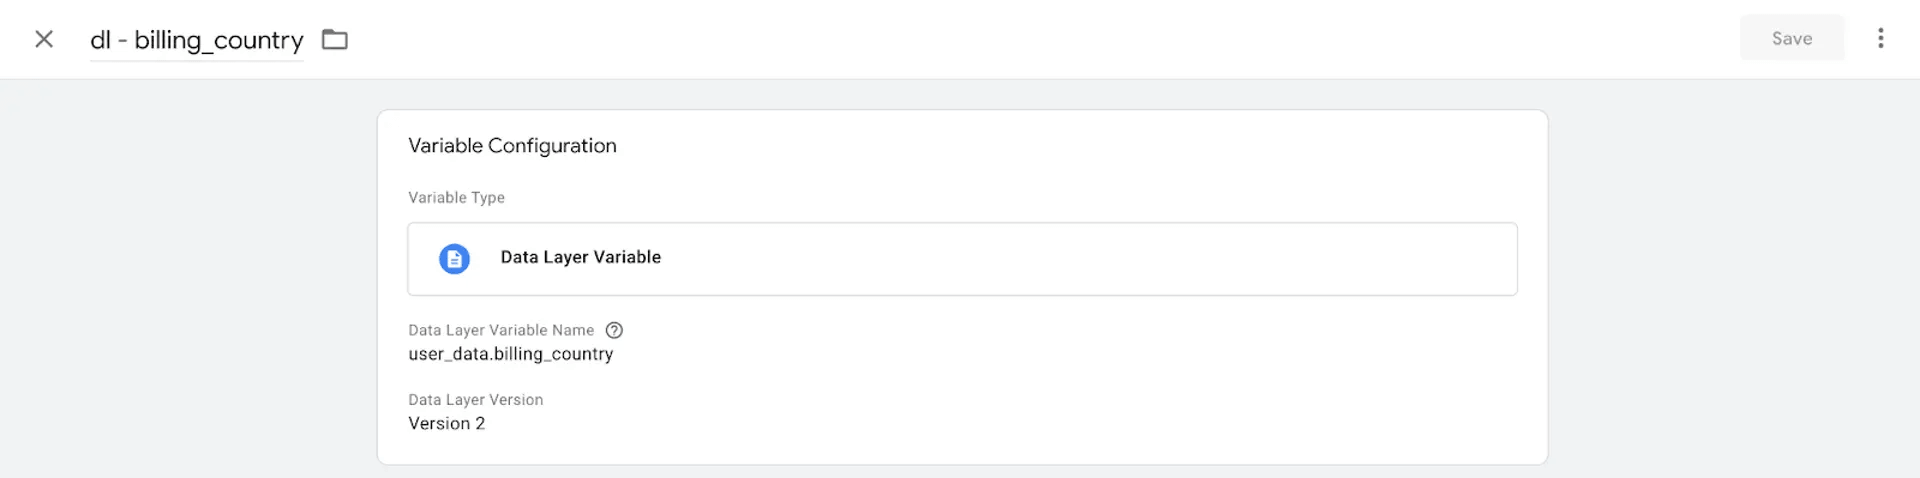
Example of the variable that extracts user data from the Data Layer.
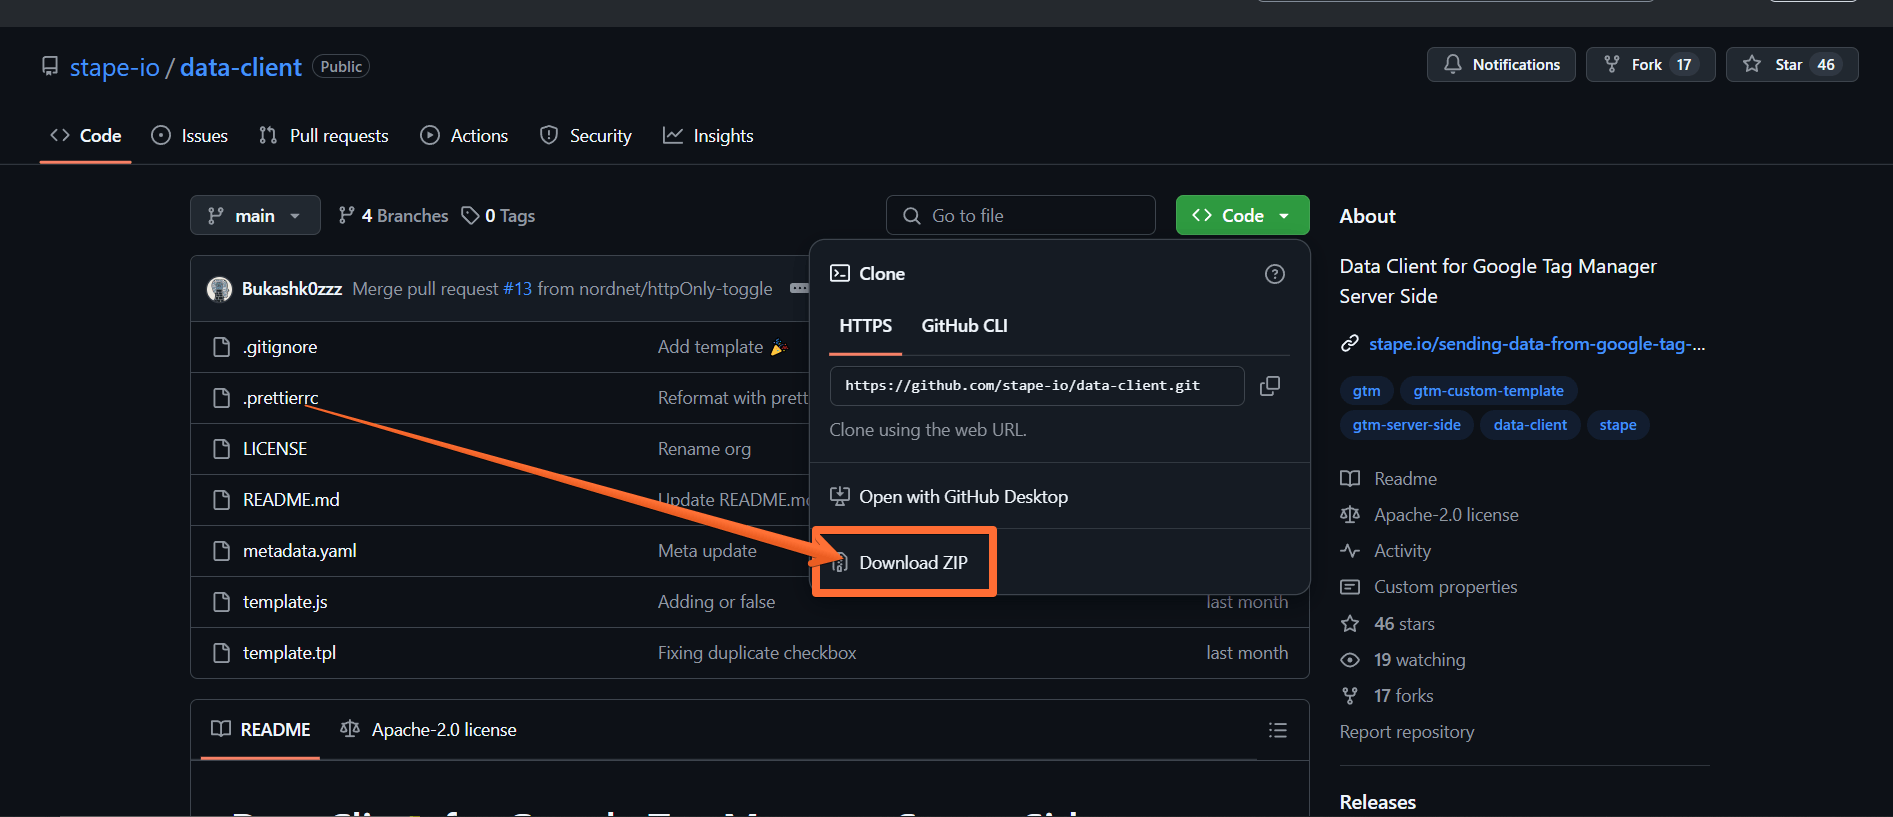
Step 4. Next, download Data Client from the GitHub:
- Follow this link.
- Click Code → Download ZIP.
Step 5. Now to import the Data Client:
- Open your server Google Tag Manager container.
- Click Templates.
- Under Clients, click New.
- Click three dots in the top right corner.
- Click Import and select the Data Client you downloaded from GitHub (you may have to unzip the archive first.)
- Once the import is done, click Save.
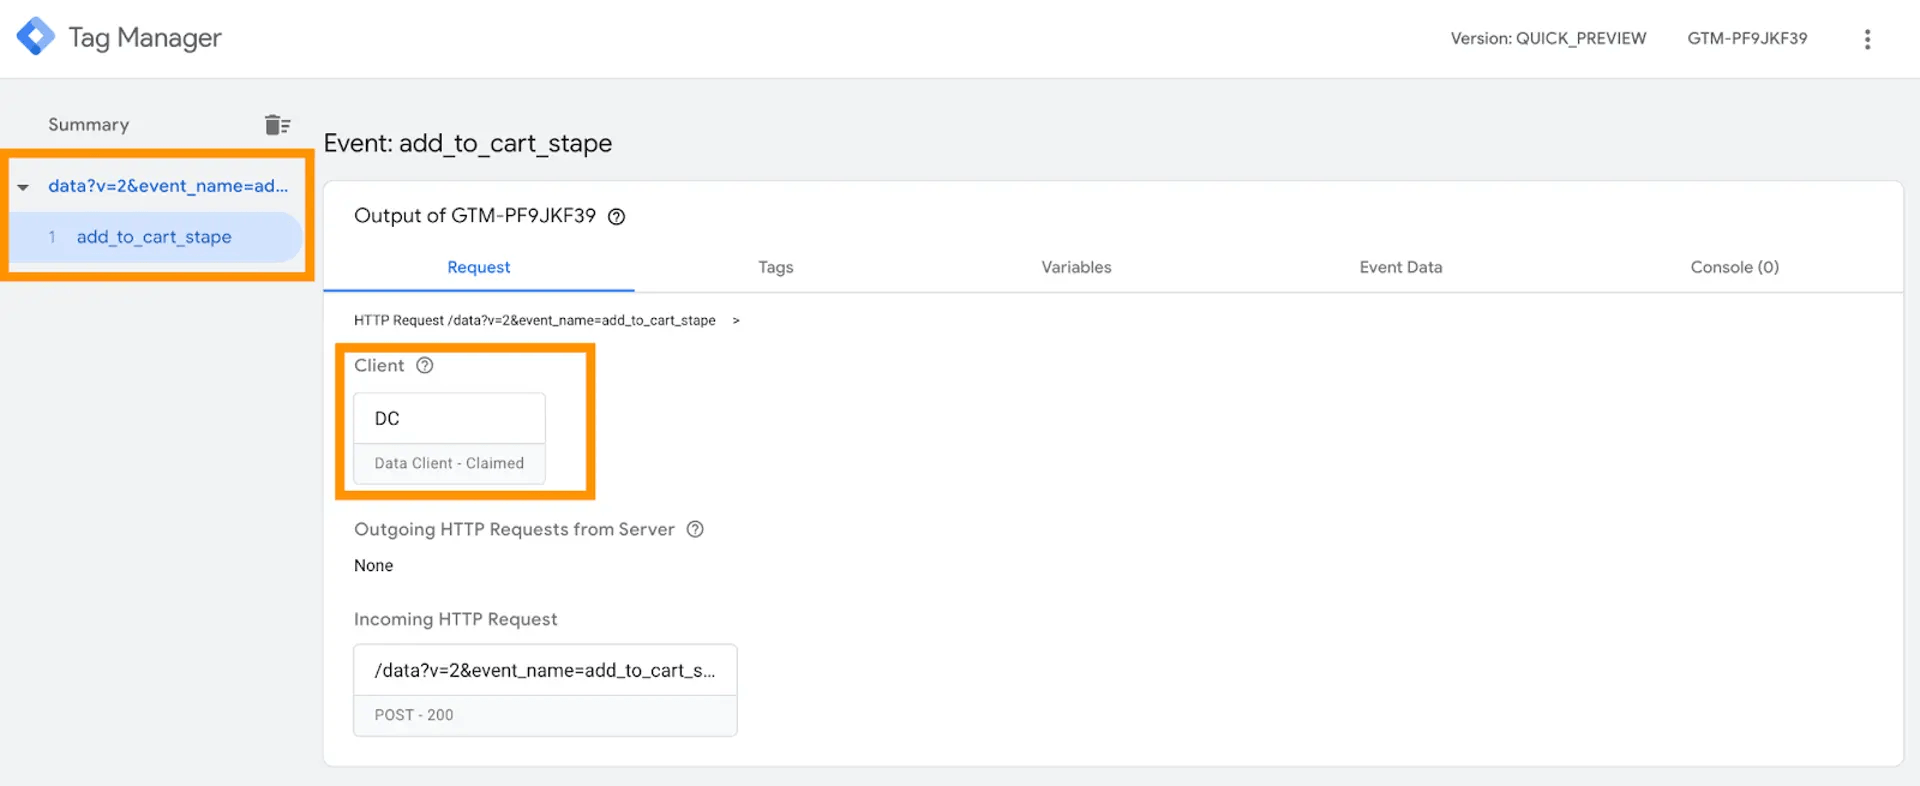
Step 6. Open the Clients tab and click New → choose Data Client → click Save.
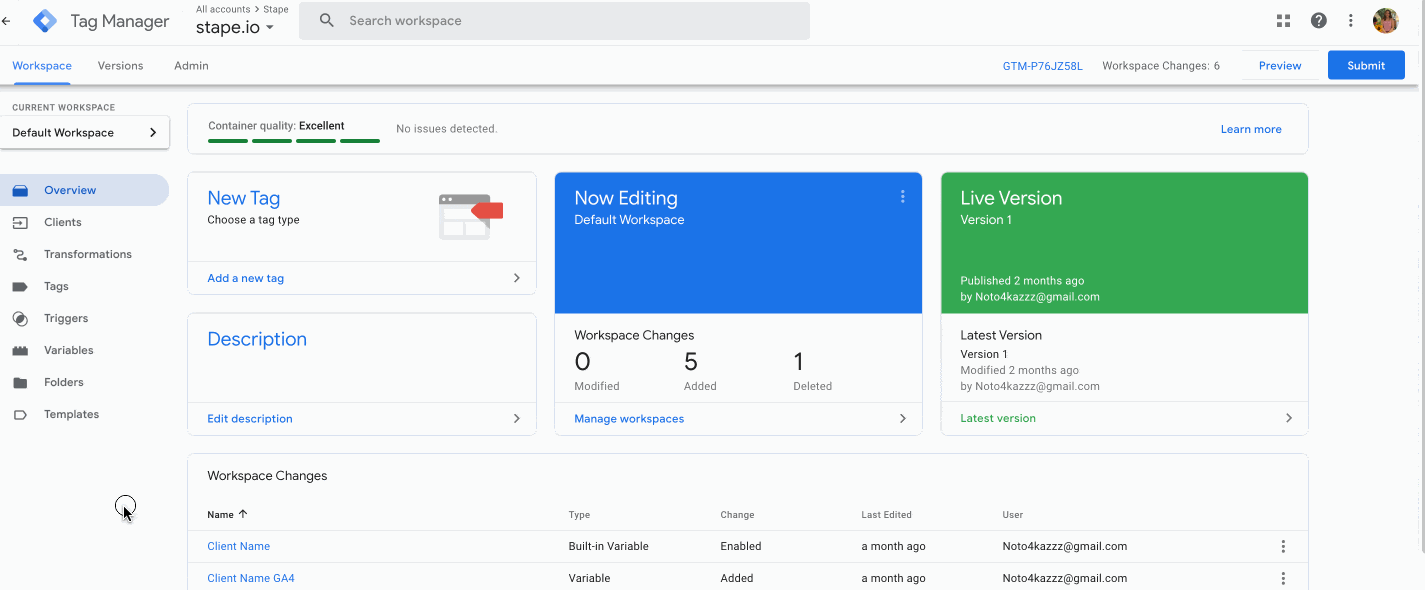
Step 7. Open web and server GTM preview screens and test the setup. You should see Data Tag triggered in the web GTM container and Data Client parsed Data Tag requests in the sGTM.
How to send data from web to server container via Google Analytics 4
Step 1. Create a configuration variable for the server container URL. To do that:
- Click on the Variables menu.
- Click New under the User-Defined Variable bar.
- Click on the Variable Configuration bar.
- Select the type Google tag: Configuration settings.
- Click Add parameter.
- Enter the following parameters:
- Config Parameter: server_container_url.
- Value: the URL of your Tag Manager server container.
- Give your variable a descriptive name and click Save.
Step 2. Create a Google Analytics 4 tag:
- Click on the Tags menu.
- Click New.
- Click on the Tag Configuration tab.
- Select Google Analytics → Google Tag.
- Under Tag ID, enter the ID from your GA4 account (to find it, go to your GA4 → click Admin → Data streams → select the stream → see Measurement ID.)
- Under Configuration settings, select the server container variable you created earlier.
- Under Triggering, make sure the option Initialization - All pages trigger is selected.
- Give your tag a descriptive name and click Save.
- Click Publish for the container to go live.
Step 3. Next, let’s see how to create a GA4 event, using the All Clicks event as an example:
- Click on the Tags menu.
- Click New.
- Click on the Tag Configuration tab.
- Select Google Analytics → Google Analytics: GA4 Event.
- Enter your Measurement ID (from the GA4 Data streams menu.)
- Give your event a descriptive name.
- Click Triggering → All Clicks.
- Give the tag a descriptive name.
- Click Save.
Setting up conversion tracking with various platforms
Next, you'll need to configure sending your event data to your marketing / analytics platform. Exact steps will depend on your choice of platform. Check out our guides on the popular platforms for more information:
Was this article helpful?
Comments