Pirsch Analytics tag
Updated May 10, 2026
The Pirsch Analytics tag for server-side Google Tag Manager (GTM) lets you send events from server-side GTM to Pirsch Analytics using the Pirsch Analytics API. It supports automatic event name mapping and parameter formatting, making it easy to align with Pirsch’s event structure.
Benefits of using the Pirsch Analytics tag
- Improved data accuracy: server-side tracking avoids common client-side issues like ad blockers and browser privacy restrictions. That means fewer lost events and more reliable analytics.
- Faster website performance: by shifting tracking logic to the server, you reduce the load on your website, improving speed and the overall user experience.
- Better privacy compliance: sending data directly from the server gives you more control over what’s collected and how it's processed. This helps ensure alignment with privacy laws like GDPR and HIPAA.
Requirements for setting up the Pirsch Analytics tag
Please ensure that you already have Google Tag Manager web and server containers, as well as a configured server container and custom domain in Stape. Please follow these guides if you don’t have any of those:
How to set up the Pirsch Analytics tag
1. Configure sending data to the server GTM container. The two most popular options for sending data to sGTM are Google Analytics 4 and Data Tag/Data Client. Here is a step-by-step guide on sending data to sGTM.
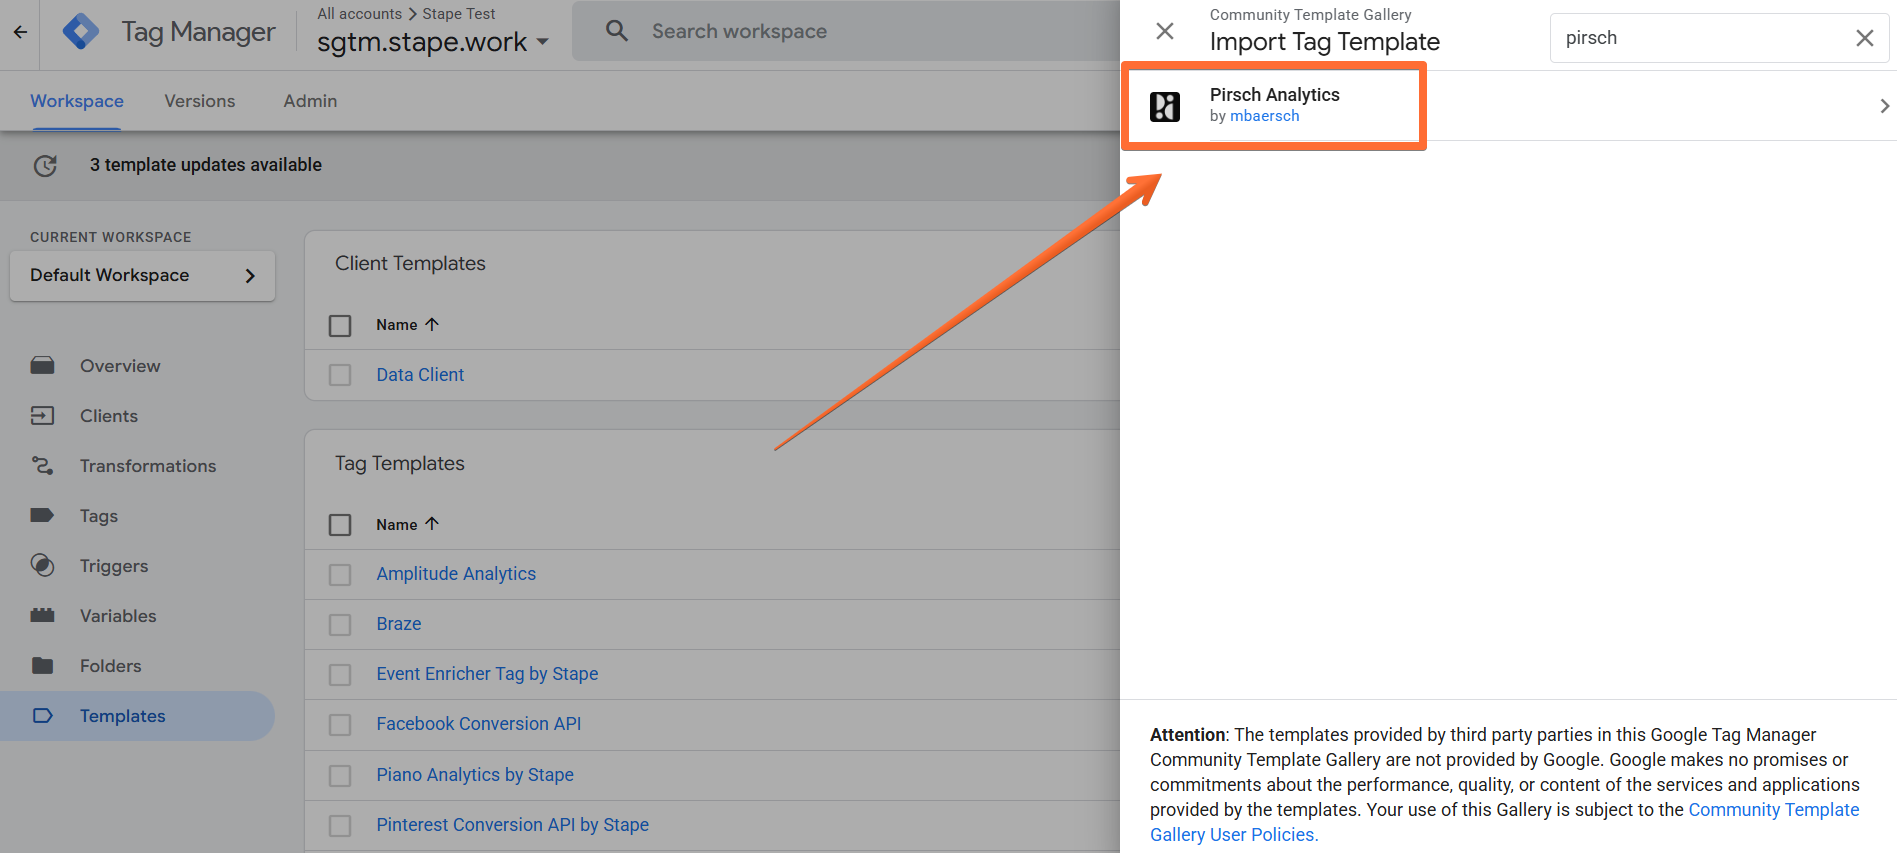
2. Add the Pirsch Analytics tag template in the server GTM container by importing it from the Template gallery:
- Search for the Pirsch Analytics tag by mbaersch in the Google Tag Manager Tag Template gallery.
- Click Add to workspace.
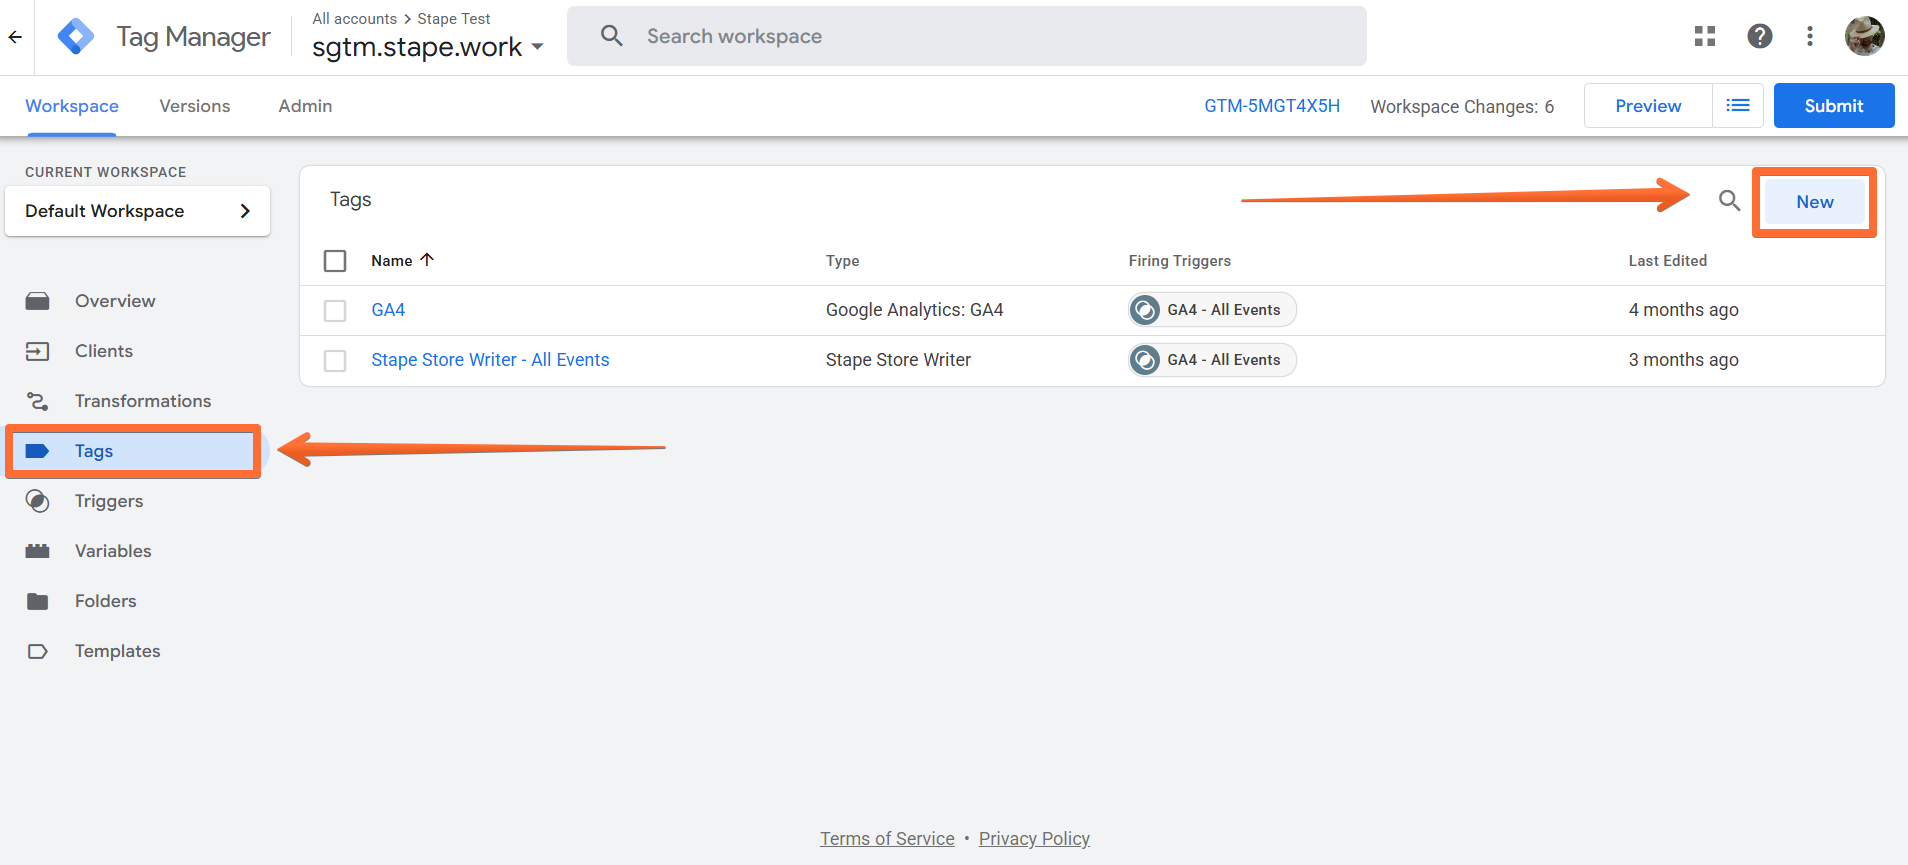
3. Create the Pirsch Analytics tag:
- Go to the Tags menu → click New.
- Click Tag Configuration → select Pirsch Analytics.
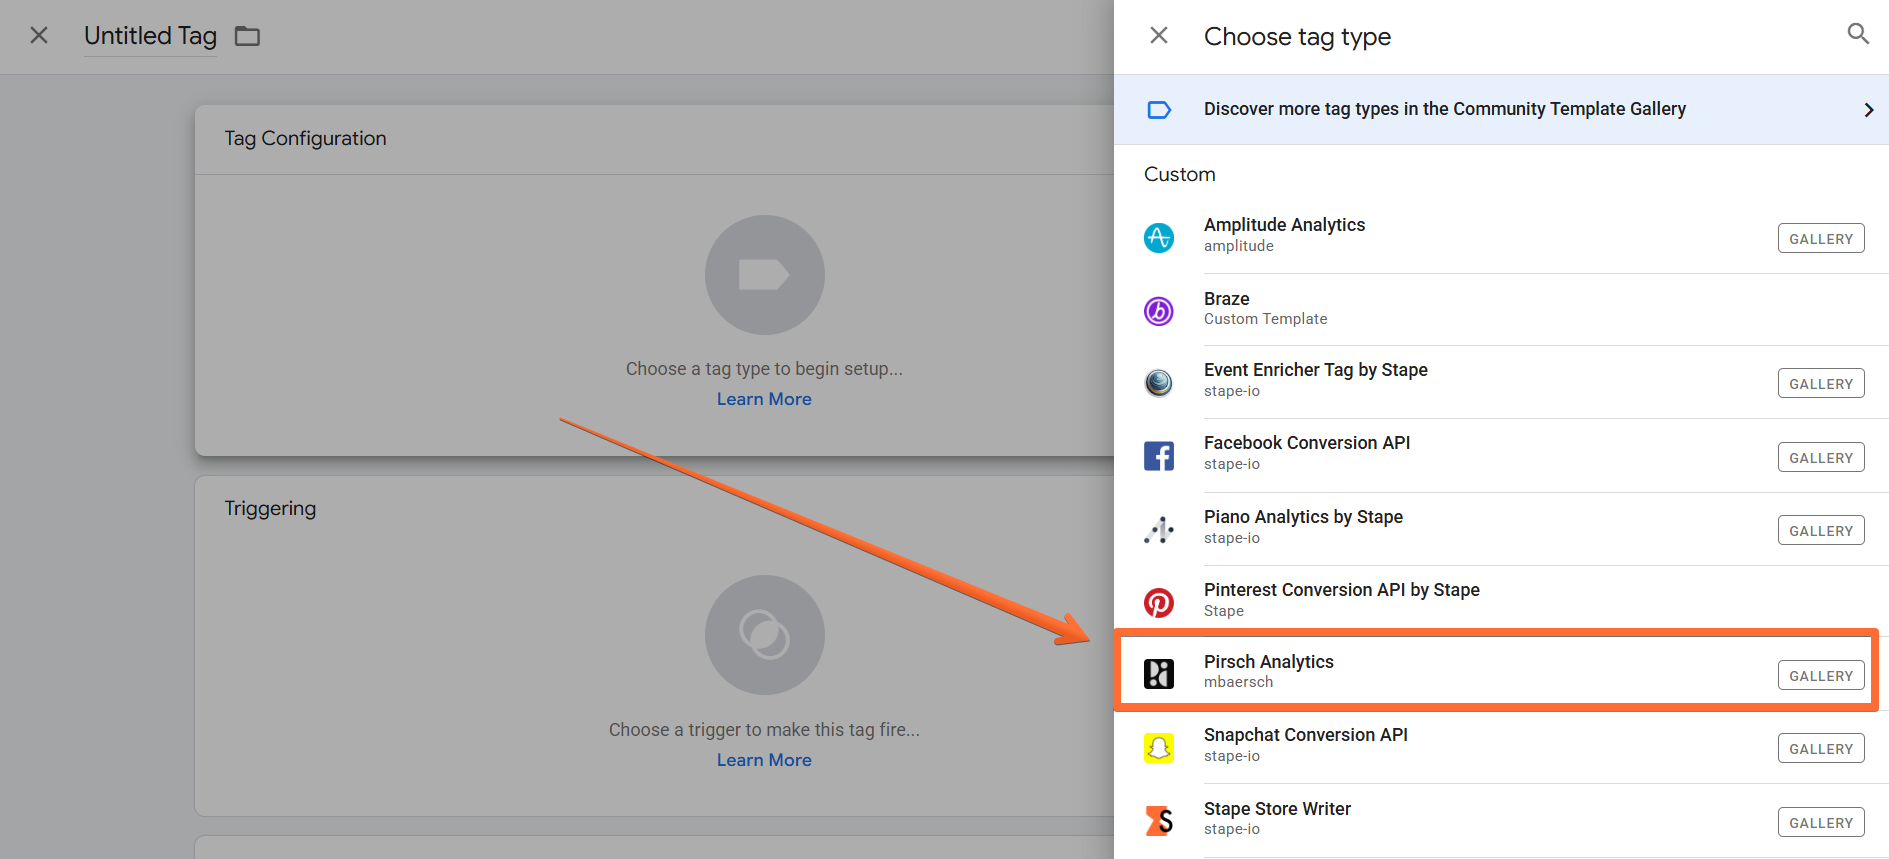
4. Configure the Pirsch Analytics tag:
- Endpoint URL - enter the API endpoint URL without a trailing slash. Note: the path /hit or /event will be added to this URL according to the request type.
- Single Access Token - enter a non-expiring Single Access Token for sending events and pageviews. The API requires a token to send pageviews and events to your dashboard. To obtain a token, log in to your Pirsch Analytics account, navigate to Settings → Developer, and click Add Client to create a token. For more information, refer to the Pirsch Access Token documentation.
- Timeout (ms) - set this if you want events to be delayed. Pirsch recommends that 200 milliseconds should be fine in most cases.

- Event Metadata (Add Custom Event Metadata) - define additional data to send in case an event (not a page_view) is processed. Pageviews can not contain additional metadata.
- Advanced Settings - this section contains additional options that allows for enhanced data redaction. You can optionally send an empty referrer and delete any parameters from tracked URLs. If you want to change URLs before they get sent, you can override the page path with a different value. This option also can be used for further data redaction or enrichment. Every event name can be translated for Pirsch using an optional override field. You can for example set the new event name with a lookup table.
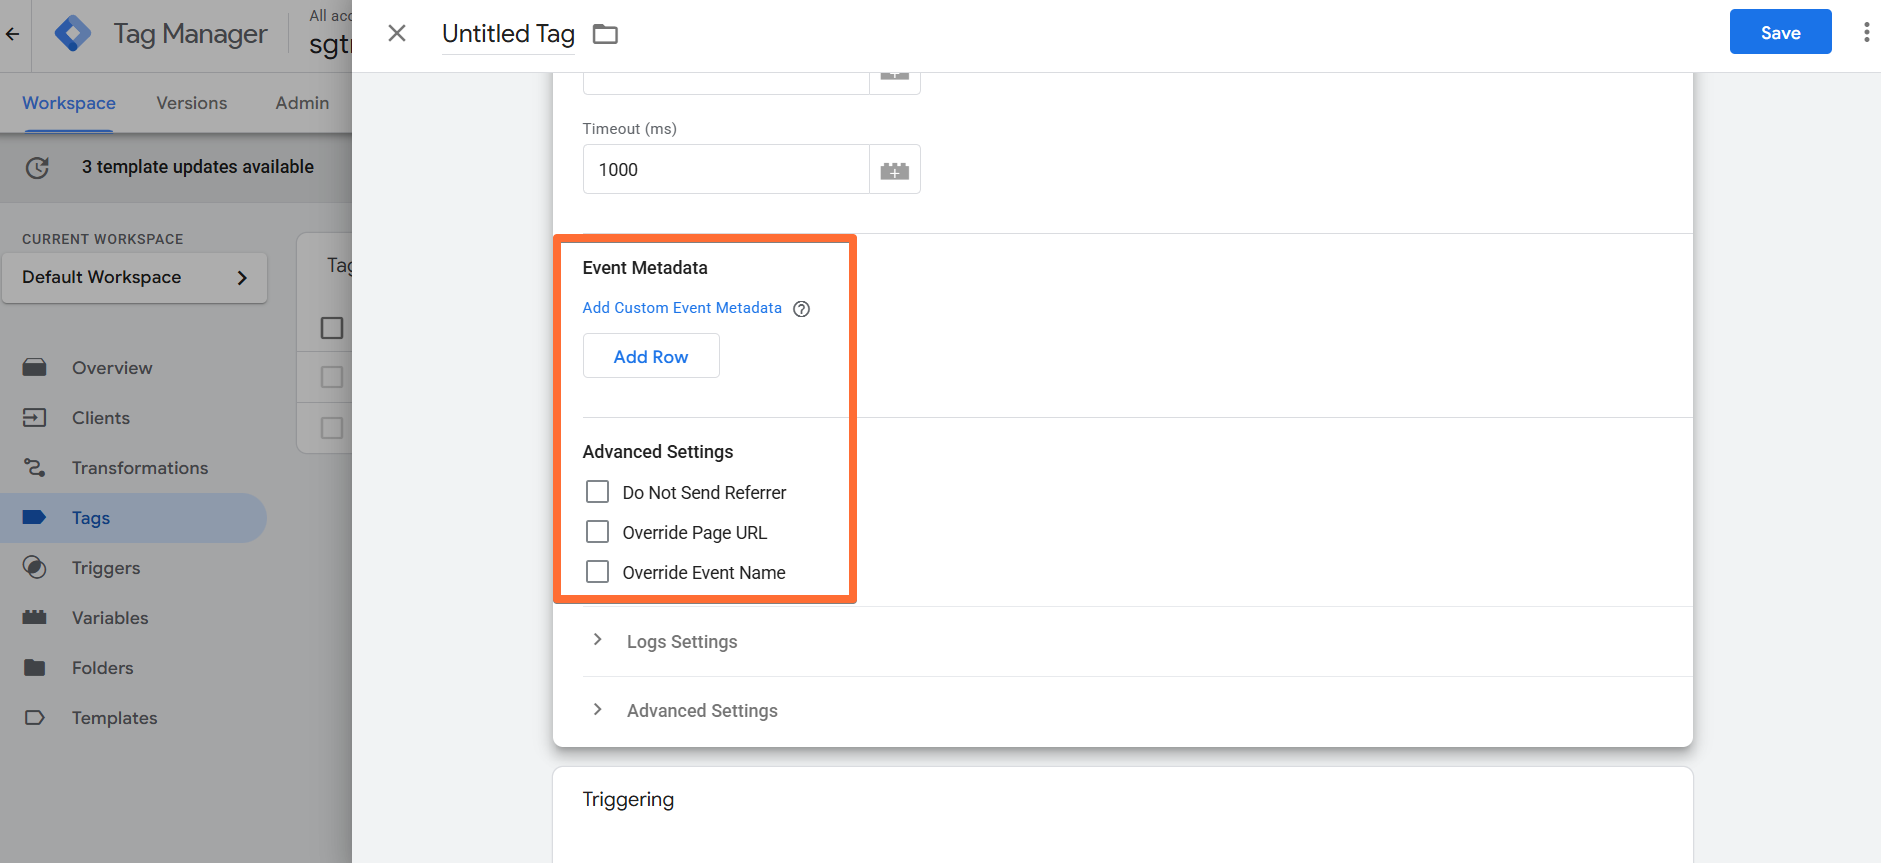
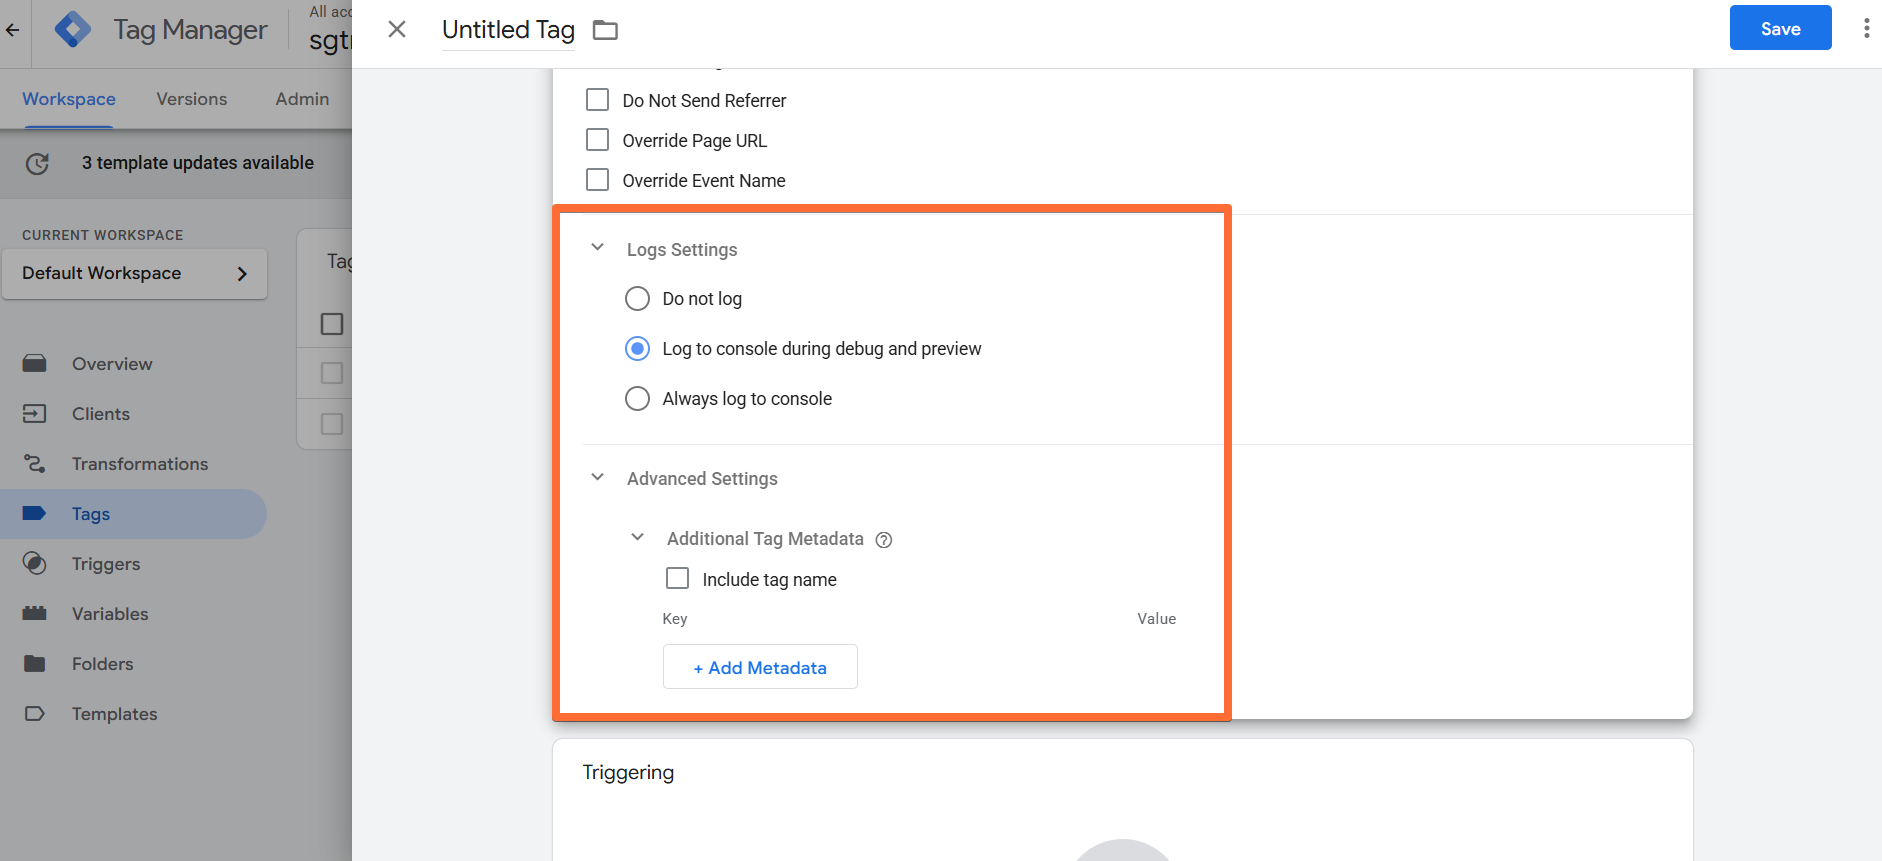
- Logs Settings - choose whether you wish to log all events to the browser console during preview/debug or always.
- Advanced Settings (Additional Tag Metadata) - specify additional tag metadata to be included in the event data when a tag is fired.
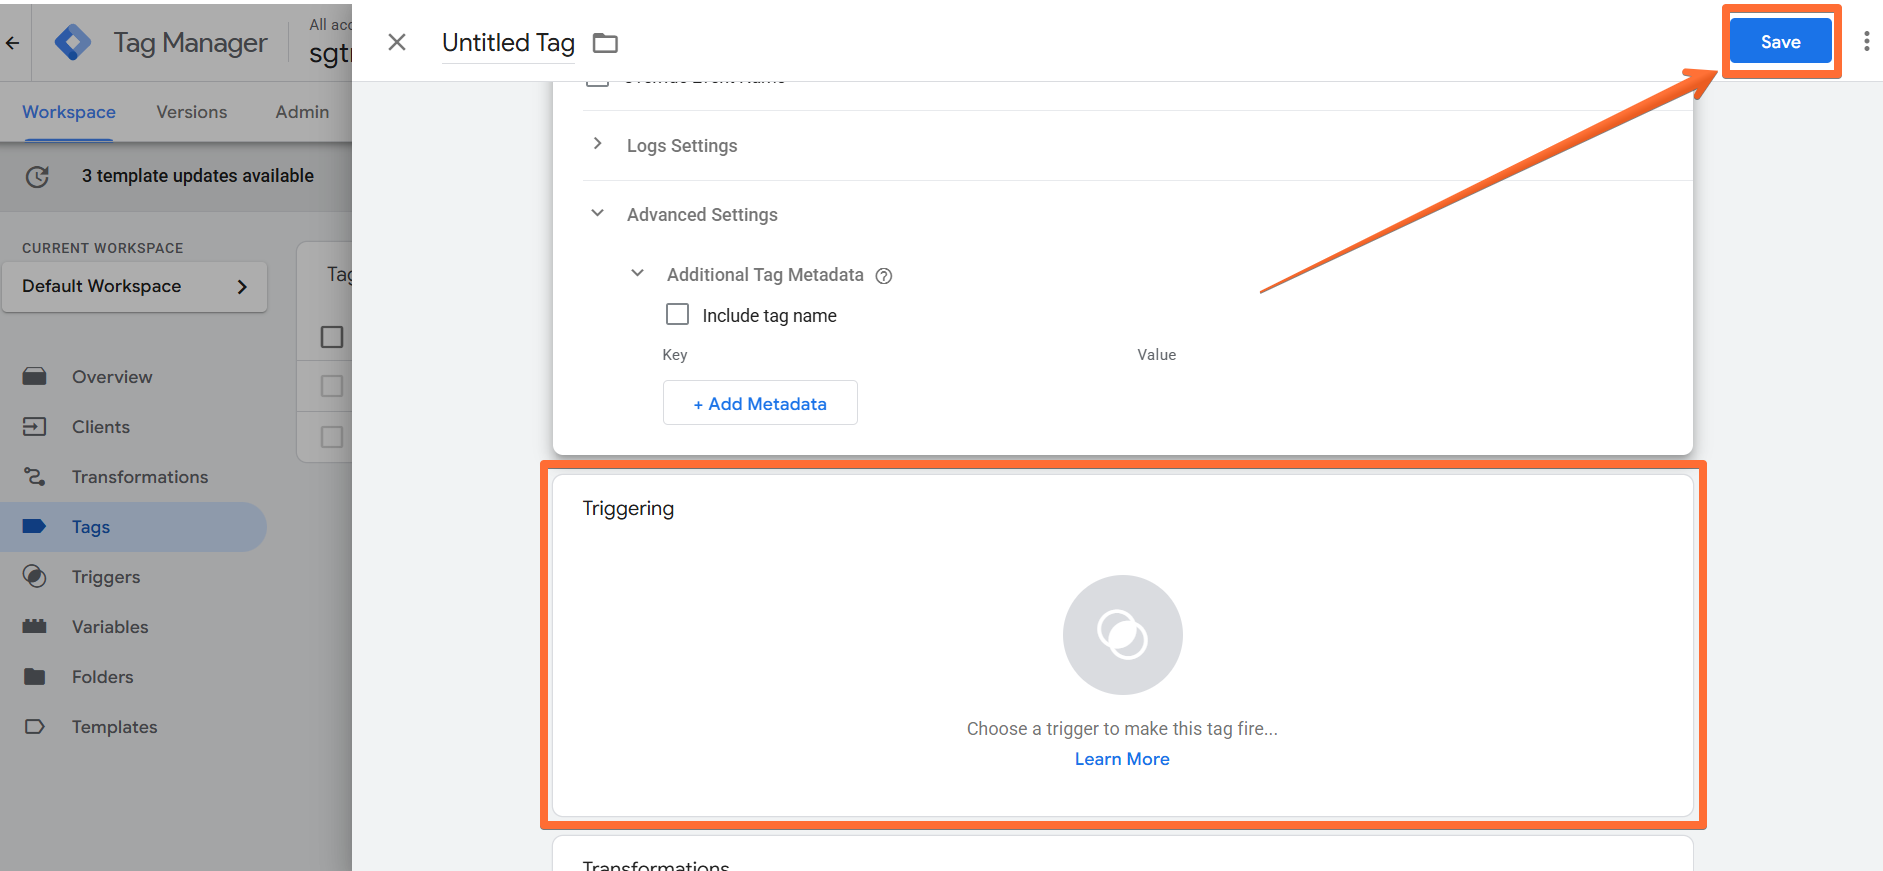
5. Add the Trigger for the tag, give it a descriptive name, and click Save.
How to test and troubleshoot the Pirsch Analytics tag setup
You can test the configurations in Google Tag Manager. Click on Preview, trigger the event, and check whether the tag has fired.

Find out more about debugging and monitoring server-side tracking configuration in our guide.
Was this article helpful?
Comments