Axon (AppLovin) tag
Updated Aug 28, 2026
Axon (AppLovin) server API tag by Stape allows you to send conversion and user events from your server Google Tag Manager (sGTM) container directly to AppLovin through the Axon server-to-server API. It supports standard eCommerce and app events, custom events, and flexible mapping from GA4 event names to Axon event names.
- The tag automatically maps common event, user, and measurement parameters, including transaction details, attribution data, and device information.
- It can automatically hash email addresses and phone numbers using SHA-256, manage AppLovin identifiers by reading and storing first-party cookies, and support event deduplication through configurable event IDs.
- Additional features include consent-aware execution, configurable attribution settings, and an optimistic response mode to reduce tag execution latency.
Before you begin
Please ensure that you already have Google Tag Manager web and server containers, as well as a configured server container and custom domain in Stape. Please follow these guides if you don’t have any of those:
How to set up the Axon (AppLovin) tag
1. Configure sending data to the server GTM container. The two most popular options for sending data to sGTM are Google Analytics 4 and Data Tag/Data Client. For more information, read the Send data to server container article.
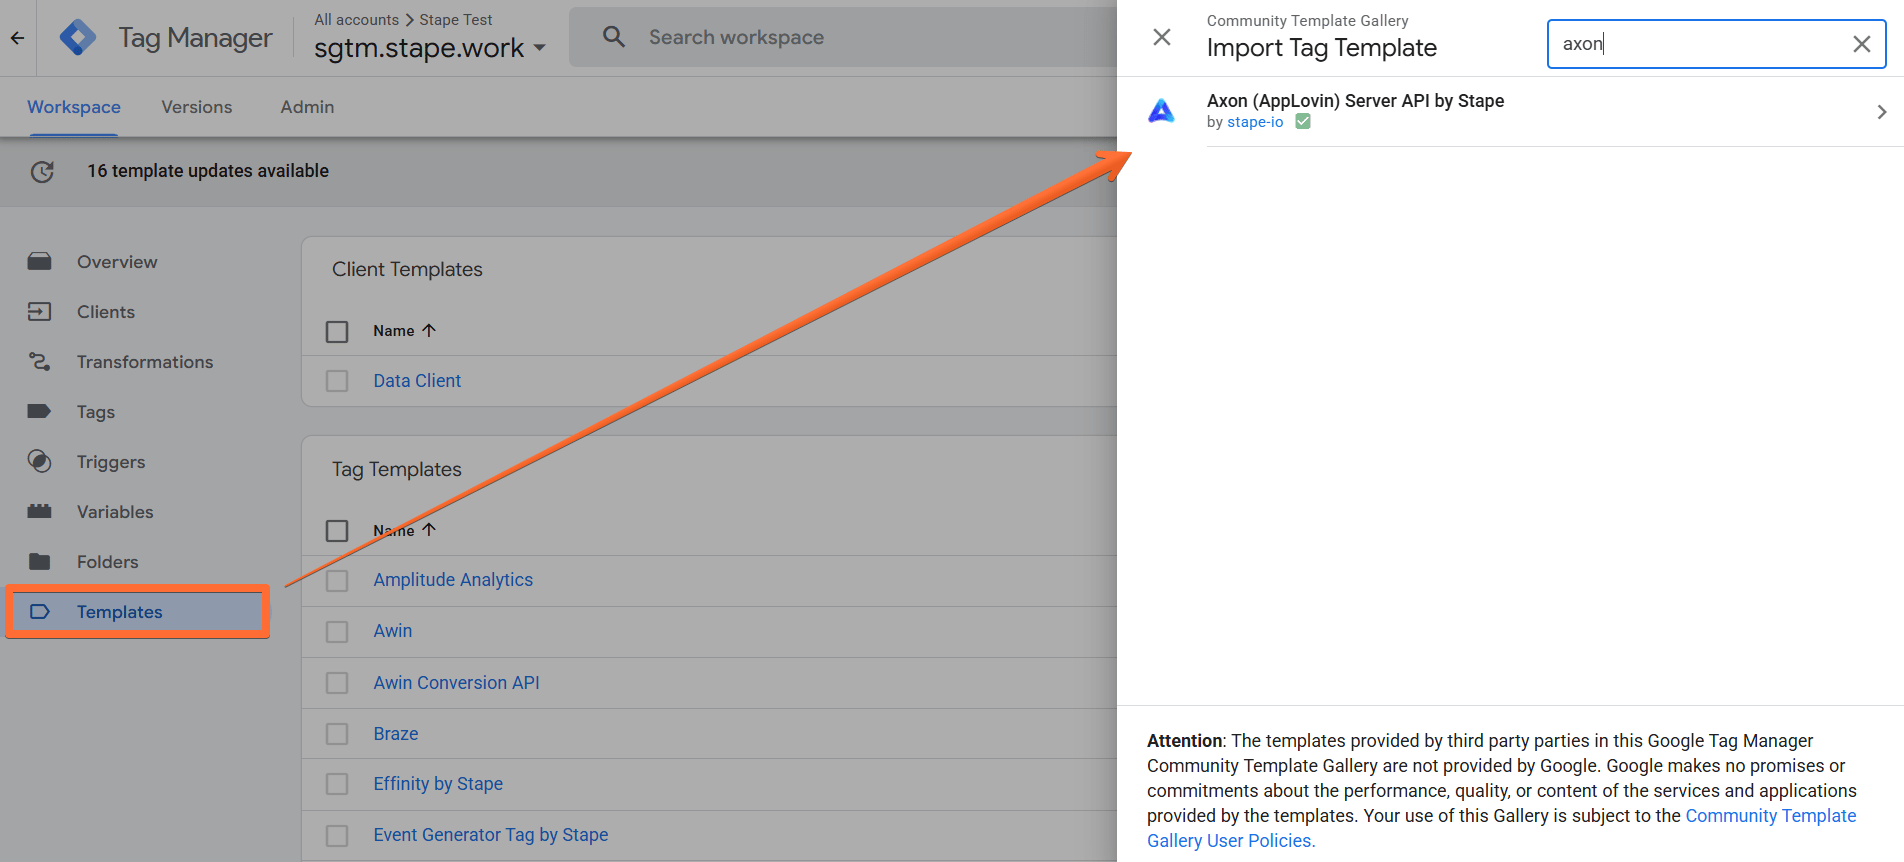
2. Add the Axon tag template in the server GTM container by importing it from the Template gallery:
- Search for the Axon tag by Stape in the Google Tag Manager Tag Template gallery.
- Click Add to workspace.
3. Create the Axon tag:
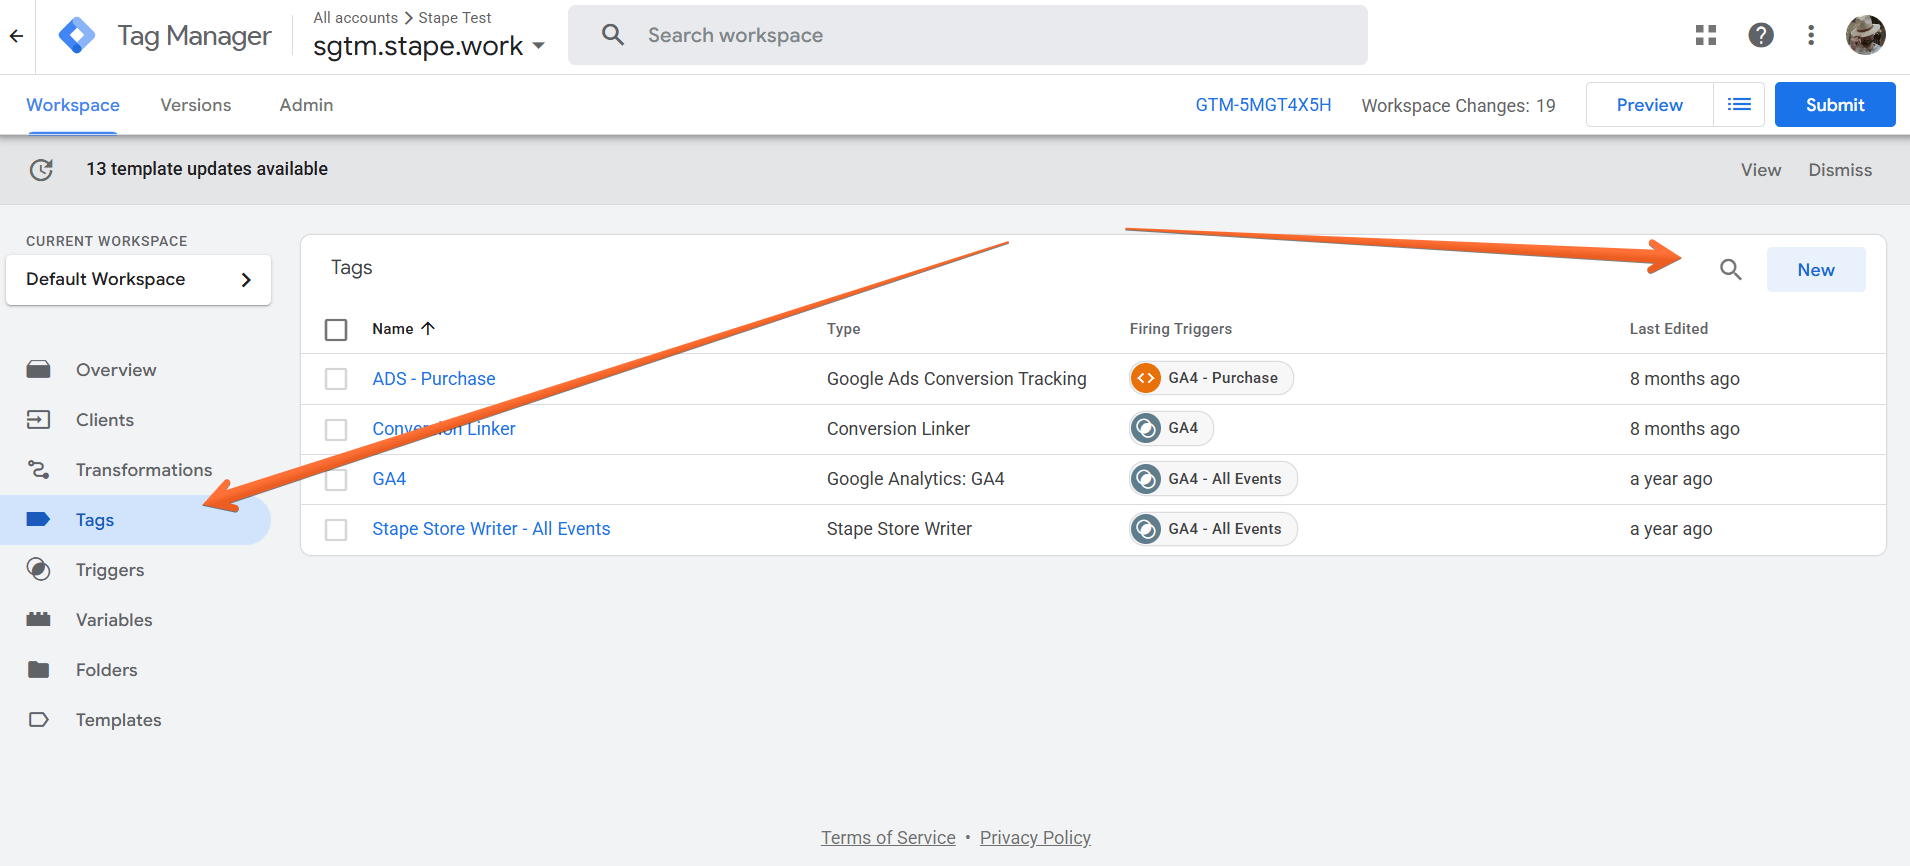
- Go to the Tags menu → click New.
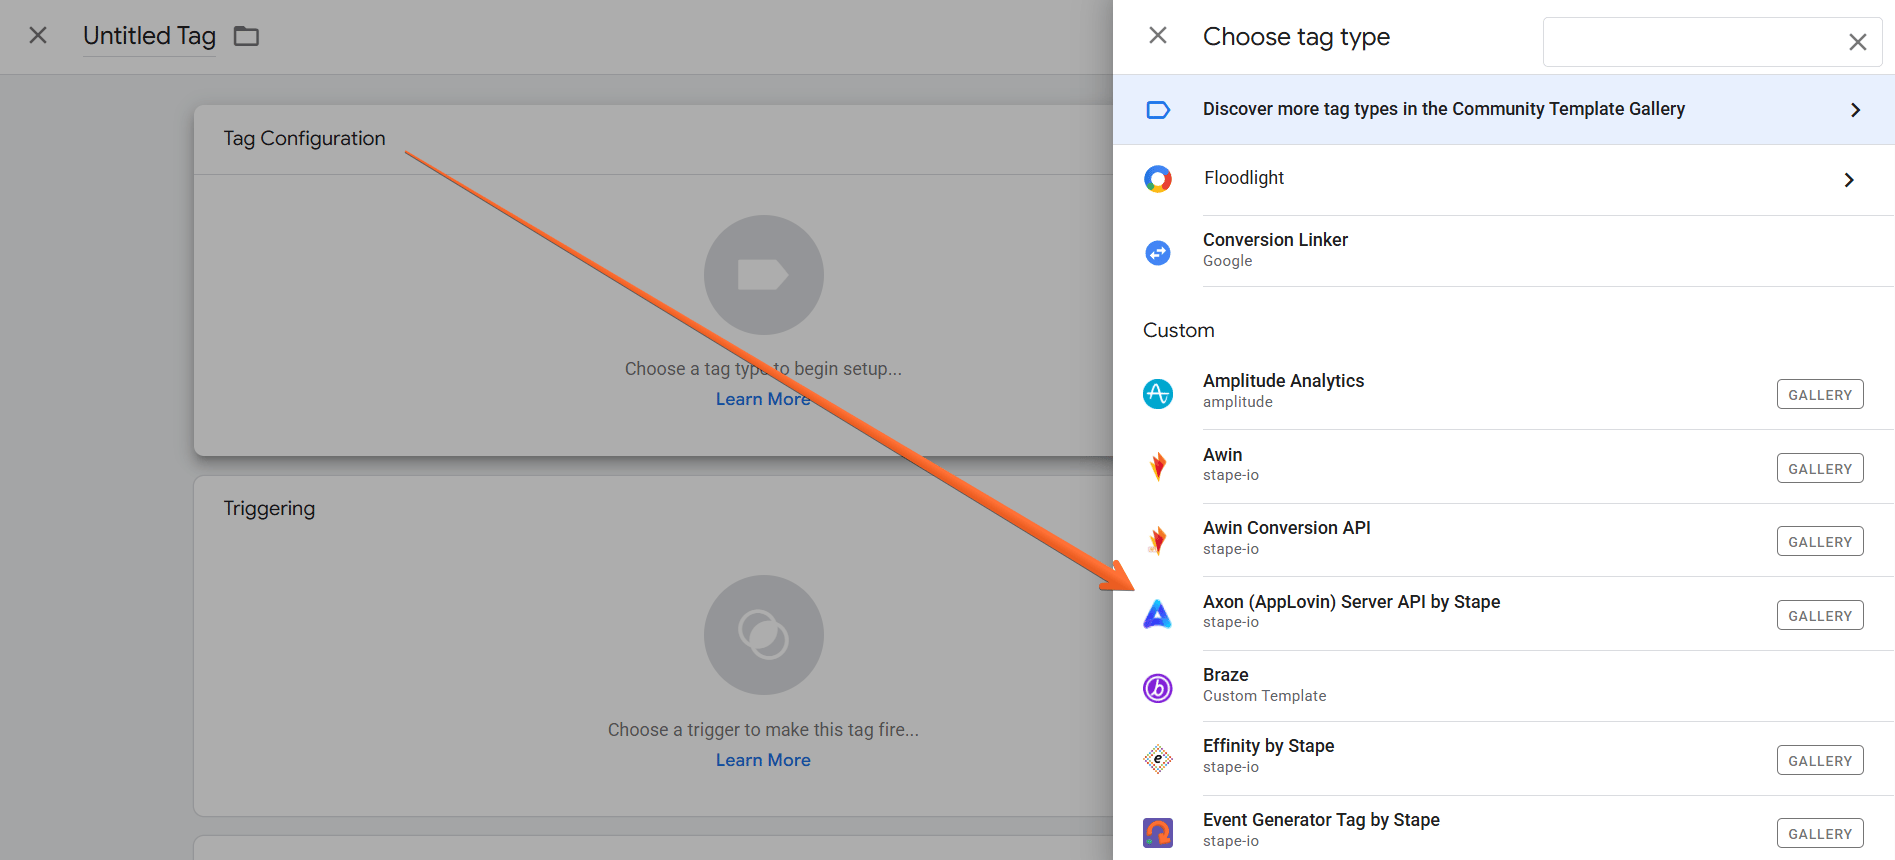
- Click Tag Configuration → select Axon.
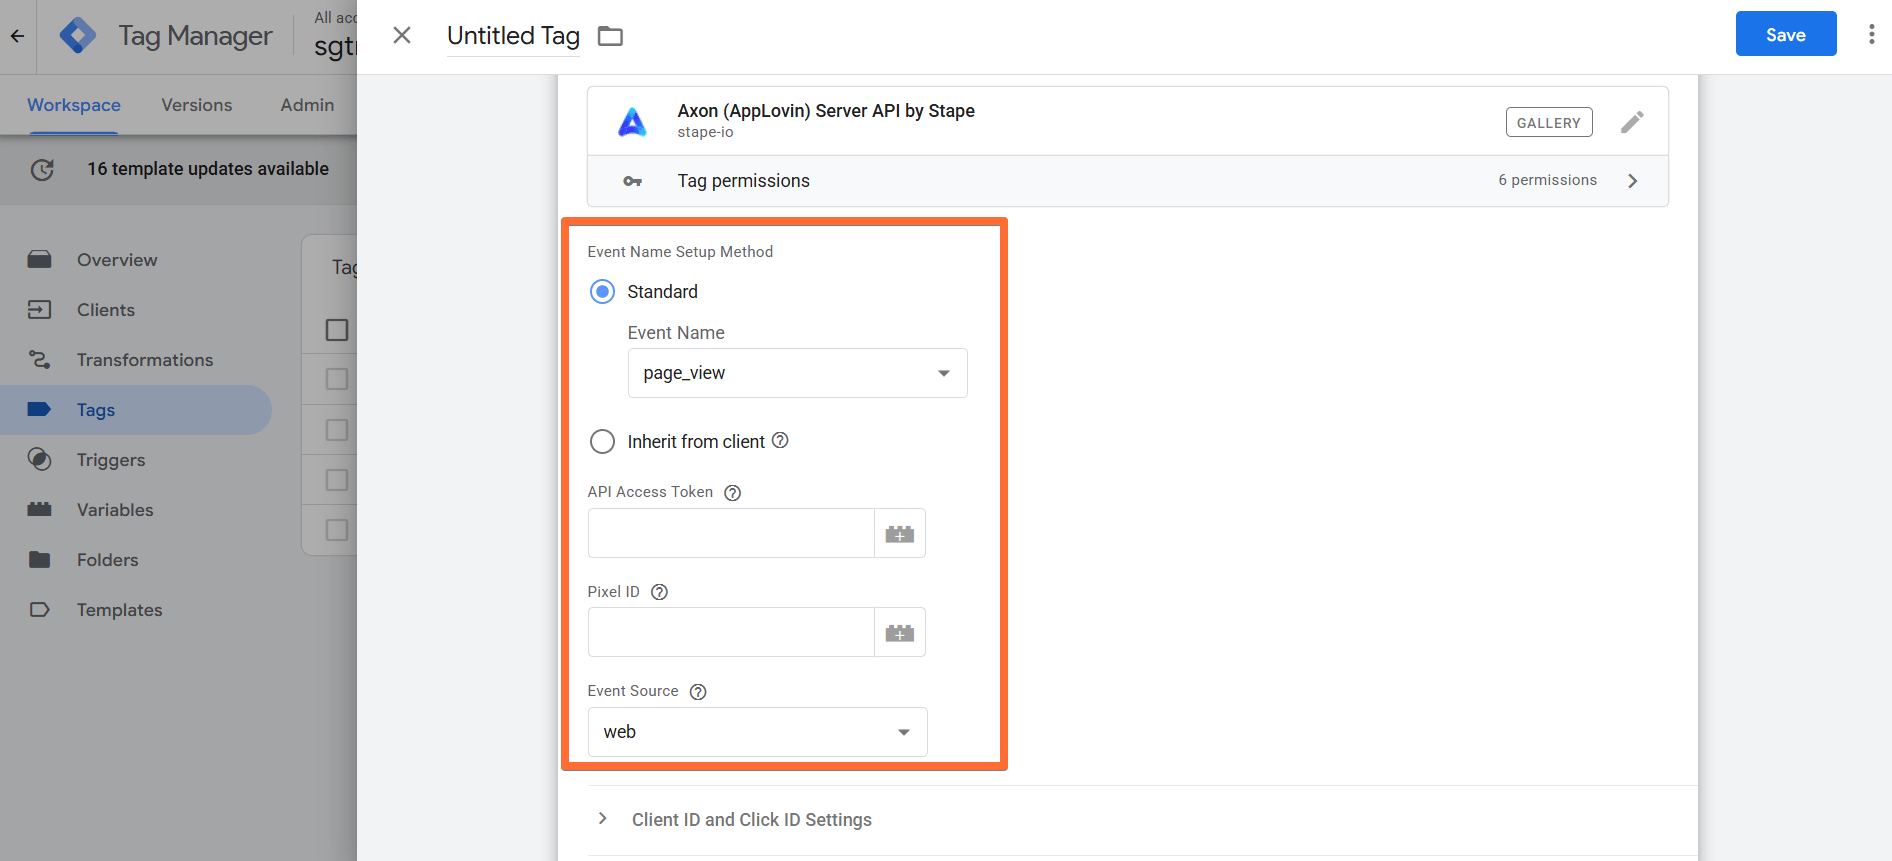
4. Configure the Axon tag:
- Event Name Setup Method:
- Standard: Select from a predefined list of event names (such as page_view or sign_up).
- Inherit from client: Maps GA4 events to names used by Axon (for instance, view_search_results → search).
- API Access Token - provide the token generated by AppLovin (located in the AppLovin dashboard → Account → General → Keys).
- Pixel ID - provide the Pixel ID generated by AppLovin (available in the Events dashboard within the Axon UI). If you can’t locate your Pixel ID, please contact Axon support or your representative.
- Event Source - choose the platform where the event happened.
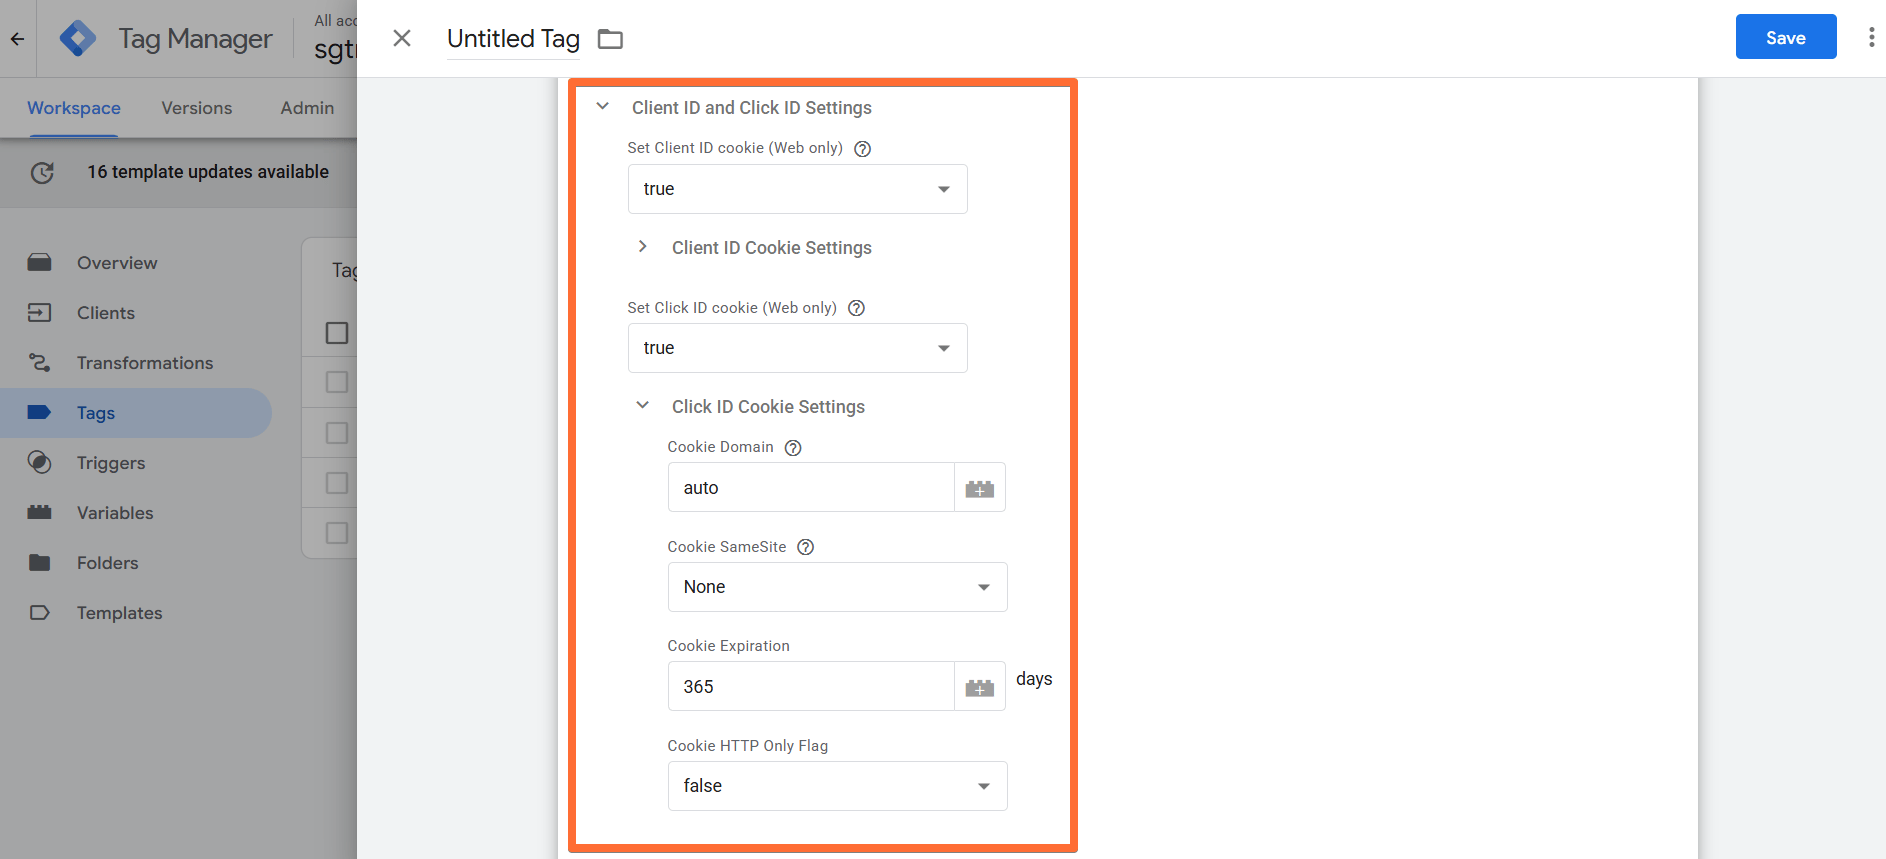
- Client ID and Click ID Settings:
- Set Client ID cookie (Web only) - choose either false to send an existing Client ID cookie in the request but not store it as a cookie, or true to send it and store it as the axcid cookie, generating it automatically if missing. In the latter case, you can configure Client ID Cookie Settings (see below).
- Set Click ID cookie (Web only) - choose either false to send existing Click ID cookies in the request but not store them as cookies, or true to send them and store them as axart and axeid cookies, generating them automatically if missing. In the latter case, you can configure Click ID Cookie Settings (see below).
- Click ID Cookie Settings - this menu allows you to:
- Override the Cookie Domain - enter your website's top-level domain as a fixed value (e.g., example.com), or leave auto for the domain to be determined automatically.
- Set up the Cookie SameSite - control whether or not a cookie is sent with cross-site requests (requests originating from a site different from the one that set the cookie). Learn more about the cookie SameSite value.
- Time the Cookie Expiration - use this to set cookie lifetime in days.
- Cookie HTTP Only Flag - control whether the cookies can be accessed by JavaScript running in the browser.
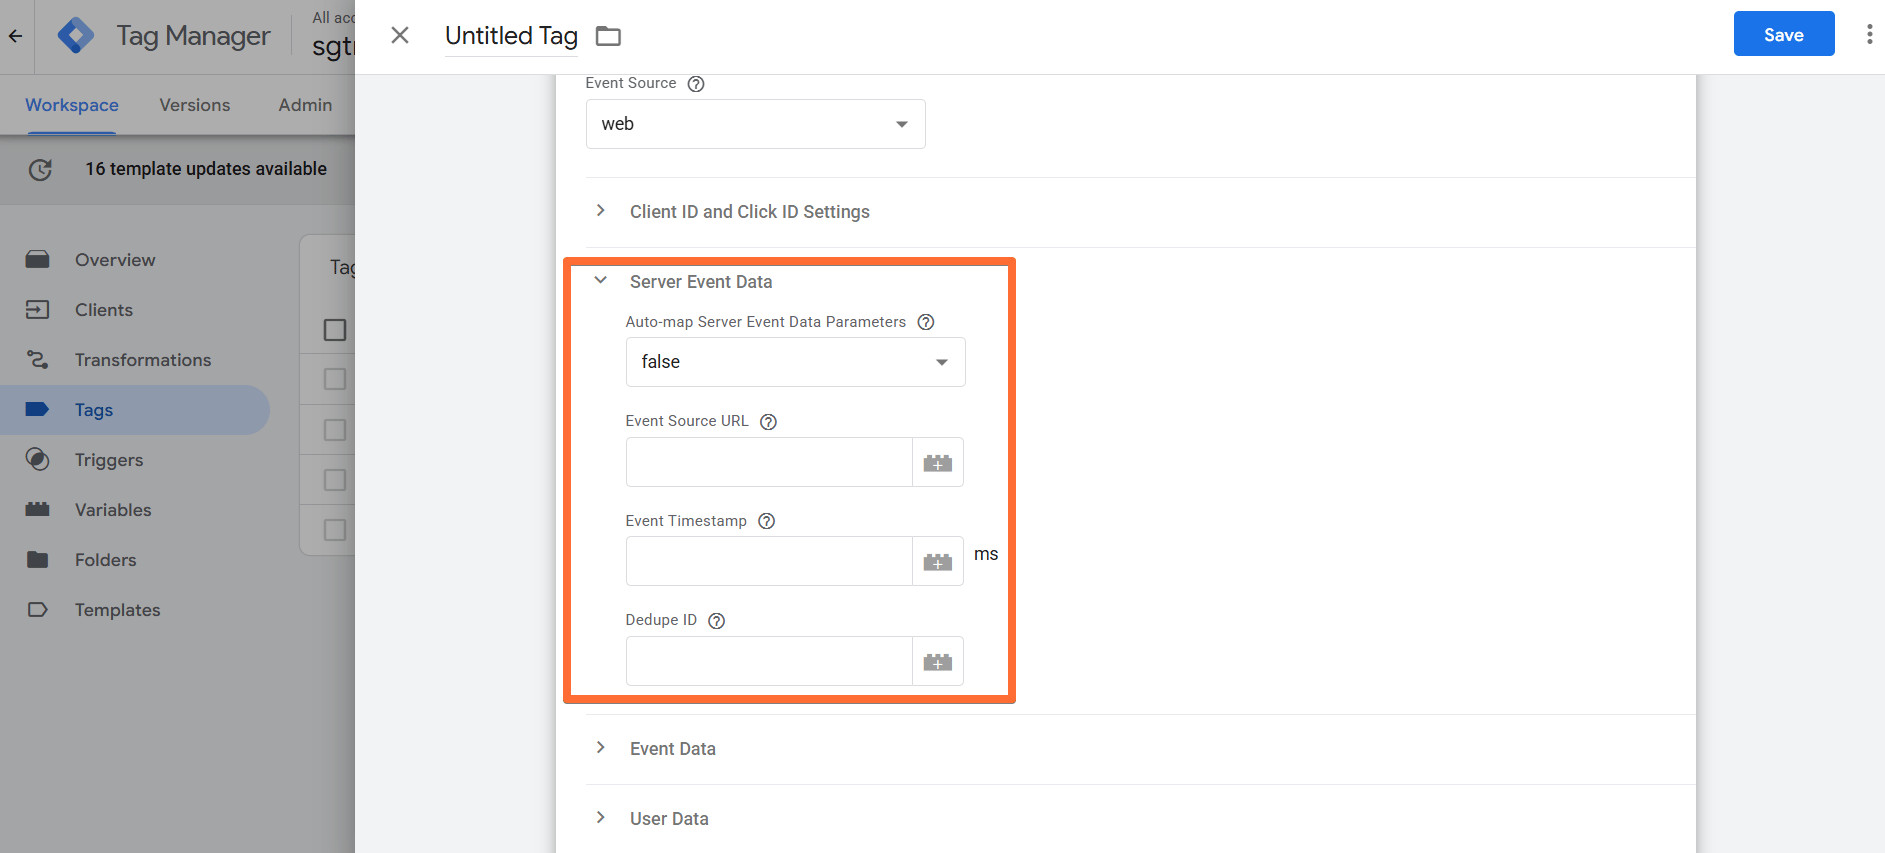
- Server Event Data - select whether you wish to Auto-map Server Event Data Parameters. If true, the tag will attempt to automatically map parameters from the Event Data (event_id, page_location, and timestamps). You can manually enter values to override the auto-mapped ones. In that case, you are required to enter the Event Source URL (the complete URL where the event occurred) and Event Timestamp (time of the event in milliseconds), and you can add the Dedupe ID (a unique identifier for this event that will be used for de-duplication).
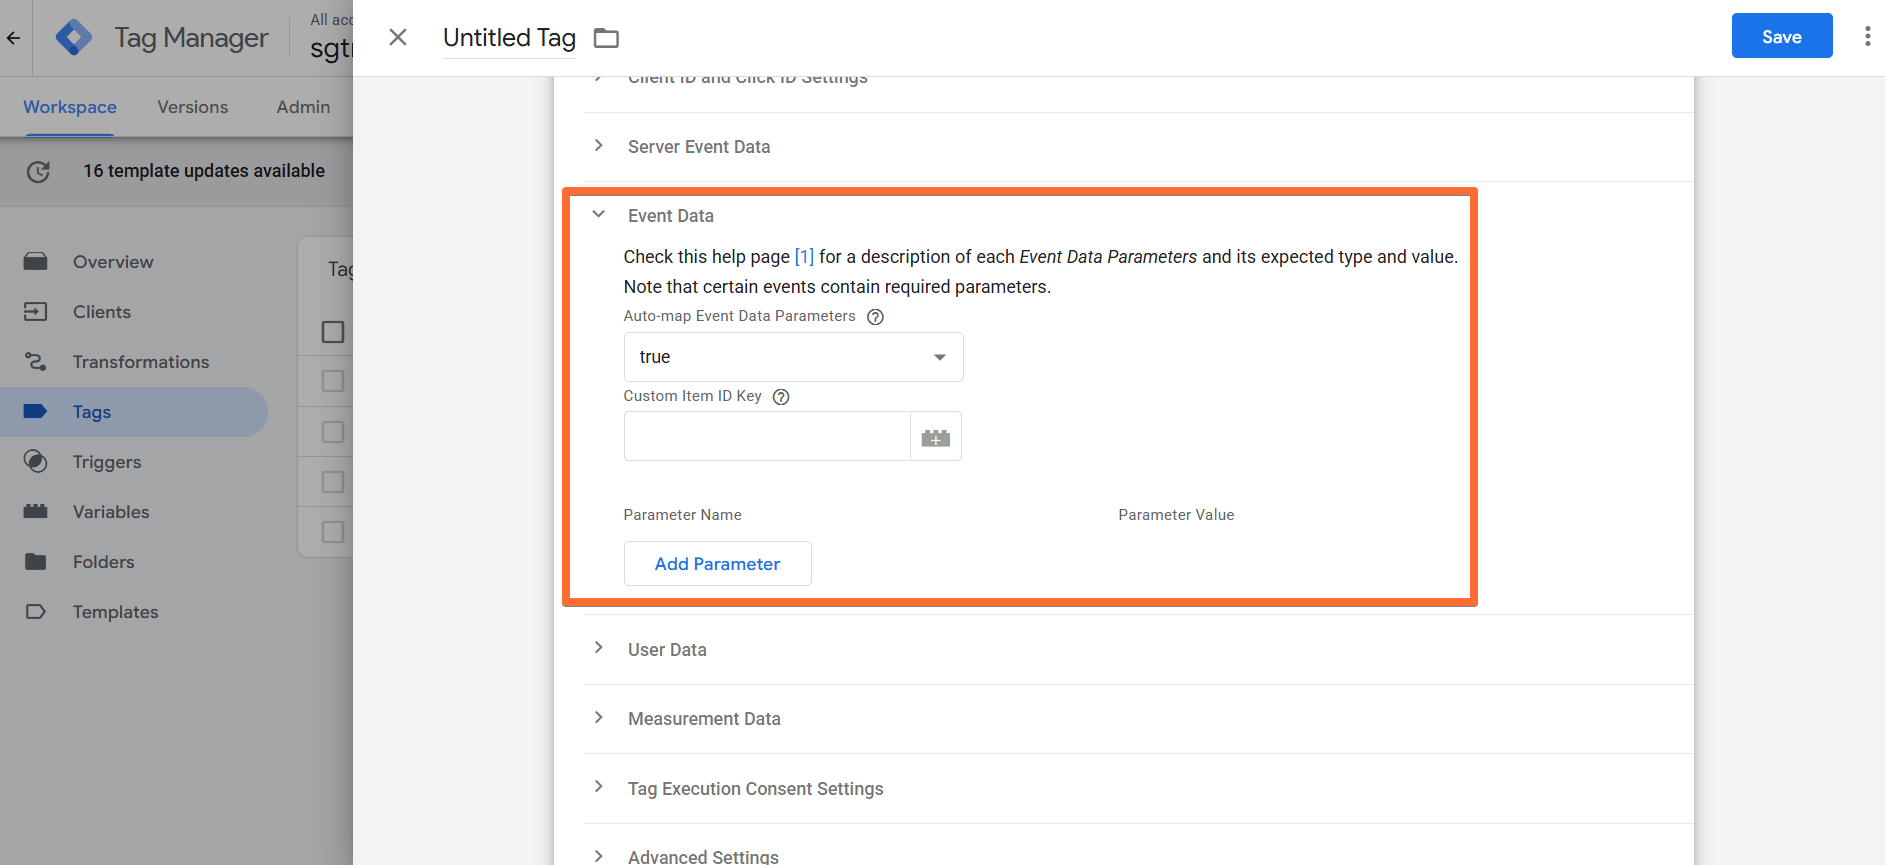
- Event Data - select whether you wish to Auto-map Event Data Parameters. If true, the tag will attempt to automatically map parameters from your event data (including value, currency, items, and transaction_id). You can manually enter values to override the auto-mapped ones, including the default item_id Custom Item ID Key. See the AppLovin guide for the list of expected types and values.
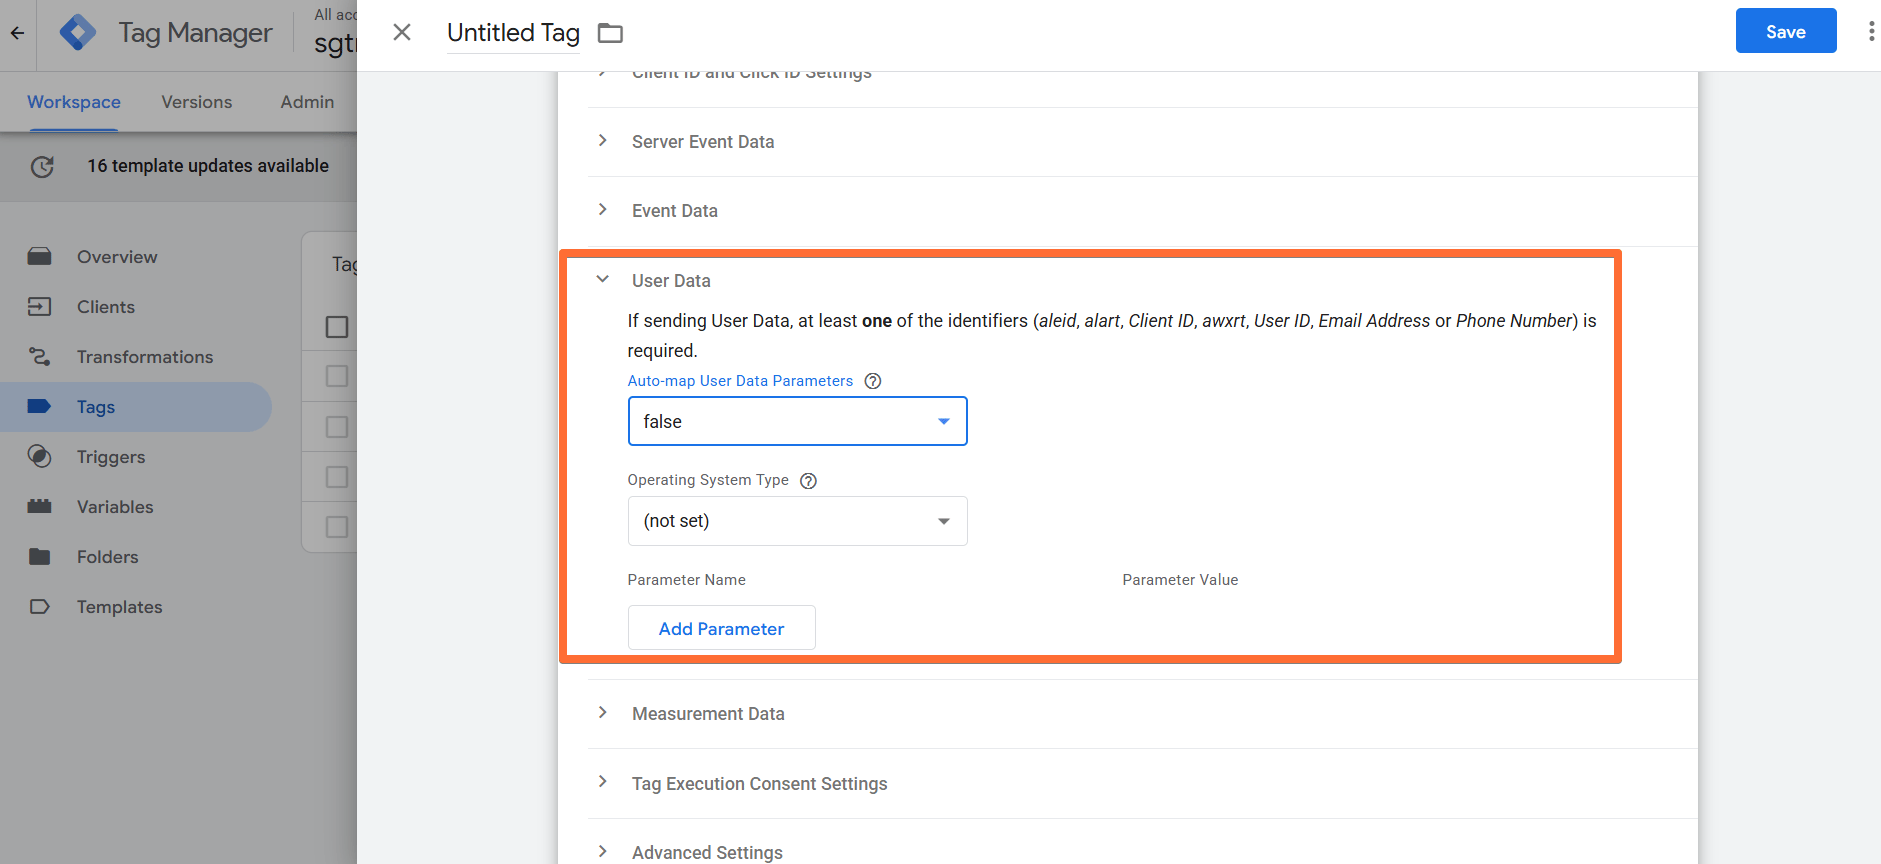
- User Data - select whether you wish to Auto-map User Data Parameters. If true, the tag will attempt to automatically map parameters from the Event Data (contact info, device IDs, and location data). You can manually enter values to override the auto-mapped ones, including the Operating System Type. If enabled, at least one of the identifiers is required (aleid, alart, Client ID, awxrt, User ID, email, or phone).
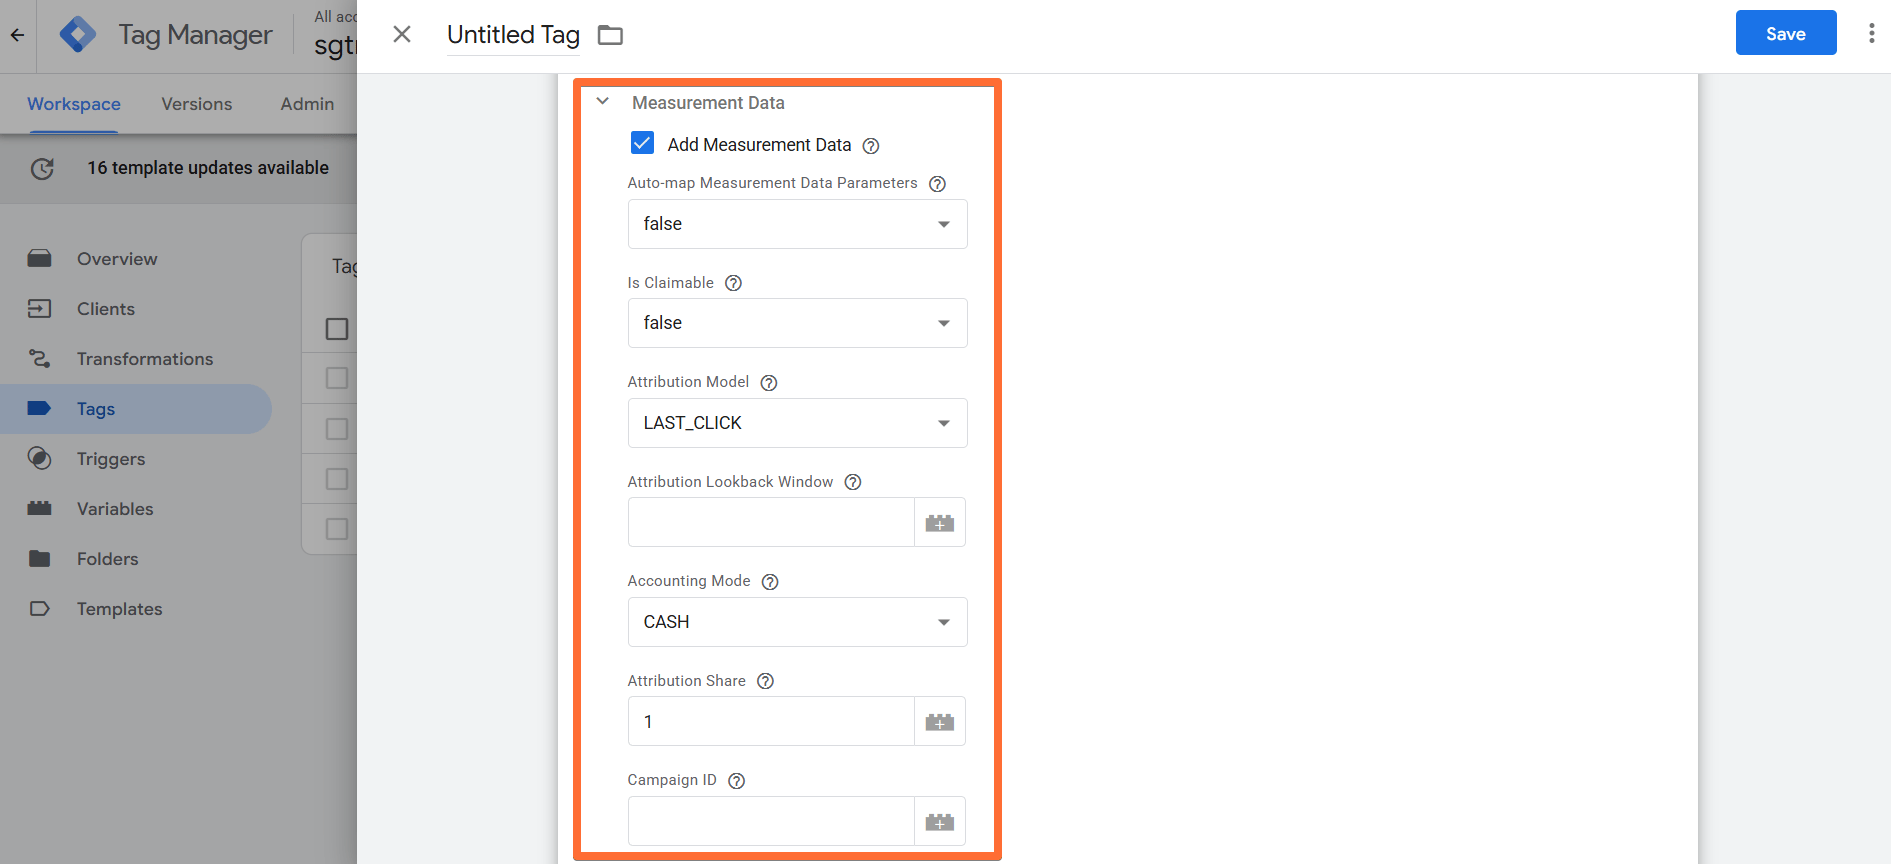
- Measurement Data - turn on to include attribution data with the tag. If enabled, select whether you wish to Auto-map Measurement Data Parameters. If true, the tag will attempt to automatically map parameters from your event data (including is_new_customer, first_visit_ts, and last_visit_ts). You can manually enter values to override the auto-mapped ones:
- Whether the event Is Claimable by AppLovin.
- The Attribution Model (LAST_CLICK by default).
- Specify the Attribution Lookback Window in hours, or leave it empty for infinite.
- Choose either CASH or ACCRUAL Accounting Mode.
- Set the Attribution Share, a number between 0 and 1 representing the credit AppLovin gets for the event.
- AppLovin Campaign ID.
- AppLovin Creative Set ID.
- Flag whether the event Is New Customer or if the customer had already made a purchase with the advertiser before. First Purchase Timestamp and Last Purchase Timestamp can be added in milliseconds, for when the customer made a purchase with the advertiser for the first and last time respectively.
- Flag whether the customer Is New Visitor to the website. First Visit Timestamp and Last Visit Timestamp can be added in milliseconds, for when the customer visited the website for the first and last time respectively.
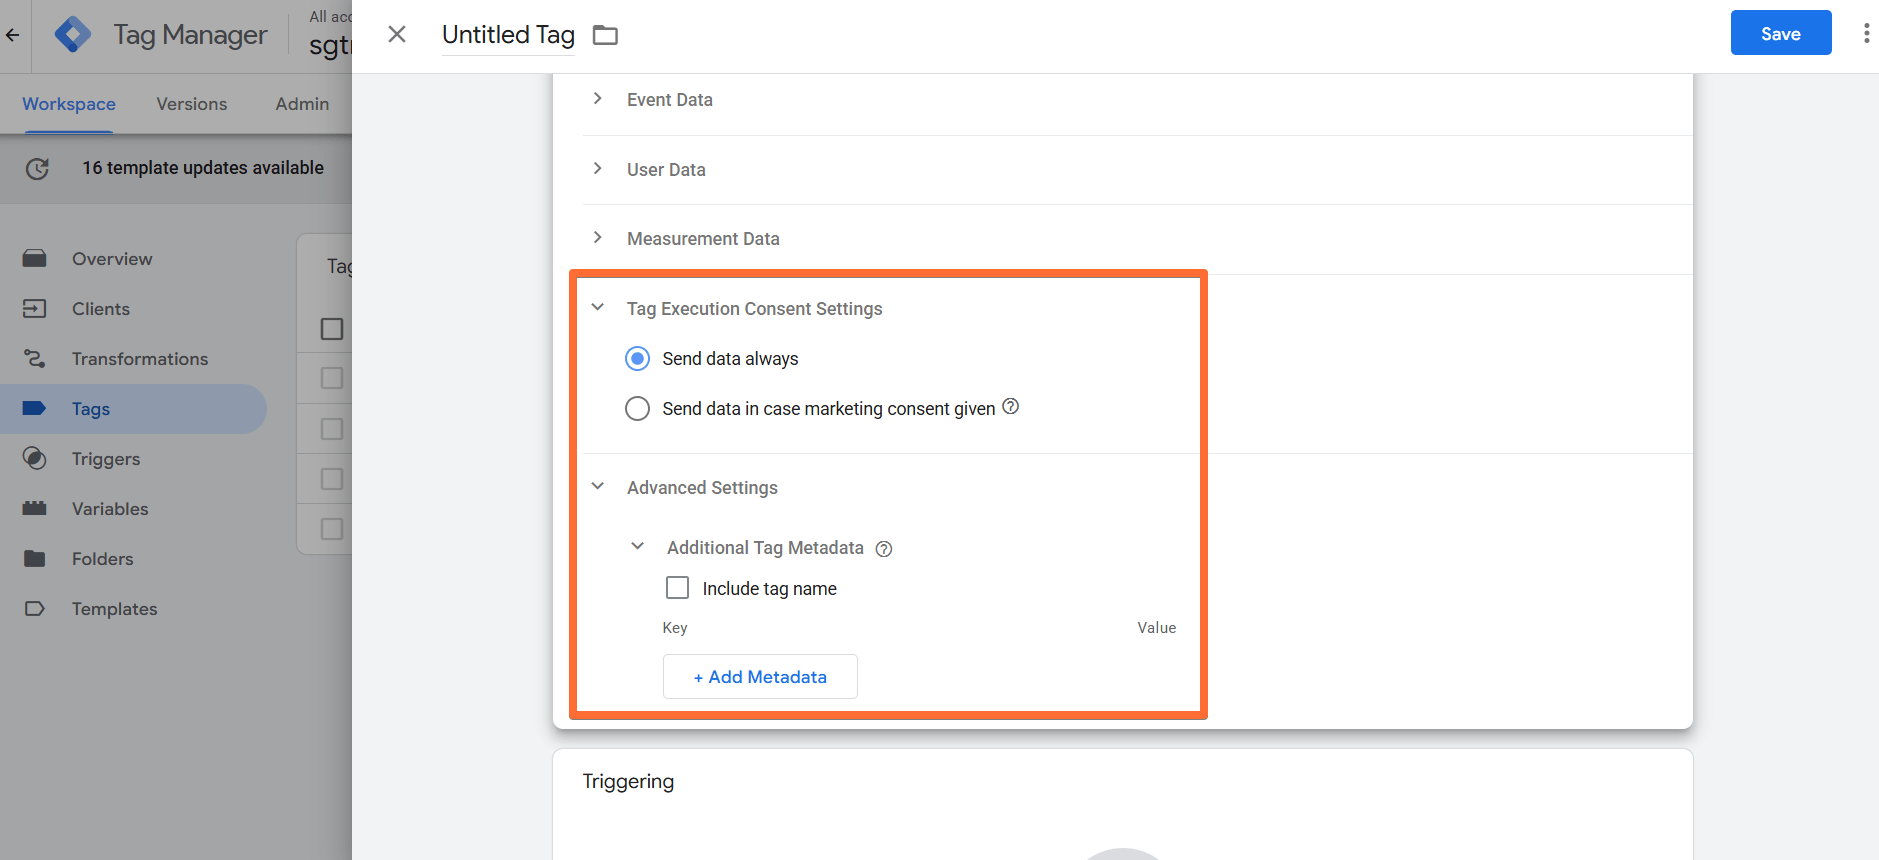
- Tag Execution Consent Settings - choose if you wish for the tag to wait for marketing consent from the user before firing.
- Advanced Settings (Additional Tag Metadata) - specify additional tag metadata to be included in the event data when the tag is fired.
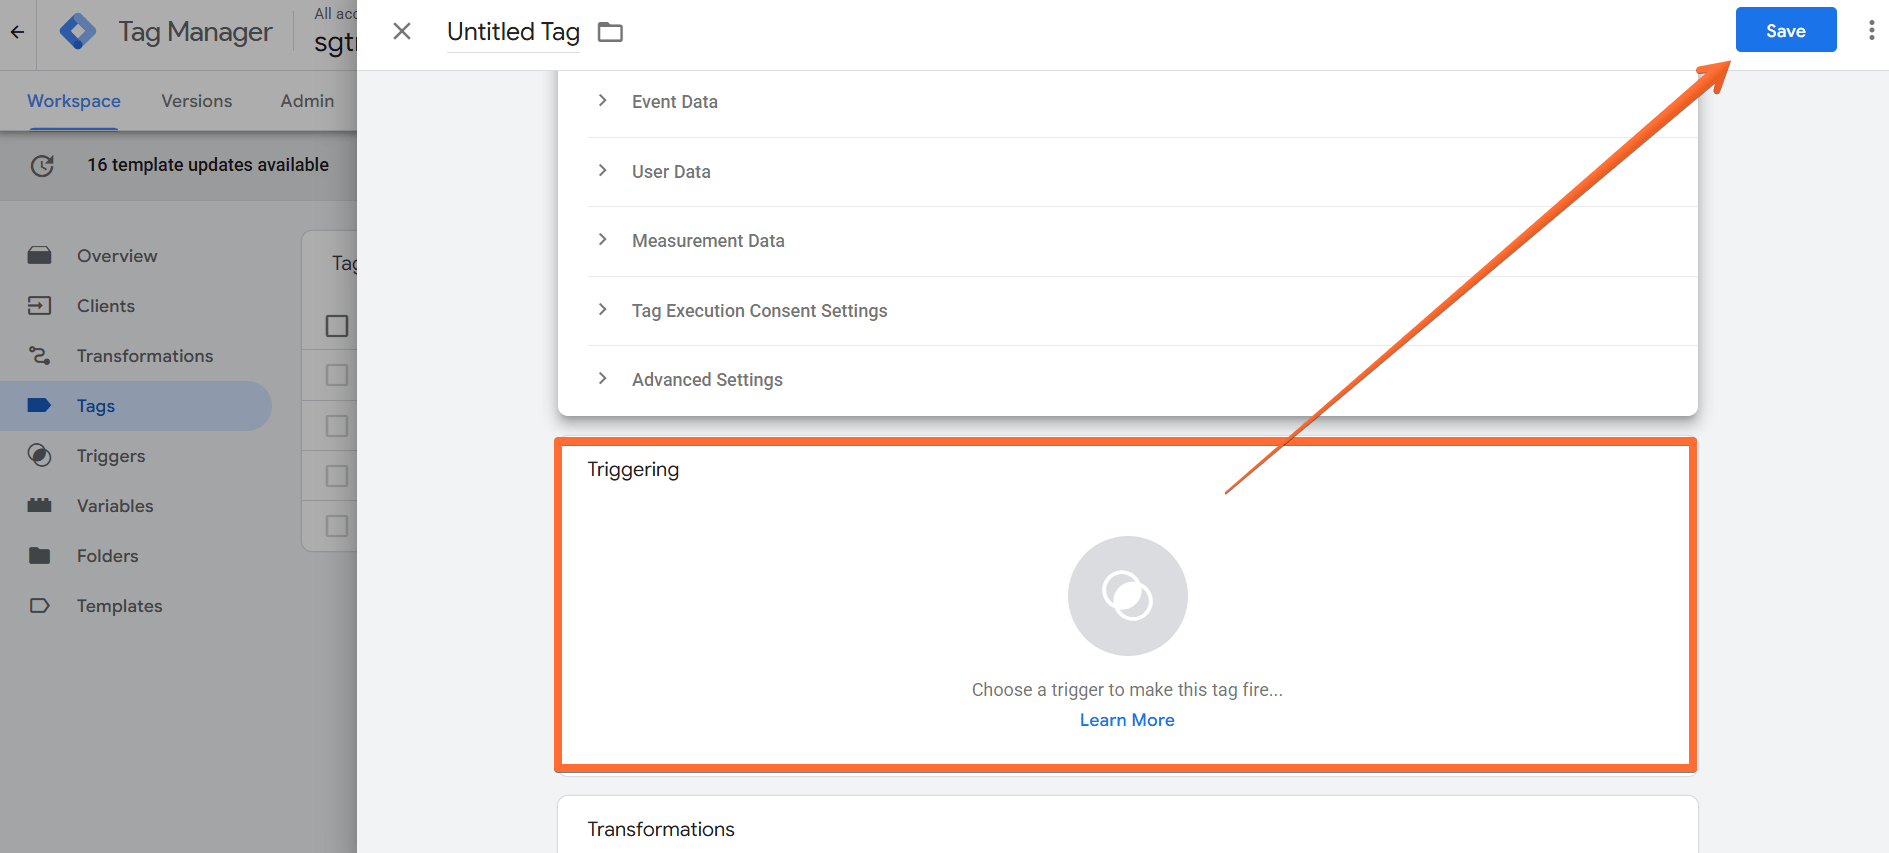
5. Add the Trigger for the tag, give it a descriptive name, and click Save.
Testing
You can test the configurations in Google Tag Manager. Click on Preview, trigger the event, and check whether the tag has fired.

Find out more about debugging and monitoring server-side tracking configuration in our guide.
Was this article helpful?
🍽 Table of content:
Comments