Oct 5, 2026
CMP not pushing consent update event to dataLayer: how to fix
Written by
Uliana Lesiv
Published Sep 9, 2026 comments
Key takeaways
- Not every CMP pushes a separate dataLayer event when a user's consent preferences change.
- A consent update event helps GTM trigger non-Google tags and other logic based on the user's latest consent choices.
- Before creating a custom solution, check whether your CMP can be configured to push a consent update event.
- Google Consent Mode Listener tag can create a
stape_consent_updateevent when monitored consent types change. - Stape's free Setup Wizard tool can automatically configure consent management, including the consent update event, without manually setting up the required tags and triggers.
CMP not pushing consent event: problem overview
When a user interacts with your cookie banner, the consent management platform (CMP) may update their consent preferences and pass the new state to Google Consent Mode. However, not every CMP also pushes a separate event to the dataLayer that you can use in Google Tag Manager (GTM).

Why you may need a consent update event in GTM
Missing a consent event can be a problem if you need to trigger other tags or run specific logic immediately after the user's consent changes. A consent update event gives GTM a signal that the user's consent preferences have changed. You can use this event as a trigger for tags that should run after the updated consent state is available.
Most frequently encountered cases when you need a separate event after a consent status change are the following:
✅ Trigger non-Google tags that need to react to consent changes (Google tags that support Consent Mode can react to changes in consent state without requiring a separate dataLayer event);
✅ Handle changes made when a user reopens the consent banner and updates their preferences.
Without a dedicated event, implementing these workflows may require custom JavaScript or a separate tag such as the Google Consent Mode Listener tag developed by Stape.
How to spot the problem
- Run preview mode in the web GTM container in which you have the CMP tag configured for your banner.
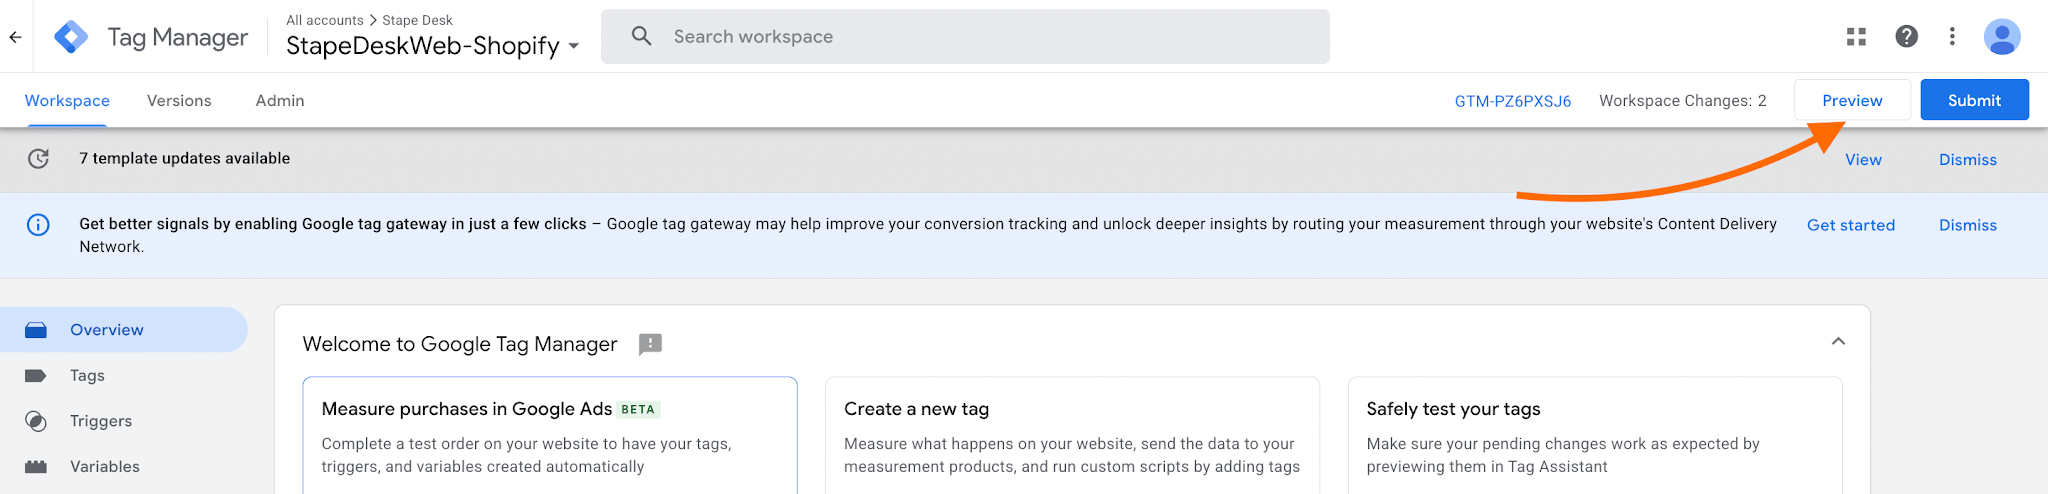
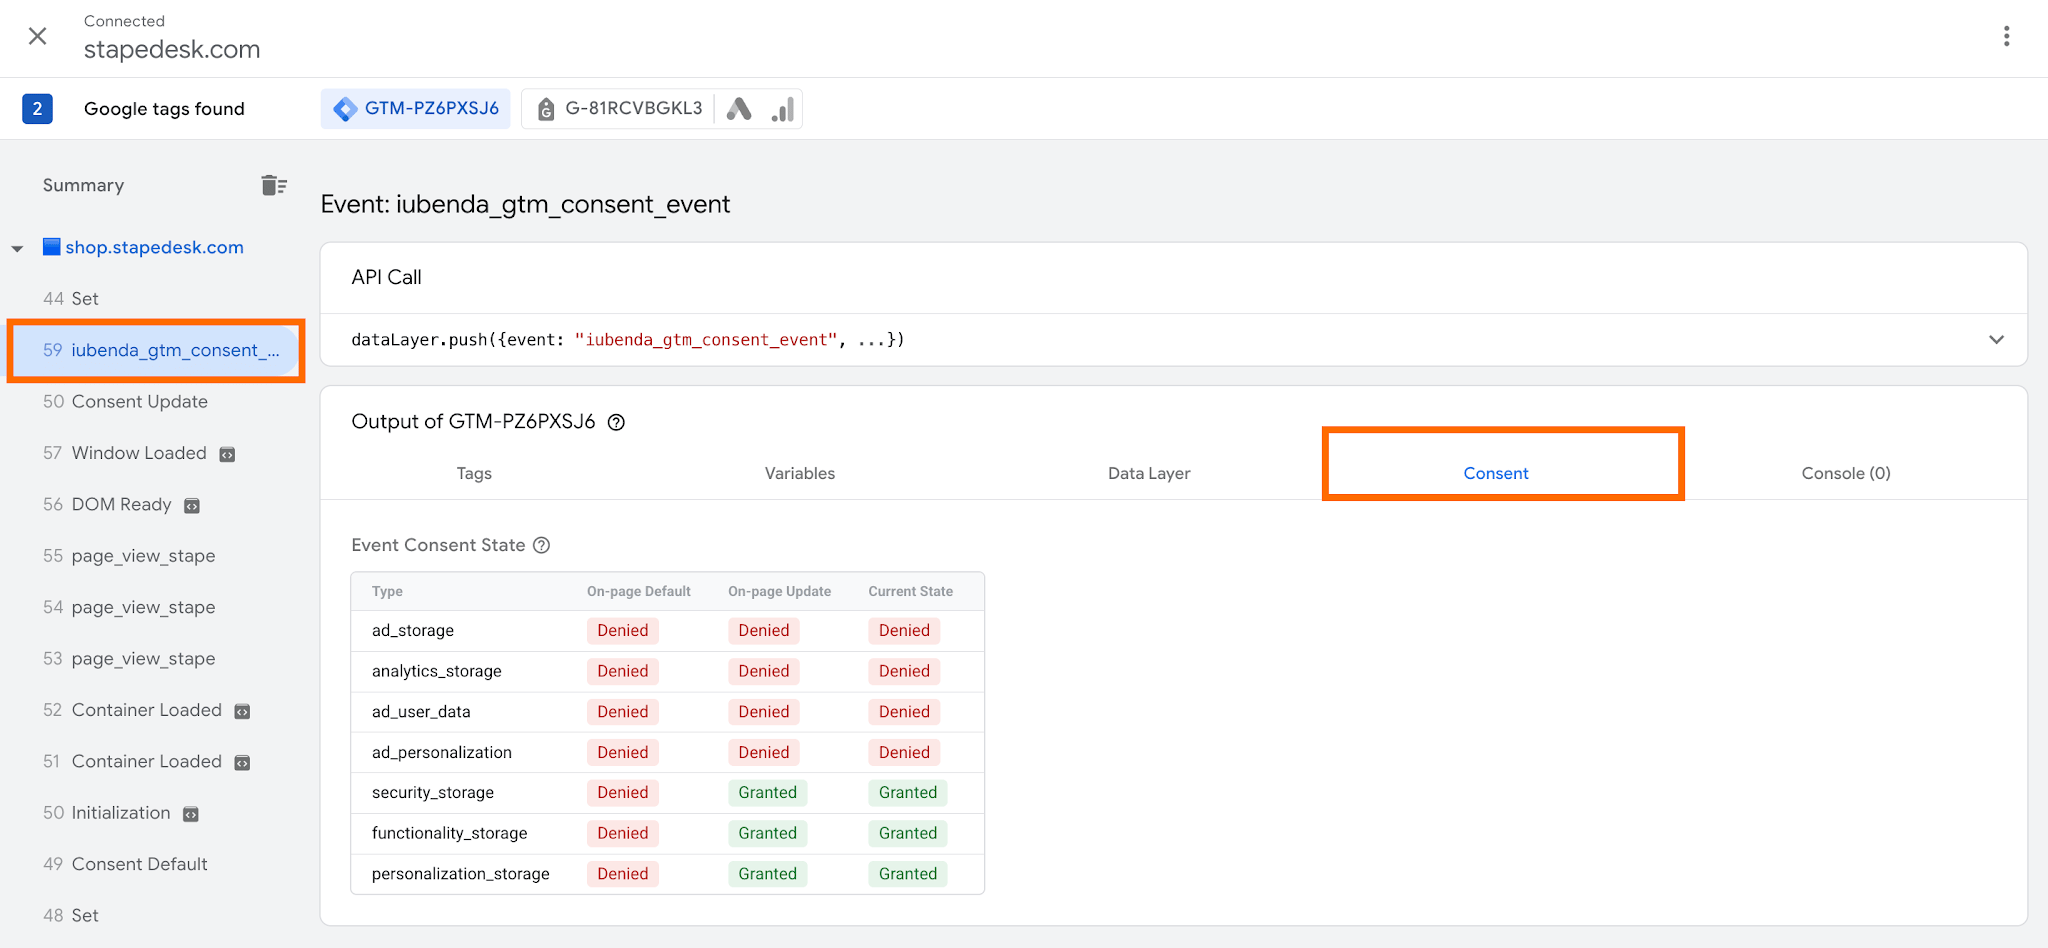
- Interact with the consent banner and check the results in the debug window.
If the CMP pushes a separate event to the dataLayer, you should see the event (usually it contains the name of the CMP you use). In the tab "Consent," you should see the selections you've specified within the cookie banner.
Next steps if there's no separate CMP event
Many CMPs can push a consent update event, either by default or through an optional configuration.
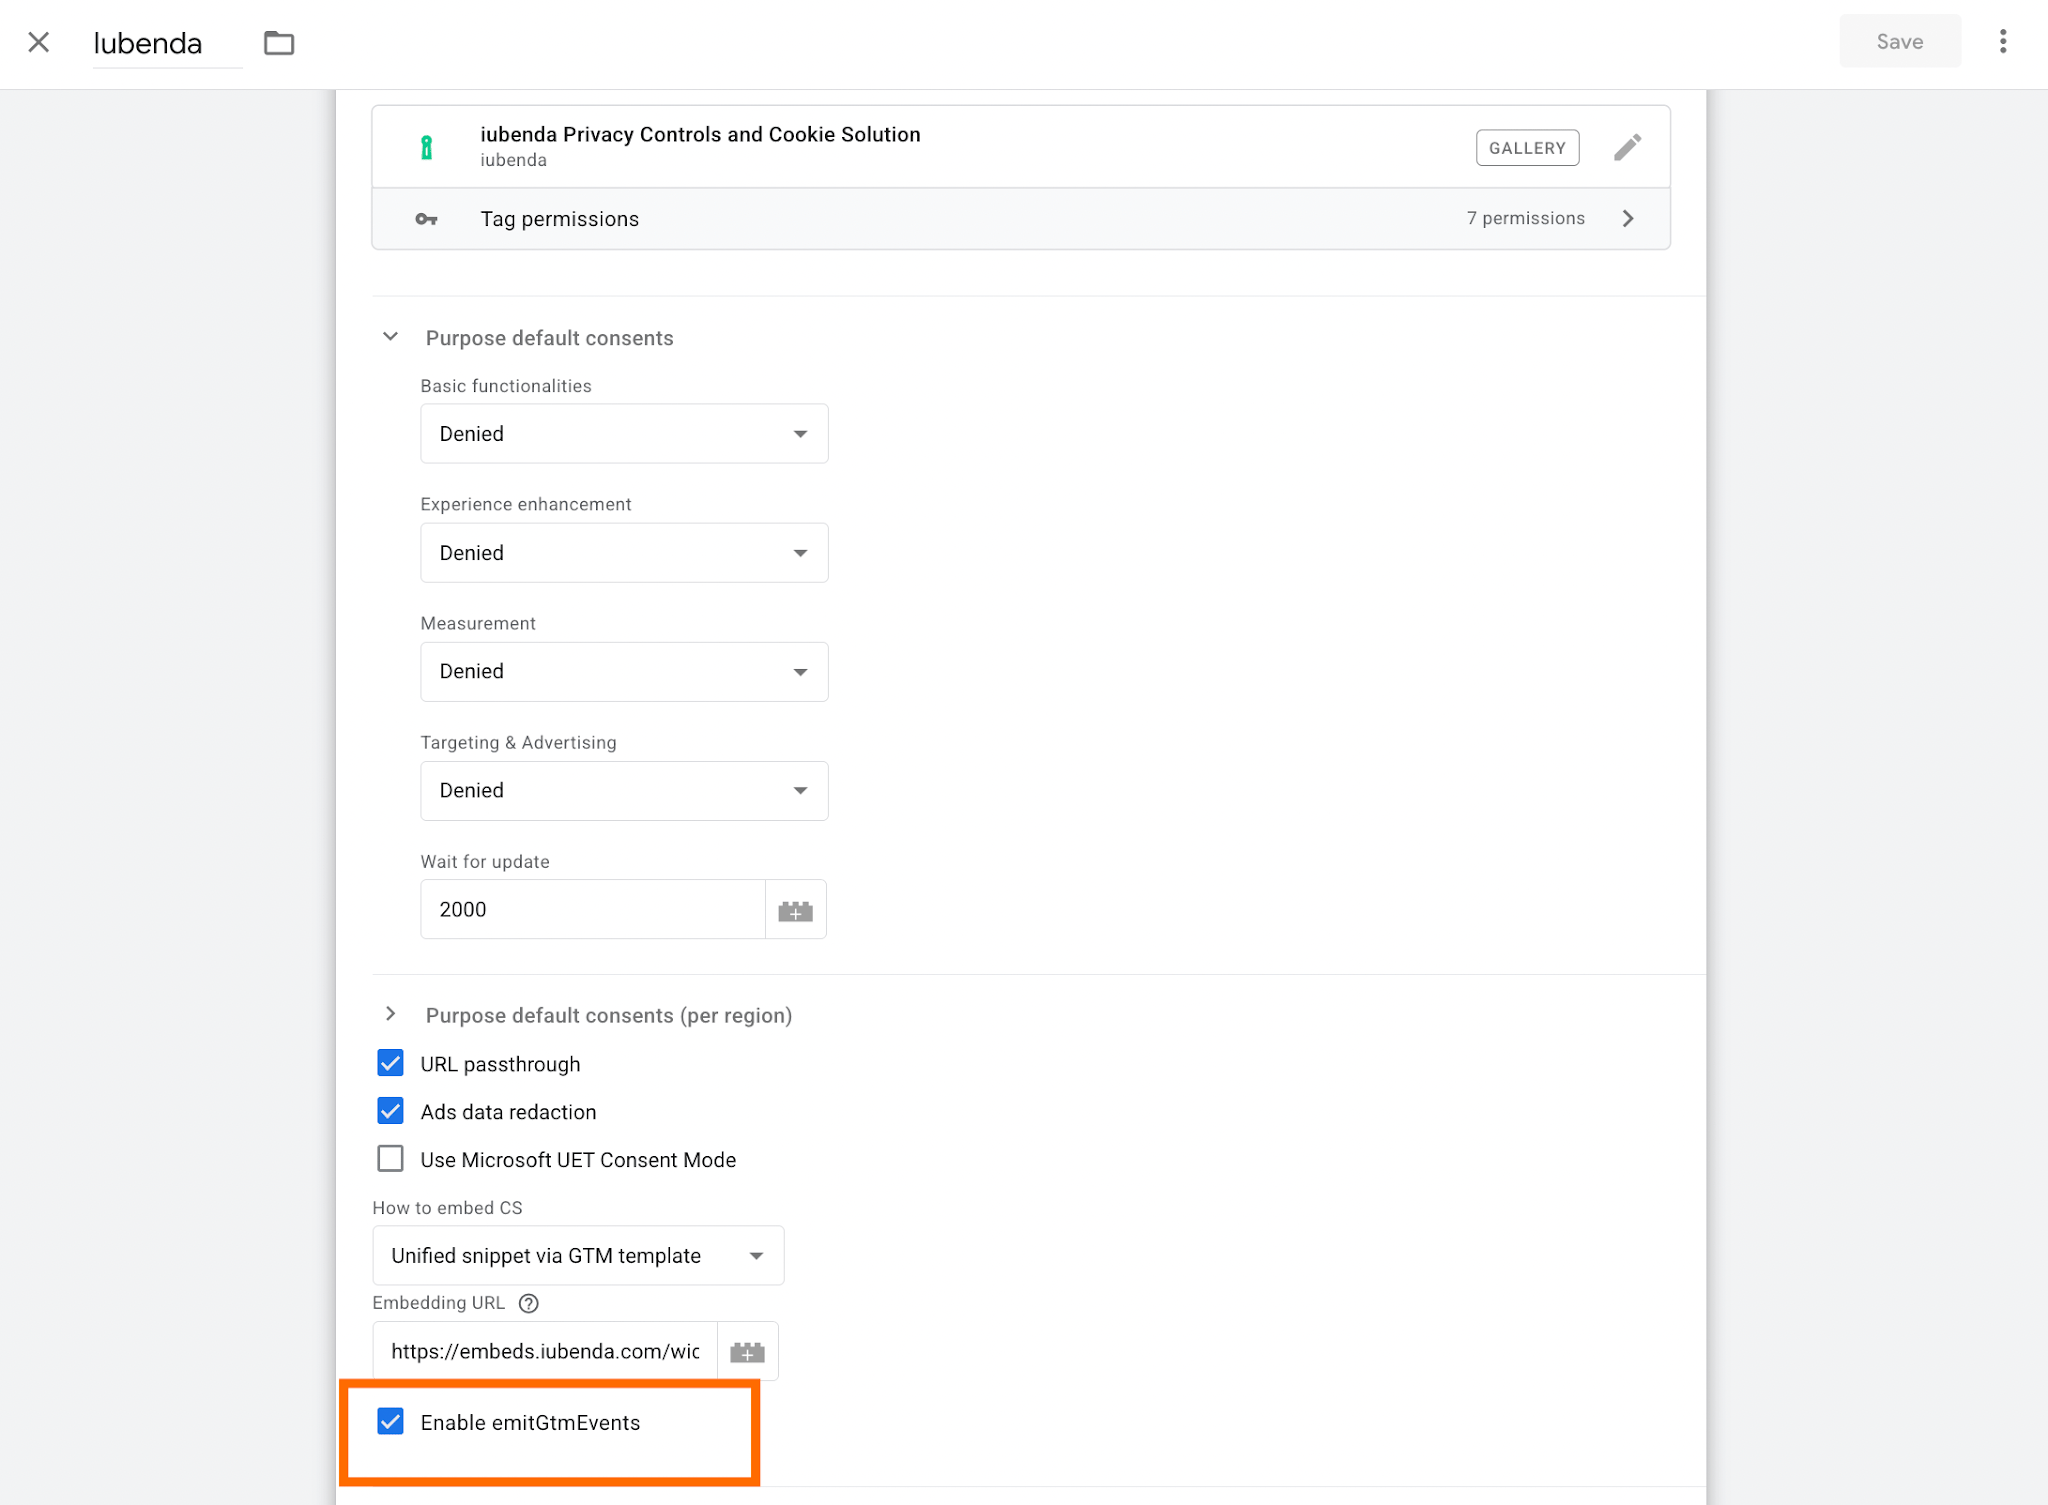
So, before proceeding with the actual setup of the dataLayer event push (which we show below in the guide), check the documentation of your CMP. If there's no event by default, there’s a chance it can be enabled manually. As an example, the consent management platform we used to demonstrate the test above – Iubenda.
Iubenda's GTM tag has a checkbox to enable the event push; without checking this box, no event will be pushed to dataLayer:
Use the Setup Wizard to manage the consent on your website
In the next section of this guide, we show how to configure the tag to push events with updated consent statuses to dataLayer.
However, you can use a free tool developed by Stape – the Setup Wizard. It will help to configure consent management on your website automatically without manually setting up consent-related tags and triggers. Our tool uses the tag we describe below to push events to the dataLayer, and this tag will be configured in your container as well.
Besides assistance in consent management, the tool will be helpful if you need:
✅ Configure the website tracking with GTM from scratch (for you or your clients);
✅ Switch to server-side tracking easily without long setups (most of the steps within Setup Wizard are automated; those that require manual input from you are guided with details from our end);
✅ Standardize the setup across websites, which can be particularly useful when working with multiple clients (Setup Wizard generates all the GTM entities for both web and server containers).
How to push a consent update event to dataLayer using a Google Consent Mode Listener tag?
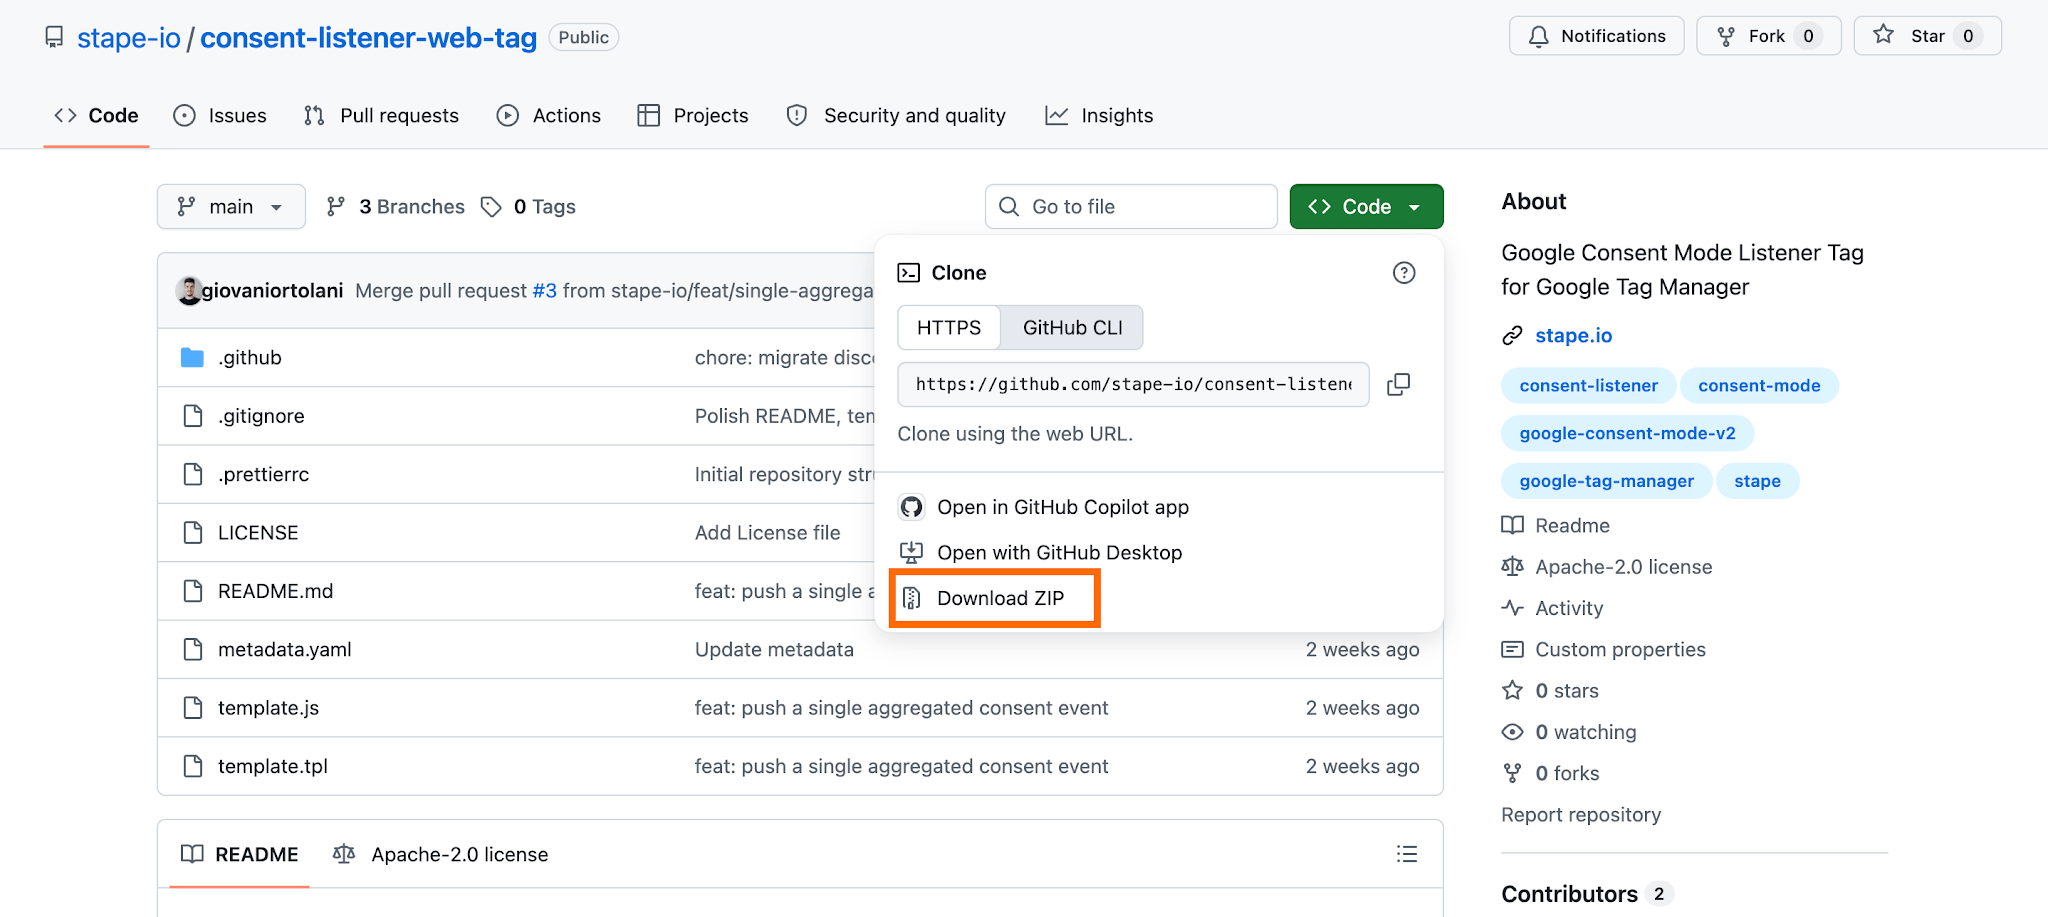
1. Download the tag file from Stape's GitHub and unzip it.
Currently, the tag isn't available in the GTM Template Gallery, so the setup requires adding it manually to the GTM workspace.
2. Upload the tag template into the web GTM container workspace.
Go to the Templates section → in the Tag Templates, click New → click on the three dots in the upper-right corner → click Import → select the file from your desktop → click Save.
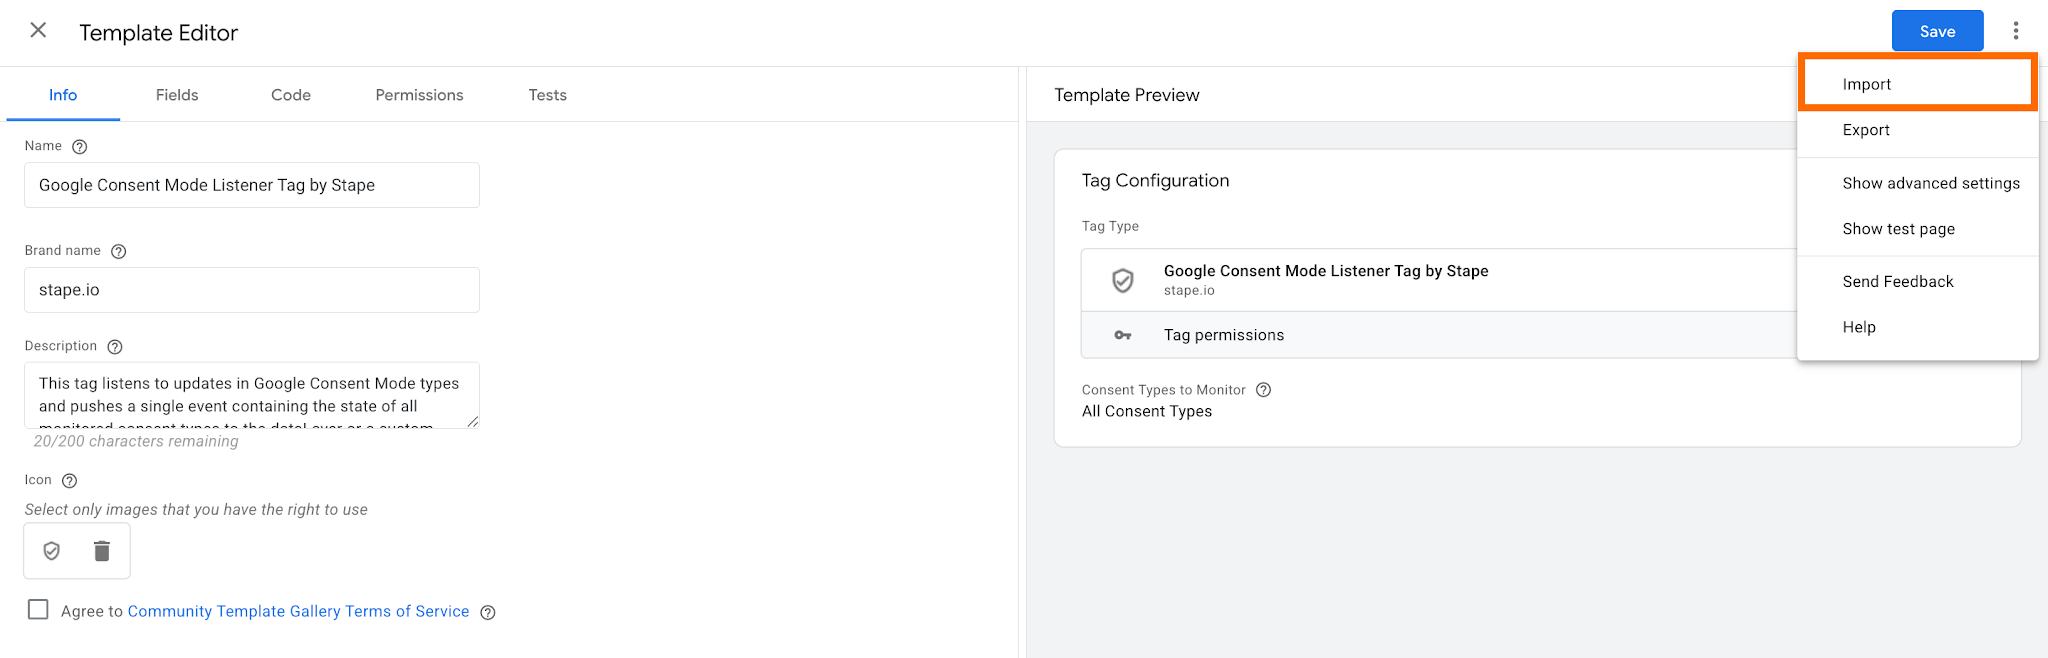
3. Create a new tag.
Go to the Tags section → click New → Tag Configuration, select Google Consent Listener Tag by Stape.
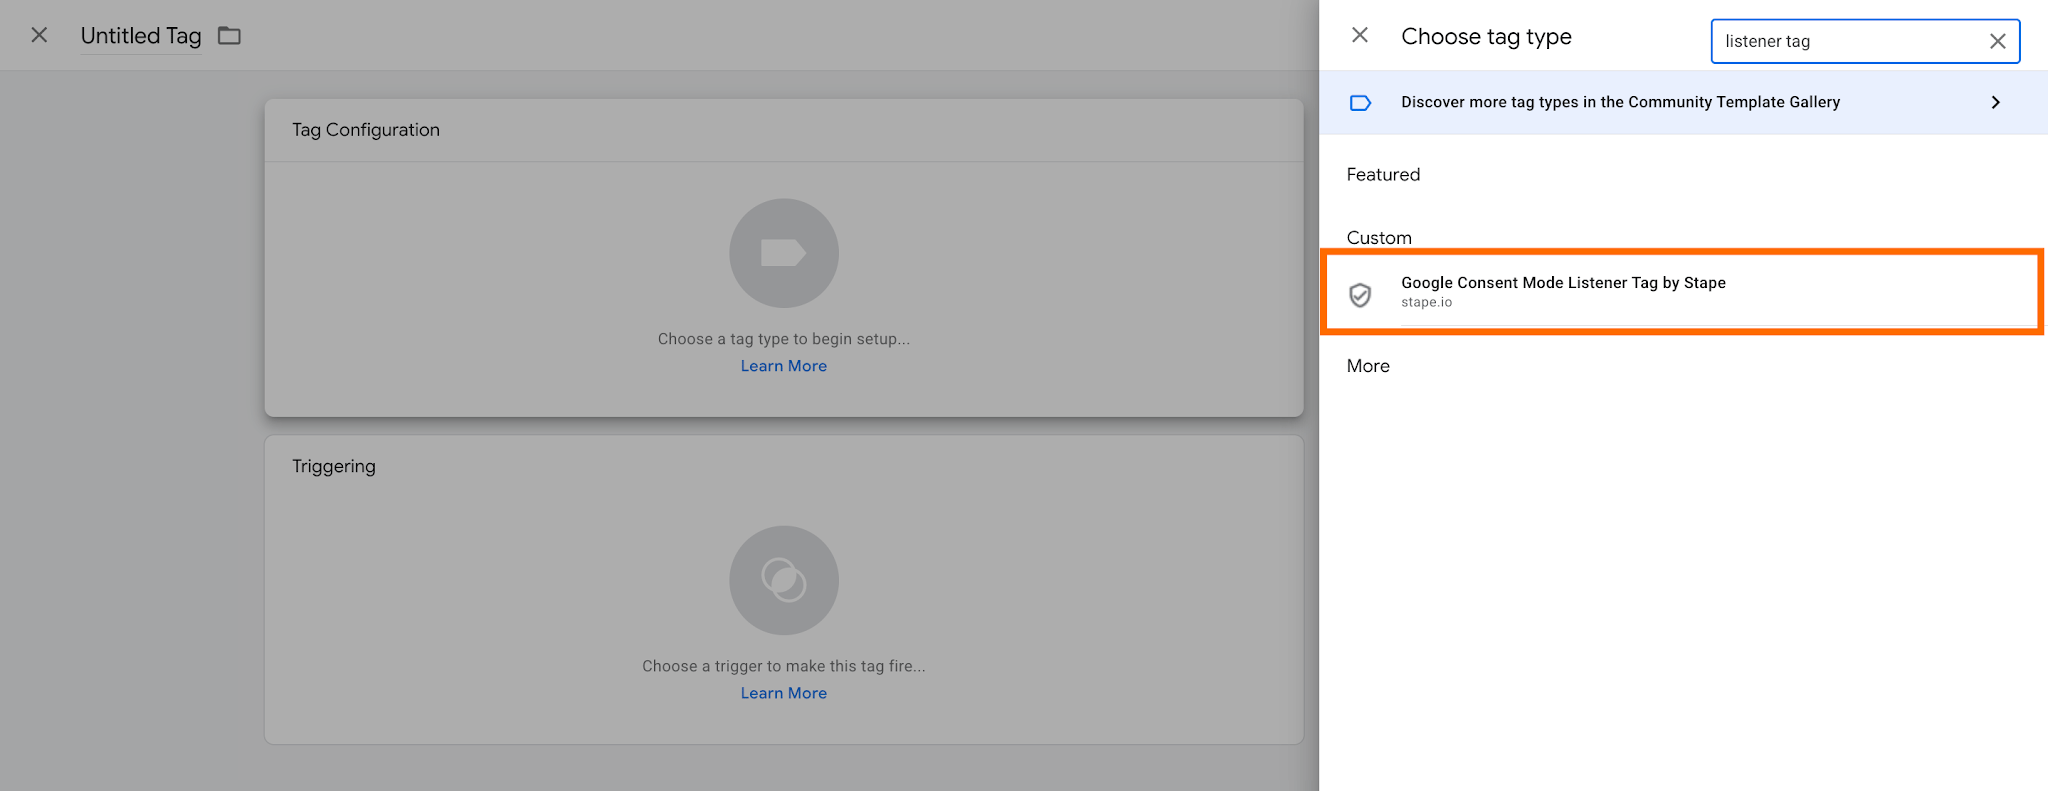
4. Configure the tag.
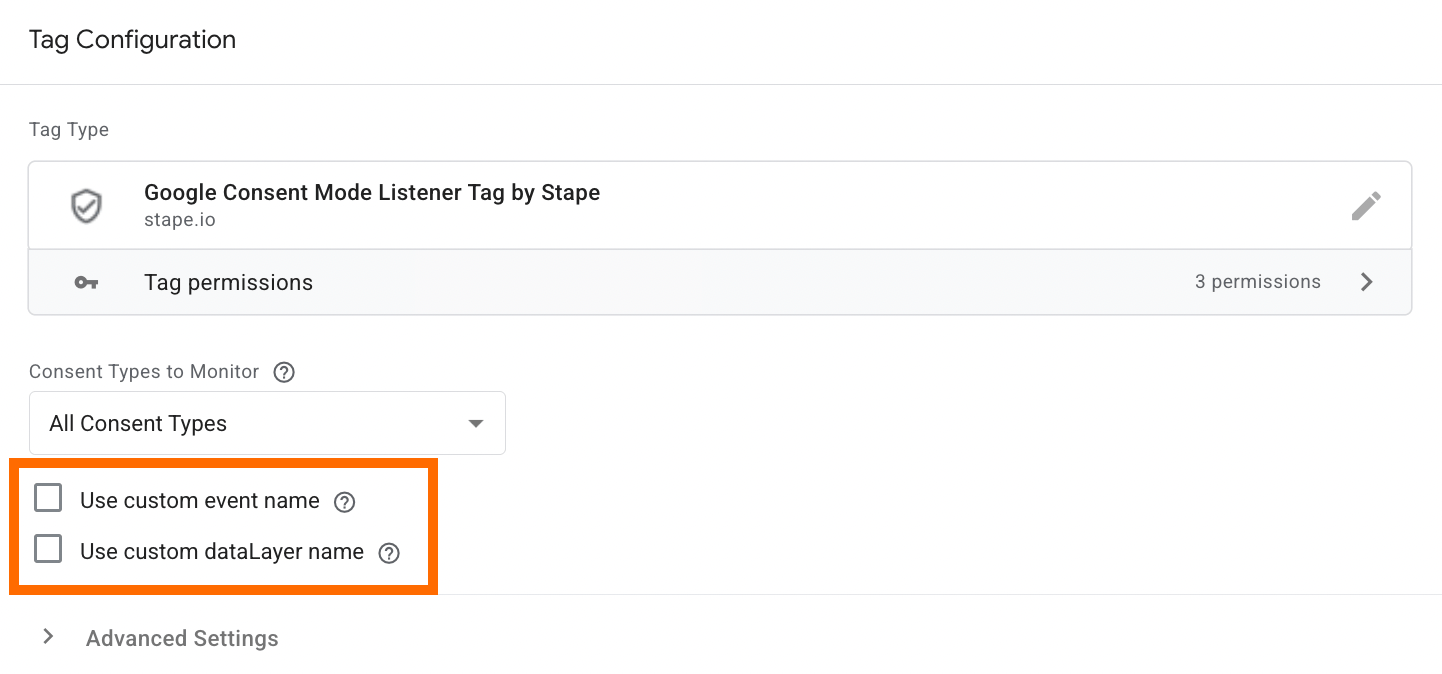
- Consent Types to Monitor – choose whether to listen to all consent types or only specific ones.Whenever one or more monitored consent types change, the tag pushes one event containing a consent object with the current state of all monitored types:
{
  event: 'stape_consent_update',
  consent: {
    ad_storage: 'granted',
    ad_user_data: 'granted',
    ad_personalization: 'denied',
    analytics_storage: 'granted',
    functionality_storage: 'denied',
    personalization_storage: 'denied',
    security_storage: 'granted'
  }
}
For our case, we select the All Consent Types option.
- (Optional) Configure using a custom event name or dataLayer name.
You can add some custom configuration if you check the checkboxes next to Use custom event name and/or Use custom dataLayer name.
If these boxes aren't checked, the default Stape event named stape_consent_update will be pushed.
With the Use custom event name option, the standard event will be overridden to one you specify.
Use custom dataLayer name option allows you to use a custom dataLayer name.
Warning:
If you use a custom named dataLayer, you will need to add a global variable permission (read/write) within the template. Be aware that by doing so, your template will unlink from the Community Gallery (unlinking it from the Gallery results in not receiving any future updates for this template).
For the purpose of our setup, we won't check any of the boxes.
5. Add a trigger for a tag.
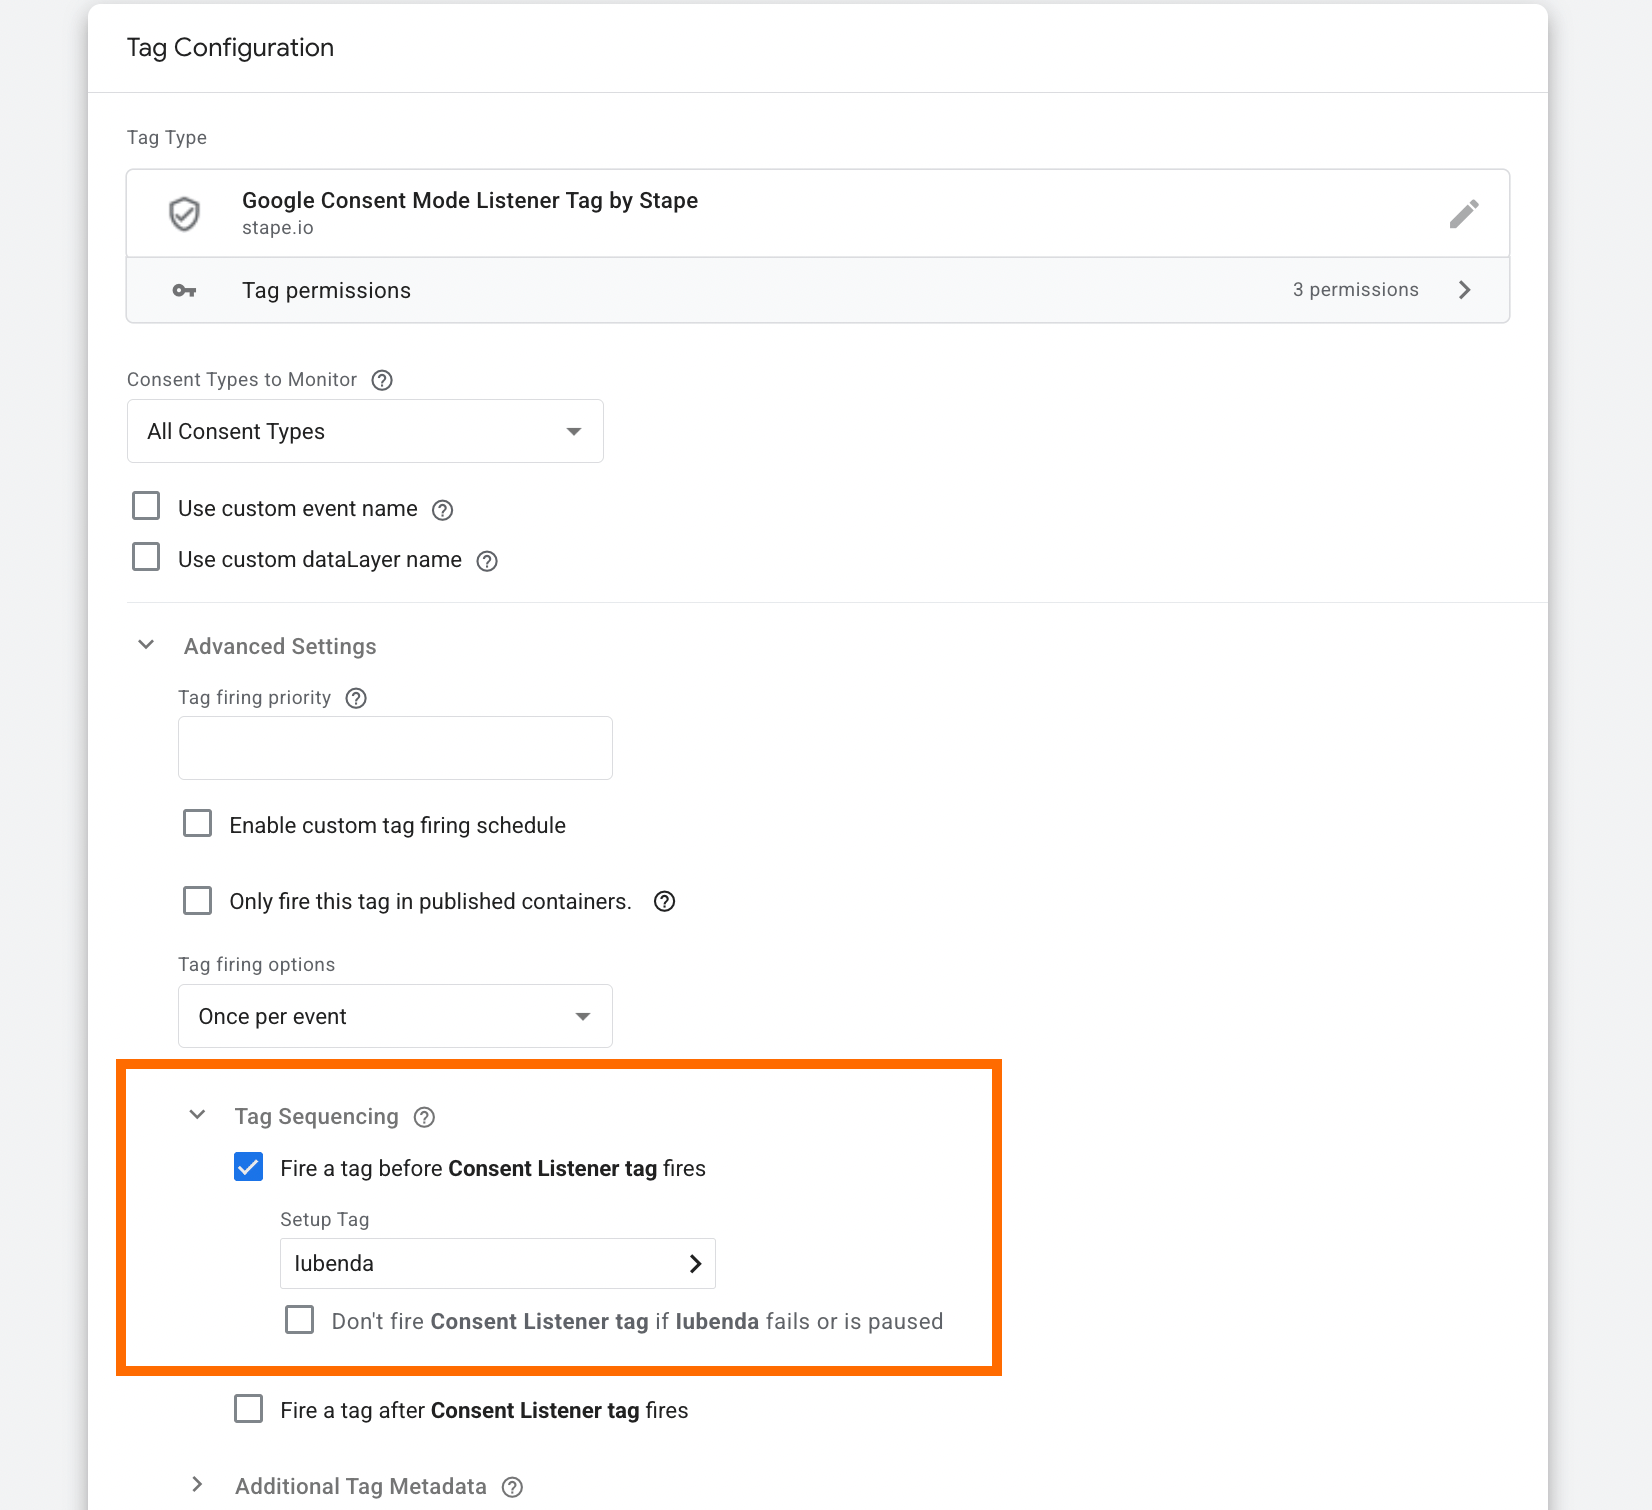
This Listener tag must fire after your CMP has established the default consent baseline. If the Listener initializes before your CMP sets a default consent state, the Listener may capture incorrect initial consent values, resulting in inaccurate reporting of subsequent consent changes.
So if your CMP tag sets the default state using the Consent Initialization - All Pages trigger, you should fire this Consent Listener tag on the Initialization - All Pages trigger.
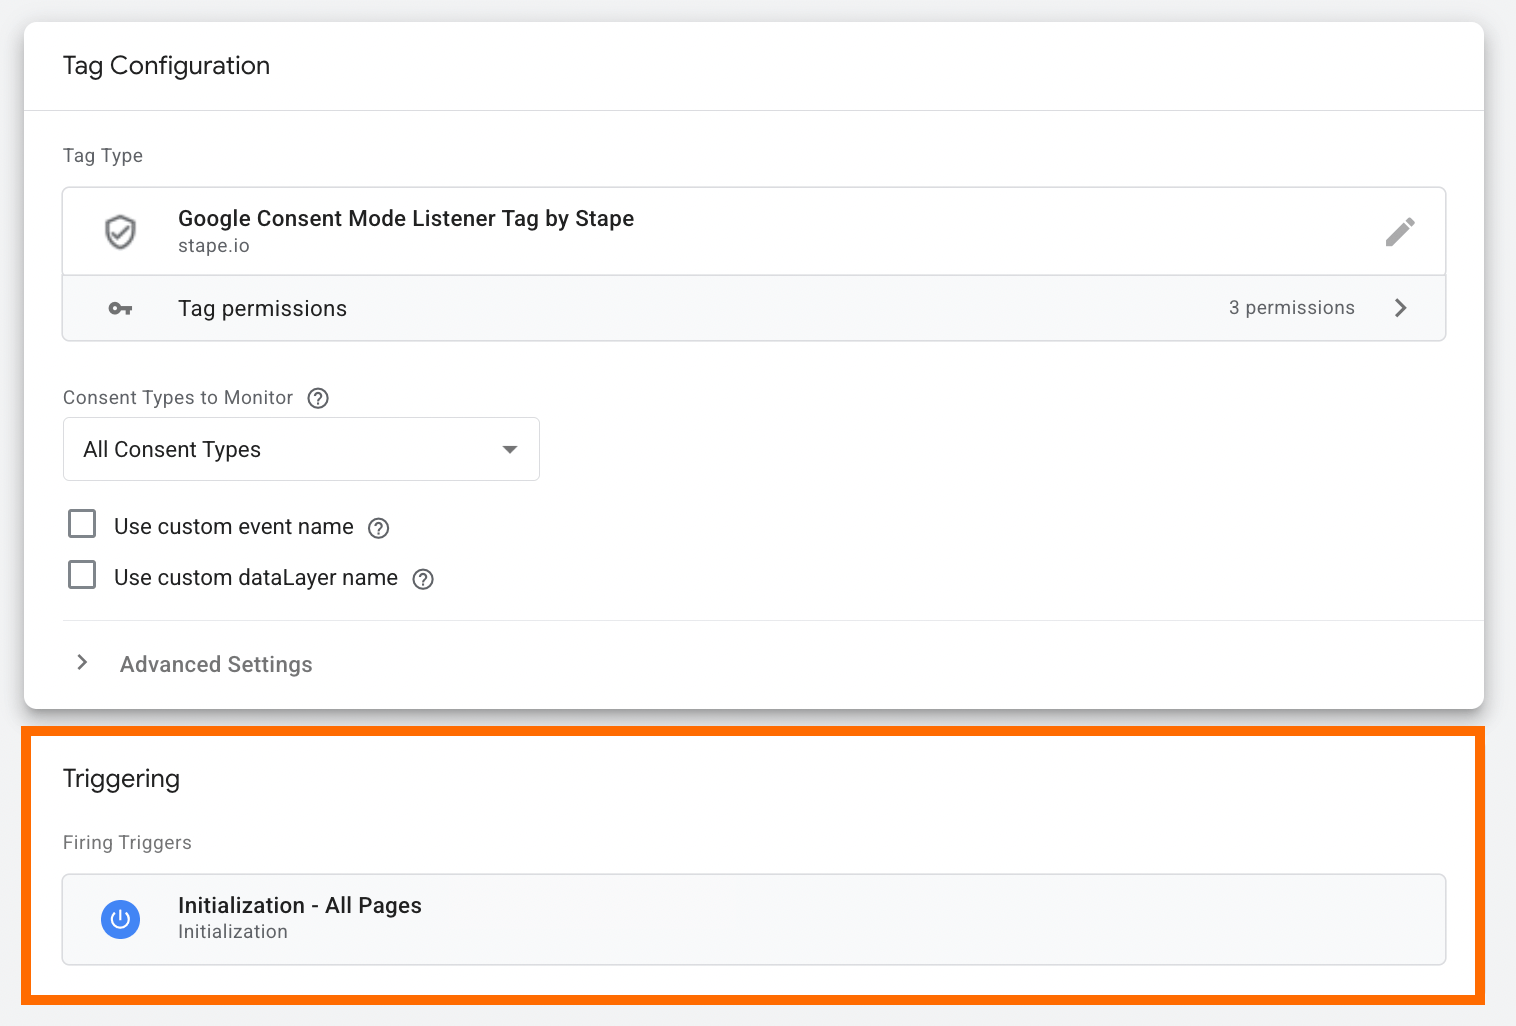
Alternatively, use GTM's tag sequencing feature to guarantee the Listener tag fires immediately after your CMP tag completes its execution.
6. Create a Custom Event trigger matching your event name.
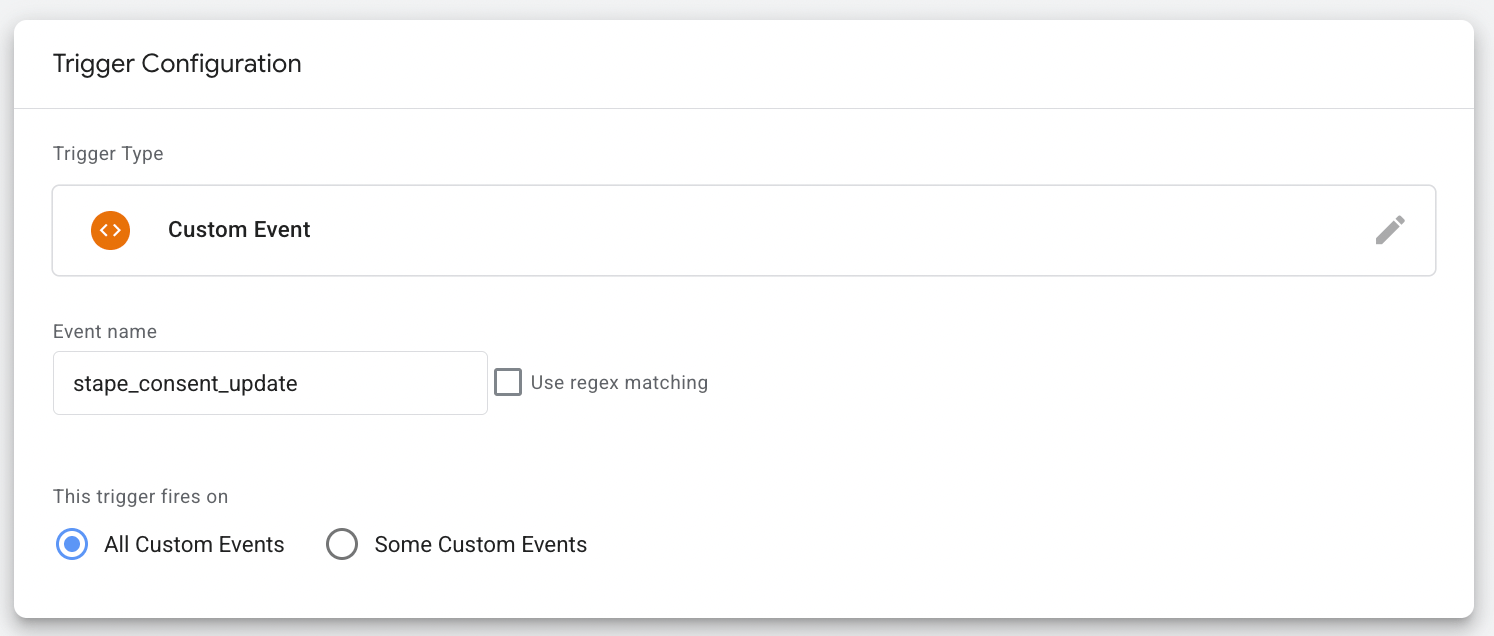
To do it, in your GTM web container, go to Triggers → click New → select the Custom Event trigger type.
Enter the event name that the Google Consent Mode Listener tag pushes to the dataLayer. By default, this is stape_consent_update.
Save the trigger.
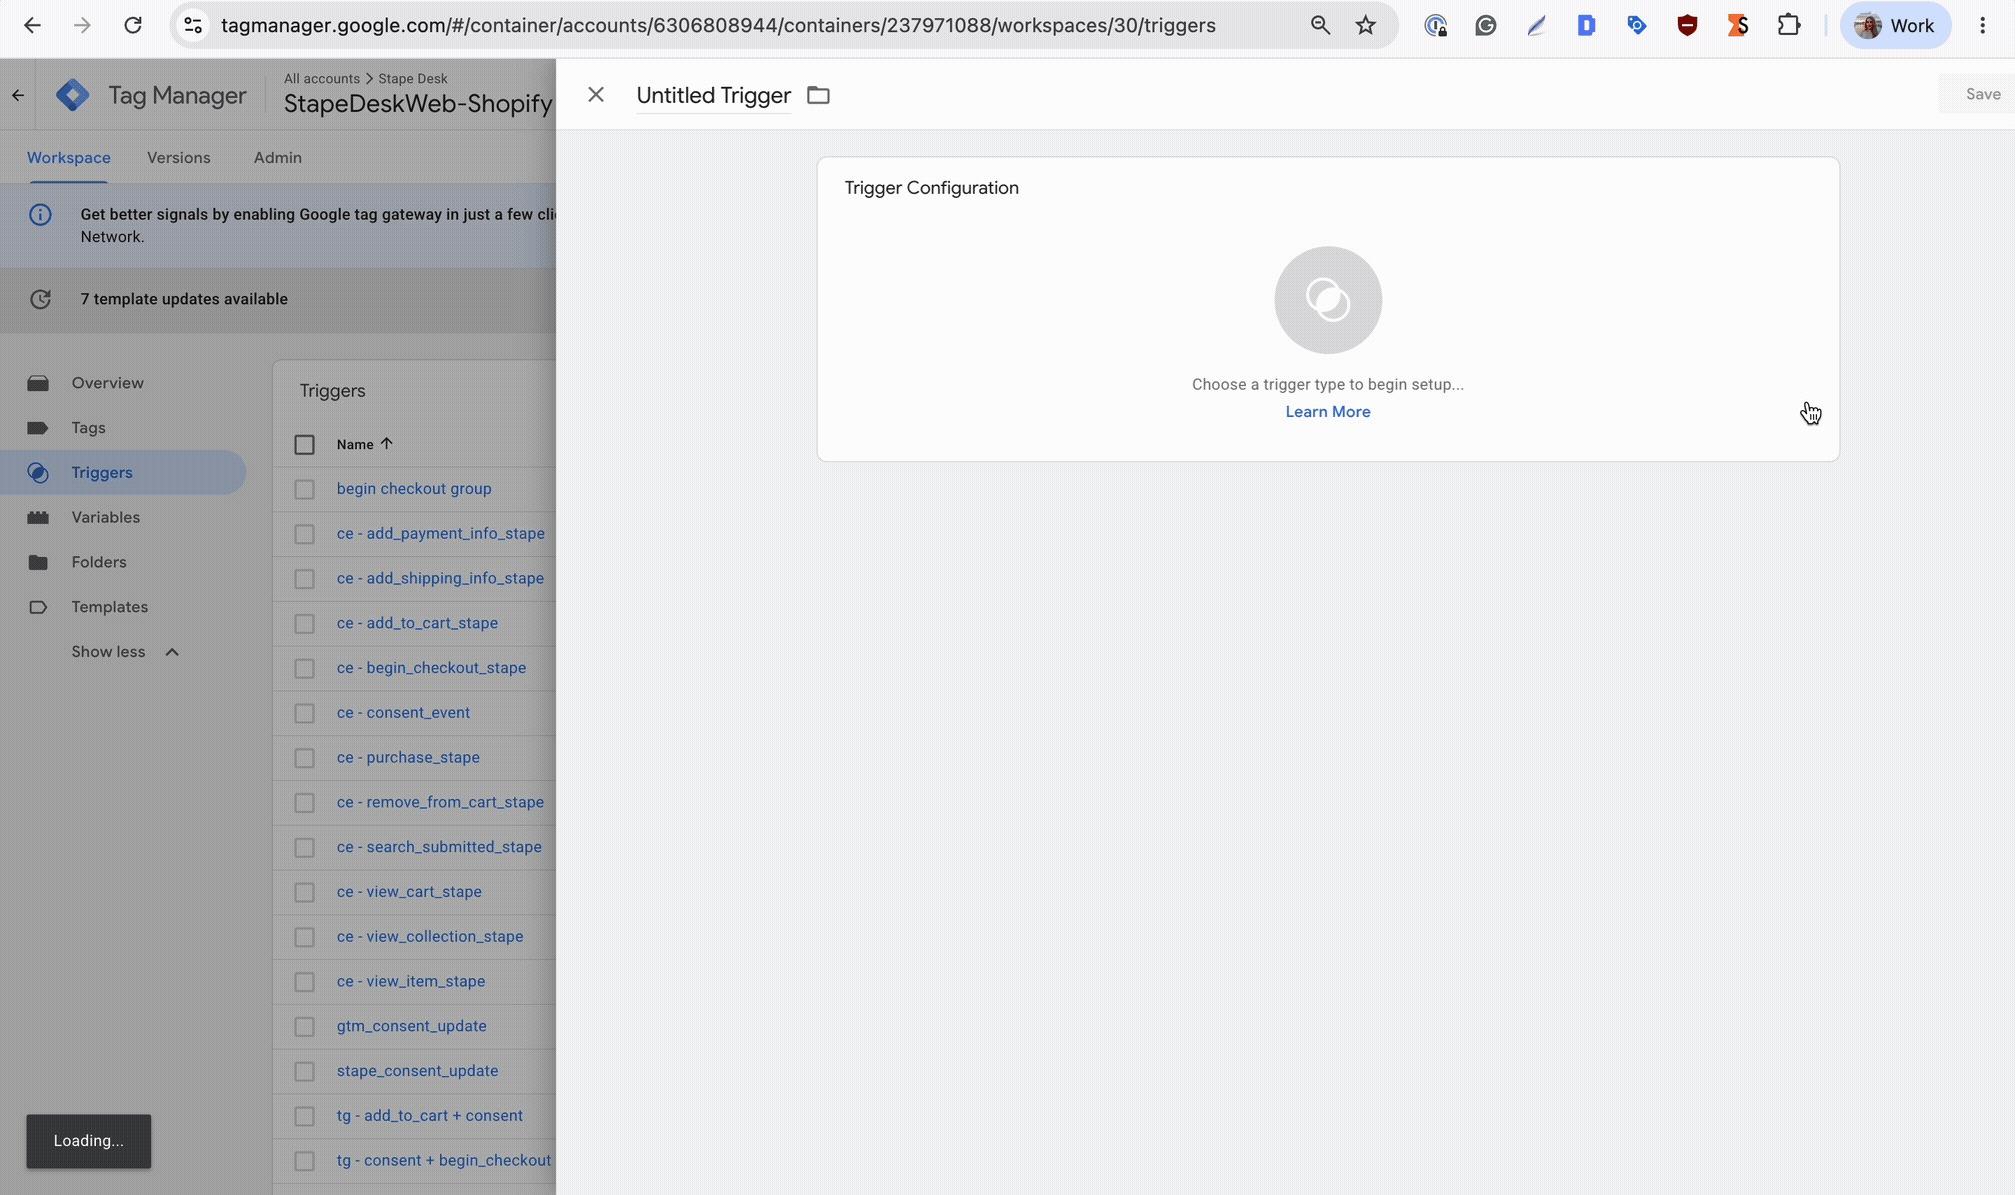
7. Update the triggers with the trigger groups.
To fire a tag only after consent has been updated, you may need to check two conditions:
- The user has triggered the corresponding event;
- The consent update event has been triggered containing the required consent status for data collection.
You can use a Trigger Group to combine these conditions and fire the tag only when both conditions have been met.
Depending on your setup, GTM's built-in consent checks may already be enough. Trigger Groups are most useful when a tag must fire specifically after a consent-change event.
Test tag configuration
1. Run Preview in GTM.
Interact with the cookie banner and trigger events on your website.
2. Check the debug window and ensure that:
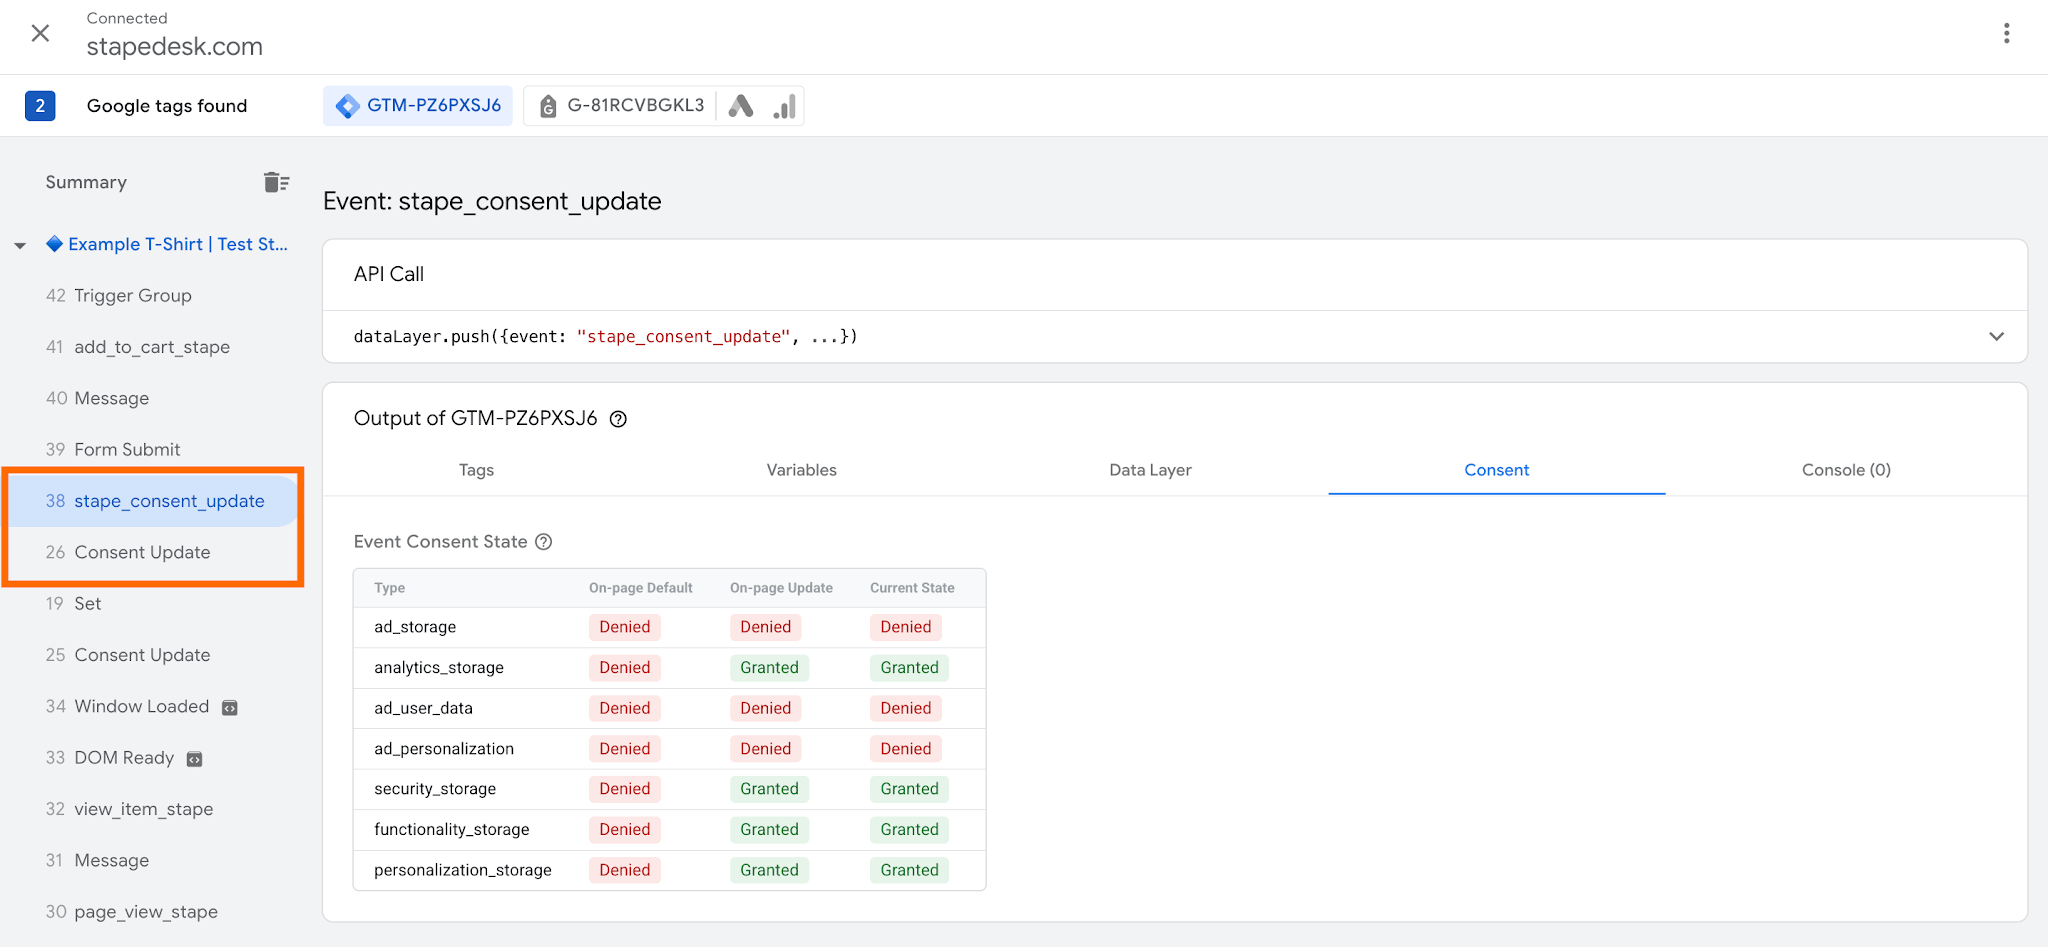
- Confirm that your CMP establishes the initial consent state before the Google Consent Mode Listener tag starts monitoring consent changes.
- After changing consent preferences, confirm that the
stape_consent_updateevent appears and that the Consent tab shows the updated consent statuses. - Navigate to the Consent tab and ensure that statuses correspond to the ones you've specified via the banner. In most Consent Mode implementations, consent defaults are configured as Denied until the user makes a choice.
Final thoughts
From a GTM perspective, the important part is ensuring that the rest of your tracking setup can react correctly when consent decision changes. This is where a consent update event can become useful. It helps you build tracking logic around the user's current preferences.
The main goal is to make sure that your tags react to consent changes at the right moment and according to the user's latest choices.
Want to join the server side?
Try for freeRecommended for you
Sep 9, 2026
Blog
Google Consent Mode V2
Google Consent Mode V2 lets websites share users' cookie choices with Google tags. Learn what's new, how it works, and how to implement it.
Sep 9, 2026

Comments