Jul 20, 2026
How to configure the MCP Server for Google Ads
Written by
Mykhailo Zernov
Updated Sep 4, 2026 comments
Key takeaways:
- The Google Ads MCP server allows your AI app to interact directly with Google Ads. You can run commands, request data, and generate reports.
- Setup is done by adding a configuration entry to your AI client’s config file.
- You can connect multiple MCP servers (GTM, GA4, Stape) in the same config.
- After setup, you authenticate with your Google account.
- A “Running” status confirms everything is working correctly.
How the Google Ads MCP server works
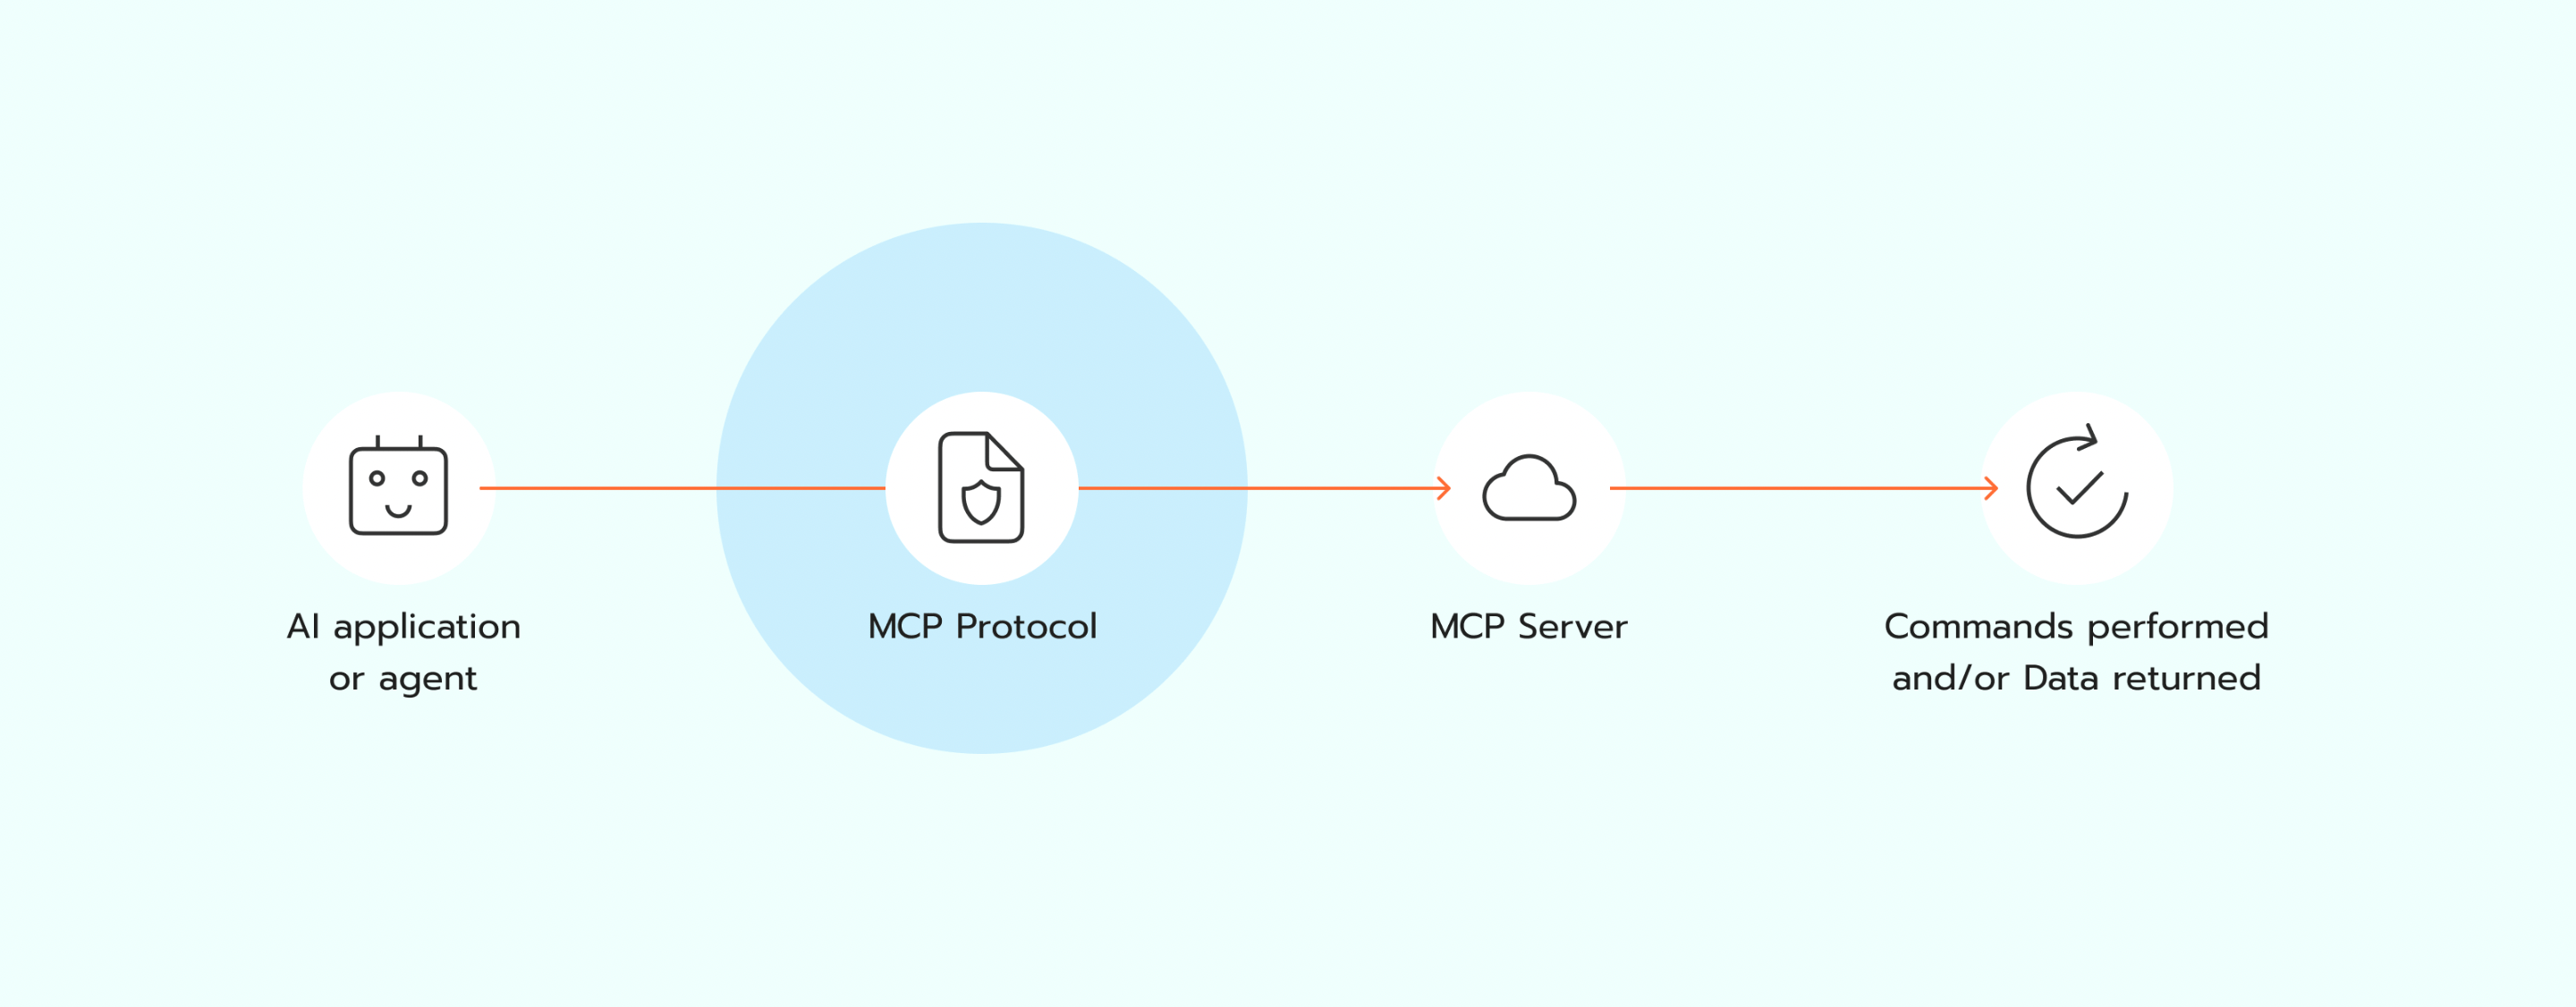
Once you configure an MCP server for Google Ads, you can send requests from your AI app (e.g., Claude). These requests are routed through the Model Context Protocol (MCP), which acts as a standard bridge between your AI client and the MCP server.
The server processes each request, like fetching campaign data, executing actions, or returning structured results. This allows you to interact with Google Ads using simple prompts instead of manual navigation.
Use cases of Google Ads MCP Server
You can use the MCP server for a wide range of Google Ads tasks, including:
- Campaign performance analysis. Retrieve metrics and evaluate campaign results.
- Real-time insights. Access up-to-date data to monitor ongoing performance.
- Account overview. Get a structured summary of accessible accounts and properties.
- Data annotations. Access notes and insights tied to specific dates or events.
Requirements
To configure the MCP server for Google Ads, you need an MCP-compatible AI app. In our example, we’ll use the Claude app. See installation instructions for other services.
How to configure Google Ads MCP Server?
We’ll cover two ways to configure an MCP server:
- 1.Using HTTP connection - generally a better option, as long as your MCP client supports it. It prevents a lot of bugs and is way easier to install.
- 2.Using mcp-remote - more complicated and error-prone, but can be the only option for some MCP clients (or if you specifically wish to use it for your setup).
How to configure the MCP server using HTTP connection
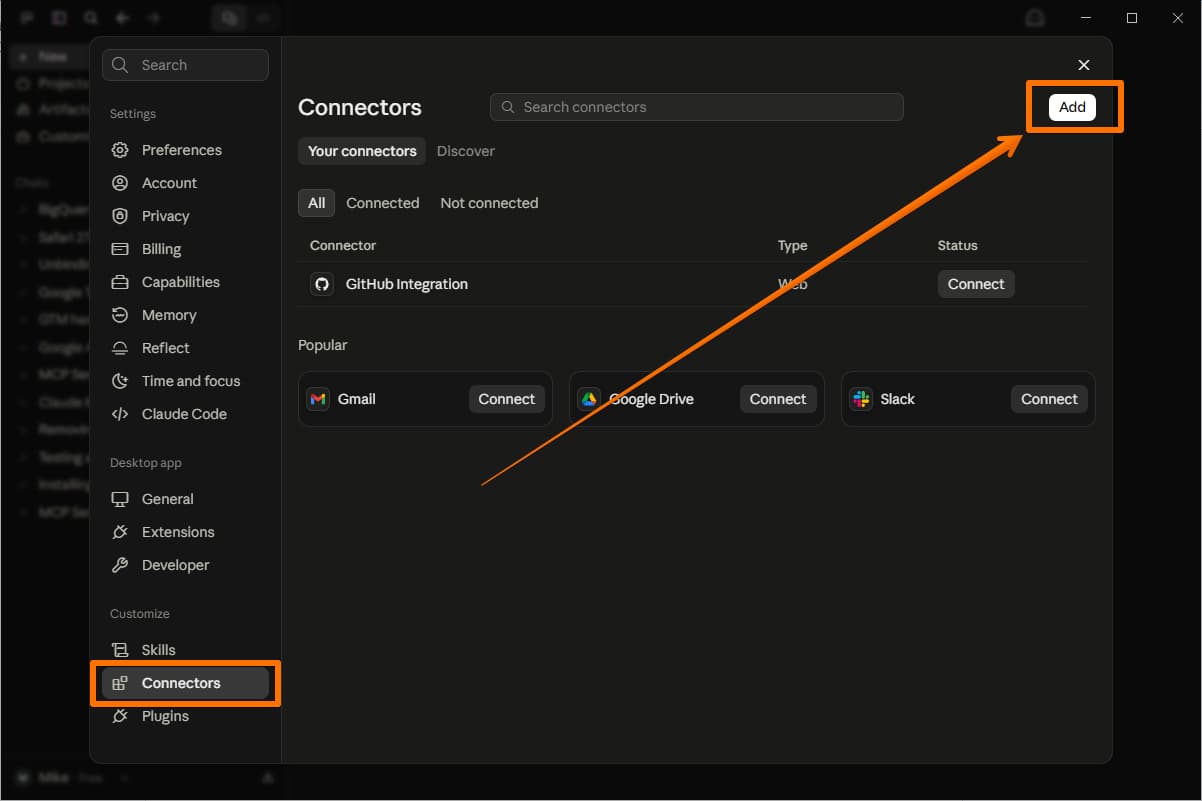
1. Open Claude Desktop and go to File → Settings → Connectors → click Add to create a custom connector.
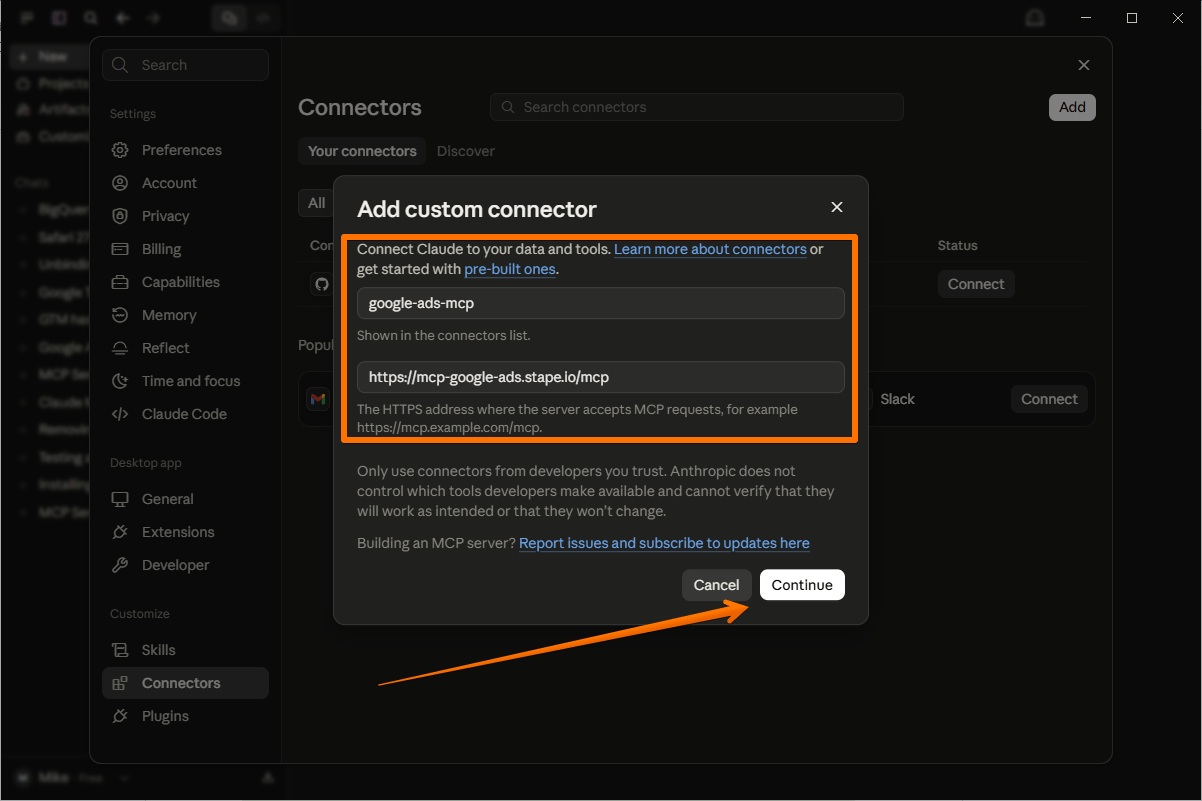
2. Set the name to google-ads-mcp and the URL to https://mcp-google-ads.stape.io/mcp, then click Continue.
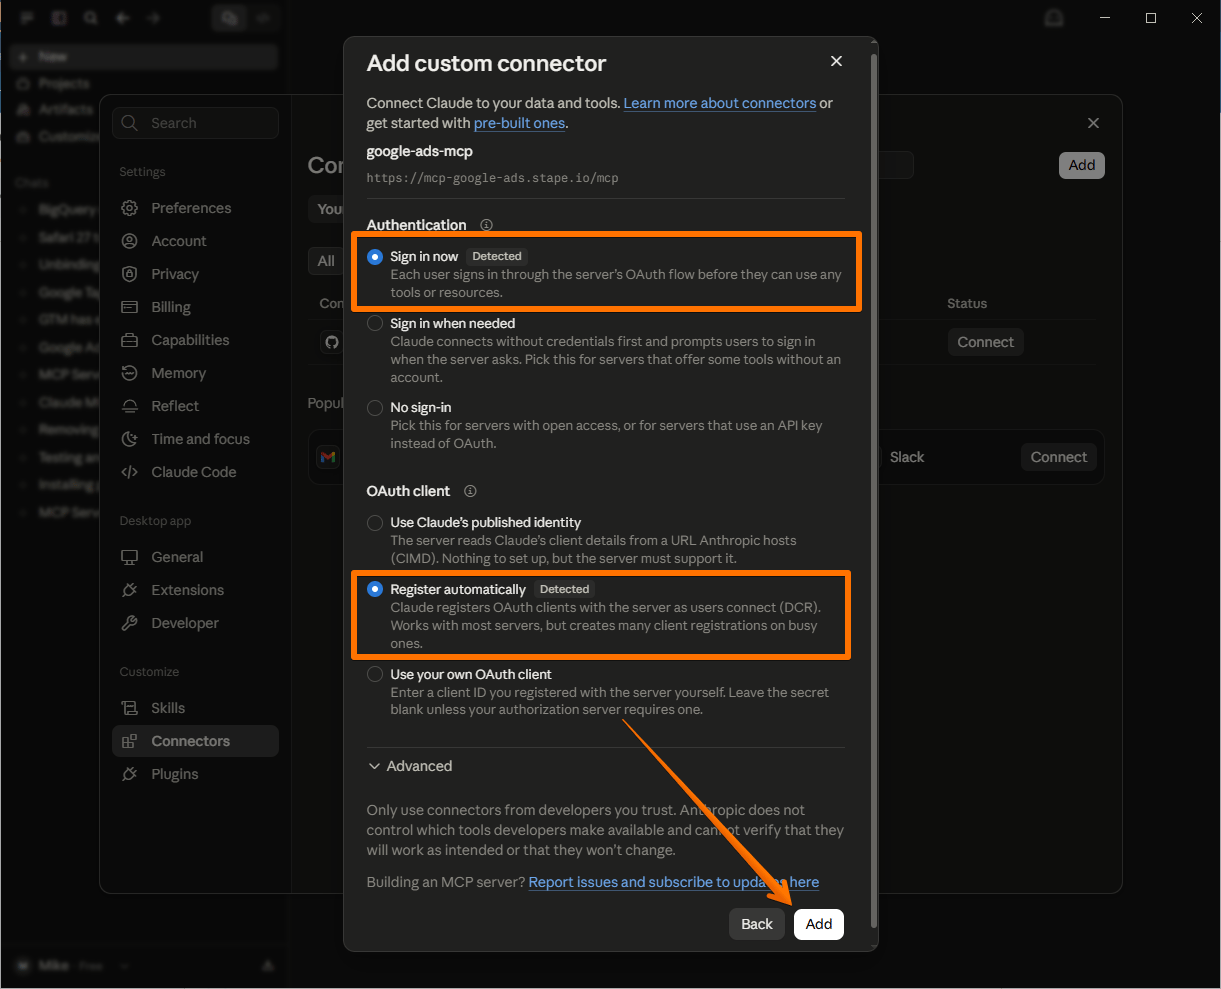
3. For Authentication, select Sign in now → for OAuth client, select Register automatically → click Add.
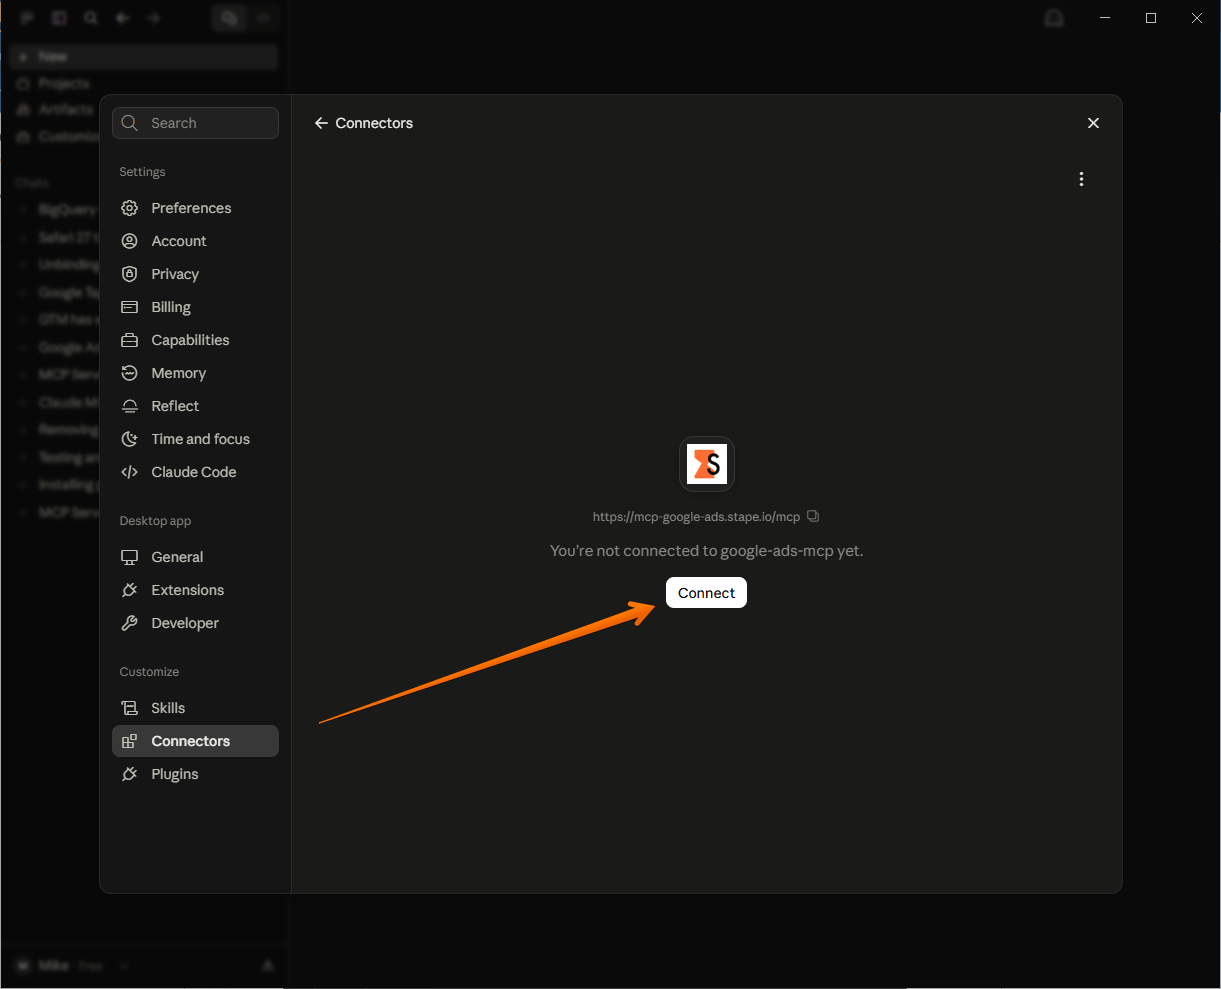
4. On the new screen, click Connect (or click the new connector in the Connectors list).
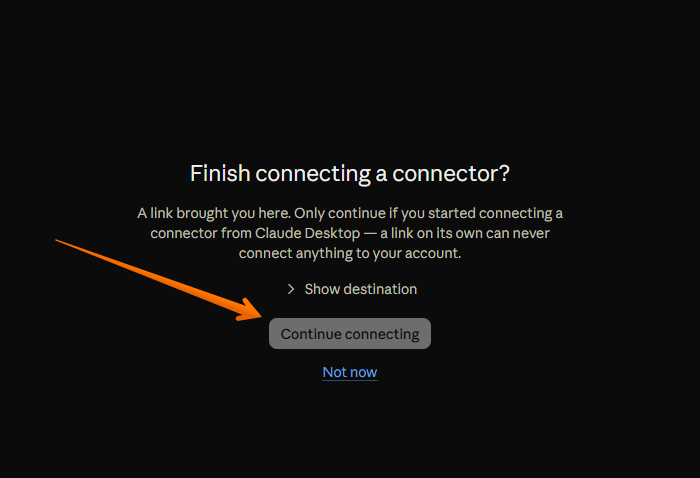
5. A new browser page will open - click Continue connecting and go through the Google OAuth flow.
6. After the access is granted, the tool will be available for your use.

7. Now you can type your request via chat. To verify that it’s working, just type any query related to your Google Ads account, like “List all my Google Ads campaigns” or “What's the total spend across all campaigns this month?”
How to configure the MCP server using mcp-remote
1. Open Claude Desktop and go to File → Settings → Developer → Edit Config → open desktop JSON file called claude_desktop_config.
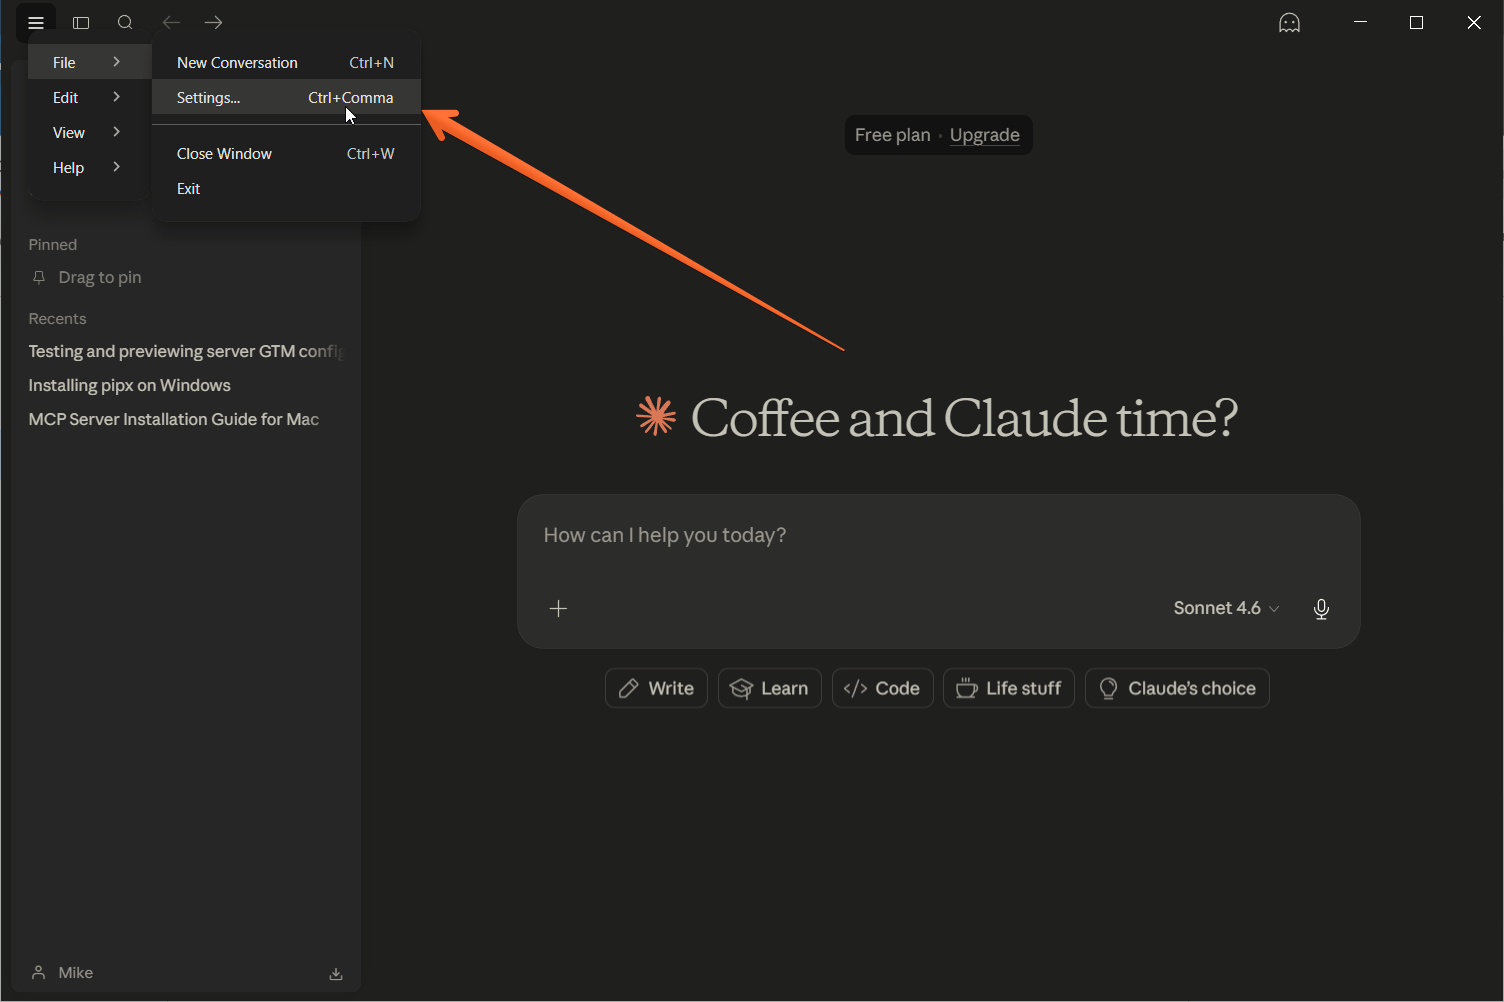
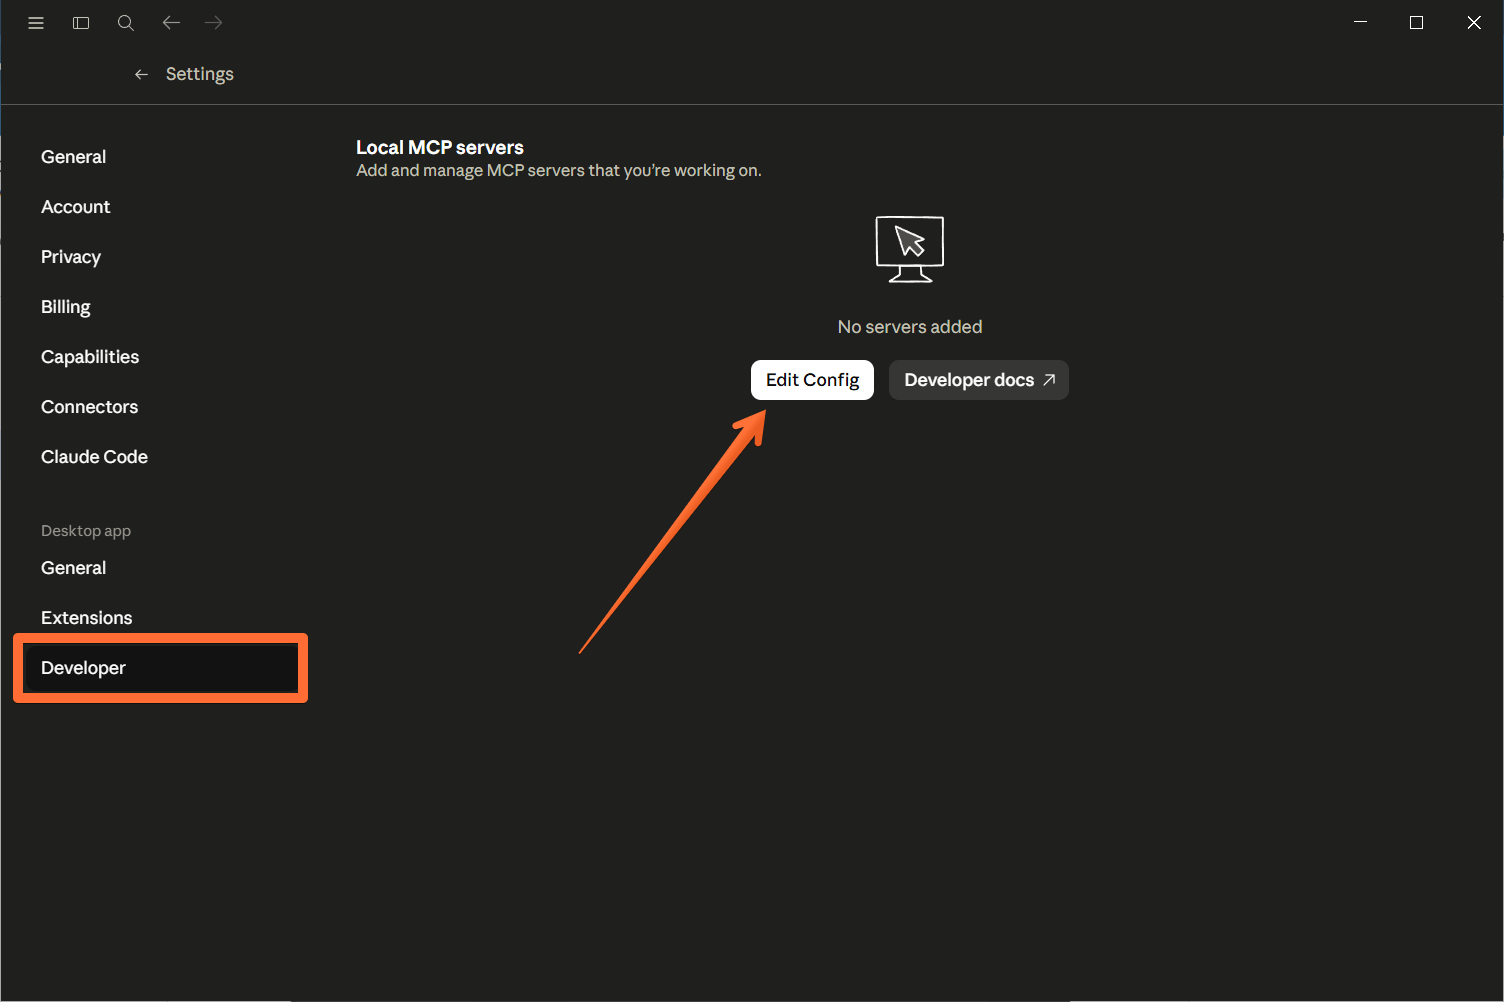
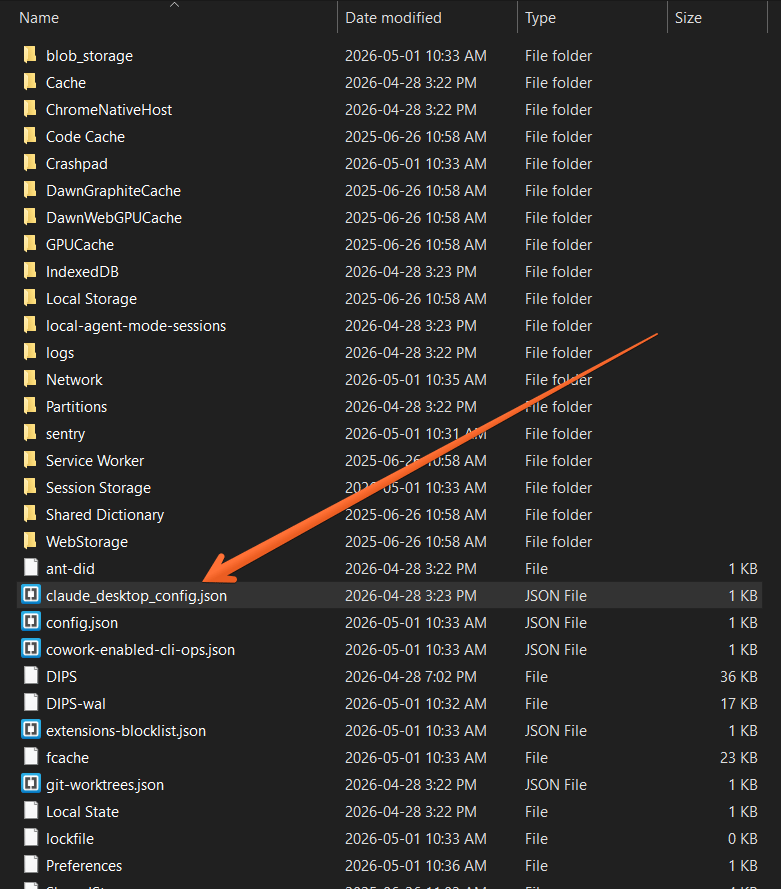
This opens Claude’s JSON configuration file, which is where Claude stores information about the MCP servers it can connect to. Every MCP server that you want Claude to use must be defined in this configuration file.
2. Add the following configuration (remove any existing Google Ads MCP configs):
{
  "mcpServers": {
    "google-ads-mcp": {
     "command": "npx",
      "args": [
        "-y",
        "mcp-remote",
        "https://mcp-google-ads.stape.io/mcp"
      ]
    }
  }
}
3. Save the changes in the file.
4. Restart Claude Desktop. After restarting, a browser window will open. Choose the Google account that has access to the Google Ads property you want to modify using the MCP server by Stape. Complete the authentication process to grant Claude access to your MCP server.
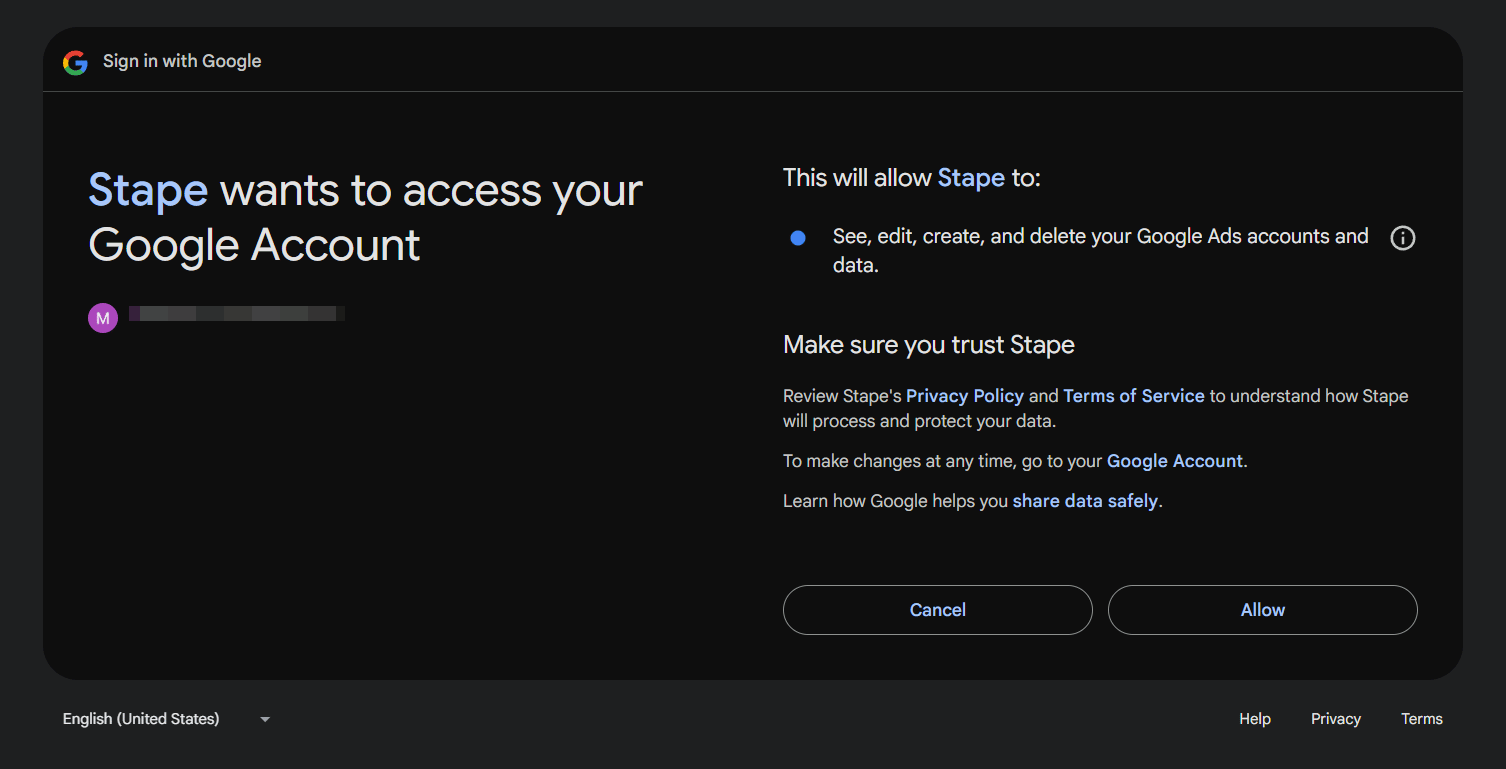
5. After the access is granted, you’ll get the message:

It means that the tool will be available for your use. In Settings → Developer, you will see the status Running next to google-ads-mcp. If you face any problems with configuration, refer to the troubleshooting section further in this guide.
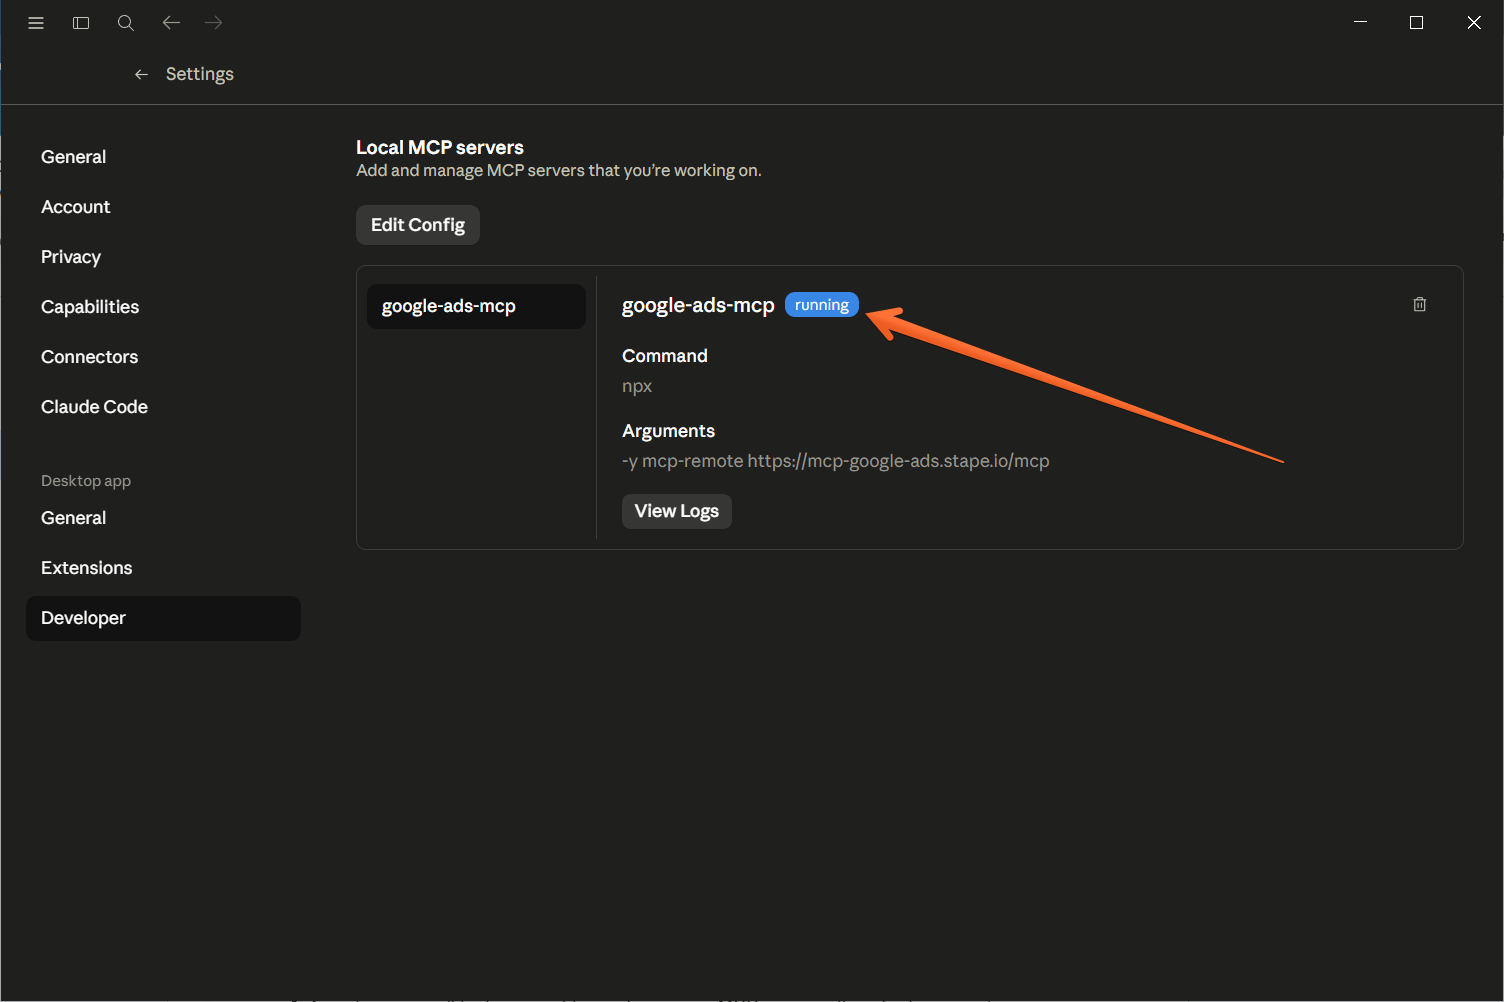
6. Now you can type your request via chat. To verify that it’s working, just type any query related to your Google Ads account, like “List all my Google Ads campaigns” or “What's the total spend across all campaigns this month?”
Using the Google Ads MCP Server with a CLI
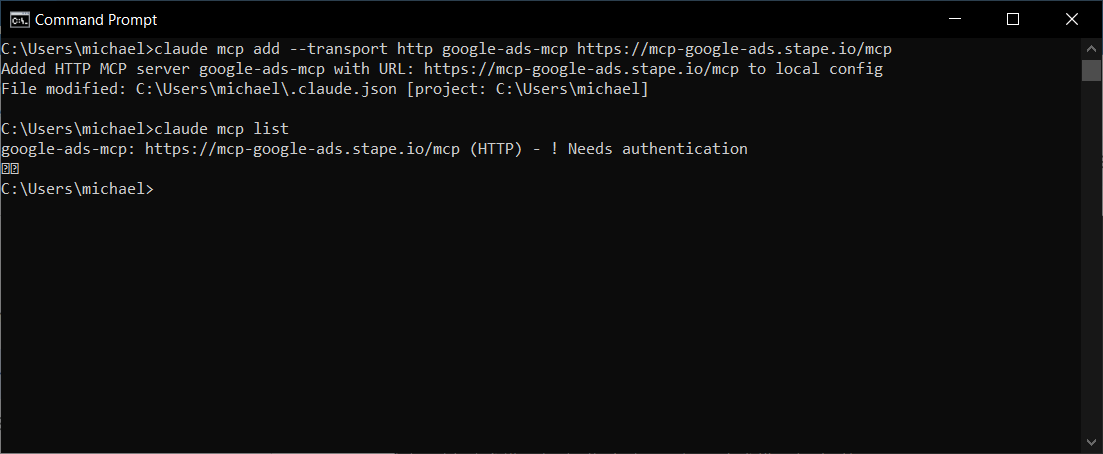
If you prefer working in the terminal rather than a desktop app, it’s pretty simple. For instance, you can add the Google Ads MCP server to Claude Code with a single command:
claude mcp add --transport http google-ads-mcp https://mcp-google-ads.stape.io/mcpThat's it. Claude Code will handle the OAuth authentication flow automatically when you first use the server – a browser window will open for you to log in and grant access, just like with Claude Desktop.
To confirm the server was added successfully, run:
claude mcp listYou should see google-ads-mcp in the output with its URL.
Troubleshooting Google Ads MCP server configuration
MCP Server name length limit
Some MCP clients, like Cursor AI, enforce a 60-character limit on the combined length of the MCP server name and the tool name. If your configuration uses a long server name (e.g., google-ads-mcp-your-additional-long-name), this may cause specific tools to be hidden or filtered out by the client.
Action: to ensure all tools are visible, configure your MCP server with a shorter name (e.g., google-ads-mcp).
The MCP cache
mcp-remote stores credential data in ~/.mcp-auth (or the location defined by the $MCP_REMOTE_CONFIG_DIR$ environment variable). If you run into persistent issues, you should try clearing this cached state and tokens.
Use this command to clear the cache:
rm -rf ~/.mcp-authAfterward, restart your MCP client.
Want to start on the server side?
Try for freeRecommended for you
Jul 20, 2026
Sep 8, 2026
Blog
Claude MCP guide: use cases, setup & best practices
Claude MCP connects Claude to external tools, enabling automated reporting and cross-platform workflows. Learn how it works, the configuration, best practices.
Aug 19, 2026
Solutions
Google Ads MCP server
Run an MCP server that connects your AI app with the Google Ads API. Analyze your campaign results and marketing reports without opening the dashboard.
Sep 11, 2026

Comments