How to set up the Stape MCP server
Uliana Lesiv
AuthorModel Context Protocol (MCP) Server can significantly simplify the management of your sGTM containers on Stape without requiring coding skills. You just type your task to the AI assistant, and the MCP server handles the request.
In this article, we will define the MCP Server and show how to set up the Stape MCP Server in a few simple steps.
What is the Model Context Protocol Server?
The Model Context Protocol (MCP) is an open standard that allows AI models to interact with APIs, databases, and other services in a consistent and scalable manner.

Independent of the platform (Stape or any other), the Model Context Protocol (MCP) Server is the intermediary, offering a unified interface to access external systems, tools, and data sources. MCP Server standardizes access to tools, resources, and prompts, ensuring they are usable by any AI application or agent that supports the protocol.
🤔 Looking for a broader introduction to MCP? Read our complete Claude MCP guide to learn how MCP works, when to use local or remote servers, and best practices for using MCP in Claude.
What are the benefits of Stape MCP Server?
The key benefit of implementing Stape MCP Server for users is the simplified management of their server GTM containers on Stape. It allows users to list, create, and delete containers and container zones without writing API requests; instead, the request is written in “human language” in the AI app.
Along with the MCP Server for Google Tag Manager, you can configure a server container on GTM and Stape in no time.
Prerequisites
For the MCP to connect and operate correctly, you will need AI app or agent (in our case, it is the Claude app).
Stape MCP Server configuration
1. Open your AI app and add the config. For this purpose, we use the Claude app.
Open the Claude desktop app → Settings → Developer tab → Edit Config → open desktop JSON file called “claude_desktop_config” → paste the code below.
Based on the Stape environment you use (Global or EU), follow the instructions:
Stape Global
To configure only the Stape MCP Server, paste the code below.
{
  "mcpServers": {
    "stape-mcp-server": {
      "command": "npx",
      "args": [
        "-y",
        "mcp-remote",
        "https://mcp.stape.ai/mcp",
        "--header",
        "Authorization: ${your_stape_api_key}"
      ]
    }
  }
}
If you would like to configure the MCP Server for GTM, please follow steps 1-8 from our guide for GTM and paste the code below.
{
  "mcpServers": {
    "google-tag-manager-mcp-server": {
      "command": "npx",
      "args": [
        "-y",
        "mcp-remote",
        "https://gtm-mcp.stape.ai/mcp"
      ]
    },
    "stape-mcp-server": {
      "command": "npx",
      "args": [
        "-y",
        "mcp-remote",
        "https://mcp.stape.ai/mcp",
        "--header",
        "Authorization: ${your_stape_api_key}"
      ]
    }
  }
}
Stape EU
If you are using the Stape EU environment, you need to provide an additional header X-Stape-Region: EU.
{
  "mcpServers": {
    "stape-mcp-server-eu": {
      "command": "npx",
      "args": [
        "-y",
        "mcp-remote",
        "https://mcp.stape.ai/mcp",
        "--header",
        "Authorization: ${your_stape_api_key}",
        "--header",
        "X-Stape-Region: EU"
      ]
    }
  }
}
If you would like to configure the MCP Server for GTM, please follow steps 1-8 from our guide for GTM and paste the code below.
{
    "mcpServers": {
        "stape-mcp-server-eu": {
            "command": "npx",
            "args": [
                "-y",
                "mcp-remote",
                "https://mcp.stape.ai/mcp",
                "--header",
                "Authorization: ${your_stape_api_key}",
                "--header",
                "X-Stape-Region: EU"
            ]
        },
        "google-tag-manager-mcp-server": {
            "command": "npx",
            "args": [
                "-y",
                "mcp-remote",
                "https://gtm-mcp.stape.ai/mcp"
            ]
        }
    }
}
The Stape team has also developed the MCP Server for Google Analytics 4. For the detailed configuration instructions, refer to our guide.
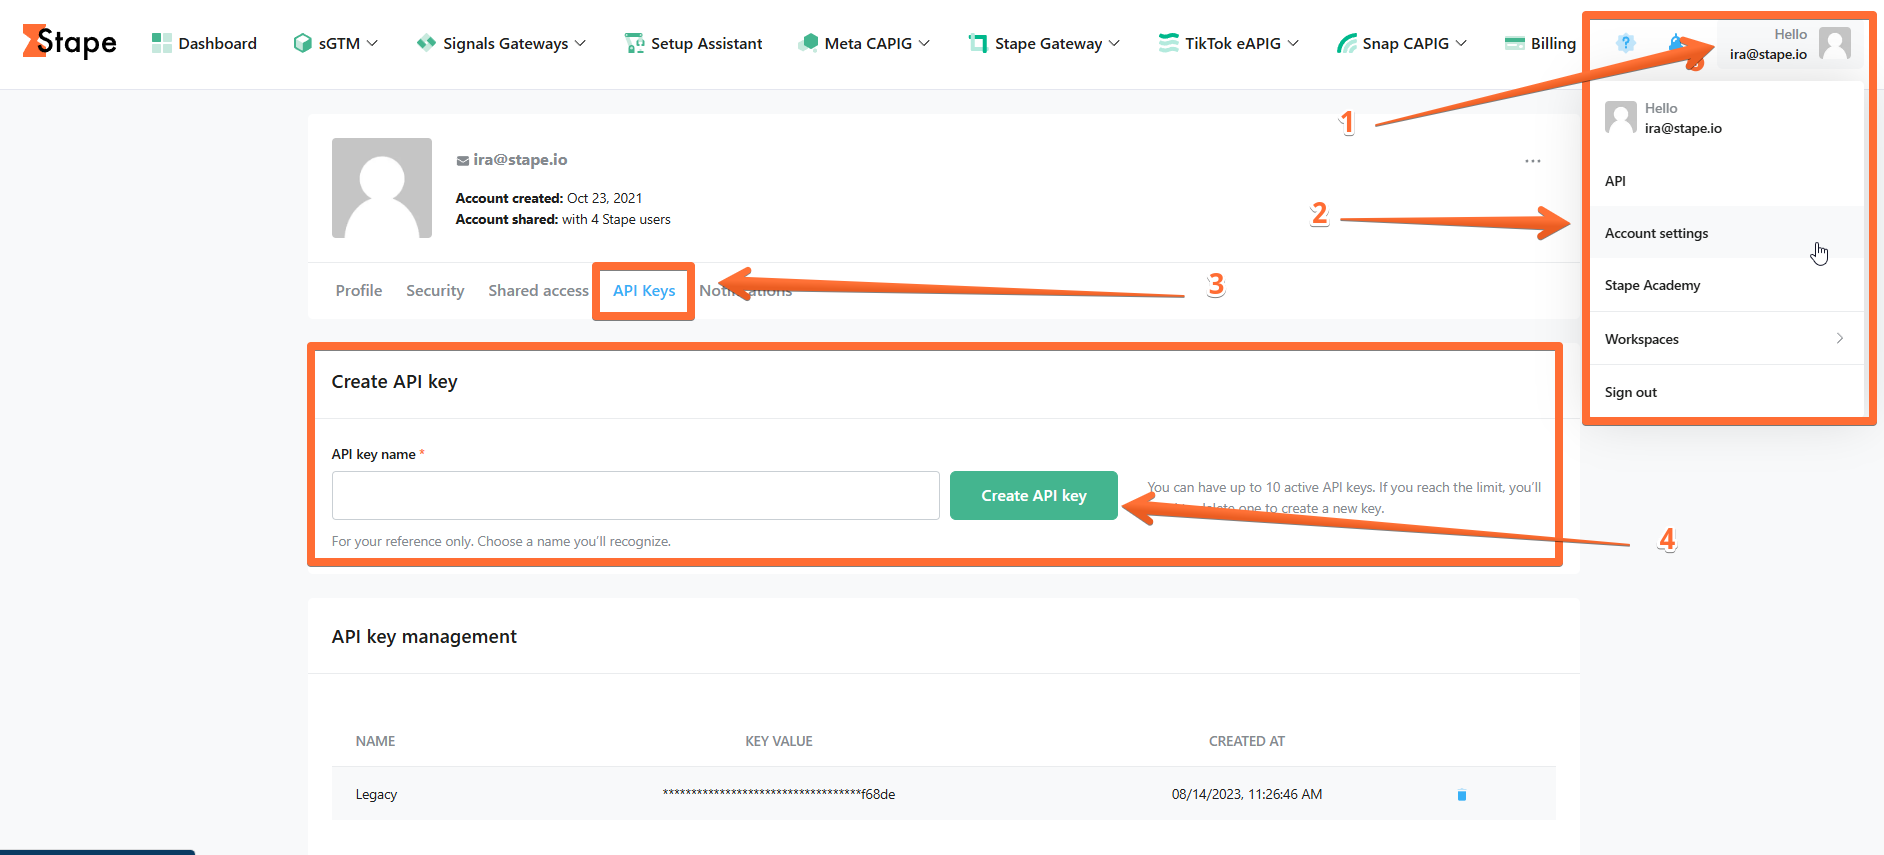
2. Find the Stape Account API Key.
Go to your Stape account → click on your account name and select Account settings → open the API Keys menu → enter a descriptive API key name and click Create API key. For security reasons, you will only be able to view the generated API key once (right now, upon generation). So for future use, be sure to write it down or save it on your device.
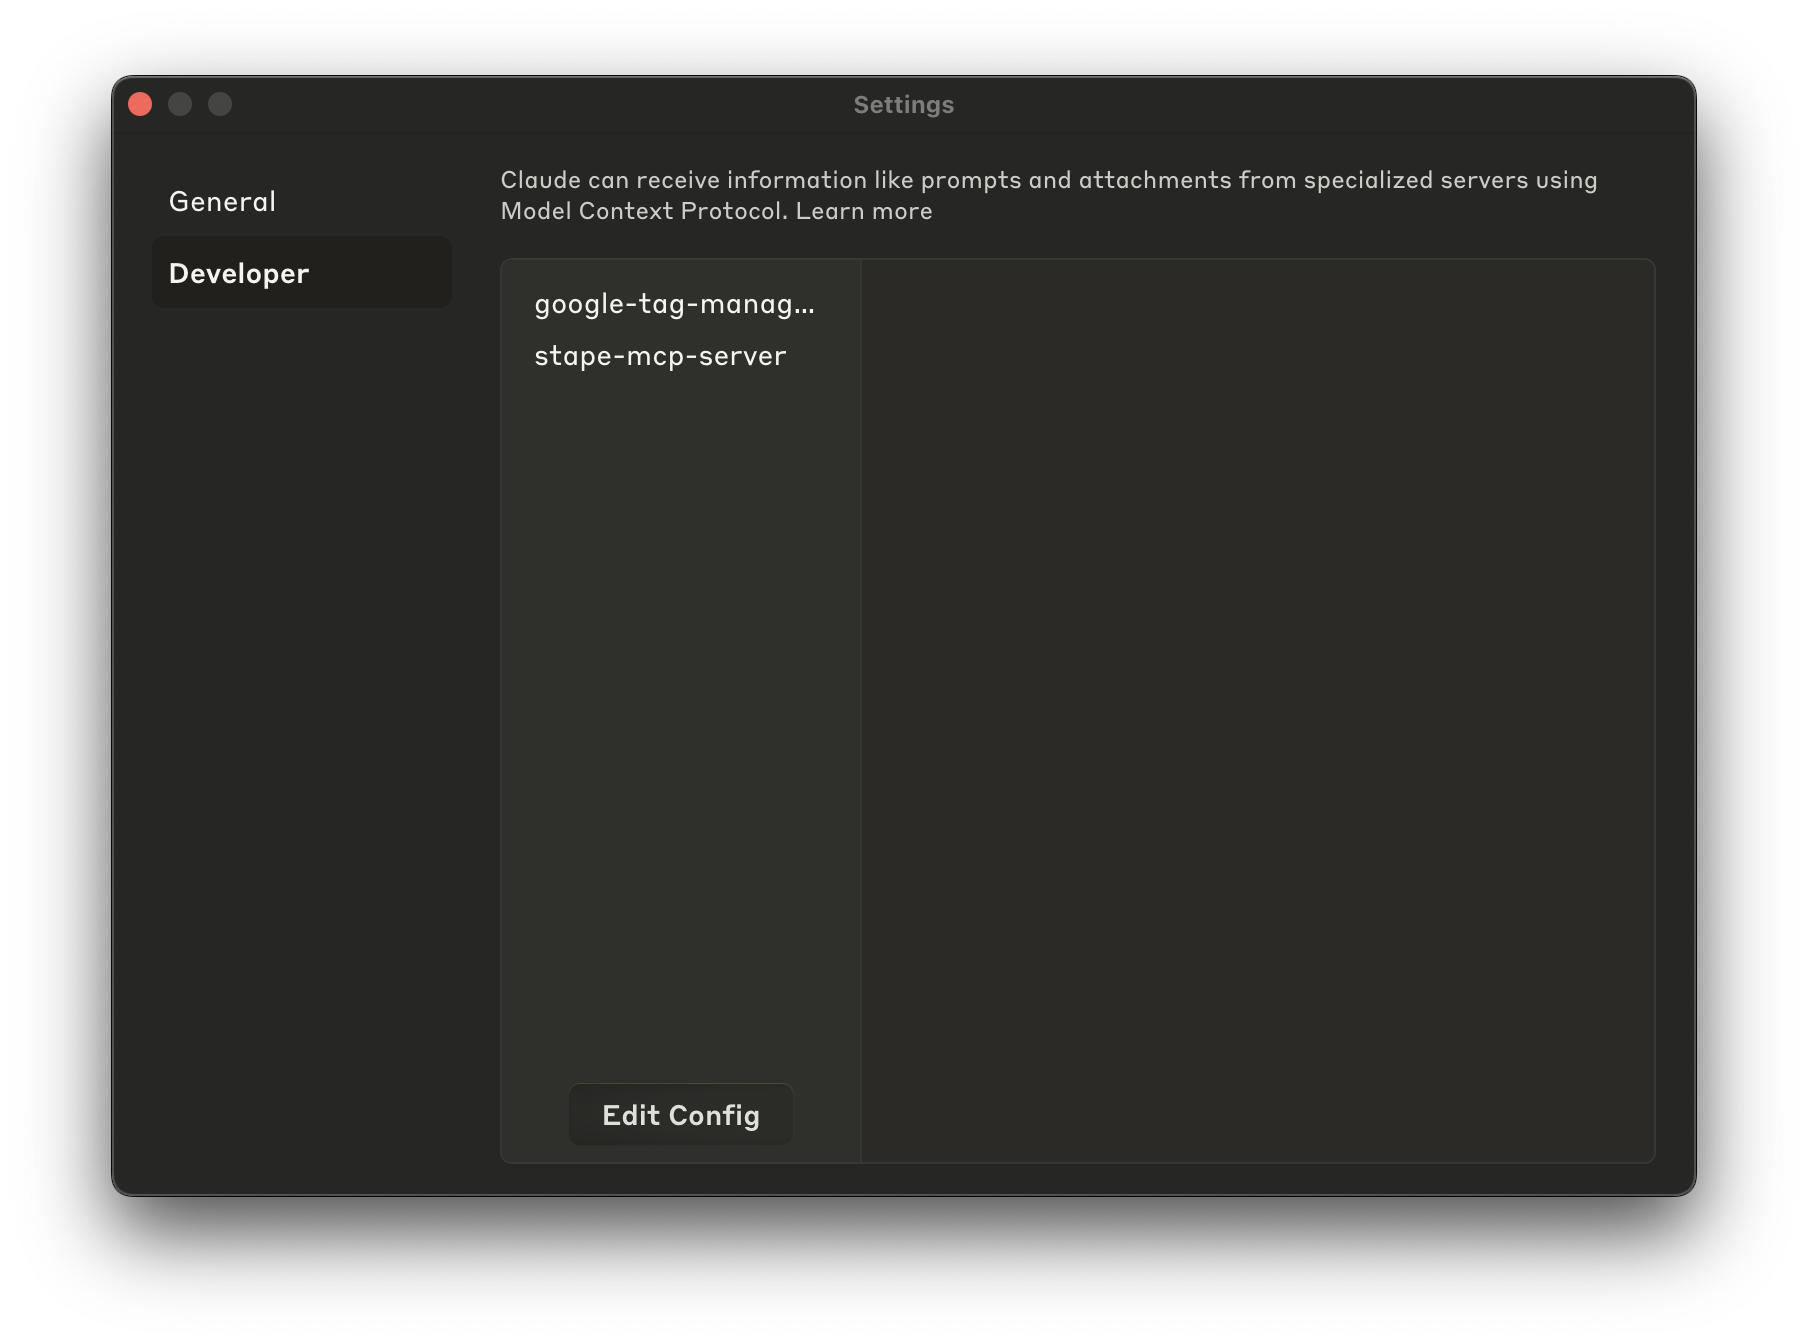
3. Save the file “claude_desktop_config” → close the Claude app → reopen it.
4. You should see the MCP Servers list in the Claude app's Developer tab.
You're all set! You can now begin typing your request in the Claude app.
To sum up
The Stape MCP Server offers a user-friendly way to manage your sGTM containers on Stape through natural language commands. There is no need for manual API interactions or coding expertise. The setup process is straightforward, and once configured, your AI assistant can handle complex account tasks. You can unlock more efficient workflows and optimize task performance with just a few steps.

Comments