Server-side tagging for WordPress
Written by
Ira Holubovska
Are you looking to try server-side tagging for your WordPress website? A server-side Google Tag Manager container is the best solution if you want to track data accurately and report it to analytics or marketing platforms.
This article will explain how to set up Google Tag Manager server-side container in WordPress using the Stape Conversion Tracking app.
What is WordPress server-side tagging?
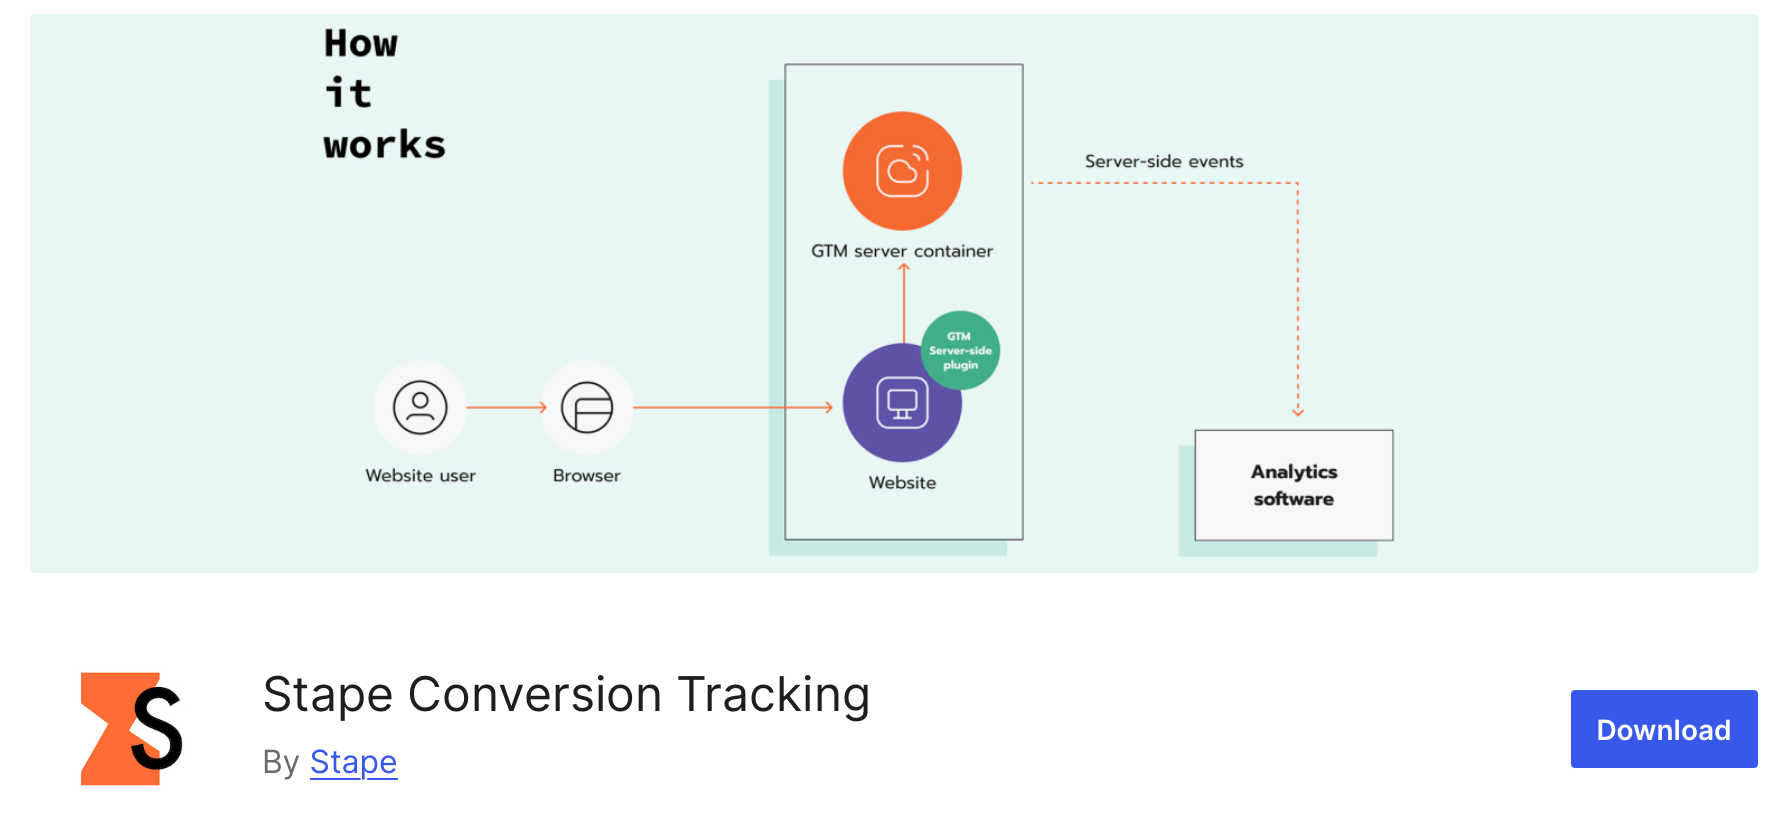
Server side tracking WordPress is a new method of implementing tracking that takes place on a cloud server instead of the user's browser. For WordPress sites, this means moving your tracking scripts off the visitor's device and onto a server you control, which makes the website load faster and reduces the chances of data loss due to ad blockers or network errors.
With server-side tagging, all tags and scripts are managed and executed on a separate server, which sends back the necessary data to advertising or marketing instead of requiring the browser to load and execute each script individually. This approach allows for greater control over the tag management process and can help to improve website performance, increase data accuracy, and ensure compliance with data privacy regulations.
As web analytics adapt to modern restrictions and ever-evolving rules, server-side tracking methods are quickly becoming the new standard for user identification. This technology has grown exponentially in popularity over recent years as companies seek more reliable data collection tactics.
Main benefits of server-side tracking for WordPress
1. Increased cookie lifetime
Safari and Firefox's Intelligent Tracking Prevention (ITP) restricts cookie lifetime. Previously, your cookie could live up to 2 years, and now its lifespan is limited to 7 days or even 24 hours.
You can extend the cookie lifetime by implementing tracking on the server environment, which is currently the most straightforward way to reach this goal. If you don't, users who return to your WordPress site after seven days (or, in some cases, 24 hours) will be considered new users. As a result, data quality inside your analytics platform will decrease.
2. Improved data accuracy
Most WordPress site owners see discrepancies between the number of transactions in analytics platforms and their CRM. This happens because of ad blockers and errors inside client browsers with third-party pixels. You can reduce this problem by moving tracking to the server-side with the Custom Loader power-up enabled. With Custom Loader, you can make tracking scripts invisible to ad blockers.
3. Faster page load speed
Heavy JavaScript is one of the most common reasons for decreased site speed. With server-side tagging, you remove third-party pixels from the browser and move them to cloud servers. Google has released a study showing that every 0.1-second reduction in mobile website speed, on average, increases order value by nearly 10%. For WordPress sites that often run multiple plugins and scripts already, this speed gain can make a noticeable difference.
If you're impressed by what a server Google Tag Manager container offers, you'll be happy to hear that adding it to your WordPress website is effortless with our plugin. The plugin is free, though we also offer several pricing plans for our hosting services.
4. Reduced risk of data privacy violations
By managing all tags on the server-side, marketers can ensure that user data is collected and processed in compliance with data privacy regulations, reducing the risk of data privacy violations.
WordPress Conversion Tracking app by Stape
Note:
You can also try to use Setup Wizard, which lets you select the platforms you use and generates pre-built templates for both your web and server GTM containers. The templates are then automatically imported into your container.
Stape has developed a Conversion Tracking app to make it easier for server side tracking WordPress. With this app, you can take advantage of features that previously required extensive technical knowledge. Here's what the Stape Conversion Tracking app for WordPress can do.
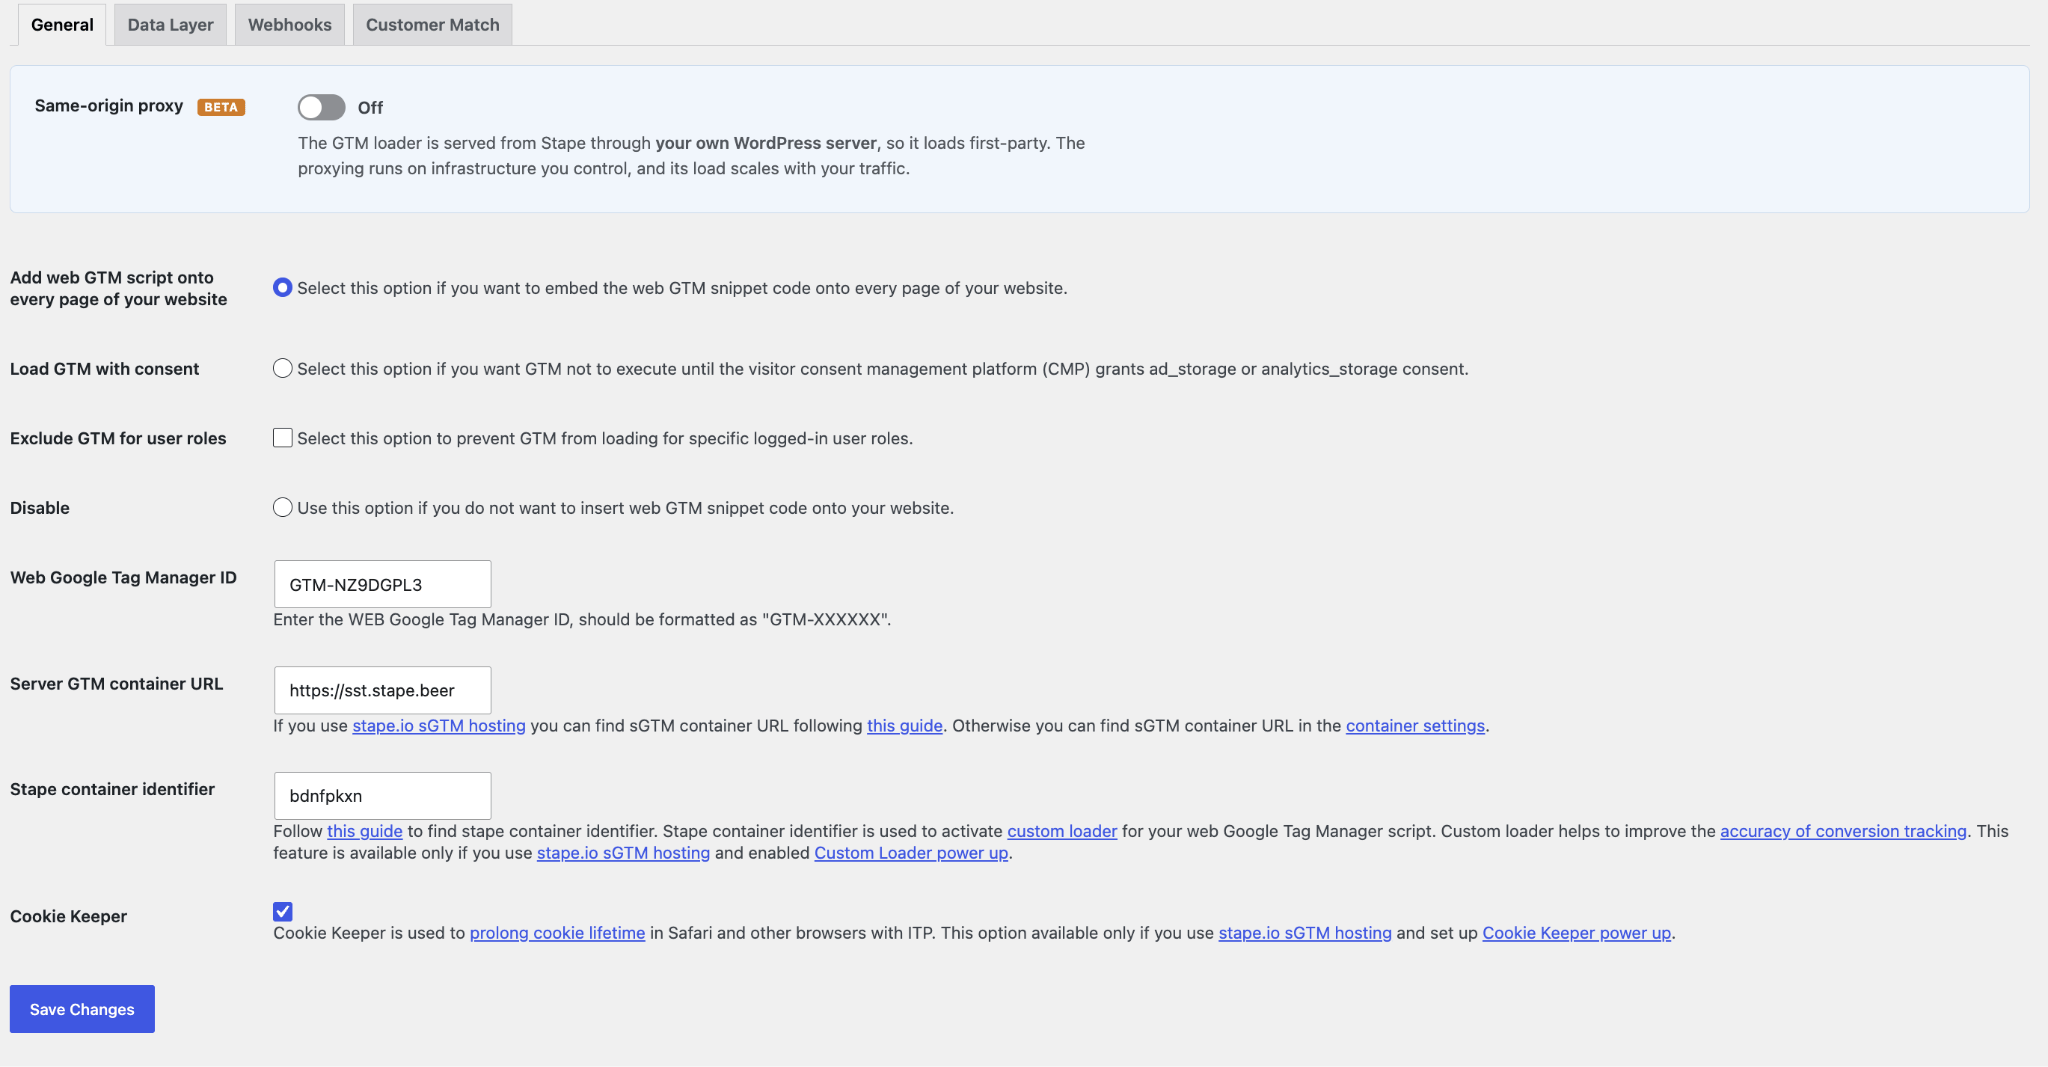
1. Inserts the Google Tag Manager script on your website
The Stape Conversion Tracking app can either insert the GTM script on all website pages or work alongside other WordPress plugins that already insert the GTM script. The second option becomes active only when the Stape plugin detects a GTM snippet added via another plugin – in that case, the Stape plugin won't add the GTM script again but will still add all the configured features.
- Same-origin proxy - normally, the GTM web loader is served from the customer's Stape subdomain (for instance, xxxx.stape.io). With same-origin on, that same loader is served from Stape but routed through the customer's own WordPress site.
- Add web GTM script onto every page of your website - select this if you want to add web GTM to all site pages. Make sure you are not using any other plugins that insert GTM script on the site to avoid conflicts or event duplication.
- Load GTM with consent - select this and GTM will wait for information about the user’s marketing consent before tracking any data.
- Exclude GTM for user roles - select user roles whose activities will not be tracked by GTM.
- Disable - select this to only add plugin functionality without adding GTM script (for example, if you are using another plugin that inserts GTM script on the site).
- Web Google Tag Manager ID - make sure to add your web Google Tag Manager ID. If you add a server GTM ID instead, it will cause 403 errors.
- Server GTM container URL - enter your tagging server URL. If you are using Stape’s sGTM hosting, read how to find your sGTM container URL on Stape. Otherwise, it can be found in your server GTM container’s settings.
- Stape container identifier - enter the Stape container identifier if you want to use a Custom Loader (highly recommended to improve the accuracy of conversion tracking).
- Cookie Keeper - this power-up is available only if you have a container hosted on Stape. With it, you can continue using the full cookie duration.
2. Sends dataLayer events to the web GTM container
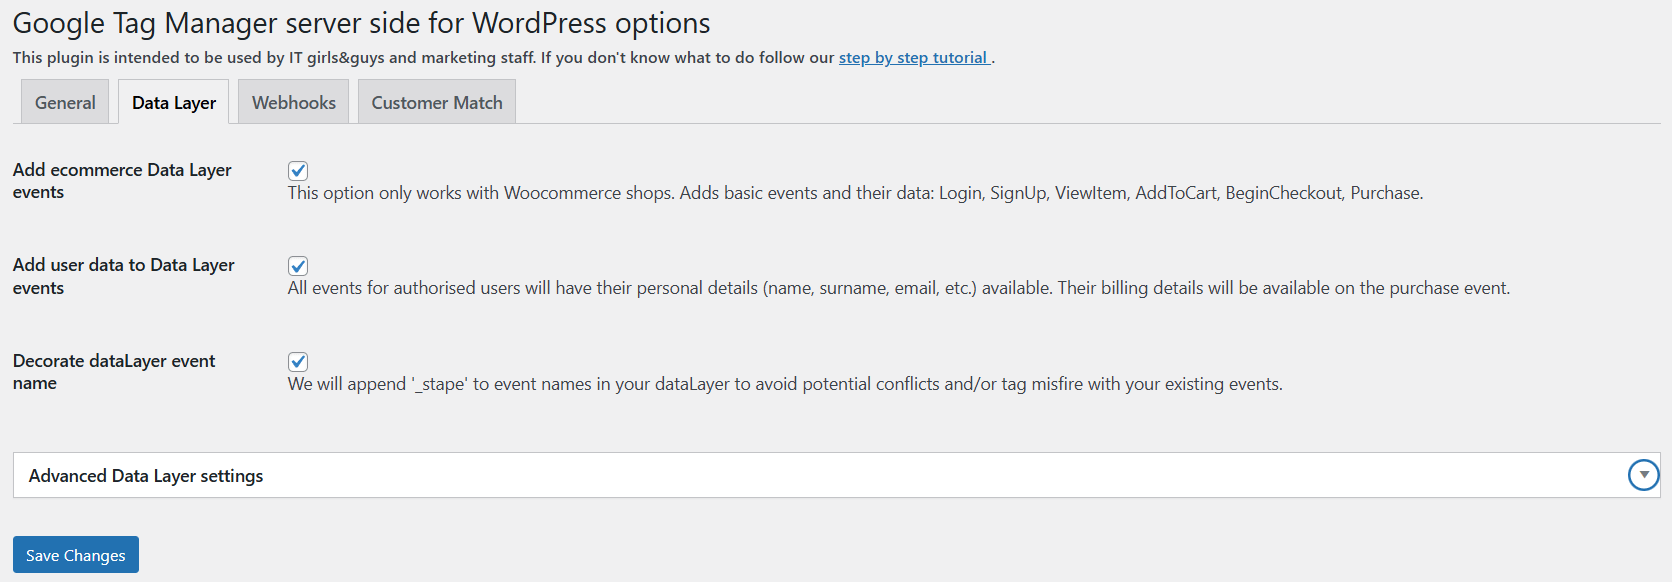
This option allows you to send eCommerce data and user data to the data layer. Note that it works only with WooCommerce server-side tracking.
- Select item
- View item list
- Add to cart
- Remove from cart
- Begin checkout
- Purchase
User data:
- Name
- Surname
- And more.
- Add ecommerce Data Layer events - add basic ecommerce events and their data for shops built with WooCommerce.
- Add user data to Data Layer events - add data with personal details of authorised users to Data Layer events.
- Decorate dataLayer event name - add _stape to Data Layer event names.
- Advanced Data Layer settings - fine-tune your Data Layer event values.
3. Sends webhooks
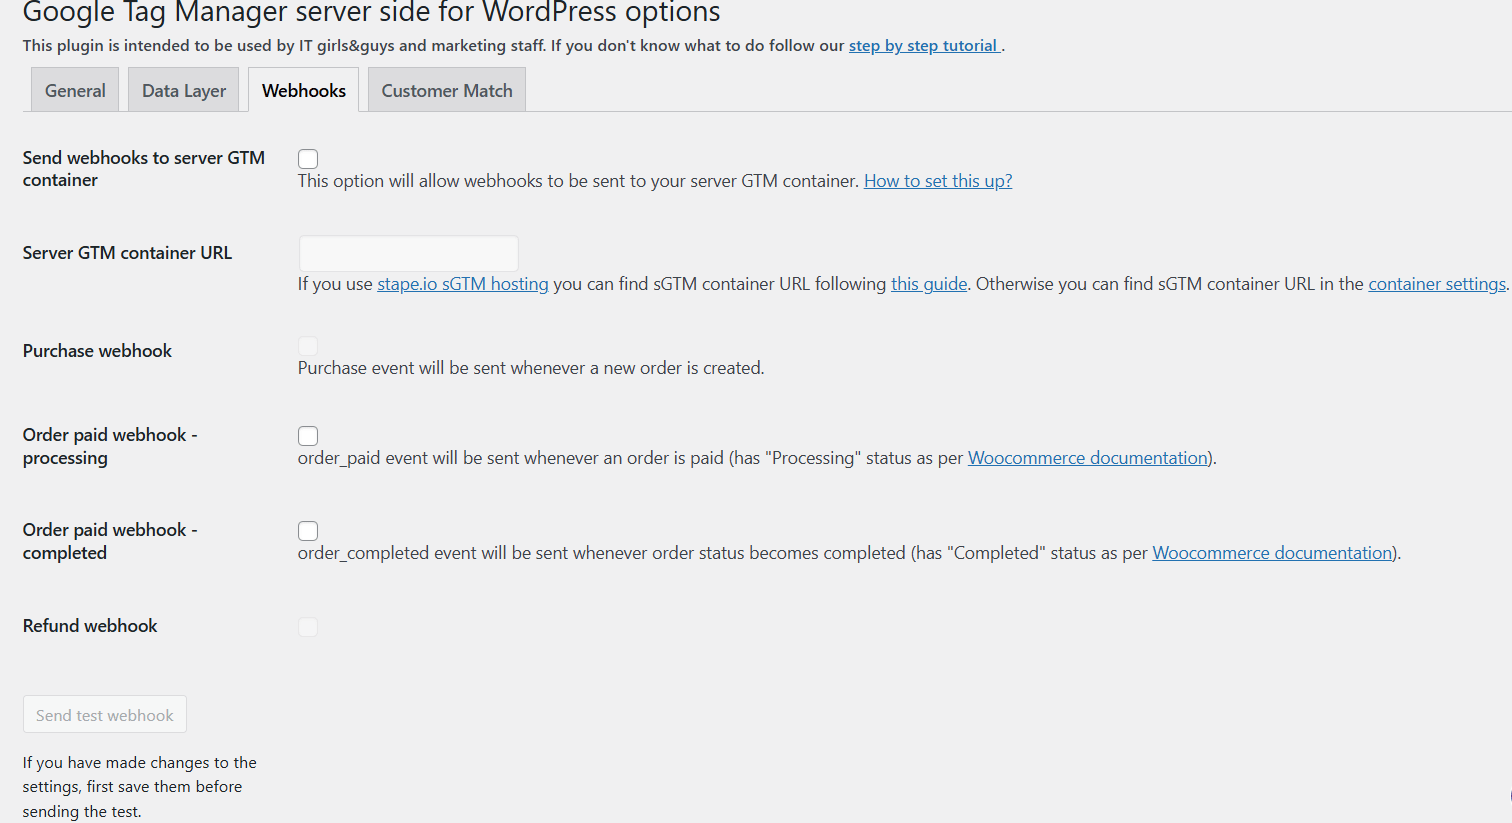
The app can send Purchase and Refund webhooks to the server GTM container. To enable webhooks, add your server GTM container URL and select the events you want to send to sGTM.
4. Creates Customer Match lists
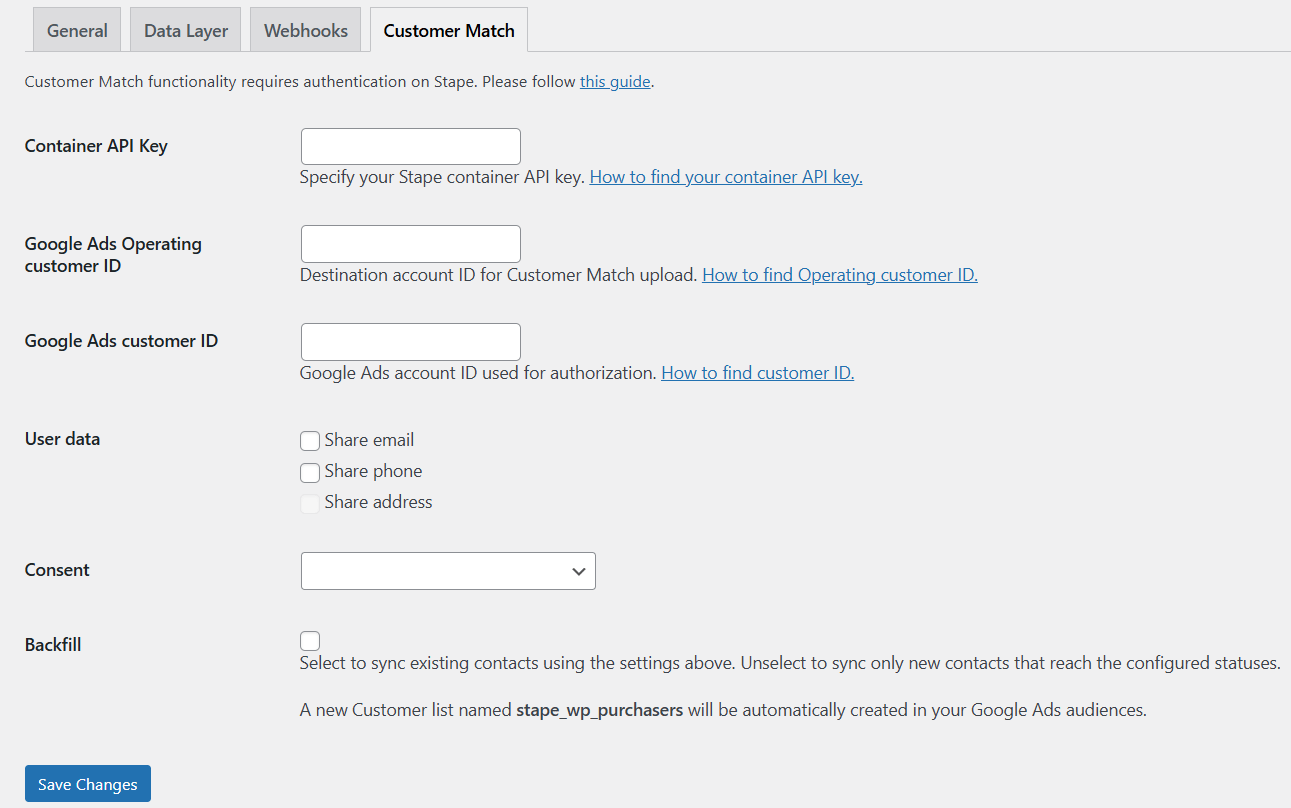
The app can create and fill the Customer Match list in Google Ads automatically. It allows you to choose which customer data to upload, establish consent status, and update existing contacts or create new ones.
How to set up WordPress server-side tracking
1. Log into your WordPress admin panel and go to Plugins → Add New → search for "Stape Conversion Tracking" → select the Stape Conversion Tracking app → click Install Now. Once installed, click Activate.
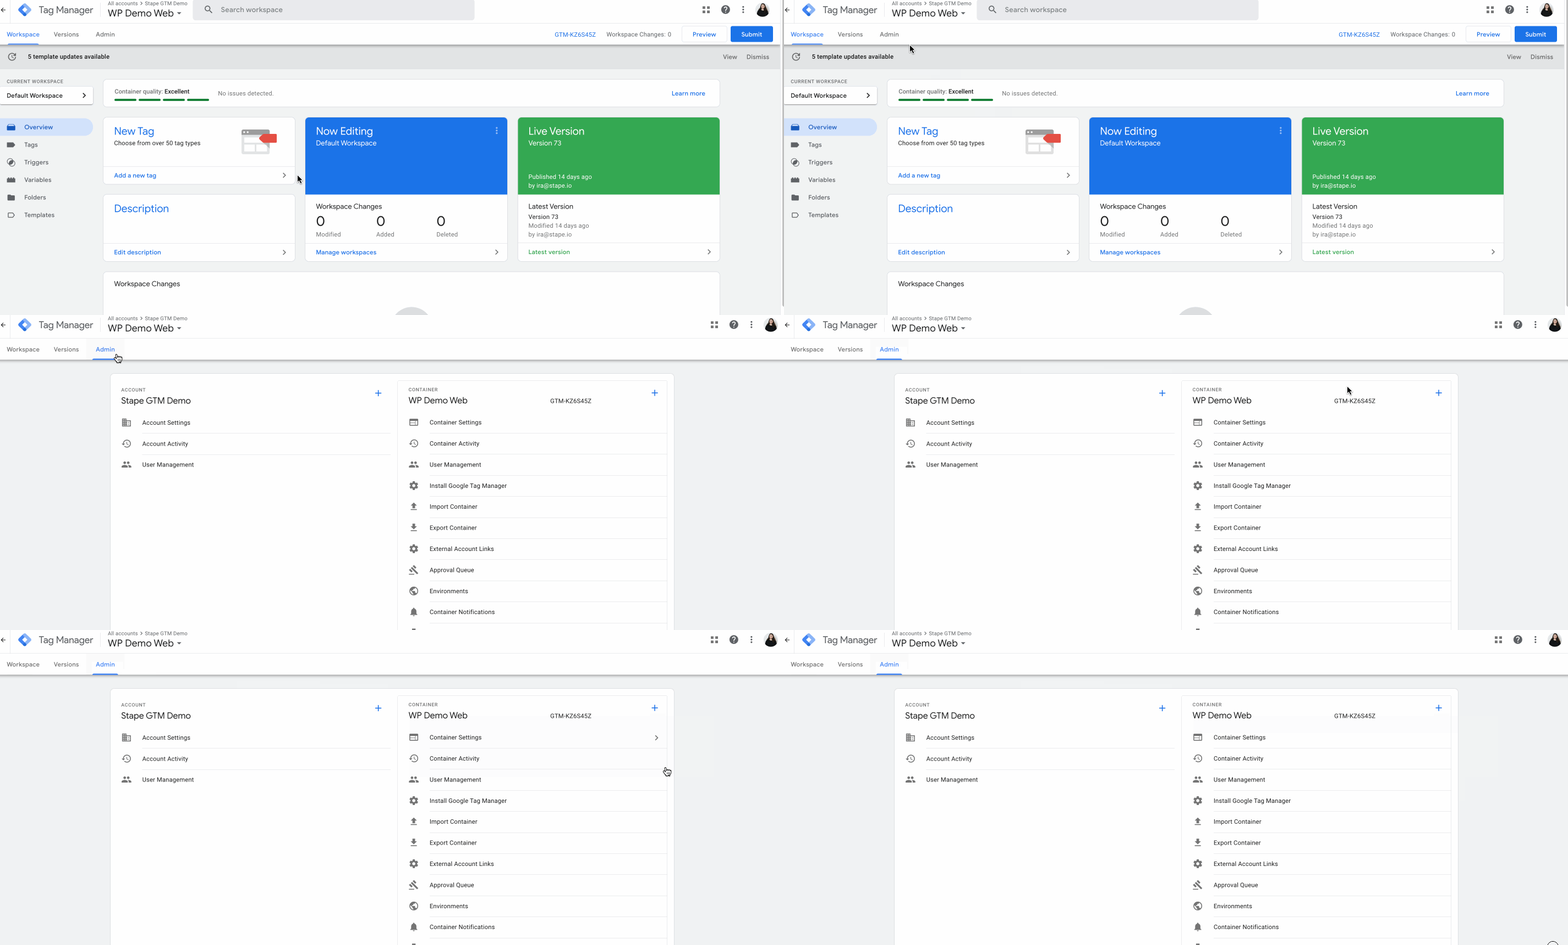
2. Create a Google Tag Manager Server container if you don’t have one. Go to https://tagmanager.google.com/ and choose the account where you want to create a container. Then, click Admin.
3. Under the container column, click +.
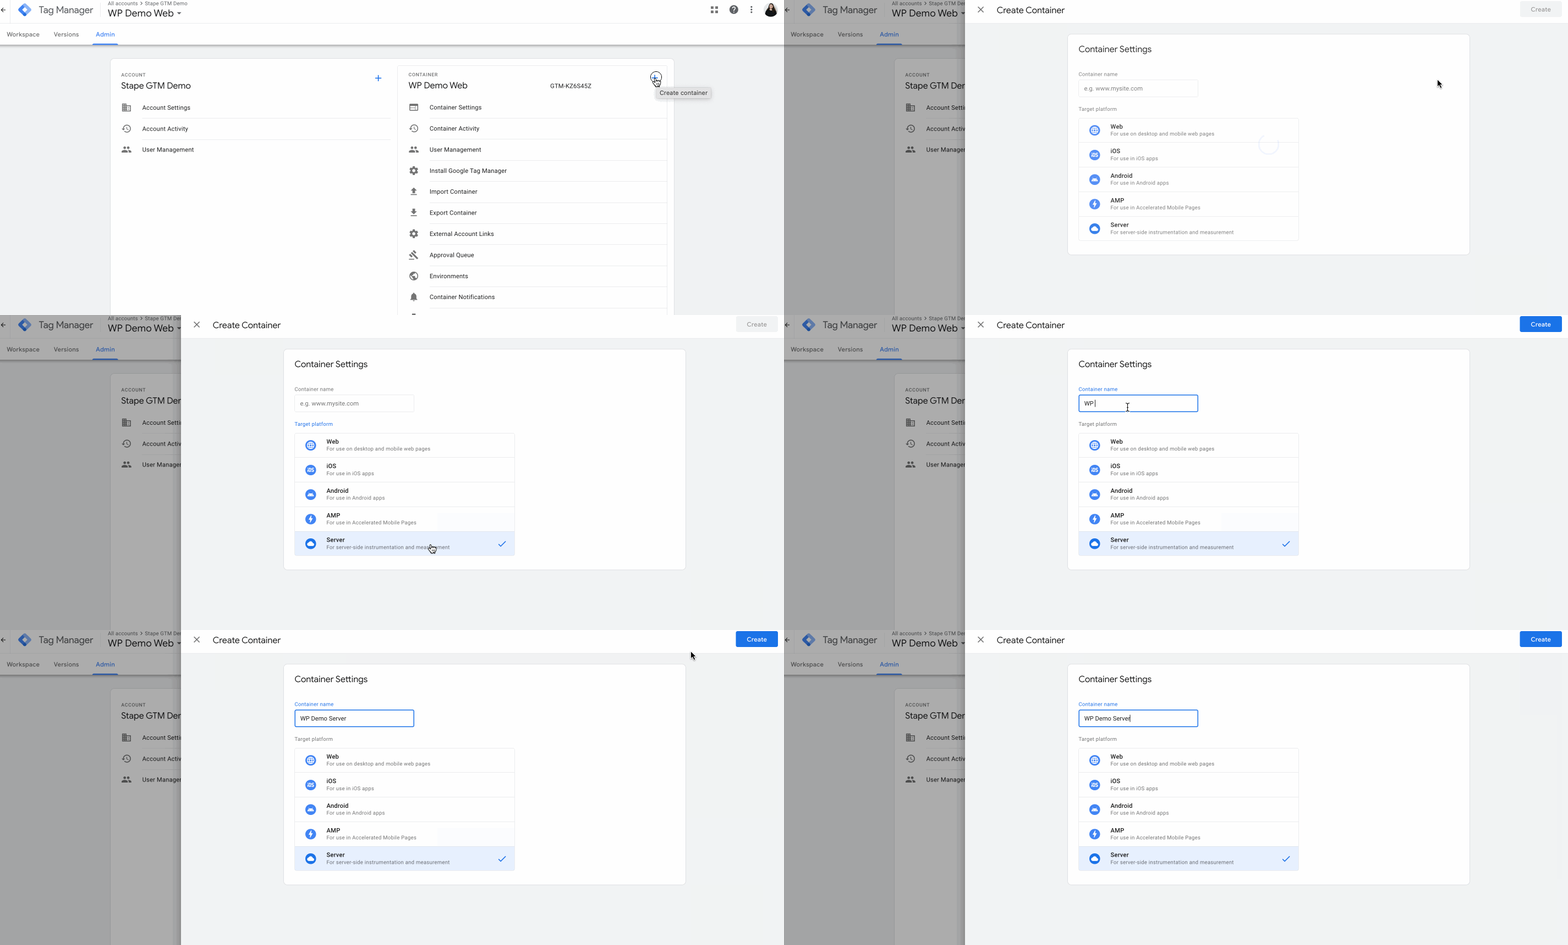
4. Type a container name, choose Server as the target platform, and click Create.
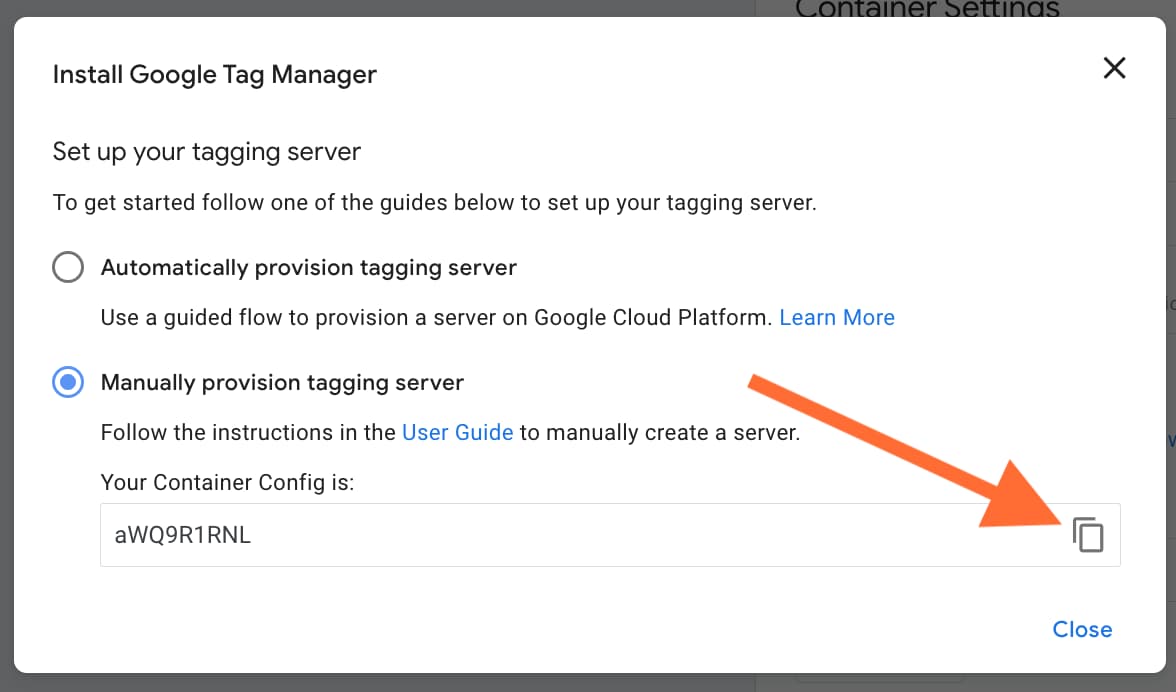
5. On the install pop-up, choose Manually provision tagging server, copy your container config, and paste it into a text editor. You'll need this for the next steps.
6. Sign up for an account on Stape.
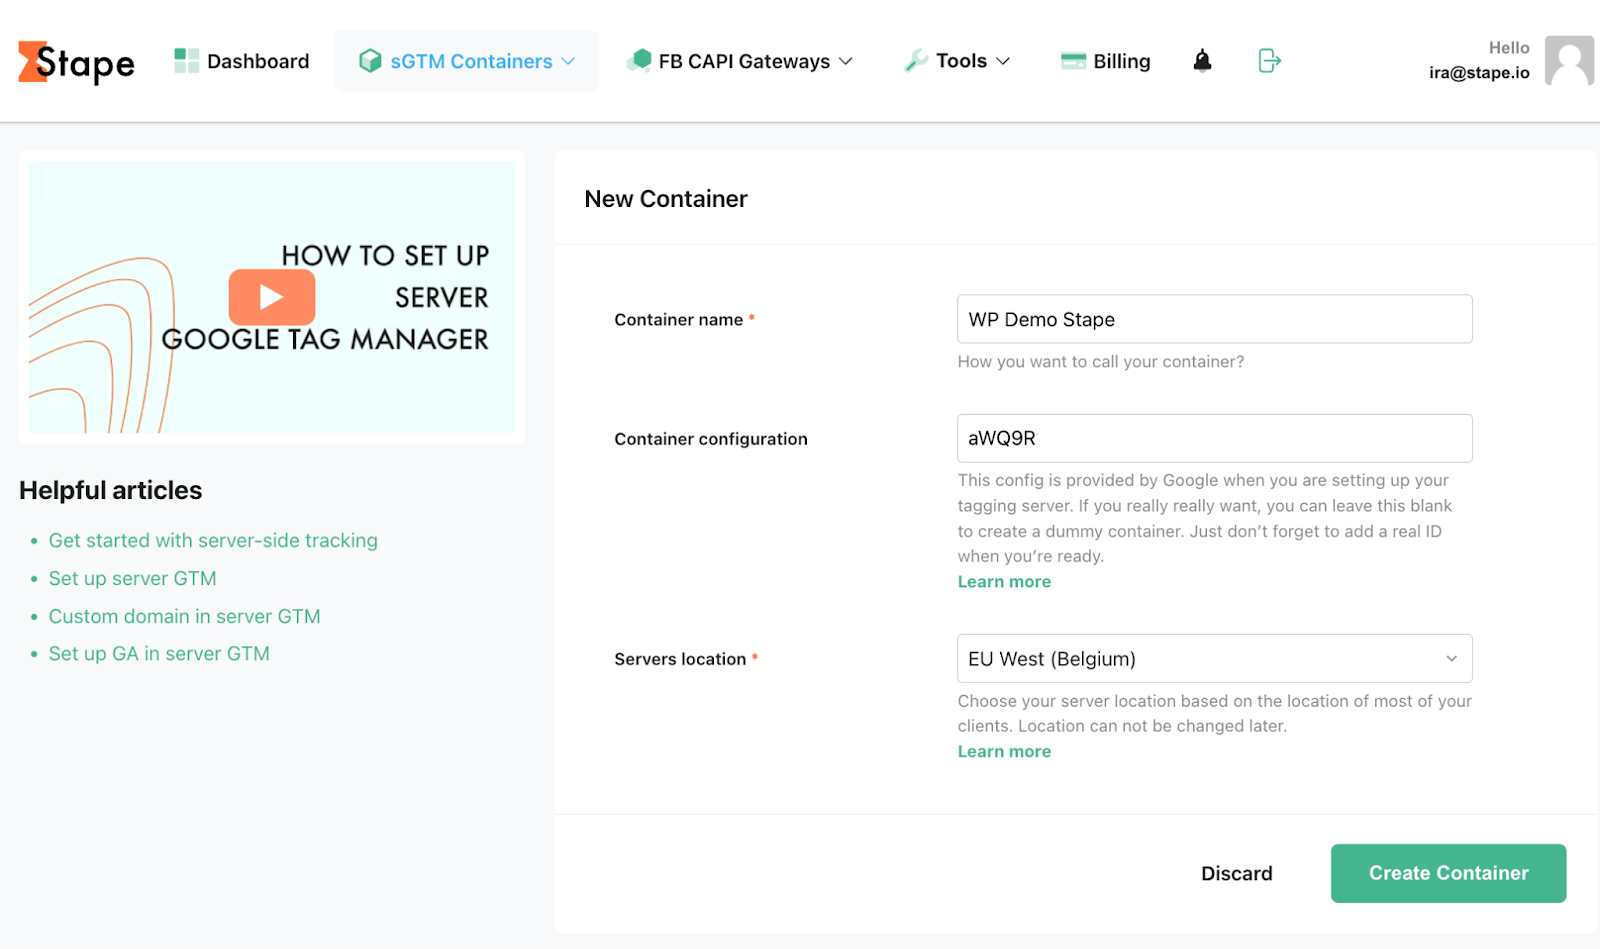
7. Once you receive the confirmation email and set your password, create a container. Enter your container name and paste the container config you copied from your Google Tag Manager server container, then click Create Container.

8. After clicking Create, you'll see the status of your container, container config, and plan name. It takes around five minutes to deploy a server container – reload the page to update the status. If the setup was done correctly, you should see the status Running.
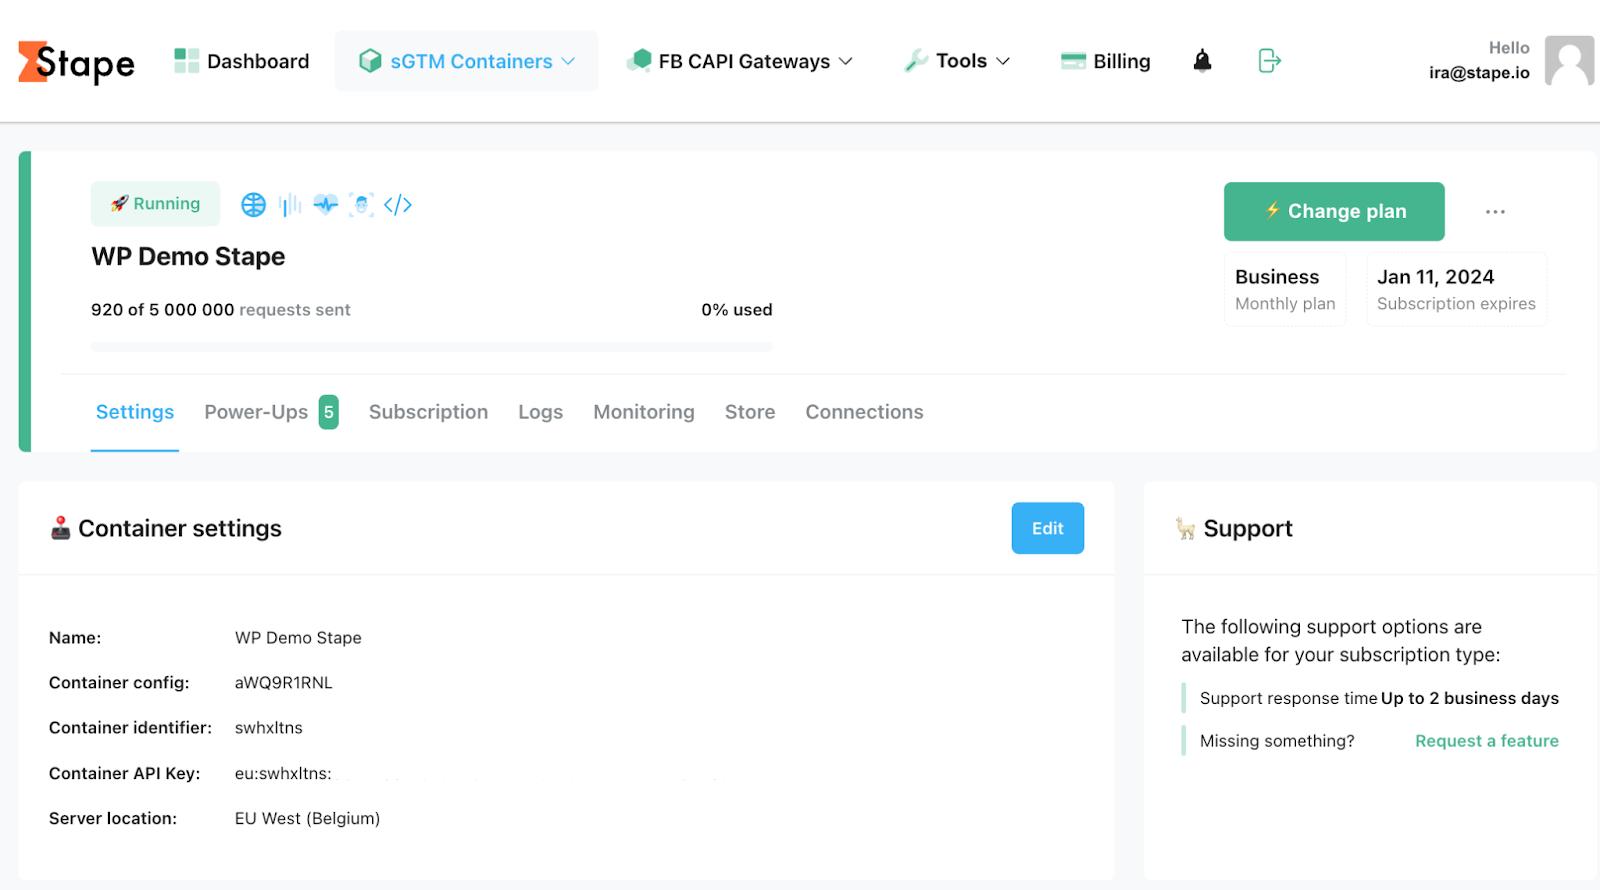
If you see Error, check that you've copied and pasted the correct container configuration. If the error persists, contact our support team.
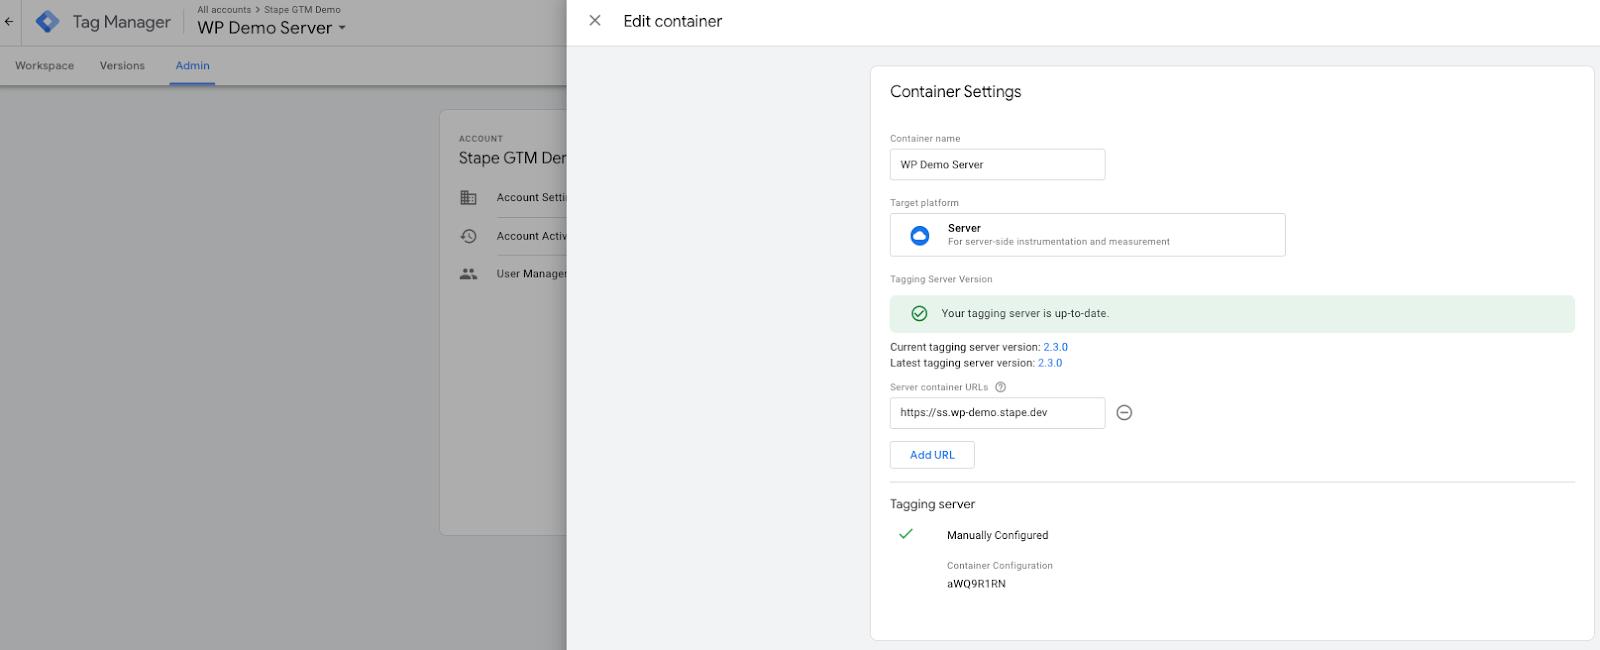
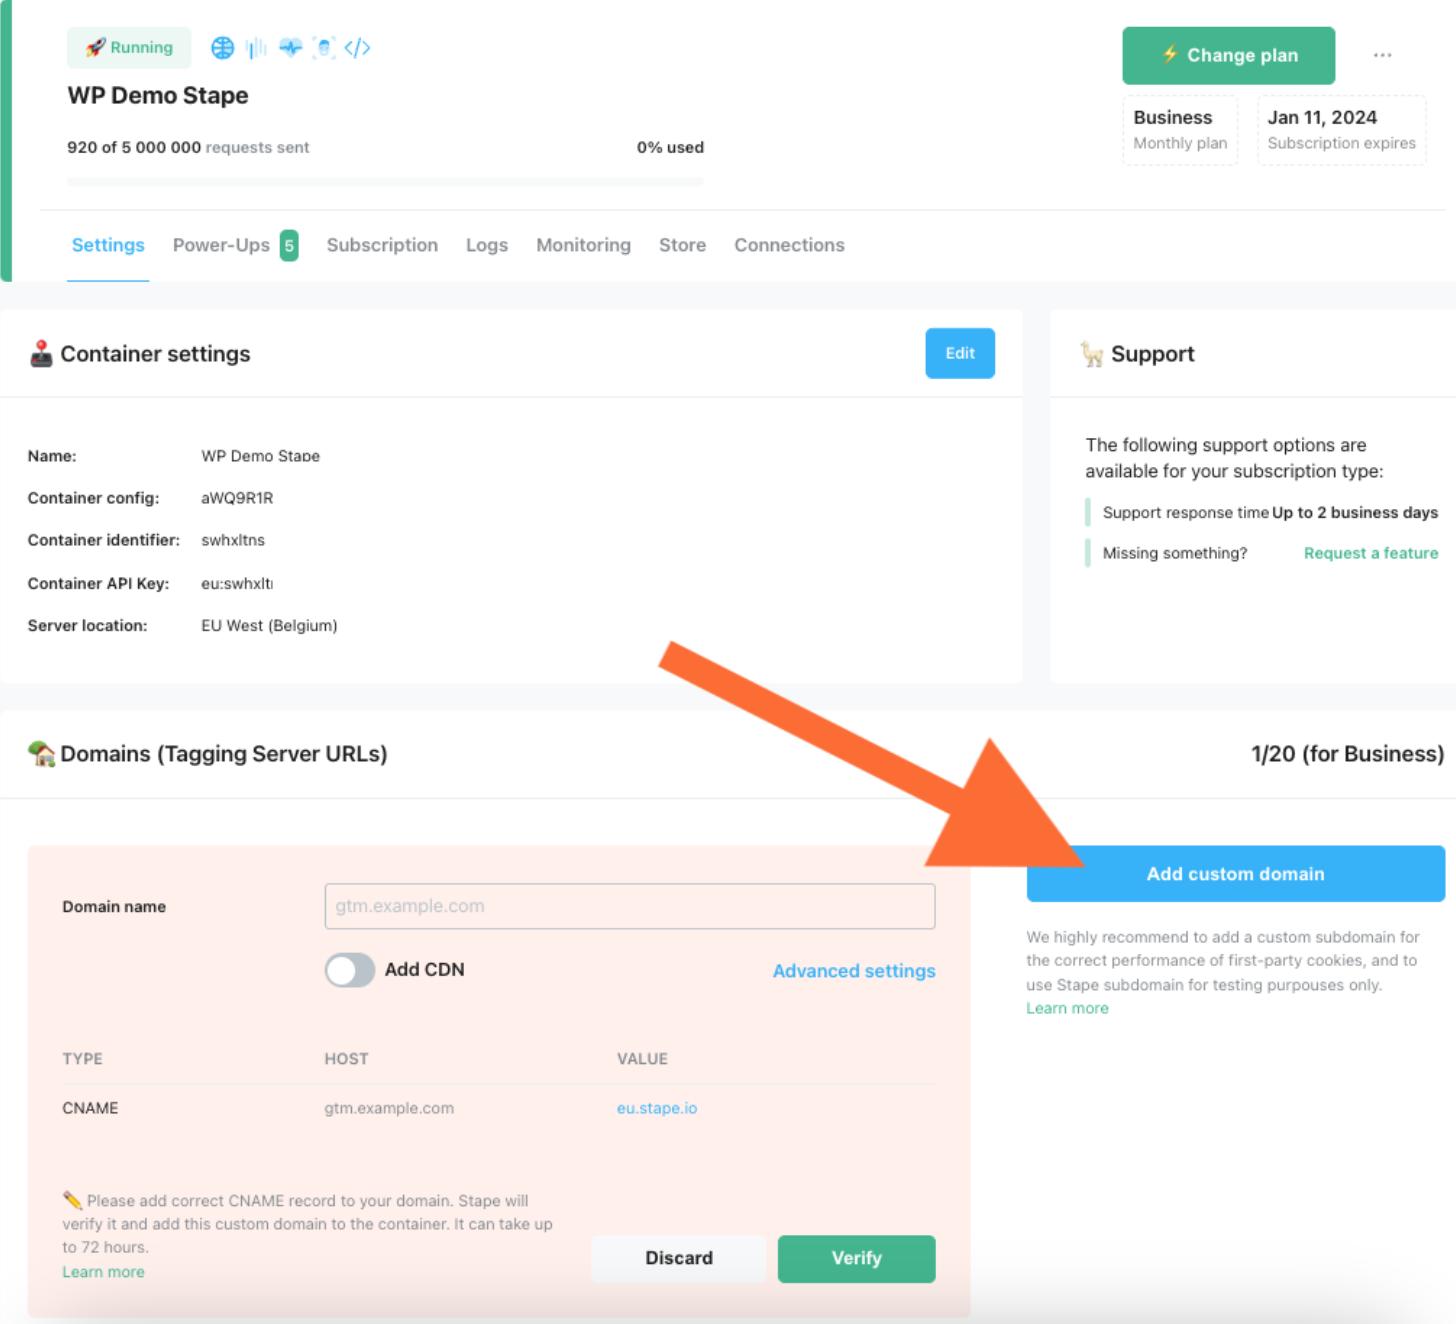
9. Inside your Google Tag Manager server container, click Admin → Container Settings and paste the domain URL you see inside your Stape container. Using a custom domain is highly recommended.
10. Open the Stape Conversion Tracking plugin you installed in the first step and configure it.
General tab:
- Same-origin proxy. Normally the GTM web loader is served from the customer's Stape subdomain (for instance, xxxx.stape.io). With same-origin on, that same loader is served from Stape but routed through the customer's own WordPress site. To the browser, it looks first-party, helping the loader work reliably in Safari and pass ad blockers. Note: it's still Stape's loader and Stape's container doing the work; WordPress is just the pass-through that makes it first-party.
Data Layer tab:
- Add ecommerce Data Layer events - add basic ecommerce events and their data for shops built with Woocommerce.
- Add user data to Data Layer events - add data with personal details of authorised users to Data Layer events.
- Decorate dataLayer event name - add _stape to Data Layer event names.
- Advanced Data Layer settings - fine-tune your Data Layer event values.
Webhooks tab:
- Send webhooks to server GTM container - enable sending webhooks to your server GTM container. Be sure you understand what webhooks are and how to use them.
- Server GTM container URL - enter the URL of the server container where webhooks will be sent. If you are using Stape’s sGTM hosting, follow this guide to locate it. Otherwise, it can be found in your server GTM container’s settings.
- Purchase webhook - send a purchase event when a new order is created.
- Order paid webhook - processing - send an order_paid event when an order is paid.
- Order paid webhook - completed - send an order_completed event when an order is completed.
- Refund webhook - send a refund event when an order is refunded.
- Send test webhook - troubleshoot your webhook setup by sending a test webhook.
Customer Match tab:
- Container API Key - enter your container API key, located in your Stape account container settings. Read how to find the container API key.
- Google Ads Operating customer ID - enter the destination account ID for Customer Match upload. Read how to find your operating customer ID.
- Google Ads customer ID - enter your Google Ads account ID (NOT the operating one). Read how to find your customer ID.
- User data - select which user data to share with Google Ads’ Customer Match functionality.
- Consent - select one of the options if you wish to define the consent status of the user data.
- Backfill - select to update existing contacts using the settings above, or leave blank to synchronize only new contacts.
11. Save your changes, open the browser console, and check that the web GTM script is being served through your tagging server URL.
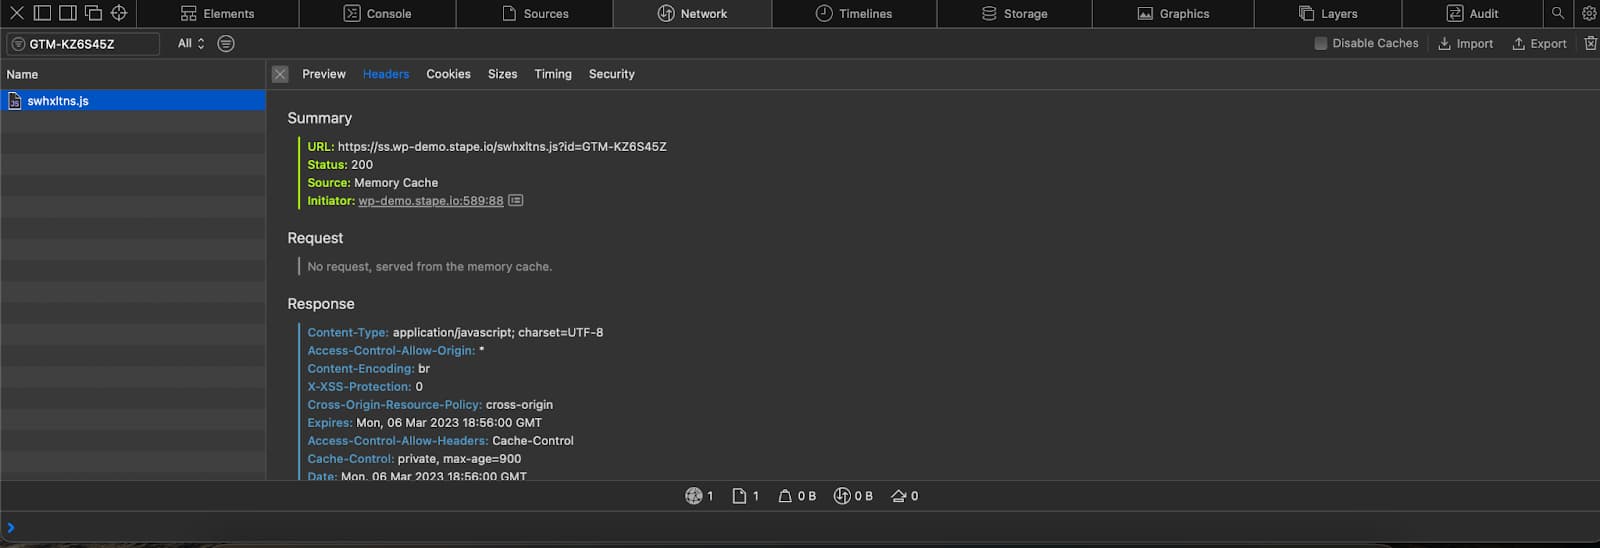
12. Once your server GTM container for WordPress is up and running, you can start configuring server-side tagging for the platforms you need. We have separate guides on setting up server-side Google Analytics 4, Facebook, TikTok, Snapchat Conversions API, etc.
Conclusion
Server-side tagging is a powerful tracking solution, and with the Stape Conversion Tracking app, you can implement it on your WordPress website with relative ease. Now that you know what's involved in setting up a Google Tag Manager server container for WordPress and how it can benefit your site, it's worth taking the time to put it into practice. Keep an eye on any platform changes and adjust your setup as needed to maintain a reliable tracking experience.
If you have questions or need assistance, don't hesitate to reach out – we'd be glad to help.
Want to start on the server side?
Try for free
Comments