Advertising in ChatGPT: how to track ChatGPT ads’ performance
Uliana Lesiv
AuthorKey takeaways
Advertising in ChatGPT
OpenAI began testing ads inside ChatGPT in February 2026. The initial rollout started in the United States and was limited to logged-in users on the Free and Go plans. According to OpenAI, advertisers cannot influence model responses, rankings, or recommendations.
At the beginning of the rollout, only a limited number of advertisers were able to participate through OpenAI partnerships and pilot programs. In May 2026, OpenAI expanded access and introduced a beta self-serve Ads Manager and agency-based buying options.
Currently, ChatGPT ads are in an early-stage rollout. Availability for advertisers is still limited.
The European Union is not yet included in the public ad rollout, largely because advertising and tracking in the EU have stricter privacy and consent requirements.
Currently available tracking solutions
OpenAI has started to define its official measurement stack for advertising. The company has recently published documentation for two approaches to ad tracking:
The approach is similar to what you saw in other advertising platforms like Meta (client-side + server-side solution and platform suggests using a hybrid approach for more precise tracking).
Stape team has developed end-to-end solutions that will allow you to track ChatGPT ads' performance using GTM:
The first solution is the OpenAI Pixel Tag for the GTM web. This tag simplifies the implementation of OpenAI’s measurement pixel using GTM. Instead of adding scripts manually to the website, you can configure event tracking for ChatGPT ads directly through GTM. The tag helps align web analytics data with ad platform requirements.
The second solution is the OpenAI Conversions API Tag for the GTM server. This server-side tag allows you to send conversion events directly from a server-side GTM container to OpenAI’s Conversions API.
The server-side tracking approach improves data accuracy as your tracking becomes less dependent on browser execution. It is especially useful for improving attribution accuracy where browser-based tracking is incomplete or restricted.
How hybrid tracking improves ChatGPT ads measurement
Hybrid tracking combines two data sources (client-side events and server-side tracking) into one tracking system. With this approach, you don’t rely on browser tracking alone; you can also capture conversion signals from the server.
In the context of ChatGPT ads, this approach becomes particularly important because attribution signals are more fragmented. Users may interact with a conversation, click through at different moments, and convert later in a separate session. Browser-only tracking often misses part of this journey due to cookie restrictions, ad blockers, or incomplete session continuity. With the Conversions API, you can be sure that conversion events still reach OpenAI.
Another key advantage of hybrid tracking is data enrichment. Browser-based events usually contain limited information. With server-side events, you can include additional context such as transaction details, customer identifiers, and CRM data. When combined, these signals create a more complete picture of user behavior.
Hybrid tracking is highly recommended by the OpenAI platform for more precise tracking.
How to configure ChatGPT ads tracking step-by-step
Step 1. Configure the OpenAI ads Pixel in the web GTM container
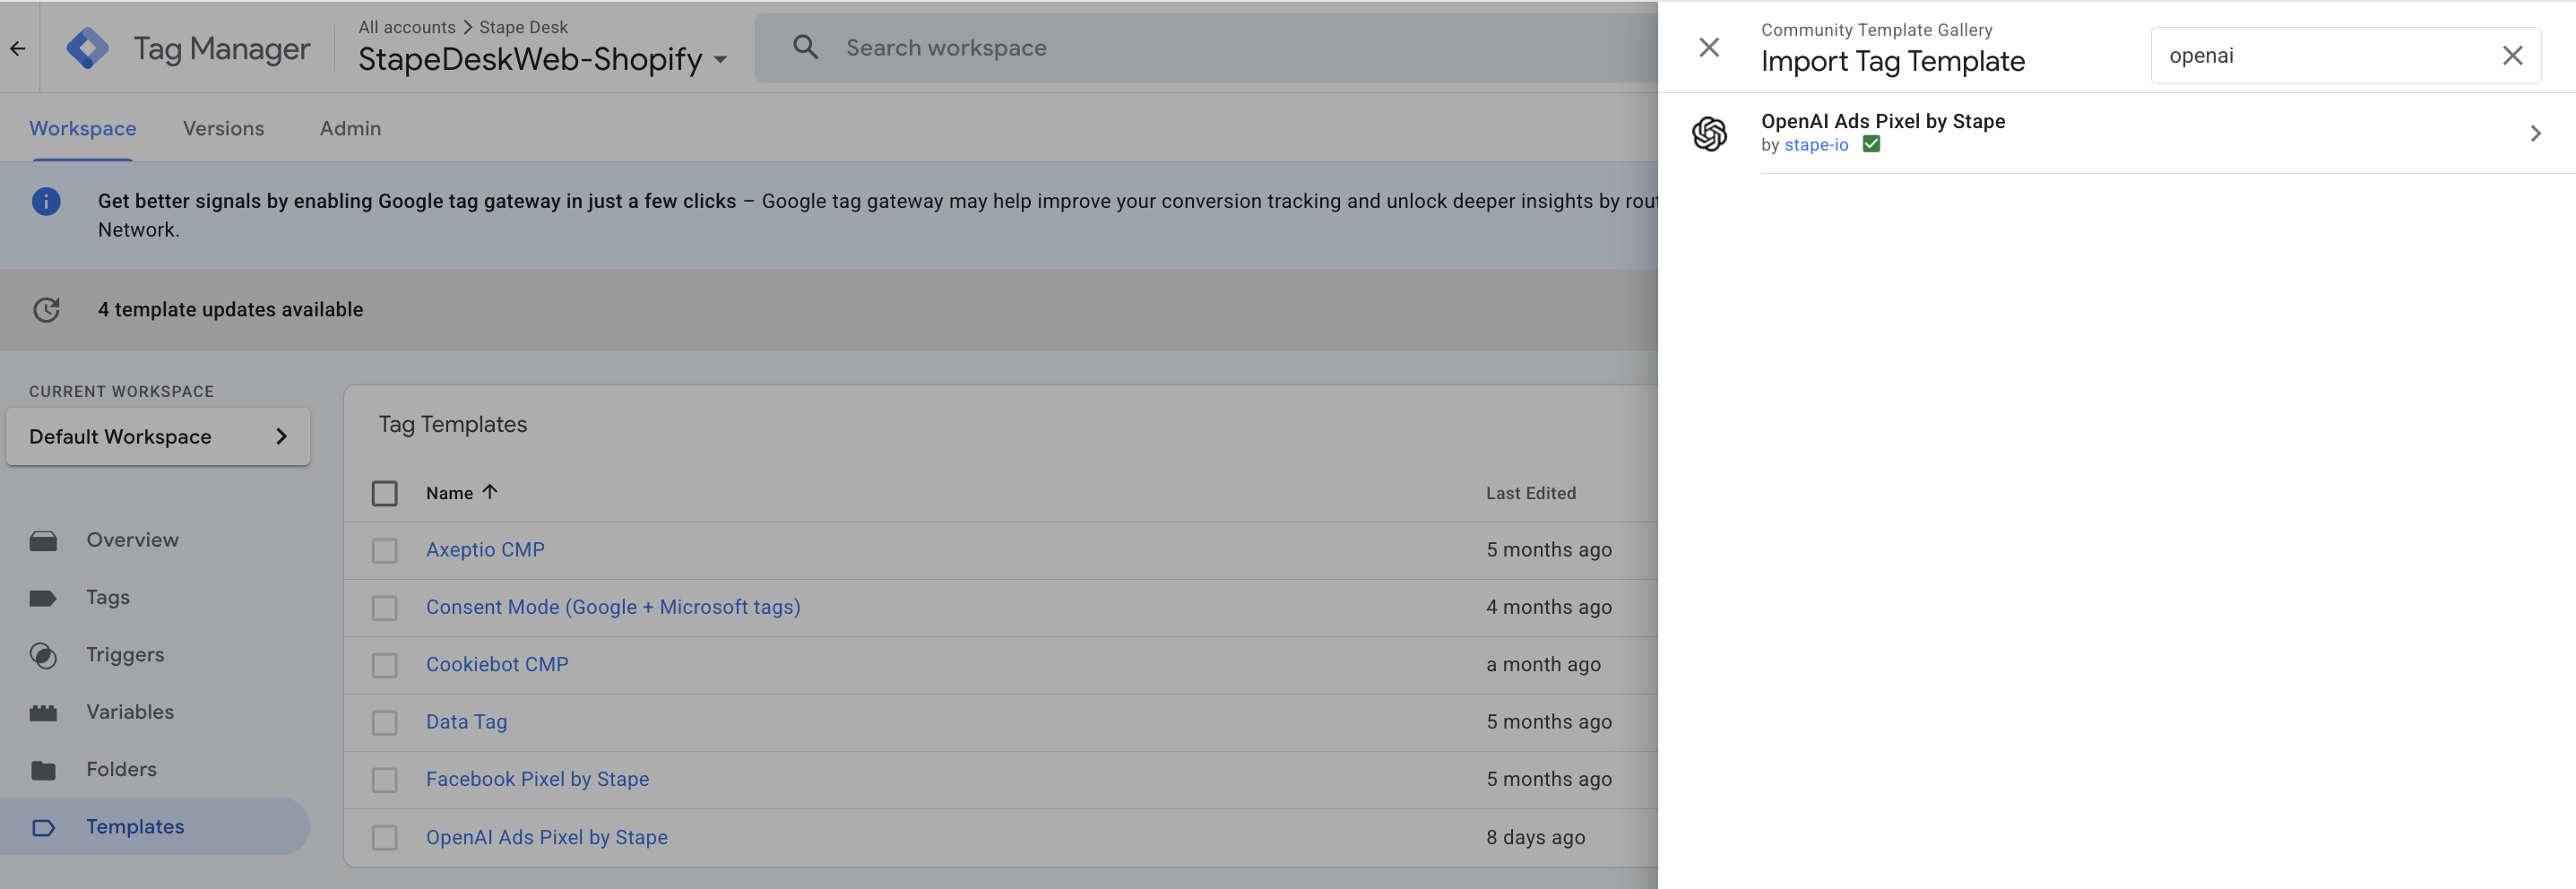
1.1 Add the OpenAI Ads Pixel template to your workspace in the web GTM container.
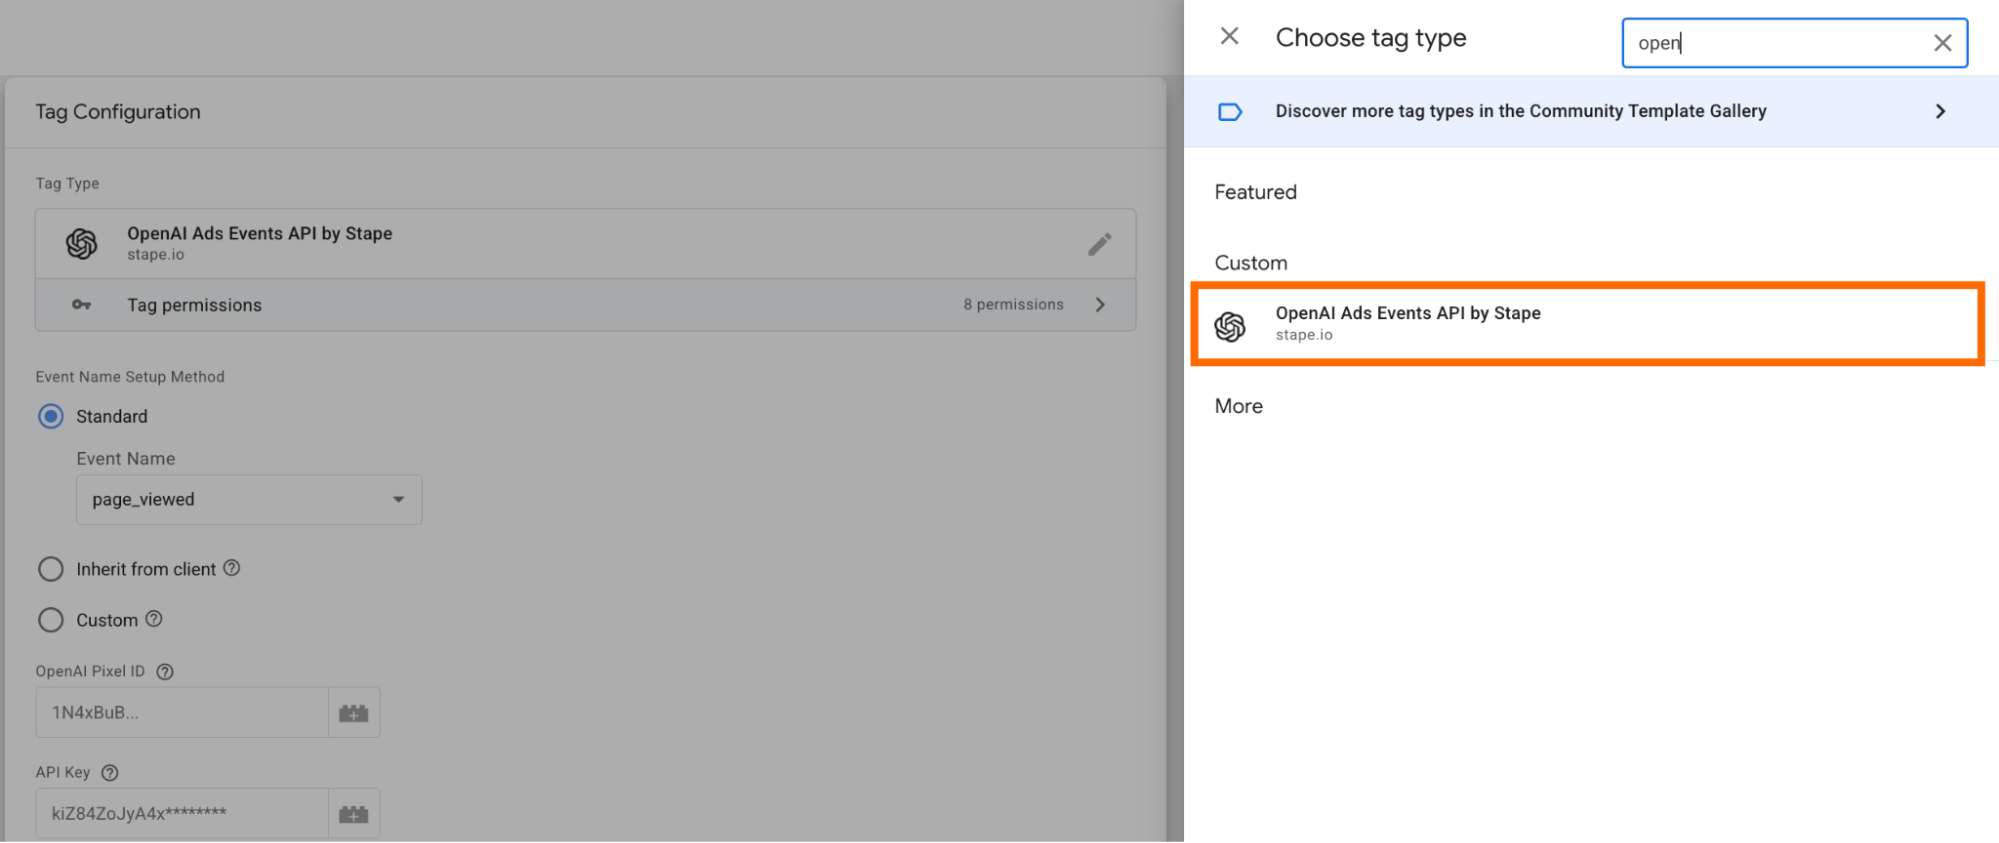
Go to the Templates → next to Tag Templates click "Search gallery" → find OpenAI Ads Pixel → click "Add to workspace."
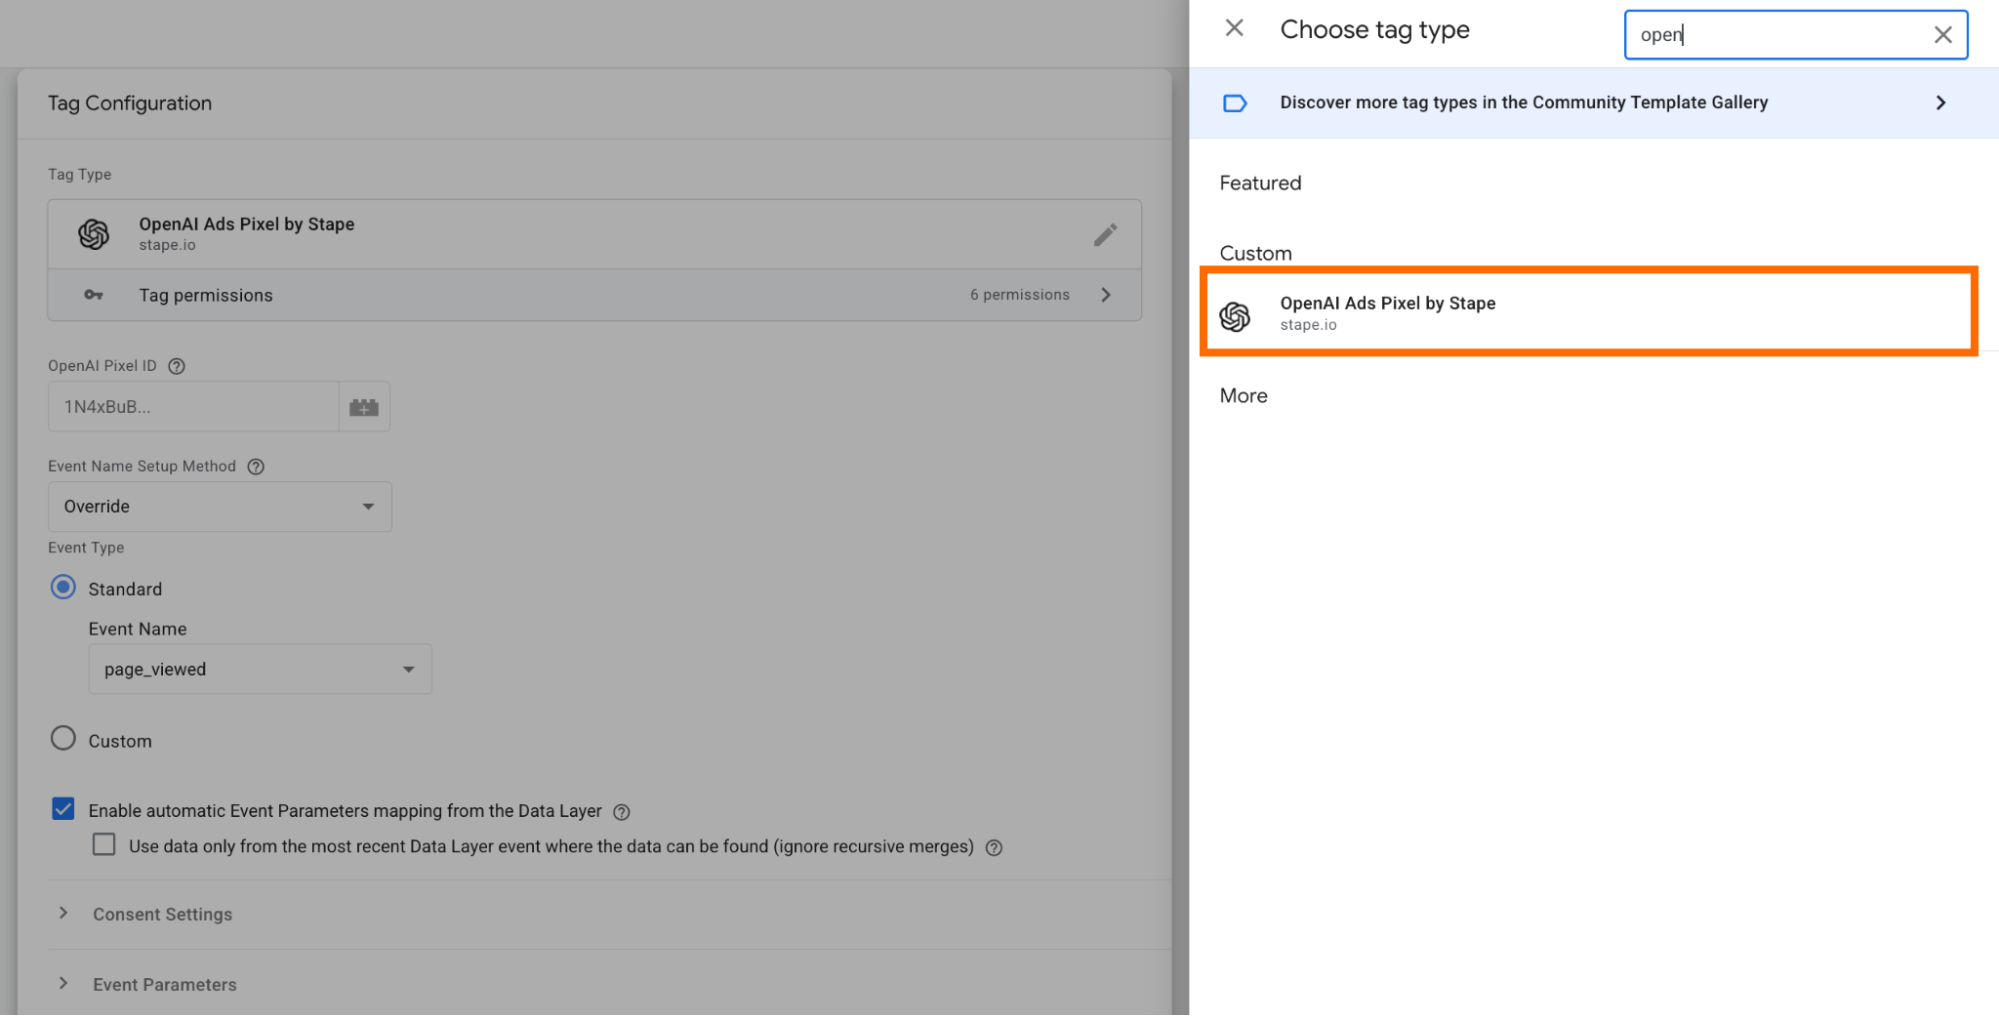
1.2 Create a new tag.
As Tag Configuration, select “OpenAI Ads Pixel by Stape”.
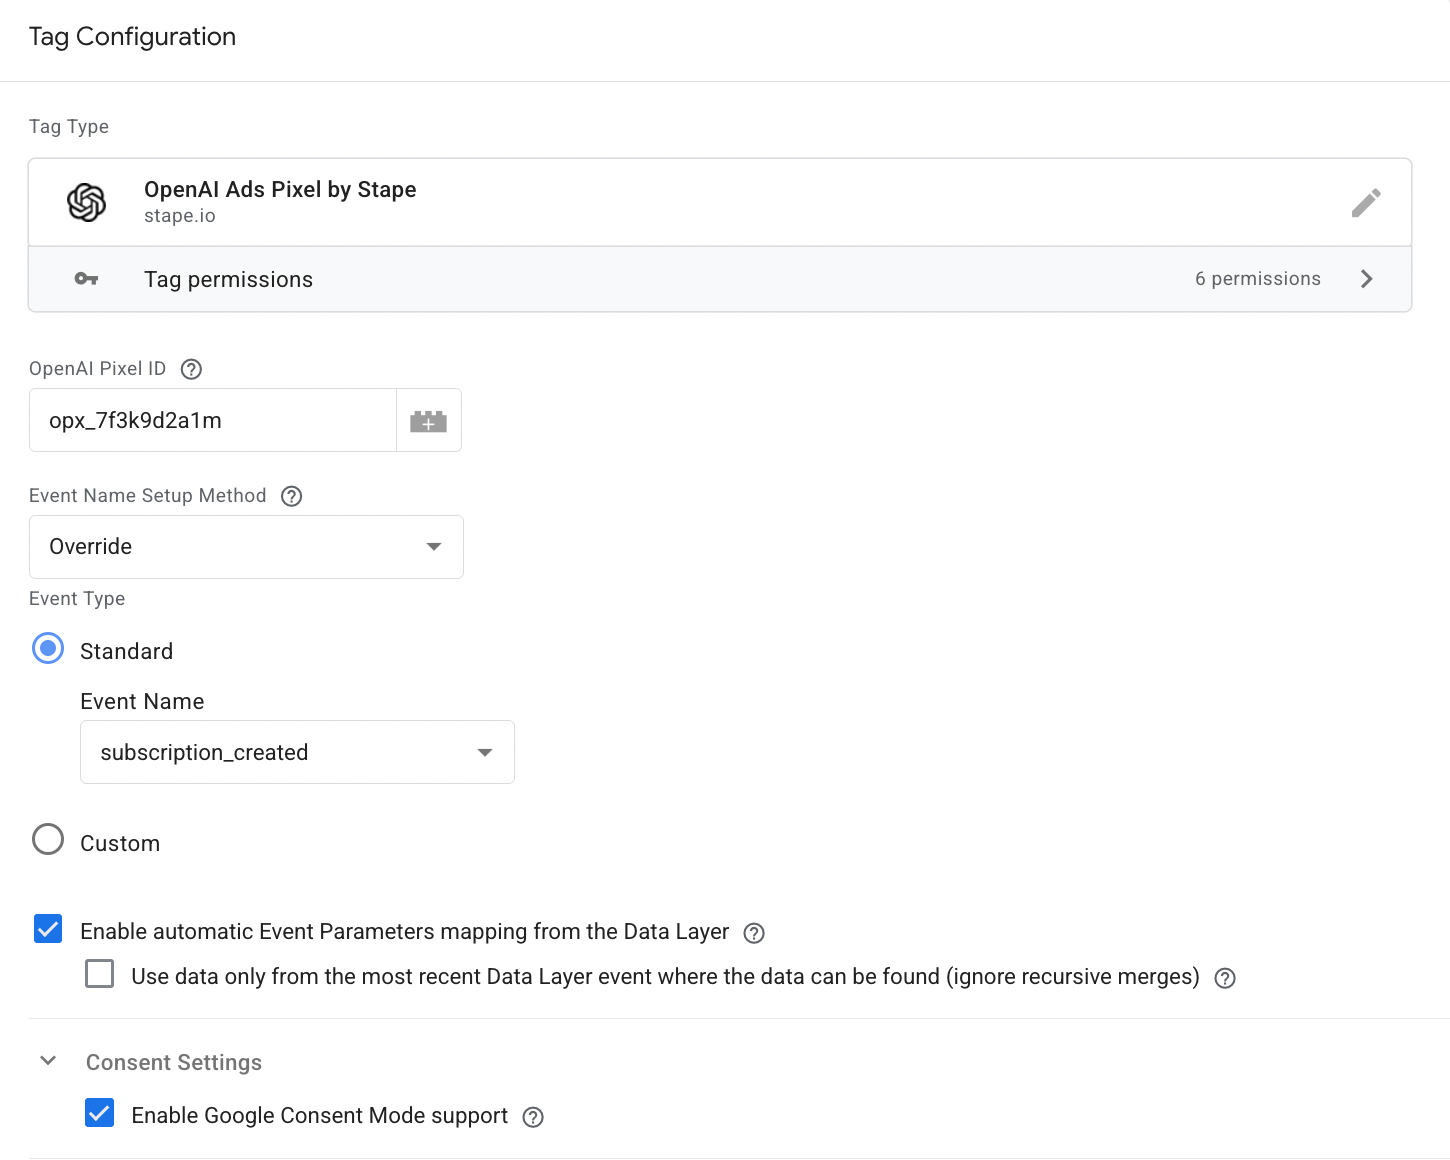
1.3 Configure the tag.
- OpenAI Pixel ID - a unique identifier that connects your website tracking events to your ChatGPT Ads account. You can find it in your ad account. Please note that currently only one Pixel ID is supported on the page.
- Event Name Setup Method - select the method:
Inherit from DataLayer - with this option, the tag maps GA4 event names (add_to_cart, sign_up, etc.) to ChatGPT equivalents.
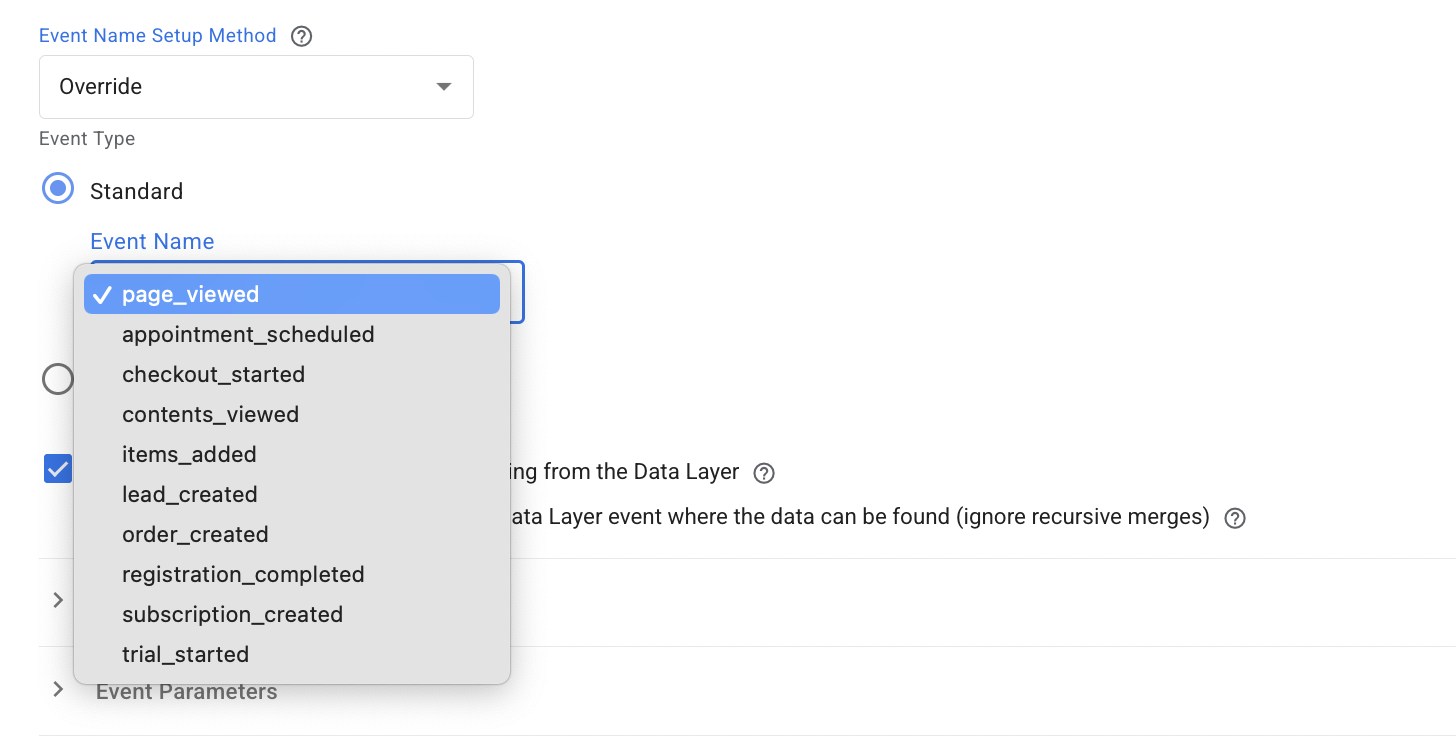
Override - choose from standard events or provide a custom event name.
- (If selected "Override" as event name setup method) Choose the Event type you want to track: standard from the list of available events or a custom one.
- Enable automatic Event Parameters mapping from the Data Layer box is checked by default. It’s a recommended configuration; with this option, the tag will automatically populate standard Object Properties and User Properties from the DataLayer. Tag parses Google Analytics 4 and Common Event Data formats.
- Configure Compliance section:
Consent Granted - if you set Consent Granted to false, it will prevent the Pixel from sending hits until the tag is fired with Consent Granted true.
Enable GTM consent mode support - when enabled, this tag checks for the Google Consent Mode ad_storage consent. If ad_storage consent is denied, the tag will not load the JS SDK, and it will prevent events from being sent until user consent is explicitly granted.
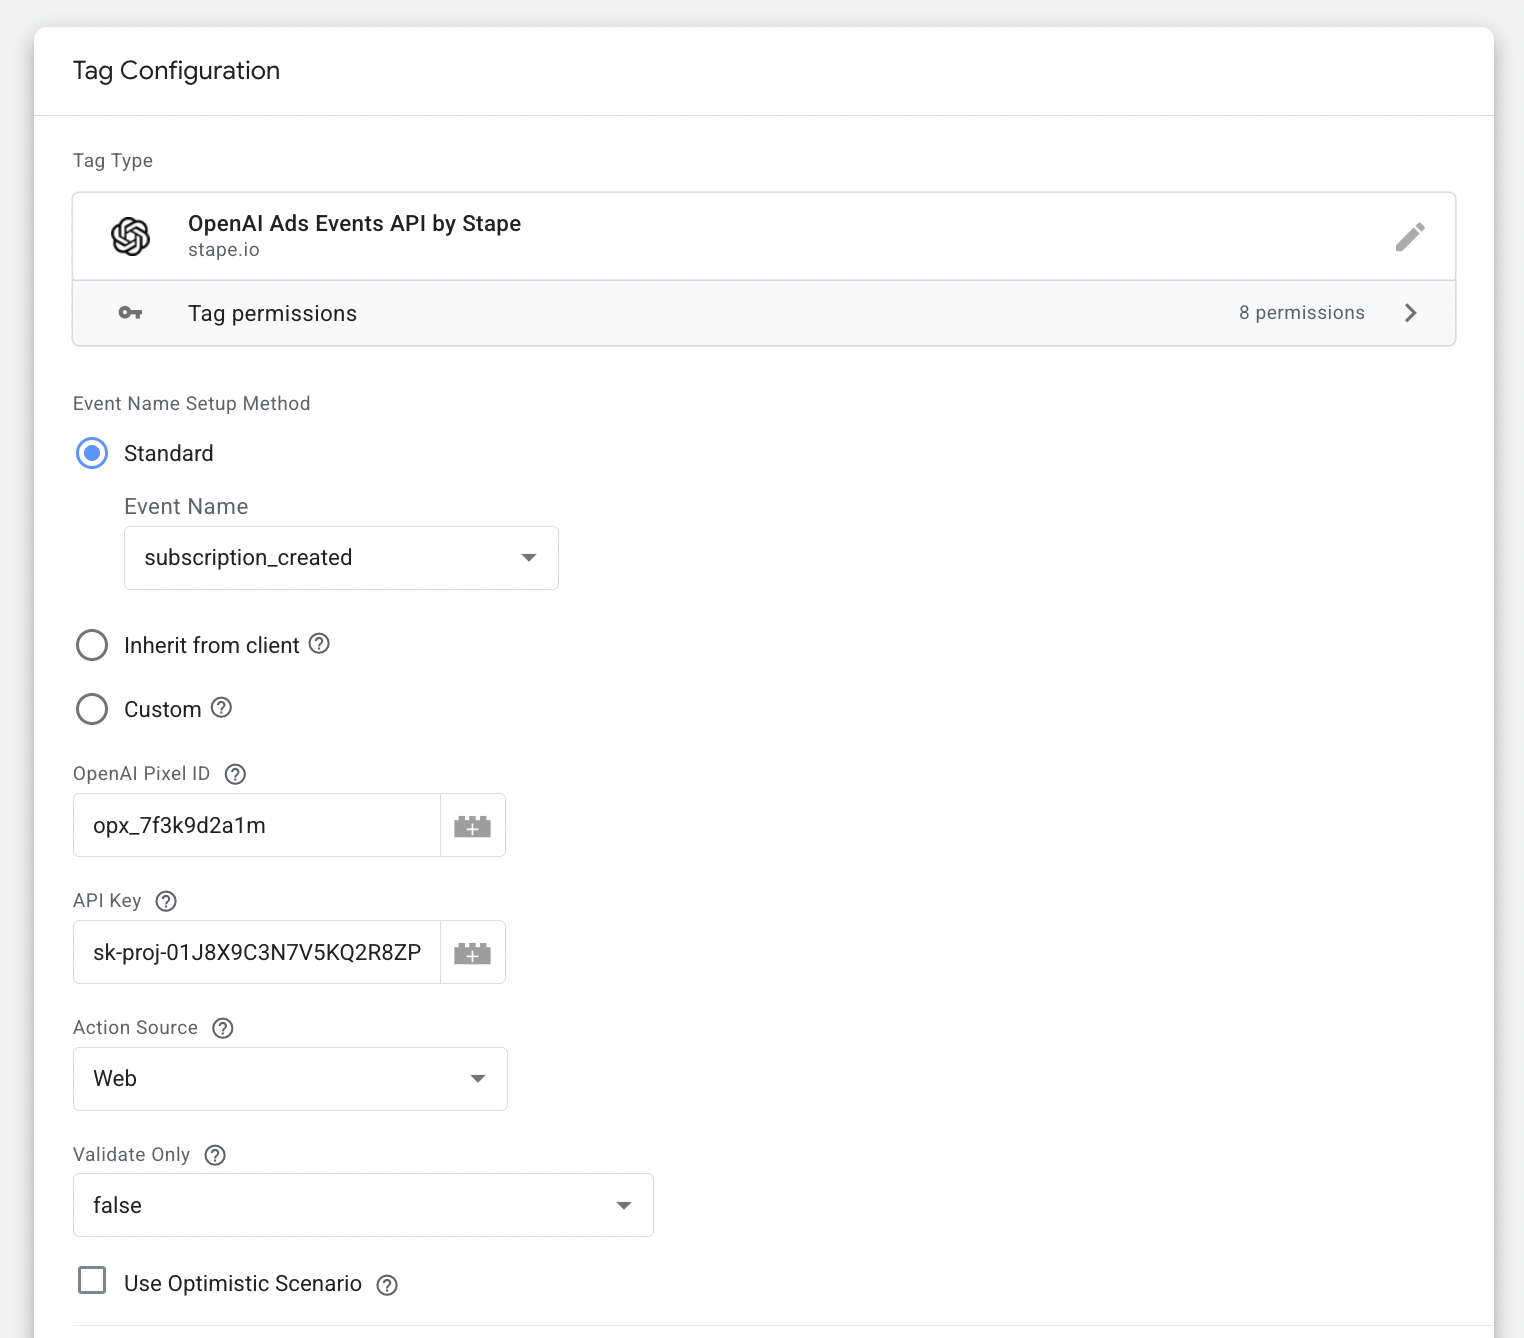
These are the key configuration parameters within a tag. Here is an example of tag configuration at this point:
The optional ones include the following:
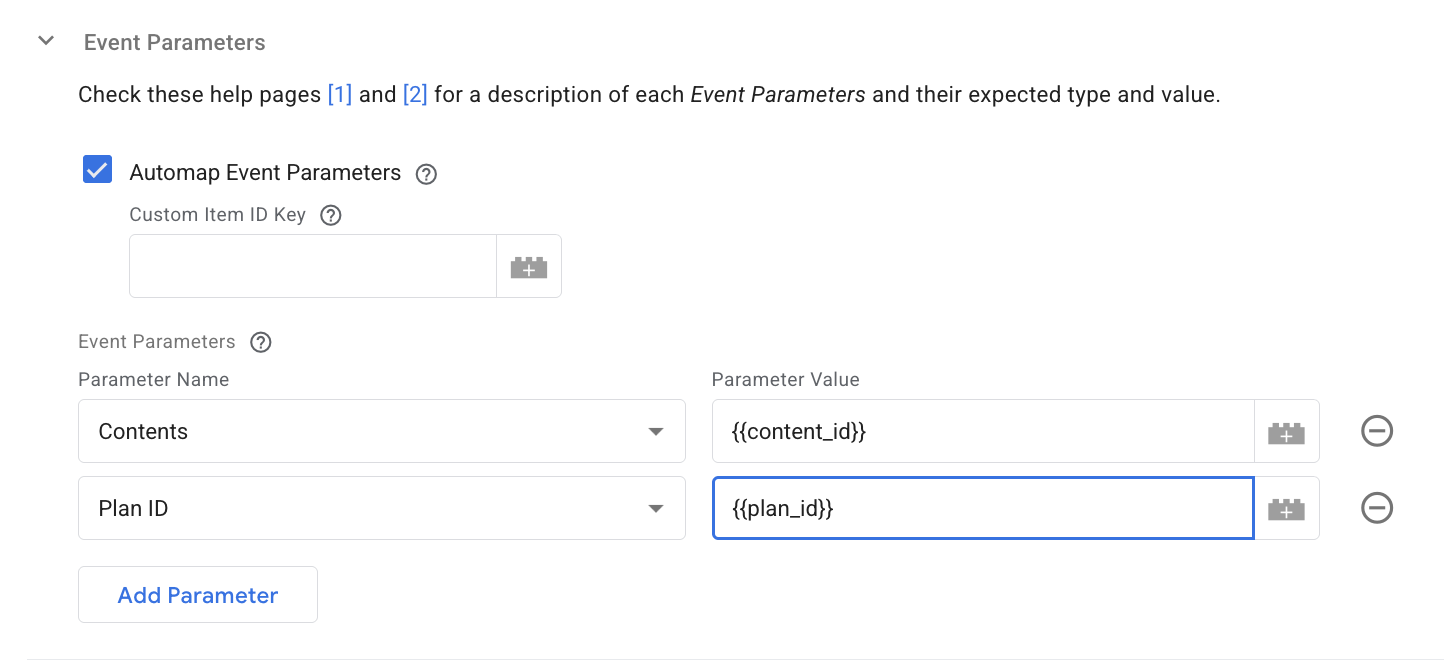
- Event parameters section.
Load Parameters From Variable - you can create a variable that returns a JavaScript object with the desired Event Parameters.
Add parameters name and value - list the properties that will be sent to OpenAI with an event. See the list of supported events in OpenAI’s documentation.
- Server-side tracking settings section.
This section is valid for you if you have or are going to configure server-side tracking. The section is dedicated to event deduplication. We will get back to it in step 4 of this guide.
1.4 Add a trigger for a tag.
The trigger must correspond to the event you aim to track with the tag. In our case, it is “subscription created”.
Step 2. Set up basic server-side configuration
As mentioned earlier, the hybrid approach (client + server-side tracking) is highly recommended by OpenAI for precise data tracking. Before moving to the server GTM tag configuration, you need to have the “basic” server-side tracking config.
The basic set includes the following:
✍️ Note: if you don’t track data on the server-side, you can test how it works for you right now! We provide a free plan for websites with up to 10,000 requests per month.
- A configured data stream from the web to the server container (Google Analytics 4 and Data Tag/Data Client are popular ways to do it).
- Configured Custom Loader power-up - it allows you to minimize the impact of ad blockers on your GTM and GA4 scripts by routing them through a path that turns all cookies into first-party cookies.
Step 3. Configure OpenAI ads Events API Tag for server GTM
3.1 Add the OpenAI Ads Conversions API by Stape to your workspace in the server GTM container.
Go to the Templates → next to Tag Templates click "Search gallery" → find OpenAI Ads Conversions API by Stape → click "Add to workspace."
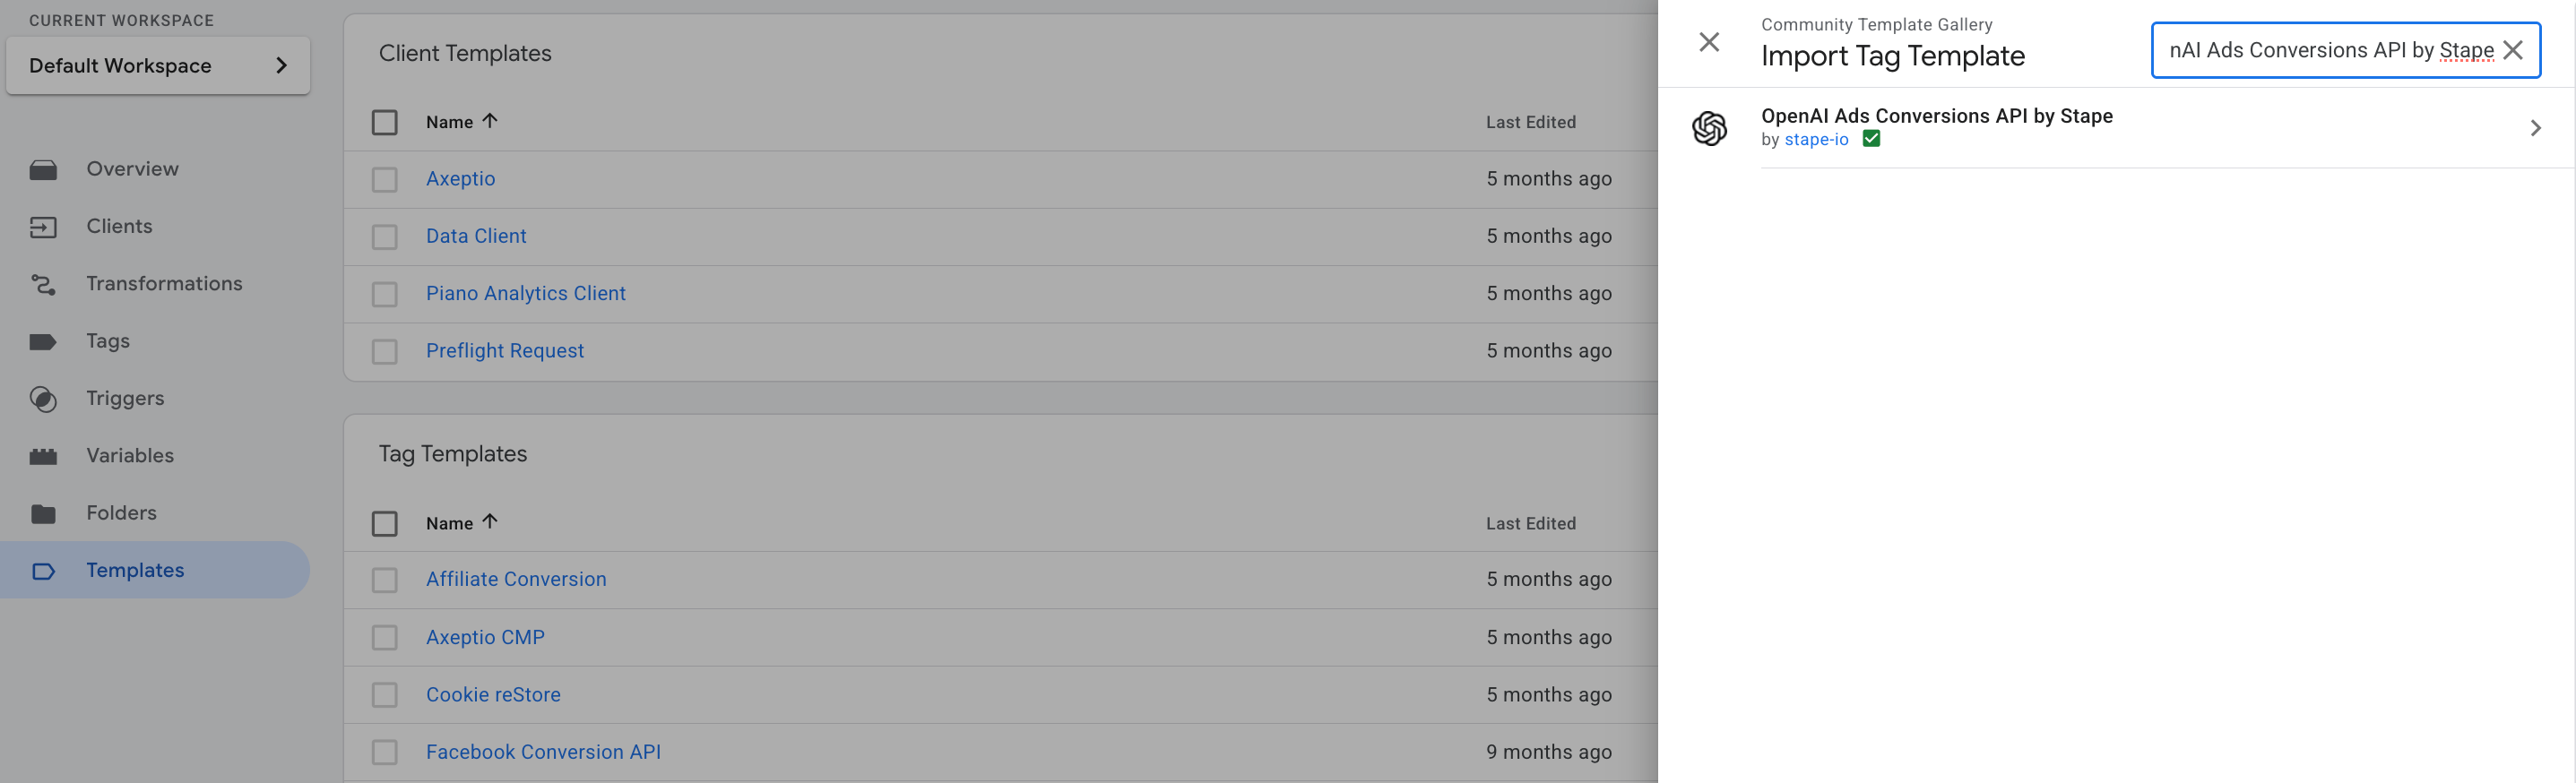
3.2 Create a new tag.
As Tag Configuration, select “OpenAI Ads Events API by Stape”.
3.3 Configure the tag.
- Event Name Setup Method - select the method:
Standard - choose from the list of events.
Inherit from the client - with this option, the tag maps GA4 event names (add_to_cart, sign_up, etc.) to ChatGPT equivalents.
Custom - provide your own event that you want to track.
Note: if you opt for the Custom event name method, be sure to use lowercase letters, numbers, underscores, or dashes. Keep the name between 1 and 65 characters and don’t use built-in names.
- OpenAI Pixel ID - you can find it in your ad account in ChatGPT.
- API Key - ask your OpenAI Account team to provide an API Key.
- Action Source - select where your events will be coming from.
- Set Click ID cookie - enabled by default. If false, and if an existing Click ID is found on the sources below, it will still be sent in the request, but not stored as a cookie. If true, the Click ID will be sent in the request and stored as the __oppref cookie by server GTM.

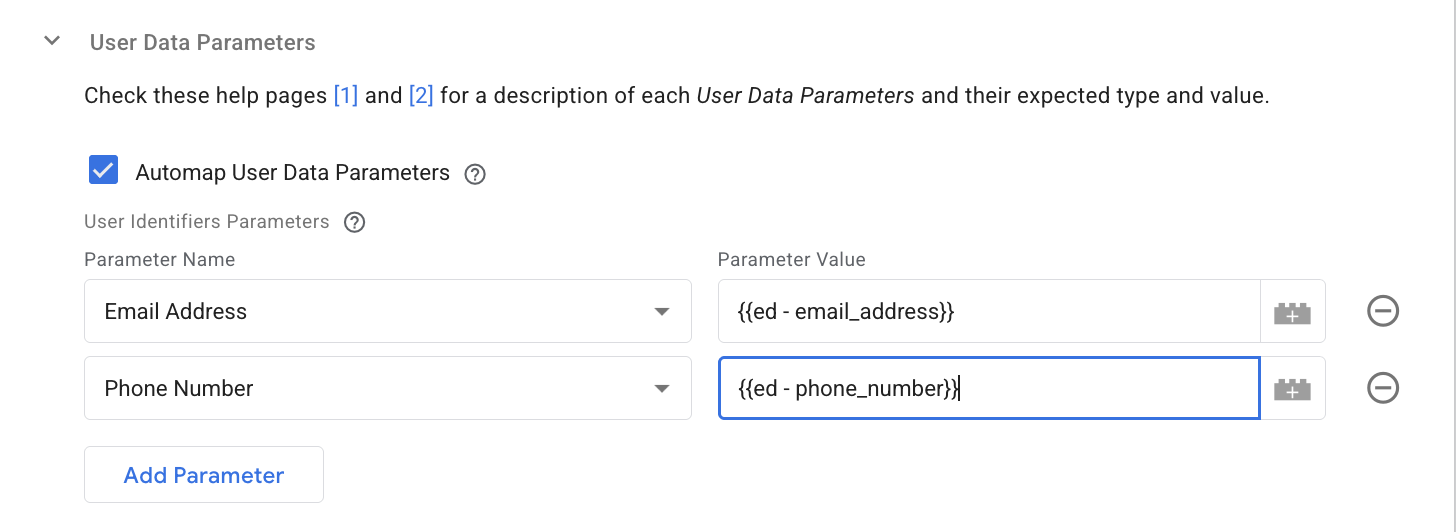
- User Data - select from a list of user data if you want to enrich the conversions with data on the user.
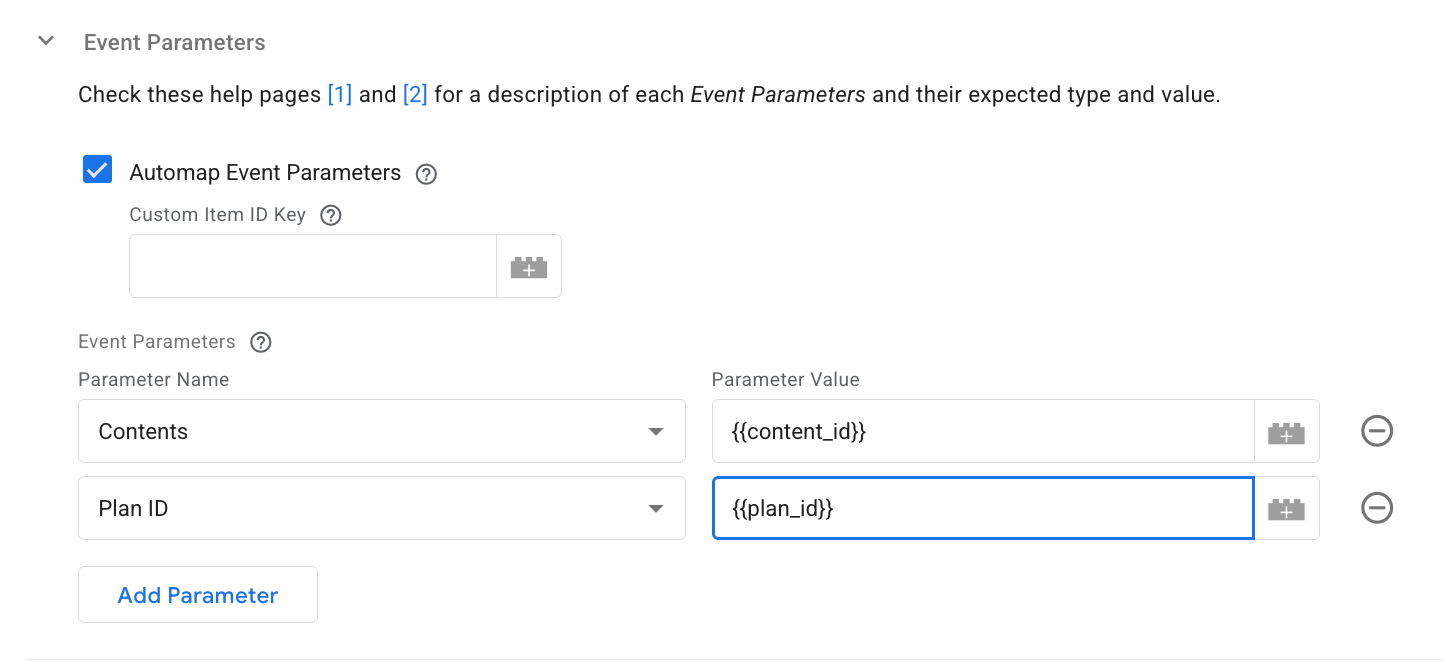
- Event Data - list the properties that will be sent to OpenAI with an event. See the list of supported events in OpenAI’s documentation.
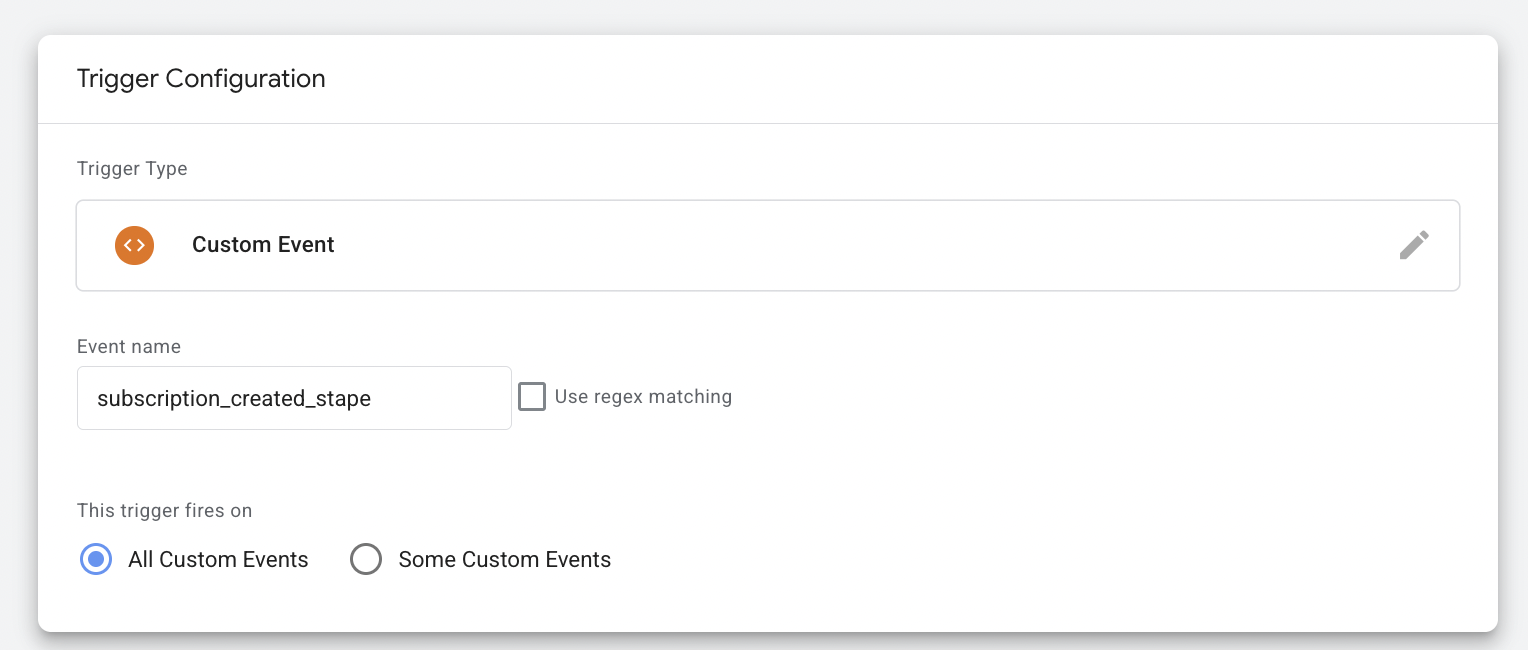
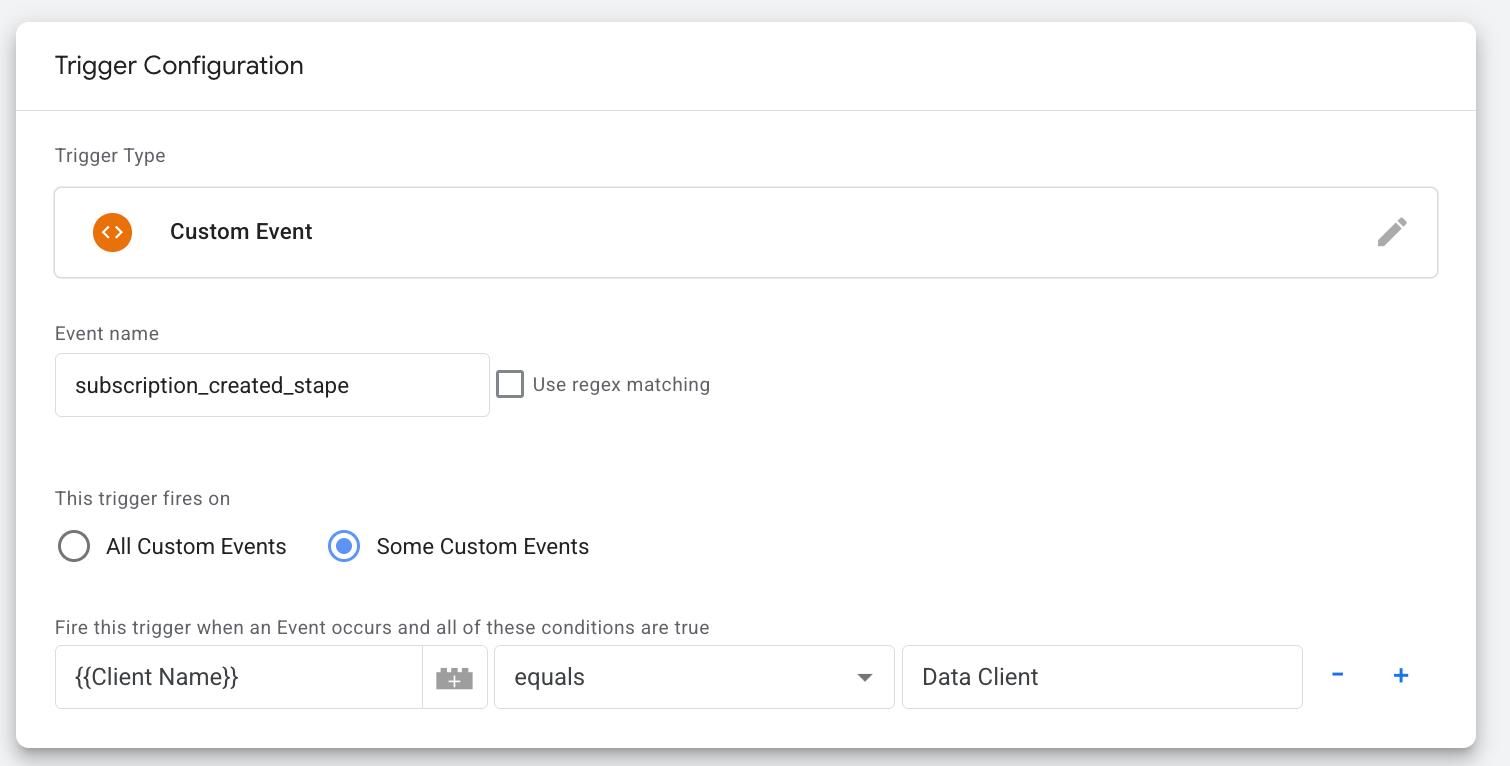
3.4 Add a trigger for a tag.
It should have the following configurations:
- Trigger Type: Custom Event
- Event name: select the one you specified in tag configuration (in our case, it’s subscription_created)
- This trigger fires on Some Custom Events
- Add the variable with the client name and specify the client you use (in our case, it is the Data Client)
Step 4. Configure events deduplication
Since you send data to ChatGPT from both web and server containers, you need to be sure that the events won’t be duplicated and that the platform receives only the accurate data.
Stape’s tags provide the solutions for you, so you can easily configure event deduplication. So, you need to do the following configurations:
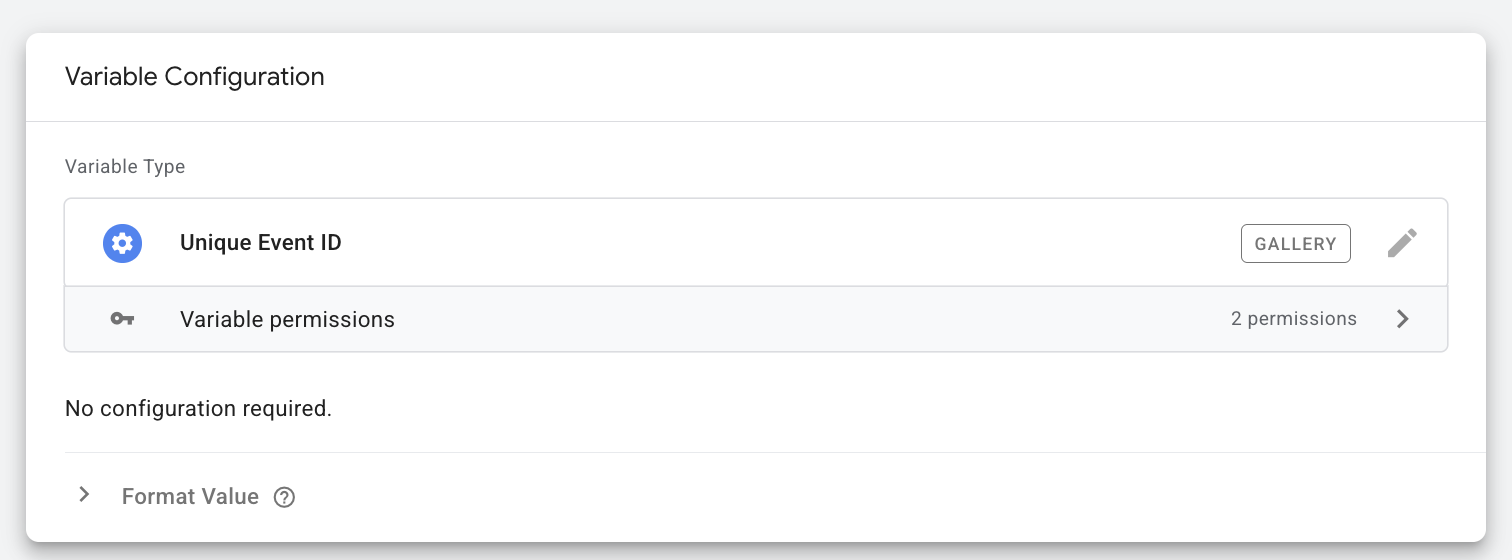
4.1 Add Unique Event ID Variable.
We created a custom GTM variable that generates a unique event ID that you can use in your web and server ChatGPT events. With its help, you can track users both from the browser and server and deduplicate events.
Just add it (search for Unique Event ID variable in your containers); no additional configuration is required.
4.2 Add the variable in the web tag that you configured in step 1.
Scroll to the Server-Side Tracking Settings and add the variable.

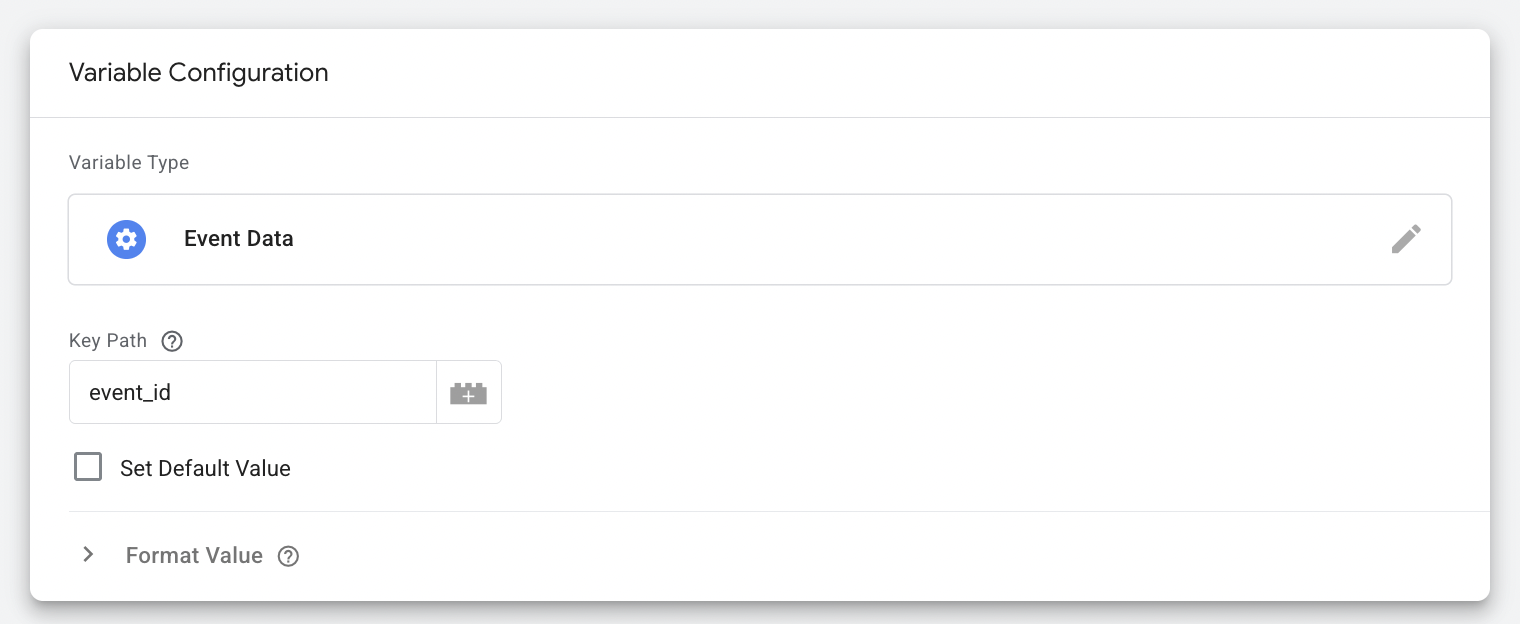
4.3 In the server GTM container, add the variable that will catch the event ID. Use the configurations as shown in the screenshot:
4.4 Add the variable in the server GTM tag you’ve configured in step 3.
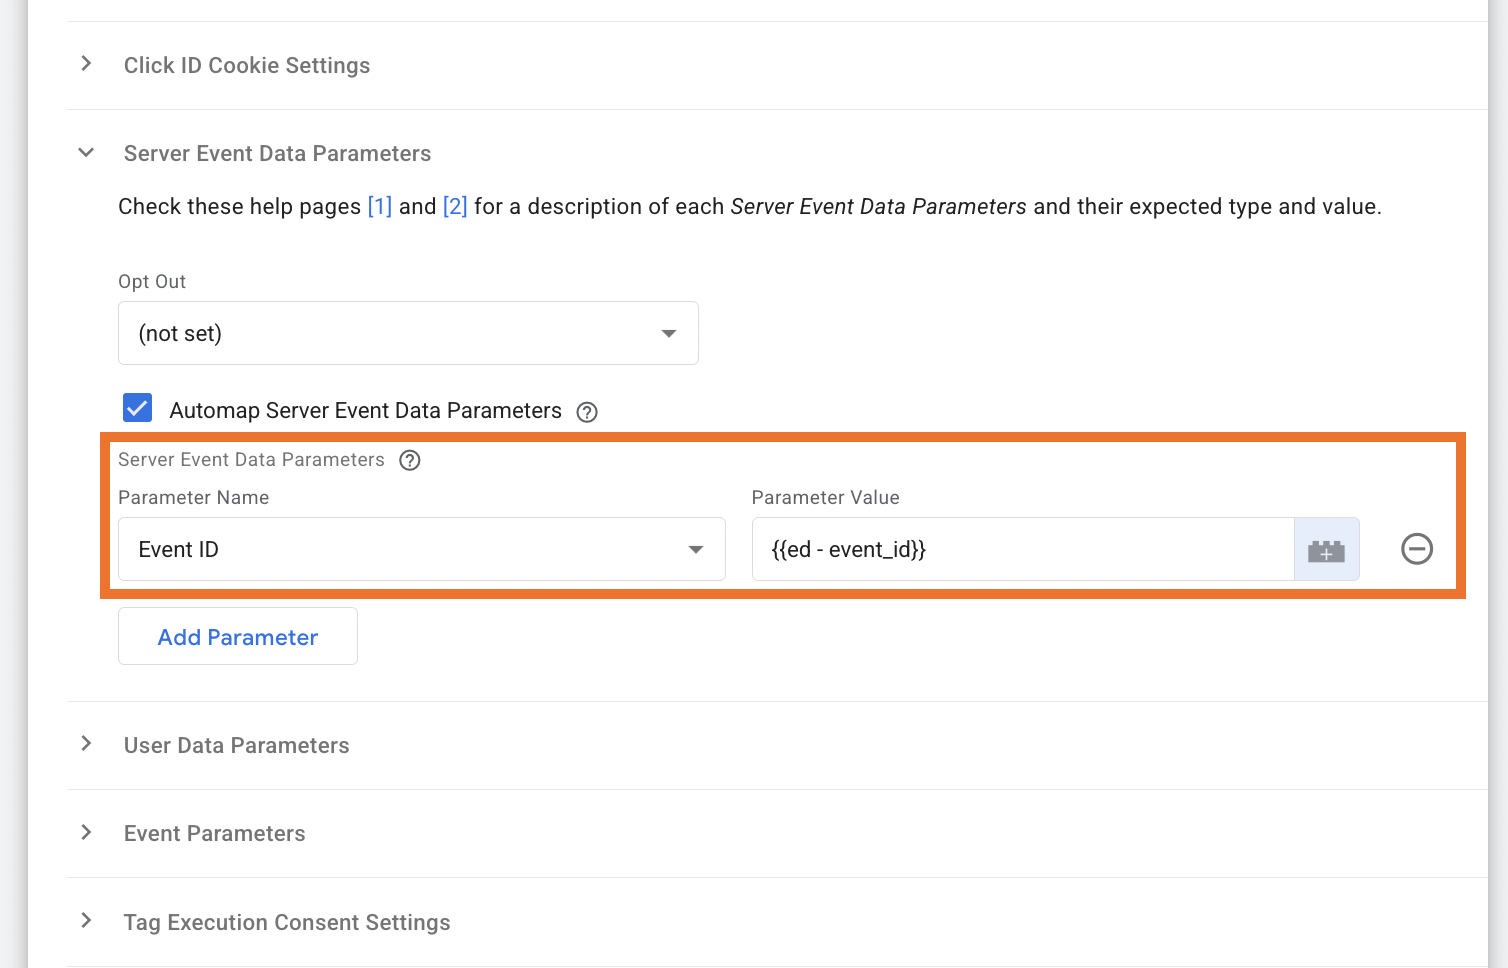
Expand the section Server Event Data Parameters and select Event ID as Parameter Name, as Parameter Value, add the variable you’ve created earlier.
Step 5. Test the setup
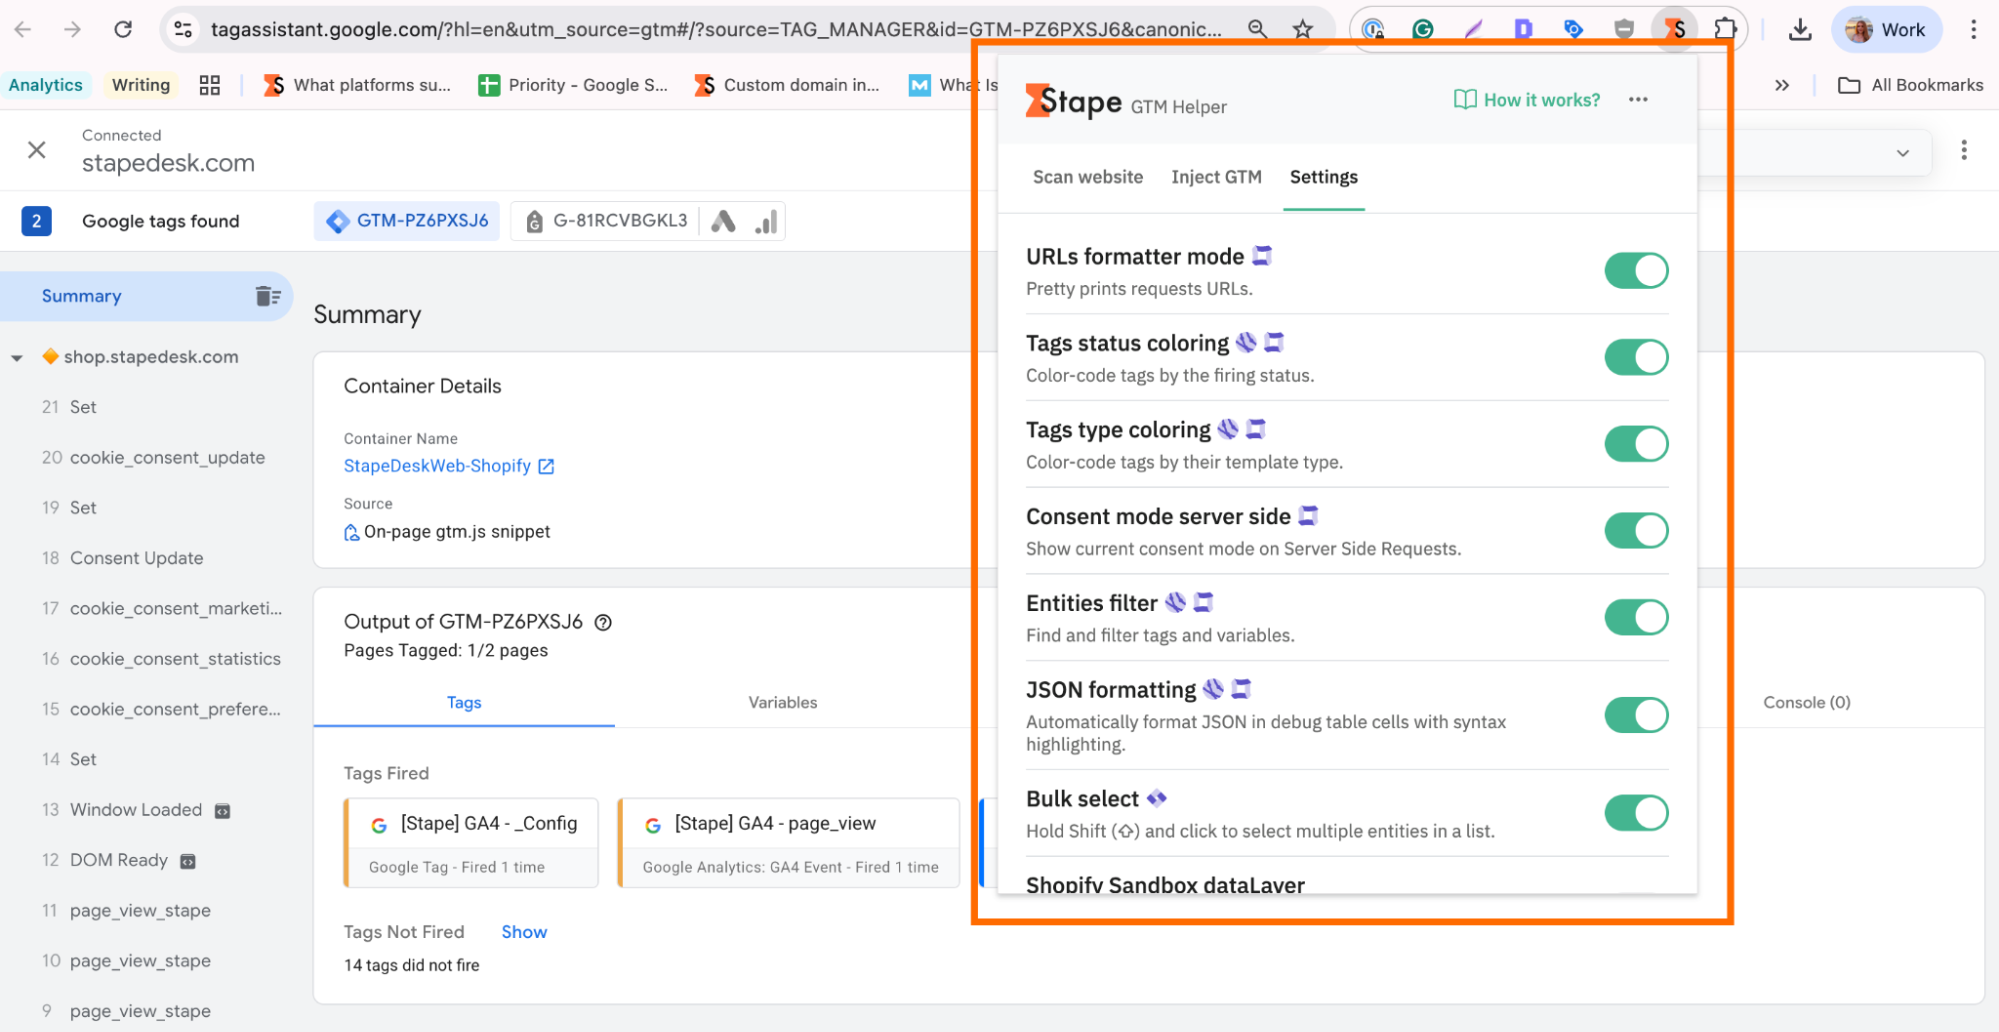
Open the GTM debugger in both web and server containers. Enable the Stape GTM Helper extension for easier navigation during debugging.
Navigate through your website as a real user would, and trigger the actions you’ve implemented (in our case, subscription_created).
After completing the test journey, switch back to the debugger panel to review the results and confirm that the events were recorded correctly.
In case of any issues while troubleshooting the setup, please refer to our guide on debugging and monitoring server-side tracking configuration.
Final words
ChatGPT ads are still in an early stage, but they already signal a shift in how digital advertising and attribution will work. At the same time, tracking is becoming more complex. The tracking direction is clear for now: hybrid tracking (client-side + server-side). Stape provides solutions that help you implement this setup more efficiently and quickly.

Comments