Stripe purchase tracking via sGTM: a step-by-step guide
Kristian Krogh Bang
AuthorIf you use Stripe Checkout or Payment Links, you have a tracking problem.
The checkout happens on Stripe's domain. Your pixels never see it. The customer lands on your thank-you page, and all you have is a session ID – no revenue, no items, no customer data, no cookies, no browser context.
Most solutions make it worse. Webhooks give you order data but zero session context. Node.js proxies require infrastructure you shouldn't need. Zapier workflows give you partial data at best. And some blog posts suggest exposing your Stripe secret key client-side – don't do that.
There is a better way.
Purchase tracking flow via sGTM
One sGTM client template + one JS snippet on your thank-you page. That's the entire setup.
Here is the full flow:
- Customer completes payment on Stripe and lands on your thank-you page with
?session_id={CHECKOUT_SESSION_ID}in the URL. - The JS snippet reads the session ID, collects 30+ ad platform cookies (including Stape cookies), and POSTs everything to your sGTM container hosted on Stape.
- The sGTM client template calls the Stripe API server-side with your secret key.
- Stripe returns the full session – line items, customer details, tax, discounts, and payment status.
- The template builds a complete GA4 purchase event and fires all your sGTM tags with the enriched data.
Your Stripe secret key never leaves the server. The browser only sends the session ID and cookies.
| The key difference from webhooks: because the request comes from the customer's browser on your thank-you page, you get real session context. GA4 sees the purchase as part of the same session. No orphaned conversions. |
What data is extracted per purchase event
The template extracts everything useful from the Stripe session and maps it to GA4 and Meta CAPI format: _epik
| Category | Fields |
|---|---|
| Ecommerce | transaction_id, value, currency, tax, shipping, coupon, payment_type, items[] |
| User data | Email, phone, first name, last name, billing address, business name |
| Session stitching | client_id, ga_session_id, ga_session_number, ip_override,user_agent, page_location, page_referrer |
| Consent | Google Consent State, DMA flag, no-personalized-ads signal |
| Ad platform cookies | _ga, _fbp, _fbc, _ttp, li_fat_id, _gcl_aw, _epik, Klaviyo, affiliate networks, and more |
Step-by-step setup
Step 1: Host your sGTM container on Stape
If you haven't already, set up your server-side GTM container on Stape and configure a custom subdomain (e.g., sgtm.yourdomain.com). Point your DNS records to Stape.
Using a custom subdomain is important – it ensures tracking requests bypass ad blockers and that cookies are treated as first-party by the browser.
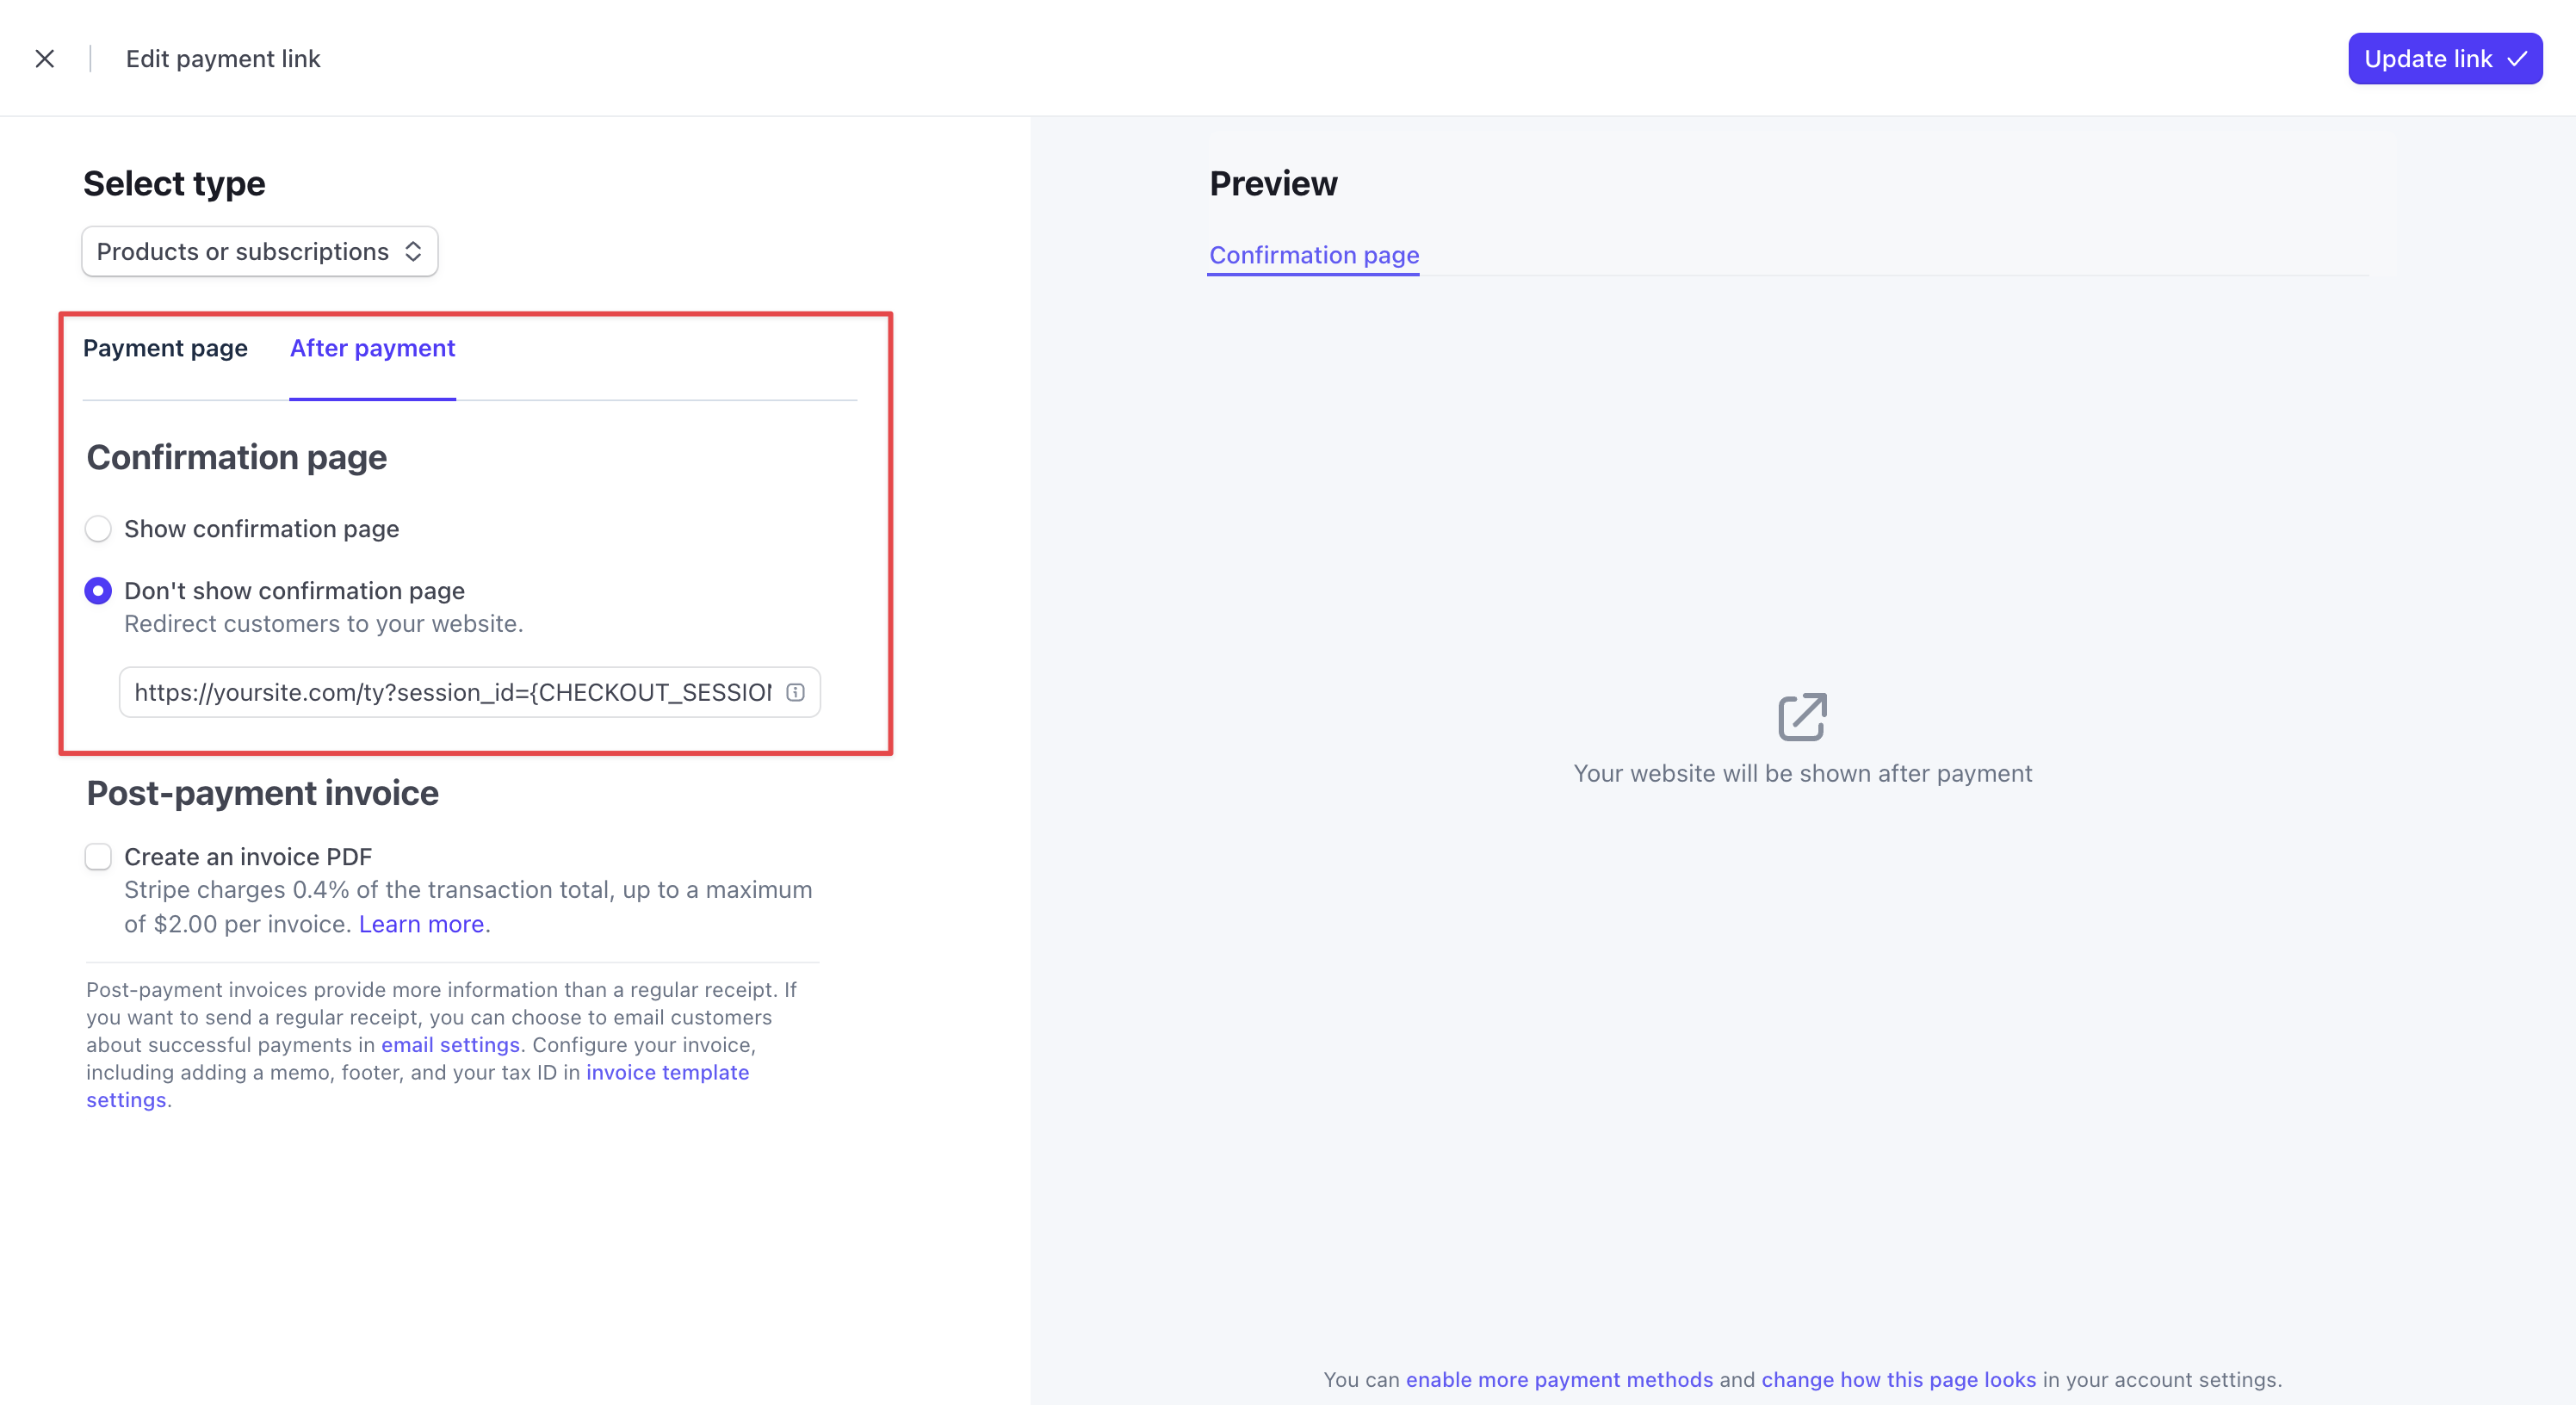
Step 2: Configure the Stripe redirect
You need Stripe to send the customer back to your site with the session ID in the URL.
For Stripe Payment Links: In your Payment Link settings, set "After payment" to "Don't show confirmation page" and redirect to:
https://yourdomain.com/thank-you?session_id={CHECKOUT_SESSION_ID}
For custom Stripe integrations: Add the parameter to your success_url when creating a Checkout Session:
const session = await stripe.checkout.sessions.create({
  success_url: 'https://yourdomain.com/thank-you?session_id={CHECKOUT_SESSION_ID}',
});
Stripe automatically replaces the placeholder with the actual session ID.
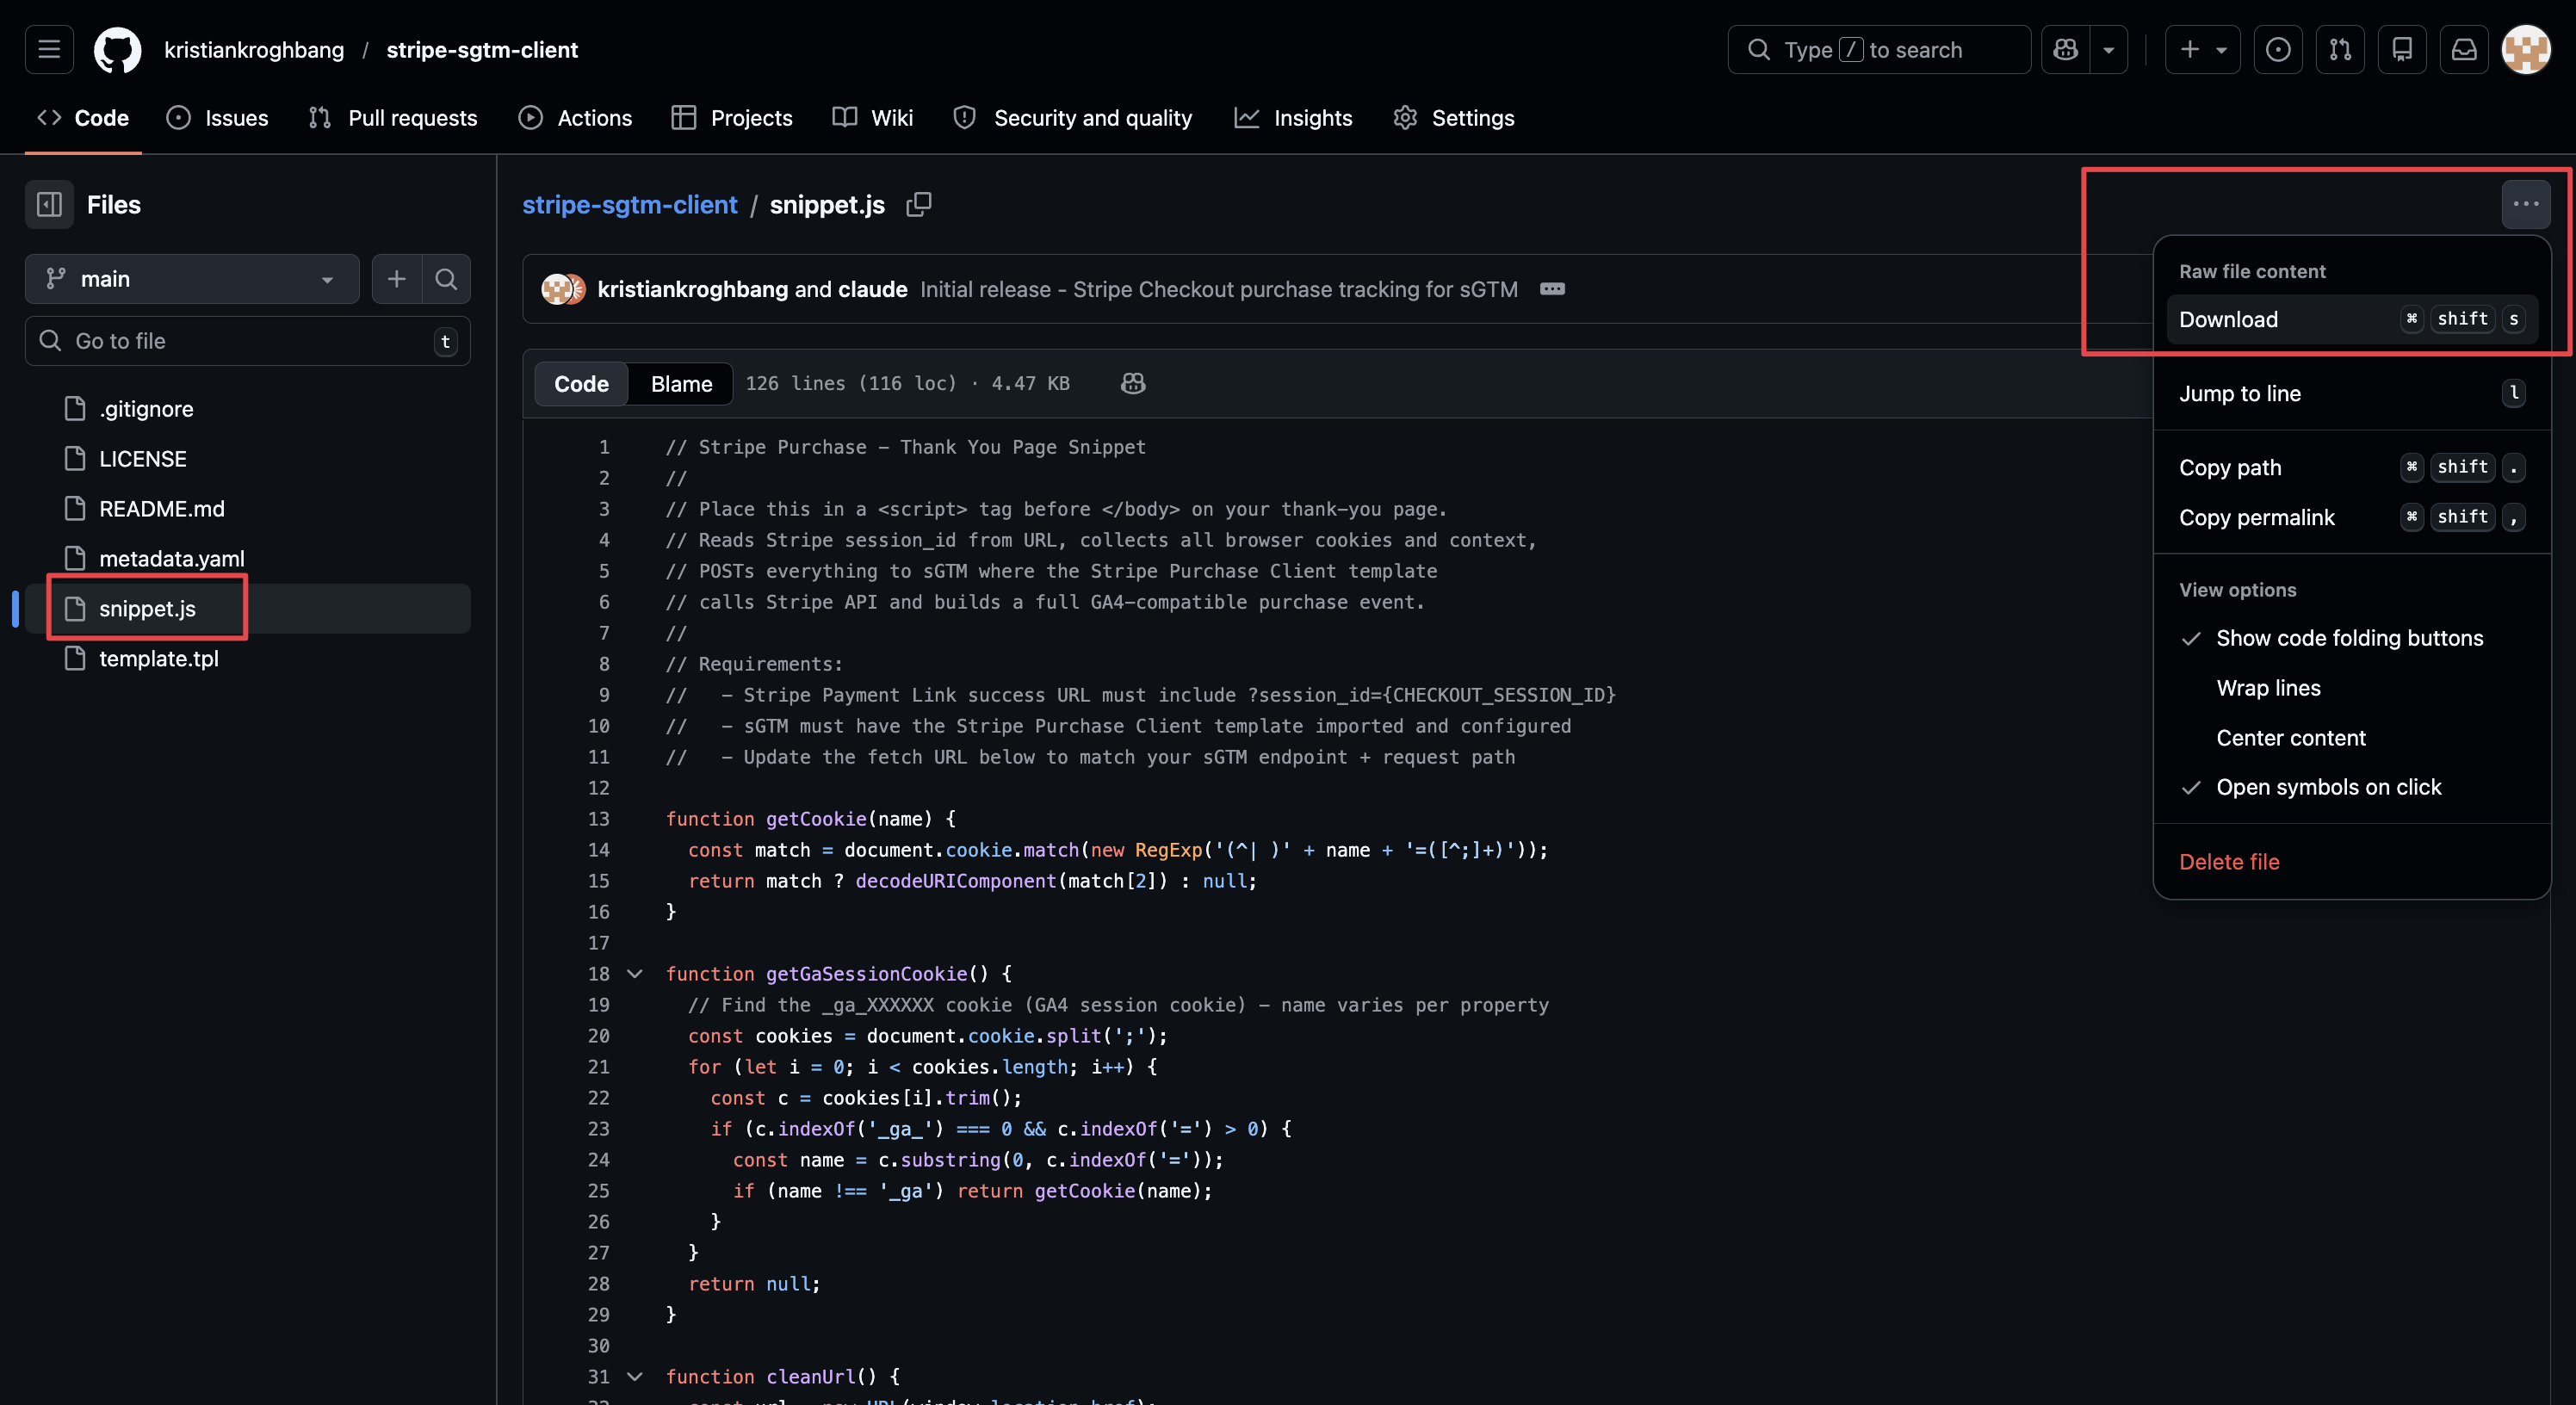
Step 3: Add the JS snippet to your thank-you page
Add the snippet as described in a GitHub repository in a <script> tag before </body> on your thank-you page. Two things to update:
The sGTM endpoint – point this to your Stape custom domain:
const sgtmEndpoint = 'https://sgtm.yourdomain.com/stripe-purchase';The consent detection – the snippet reads your CMP cookie and sends the consent state to sGTM. It defaults to Cookiebot. If you use OneTrust or no CMP, update this section accordingly.
The snippet automatically collects 30+ cookies from every major ad platform and sends them to your server container alongside the session ID.
Step 4: Import the template to sGTM
- Download
template.tplfrom the GitHub repository. - In your sGTM container, go to Templates → Client Templates → New.
- Click the three dots in the top right, select Import, and upload the file.
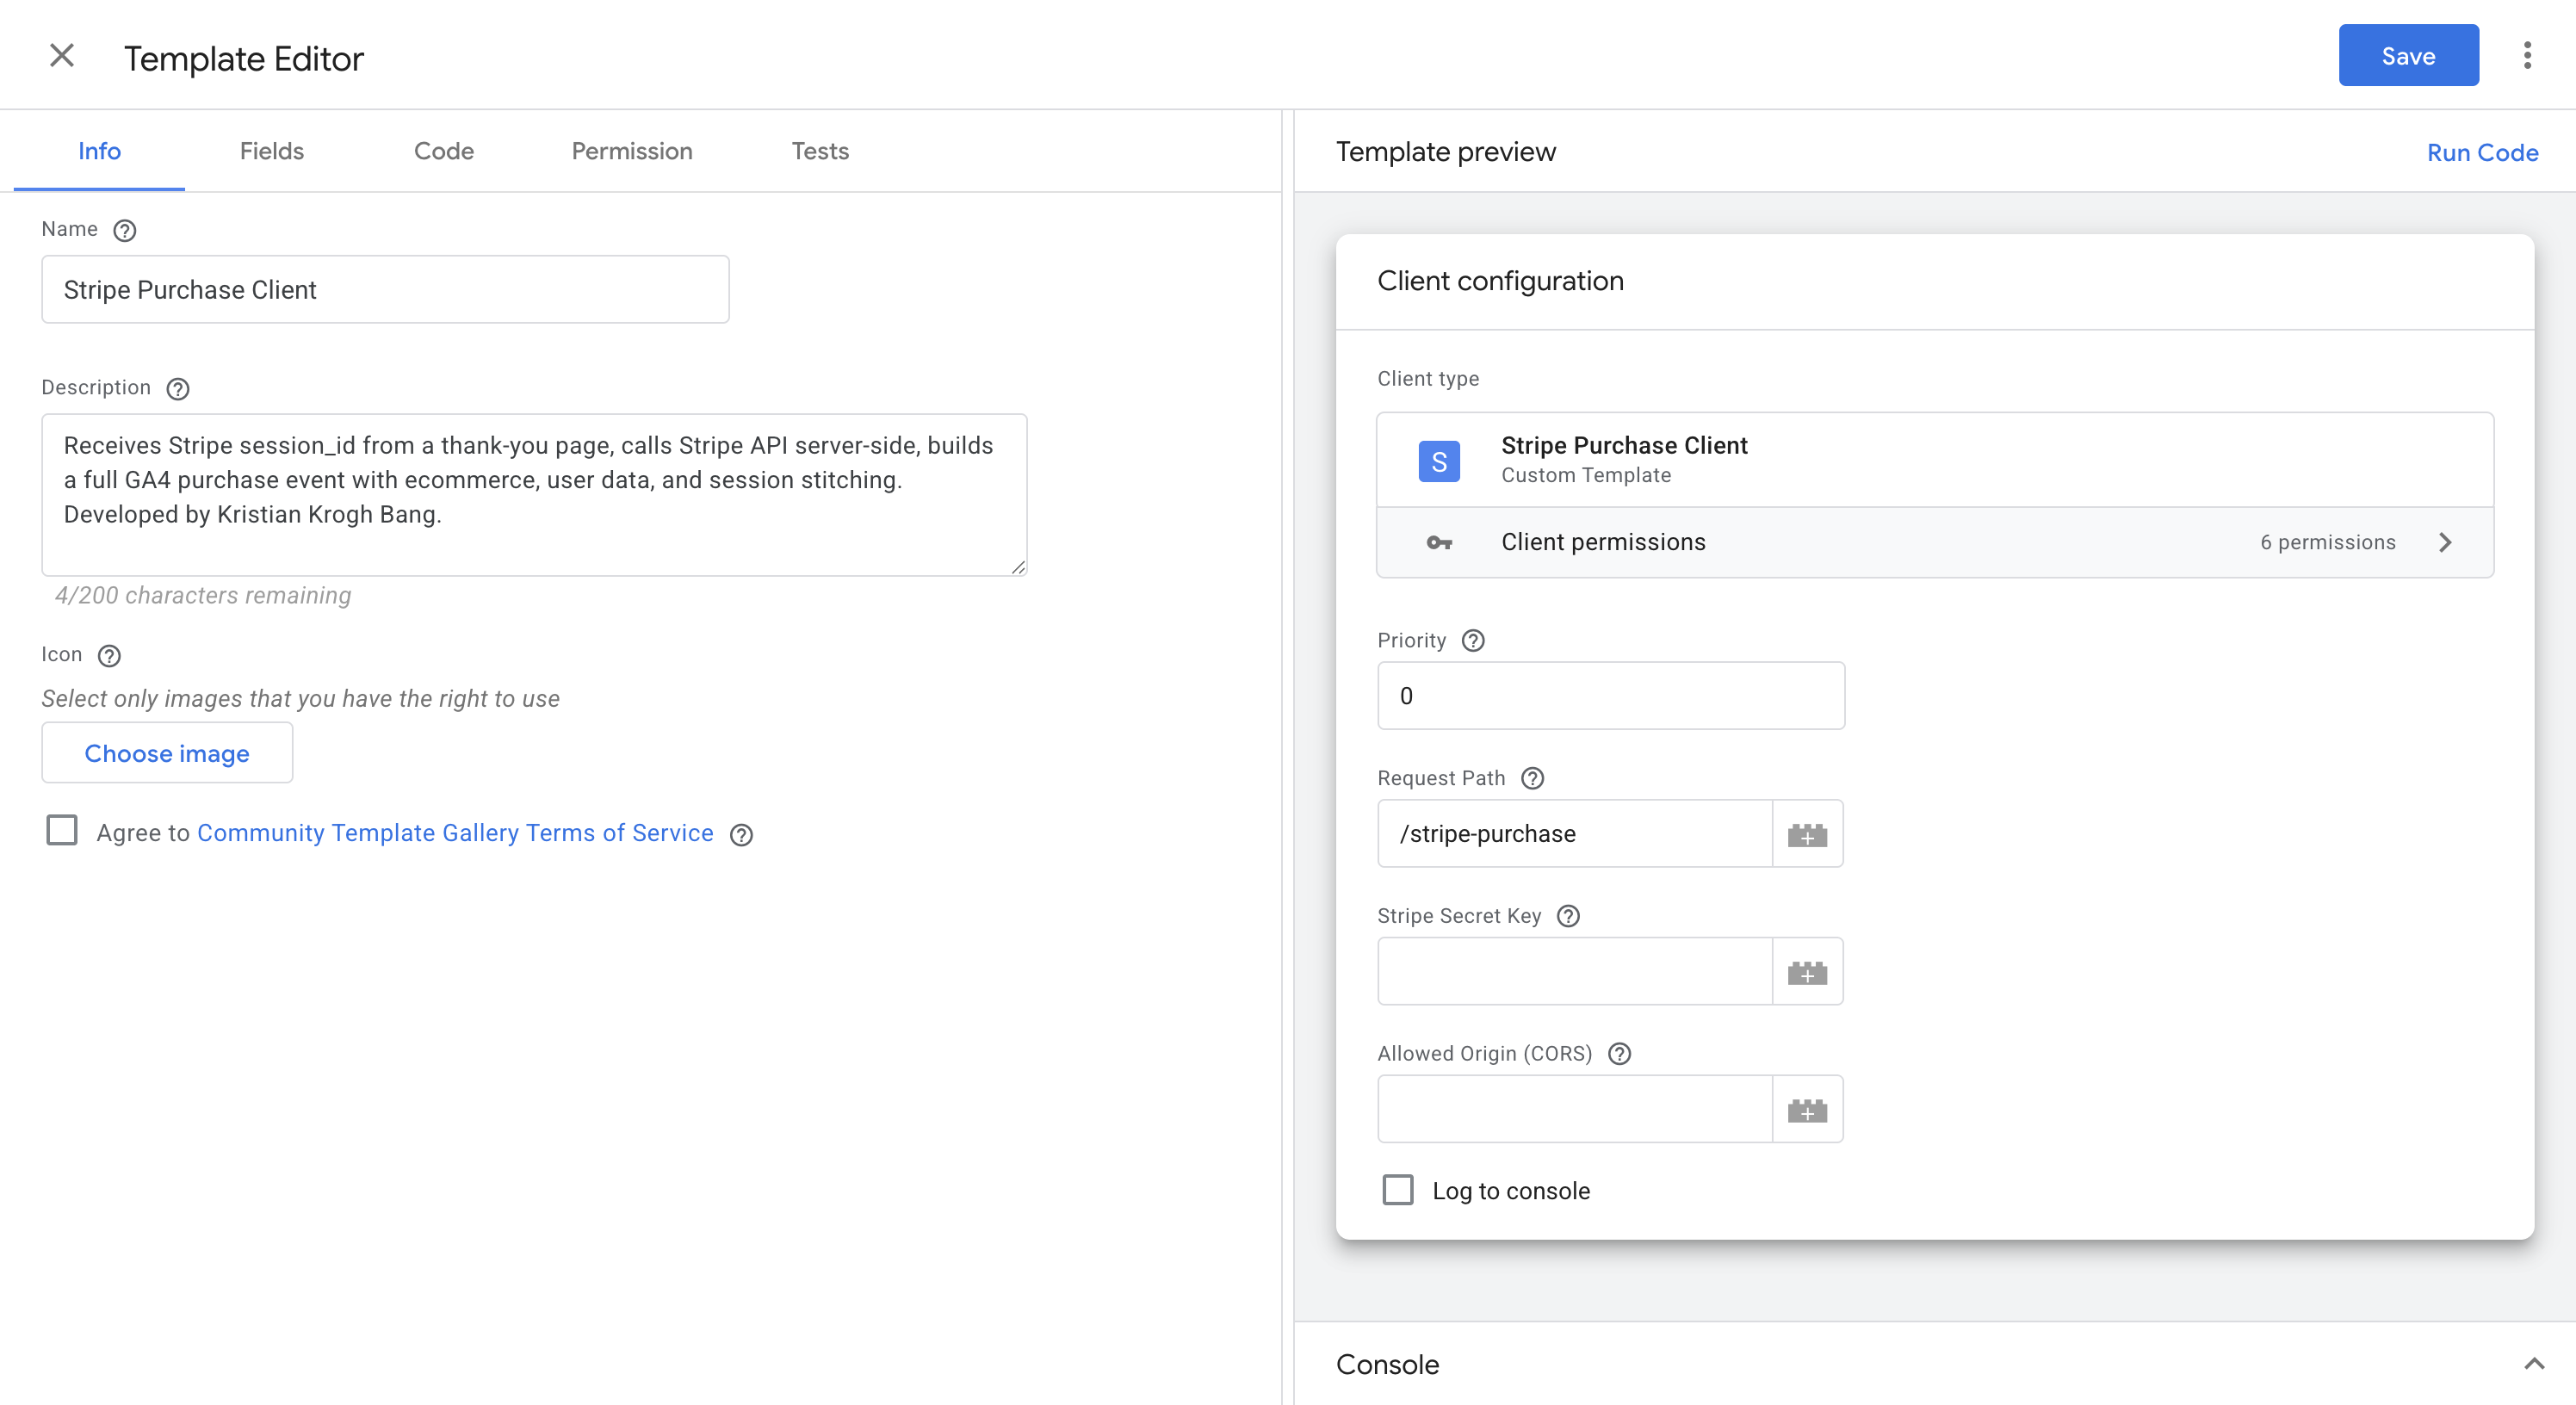
- Go to Clients → New and select the Stripe Purchase Tracking client.
Configure the client:
| Setting | Value |
|---|---|
| Request Path | /stripe-purchase (must match your snippet URL) |
| Stripe Secret Key | Your sk_live_... key |
| Allowed Origin | Your thank-you page domain (e.g., https://yourdomain.com) |
Publish your container and run a test purchase. You should see a full GA4 purchase event in sGTM preview mode, complete with user data, line items, and session context.
Security note:
Taking it further with Stape
Because this setup runs on Stape, you can easily extend it with features that are otherwise complex to build.
Extend cookie lifespan with Cookie Keeper
The JS snippet natively collects Stape cookies and 30+ ad platform cookies. If you want to go further, Stape's Cookie Keeper power-up extends the lifespan of those cookies to 2 years, protecting attribution against Safari's ITP restrictions, which otherwise expire client-side cookies in 1-7 days.
Track new vs. returning customers with Stape Store
Hash the customer's email at purchase time and store it as a document key in Stape Store with a purchase_count.
On the next purchase, look it up:
- If the key doesn't exist, it's a new customer.
- If
purchase_countis 1 or higher, it's a returning customer.
You can send this signal directly to Google Ads and Meta, significantly improving bidding efficiency.
Read the full guide on Stape Store customer tracking.
Re-stitch subsequent purchases and handle cancellations
Store the original session stitching data (client ID, session ID, etc.) in Stape Store alongside the hashed email. When the same customer makes a subsequent purchase – an upsell, a renewal, a repeat order – you can retrieve that data and re-stitch the new event into the correct user journey, even without a live browser session.
For cancellations and refunds, Google Ads is the only major platform that supports post-conversion adjustments. Store the transaction_id at purchase time and use the Google Ads Conversion Adjustments tag to retract or reduce the value when an order is canceled.

Comments