How to set up Facebook Сonversions API for Shopify
Tracking performance in Shopify becomes more difficult every year because of user privacy protections from browsers and ad blockers.
Many store owners see gaps in their data, missed conversions, and low ad efficiency, even when campaigns seem to perform well according to analytics.
In this article, we cover how to avoid these issues, explain why Meta Conversions API (CAPI) matters in 2025, and provide a step-by-step setup summary.
| Simplify Shopify tracking setup. Stape Conversion Tracking with Setup Assistant sets up server-side GTM in minutes, auto-creates eCommerce events, and loads tags for Google, Meta, TikTok, and more. By sending events through Stape’s server-side tracking platform, you capture more conversions and improve ROAS. |
Key benefits of implementing Meta CAPI for Shopify:
- Boost ad performance: businesses have reported up to a 30% improvement in Return on Ad Spend (ROAS) after integrating the Meta CAPI.
- Improve event match quality: CAPI sends first-party data (like email or phone) directly from your server, helping Meta better identify users and optimize ads to bring you better results.
- Recover lost conversions: server-side tracking captures events that browser tracking misses due to ad blockers and privacy restrictions.
- Simplify setup: Stape's Conversion Tracking app for Shopify makes it easier to connect Meta CAPI without needing advanced tech skills.
How to set up Meta CAPI:
- Get started: create a server-side GTM container and install the Conversion Tracking app for Shopify.
- Connect Meta: add the Meta CAPI tag inside your server GTM container.
- Set the rules: add a trigger to tell the tag when it should send data.
- Test everything: use the GTM debugger or Facebook’s test tools to make sure your setup works correctly.
💡Note: There are other ways to set up Facebook CAPI for Shopify, such as using native Shopify pixel integrations. However, these rely on fixed data flows, offer less flexibility, and don’t give you full control over what data is sent or when. In contrast, server-side tracking with GTM and Stape provides more transparency, better accuracy, and the ability to track exactly what you need, when and how you need it.
Let's dive in!
Set up the Facebook Conversions API for Shopify
Here’s a step-by-step guide about Server-side tagging for Shopify, where you can find more information about the implementation.
3. Send data to the server Google Tag Manager container. There are three most popular ways to do that:
- With Google Analytics 4. For more information on how to send data using GA4, check this article.
4. Configure Facebook CAPI inside server Google Tag Manager.
Facebook tags by Stape have two behaviors: Inherit from the client and Override. If you select the inherit option, the FB CAPI tag will listen to the event data and try to parse and map all data it can identify and send to the meta. If you select override, then you must manually specify all the parameters. Below are examples of configuring FB CAPI for each of these tag behaviors.
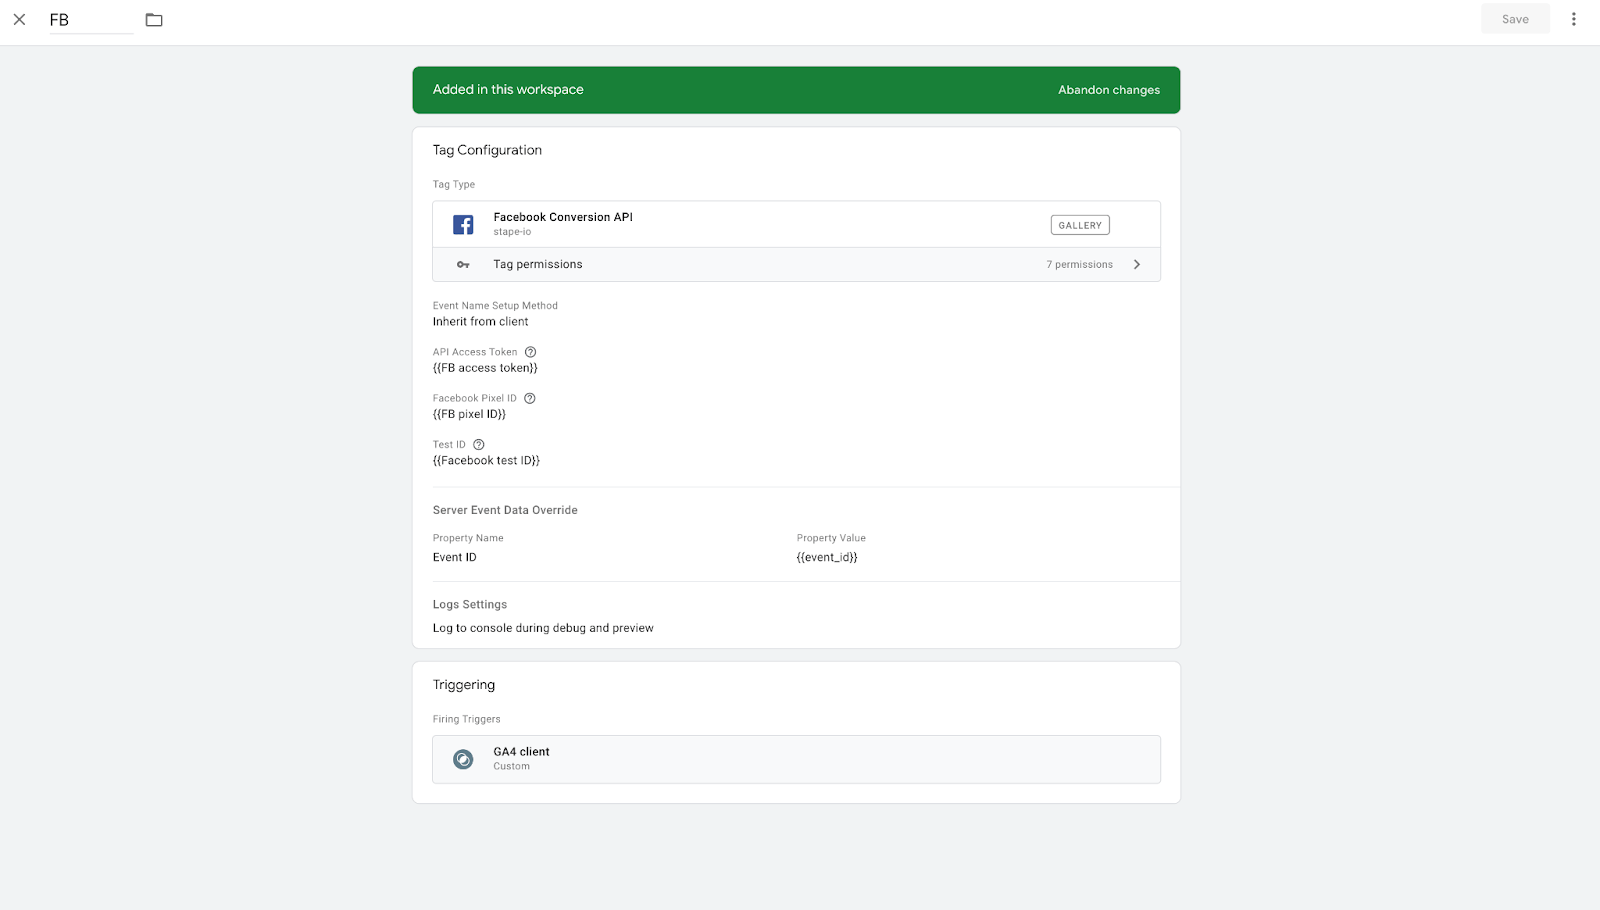
- Inherit from GA4 client:
We will automatically convert your GA4 events into corresponding Facebook standard events.
I. Add a Facebook Conversion API Tag to your server GTM container by clicking Add to Workspace.
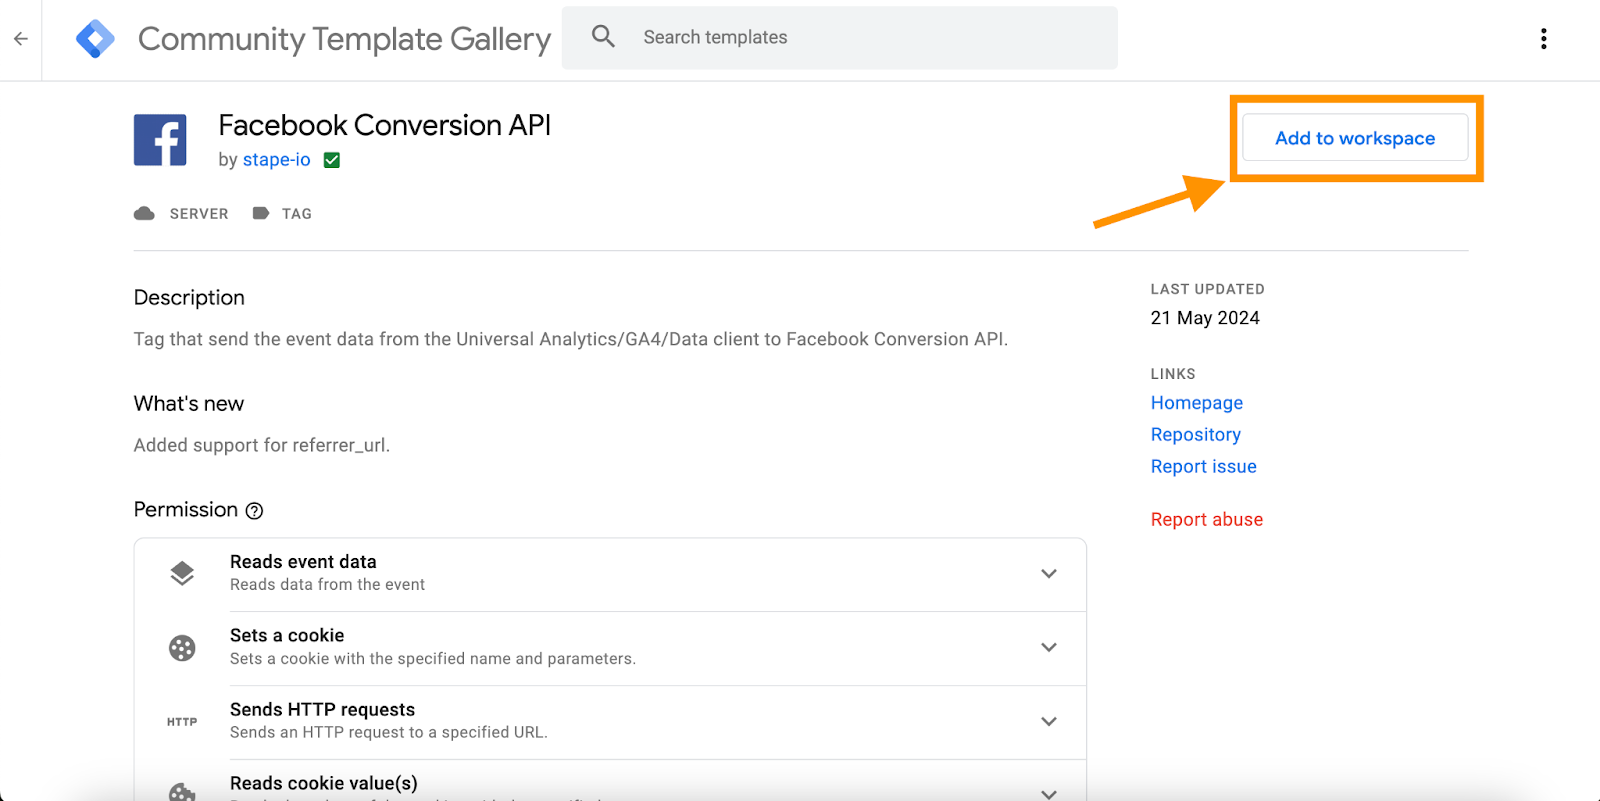
II. Create a new tag and select the tag type Facebook Conversion API Tag.
Select Inherit from client and add:
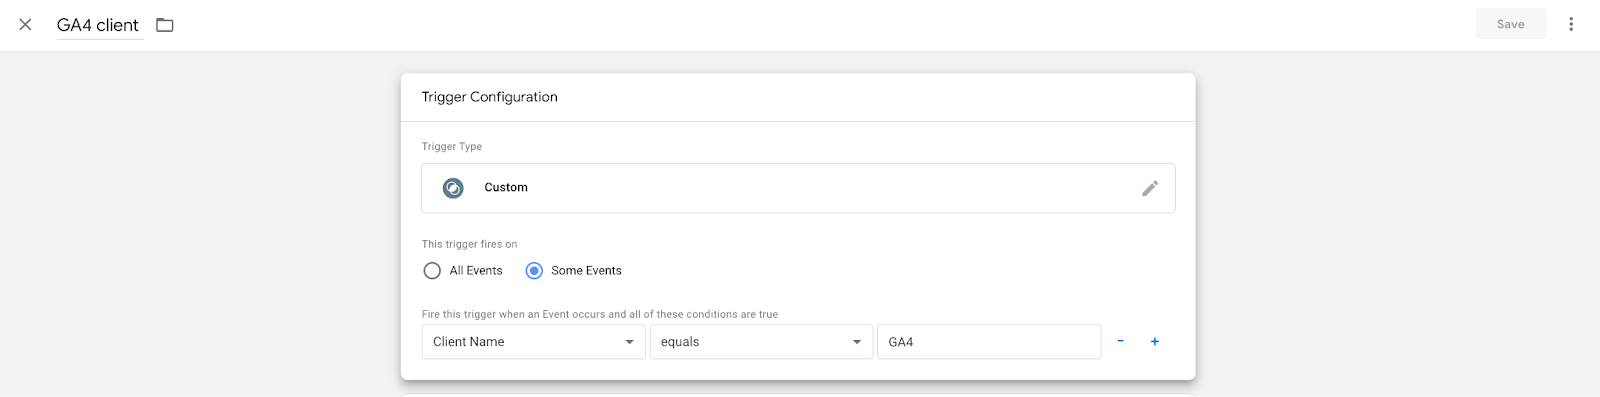
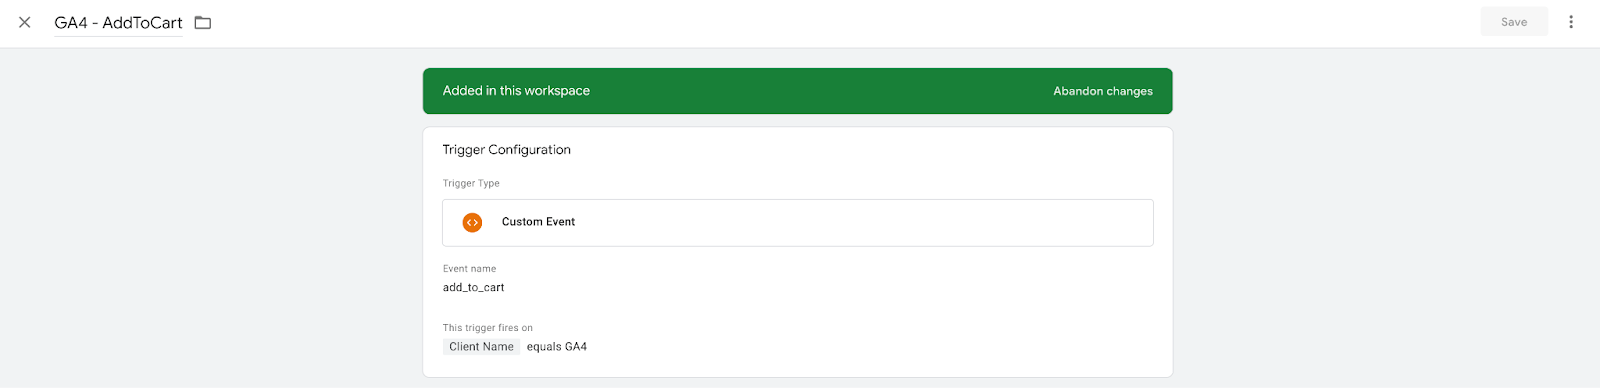
III. Add a trigger. Click triggers → + in the top right corner → trigger settings and select a custom trigger → this trigger will fire on Some Events → Client Name equals GA4. Click Save.
- Override:
I. You’ll need to set up FB events manually.
Use GA4 events to trigger Facebook server events.
Example: an “add_to_cart” event and send value, currency and item_id parameters.
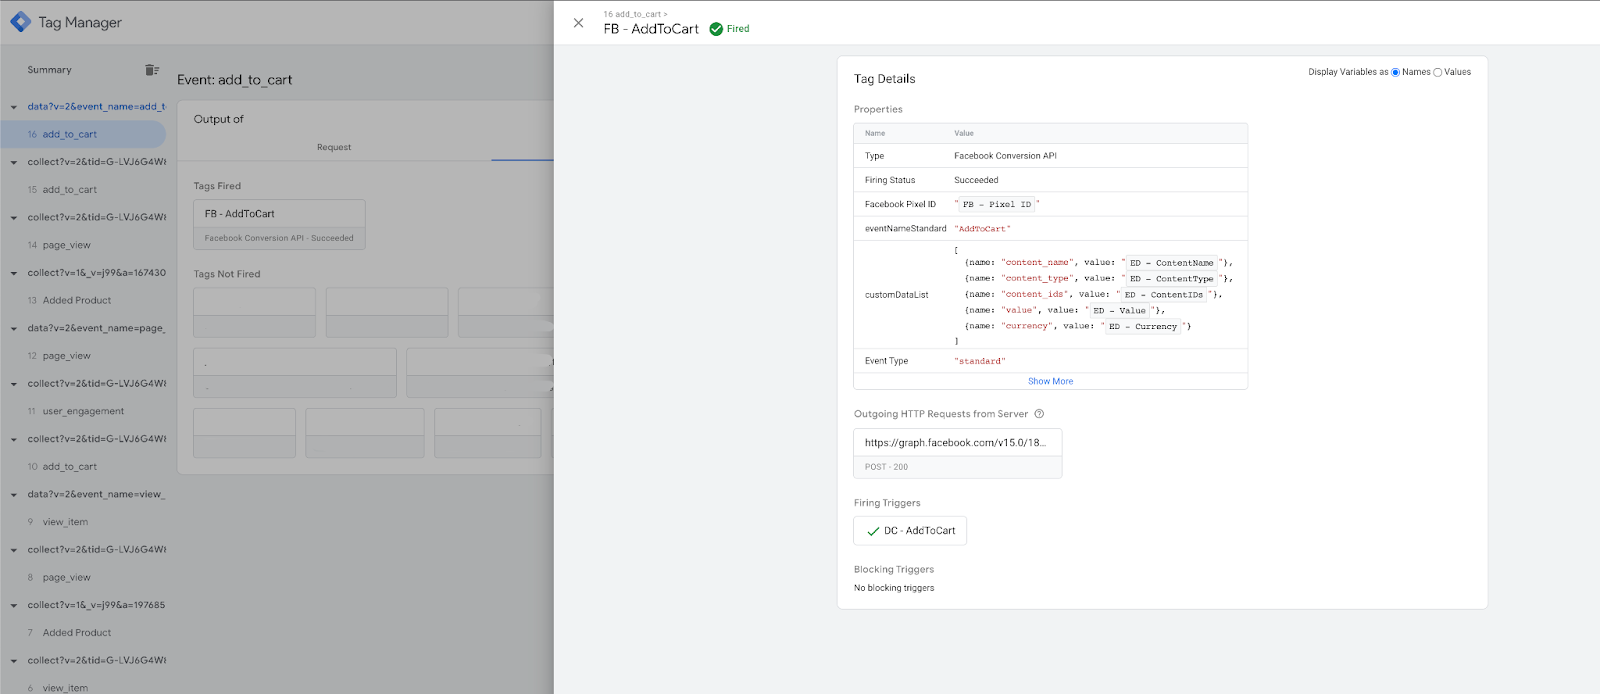
II. In your server container add Meta API tag from the template gallery. Select override in Event Name Setup Method and the event type AddToCart. Fill in your:
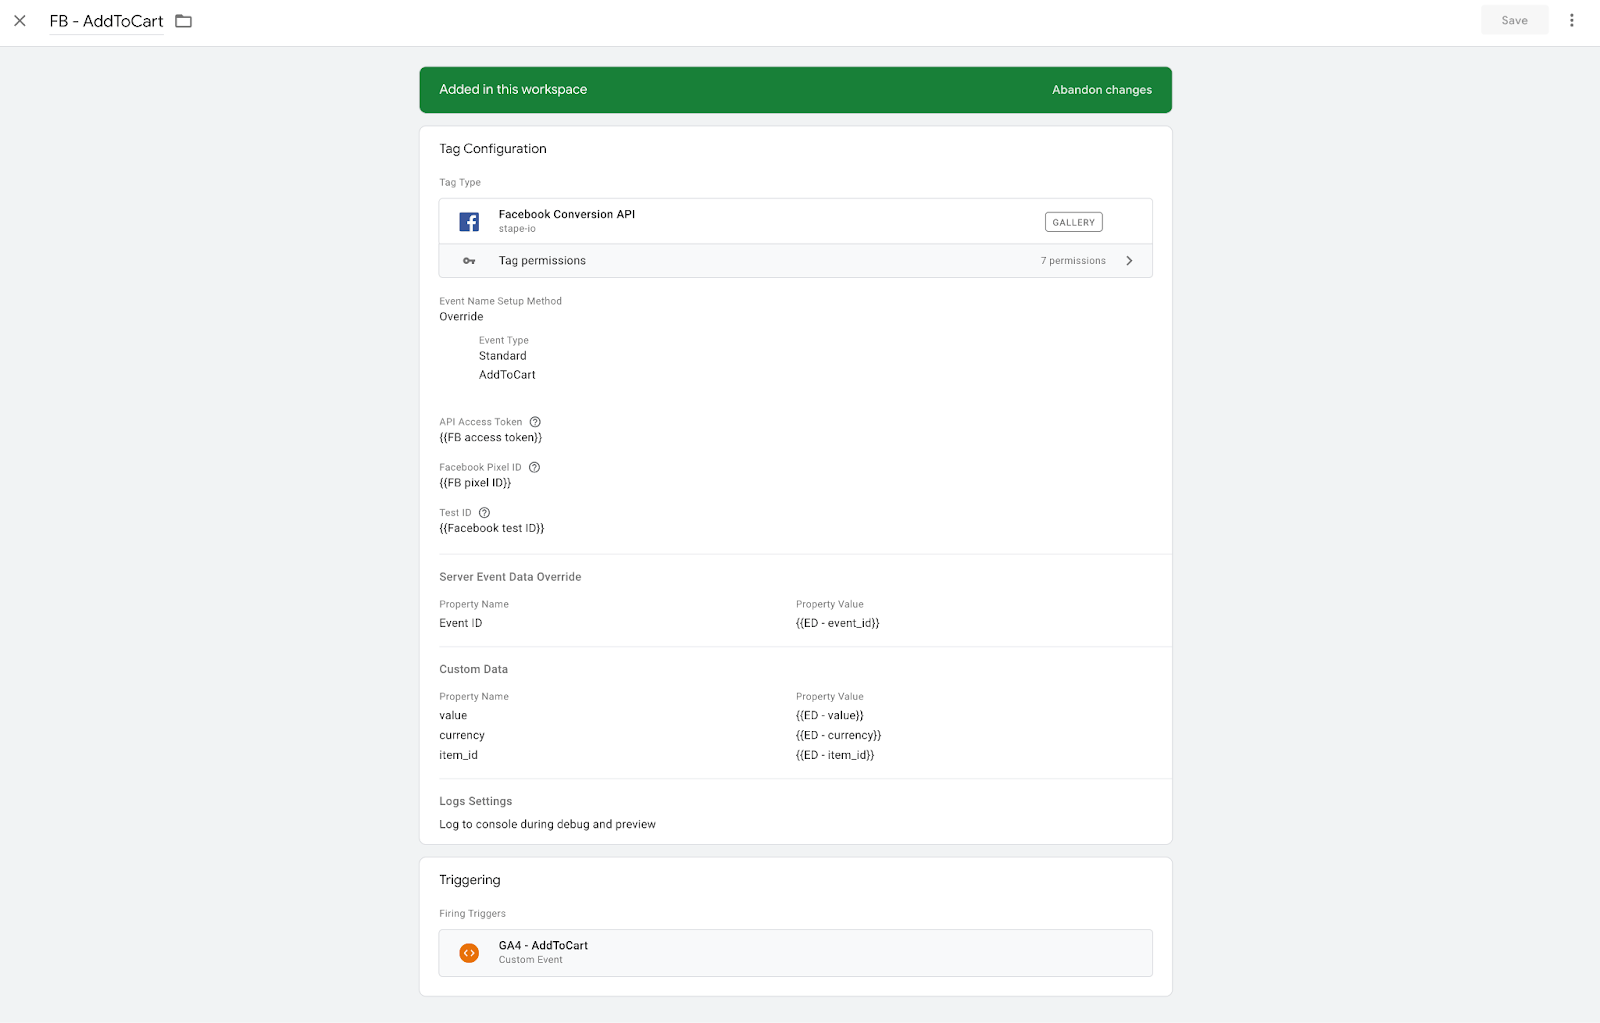
III. Fill in the custom data that we decided to pass to Facebook. For these parameters, we will also need to make variables, but now in a server container with the type of variable “event data”.

The trigger should fire when the event name is add_to_cart and the client name equals GA4.
Click Save.
Verifying the setup is complete and correct
1. Open the web and server GTM containers debugger and click through your site. In the server GTM container, you should see events fired by the Facebook Conversions API tag.
2. You can test this event inside the Facebook testing tool as well.
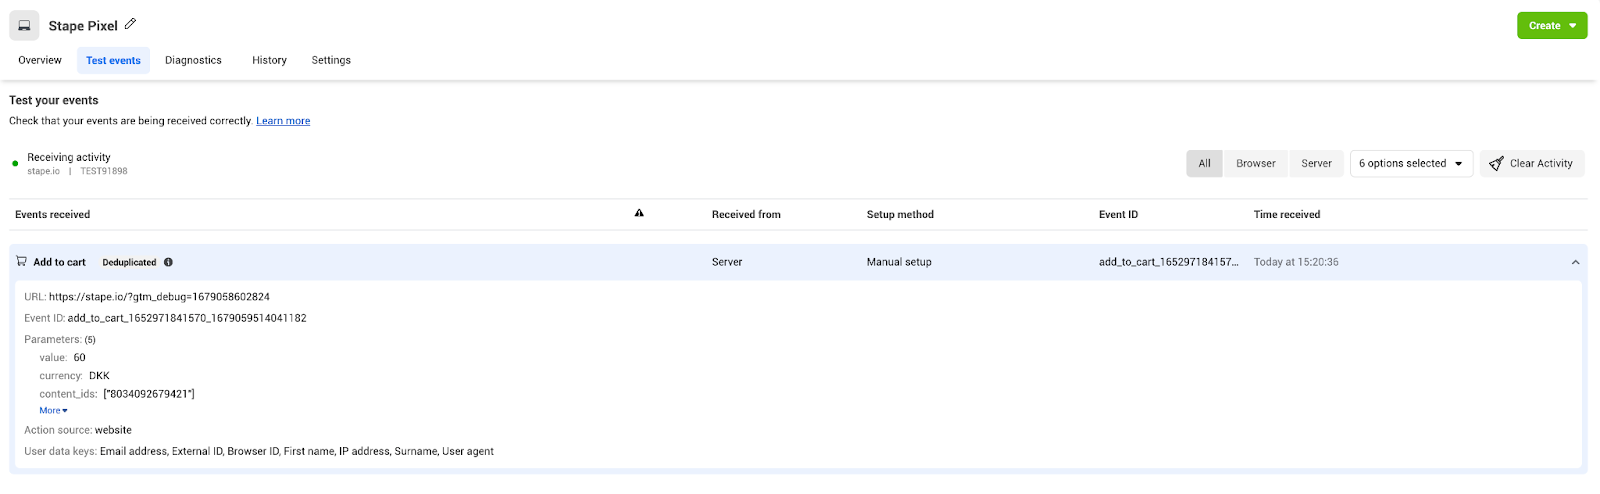
Once your Meta CAPI setup is live, don't skip verification. Shopify's sandboxed checkout means tags can appear to work in GTM preview while failing silently in production – causing missed or duplicate events in Meta. For a step-by-step validation process, read: Debugging Shopify tracking with web and server GTM: a complete guide.
Facebook Conversions API for Shopify: real Stape users' problems solved
1. In this thread, a user setting up the Facebook Conversions API for Shopify couldn’t get their purchase event to trigger, even after adding custom code to the checkout page. In the full thread, the issue was traced to an incorrect trigger in Google Tag Manager—the user had set it to fire on “gtm.js” instead of “purchase.” After switching the trigger to the correct event name, the purchase event fired properly and the Facebook Conversions API for Shopify setup worked as intended.
2. A Shopify store using Facebook Conversion API for Shopify via Stape faced failed purchase events in server-side GTM and no test events showing in Meta. The issue was not Stape itself, but an incomplete setup: events were reaching the server, but Facebook wasn’t receiving browser-side data. The fix was to use hybrid tracking — set up both the Facebook Pixel in the web GTM container and the Facebook CAPI tag in the server container. Facebook then automatically deduplicates events, server-side errors disappeared, and events showed correctly in Meta Event Manager.
Final thoughts
Overall, Shopify users have various options when it comes to integrating Facebook’s conversion API. We’ve discussed each possibility thoroughly and explored how to deploy the Facebook conversion API for Shopify using the Stape Conversion Tracking app.
Take the time to review your business needs and use cases before determining which integration is best for you. Then, whether you choose a manual solution or rely on automation, implementing the Meta Conversions API will give your company additional insights into customer behaviors, help optimize campaigns, and deliver more engaging experiences for your customers.
To get started quickly and achieve the best results, we recommend trying the Conversion Tracking app, which provides an easy-to-use implementation option.
Switching to server-side?
Click Try for free and check all the solutions and benefits of Stape at no cost!

Comments