Facebook Conversions API for Magento 2
Ivanna Holubovska
AuthorRecognizing the power of data-driven marketing strategies, Facebook has developed the Conversions API, a powerful tool that enables businesses to send events from server to server and it means you can now seamlessly connect your Magento 2 -powered online store with the vast advertising capabilities of the social media giant.
In this article, we delve into the world of Facebook Conversion API for Magento 2, exploring its features, benefits, and how it empowers businesses to enhance their marketing efforts, streamline data synchronization, and ultimately boost their online sales. Get ready to harness the true potential of our Magento 2 extension and take your eCommerce game to the next level with the Facebook Conversion API. By the way, check out Stape’s pre-configured templates for Meta CAPI. Now it is easier than ever to configure your setup: everything is done and all ready for you!
What are the main benefits
The Facebook Conversion API for Magento 2 offers a range of benefits that empower eCommerce businesses to maximize their marketing efforts and achieve higher conversions.
Firstly, it provides a seamless integration between Magento 2 -powered online stores and Facebook's advertising platform, allowing businesses to track and optimize their advertising campaigns more effectively. By syncing data directly from the server side, rather than relying solely on browser-based events, the Conversions API ensures more accurate tracking of conversions, even in scenarios where cookies may not be present or blocked. This enables businesses to gain deeper insights into their customers' actions and behaviors, facilitating better targeting and personalized ad experiences.
Additionally, the Conversions API enhances data privacy and security by keeping sensitive customer information within the server environment, reducing the risk of data breaches.
Moreover, the API offers increased scalability and flexibility, allowing businesses to handle high volumes of traffic and transactions without compromising performance.
With these benefits, the Facebook Conversions API for Magento 2 empowers businesses to optimize their advertising campaigns, drive more relevant and personalized experiences, and ultimately boost their online sales.
How to set up Facebook Conversions API for Magento 2
2. Add and configure Magento 2 extension.
3. Send data to the server Google Tag Manager container. There are two most popular ways to do that:
- With Google Analytics 4. For more information on how to send data using GA4, check this article.
- Data Tag/Data Client. In this article, I will use Data Tag/Data Client to send data from the web to the server.
3. In your Web Google Tag Manager go to the template gallery, find Data Tag, and add it to the Workspace.
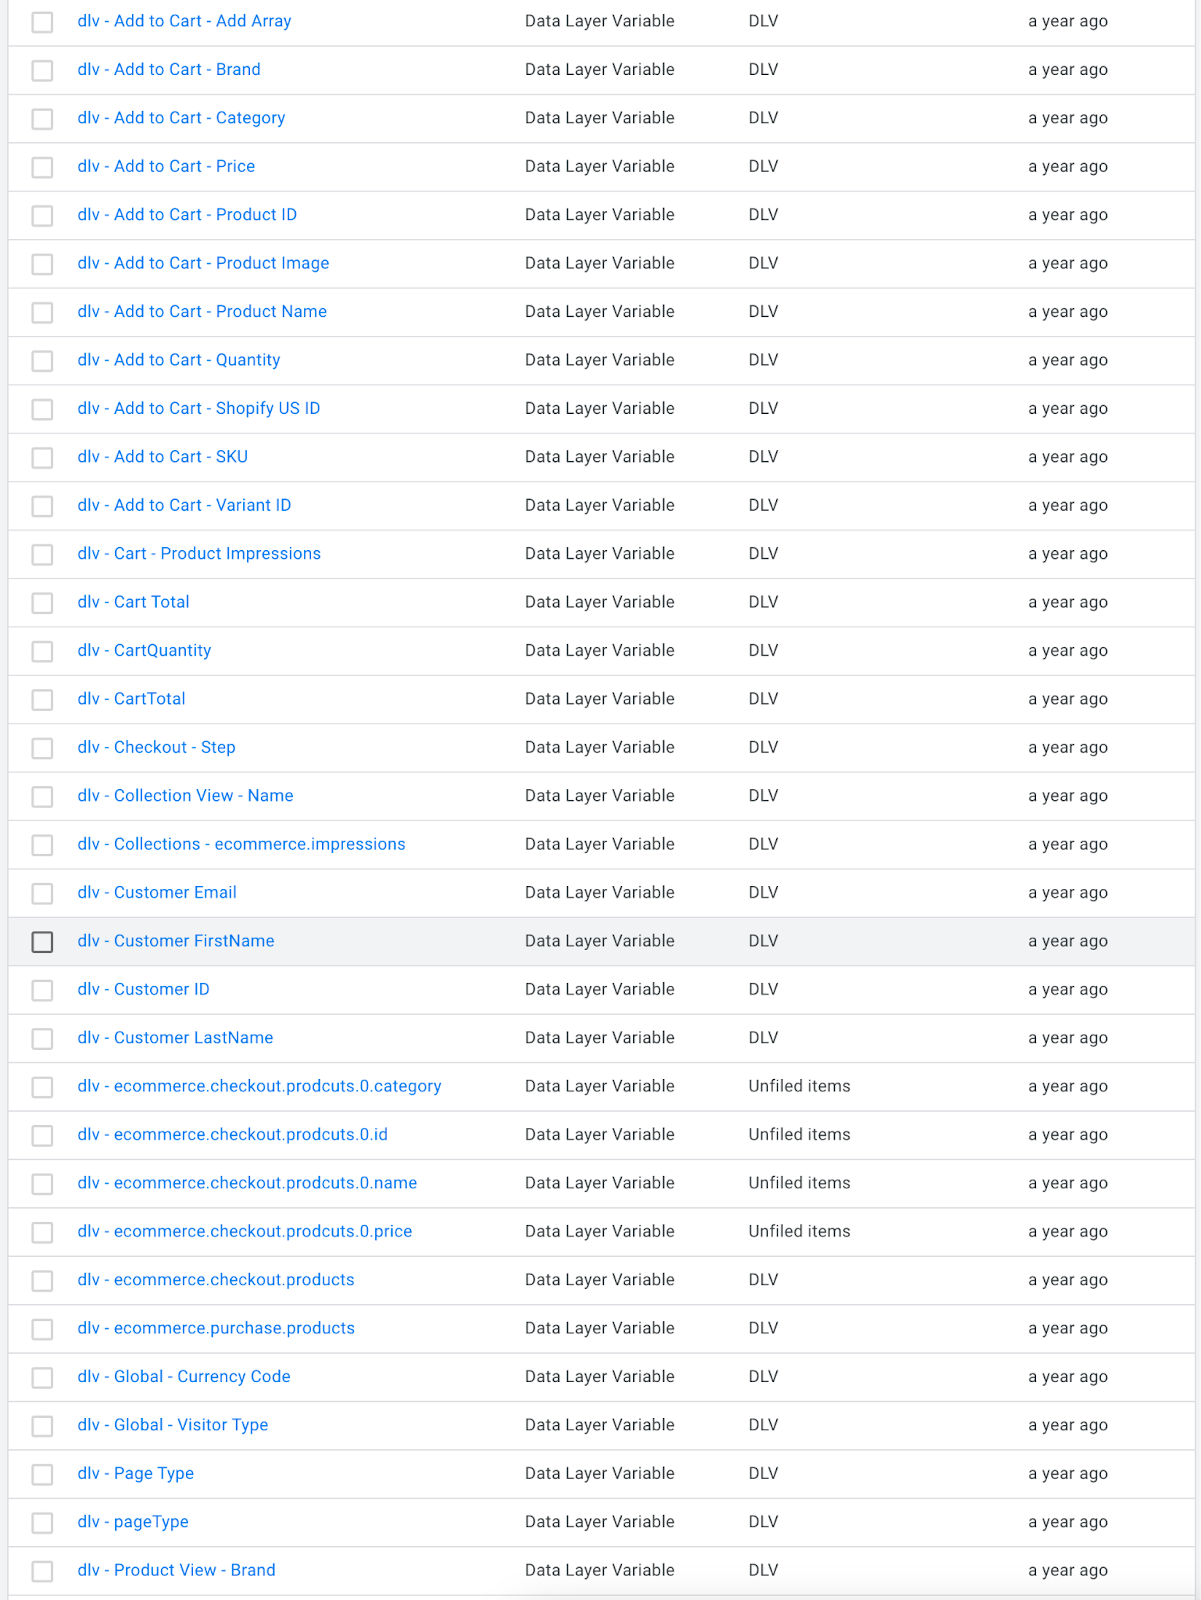
4. To ensure eCommerce events, product, and user data are set up correctly, open a web GTM container and check the data layer the Stape extension sends for each eCommerce event. You might need to configure a data layer variable for an event or user data you must send to Facebook.
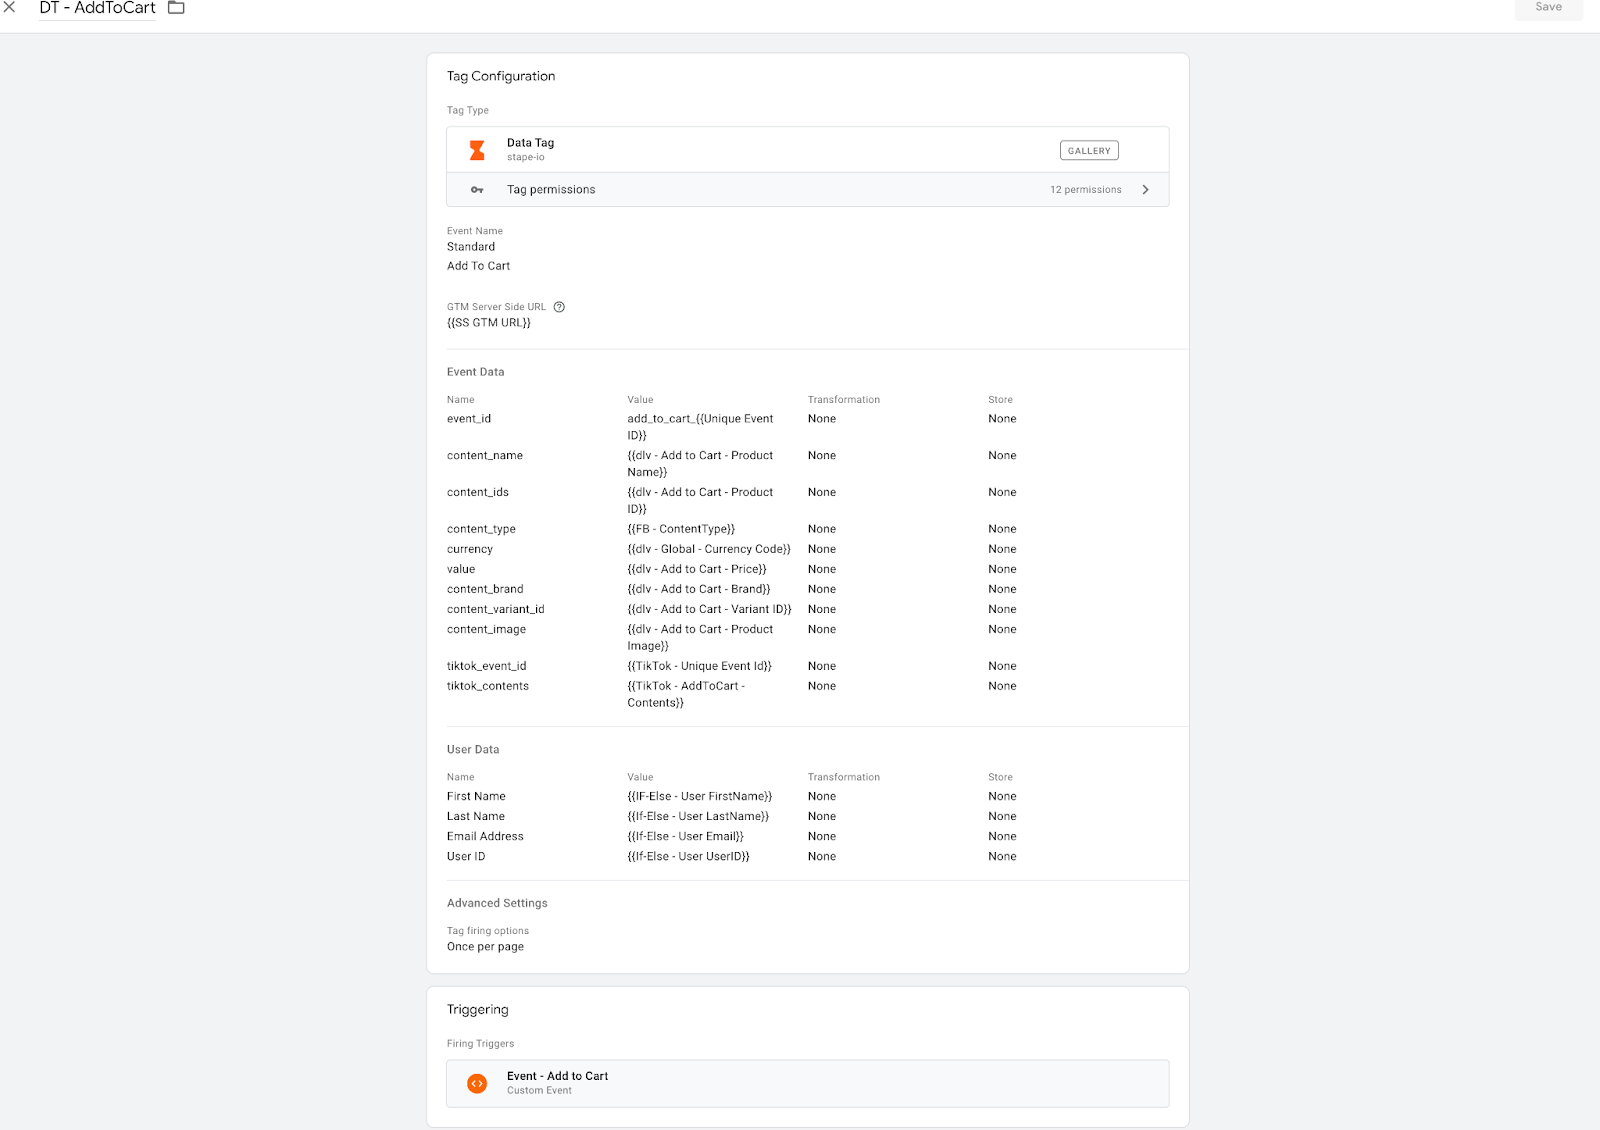
5. Go to Tags, and create a new Data Tag.
6. Inside the Data Tag in the Event Name, select standard and choose Add To Cart. Add your tagging server URL. Add event data (such as product name, value, ID, etc.) and User Data manually or select Send all from DataLayer. You can leave all the other settings unchanged. Add a trigger, in my case, a custom event add_to_cart.
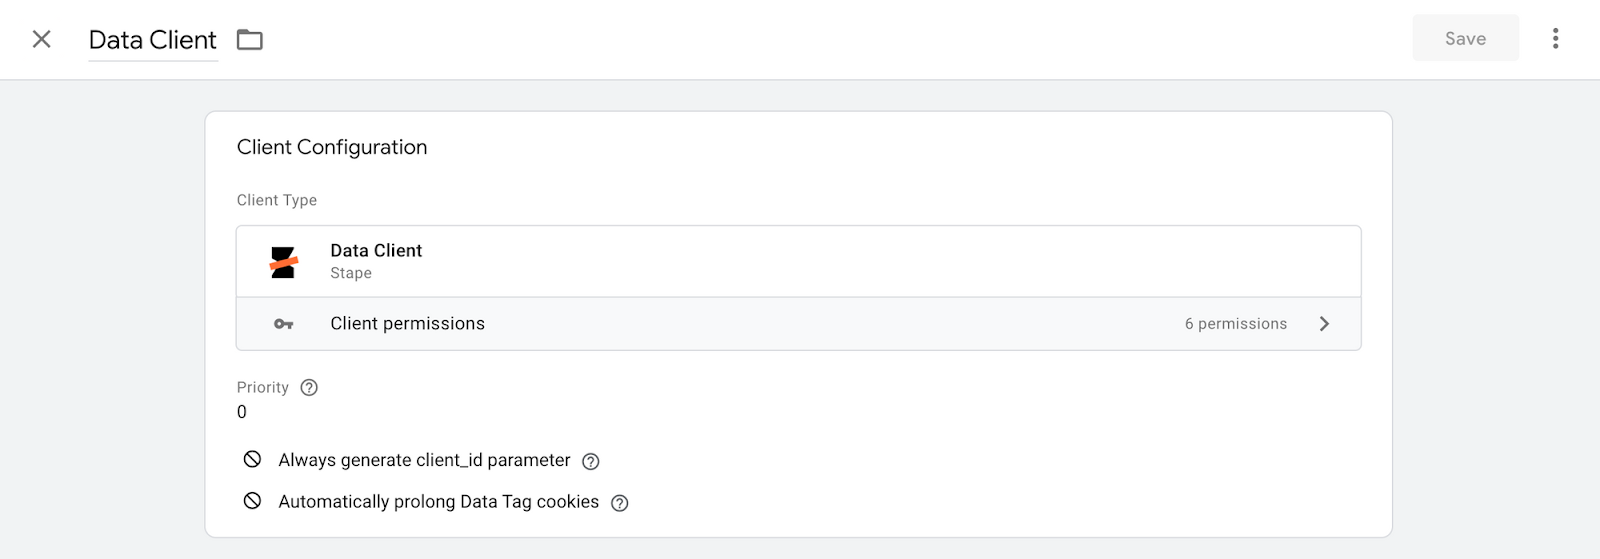
7. Add Data Client inside the Google Tag Manager Server container. This Client will listen to Data Tag, process all information, and convert it into events data inside the server container. Open this link -> Click on the green button Code -> Download Zip file -> Go to the templates tag in the Google Tag Manager Server container -> On the Client Templates, click New -> Import -> Click Save.
8. Create a Data Client in the server GTM container. Select Clients, click New, and choose Data Client.
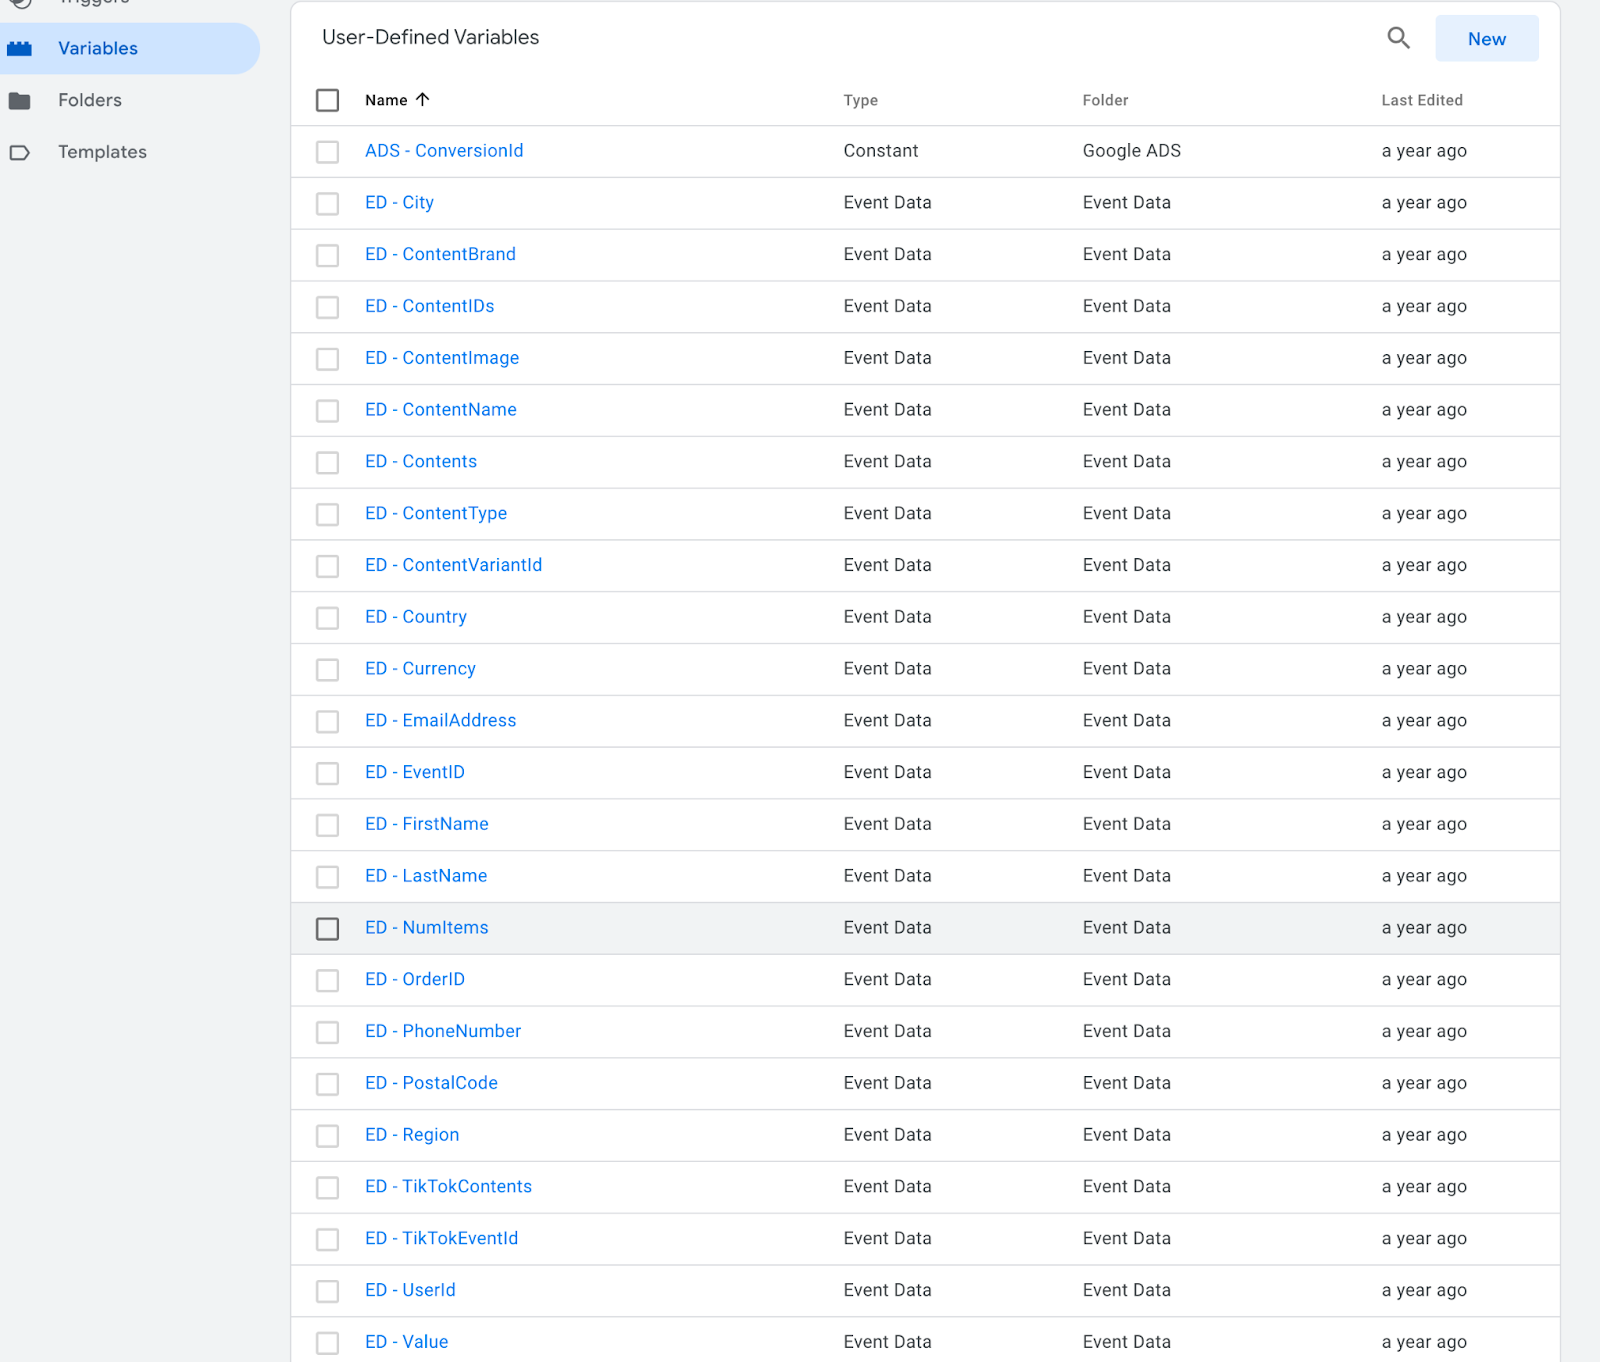
9. Create variables inside the Server container that will capture the request_data you sent from the Web container. Go to the variables tab inside the Server container -> Create new variable -> Variable type event data -> Add Key Path.
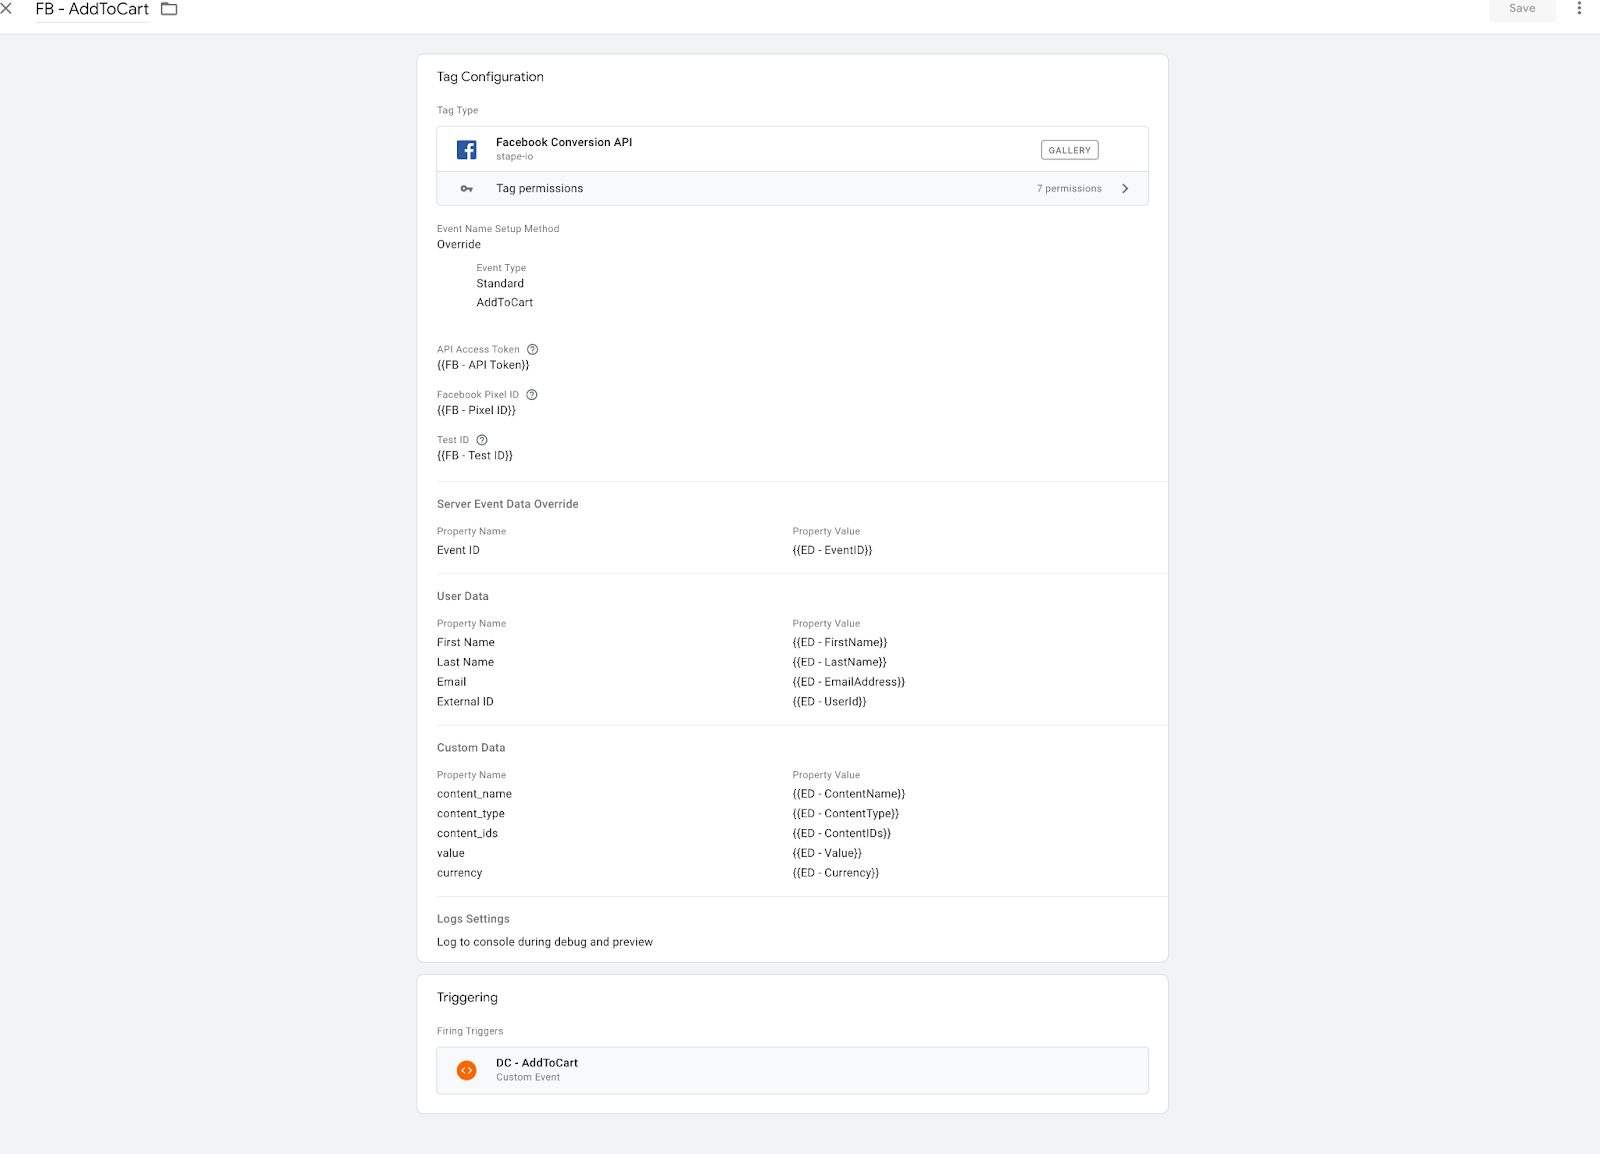
10. Create a new Tag. Go to the community template gallery and add Facebook Conversions API Tag. In the Tag select override in Event Name Setup Method and choose AddToCart event. Fill in your FB API Access Token, FB Pixel ID, and Test ID to see events inside the FB testing tool. Add User Data and Custom Data that you wish to send to Facebook.
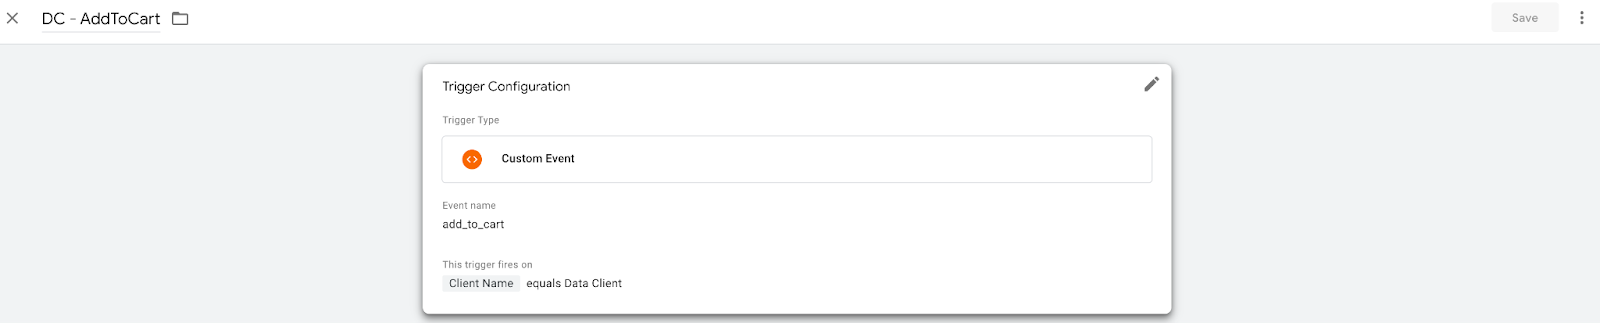
11. Add a trigger. Click on triggers-> + in the top right corner-> trigger settings and select a custom event trigger-> type add_to_cart to the event name, and this trigger will fire on Some Custom Events-> Client Name equals Data Client. Click save.
Conclusion
In this article we have highlighted the advantages of using Facebook CAPI for your Magento 2 store and also described steps of implementation. With Stape’s Magento 2 extension it’s now much easier to get started with server-side tracking. And if you have any questions - don’t hesitate to contact us. Our team of experts will guide you through or give an excellent consultation!
Setting up server-side tracking?
We've got you covered! Click Get assistance, fill-up the form, and we will send you a quote.

Comments