If you have your store on Magento 2, you might be well-interested in setting up server-side tracking on your website. As in the evolving landscape of e-commerce, data-driven insights are crucial to success. Understanding how your customers interact with your website not only enhances their experience but also optimizes your marketing strategies.
That's where Stape's Conversion Tracking extension for Magento 2 comes in, simplifying the process and opening up the world of server-side tagging. In this guide, we'll delve into the benefits of implementing the Magento 2 app, understand the offerings of Stape's Conversion Tracking extension, and walk through the steps of setting it up.
The Magento 2 plugin simplifies the process of modifying the Google Tag Manager script by incorporating the tagging server URL. This extension is compatible with other extensions that insert the GTM script on your website, allowing you to load a GTM container from your subdomain. Also, it includes a custom loader that makes Google Tag Manager and Google Analytics tracking invisible to ad blockers and various tracking prevention mechanisms.
Another advantage of using this extension is the extended cookie lifetime when utilizing a custom domain for the server Google Tag Manager container, which enhances tracking accuracy. Furthermore, the Stape power-up Cookie Keeper feature restores marketing cookies in Safari 16.4+. Our plugin supports two most popular themes on the market - Luma and Hyva.
With the Magento 2 plugin it is possible to remove 3rd party pixels from the browser to cloud servers and therefore increase your site page speed.
To find out more about the benefits of server-side tagging and what they can bring for your business please click on the link.
1. Log in to your Magento 2 Admin.
2. Go to Magento 2 Marketplace, then choose Stape's Conversion Tracking, click Add to cart and proceed to Checkout.

Please note that the plugin is entirely free, and all plugin functions - except the Cookie Keeper - can be used regardless of whether you use the Stape service or not. The Cookie Keeper function will only work if you use the Stape service on any tariff and have activated it in your container settings.
3. Follow the instructions provided to install the extension on your Magento 2 site.
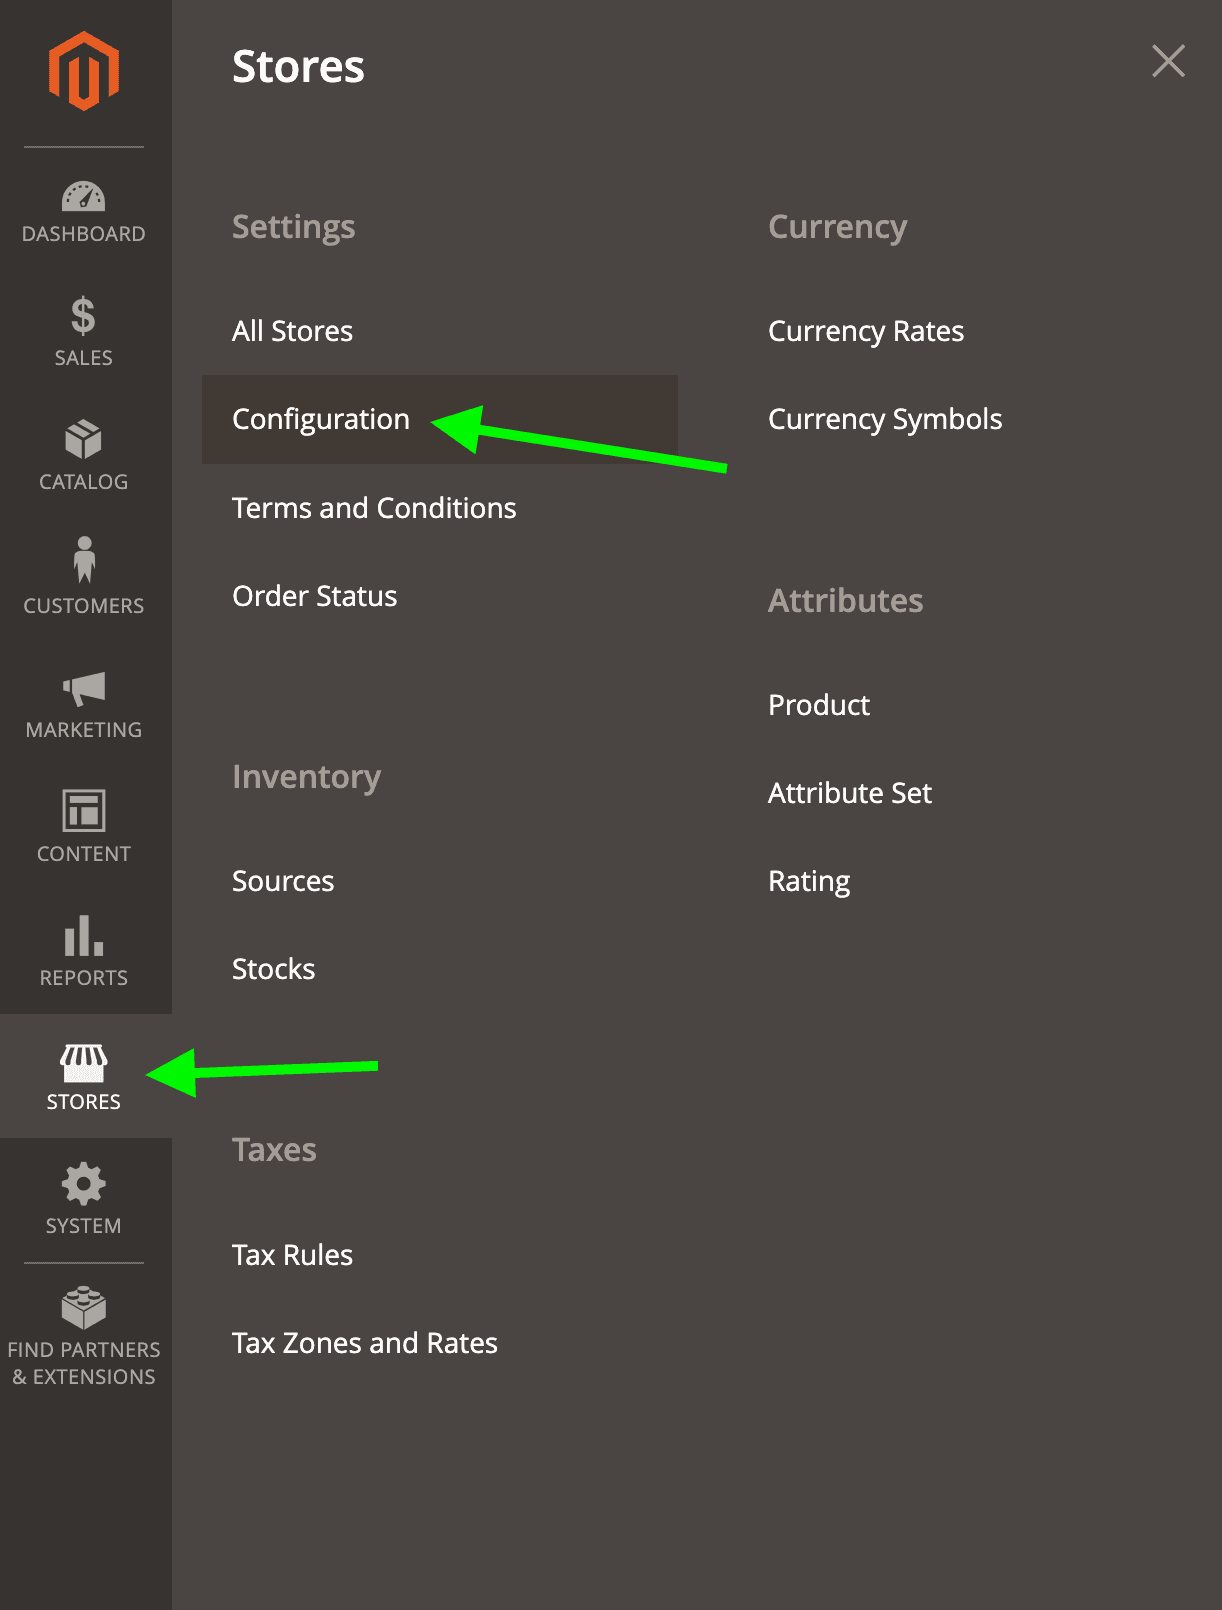
5. In your Magento 2 account go to Stores and choose Configuration.

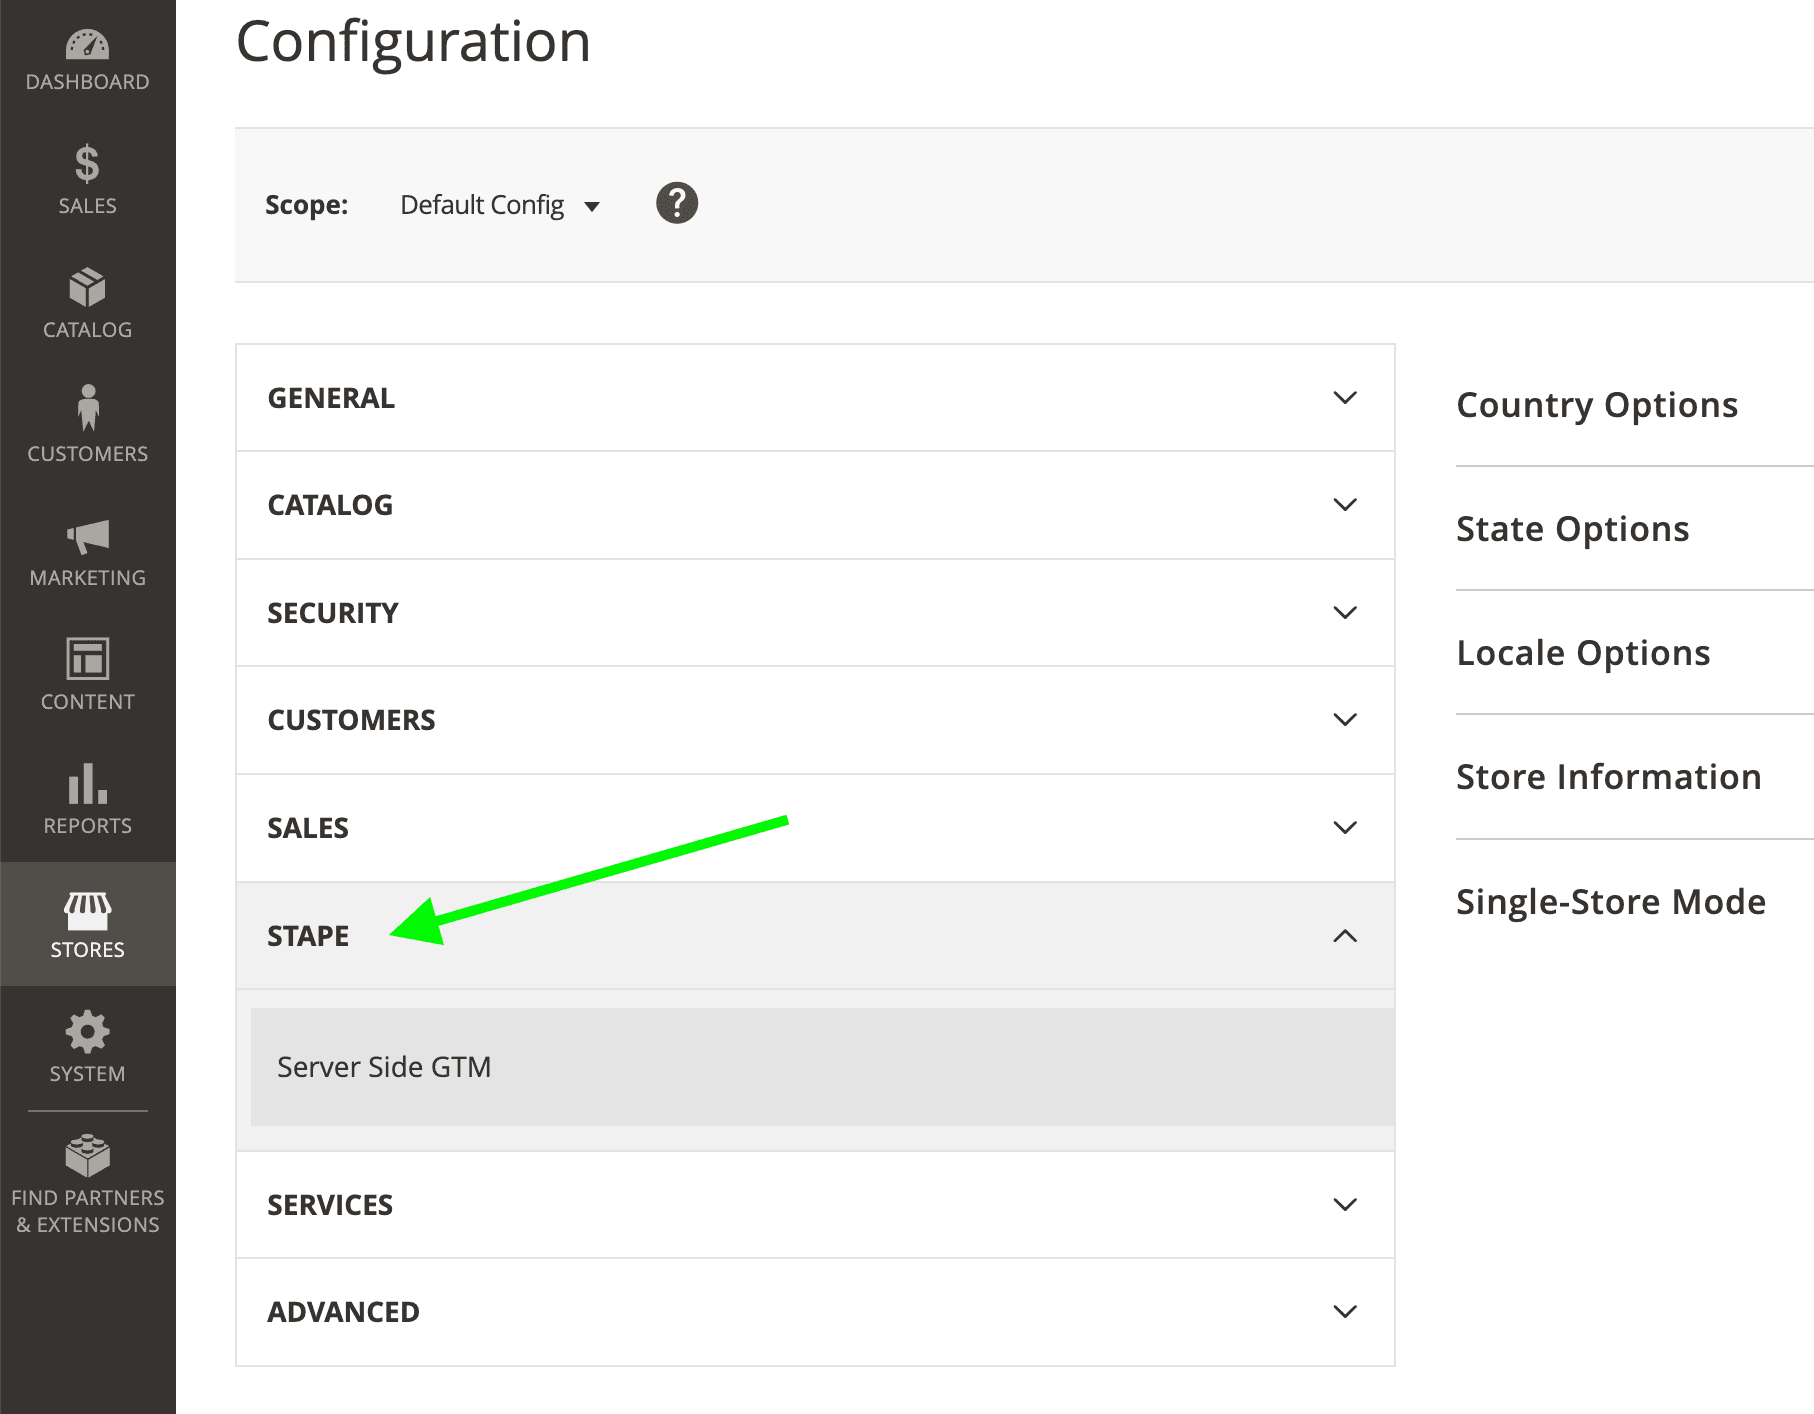
6. Choose Stape and click on Stape Conversion Tracking.

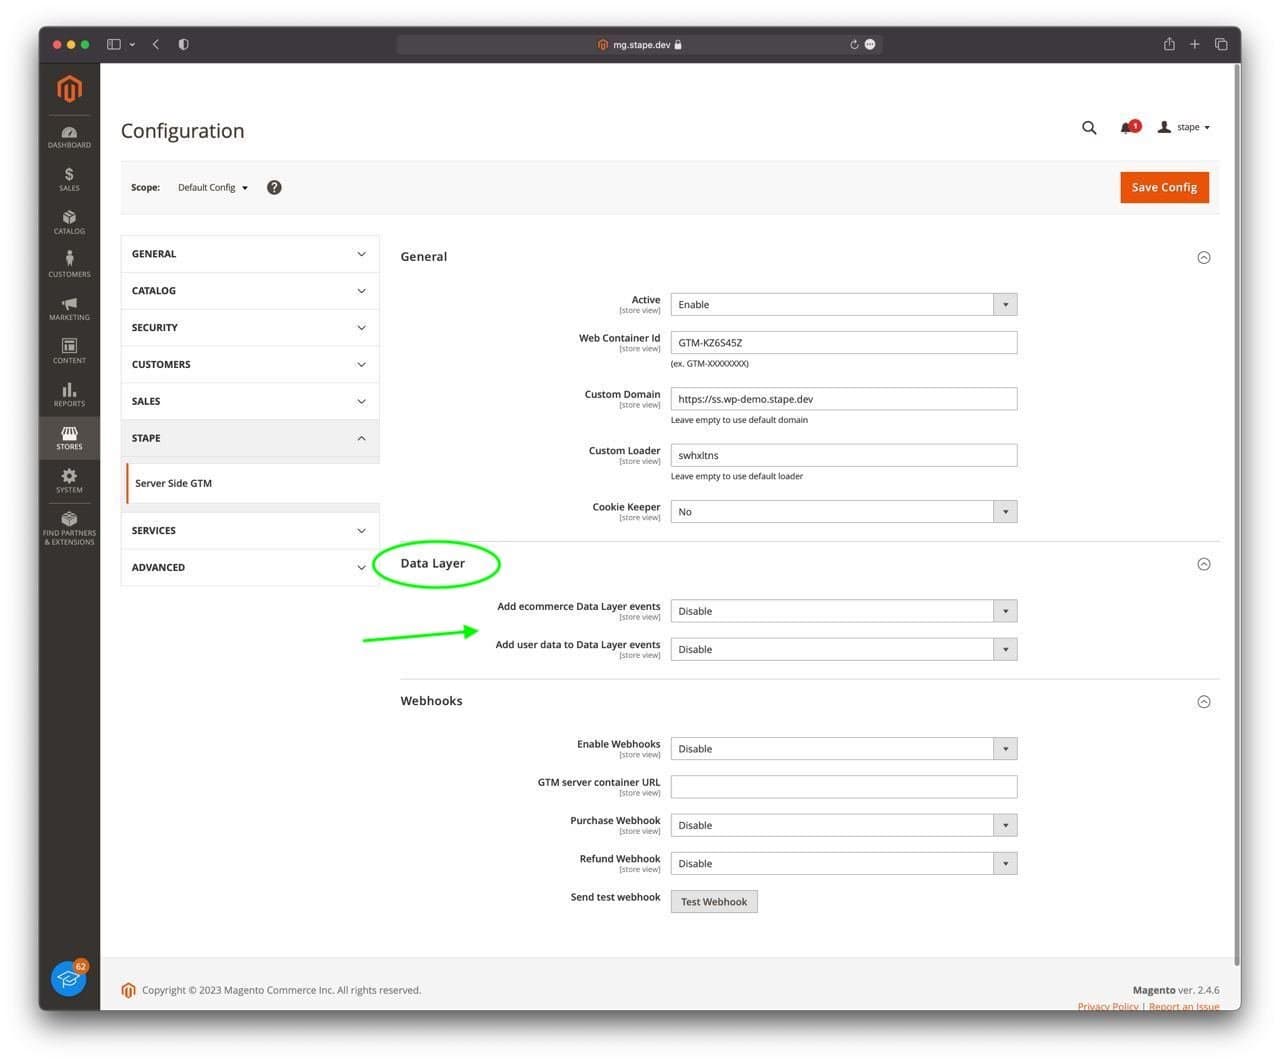
7. Paste your WEB container ID, Custom domain and Custom Loader from your container. Don’t forget to click the Save config button.

8. You also have an option to send data layer with the help of Magento 2 extension. Simply enable two boxes to send e-commerce and user data.
User data:

9. Once you have a server GTM container for the Magento 2 site up and running, you can start setting up server-side tagging for needed platforms. For example, we already have blog posts describing setting up server-side Google Analytics 4, Facebook, TikTok, Snapchat, and the Magento 2 Facebook Conversion API, which ensures reliable event delivery even when browser tracking is restricted.
| Simplify data tracking setup for web and server GTM containers with Stape’s Setup Assistant. Just choose the tools you use, and it will generate ready-made templates that are automatically imported into your GTM containers. |
Implementing server-side tagging for your Magento 2 site through the Stape Conversion Tracking extension offers a range of benefits and is a crucial step towards optimizing your website's performance. Among the features we highlighted: integration of the Google Tag Manager script on every page of your website, compatibility with other extensions that insert GTM script on your website, loading a GTM container from your subdomain, and inclusion of a custom loader to render Google Tag Manager and Google Analytics tracking invisible to ad blockers and various tracking prevention mechanisms, etc.
We hope this article has provided a comprehensive guide, outlining the step-by-step process for integrating Stape Conversion Tracking app into your Magento 2 site. By following these instructions, you can unlock the full potential of server-side tagging, empowering you to track and analyze user data more effectively while ensuring a seamless browsing experience for your visitors.
We've got you covered! Click Get help, fill-up the form, and we will send you a quote.
Comments