Piano Analytics server-side tracking configuration guide
Uliana Lesiv
AuthorKey Takeaways
Server-side tracking solutions for Piano Analytics
Piano Analytics stands out as an enterprise-grade solution that balances data science with user accessibility and privacy standards. Its users appreciate the platform for easy connection with monetization and revenue optimization tools, as well as high privacy (it was the first analytics platform to receive the Europrivacy certification for GDPR).
For a long time, there were no solutions to configure server-side tracking for Piano analytics with Google Tag Manager. Stape has solved this problem by creating a Client and a Tag for the server container. Both solutions allow their users to configure end-to-end server-side tracking, making the data collected more precise.
- Piano Analytics Client - handles Piano Analytics event requests sent to a designated path, converts incoming event data into the Common Event Data format for your container, manages visitor identification through client- or server-side cookies, and can serve the JavaScript SDK (piano-analytics.js) from your domain for the first-party context and improved pagespeed if you are using CDN.
- Piano Analytics tag for server-side GTM - allows direct event transmission from your server container to Piano Analytics. It supports both Piano Analytics and GA4 schemas, automatically mapping event names and formatting parameters as needed.
In the article below, we will focus on the detailed configuration process of both solutions.
Benefits of switching to the GTM server-side if you are using Piano Analytics
Piano Analytics is already highly privacy-centric, and moving it to the server-side provides numerous advantages in data accuracy and website performance.
Improved data accuracy
Client-side tracking relies on JavaScript files and network requests that can be easily identified and blocked by ad blockers.
By using server GTM, tracking requests become "first-party" ones for the browser. As a result, you can recover up to 12% of data that could be lost due to ad-blockers and browser restrictions. In this way, your Piano Analytics reports will reflect your true traffic volume.

Better site performance
Piano’s standard JS library is lightweight, but every script added to a browser still consumes CPU and memory. You can move the scripts to the server. Instead of the browser sending data to different platforms (such as Piano Analytics, Meta, Google, etc.), it sends one request to your sGTM container. The server then transforms that data for each destination.
High data protection and security
Privacy is one of Piano’s "killer features." Along with sGTM, you get an extra layer of data protection.
In a client-side setup, the vendor's script can see the user's IP address and other browser fingerprints. With sGTM, the data hits your server first. You can remove Personally Identifiable Information (PII) before sending the data to Piano's servers.

You get full control over shared data. So, you can adjust the data collection process to comply with data regulations such as GDPR.
Data enrichment
Since the data is processed on a server you control, you can enrich it before it reaches Piano Analytics. You can call an internal database or API during the tracking. Here is an example of a use case: you are able to add a product's Profit Margin to a purchase event without exposing sensitive data.
Pre-requirements
Before starting to configure server-side tracking for Piano Analytics, be sure to:
- Have events flow from the web environment to the server. There are the following options:
- Piano SDKs (iOS and Android).
- Piano Analytics web events implemented without using Google Tag Manager (i.e., using the JavaScript SDK directly).
- Piano Analytics web events are implemented using Google Tag Manager.
- GA4 web/app events.
- Events that adhere to the Common Event Data schema.
If you don't have it configured, please follow the Piano Analytics guide on implementing SDKs on the web.
- Configure web and server GTM containers.
How to configure server-side tracking for Piano Analytics using GTM
Step 1: Set up data sending from the web to the server GTM
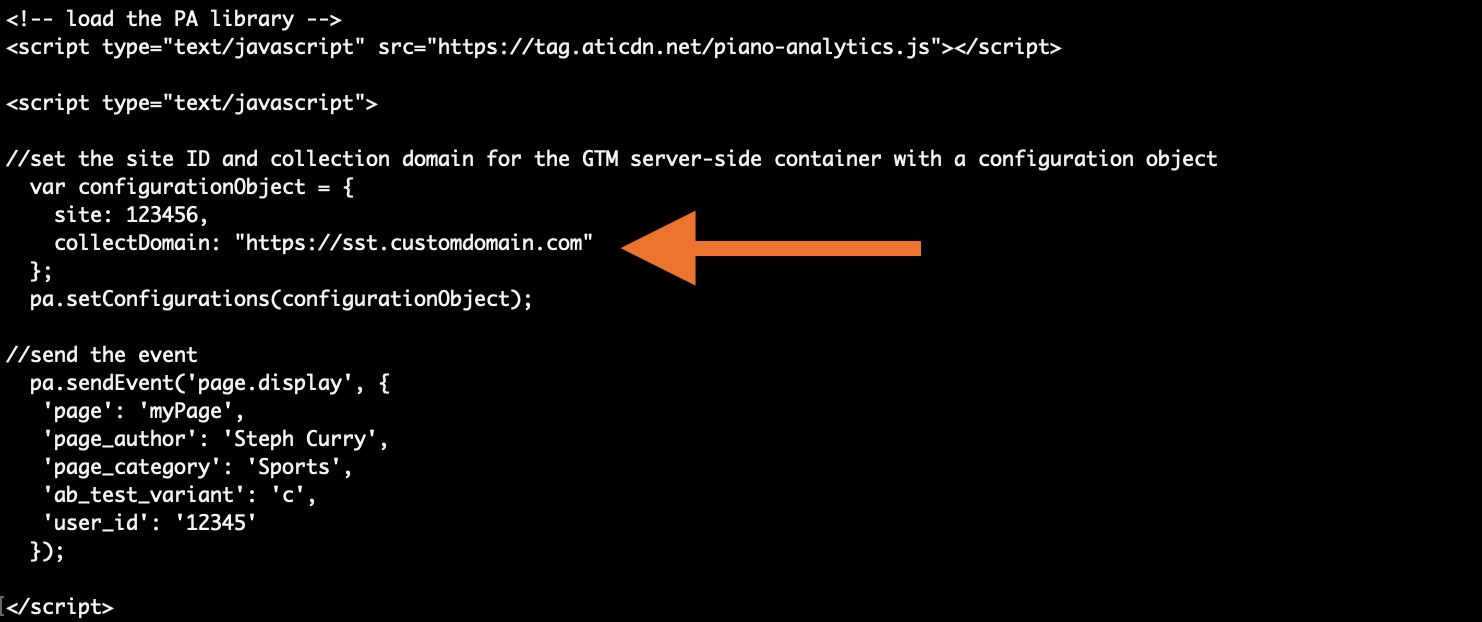
To send data from the web to the server container, you will need to update the existing collectDomain to the one that points to your GTM server-side container.
It must be a change of the collectDomain field in the Piano Analytics SDK code. For more information, please refer to: Piano Analytics JavaScript SDK, Piano Analytics Android SDK, Piano Analytics iOS SDK.
Step 2: Configure data receiving on the server GTM container with Client
2.1 Download the Piano Analytics Client from GitHub and unzip the file.
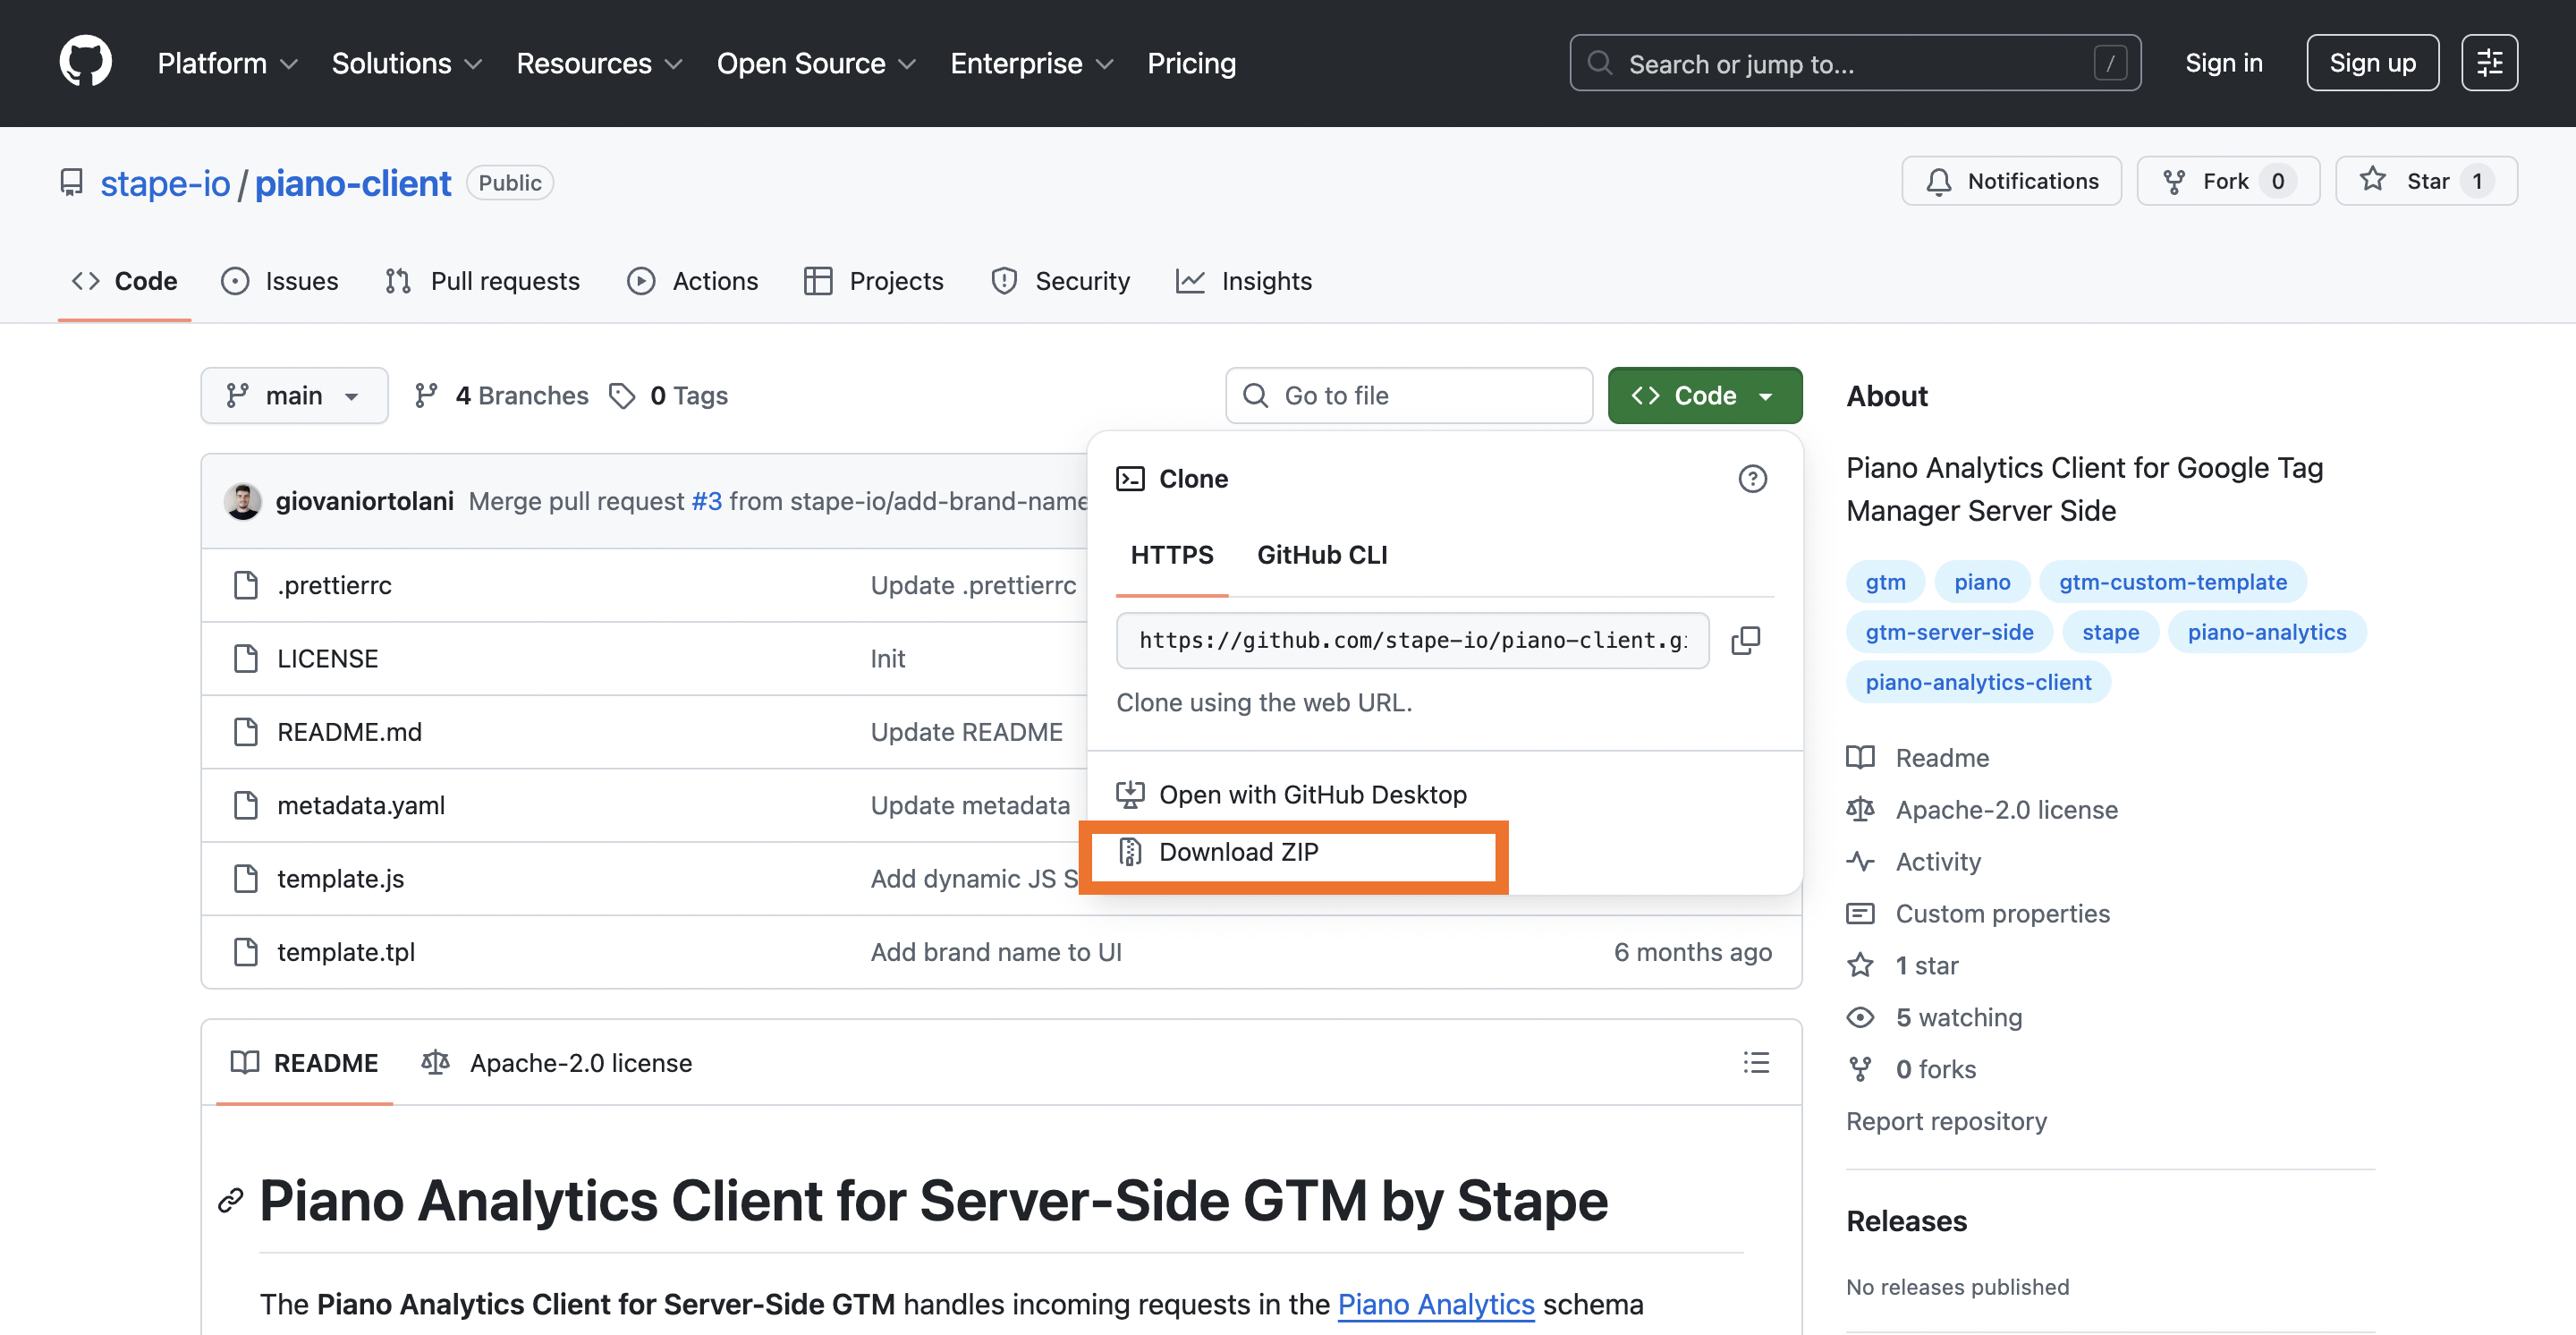
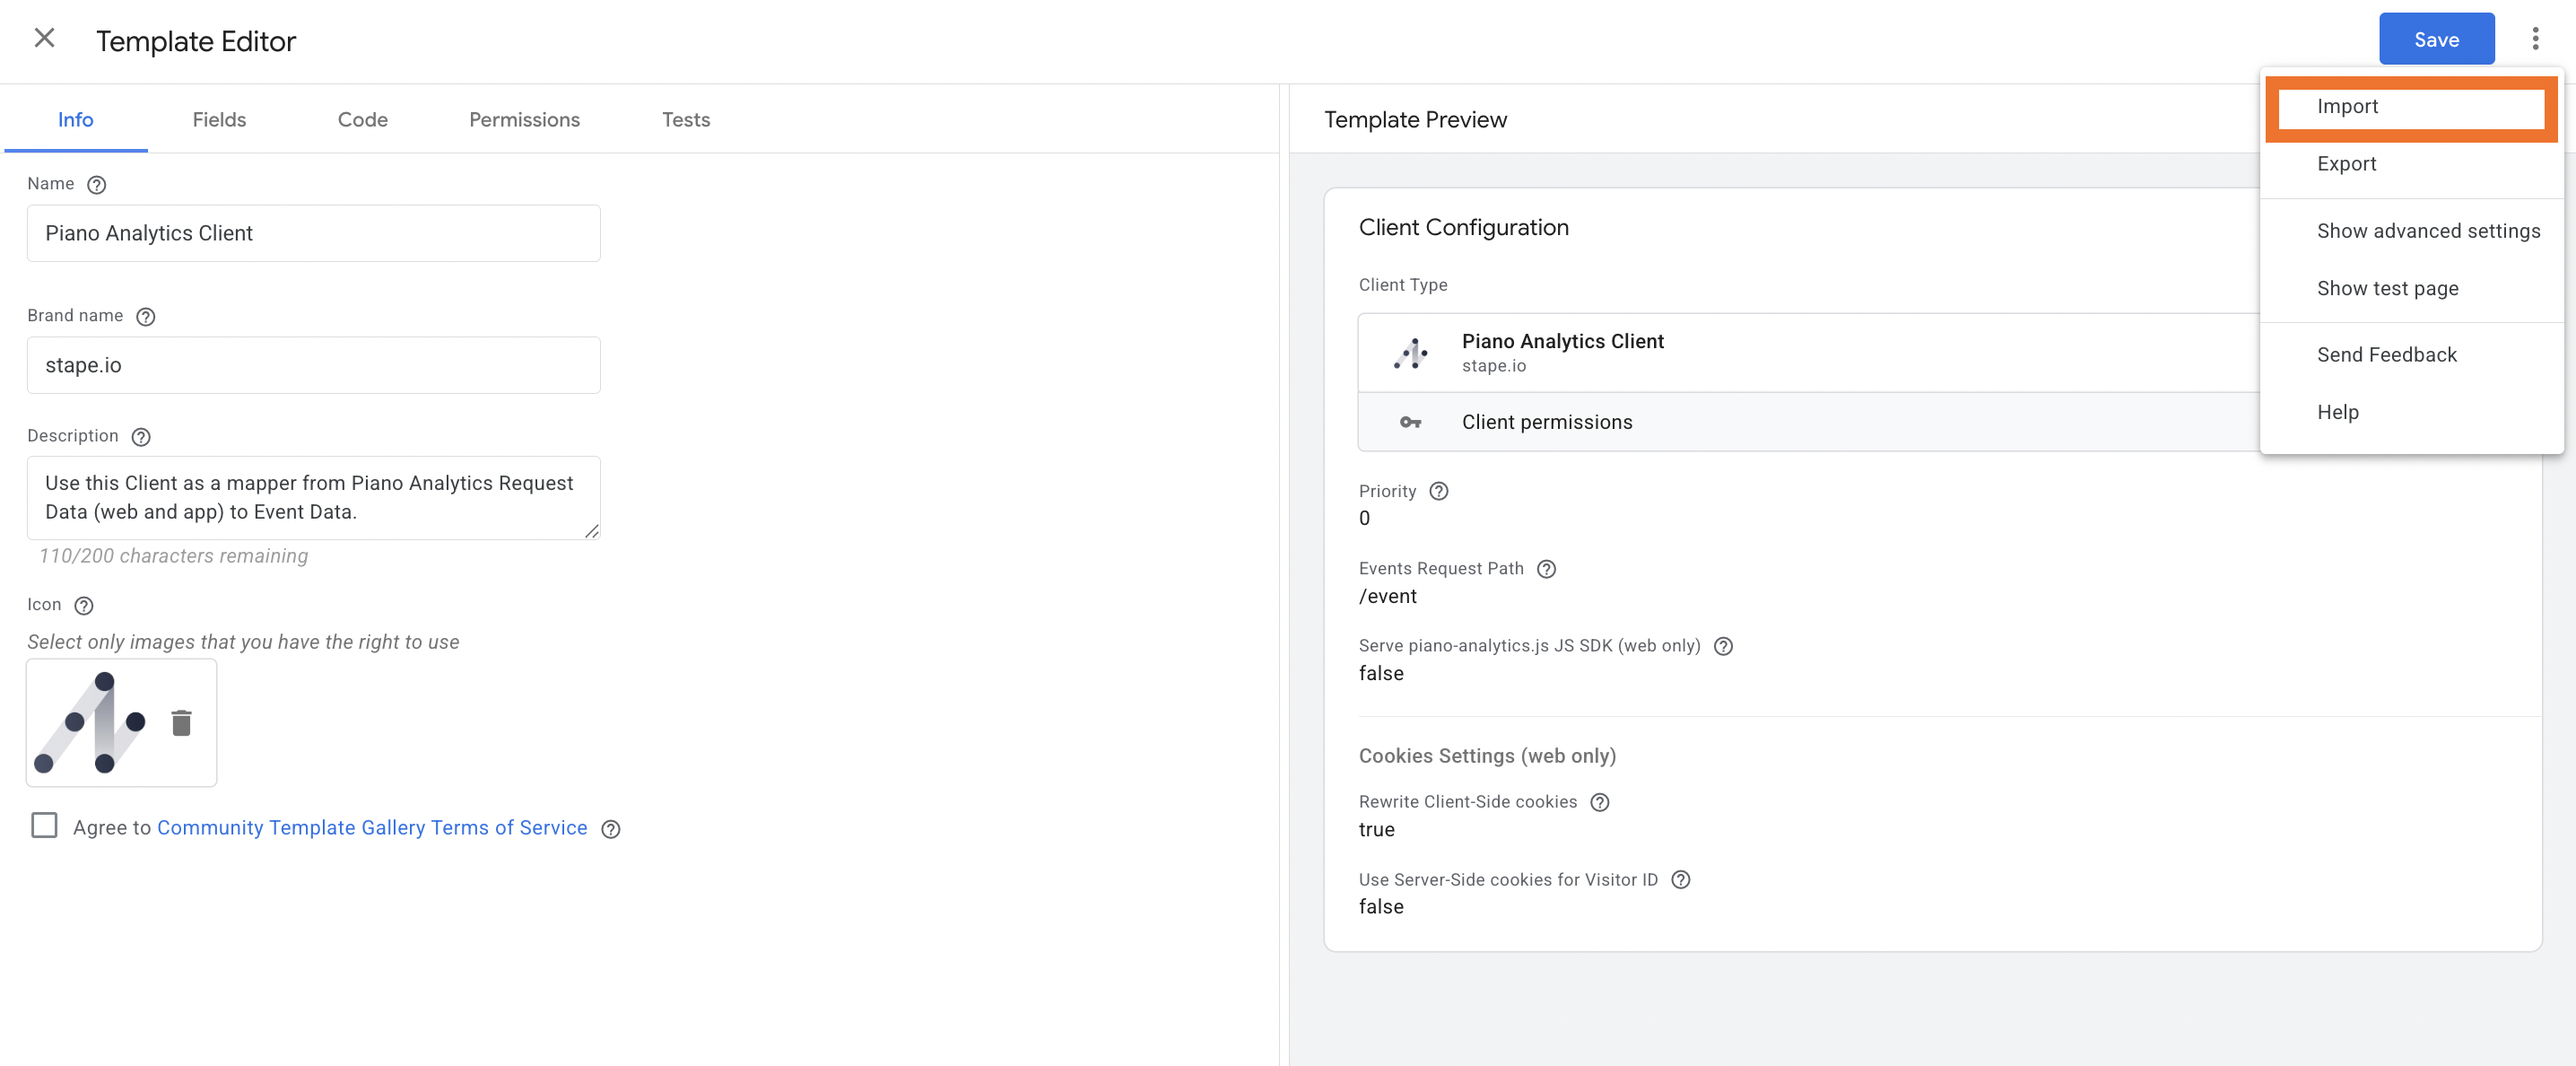
2.2 Go to the server GTM container → Templates section → click "New" next to Client Templates → Import → select the file you downloaded from GitHub → Save.
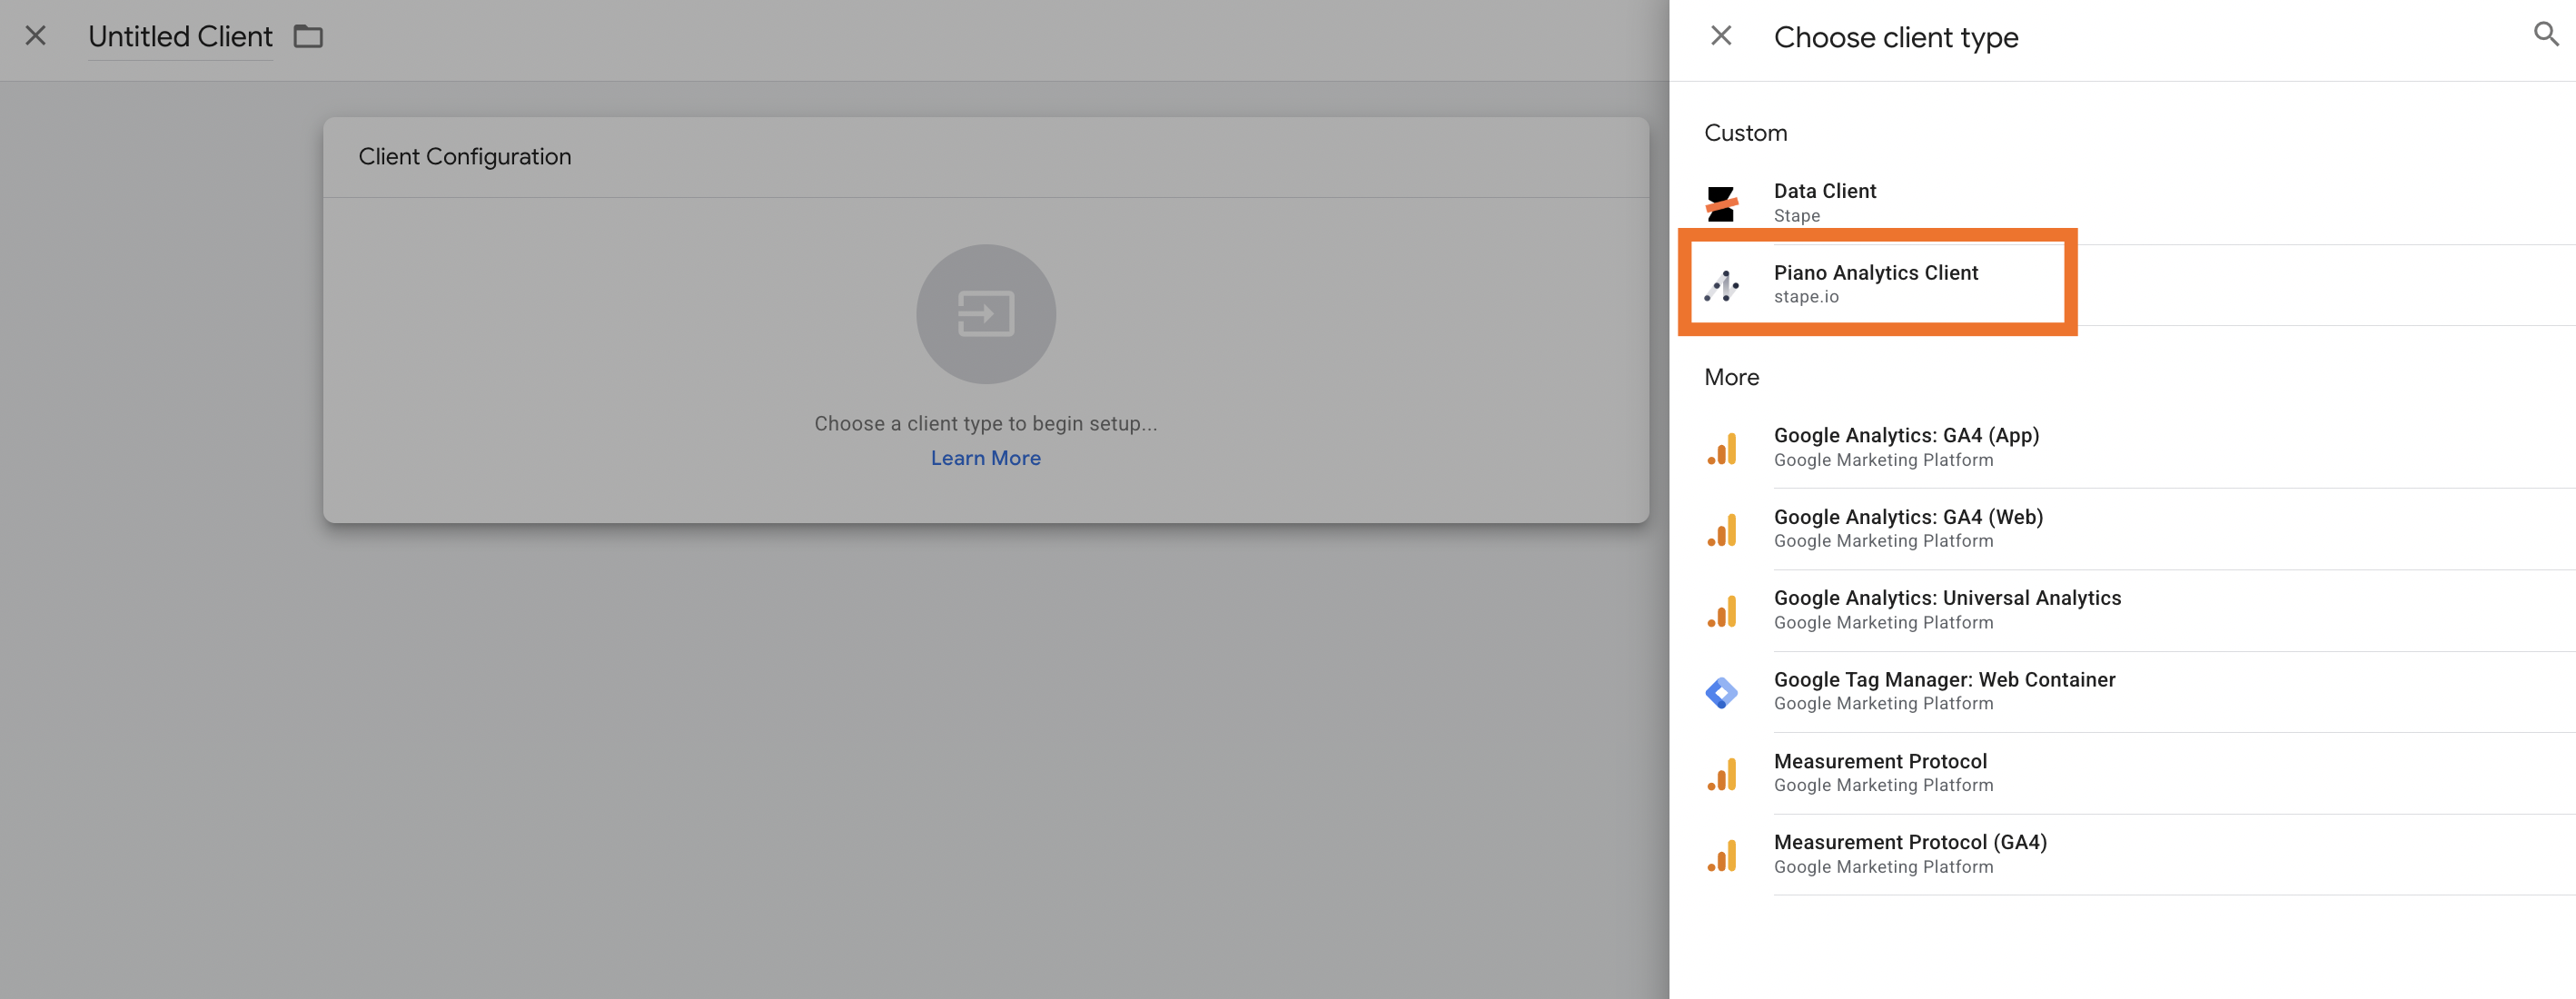
2.3 Go to Clients section → New → select "Piano Analytics Client" as Client type.
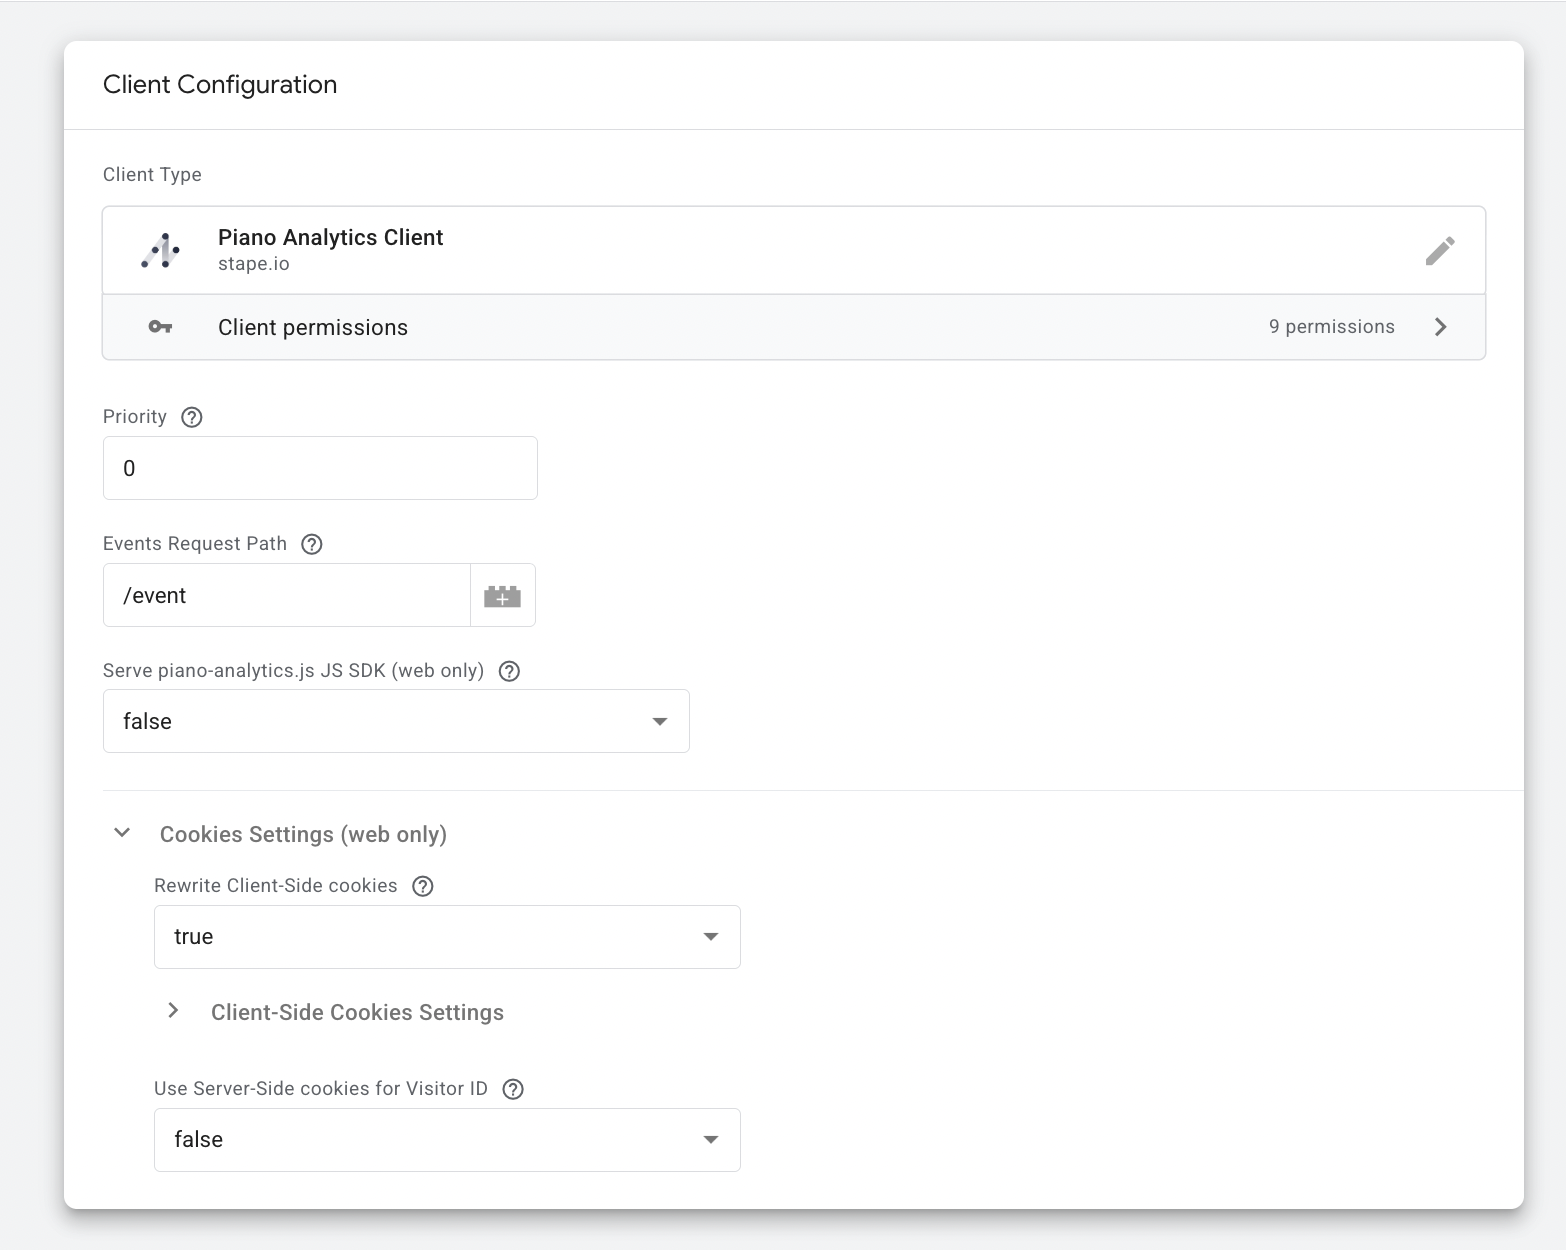
2.4 Configure the Client.
- Set the Event Request Path - the default path is /event. All incoming Piano event requests should be directed to this path.
- (Optional) Enable JS SDK Hosting if you want your server to host the Piano SDK file:
- Set Serve piano-analytics.js JS SDK to true
- Specify the JS SDK Request Path (default: /piano-analytics.js)
- Configure allowed origins to restrict which domains can load the file
- (Optional) Configure Cookie Behavior:
- Enable client-side cookie rewriting to improve reliability across different tracking contexts
- Enable server-side cookies for the Visitor ID, especially when using privacy modes such as opt-in or exempt (these settings can be adjusted as needed)
Step 3: Send data to Piano Analytics with a tag
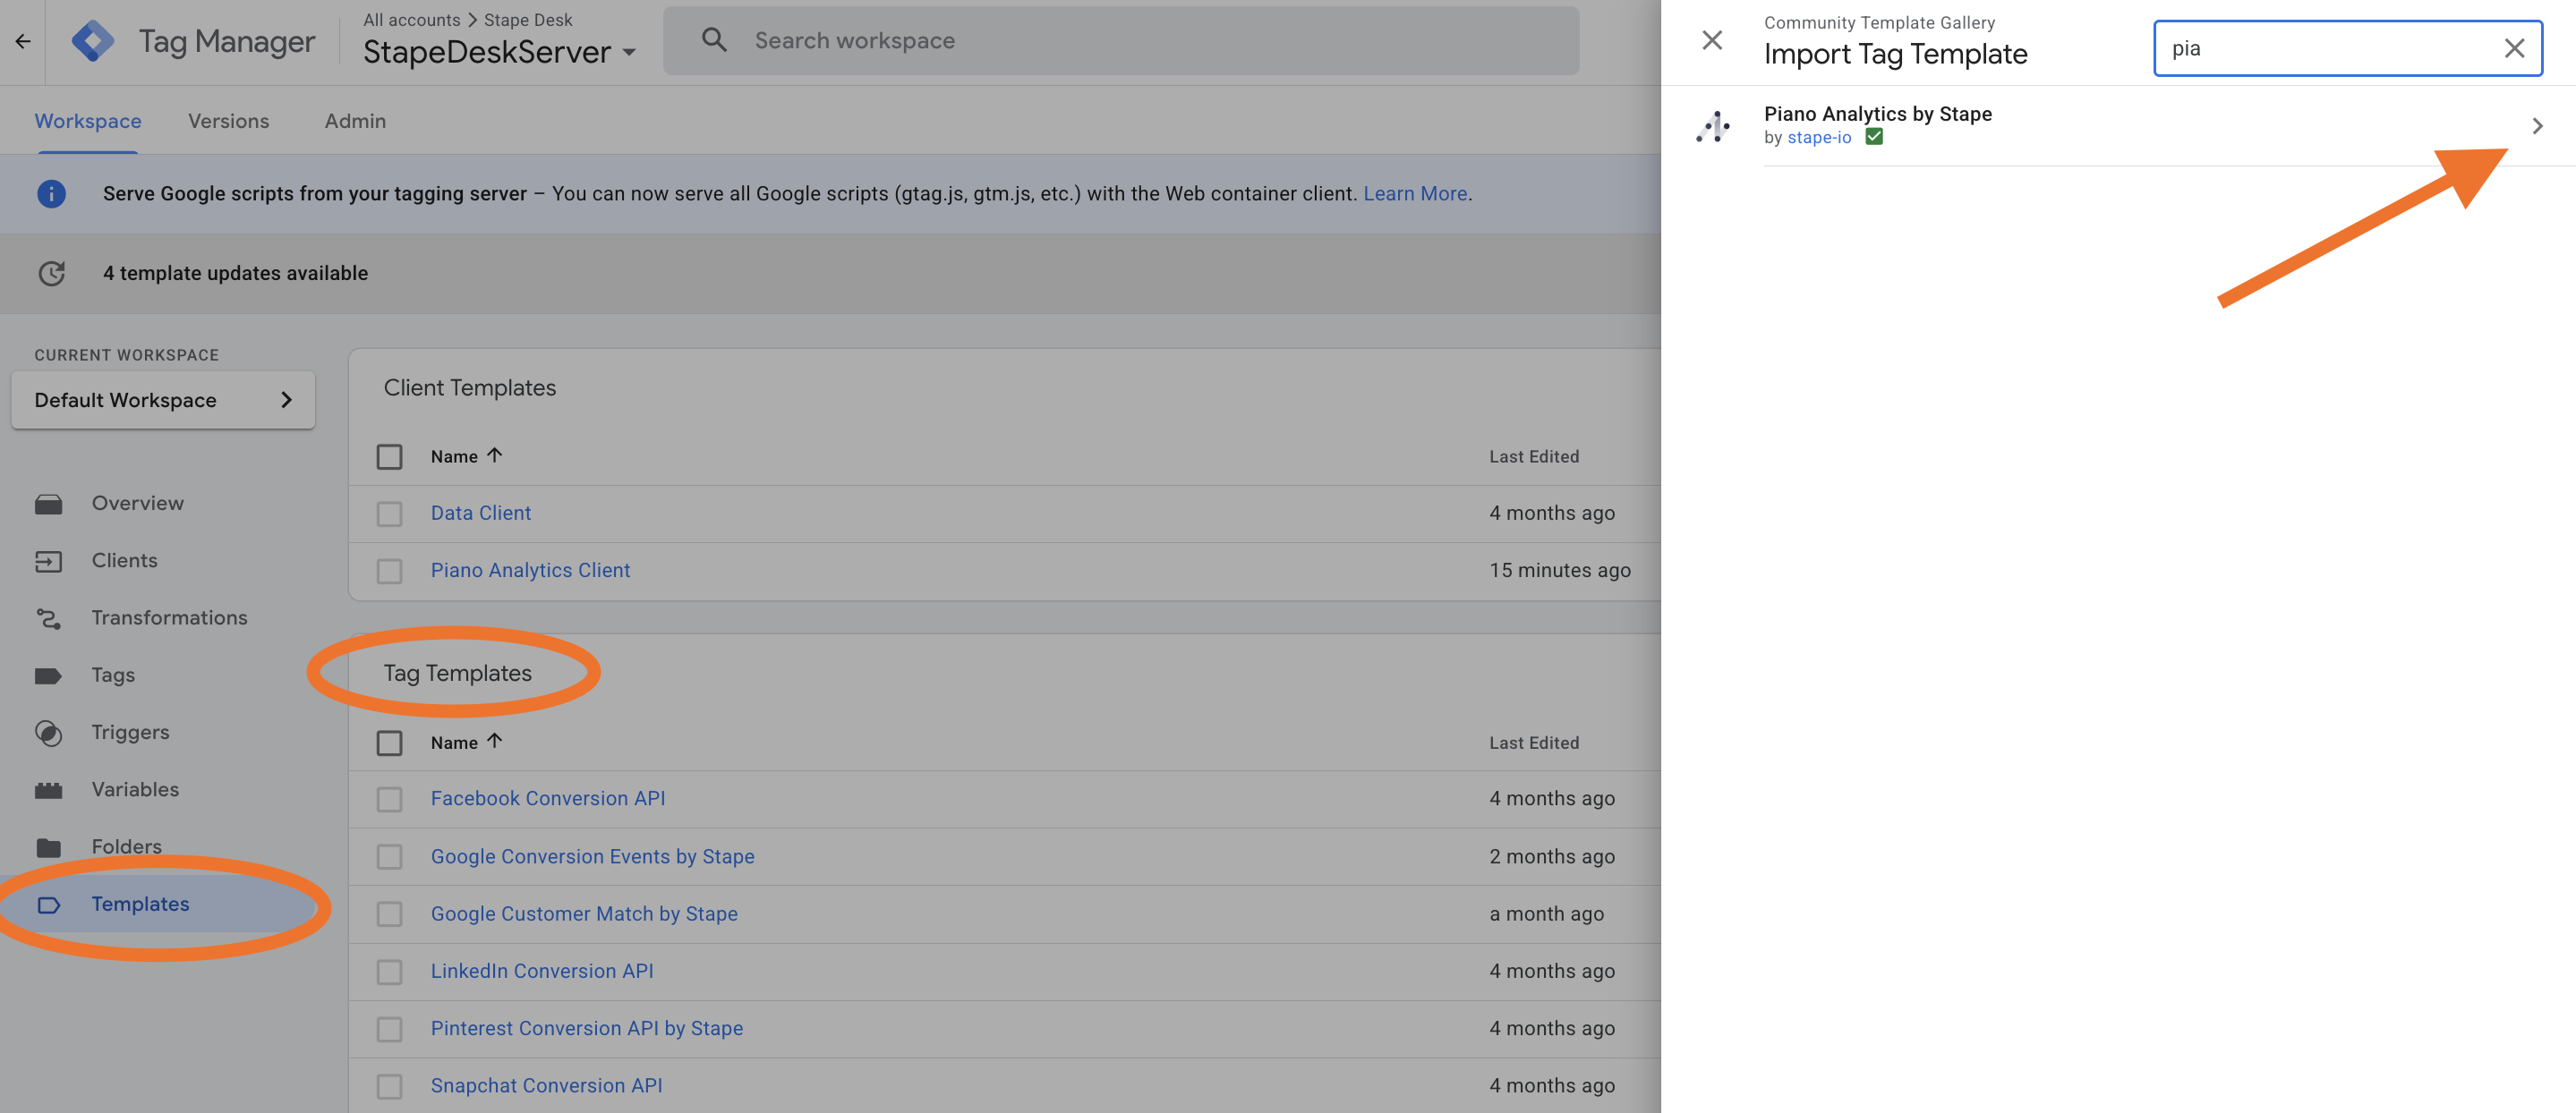
3.1 Add the Piano Analytics tag template to your server-side GTM container.
Go to Templates section → Tag Templates → search for Piano Analytics by Stape → click Add to workspace.
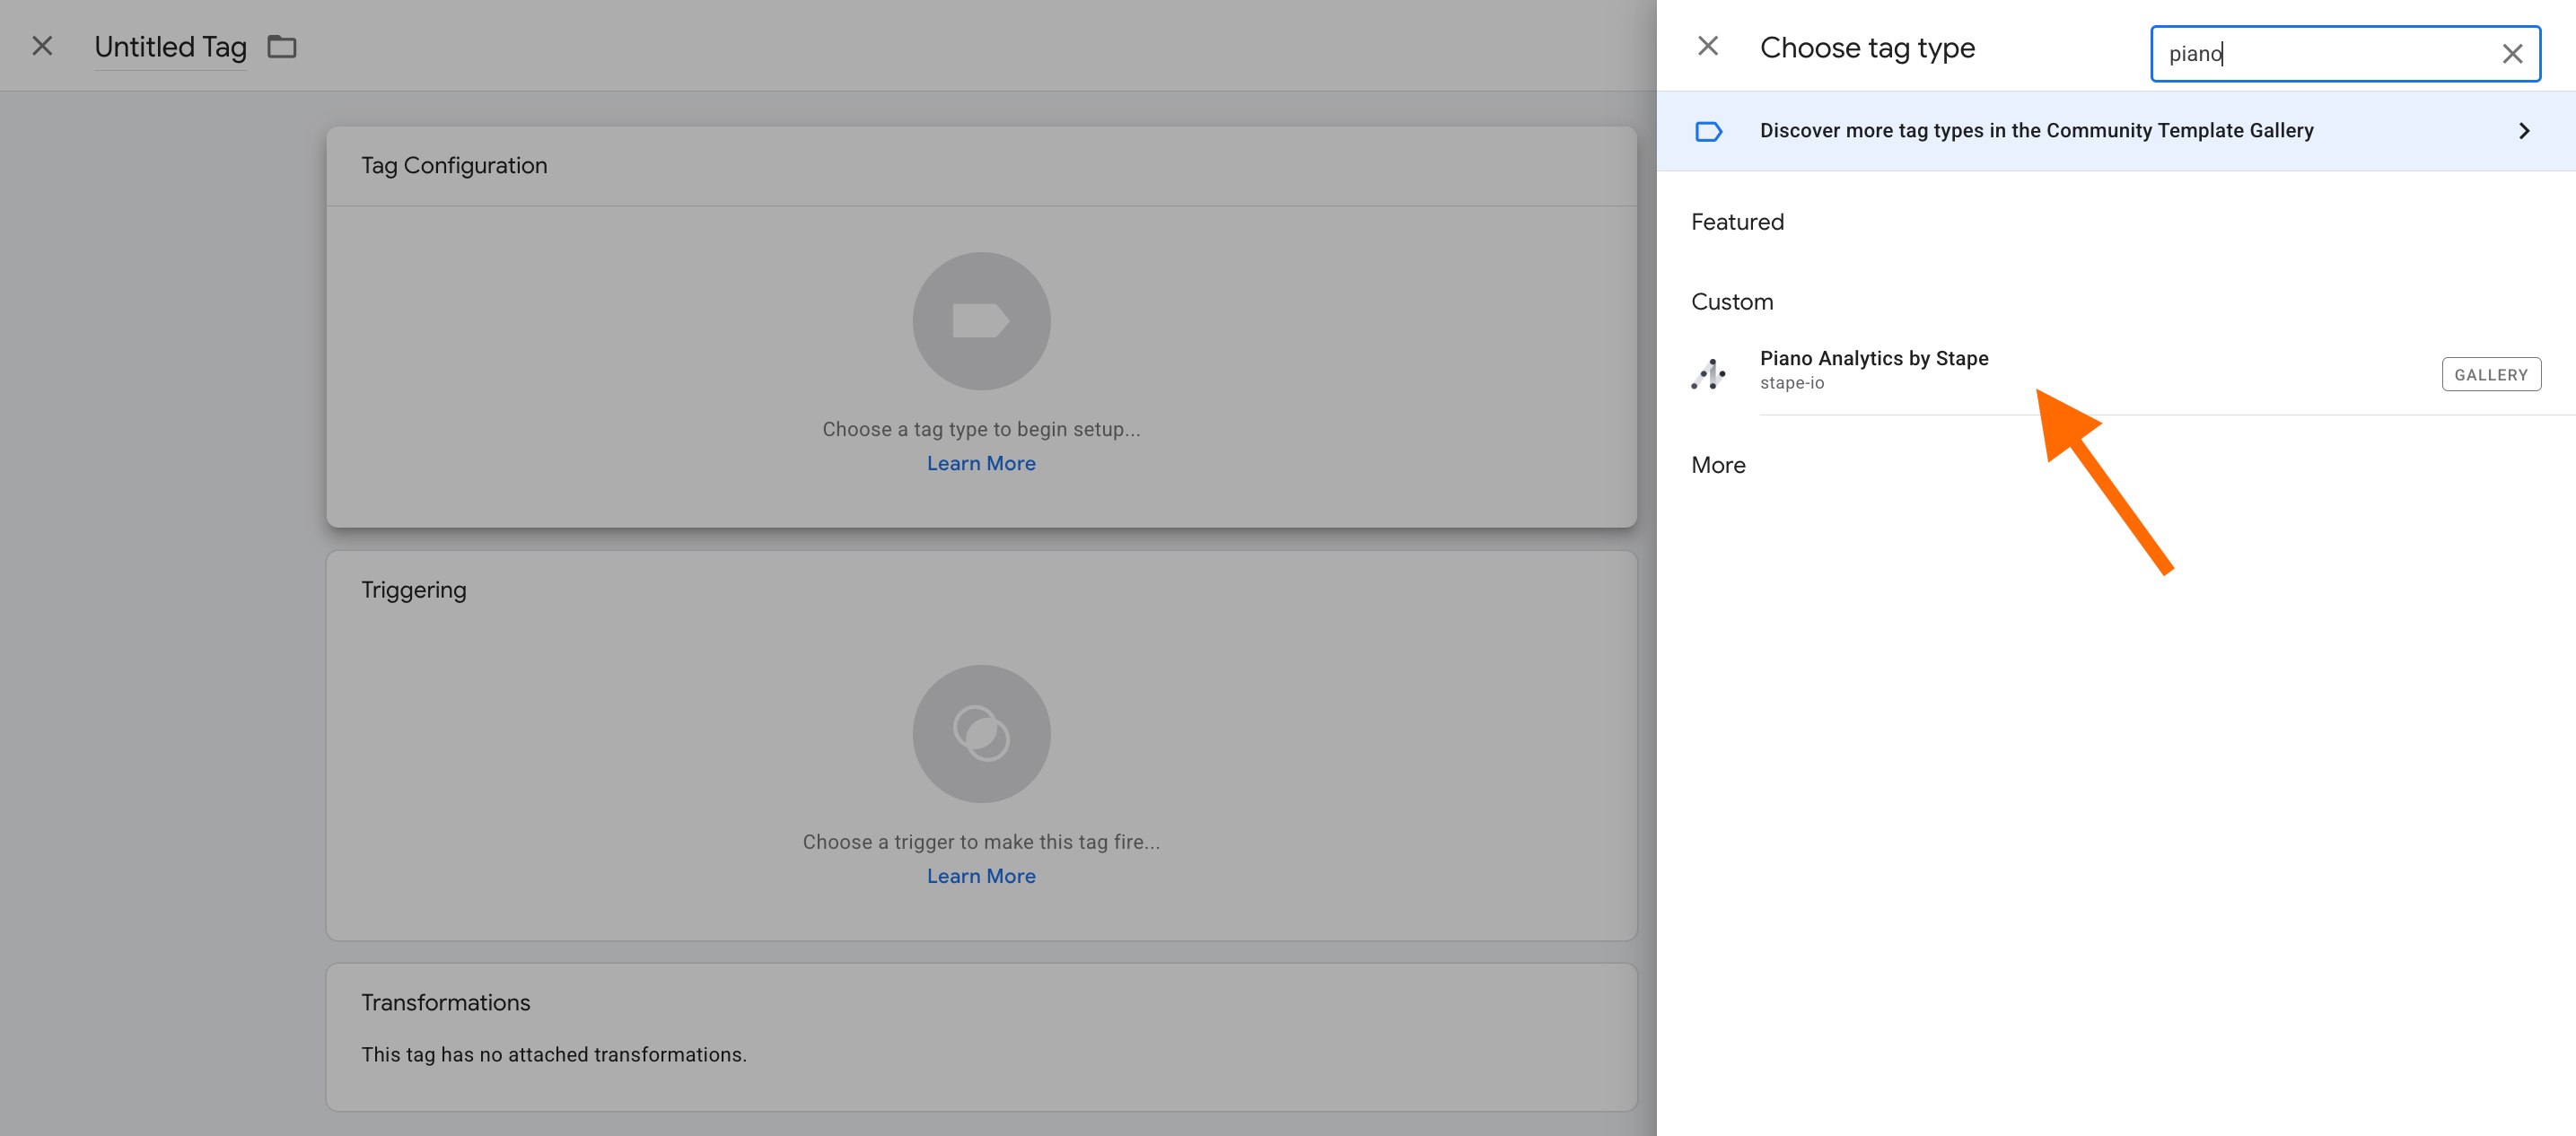
3.2 Create a new tag in the Tags section → select "Piano Analytics by Stape" as tag configuration.
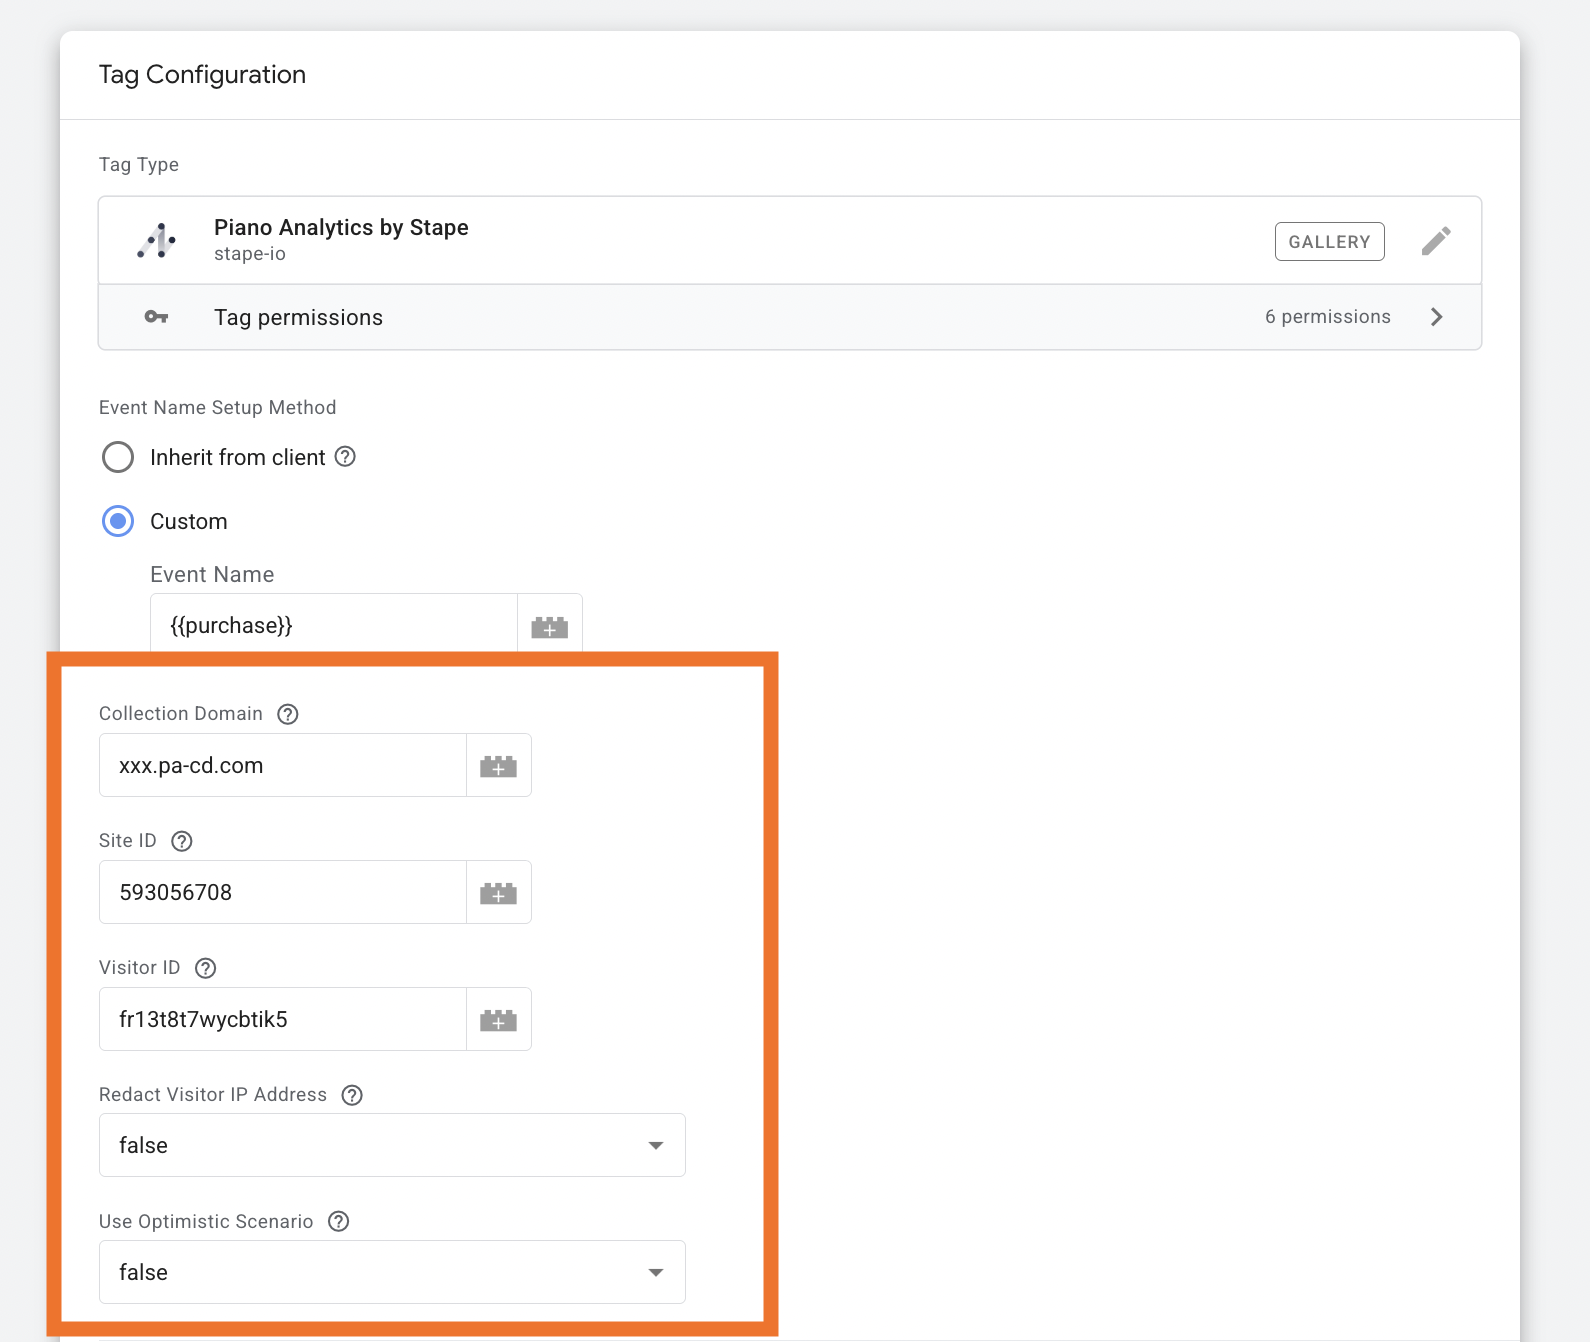
3.3 Configure the tag.
Select Event Name Setup Method:
- Custom (recommended) - although more advanced to set up, this option allows you to specify events manually and gives you full control over the event payload.
- Inherit from client - with this option, the tag automatically maps your GA4/Data event payload to Piano Analytics standard events. If no matching standard Piano event is found, the event is sent as a custom event. Refer to the supported event name mapping for details.
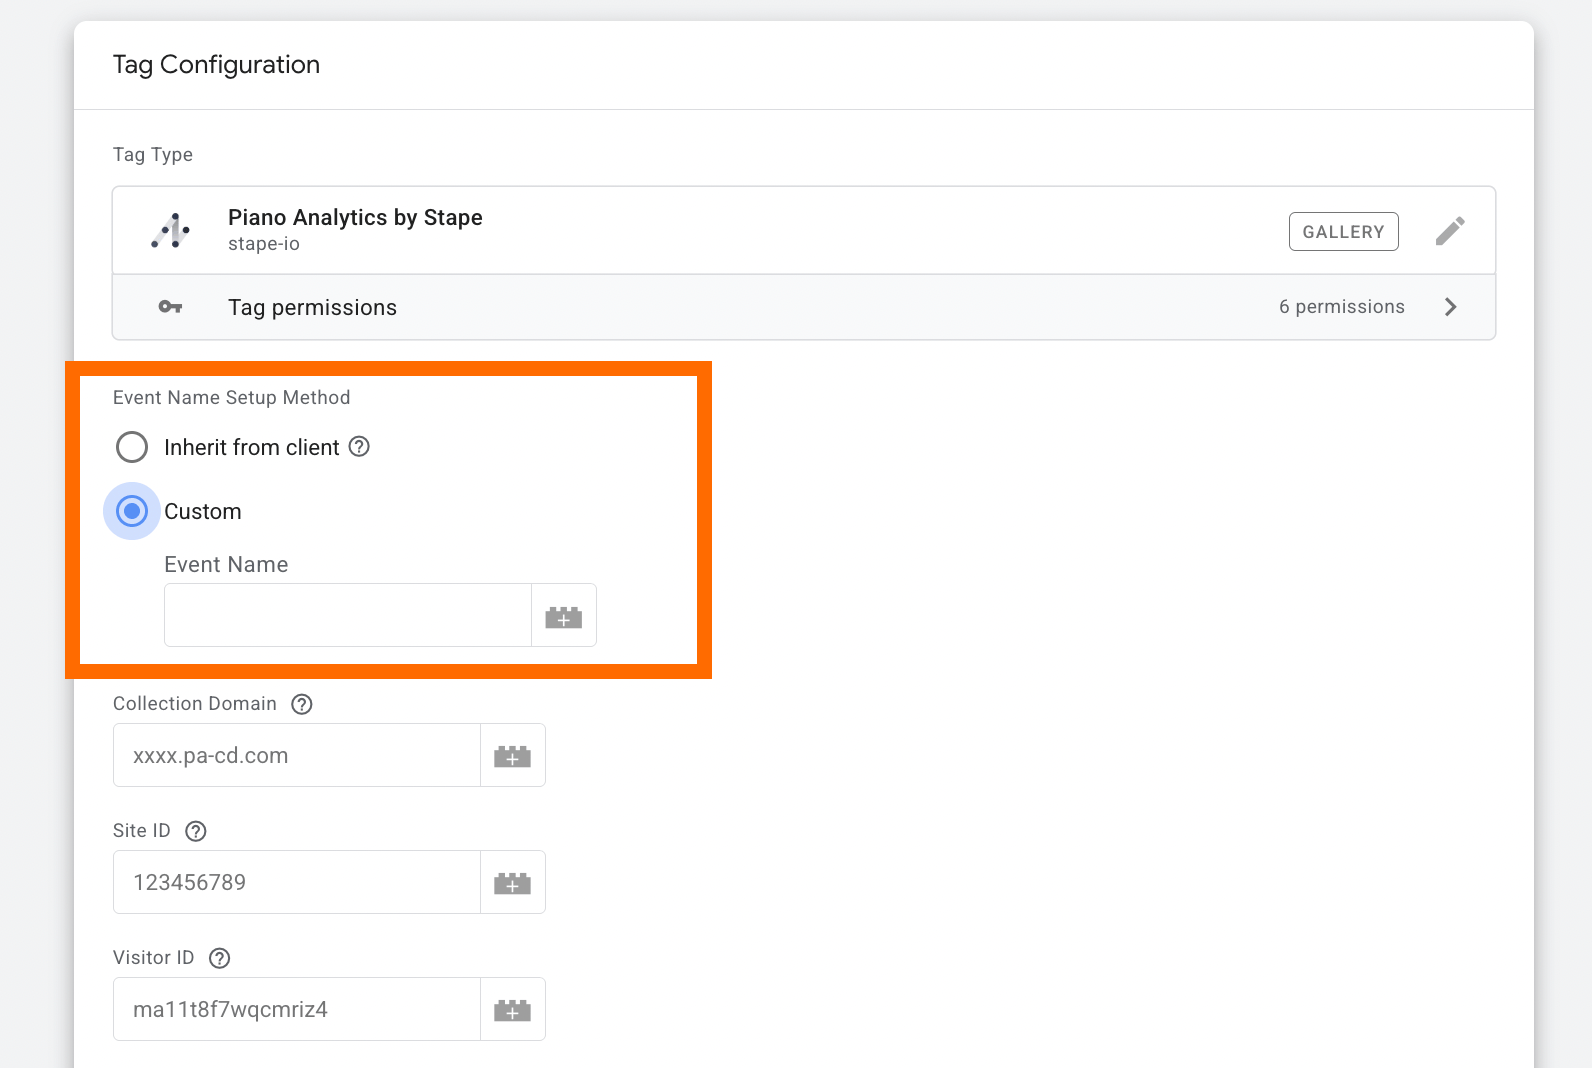
Collection Domain - specify your collection domain. You can find this in the Piano Analytics Dashboard under Tagging → Collection Domains. Refer to the official Piano Analytics documentation for more details.
Site ID (optional) - in the Piano Analytics Dashboard, use the value from the ID column for the relevant website. If left empty, it will be inherited from the Event Data parameter x-pa-site-id (only when Piano Analytics events are used as the incoming server events).
Visitor ID (optional) - provide a unique visitor identifier (either a 16-character string or a UUID). If not specified, it will be inherited from the Event Data parameters client_id or x-pa-idclient.
Redact Visitor IP Address (optional) - removes the visitor’s IP address from the event data. Use this option carefully, as it may reduce reporting accuracy and overall data quality.
Use Optimistic Scenario (optional) - the tag will trigger gtmOnSuccess() without waiting for an API response. This improves sGTM response time, but the tag will always report a successful fire, even if the request ultimately fails.
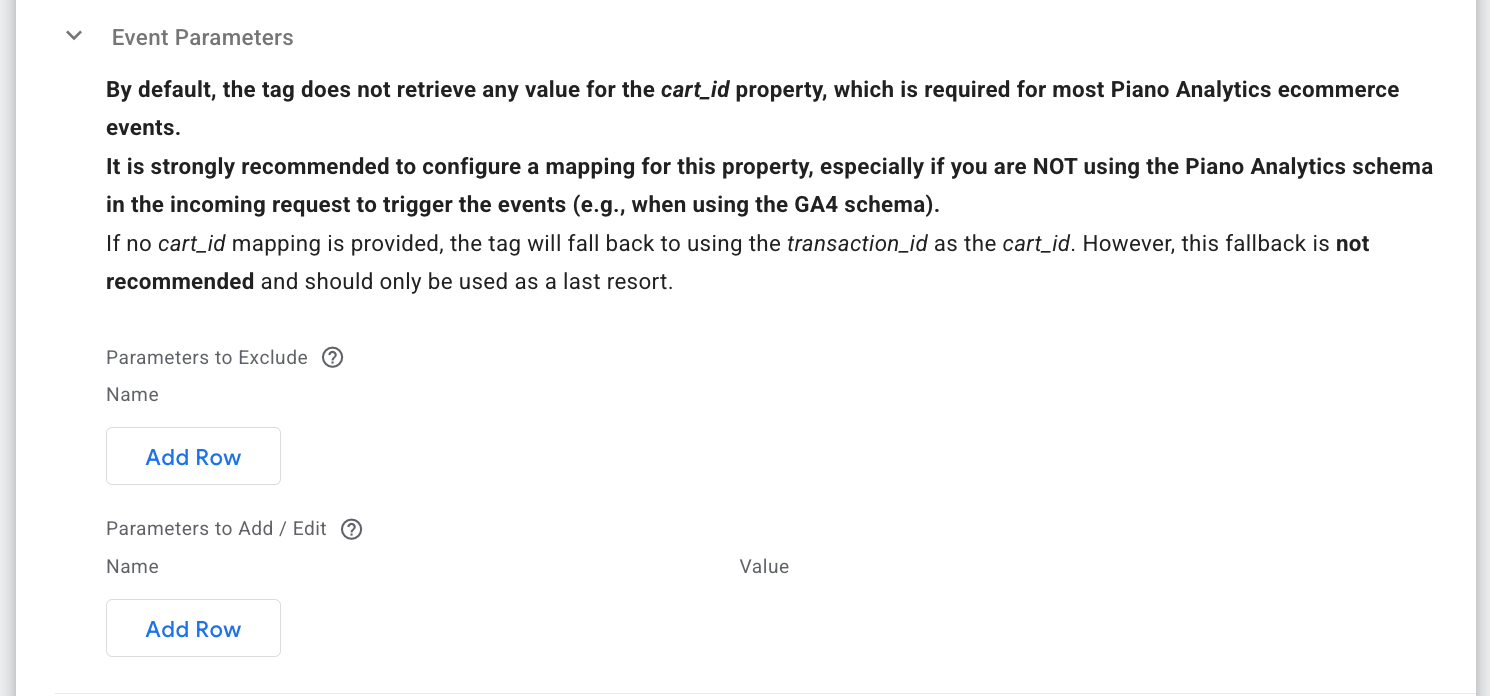
Event parameters - you can add, edit, or exclude event parameters. By default, the tag does not populate the cart_id property (it is required for most Piano Analytics ecommerce events). Be sure to configure a dedicated mapping for this property. If not set explicitly, the tag will fallback to transaction_id, though this is not recommended.
Log Settings - select whether events should be logged to the browser console only during preview/debug mode or at all times.
BigQuery Log Settings - choose whether to store event payloads, request details, and responses in a designated BigQuery table.
Advanced Settings (Additional Tag Metadata) - define extra tag metadata that will be appended to the event data when the tag fires.

3.4 Add a trigger for a tag. Specify the condition that must be met to fire the tag.
Step 4: Test your configuration and publish the changes
Google Tag Manager
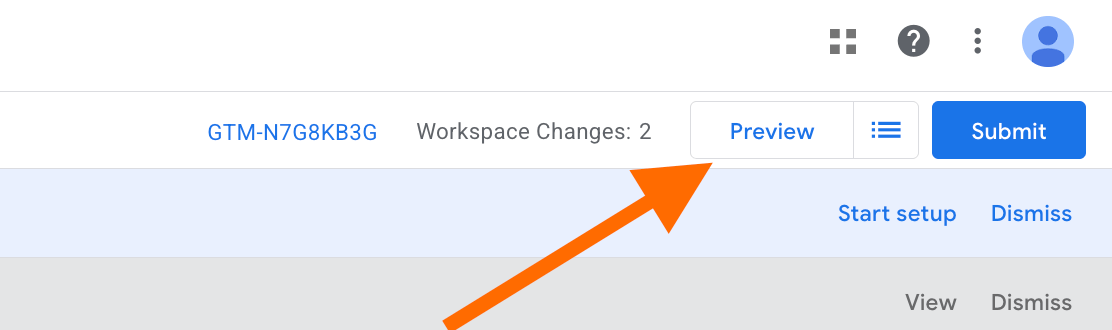
Test the configurations using Google Tag Manager. Click on Preview in both web and server containers. Trigger the event you’ve configured.
You should see Piano Analytics Client claiming the incoming request from the web, breaking down all the available information into the Event Data, and Piano Analytics tag reporting a properly structured request to Piano Analytics.
Find out more about debugging and monitoring server-side tracking configuration in our guide.
| 💡Pro tip: For convenient GTM debugging, try Stape GTM Helper (Chrome extension), which is created to improve the debugging experience within GTM. It offers color-coding GTM tags and server-side requests, identifying failed GTM tags. Find more about Stape GTM Helper features in our post. |
Piano Tag Inspector
For verifying and debugging the implementation of Piano Analytics on a website, you can use PA's Chrome extension - Piano Tag Inspector. It will allow you to see what information is sent from a website to Piano’s servers in real-time.

Piano Analytics data quality tool
Piano Analytics Stream Inspector is a vendor-specific tool for quality assurance. It helps verify specific Piano events and properties and flag Piano-specific syntax or logic errors.
To find the tool, go to your Piano Analytics account → Settings → Data Collection Portal → Tools → Stream Inspector.
| For the constant and automated website tracking monitoring, use Stape’s Monitoring feature. After configuring the rules, you’ll receive alerts when the tracking setup breaks, so you can fix the problems before they significantly impact your data. |
Final thoughts
The shift toward server-side tracking isn't just a technical trend; it’s a fundamental change in how website owners respect user privacy without sacrificing the insights needed for a business to grow.
In a digital landscape where data gaps are widening and privacy requirements are getting stricter, a server-side setup allows business owners' balance between data collection and regulatory compliance.

Comments