Aug 5, 2025
Chrome extension GTM Helper by Stape: key features and use cases
Written by
Alex Held
Updated Apr 22, 2026 comments
There are a lot of challenges in the GTM preview interface - many have likely noticed areas that could be improved. Data can often be difficult to read, and navigating the GTM preview can become cumbersome in large containers with numerous active tags. That's where browser extensions help - they make data clearer and navigation easier.
That's why the Stape team made a simple Chrome extension to improve the GTM preview. The whole GTM team uses it, so we know it will help many people.
What is Stape GTM Helper?
Stape GTM Helper is a free Chrome extension designed to improve the debugging experience in Google Tag Manager preview mode. The tool provides multiple features for both web and server GTM containers. With this extension, you can easily navigate fired tags, quickly identify failed ones, focus only on the tags you’re testing, and take advantage of other features, which we'll explore in detail below.
Who can benefit from Stape GTM Helper?
Stape GTM Helper will be helpful for anyone configuring data tracking using GTM. It can be used by data tracking specialists, data analysts, freelancers, or agencies that need a convenient tool to simplify the debugging process.
Stape GTM Helper has the following benefits:
- Targeted tag testing. Filter and focus on the tags you need to test right now. Especially helpful if you have multiple entities in your GTM container.
- Easy tag status identification. If you have multiple tags in a GTM container, it is crucial to navigate through them during the debugging process to figure out which tags fired and what failed. Stape GTM Helper adds color coding to the most popular tags and highlights the status.
- Readability of request parameters. With Stape's extension activated, JSON incoming and outgoing requests, as well as the Request URL, are getting structured and easy to read. The feature will be helpful for sGTM users who need to view incoming/outgoing requests.
- Clear consent status in sGTM. The consent status can be viewed only in the request parameters in server GTM debugging. The Stape GTM Chrome extension displays the four main consent statuses in the server preview.
- Easy debugging of the checkout page on Shopify. Due to the sandbox on the checkout page in Shopify, you can struggle with troubleshooting this part of the setup. Our Chrome extension allows you to inject the GTM snippet on the checkout page and easily debug the setup.
- Bulk selection of GTM container entities. Pick multiple items to modify in a single step instead of clicking through each one individually.
- Tracking setup analysis. Scanner feature analyzes the page you’re viewing and generates a report with recommendations for improving both web and server-side tracking.
How to use Stape GTM Helper
How to scan a website
The Scan website tab lets you run a fast health check on the tracking setup of any page you're viewing – checking analytics, cookies, ads, and SEO. The report is generated using Website Tracking Checker, so it evaluates the same metrics.
- 1.Navigate to the website you want to check.
- 2.In Chrome Extensions, click the Stape GTM Helper icon and open the Scan website tab.
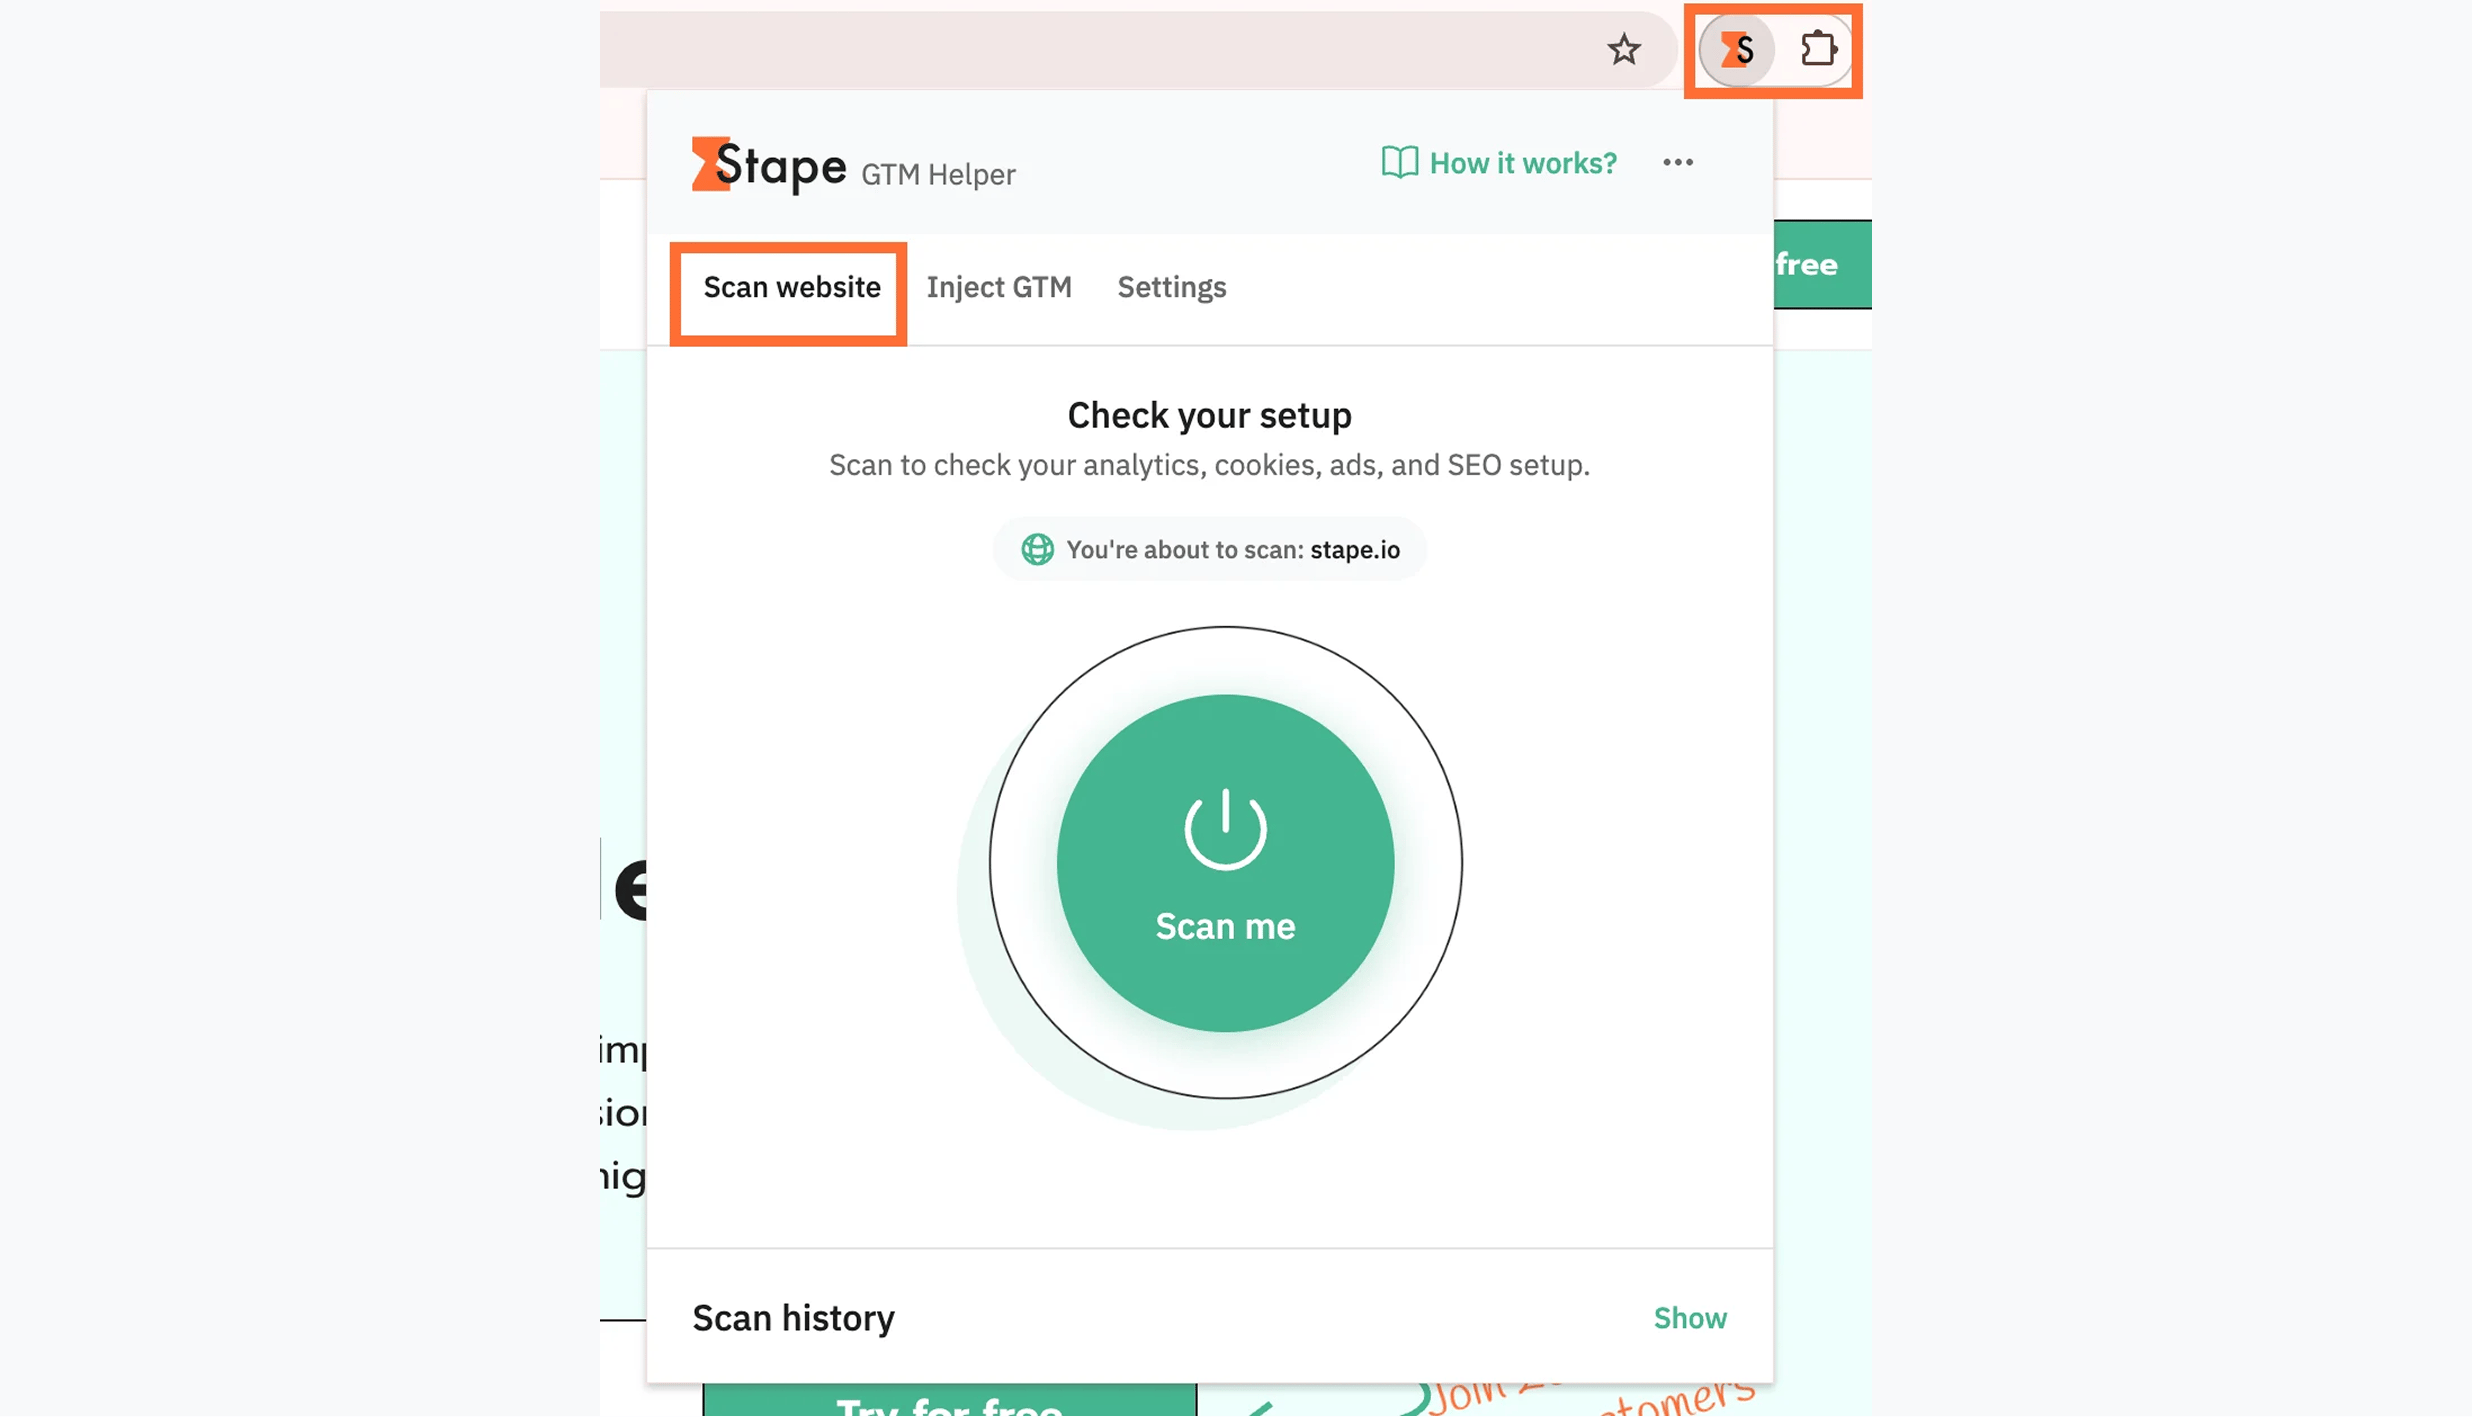
3. Click Scan me.
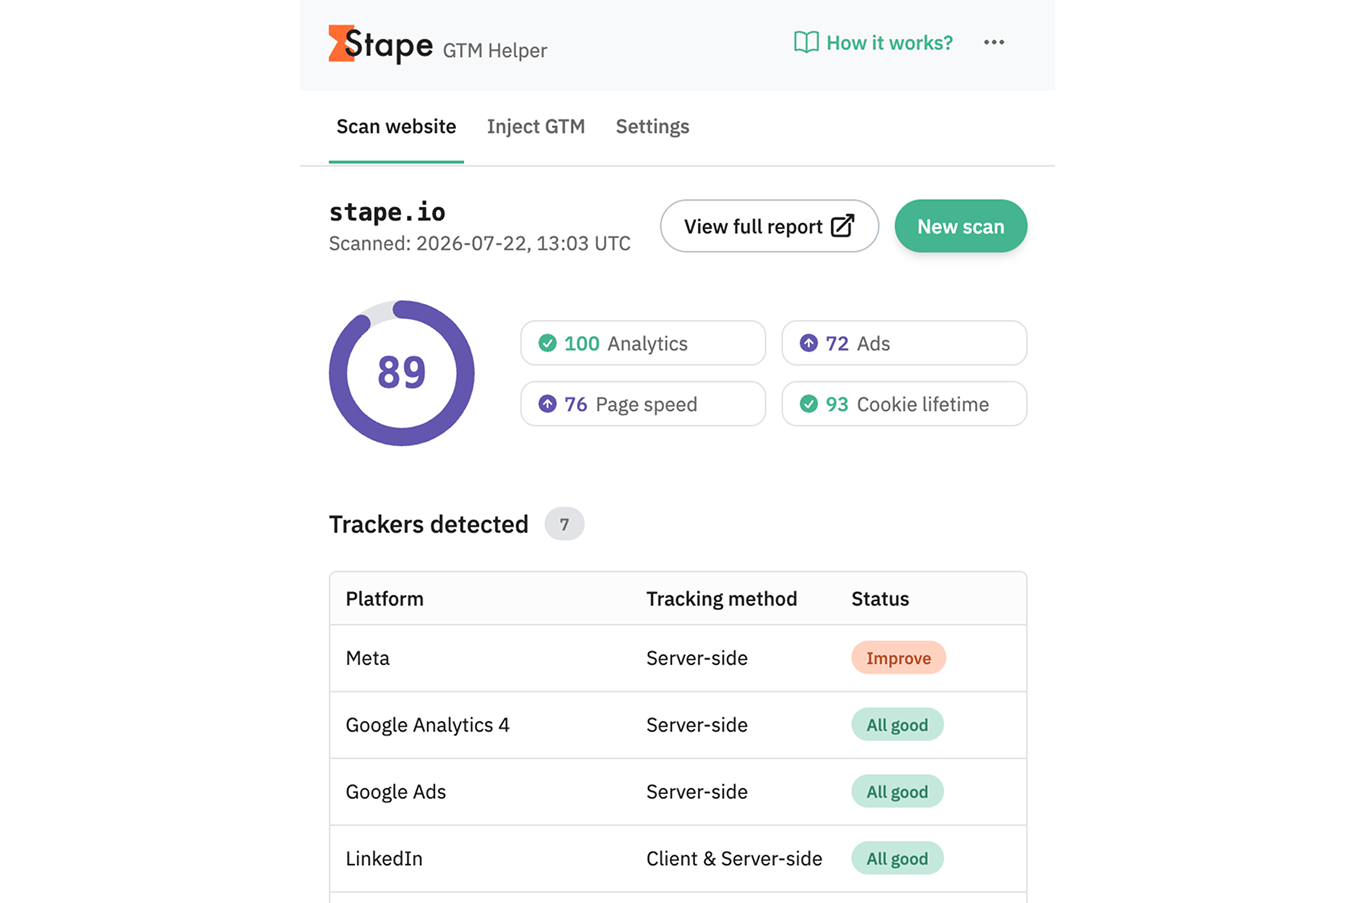
4. Wait for a couple of minutes and review the results. The extension shows:
- Site name and scan timestamp.
- Overall score – a single 0-100 score summarizing overall tracking health.
- Category scores – four metrics, each with a status icon:
- Analytics – checks if platforms like GA4 are implemented using the best practices for the setup.
- Ads – reviews how server-side tracking can improve quality for better ad attribution and ROAS.
- Page speed – detects tracking scripts that slow your site and flags those that can be moved server-side.
- Cookie lifetime – audits cookie lifetimes, consent mode configurations, and technical compliance.
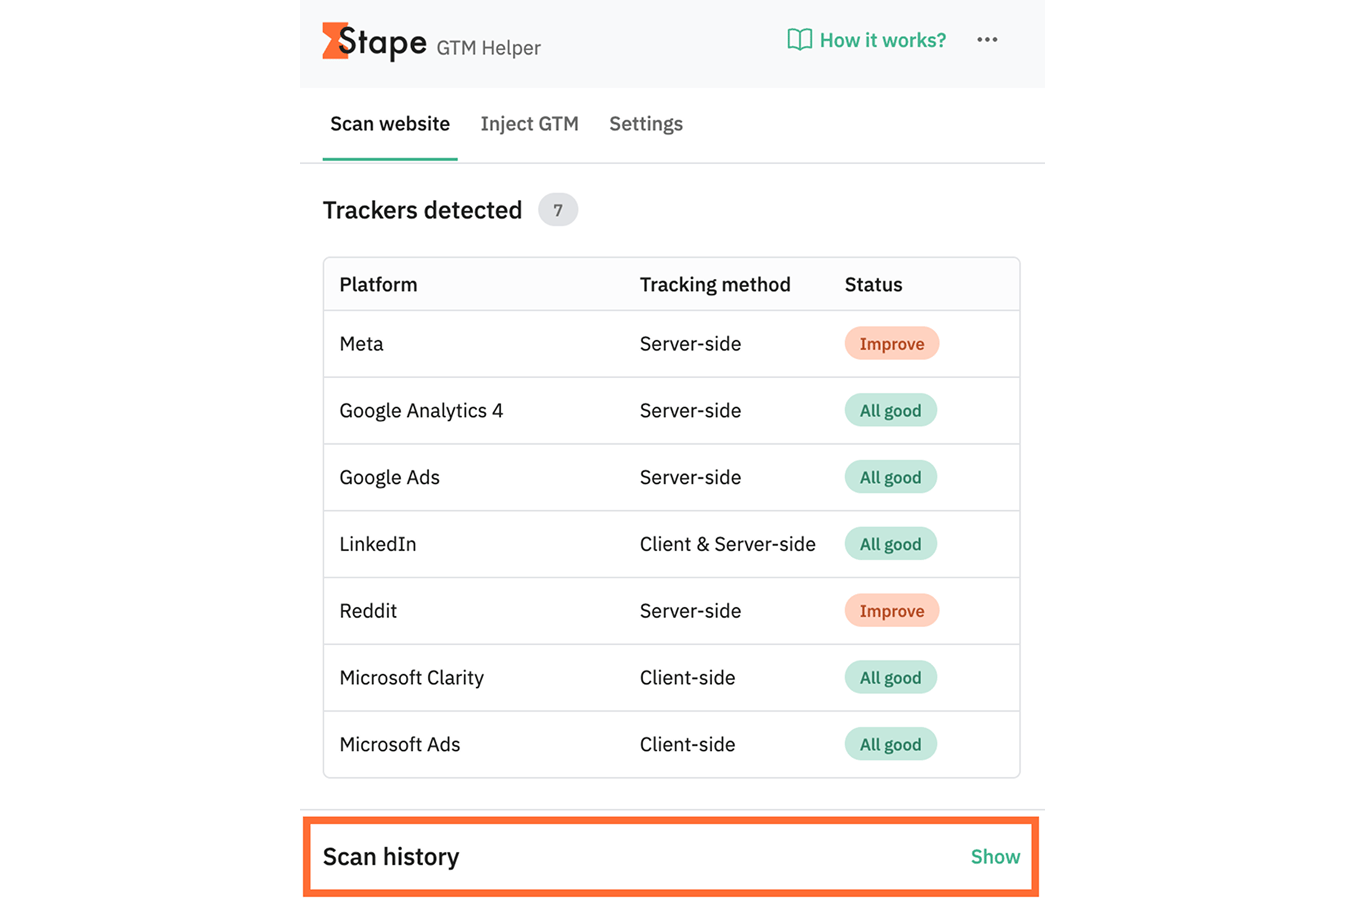
- Trackers detected – a table listing every tracking platform found on the page, with:
- Platform
- Tracking method – whether it runs client-side, server-side, or both
- Status – a colored badge, either All good (green) or Improve (orange), flagging platforms that need attention.
5. Click View full report to open the complete Website Tracking Checker report with detailed findings and recommendations. For more information about the metrics read the Website Tracking Checker overview article.
6. Click New scan to re-run the check – useful after making fixes, to confirm your score and statuses improved.
Past scans remain available under Scan history, so you can compare results over time for the same site.
How to inject GTM script
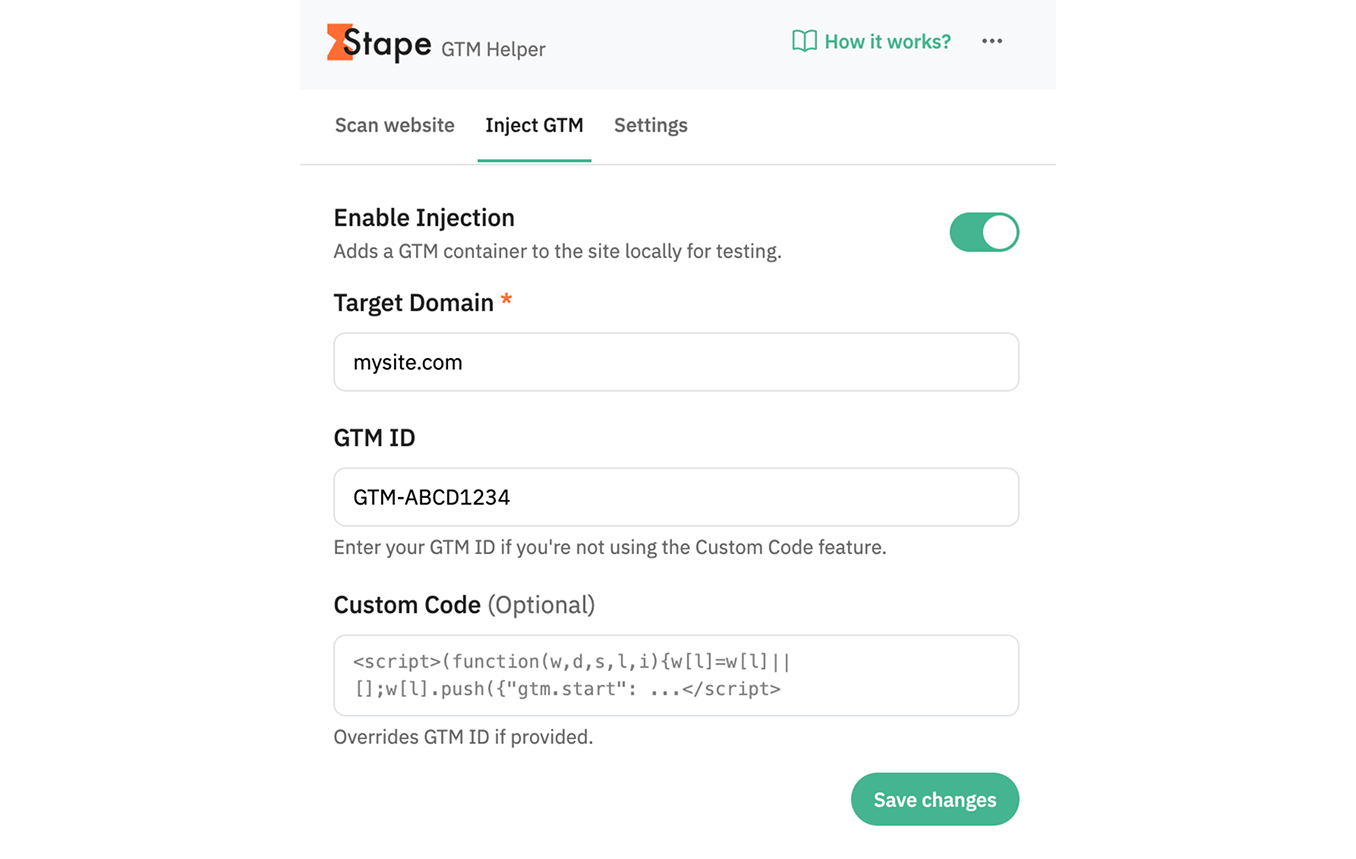
The Inject GTM feature allows you to inject a GTM container snippet into any website without altering the site's source code or CMS backend. This is useful for testing, debugging, or staging tracking setups on live pages before deploying them. This injection is local to your browser session and doesn't affect your live site or other visitors.
- 1.Navigate to your website.
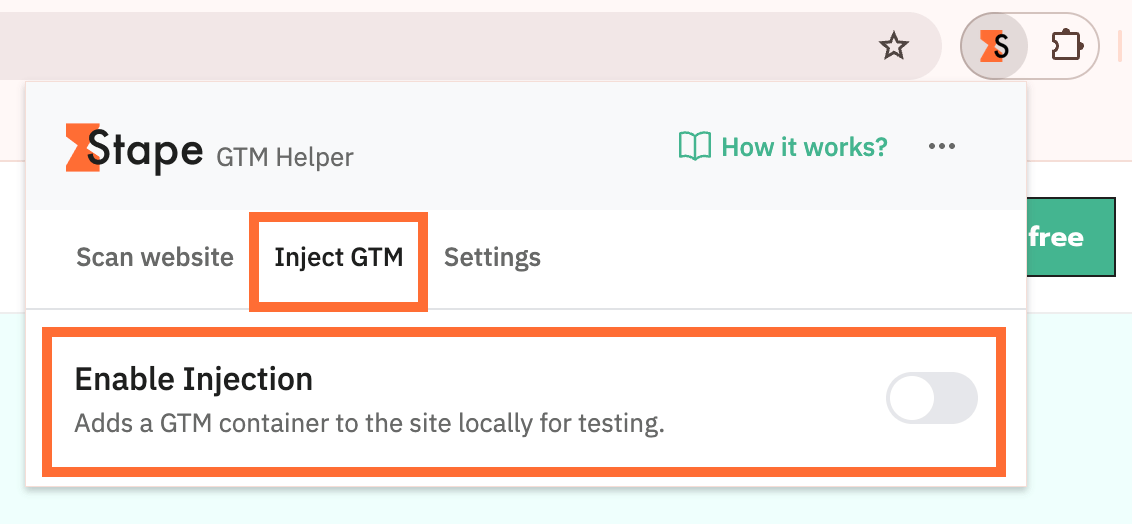
- 2.In Chrome Extensions, click the Stape GTM Helper icon and open the Inject GTM tab.
- 3.Toggle Enable Injection.
4. Enter the domain name and GTM container ID you want to inject.
5. Optionally, instead of using the standard Container ID field (which generates a standard gtm.js tag), the Custom Code field accepts any custom script or snippet you want to execute on the target page. If you generated a snippet with the Custom Loader power-up (which routes gtm.js requests through your custom domain/loader path), paste the full HTML <script> block provided by Stape. You can also inject inline JavaScript to initialize data layer variables or push events for testing before GTM loads.
6. Click Save changes.
7. Once enabled, reload the page and open GTM Preview mode. You'll now be able to see the events firing on the previously restricted page.
How to use Stape GTM Helper settings
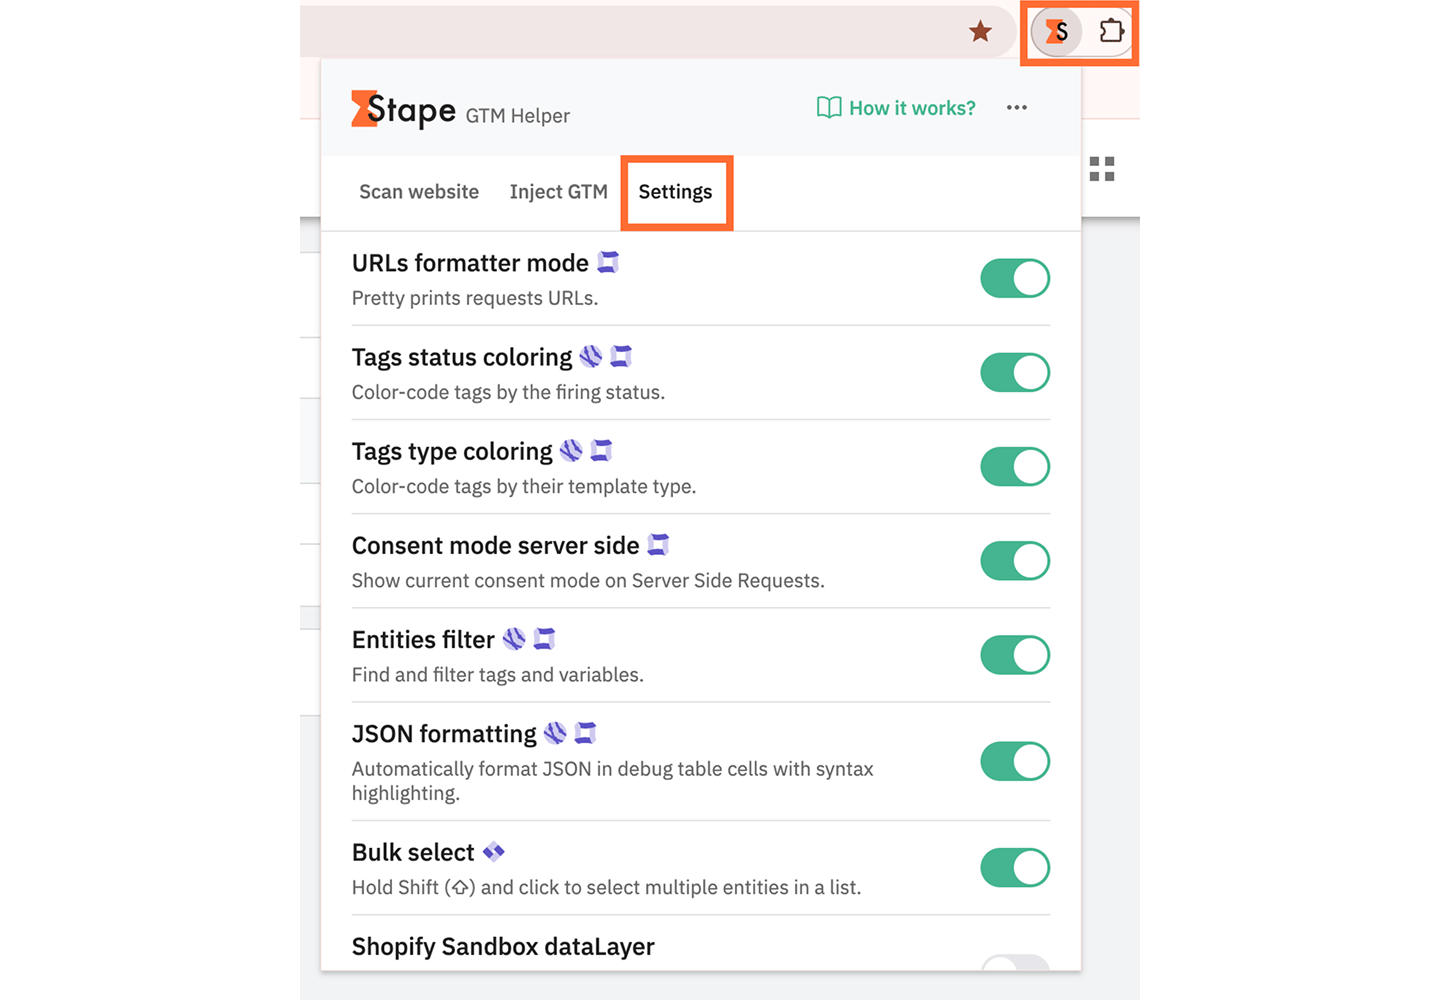
The Settings tab is where you turn individual debugging features on or off. All toggles are enabled by default, and each affects either the web container, the server container, or both.
- 1.Go to the Google Tag Manager and open any container in Preview mode.
- 2.In Chrome Extensions, click the Stape GTM Helper icon and open the Settings tab.
- 3.Toggle each setting on/off according to your needs.
URLs formatter mode
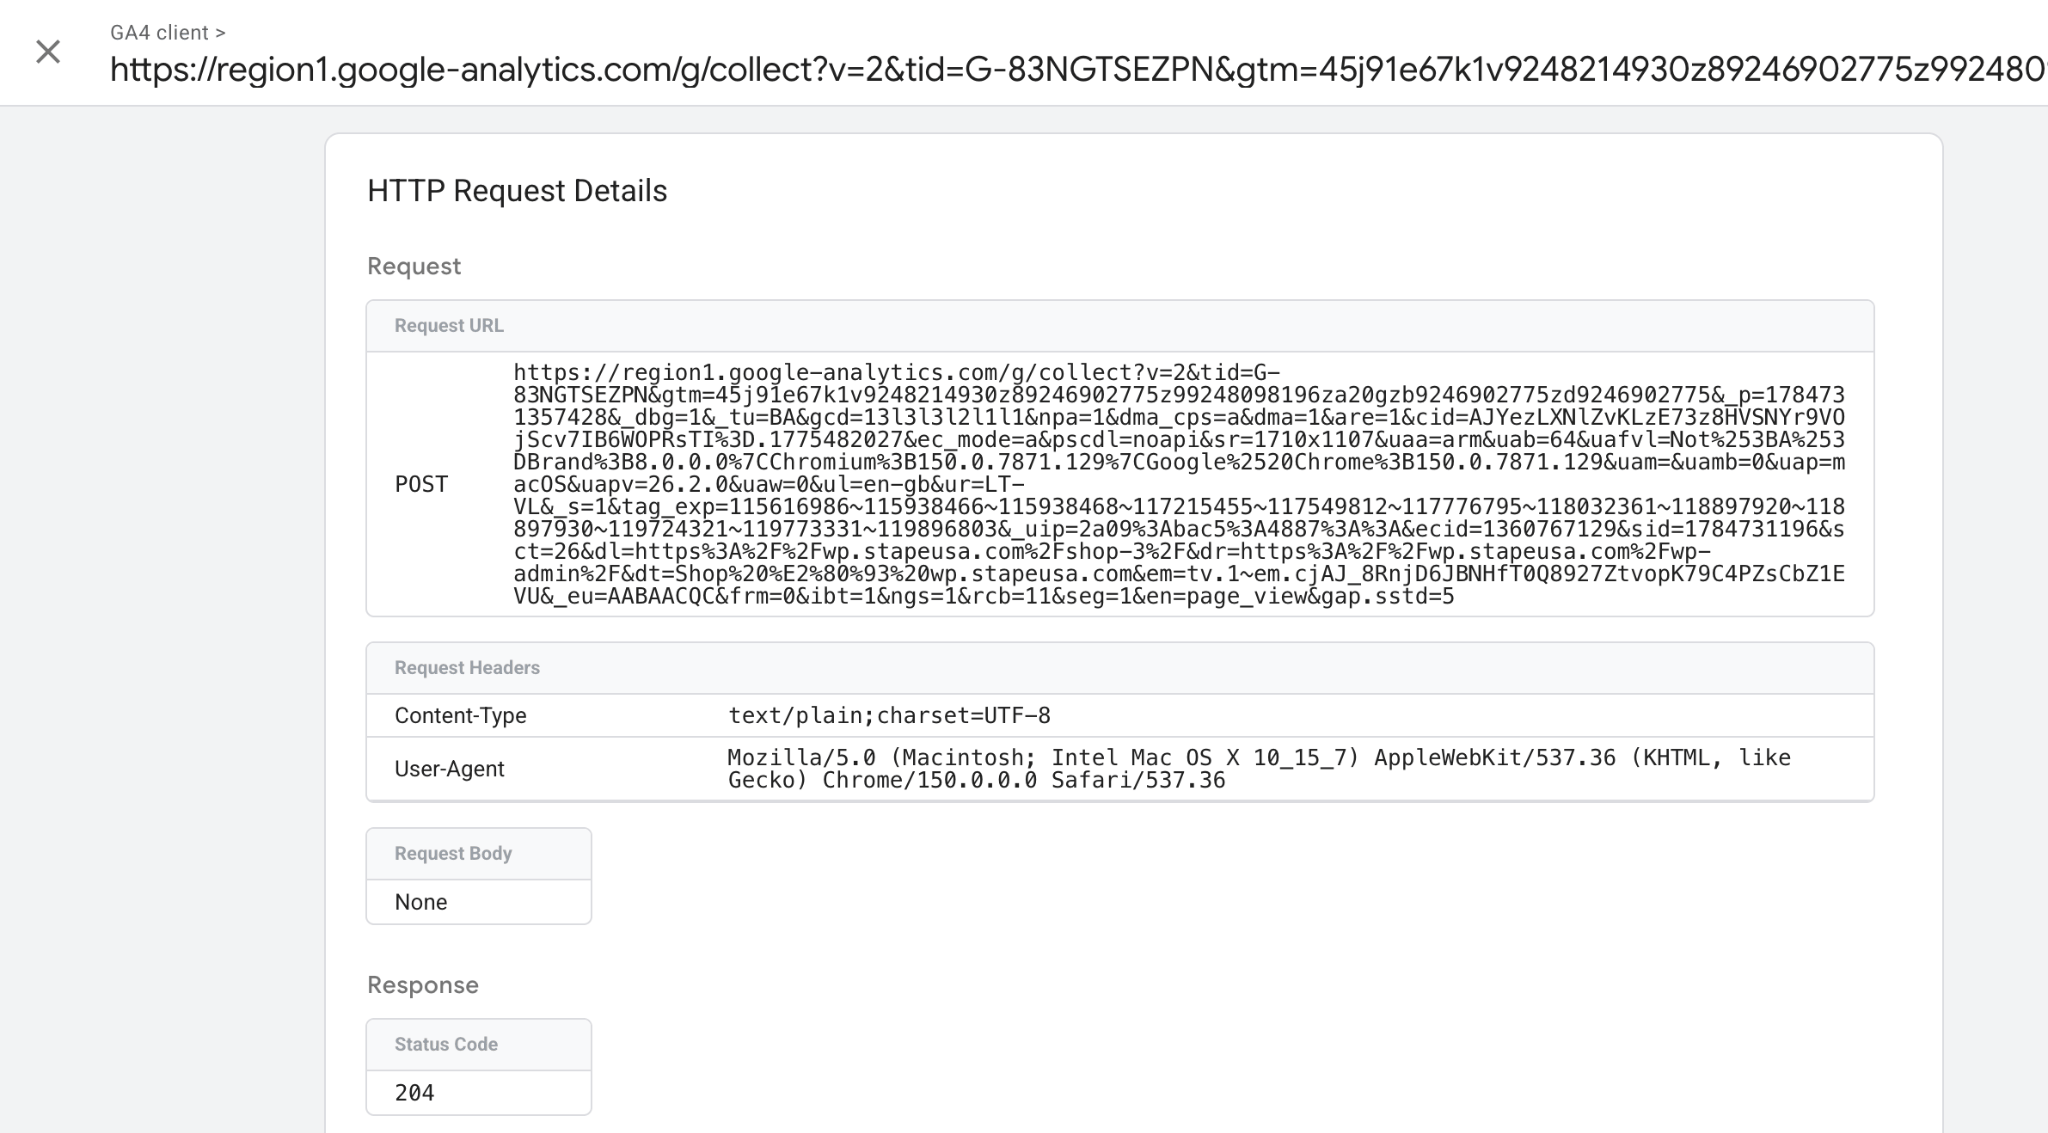
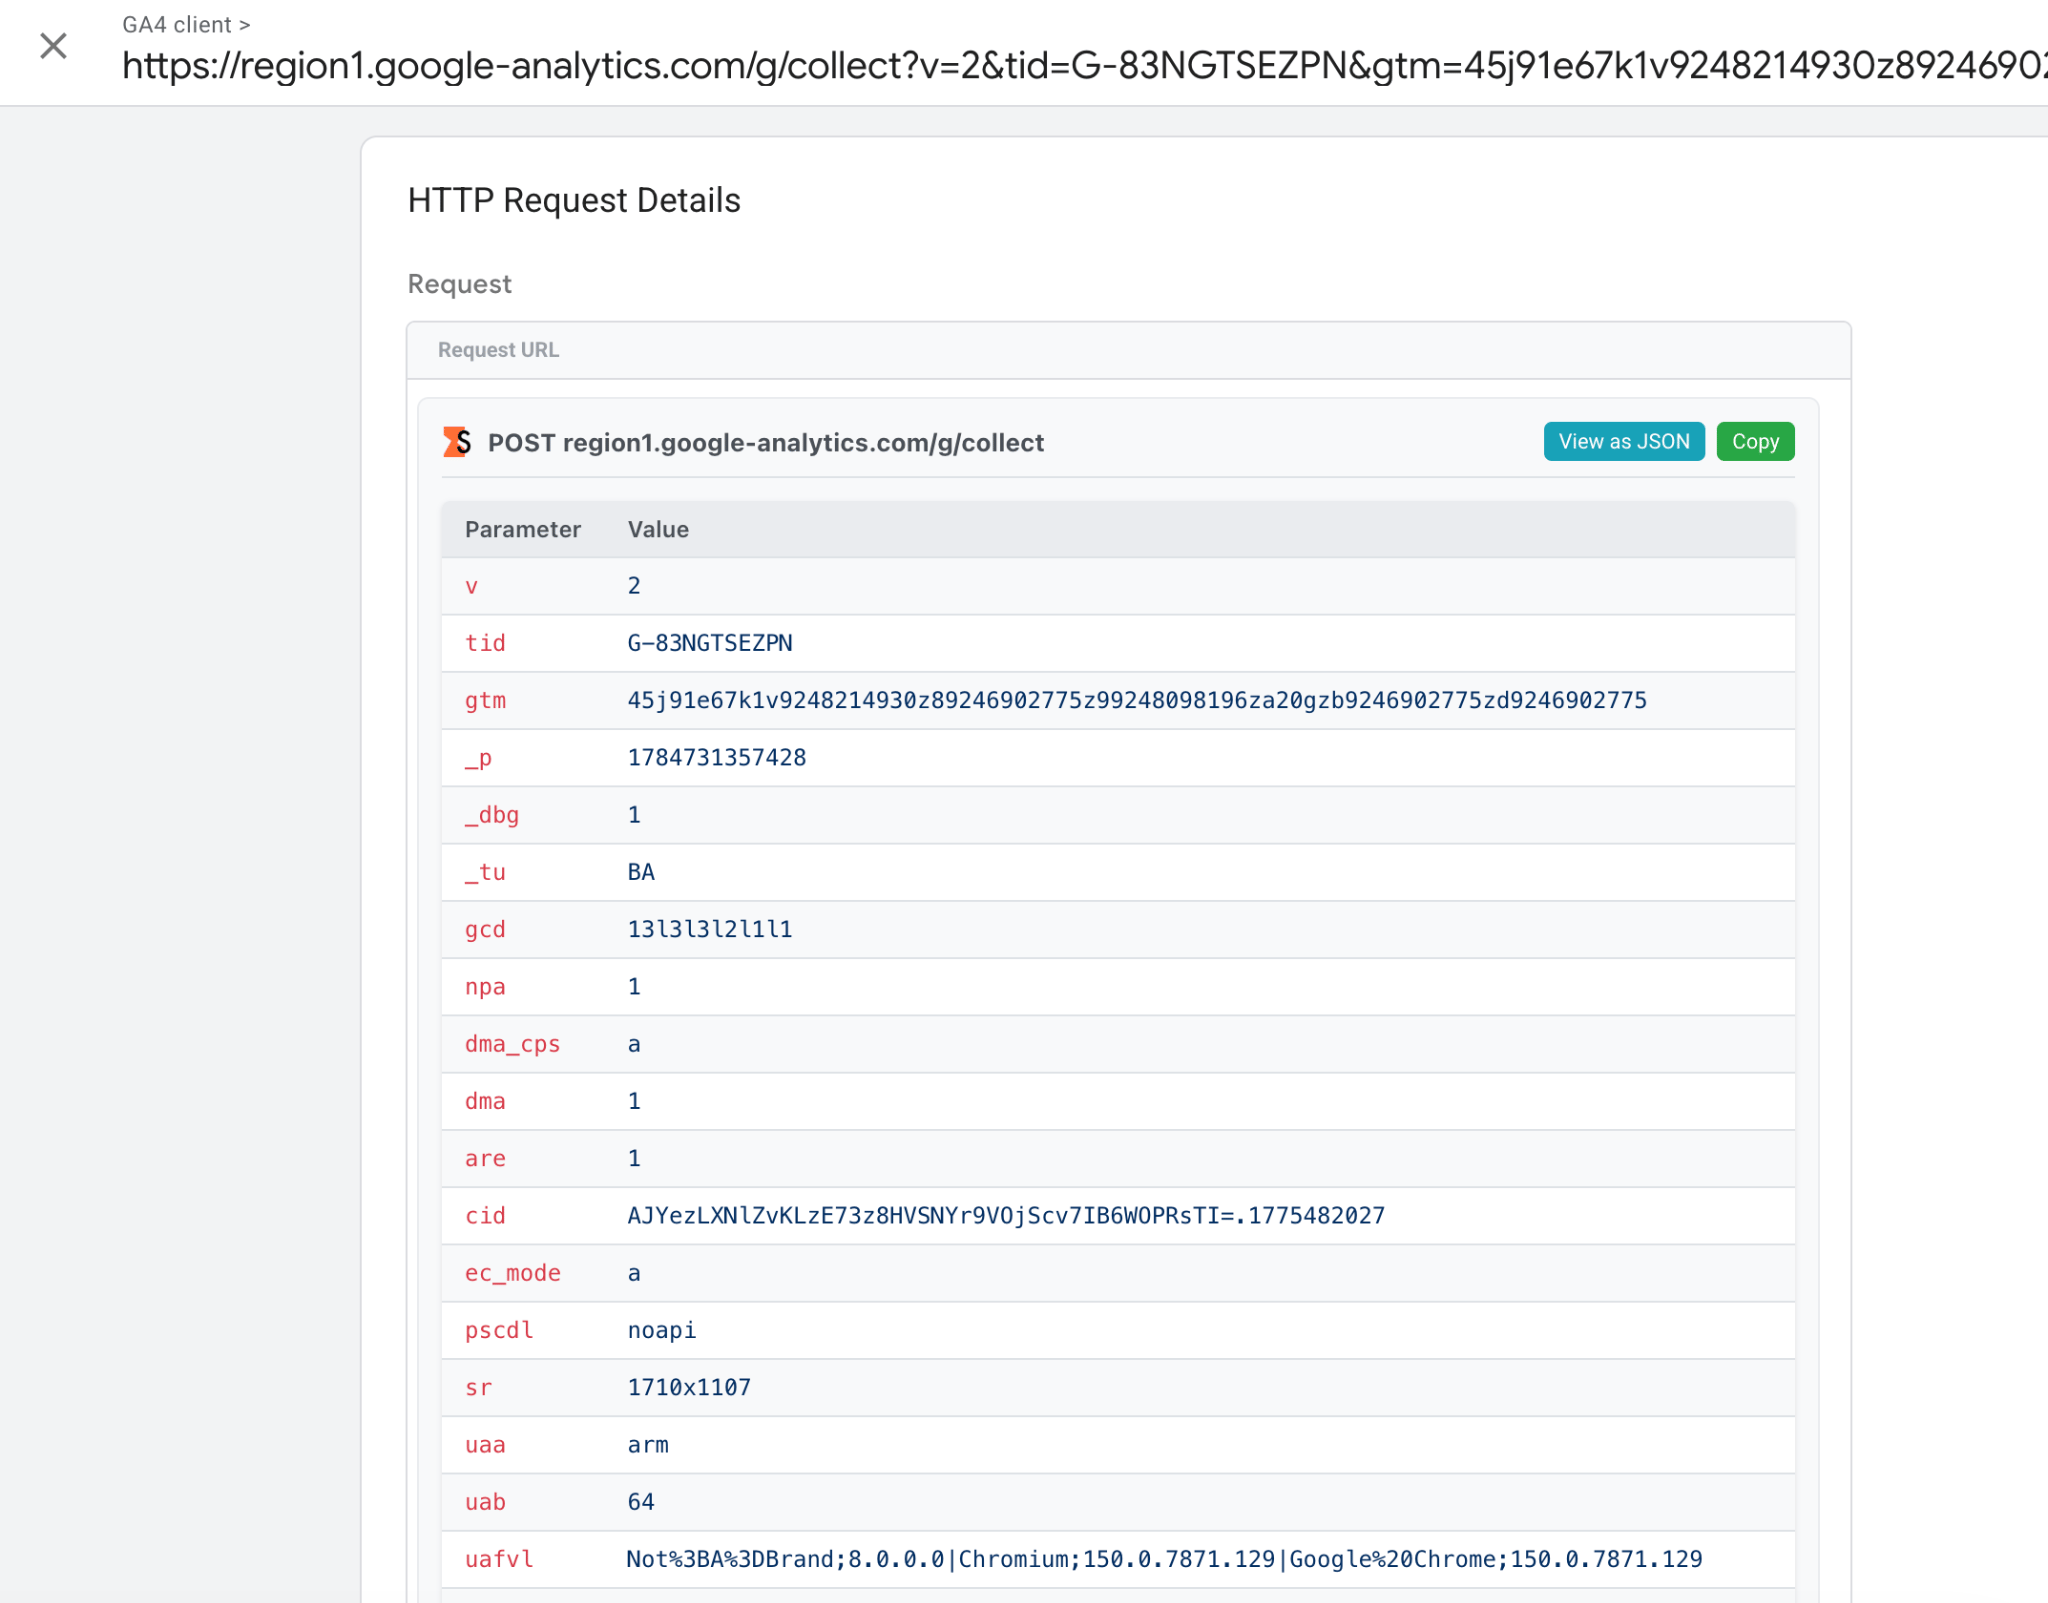
Makes request URLs prettier, turning long query strings into a readable table (useful for GA4 requests). Only applicable for server containers.
Before
After
Tag status coloring
Color-codes tags in Preview mode by their firing status, so you can spot failed tags or 4xx/5xx responses at a glance. Applicable for both server and web containers.
Before
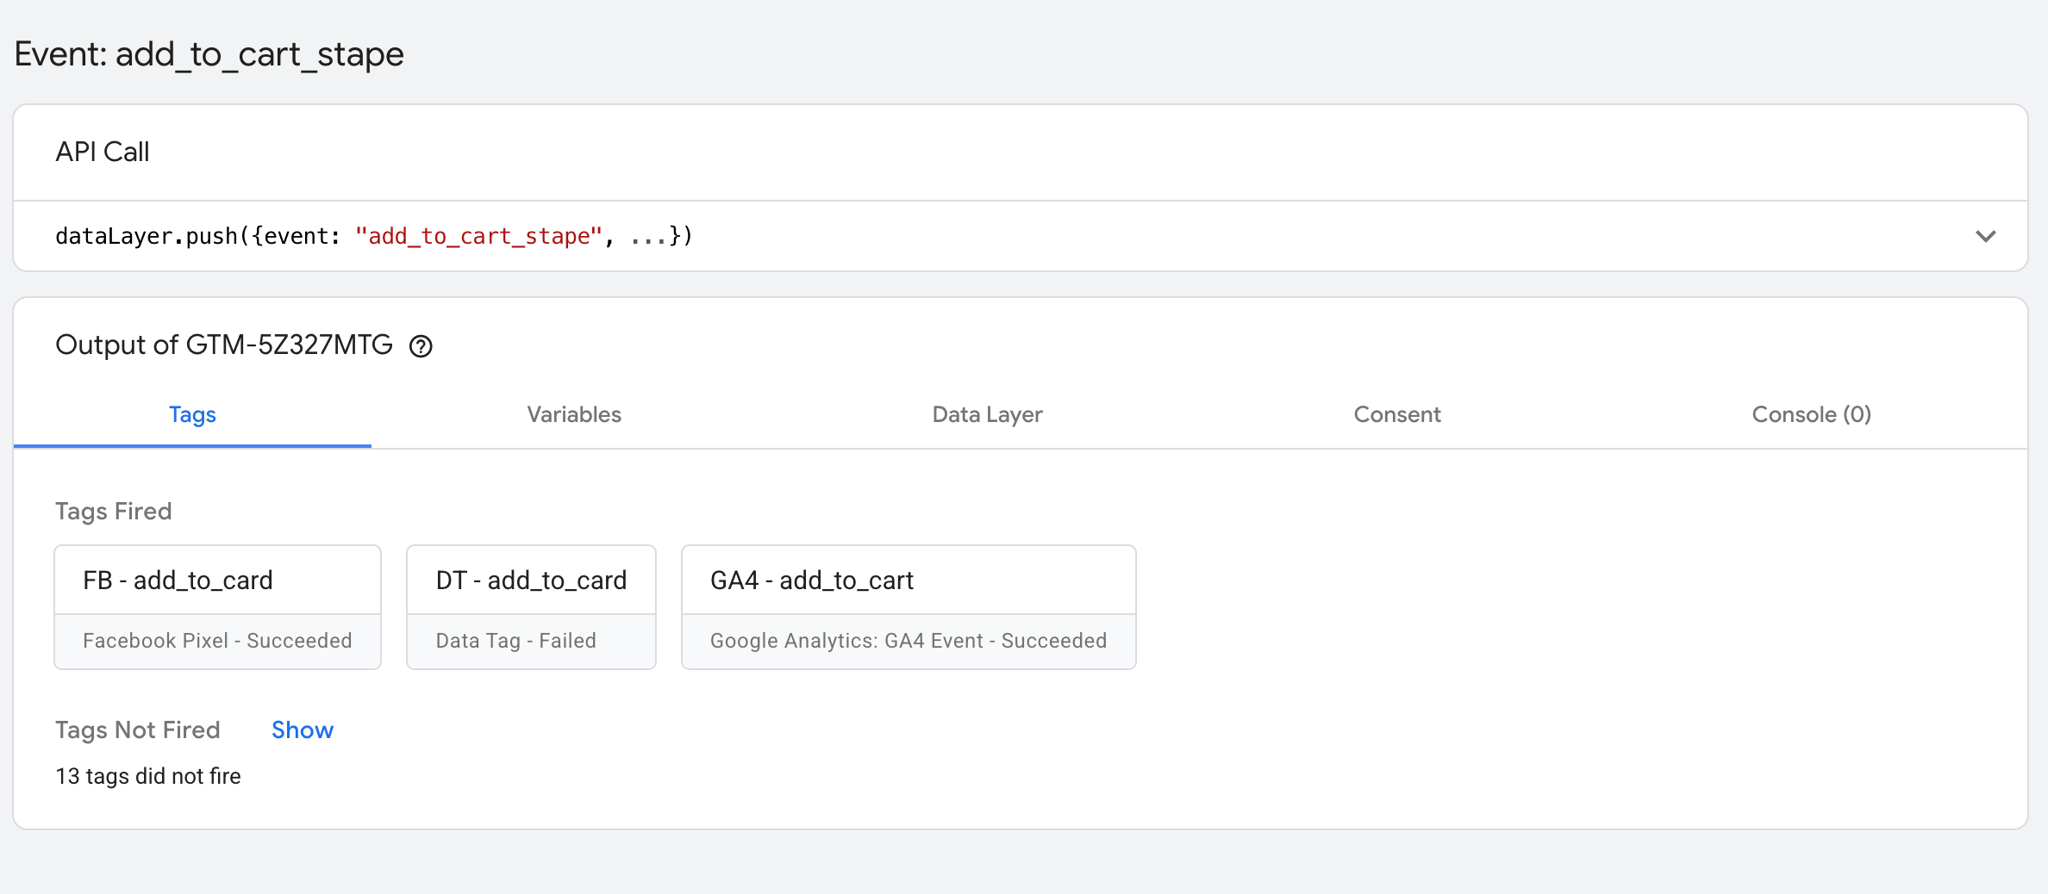
After
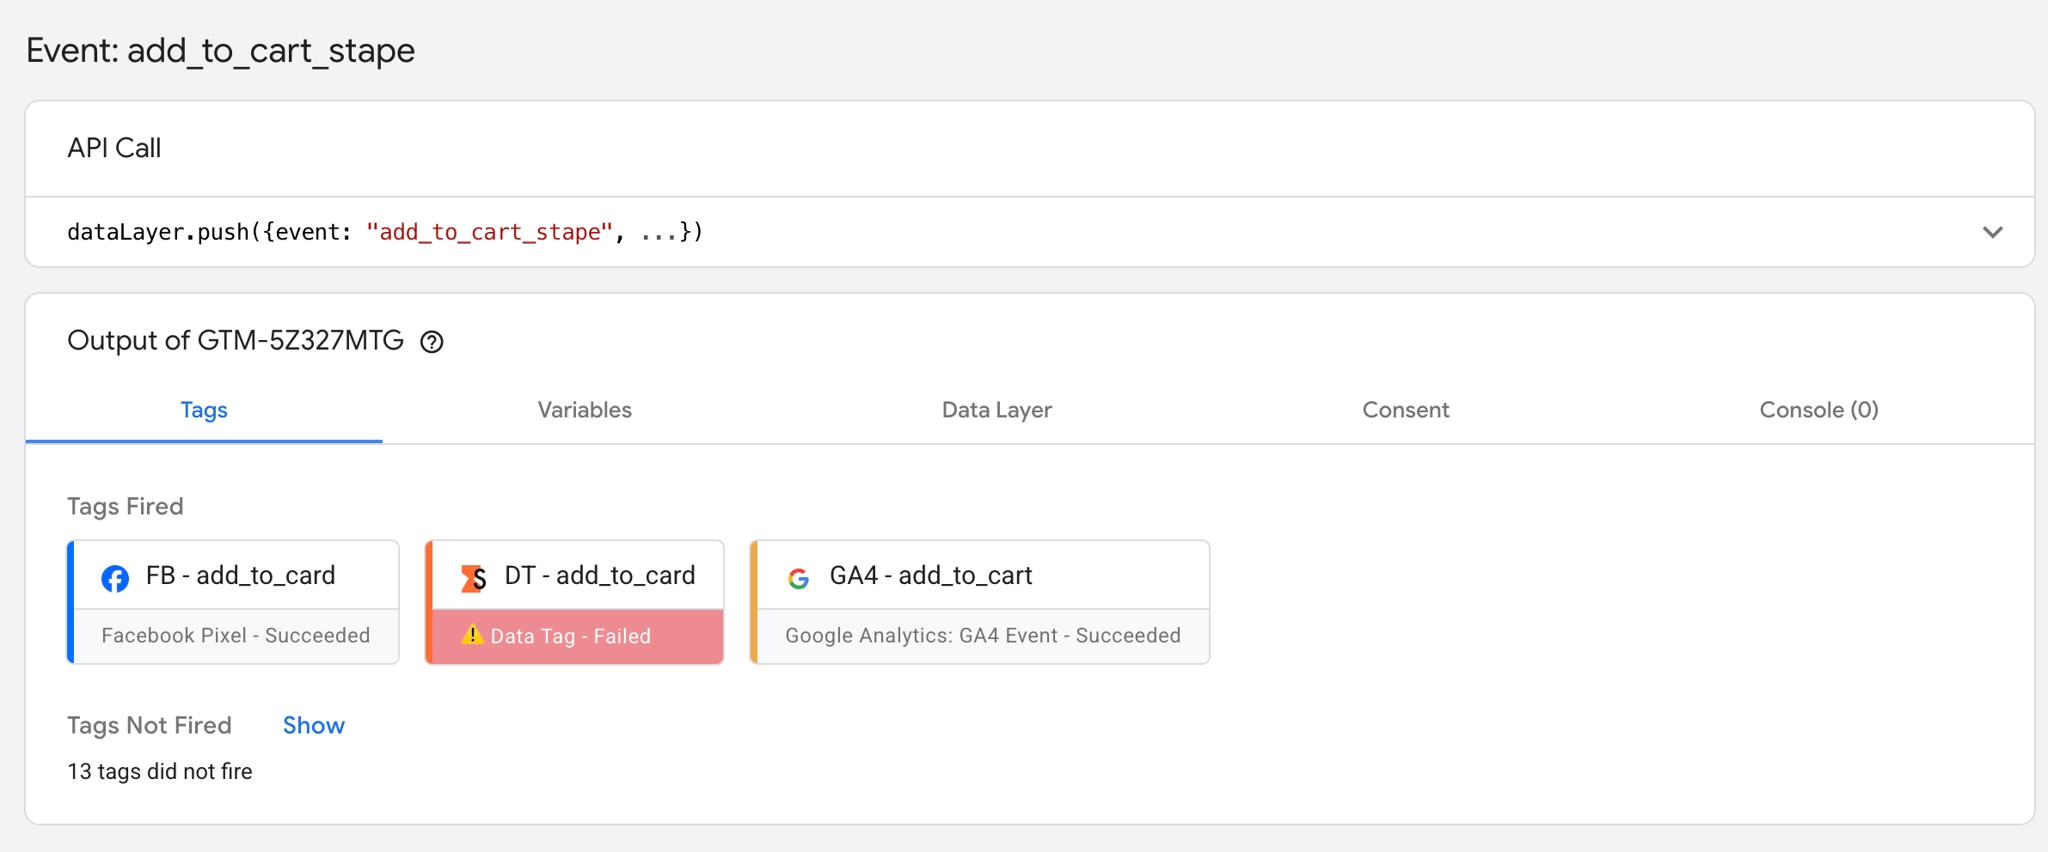
Tags type coloring
Adds color and platform logos (Meta, GA4, Google Ads, Microsoft, etc.) to tags, making it easier to scan a container with many tags. Applicable for both server and web containers.
Before
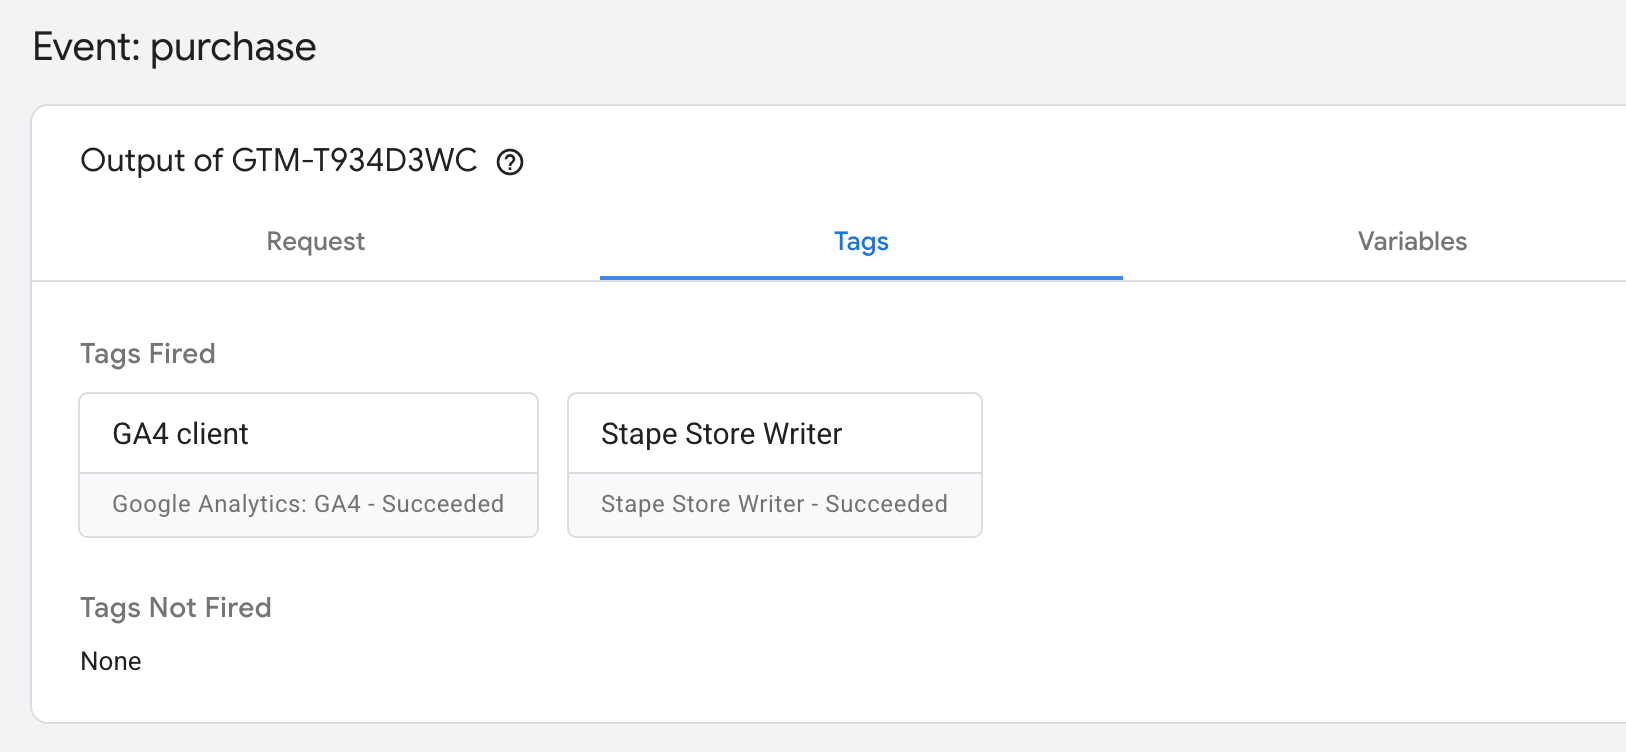
After
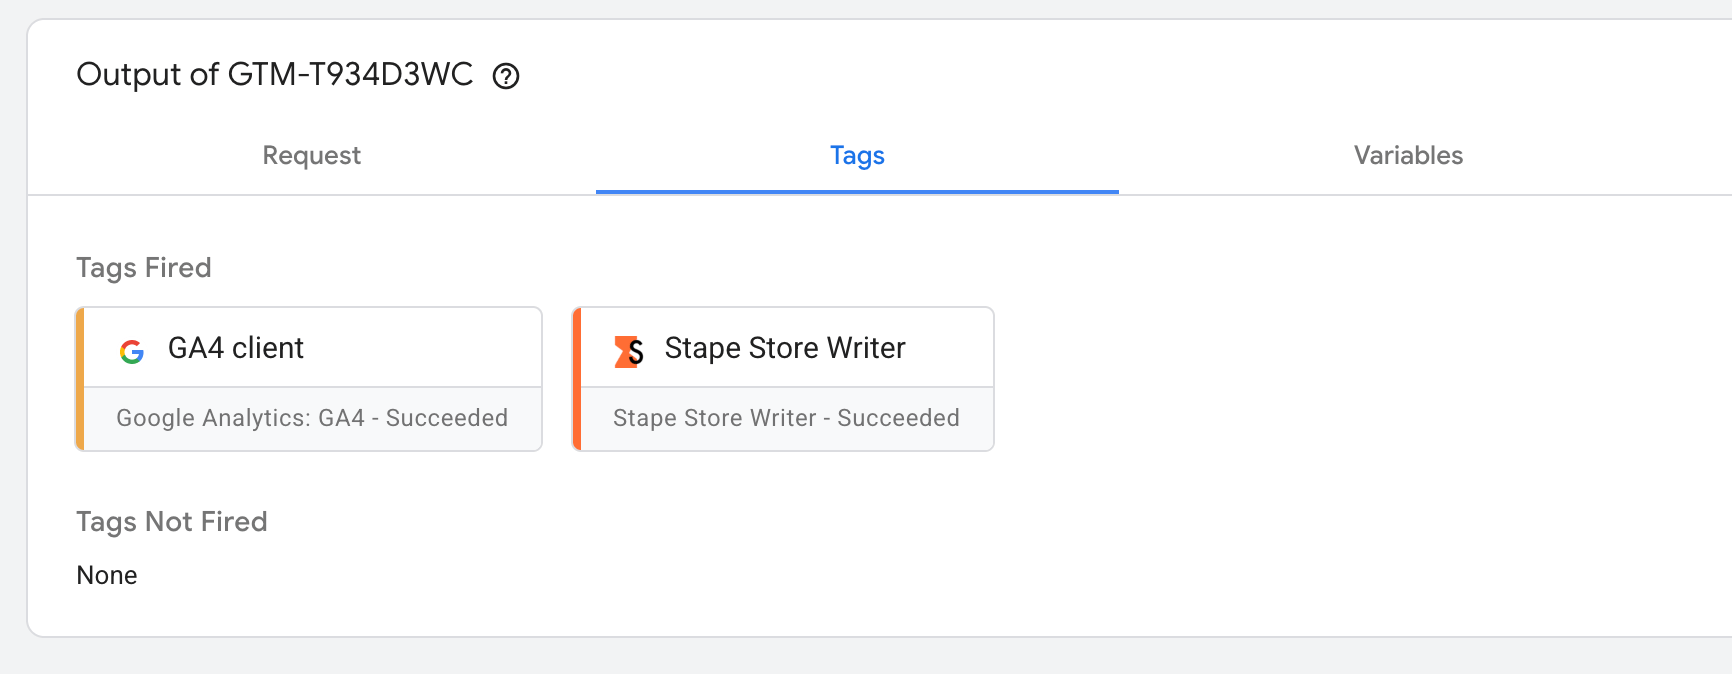
Consent mode server side
Displays the current Consent Mode status directly in the Request tab, by reading the gcs parameter on GA4 requests. The setting shows both consent type and whether it's Granted or Denied. With this setting you don’t need to look for the gcs parameter in the HTTP requests anymore. Only applicable for server containers.
Before
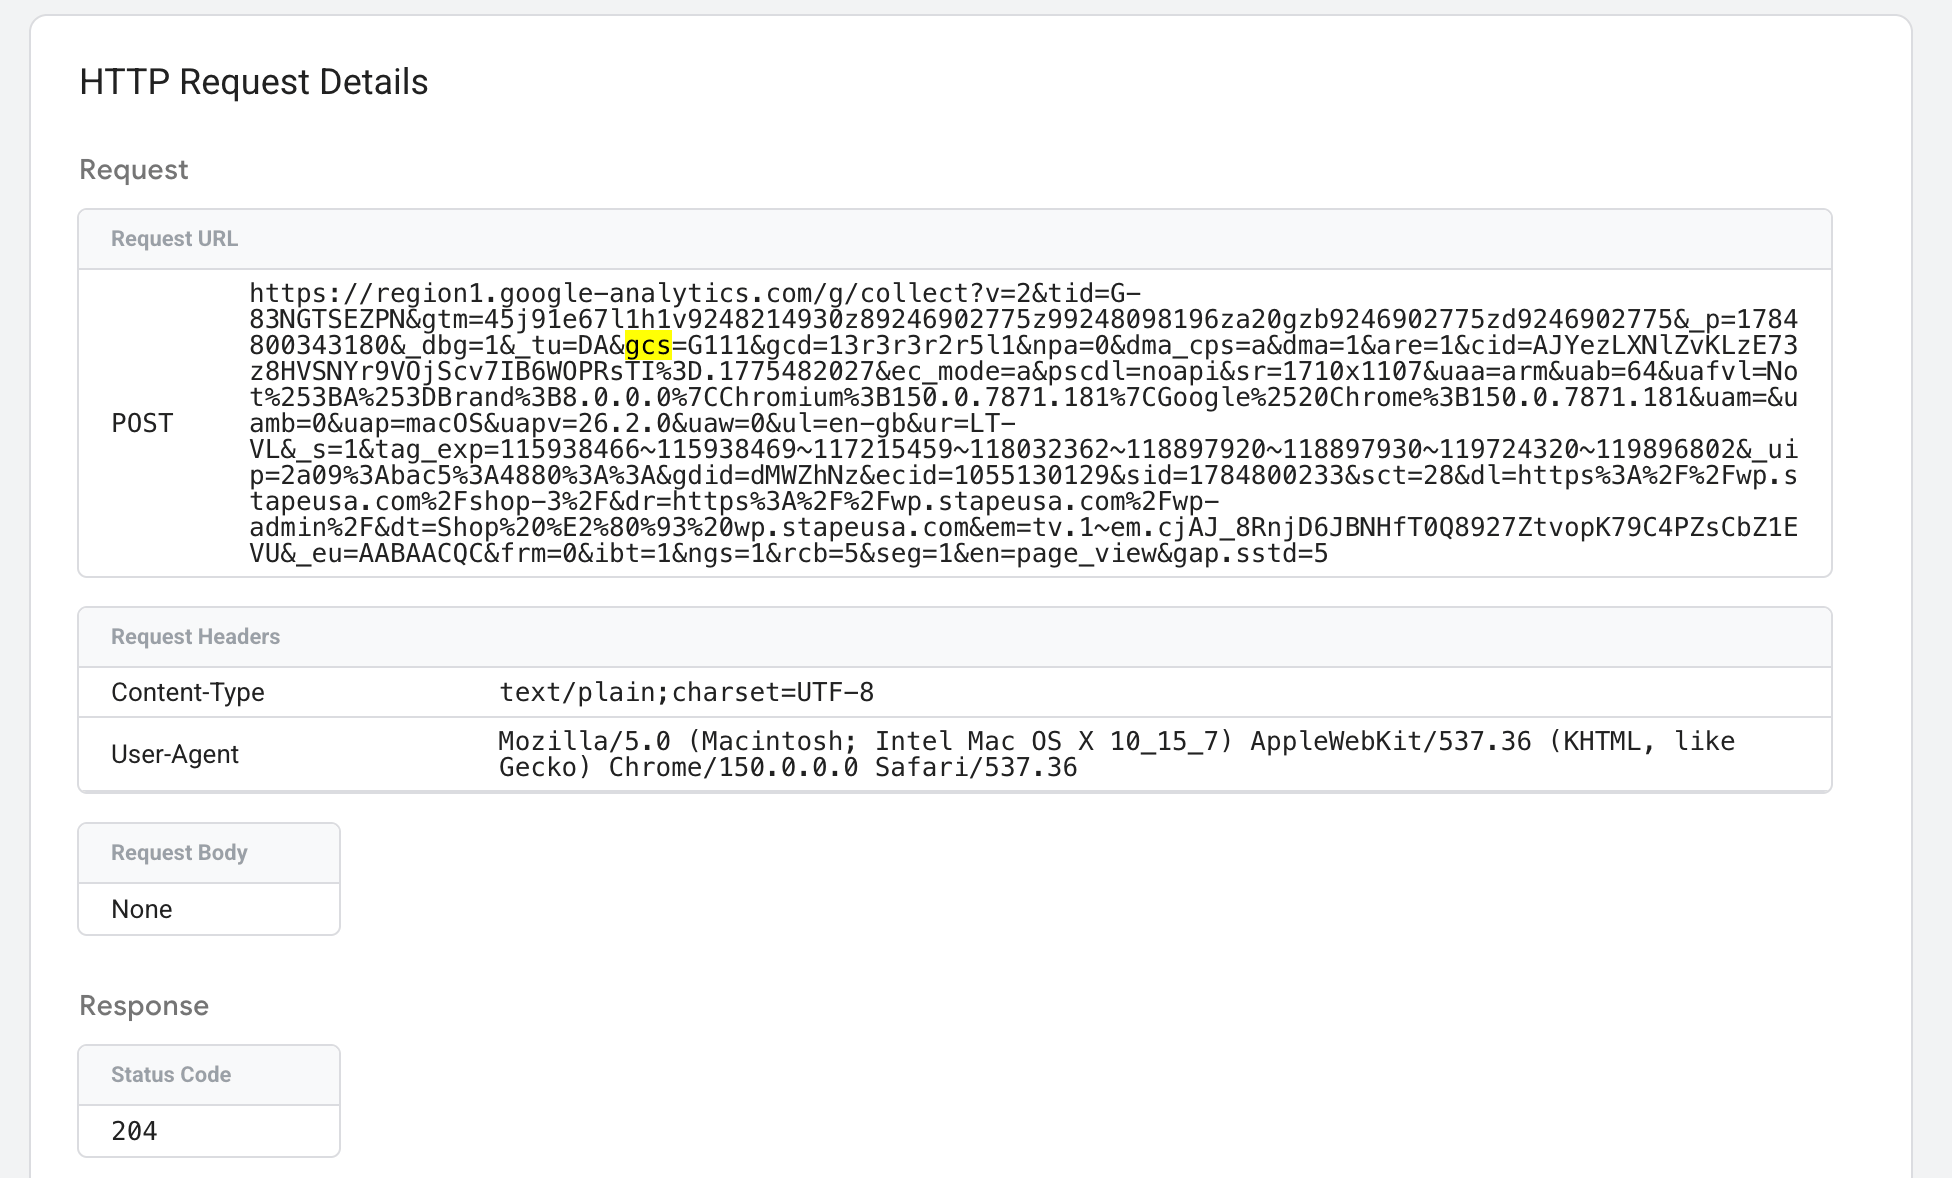
After
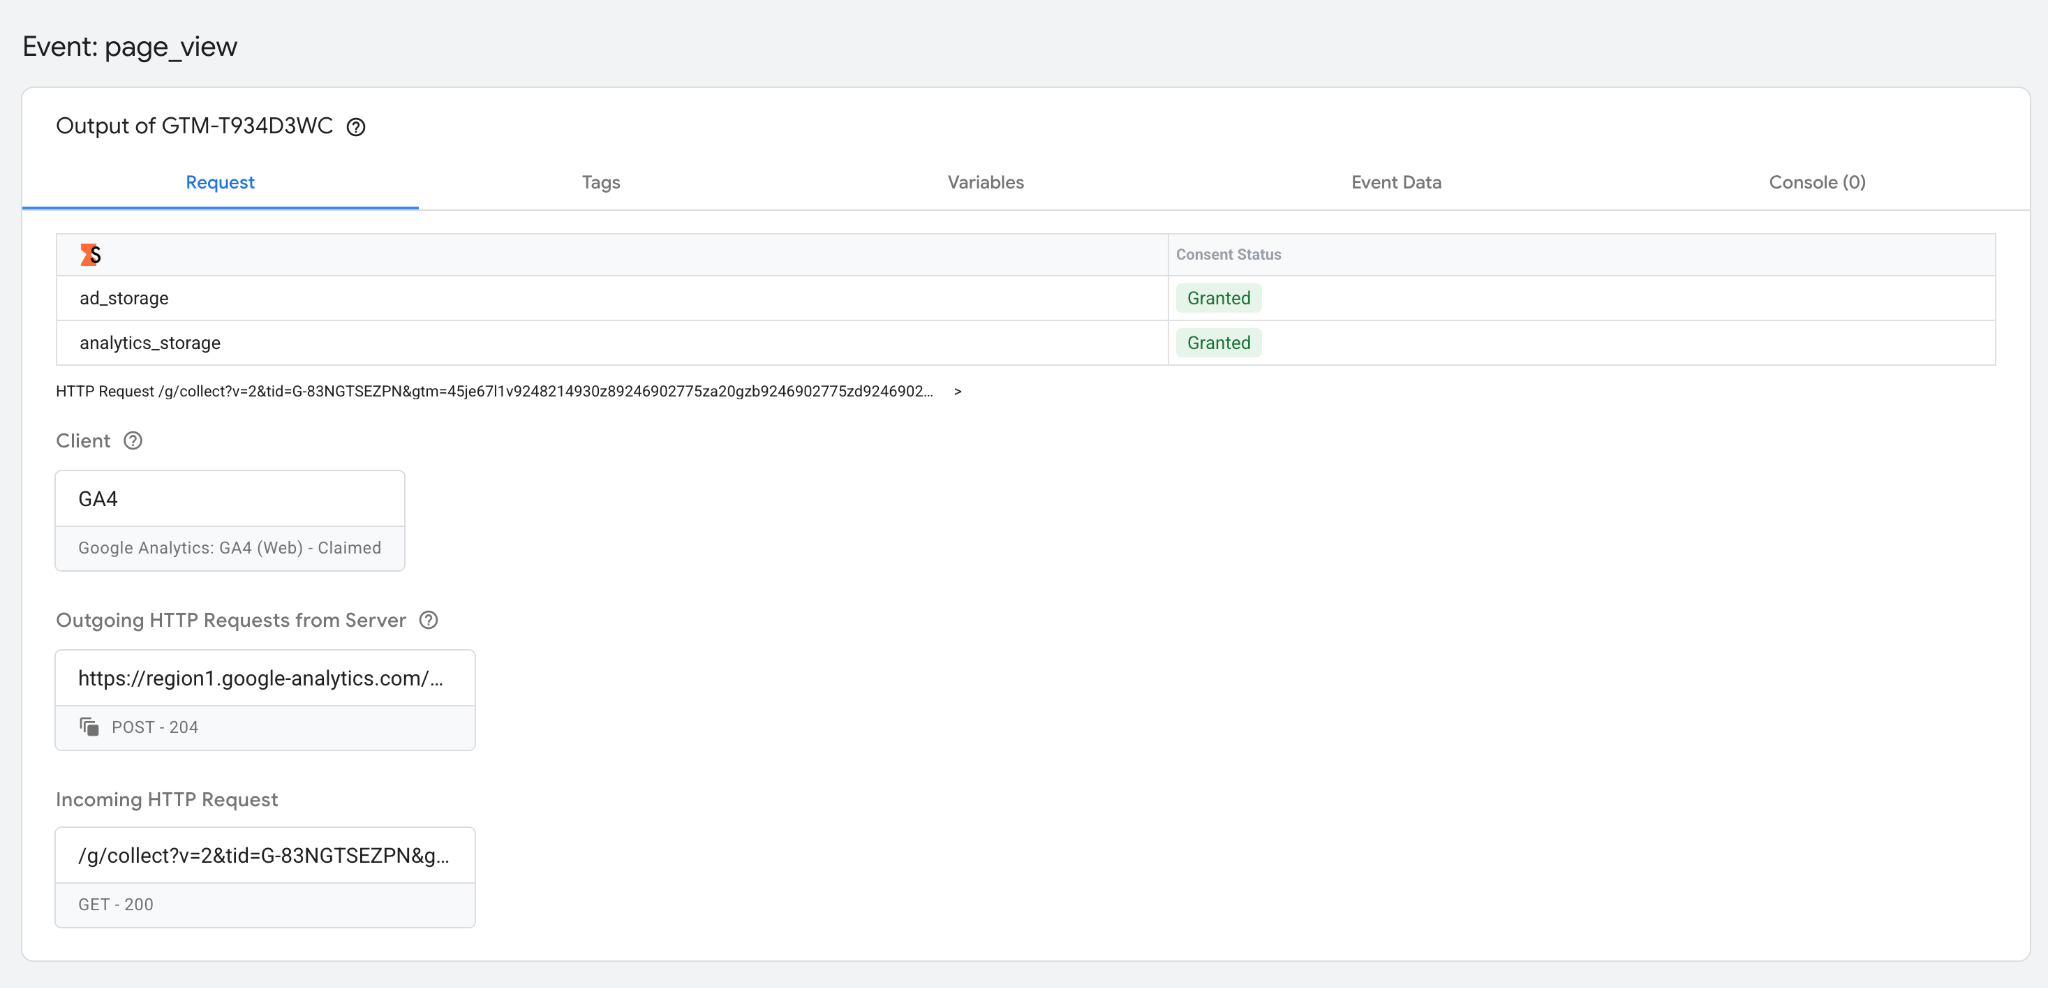
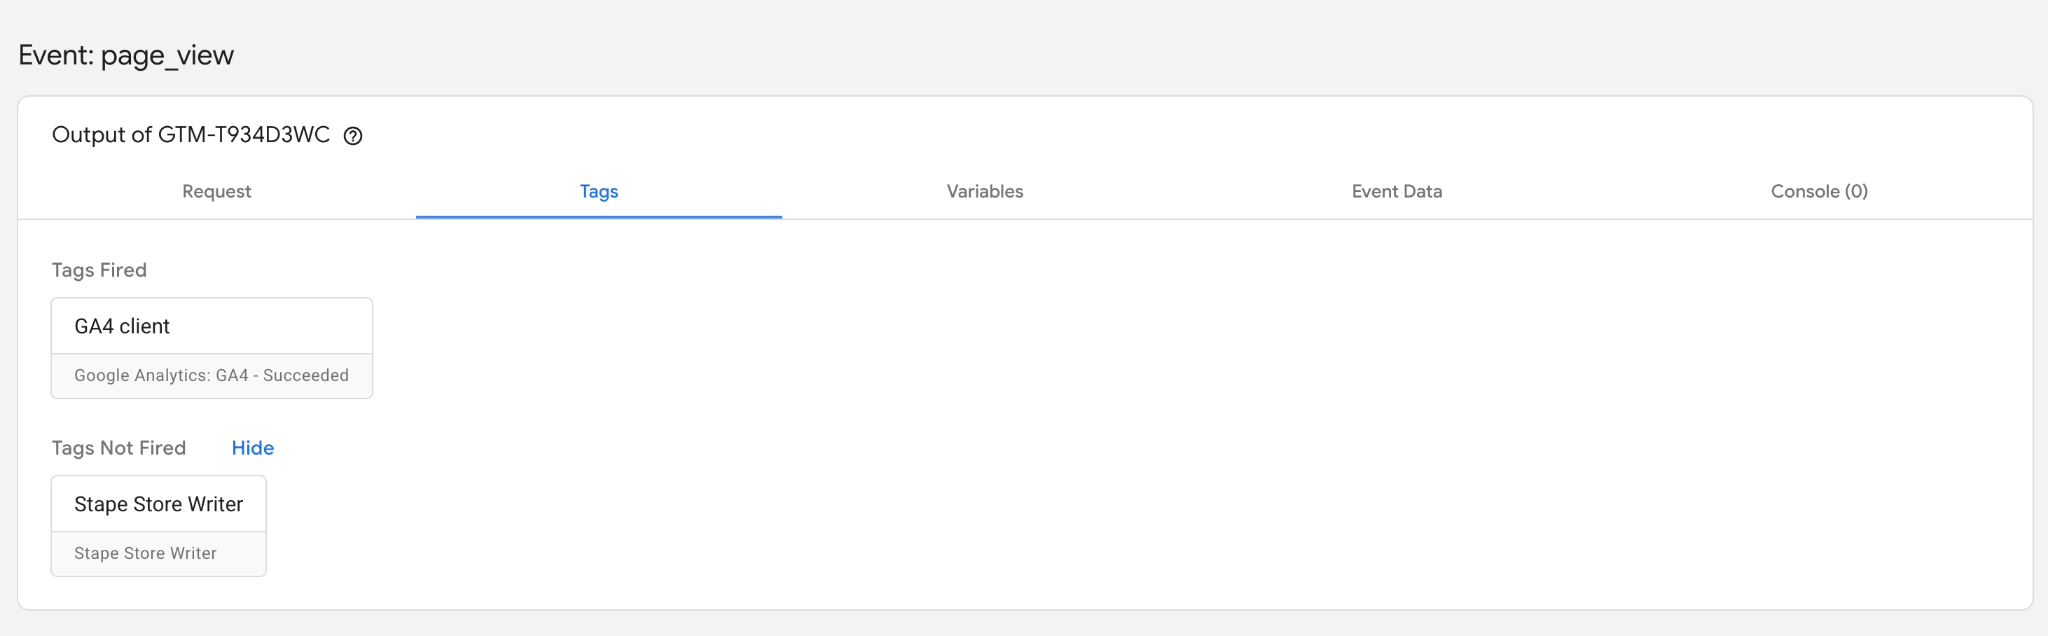
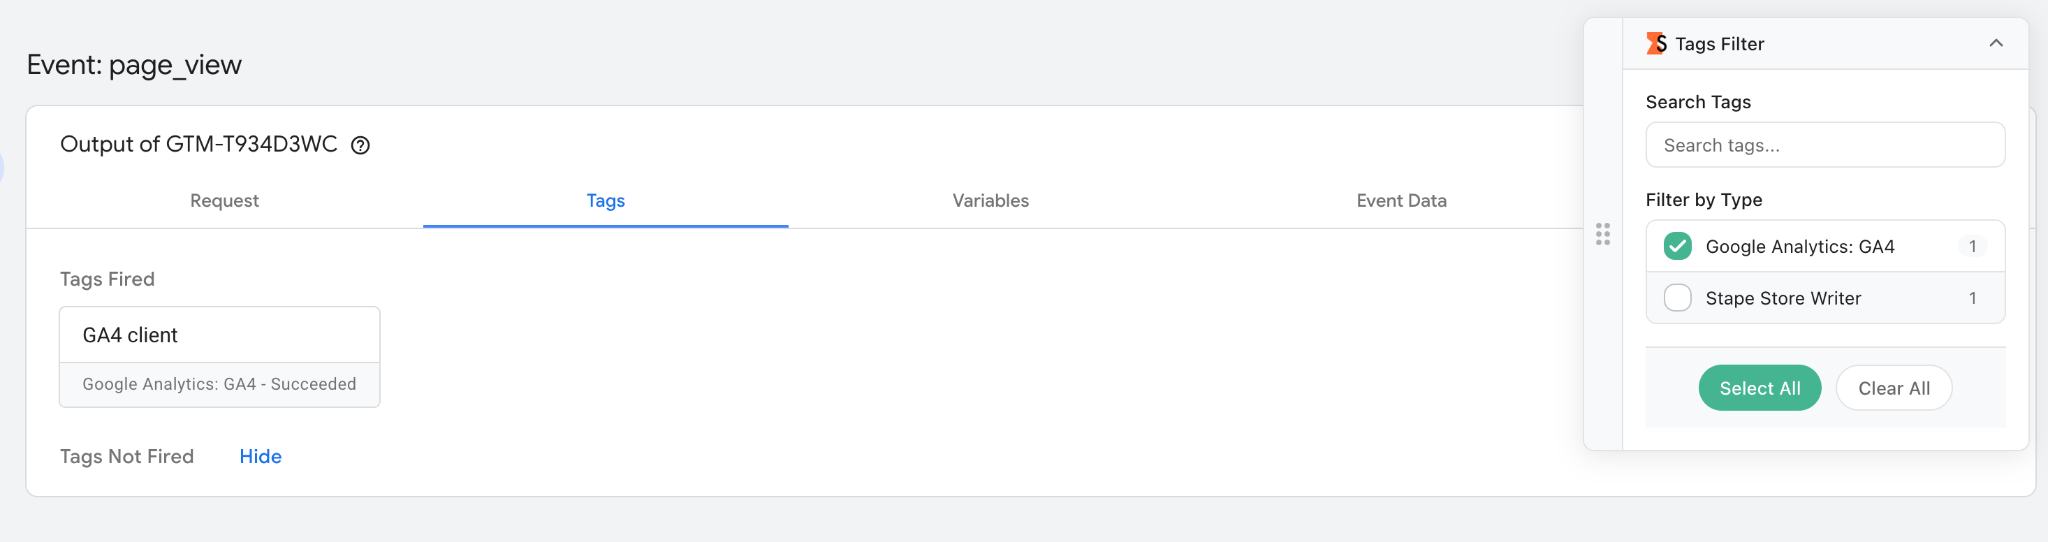
Entities filter
Lets you filter tags and variables in a container down to just the ones you're testing. Applicable for both server and web containers.
Before
After – click on the Tags Filter and select your tag.
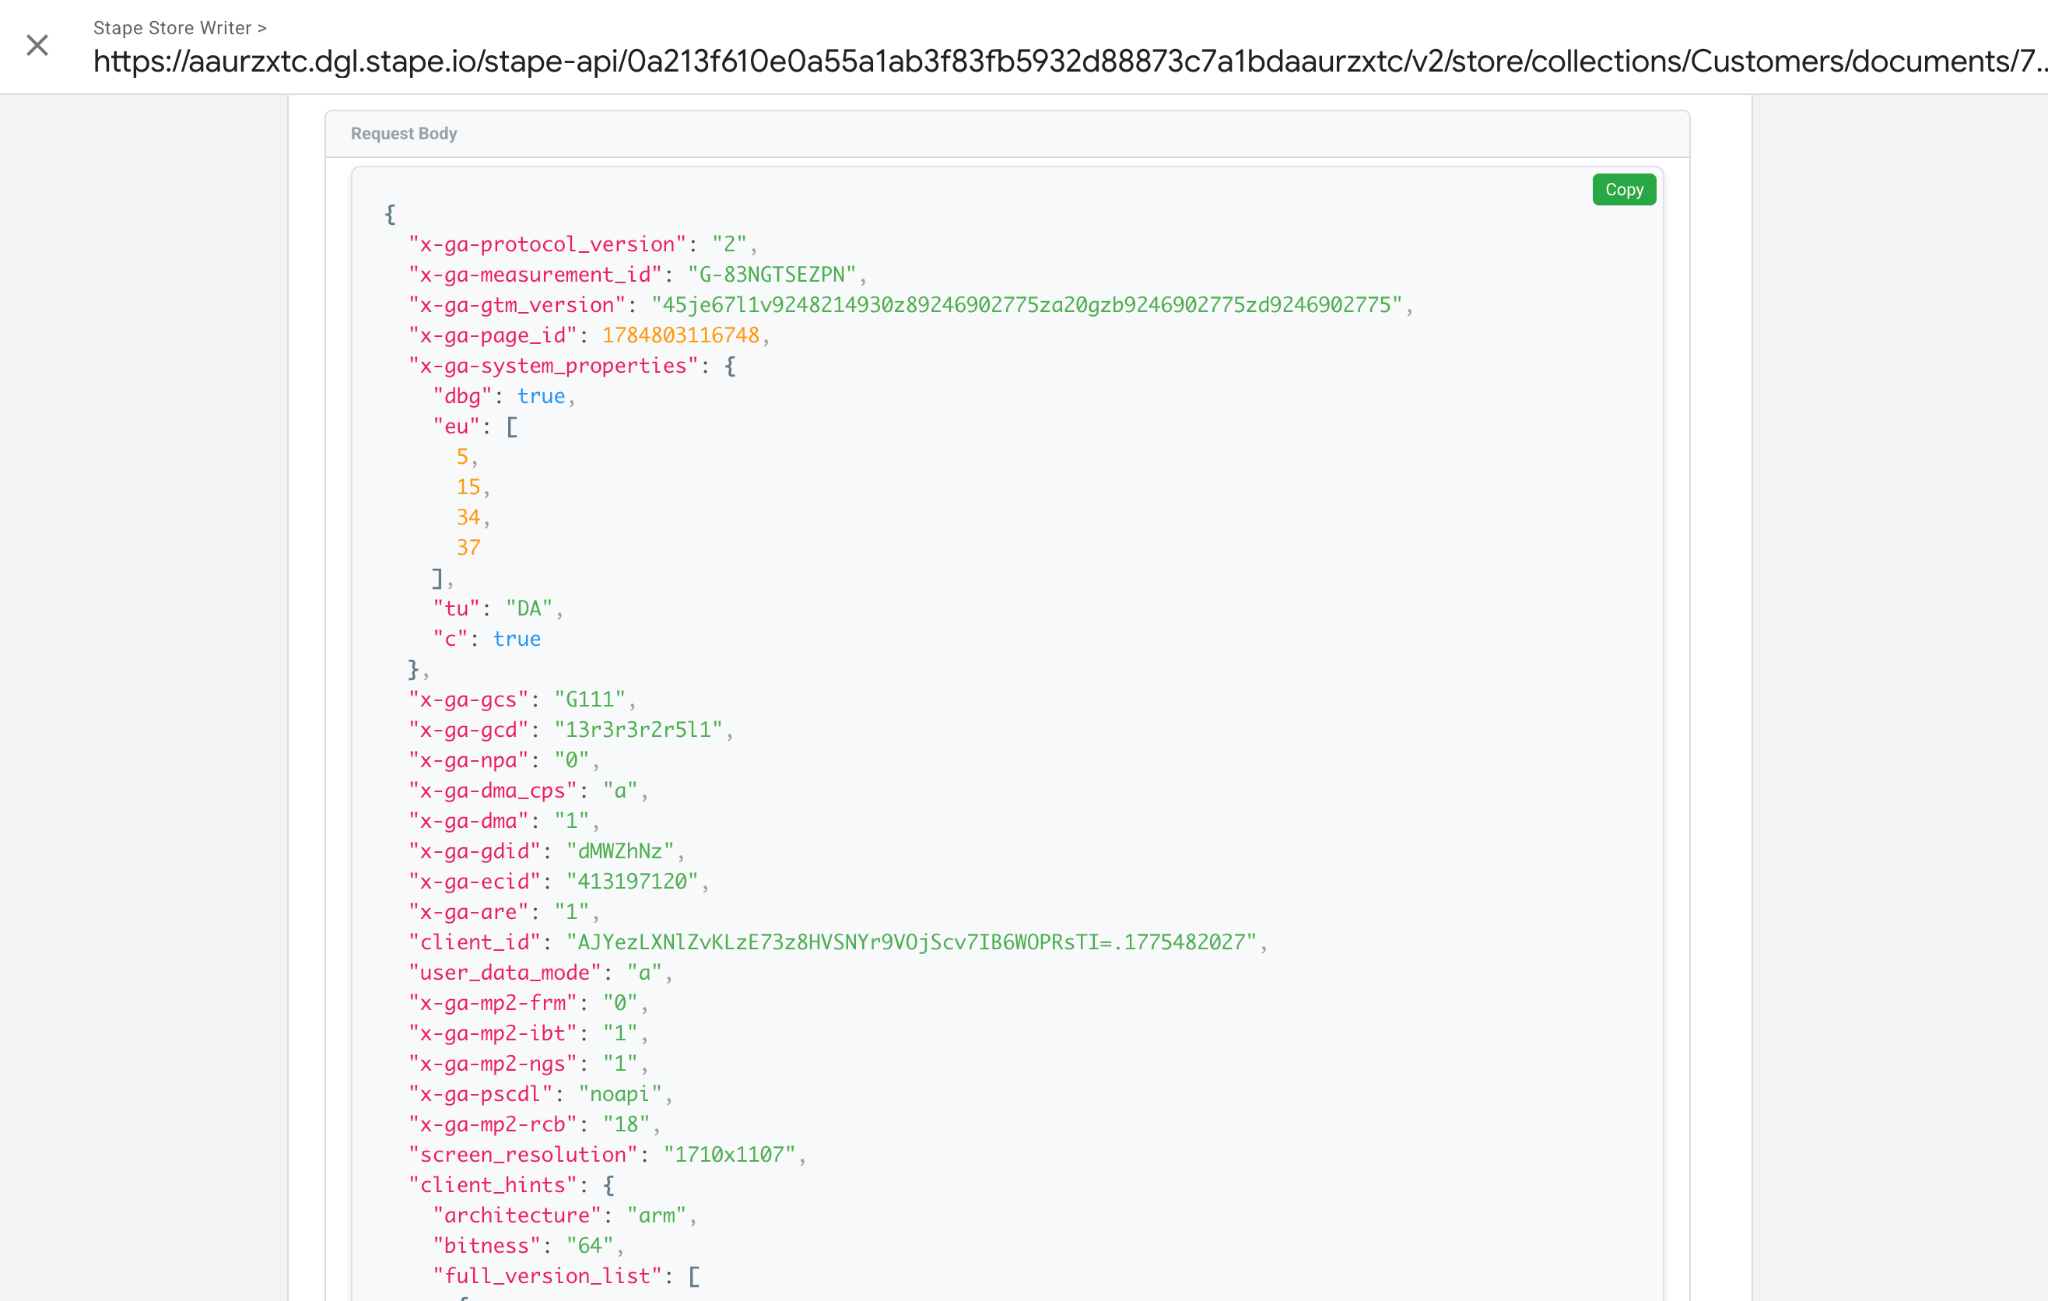
JSON formatting
Automatically formats and syntax-highlights JSON in debug table cells (incoming/outgoing requests, webhook payloads, etc.). Applicable for both server and web containers.
Before
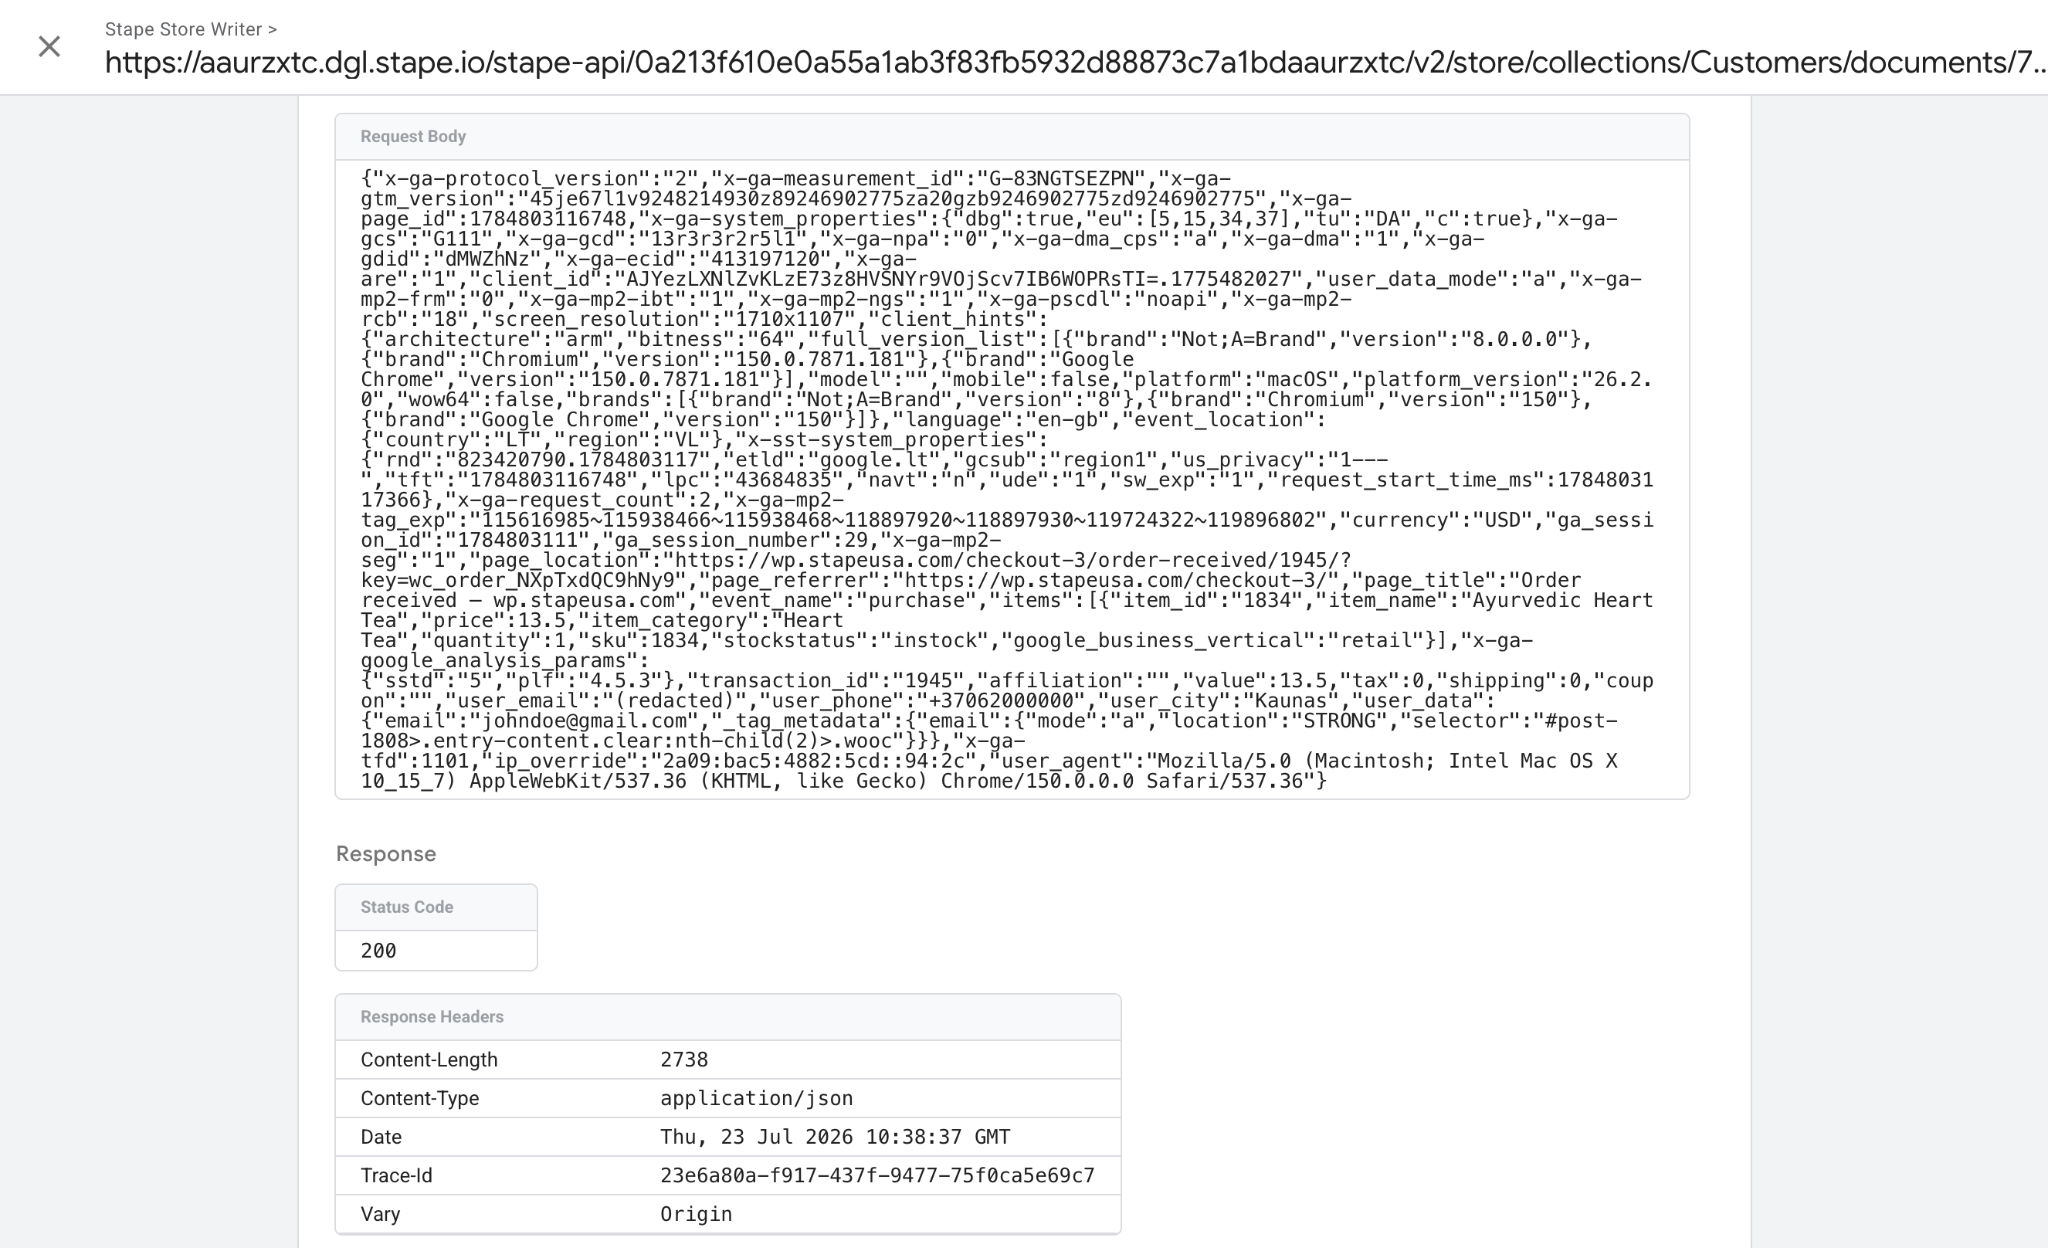
After
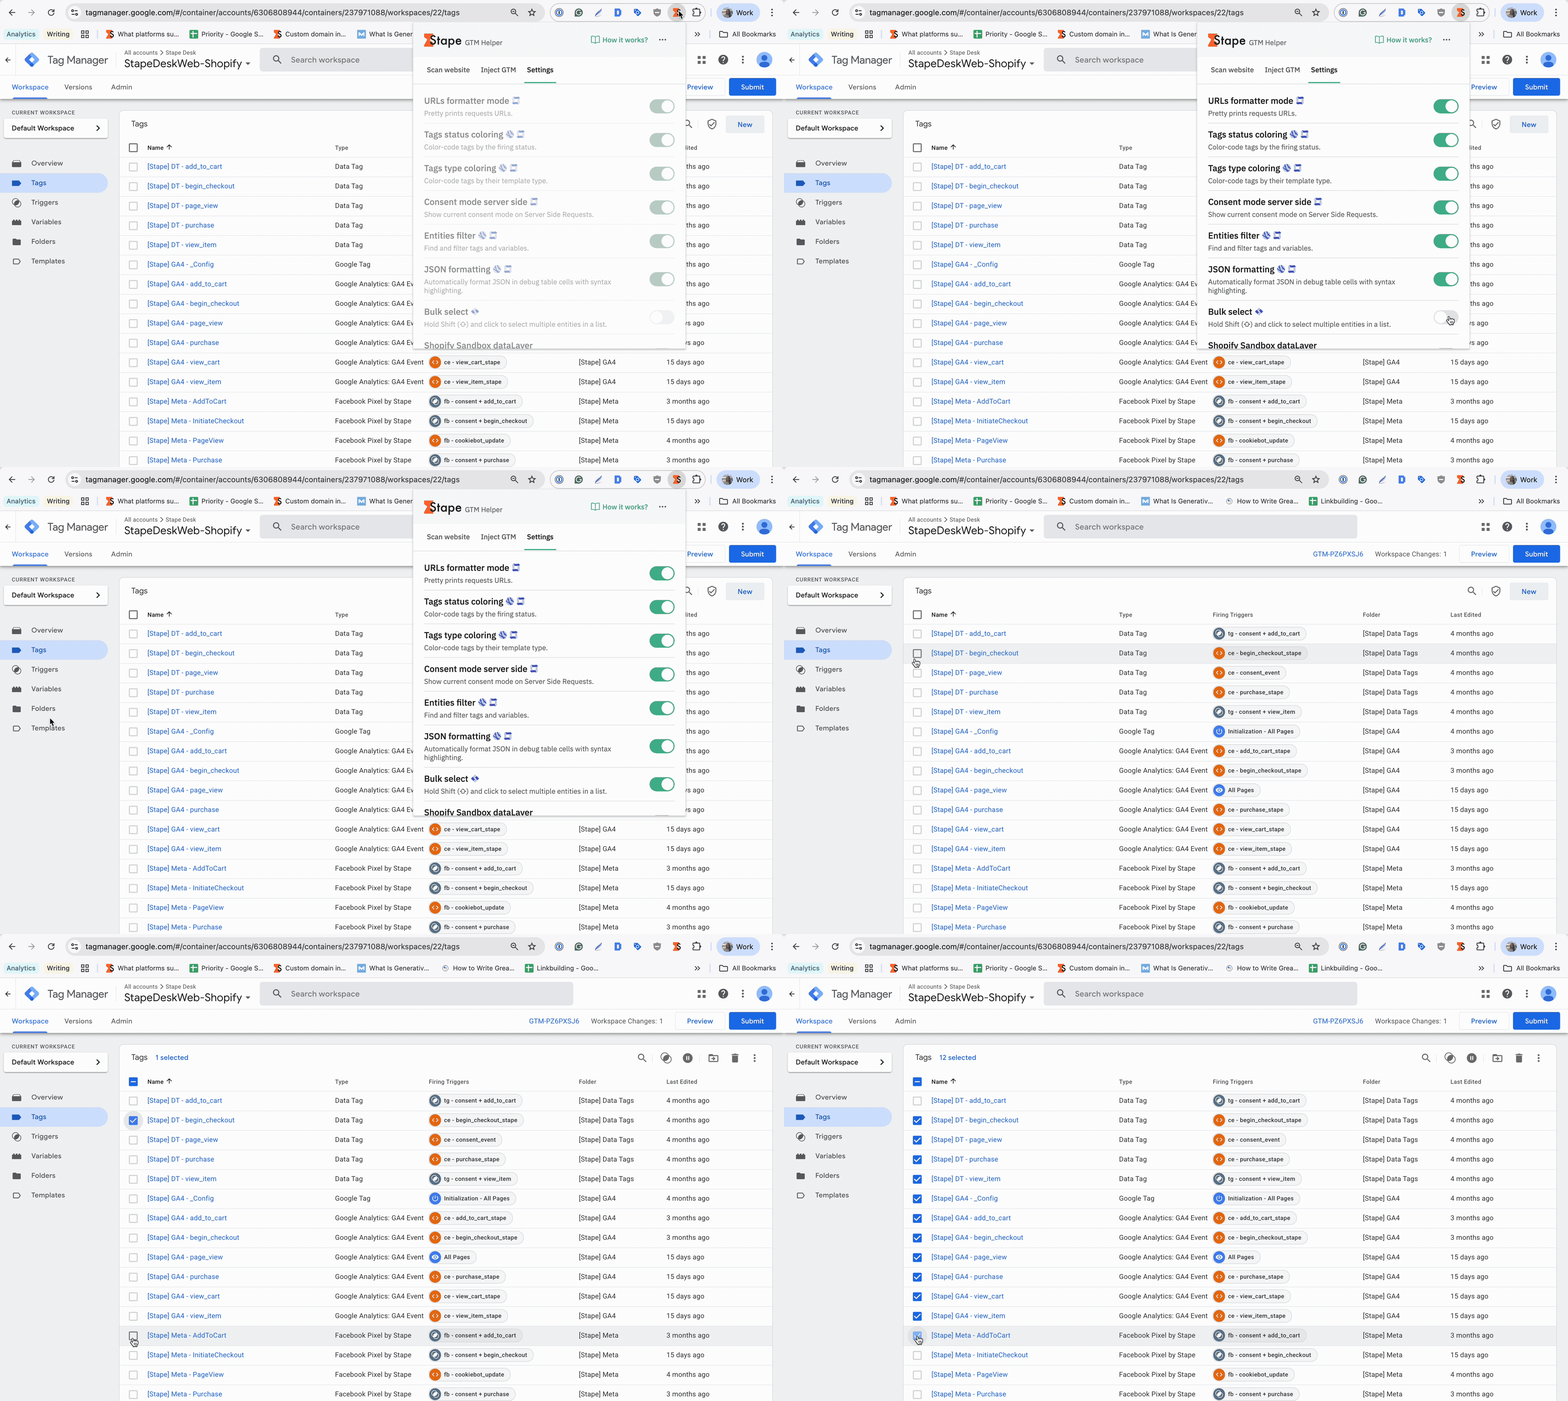
Bulk select
In the GTM container workspace, hold Shift and click to select multiple assets in a list at once, instead of checking each box individually. Applicable for both server and web containers.
Shopify Sandbox dataLayer
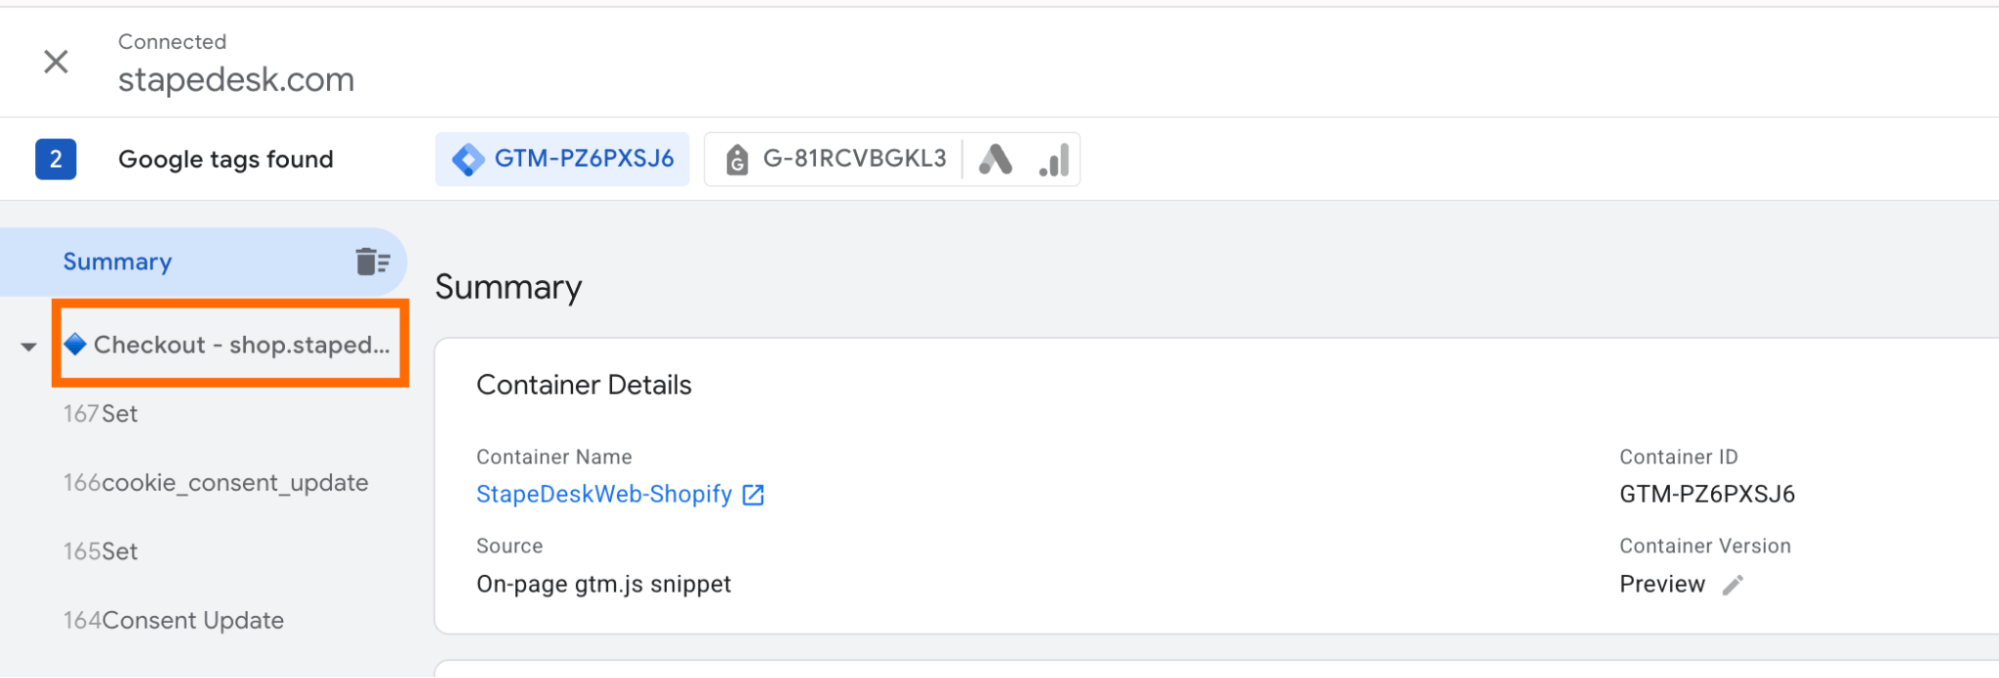
When debugging a Shopify setup, the GTM dataLayer isn’t visible on the checkout page because Shopify restricts access to the checkout environment. The checkout is isolated and doesn’t allow unrestricted DOM manipulation or script injection, as on other Shopify pages. Enable this setting to manually insert the GTM snippet on the checkout page for it to appear in the Preview mode. Only applicable for server containers.
- 1.Enable the Shopify Sandbox dataLayer setting.
- 2.Follow the instructions to set up the GTM script injection.
- 3.The Shopify checkout page now appears in the Preview mode.
Takeaway
The free Stape GTM Helper includes an Entities filter, a Request URL format, and a JSON format. The Entities filter allows you to filter certain tags for easier debugging. The URL format enhances the readability of queried parameters in URL requests, while the JSON formatter makes incoming and outgoing JSON requests easier to read. Combined with color-coded tag statuses and types, these features simplify debugging and improve the overall experience when working with sGTM.
Get the free Stape extension from the Chrome Web Store today to make your workflow more straightforward and more efficient. You don't even have to create a Stape account to use the Stape GTM Helper. We'd love to hear your ideas and challenges that the Stape extension can help solve. Feel free to share your suggestions on our Feature Request page.
Want to start on the server side?
Try for freeRecommended for you
Sep 17, 2026
Case studies
15% to 30% more complete data in Meta Events Manager | Hide and Seek
Check how server-side tracking and Meta Conversions API helped Hide and Seek’s clients achieve precise data collection.
Aug 26, 2025

Comments