POAS Data Feed power-up
Updated Apr 13, 2026
The POAS Data Feed power-up lets you send actual profit to ad platforms and analytics tools through sGTM. Profit values are stored securely in Stape's storage and matched against your product catalogue when events arrive, so sensitive margin data never goes to the frontend.
POAS Data Feed is available on the Pro subscription plan and higher. To check your current plan or upgrade, go to your sGTM container settings.
How to set up POAS Data Feed
Step 1 | Activate the power-up
1. Log in to your Stape account and select your sGTM container from the dashboard.
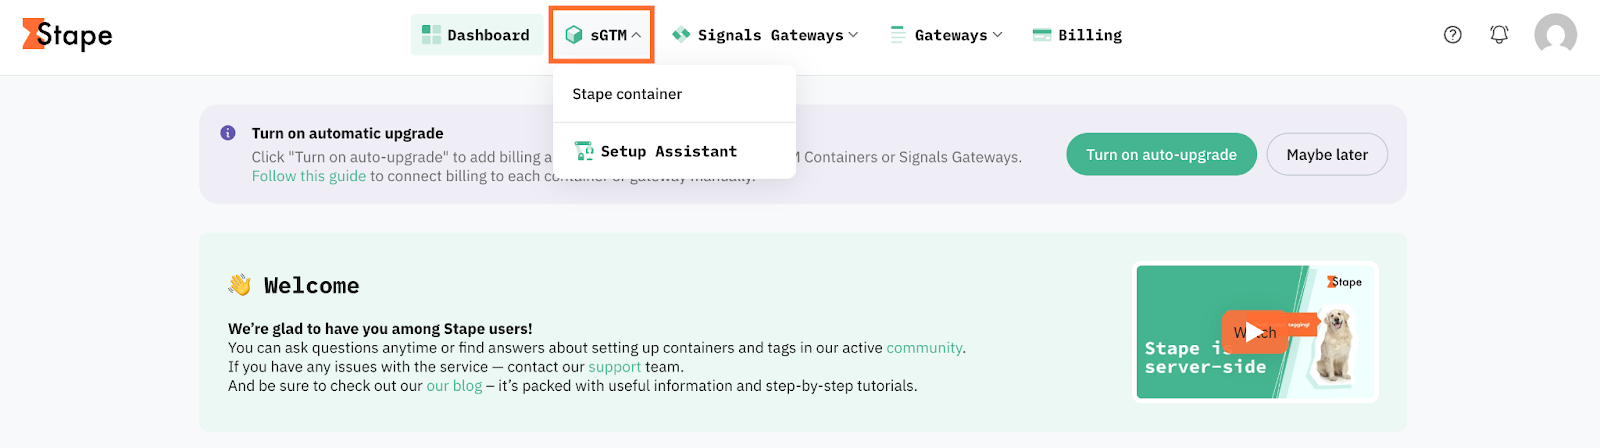
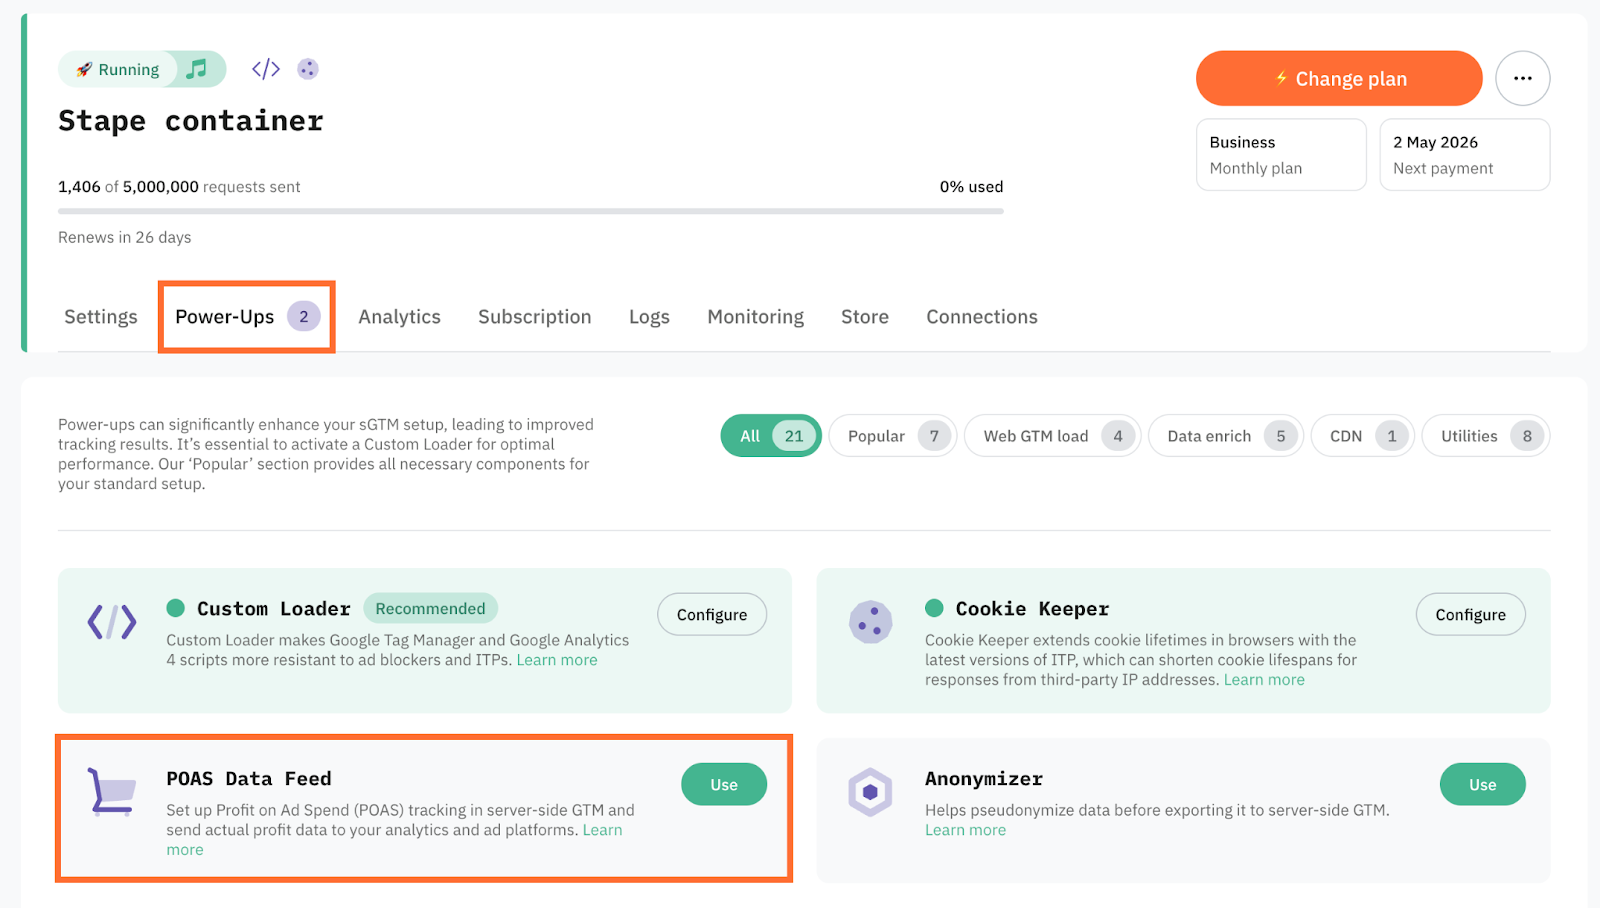
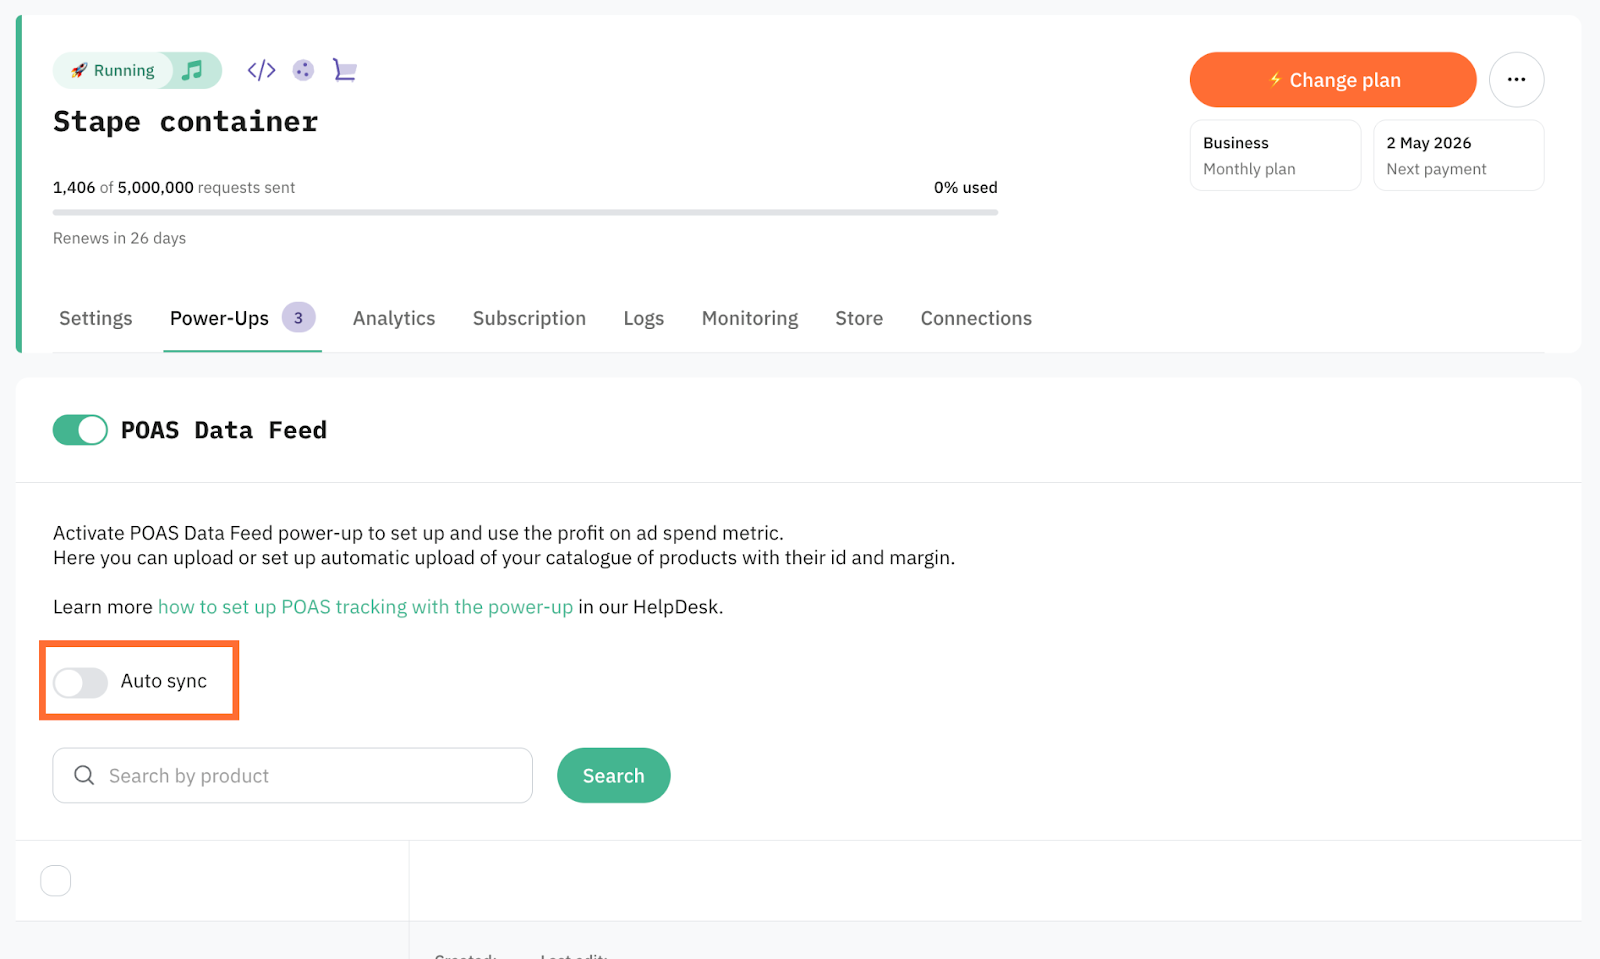
2. Go to Power-ups and click Use next to the POAS Data Feed panel.
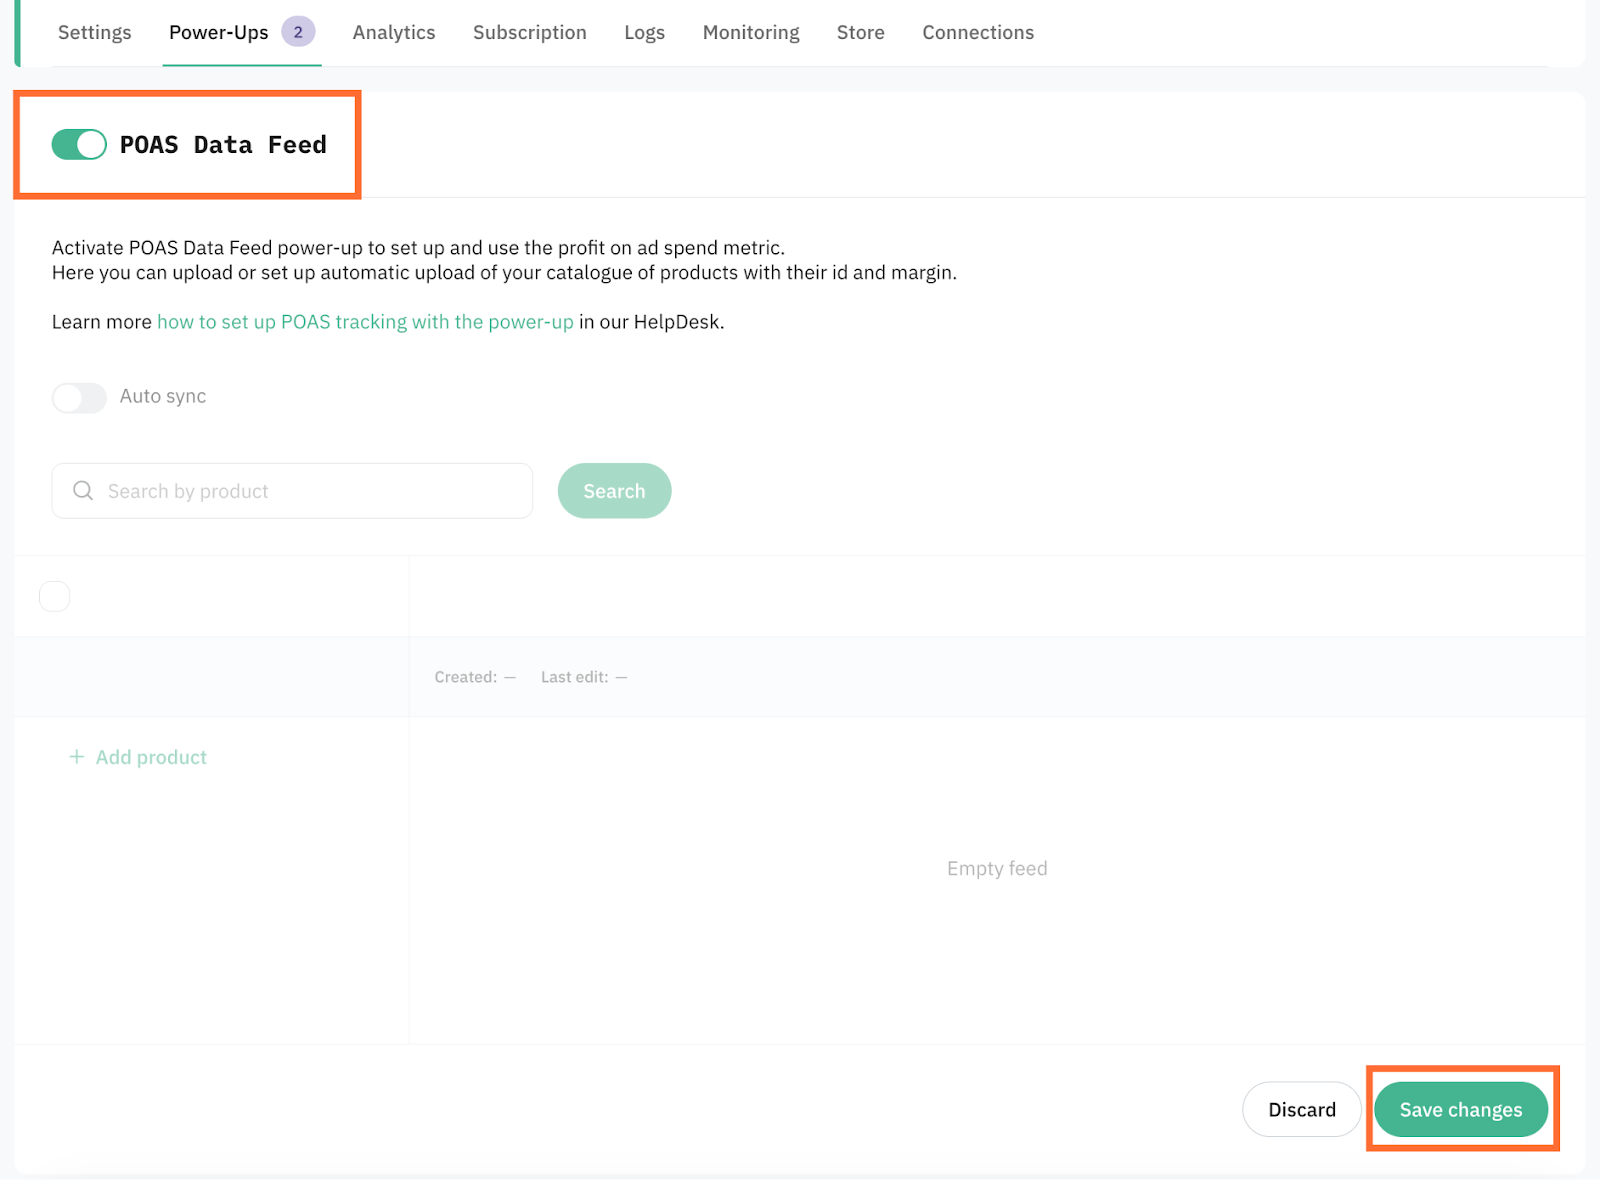
3. Toggle the POAS Data Feed switch to enable it and click Save changes.
Step 2 | Add cost data to your products
In this guide, we use Shopify and WordPress/WooCommerce examples. The same setup logic can also be used with other CMS platforms if you can export a feed with product IDs and margin values.
Wordpress setup
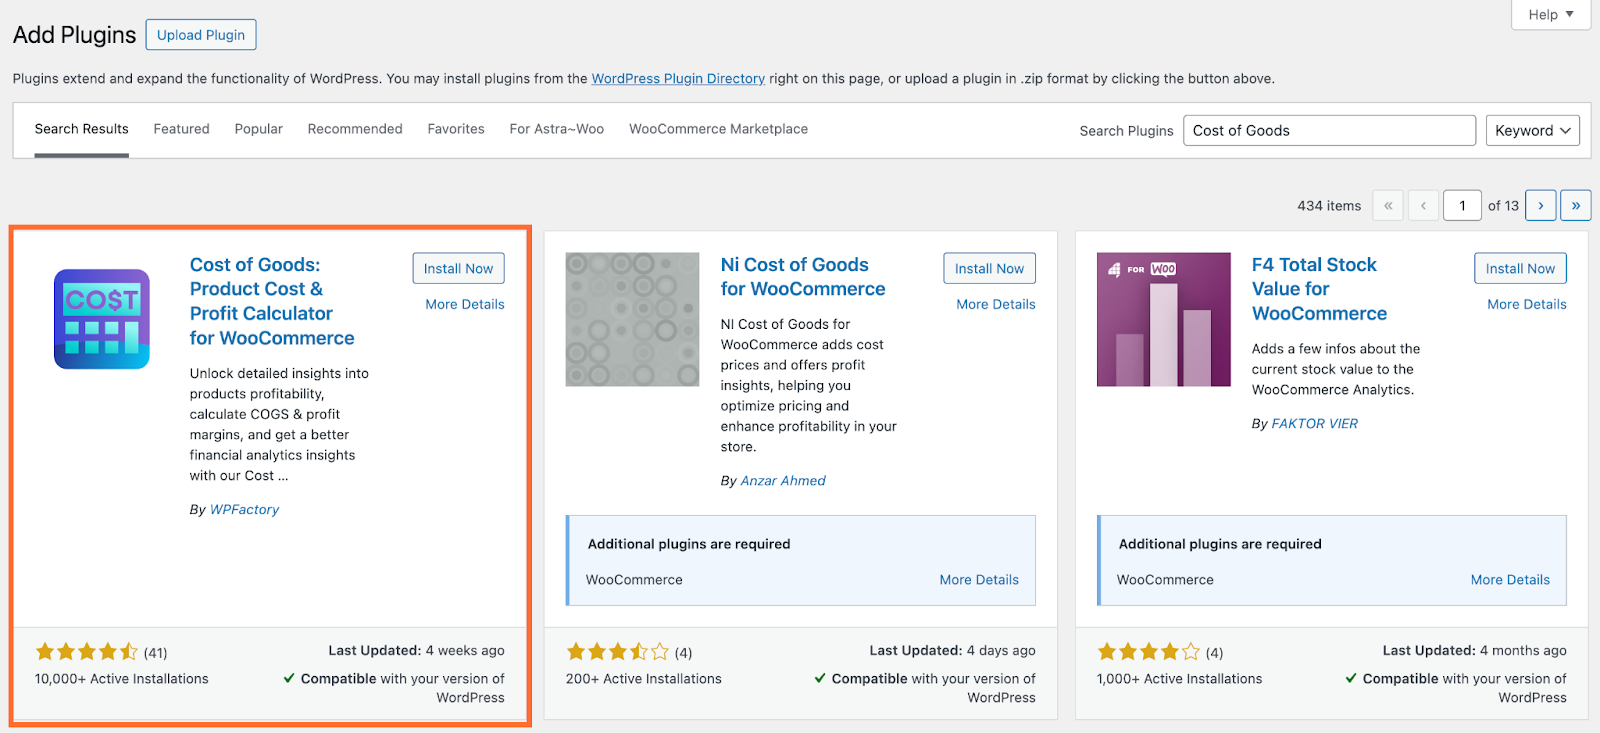
Your catalogue needs a product ID (matching the ID you send in the data layer) and a margin column. Wordpress doesn't have a native cost field, so you'll need the Cost of Goods plugin to store margin values per product.
1. In Wordpress, go to Plugins and click Add Plugin. Search for Cost of Goods, install and activate it.
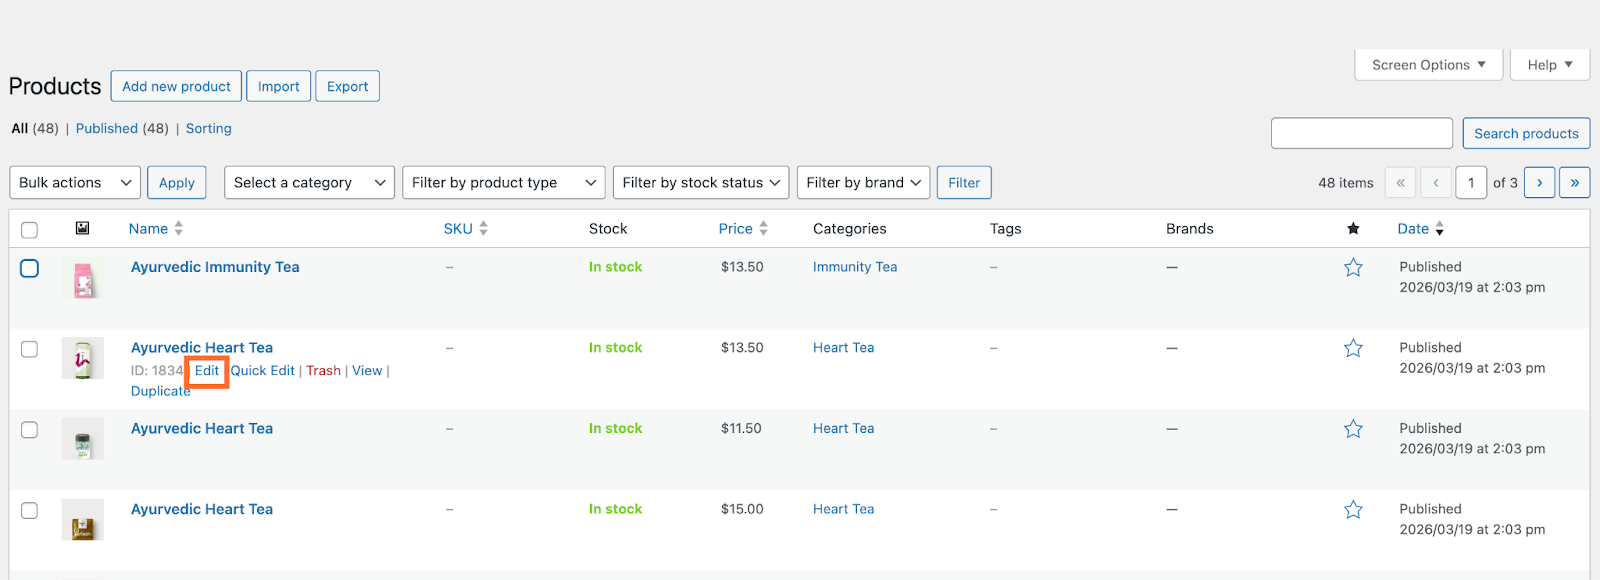
2. Go to Products and hover over your product. Click Edit.
3. Scroll to the Product Data section. In the Cost (excl. tax) field enter the POAS of the product. Click Update in the Publish section.
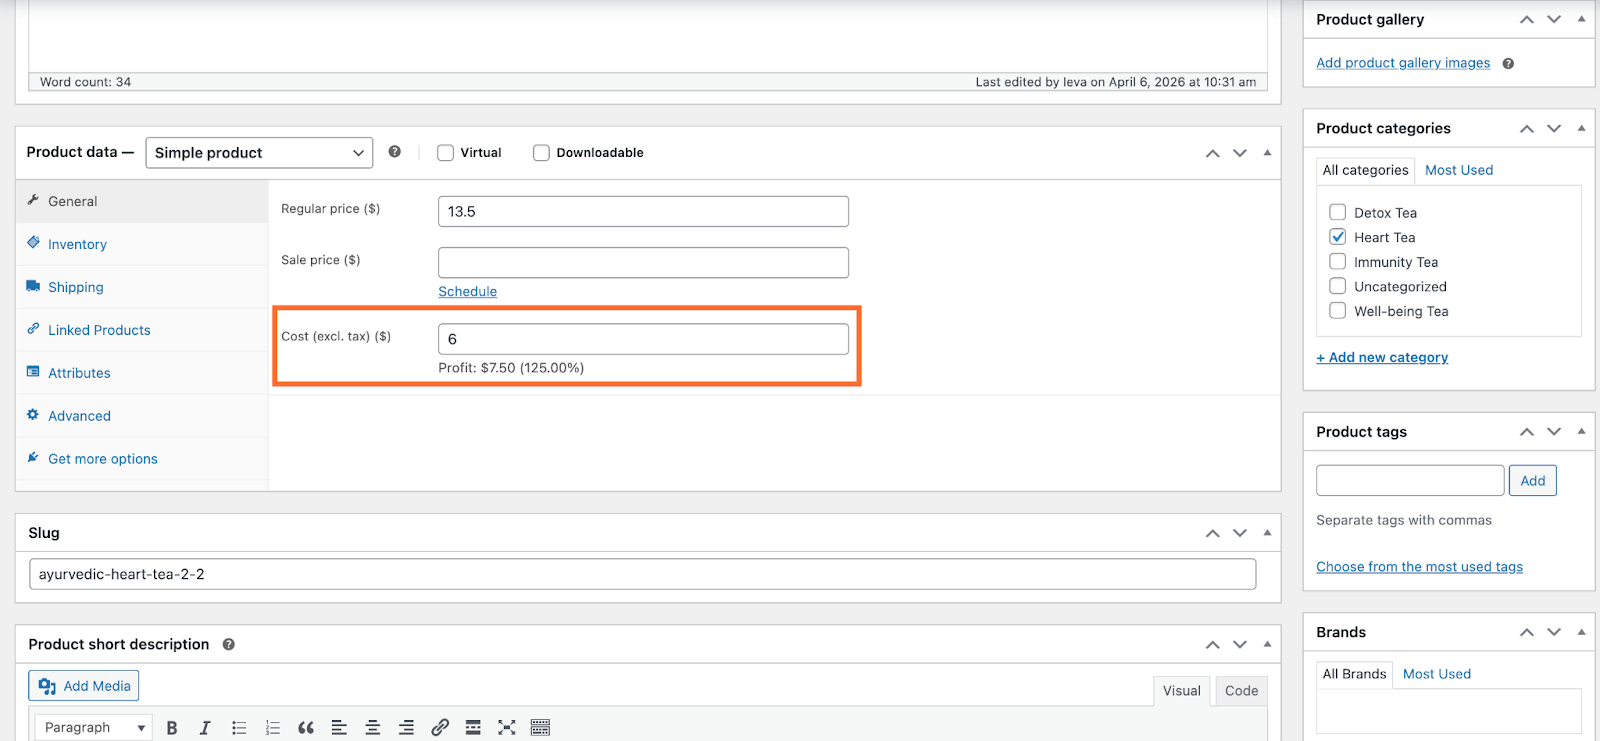
Tip: For a detailed explanation on how to calculate POAS, you can read this article.
Shopify setup
Your catalogue needs a product ID (matching the ID you send in the data layer) and a margin column.
1. In Shopify, go to Products → select all required products → click Bulk edit.
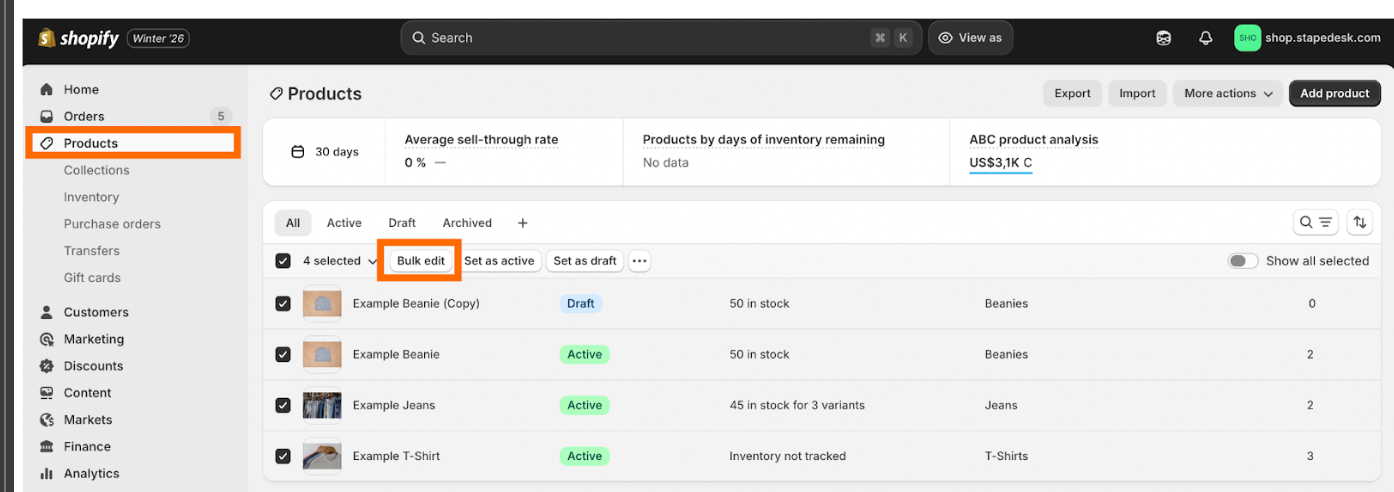
2. Add the Cost per item column and enter the POAS value for each product.

Tips:
- You can create a custom attribute instead of Cost per item as long as it can be exported in the product feed.
- For a detailed explanation on how to calculate POAS, you can read this article.
Step 3 | Create a product feed
Wordpress setup
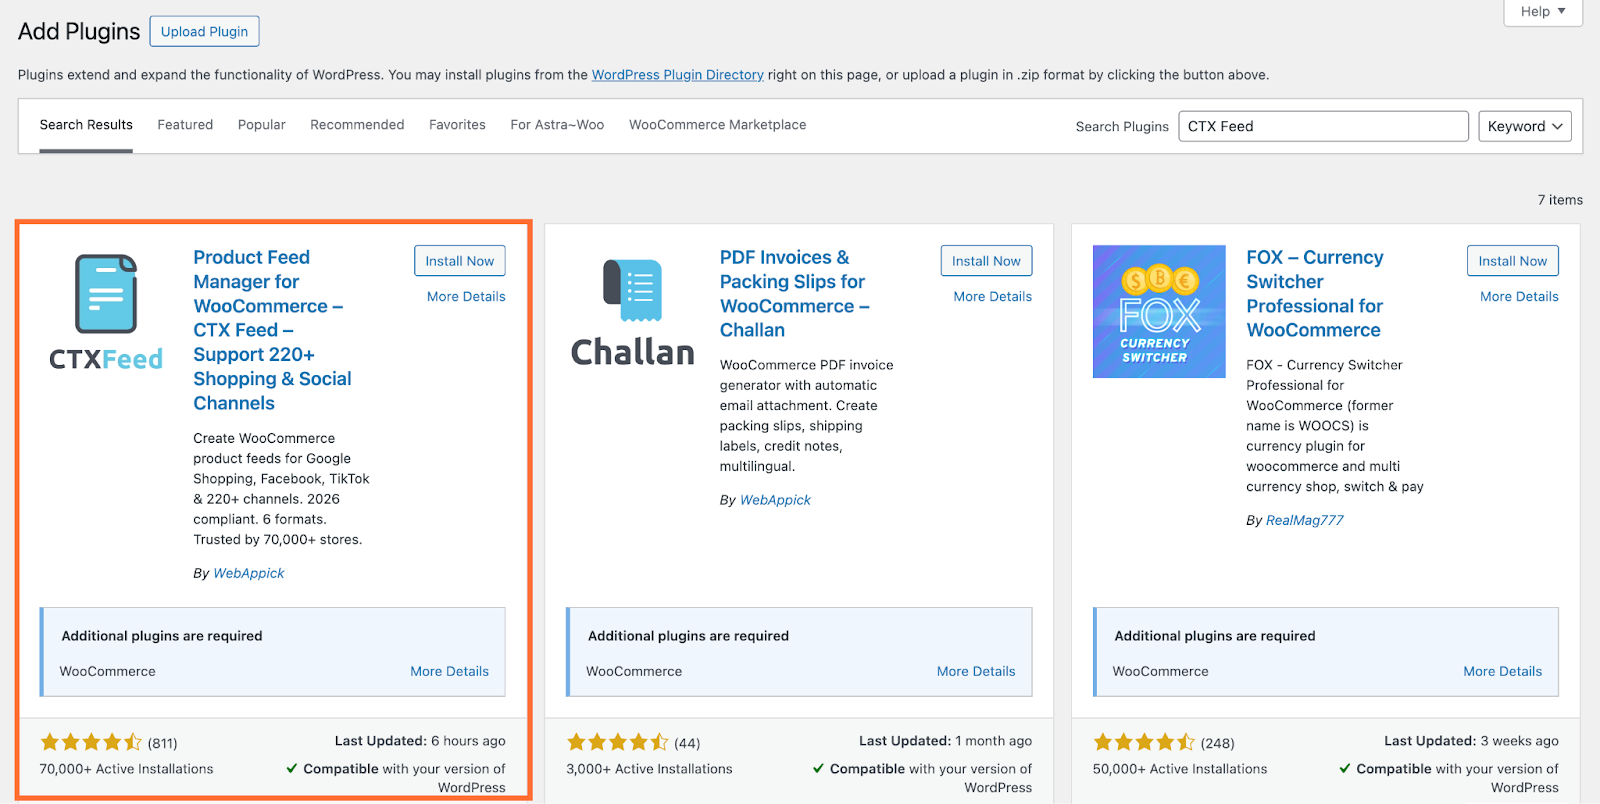
1. Go to Plugins and click Add Plugin. Search for CTX Feed, install and activate it.
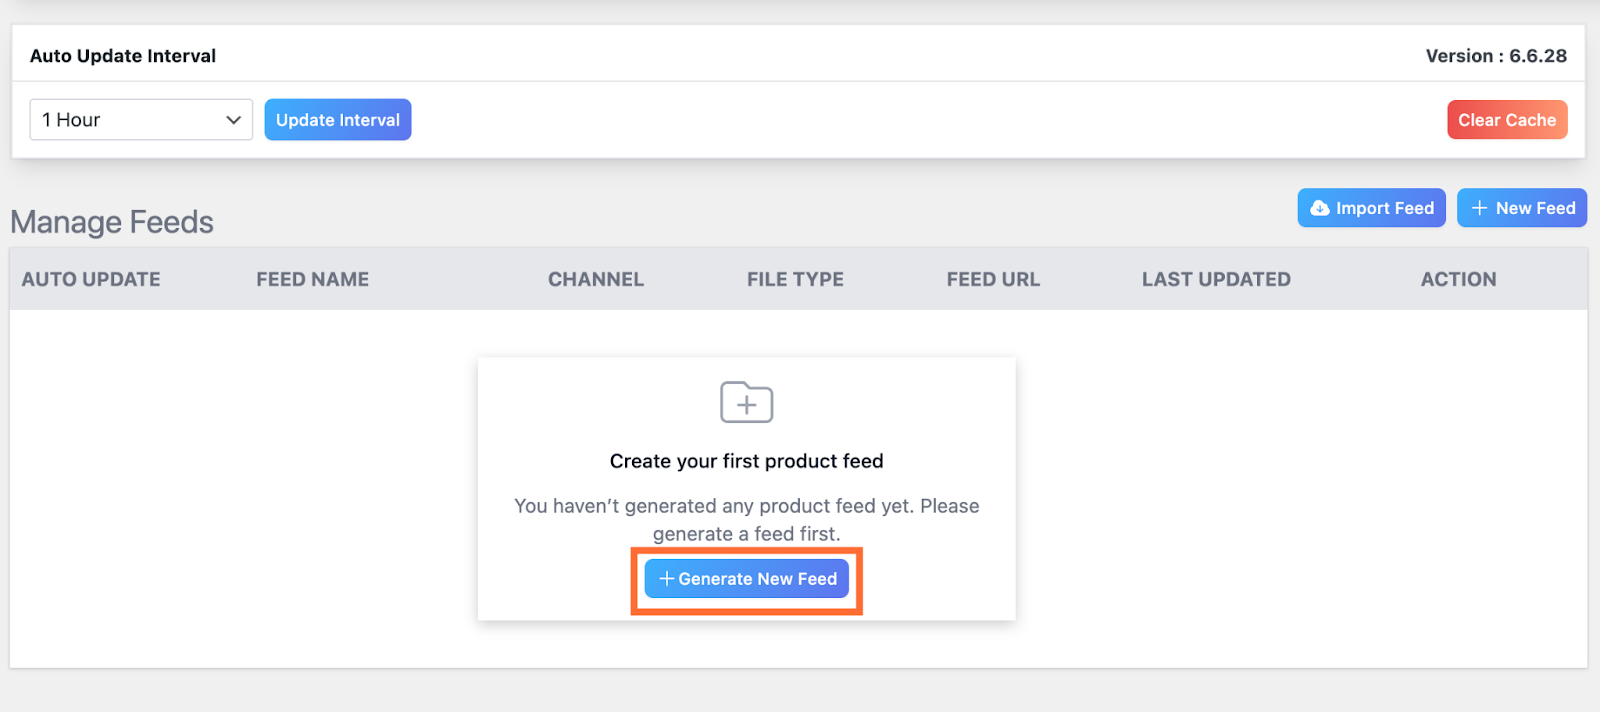
2. Go to CTX Feed and click Generate New Feed.
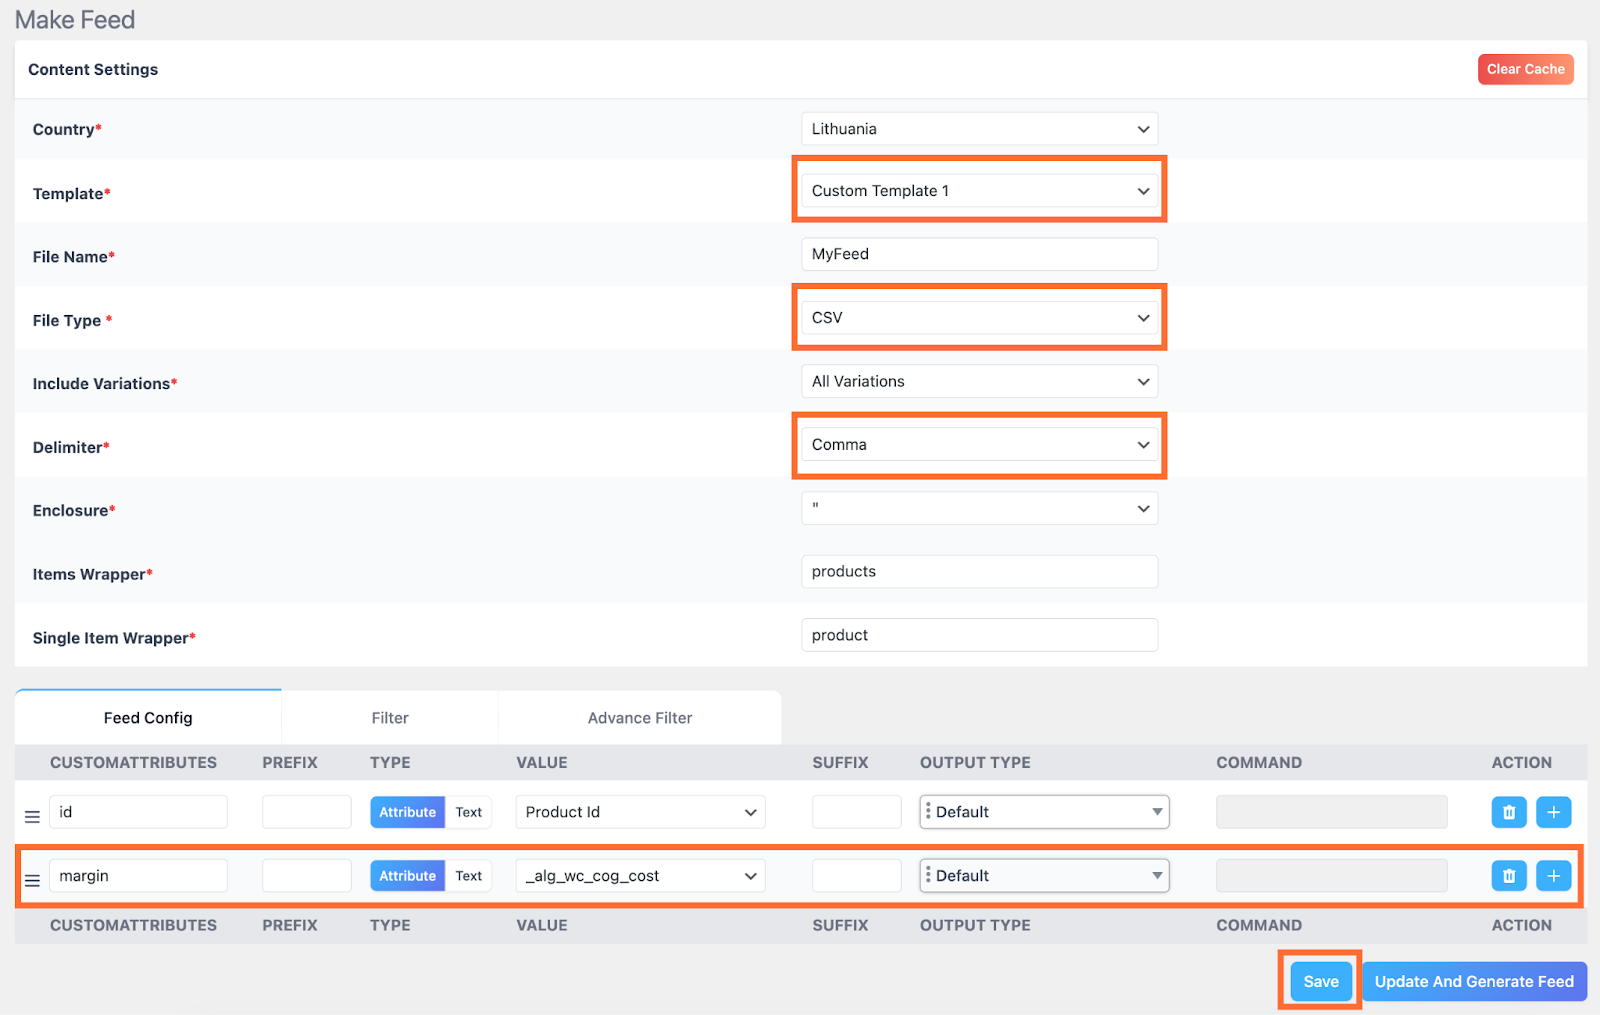
3. Select your country and file name. In Template select Custom Template, and set the File Type to CSV. The Delimiter must be set to Comma.
4.Remove all default fields except the id.
5. Add a custom field named margin and map it to the _alg_wc_cog_cost attribute.
6. Click Save.
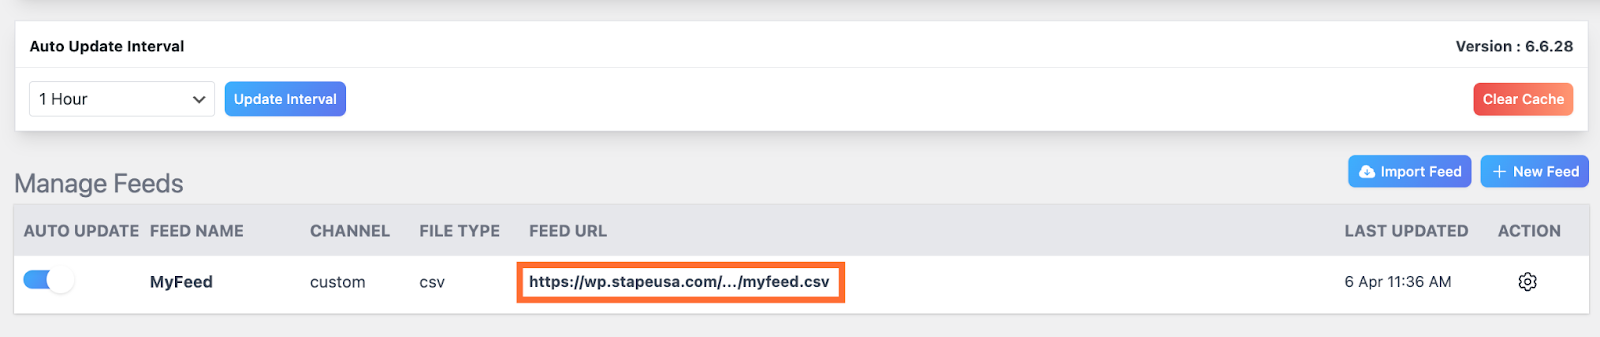
7. In the menu under CTX Feed, click Manage Feeds. Copy and save somewhere the URL of your feed.
8. View the feed by pasting its URL into the browser. Check the following:
- The file includes one column with the product ID.
- The file includes one column with the margin value.
- The product ID in the feed matches the product ID used in your event data.
- The margin value is a fixed amount or a percentage and it’s consistent.
If you get the 404 error, toggle the Auto Update switch to disable/enable the feed. With this error the power-up won’t be able to fetch the data.
Shopify setup
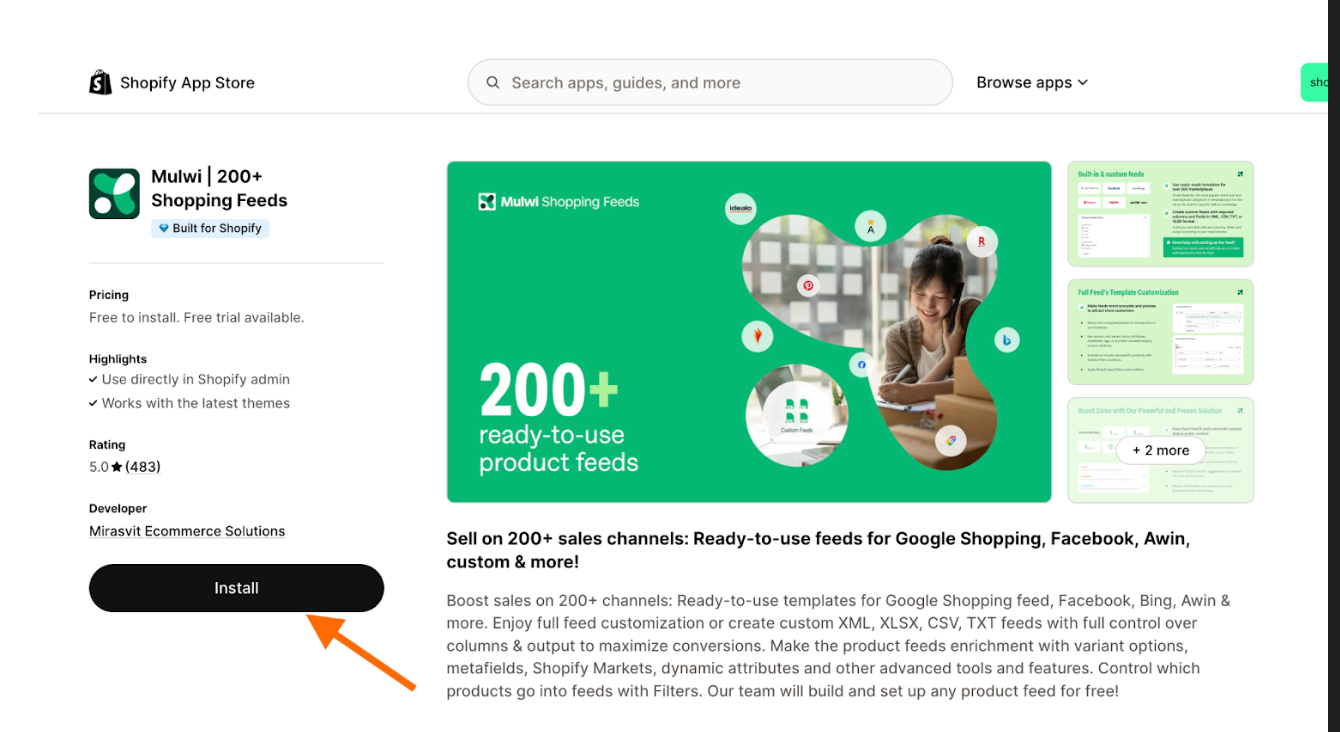
1. Install Mulwi Feeds.
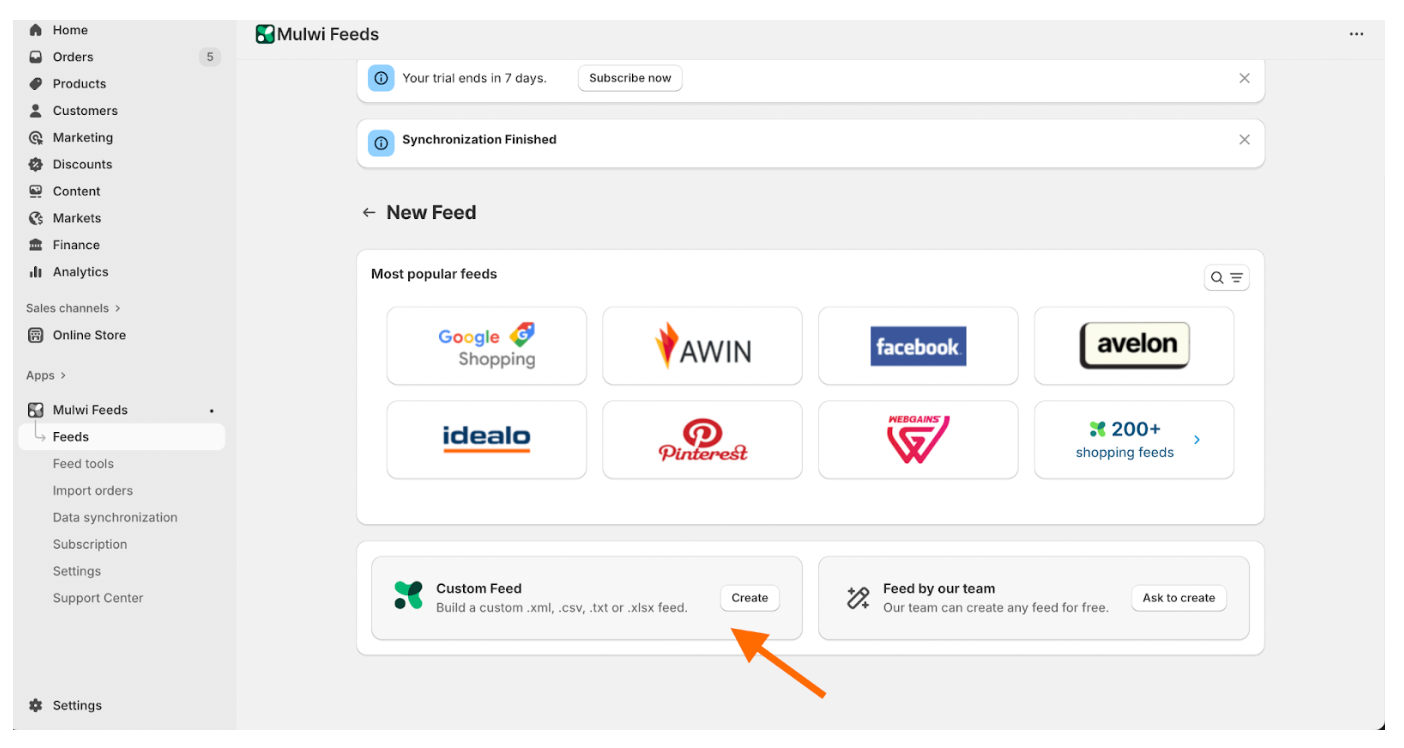
2. Go to Mulwi Feeds and click Create Feed.

3. Click Create in the Custom Feed section. Select CSV as the file format, add an internal name and filename, and click Save.
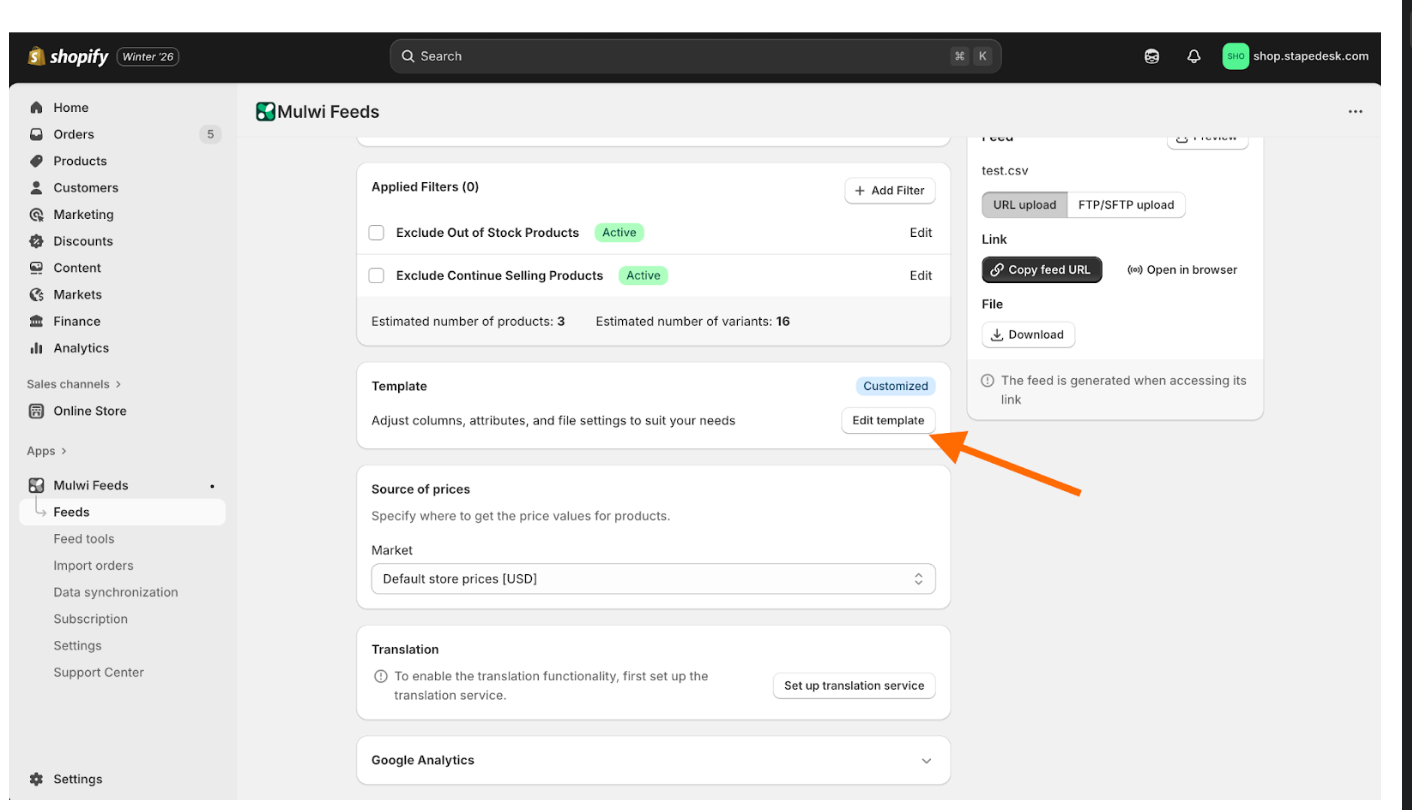
4. Go to the Template section and click Edit template.
5. In the feed template, set the Delimiter to comma, keep only the SKU field, and add a custom field named Margin mapped to Cost per item.
6. Click Save.

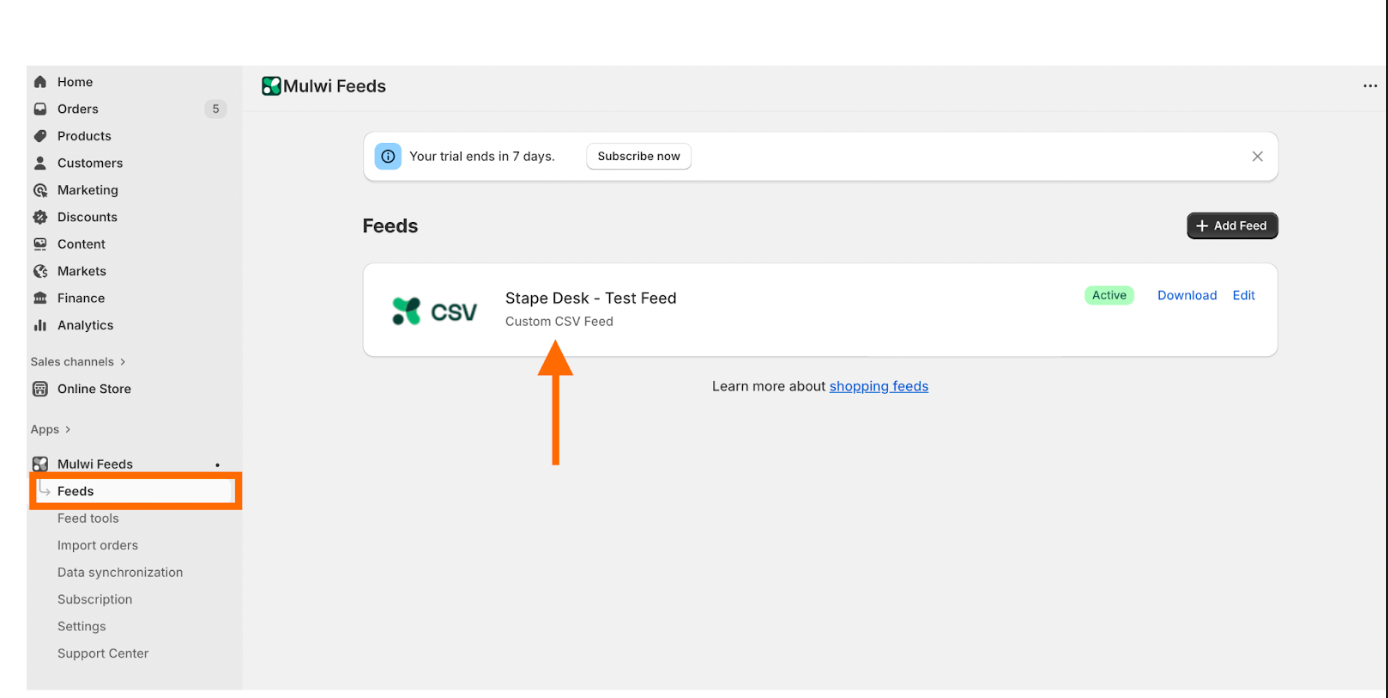
7. In the menu under Mulwi Feeds, click Feeds.
8. Click the feed you’ve just created.
9. Click Copy feed URL.
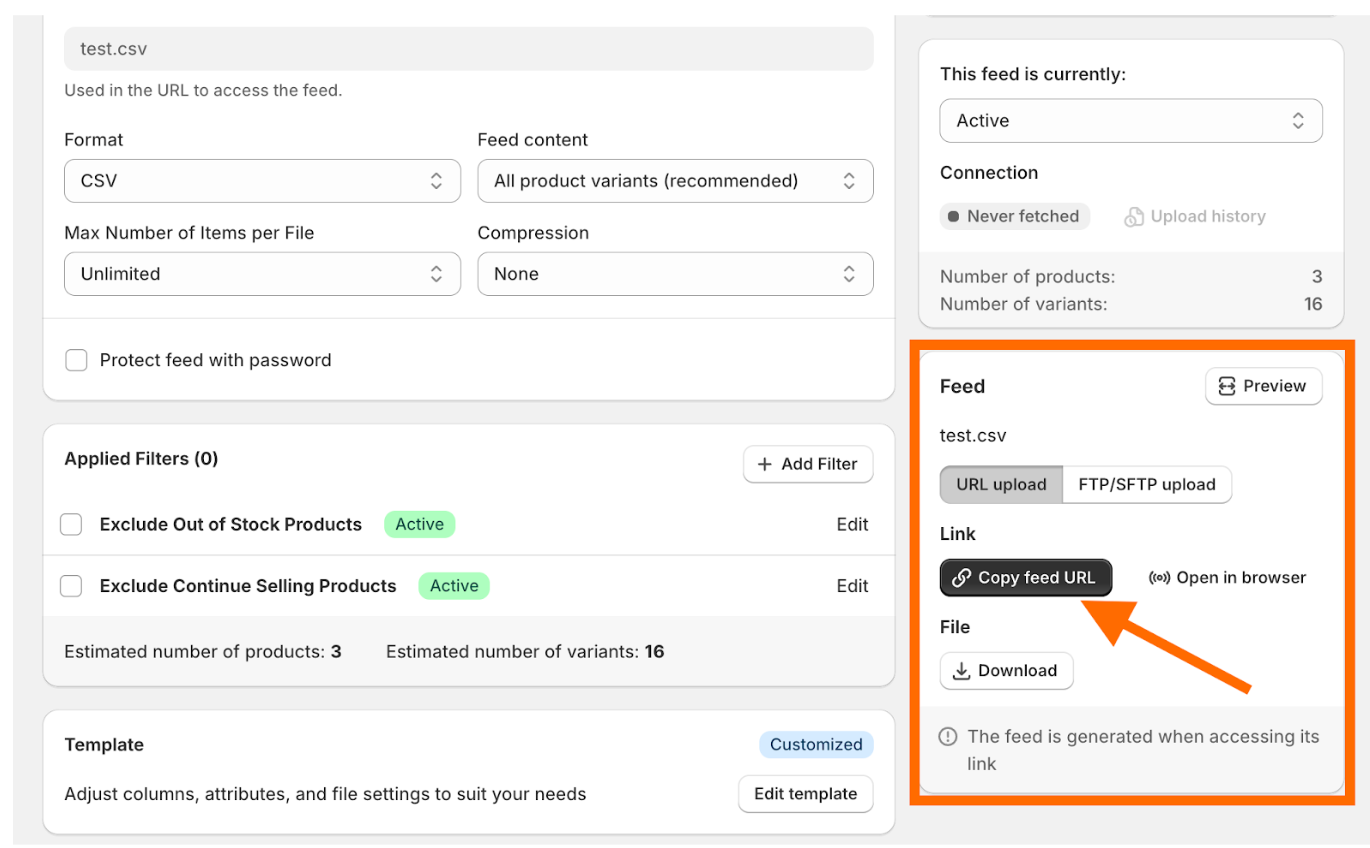
9. View the feed by pasting its URL into the browser. Check the following:
- The file includes one column with the product ID.
- The file includes one column with the margin value.
- The product ID in the feed matches the product ID used in your event data.
- The margin value is a fixed amount or a percentage and it’s consistent.
Step 4 | Upload your catalogue and configure Auto sync
1. In your Stape container, go to Power-ups → POAS Data Feed.
2. Enable Auto Sync.
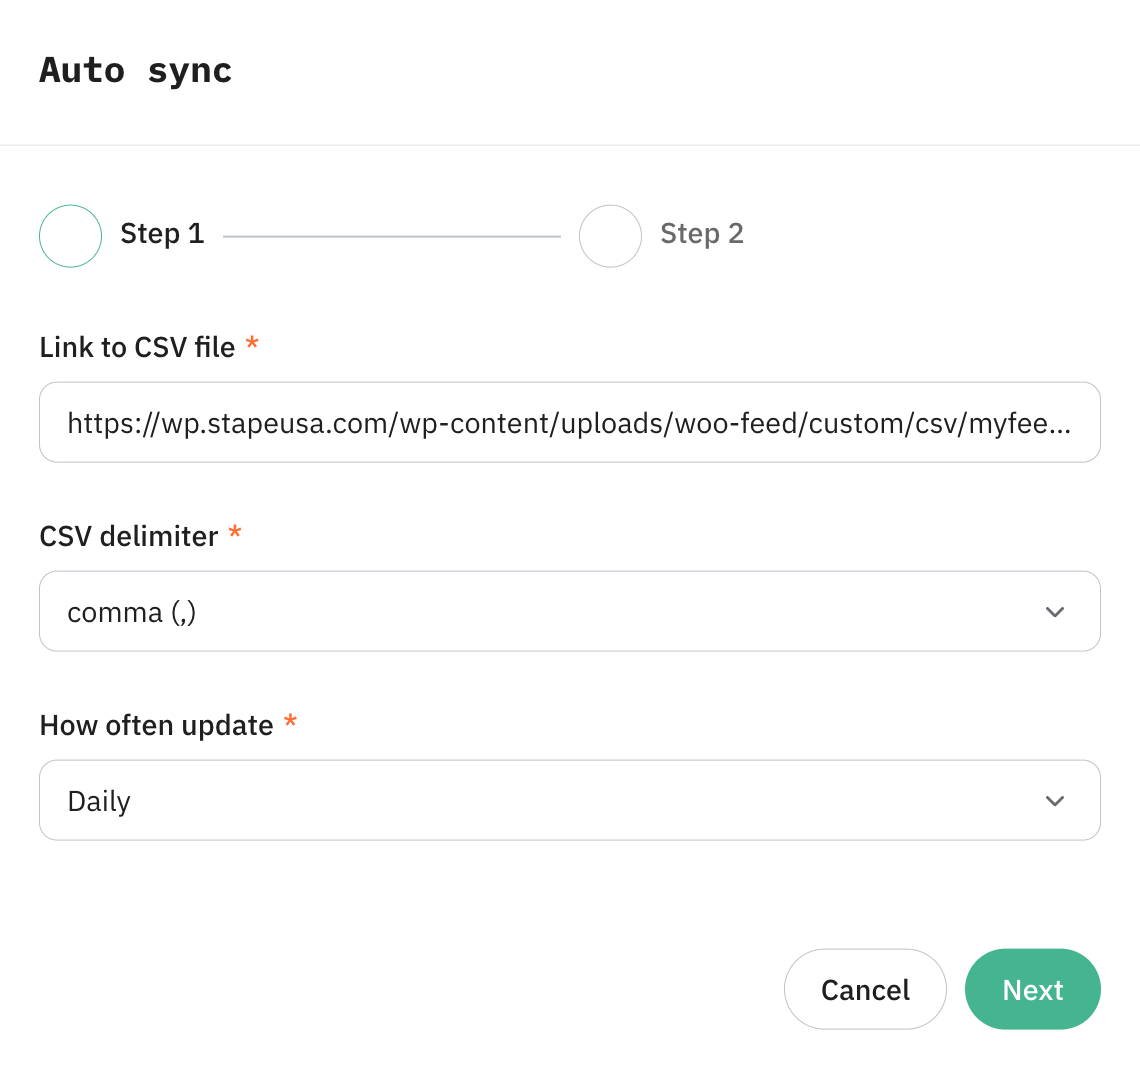
3. Paste the feed URL, set the CSV delimiter to comma, and choose a sync frequency. Click Next.
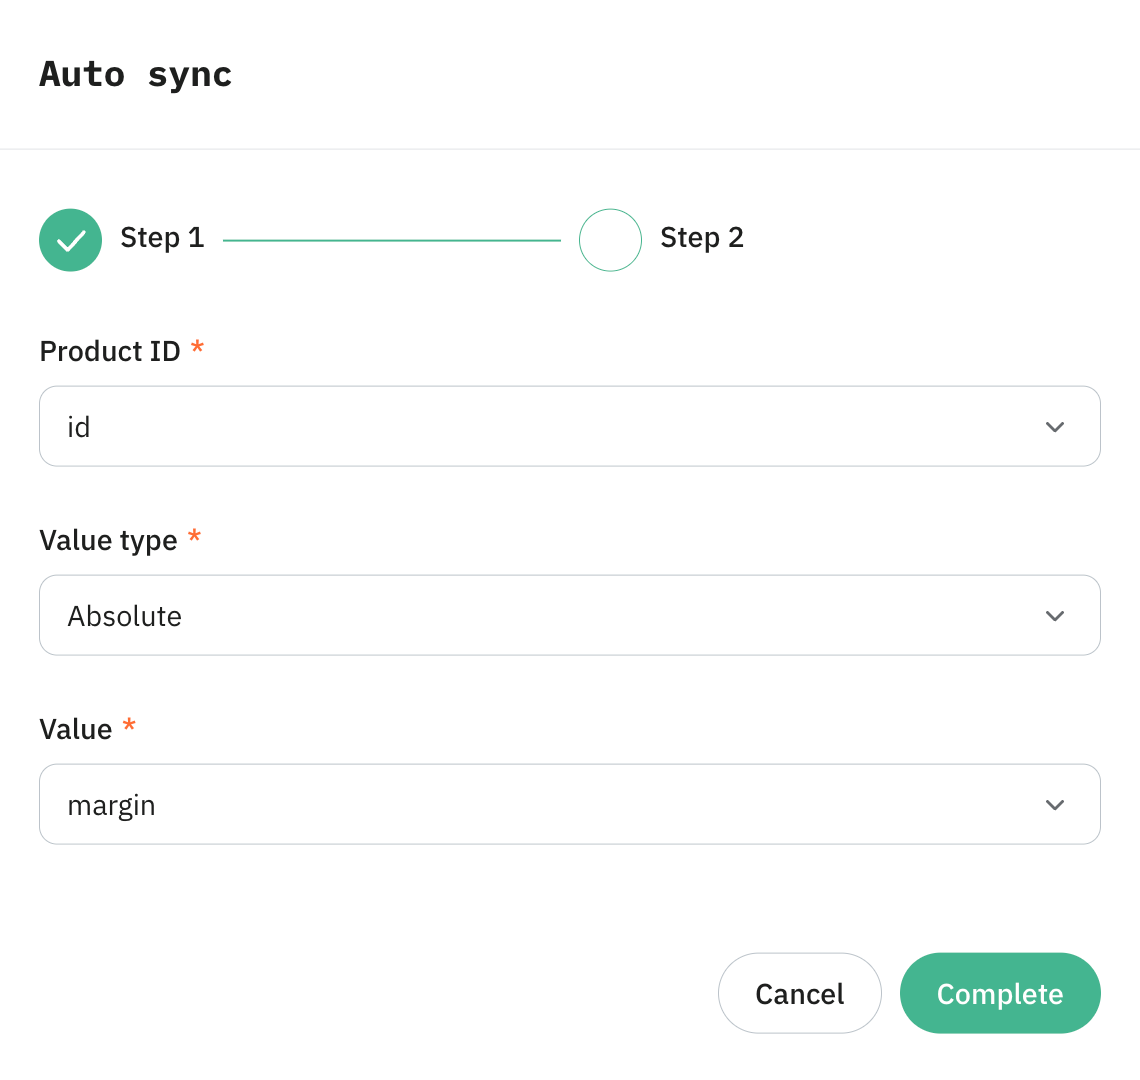
4. Map the columns.
4.1. Wordpress:
- Product ID → id column
- Value Type → Absolute
- Value → margin column
4.2. Shopify:
- Product ID → SKU column
- Value Type → Absolute, if the margin value comes from Cost per item
- Value → Margin column
Click Complete.
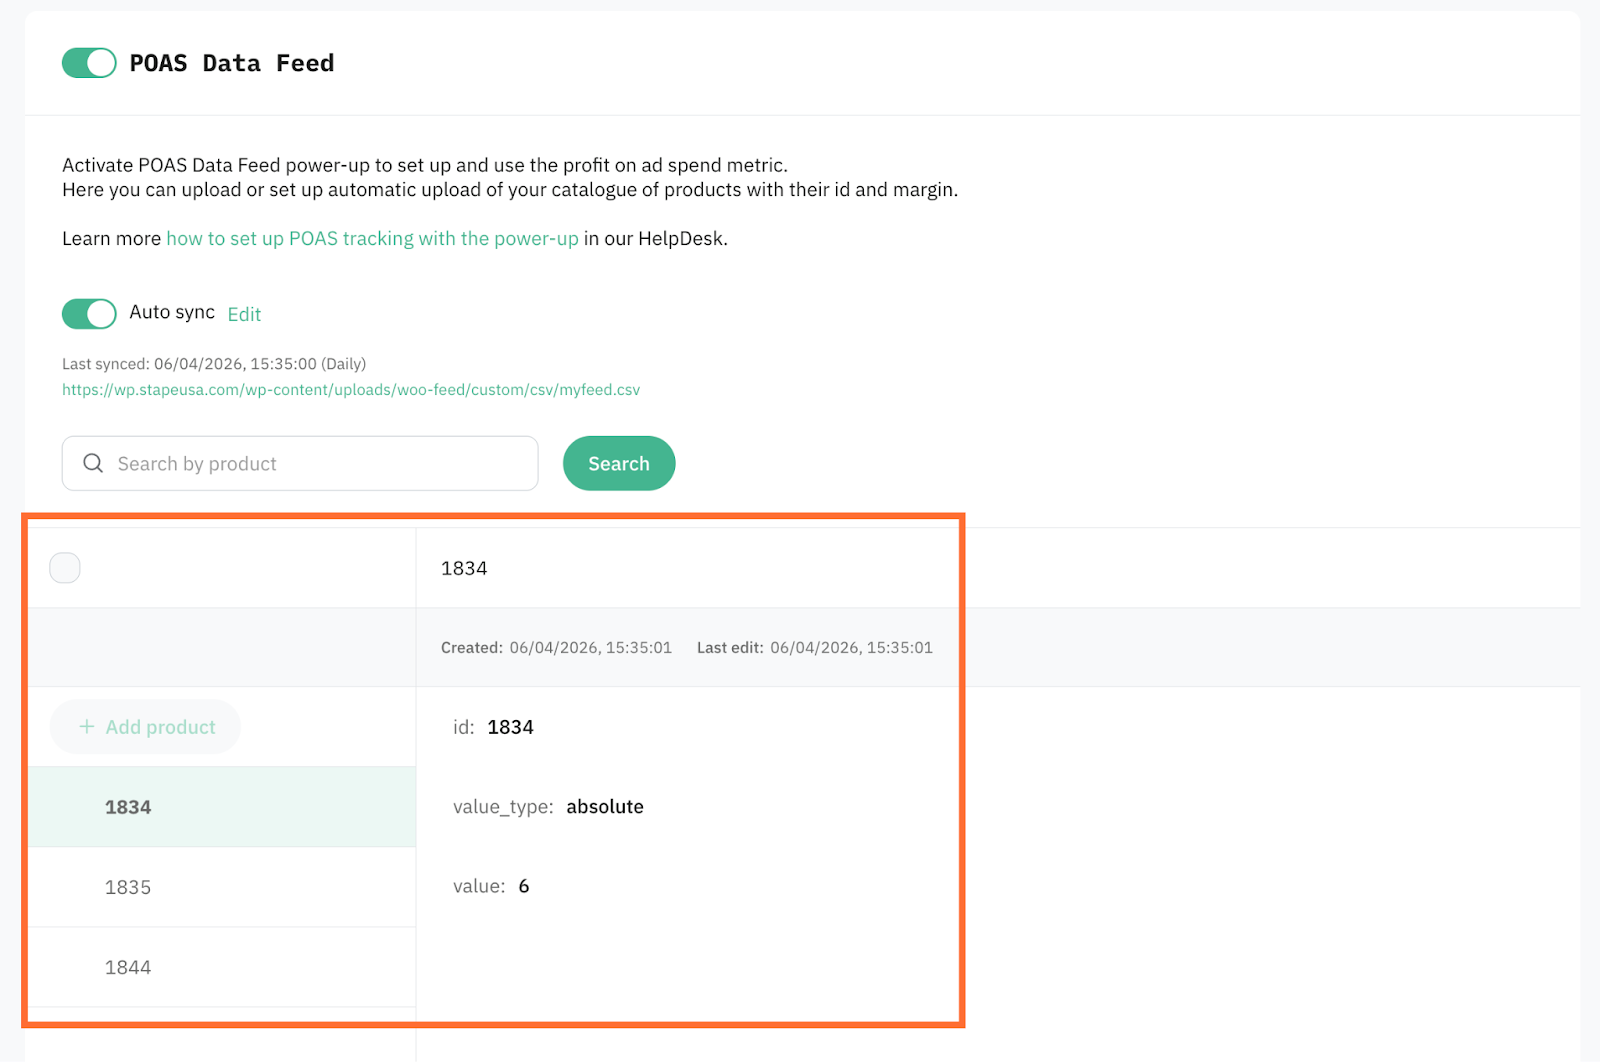
5. The catalogue downloads immediately and syncs automatically going forward.
Step 5 | Configure the variable in sGTM
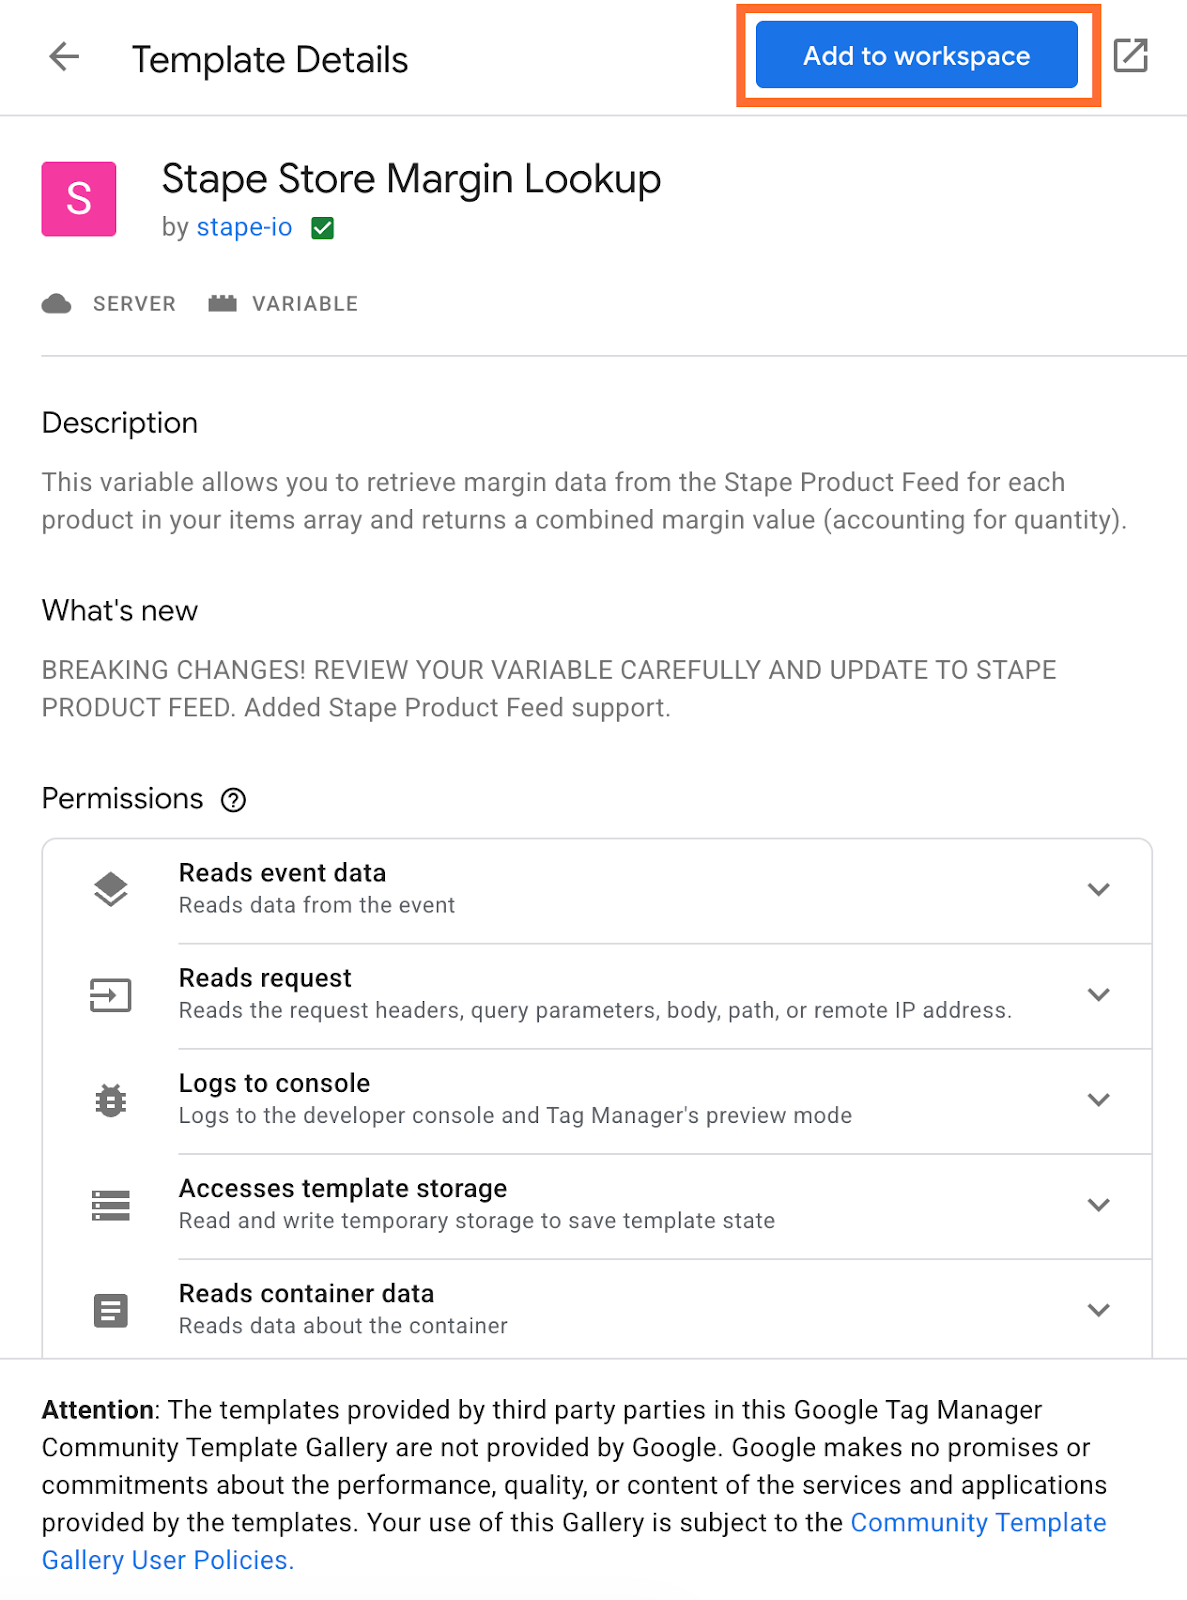
1. In your sGTM container, go to Templates, and in the Variable Templates section click Search gallery.

2. Search for Stape Store Margin Lookup, and add it to your workspace.
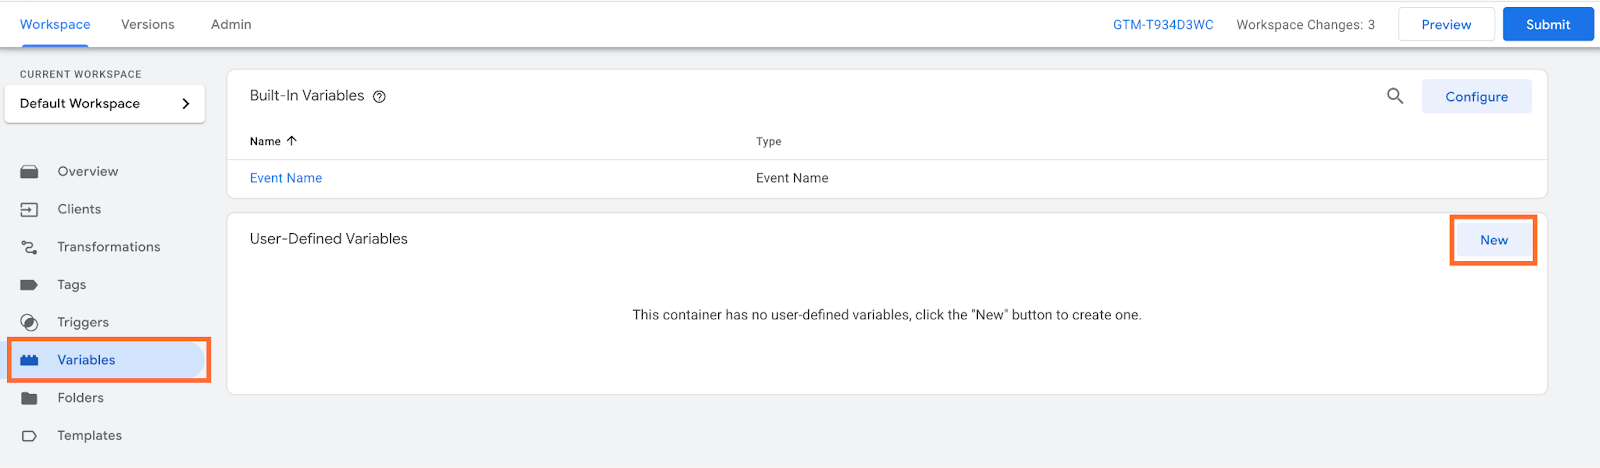
3. Go to Variables, and in the User-Defined Variables section click New.
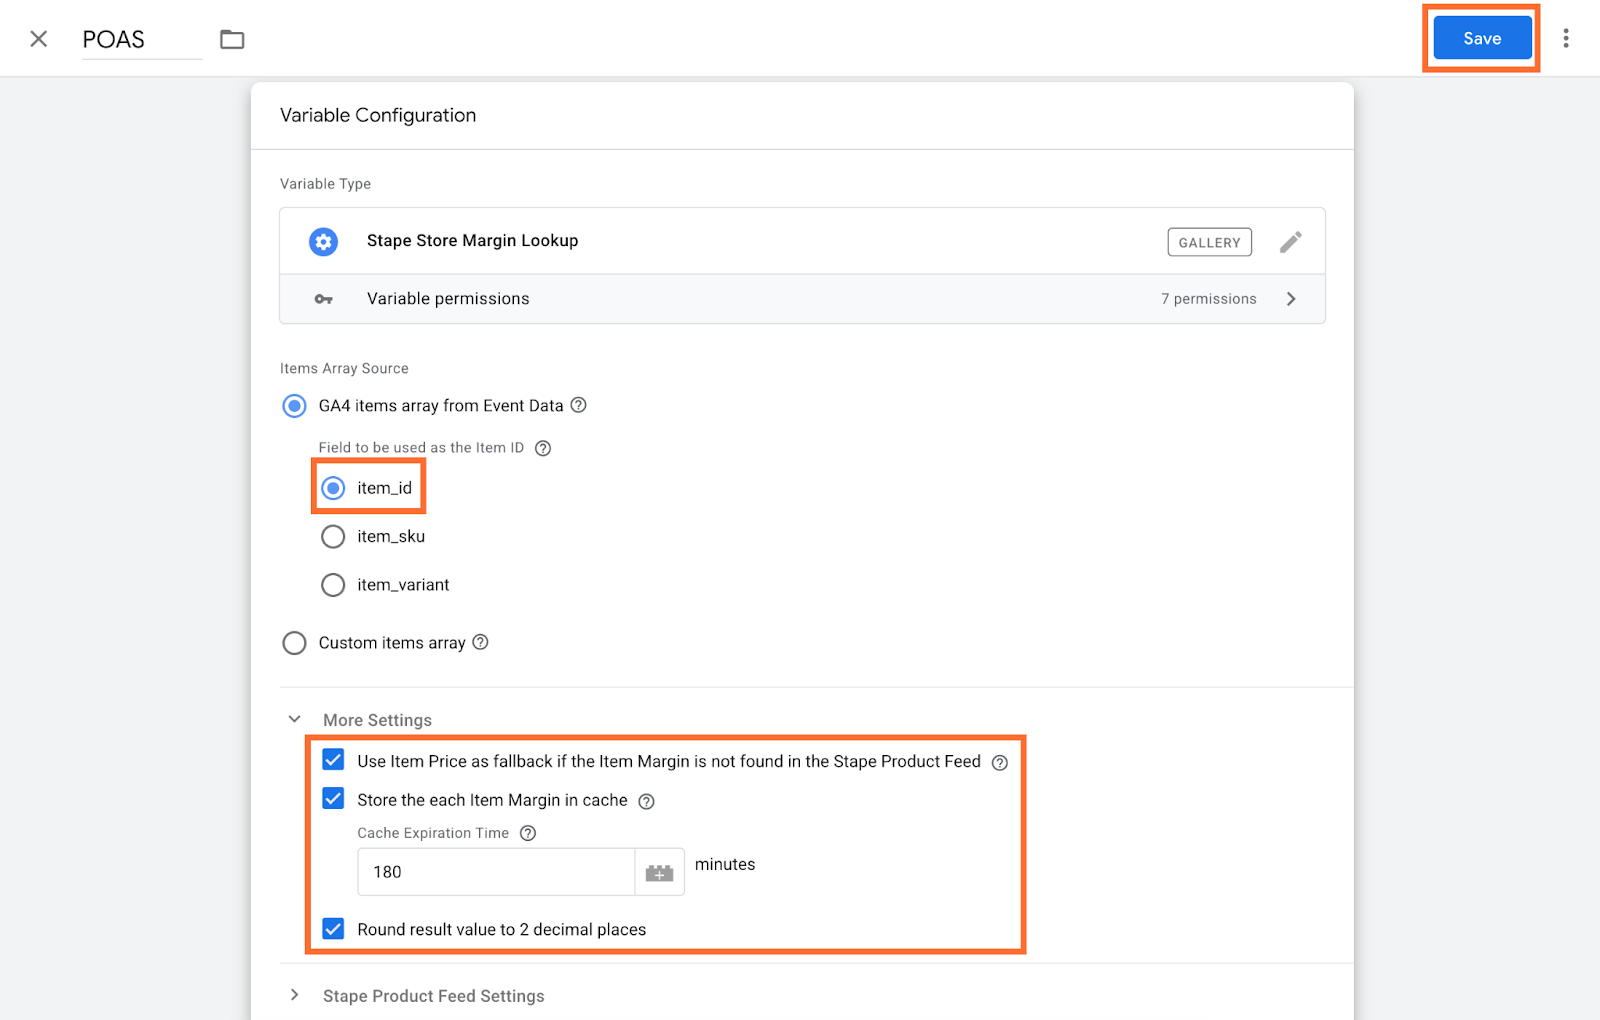
4. Create a new variable and select Stape Store Margin Lookup as the type.

5. Set the Product ID field to match the identifier used in your data layer (item_id for Wordpress and item_sku for Shopify).
6. Tick all options under More settings unless your tracking logic requires otherwise. Click Save.
Step 6 | Update your tags
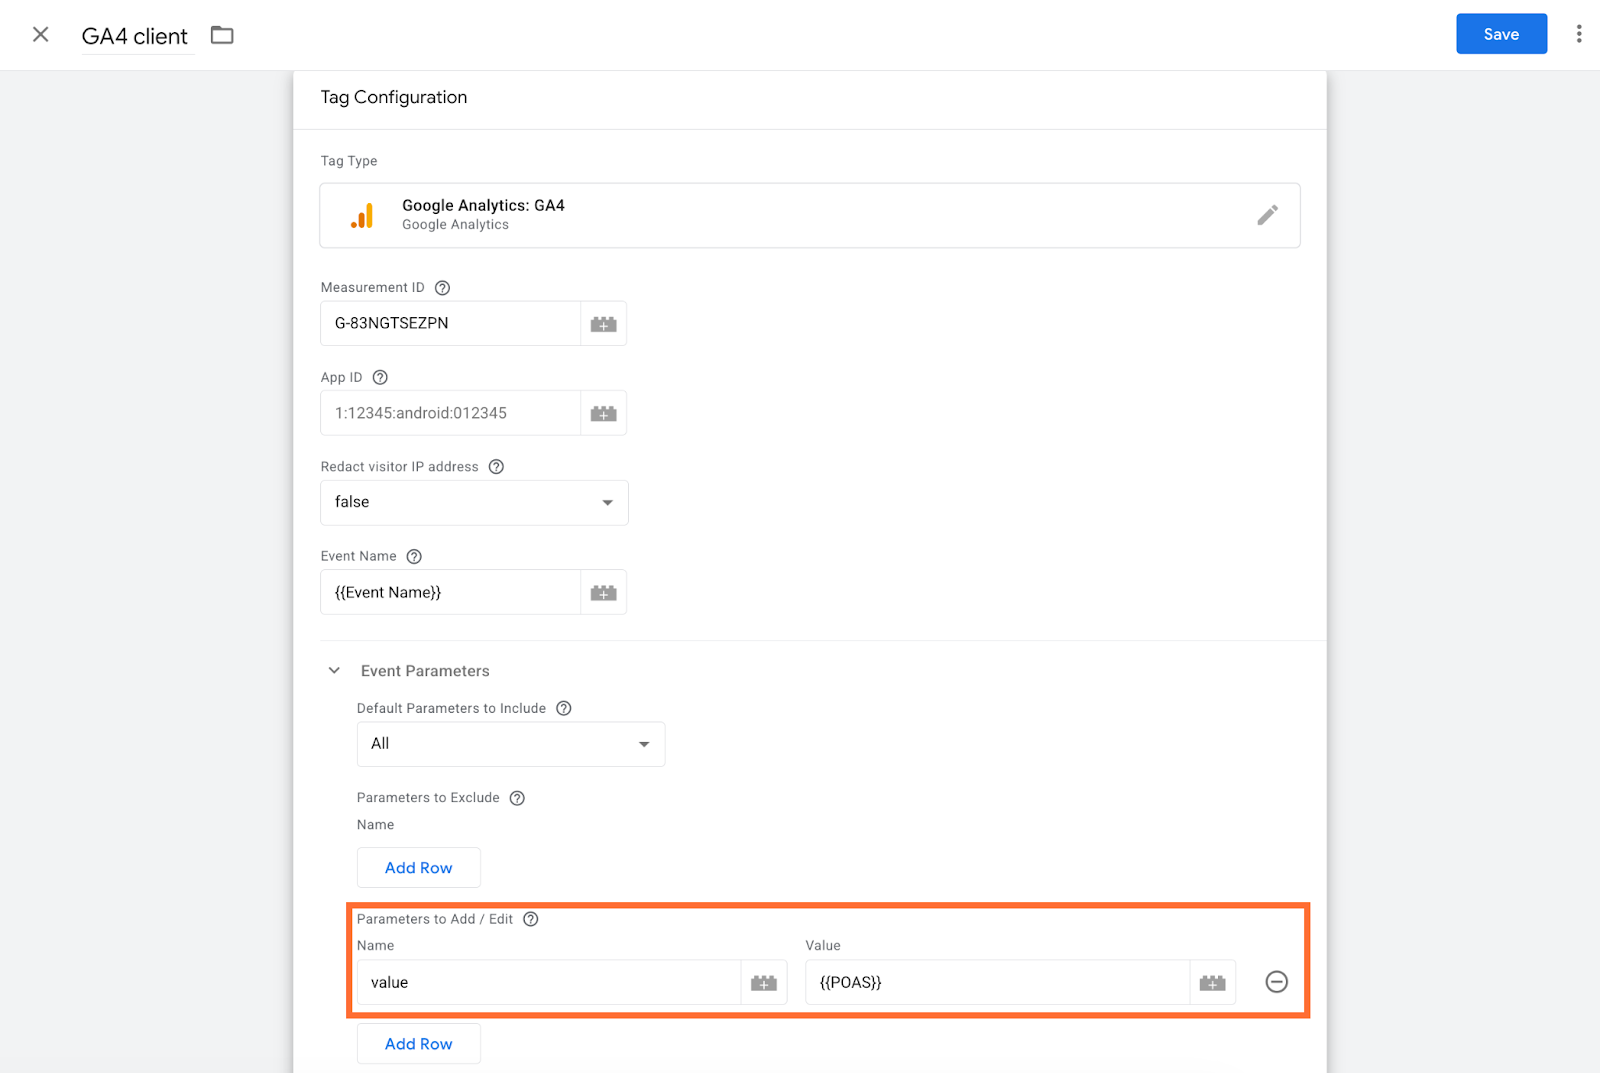
Add the Stape Store Margin Lookup variable as the conversion value in your platform tags. For example, in the GA4 tag set it as Event Parameter:
- Add a new parameter named value (or any custom name you want to use in GA4 reports, e.g. profit).
- Set its value to your Stape Store Margin Lookup variable.
Notes:
- Using value as the parameter name means GA4 will automatically pick it up in purchase event reporting. If you use a custom name like profit, you'll need to register it as a custom metric in GA4's admin settings to see it in reports.
- In the web container tag, make sure you tick Send Ecommerce data under More Settings and you have a custom trigger for the purchase event.
Testing
To verify the setup is working:
1. Open Preview in your sGTM container.
2. Trigger a purchase event on your site.
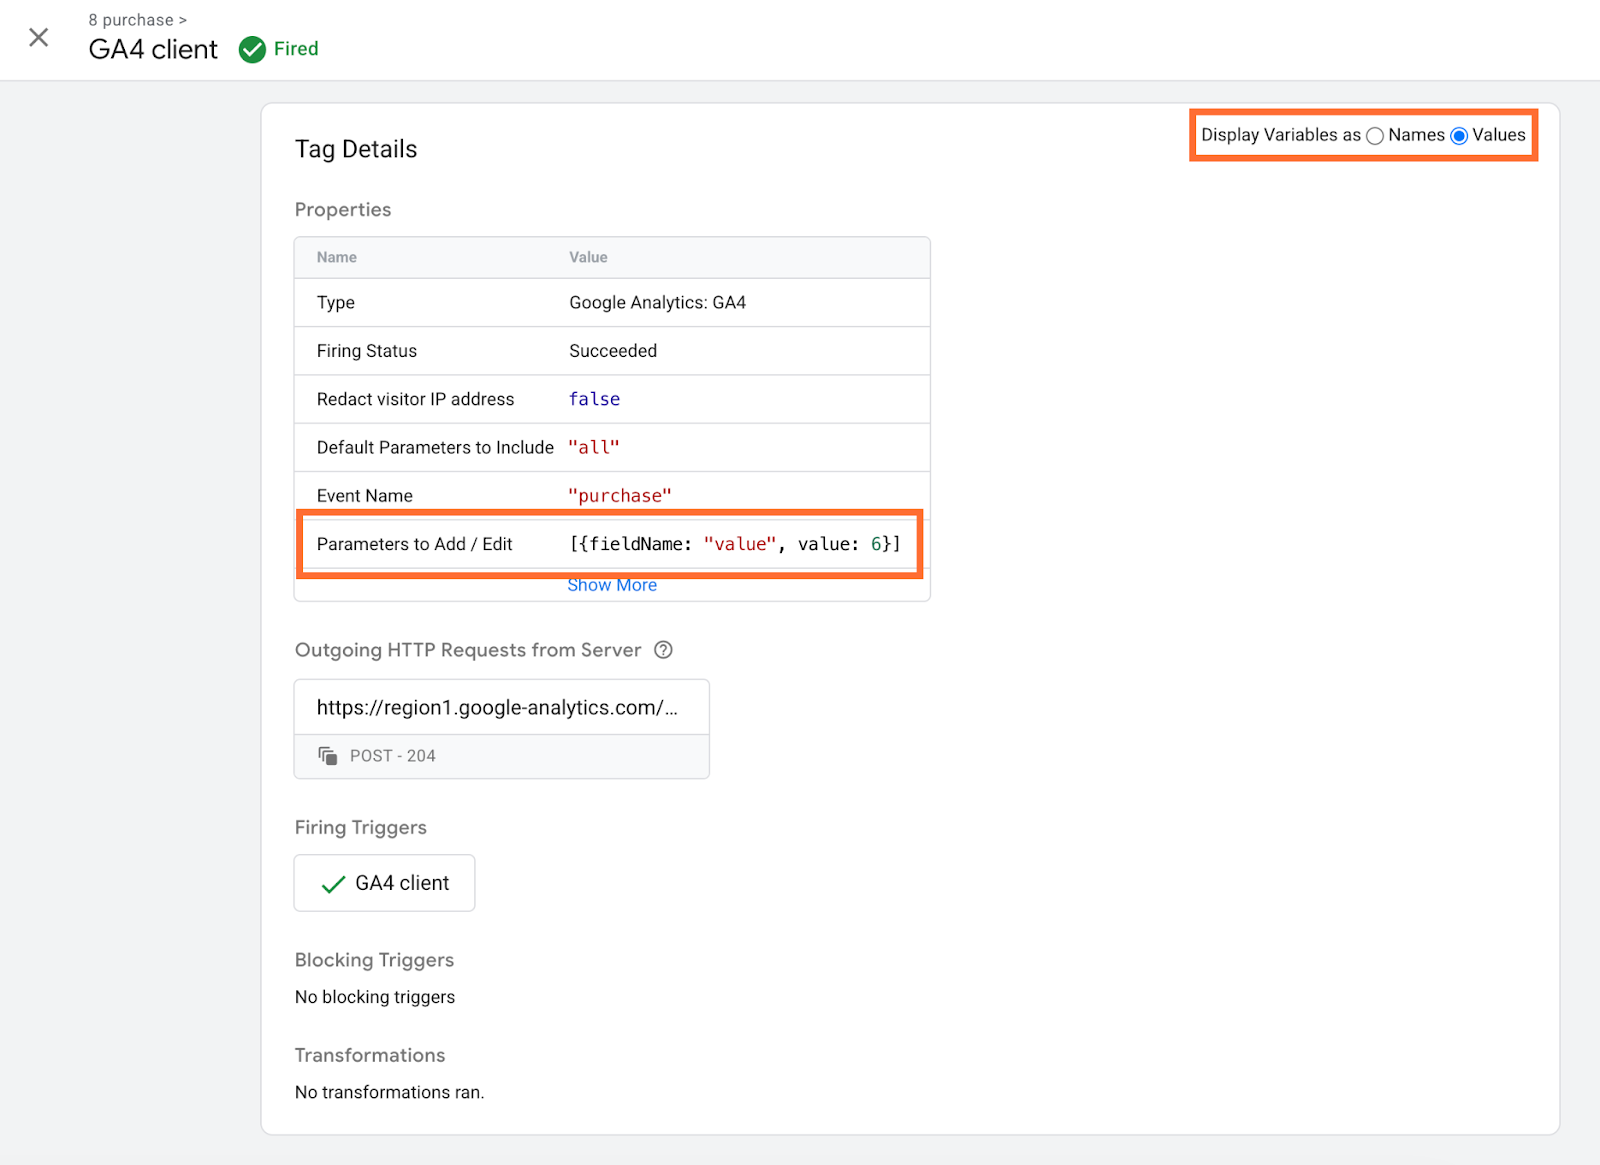
3. In the Tag Manager Debug Mode window, locate the triggered tag.
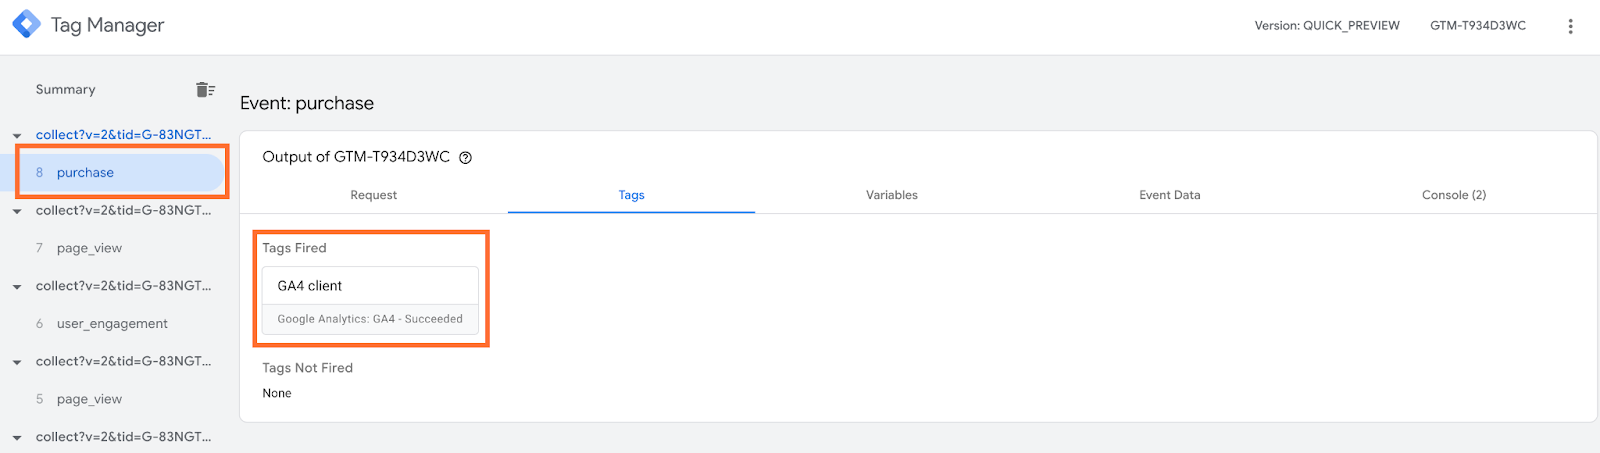
4. Under Tag details, check the Parameters to Add / Edit, the value will show your POAS.
Use case
A sample scenario is an eCommerce store that wants to optimize ad spend based on actual profit rather than revenue. Their Google Ads campaigns are generating strong ROAS, but after accounting for product costs and fees, several top-performing campaigns are actually unprofitable.
You can identify this problem and fix it this way:
- Compare your Google Ads ROAS against your actual profit margins for the same period. If Google Ads reports a 4x ROAS on a product that costs you $60 to produce and sell for $95, the real return may be far lower once costs are factored in.
- Enable POAS Data Feed and configure it with your product margins. This sends the margins to Google Ads instead of revenue when a purchase event fires.
- Monitor your Google Ads campaigns using the profit-based conversion value over the same time window and compare it against the revenue-based value.
If your campaigns were previously optimizing toward high-revenue but low-margin products, you should see Google Ads begin shifting budget toward products with higher actual profit after the learning period.
Was this article helpful?
Comments