Google Service Account power-up
Updated Jun 18, 2026
The Google Service Account power-up connects your sGTM container to Google Cloud services such as BigQuery and Firestore, and allows the container to talk to authenticated GCP APIs. A single JSON credentials file is all you need to start reading, writing, and enriching event data directly from your sGTM container.
Google Service Account is available on the Free subscription plan and higher. To check your current plan or upgrade, go to your sGTM container settings.
How to set up Google Service Account
Step 1 | Activate the power-up
1. Log in to your Stape account and select your sGTM container from the dashboard.
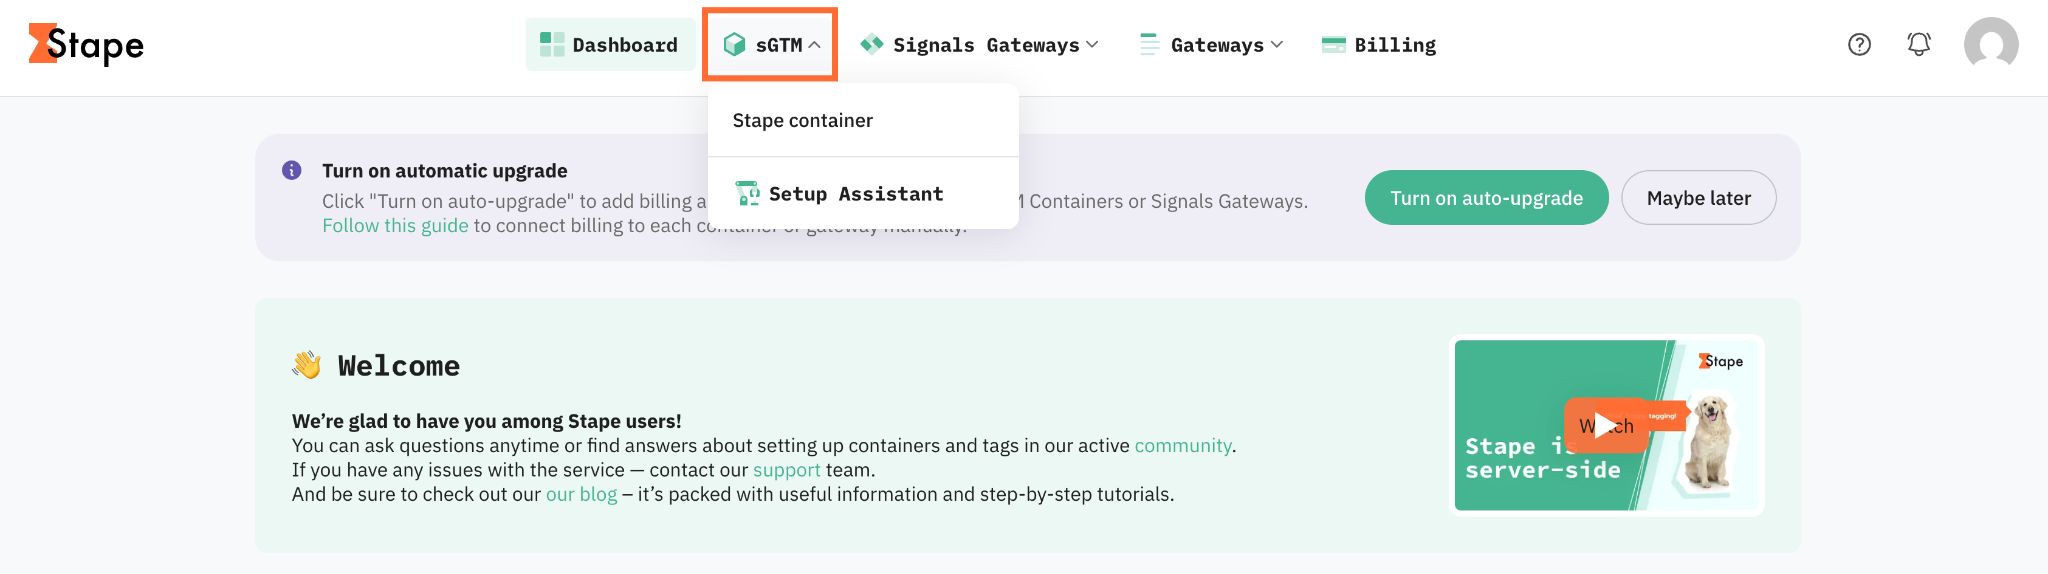
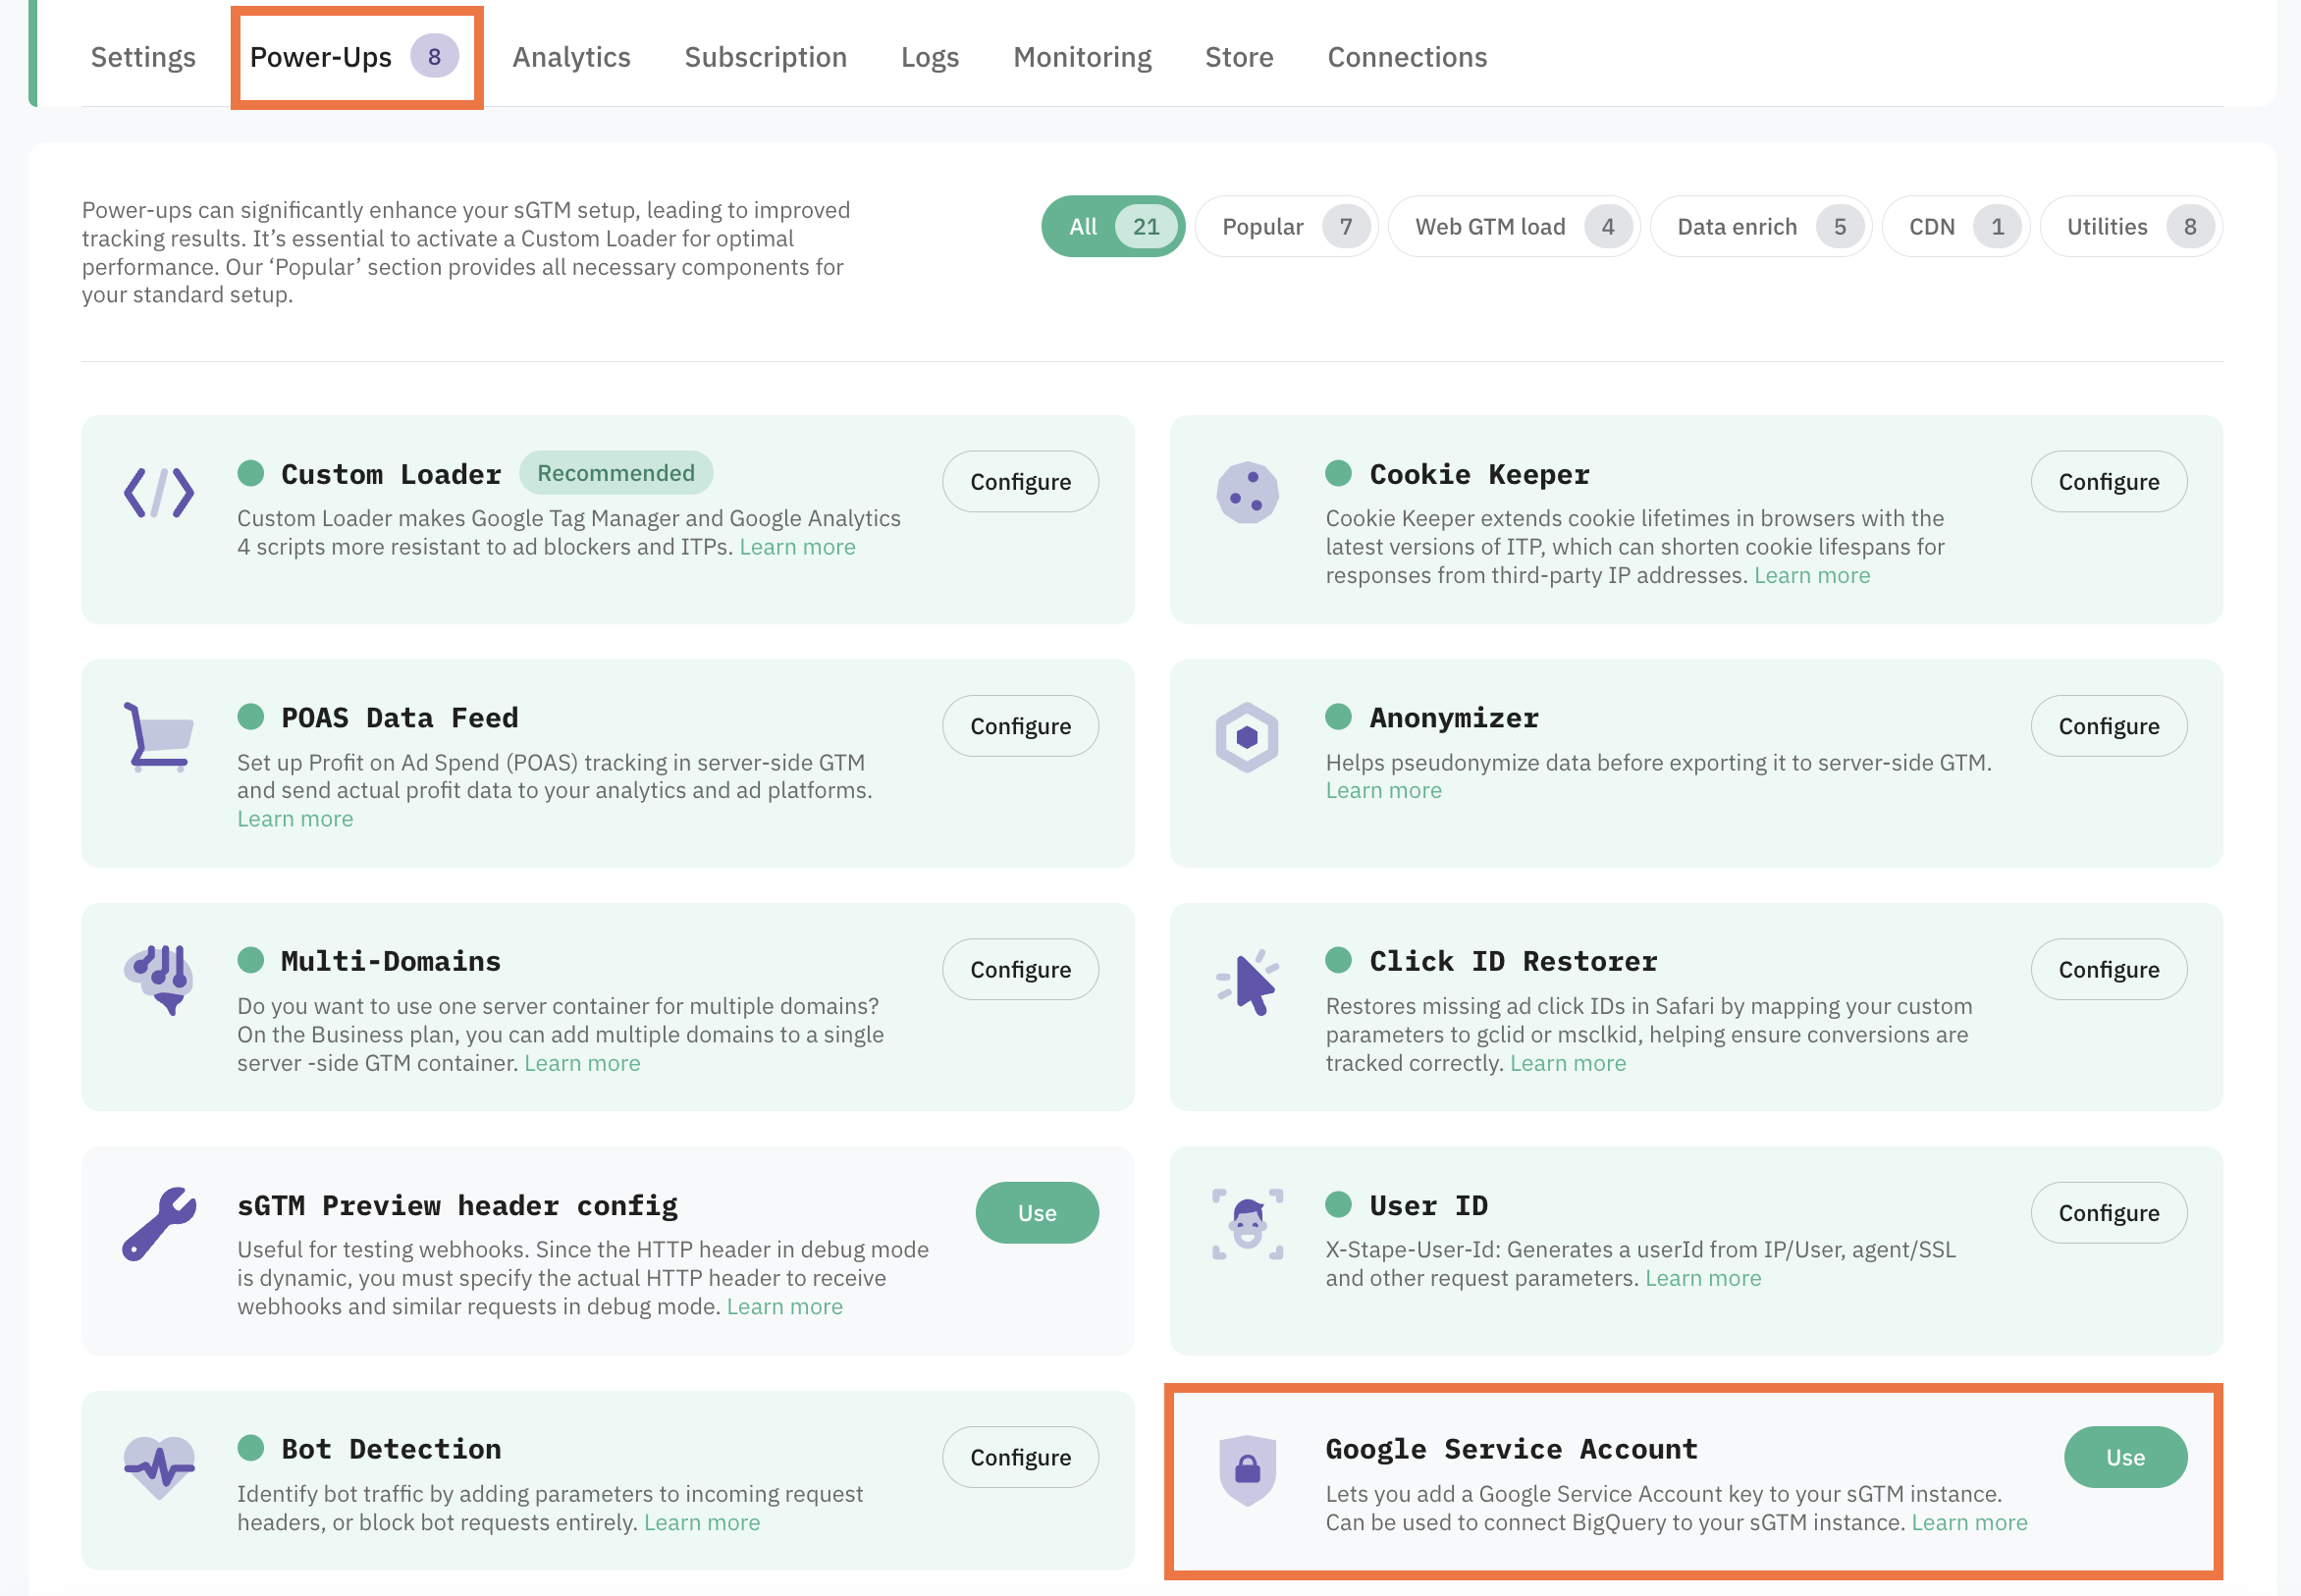
2. Go to Power-ups and click Use next to the Google Service Account panel.
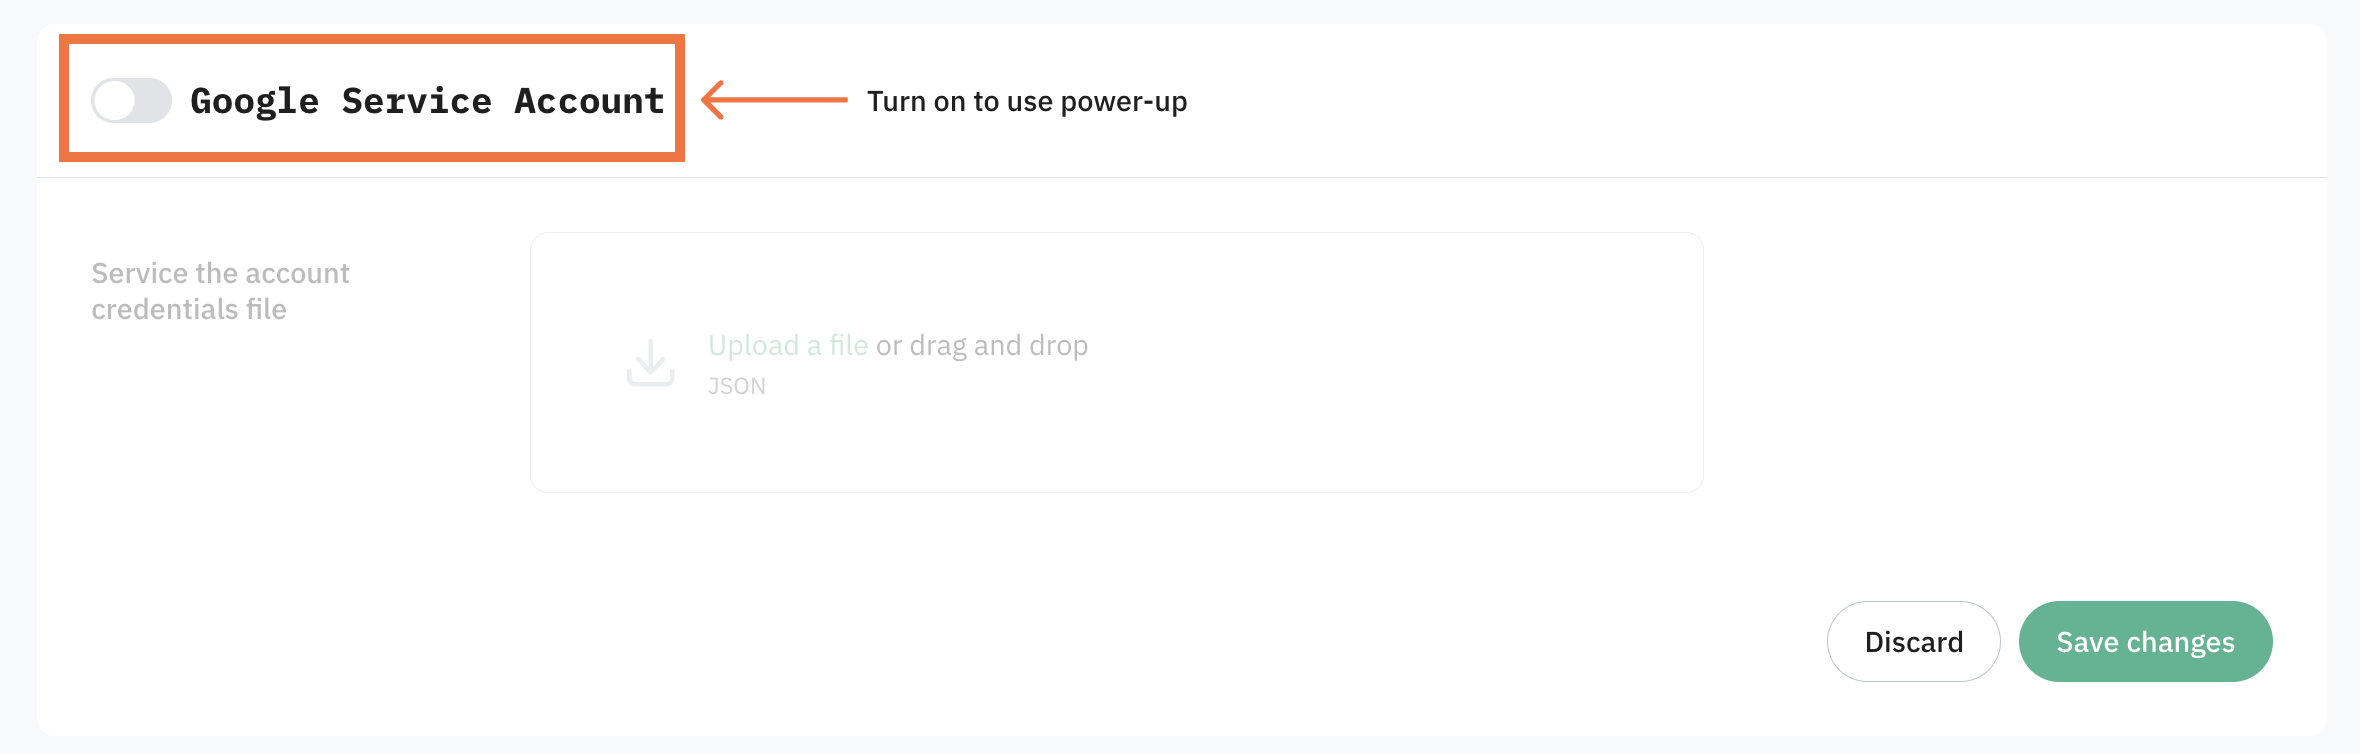
3. Toggle the Google Service Account switch to enable it.
Step 2 | Obtain the service account credentials file
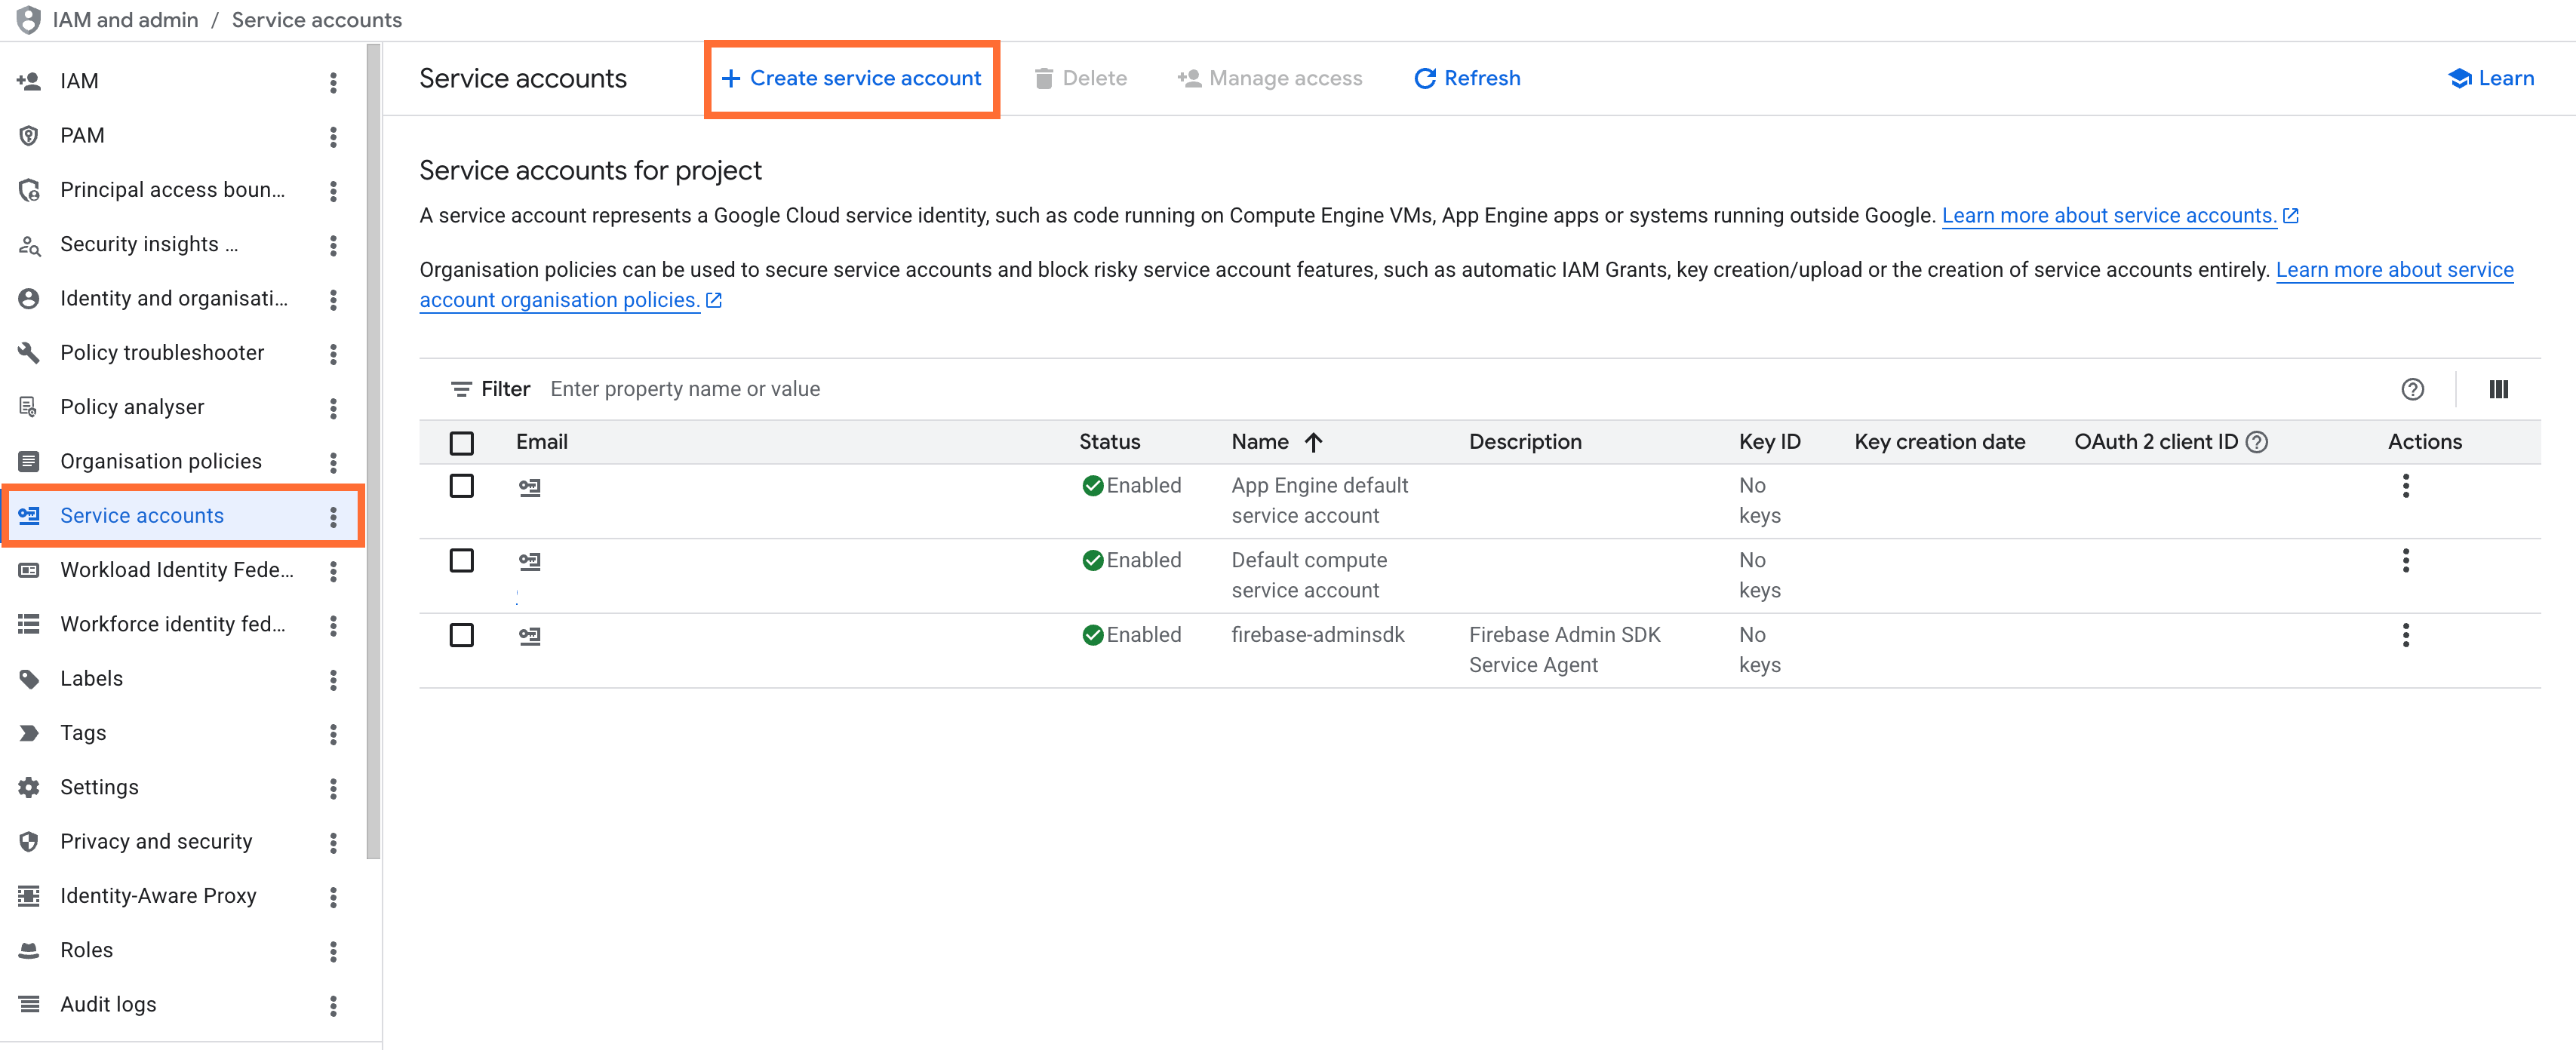
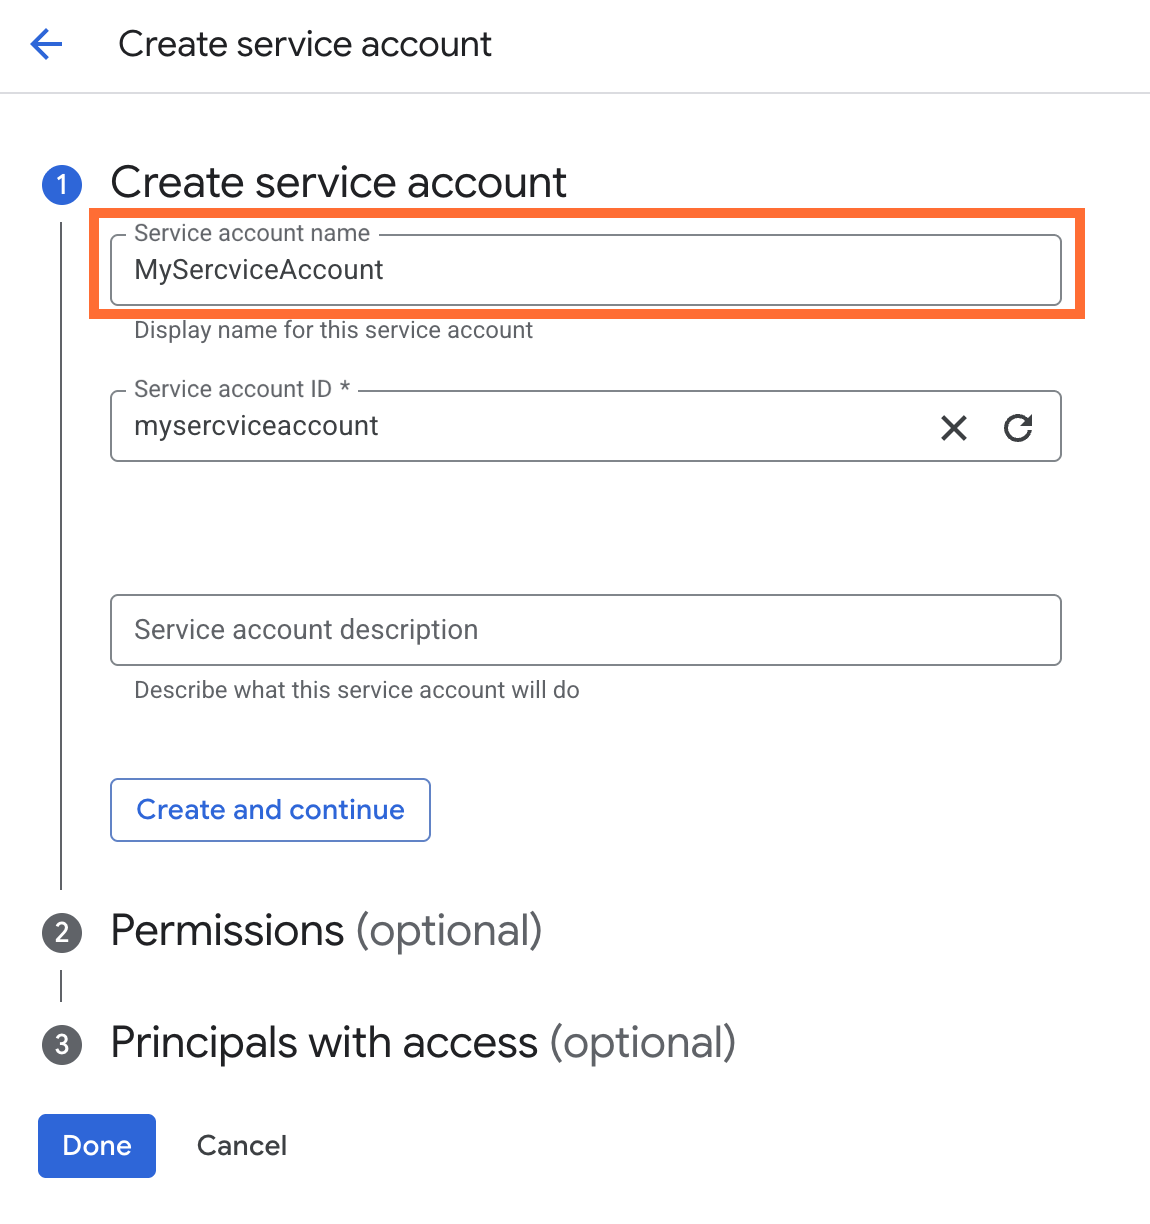
1. Open the Google Cloud Console and go to IAM & Admin → Service Accounts. Click Create service account.
2. Enter a name, and click Create and continue.
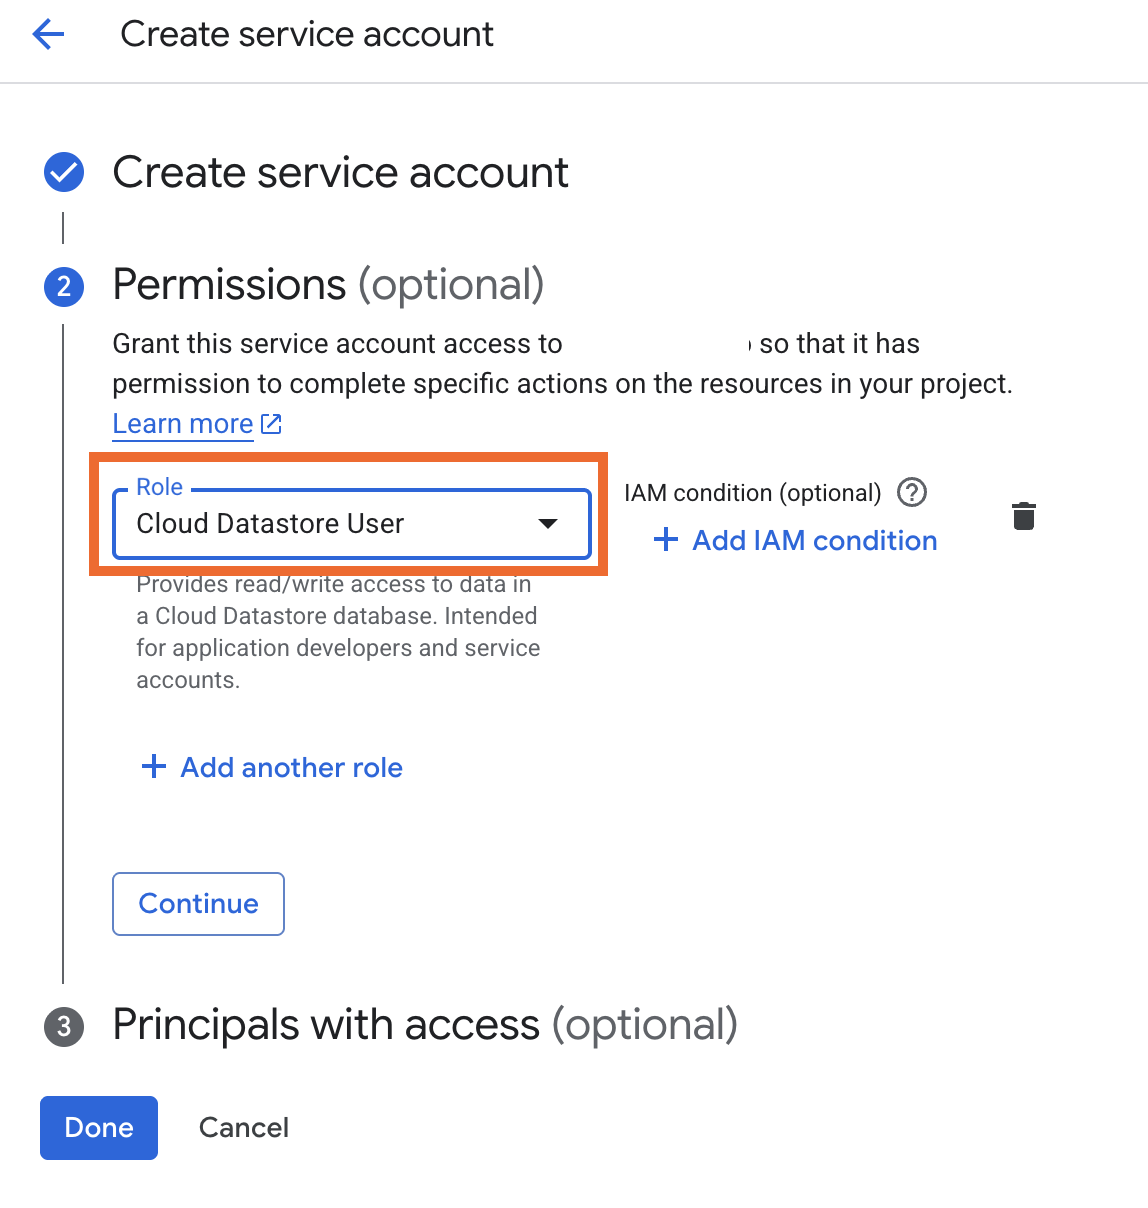
3. Assign the appropriate role:
- BigQuery Data Editor for BigQuery access
- Cloud Datastore User for Firestore access
- Both roles if you need access to both services
4. Click Continue and Done.
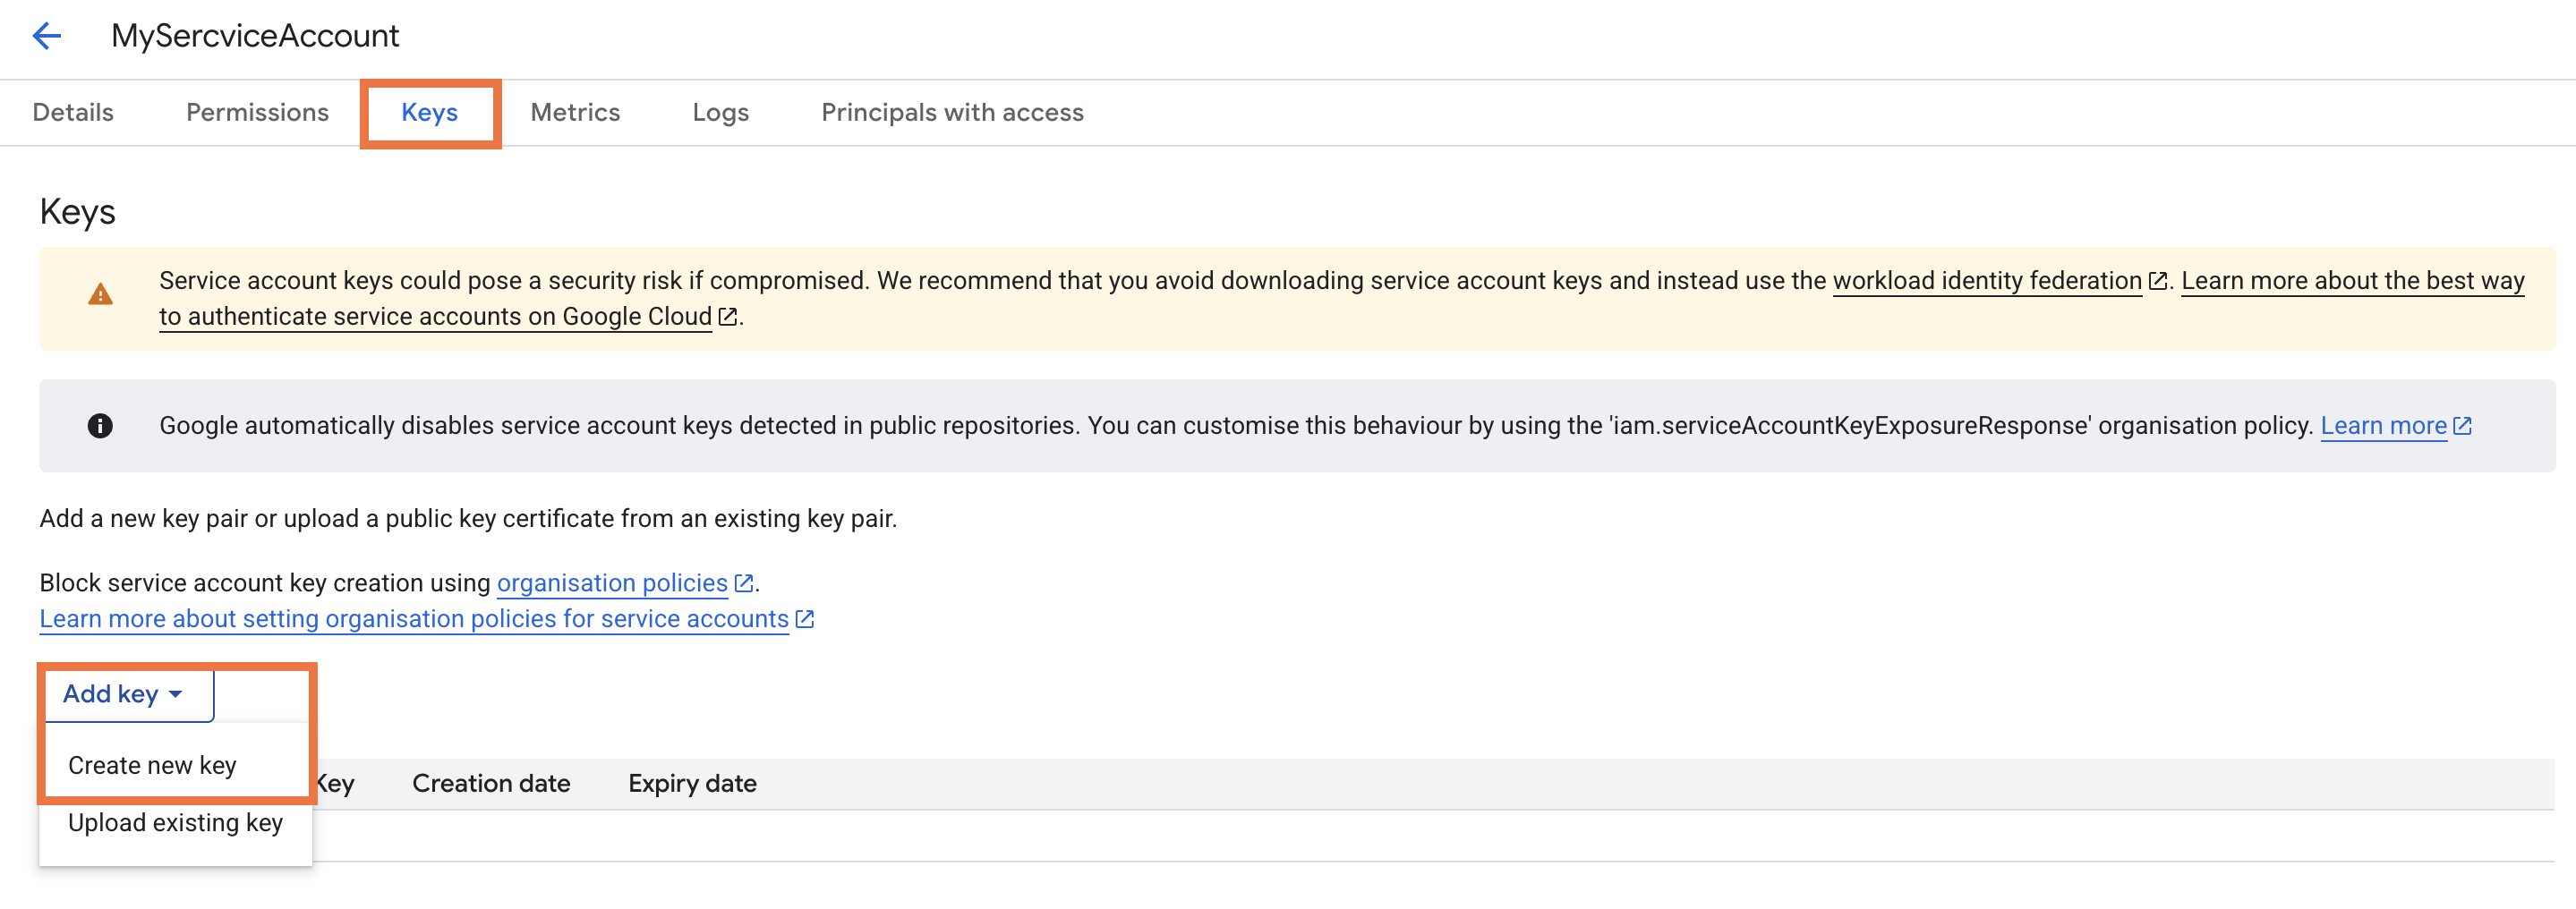
5. Click the newly created account, open the Keys tab, then click Add key → Create new key.
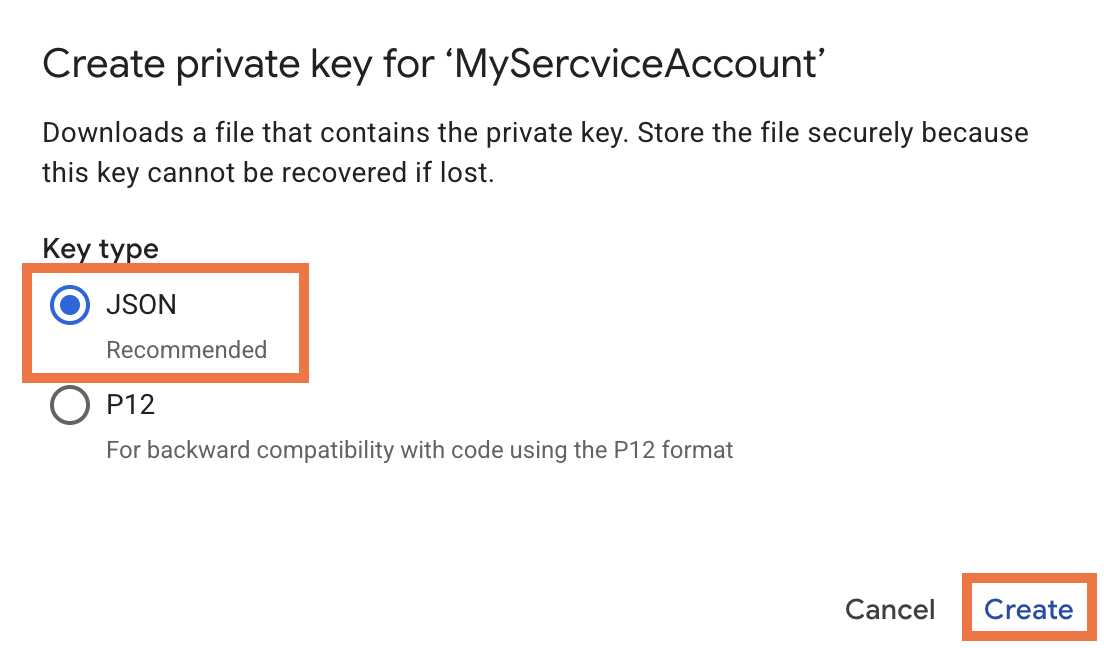
6. In the pop-up, select JSON and click Create. A JSON file will download to your computer.
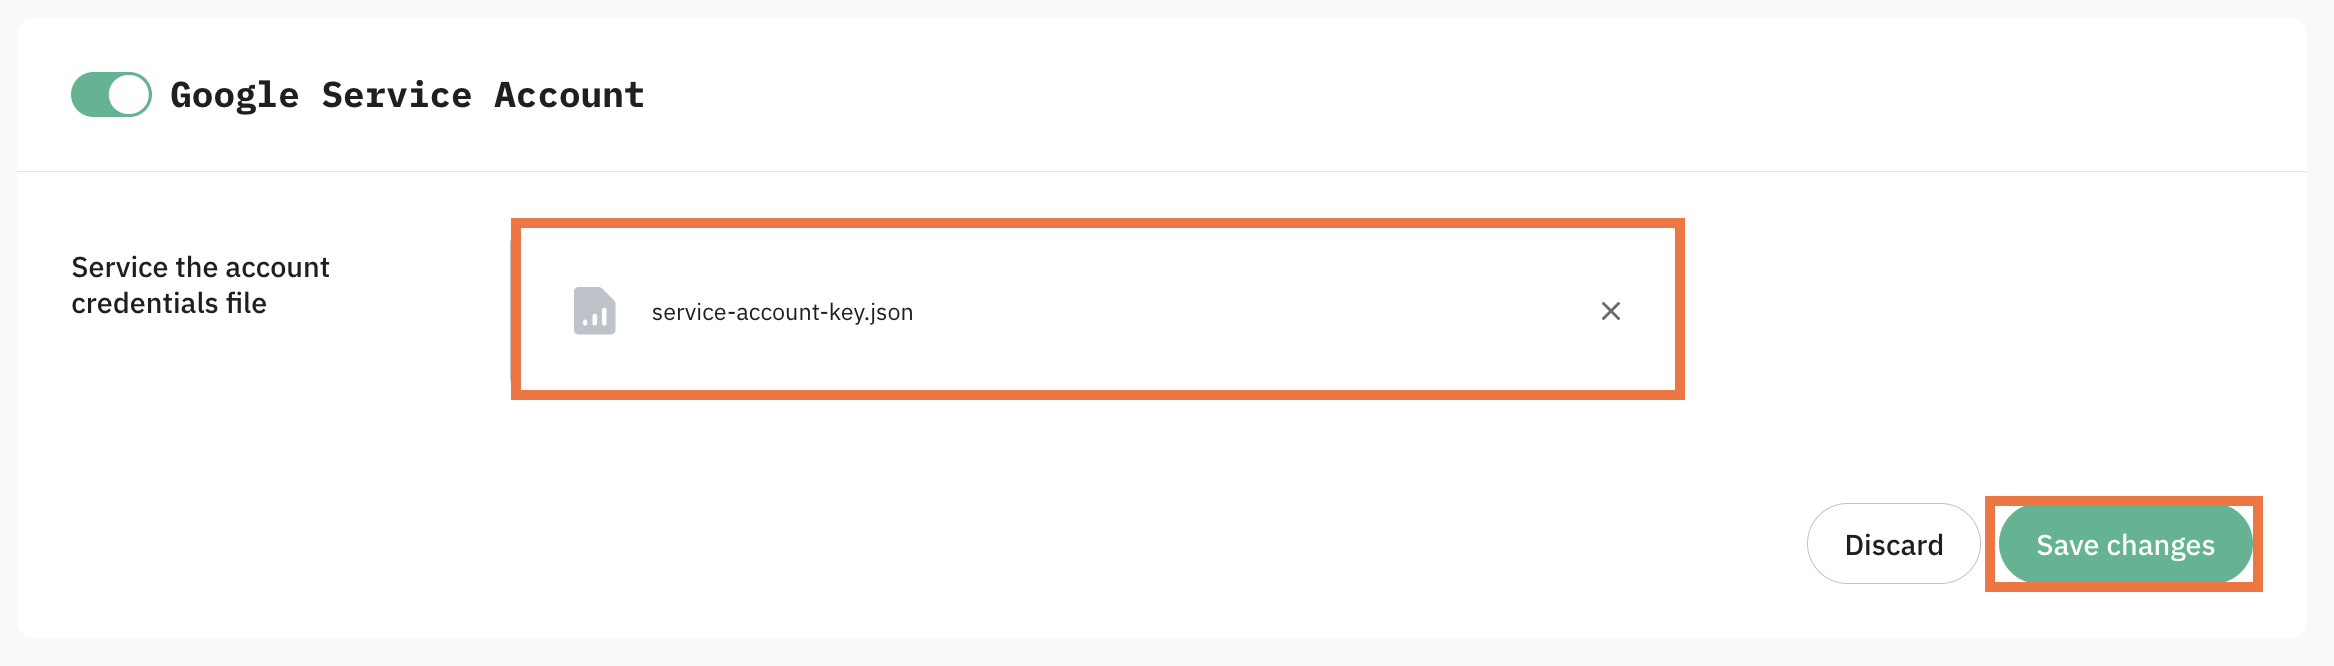
7. Back in Stape, click Select file and upload the JSON file you downloaded.
8. Click Save changes.
Step 3 | Set up Google Cloud Services
BigQuery setup
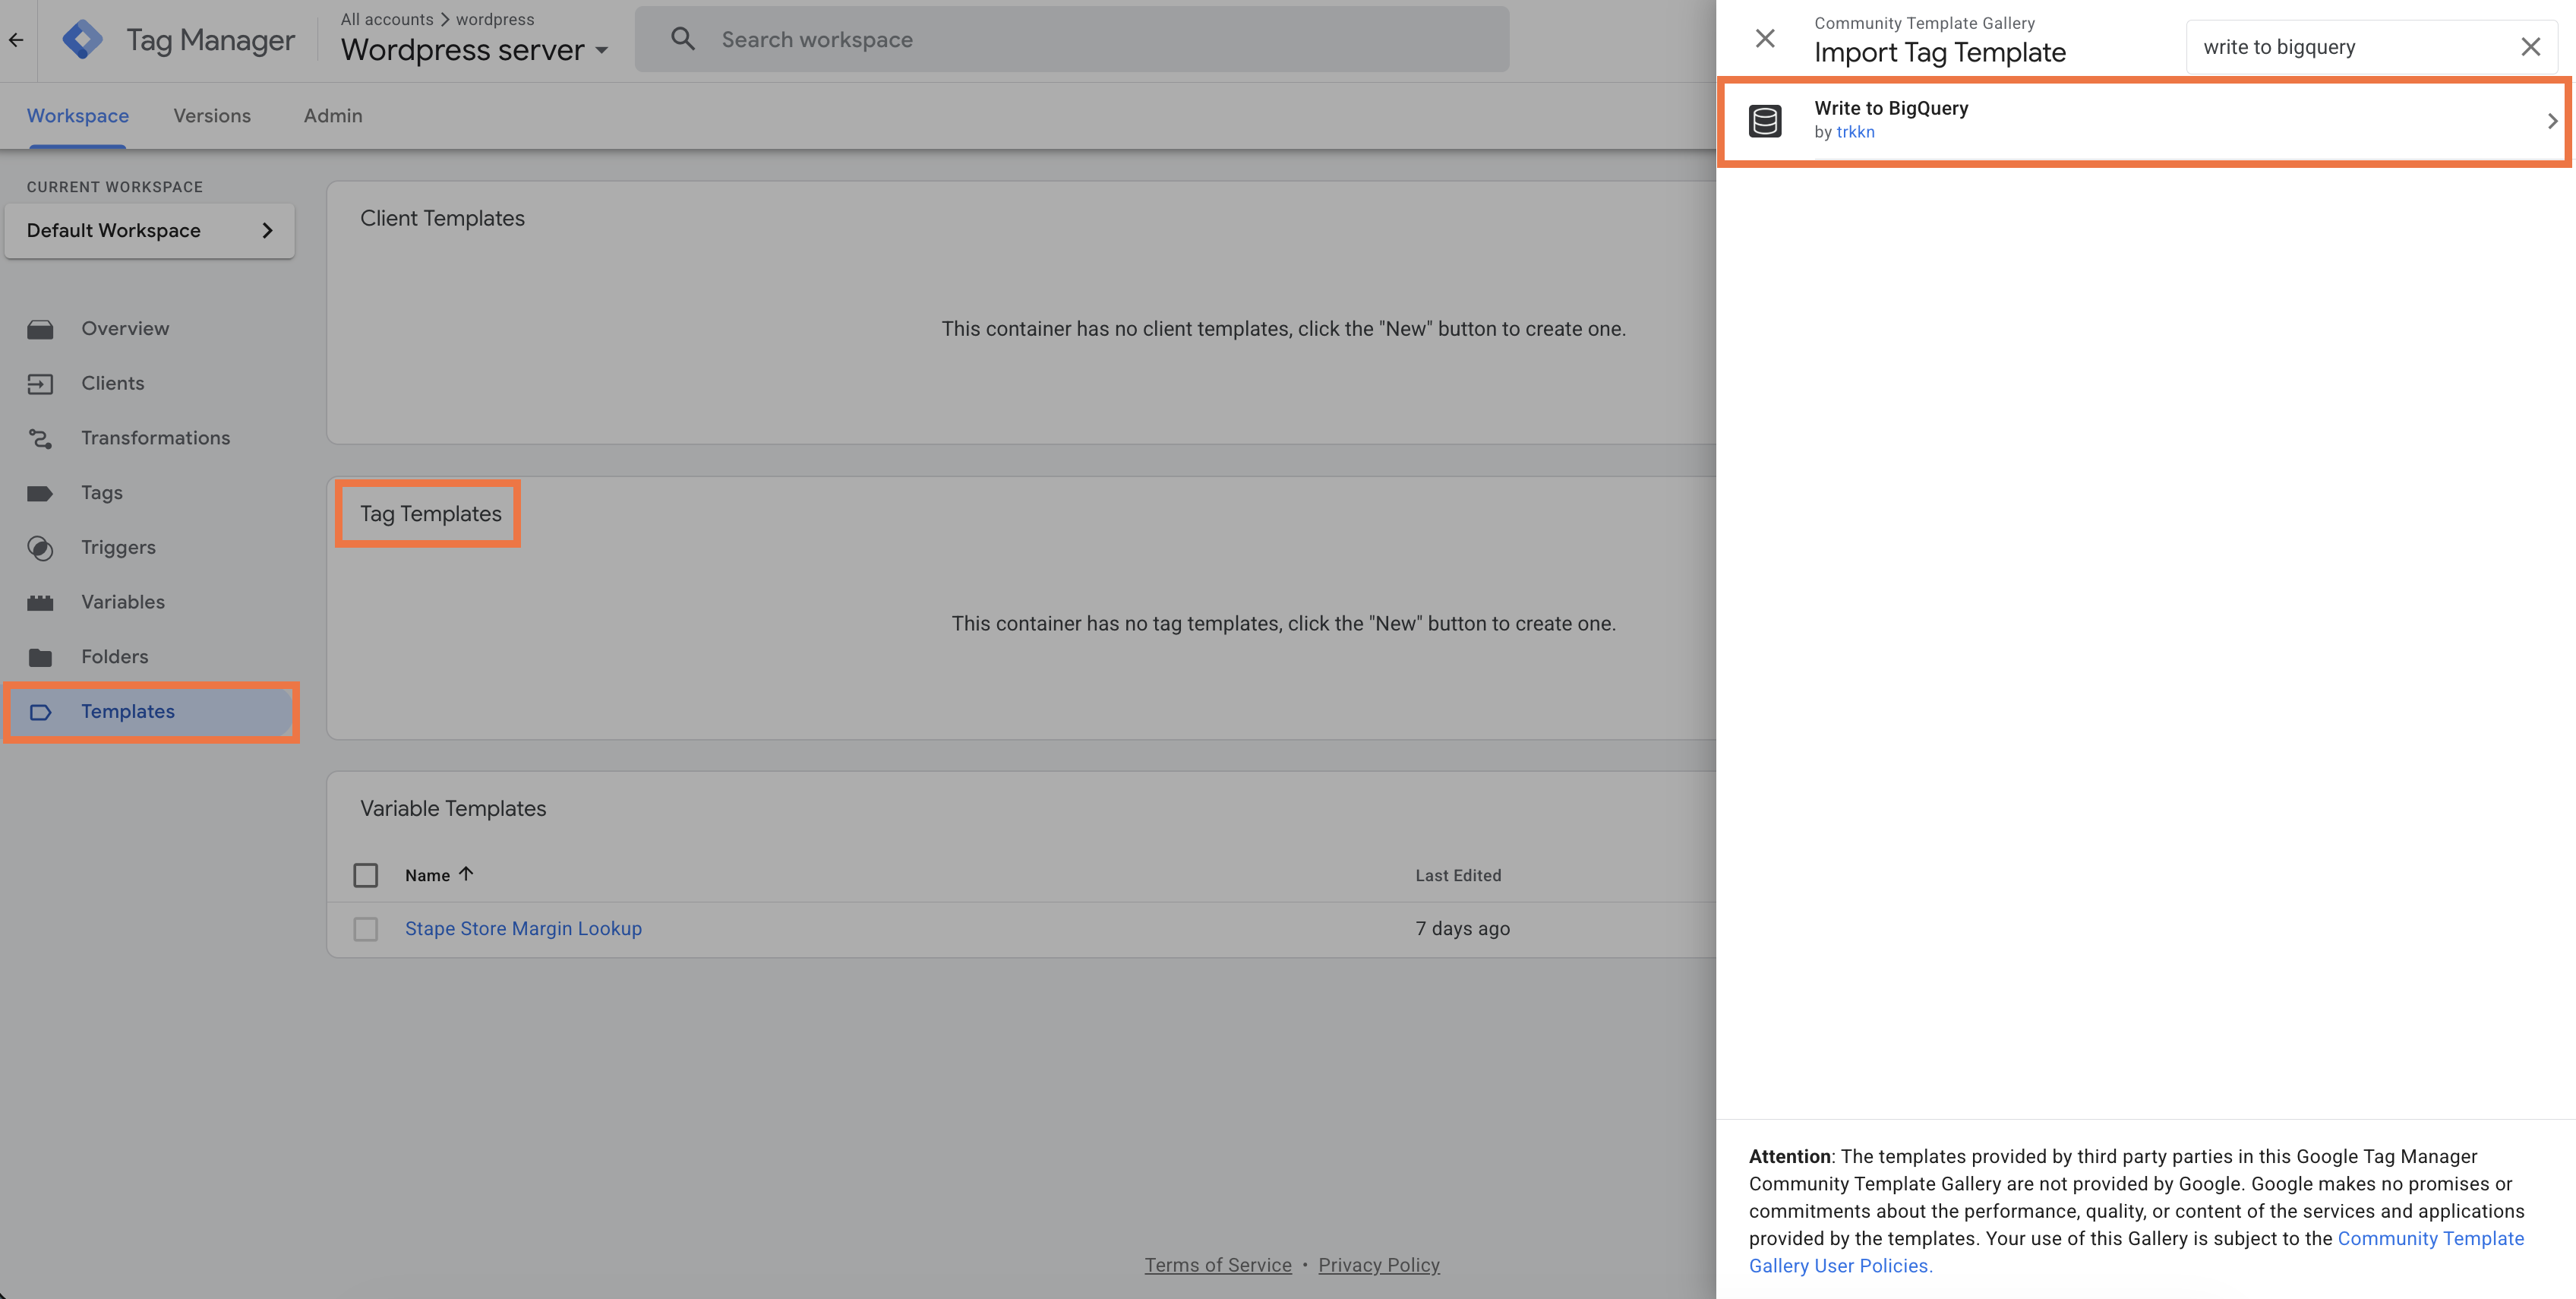
1. In your sGTM container, open Templates, click Search Gallery, and add the Write to BigQuery tag from the Template Gallery or import it from GitHub.
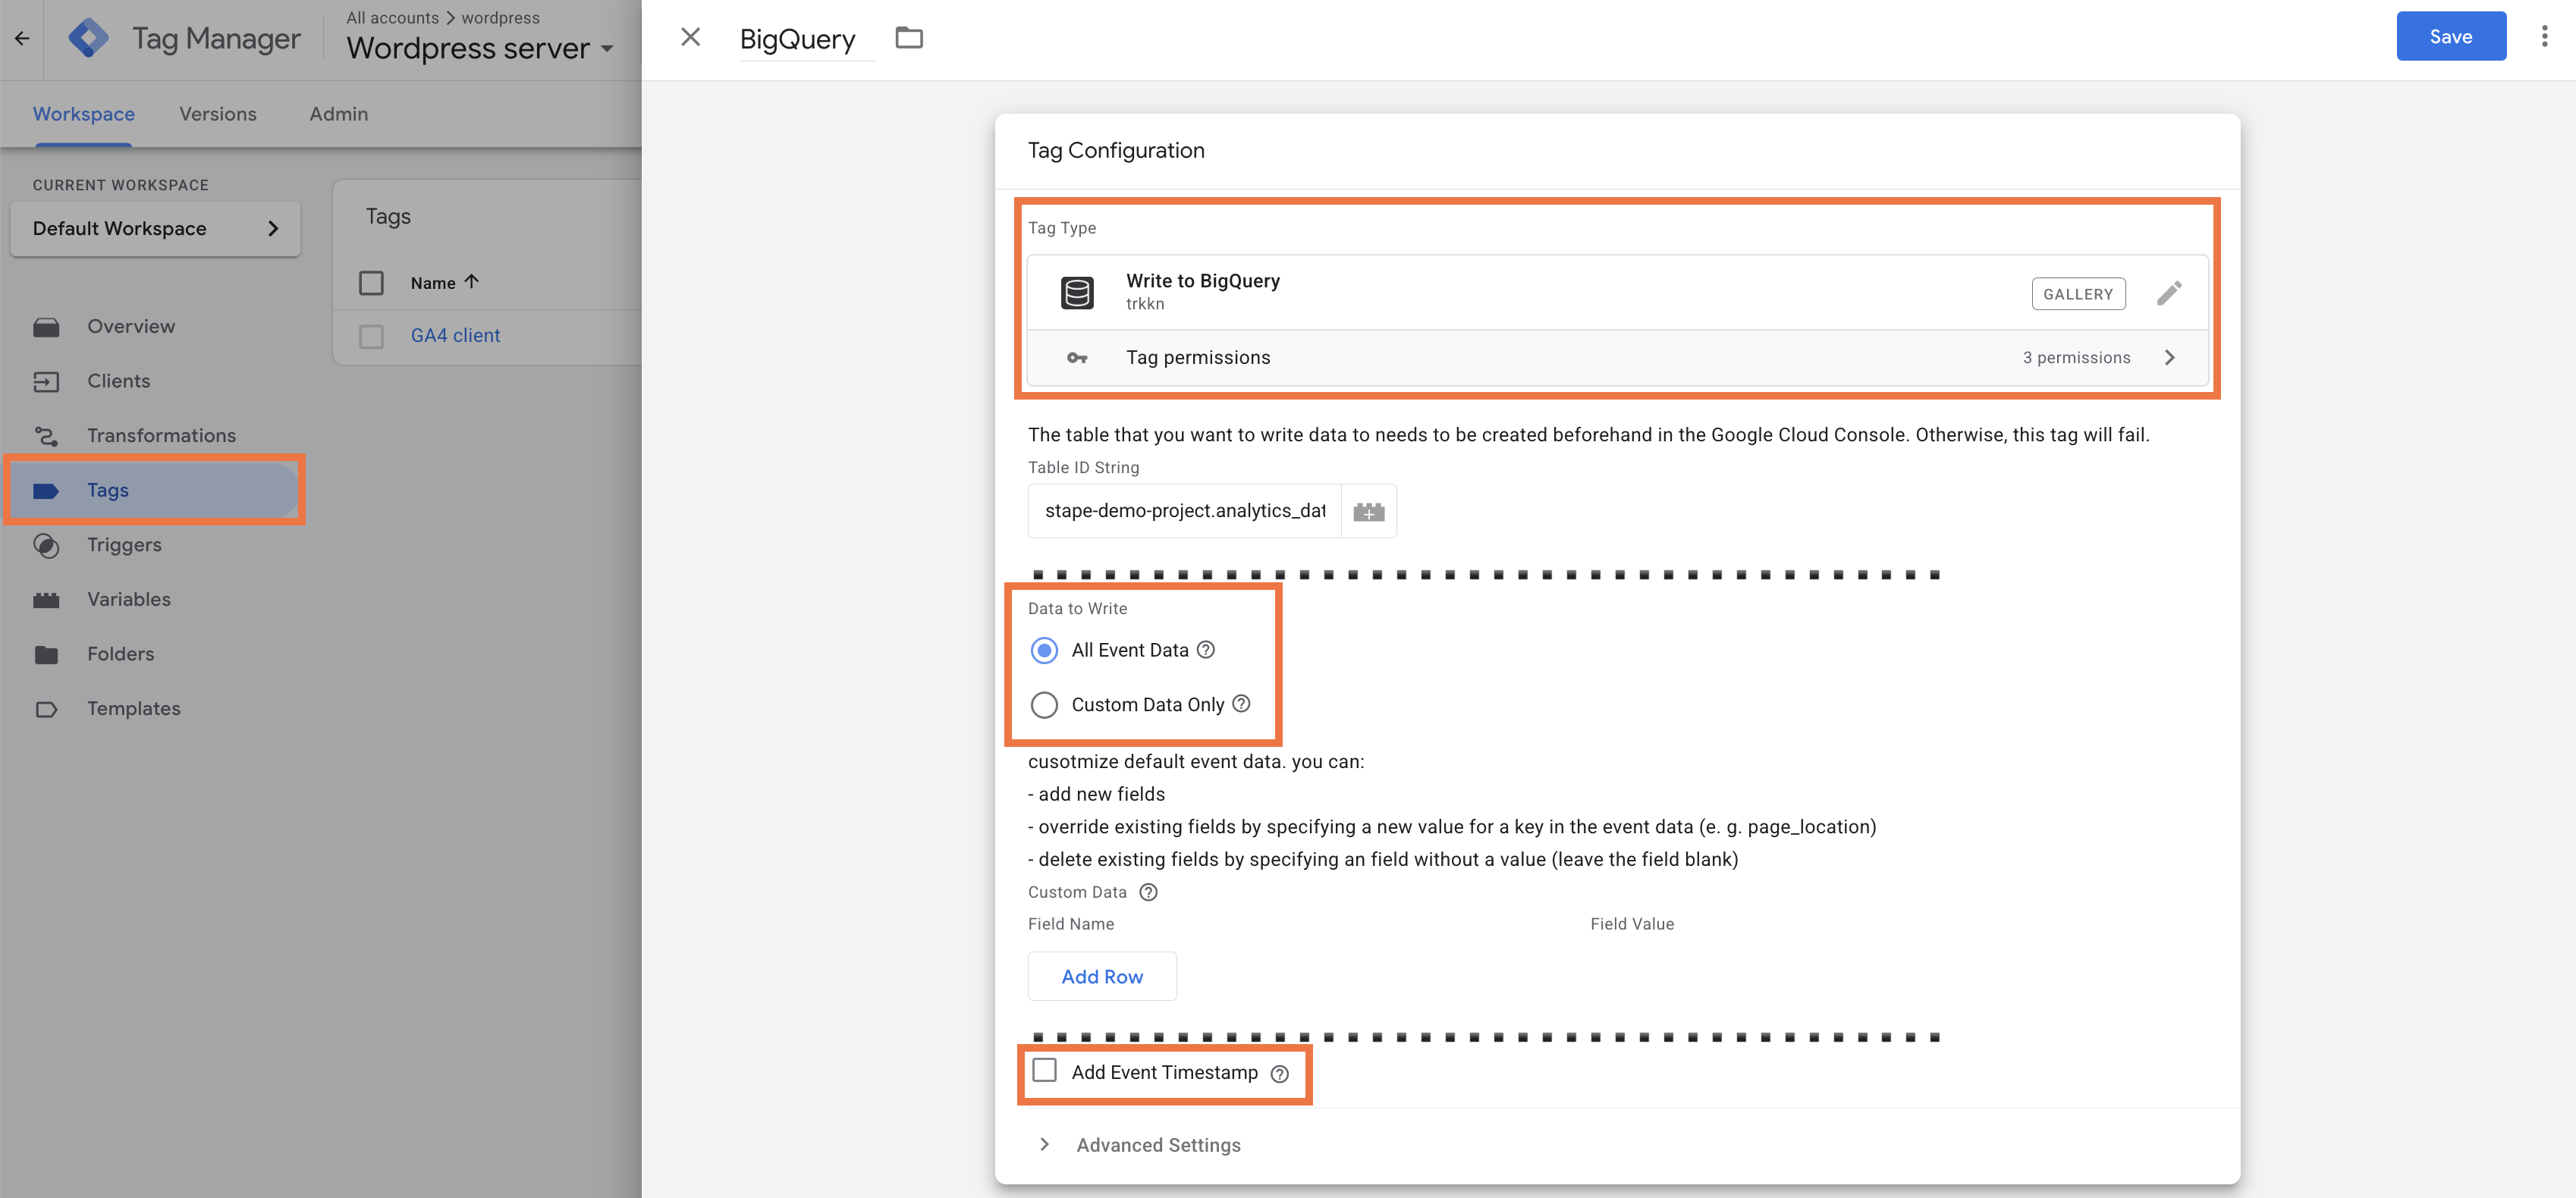
2. Create a new tag using that template and configure what data to write:
- All Event Data - writes all event data available in the sGTM event to your BigQuery table. Only fields matching your table schema will be accepted, others are discarded.
- Custom Data Only - writes only the specific fields you define, with no default event data included.
Optionally enable Add Event Timestamp to include a millisecond timestamp. The target BigQuery column must be of the INTEGER type.
3. Set your trigger and save the tag.
Firestore setup
1. Open Firebase, click Create project, and select the same project you used for the service account.
2. Follow the Firebase instructions to create a database. Choose a Cloud Firestore location that matches your sGTM server location. You can check your server location in your Stape container settings. When selecting a starting mode, choose Production.
3. Click Start a collection and define the collection path you'll use in your tag (e.g. purchase).
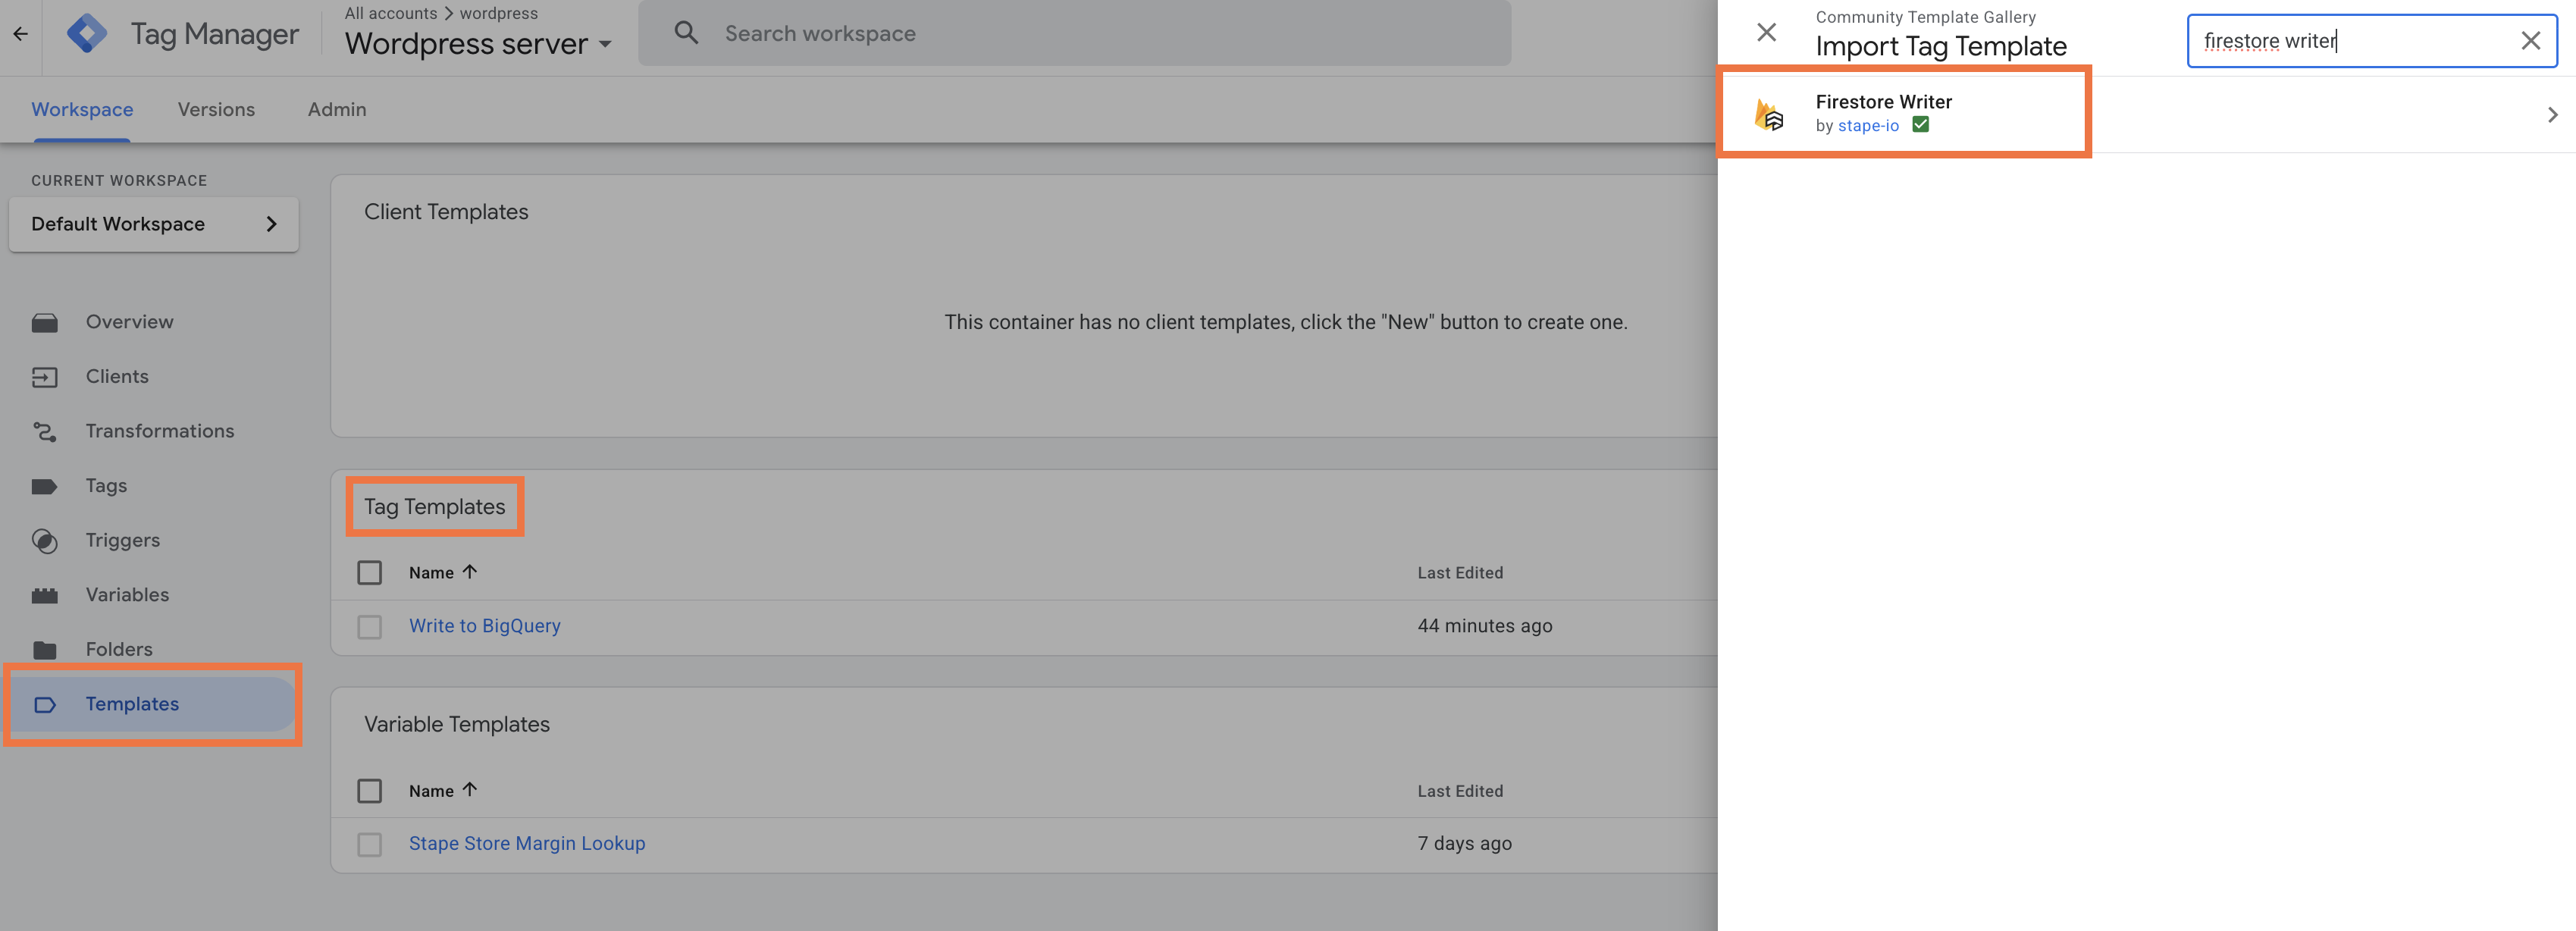
4. In your sGTM container, open Templates, click Search Gallery, and add the Firestore Writer tag from the Template Gallery.
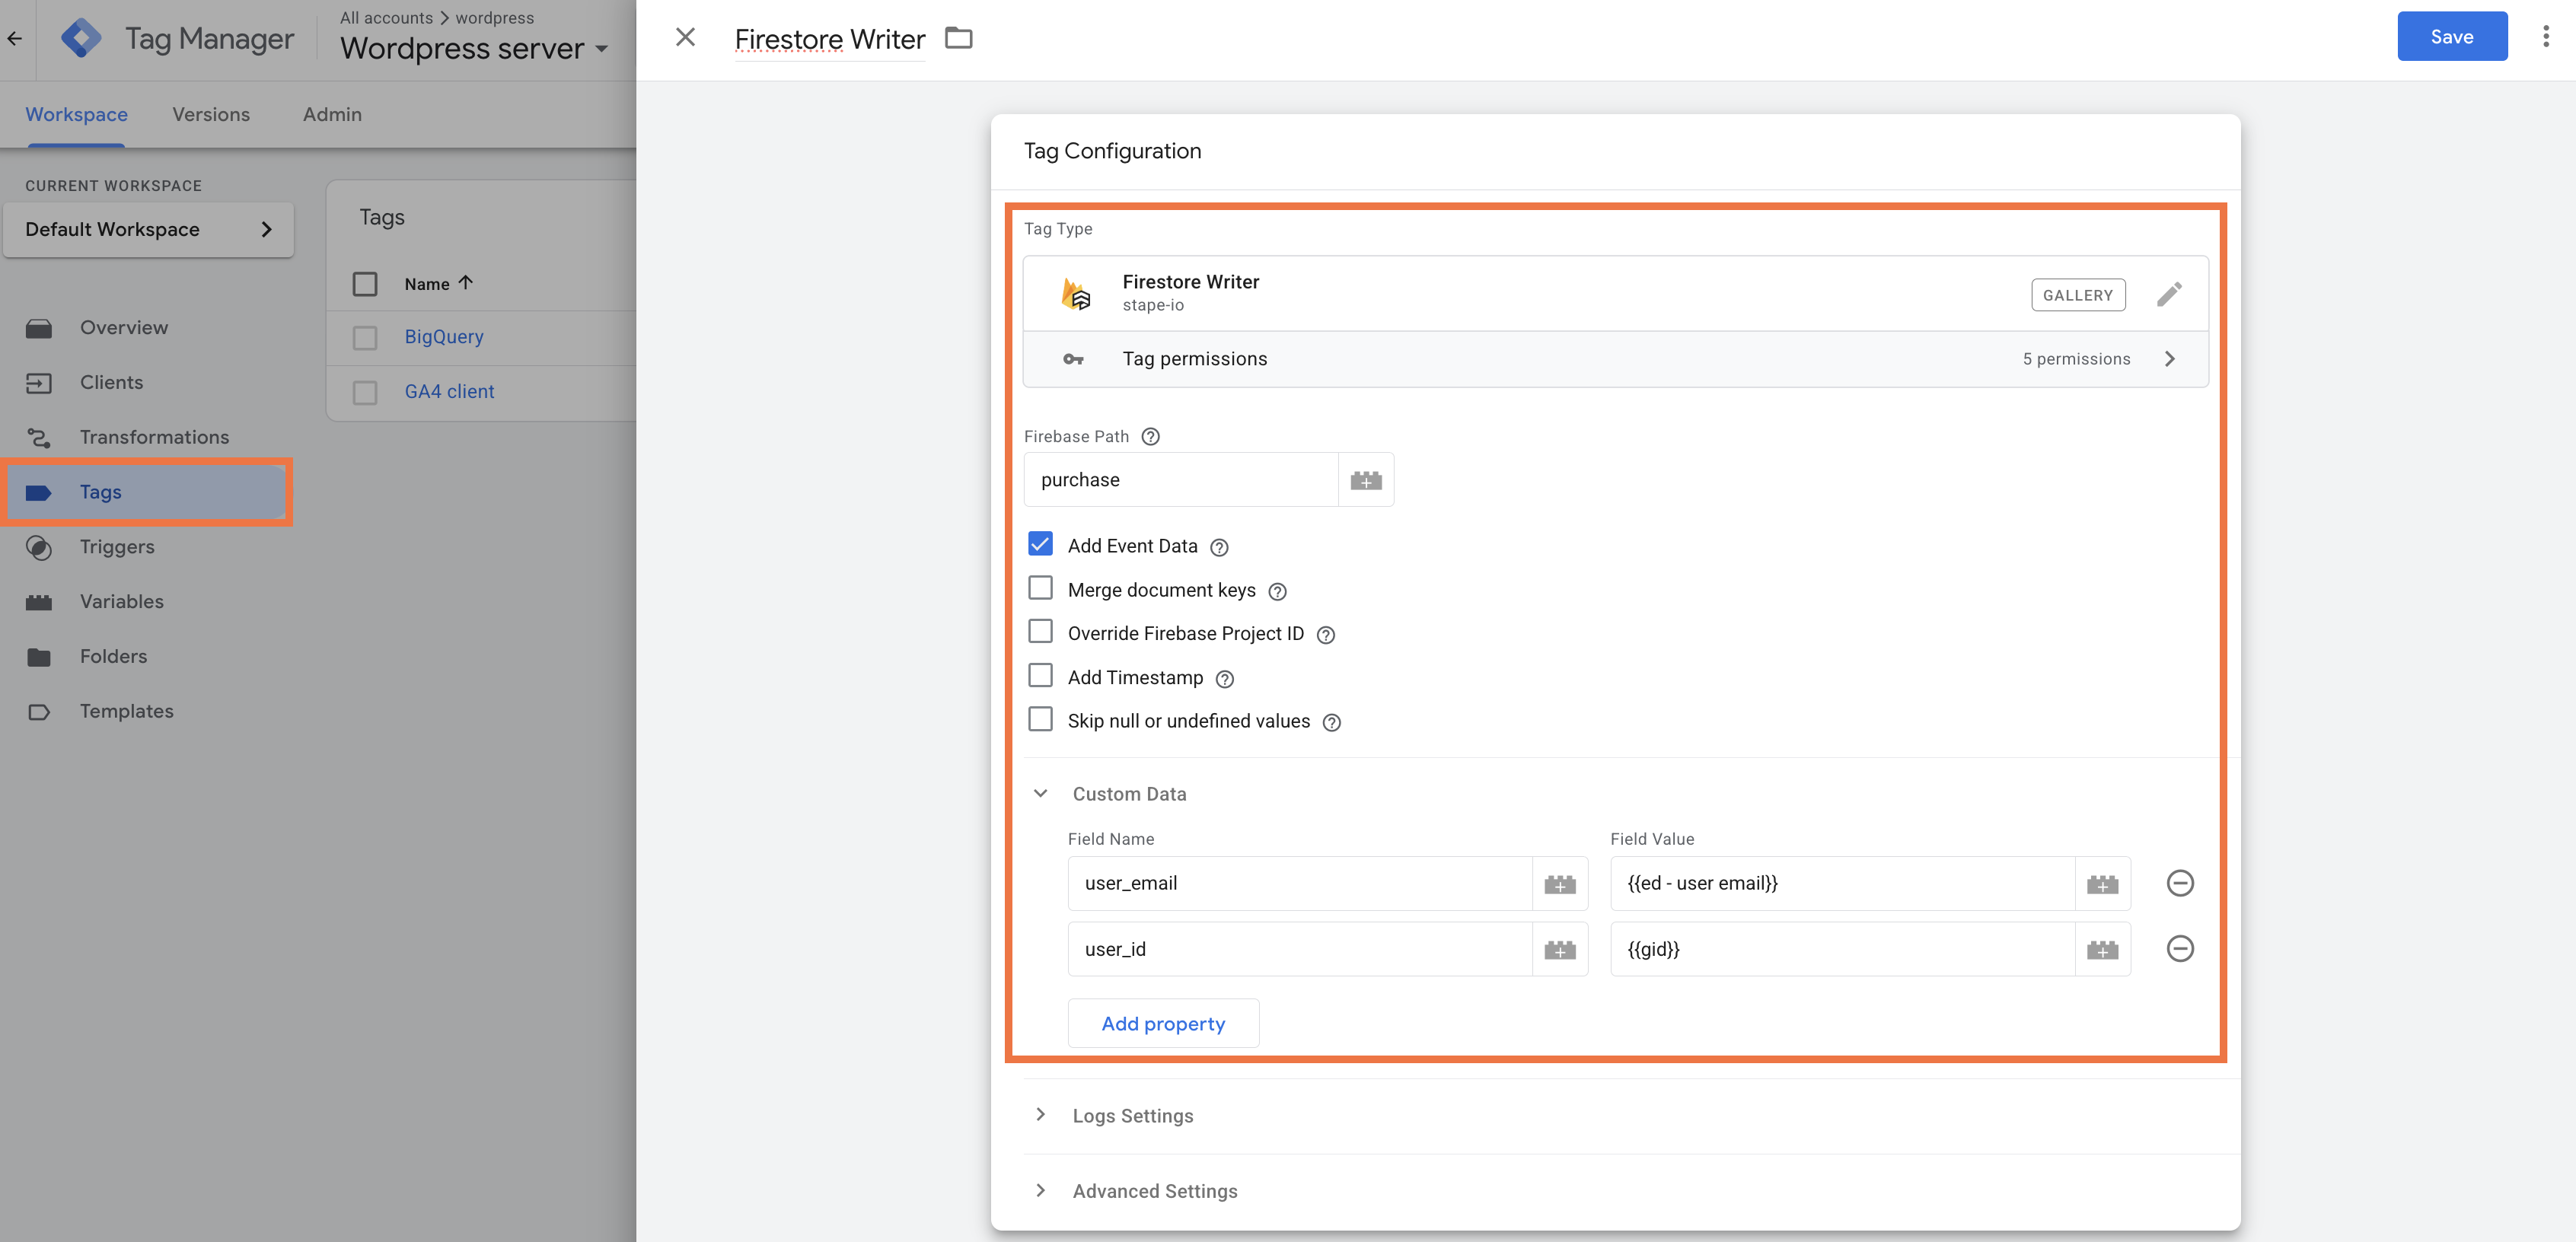
5. Create a new tag using that template and configure it:
- Firebase Path - path to your Firestore collection or document. Mustn’t start or end with a '/'. If you point to a collection, a document with a random ID will be created automatically.
- Add Event Data - sends all sGTM event data to the Firestore document. Custom Data fields override Event Data fields where they overlap.
- Merge document keys - merges incoming data with the existing document instead of overwriting it entirely.
- Override Firebase Project ID - by default, the tag reads the project ID from the
GOOGLE_CLOUD_PROJECTenvironment variable, which is automatically set when your sGTM container runs on Google Cloud. Enable this option only if you need to use a Firebase project that is different from the one your container is running on. - Skip null or undefined values - allows skipping items from
customDataListwith undefined or null values. - Add Timestamp - adds a millisecond timestamp to the document.
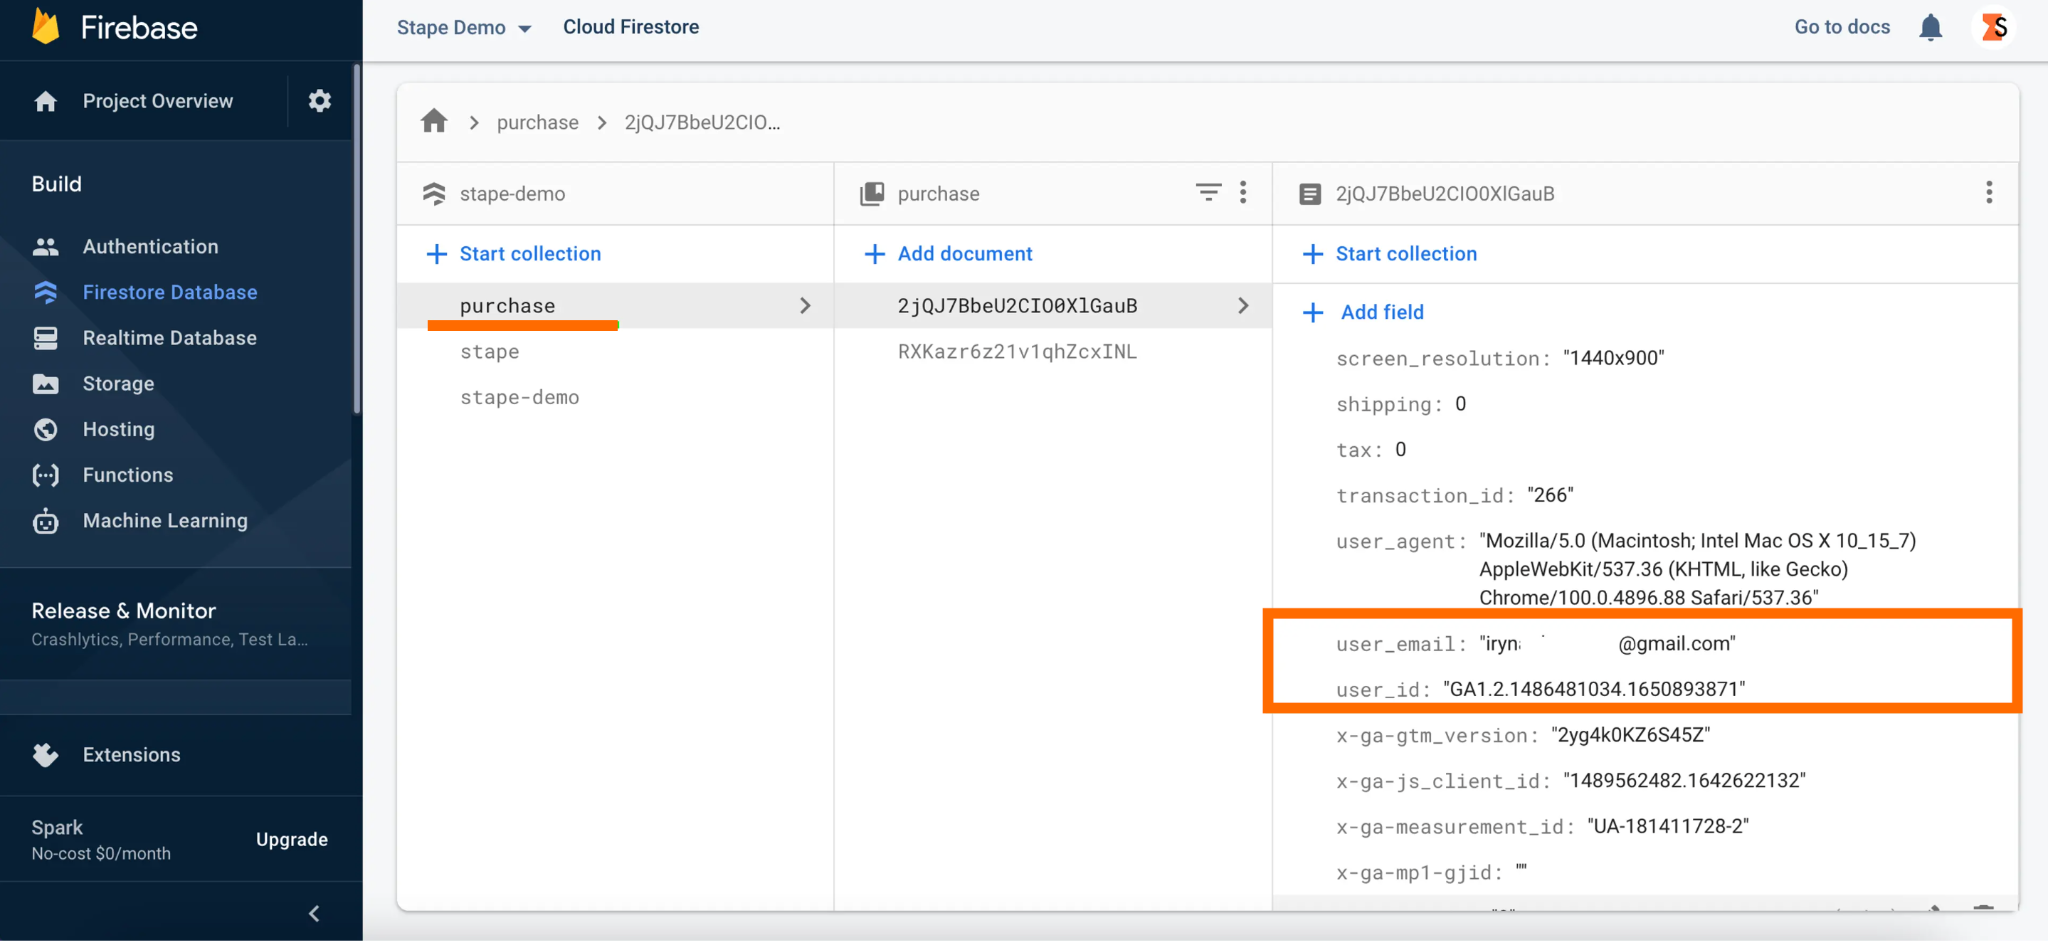
Use Custom Data to add or override specific fields, such as user_email or user_id. If sending user data to production, make sure to hash it before writing.
6. Set your trigger and save the tag.
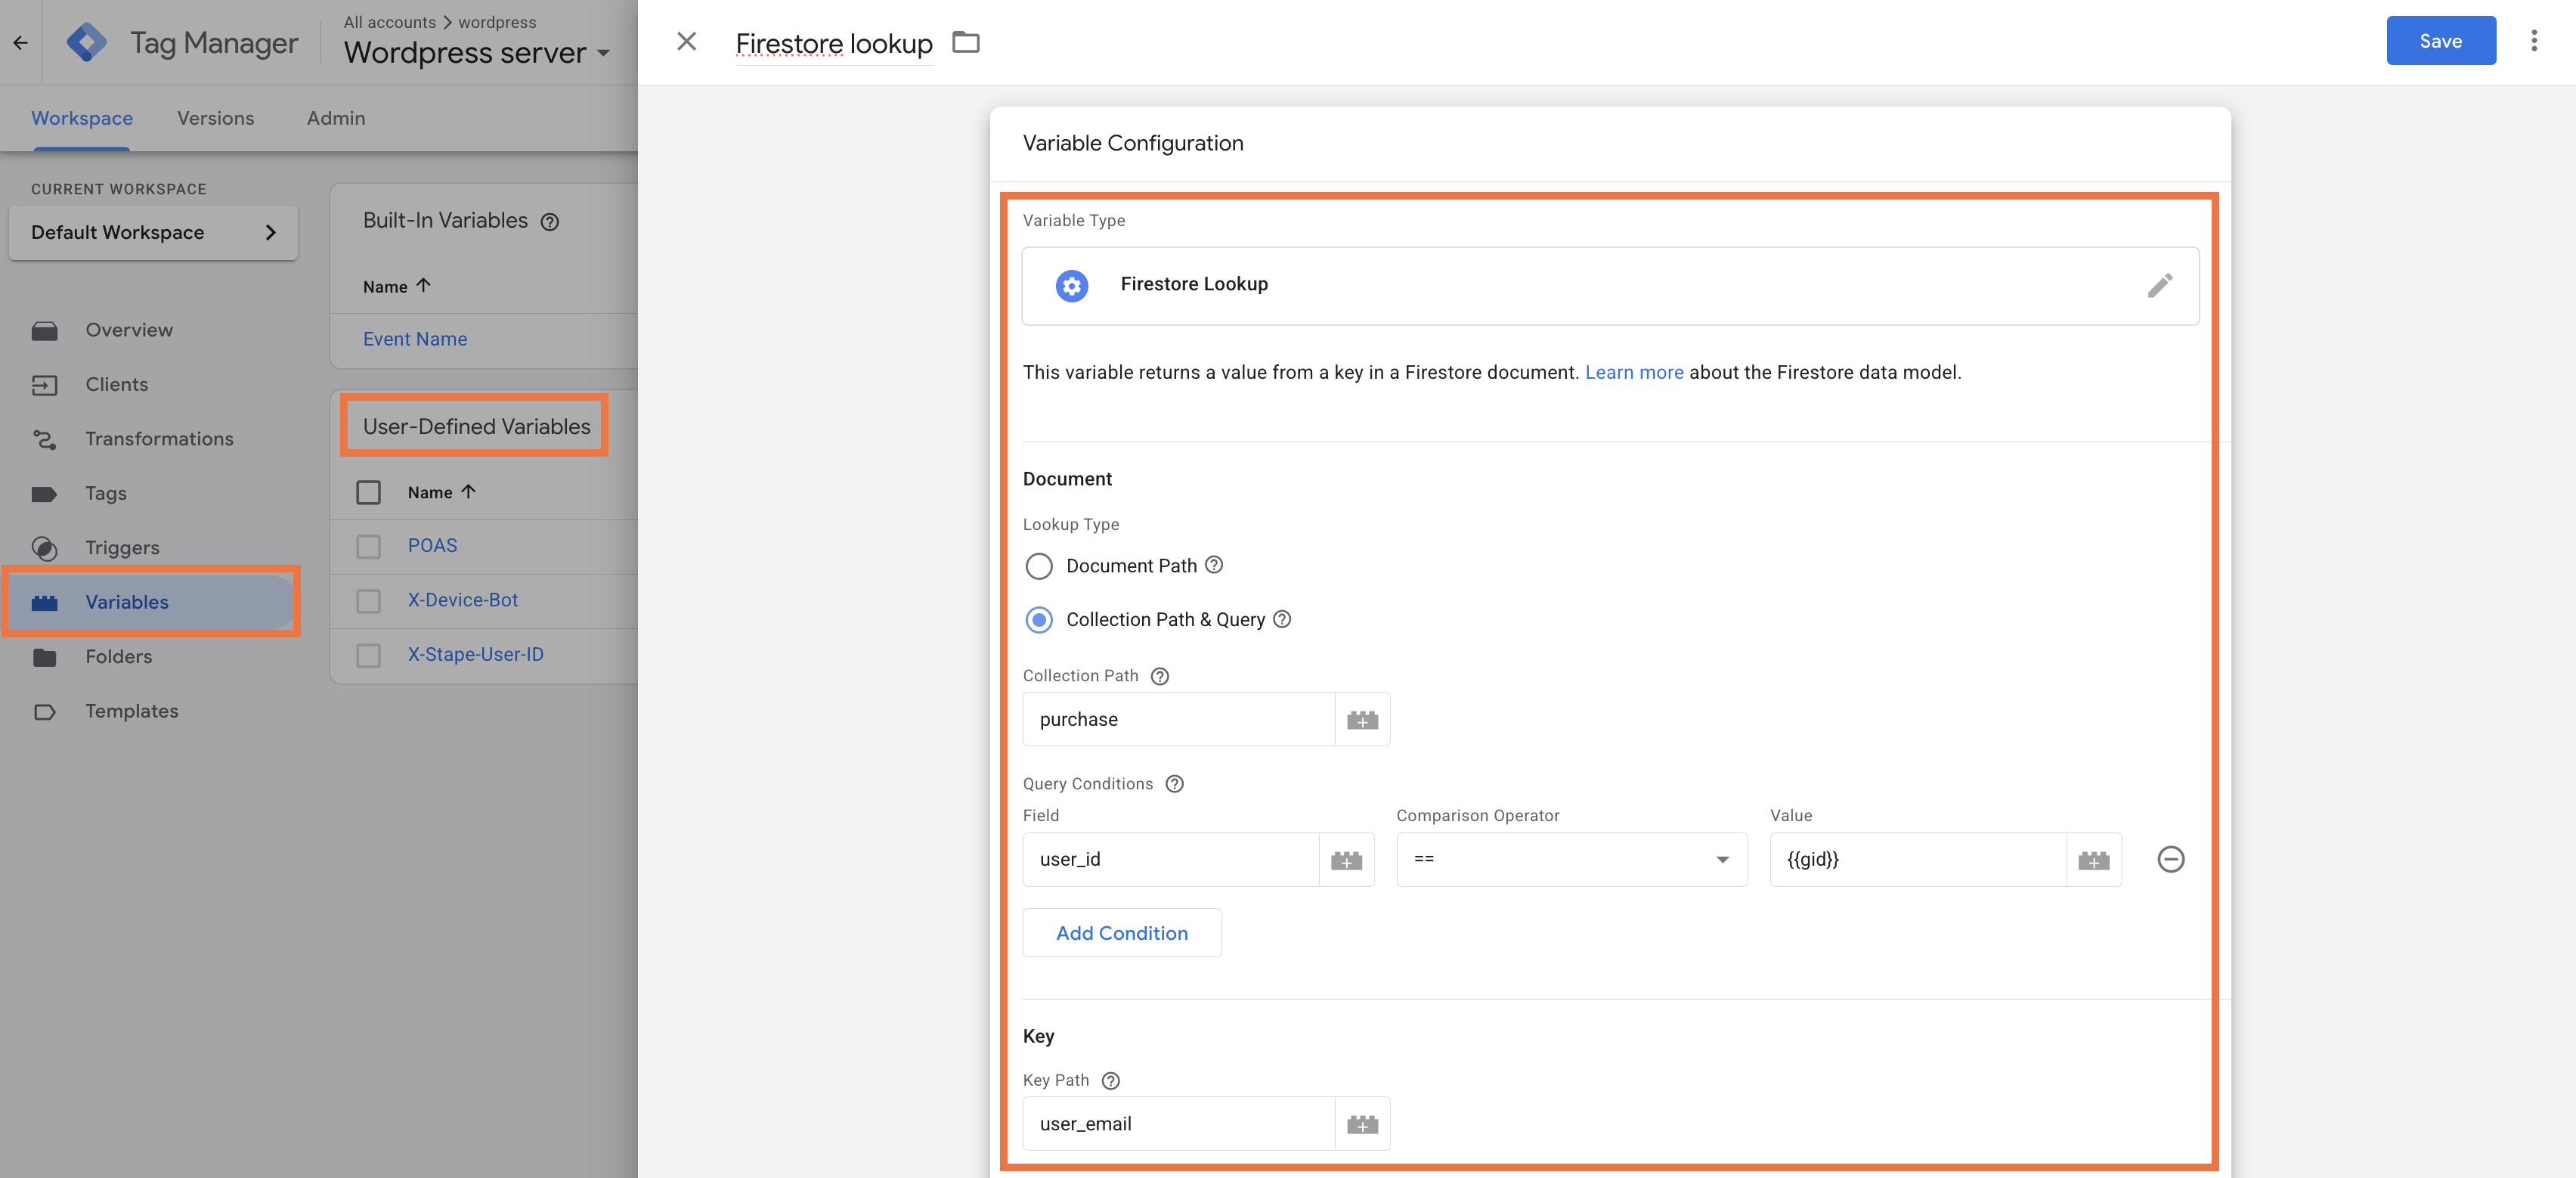
7. To read data back from Firestore, create a Firestore Lookup variable in sGTM.
8. Set your Collection Path and define a query condition (e.g. match user_id in Firestore against a _gid variable in sGTM) to retrieve stored values and use them in other tags.
Testing
Verify the connection is working by triggering a test event through your sGTM container and checking that data lands in the expected destination:
- BigQuery: Navigate to your dataset in the BigQuery console and confirm a new row appears after the test event fires. See Explore BigQuery in the Google Cloud console for instructions on browsing table data.
- Firestore: Open your Firestore database in the Cloud Console and check that the relevant document was created or updated. See Use Firestore Studio for instructions on viewing and filtering documents.
Use case
BigQuery
A sample scenario is an online store that needs to know which products are selling best, but their GA4 data is incomplete because of sampling, making it hard to get clear answers. This means the team is guessing based on general numbers rather than seeing what's really happening.
You can fix this by sending raw data directly to BigQuery:
- Set up the Google Service Account power-up using your service account JSON key (make sure the key has the BigQuery Data Editor role). Then, create a Write to BigQuery tag in your sGTM container to send your purchase data to a BigQuery table.
- As your data arrives in BigQuery, you can run clear, detailed reports to see your revenue by product, date, or source - without any sampling issues.
- Check these results against your GA4 reports. You'll likely see more accurate, detailed data in BigQuery that helps your team finally answer tricky questions about product sales.
Google Merchant Center
If your Google Shopping reports are missing important product details, like brands or categories, you are likely only seeing basic information like item IDs and prices. This makes it difficult to track campaign performance accurately.
You can fix this by automatically adding product information from your Google Merchant Center feed into your tracking setup.
- Enable the Merchant API in your GCP project, and set up a Service Account with Admin access to your Merchant Center. Add the Google Merchant Center Lookup variable to your sGTM container, point it to your Merchant Center ID, and map the attributes you need (such as
product_typetoitem_category)into your GA4 and Google Ads tags. - Once active, your tracking system will automatically fill in the missing product details for every event before it is sent to your reports.
- After about a week, compare your GA4 and Google Ads reports to your previous data.
Firestore
A sample scenario is an eCommerce store with a loyalty program that rewards customers based on how much they’ve spent (Bronze, Silver, and Gold tiers). You want to bid more for those, but your ad platform doesn’t know who they are because that data is hidden in your private database and doesn't get sent to your website's tracking tools.
You can solve this by using Firestore to save and retrieve that data:
- Set up the Google Service Account power-up using your service account JSON key (make sure it has the Cloud Datastore User role). Create a Firestore collection that maps a customer identifier (such as a hashed email or a first-party cookie value) to their loyalty tier. Whenever a customer buys something, use the Firestore Writer tag to save their loyalty status into your database. Use the Firestore Lookup variable in your sGTM to look up that customer's loyalty tier whenever they interact with your site.
- Send this tier information to Google Ads as a custom label. Now, you can create specific audience lists in Google Ads for each loyalty tier (like "Gold members").
- Monitor your campaign performance by tier over the following 2-4 weeks.
- After a few weeks of testing, you can adjust your bids specifically for your most valuable customers.
Was this article helpful?
Comments