Multi-Domains power-up
Updated Apr 23, 2026
The Multi-Domains power-up lets you map multiple custom subdomains or entirely different domain names to a single sGTM container, removing the default limitation of one tagging server URL per container. This means you can manage tracking for all your web properties from one place while maintaining first-party cookies on each domain.
Multi-Domains is available on the Business subscription plan and higher. To check your current plan or upgrade, go to your sGTM container settings.
How to set up Multi-Domains
- Log in to your Stape account and select your sGTM container from the dashboard.
2. Go to Power-ups and click Use next to the Multi-Domains panel.

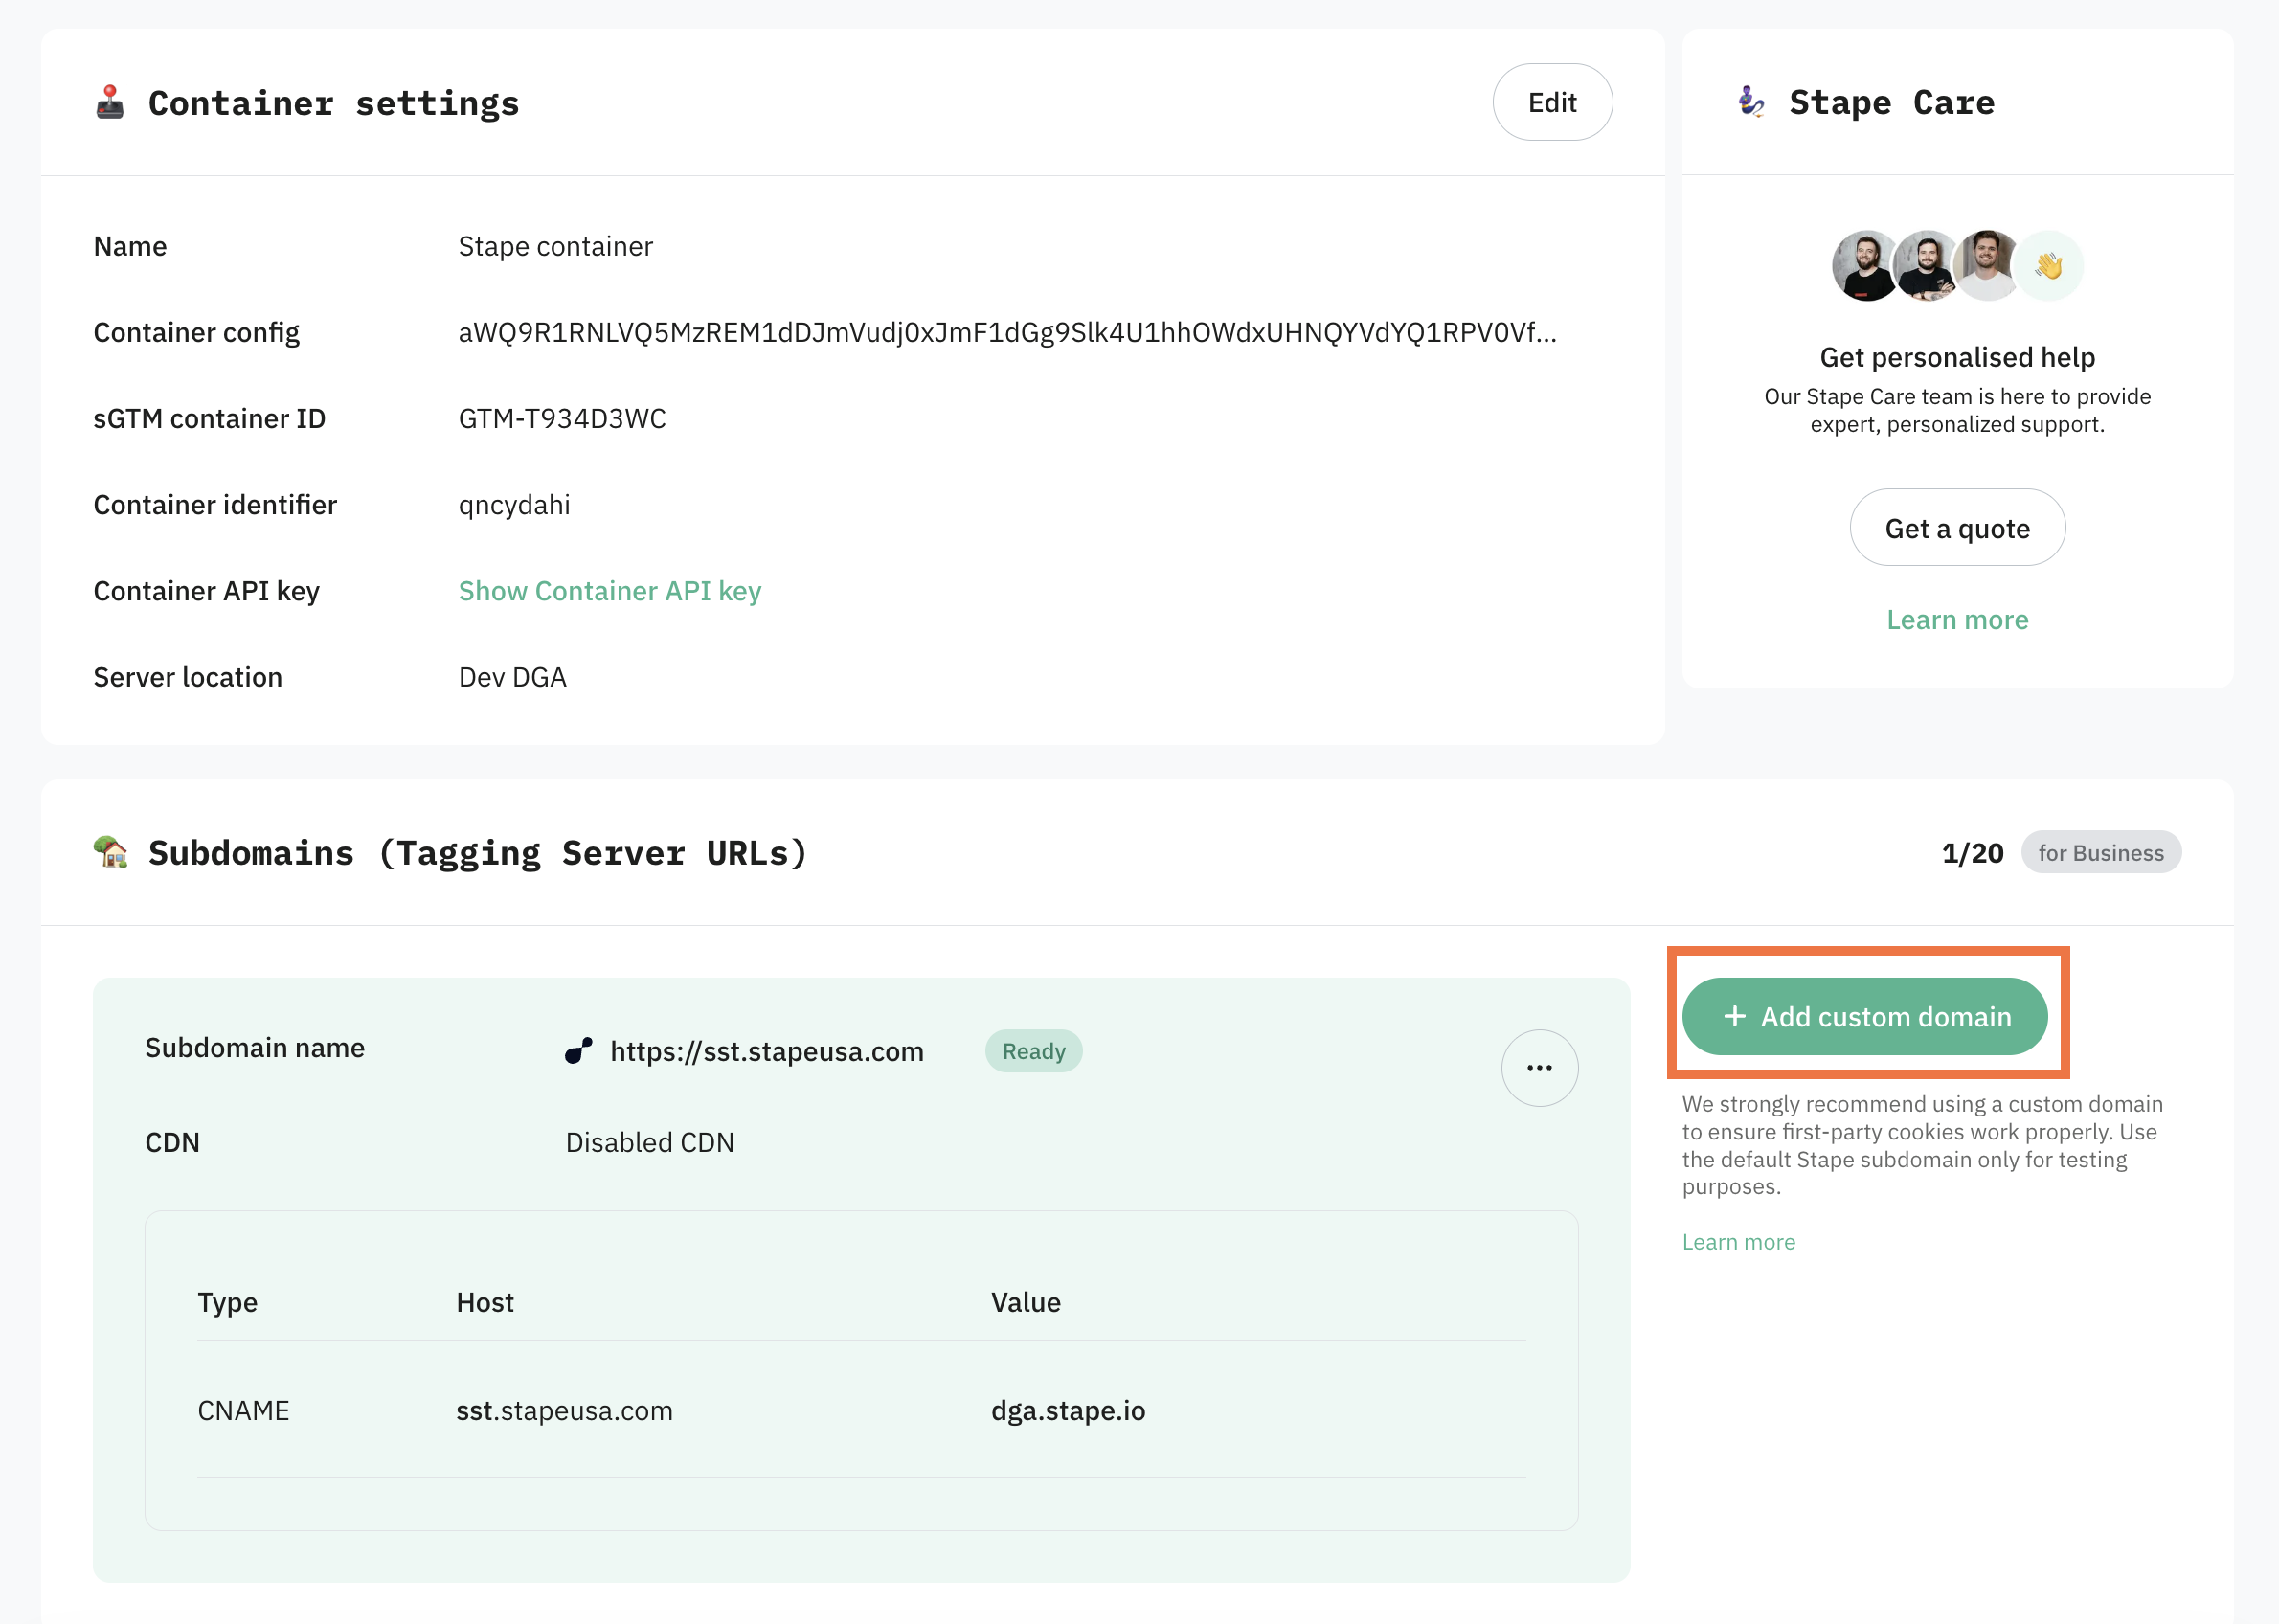
3. Click Add custom domain.
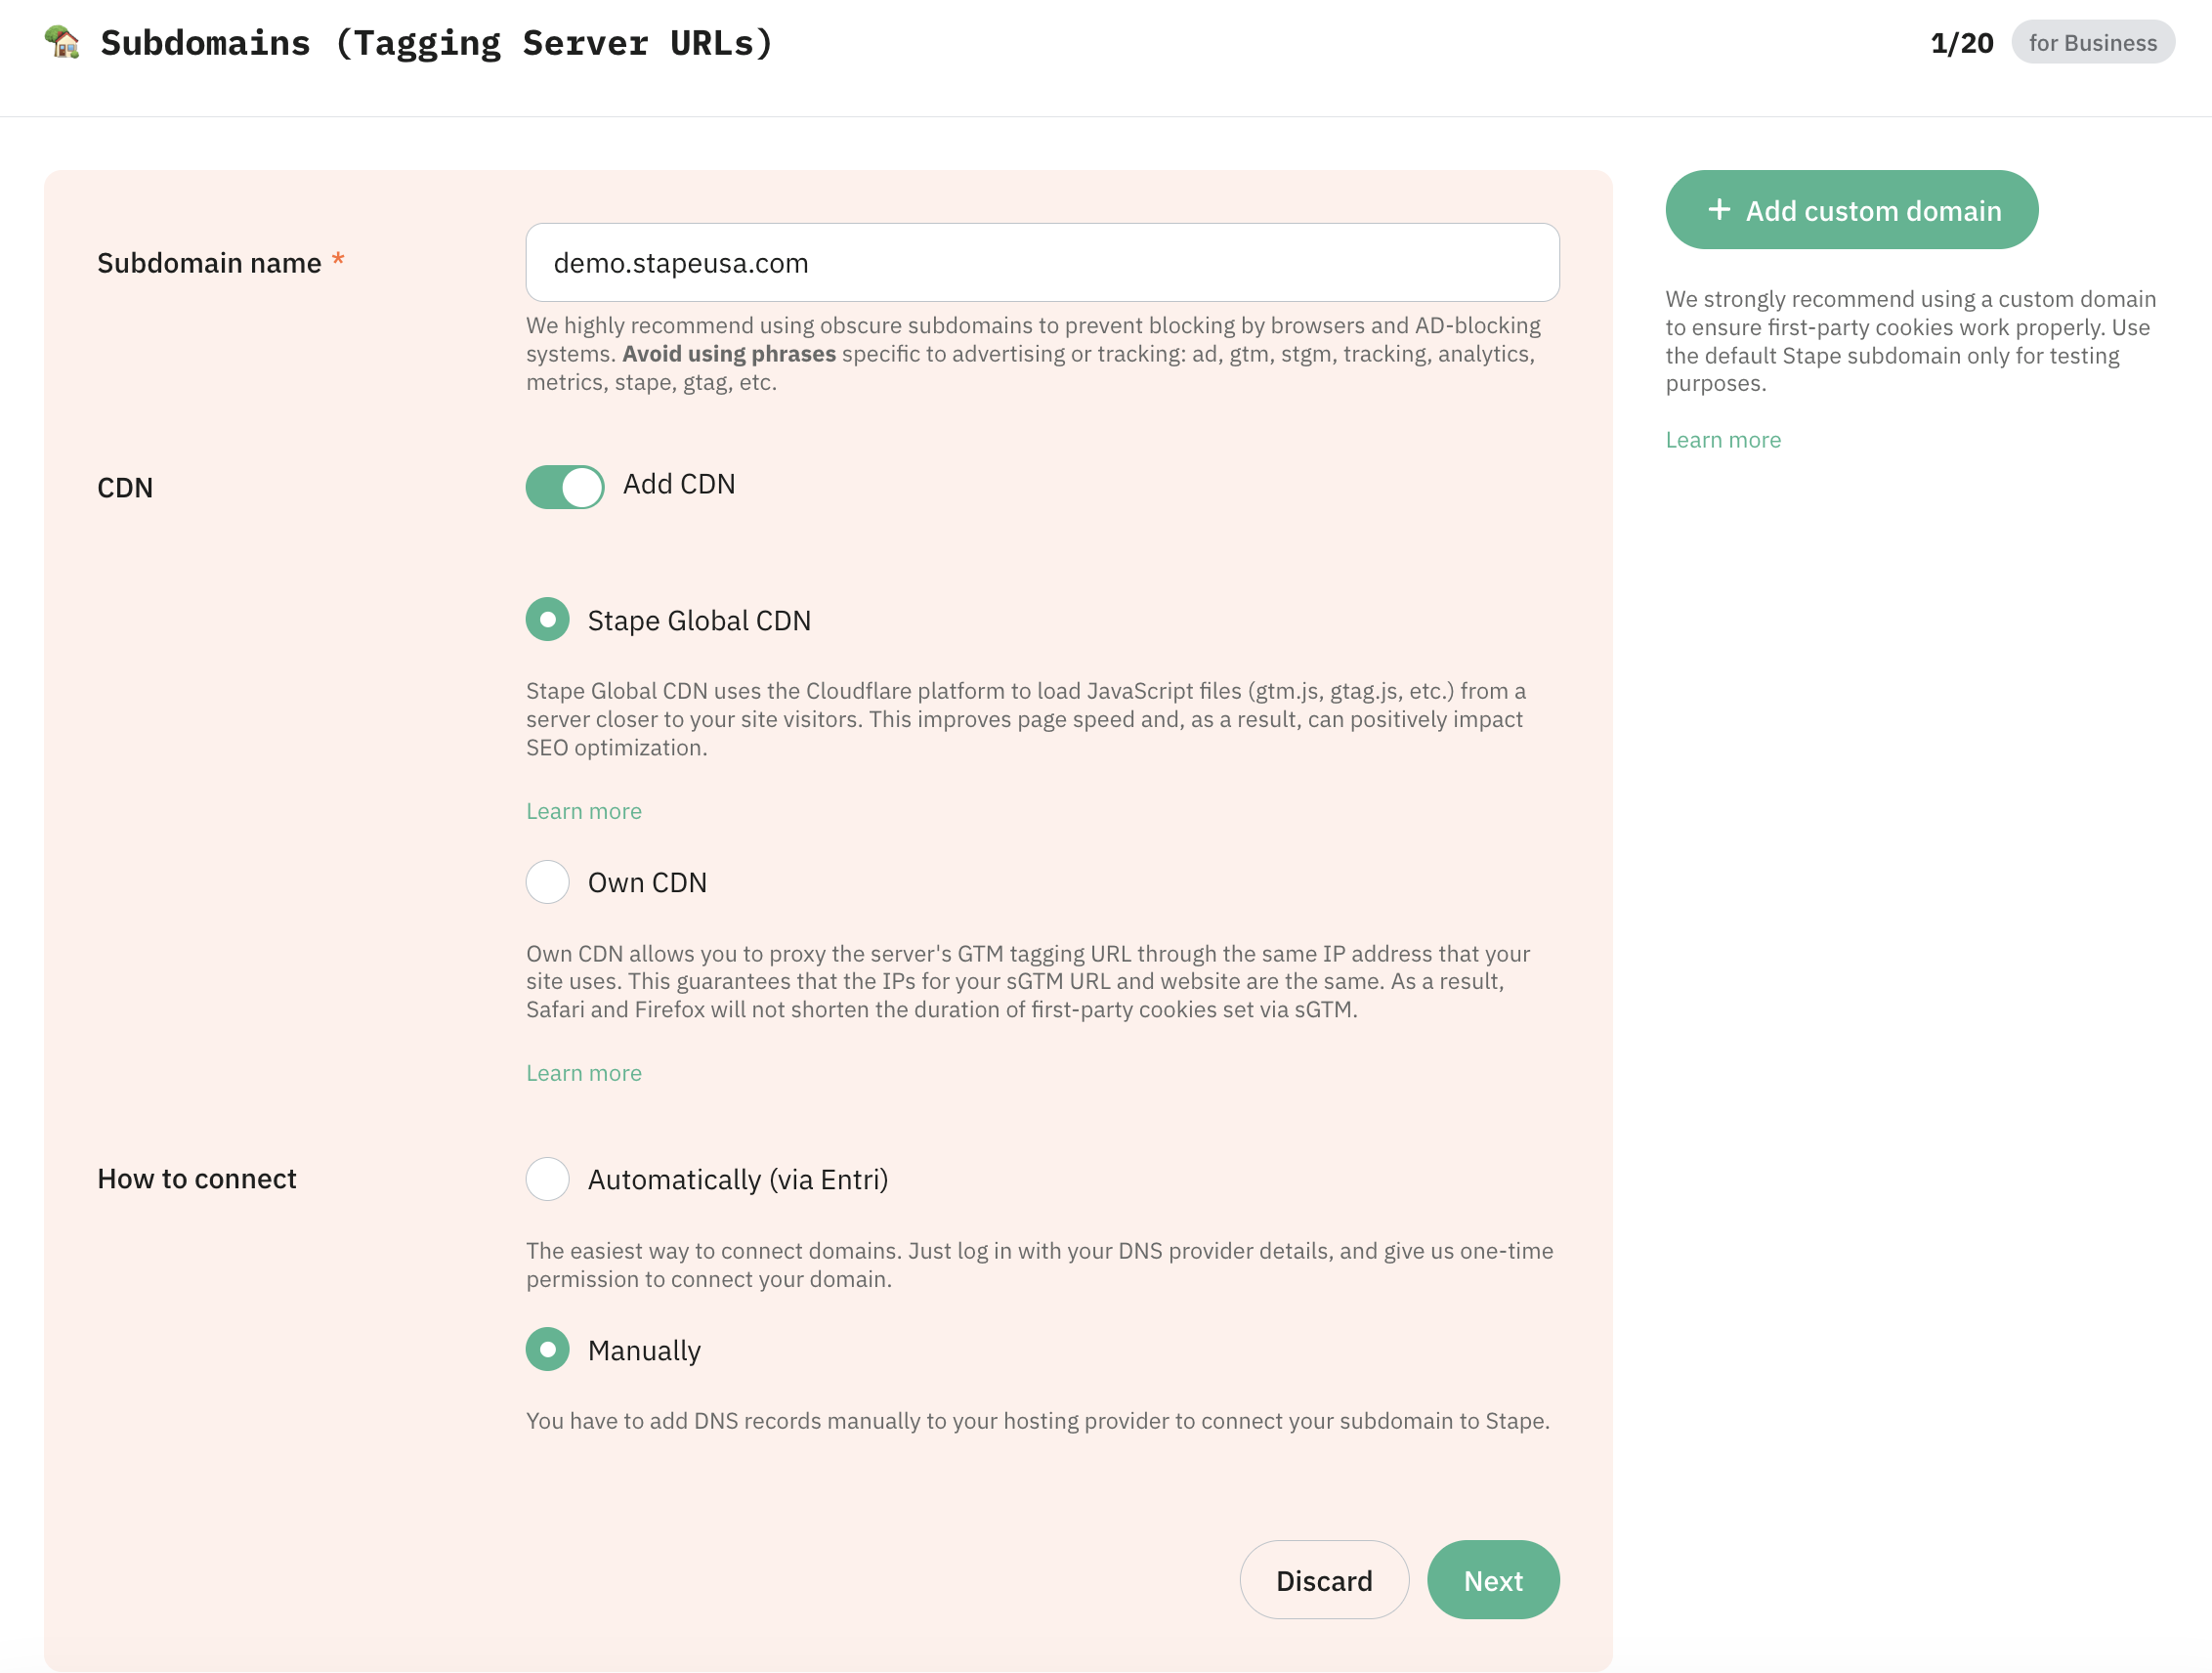
4. Configure your domain settings:
- Subdomain name - enter your tagging server subdomain (e.g. sst.my-domain.com).
- Add CDN - enable to serve JS files (gtm.js, gtag.js, etc.) from a server closer to your visitors.
- Stape Global CDN - Stape manages distribution.
- Own CDN - route traffic through your website's DNS provider. This makes the sGTM domain IP match your site's IP, which can extend cookie duration.
- Advanced settings - only available if Add CDN is disabled. Tick Use A records instead of CNAME records if your DNS provider restricts duplicate CNAME records.
5. Choose how to connect your domain:
- Automatically (via Entri) - log in with your DNS provider credentials and grant one-time permission to connect the domain. See the full list of supported DNS providers by Entri.
- Manually - copy the DNS records provided by Stape and add them in your DNS provider. For this setup we’re using Manually.
6. If you chose to enable Use A records instead of CNAME records read the Adding a custom domain with A and AAAA records section. Otherwise, read Adding a custom domain with CNAME record.
7. Click Next.
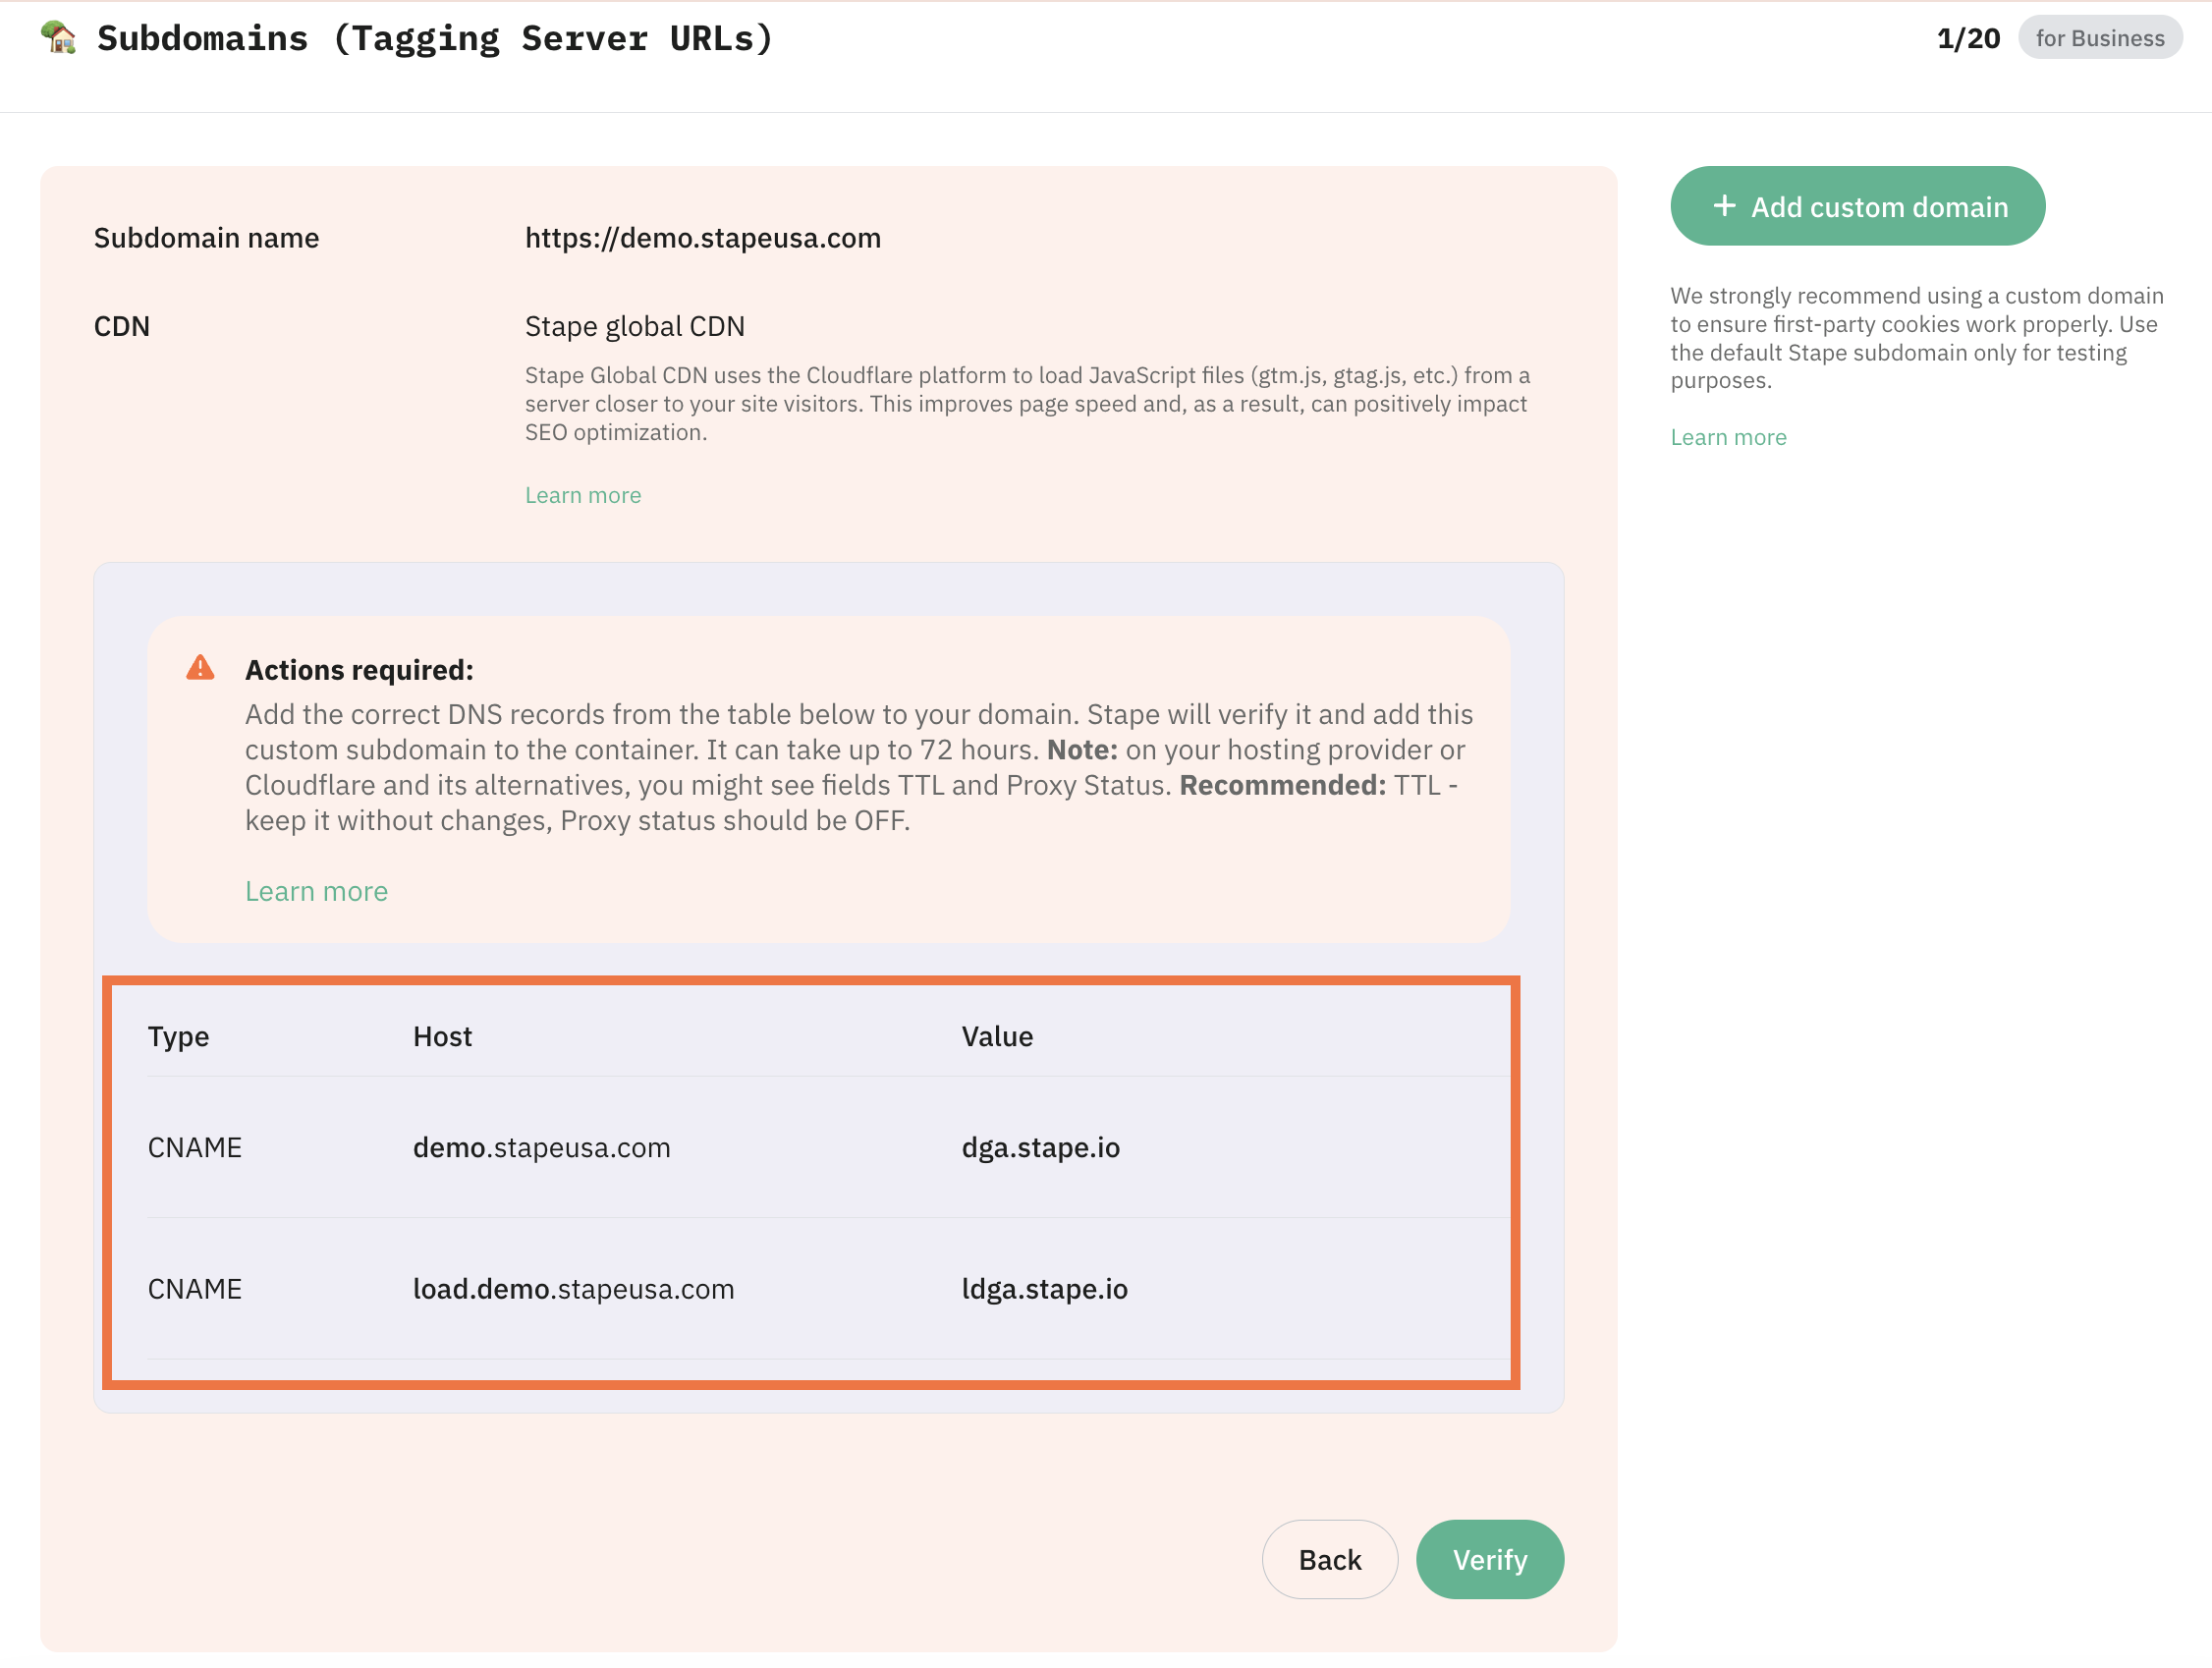
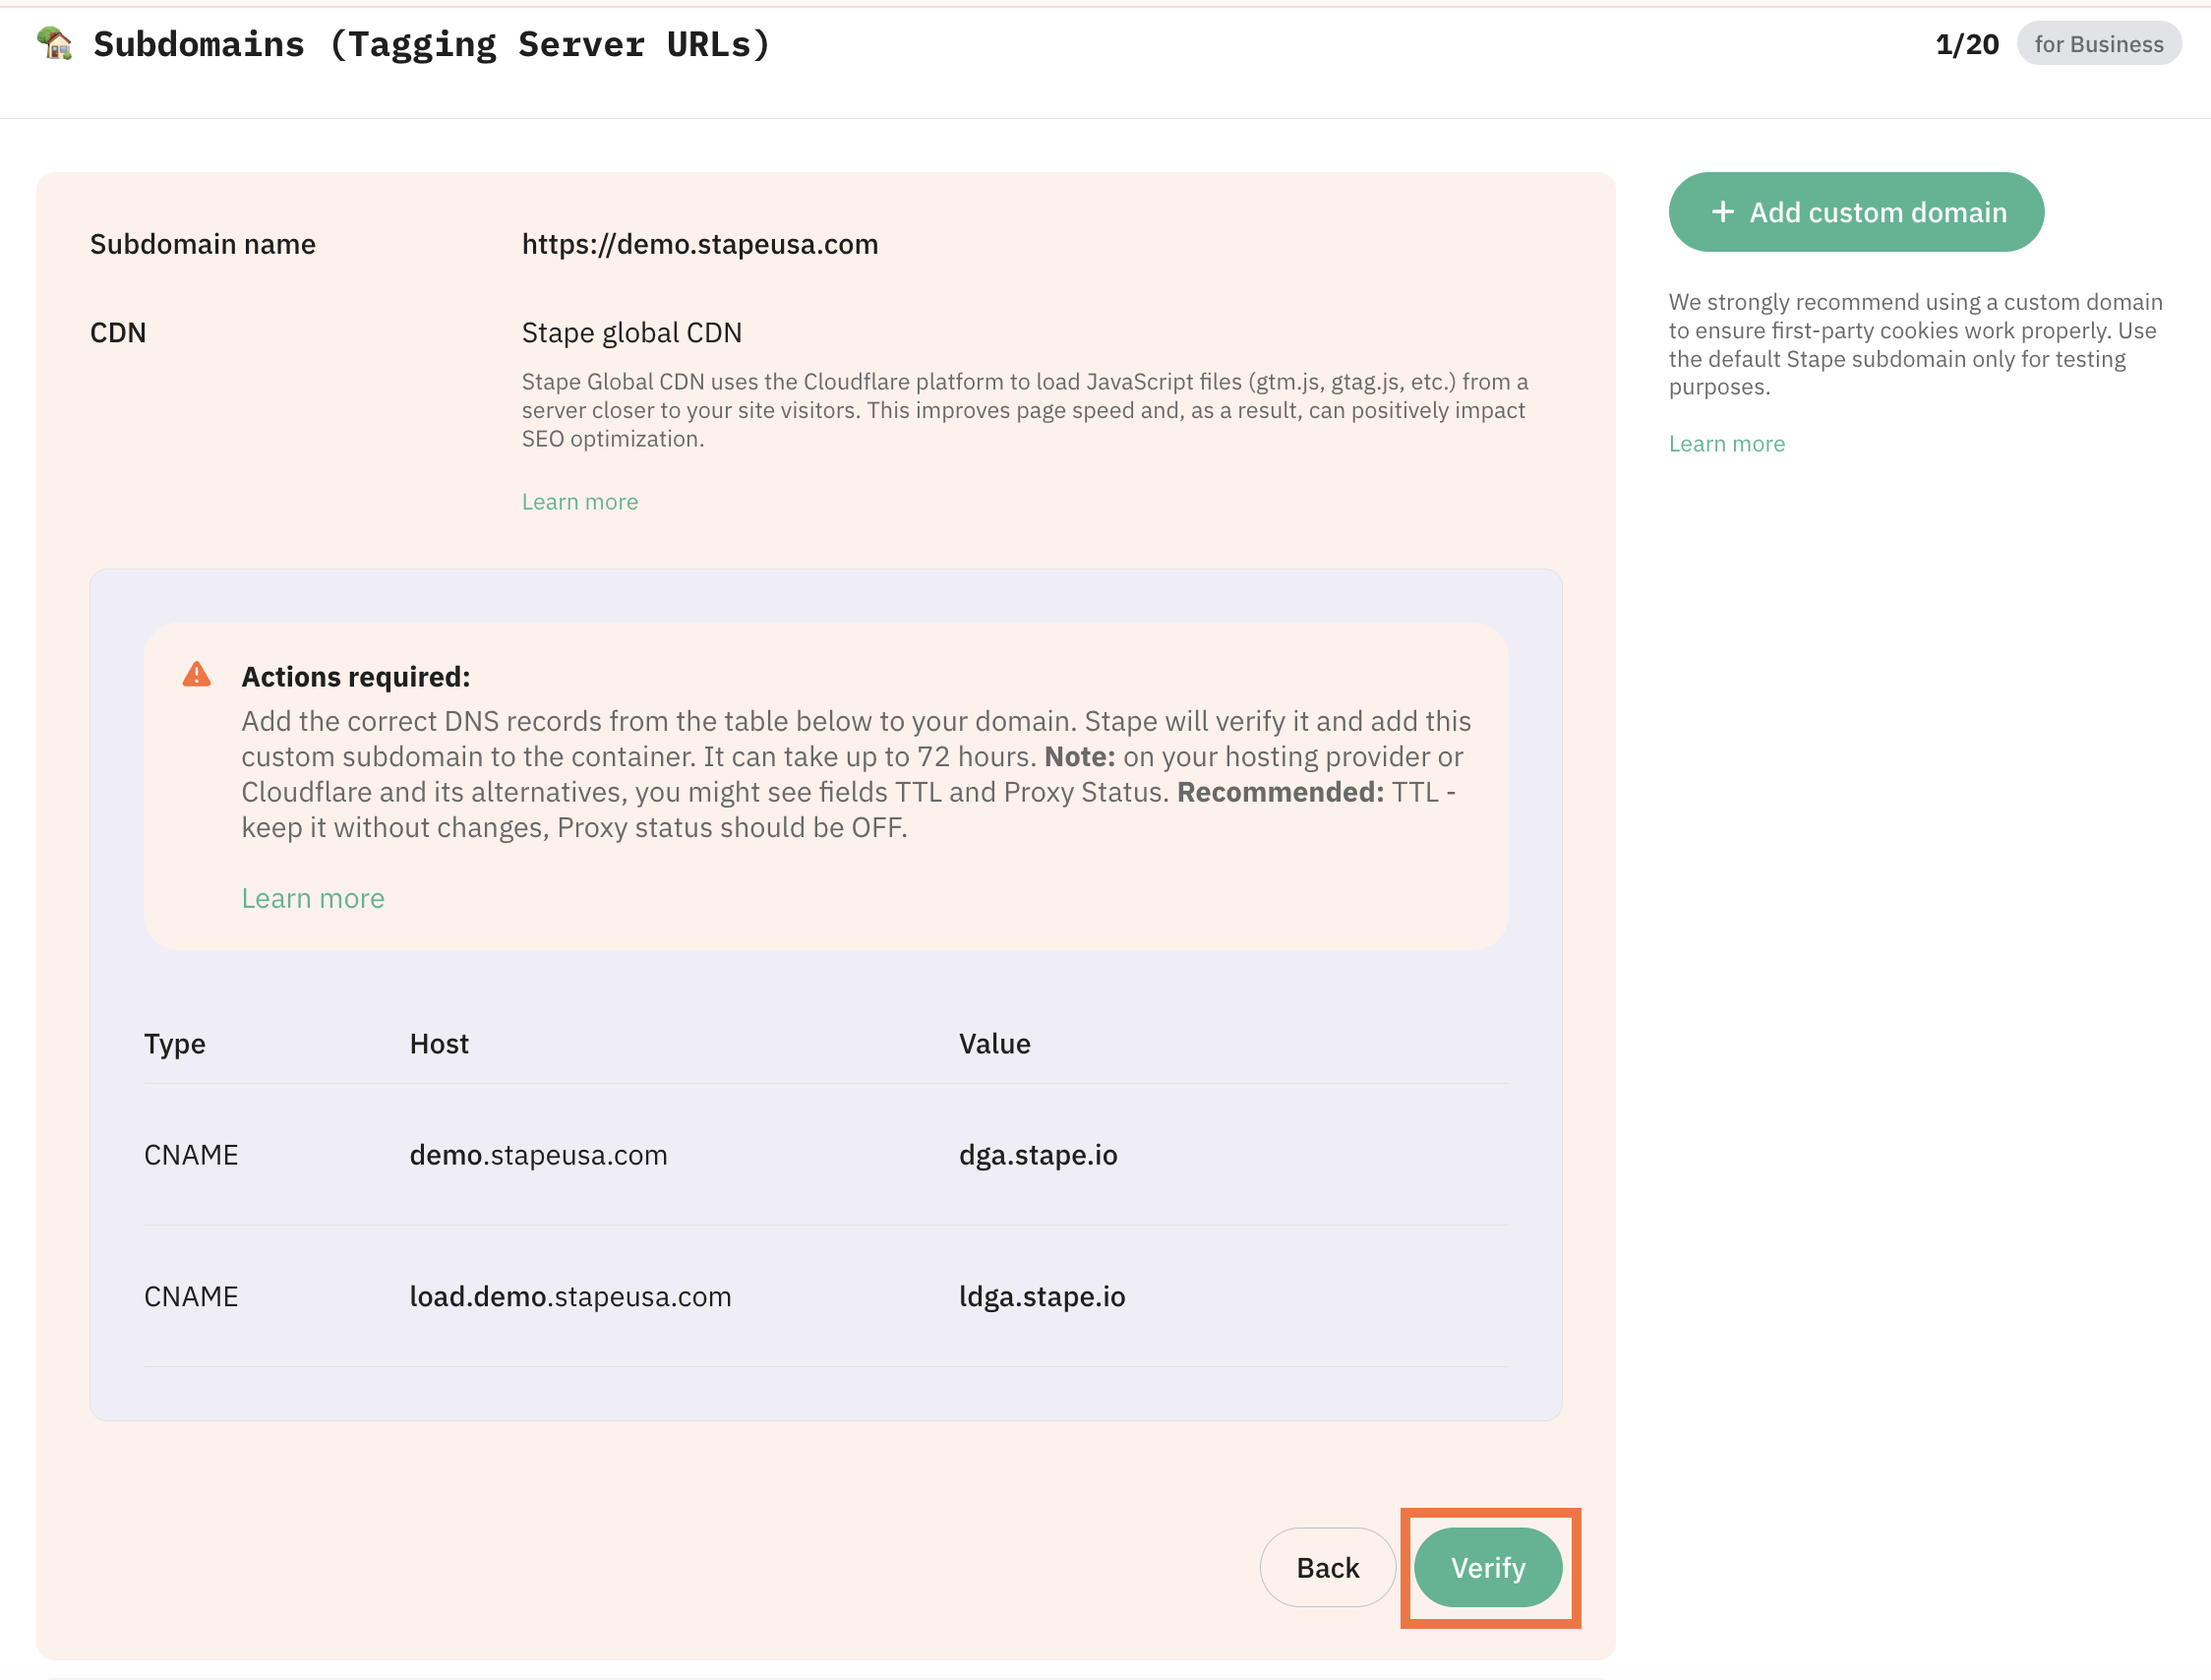
Adding a custom domain with CNAME record
Stape will provide one CNAME record (or two if you enabled Stape Global CDN).
In this example we’re using the Cloudflare DNS provider, but you can use any provider you like.
1. In Cloudflare, go to your domain, and then DNS → Records → Add record.
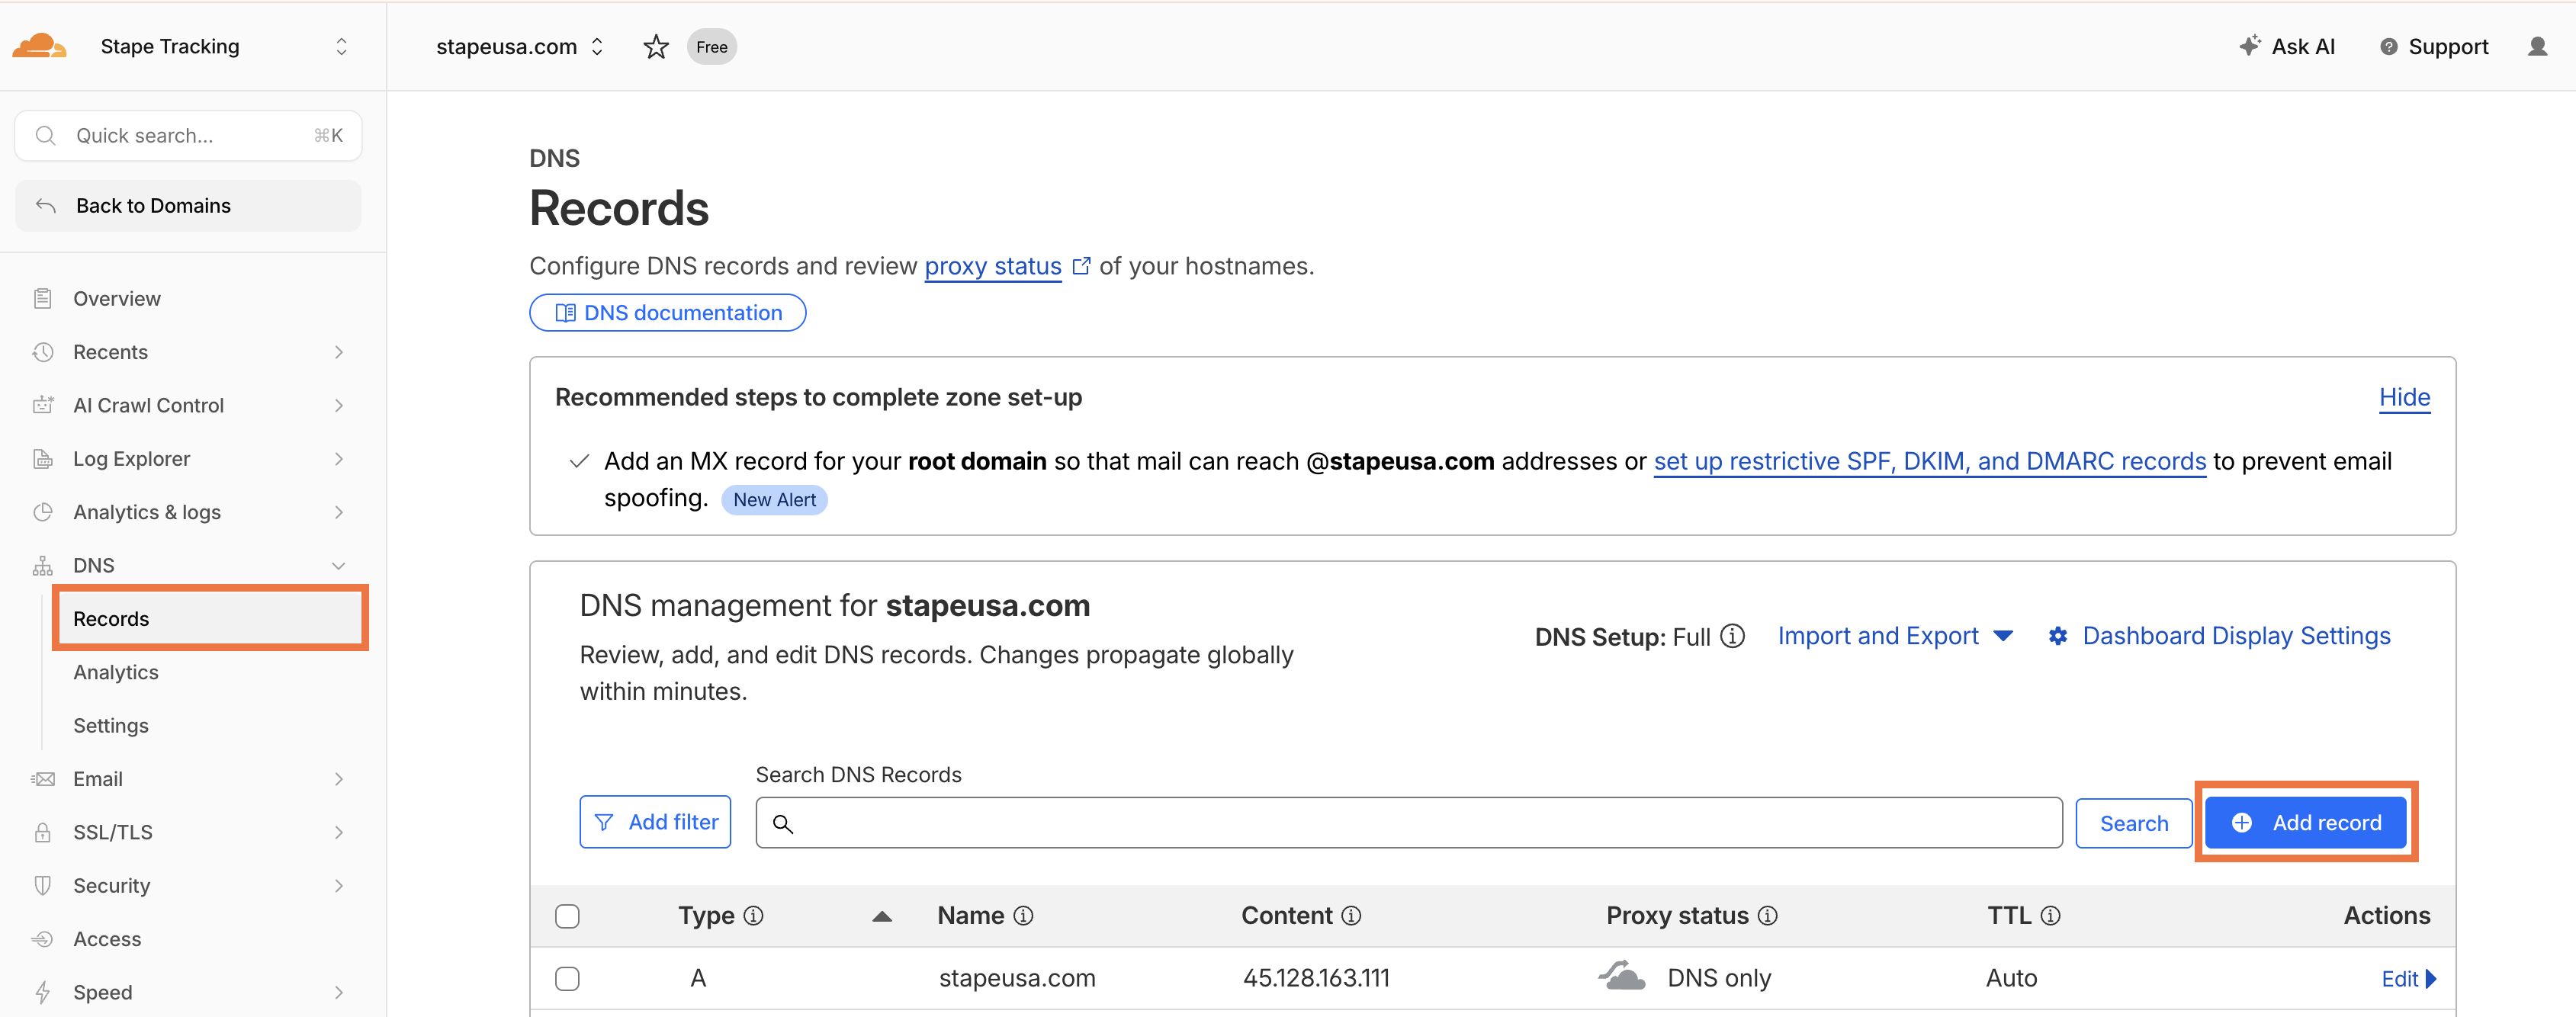
2. Set the fields:
- Type - CNAME
- Name - paste Host from Stape
- Target - paste Value from Stape
- Proxy status - toggle OFF
3. Click Save.

4. If Stape has provided two CNAME records, repeat for the second one, then click Save.
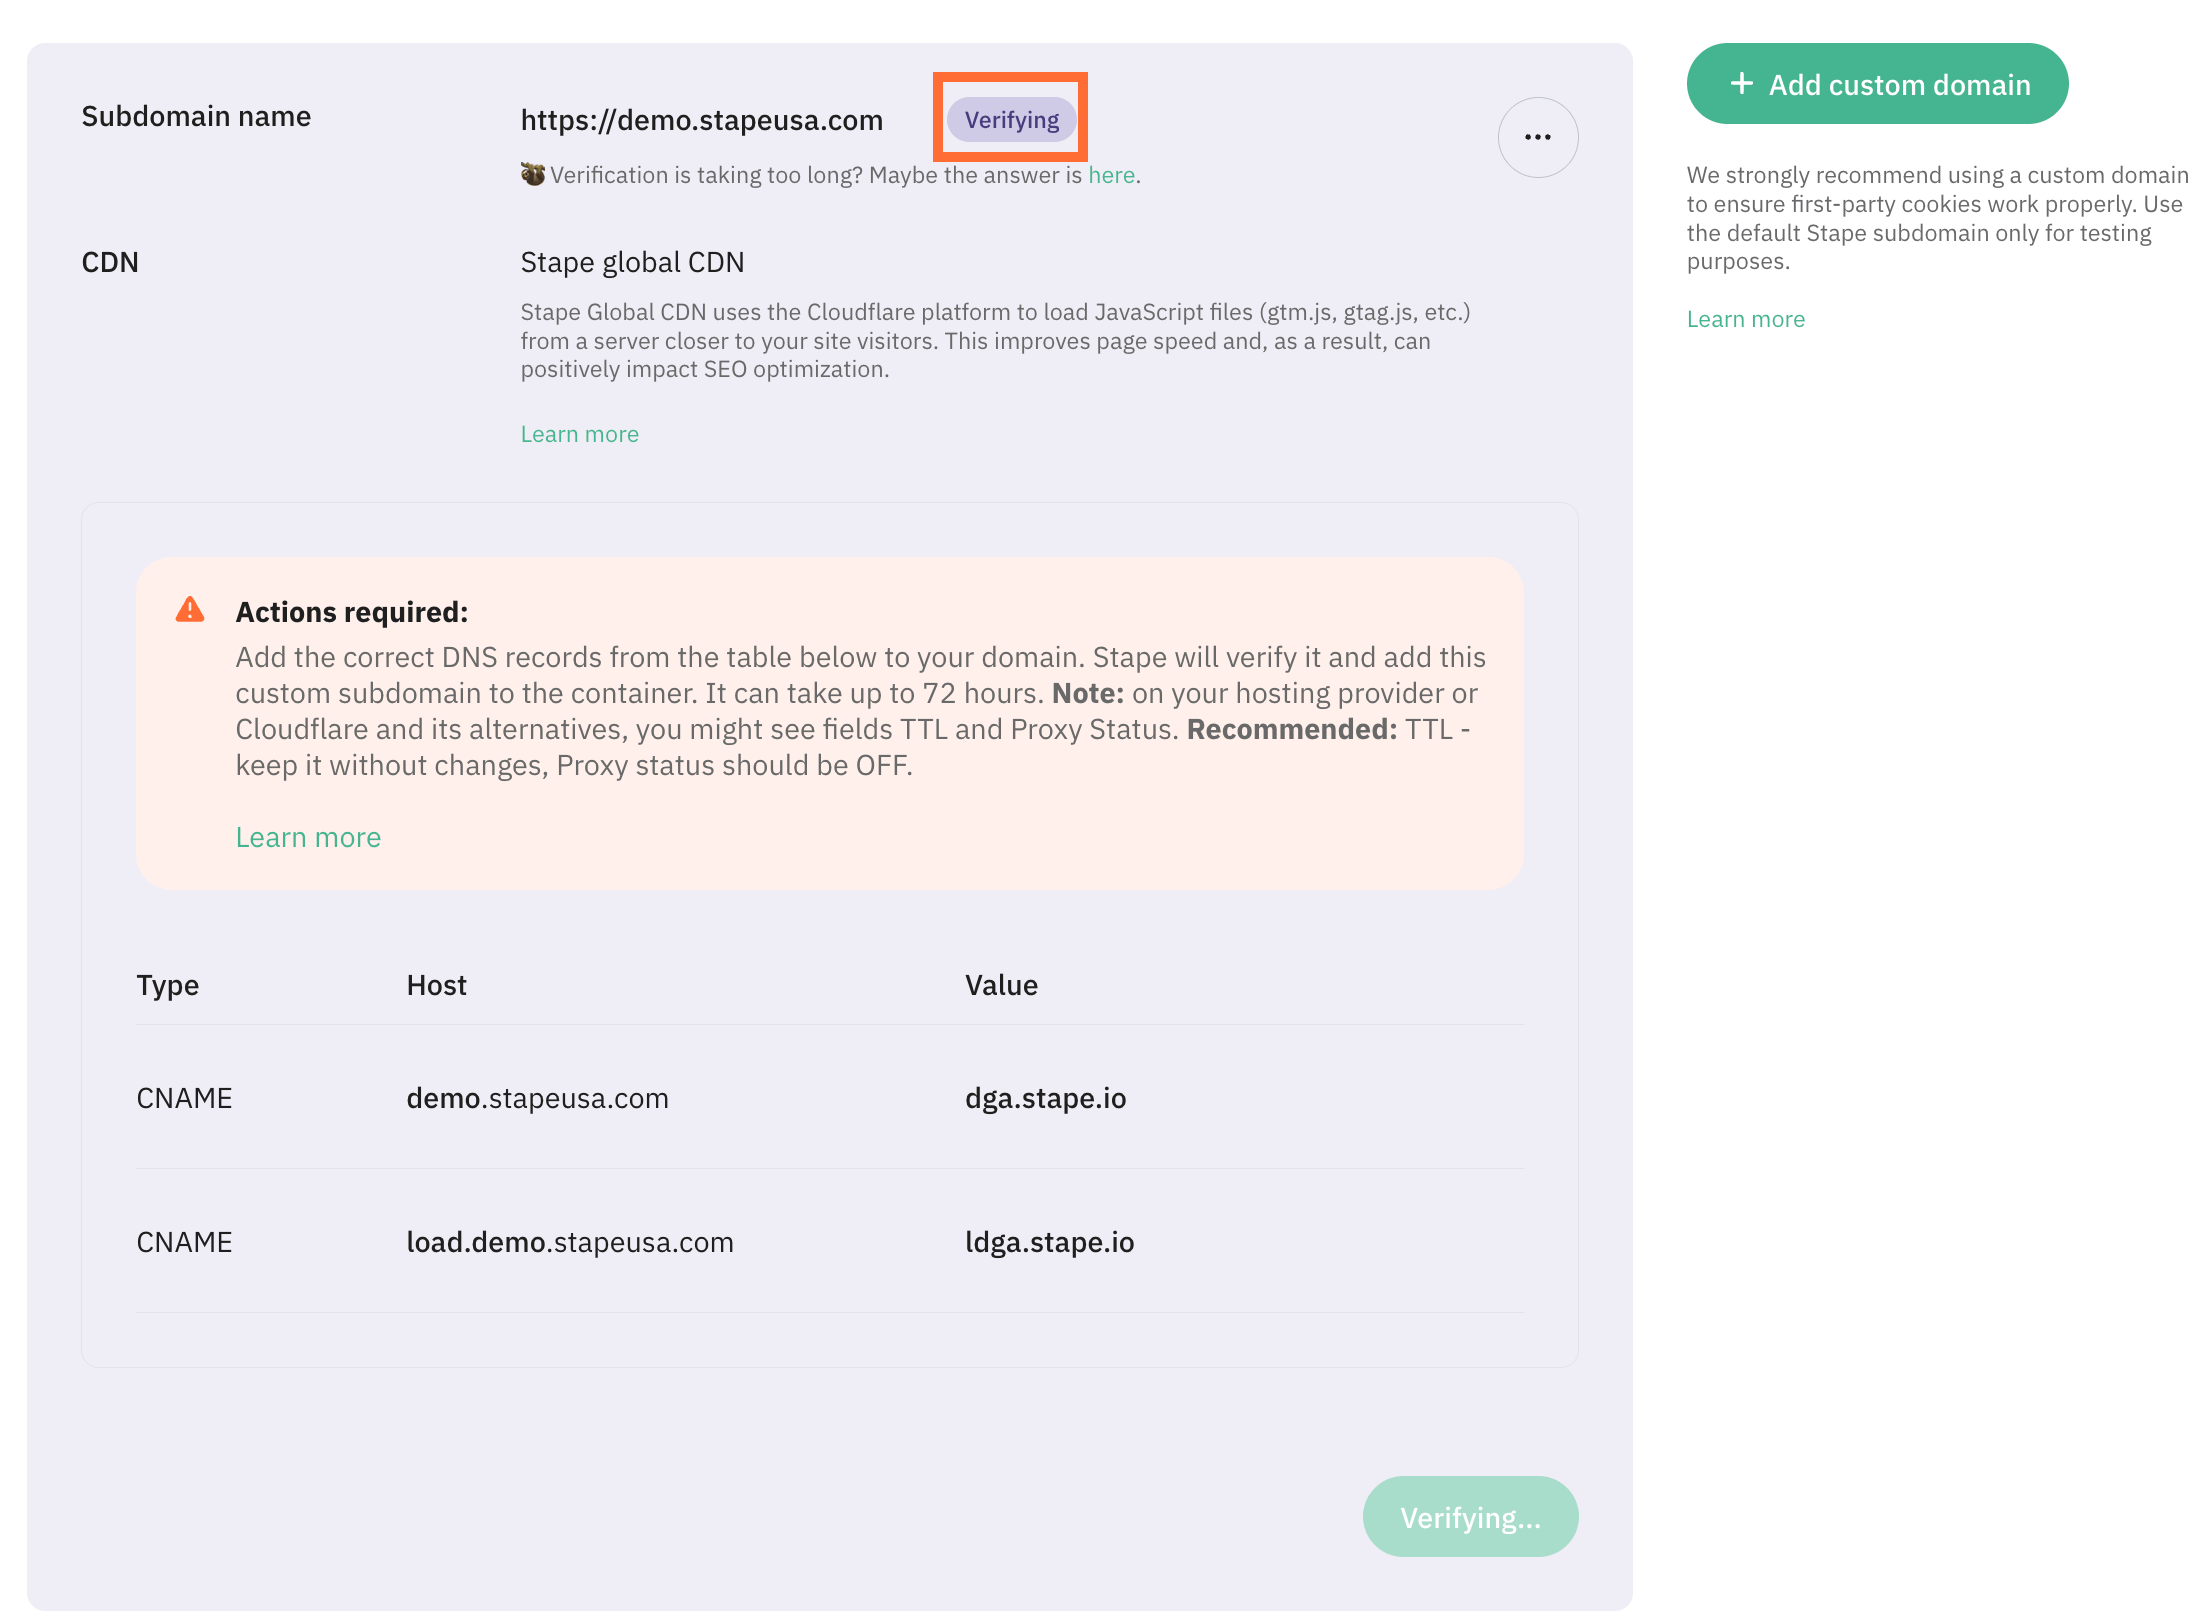
5. Return to Stape and click Verify.
6. Wait for the container status to change from Verifying to Ready, usually 30 minutes to 2 hours, up to 72 hours in some cases.
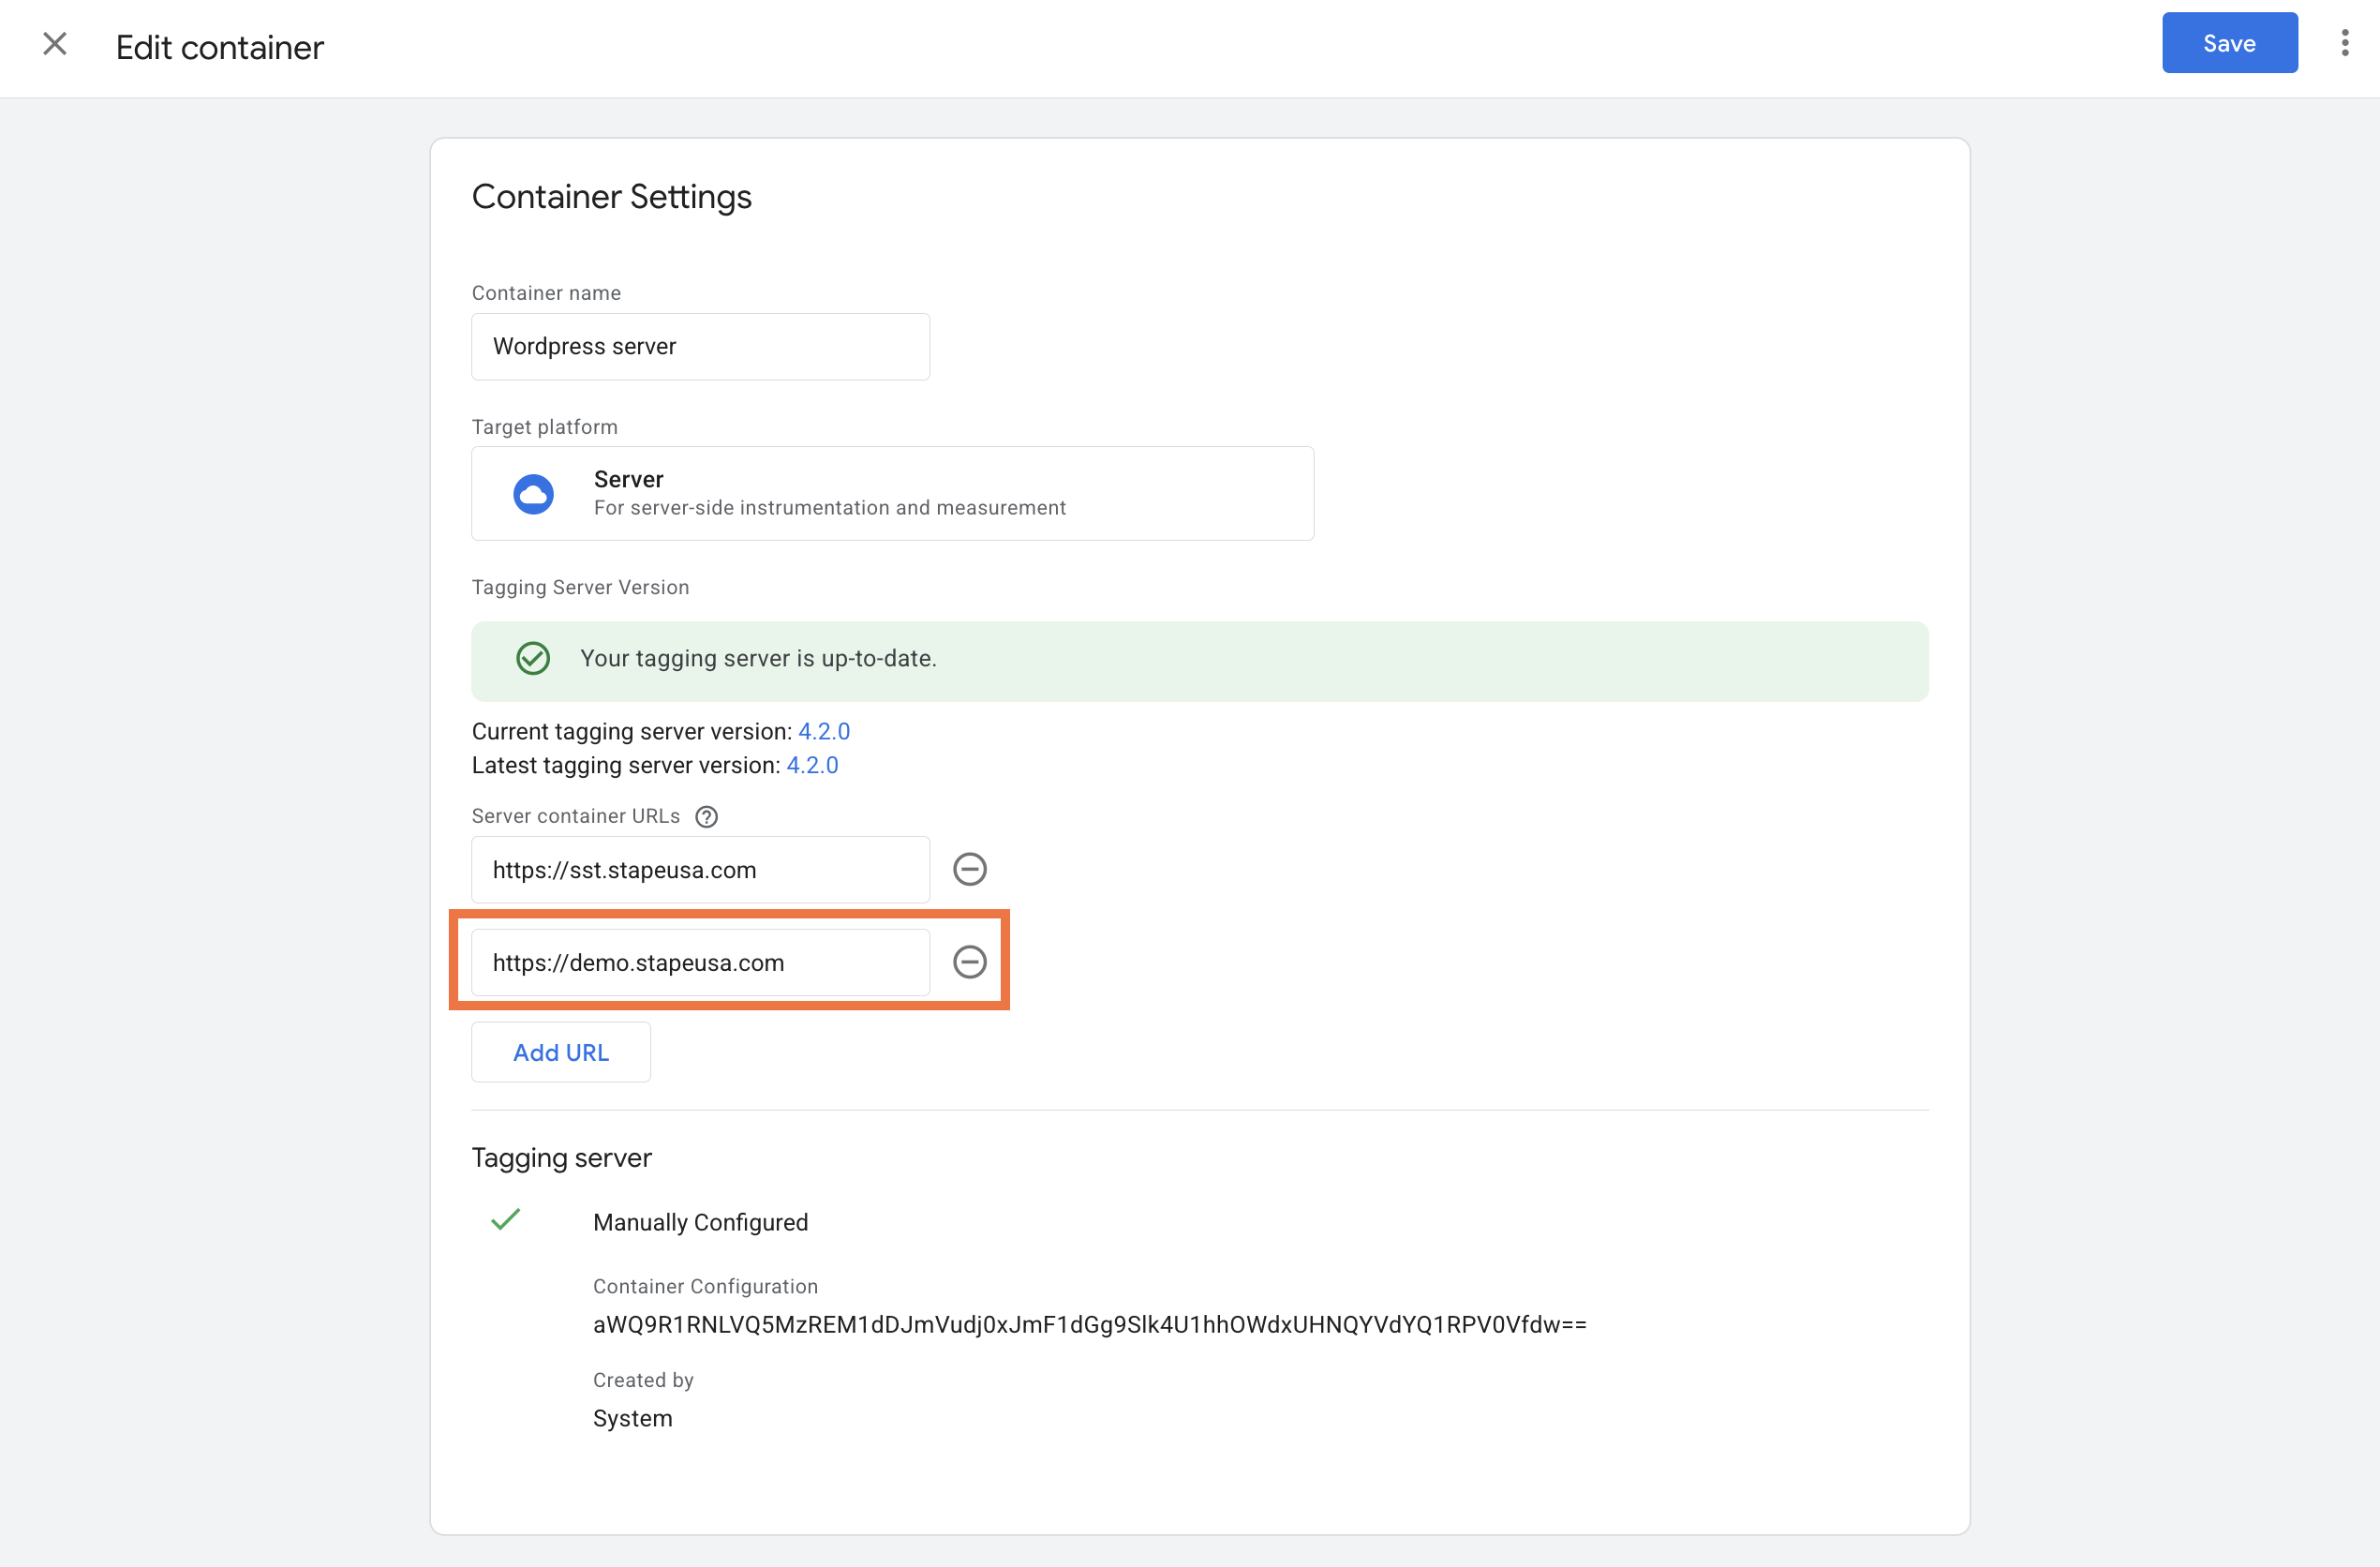
7. In your sGTM container, go to Admin → Container Settings and click Add URL to add an additional tagging server URL.
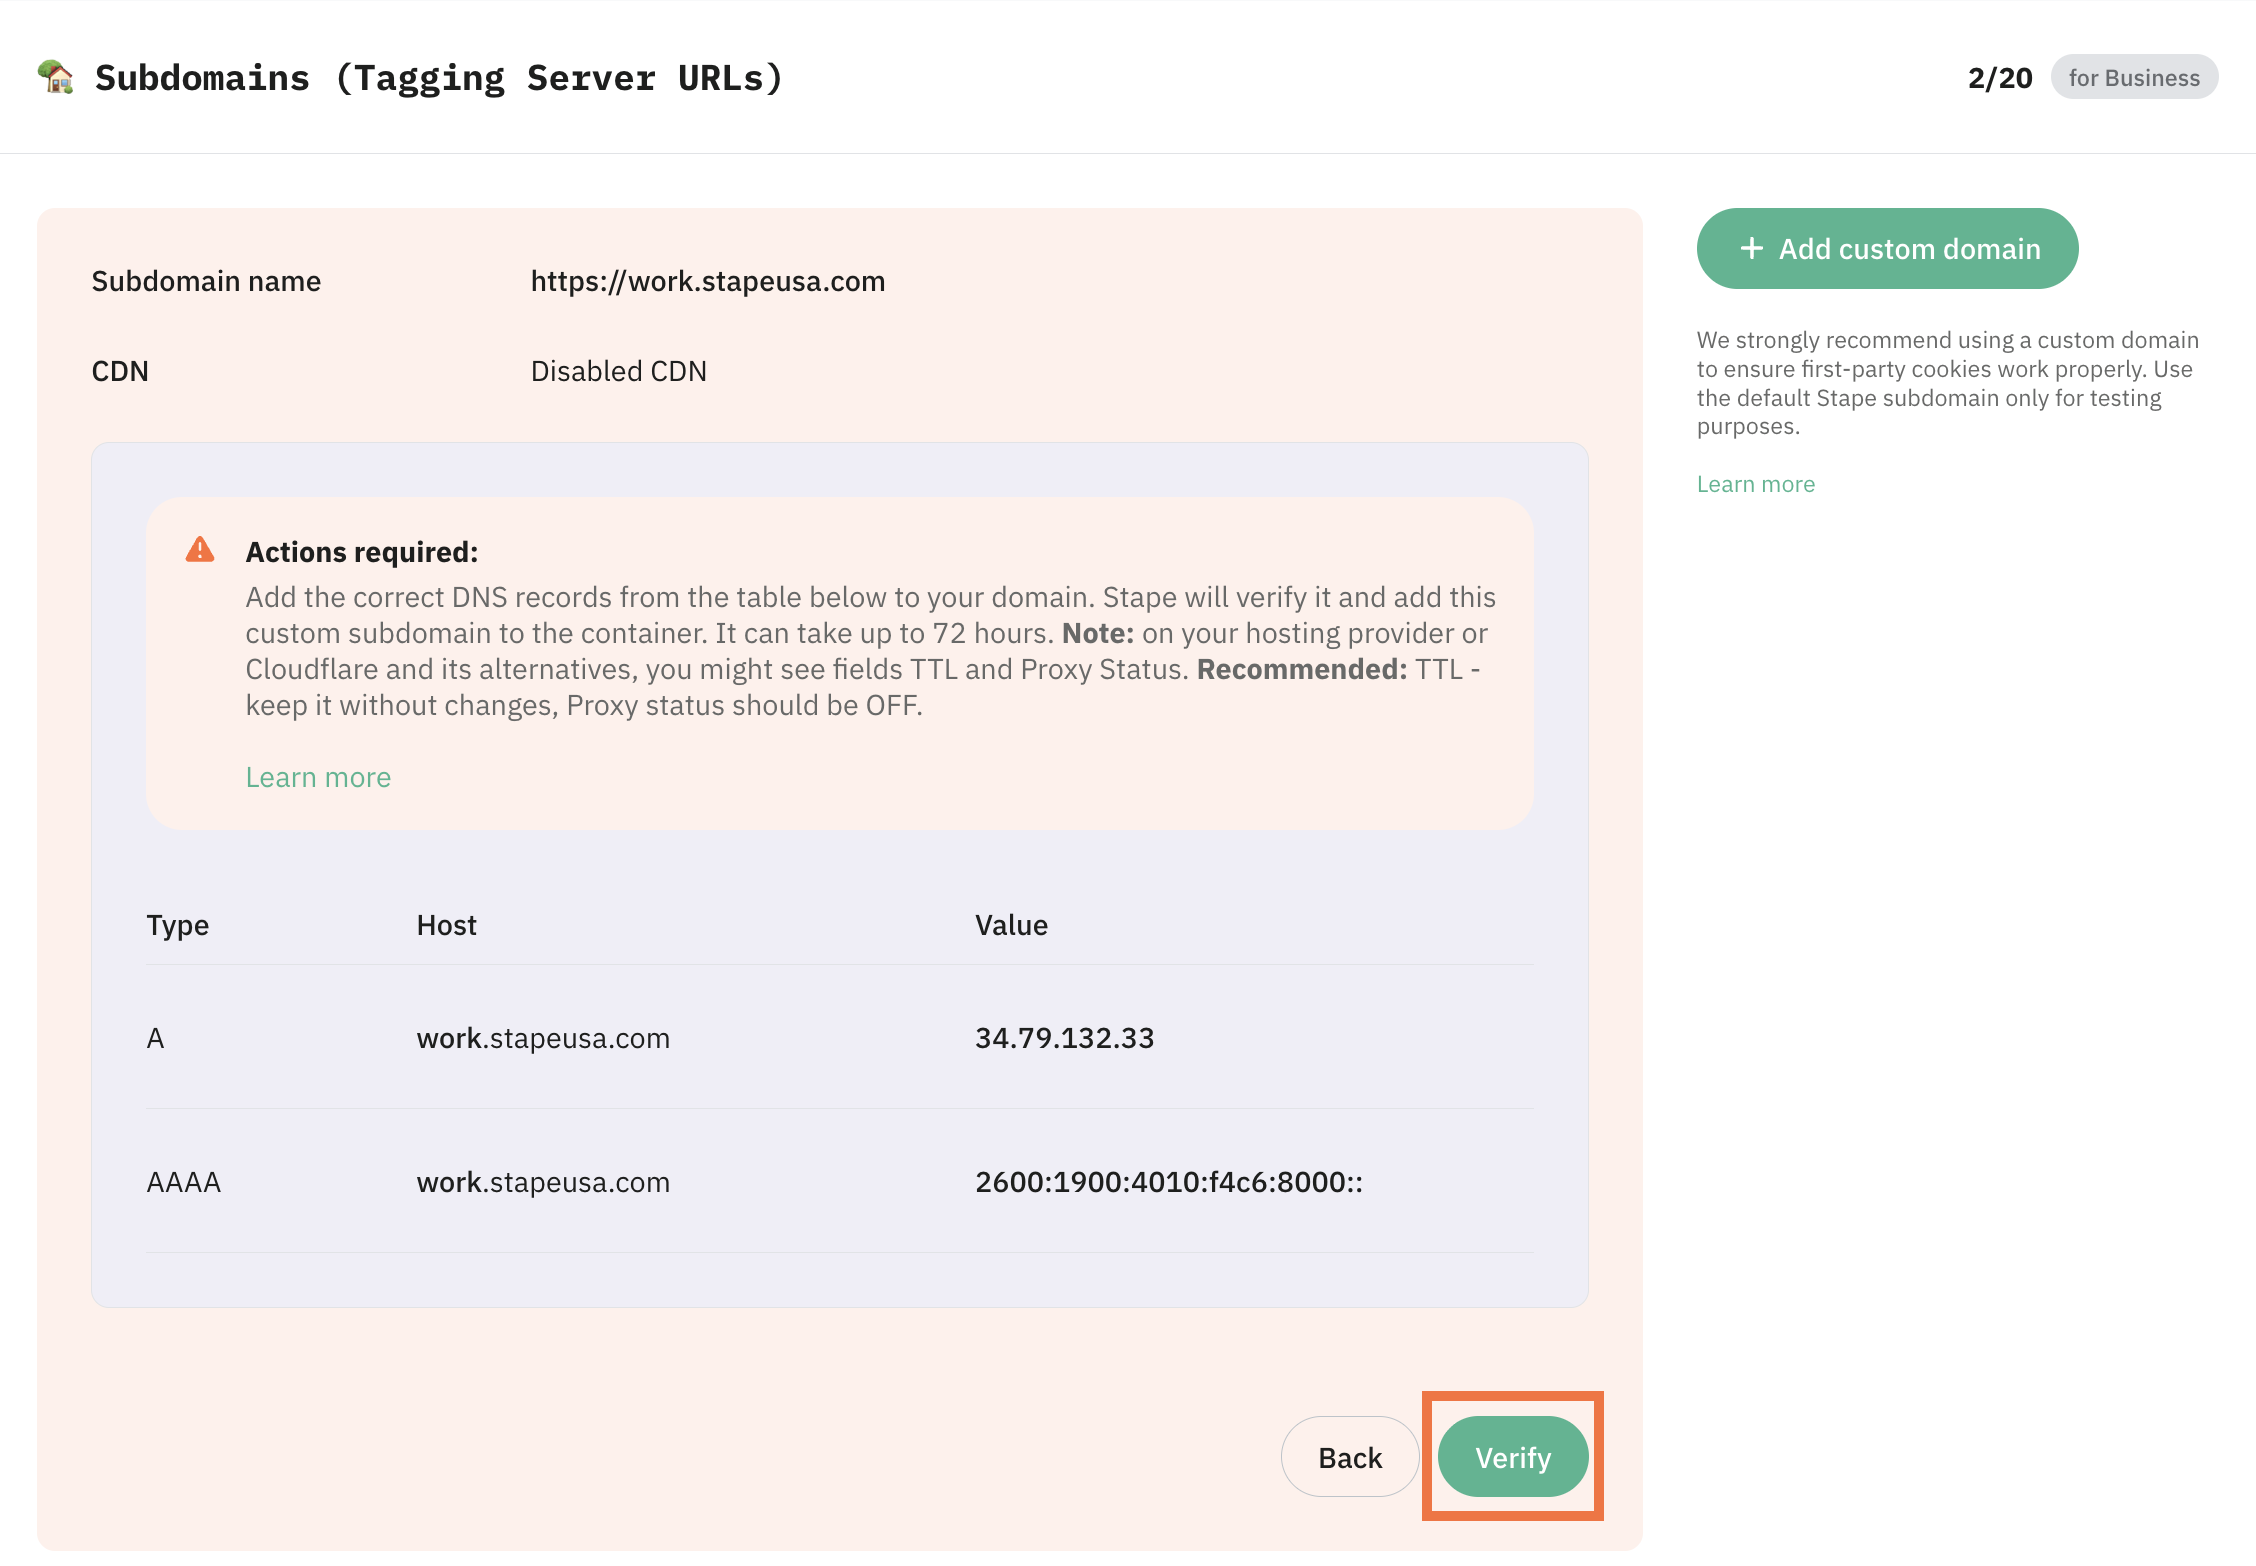
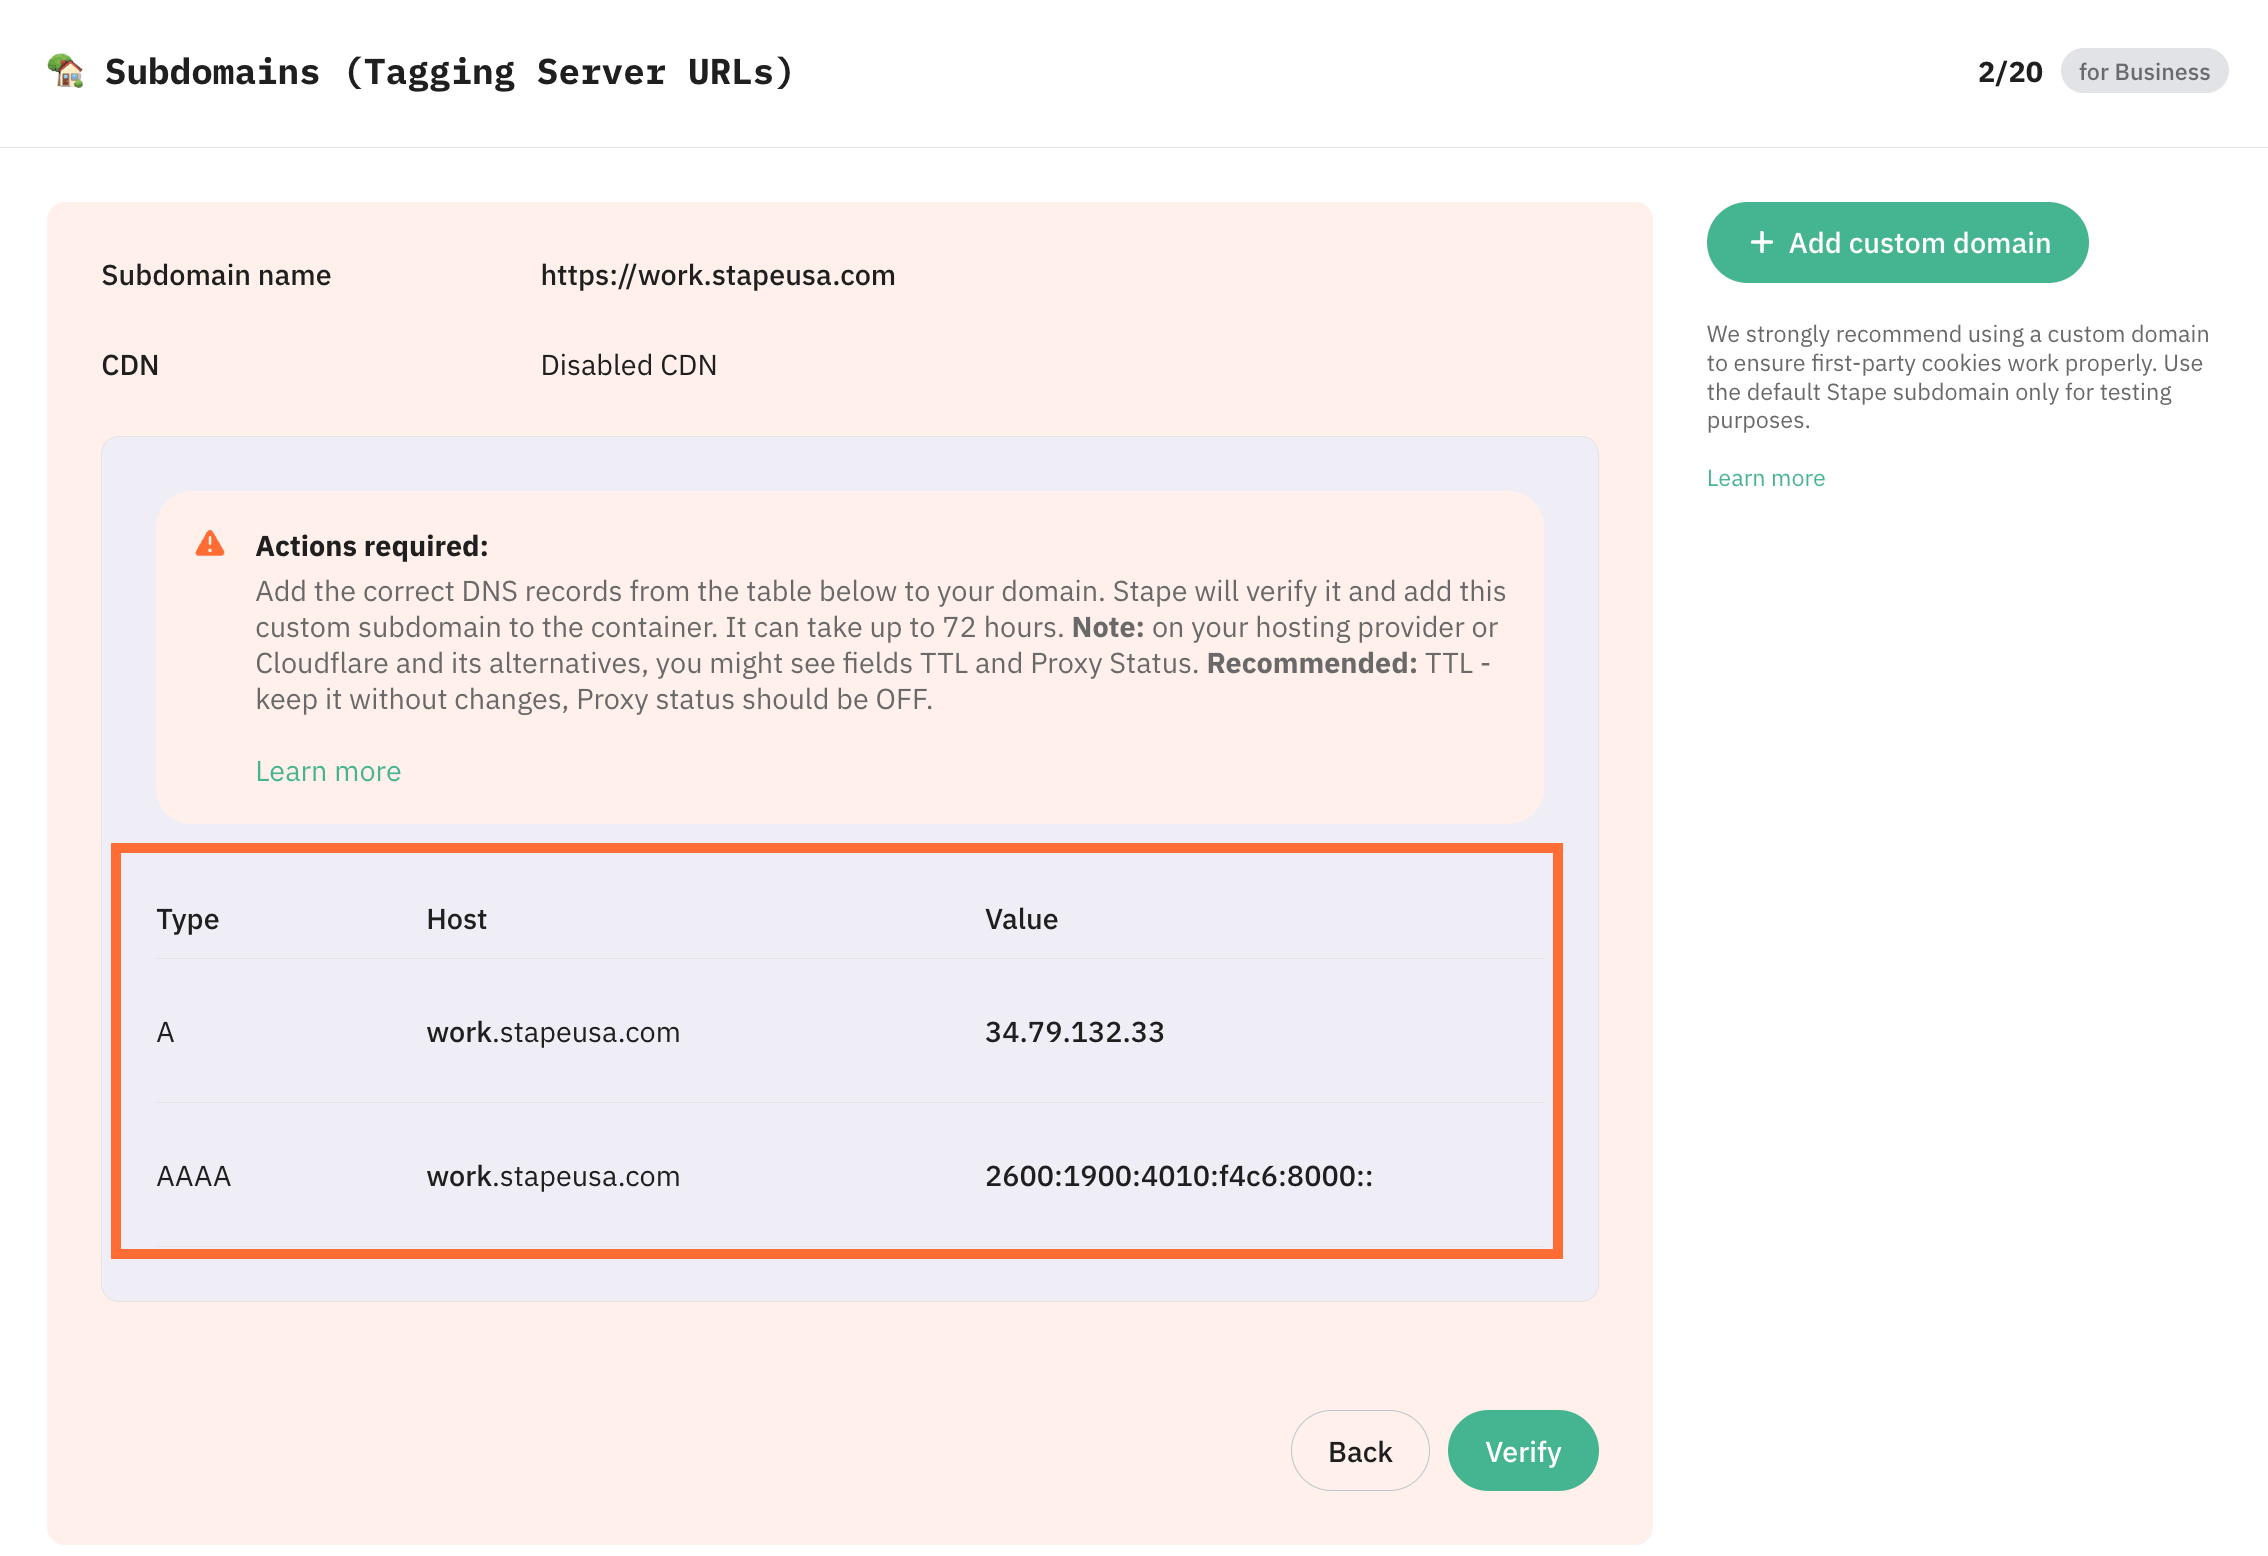
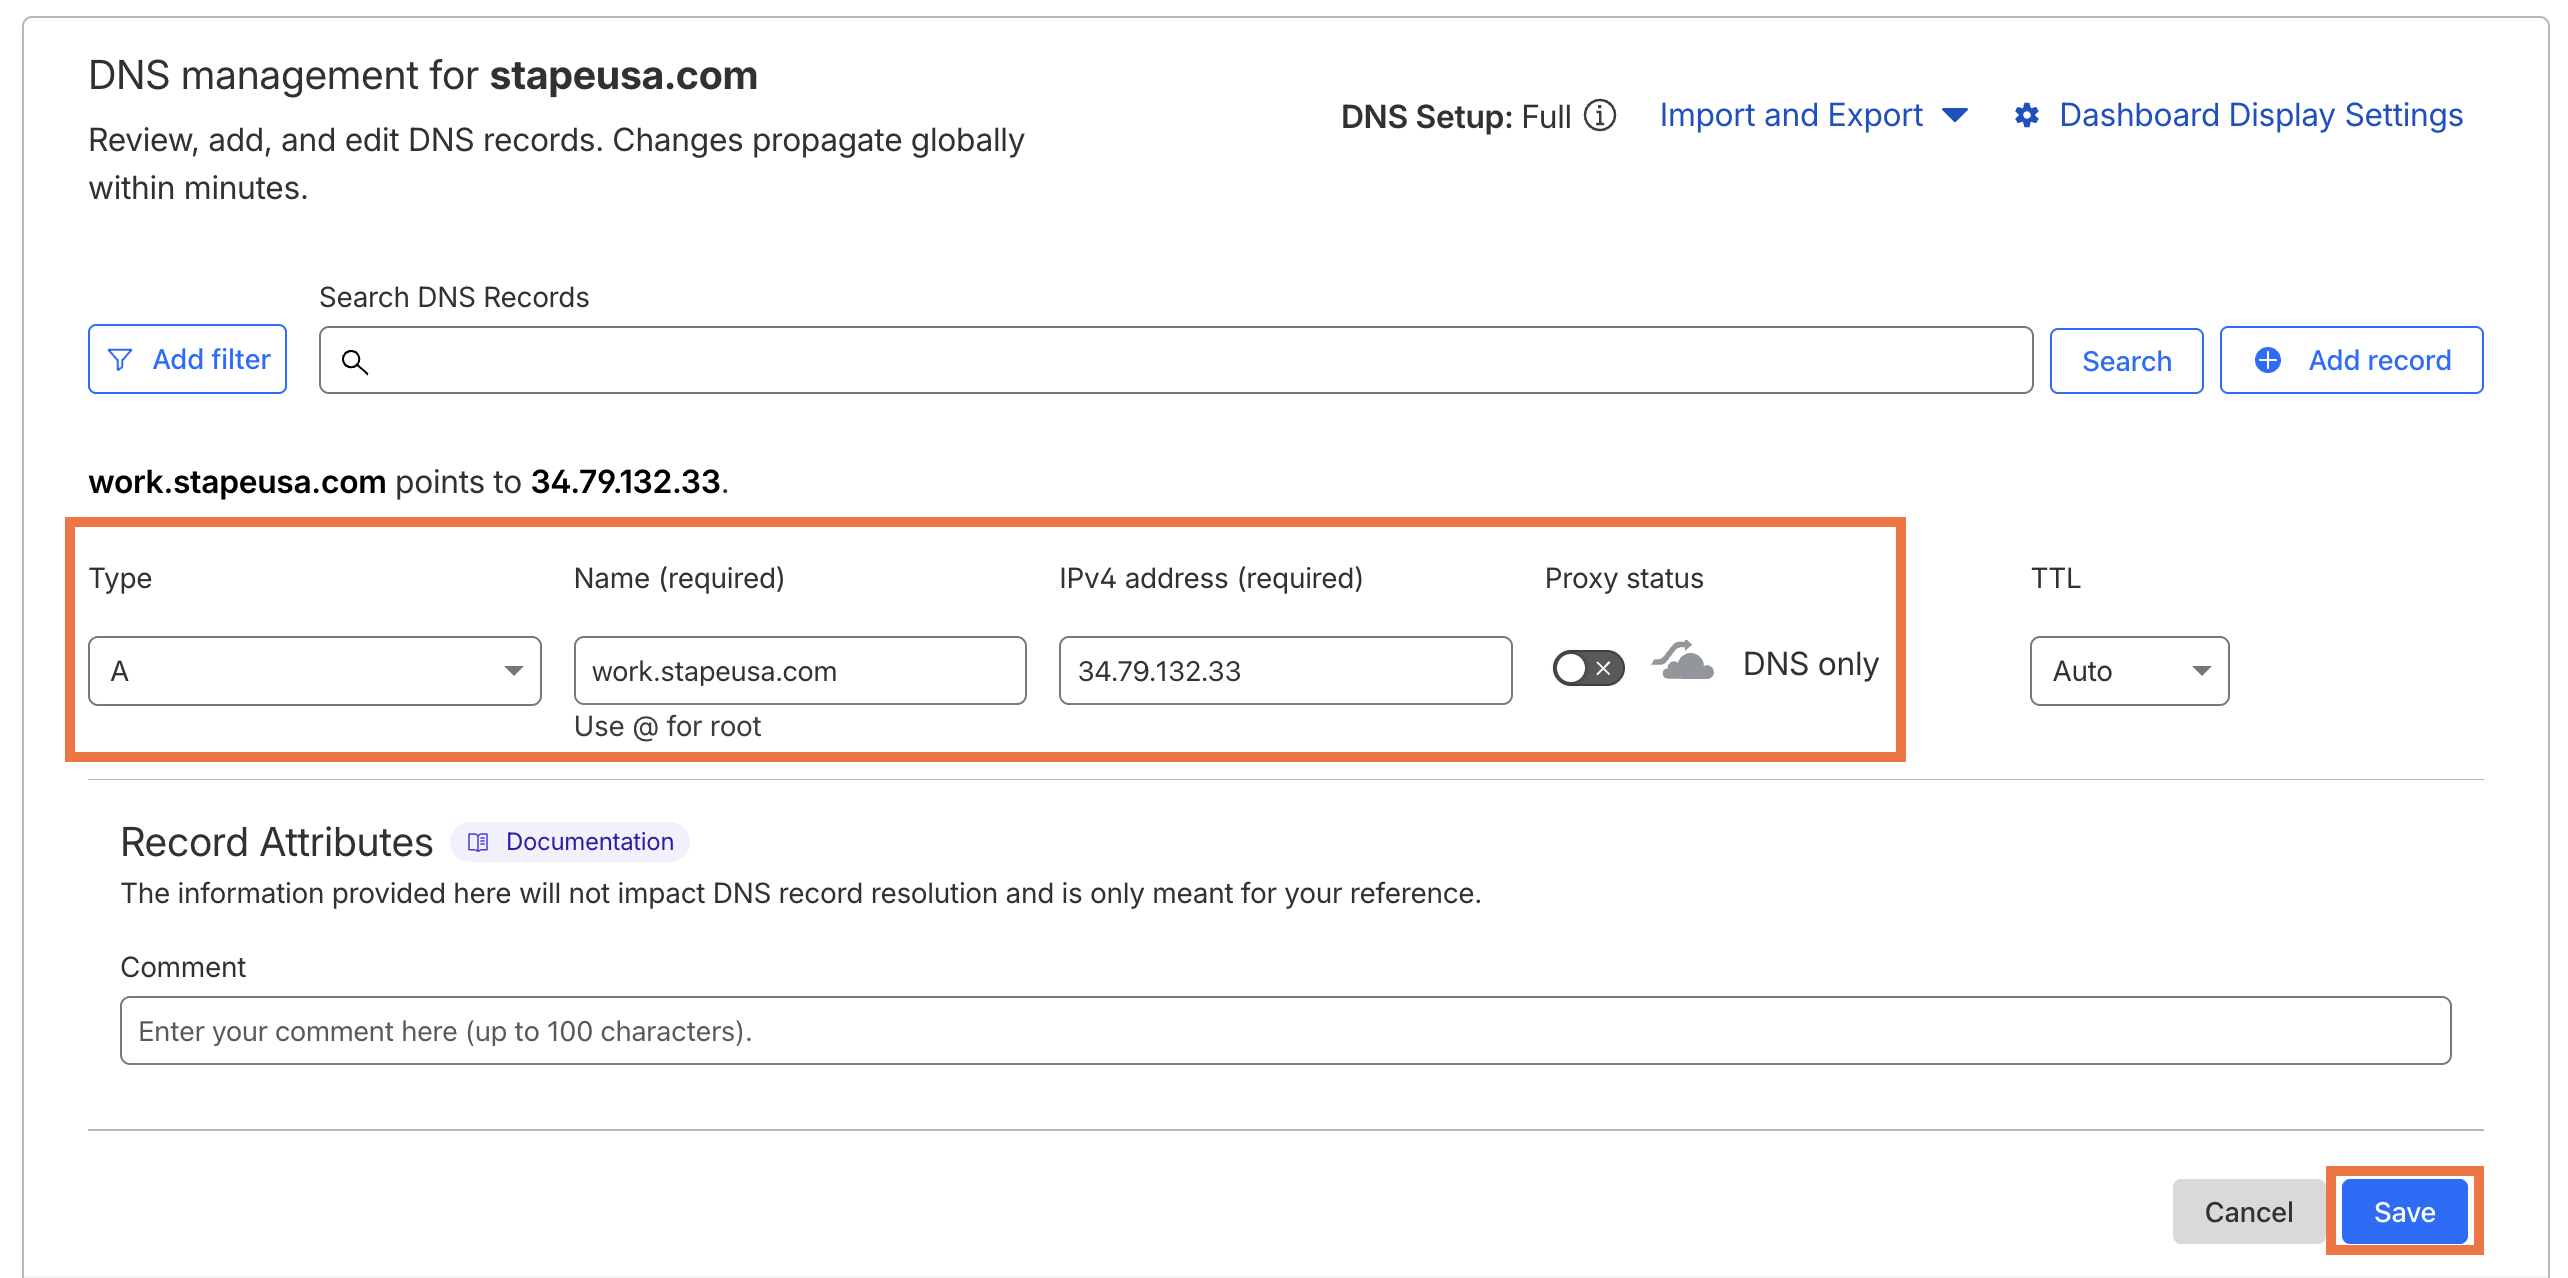
Adding a custom domain with A and AAAA records
Stape will provide a set of A and AAAA records.
In this example we’re using the Cloudflare DNS provider, but you can use any provider you like.
1. In Cloudflare, go to your domain, and then DNS → Records → Add record.
2. Set the fields:
- Type - A or AAAA (as specified by Stape)
- Name - paste Host from Stape
- Target - paste Value from Stape
- Proxy status - toggle OFF
3. Click Save.
4. Repeat for each record provided by Stape, then click Save.
5. Return to Stape and click Verify.

6. Wait for the container status to change from Verifying to Ready, usually 30 minutes to 2 hours, up to 72 hours in some cases.

7. In your sGTM container, go to Admin → Container Settings and click Add URL to add an additional tagging server URL.

Testing
1. Go to your sGTM container's workspace.
2. Click the new selector icon next to the Preview button.
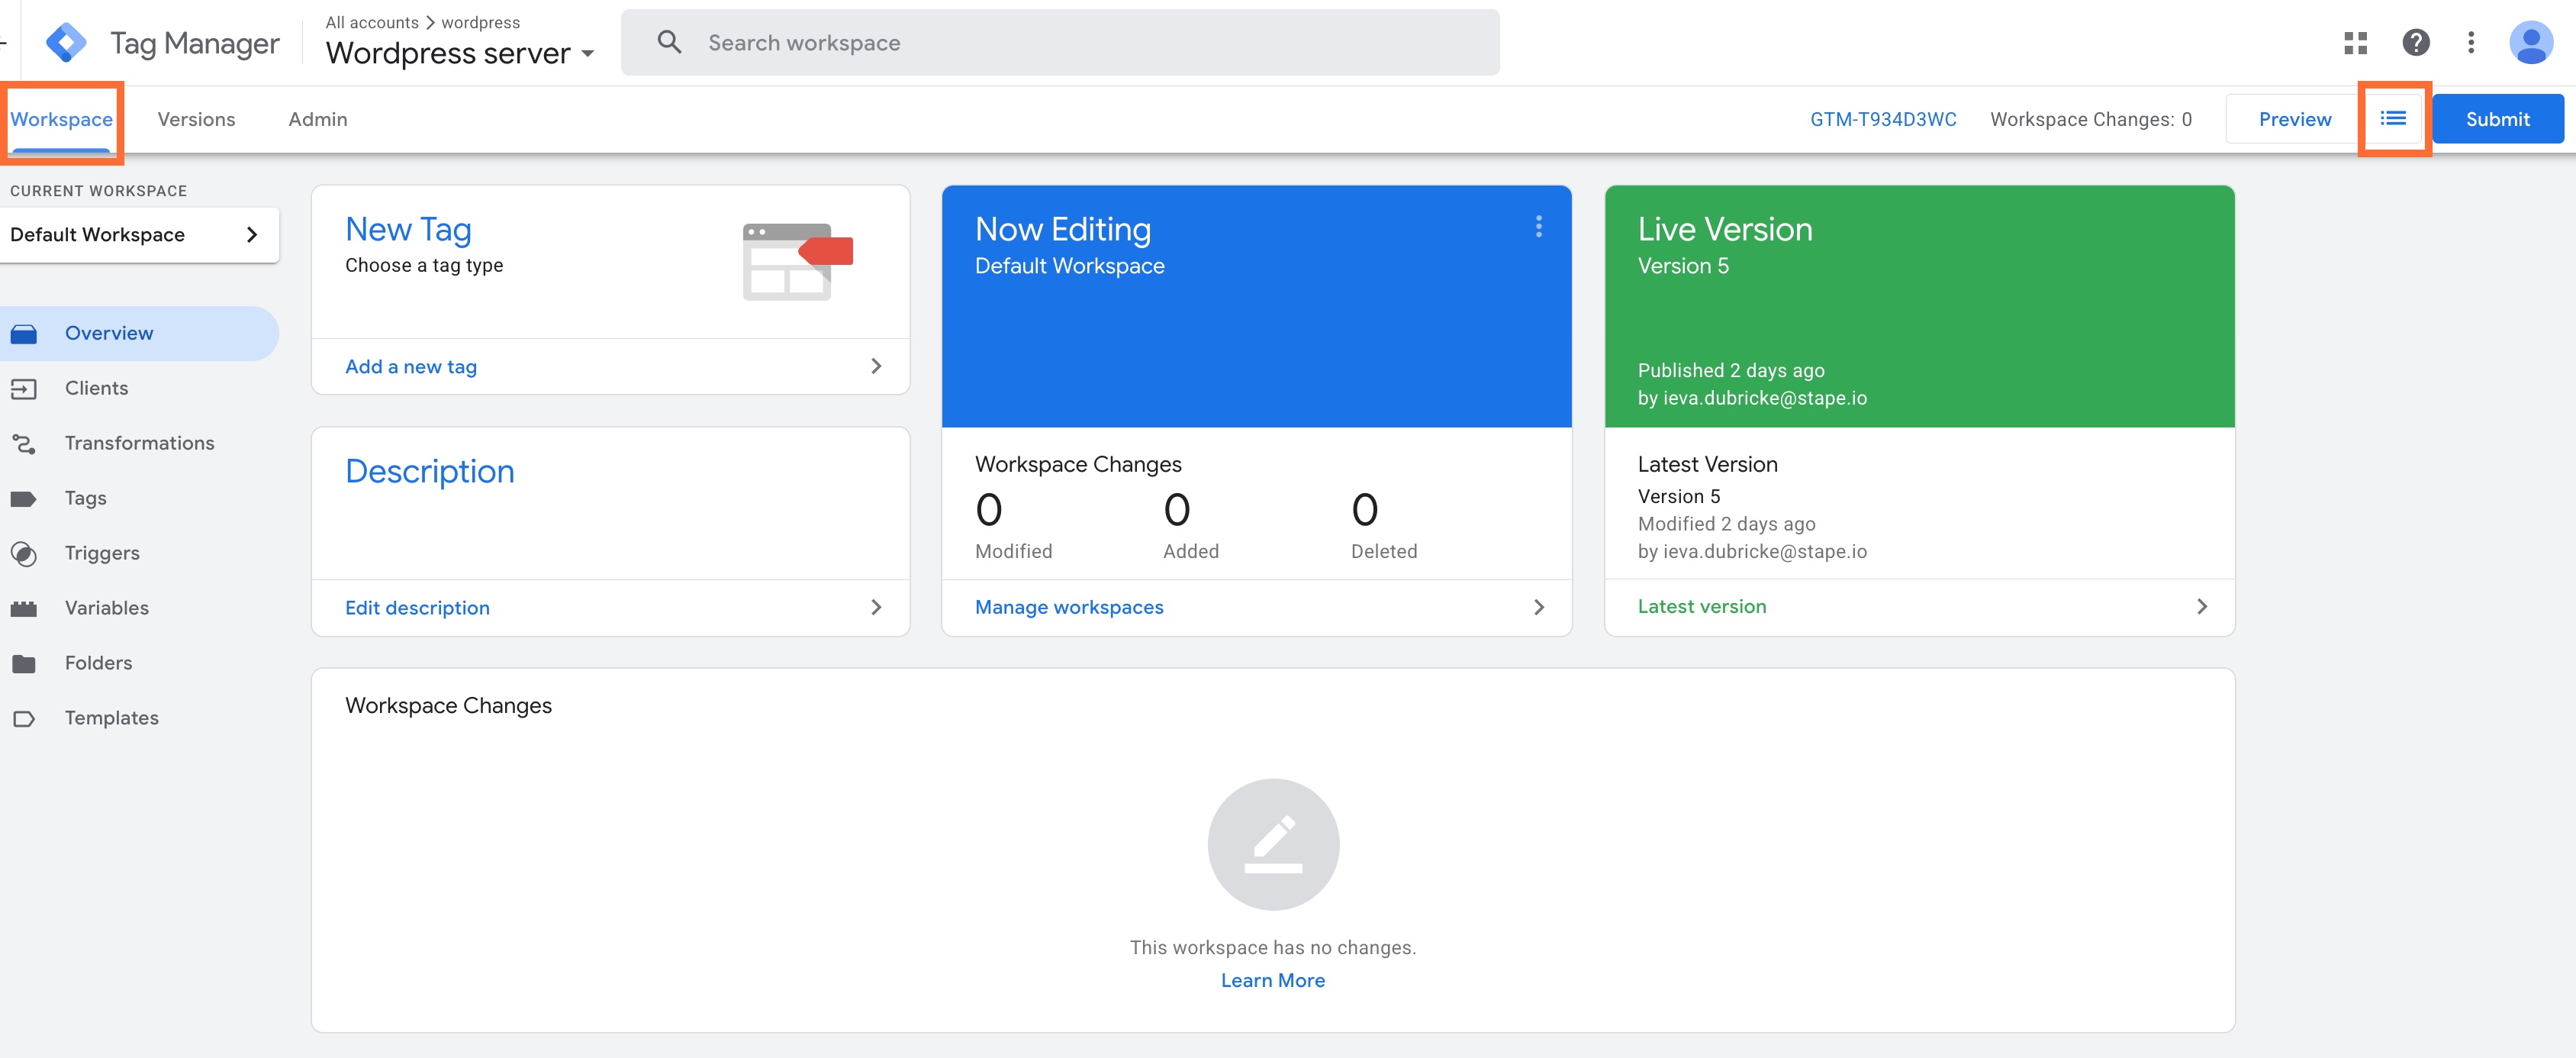
3. Select the domain you added.
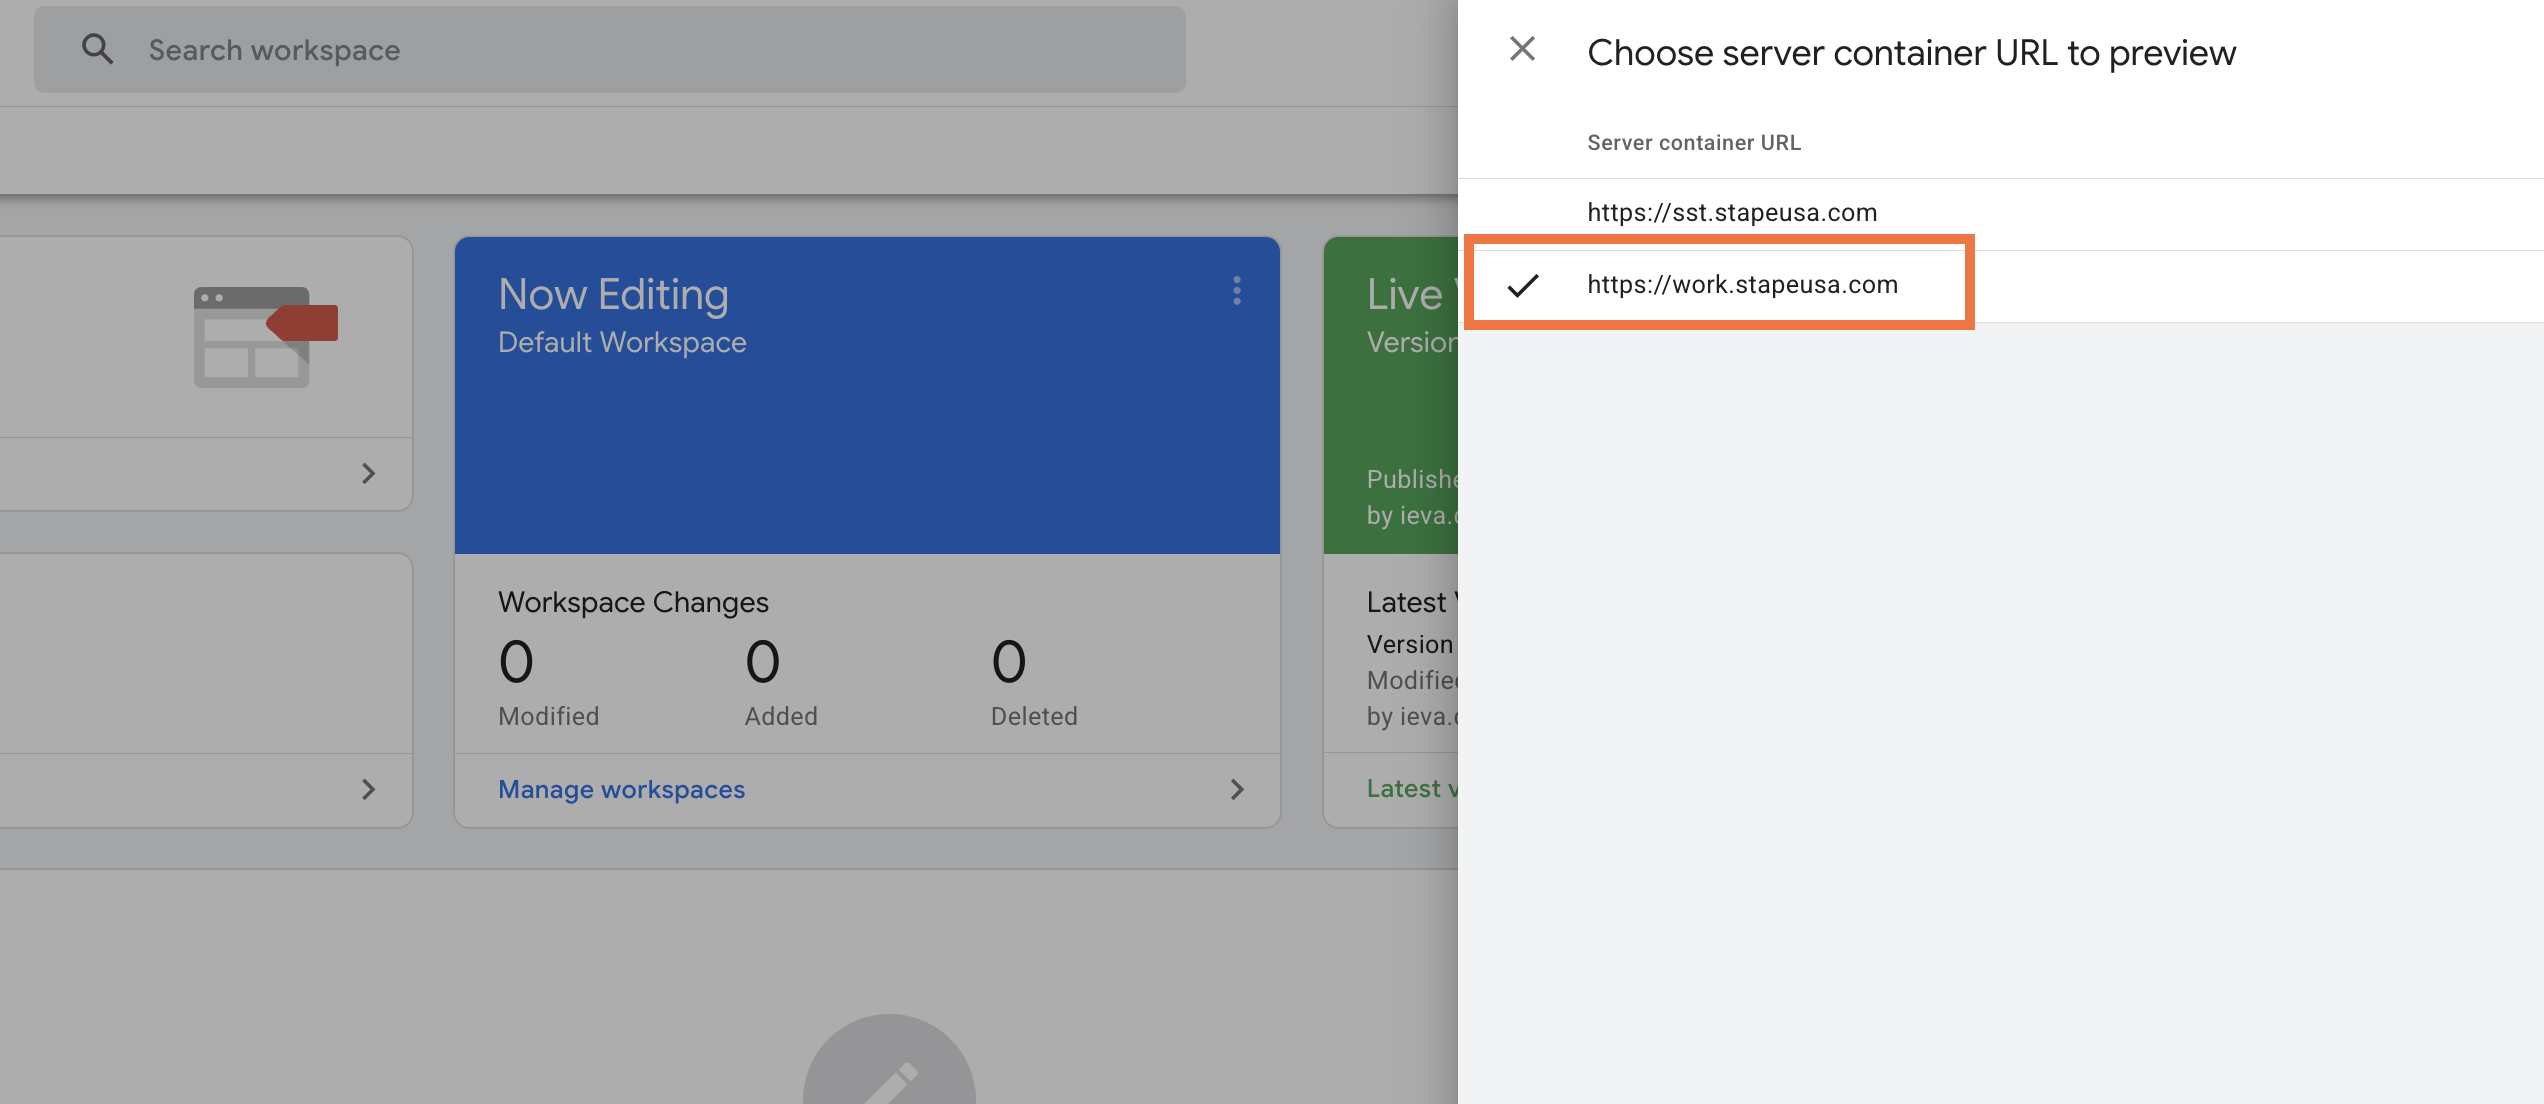
4. Click Preview.
5. If the Summary window loads, the power-up is working correctly.
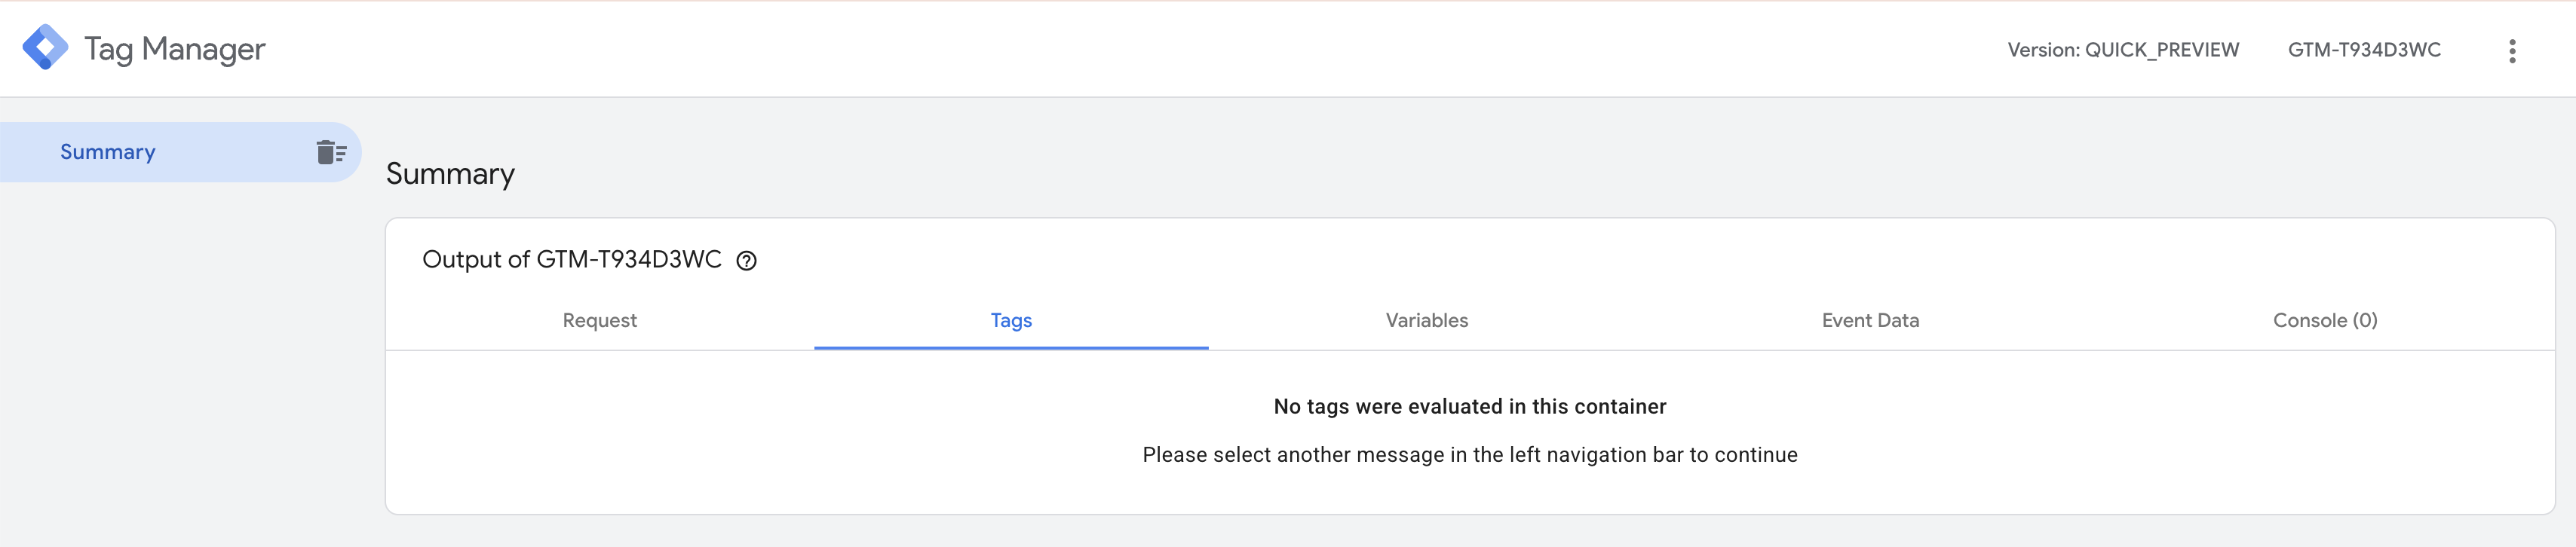
| Note: The first preview launch on a newly added domain may take about a minute. |
Use case
A sample scenario is a media company running three regional news sites: one for the US, one for the UK, and one for Australia. Each site has a separate domain. They use Google Analytics 4 across all three and want consistent event tracking, but managing three separate sGTM containers has become a maintenance burden.
You can solve this problem by using the Multi-Domains power-up:
- Enable the Multi-Domains power-up on the existing sGTM container.
- Add a custom subdomain for each site. For example,
sst.us-site.com,sst.uk-site.com, andsst.au-site.com. - Update the Tagging server URL in GTM Container Settings to reflect each new subdomain.
- Open the sGTM debugger, select each domain in turn, and confirm that events are flowing in from all three sites.
If configured correctly, all three sites send data through a single container with shared tags, triggers, and variables.
Was this article helpful?
Comments