GEO Headers power-up
Updated Apr 28, 2026
The GEO Headers power-up adds geographical information (country, region, city, IP address, and postal code) as headers to incoming requests in your sGTM container. It works based on the visitor's IP address, and you don’t need any external APIs.
GEO Headers is available on the Free subscription plan and higher. To check your current plan or upgrade, go to your sGTM container settings.
This product includes GeoLite2 data created by MaxMind, available from: https://www.maxmind.com.
How to set up GEO Headers
1. Log in to your Stape account and select your sGTM container from the dashboard.
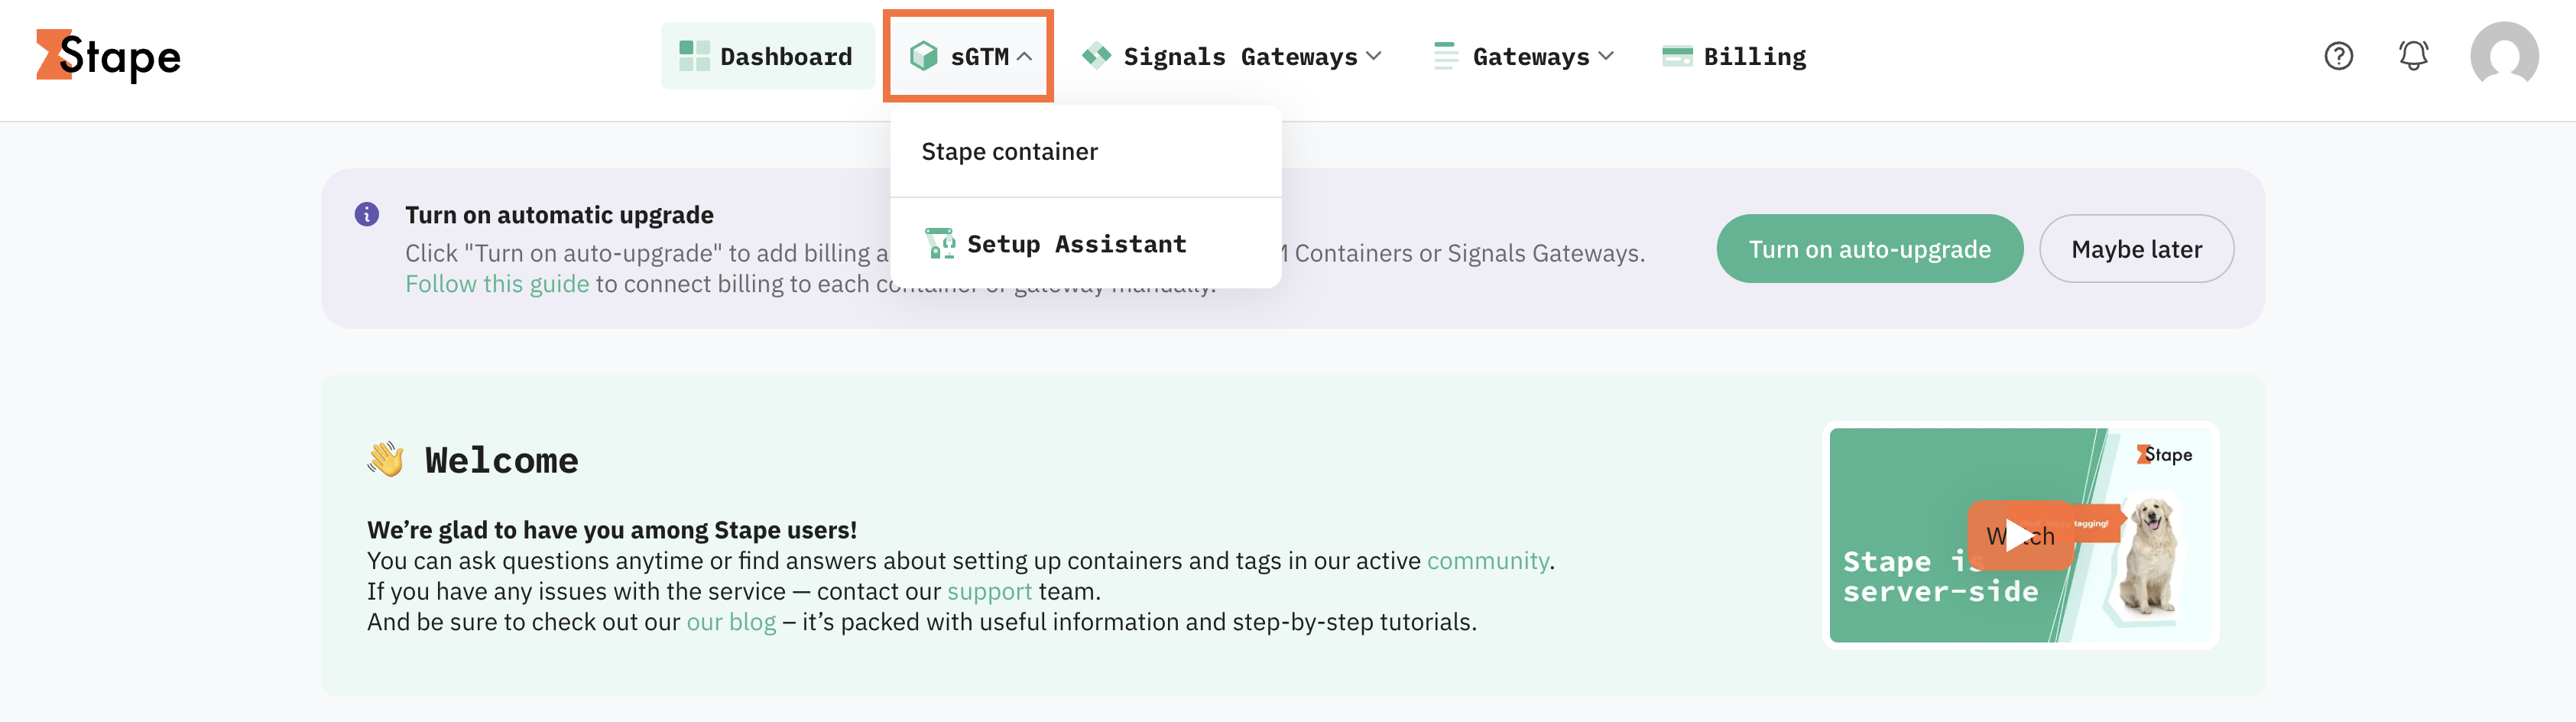
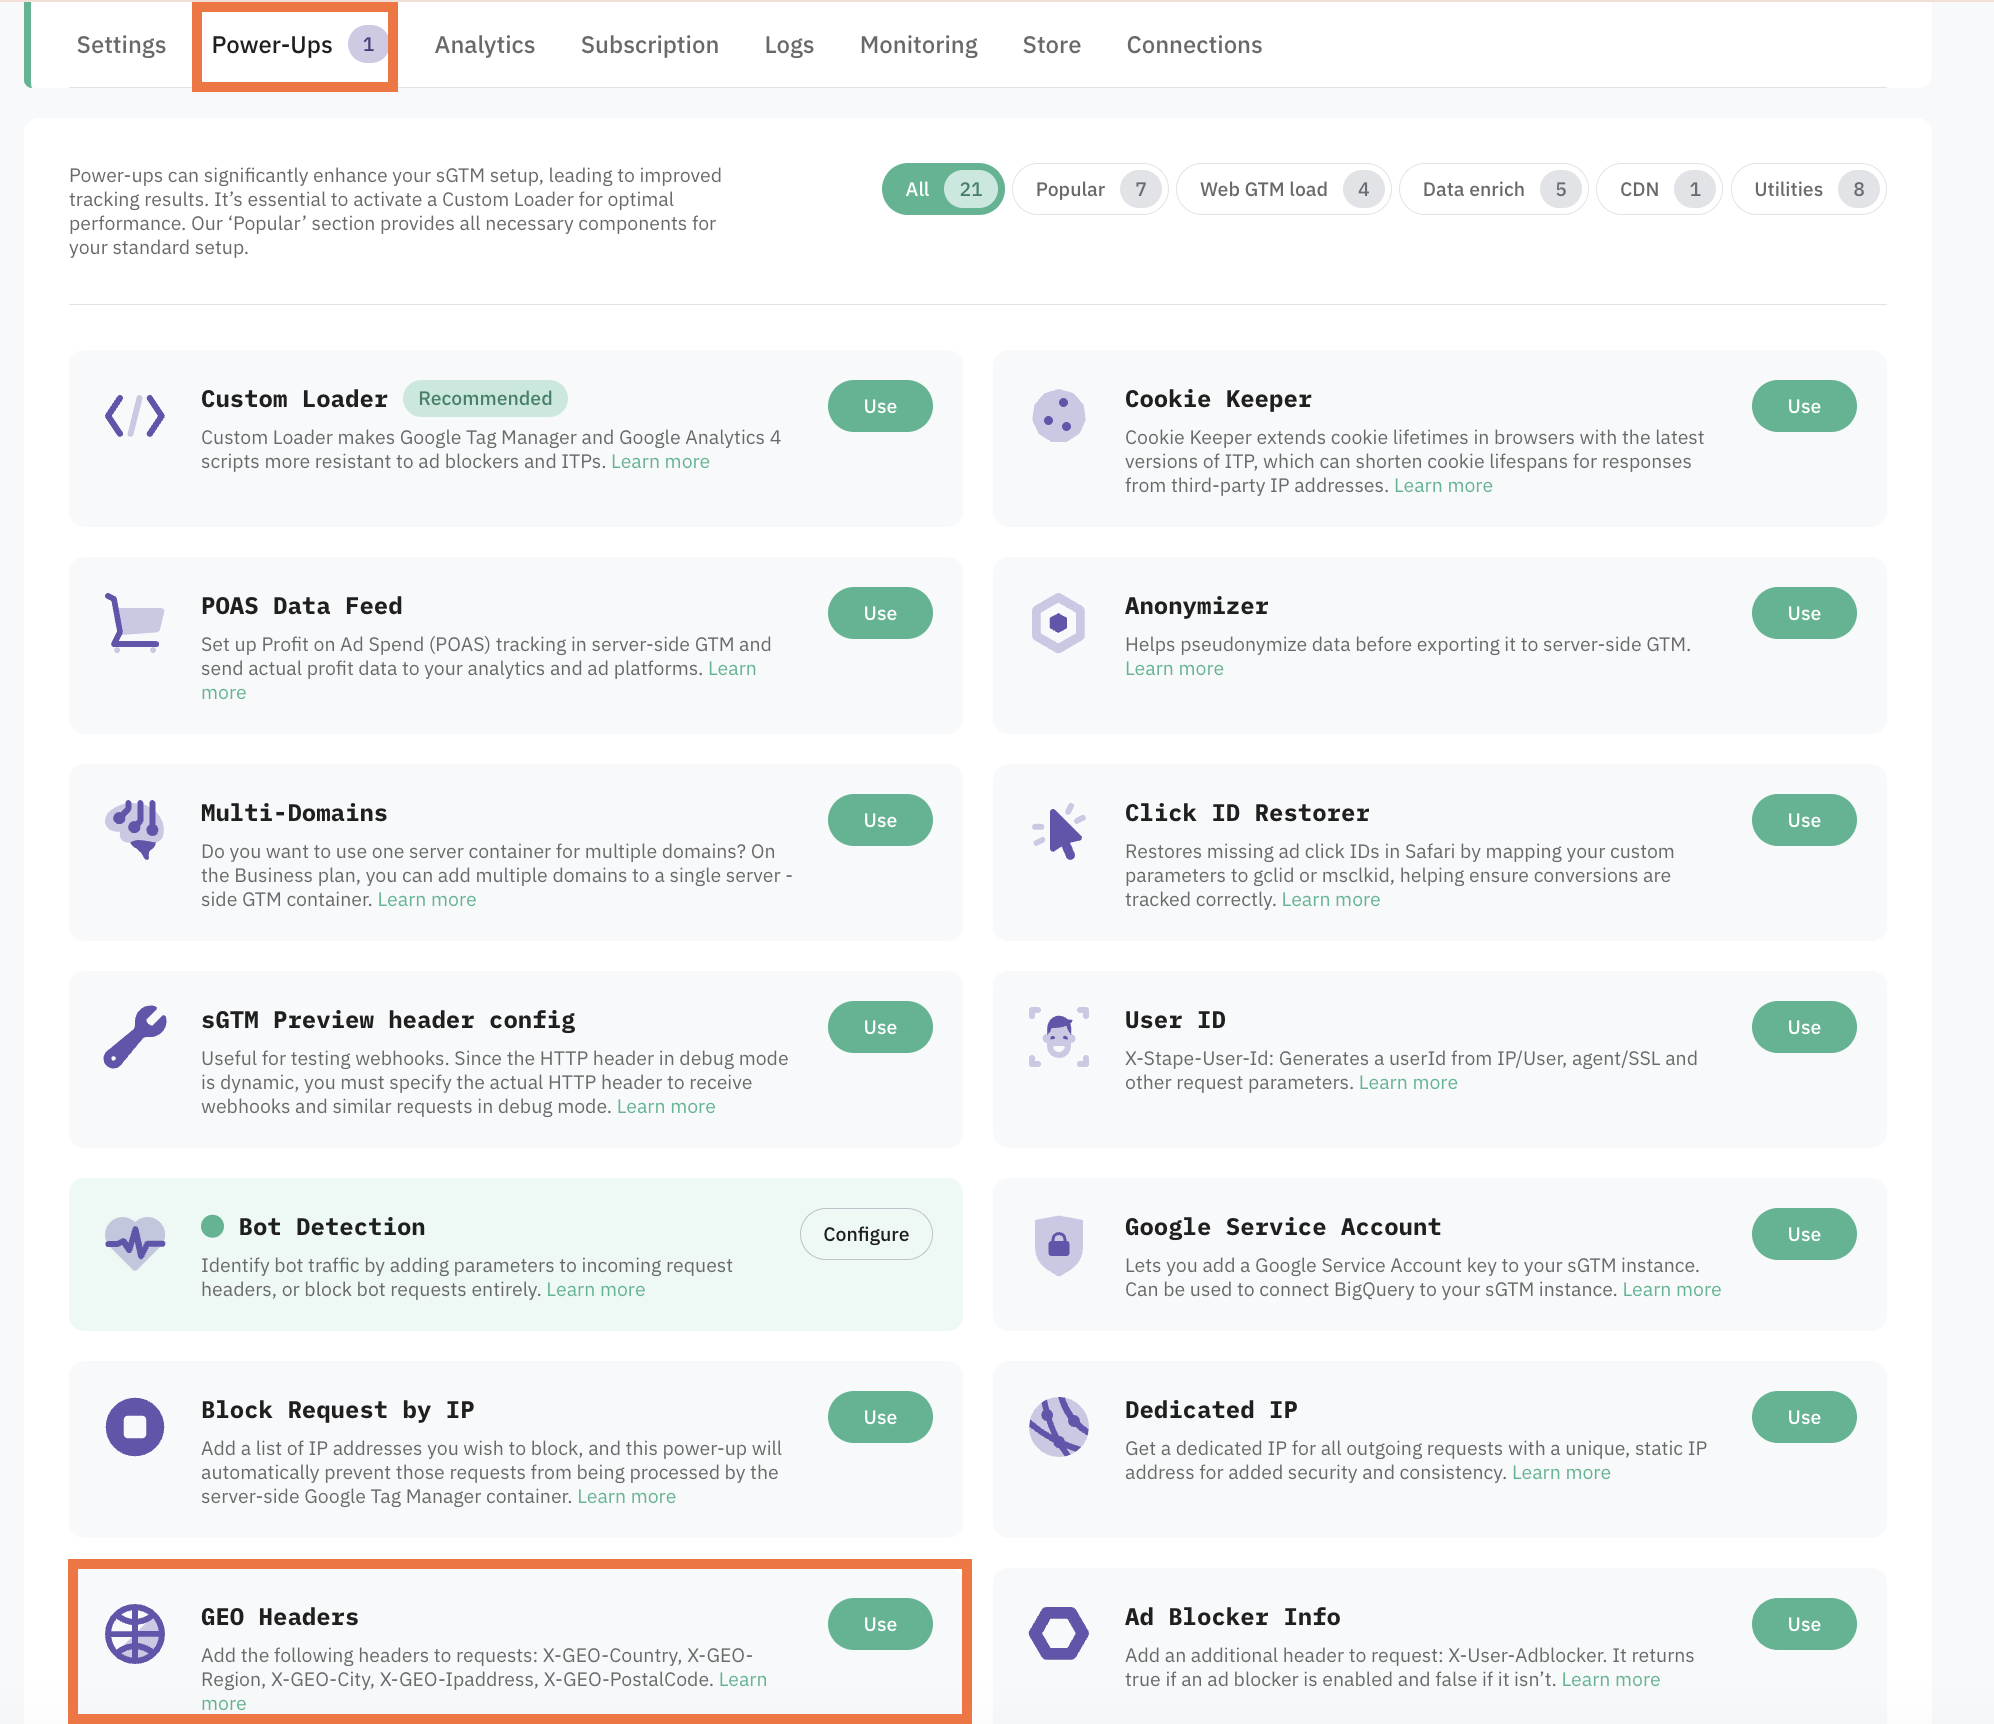
2. Go to Power-ups and click Use next to the GEO Headers panel.
4. Toggle the GEO Headers switch on to enable it, and click Save changes.
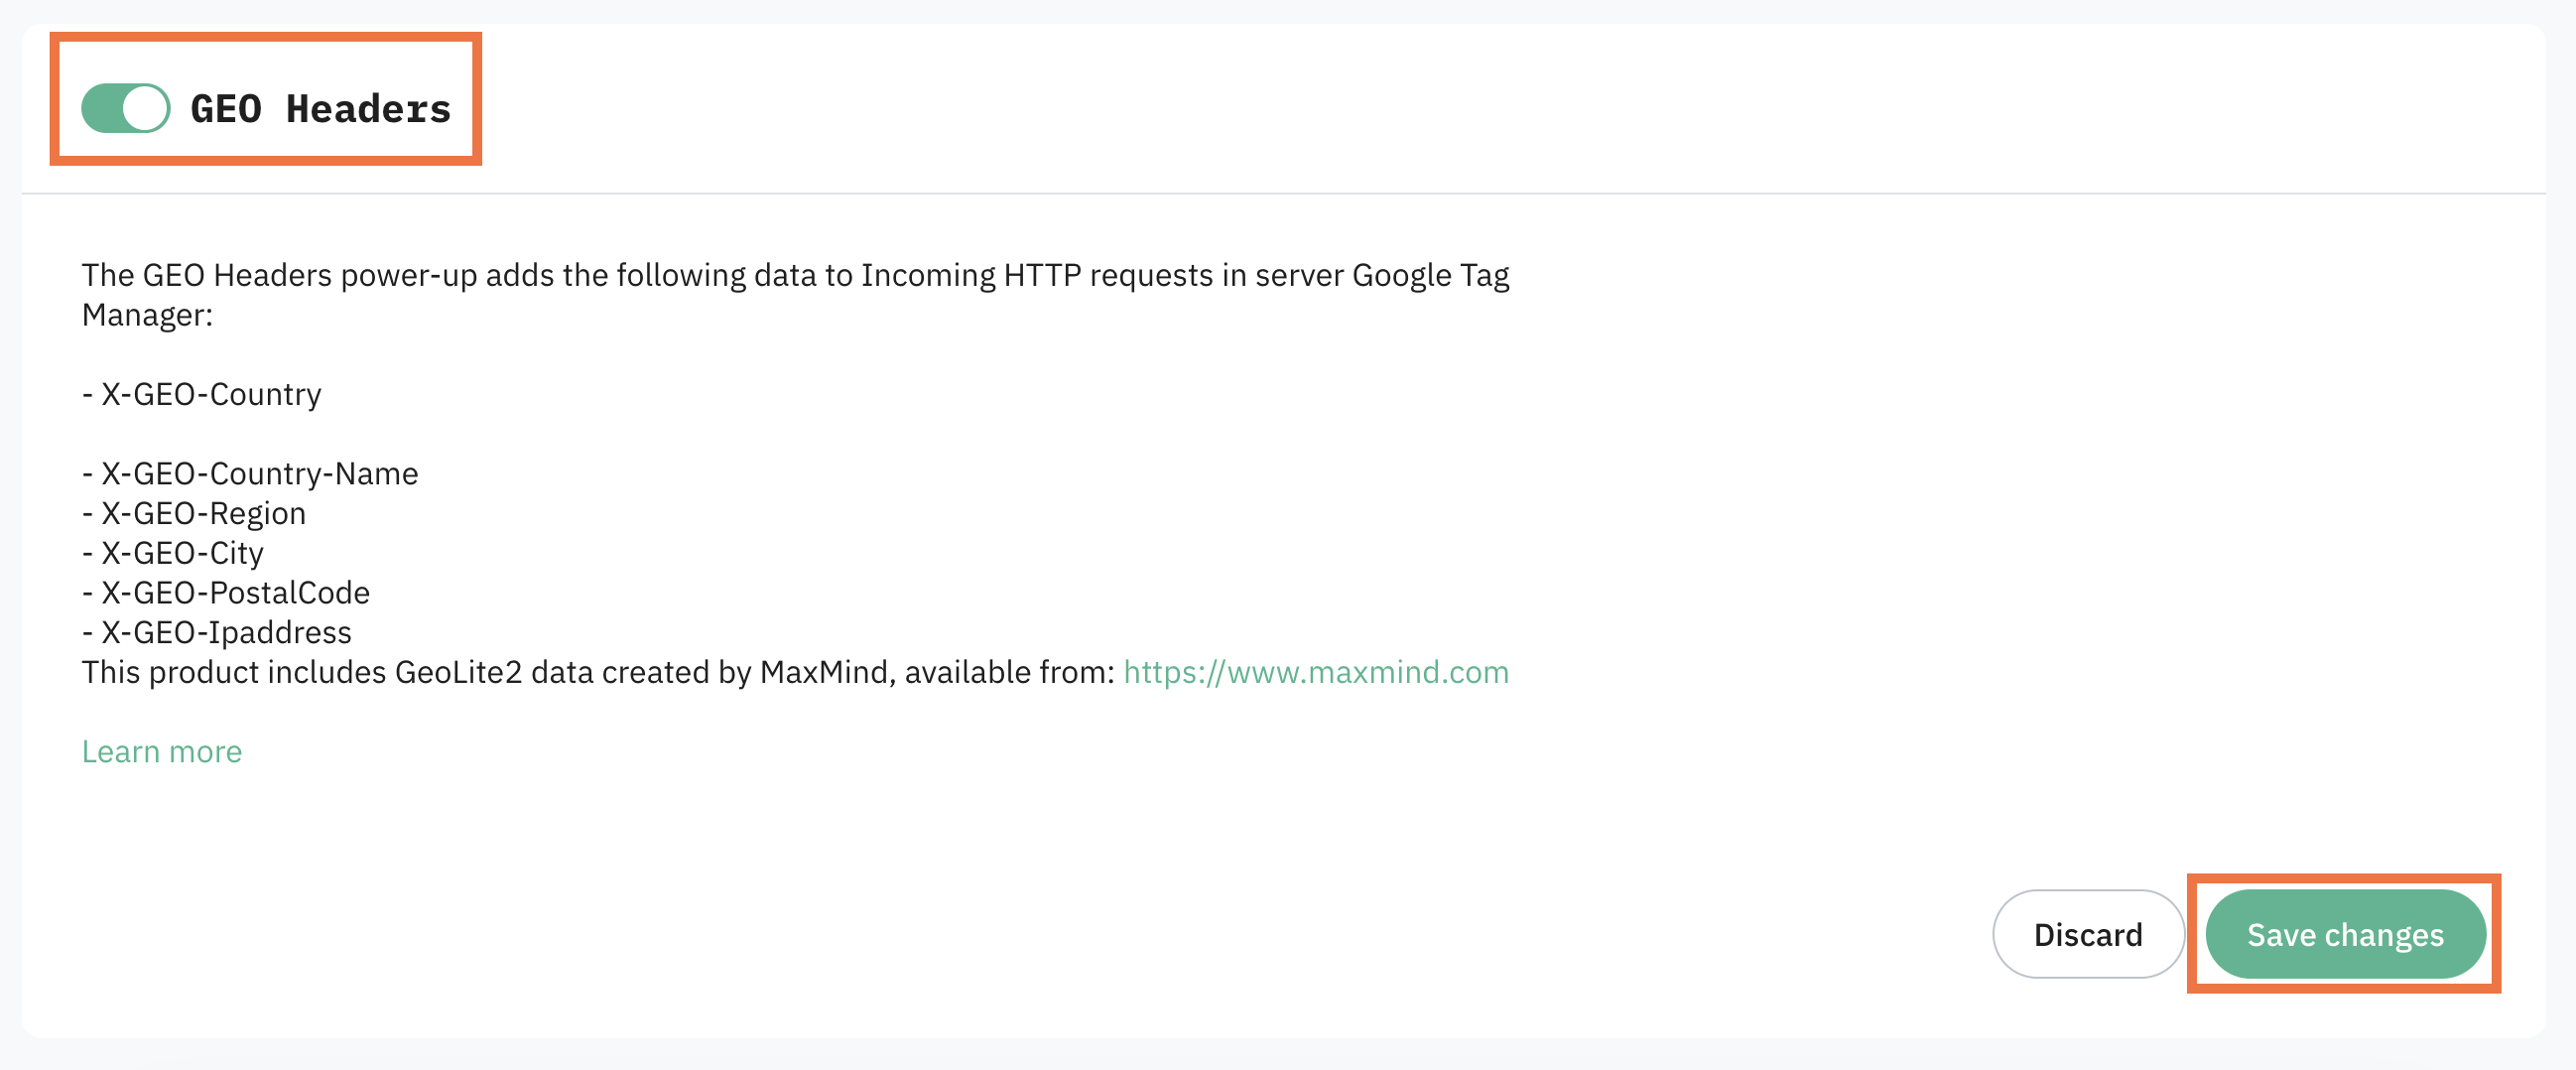
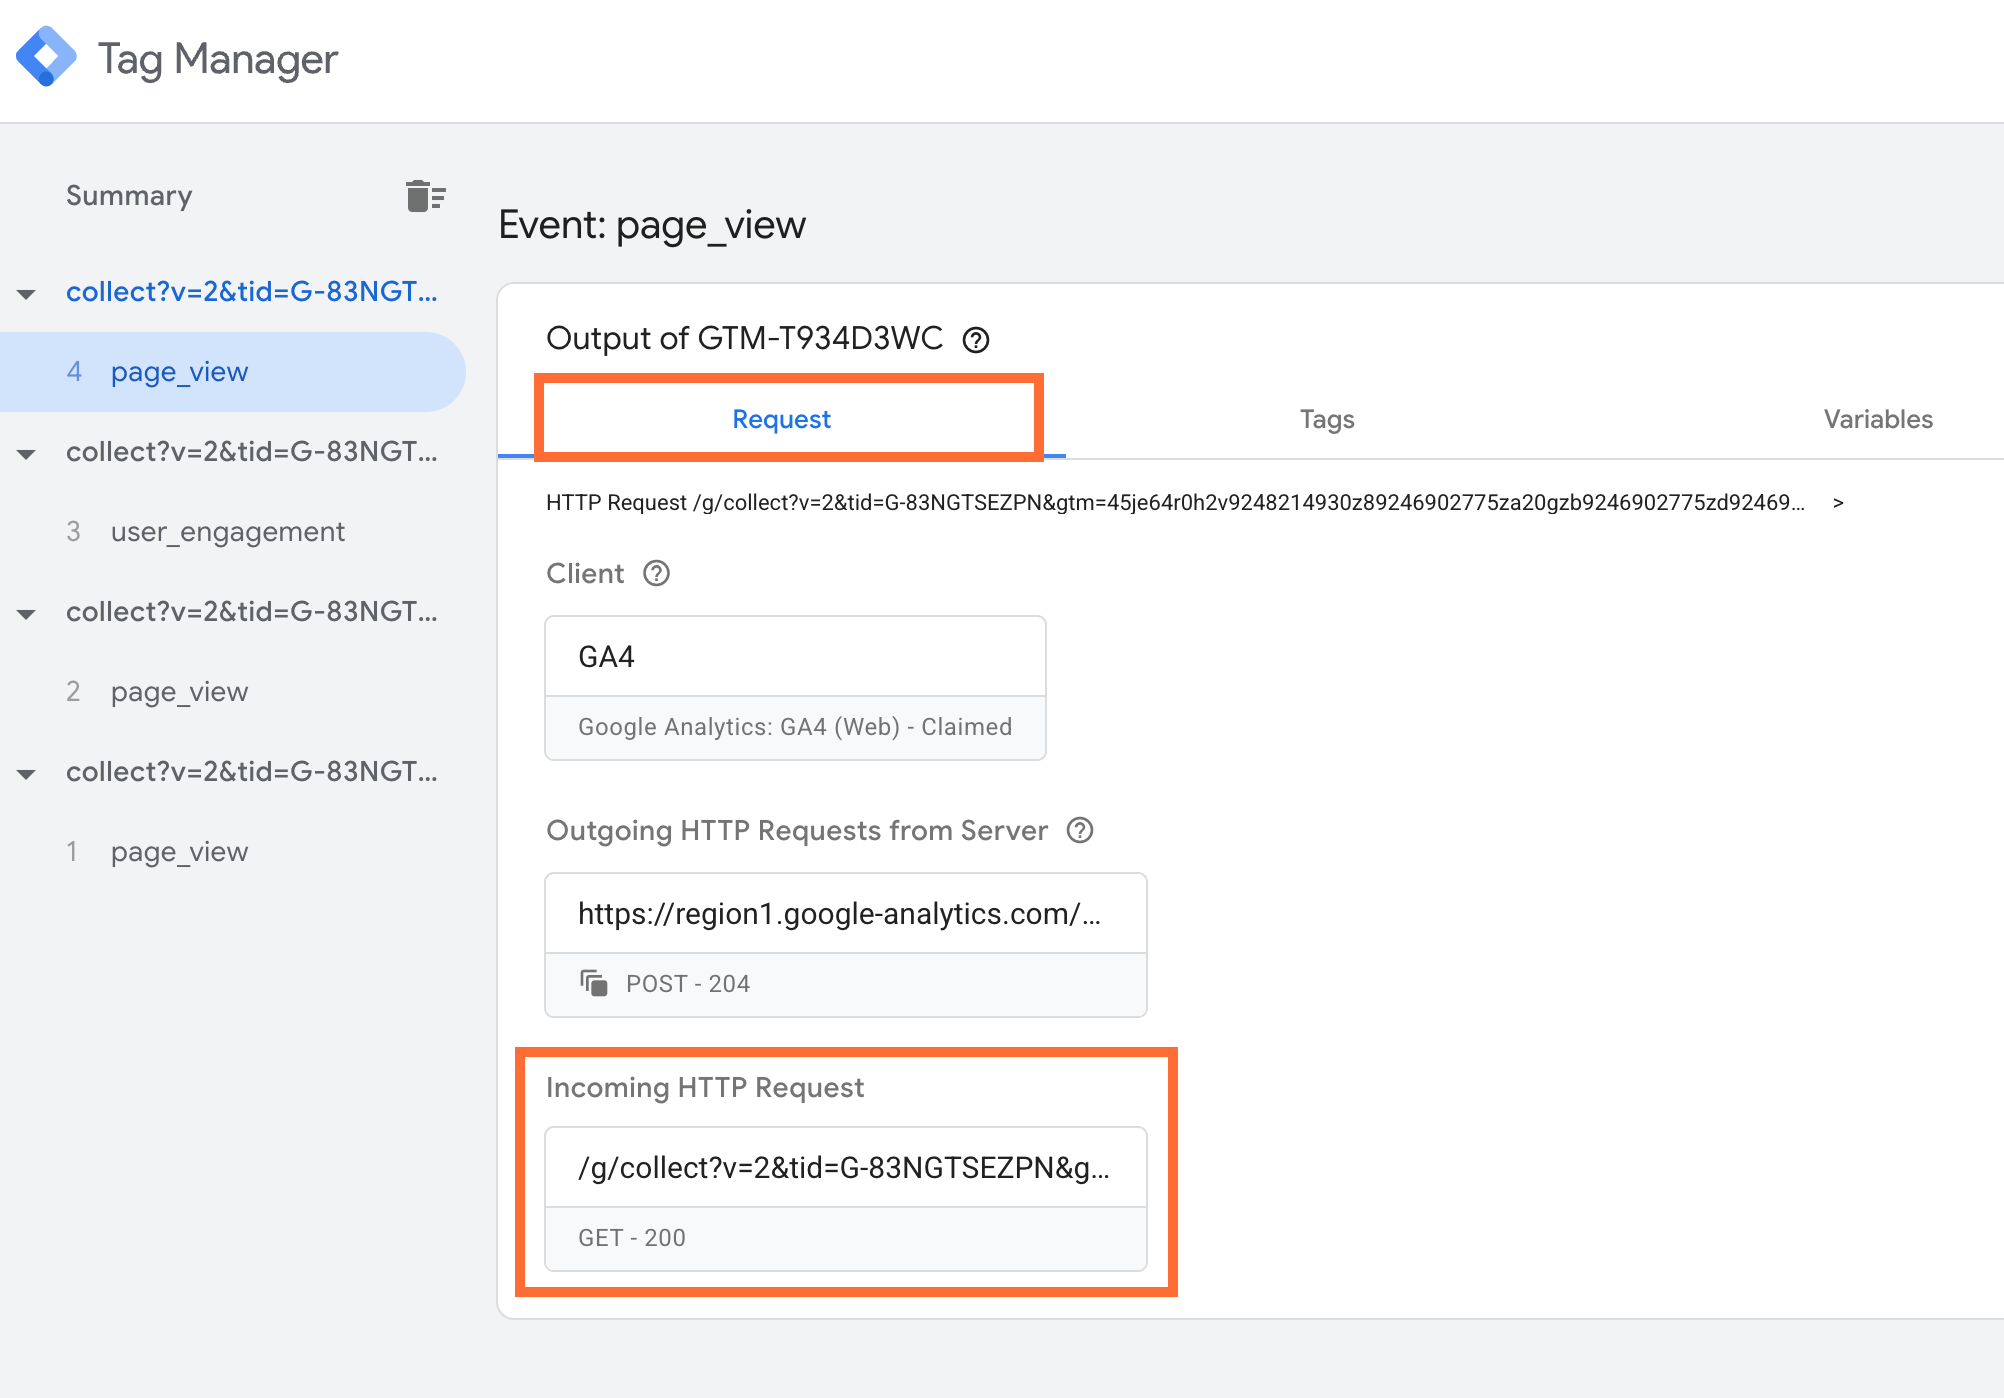
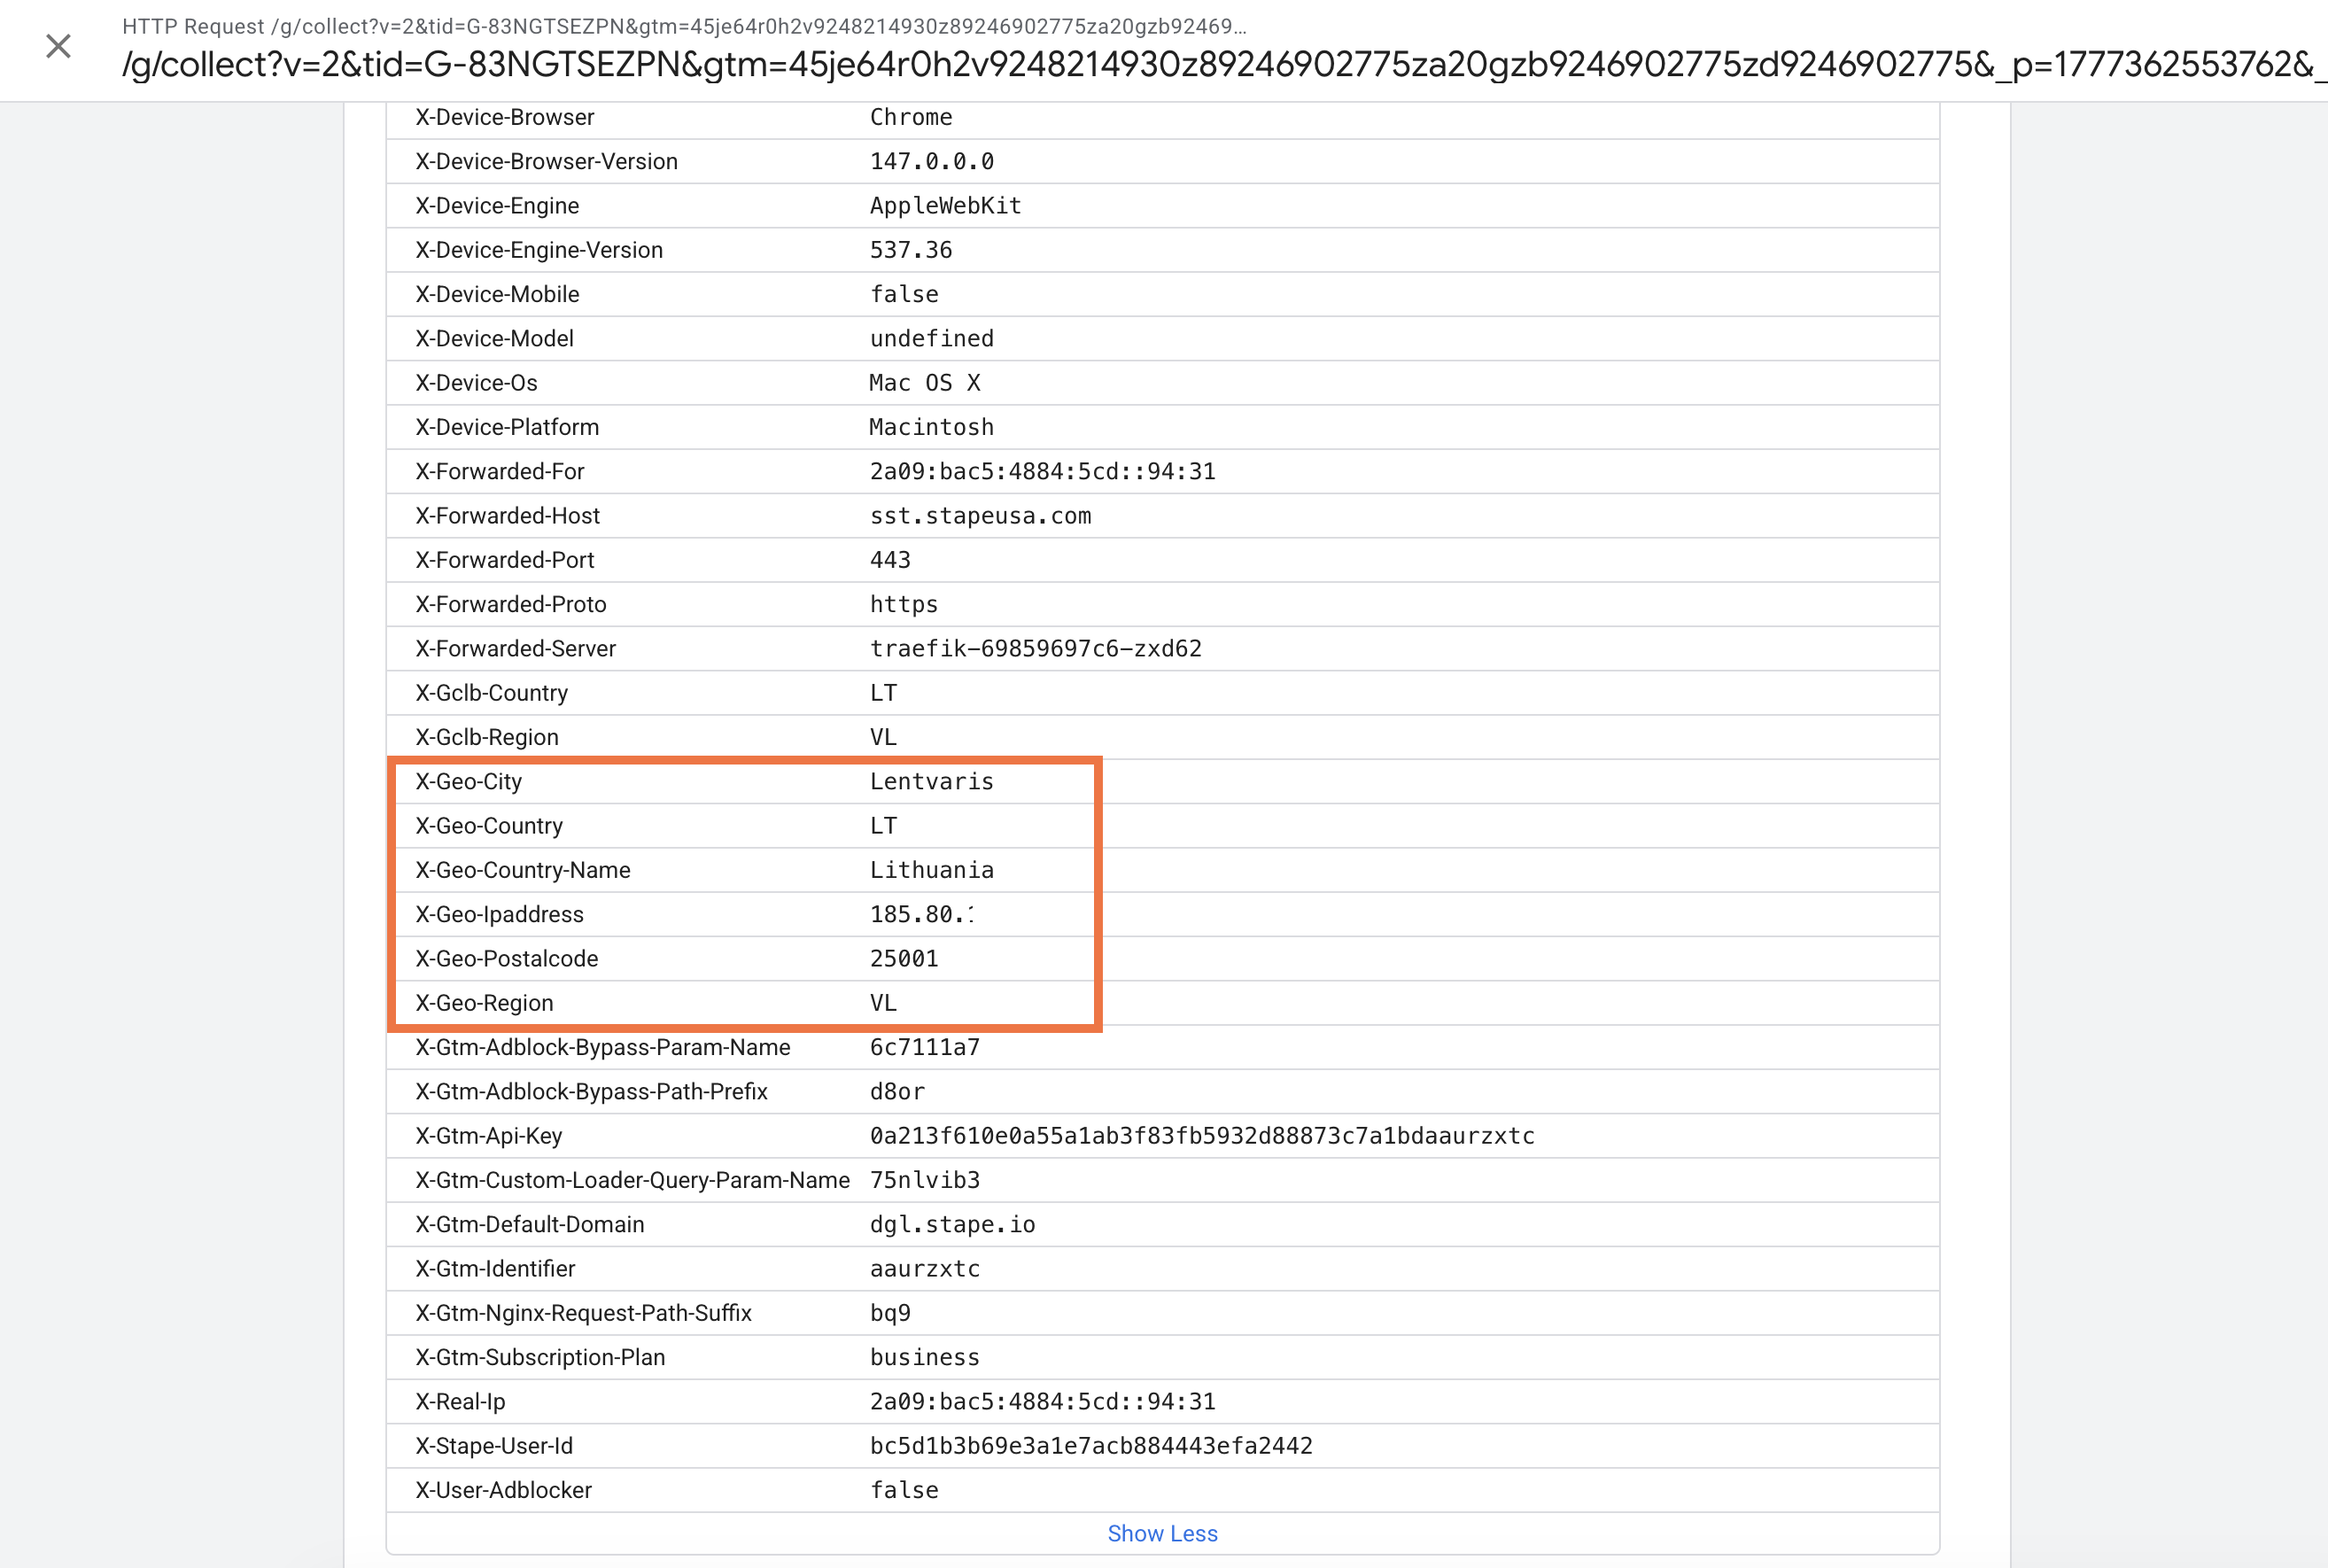
Once enabled, the following headers are added to the Incoming HTTP Request field inside sGTM:
X-GEO-CountryX-GEO-Country-NameX-GEO-CityX-GEO-RegionX-GEO-IpaddressX-GEO-PostalCode
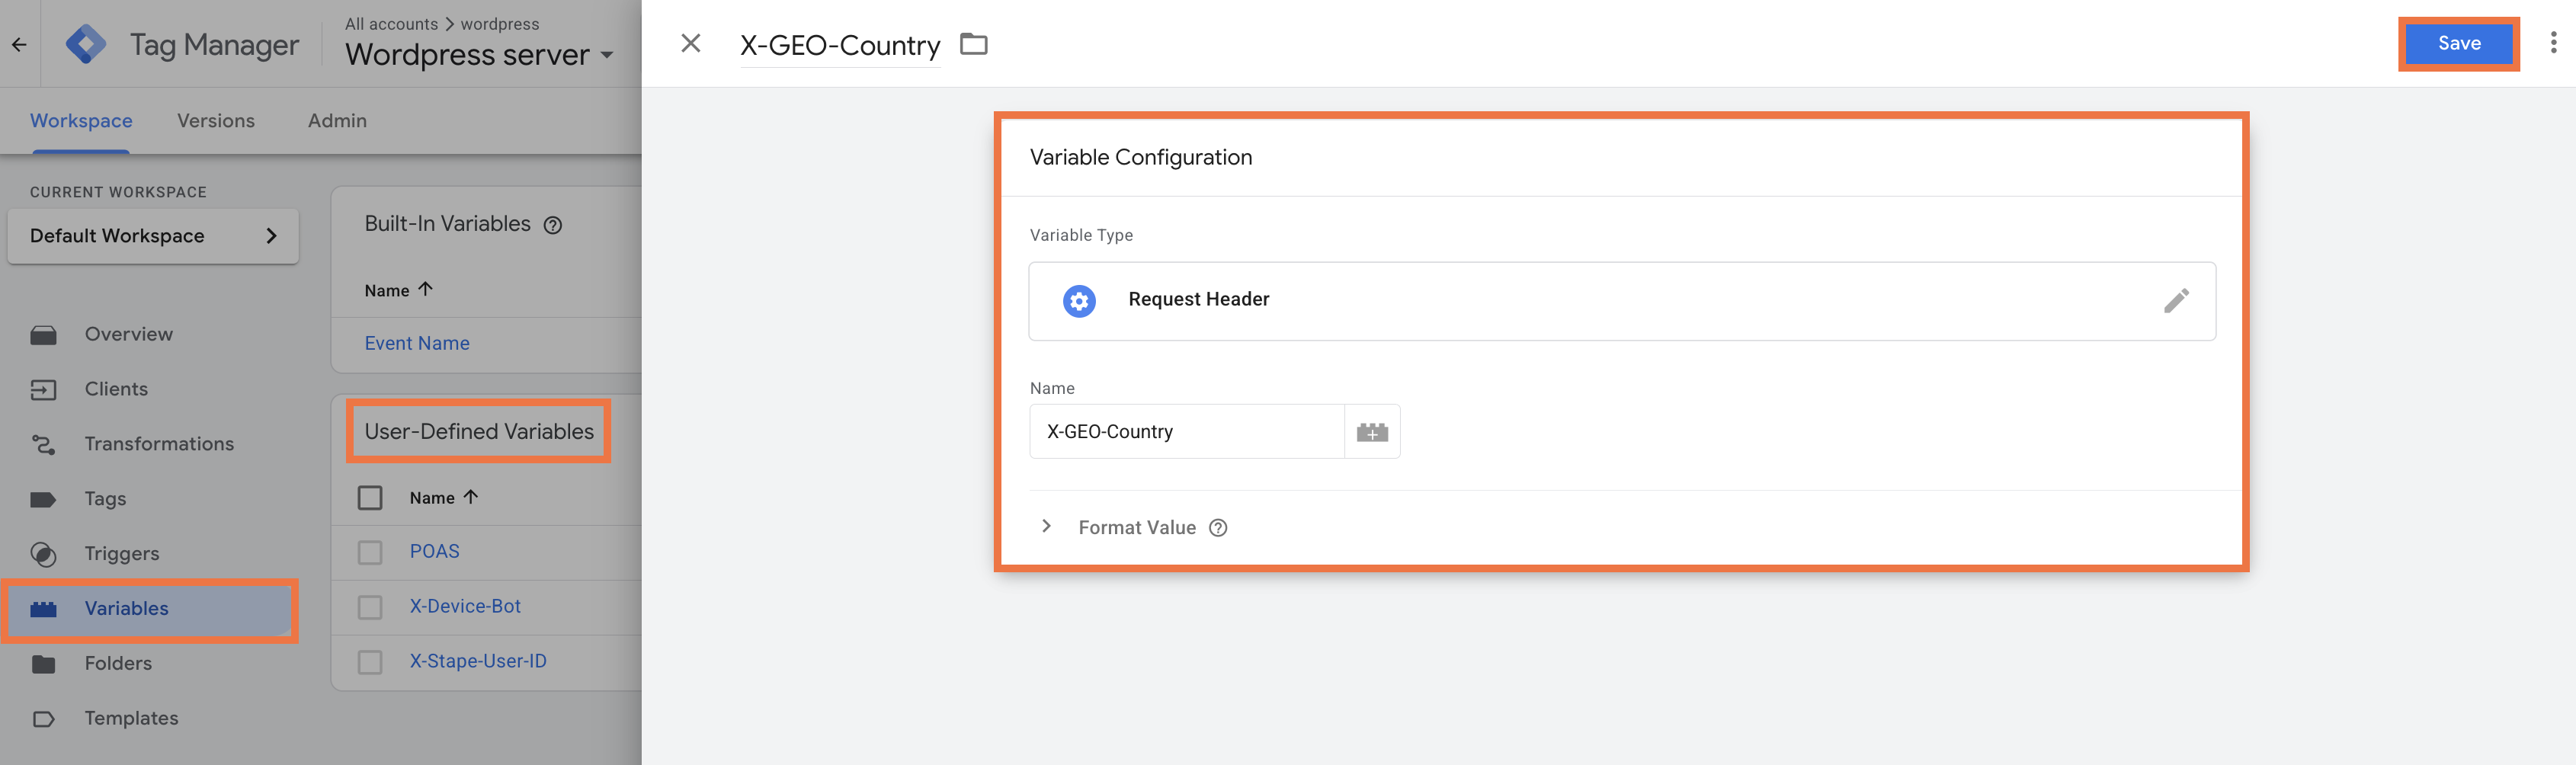
To use these headers, create variables with the type Request Header and enter the exact header names, e.g. X-Geo-Country:
- Go to your sGTM container.
- Create a new User-Defined Variable with the type Request Header and enter the header name.
- Click Save.
Testing
- Open your sGTM container in preview mode.
- Go to the Request tab → Incoming HTTP Request.
3. Click Show More under Request Headers.
4. If the X-GEO headers are listed, the power-up is working correctly.
Use case
You can use the geo data headers provided by the power-up depending on your needs:
- Analytics: send country/region/city as event parameters or user properties.
- Ad platforms: include country/region fields in server-to-server events.
- Routing: use X-GEO-Country / X-GEO-Region to choose endpoints, apply consent rules (see below), or enrich events.
Set up region-specific consent mode behavior using Stape GEO Headers power-up
Before you begin, make sure that you've enabled the Custom Loader power-up.
Step 1. Region-specific consent mode using the web Google Tag Manager template
1. Open the web GTM container and add the Consent Mode tag template.
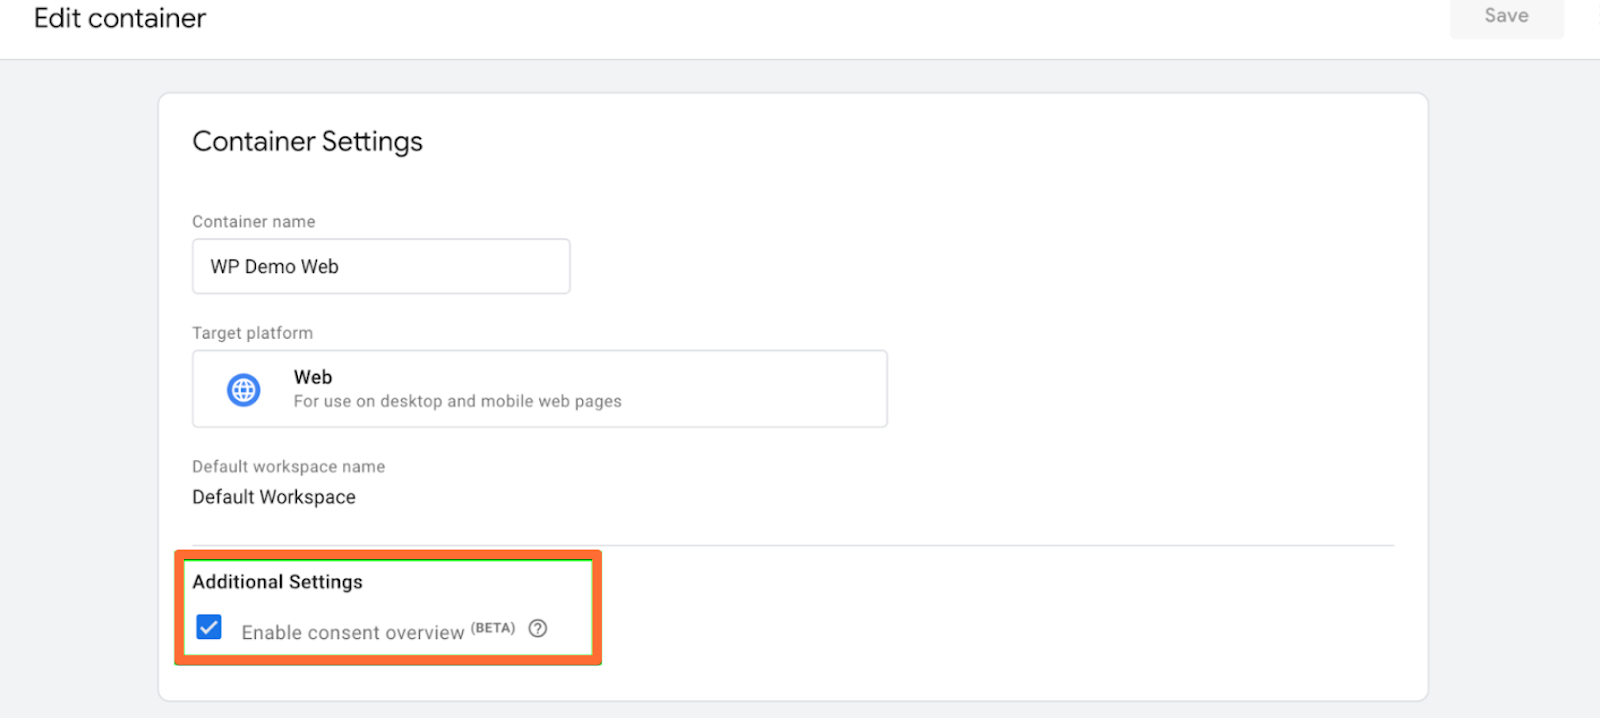
2. Ensure that consent mode is enabled by clicking Admin, Container settings, and Enable consent overview checkbox.
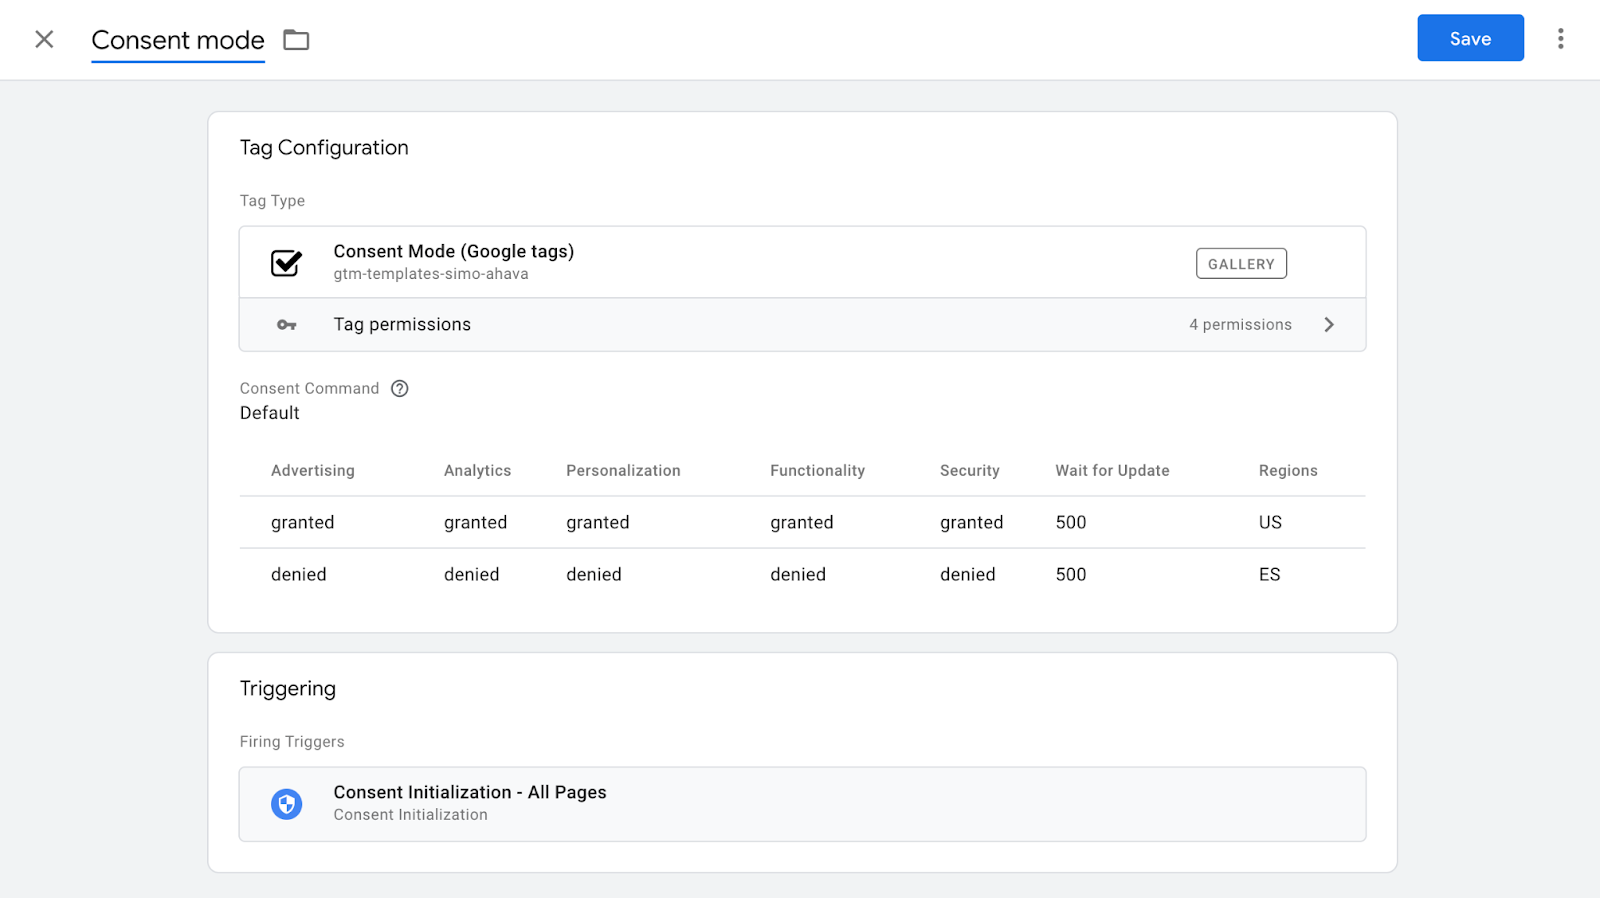
3. Create a new tag with the type Consent Mode tag. Set what type of cookies should be set for each region. The tag will check areas based on the GEO Headers power-up you've enabled in Stape. The trigger should be Consent Initialization - All Pages.
4. Open tag that should listen to the region-specific consent settings and specify which cookies this tag sets. Scroll down to Consent Settings and identify the types of cookies.

Step 2. Test region-specific tag behavior
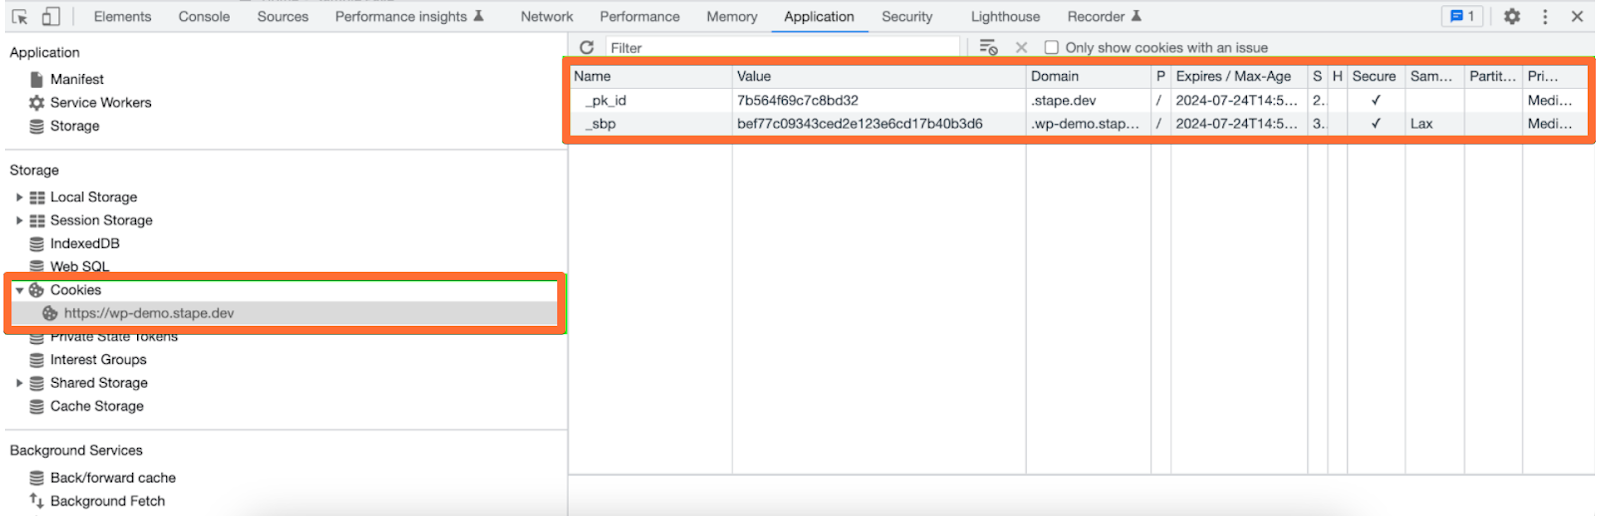
Open GTM preview mode and trigger tag that should be using region-specific tag settings. Open the website console, go to Application → Cookies, and check that the cookies' behavior matches the settings in the Consent Mode tag.
Was this article helpful?
Comments