What is Signals Gateway & Setup Guide
Meta's Signals Gateway is a comprehensive solution that simplifies sending first-party data from any origin to any destination, streamlining data flow across platforms. It integrates multiple data sources into one tool, providing seamless control over your data flow and ensuring efficient sharing across various platforms.
Benefits of Signals Gateway
1. All-in-one place control.
Signals Gateway offers a centralized environment where all your data management and sharing needs are handled in one place. It ensures a smooth and efficient flow of information from any source to any destination without the need for multiple tools or platforms.
2. No technical skills required.
You can quickly set up and customize configurations to fit your specific requirements without any coding expertise. The intuitive interface lets you manage data tracking seamlessly, removing the reliance on specialized developers. As a result, you can allocate your budget more effectively.
3. First-party data maximization.
First-party data offers greater control over privacy and compliance, and since it comes from your own audience, it helps create more targeted campaigns that resonate better with your customers, ultimately leading to higher engagement and return on investment.
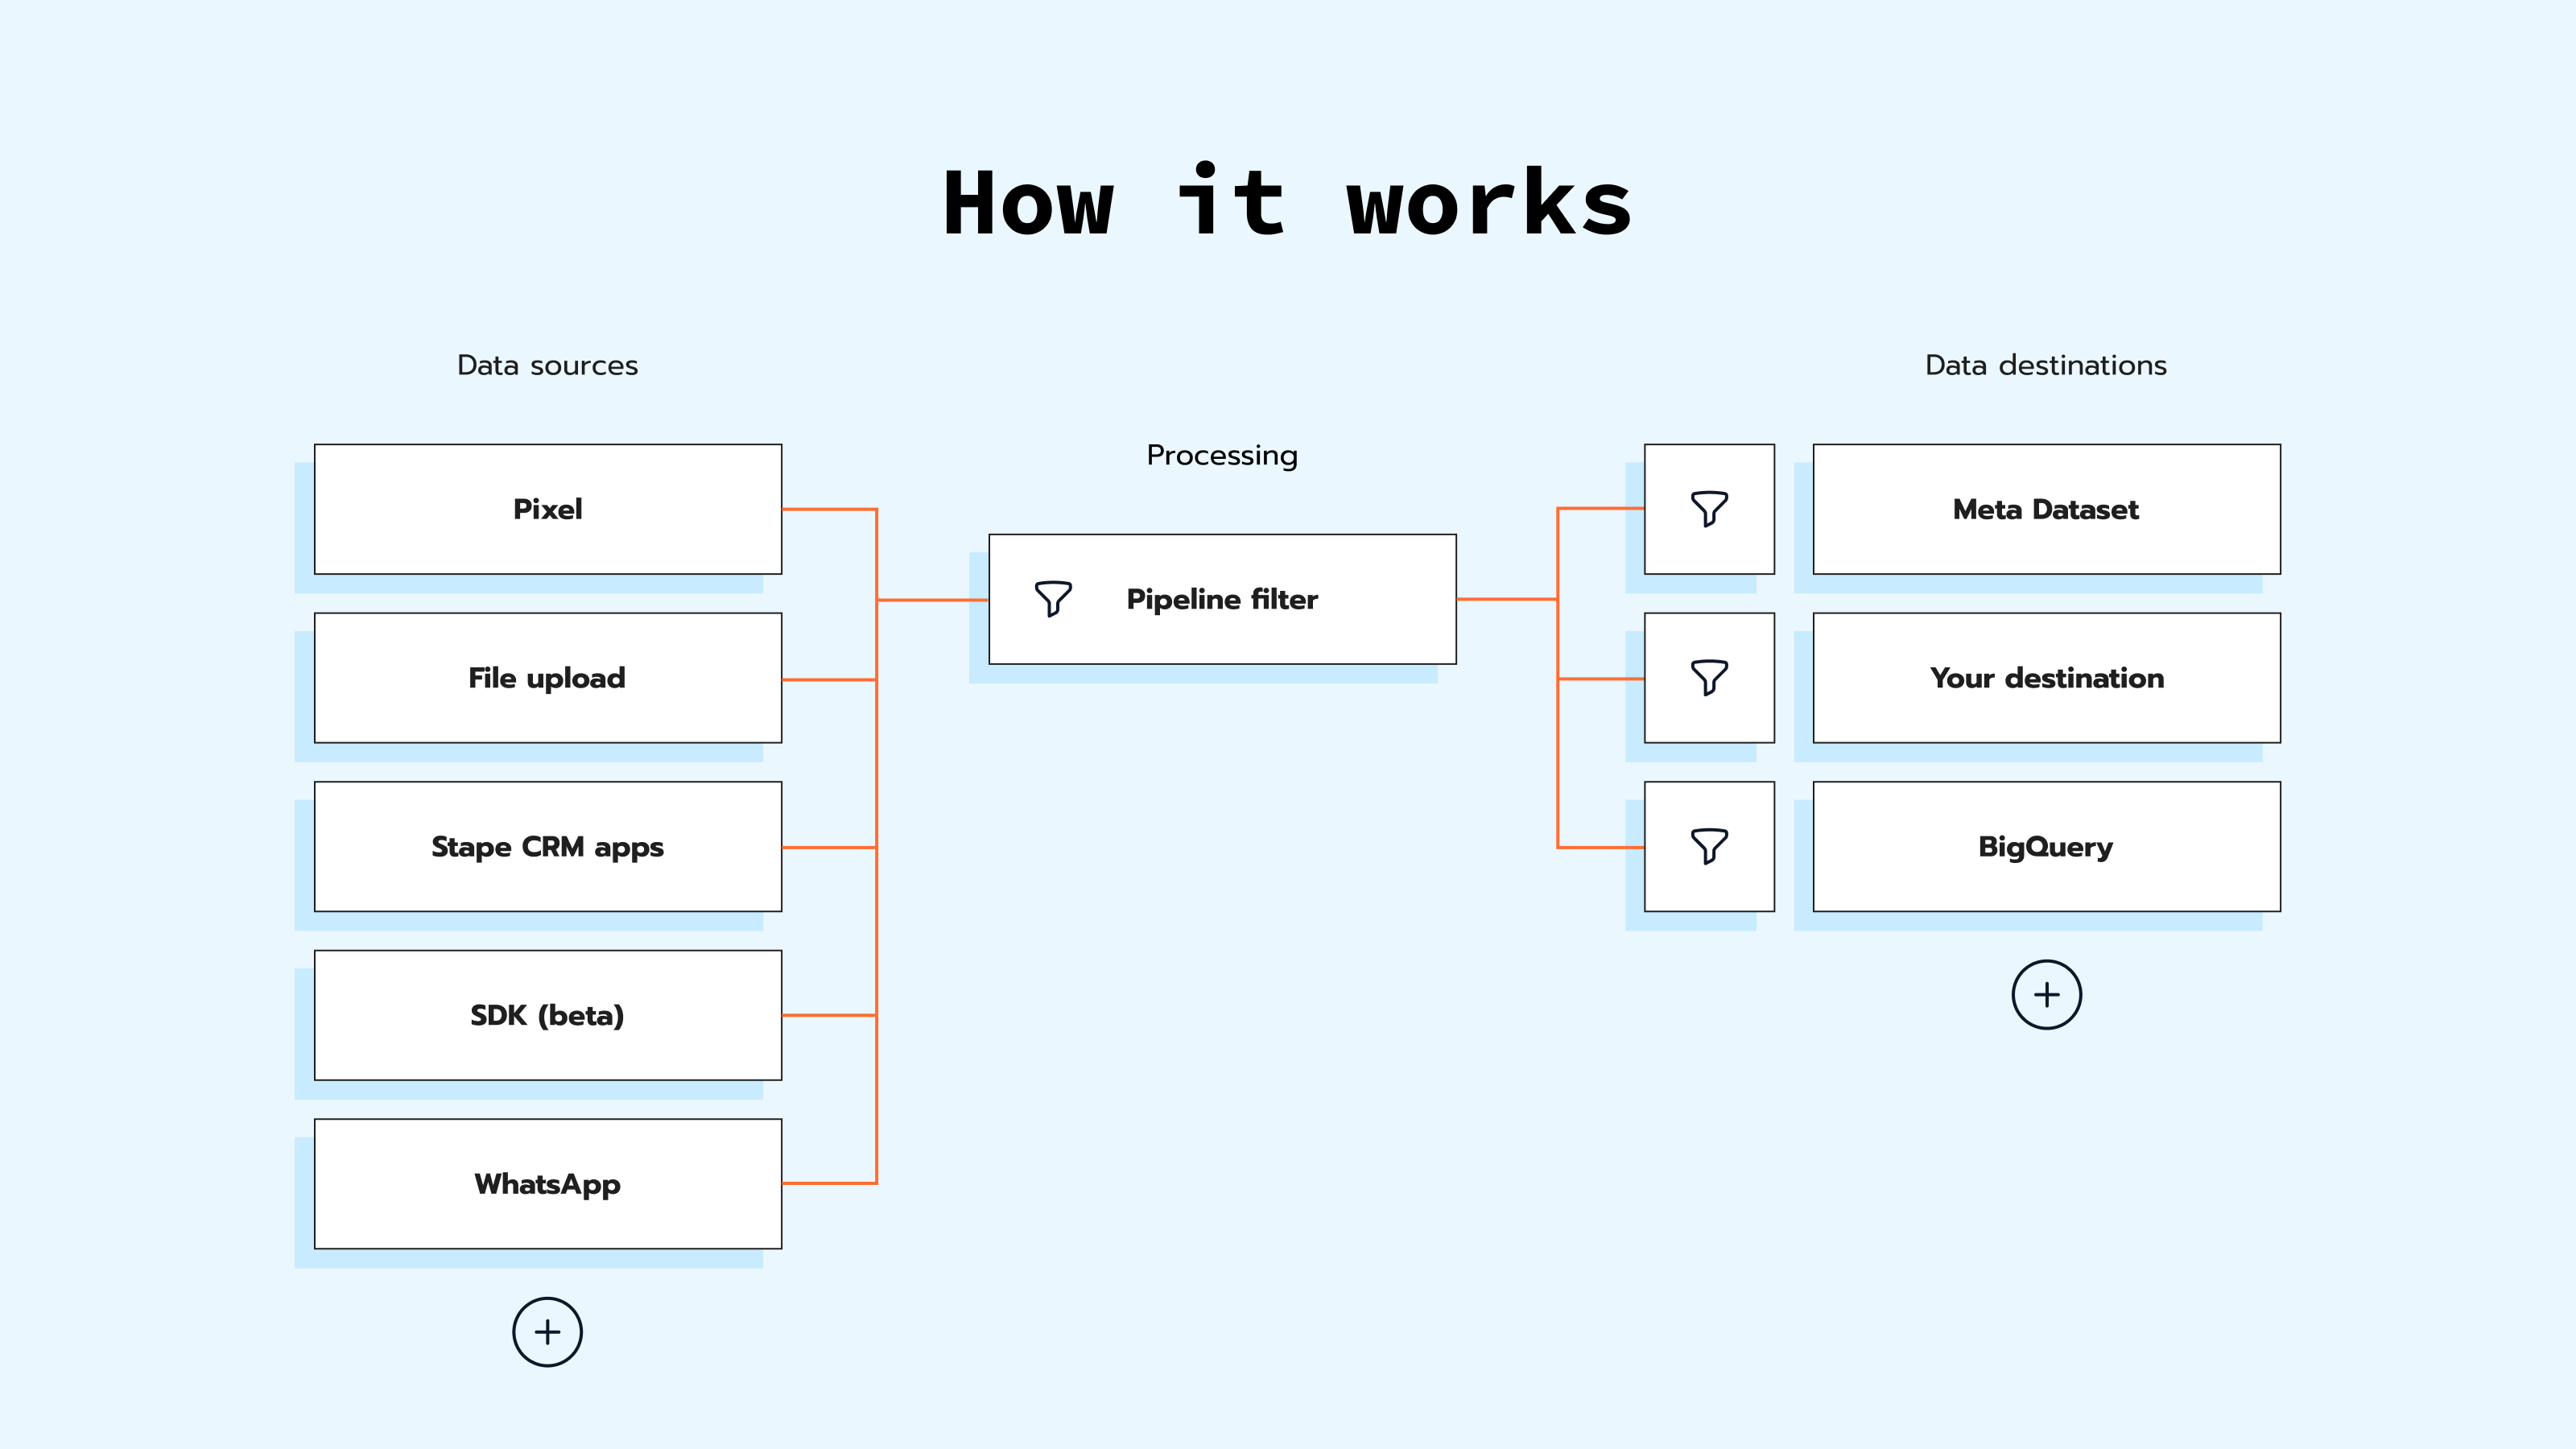
How does Signals Gateway work?
Your Signals Gateway Pixel, SDK, offline uploads, and CRM integrations share data exclusively to your own cloud server. These data sources are centralized within your Signals Gateway, giving you full control over where the data is sent, whether to Meta or another destination. With the customized connector, Signals Gateway simplifies sharing data with any platform. Additionally, Signals Gateway offers a built-in integration with Google BigQuery, which helps you to run data analyses.
In practice, you can use the Signals Gateway Pixel to send events and user data it collects to non-Meta destinations. Currently, the variety of destinations is limited, but it is expected to expand in the near future. You can choose which events you want to exclude from being sent to these destinations in the pipeline.
Update: Besides other sources, Signals Gateway also supports the WhatsApp Conversions API. Check how it works and best practices in our news post.
Stape hosting for Signals Gateway
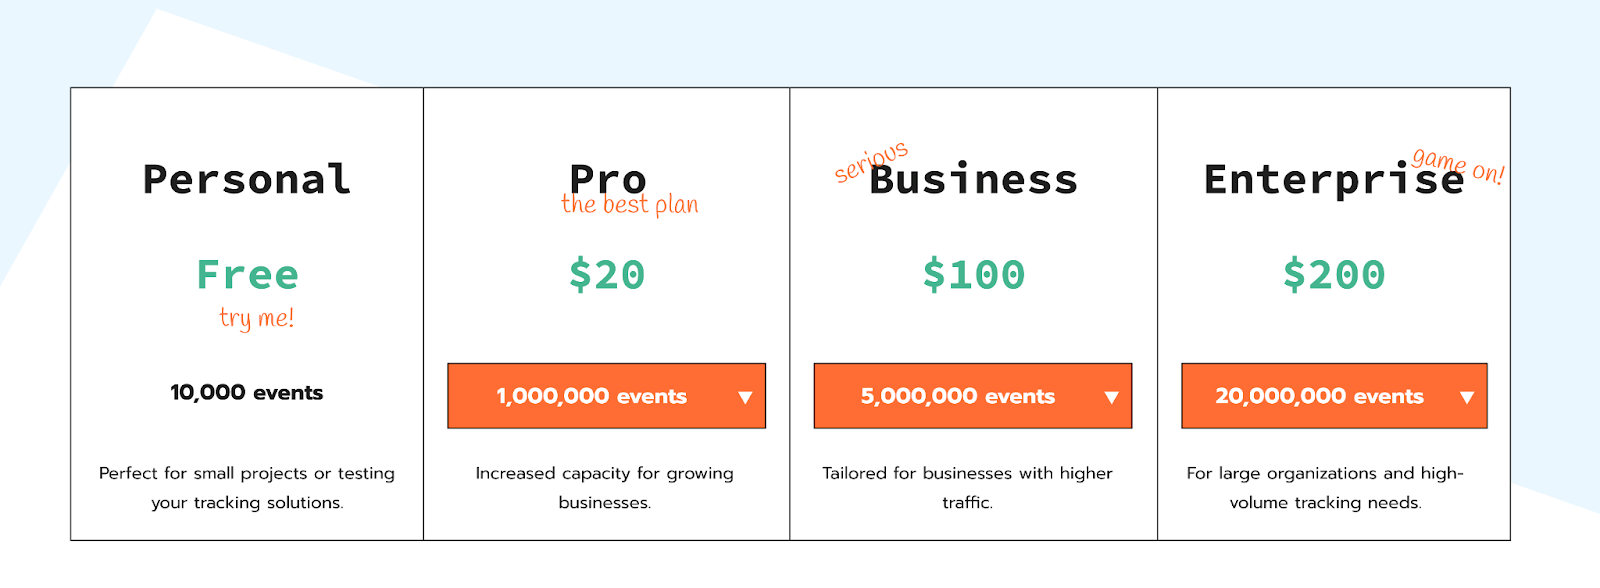
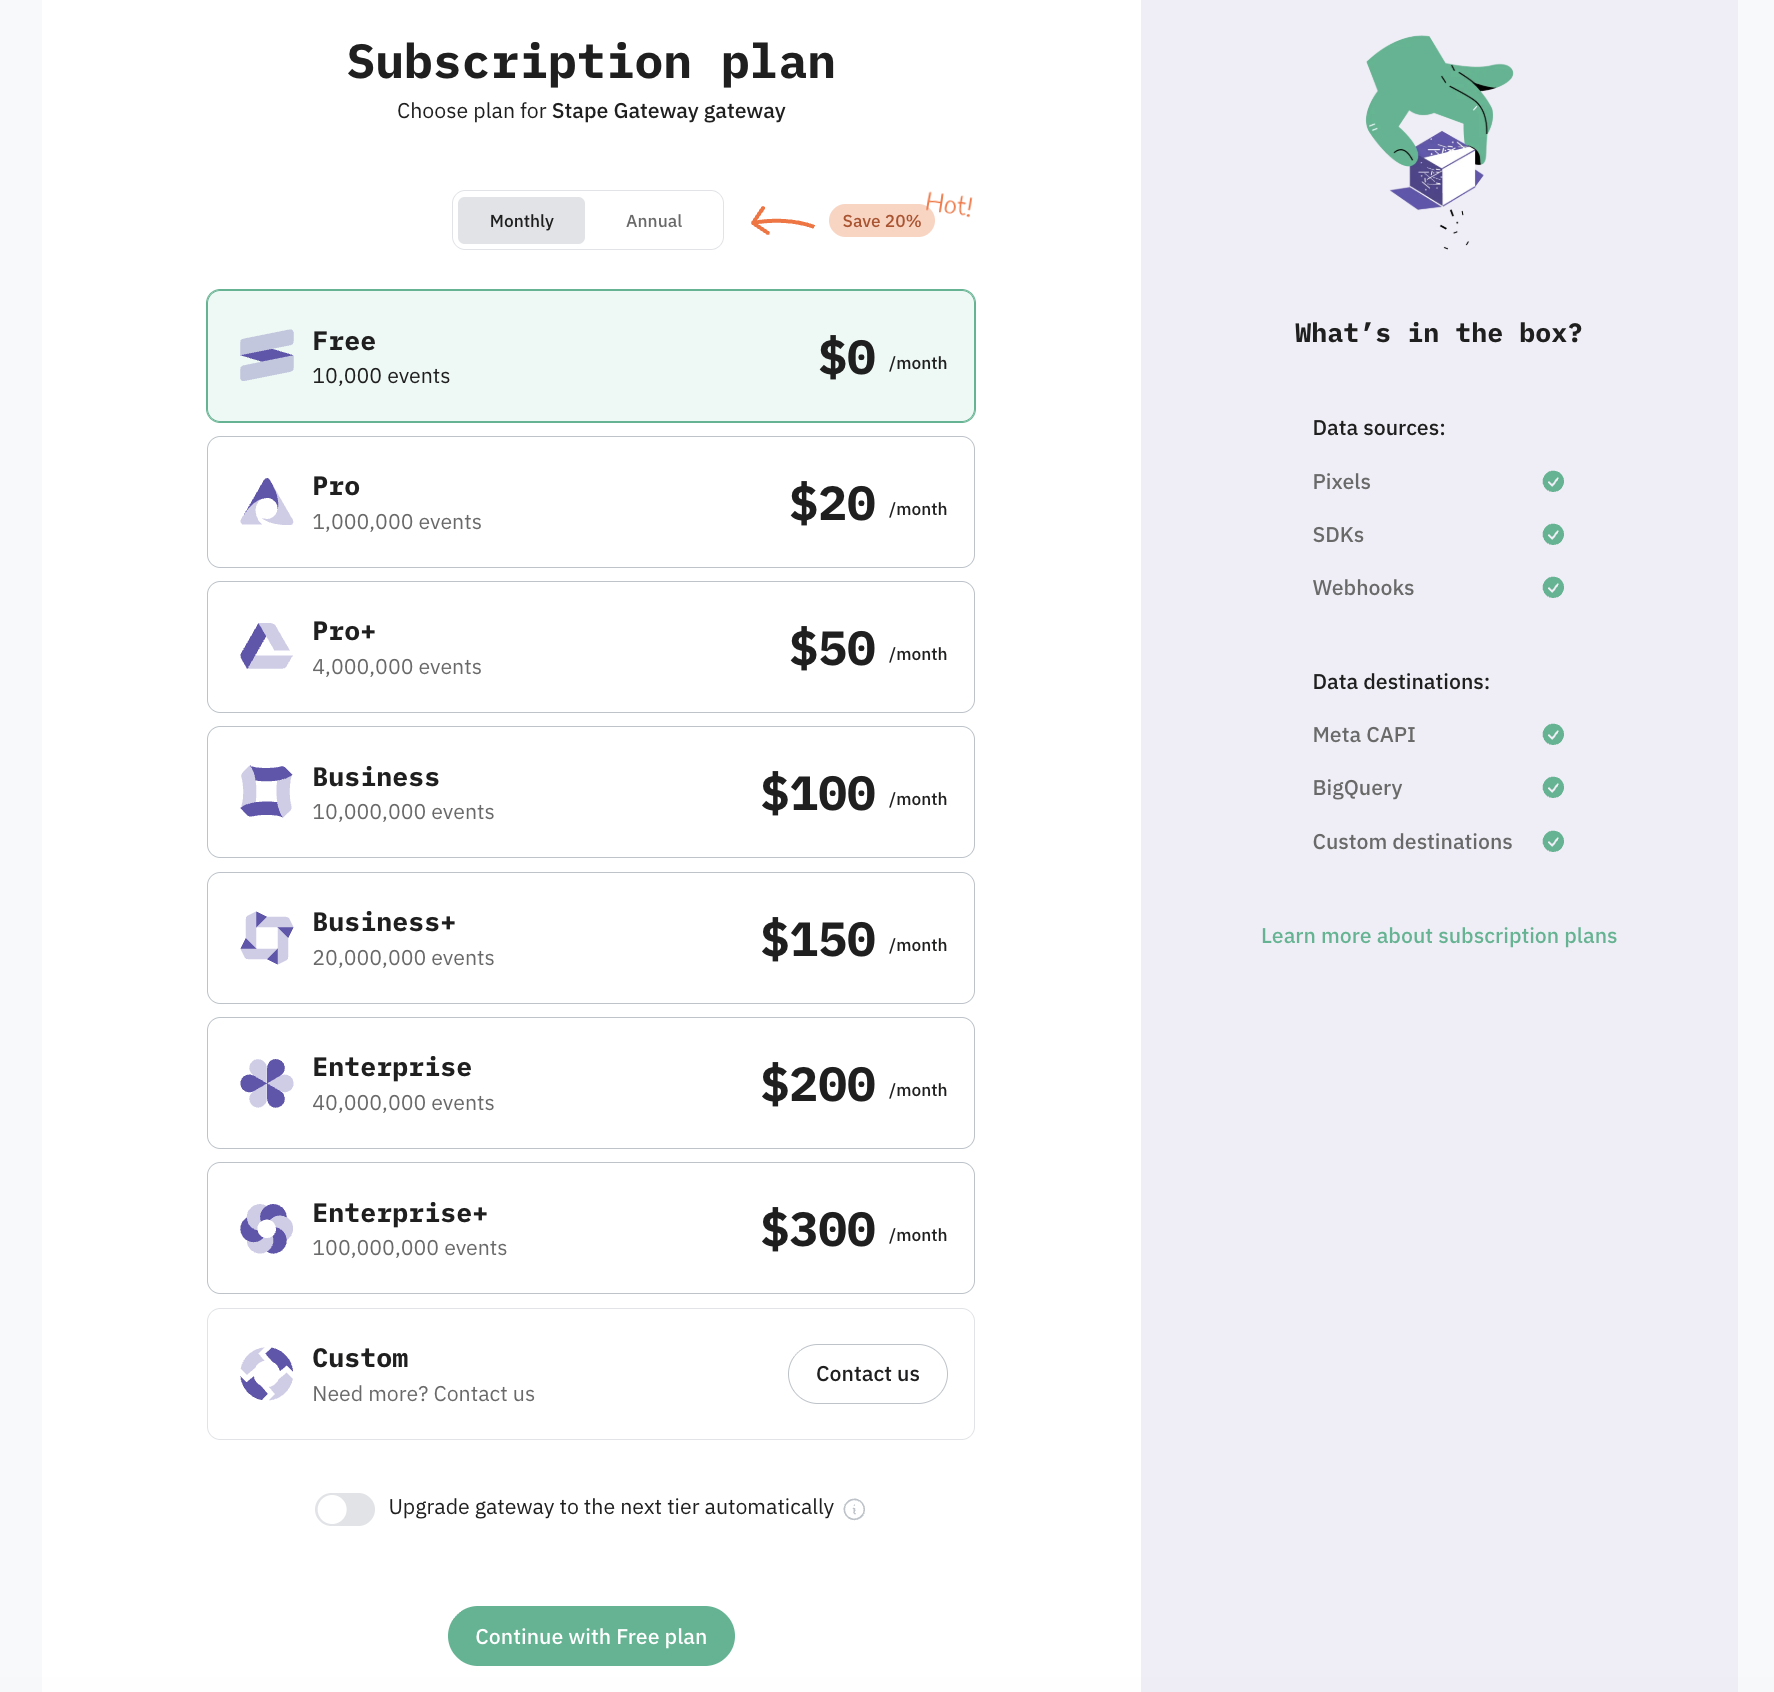
Stape offers a variety of pricing plans to suit your needs: Free, Pro, Business, and Enterprise.
Prices start from 20$ a month for 1 000 000 events. And if you choose a yearly plan – it will cost you only 17$ a month on a Pro plan.
Our Free plan allows up to 10,000 events per month. No credit card required!
You can also use the pricing calculator on our website to help determine which plan is the best fit for your site.
How to set up Signals Gateway?
In order to set up Signals Gateway please follow these steps:
- Create Signals Gateway on Stape.
- Create your first data connection.
- Route traffic through your own domain (recommended).
- Test your setup.
Before you begin
Since Signals Gateway routes the events your site already sends, you’ll need to set up Meta web tracking on your site. You can implement it through a web GTM container, hard-code on the page, or integrate via a plugin.
Step 1 | Create Signals Gateway on Stape
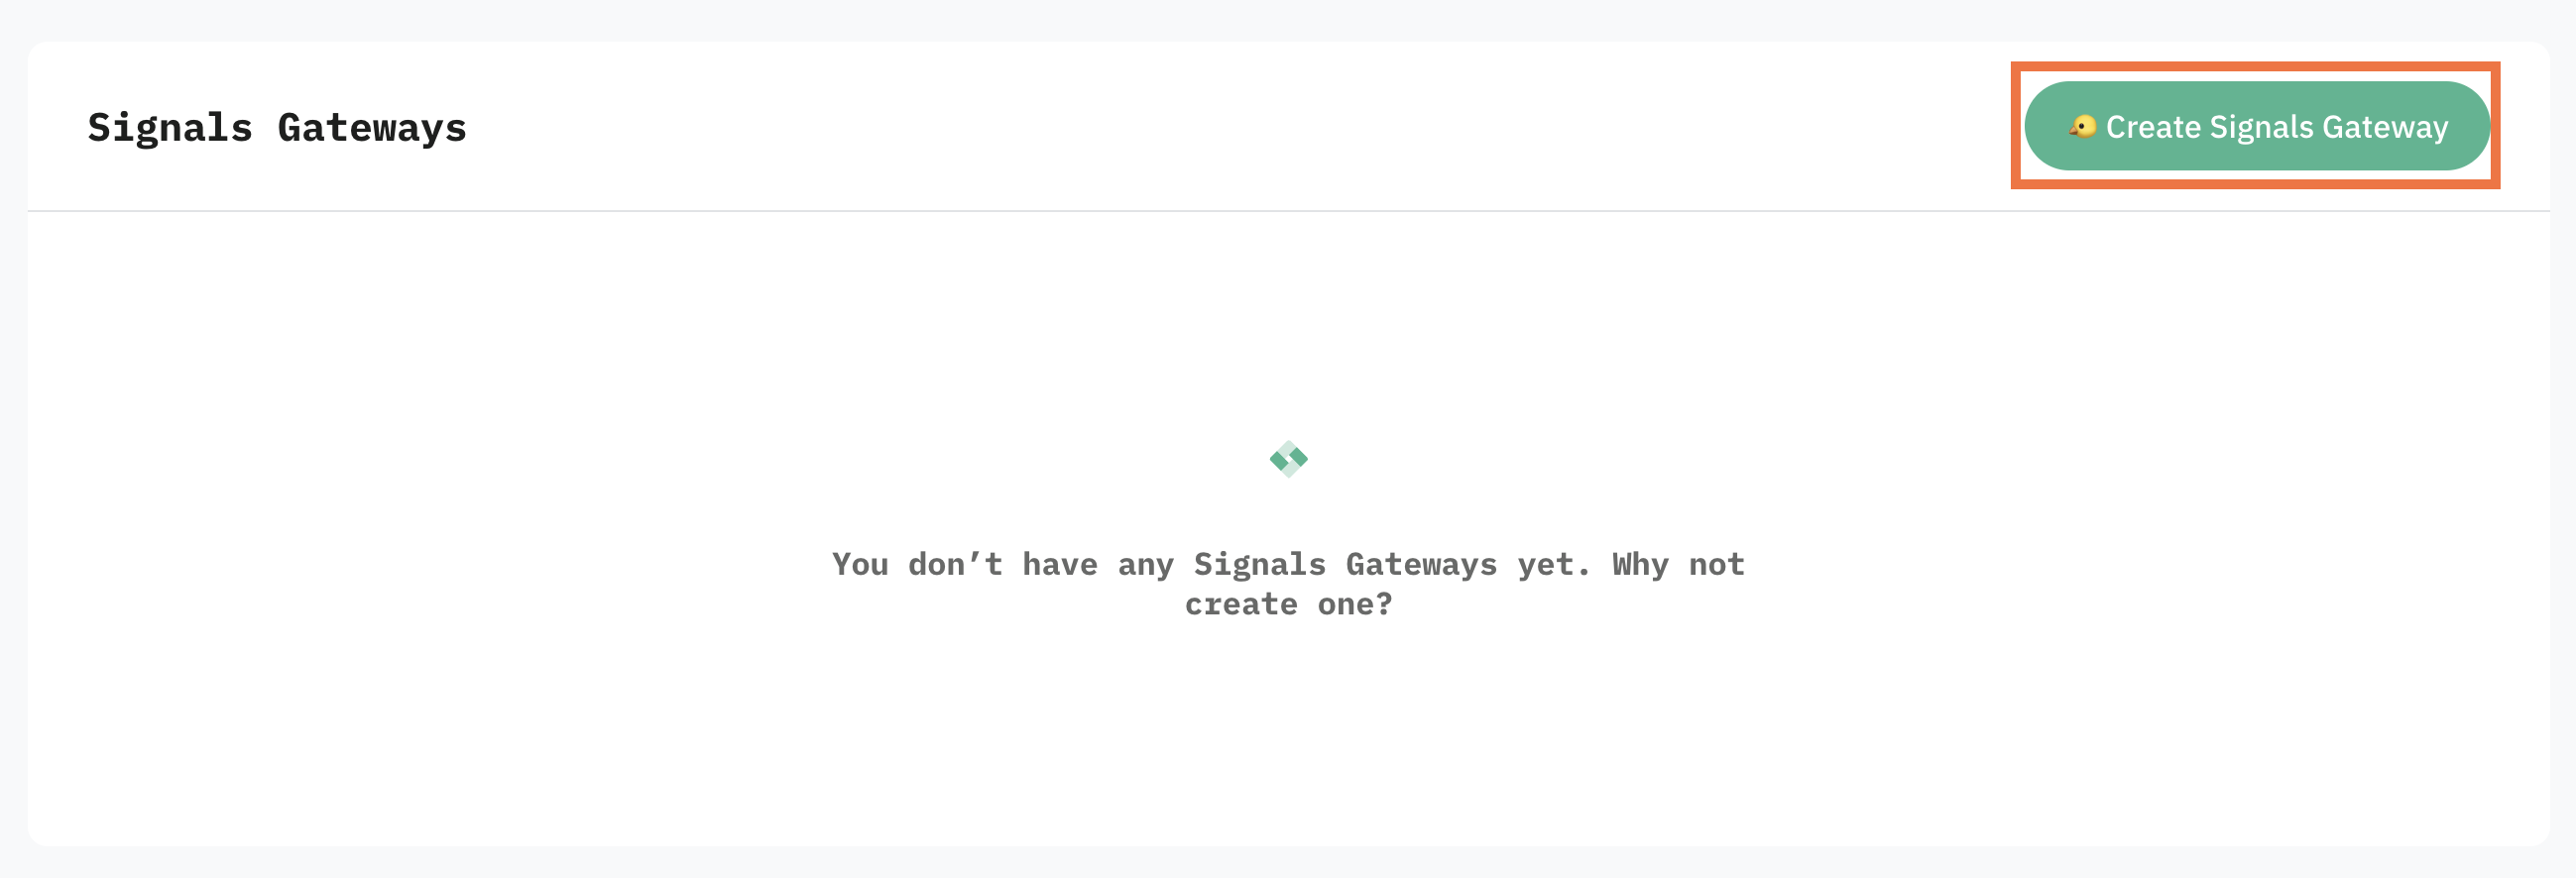
- Log in to your Stape account and click Signals Gateway in the dashboard.

2. Click Create Signals Gateway.
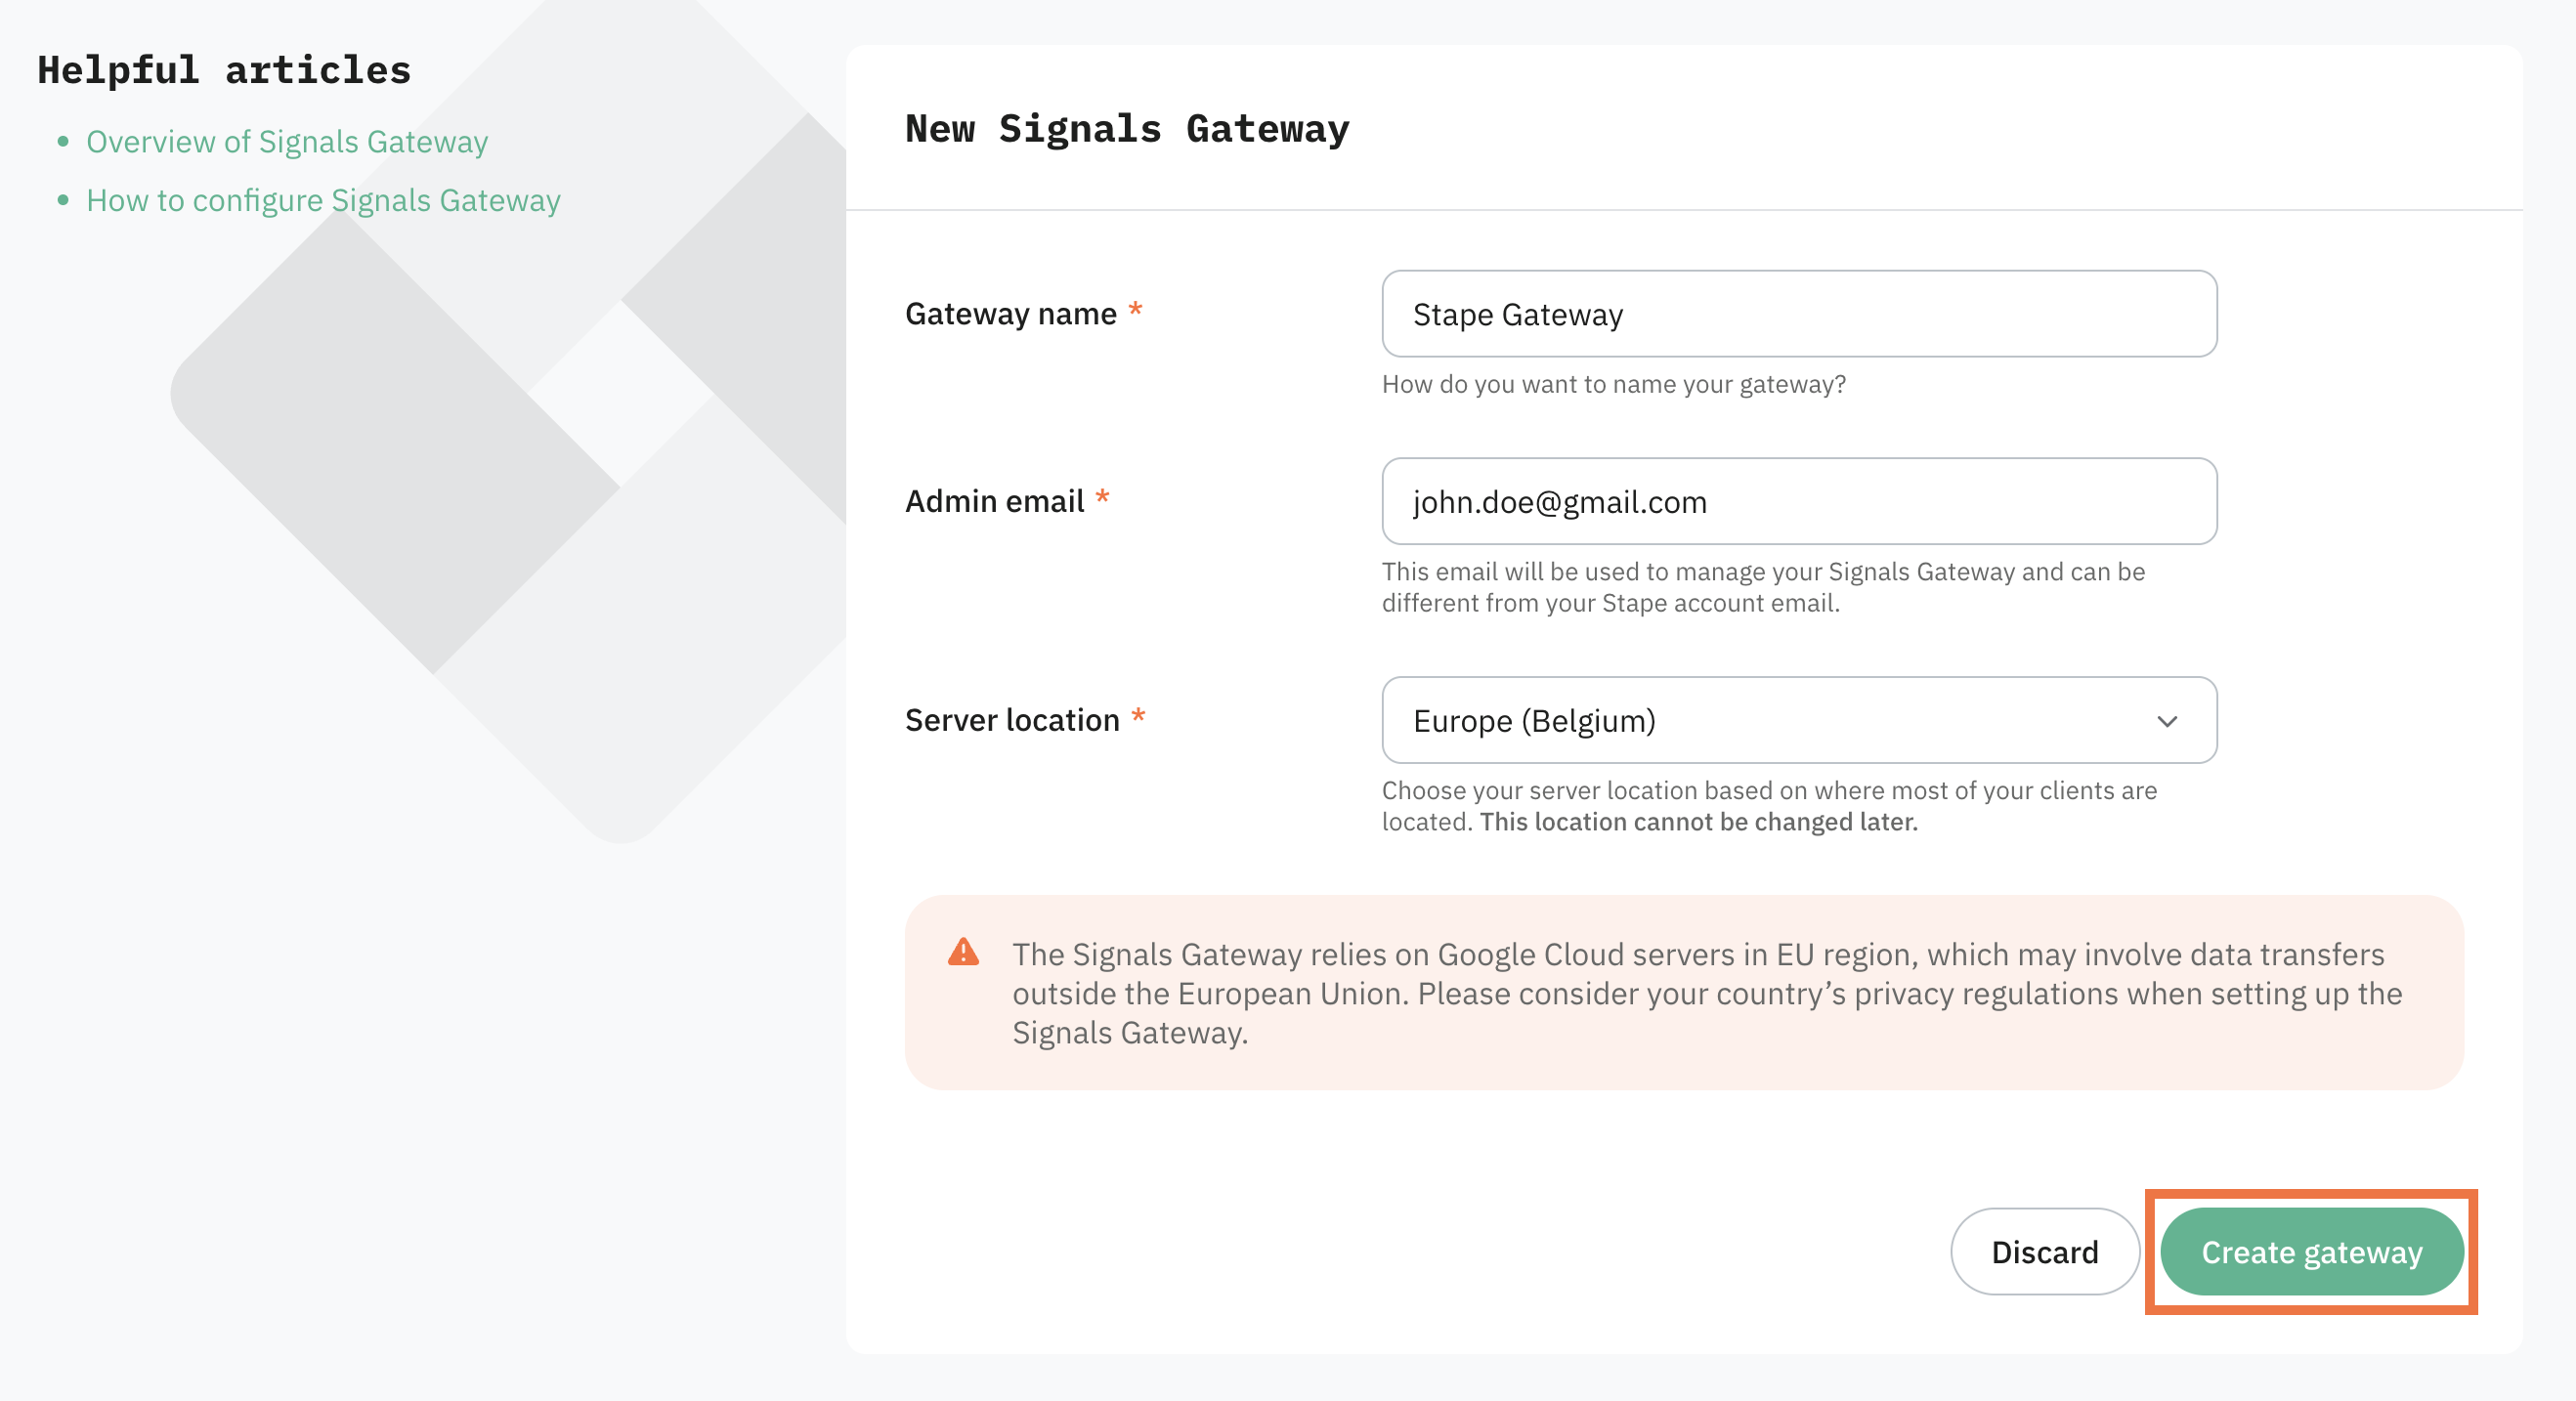
3. Fill in:
- Gateway name - a descriptive label.
- Admin email - the account you'll use to log in to Signals Gateway. It can be different from your Stape login.
- Server location - pick the region closest to the majority of your traffic.
4. Click Create gateway.
5. Select a subscription plan and click Continue.
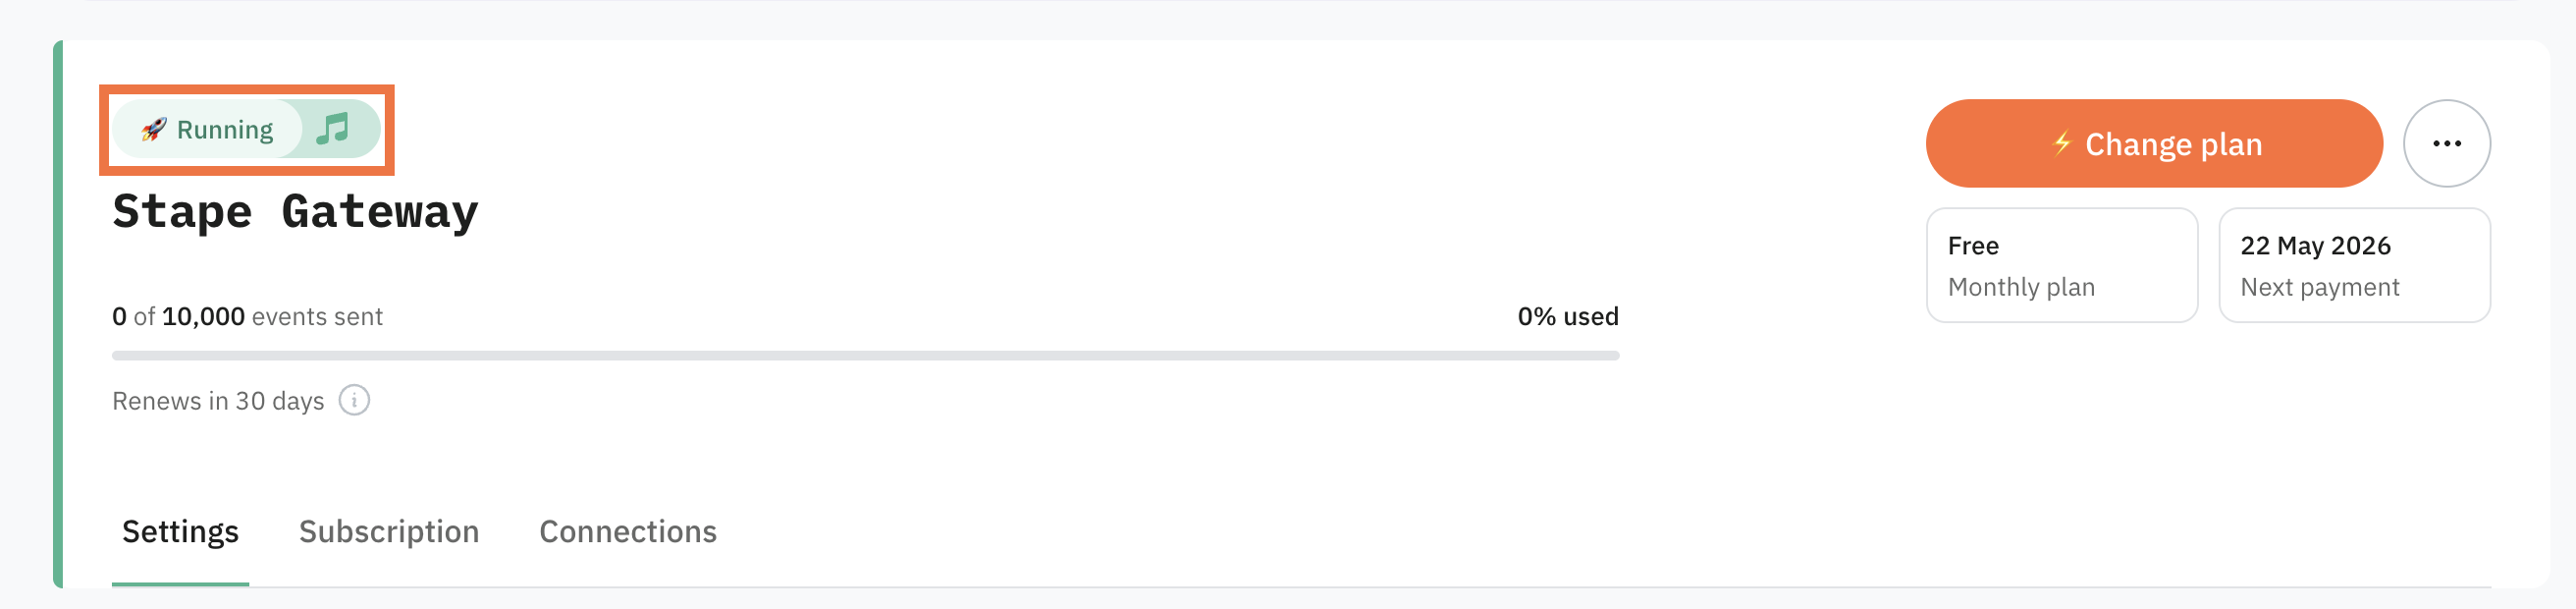
6. Wait for the gateway status to change to Running.
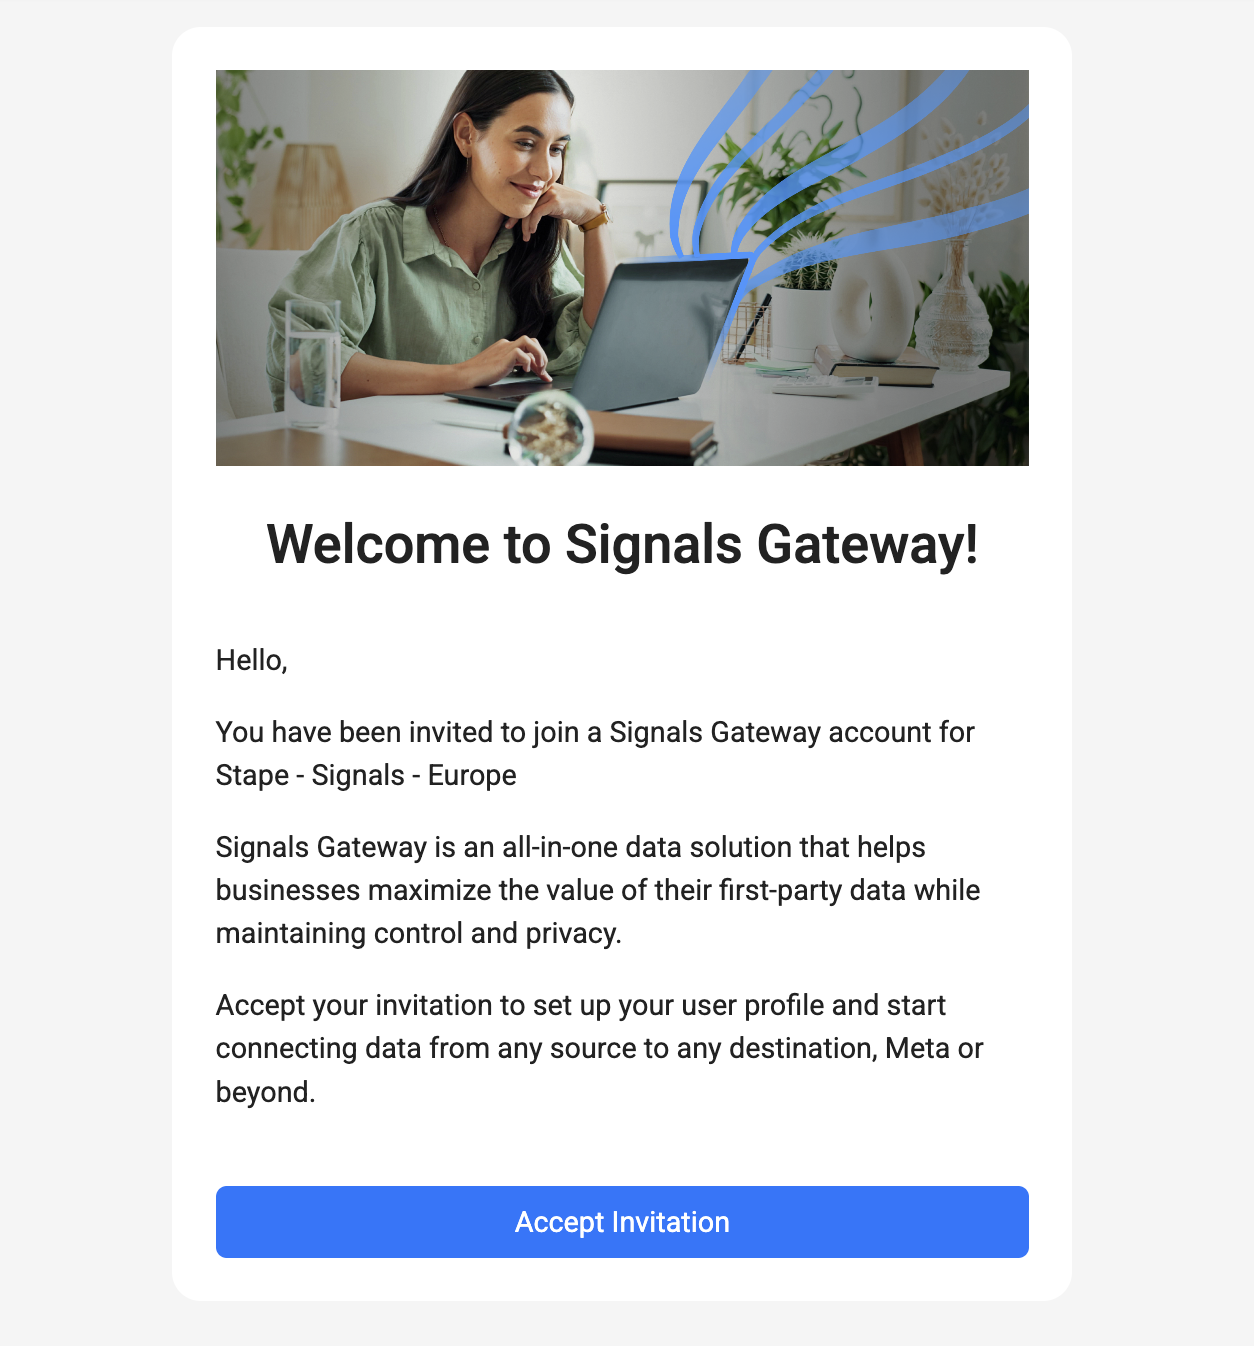
7. Open the invitation email sent to your admin address and click Accept Invitation.
Tip
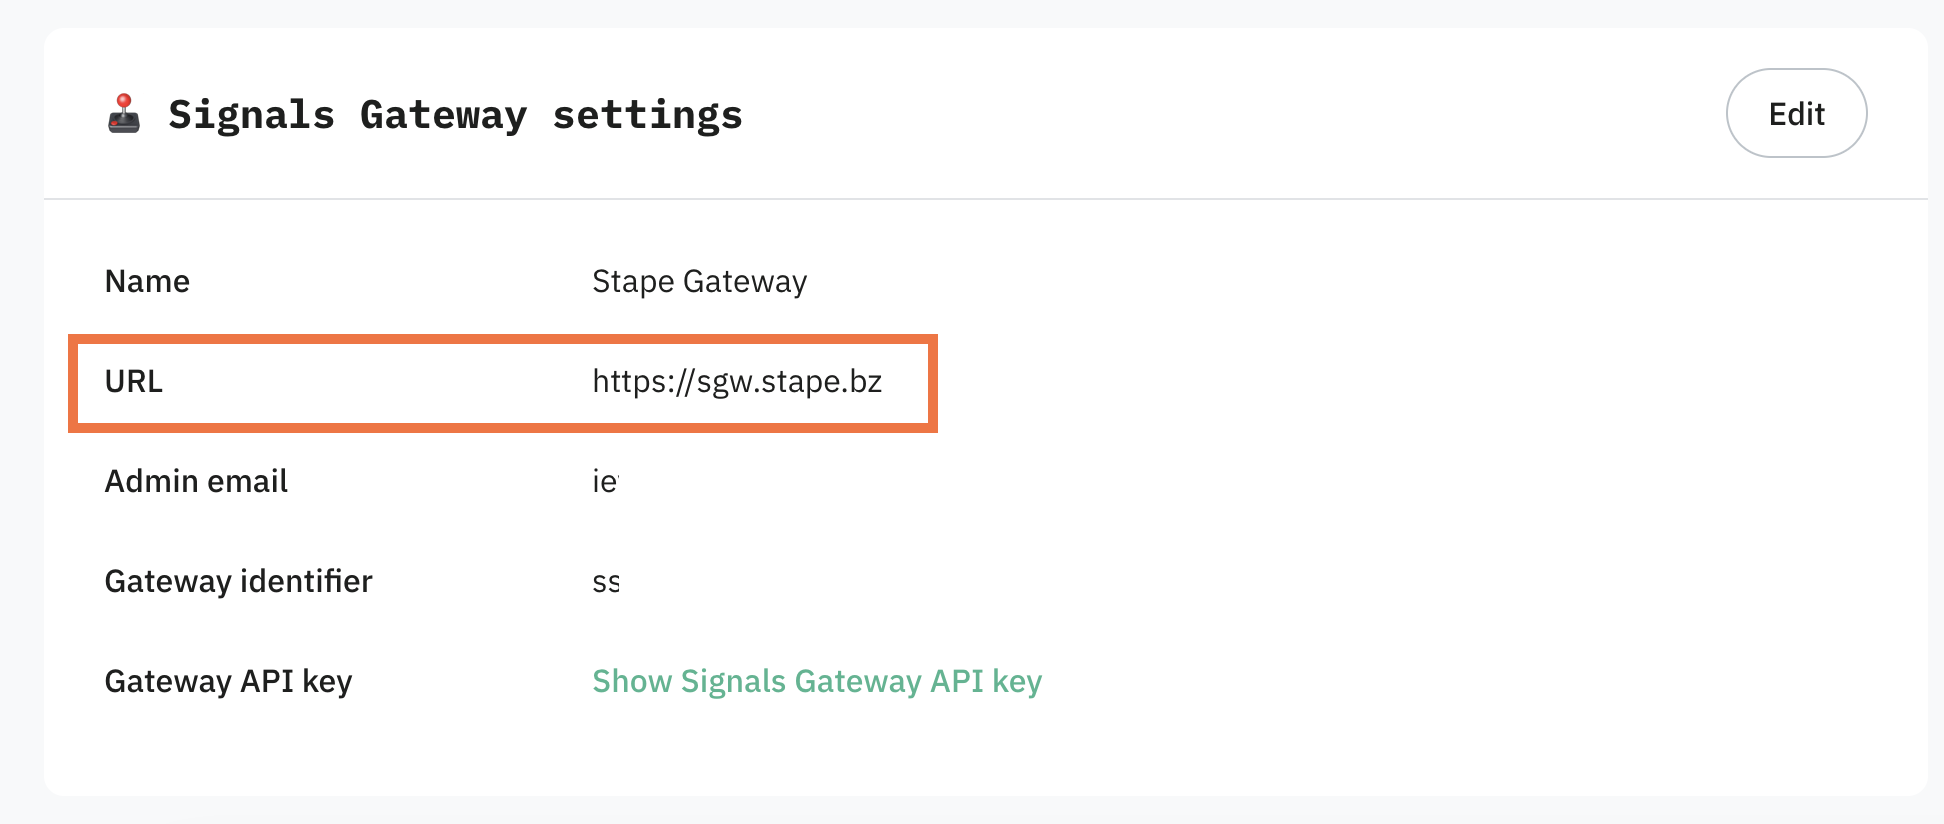
8. Save your admin URL. Once the gateway is running, copy the URL shown in the Signals Gateway settings. That's your permanent login link, bookmark it. You'll log in with the admin email and the password you're about to set.
Step 2 | Create your first data connection
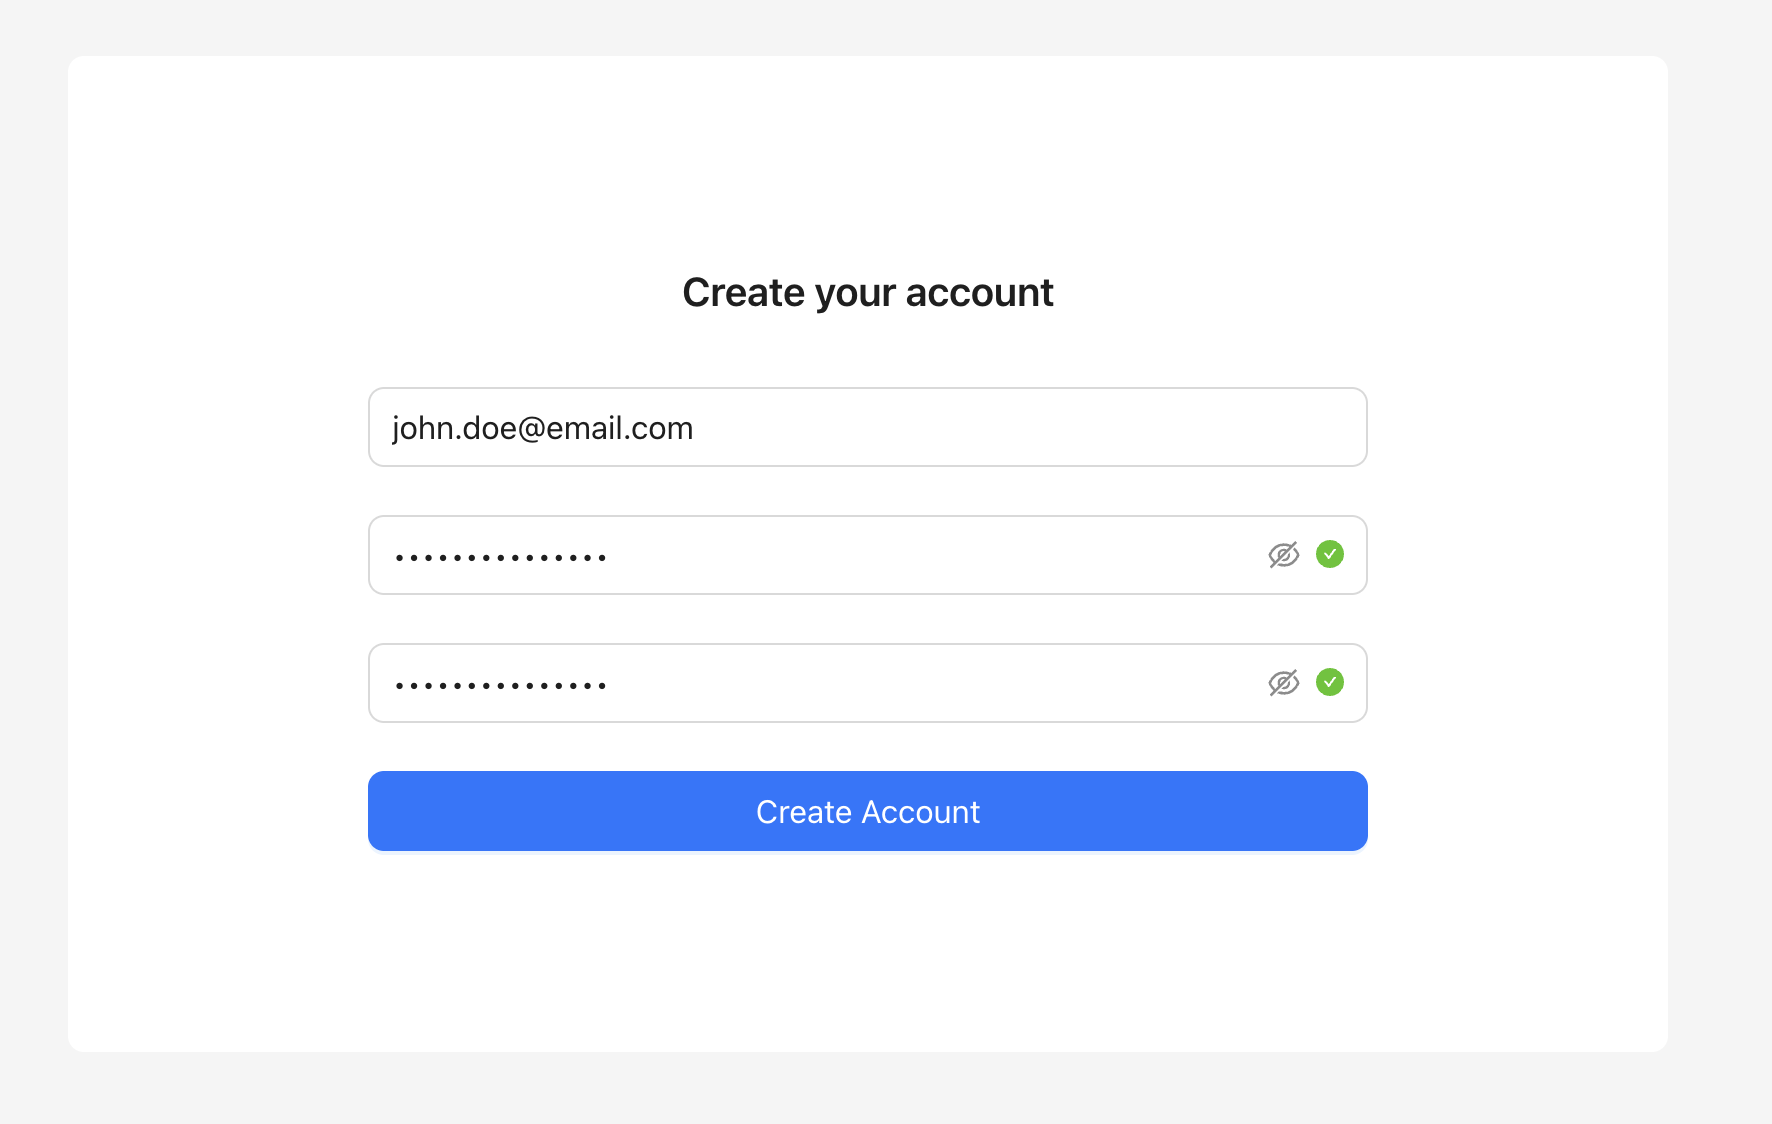
- Log in to the gateway with your admin email, set a password, and click Create Account. Stape never sees this password, store it somewhere safe.
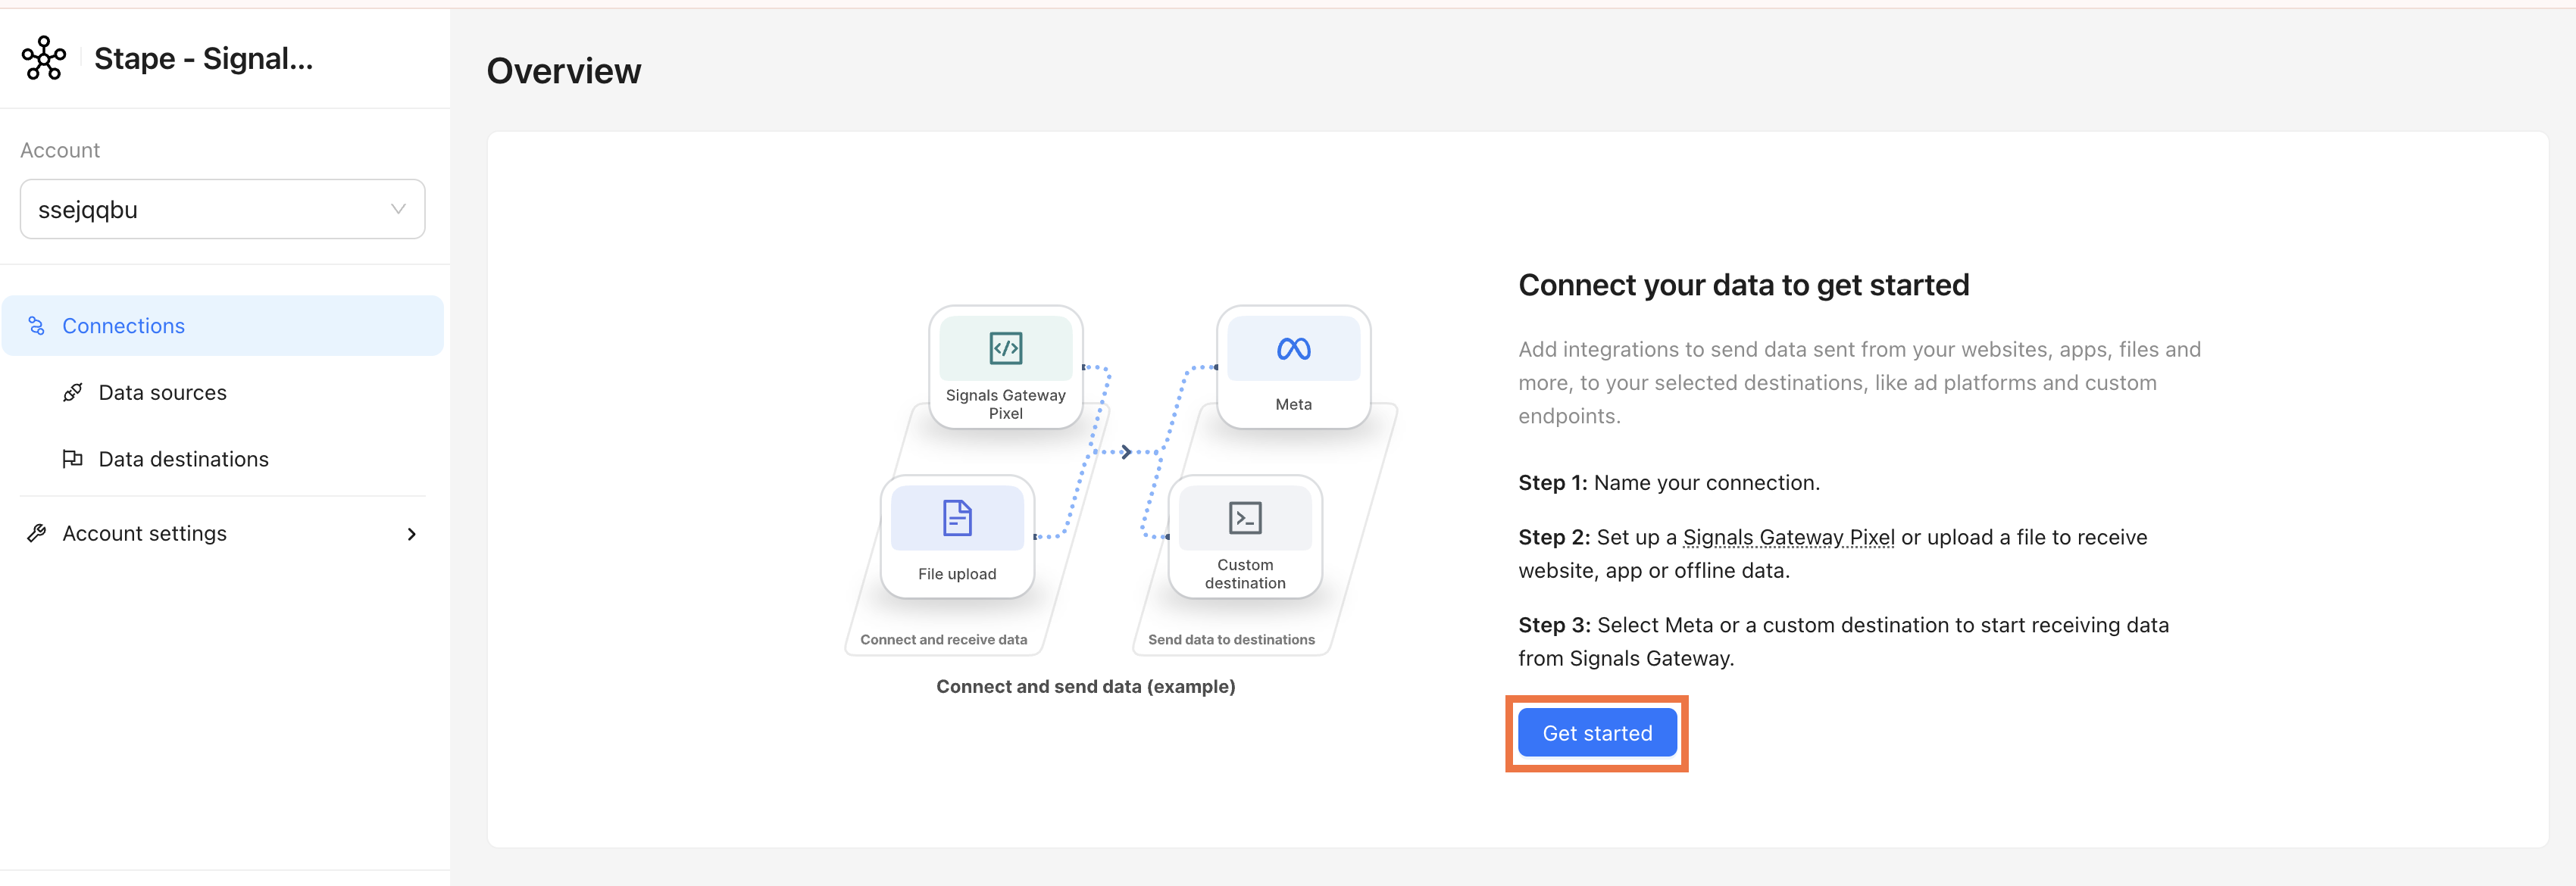
2. Click Get Started.
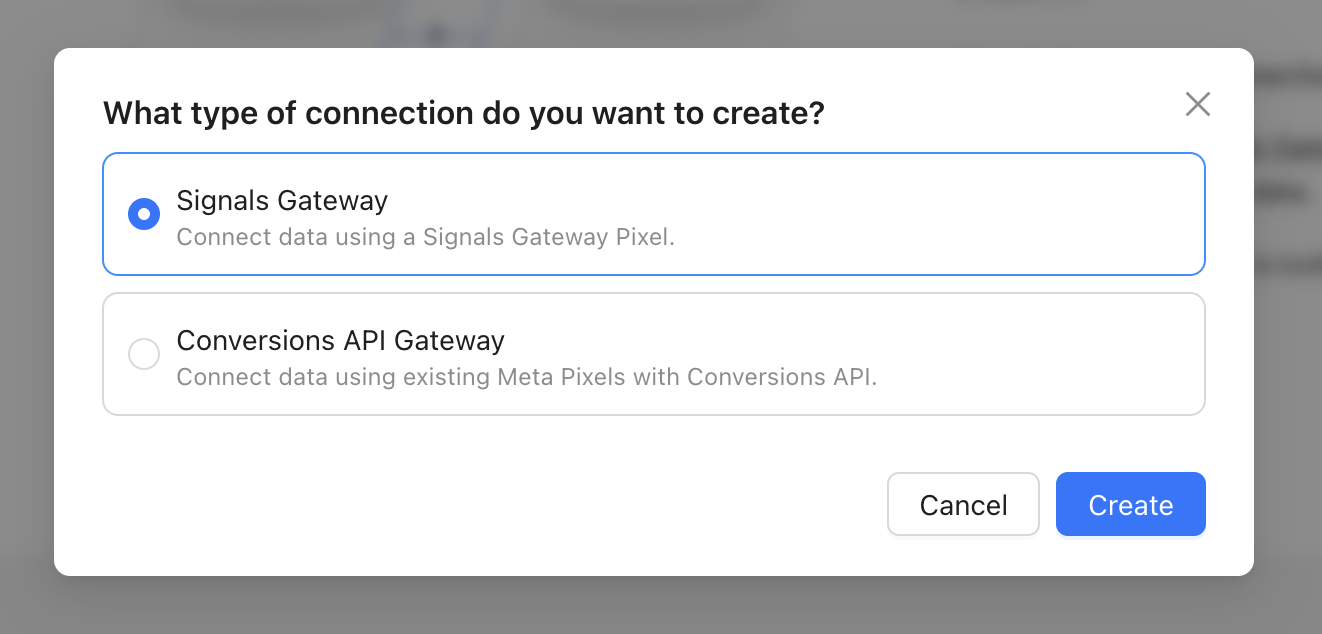
3. Pick the connection type that matches your use case:
- Signals Gateway - you want Stape to generate a new Pixel and handle Meta CAPI for you. This is the best option if you’re new to this.
- Conversions API Gateway - you already have a Meta Pixel and just want to add server-side CAPI on top of it.
Click Create.
Signals Gateway
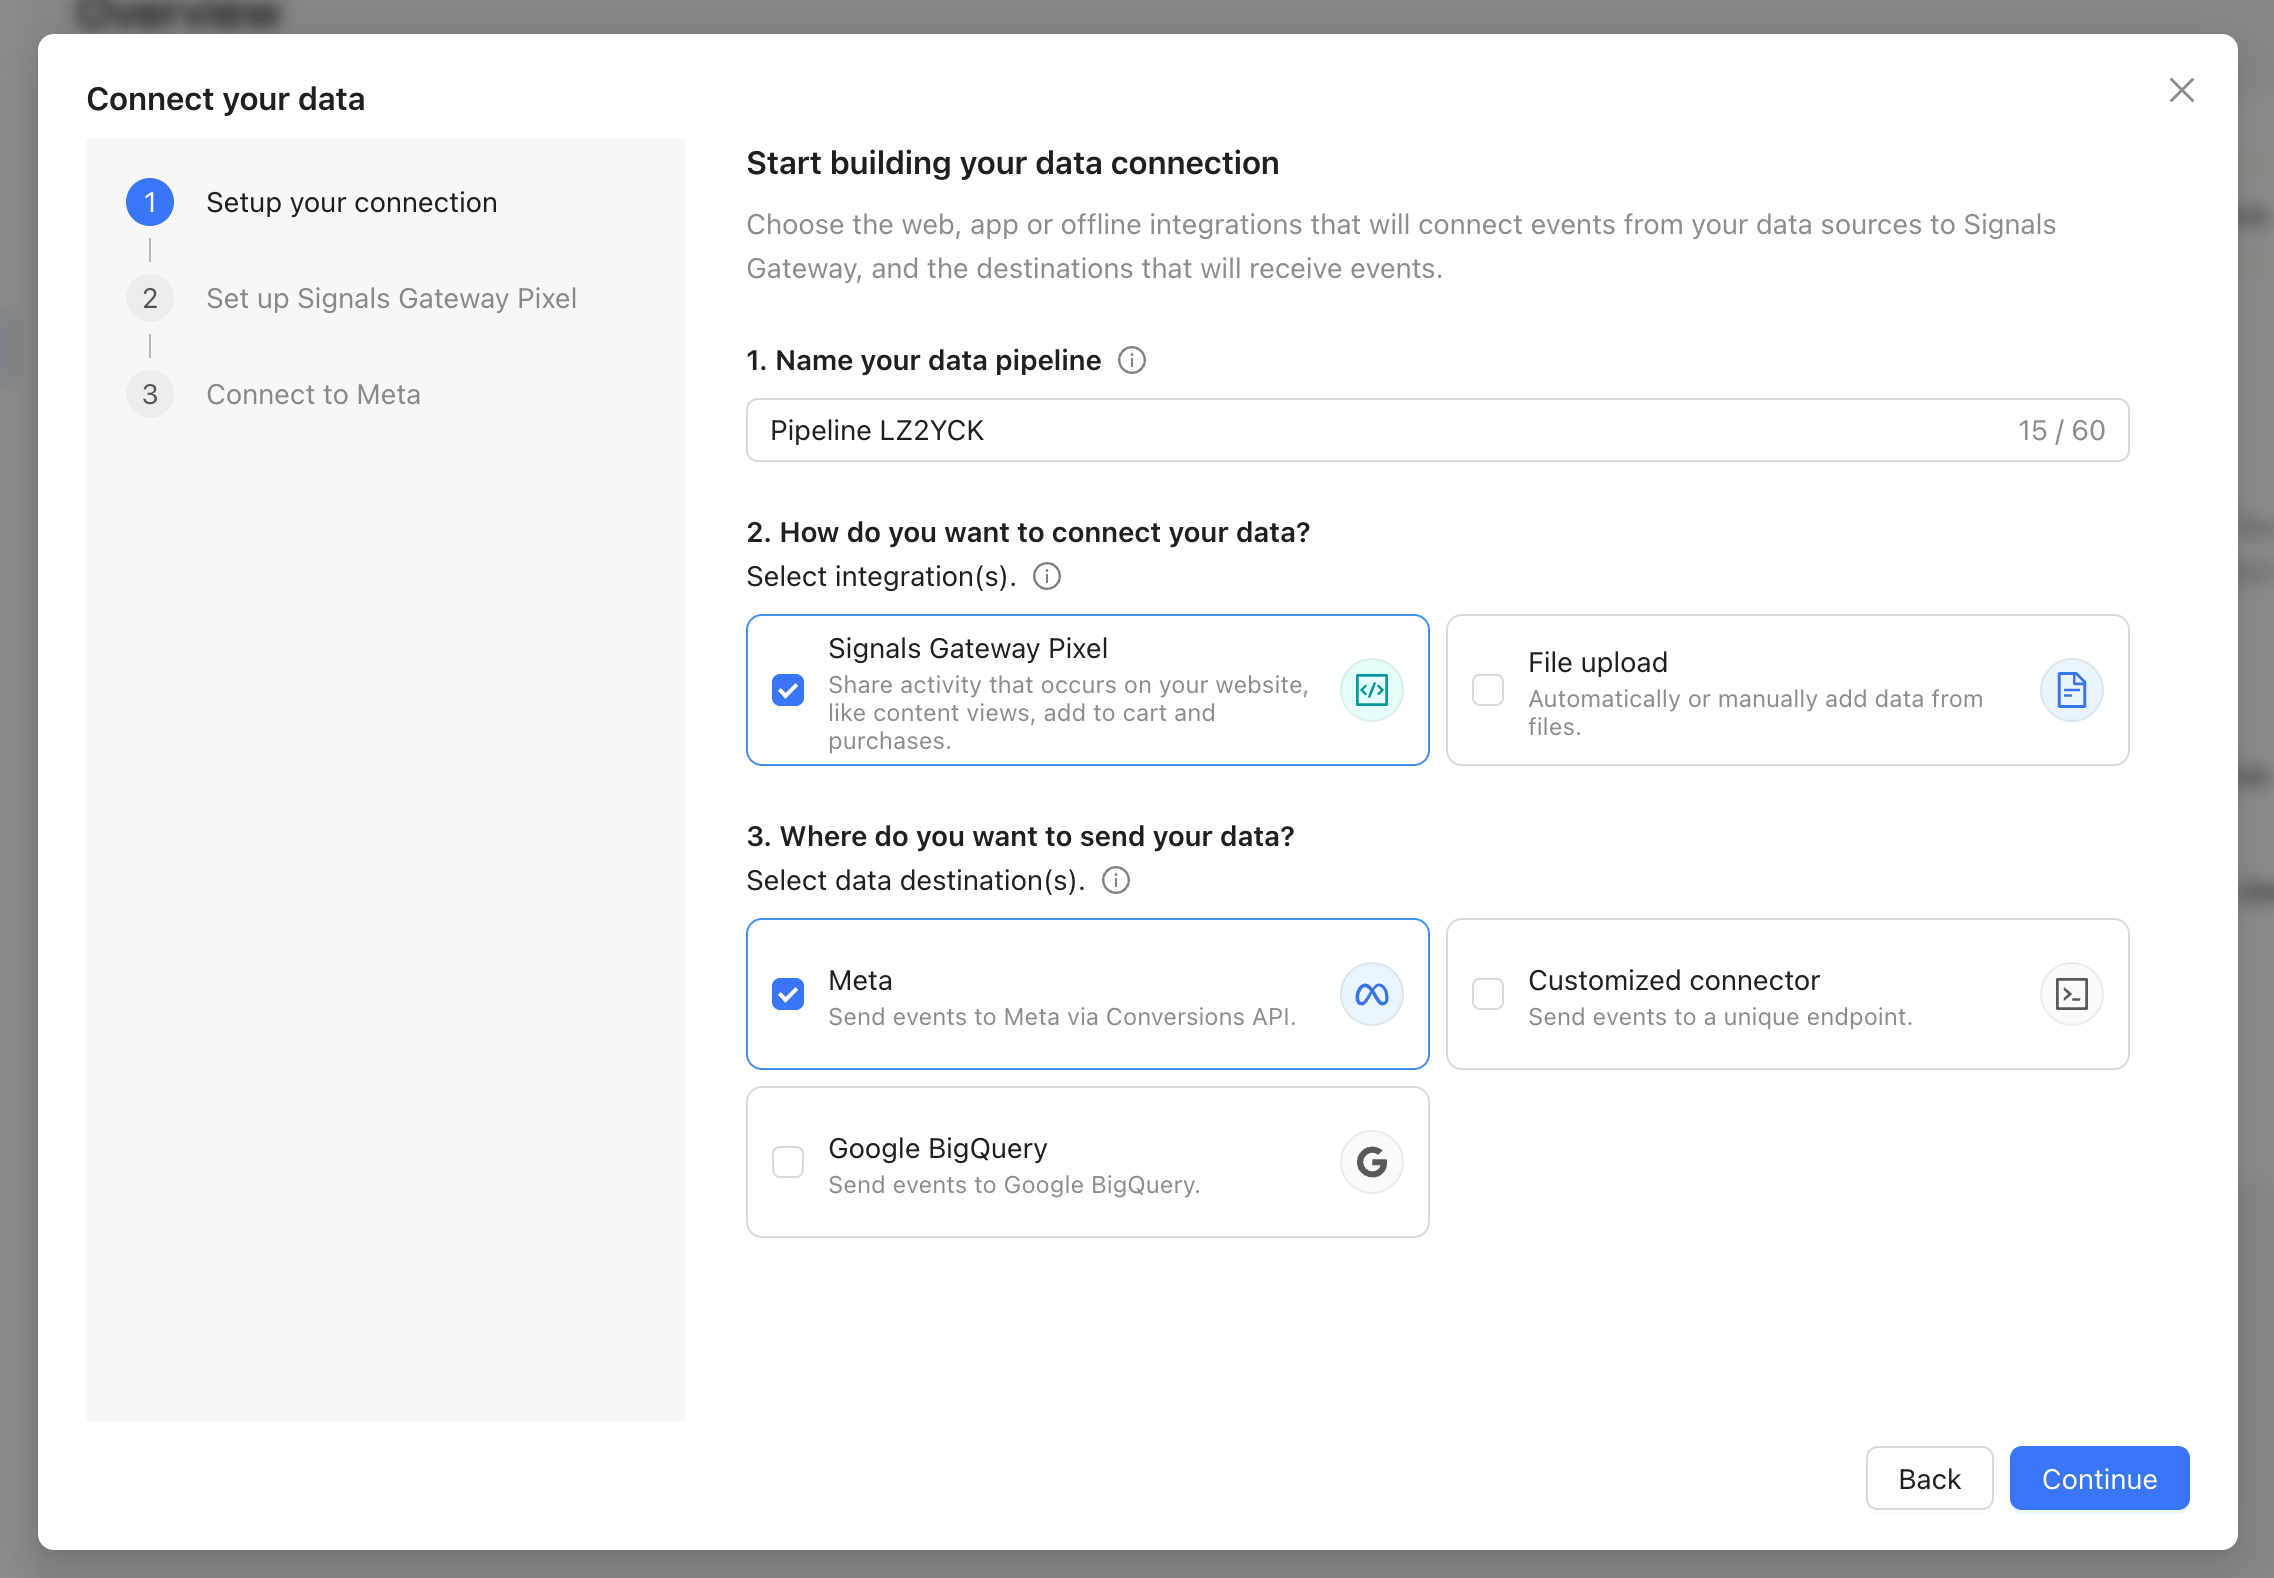
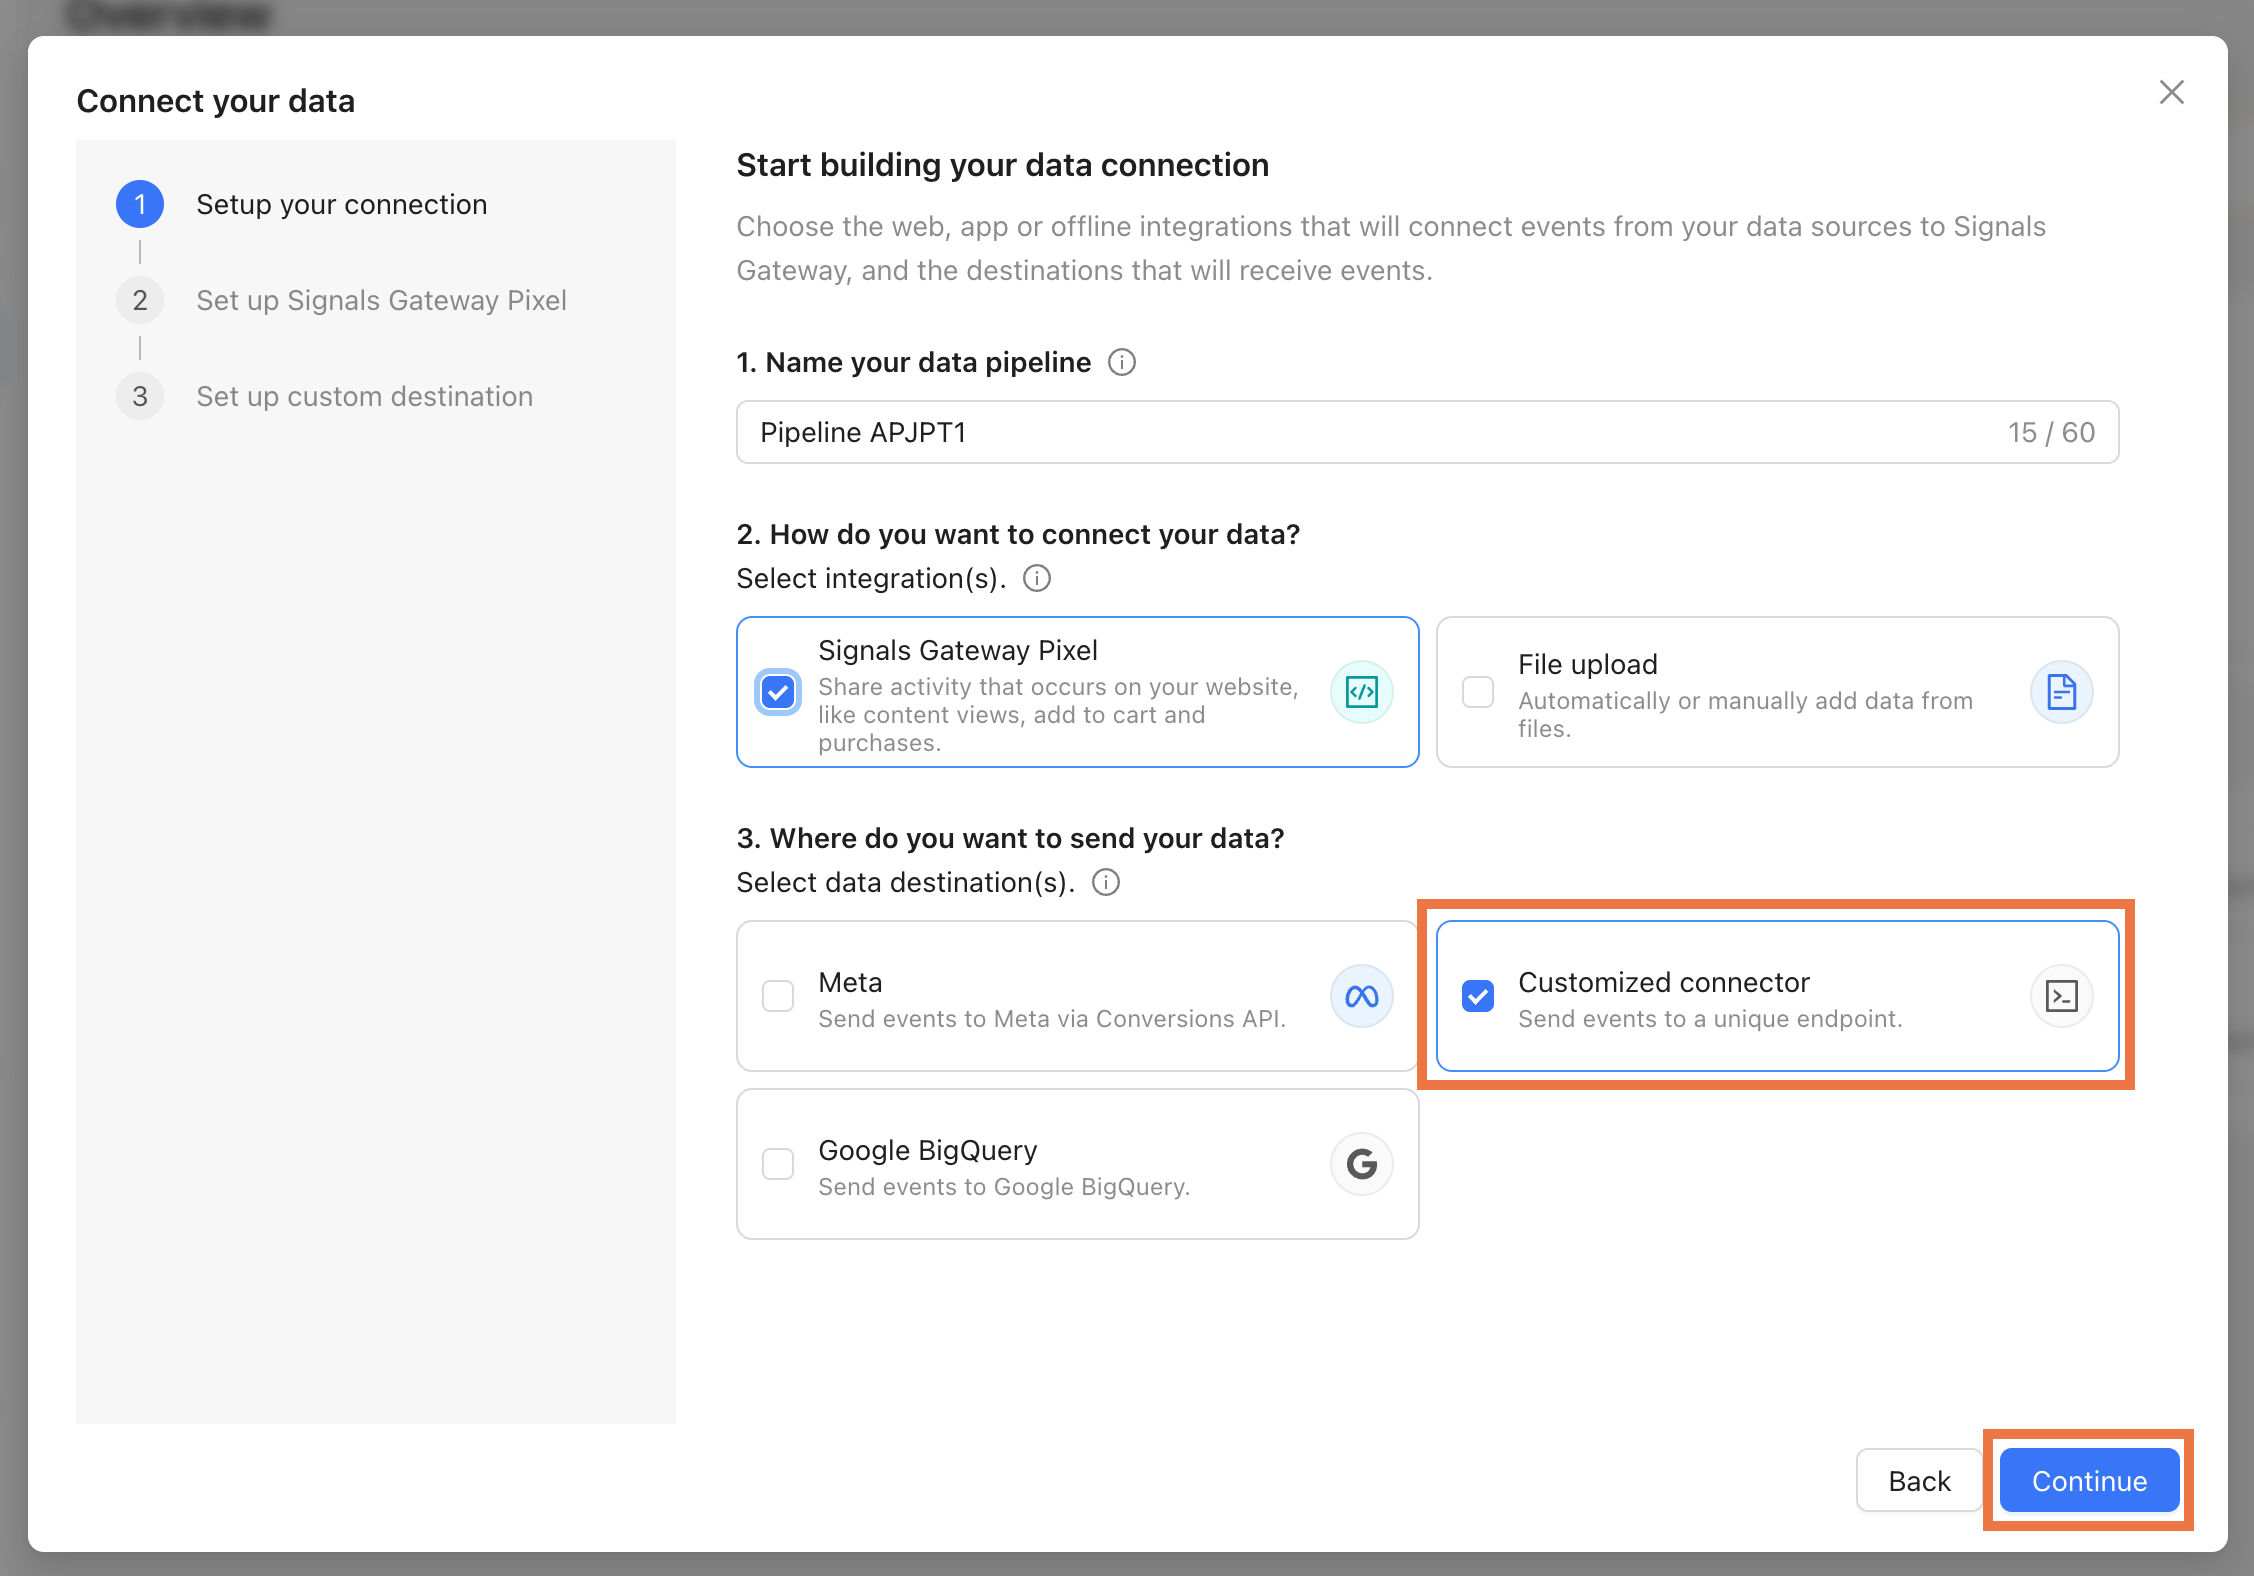
- Start building your data connection:
- Name your data pipeline - choose a name for your data pipeline. This can be edited in the pipeline details page.
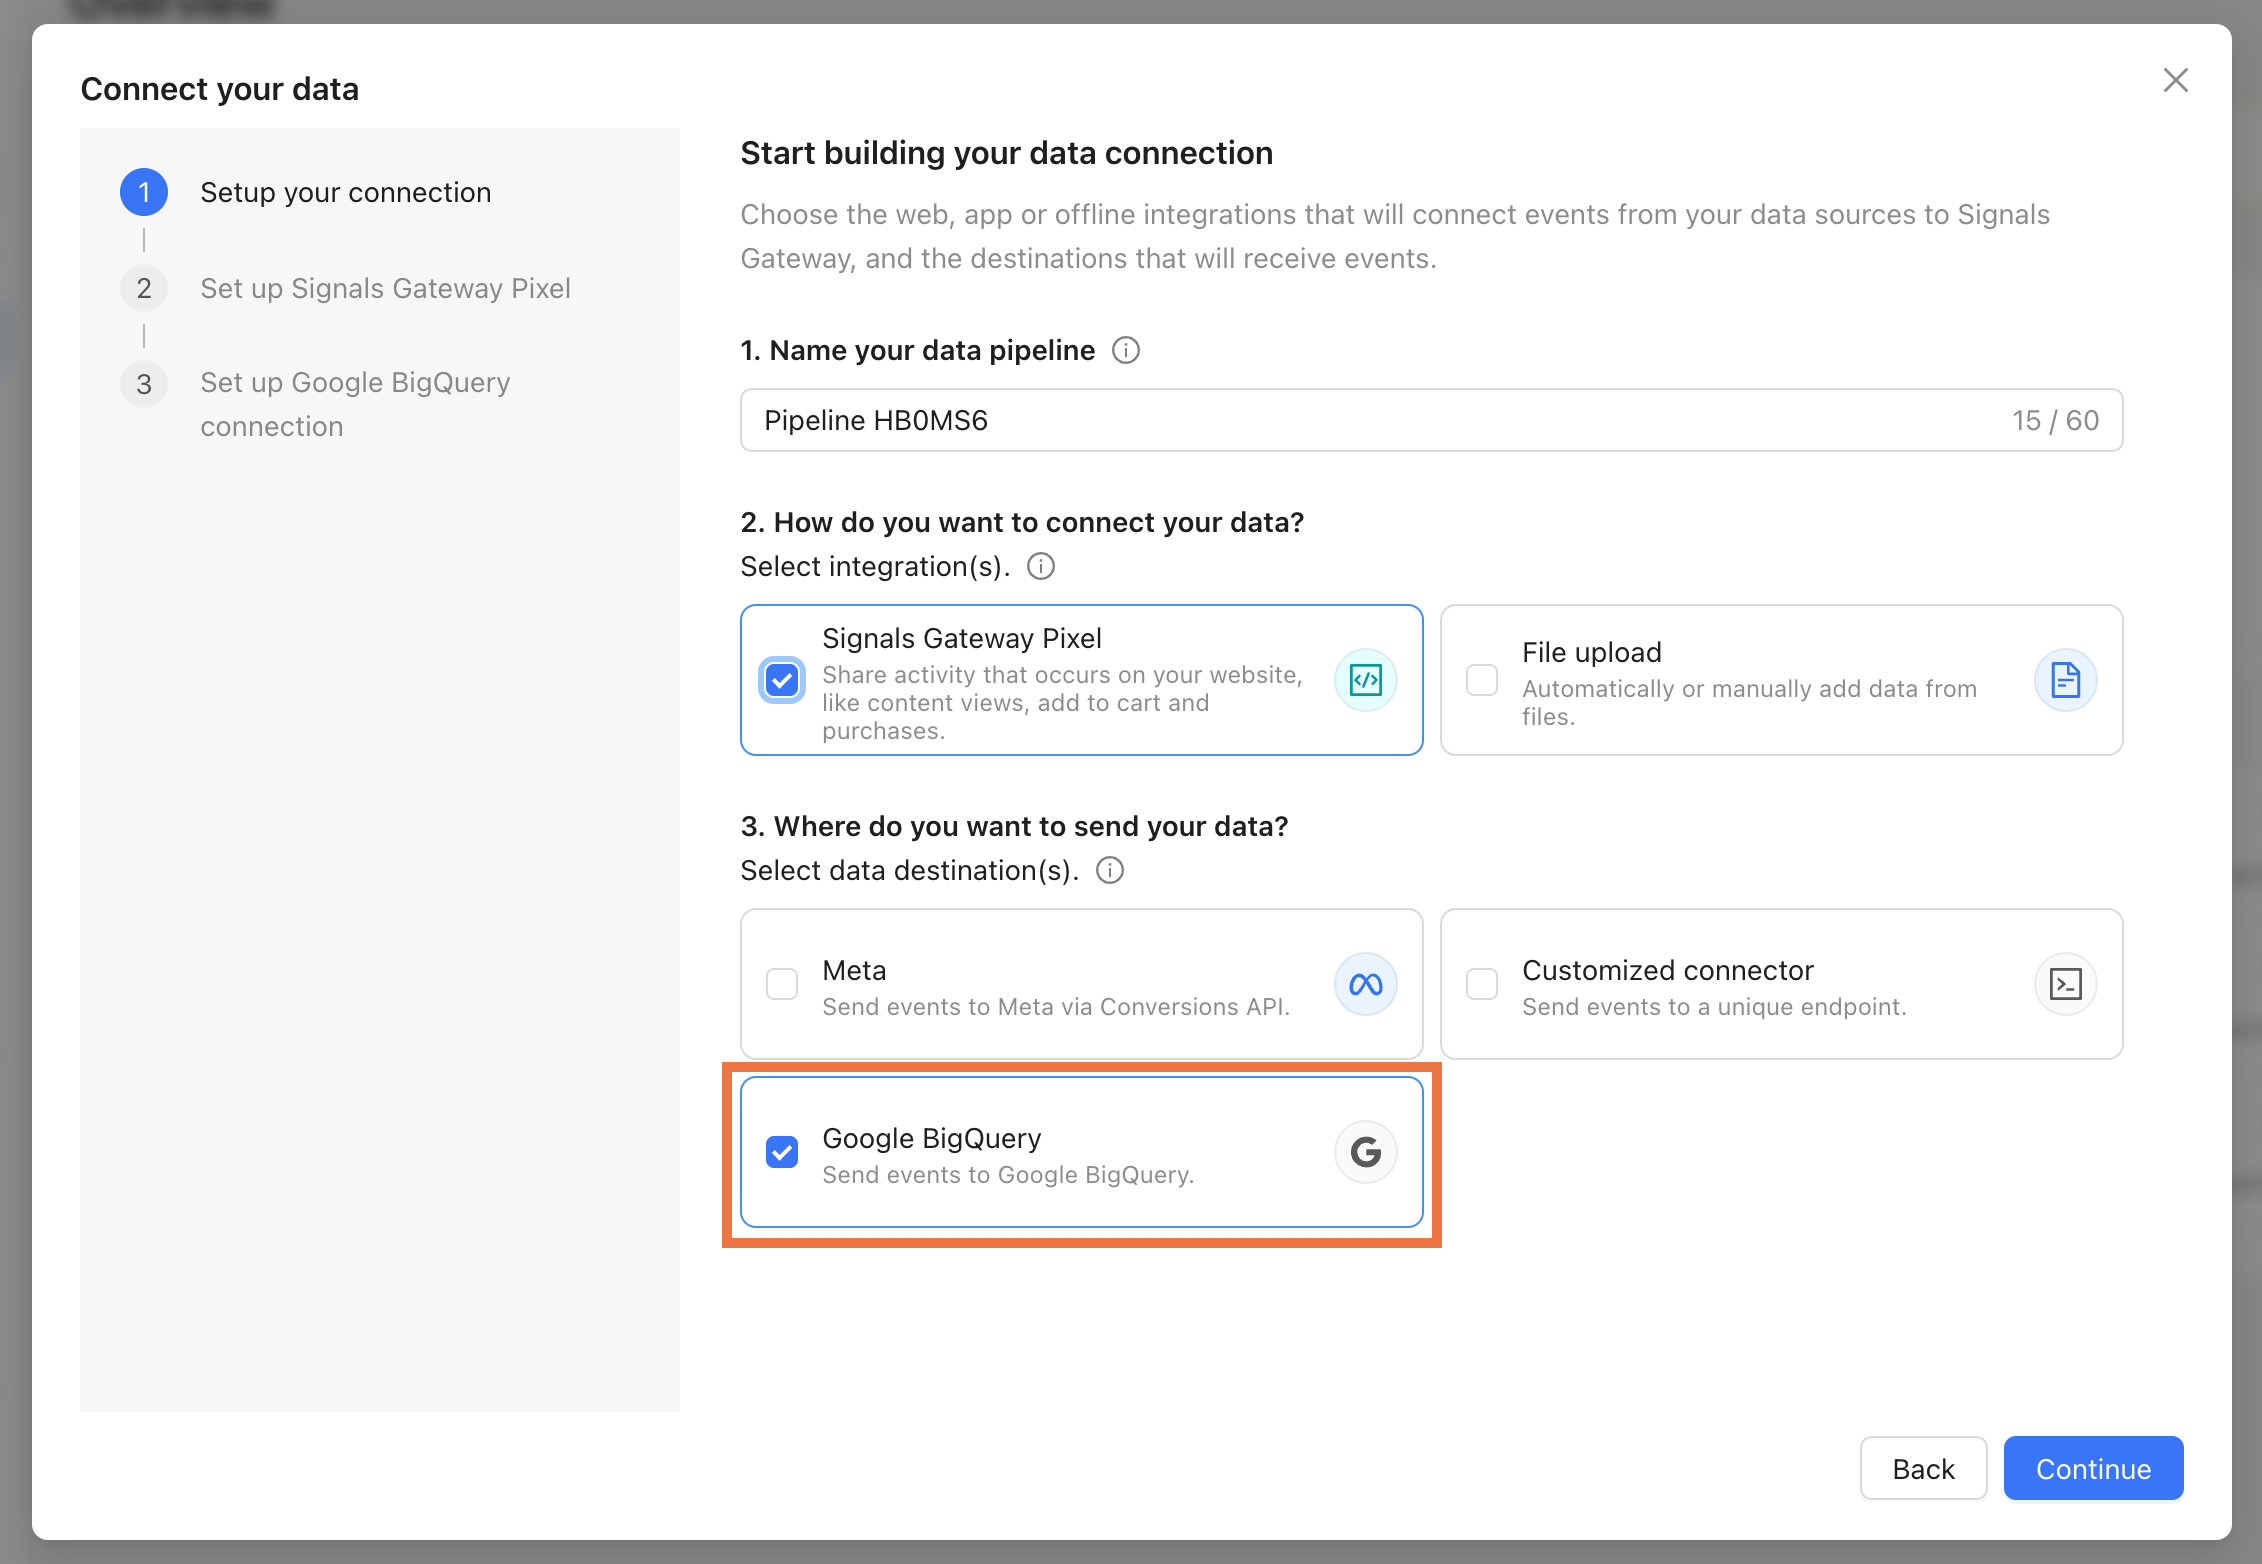
- How do you want to connect your data - inbound events come through data sources associated with websites, apps, and data files. Select the following options:
- Signals Gateway Pixel - share activity that occurs on your website, like content views, add to cart and purchases.
- File upload - automatically or manually add data from files. For detailed instructions read the Add offline events to Signals Gateway article.
- Where do you want to send your data - outbound events data is sent to a pre-selected destination once it's been processed. Select the following options:
- Meta - send events to Meta via Conversions API.
- Customized connector - send events to any endpoint that isn't Meta, like your own server, a third-party CDP, etc. See the Other data destination chapter down below.
- Google BigQuery - send events to BigQuery for analysis or audience building. See the Other data destination chapter down below.
Click Continue.
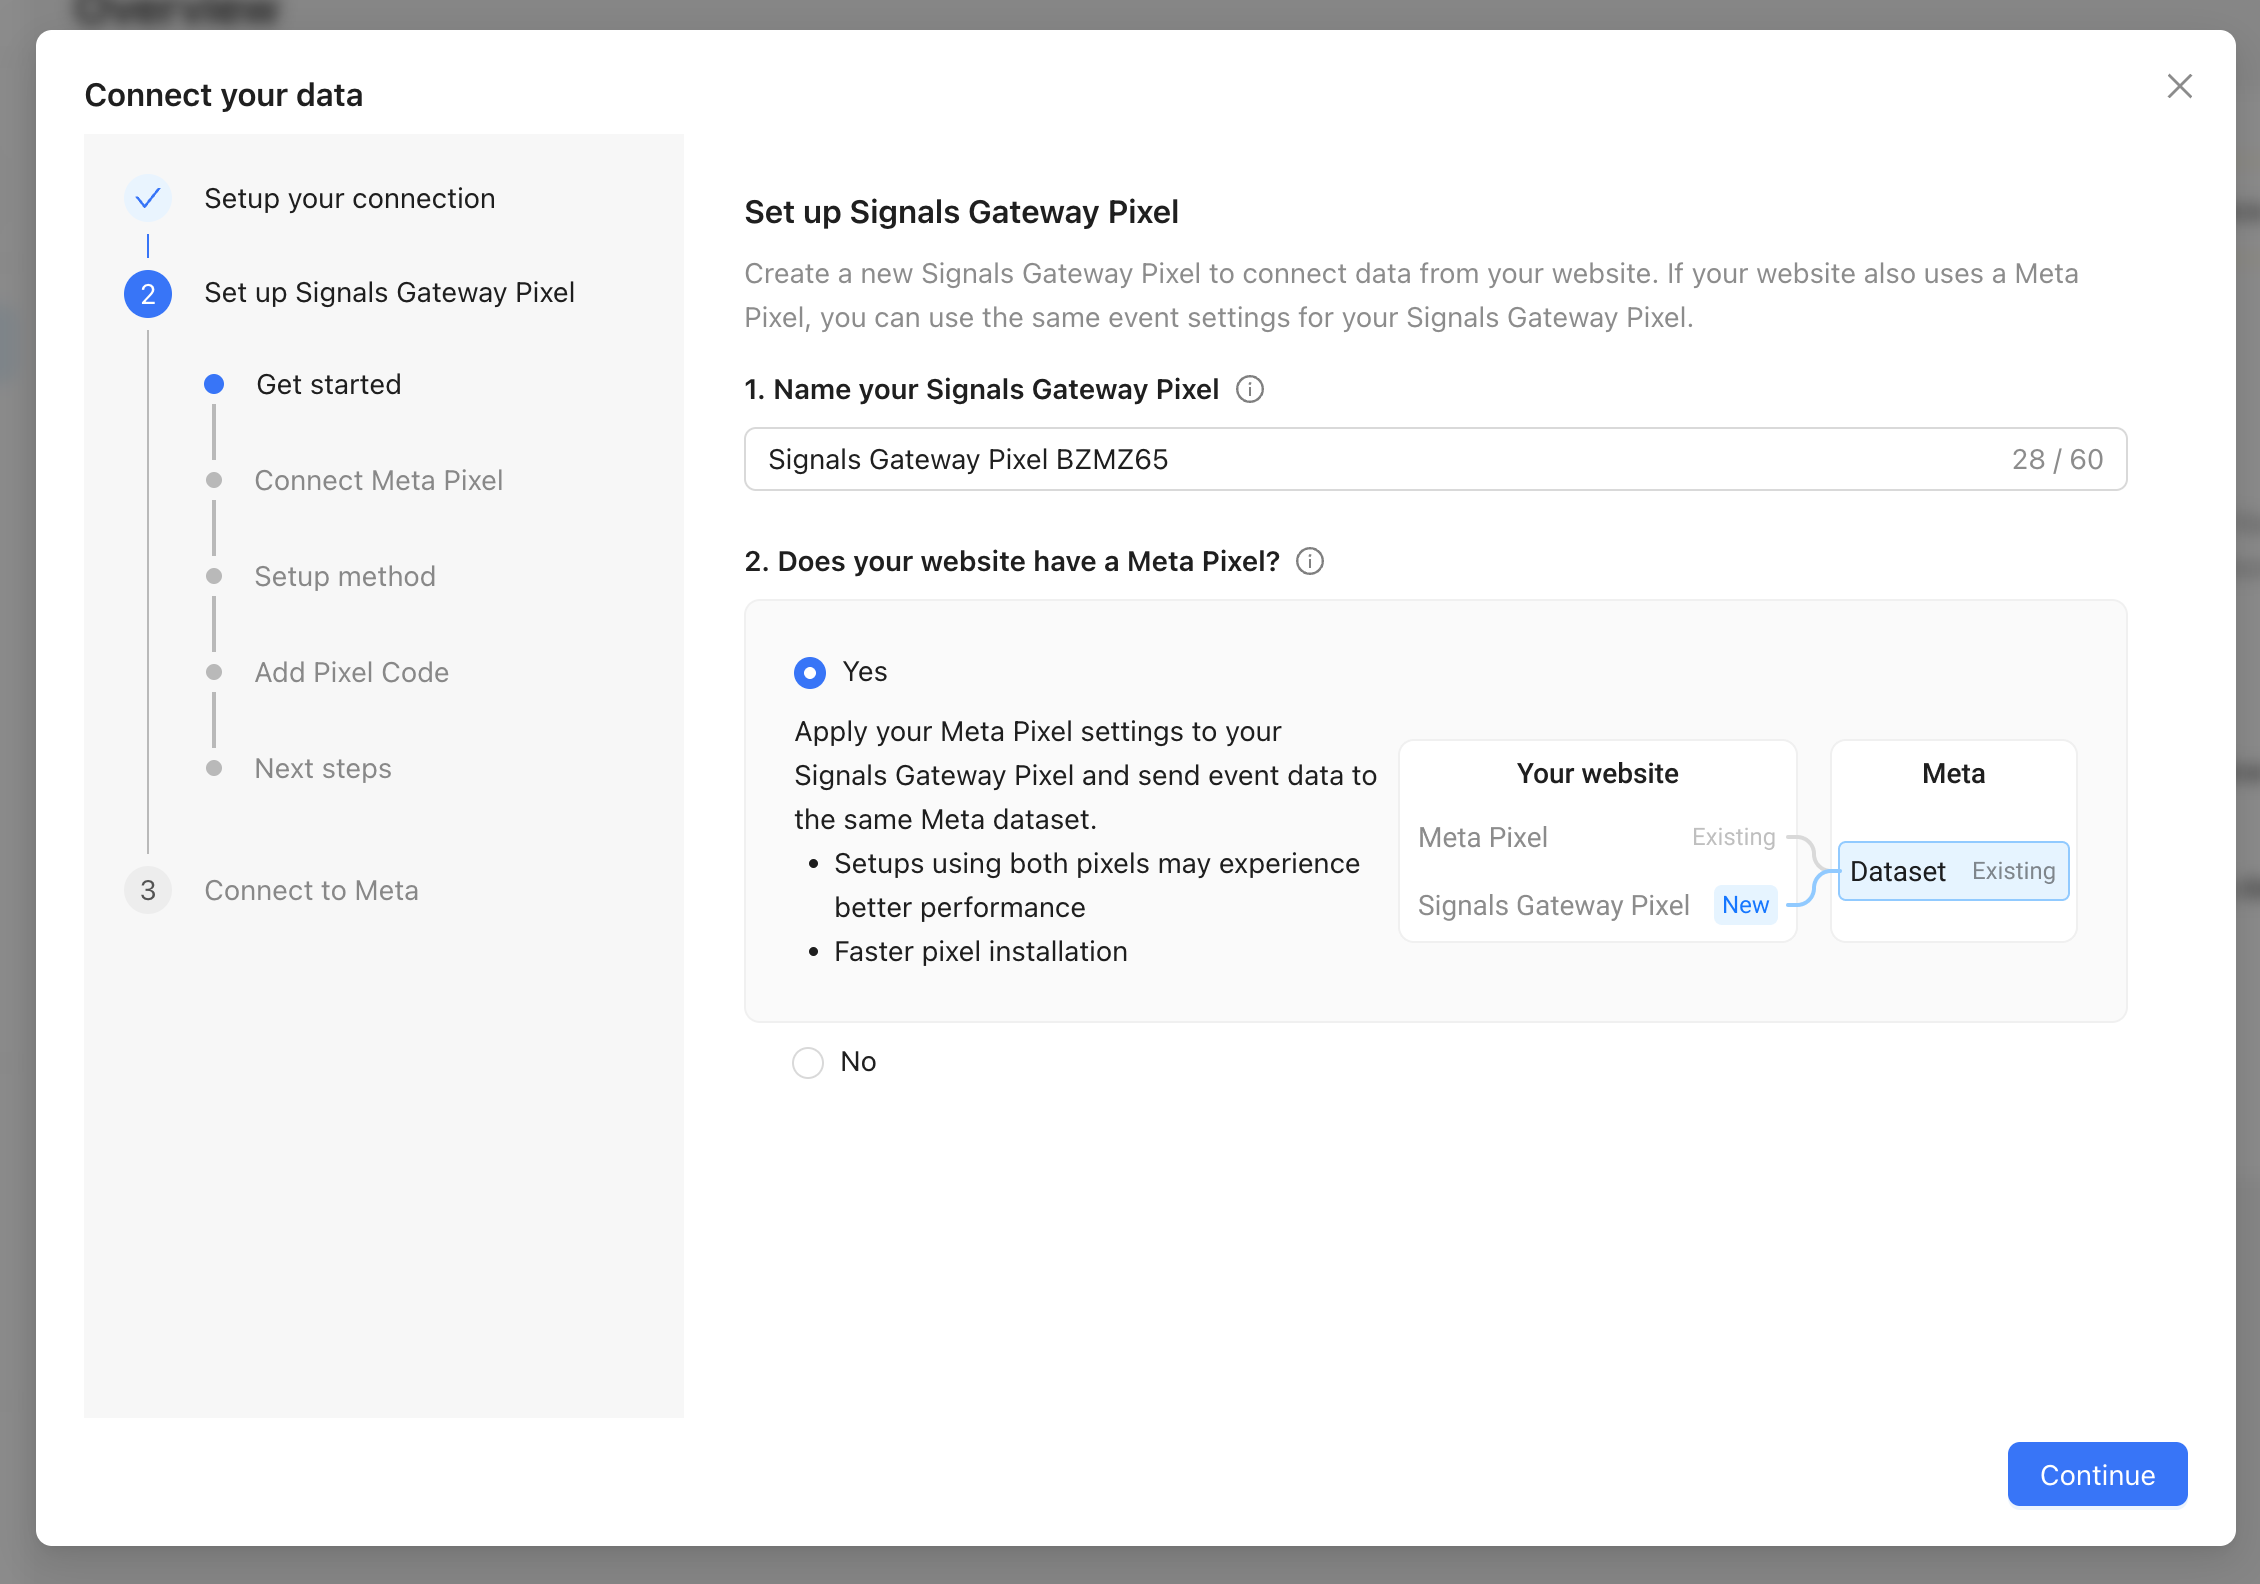
2. Name your Signals Gateway Pixel and confirm whether your website already has a Meta Pixel (it does if a Meta dataset is receiving events from the site).
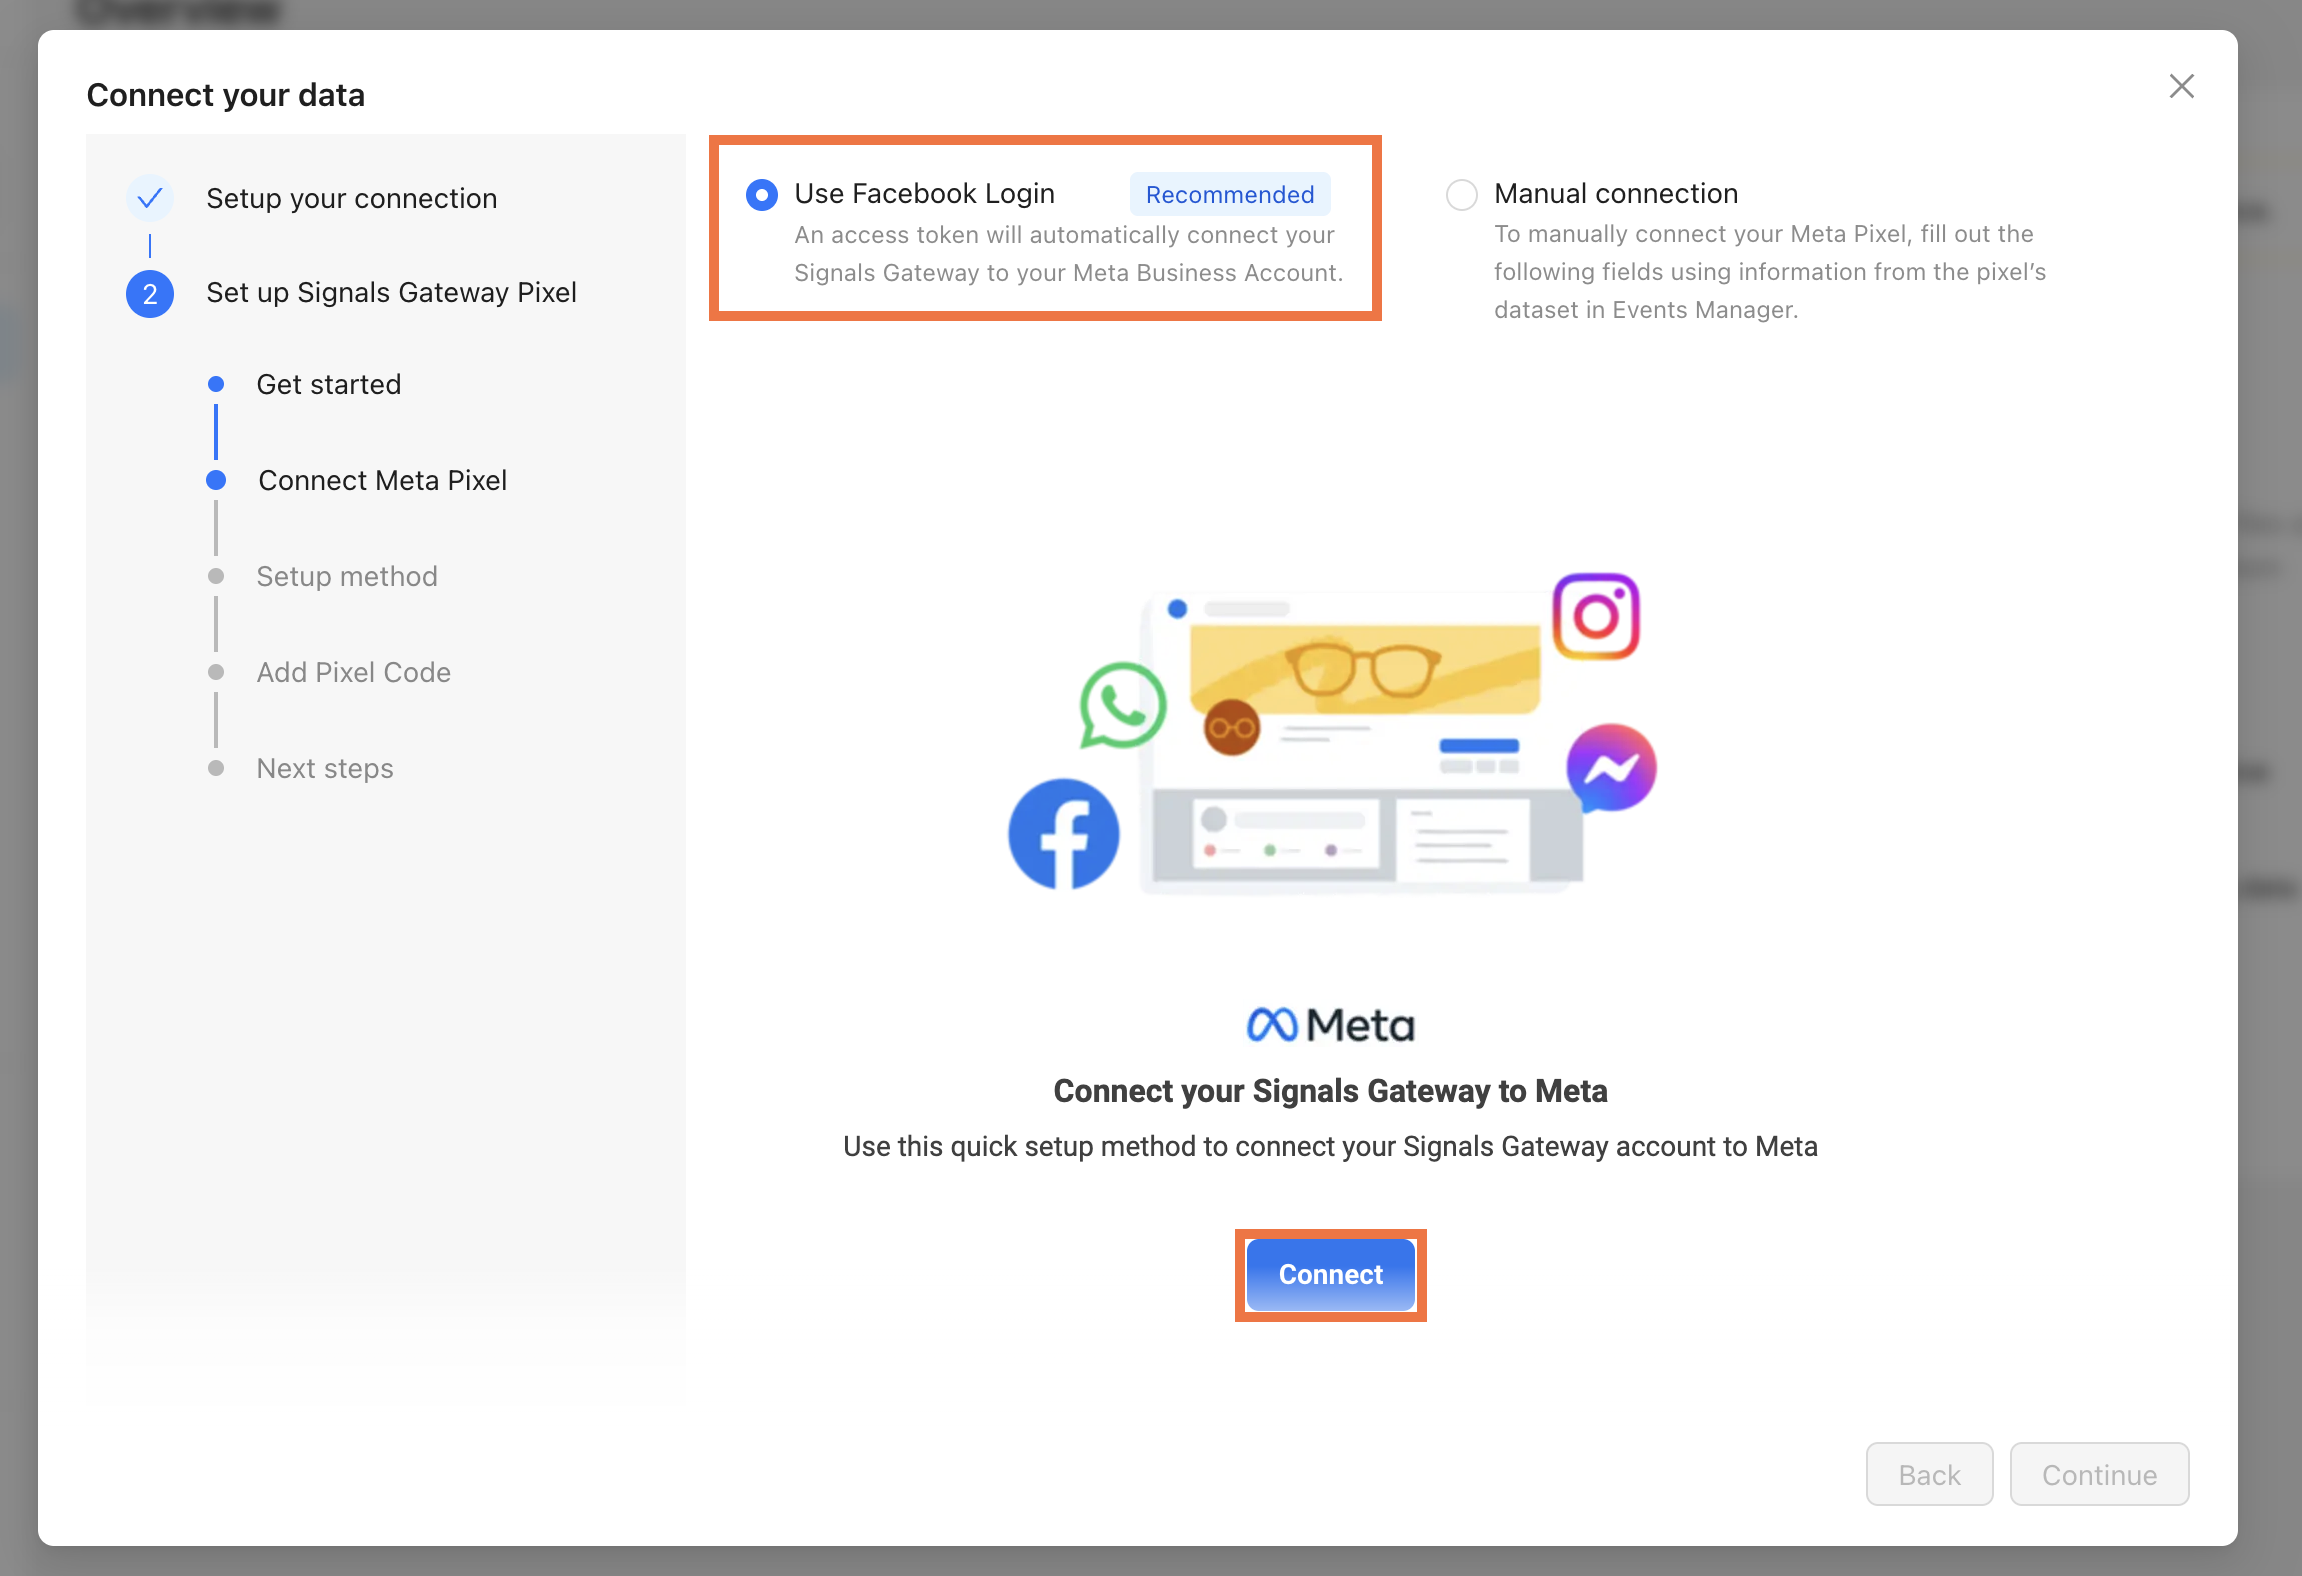
3. Connect your Meta Pixel. You can either:
- Use Facebook Login (recommended) - Signals Gateway pulls your Business Account, datasets, and tokens for you.
- Connect Manually - use this option if you can't use Facebook Login for security/policy reasons, or you want to control exactly which system user the token belongs to. Enter the following:
Click Connect.
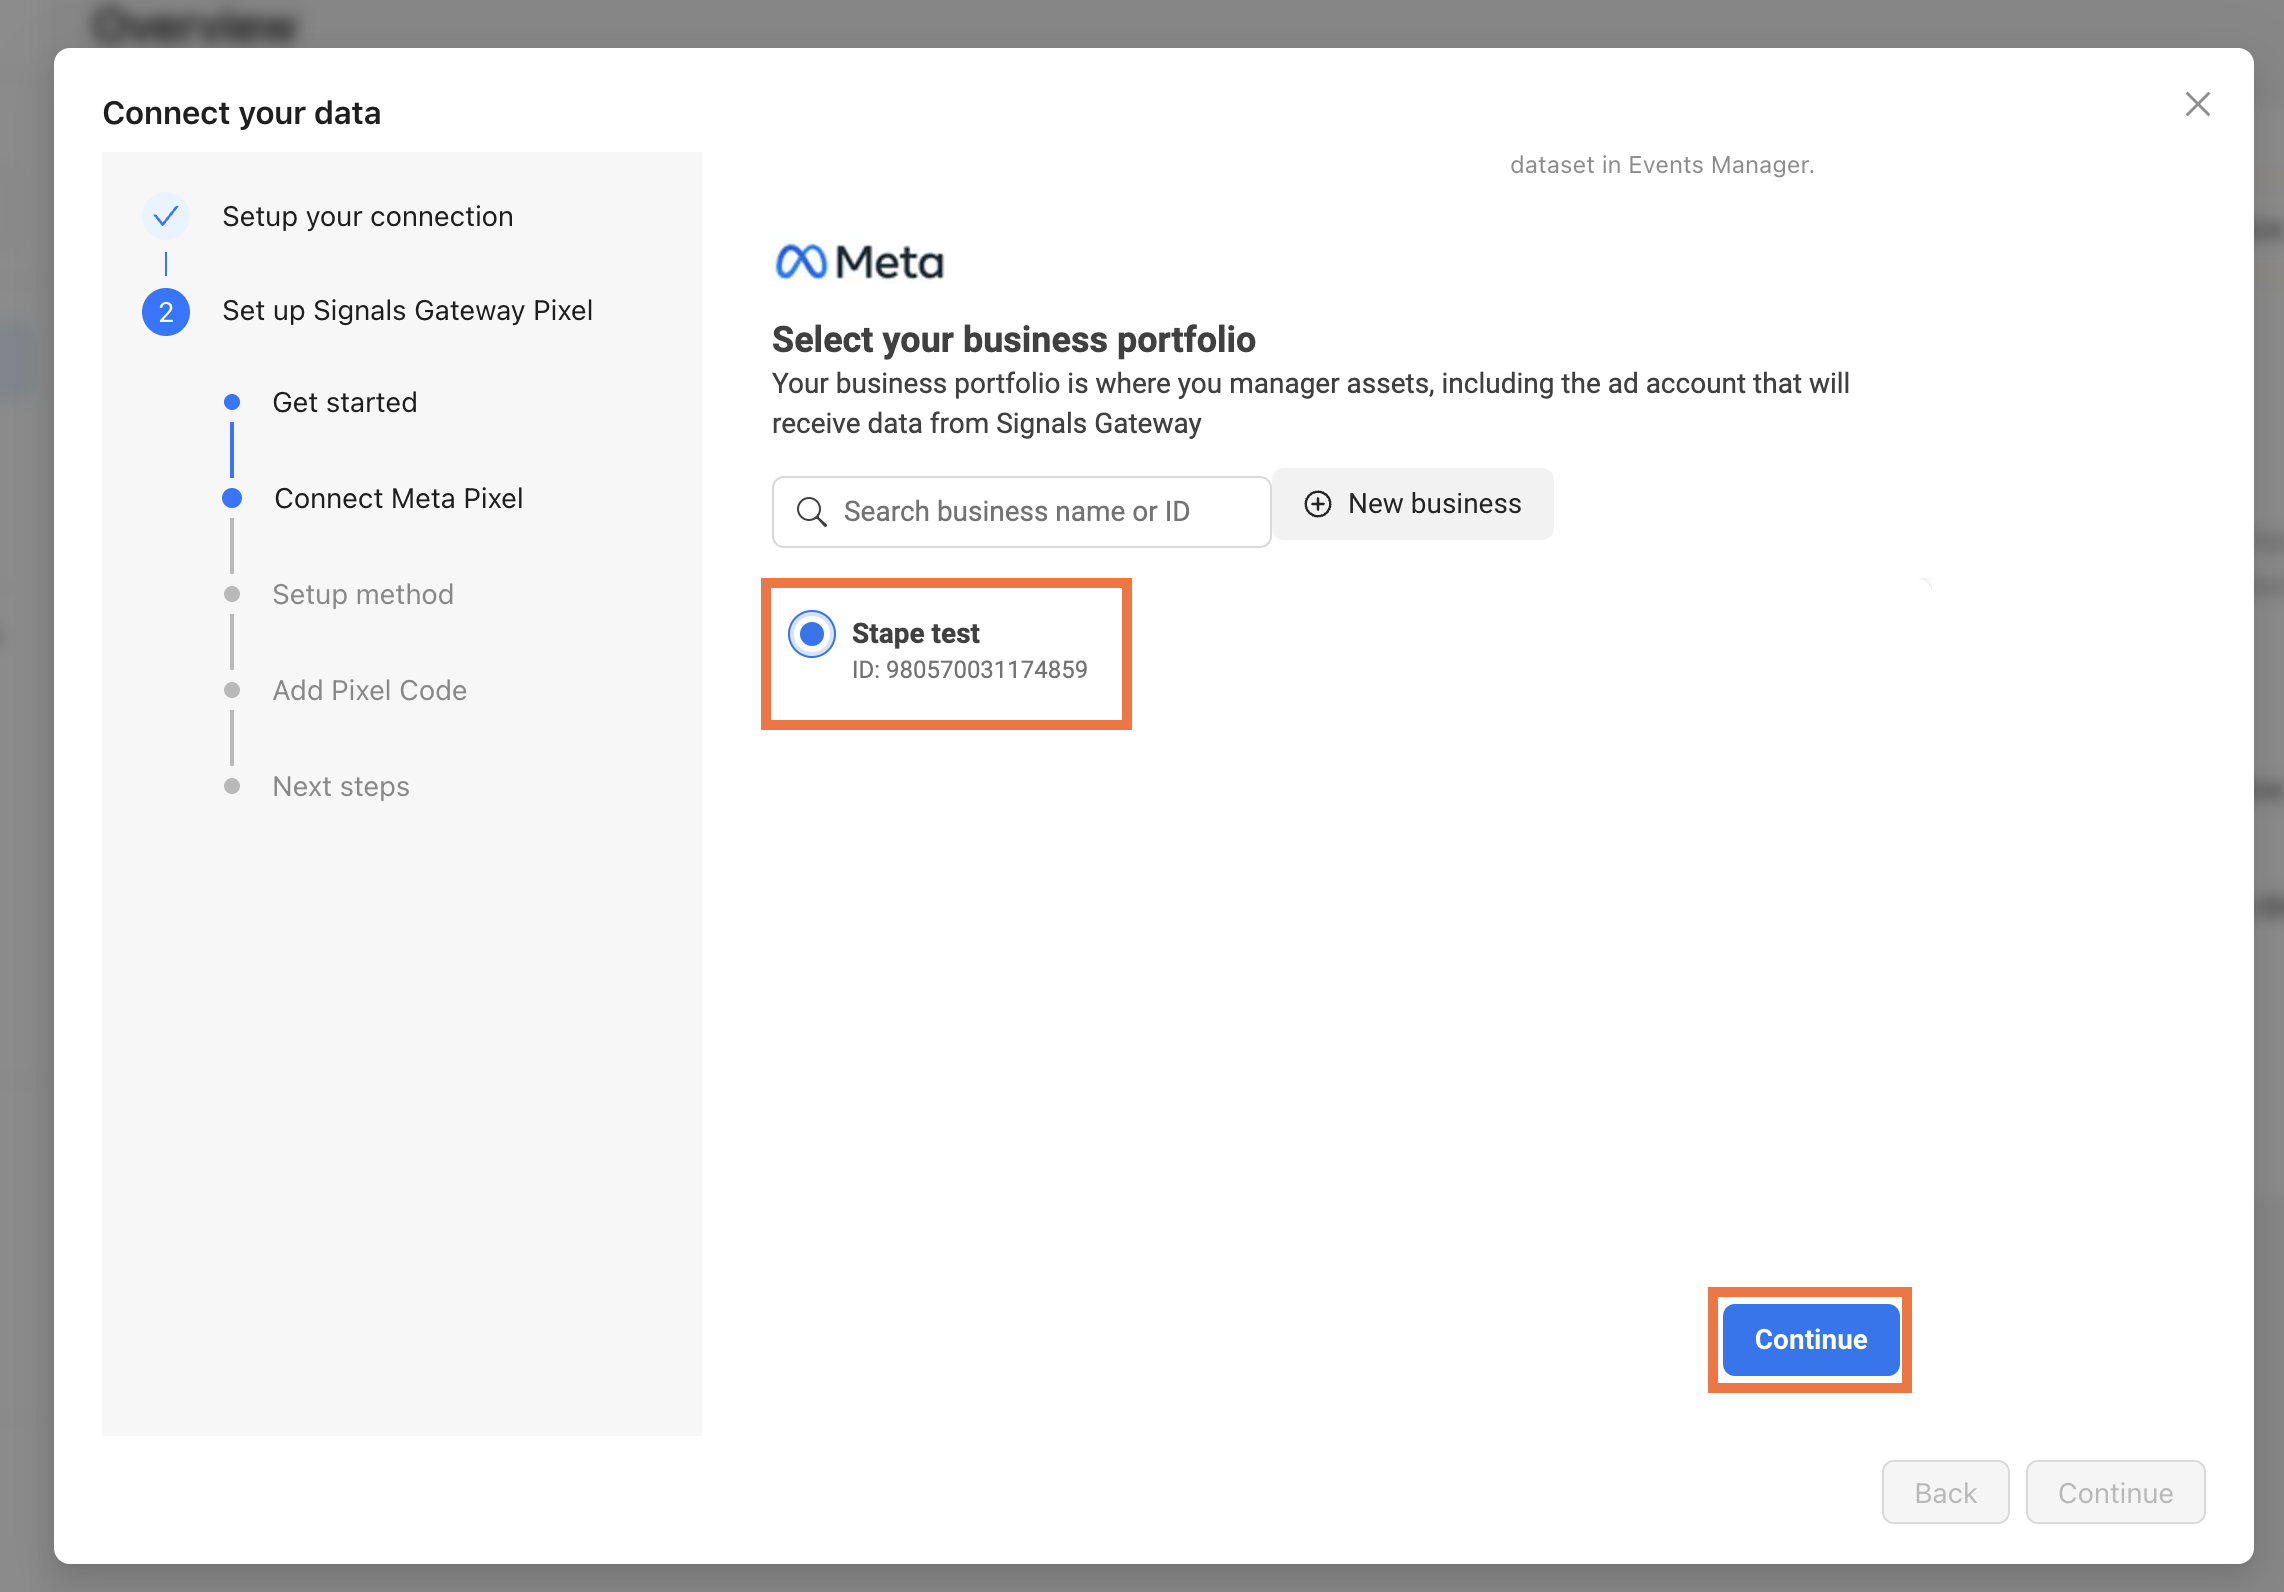
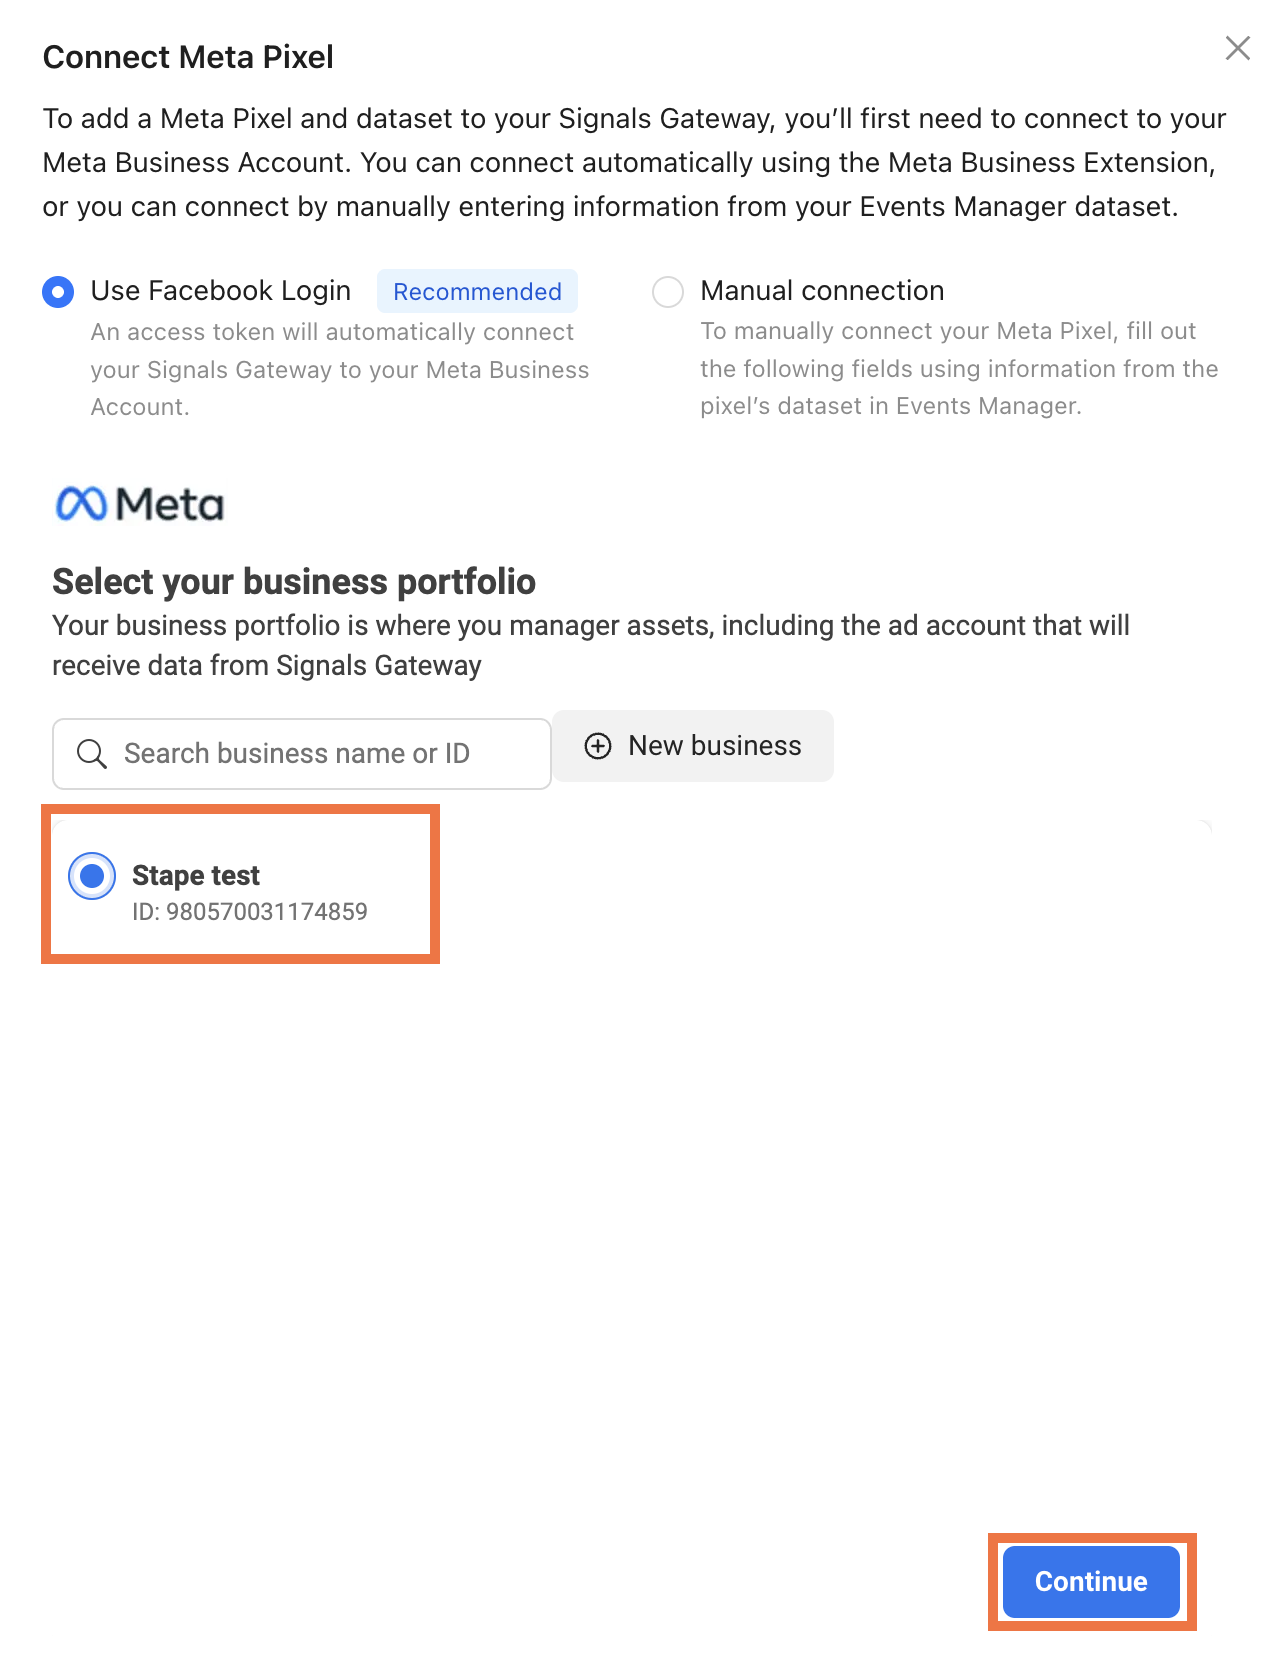
3.1. Select your business portfolio and click Continue.
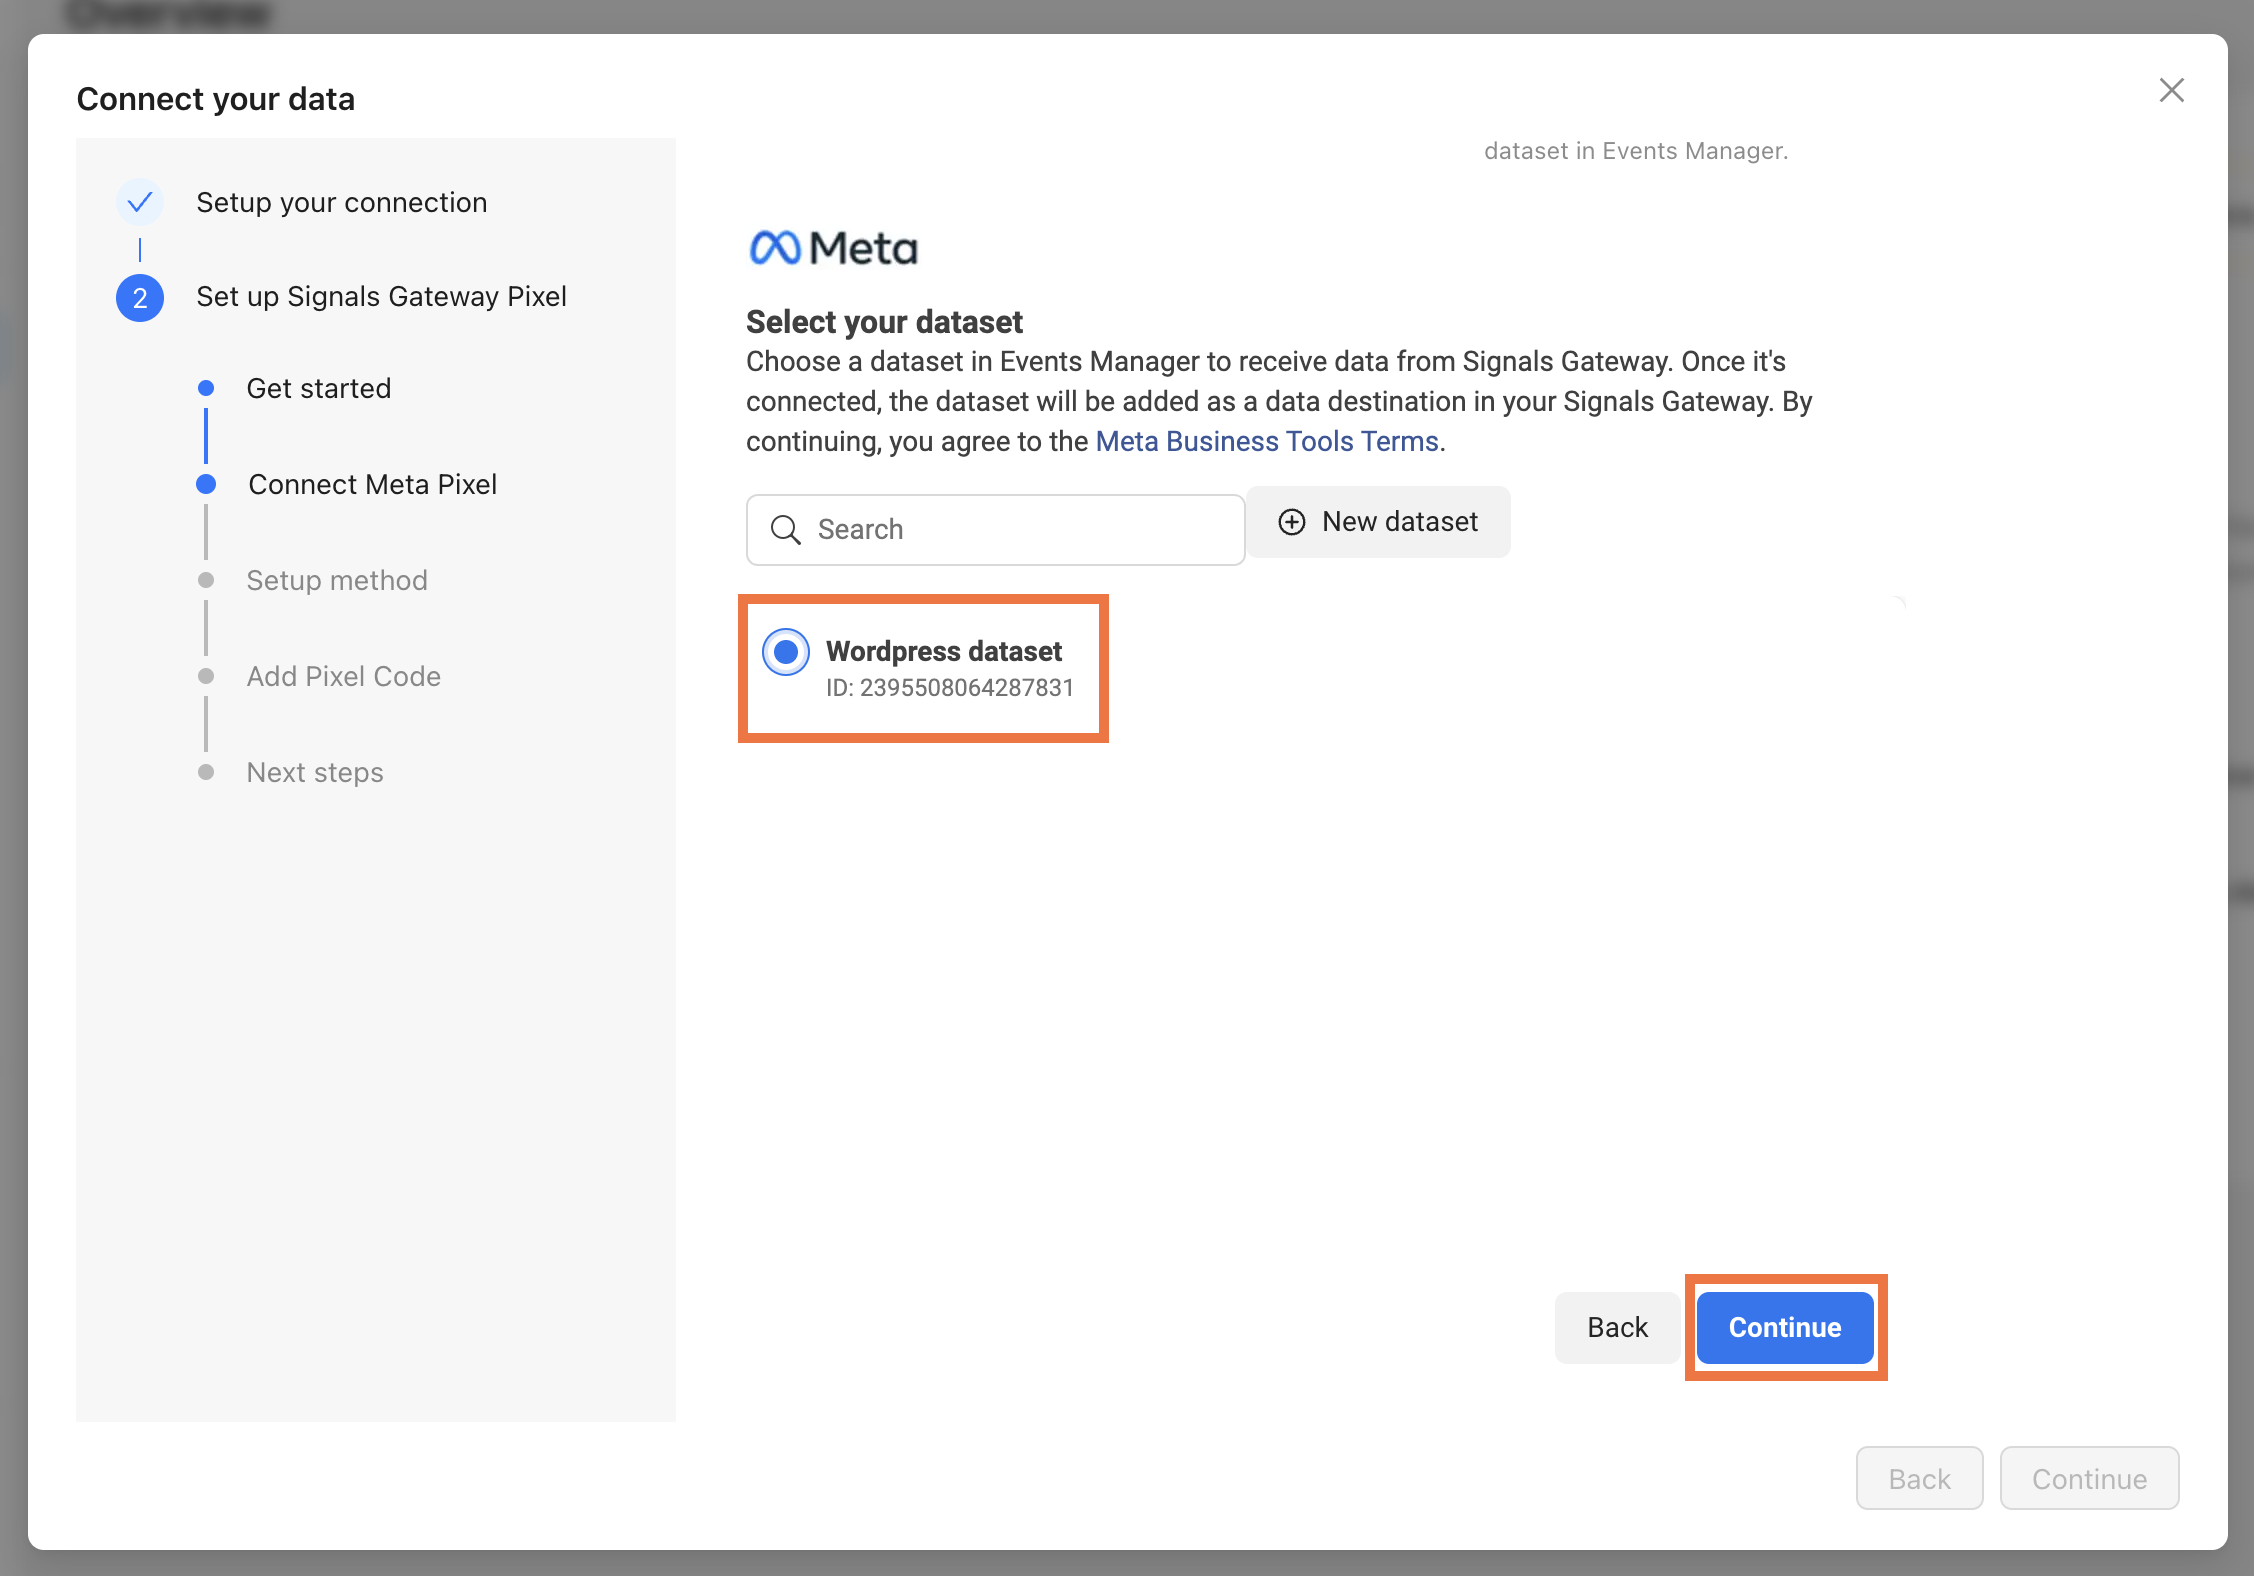
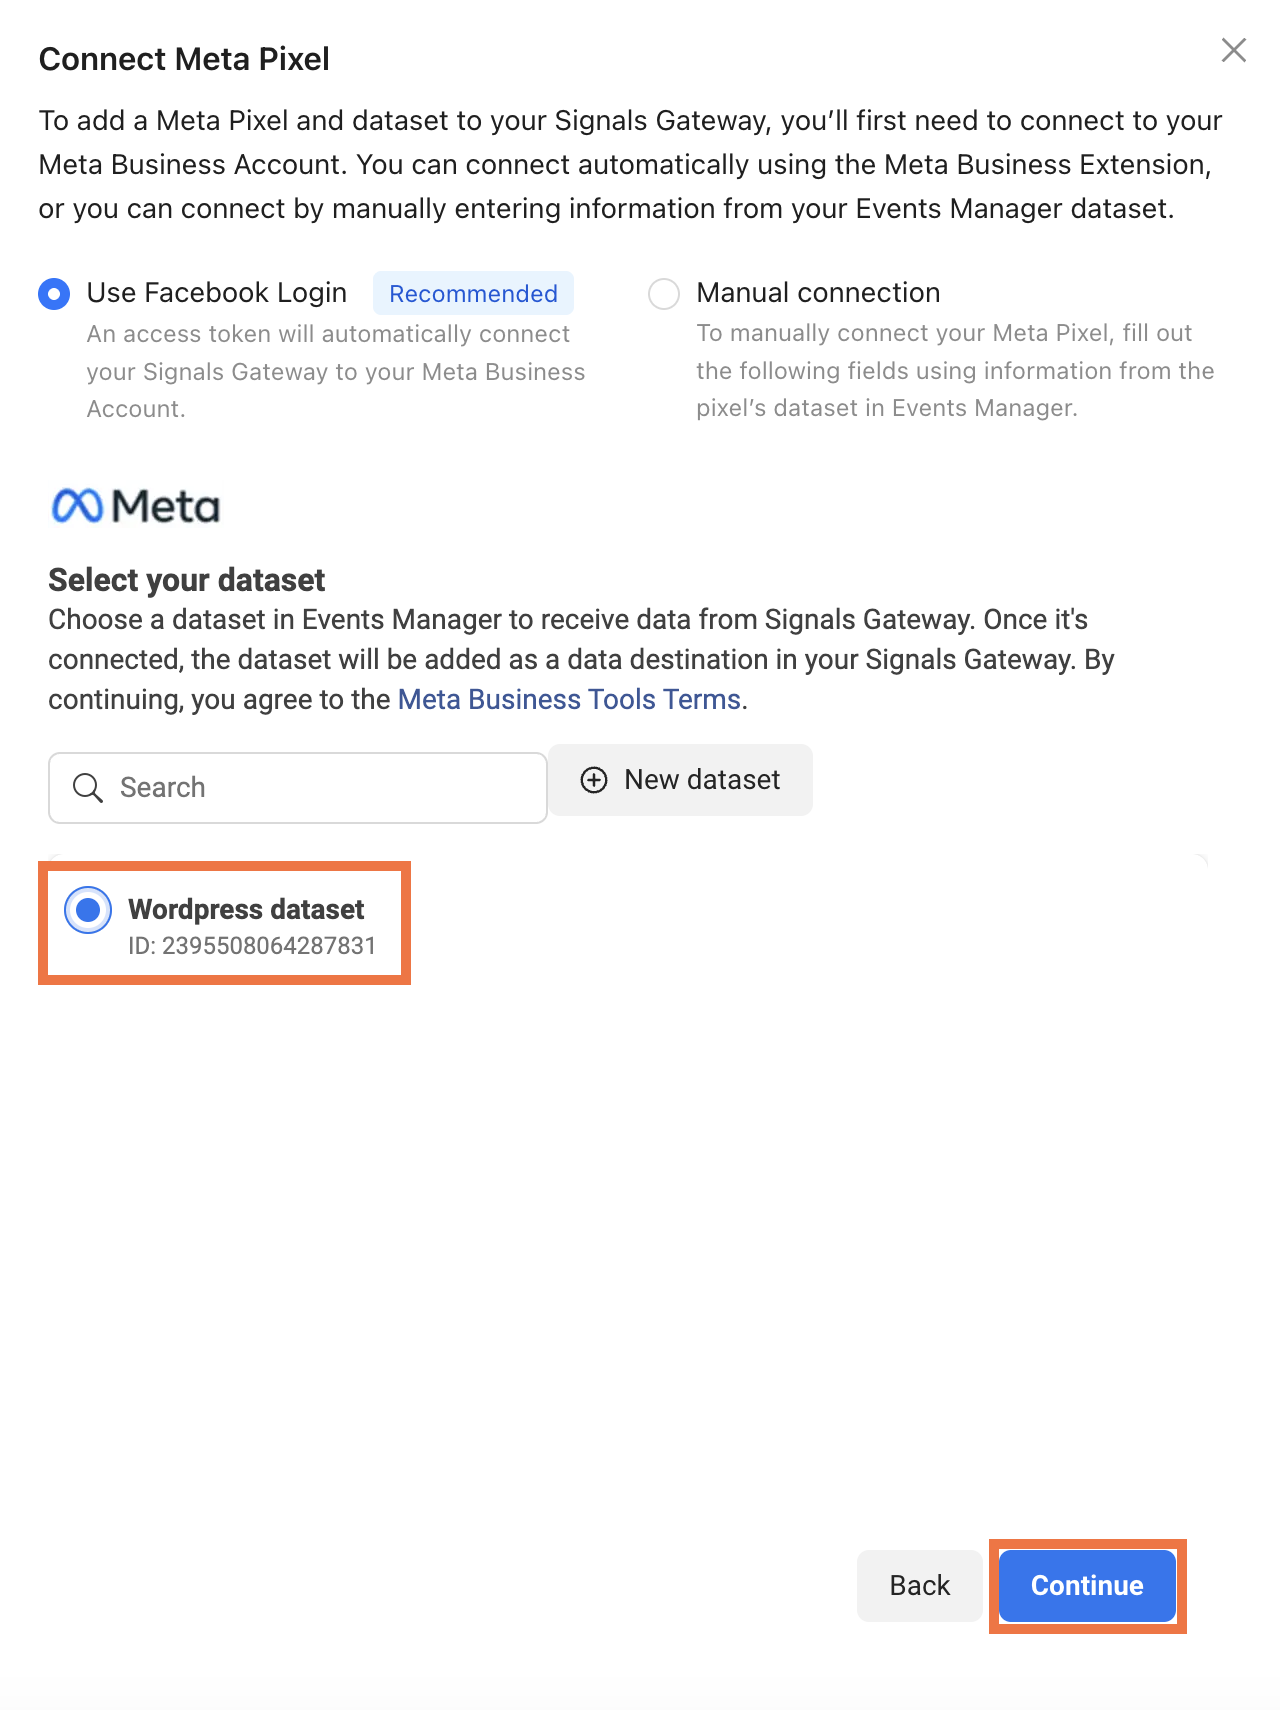
3.2. Select your dataset and click Continue.
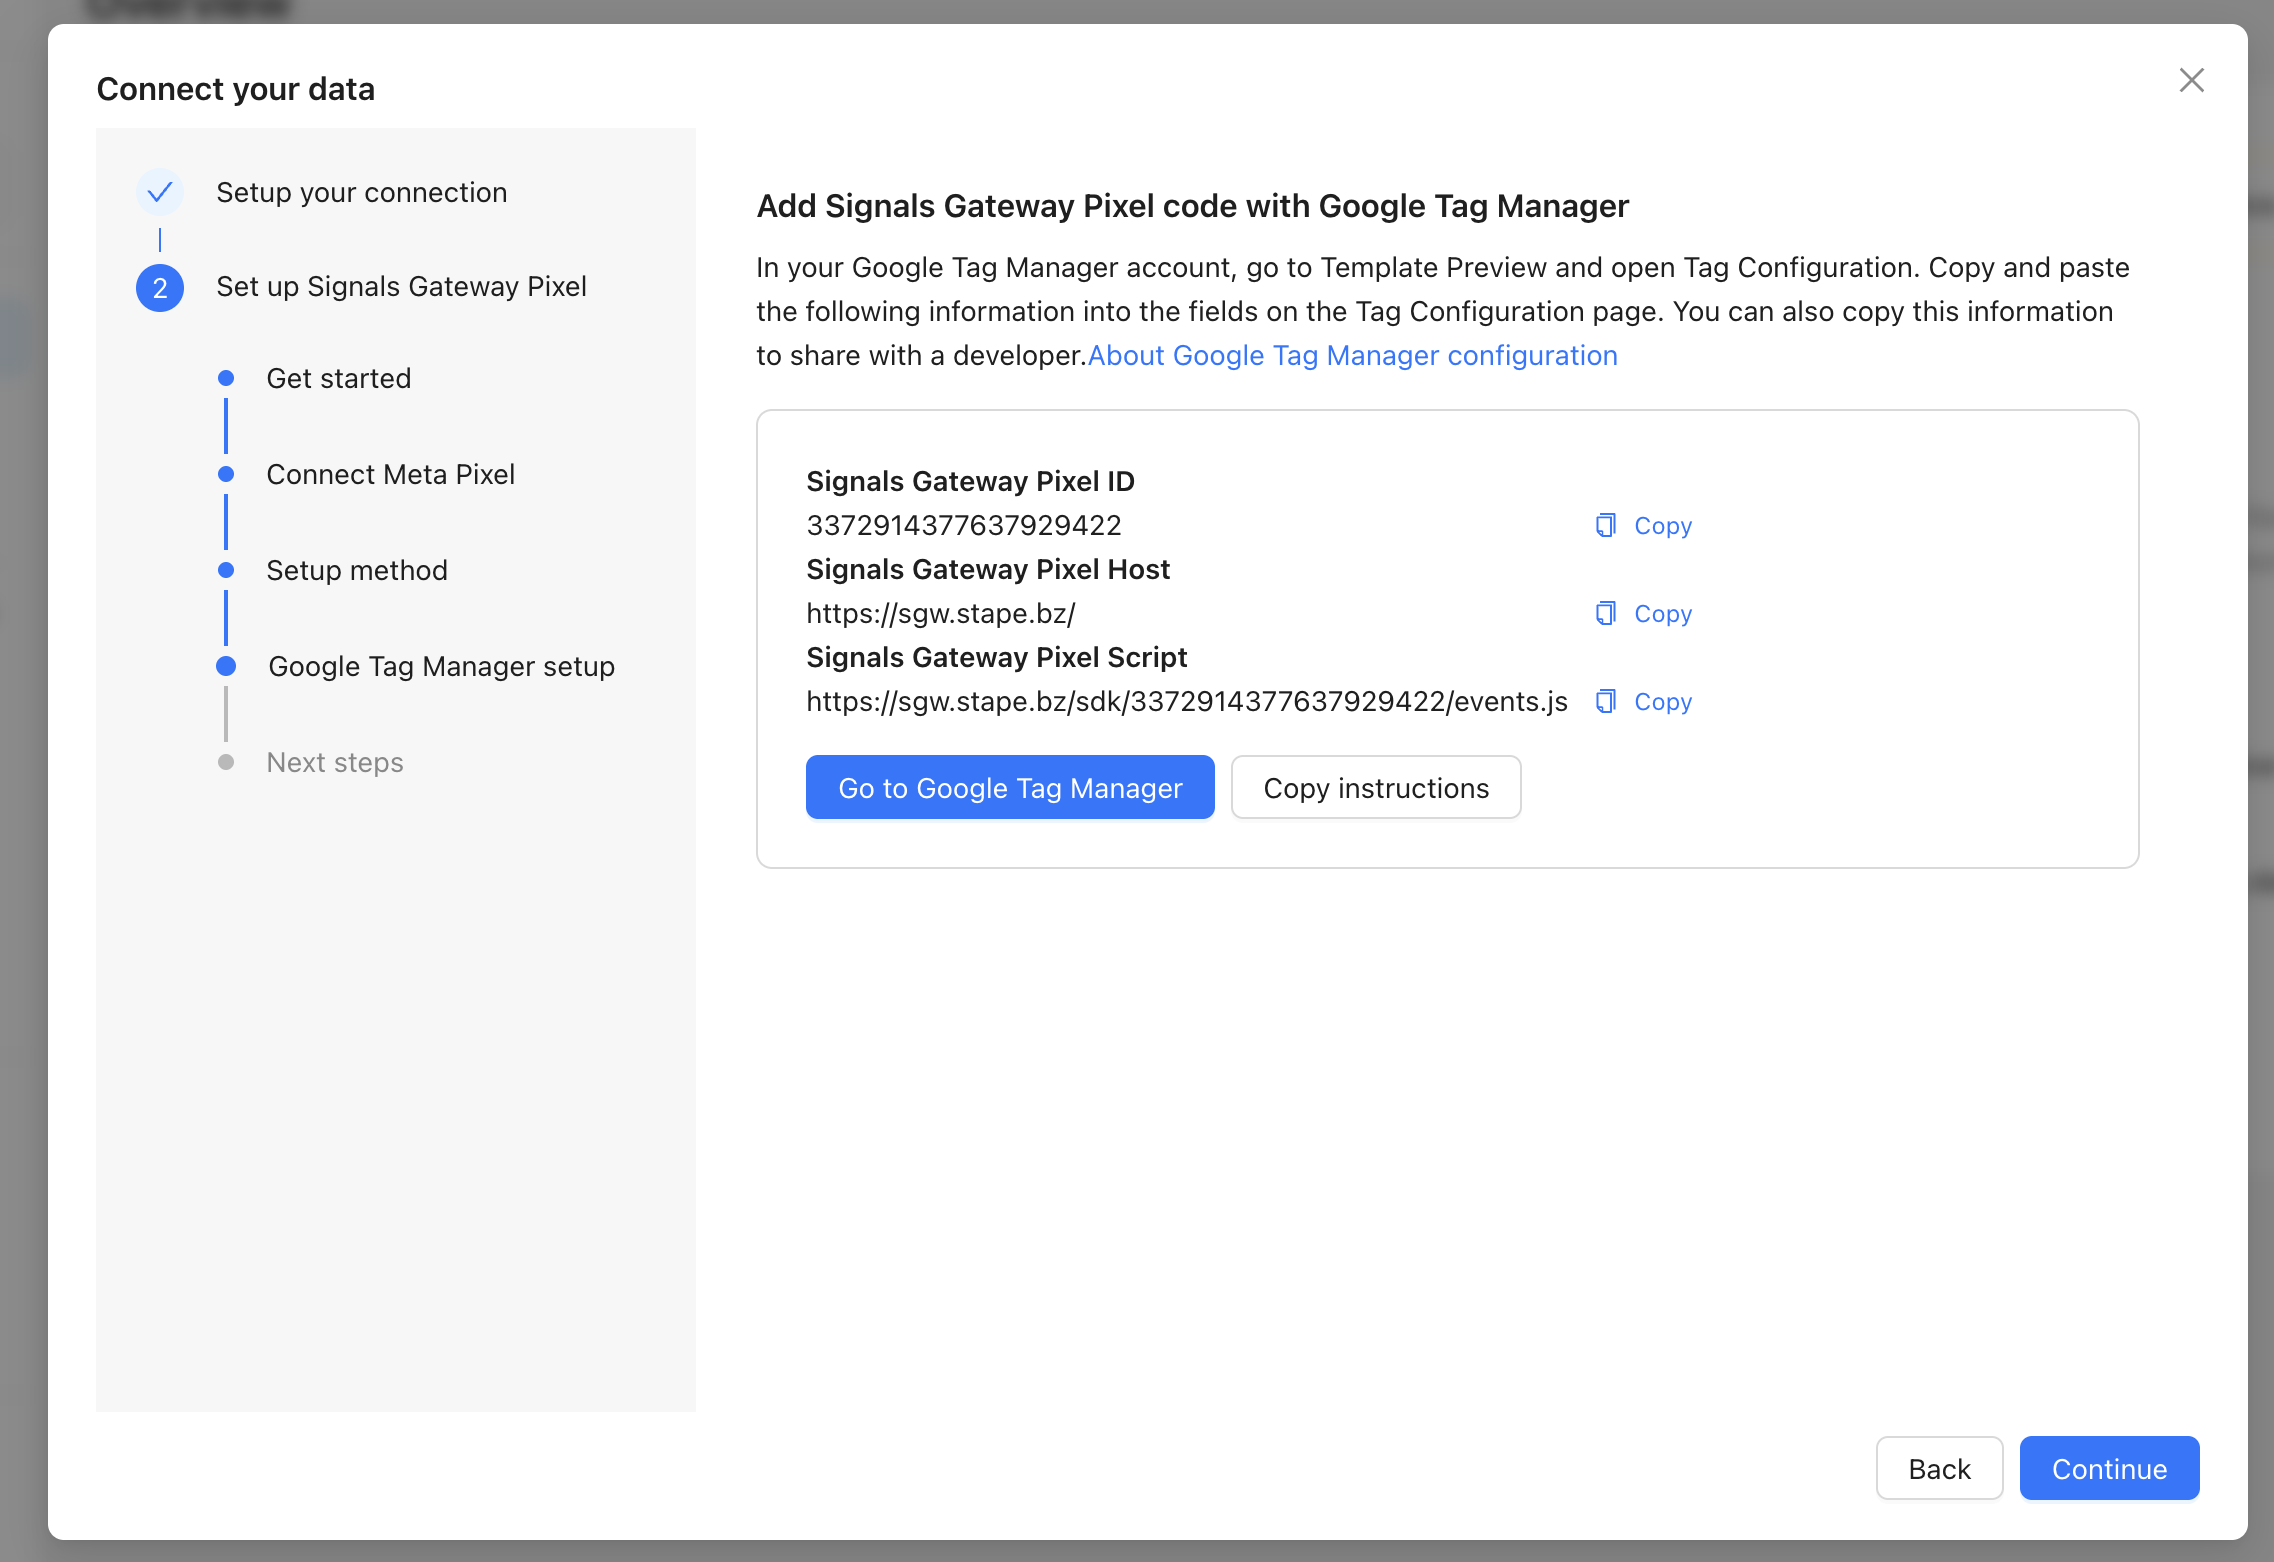
4. Set up a Signals Gateway Pixel. You can choose one of the following options:
- Manually add pixel code - you can copy the instructions and send them to a developer who can add it for you, or add the pixel to the website yourself.
- Shopify - if you're using Shopify for your website, you can deploy this through the Customer Events feature on the admin page of your Shopify website. Read
- Google Tag Manager (recommended) - in your Google Tag Manager account, go to your web container → Templates → install the SignalsGateway Pixel - Alpha - v0 template. Create a tag based on this template and copy paste the given values. For more information read Signals Gateway Pixel Setup in Google Tag Manager (Template Version)
Click Continue.
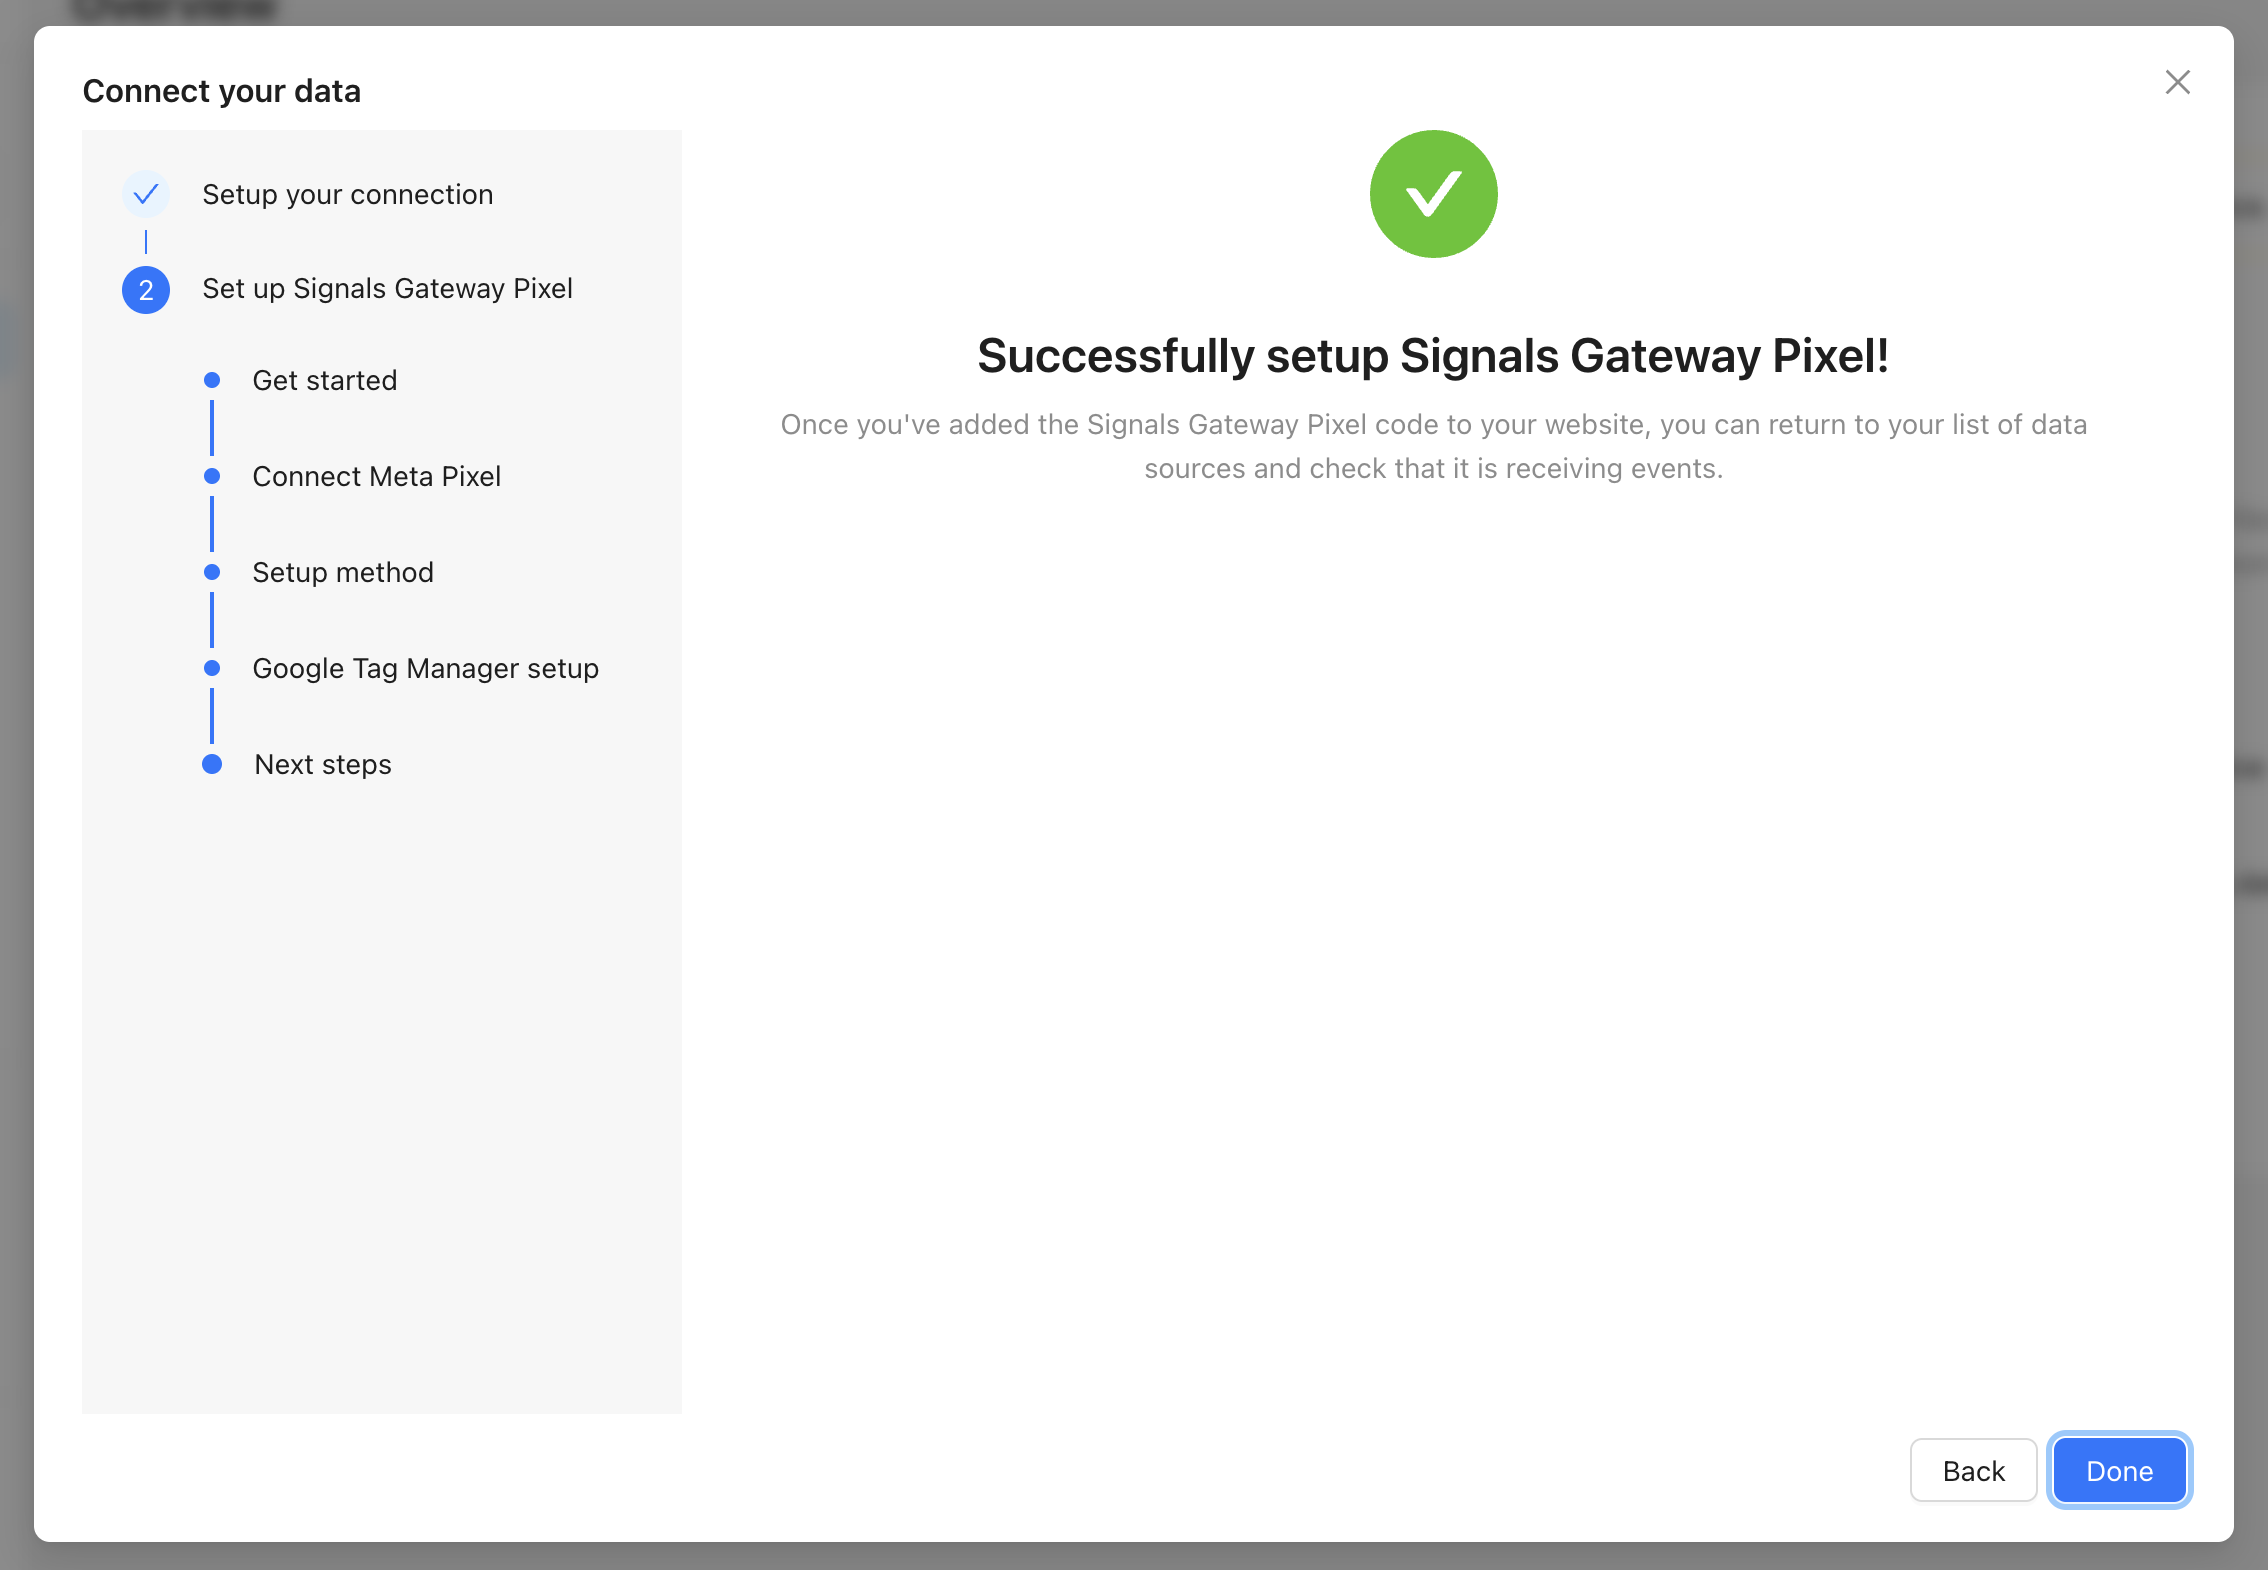
5. Click Done to finish. You'll land on the pipeline dashboard where you can edit Data sources, Data destinations, and the Pipeline filter at any time.
Other data destinations
If you want to send events somewhere other than Meta, like a custom endpoint or Google BigQuery for analysis, select one of the following options:
Customized connector
- Set up Signals Gateway Pixel. For the instructions see the Signals Gateway part step 4 above.
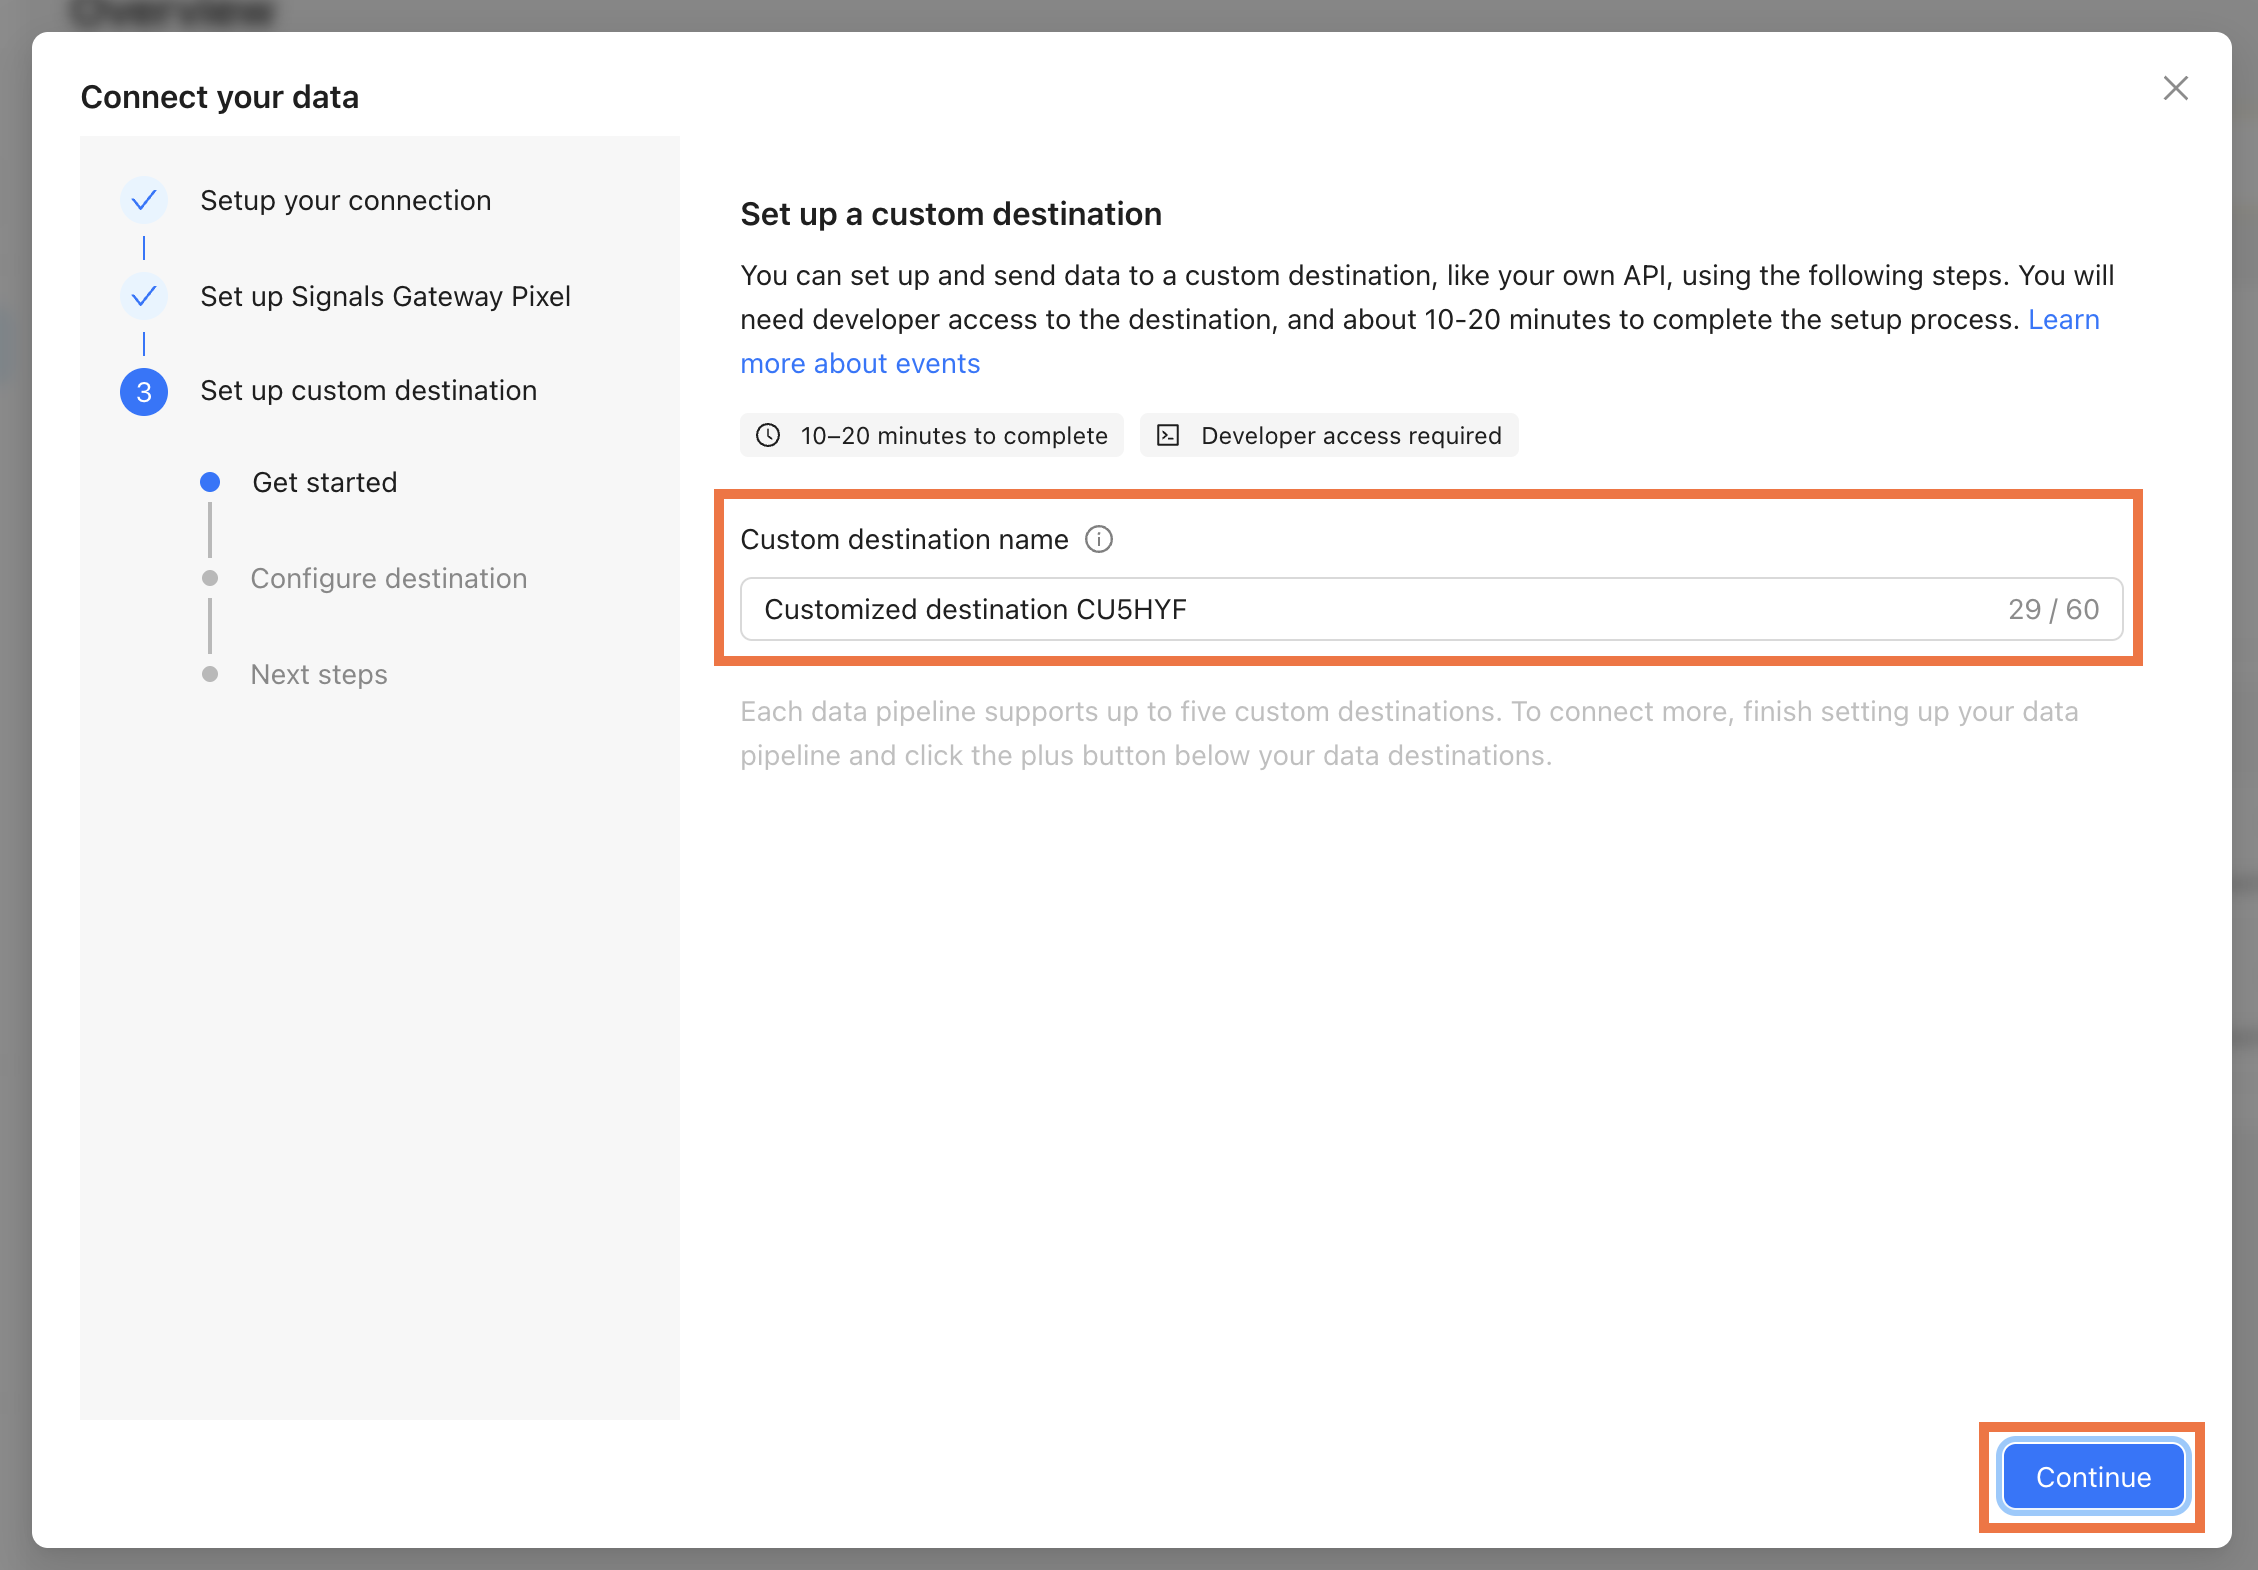
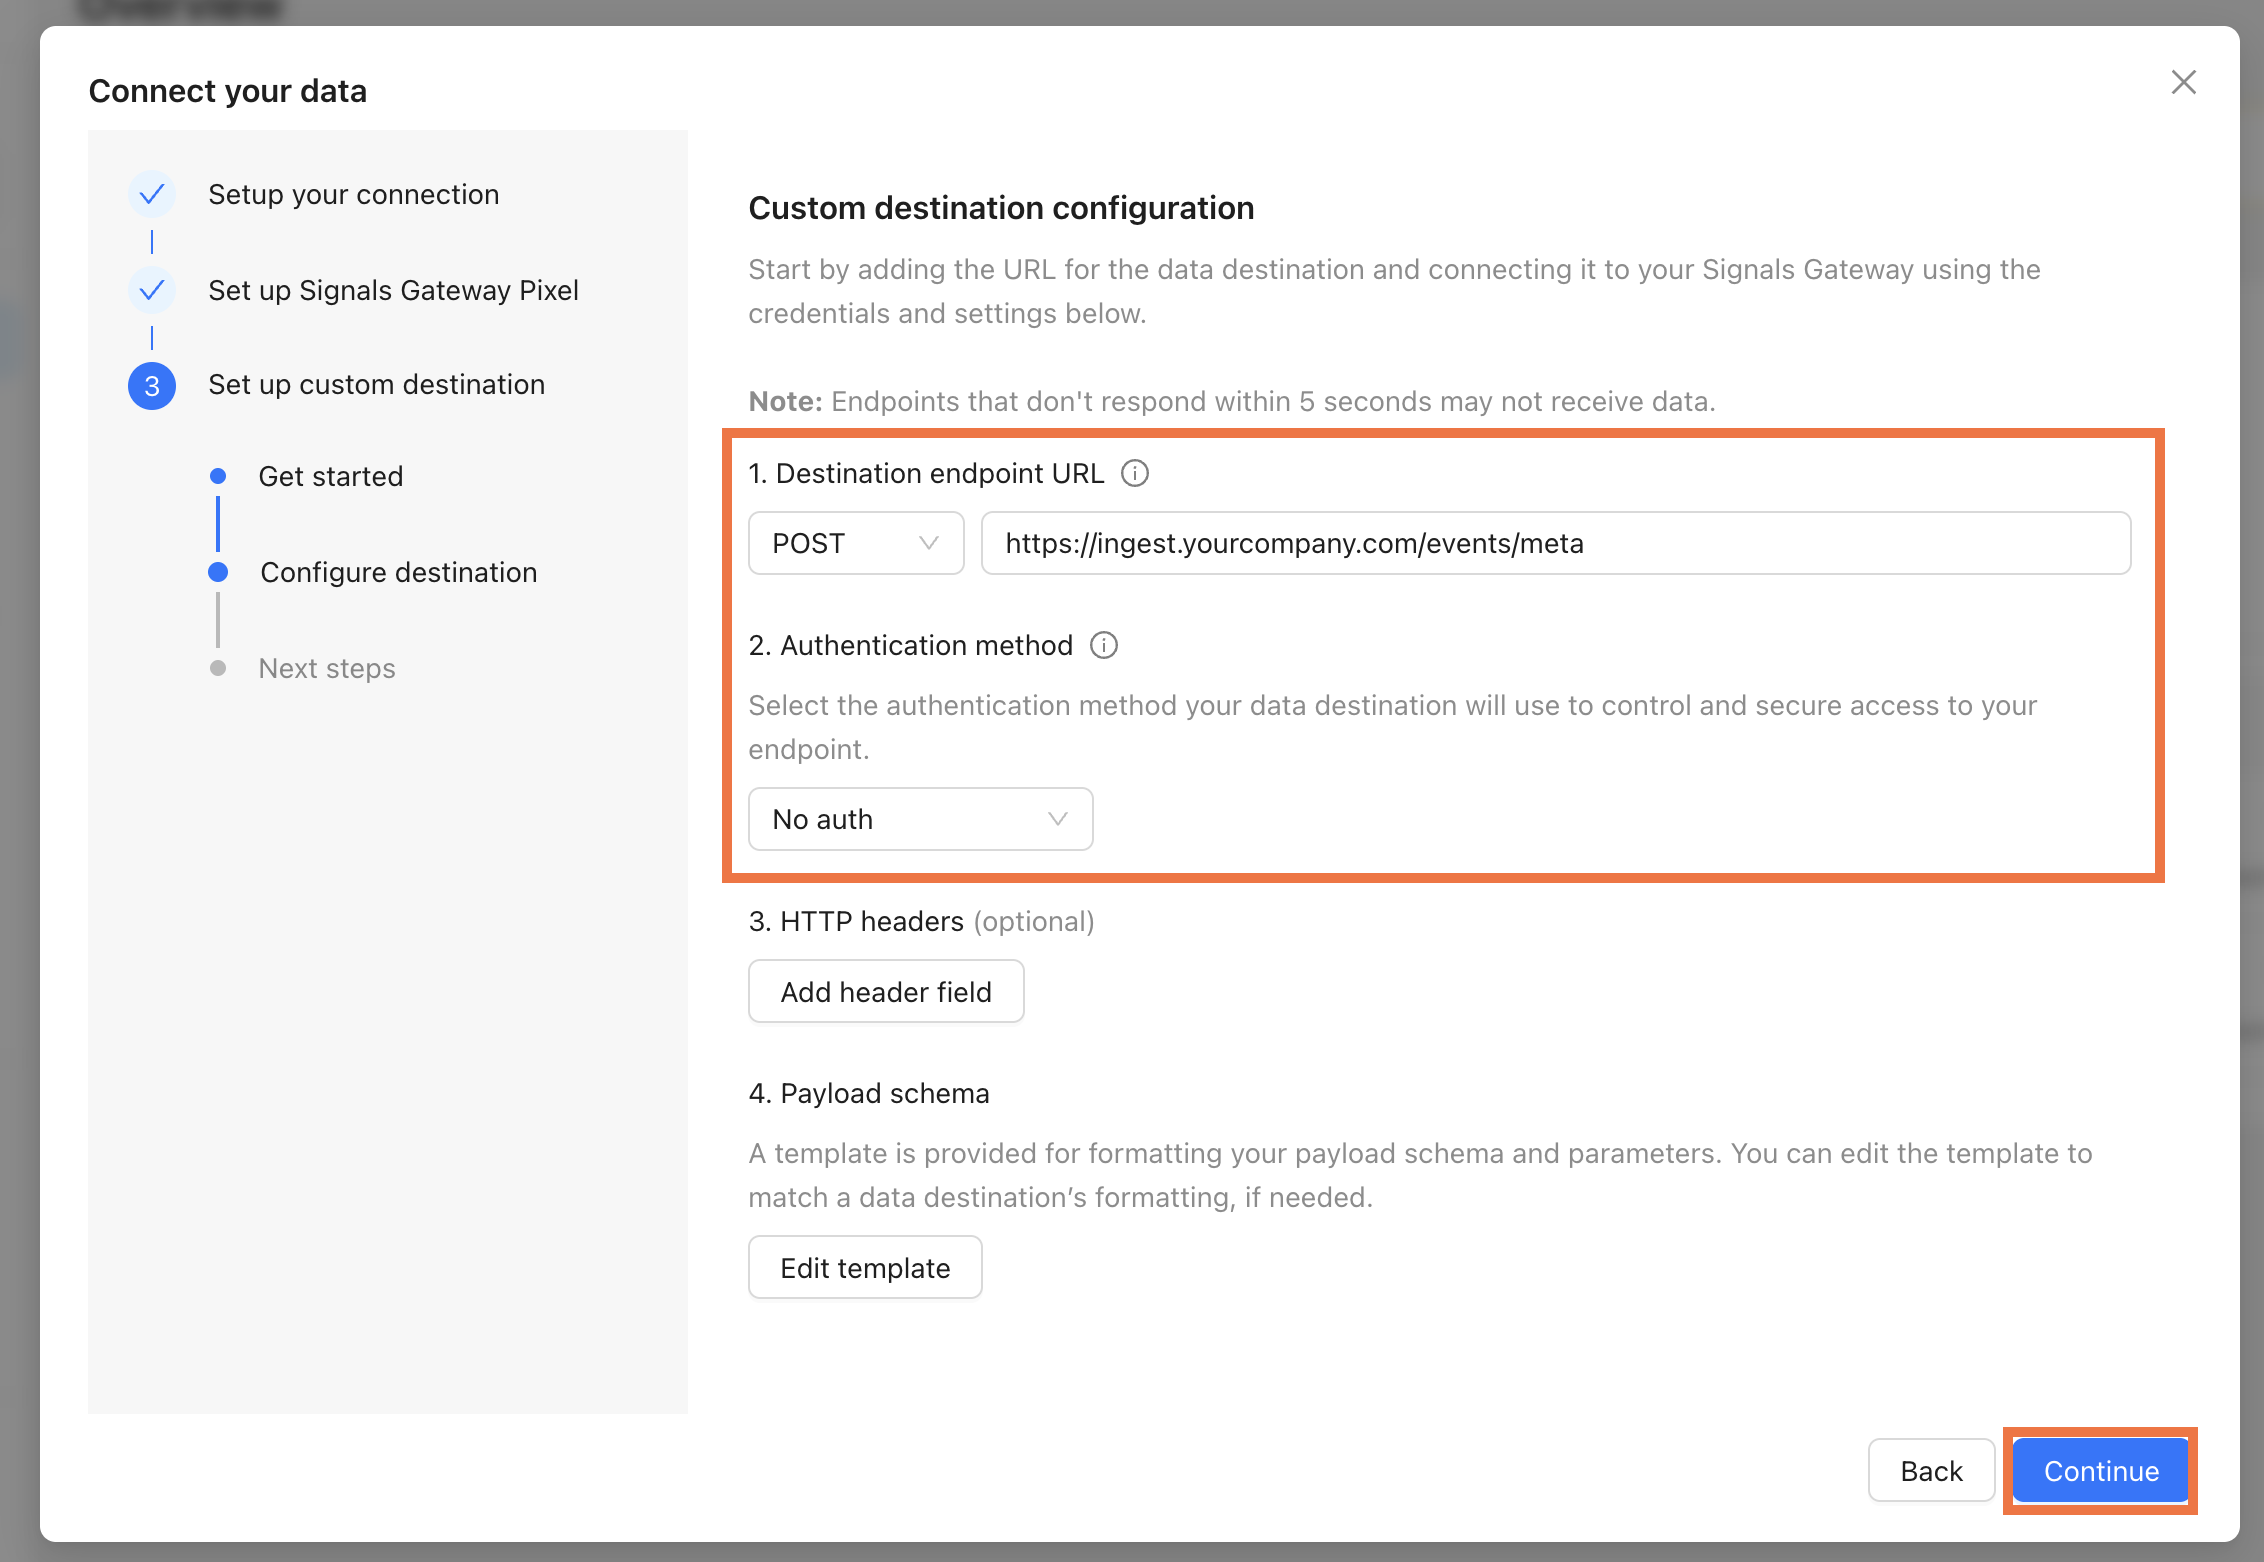
- Set up a custom destination.
- Choose a destination name and click Continue.
2.2. Paste the endpoint URL, pick an authentication method, fill in the method-specific fields, and click Continue.
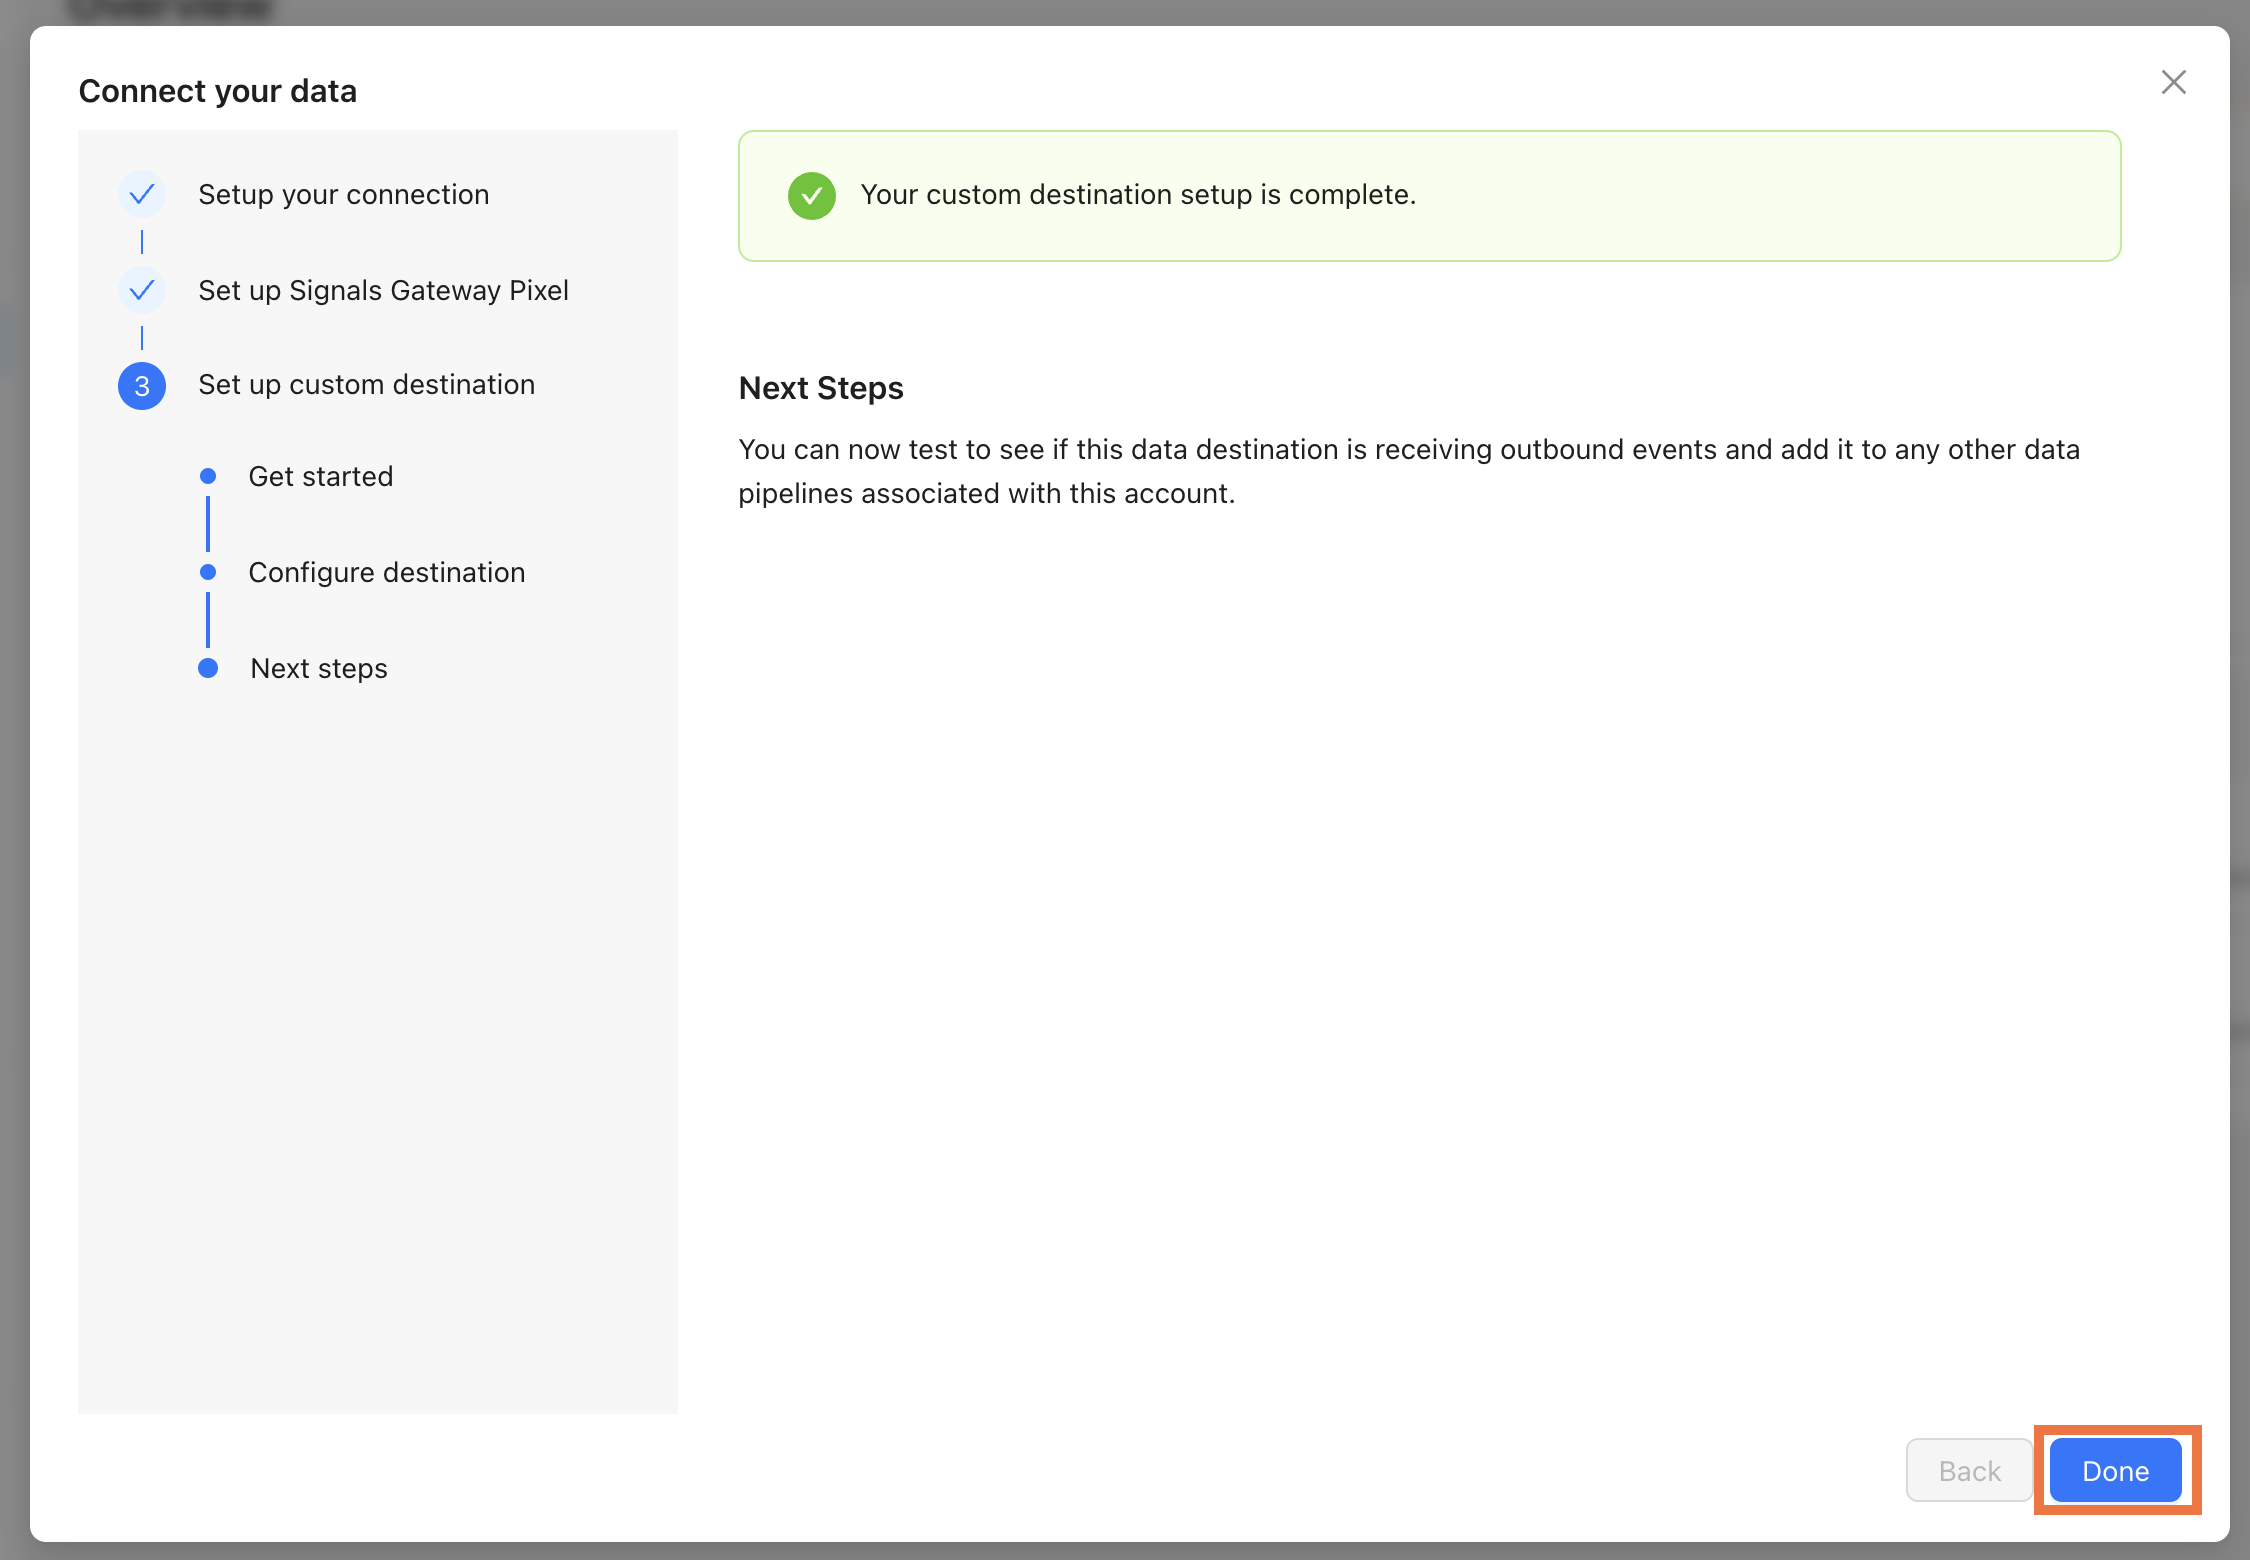
2.3. Click Done to finish. You'll land on the pipeline dashboard where you can edit Data sources, Data destinations, and the Pipeline filter at any time.
Google BigQuery
- Set up Signals Gateway Pixel. For the instructions see the Signals Gateway part step 4 above.
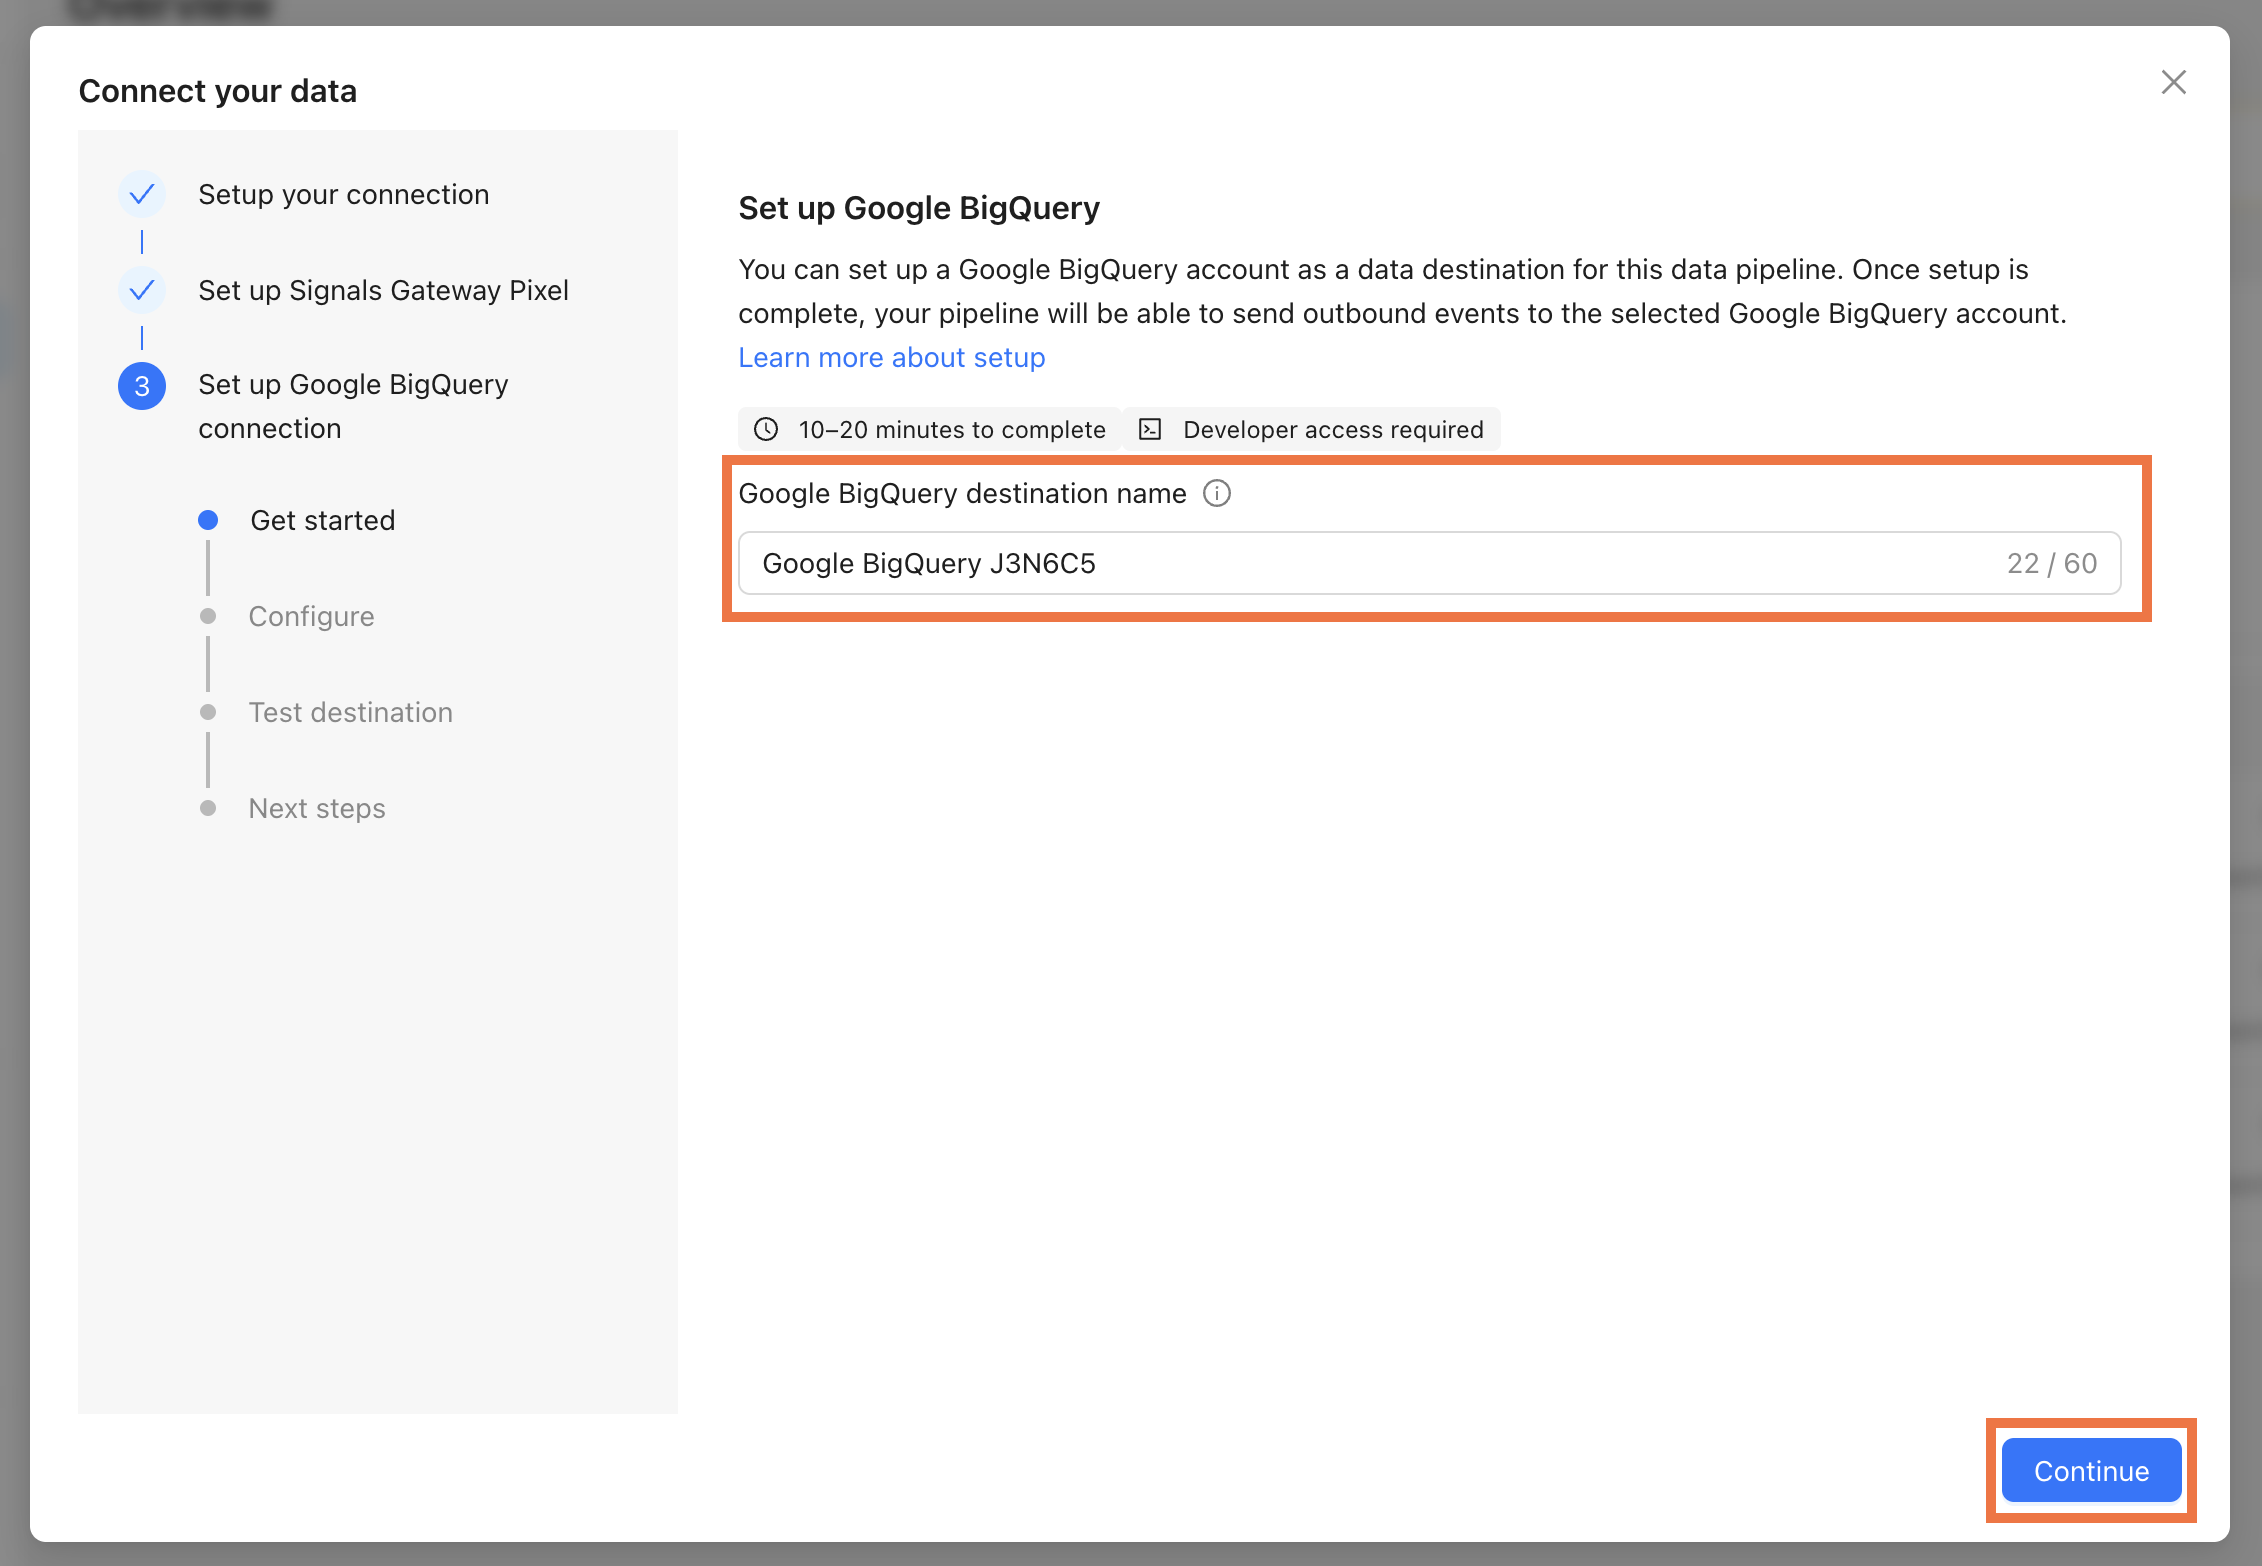
- Set up Google BigQuery.
- Choose a destination name and click Continue.
2.2. Configure Google BigQuery:
- Table ID in the format
schema.dataset.table_id. - Service Account Email of a Google Cloud service account with BigQuery Data Editor on the target dataset.
- Private Key from the same service account.
For more information on where to find this information read Google BigQuery Connection Setup.
Click Continue.

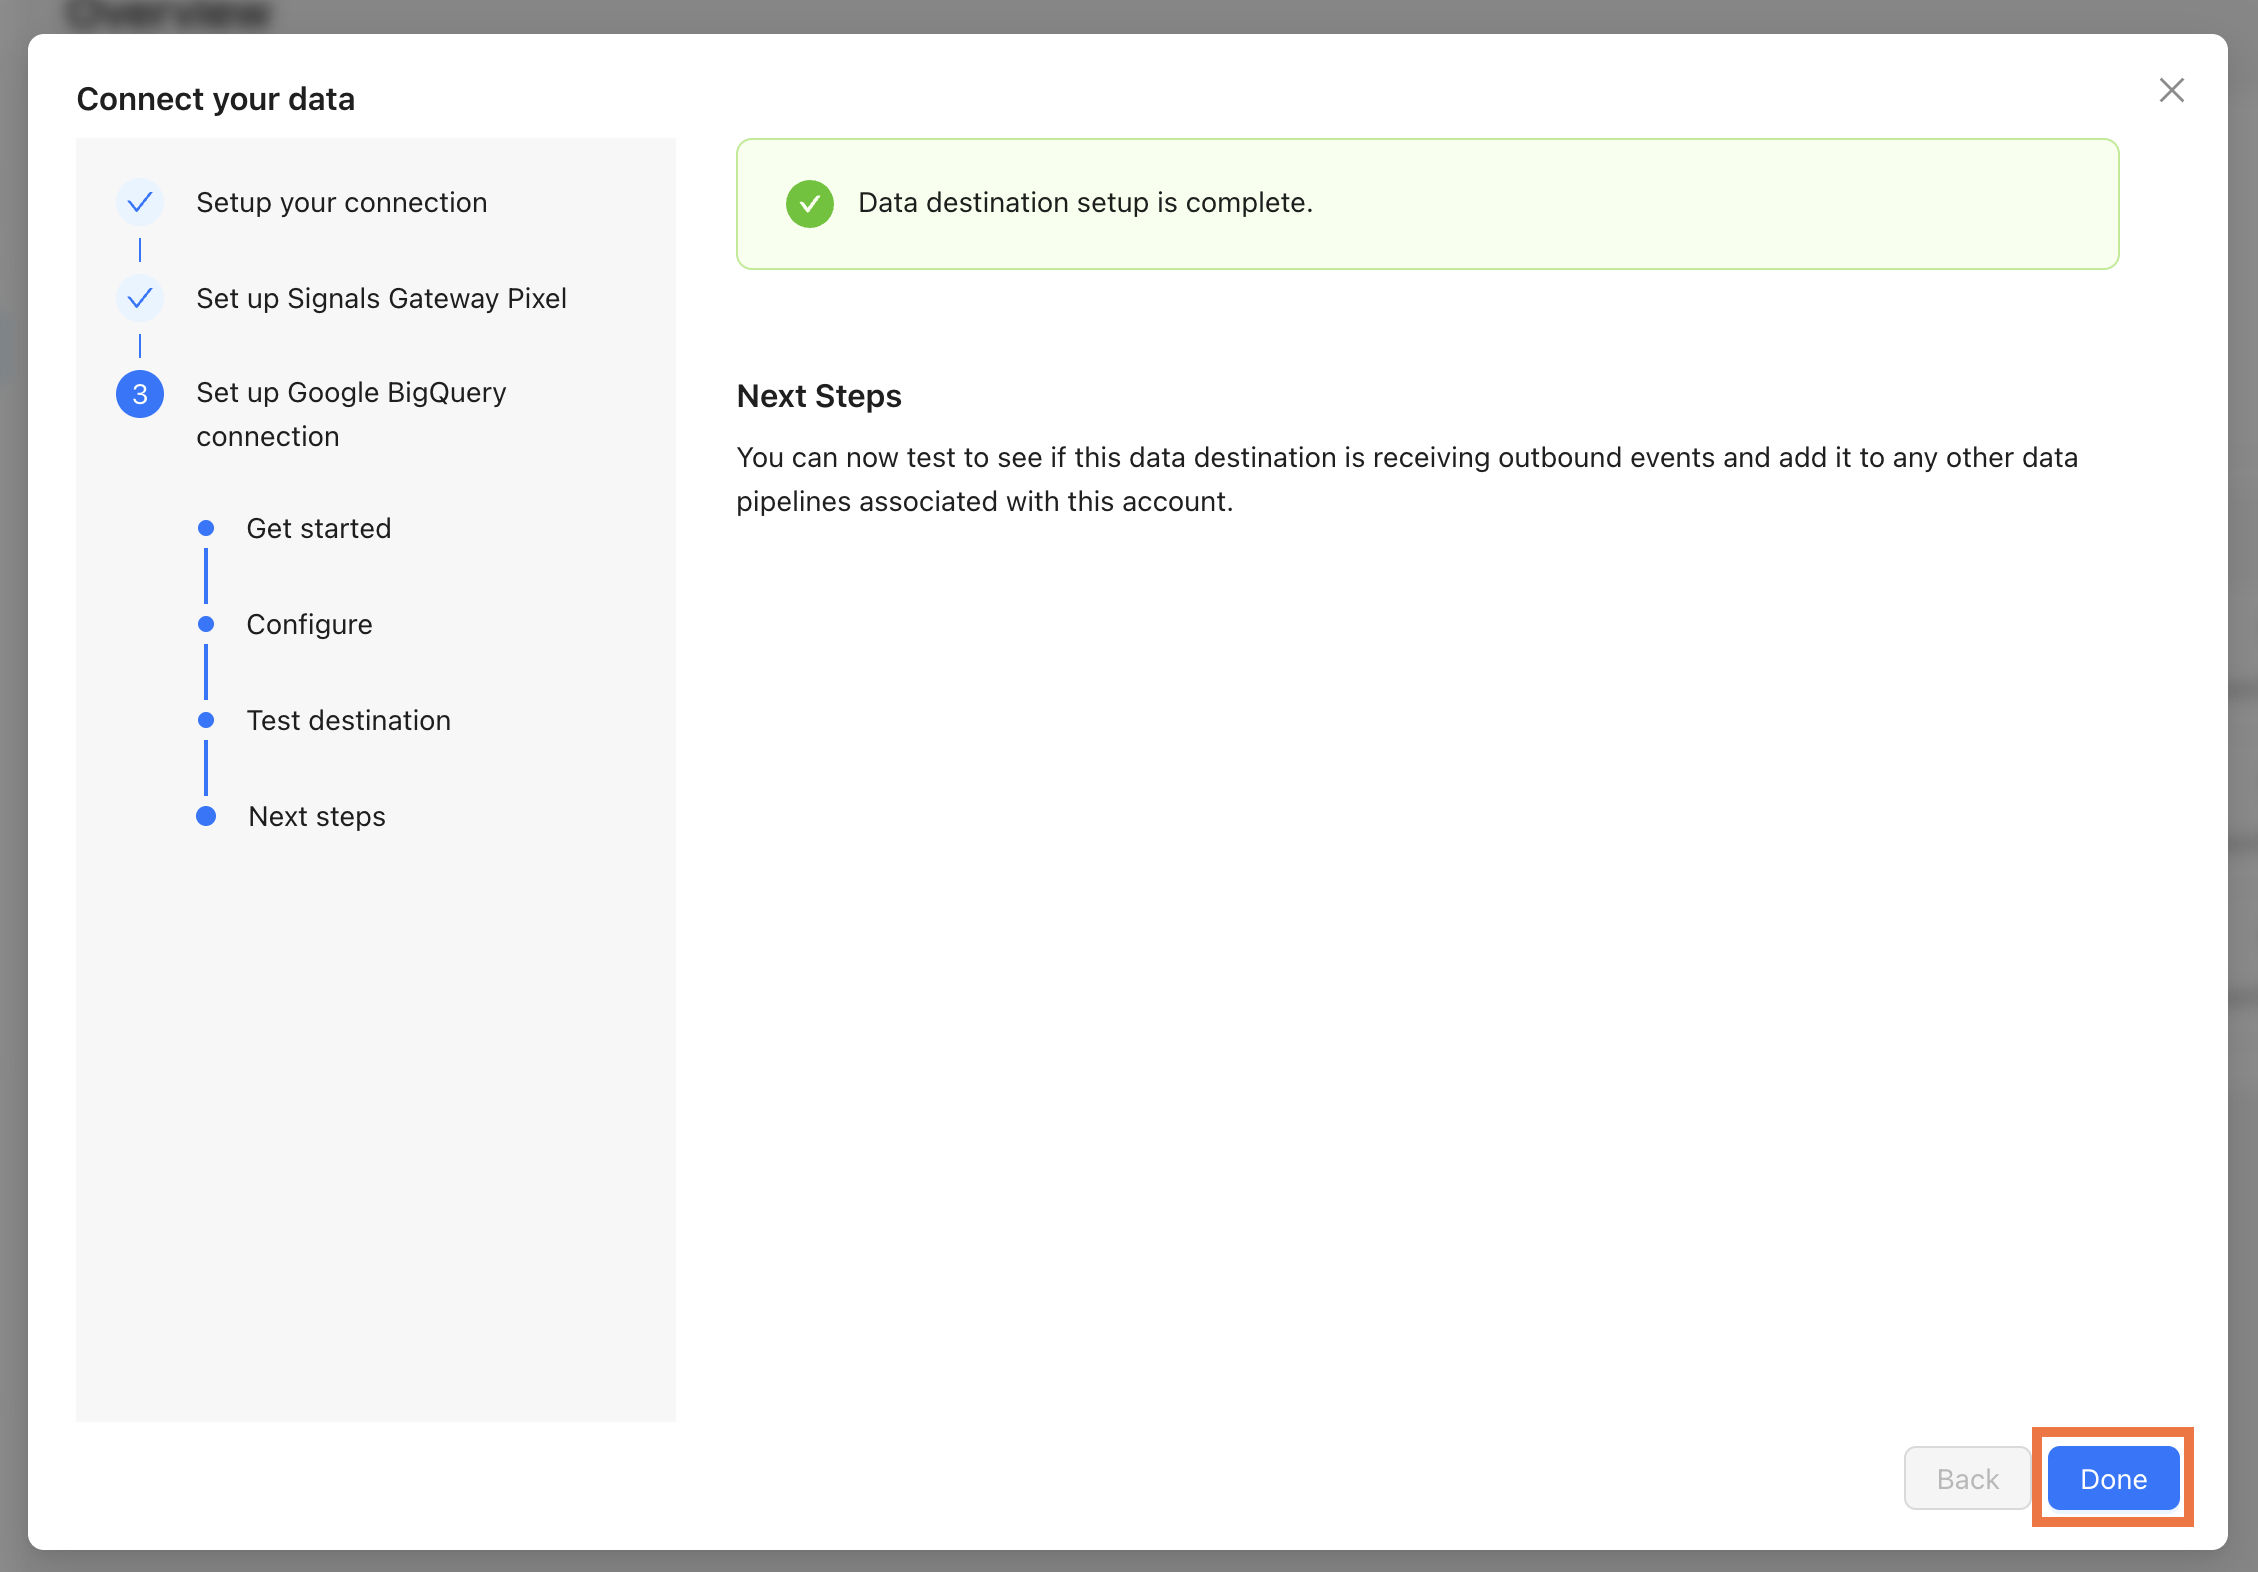
2.3. Click Test Connection and Continue.

2.4. Click Done to finish. You'll land on the pipeline dashboard where you can edit Data sources, Data destinations, and the Pipeline filter at any time.
Conversions API Gateway
- Connect your Meta Pixel. You can either:
- Use Facebook Login (recommended) - Signals Gateway pulls your Business Account, datasets, and tokens for you.
- Connect Manually - use this option if you can't use Facebook Login for security/policy reasons, or you want to control exactly which system user the token belongs to. Enter the following:
Click Connect.

1.1. Select your business portfolio and click Continue.
1.2. Select your dataset and click Continue.
2. You'll land on the pipeline dashboard where you can edit Data sources, Data destinations, and the Pipeline filter at any time.
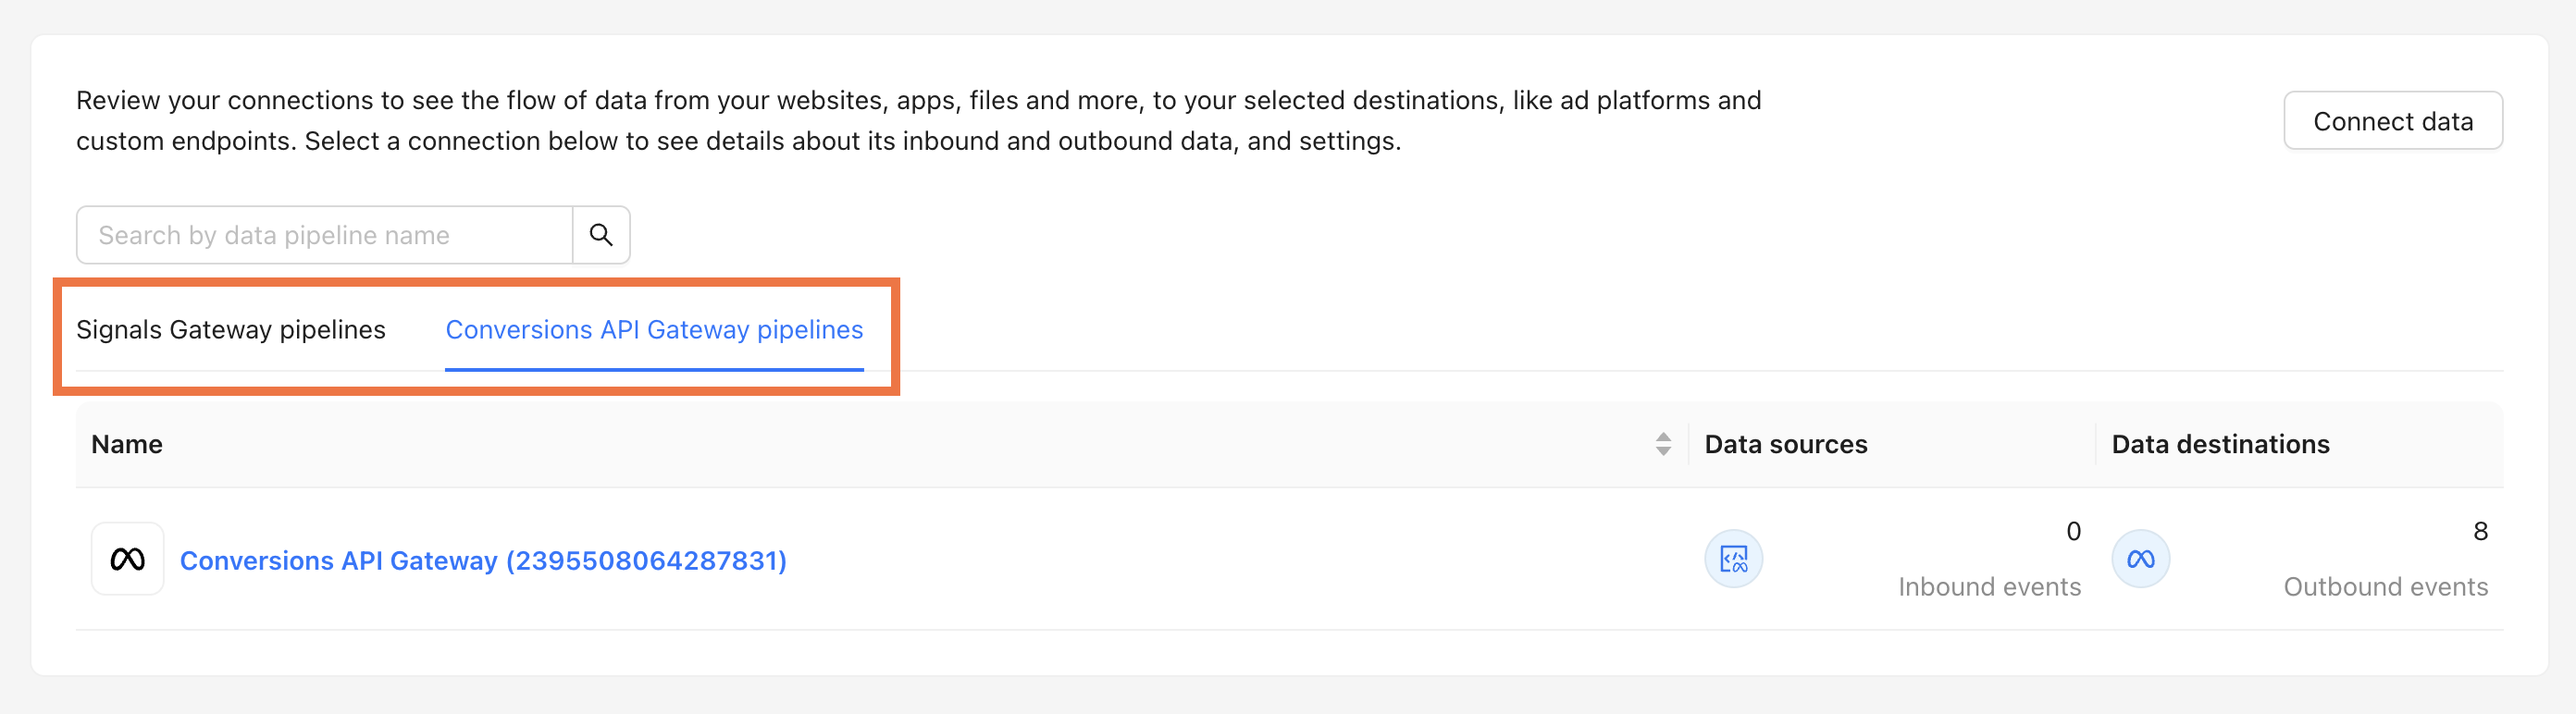
Your dashboard now lists both Signals Gateway Pixel pipelines and Conversions API Gateway pipelines side by side.
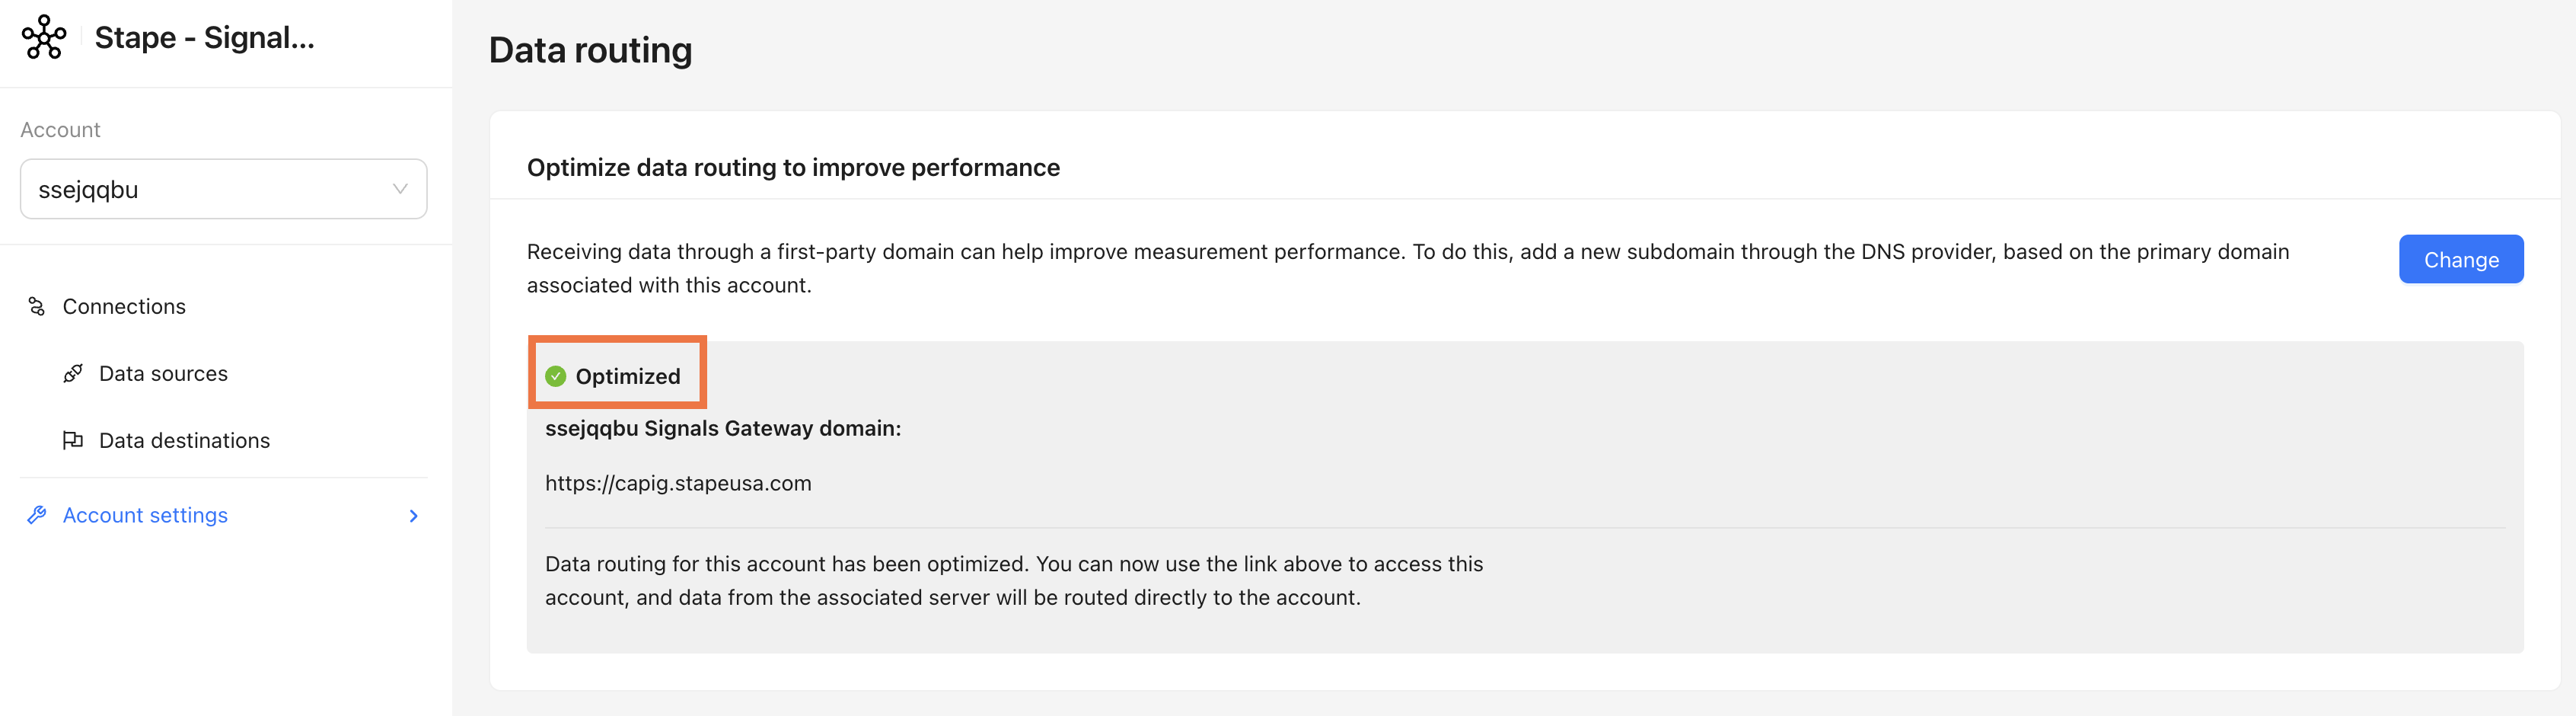
Step 3 | Route traffic through your own domain (recommended)
Routing Signals Gateway through a subdomain on your own site measurably improves match quality and reduces ad-blocker loss.
- Go to Account settings → Data routing → Optimize.
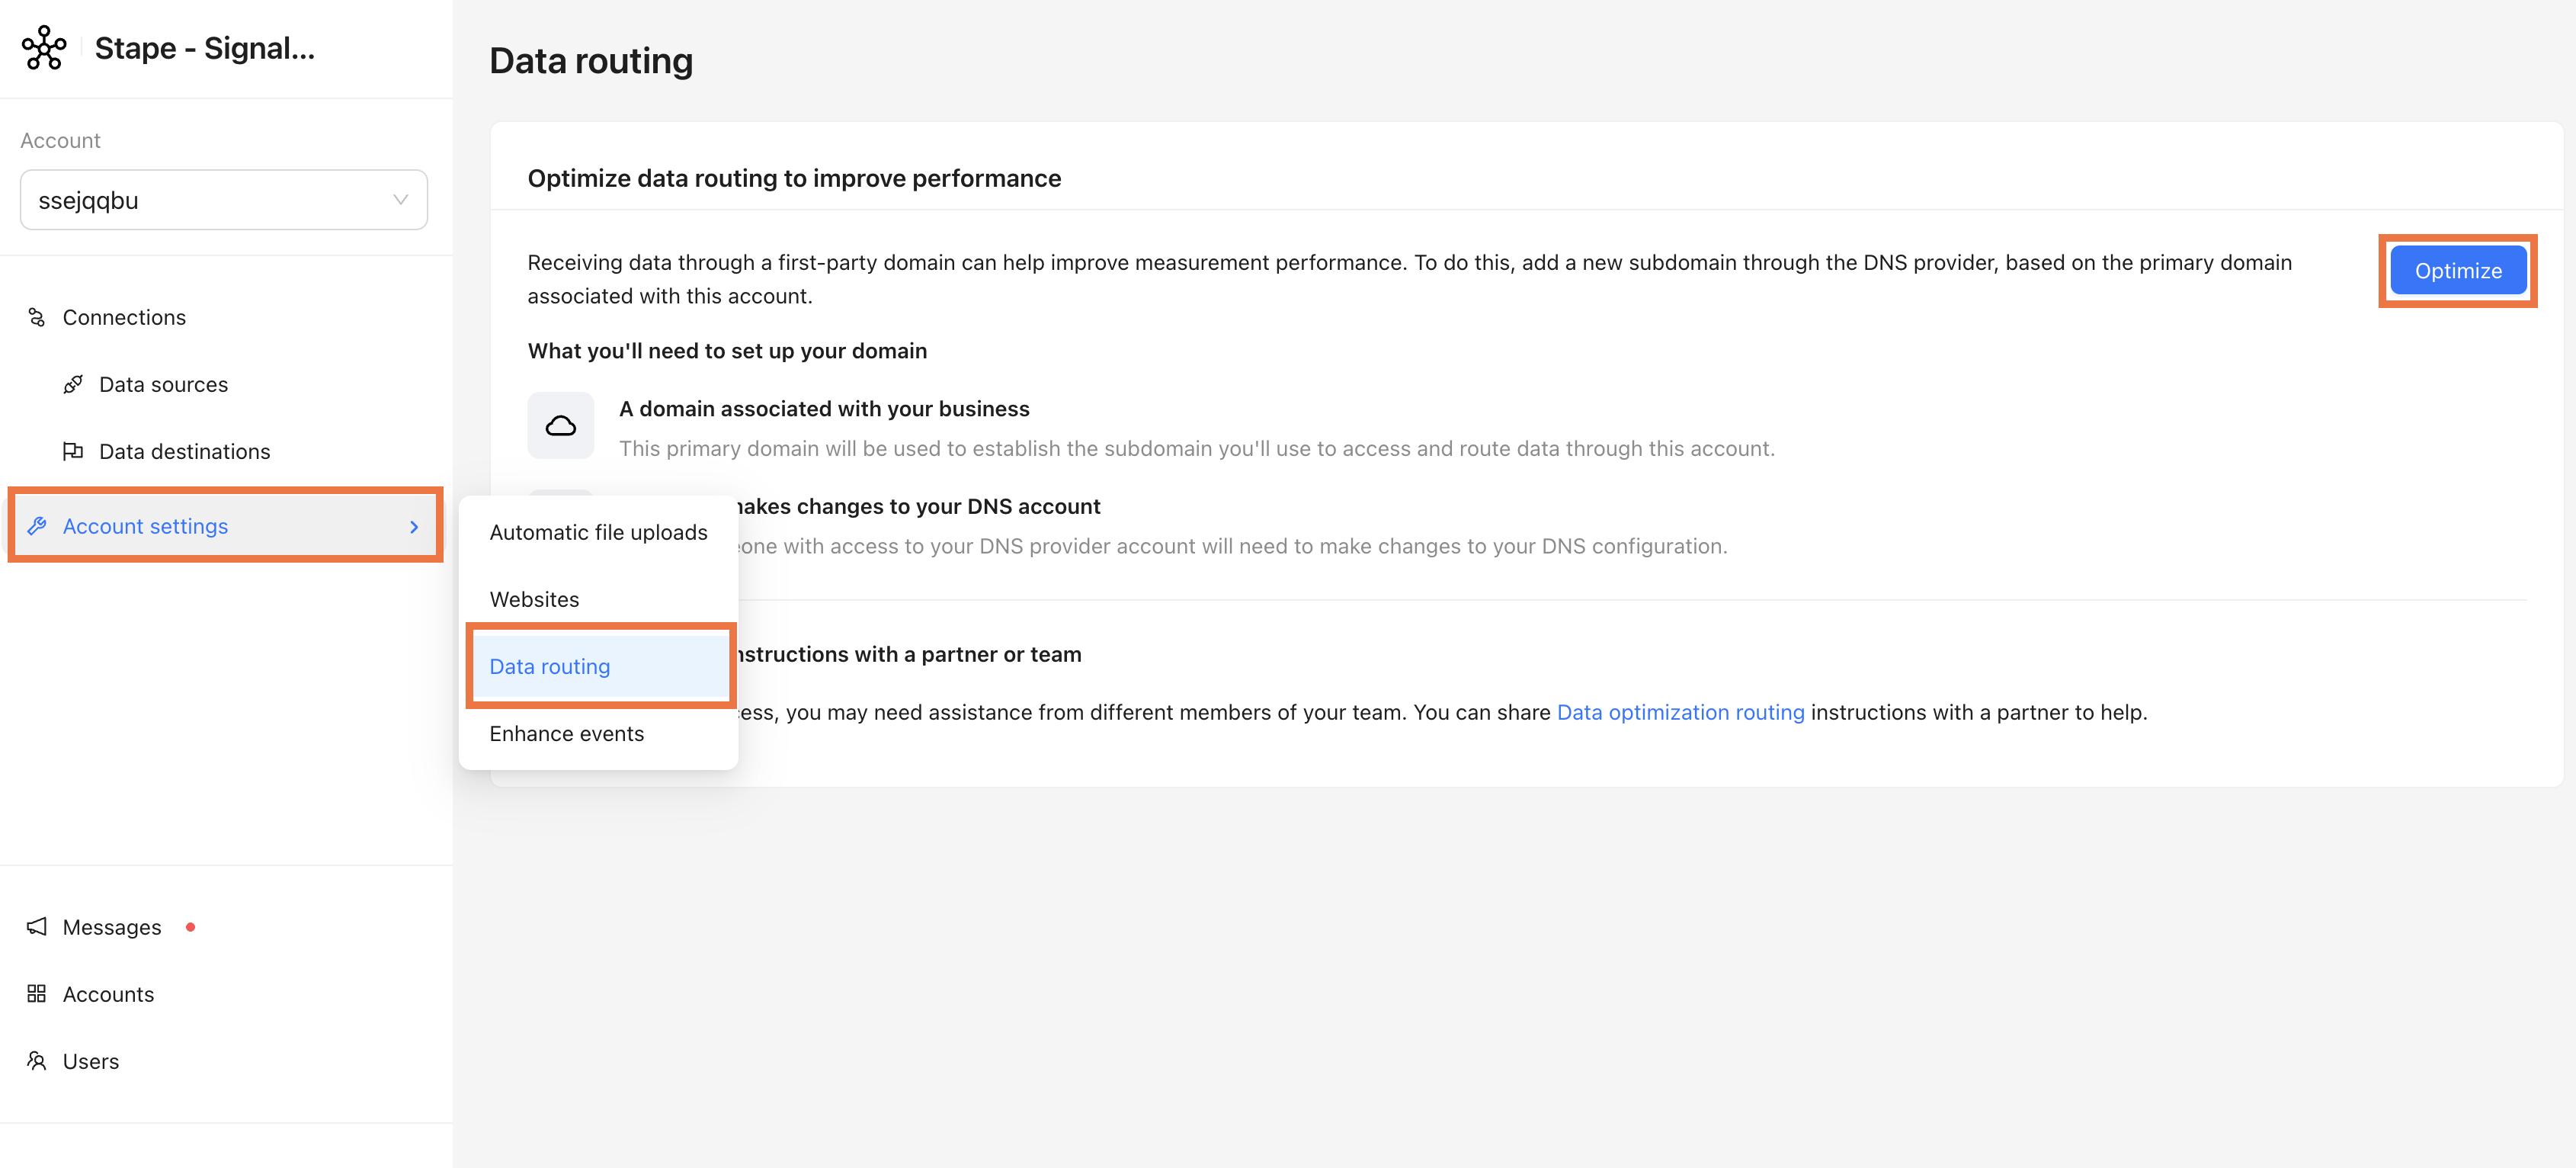
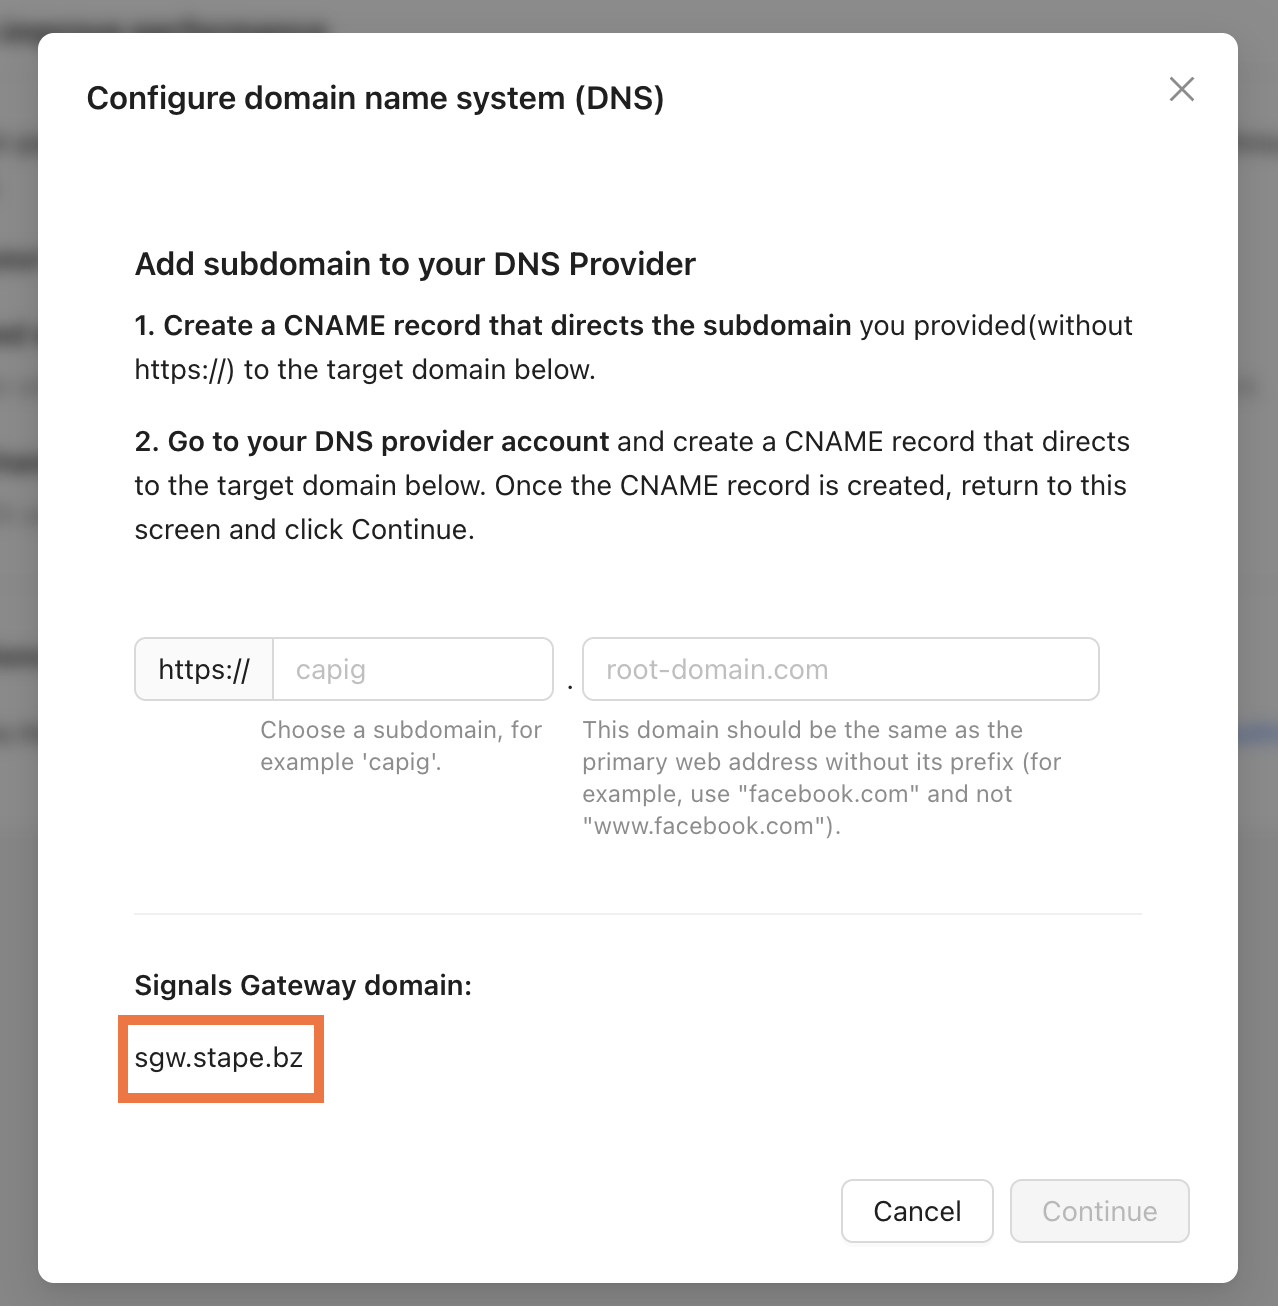
2. Copy the Signals Gateway domain shown on the pop-up.
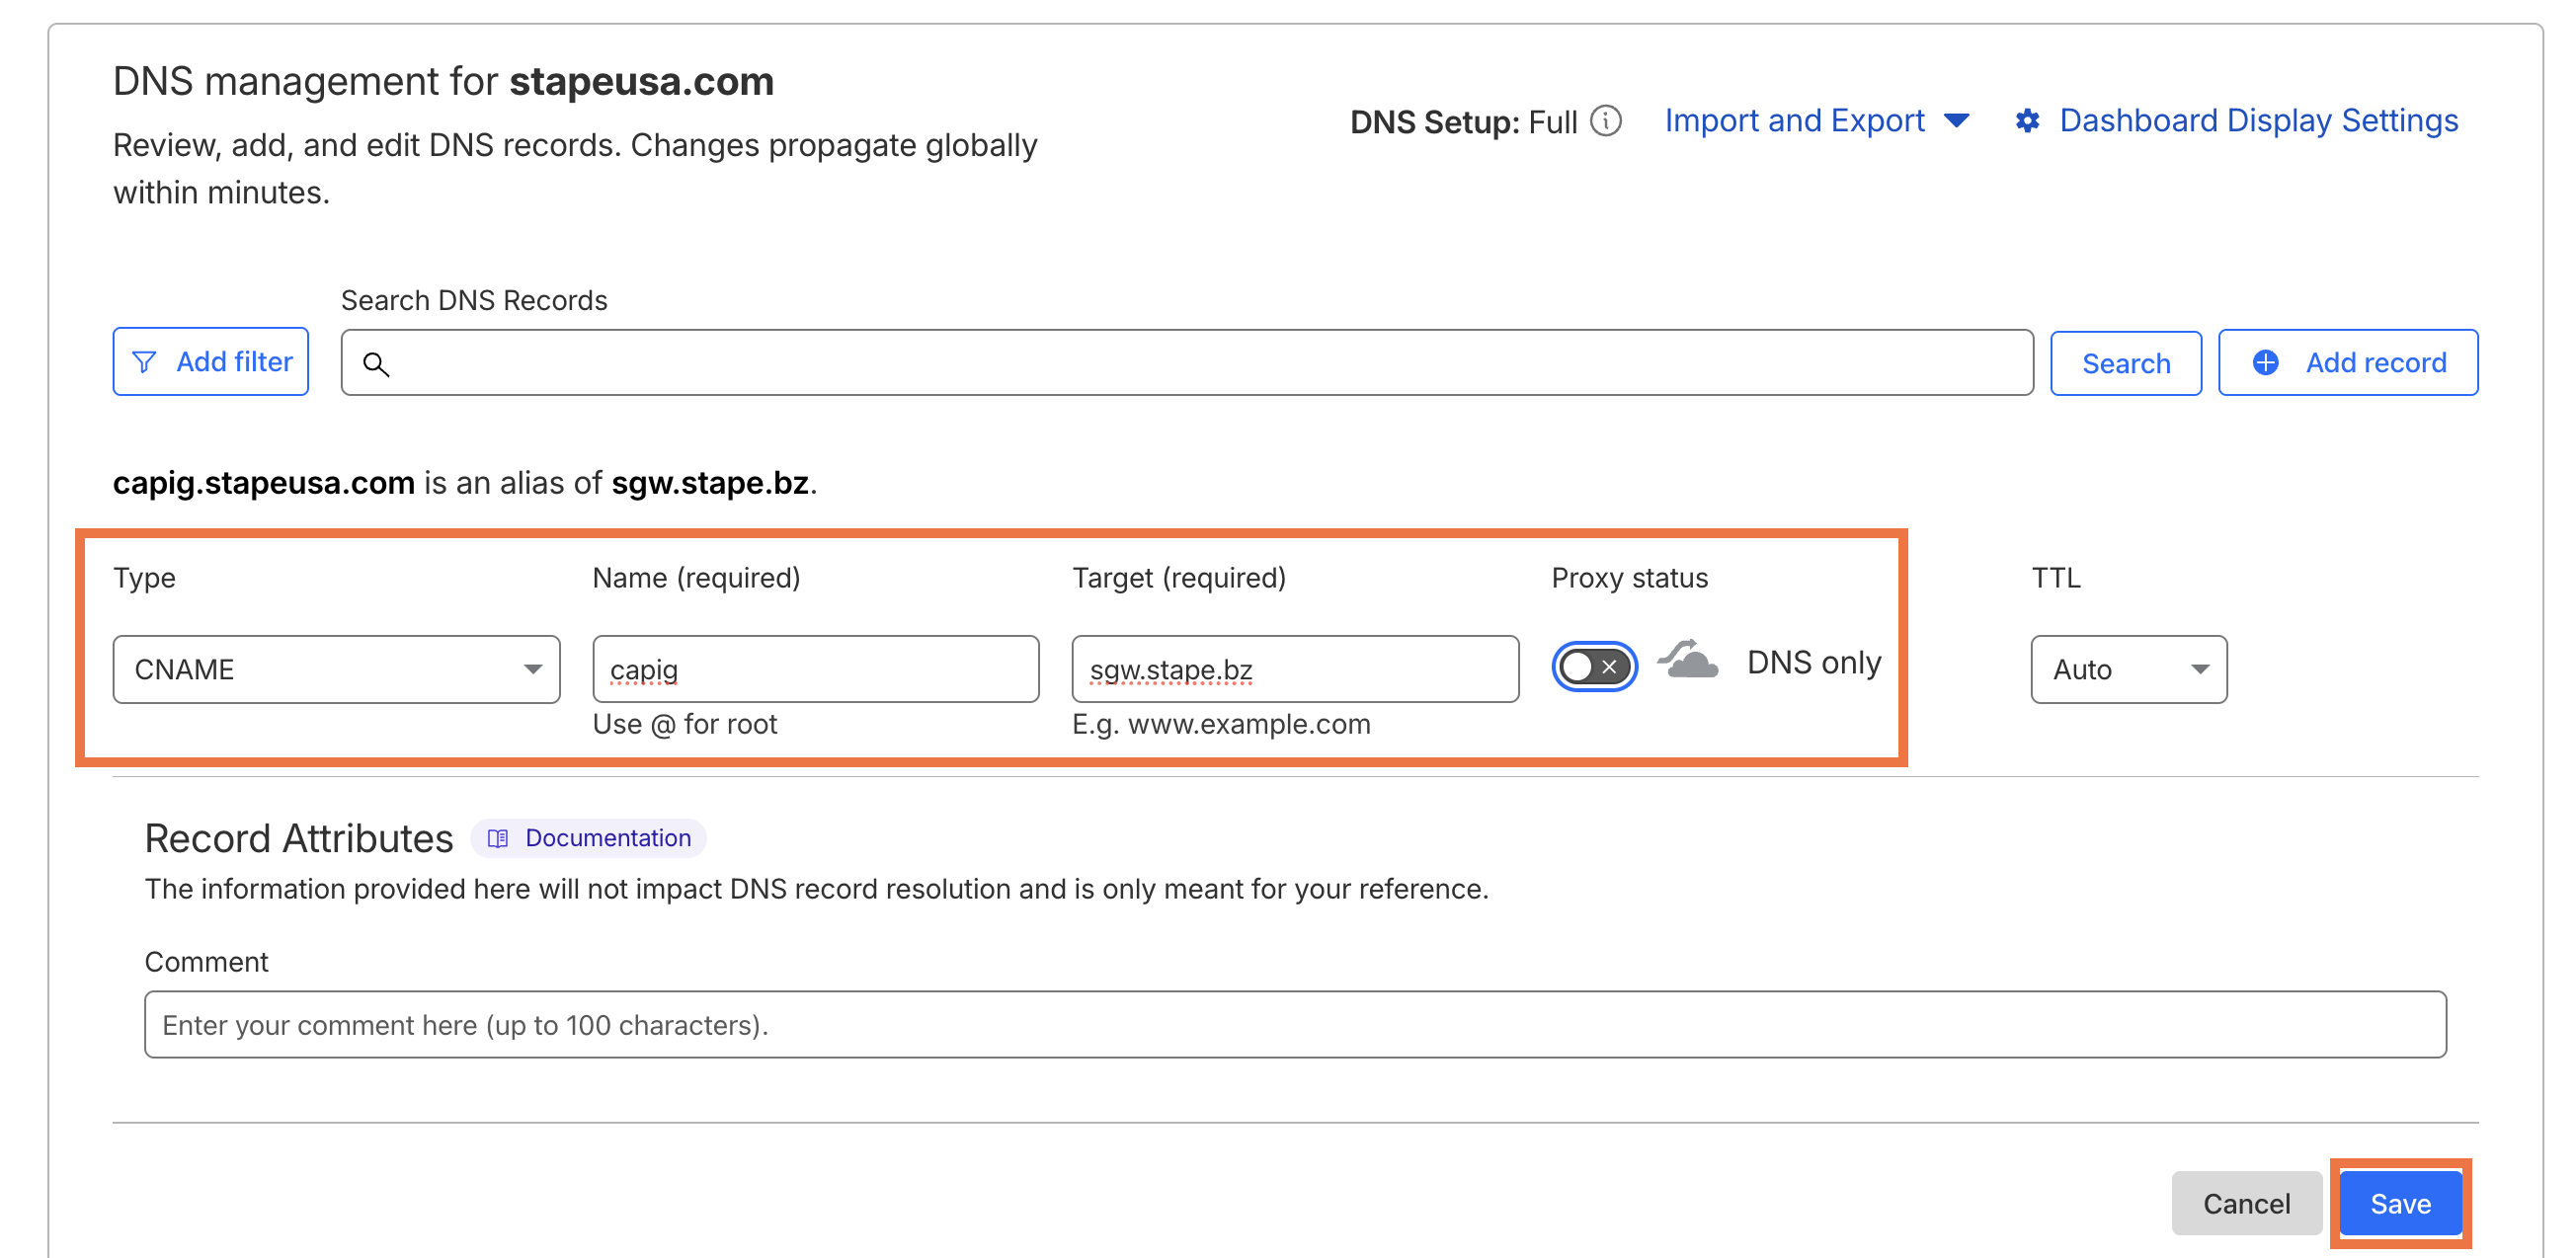
3. In your DNS provider (in our case Cloudflare), add a new record:
- Type -
CNAME - Name -
capig(or any subdomain of your choosing, e.g. events, metrics) - Target - the domain you copied in step 2
- Proxy status - off
Click Save.
4. Back in Signals Gateway, enter your subdomain and root domain, then click Continue.
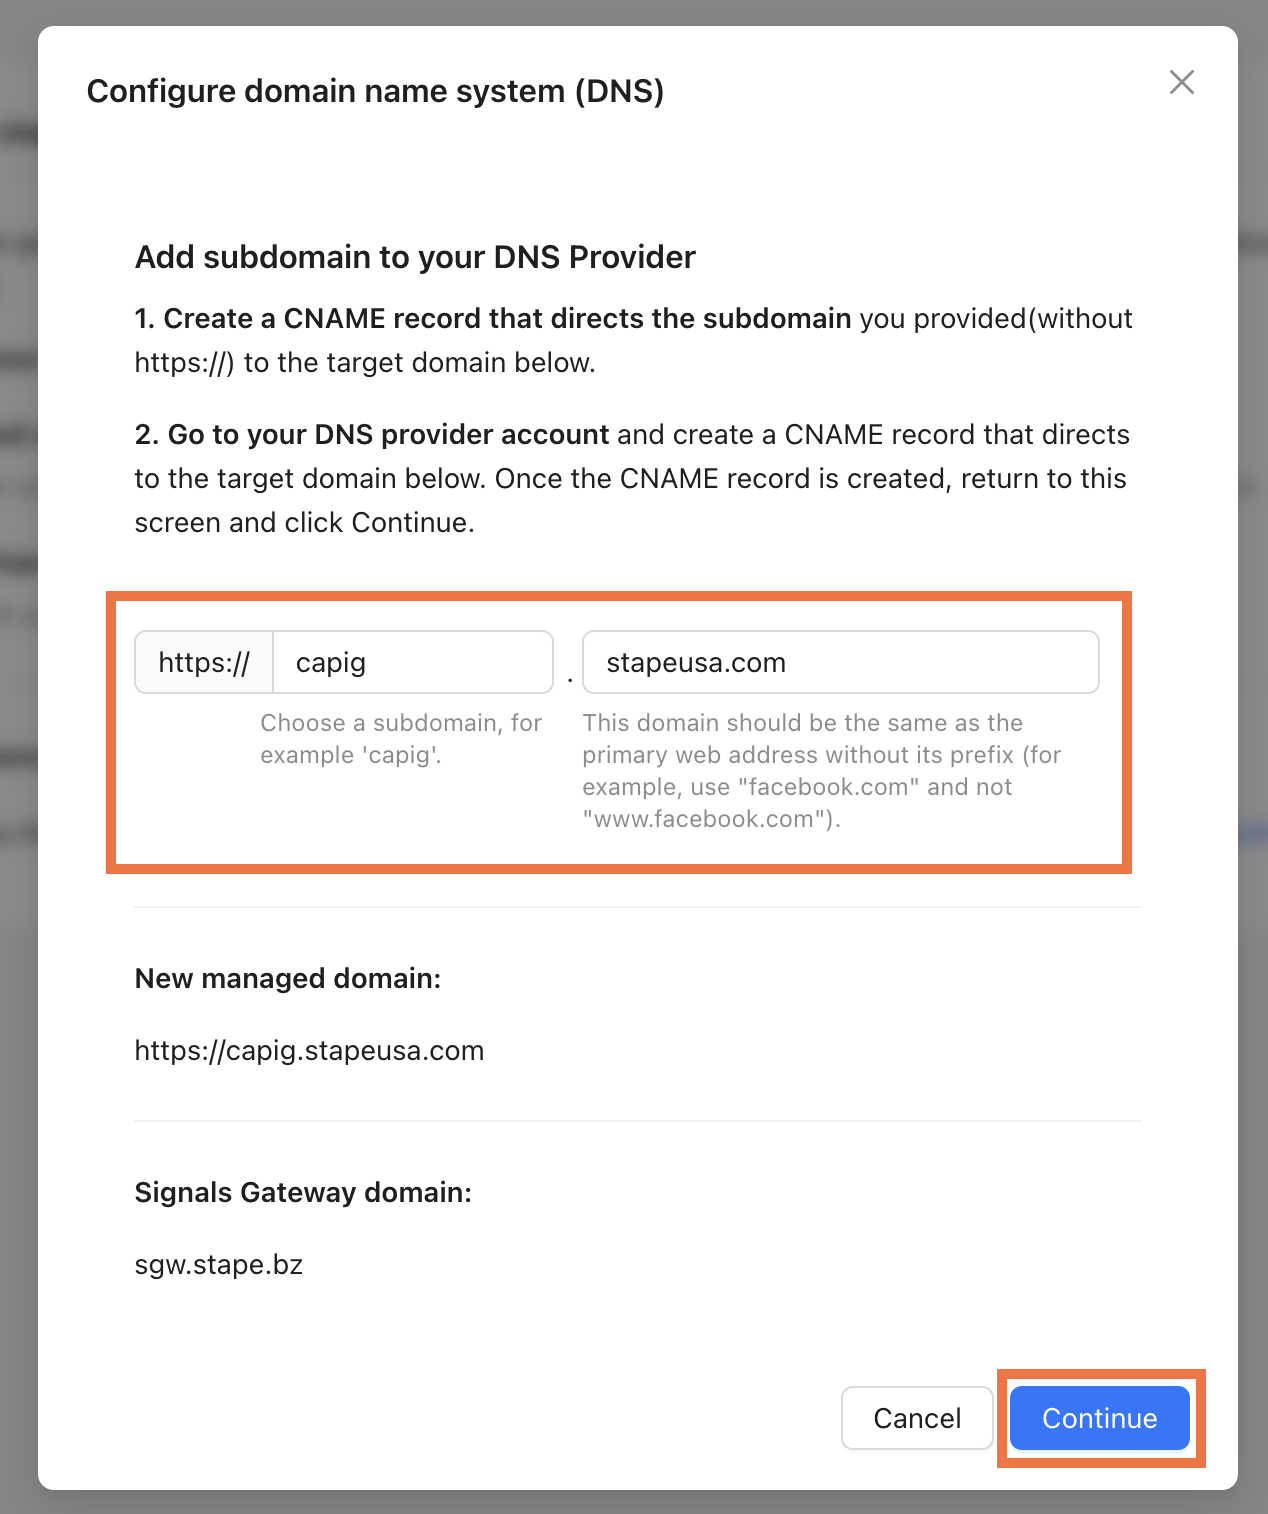
5. The subdomain will appear with a green Optimized indicator once DNS has propagated.
6. Your Signals Gateway Pixel is now reachable at your custom domain, but your GTM tag or site code still points to the old Stape host. Go to your Pixel → Setup guide tab. The snippet and values shown there will already reflect your custom domain. Use them to update whichever installation method you used:
6.1. For GTM template:
- In GTM, open your Signals Gateway Pixel tag and update Signals Gateway Pixel Host, Signals Gateway Pixel Script URL.
- Go to Templates → SignalsGateway Pixel → Permissions tab → Inject scripts and update the allowed URL pattern to match the new script URL. Save the template.
- Publish the GTM container.
6.2. For the Custom HTML method:
- Copy the complete updated snippet.
- Paste it in your GTM Custom HTML tag (or directly in your site's )
- Save and publish. If the snippet is hardcoded in your site template, clear your page cache after saving.
Optional configuration
Edit or add data sources
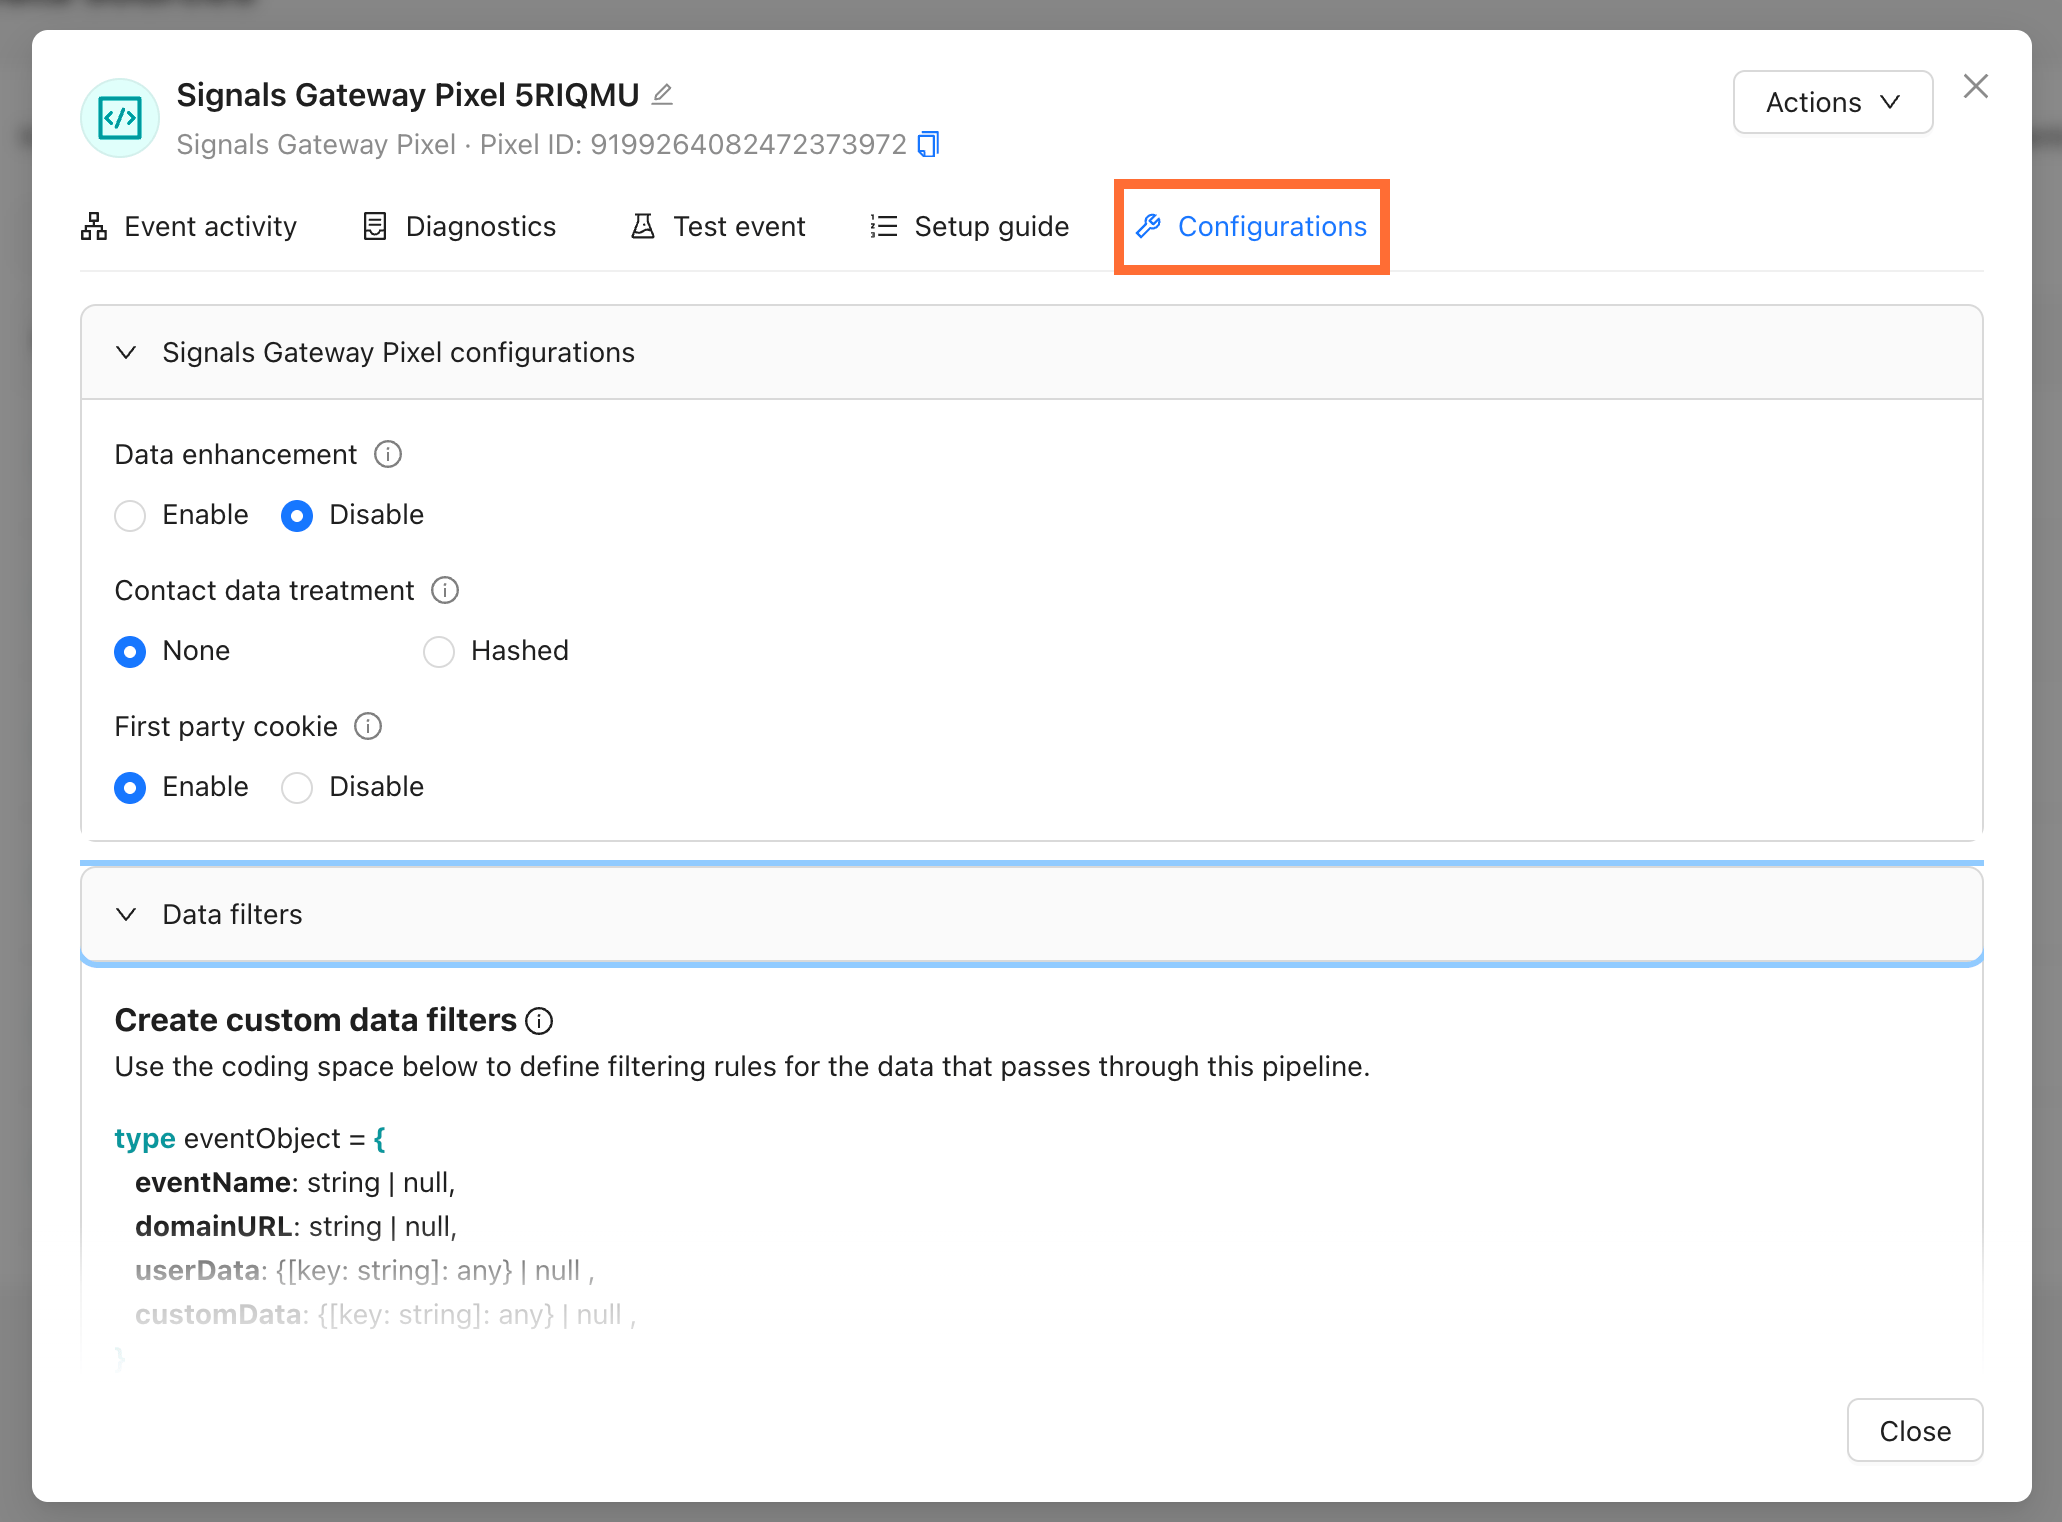
Click an existing Data source and go to the Configuration tab to change its settings, such as:
- Data enhancement - allow to send advanced matching data with your events
- Contact data treatment - you can choose to hash contact data upon collection using the SHA-256 format. Data that is hashed can’t be reverted to its original form and can’t be used by some data destinations or for audience creation.
- First-party cookie - enabling the use of first-party cookies events can help improve matching.
Also, you can tweak Data Filter to set how incoming data is processed before being forwarded to destinations.
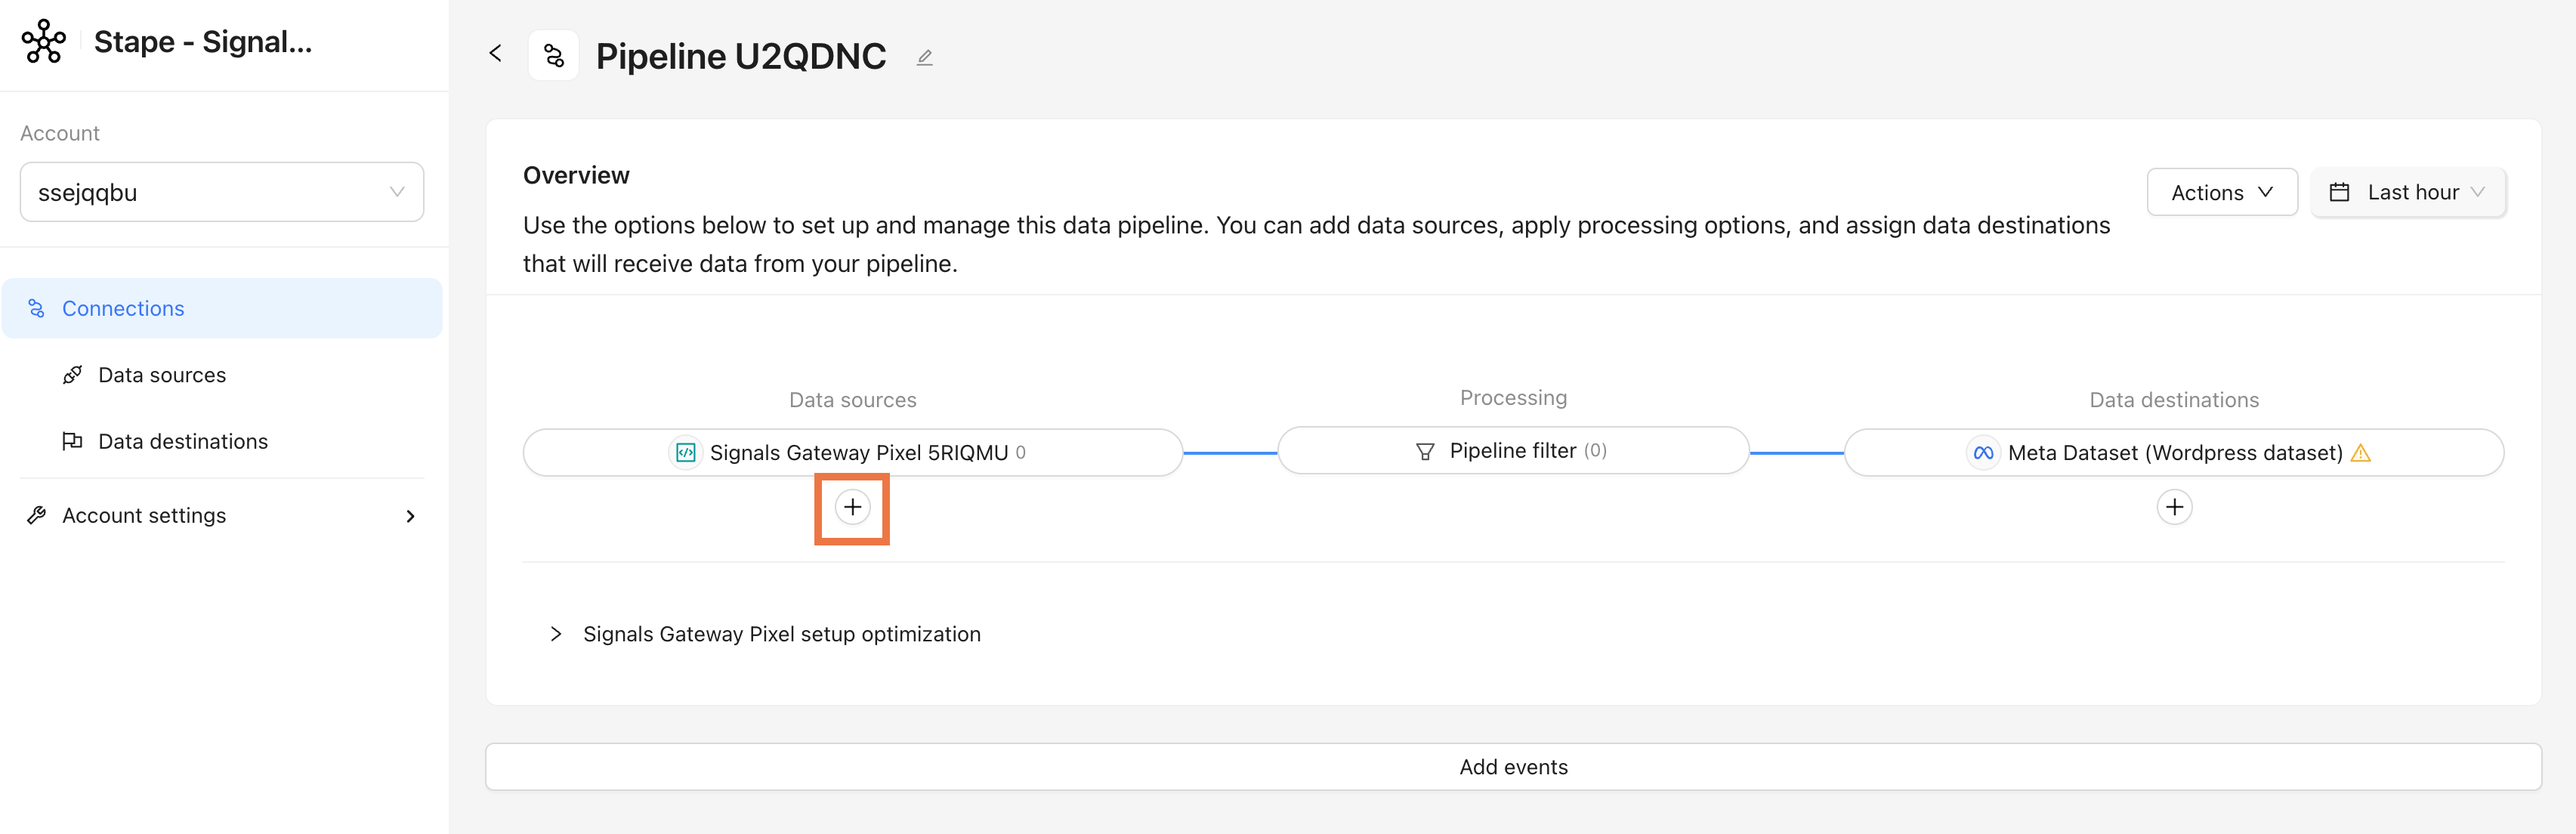
Click + under Data sources to add a file-based source, either automatically via scheduled upload or manually. For detailed instructions read the Add offline events to Signals Gateway article.
Pipeline filter
Click on the Pipeline filter in the pipeline’s dashboard to block specific event types from reaching any destination on this pipeline. Useful for suppressing test events or PII-heavy events.

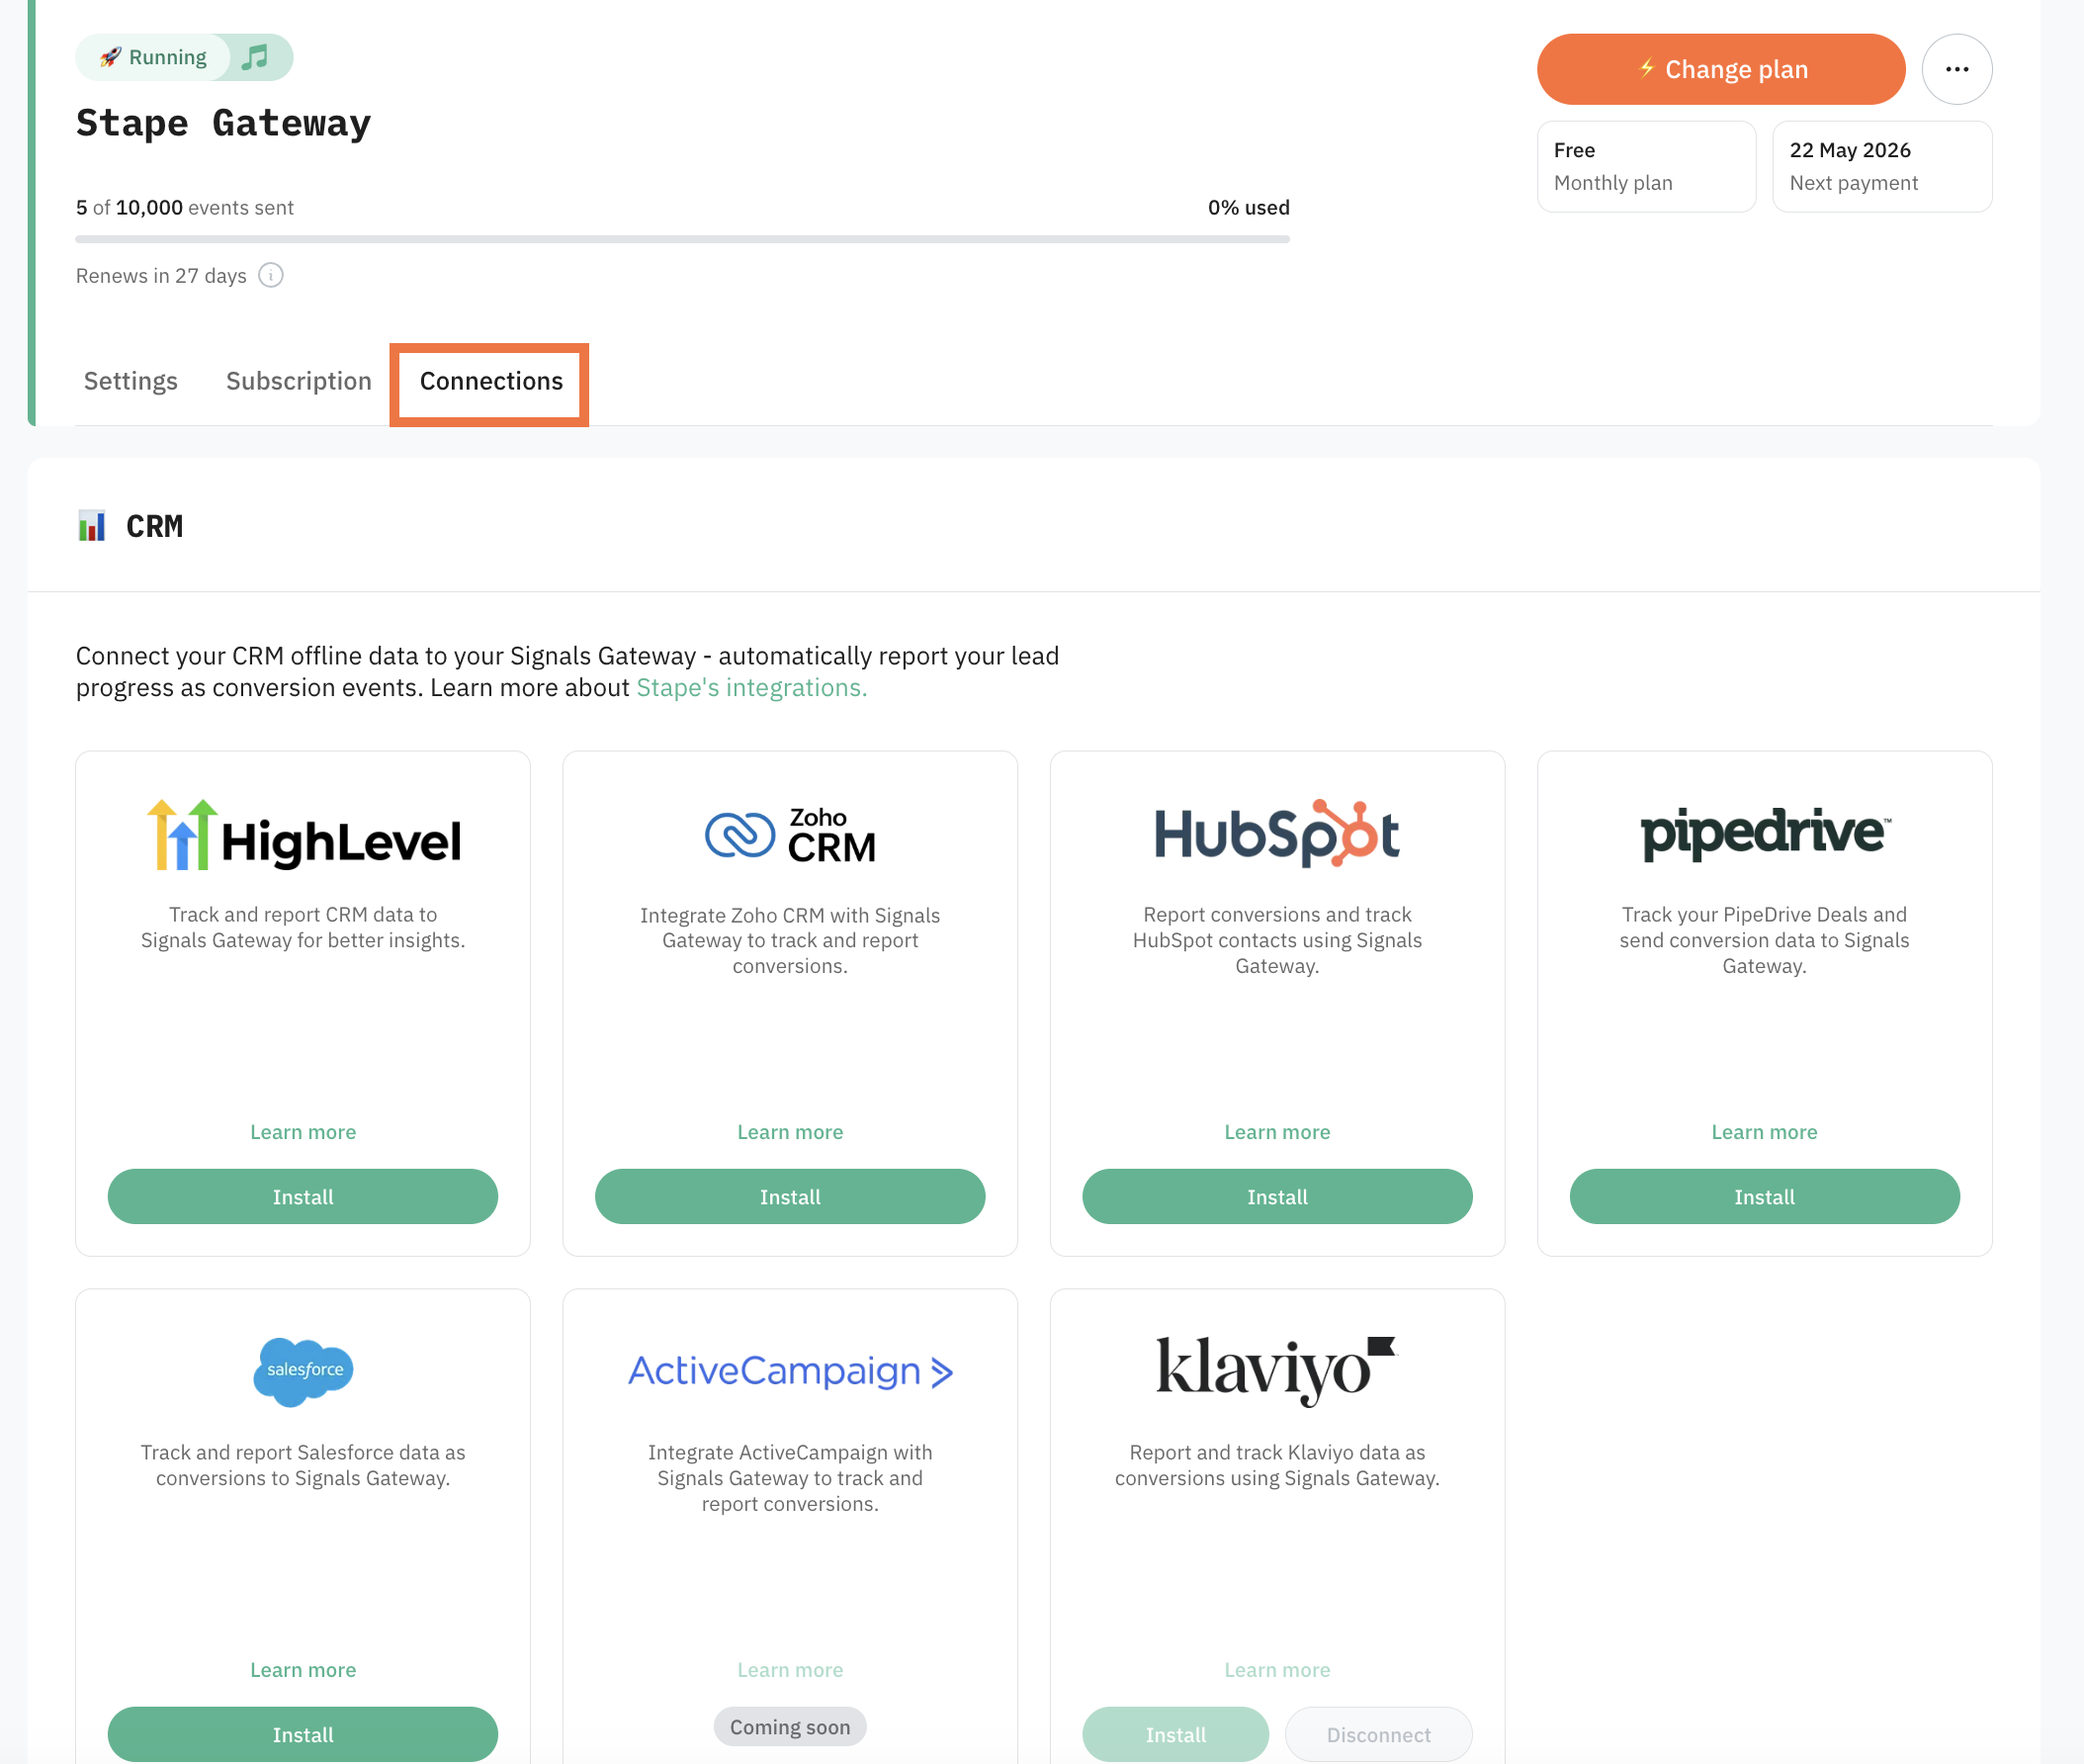
CRM integrations
Stape's CRM apps push your CRM pipeline stages into Meta as conversion events, without needing to route them through your website.
CRM integrations are configured from the Connections tab inside Signals Gateway. Read more in Stape's Conversion Tracking CRM Apps: use cases and benefits.
Testing
Check the following:
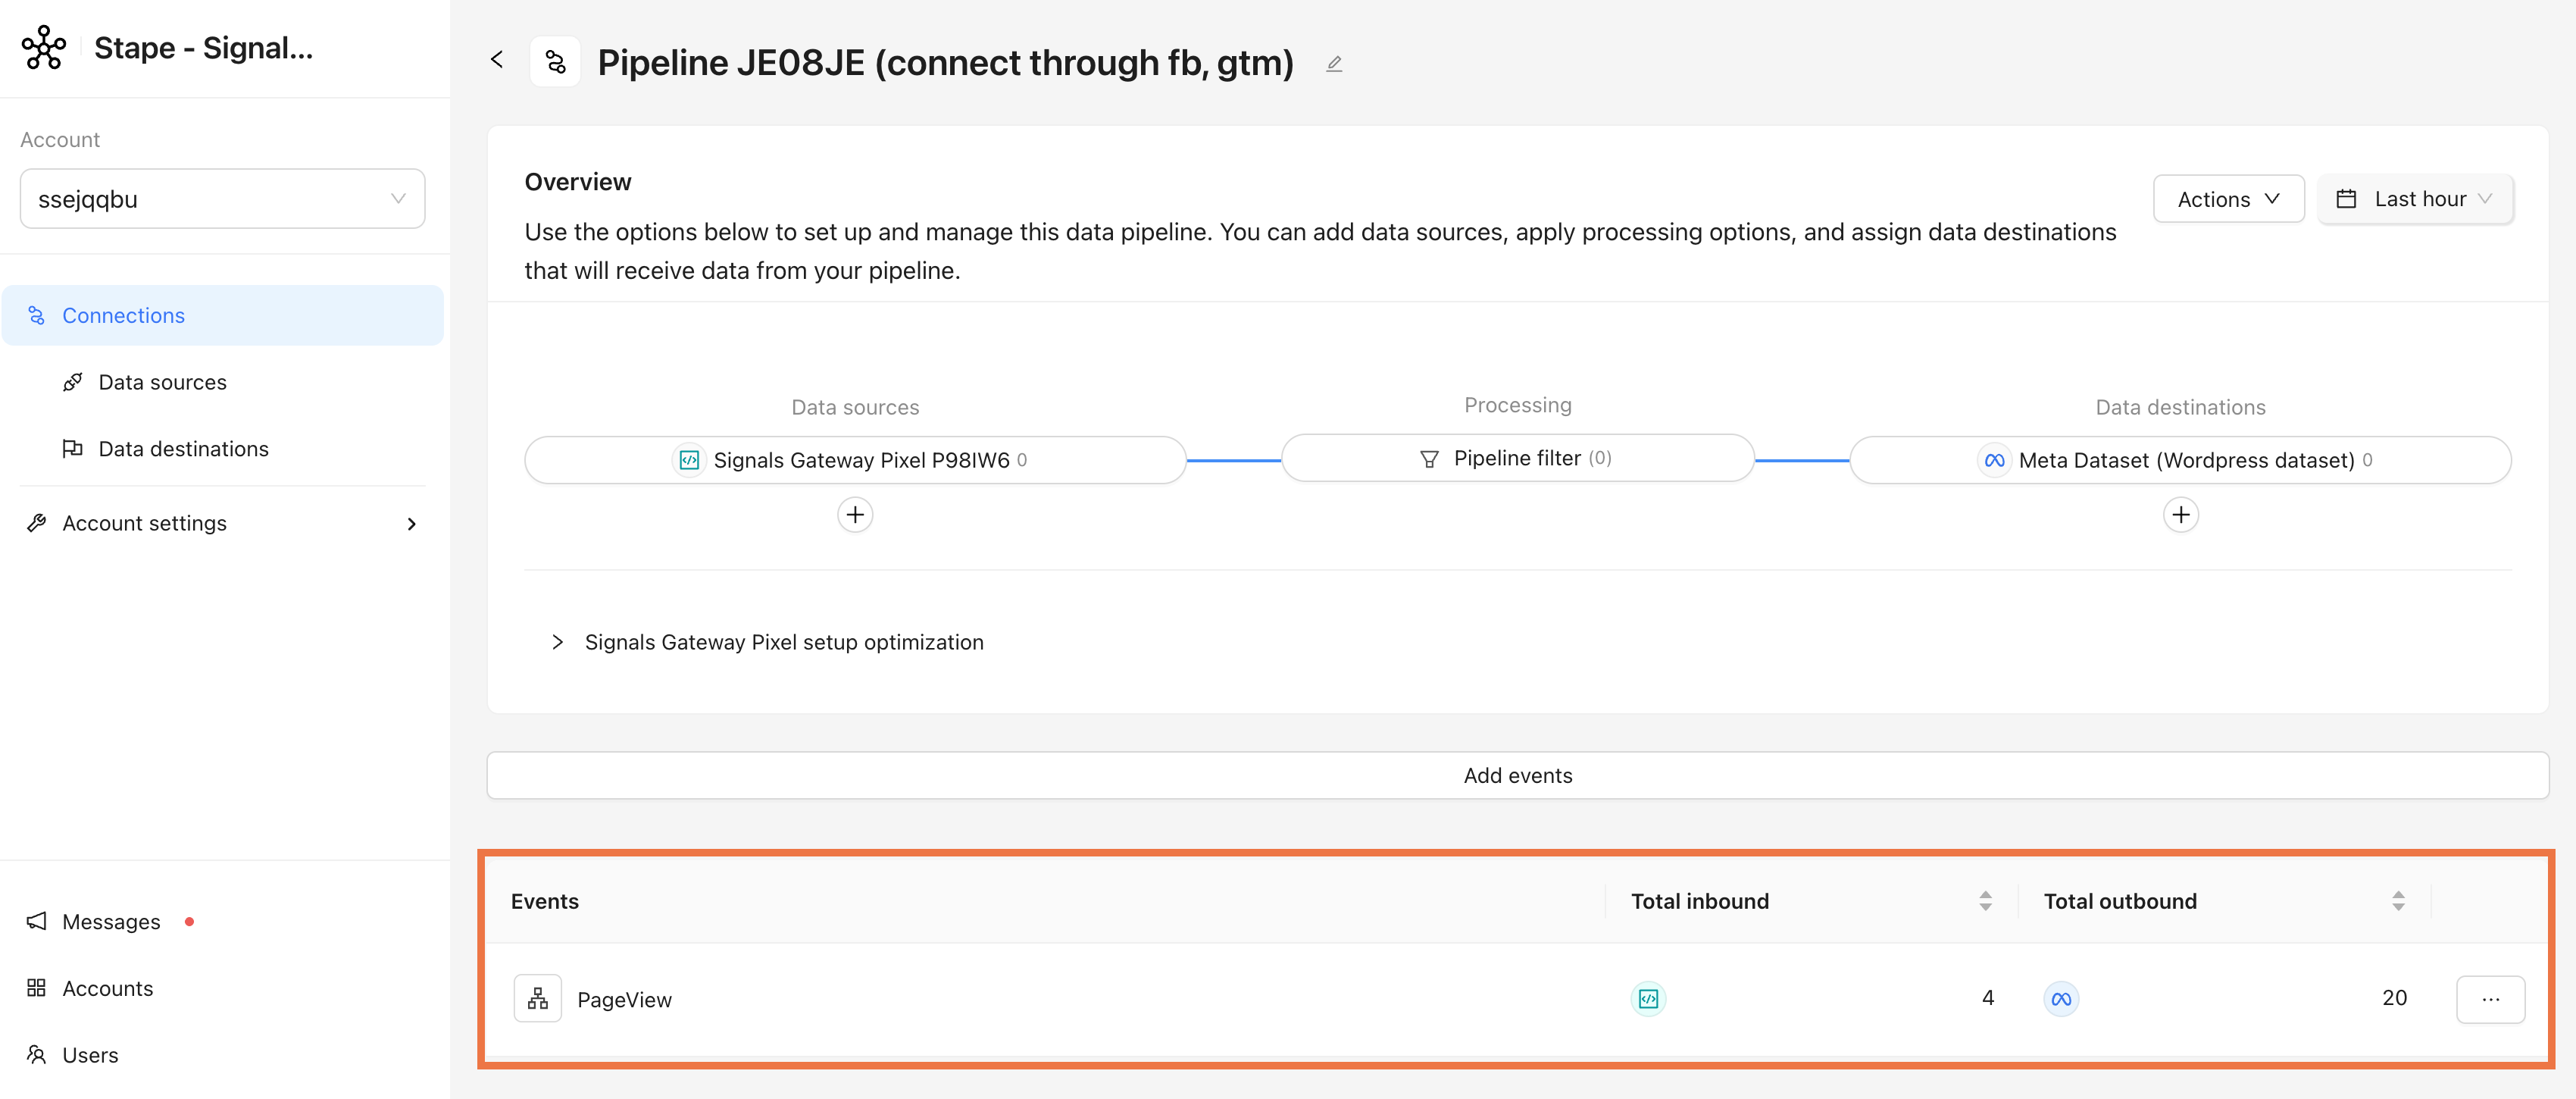
- Events in the Signals Gateway. Open your pipeline's dashboard, the event counter in Data sources should start moving within a few minutes of live traffic.
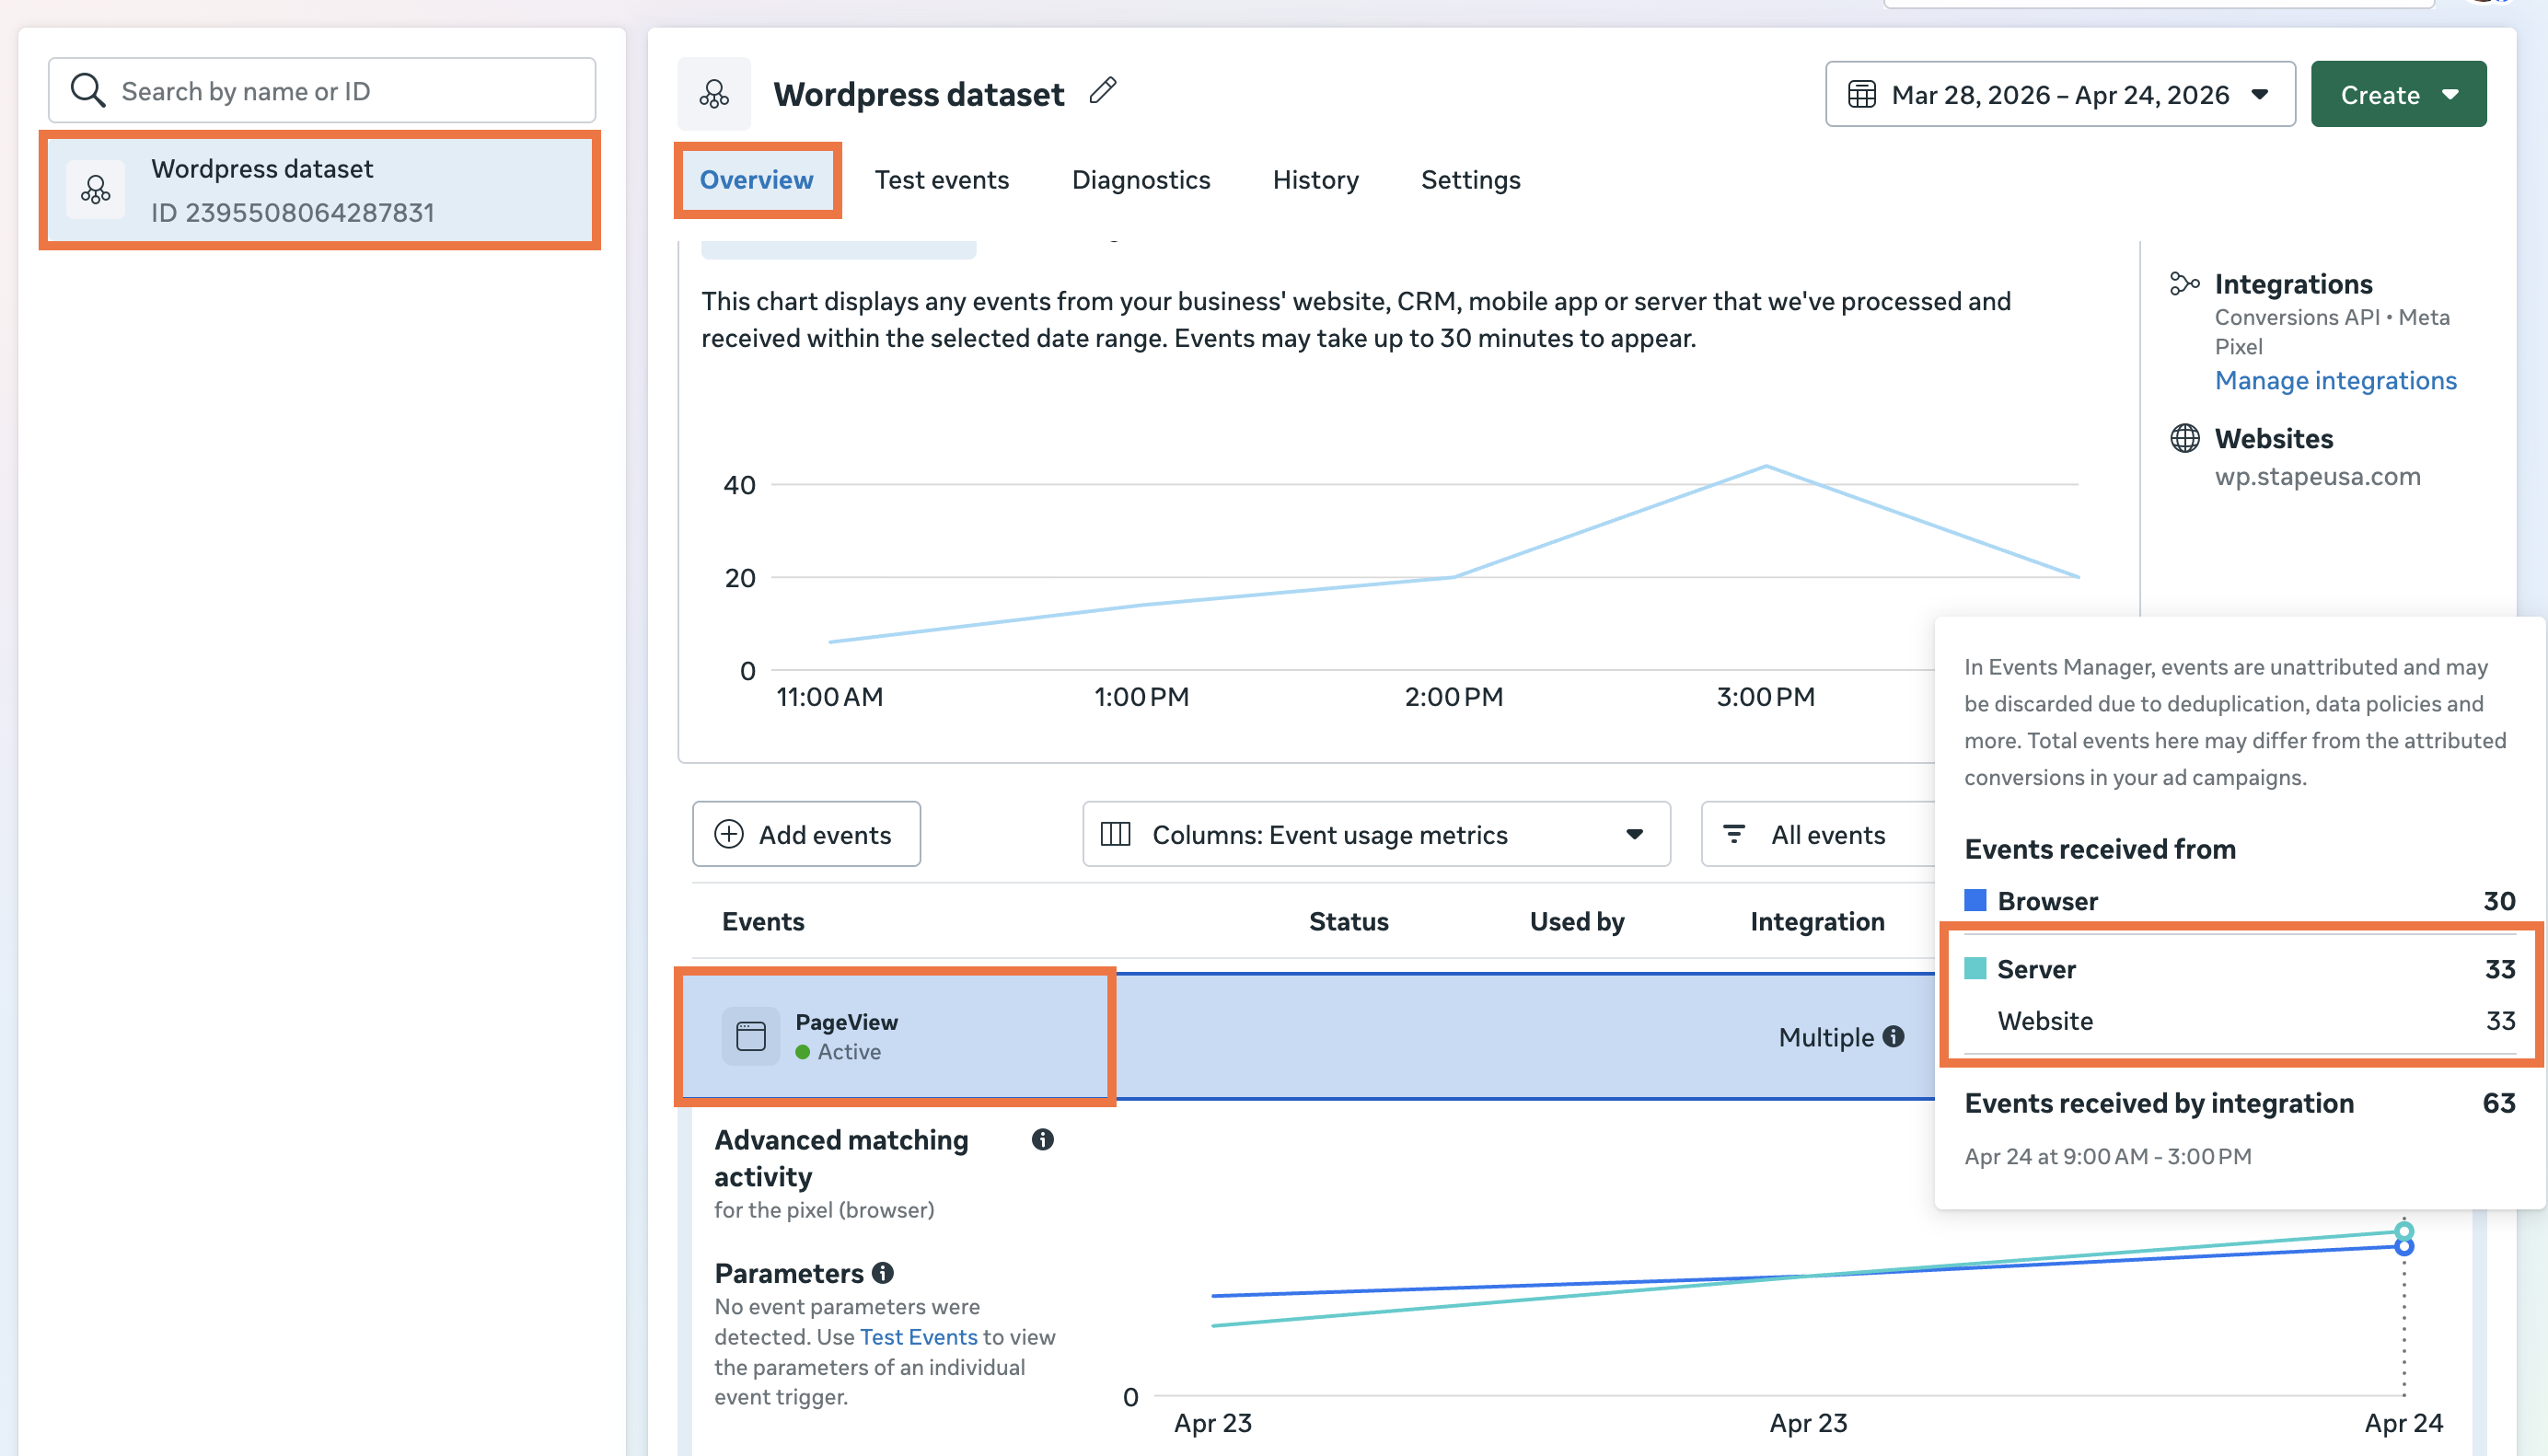
- Events in Meta Events Manager. Open the connected dataset → Overview. You should see events arriving with the server parameter populated.
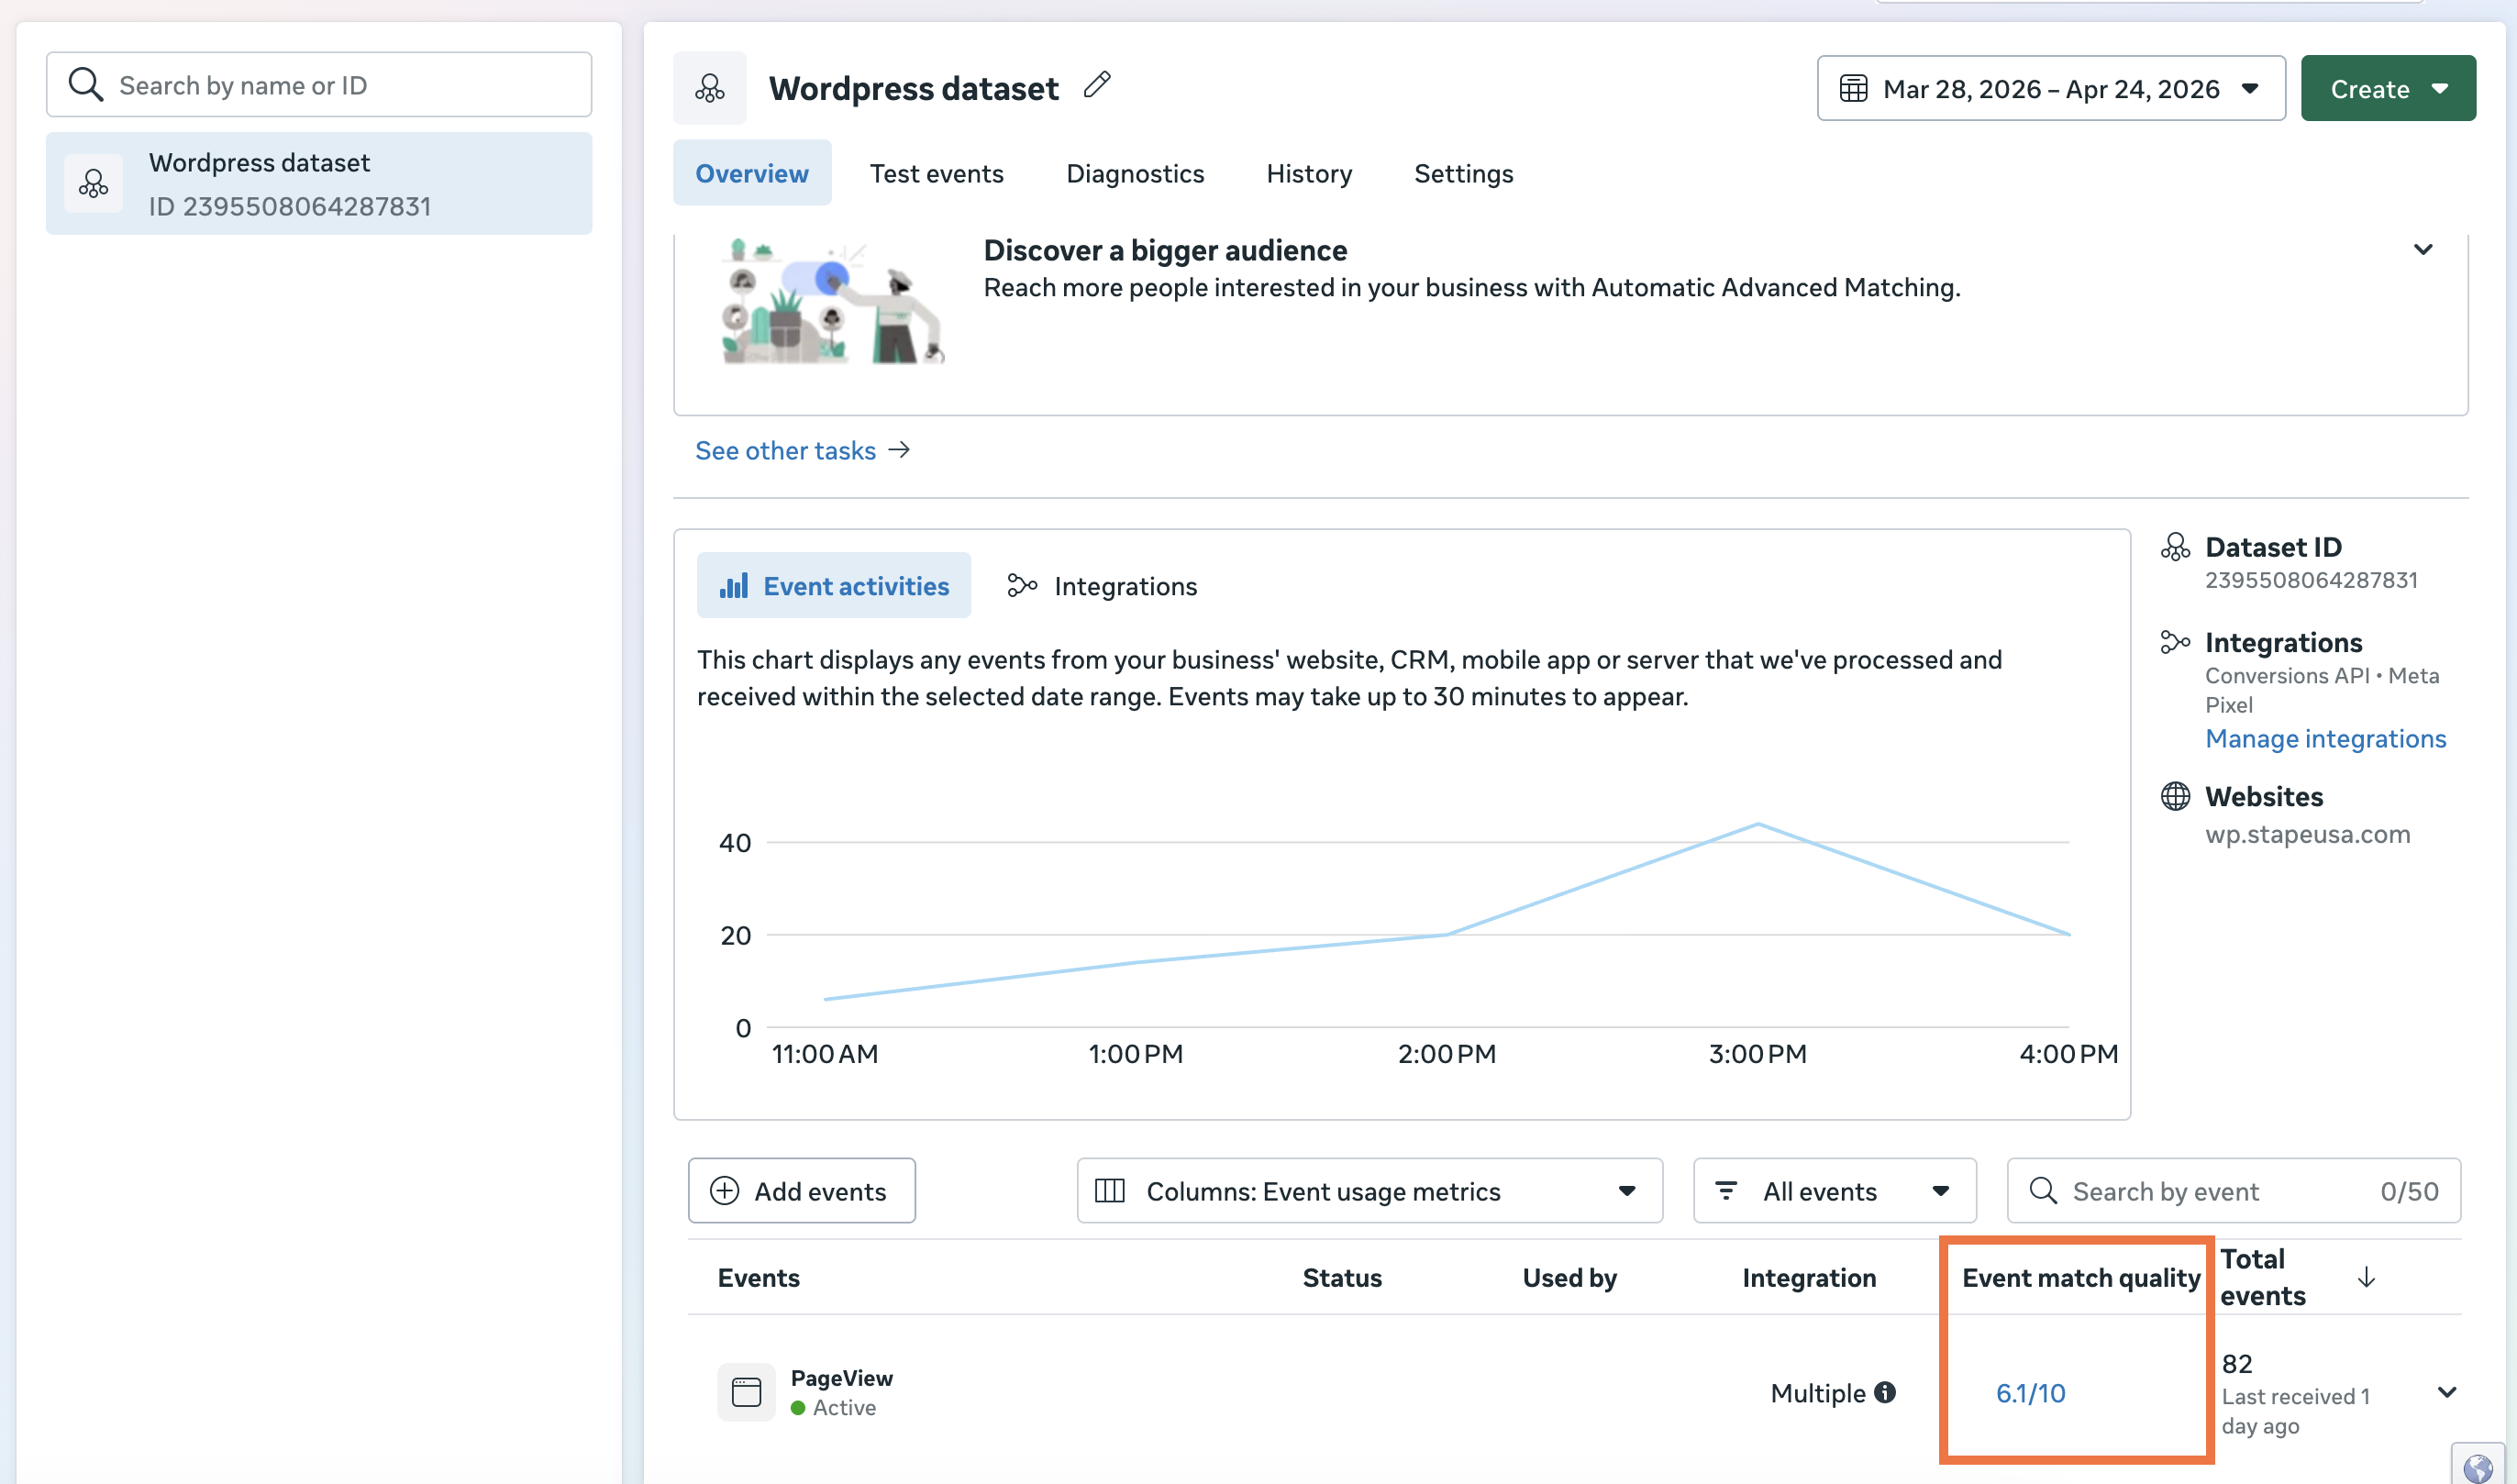
- Event Match Quality. In the Events Manager, check EMQ for each key event. Expect ≥ 6.0 once advanced matching data is flowing. If the score is <6.0, read Facebook Event Match Quality – what it is and how to increase it.
Conclusion
Signals Gateway offers a simple solution for establishing server-side tracking. Say goodbye to the hassle and expense of complicated configurations. With Signals Gateway, you can have it up and running, even if you’re not tech-savvy. Ready to give it a try? Start with a free plan today!
Would like to try Signals Gateway?
Start with a Free plan! Click on Try for free to register on Stape and create Signals Gateway.

Comments