Meta CAPI for a custom website via server GTM
Ivanna Holubovska
AuthorStep 1. Configure server Google Tag Manager container.
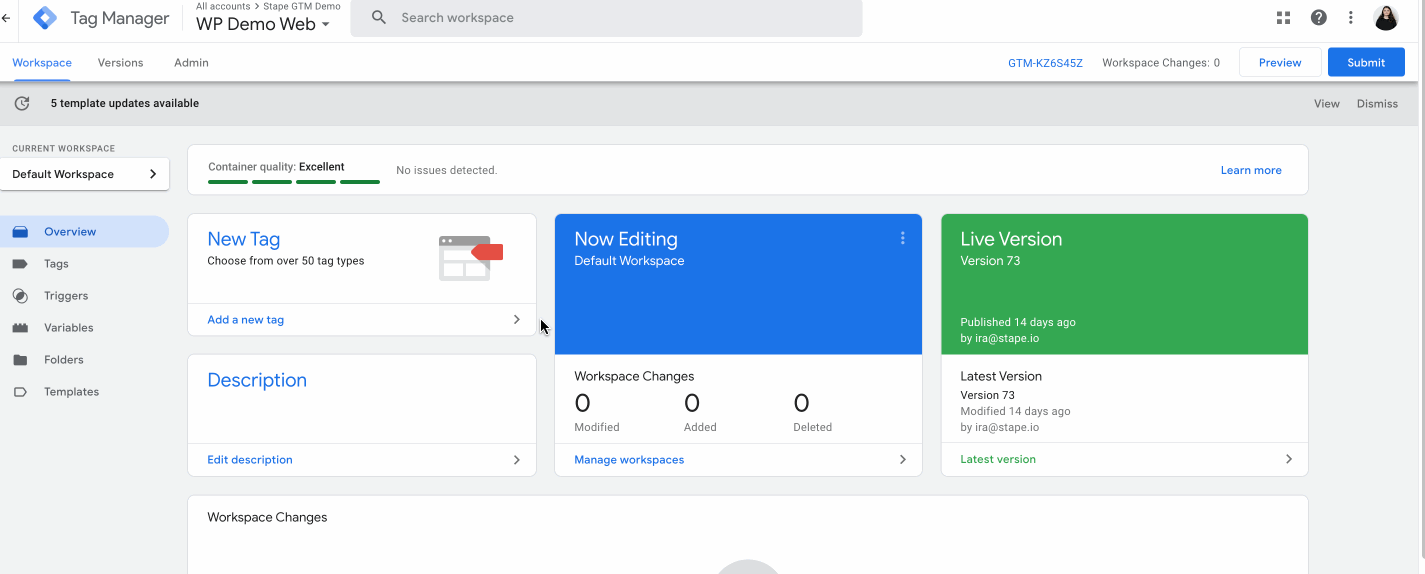
1.1. Go to your WEB Google Tag Manager container.
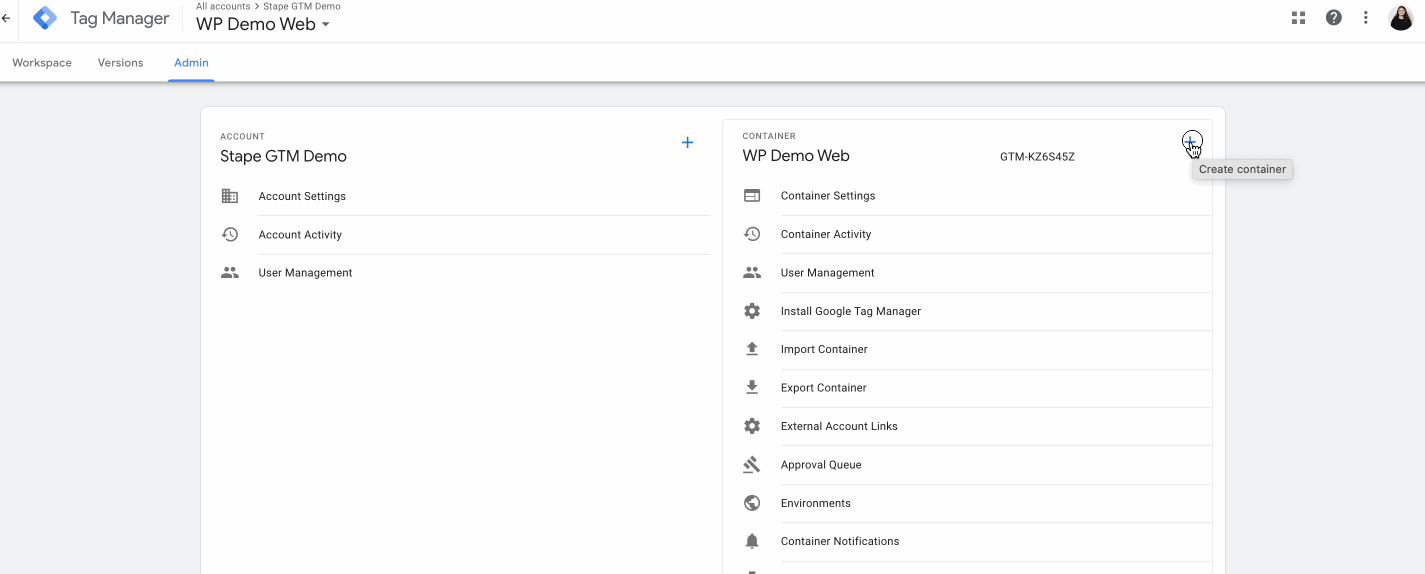
Select Admin, then in the container column, choose +.
1.2. Type the container name, choose Server, and click Create.
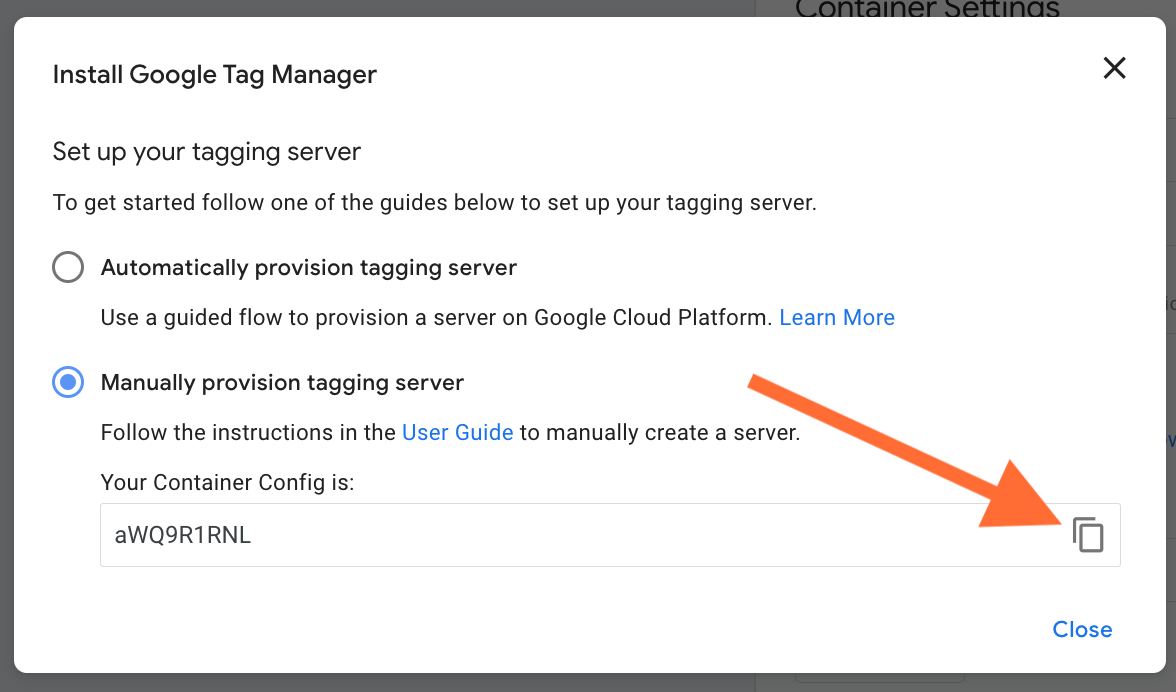
1.3. Select Manually provision tagging server, then copy your container configuration and paste it into any text editor. You’ll need this information for the upcoming steps.
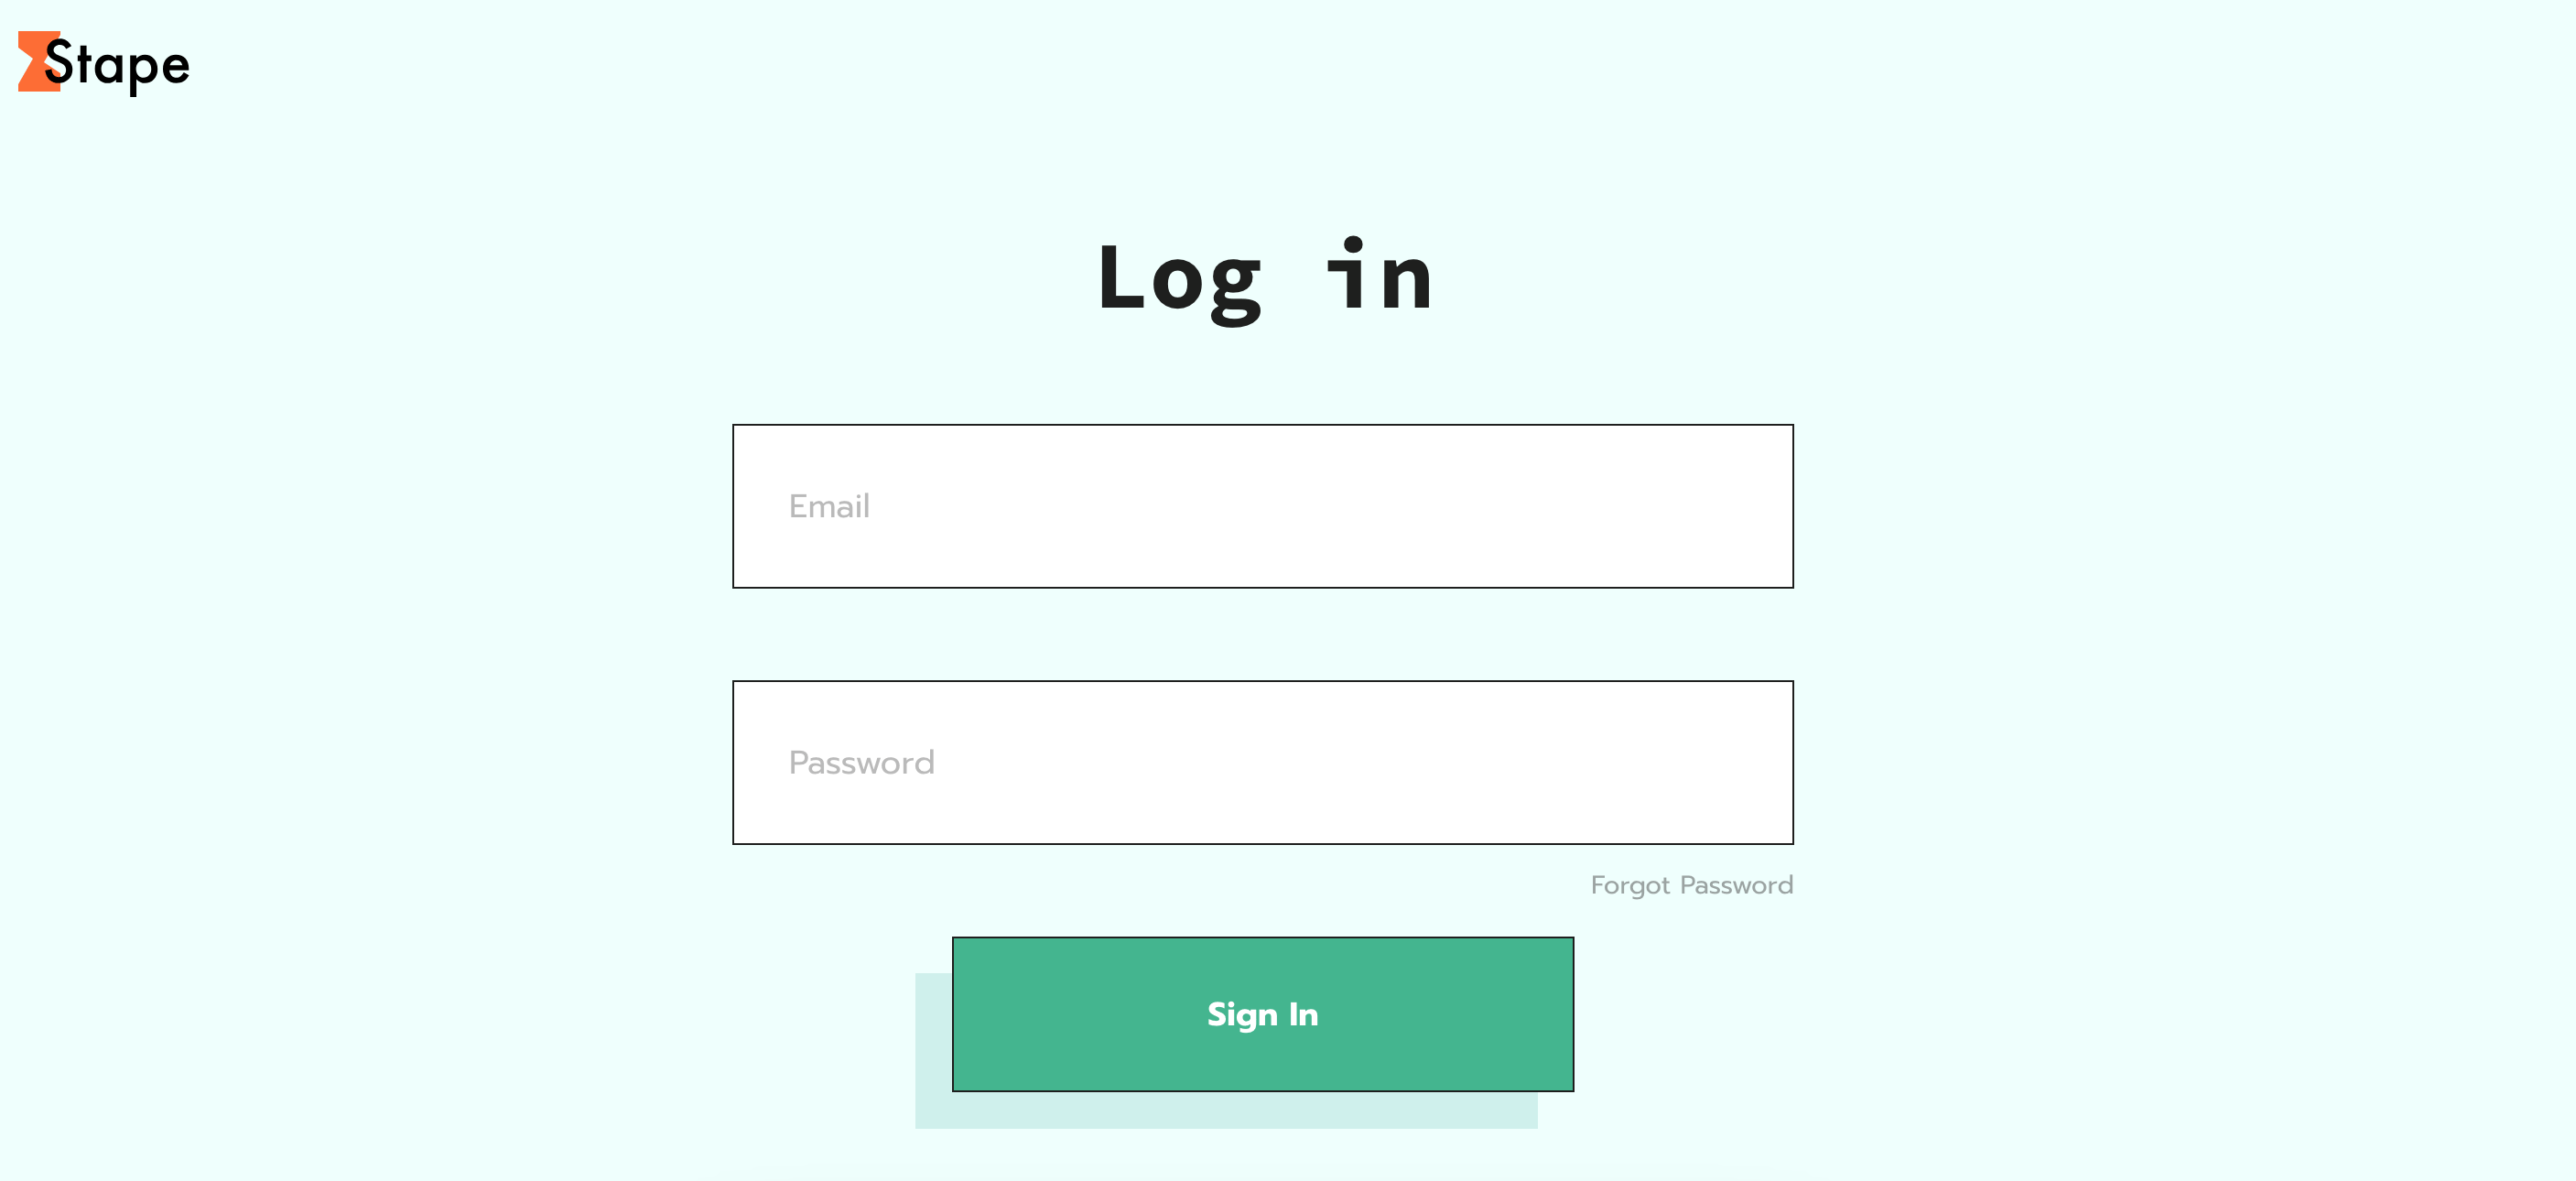
1.4. Create a Stape account or sign in to your existing account.
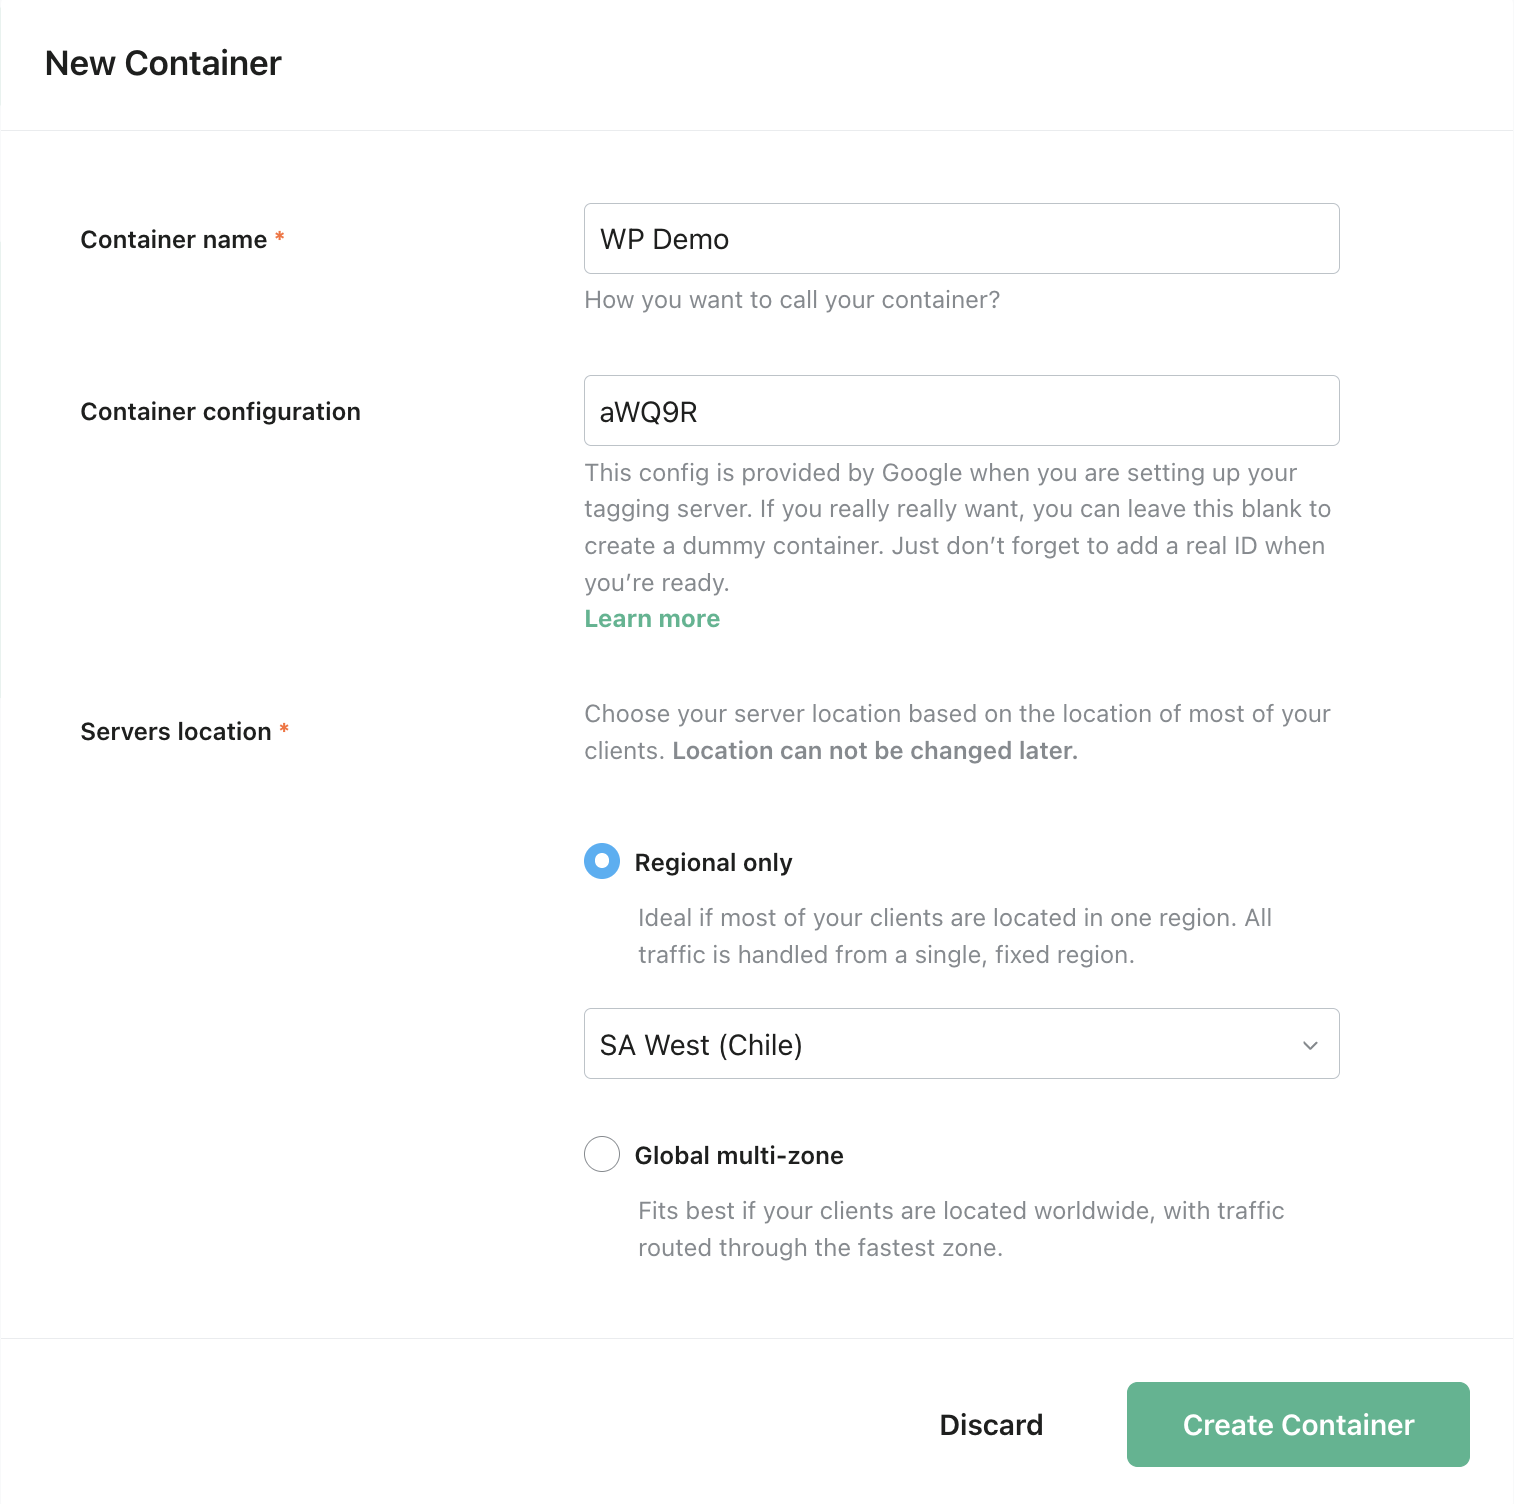
1.5. In the Stape admin dashboard, click Create container in the upper-right corner.

1.6. Fill in your container details:
- Container name. The name doesn’t have to match the container name used in your server GTM.
- Container configuration. Paste the Container Config you copied from your Google Tag Manager Server Container.
- Server location. For best performance, choose the server location that’s closest to where most of your clients are. See the list of available server locations here. If you have traffic from different regions, you can select the Global multi-zone server location option. It will automatically route incoming requests to the nearest available zone based on the user’s IP address.
Then click Create Container.
1.7. Select a plan for your container. You may begin with the Free plan.

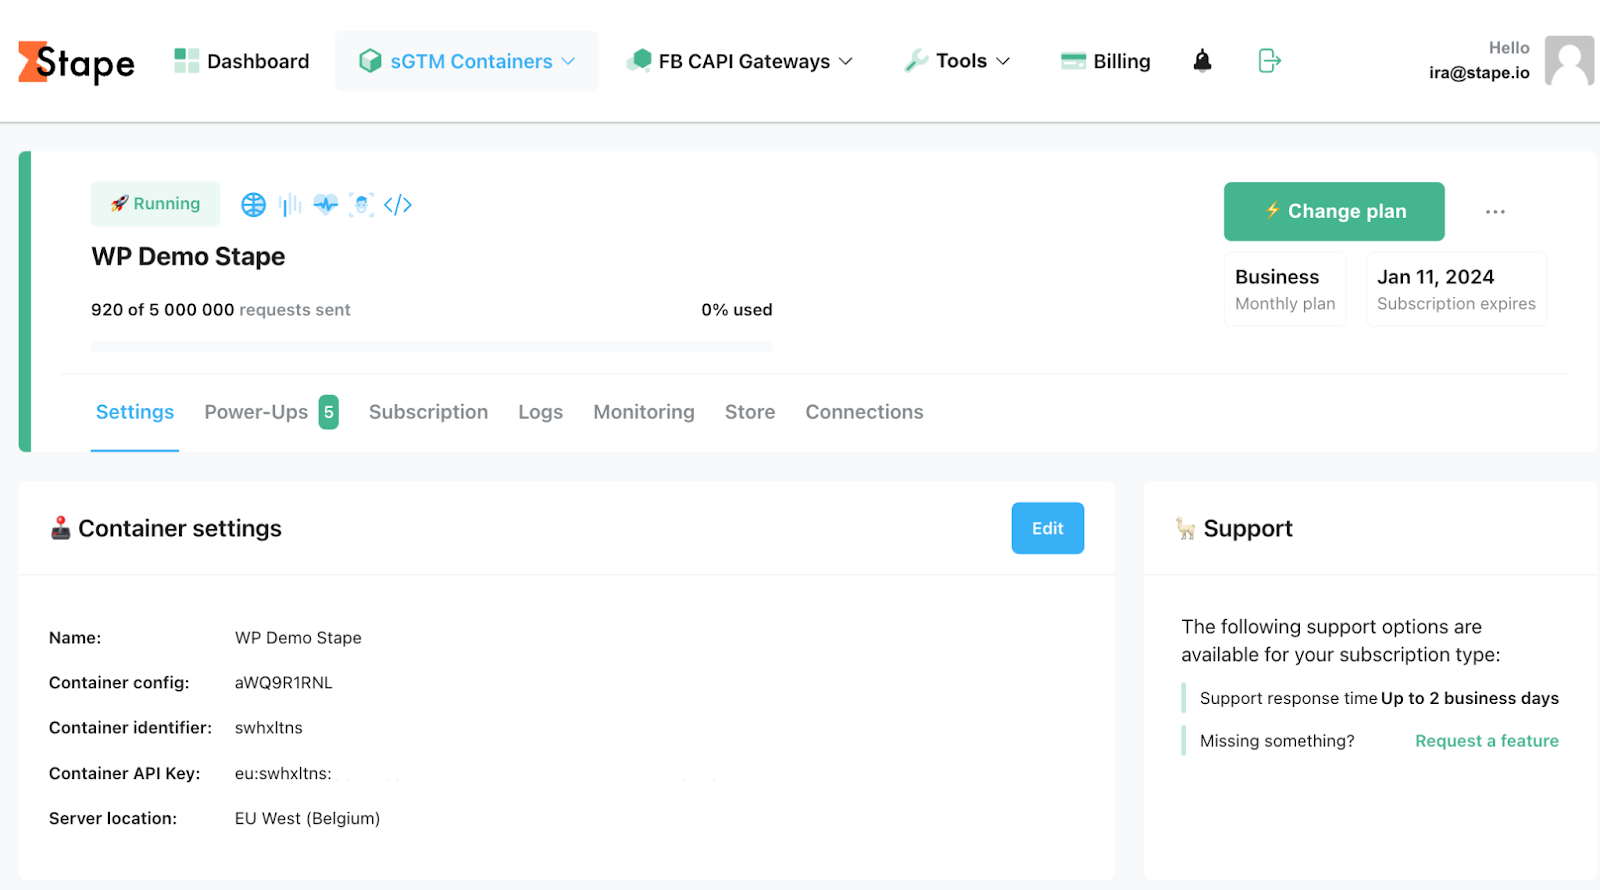
1.8. You will be able to view your container’s status, configuration details, and the chosen plan name.
Deployment of a server container typically takes about 5 minutes. To refresh the status, reload the page. If the Google Tag Manager server-side setup is completed successfully, the status will show as Running.
Step 2. Configure Custom Loader in the Stape admin panel.
| The Custom Loader changes the loading paths of gtag.js and gtm.js to help bypass ad blockers and ITPs, which can boost your data volume by as much as 40%. |
2.1. Locate and copy your Web GTM ID from Google Tag Manager.
To find it, log into your Google Tag Manager account and open your Web GTM container. In the top right corner, near the Submit and Preview buttons, you will see a short identifier beginning with GTM- followed by a series of letters and numbers.

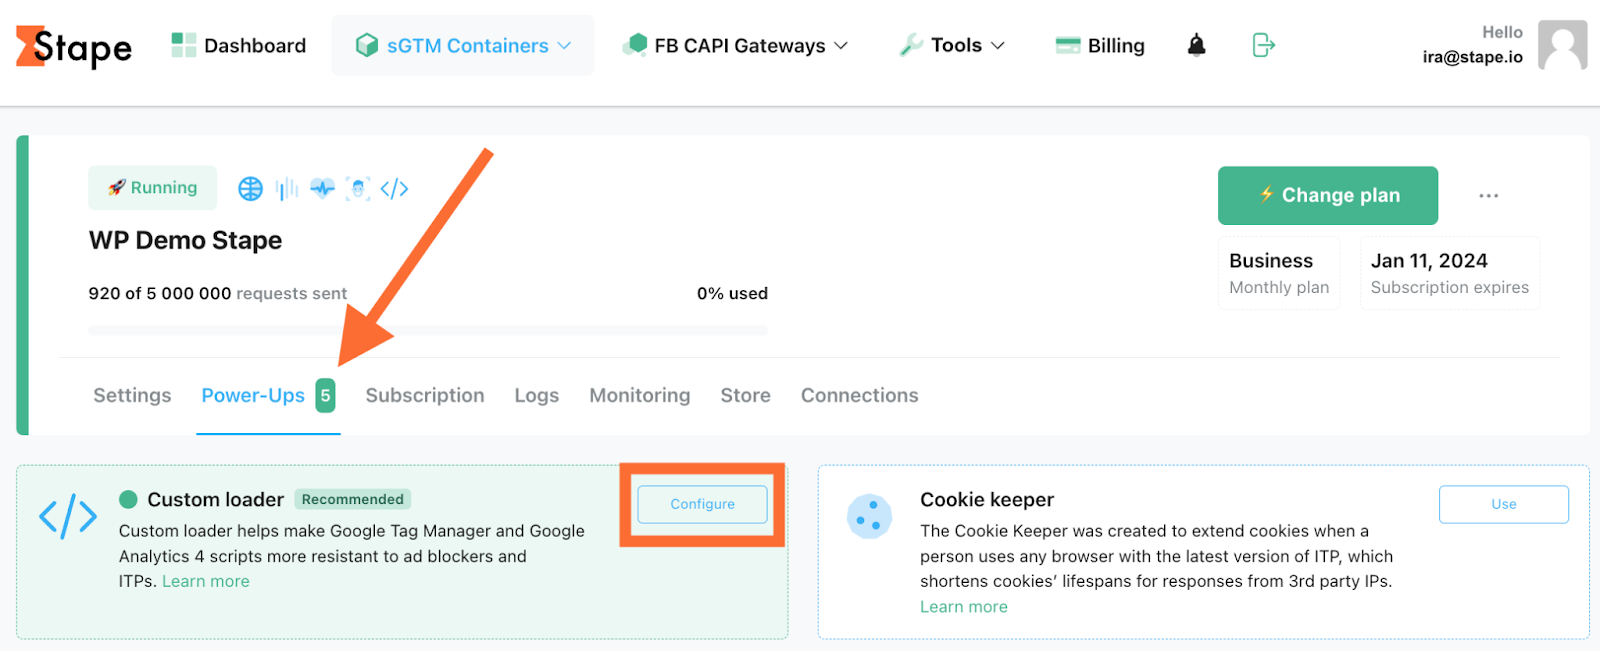
2.2. Open your sGTM container in Stape, then select Power-Ups.
Find Custom Loader and click Configure.
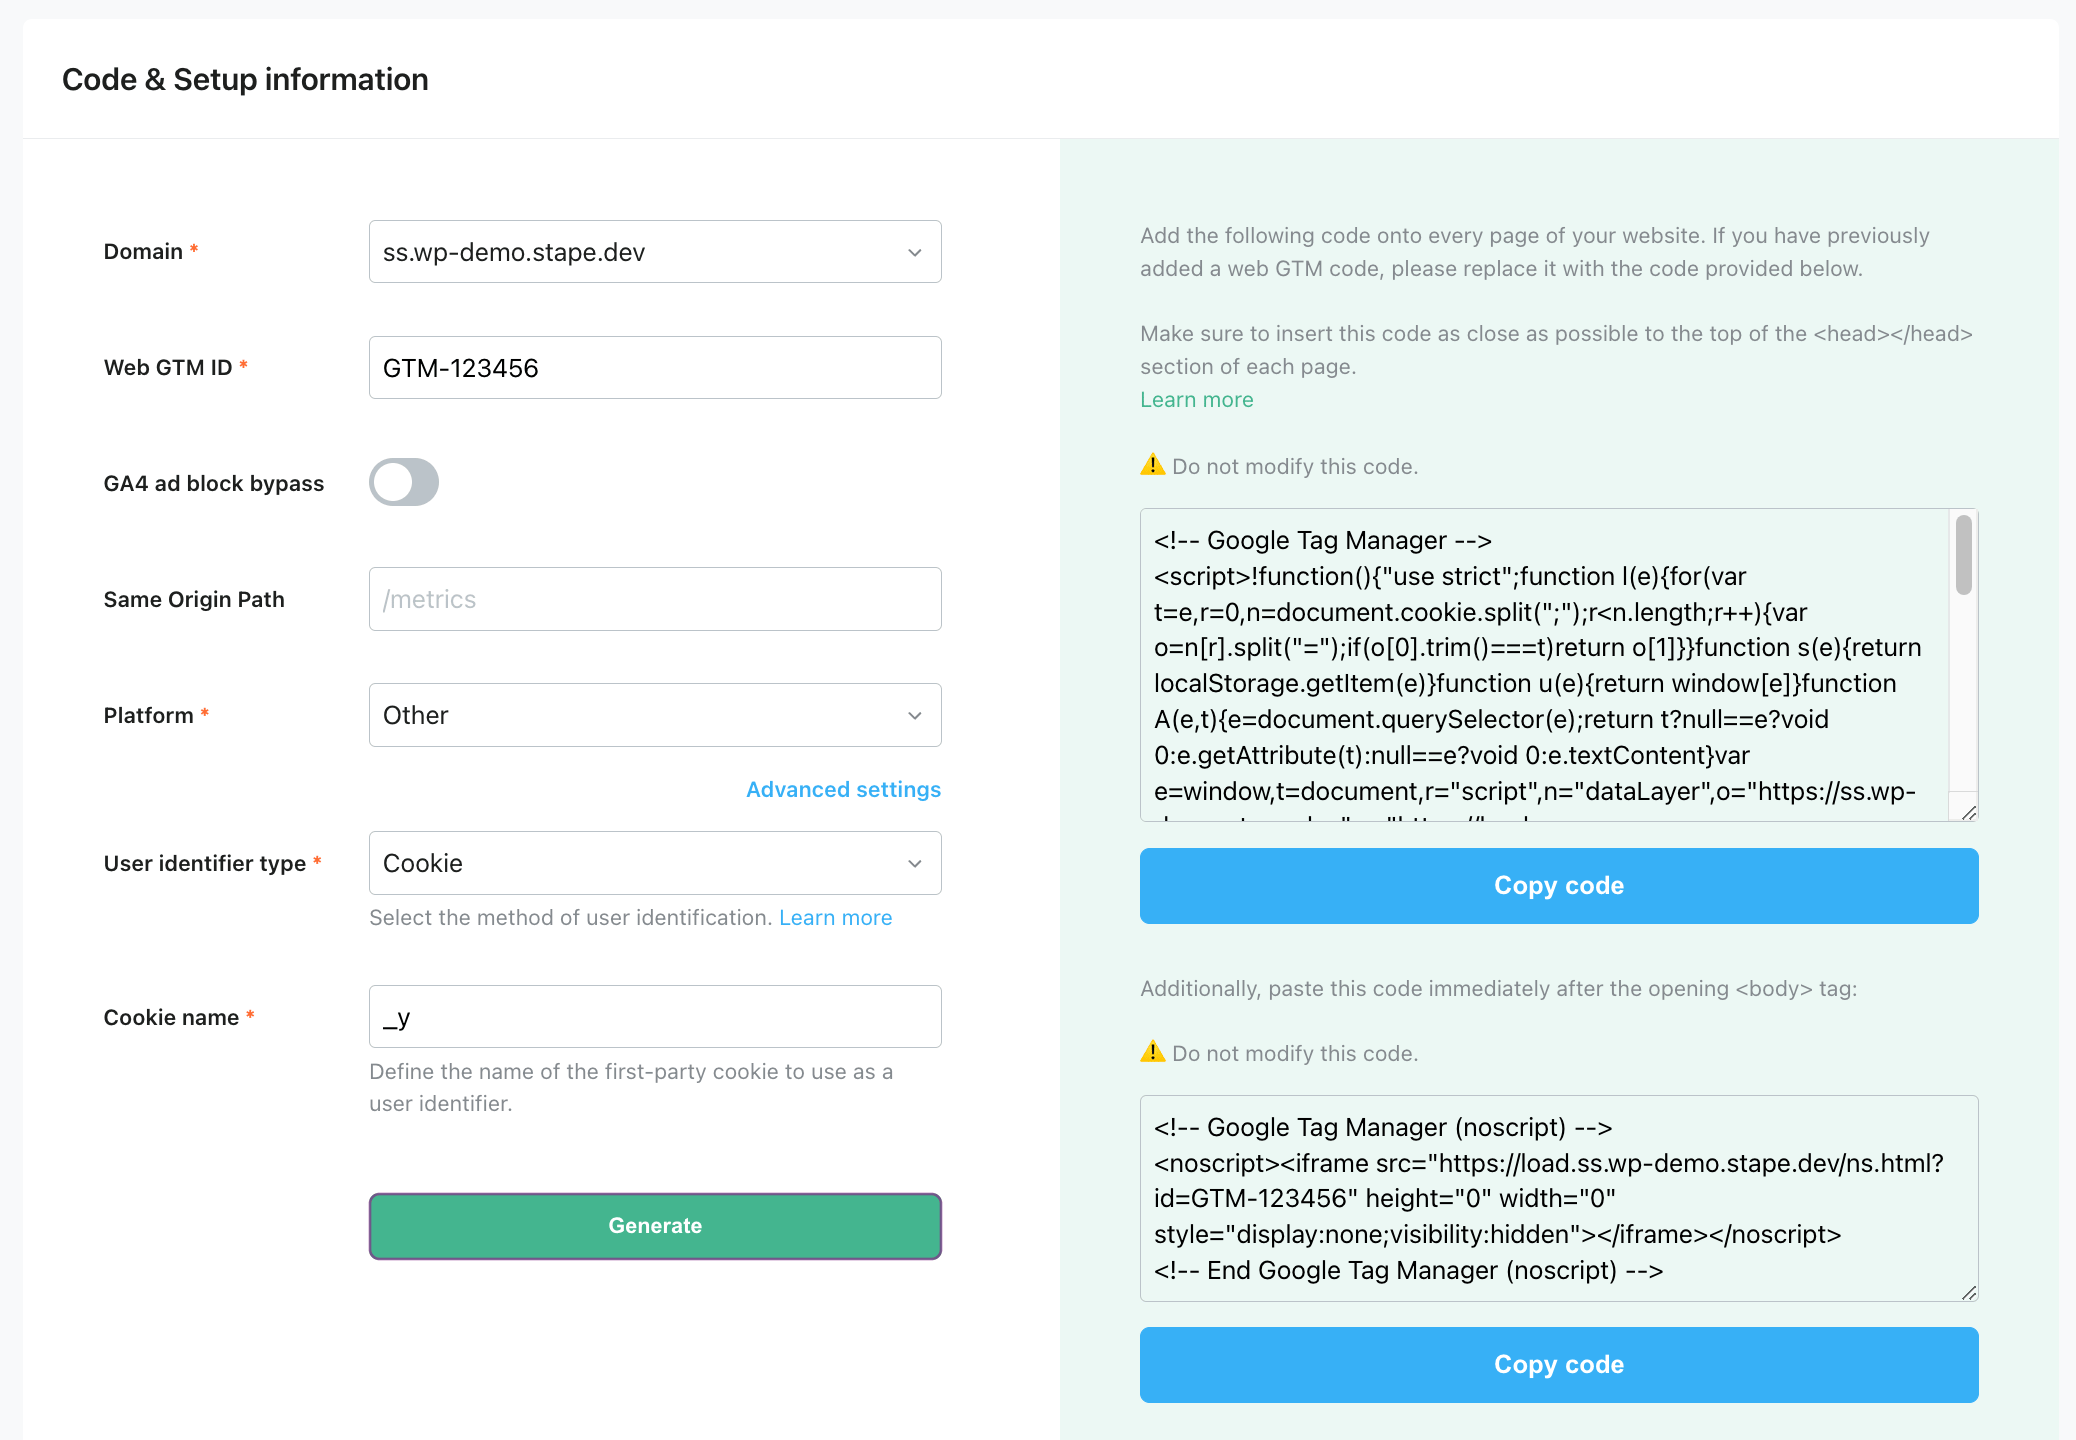
2.3. Enter the following settings:
Domain - choose the required domains from the list connected to your container.
Web GTM ID - enter your Web Google Tag Manager ID. Refer to our guide for instructions on locating your Web GTM ID.
GA4 ad block bypass - this setting allows bypassing the effects of ad blockers on the GA4 tracking code. Keep in mind that it applies to all container domains. After enabling this option, make sure to thoroughly debug both your web and server GTM containers.
Same Origin Path - if you are using the same-origin method to set up a custom domain, specify the proxy path for the requests. Learn more.
Platform - the Custom Loader code varies by platform. Choose Other and copy the provided code. Then, follow the instructions displayed on the right.
Step 3. Create the Data Layer.
Since this guide is tailored for a custom website and we don’t currently offer an app or extension to generate the dataLayer automatically, we have created a comprehensive dataLayer specification document for you to share with your development team.
The document contains all native Meta events. Because you probably won’t need every event type, we recommend making a copy of the specification and customizing it to fit your particular needs. Please find the link to the document here.
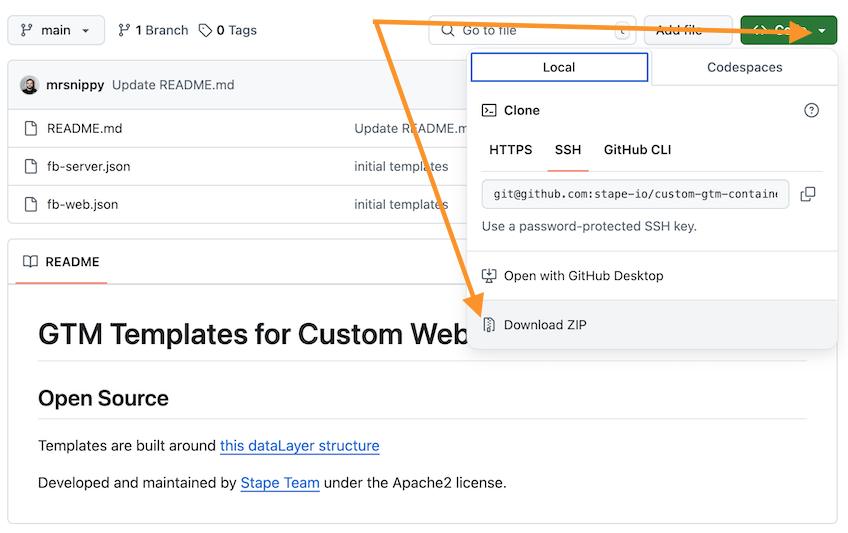
Step 4. Download and import the container templates available on our GitHub.
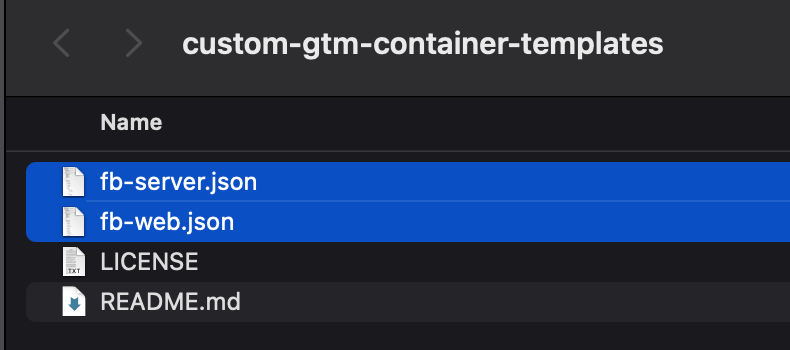
4.1. Download GTM templates on our GitHub.
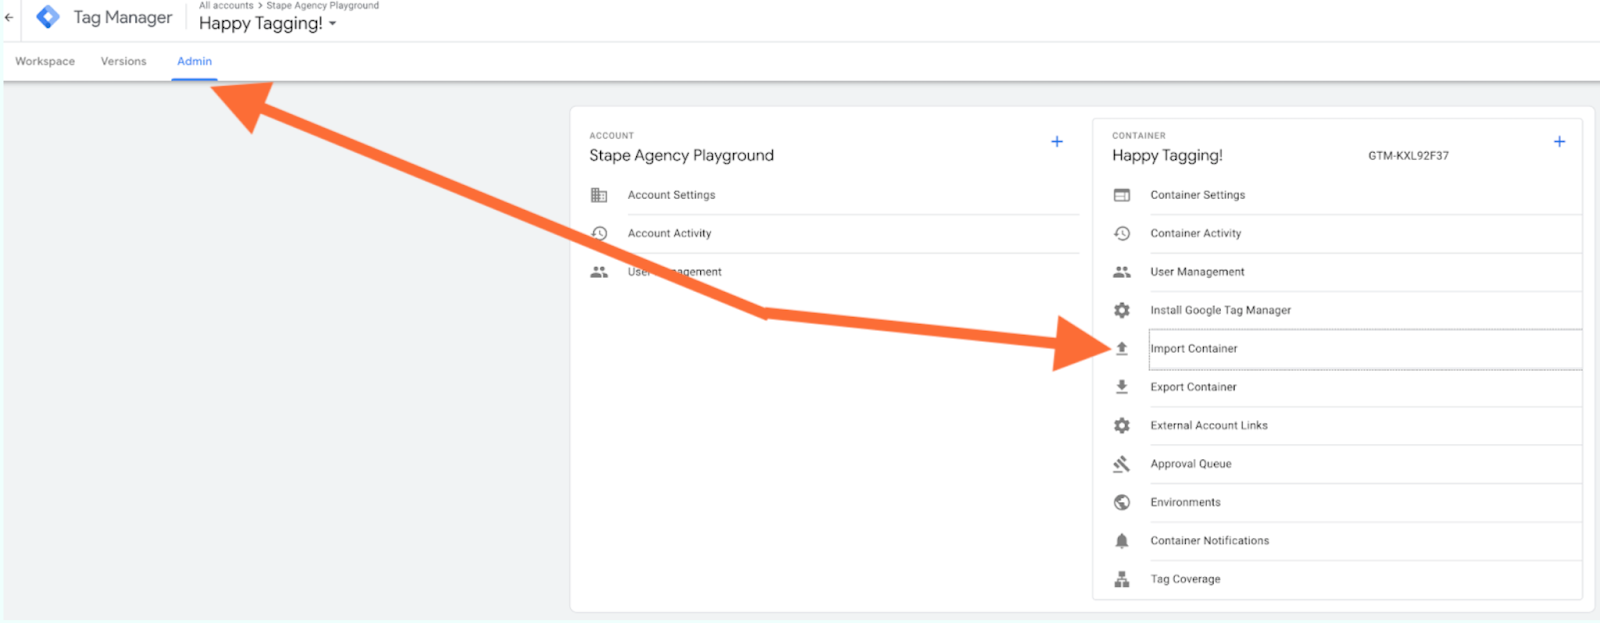
4.2. Import the templates into both your web and server containers in GTM (the process is the same for both). To do this, go to Admin → Import Container:
4.3. Choose your template file, ensuring it corresponds to the correct container type, web or server.
4.4. Select a workspace for the import, you may create a new workspace specifically for this task.
4.5. Choose either Overwrite or Merge.
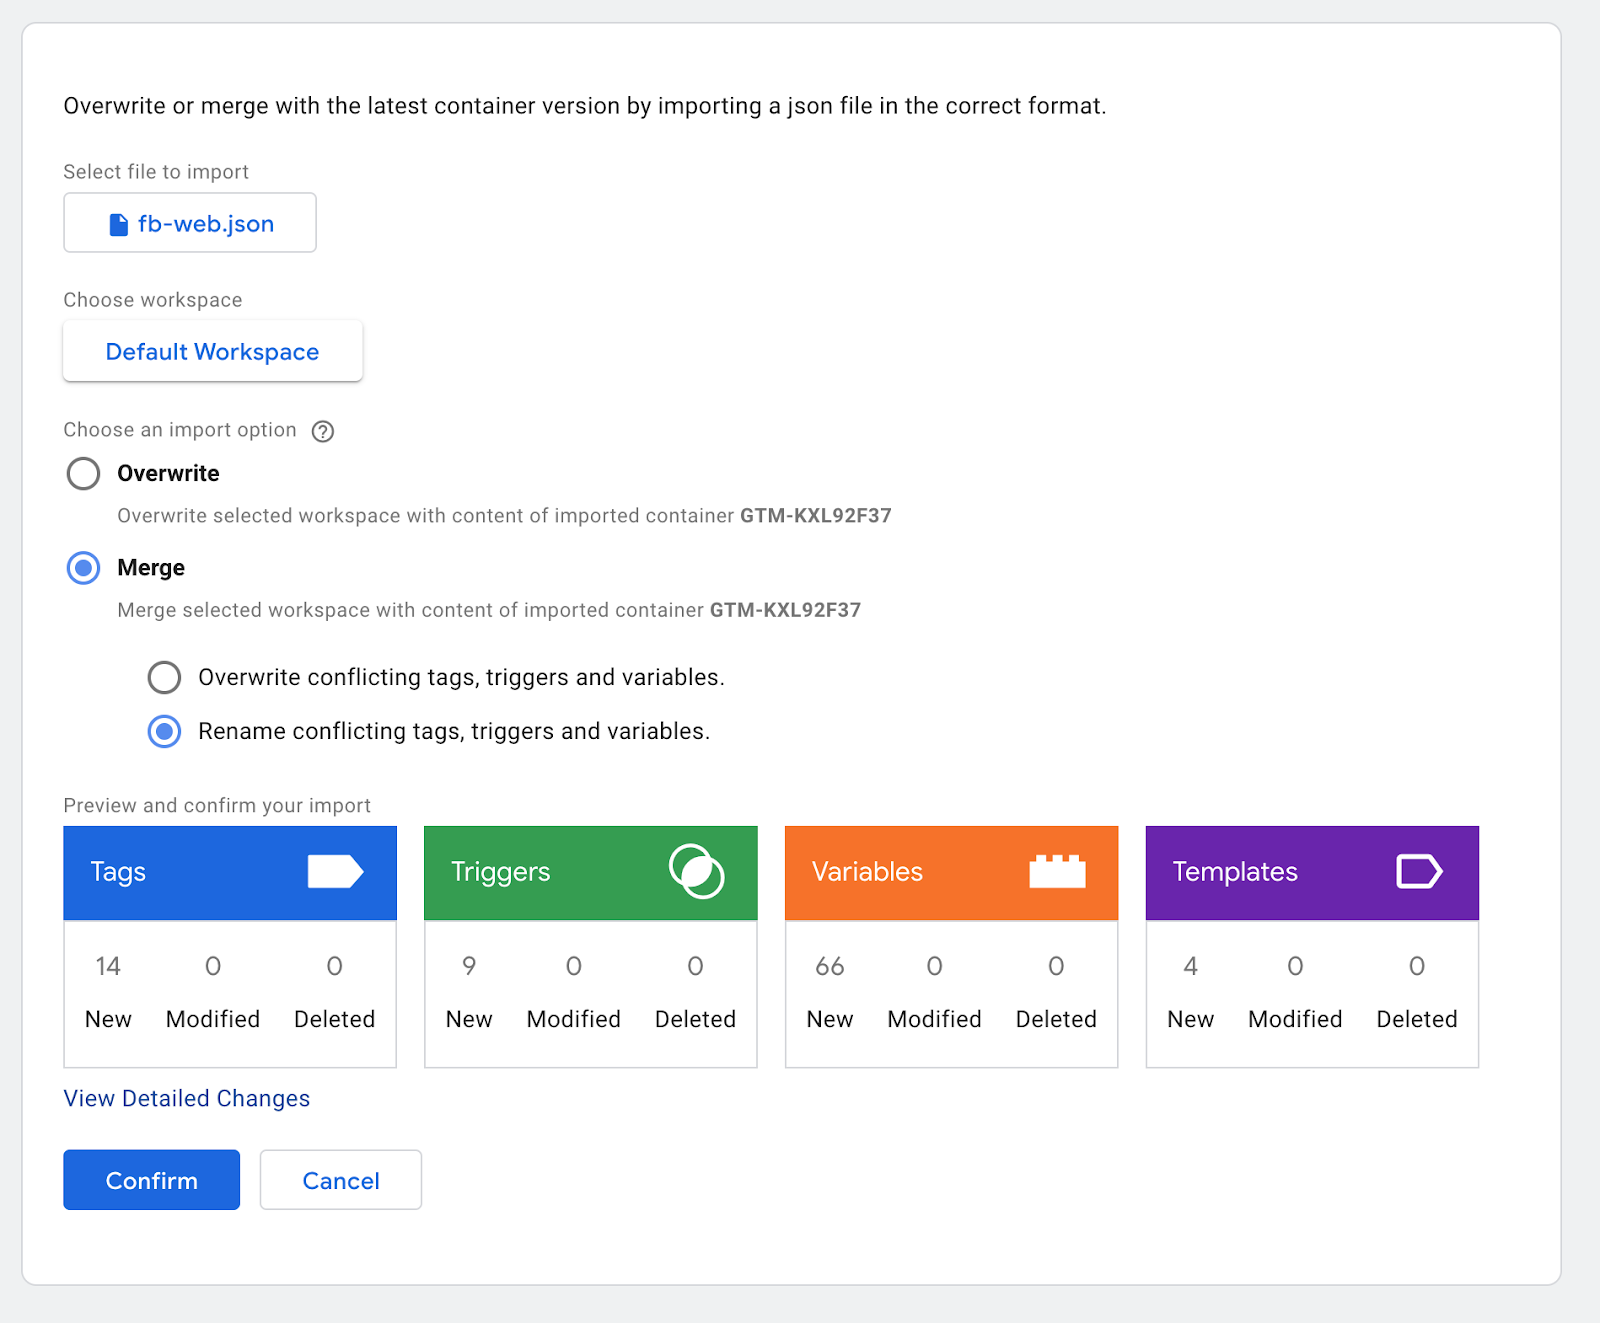
| Use the Overwrite option only if you are working with a fresh, empty container or are completely sure about replacing existing content. For this demo, we recommend using Merge with the “Rename conflicting tags, triggers, and variables” option enabled. This ensures that if any conflicts arise, GTM will rename the conflicting items instead of altering your existing container elements. |
Step 5. Set up the GTM container templates.
5.1. The templates come fully configured, with triggers, payloads, and event names all pre-set for your convenience.
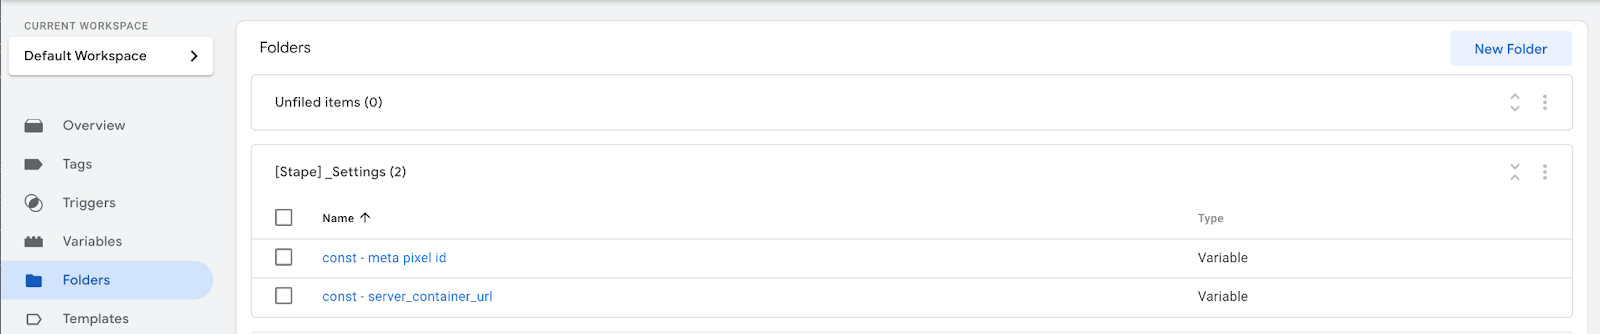
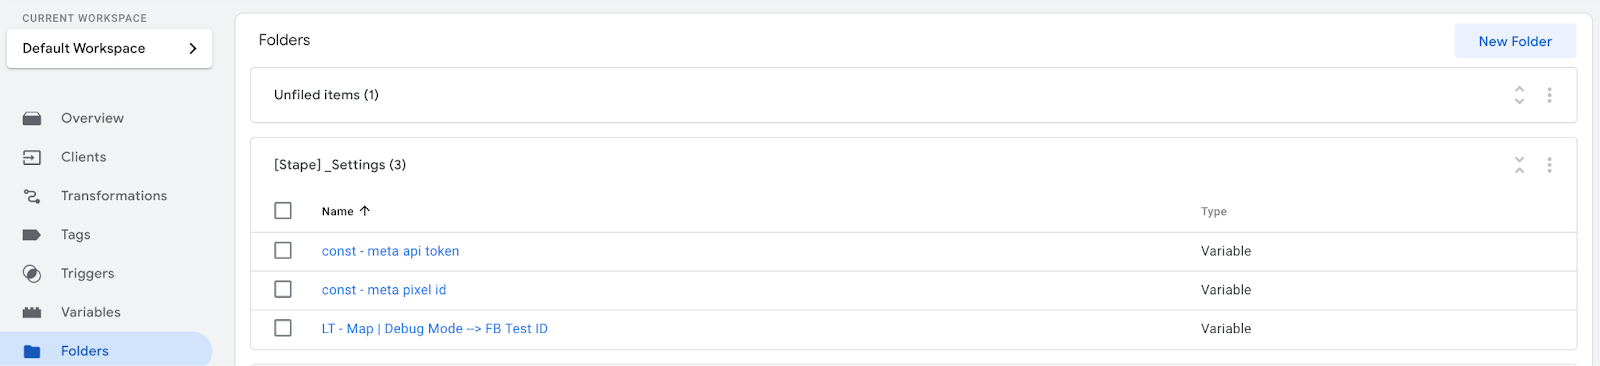
You only need to enter your specific destinations, IDs, API keys, and similar details. To make this easier, both your web and server containers include a folder named “[Stape]_Settings.”
Web
Server
All these variables are already linked to the tags that use them; you simply need to assign the correct values, such as:
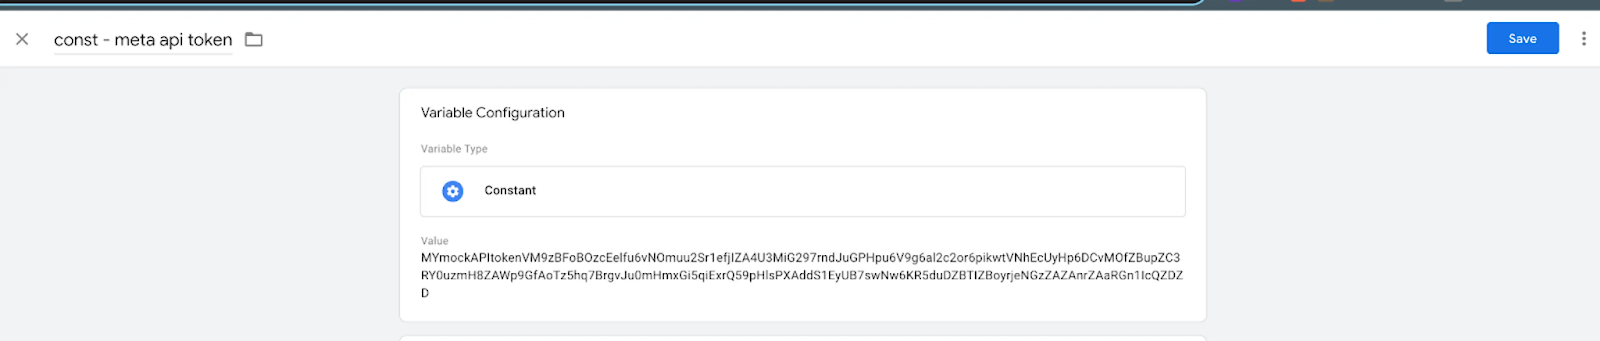
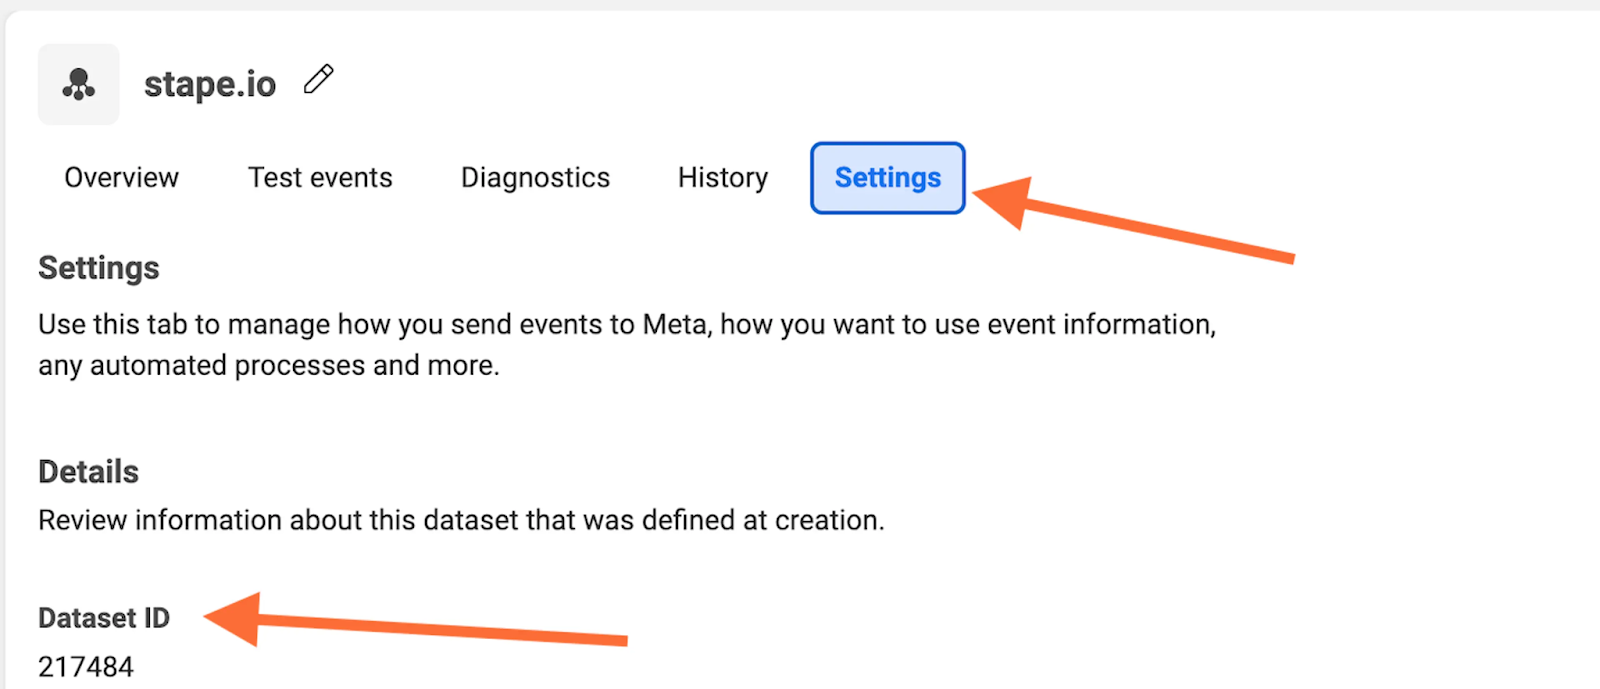
5.2. You can find the Pixel ID and API token in your pixel settings:

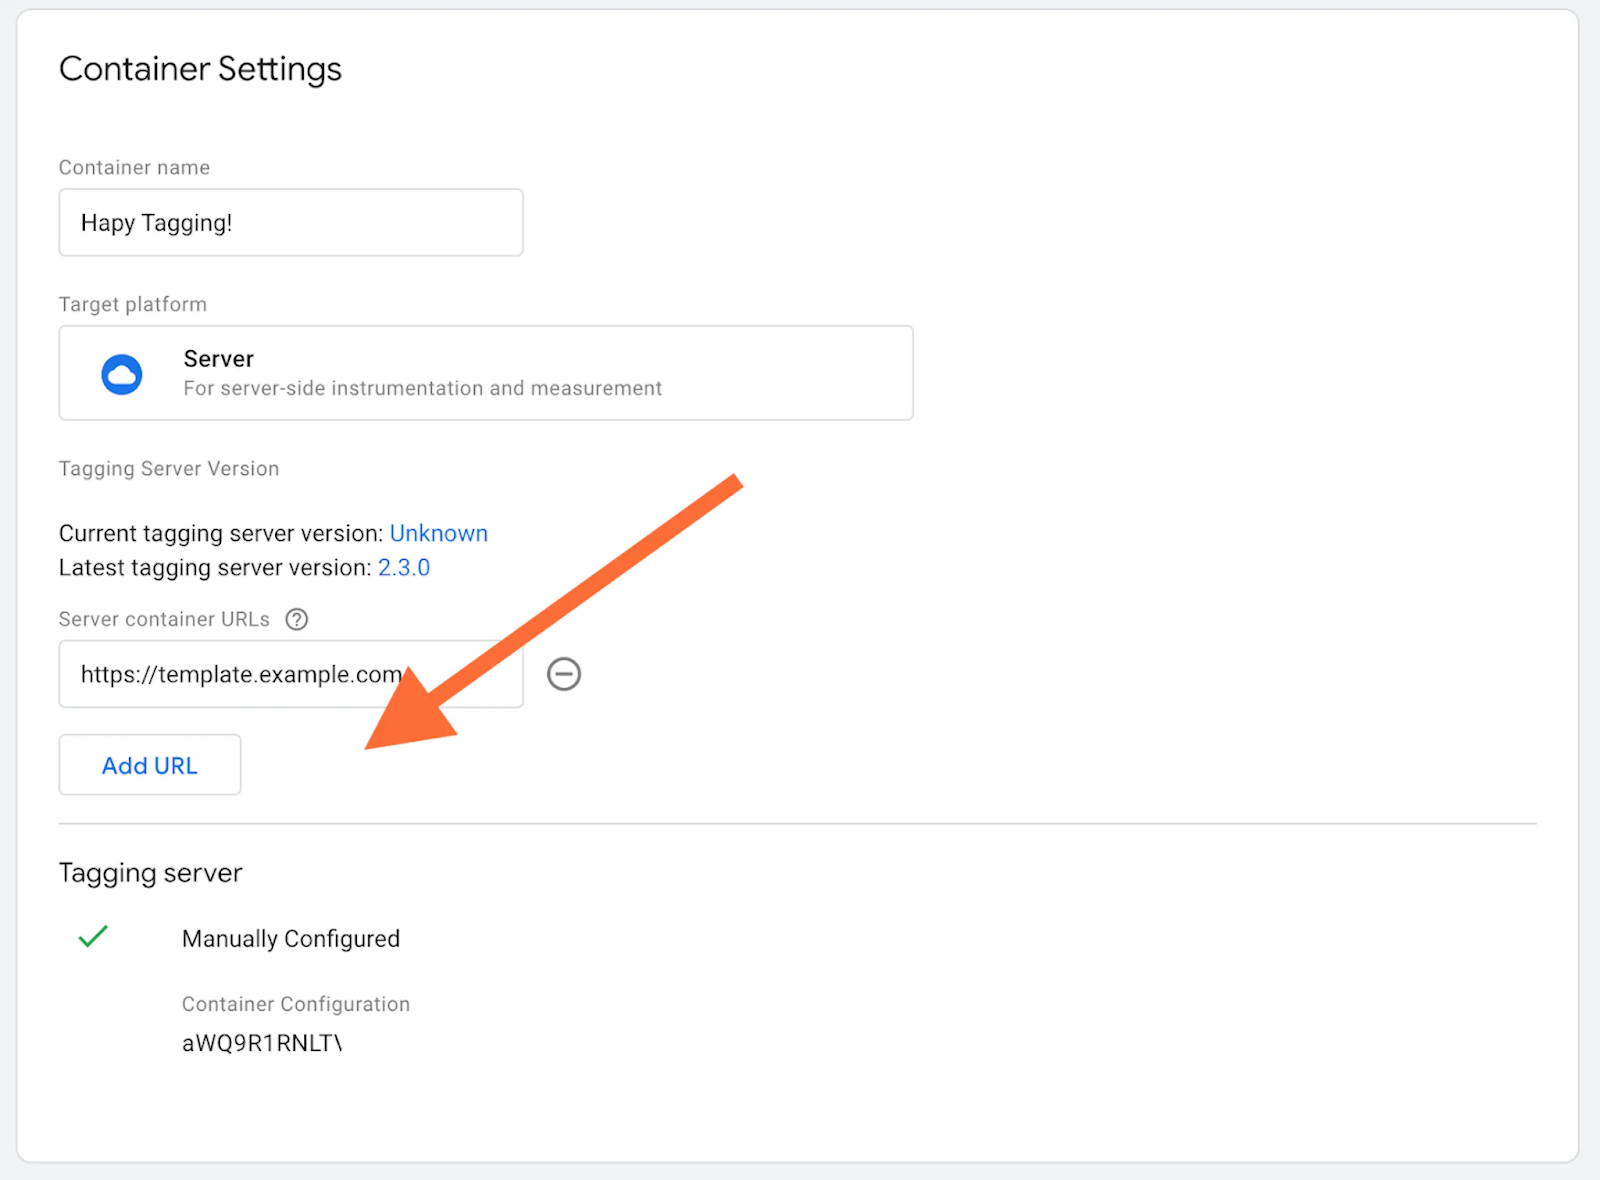
5.3. After updating and saving all these variables, your final step, if this is a new container, is to add a preview URL in your server container by navigating to Admin → Container Settings. If the container isn’t new, you can skip this step.
Step 6. Verify the setup.
Facebook offers tools to test both Browser and Server events. This is especially helpful if you’re setting up the Facebook pixel via GTM Server for the first time and want to ensure all tracked data is accurate.
6.1. First, obtain your test_event_code by logging into Facebook Manager. Select the data source you want to test, then open the Test Events tab. There, you’ll find the test event code, which may look like this: TEST2120.
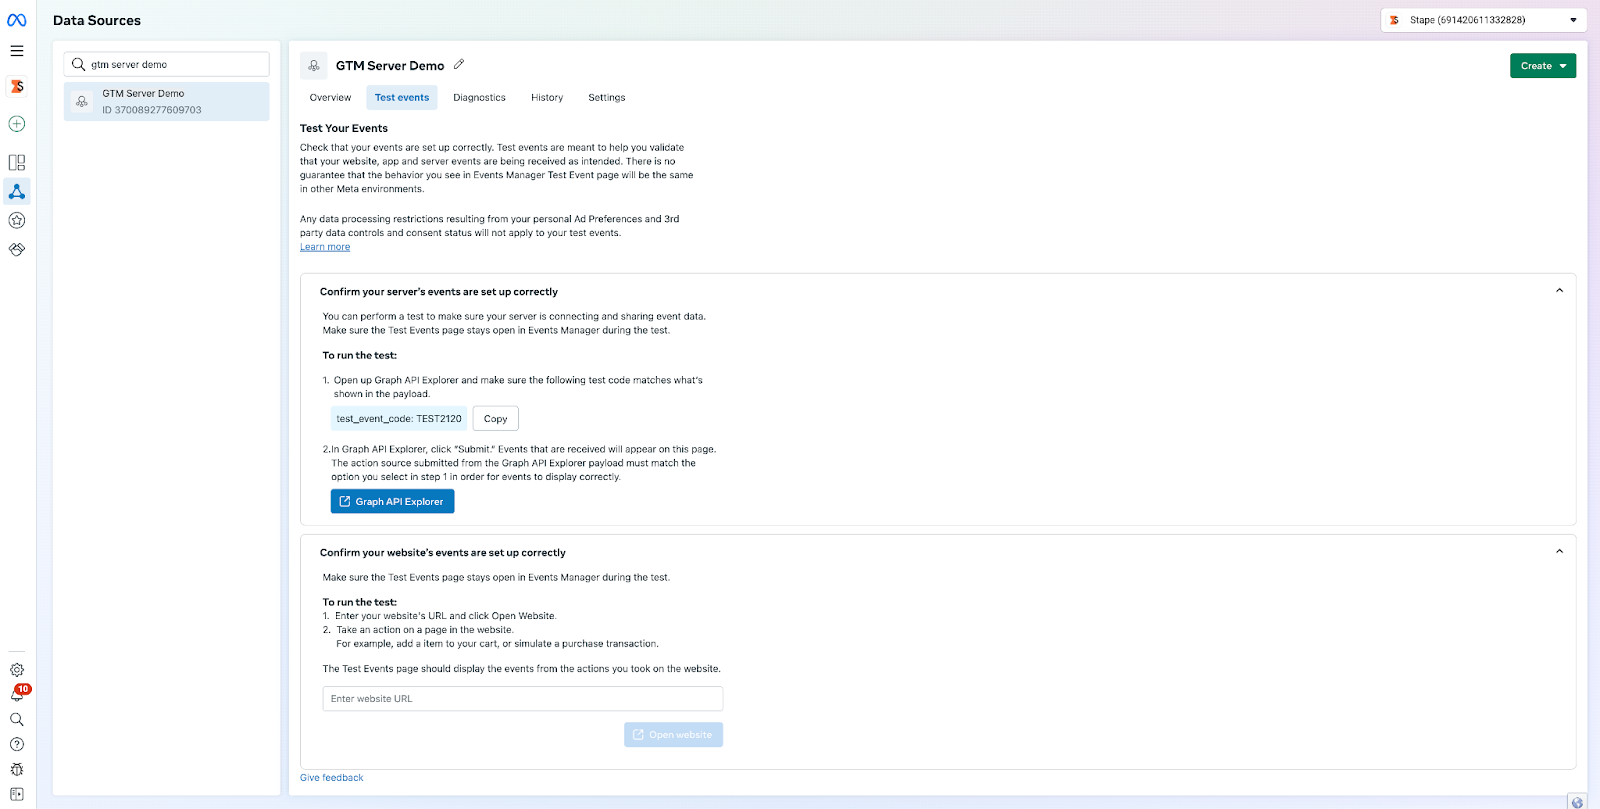
Note: The TEST ID updates every few hours, so if your debug sessions are spaced out, be sure to verify that the ID you’re using is still valid.
6.2. In your server container, enter the test event code obtained earlier into the LT - Map | Debug Mode → FB Test ID variable.
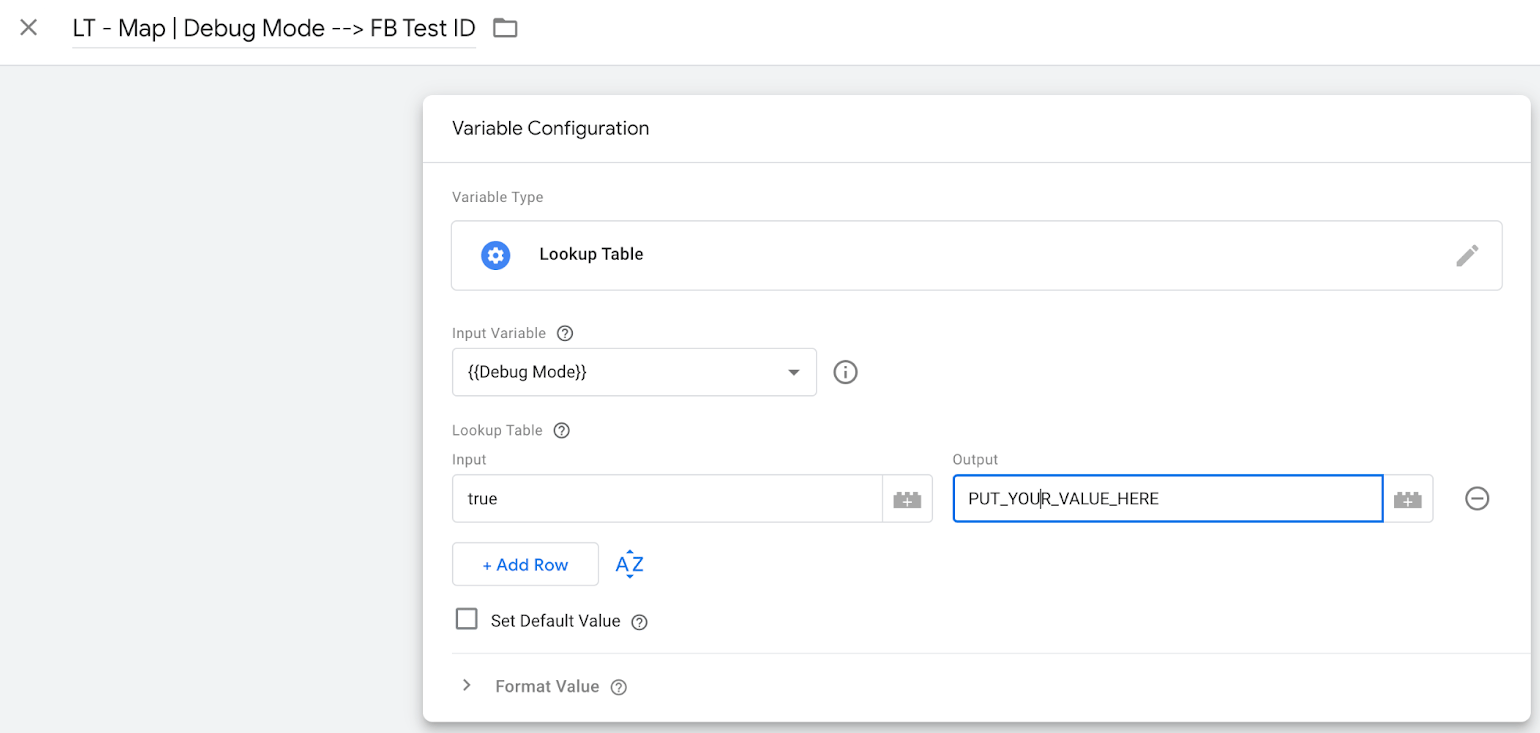
This variable is already linked to all Facebook tags and will only populate the tags when in preview mode, so you don’t need to remove it before publishing live.
6.3. Activate preview mode in both your web and server containers. If set up correctly, you’ll see test events from both containers displayed on the Facebook Test Event page.

Ready to start with server-side?
You are awesome! Click on Try for free to sign up and explore all the benefits.

Comments