In the fast-paced world of eCommerce, establishing effective marketing strategies is crucial for online businesses to thrive. One such powerful tool that aids in driving sales and engaging customers is Klaviyo — an email marketing platform that integrates seamlessly with popular e-commerce platforms like Shopify (Shopify Facebook Conversion API). However, setting up Klaviyo server-side tracking for Shopify requires careful configuration and implementation to maximize its potential.
In this guide, we will explore how to set up Klaviyo for Shopify via server Google Tag Manager, enabling you to harness the full capabilities of Klaviyo and create personalized and targeted email campaigns.
3. Send data to the server Google Tag Manager container. There are three most popular ways to do that:
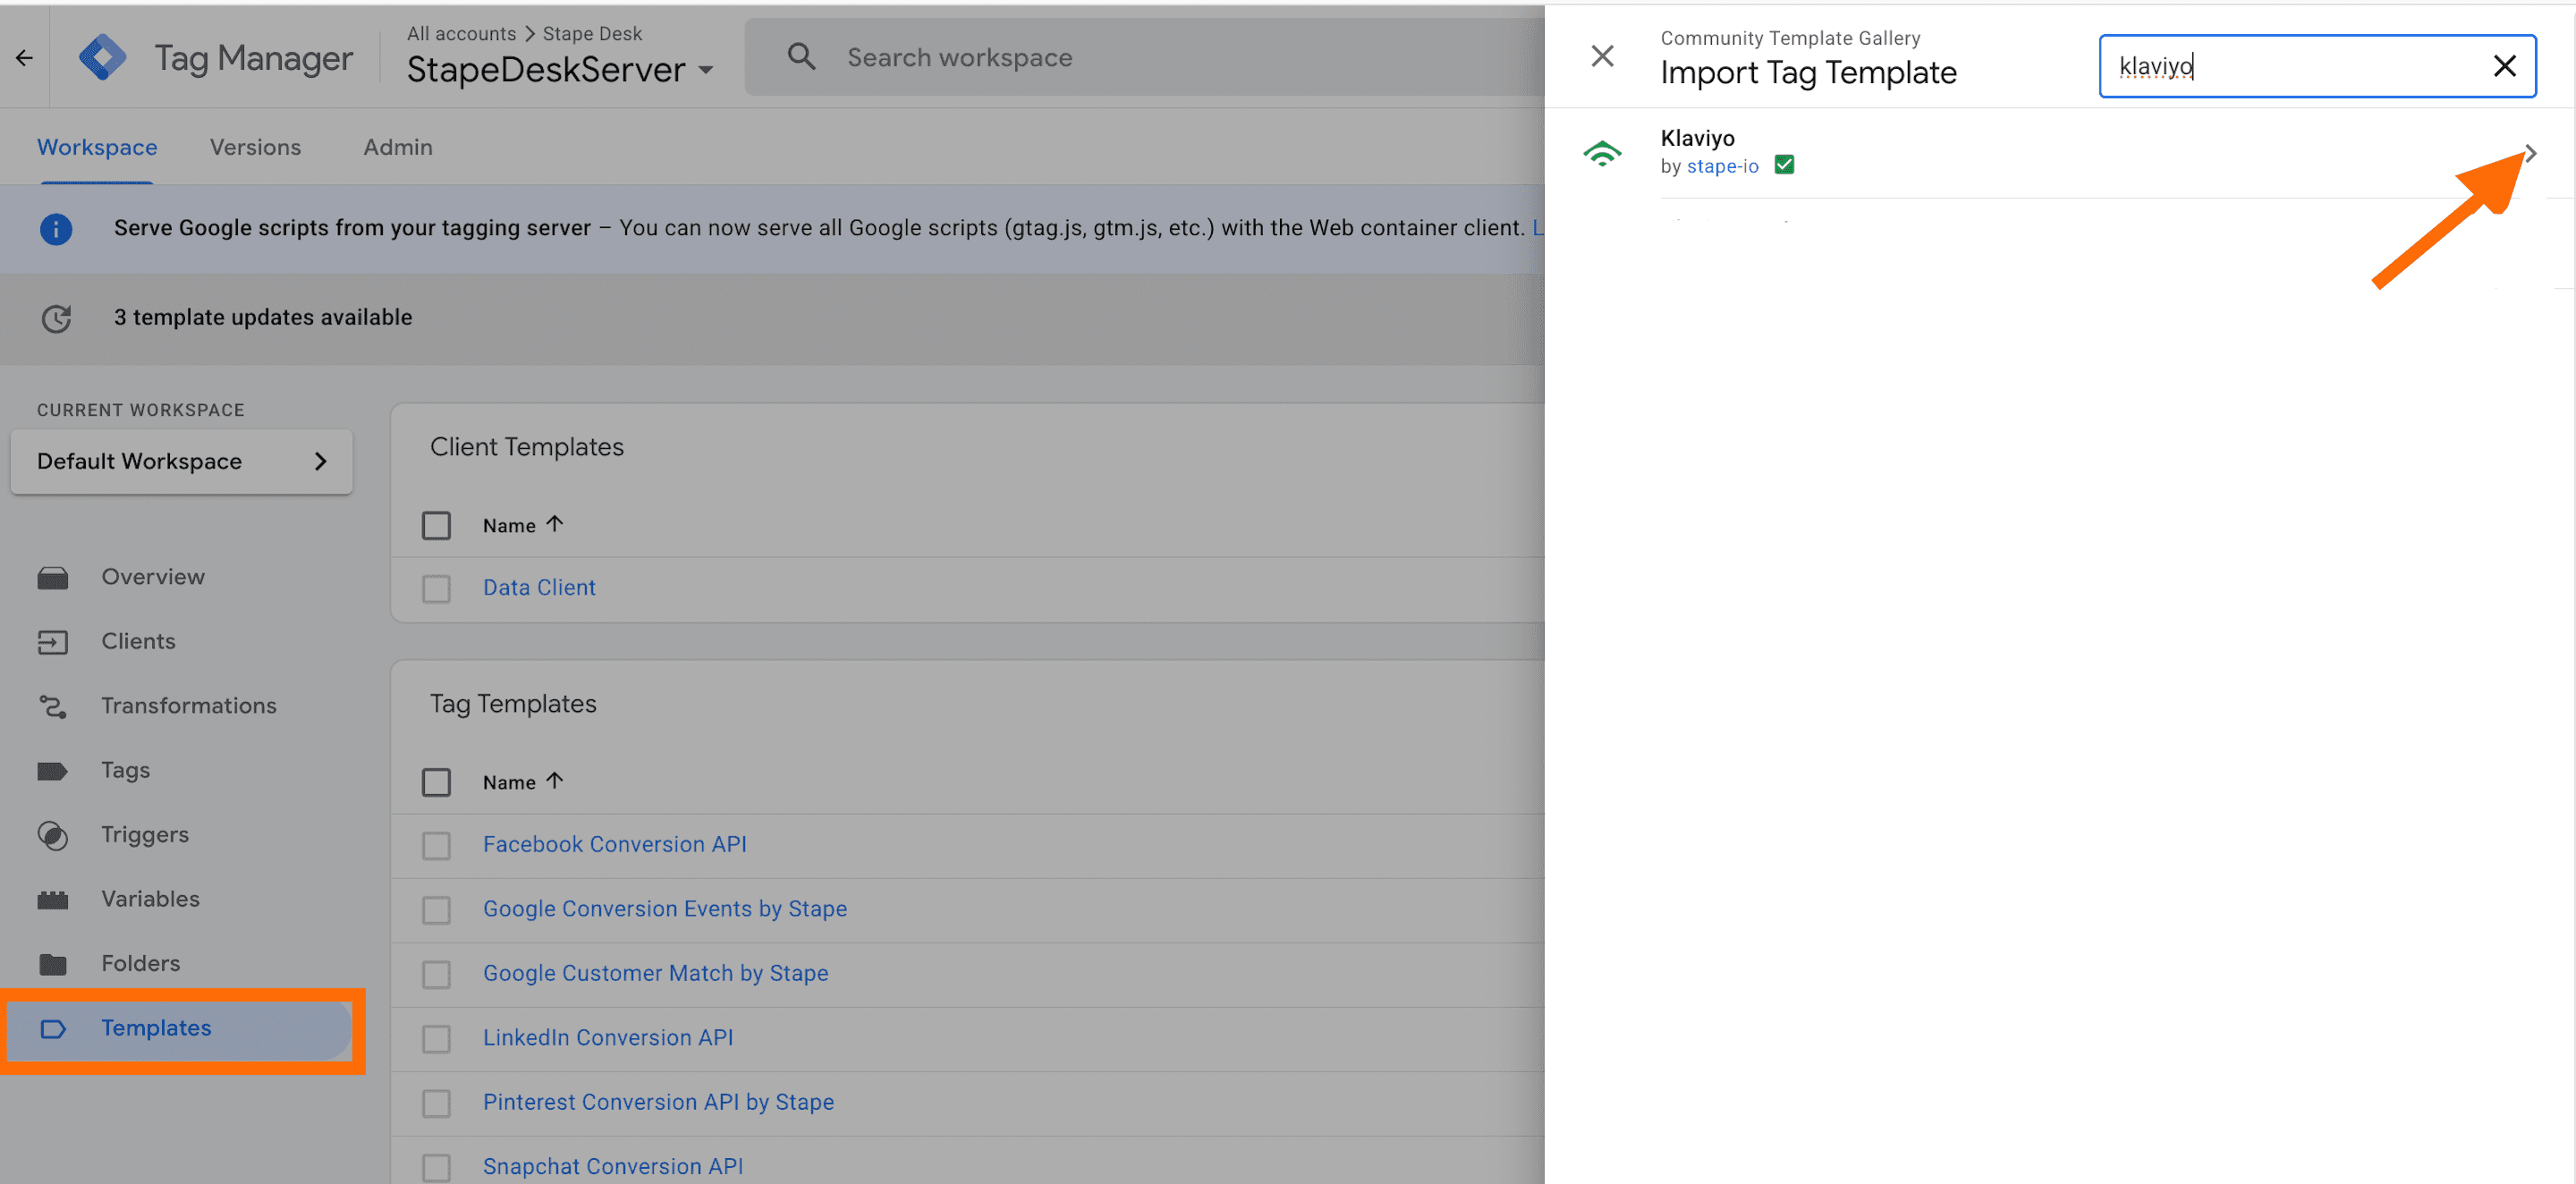
4. Add Klaviyo tag to the Google Tag Manager Server container from the Template Gallery. Click Templates → Search Gallery → search for “Klaviyo” → click “Add”.

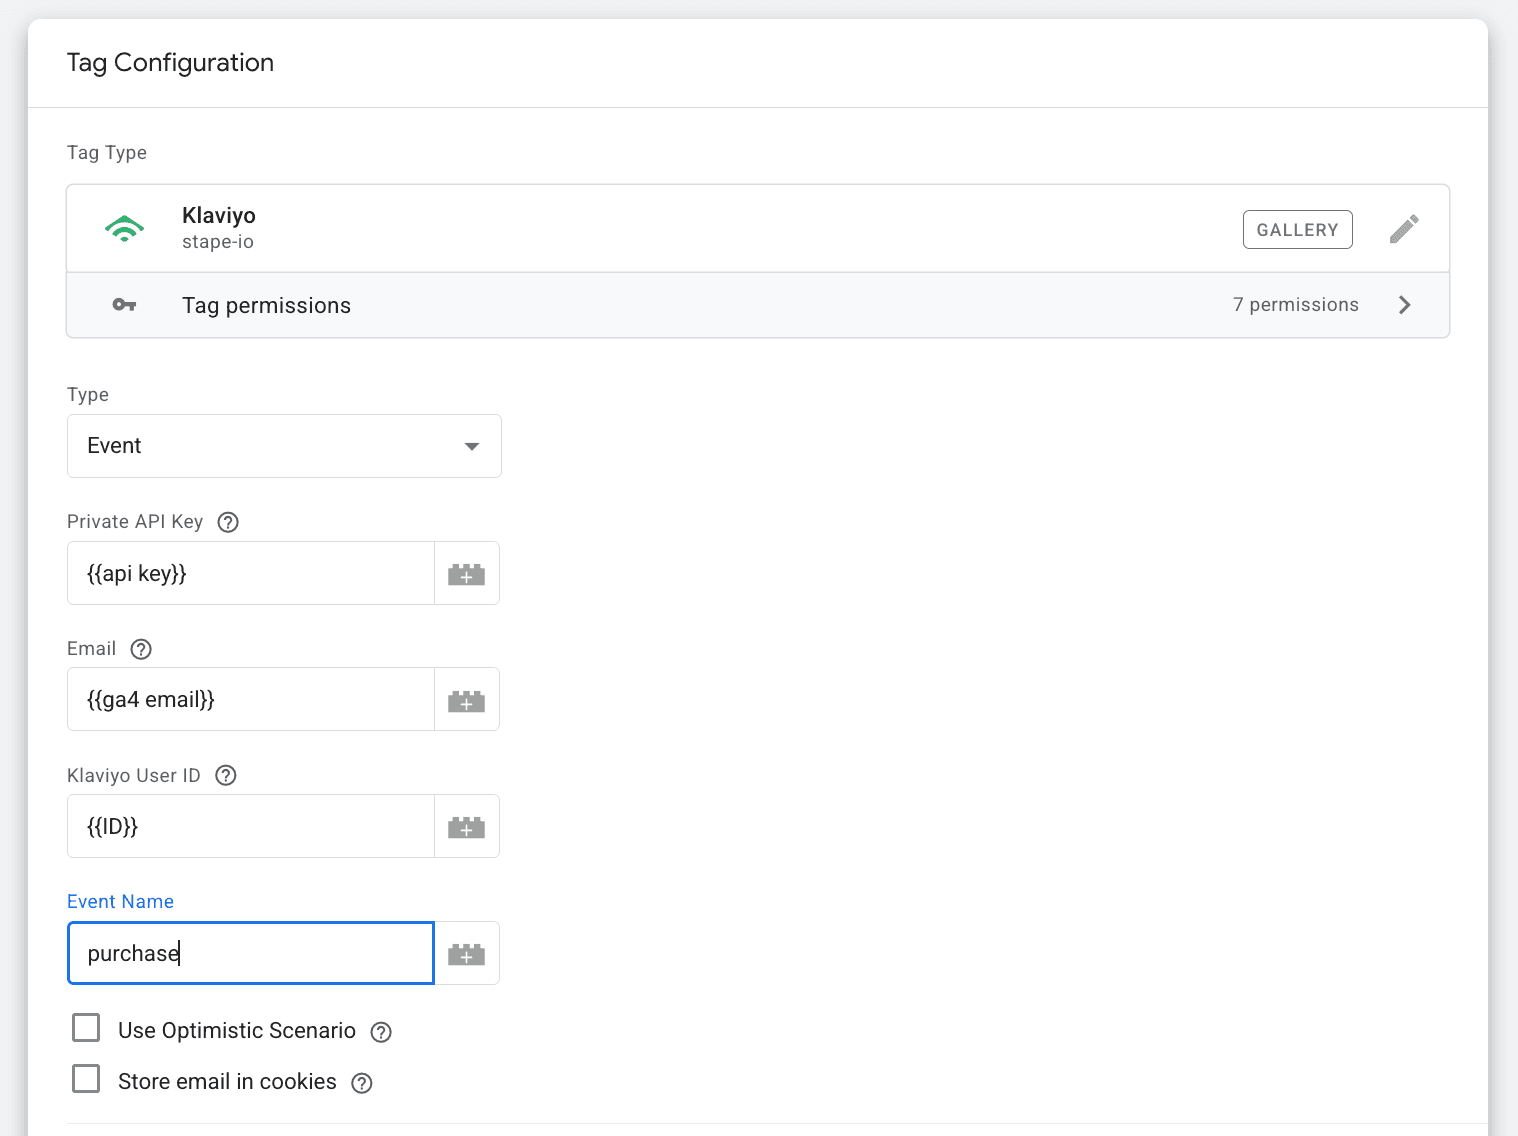
5. Go to the tags section inside the server container → Click New → Select Klaviyo tag that you’ve added to the workspace → Add tag name → Add your Klaviyo Private API key.
6. In this example, we'll see how to send purchase events to Klaviyo, assign this event to the existing user, or create a new user.
Inside the server GTM container, create a new Klaviyo tag. Add Klaviyo Private API Key, select event and add variable that includes user email.
Klaviyo tag will use email to assign events to Klaviyo profile. If there is no user with this email, it will create a new user. This tag should trigger on the purchase event.

7. You can also get the user email using Data Tag for the Google Tag Manager Web container.
This tag should trigger the purchase event. You should also add Data Client to the server container. It will listen to Data Tag and add information to the event data inside the server container.
You should also add Data Client to the server container. It will listen to Data Tag and add information to the event data inside the server container.

8. Open Preview and Debug mode of the Server and Web containers (make sure you've added a GTM Server preview HTTP header, it is required to see Data Tag events inside the Server container preview more. You can find it by clicking the three dots in the top right corner of the Google Tag Manager Server container preview mode and choose “Send requests manually.” )
9. Once you've verified that the Klaviyo tag triggers inside the Google Tag Manager Server container and sends all the parameters, go to your Klaviyo account and check if that event was added to the user. Don't forget to publish your changes.
Setting up Klaviyo for Shopify through the server Google Tag Manager can greatly enhance your eCommerce marketing efforts. By implementing this integration, you can leverage Klaviyo's robust features to create campaigns that drive engagement, boost conversions, and cultivate long-lasting customer relationships.
With Klaviyo's powerful segmentation and automation capabilities, you can deliver targeted messages based on customer behavior and preferences, ultimately increasing customer satisfaction and loyalty. By following the steps outlined in this guide, you can confidently configure Klaviyo for Shopify and unlock its potential to take your online business to new heights.
We've got you covered! Click Get help, fill-up the form, and we will send you a quote.
Comments