Setting up webhooks via the Shopify Flow app
Vlad Kononov
AuthorTracking offline subscription purchases in Shopify can be tricky. With Shopify Flow, you can easily send these events to Google Analytics 4 (GA4) using server-side Google Tag Manager (GTM). This guide will show you how to set it up and ensure all your transactions are tracked accurately.
Why Shopify Flow?
Shopify Flow is a tool that helps Shopify store owners automate tasks without needing to code. It lets you create workflows based on specific actions, like when an order is paid, or a product is out of stock.
Benefits of Shopify Flow:
- Customization. You can set it up to match your store’s needs with different triggers and actions.
- Time-saver. Automates repetitive tasks so you can focus on running your business.
- Error reduction. By automating tasks, it helps avoid errors that can happen when doing things manually.
- Integration with other apps. It connects with apps like Google Analytics or CRMs so that you can easily send data.
In a nutshell, Shopify automation with Flow makes running your store more efficient and easier to manage.
The Flow app is one of the best choices for setting up webhooks in Shopify server-side tracking. It offers a variety of triggers, conditions, and customization options so you can set up exactly what you need.
It allows you to send a customized HTTP request to your sGTM container and then report such an event to any other platform, including Shopify Conversion API Facebook for server-side ad tracking.
Let’s review an example of how you can report recurring subscription purchases of your products to GA4. Since such transactions do not happen online, the only way to track them is to report them to your Shopify CMS.
How to configure webhooks in the Shopify Flow
Step 1: Create your Flow with a trigger
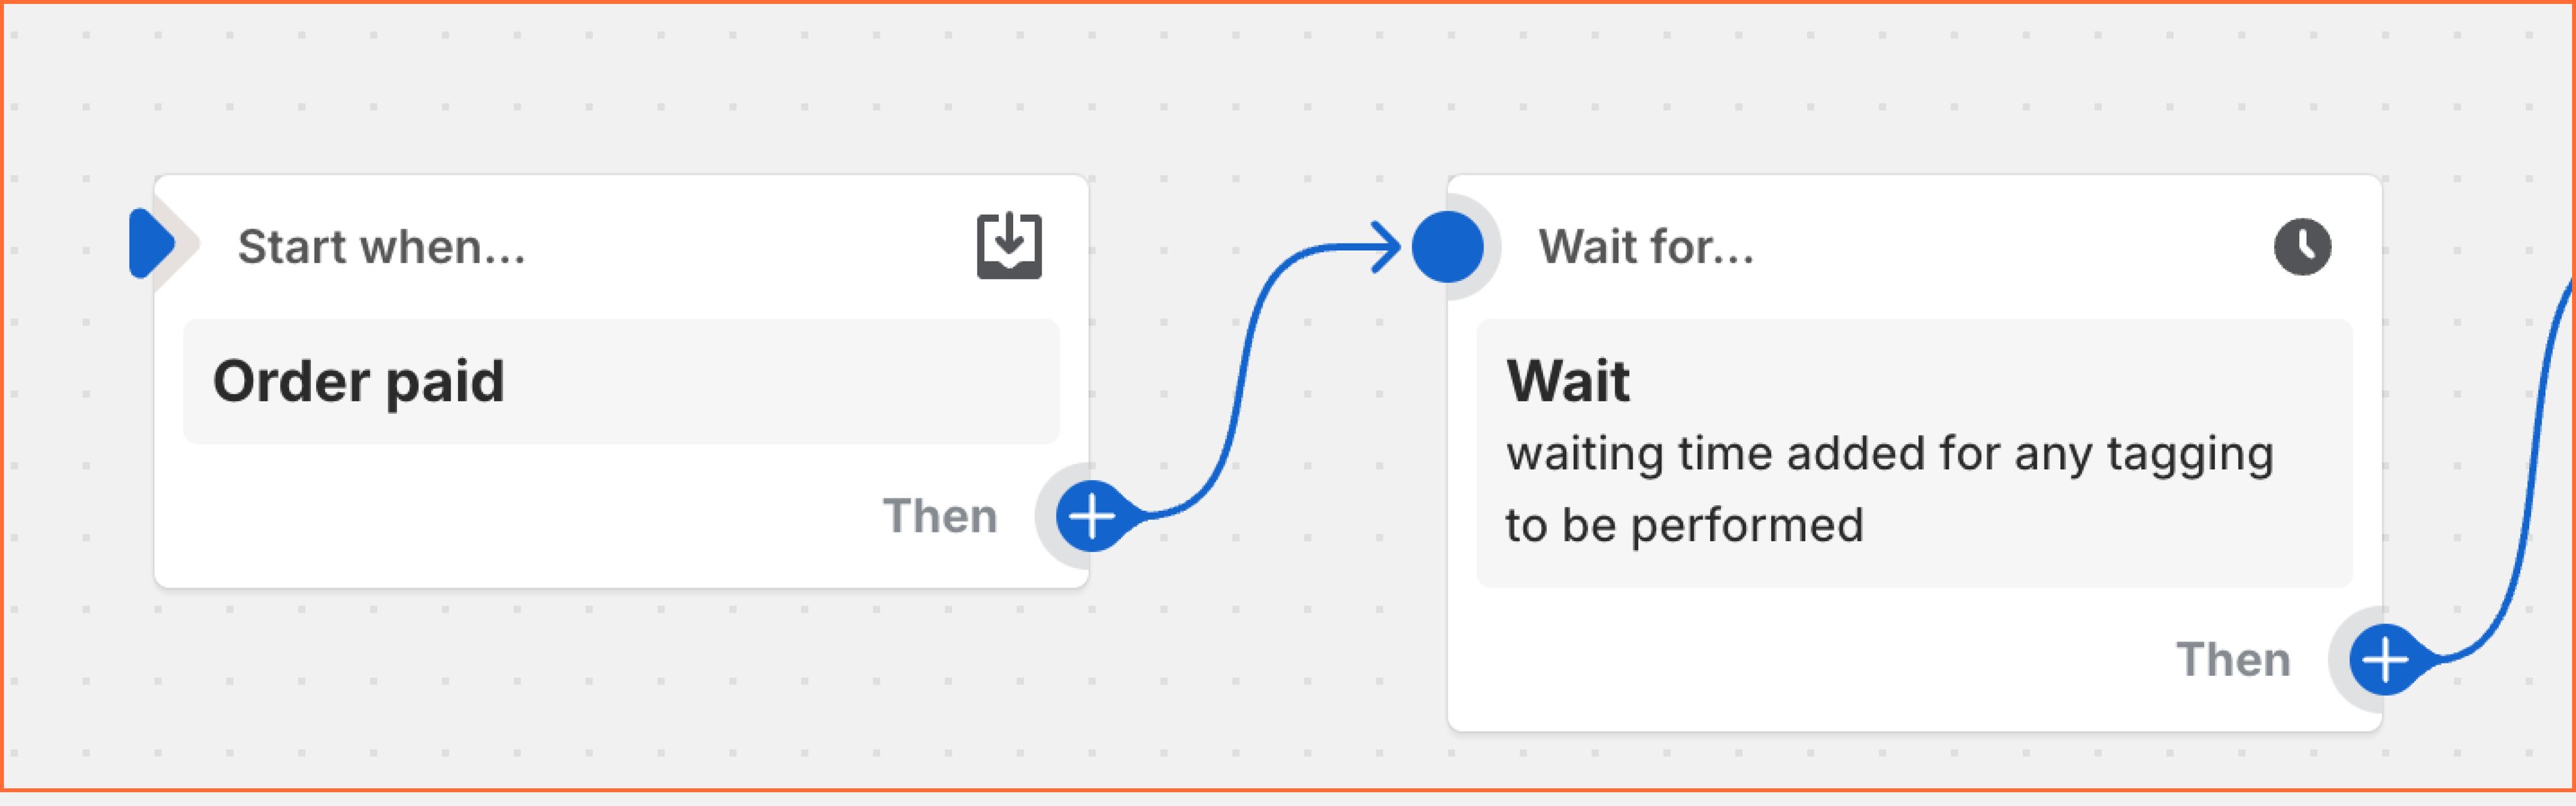
Start creating your Flow with a trigger — for our example, the “Order Paid” trigger will suit best, but depending on the case, it can also be “Order Created,” etc.
Step 2: Apply the “Wait” action
The next Action worth applying is “Wait” so that the app used for subscription recurring orders will assign necessary tags to the order. Most subscription apps do that, and you need to check which specific tags are added. Usually, several minutes should be enough. In our example, we applied 3 minutes.
Step 3: Create a condition
The next step is to create a condition to differentiate all paid (or created) orders from the ones created offline by a subscription app. To do it, we need to check if order tags contain one of the tags assigned by a subscription app.
Below is an example of how this condition may look. Please make sure to replace “subscription_recurring_order” in our example with the actual tag name that your subscription app assigns.
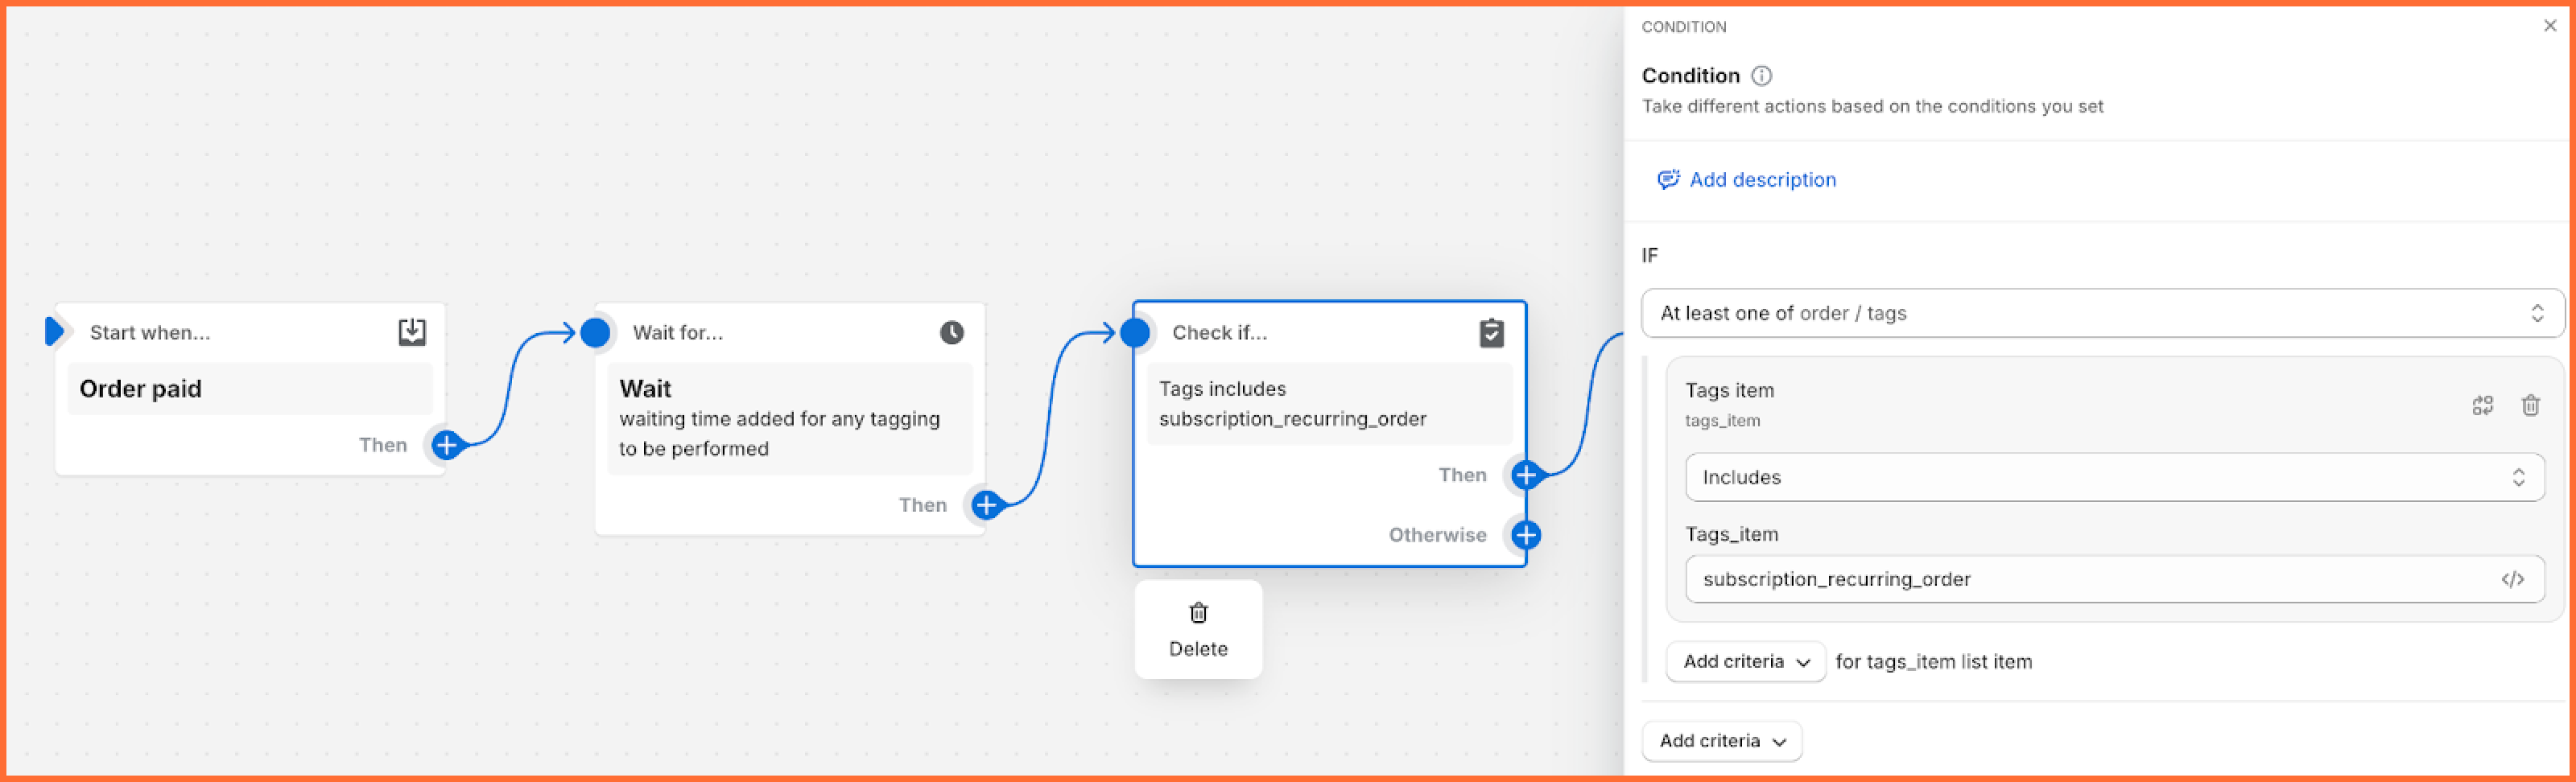
In our example, if one of the order tags is “subscription_recurring_order”, the condition will return ‘true’ and continue to the next action. If an order does not contain the mentioned tag, the Flow will just stop, and no further actions will be taken, which is fine in our case.
Step 4: Send a webhook to the sGTM container in the Shopify Flow
If the condition is accurate, we want to send a webhook to our sGTM container in the Shopify Flow. This action is called “Send HTTP request”.
Here, you can build your webhook by specifying the URL where to send the request and which headers and payload to add. Here is an example of how this webhook may be built:
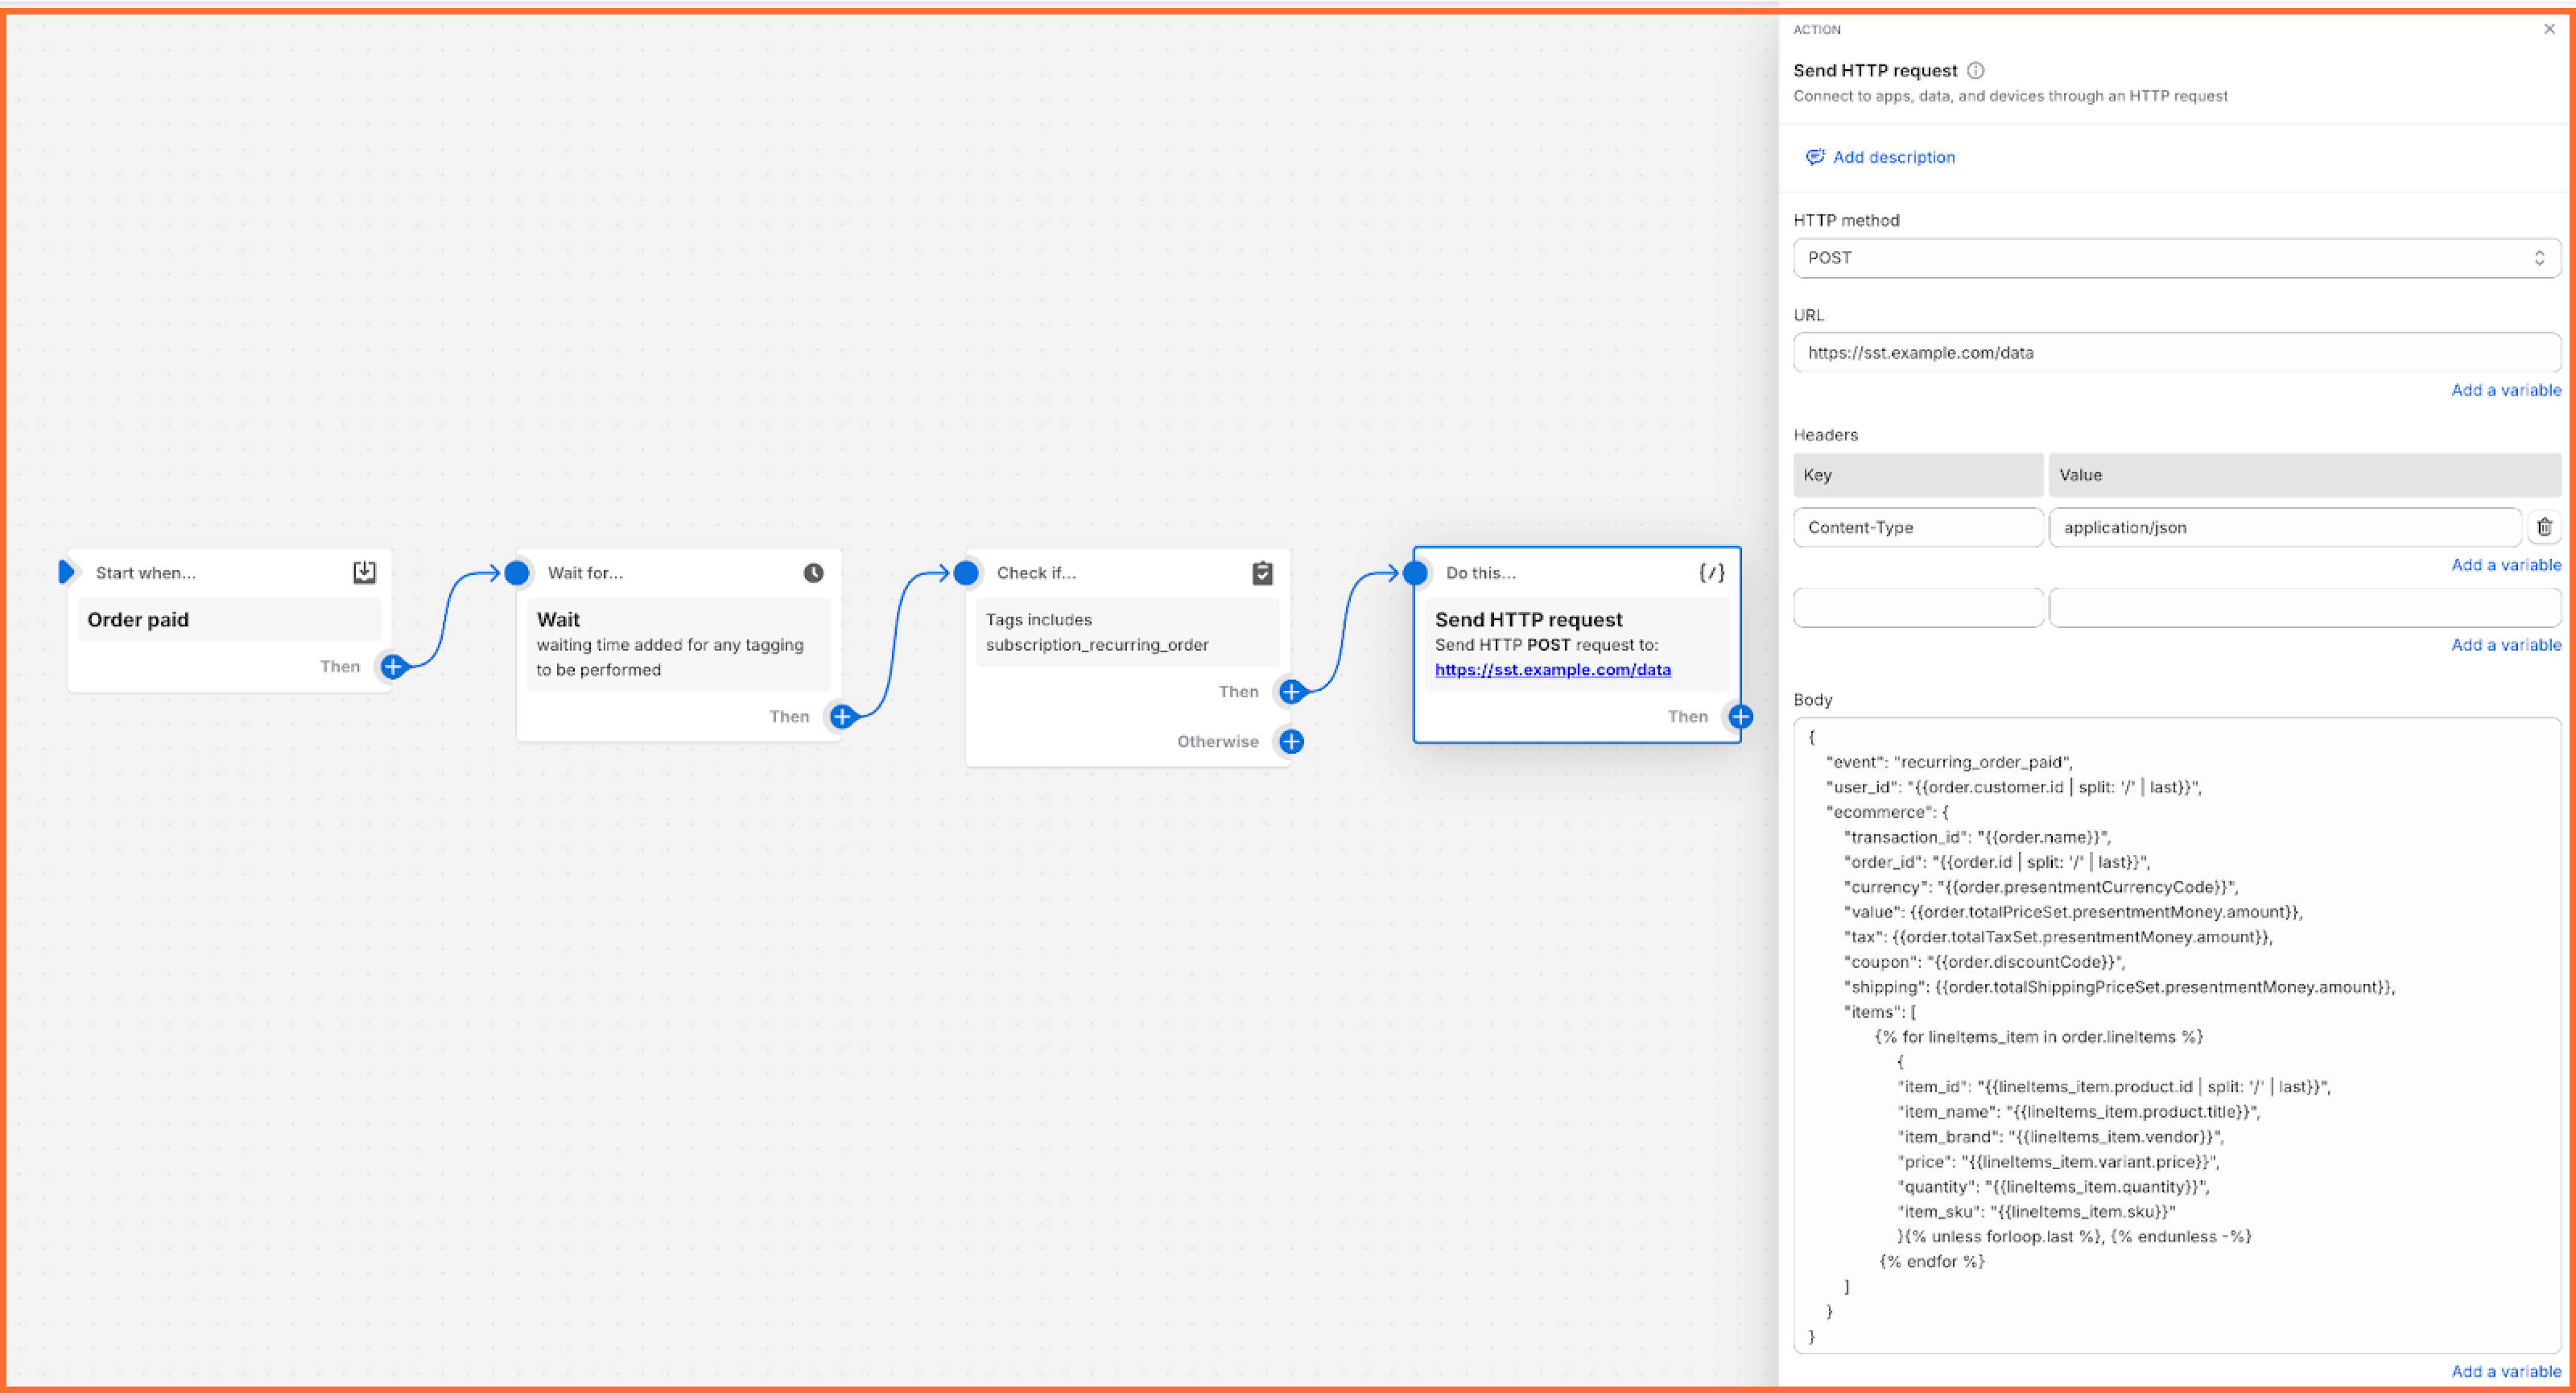
- To apply the HTTP method, please select POST.
- Enter the URL of your server GTM container. If you have a Data Client installed, please remember that the default path is /data; however, you may configure any custom path you want in Data Client settings.
- Add the header “Content-Type” with the value “application/json.”
- The following code will build a webhook with the GA4 formatted payload; however, if needed, you may adjust the structure and/or add more parameters, which can be similarly pulled from the Shopify API.
{
    "event": "recurring_order_paid",
    "user_id": "{{order.customer.id | split: '/' | last}}",
    "ecommerce": {
        "transaction_id": "{{order.name}}",
        "order_id": "{{order.id | split: '/' | last}}",
        "currency": "{{order.presentmentCurrencyCode}}",
        "value": {{order.totalPriceSet.presentmentMoney.amount}},
        "tax": {{order.totalTaxSet.presentmentMoney.amount}},
        "coupon": "{{order.discountCode}}",
        "shipping": {{order.totalShippingPriceSet.presentmentMoney.amount}},
        "items": [
               {% for lineItems_item in order.lineItems %}
                    {
                    "item_id": "{{lineItems_item.product.id | split: '/' | last}}",
                    "item_name": "{{lineItems_item.product.title}}",
                    "item_brand": "{{lineItems_item.vendor}}",
                    "price": "{{lineItems_item.variant.price}}",
                    "quantity": "{{lineItems_item.quantity}}",
                    "item_sku": "{{lineItems_item.sku}}"
                    }{% unless forloop.last %}, {% endunless -%}
                {% endfor %}
        ]
    }
}
Step 5: Test/Debug your setup
To debug your Flow, you may use Stape’s HTTP header preview power-up or temporarily add “x-gtm-server-preview” in the header of your HTTP request action in Flow, just next to Content-Type. You may find out more about how to debug webhooks in our blog post.
Conclusion
Shopify Flow app is an excellent way to achieve more accurate tracking results in your advertising and analytics platforms. With its help, you may report events that could happen offline, apply various conditional checks before sending an event, report refunds and cancellations, and much more.
By utilizing Shopify Flow app, you can automate the process of sending important event data, such as recurring subscription purchases, directly to your server-side Google Tag Manager for enhanced tracking in GA4.
Ready to get started with more accurate server-side tracking? Try Stape for free and see how our solutions can simplify your Shopify setup!
Want to start using server-side tags?
Stape has lots of tags for server GTM! Click on Try for free to register and check them all.

Comments