How to set up Sendlane tag using server GTM
Uliana Lesiv
AuthorThis guide will walk you through setting up Sendlane tracking using server GTM. Below, we provide a detailed breakdown of tag configuration, which includes the following steps:
- Setting up a server GTM container.
- Sending data from the web to the server GTM container.
- Adding the Sendlane tag from the GTM template gallery.
- Configure the tag to track events or add contacts to the lists.
- Assigning a trigger to the tag.
- Testing the configuration.
What is a Sendlane tag?
Sendlane Tag for the server Google Tag Manager container allows creating an integration between your website and Sendlane. With this tag, you can add new contacts to the lists, track user interactions, and transmit customer data directly to Sendlane's API.
Benefits of Sendlane tag
Since the Sendlane tag works on the server GTM container, it not only helps track events and new contacts to the lists but also offers several key benefits:
- More accurate data tracking, which is unaffected by ad blockers and browser restrictions.
- Faster page loading compared to client-side tracking, as tags are processed on the server rather than in the user's browser.
- Higher data control makes it easier to comply with data privacy regulations.
Before starting
- Set up data sending from the web to the server GTM container. You can set up server-side Google Analytics 4 or Data Tag/Data Client.
- (Optional but preferable) Configure a custom domain. It will allow setting first-party cookies.
How to set up Sendlane event tracking via Sendlane tag for server GTM
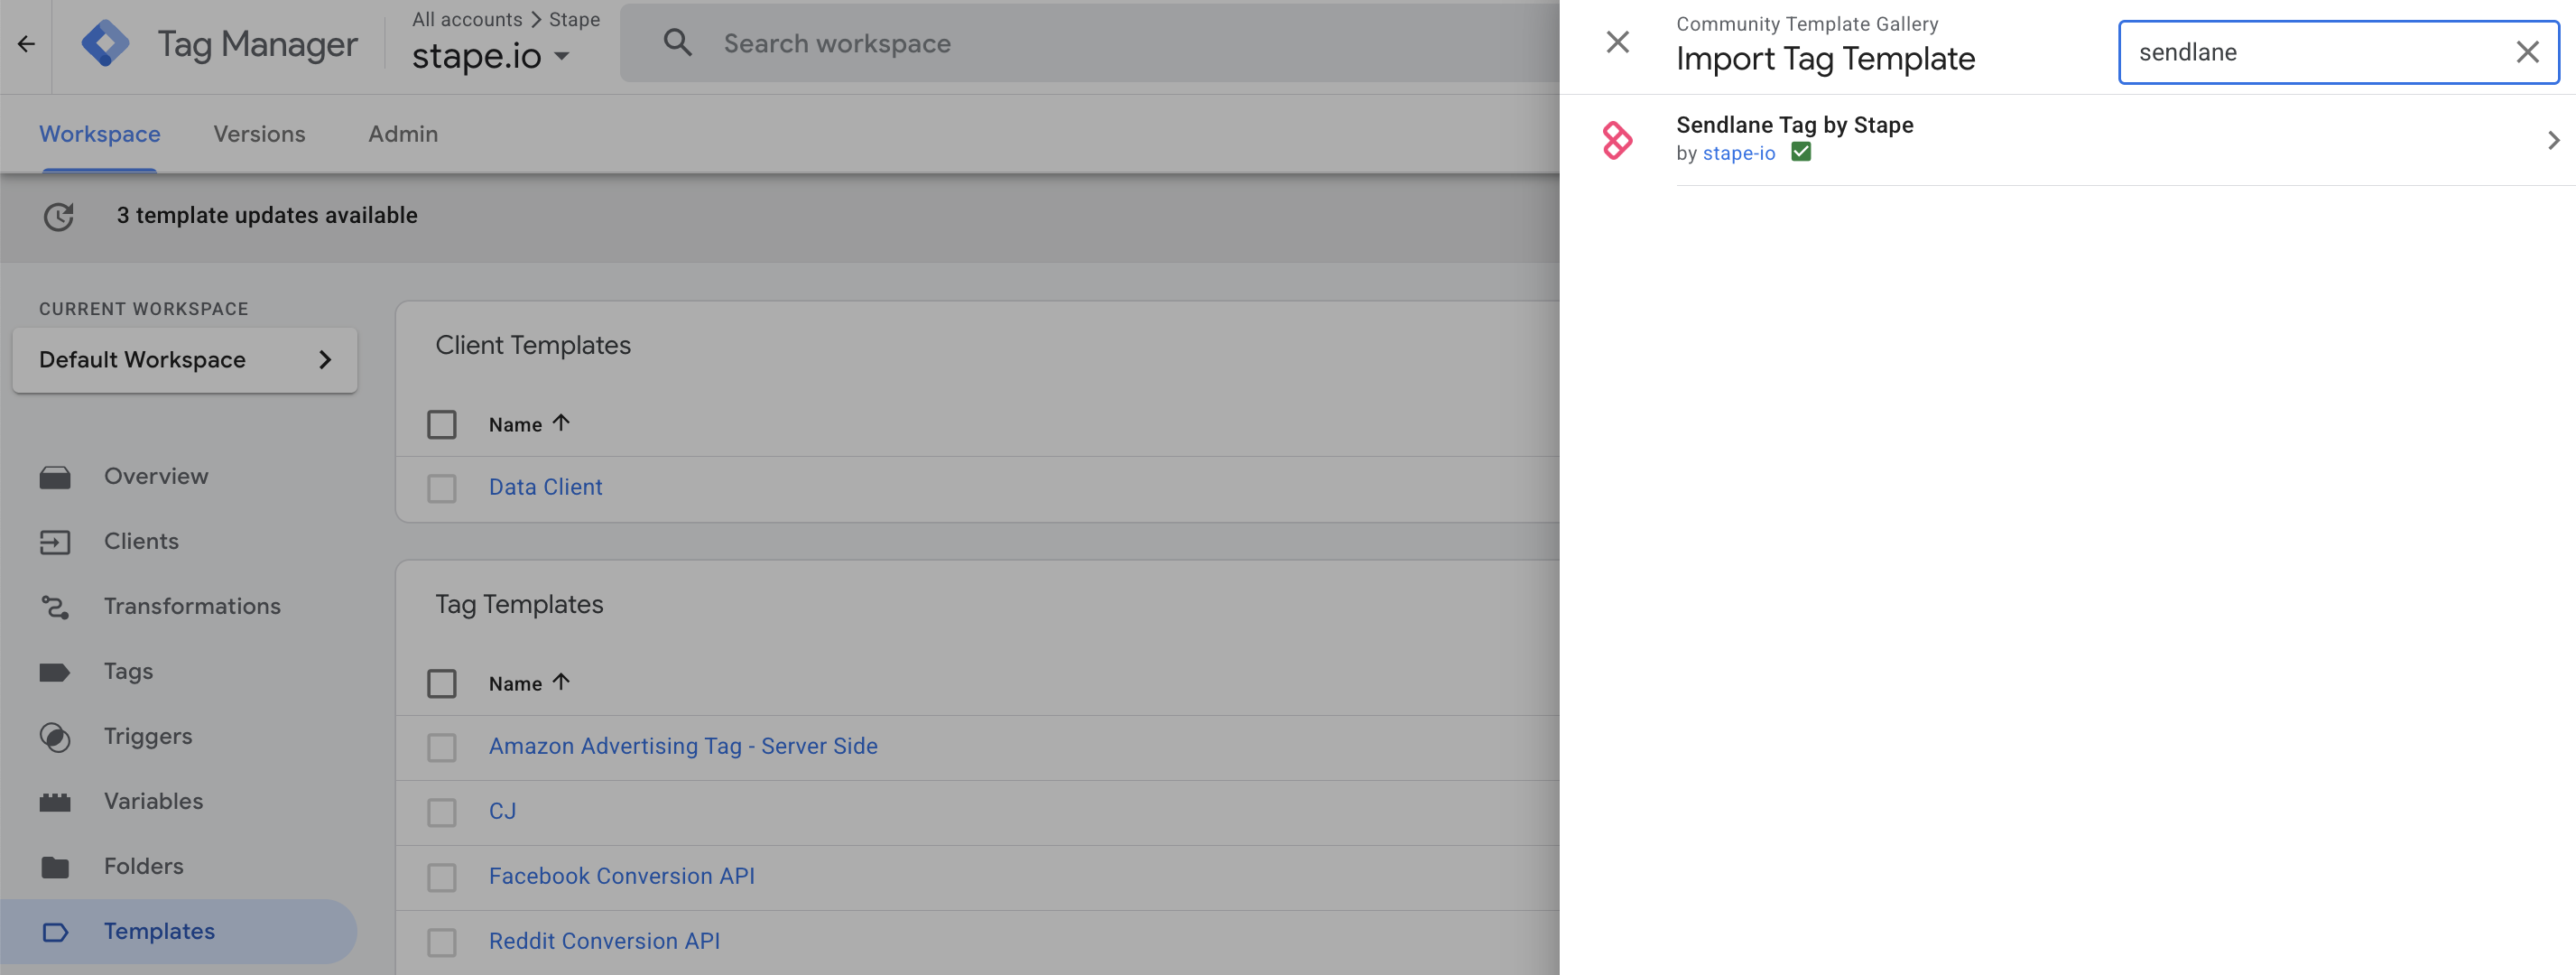
1. Find the Sendlane tag in the Template Gallery by clicking “Templates” → “Search Gallery” → “Add to workspace“.
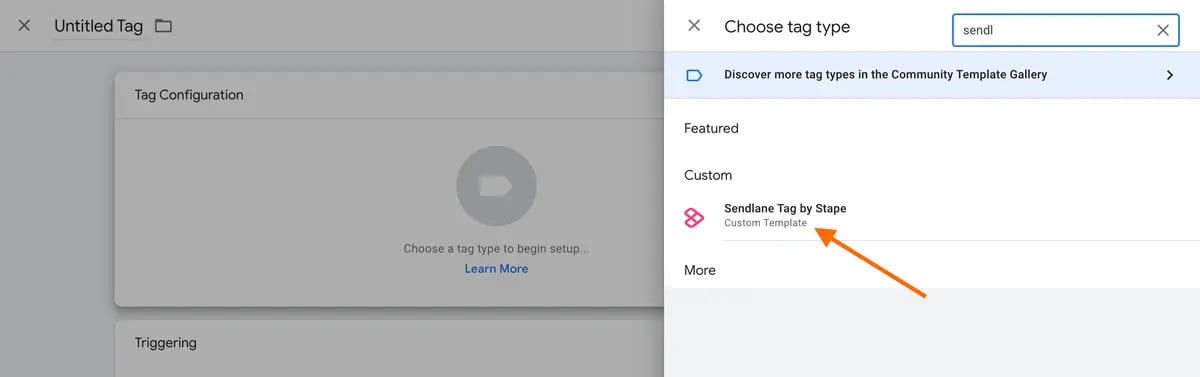
2. In the “Tags” section, click “New” and select the Tag Configuration “Sendlane tag by Stape.”
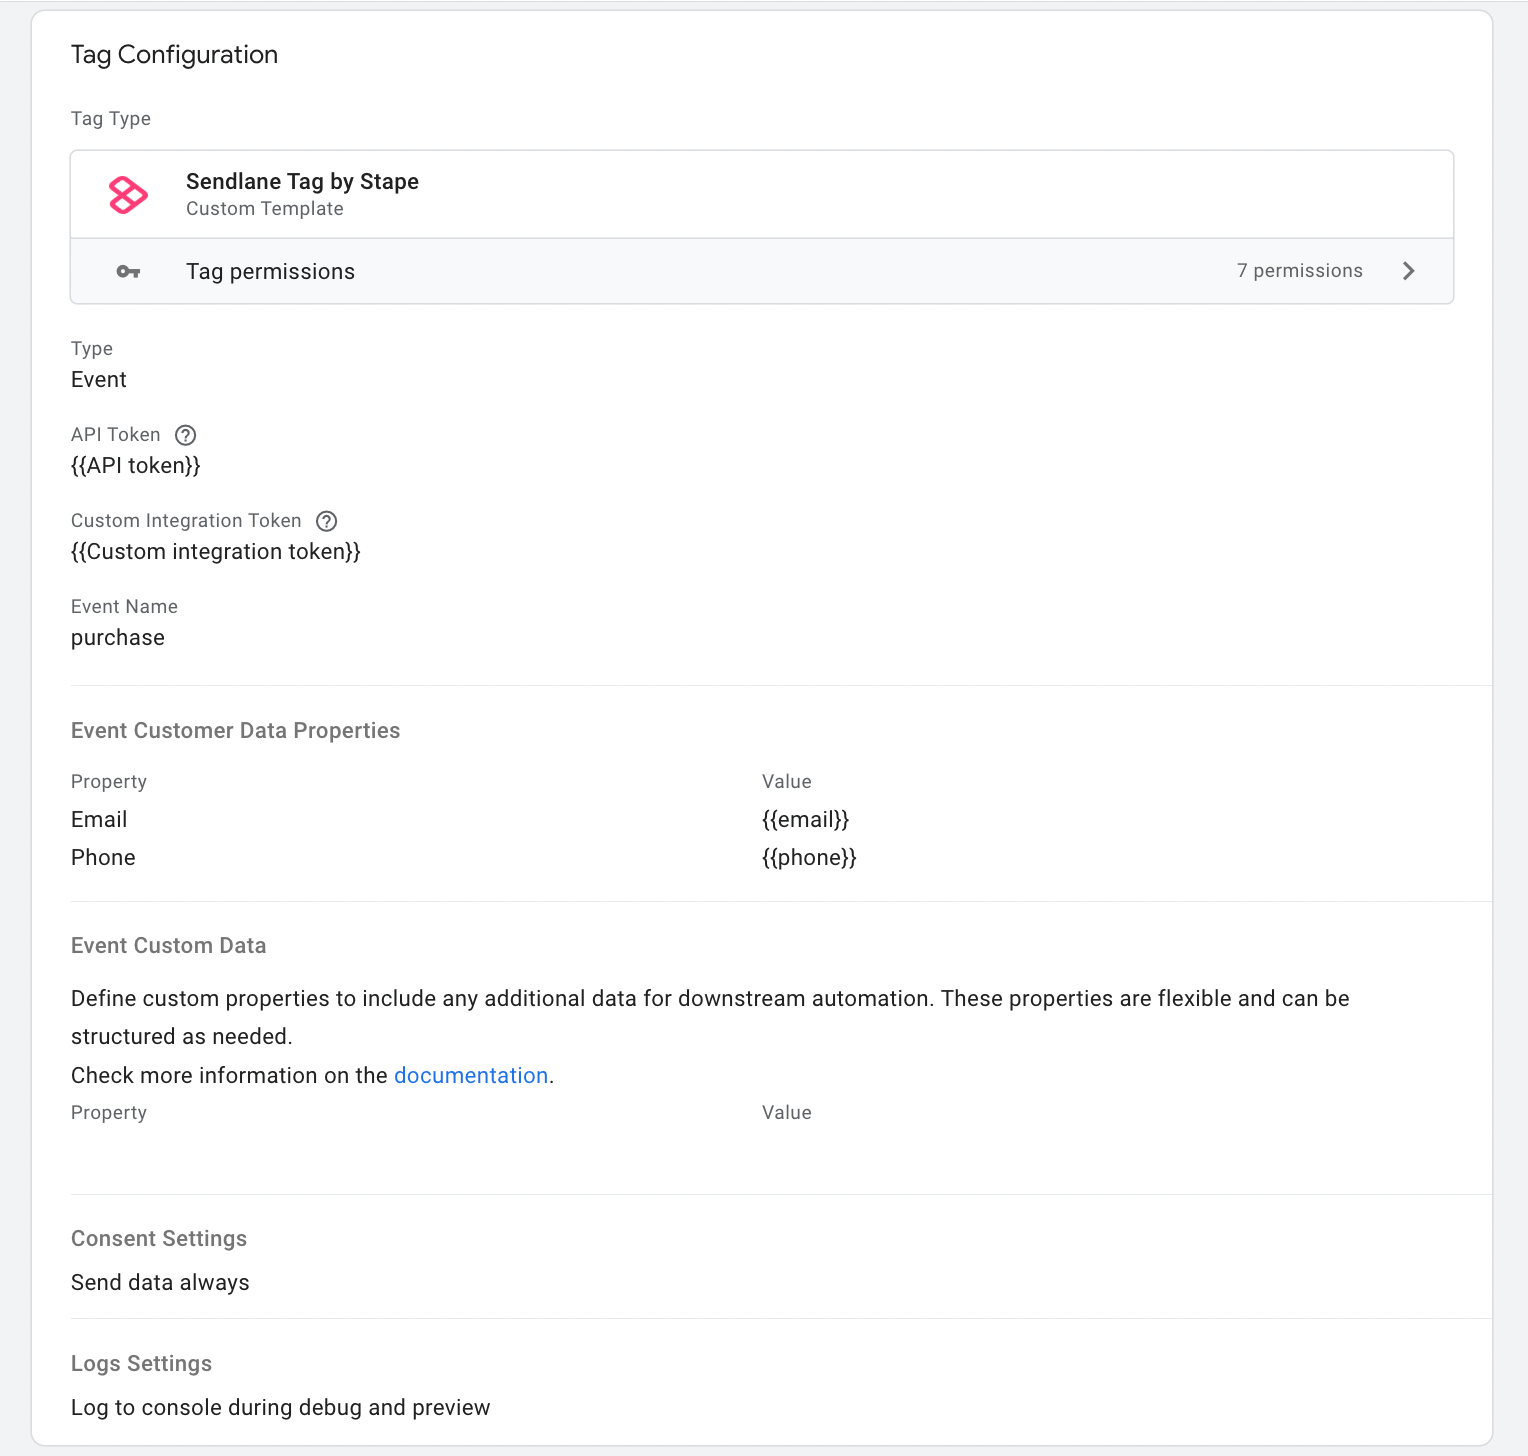
3. Configure the tag.
3.1 Choose the type:
- Add Contact to Lists – add contacts to Sendlane lists with optional custom fields.
- Track Events – capture and send custom event data, including user details and attributes.
3.2 Add API Token - you can find it in your Sendlane account under Account → API, for the details, please follow Sendlane documentation.
3.3 Custom Integration Token - a token that links API requests to a specific integration. It is required to set up event tracking. To add the token, you will need to create a custom integration, and then you will get a token. See the detailed instructions in Sendlane's article (please note: the article is aссessable only for Sendlane users).
3.4 Add Event or List ID - it depends on your chosen tag type. With Event, it is straightforward - just mention the event name you need to track. You can find List ID if you navigate to the "Lists" page in your Sendlane dashboard and select the necessary list for adding contacts. You'll find the List ID in the browser's URL before "/stats."
3.5 (Optional) Add Event Customer Data Properties/Customer Properties.
In this section you can list additional parameters that will be sent along the event.
4. Add a trigger for a tag.
5. Test the setup by using web and server GTM debugging tools to ensure the Sendlane tag triggers correctly. In case of any issues with debugging, check our debugging and monitoring guide.
Conclusion
Setting up the Sendlane tag for the server Google Tag Manager container is a handy way to improve your data tracking. Sendlane tag allows you to configure events tracking or add contacts to the lists. You can also set up additional parameters to send, such as email, phone number, first and last name. Start implementing the Sendlane tag to optimize your data tracking!
Want to try server side?
Stape has lots of options! Click on Try for free to register and check all the benefits.

Comments