Stape
Search
Contact salesTry for free

Profit on Ad Spend: why it matters and how to set it up via Stape

Alex Held

Alex Held

Author
Updated
Nov 3, 2025
Published
Oct 10, 2024

By default, marketing platforms such as Google Ads or Google Analytics report the revenue from purchases instead of profit, which often includes taxes, shipping, and other fees. Consequently, the data you get isn't reliable as it does not take into account your actual earnings on a particular purchase.

To effectively estimate the results of advertising campaigns and your marketing efforts, you need to track the Profit on Ad Spend (ROAS). This marketing metric will be helpful for current performance analysis and planning future advertising campaigns. In this article, we will explain the importance of the Profit on Ad Spend metric and how to start tracking it easily. 

Why do you need to track Profit on Ad Spend?

Profit on Ad Spend (ROAS) helps more precisely evaluate the performance of advertising campaigns. Unlike other popular formulas, such as Return on Ad Spend, it takes into account the actual profit after subtracting any additional costs (e.g., taxes, shipping costs).

Relying on profit instead of revenue generated leads to more effective ad campaign analysis and better business decisions.

To achieve this, you don't need to send the full number of conversions; you only need to send your earnings, depending on what products were purchased.

So the main task is to store your earnings data for each product somewhere and send this data instead of the purchase amount.

Methods to configure Profit on Ad Spend

Add to dataLayer

A dataLayer is a JavaScript object that holds and passes information about the page or user's interactions to tags. It can also be used to set up Profit on Ad Spend tracking. However, it has a significant drawback - low data security. Technically, the data you store in a dataLayer can be easily accessed through the browser's developer tools, like the "Inspect" function.

The dataLayer is a good solution for collecting lightweight data (e.g., cart data); if that’s the case for you, check our end-to-end guide on dataLayer in Google Tag Manager.

Create a lookup table or custom JavaScript variable

Such a method works via GTM setup. You need to create a lookup table variable or custom JavaScript that will collect data. However, this method will work only if you don't have a significant amount of items. Lookup tables or custom JavaScript variables will be inconvenient for dozens or hundreds of products.

Use external database

Storing product IDs and their profits in an external database is the most effective approach to tracking Profit on Ad Spend. It is a highly secure method that allows you to store enormous amounts of data about the items you sell.

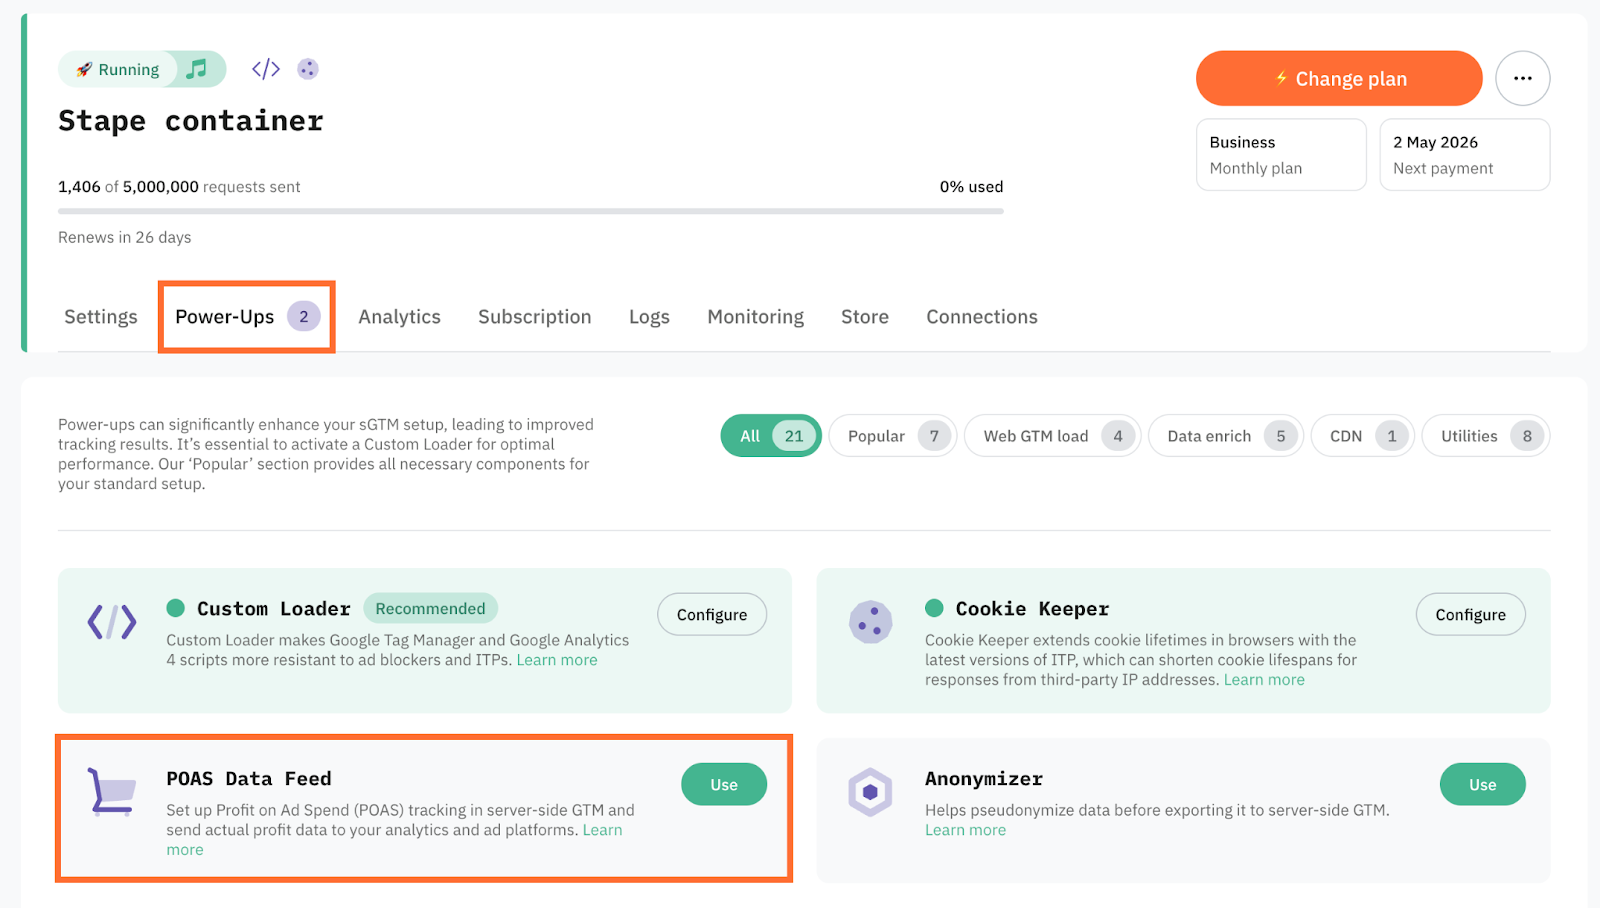
However, it has several difficulties with configuration, especially with connecting to the external database and then connecting this data to your existing tracking. To simplify the setup process, you can choose Stape as your hosting provider for sGTM and use the Product Feed power-up for simple and reliable setup.

Benefits of Stape's Product Feed as a cloud database for sGTM

  • Specifically created for data storage from GTM. This allows you to avoid errors that you may face due to the complicated configuration of the database for server GTM.
  • No additional setup is required. It is seamlessly integrated with Stape hosting.
  • No additional costs for users with the Pro or higher plan. There are no limitations on the data you can store.
  • Convenient management. You have several handy options, such as the ability to automatically update the catalogue.

Learn more about the Product Feed power-up.

Product Feed
Product Feed

How to set up Profit on Ad Spend tracking with Stape

Requirements

It is assumed that you are already using server-side tracking via sGTM and that it is already configured. If not, here is a list of relevant articles:

Quick overview of the setup

  • First, you need to prepare the data source, i.e. your product catalogue and margins. It should be in CSV format.
  • Upload this data or enable automatic synchronisation in the Product feed power-up.
  • Add a single variable to the server container for everything to work.

Step-by-step configuration

1. Preparation of a product catalogue.

Requirements for the catalogue:

  • CSV format. Delimiter: comma or semicolon.
  • It must contain the product ID that you use for tracking and your earnings for each product. The catalogue may contain more fields, but these are the ones that will be loaded and are actually needed.

This is actually the most difficult stage of this configuration, as much depends on your backend/CMS and the current state of the catalogue. For example, if you use a popular CMS such as Shopify or WooCommerce, there are dozens of plugins that can help you quickly and easily create the catalogue you need. But for custom solutions, you will definitely need the help of developers.

When uploading data to the Stape product feed, you can select one of the following options for the “value type”: absolute or percentage.

Selecting the Value type
  • Percent: assumes that the figure specified in value is the percentage of your earnings from the total price of the product. That is, if the product costs $50, and it is uploaded to the product feed with a value of 15, the variable will return $7.50 as a result. This option is more suitable for businesses that always set and maintain their margins in %.
  • Absolute: This is the full value of your earnings, i.e., the exact amount that is loaded for the product in the product feed will be returned. This option is more common, and we use it in the example below.

In general, there are two options for preparing a catalogue:

  • Simple

Download your catalogue in any way, add a margin column in Excel where you enter the earnings figures for each product, and move on to the next step - uploading this to Stape.

Simple way of preparing a catalogue

This approach makes sense if your product earnings change very rarely and new items are added infrequently. Otherwise, you will either spend a lot of time constantly updating your catalogue, or your figures will be inaccurate due to new products or price changes for old ones.

  • Correct

It differs from the simple version in that here you set up automatic catalogue synchronisation. This way, your backend acts as the primary source and the data will always be up to date.

We will examine this below using Shopify as an example, but it also applies to other platforms.

The first thing you need to do here is decide in which field/attribute the earnings on the product will be stored. Shopify has a native “Cost per item” field that should contain the cost price of the product. It is empty by default, so I decided to use it to store the profit per product, although you can use another field or some custom attributes/fields.

In the convenient bulk edit feature directly in the interface, I added values to Cost per item for all products.

Cost per item for all products

Next, you need to choose one of the dozens of apps for “product feed” in Shopify Marketplace. I looked at several and was completely satisfied with “Mulwi Feeds”. It allows you to create a custom catalogue and add any fields/attributes you need. But you can use any other app that meets your criteria.

In “Mulwi Feeds”, you need to create a custom catalogue in CSV format and then, in the Templates section of the created catalogue settings, remove unnecessary fields, leaving only SKU and adding the Margin field from the Cost attribute.

 All done, save the link to the feed catalogue and proceed to the next step.

Uploading data to Stape's Product feed power-up.

In your container on Stape, go to power-ups and find Product Feed.

Select the Product Feed power-up

Activate it and then activate the “Auto sync” switch. In the window that appears, specify the link and other catalogue parameters:

Catalogue parameters - step 1

After that, the file will be scanned. In the next window, select the fields of your catalogue:

Catalogue parameters - step 2

In my example:

  • Product ID: located in the file in the “SKU” column.
  • Value type: Absolute, because I used the full earnings value rather than a percentage.
  • Value: located in the file in the “Margin” column.

After confirmation, the catalogue will download shortly and the data received from the file will be displayed. This data will be updated once a day or once a week, depending on the option selected when adding the file to the Product Feed power-up.

Uploaded catalogue
Uploaded catalogue

3. Configuration on sGTM

At this stage, you already have all the data, and all that remains is to configure the variable that will run and collect it. To do this, use the Margin Lookup variable from Stape: https://github.com/stape-io/stape-store-margin-lookup-variable. Install it in your sGTM container and create a variable.

The variable assumes that the standard GA4 items array is used in incoming events to the server → the specified ID of all products is selected from it → a search is performed in the products uploaded to Stape → the earnings figures for each product are returned → the variable returns the total earnings taking into account the quantity in items.

Margin Lookup variable configuration 

In my case, I used SKU in the catalogue, so I use item_sku in this variable. Also, in More settings, it is recommended to use options if you do not have any cases where it could harm your logic.

Then simply add this variable as a value to the necessary platform tags where you want to use POAS in the results, for example, in Google ADS:

Our variable in the Google Ads tag

Test the setup

All that remains is to check that everything is working properly. Run the preview, trigger the necessary events, and check that the figures in the preview are correct.

In addition to this, you can use the “Math” variable to subtract the cost of delivery/taxes or any other parameters that are present in the input event.

Math variable configuration

Conclusion

Profit on Ad Spend is a helpful metric for your business to track. Unlike other metrics such as ROS and ROAS, it measures the gross profit generated for every dollar spent on an ad, so it shows the profit after subtracting any possible additional costs like taxes and shipping costs. This gives you a clear view of ad campaign profitability, enabling you to make more informed decisions.

The most effective way to track Profit on Ad Spending is to use an external database. You may consider Stape's Product Feed for this purpose. It is seamlessly integrated with Stape, so it doesn't require any additional setup; in addition, the Product Feed power-up is available for users with the Pro or higher plan.

Would like to try server-side tracking?Sign up now!

author

Alex Held

Author

Alex, a tracking expert, specializes in first-party data, enrichment, and measurement. With GTM and sGTM expertise, he helps businesses enhance data accuracy, attribution, and audience insights.

Comments

Try Stape for all things server-side