How to integrate ActiveCampaign with the website using Google Tag Manager server container
We created an ActiveCampaign tag for the Google Tag Manager server container to help connect websites with ActiveCampaign. The benefit of using this tag for the server container is that you can fully integrate your website with ActiveCampaign without the help from developers. Now, you can set up the integration using the Google Tag Manager Server container. The ActiveCampaign tag for the Google Tag Manager server container allows tracking events, creating or updating contacts, or both.
What is ActiveCampaign?
ActiveCampaign is an online CRM with feature-rich email marketing and sales functionality. Since one of the essential features is automation, they allow an automatic transfer of all your contacts and contact information into your ActiveCampaign CRM.
ActiveCampaign is a powerful email marketing and CRM software that makes it easy to cultivate and nurture relationships. You can get started right away with its easy-to-use features, such as built-in reporting and geo-tracking. ActiveCampaign allows tracking user behavior on the site and sets up email automation based on their activities.
Integrating your site with ActiveCampaign
Let’s say that you have an e-commerce store selling toothpaste. And you want to add every new customer to a contact list inside ActiveCampaign and send them a reminder about buying a new toothpaste.
To do that, you need to send this new contact to ActiveCampaign and add a parameter that will differentiate those who purchased. Previously, it was only possible with the help of developers because ActiveCampaign allows utilizing only the API method for adding contacts.
We wanted to create a more straightforward solution for integrating sites with ActiveCampaign. So now, you can do that inside the Google Tag Manager server container using our ActiveCampaigns tag.
And while you do not need any help from developers, you need to understand how to set up a web and server Google Tag Manager container. If you already set up server-side Universal Analytics, GA4, or Facebook, you should have all the data ready inside the web and server Google Tag Manager container.
Ok, let’s dive in.
How ActiveCampaign tag for Google Tag Manager server container works
ActiveCampaign tag for Google Tag Manager server container will communicate with ActiveCampaign API and send event and user data to your ActiveCampaign account.
This tag allows to do the following:
- Track events
- Create or update contacts
- Create or update contacts and track events
To do any of these events, you need to send this information to the ActiveCampaign:
Email. User email. Required field.
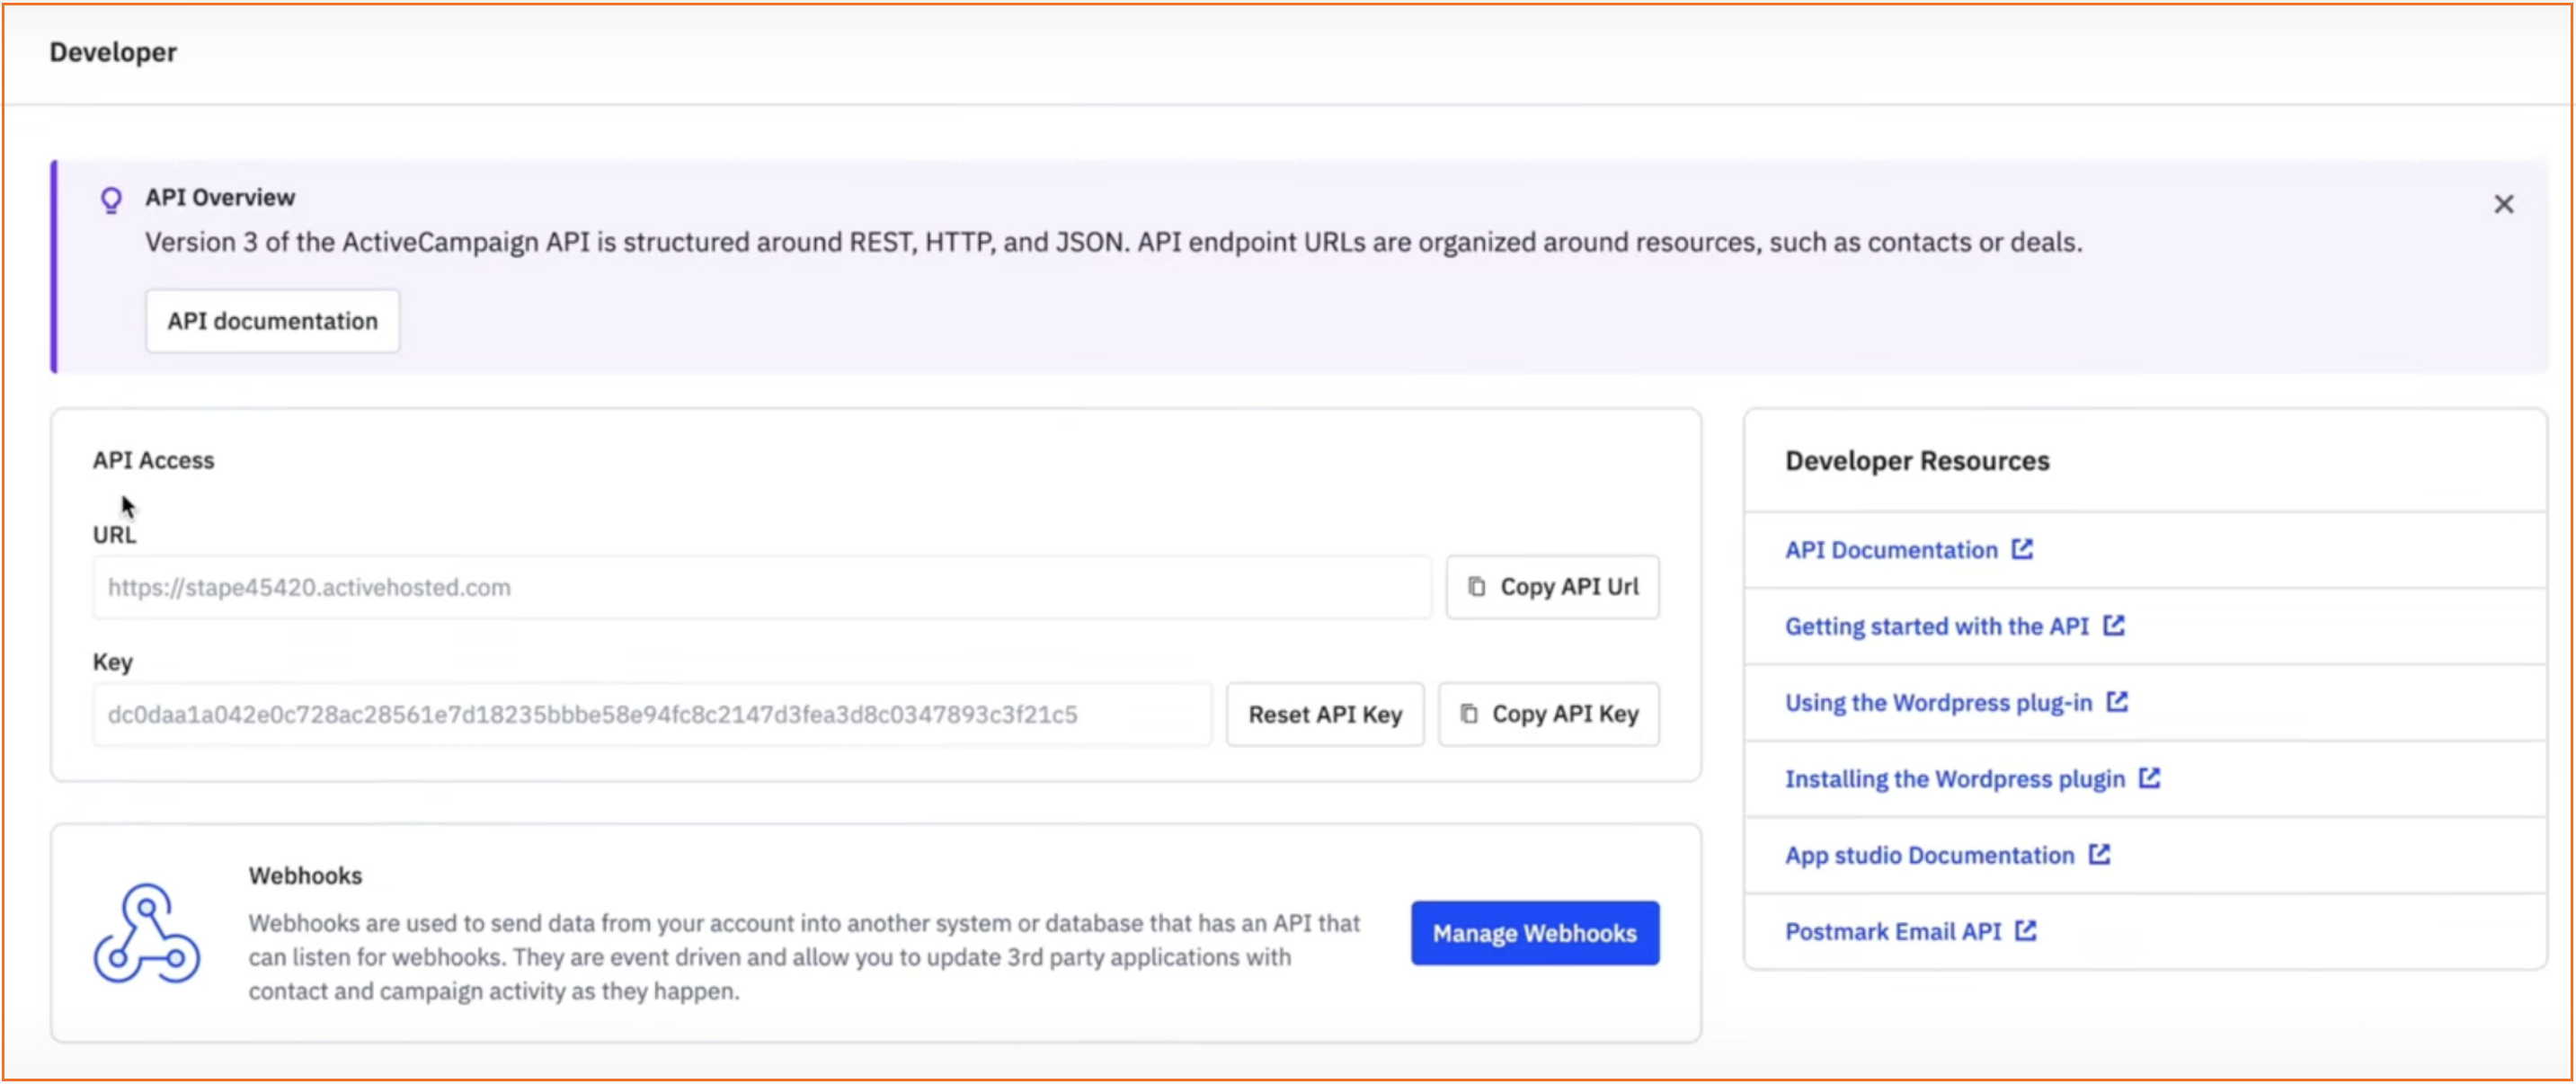
API URL. To find the API URL for your AC, go to my settings page under the “Developer” tab.
API KEY. Each user inside your ActiveCampaign has their API KEY. You can find it on the settings page under the “Developer” tab.
First name. User information. Not required
Last name. User information. Not required
Phone. User information. Not required
Event Key. Required and can be found named “Event Key” on Website -> site tracking -> event tracking inside your ActiveCampaign account.
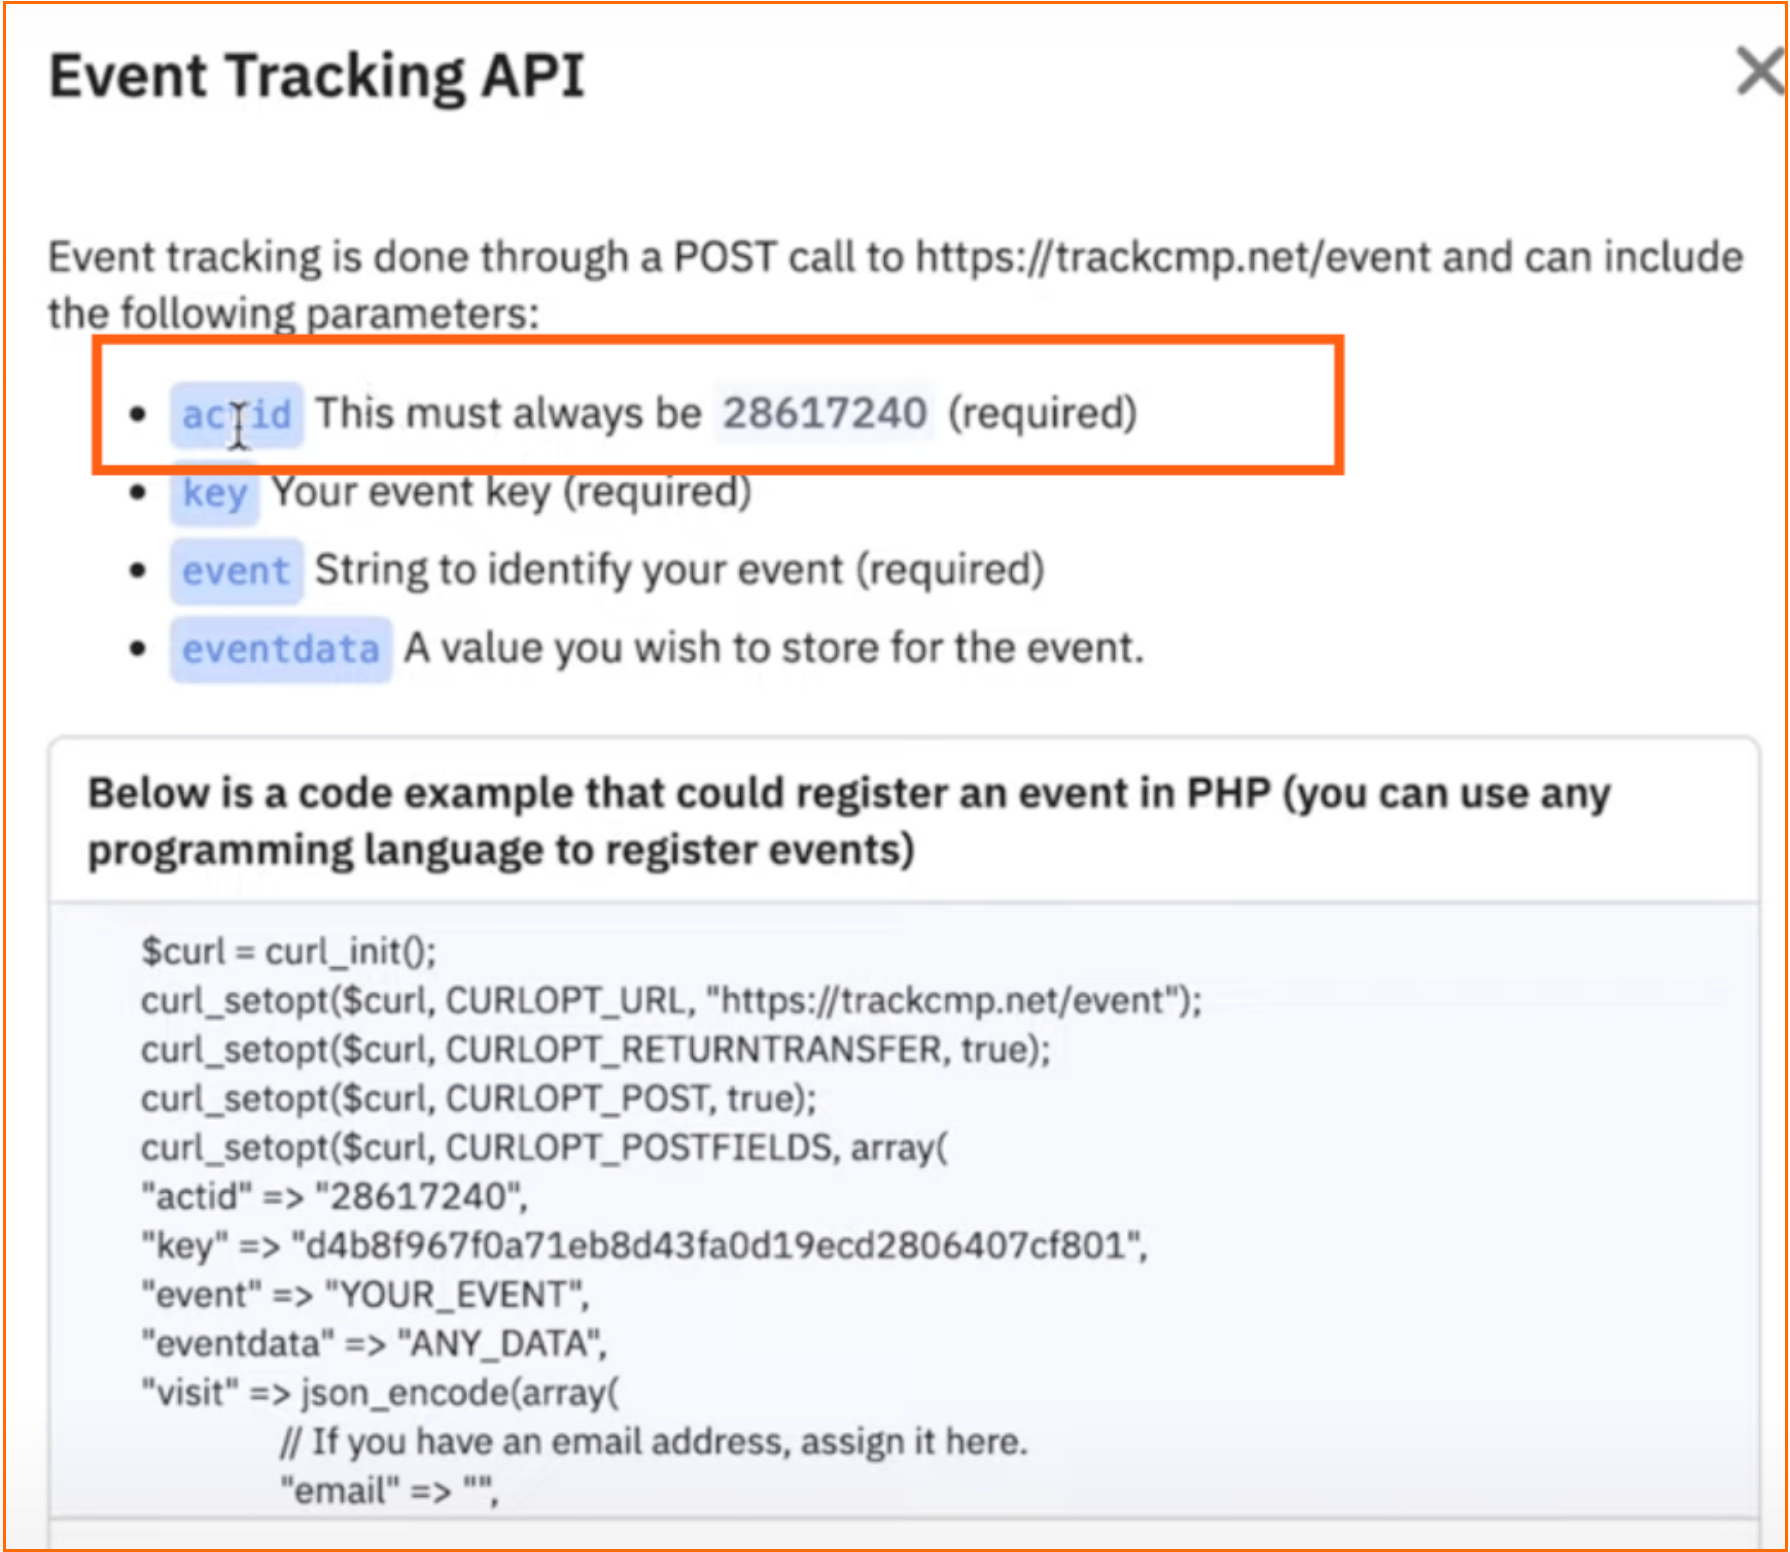
Actid. Required and can be found named “actid” on Settings > Tracking > Click Event Tracking API.
Event name. Event name that should be added inside the AC.
Event Data. Parameters you want to add to the event.
How to integrate your website with ActiveCampaign
2. Add custom subdomain. This step is highly recommended but not required.
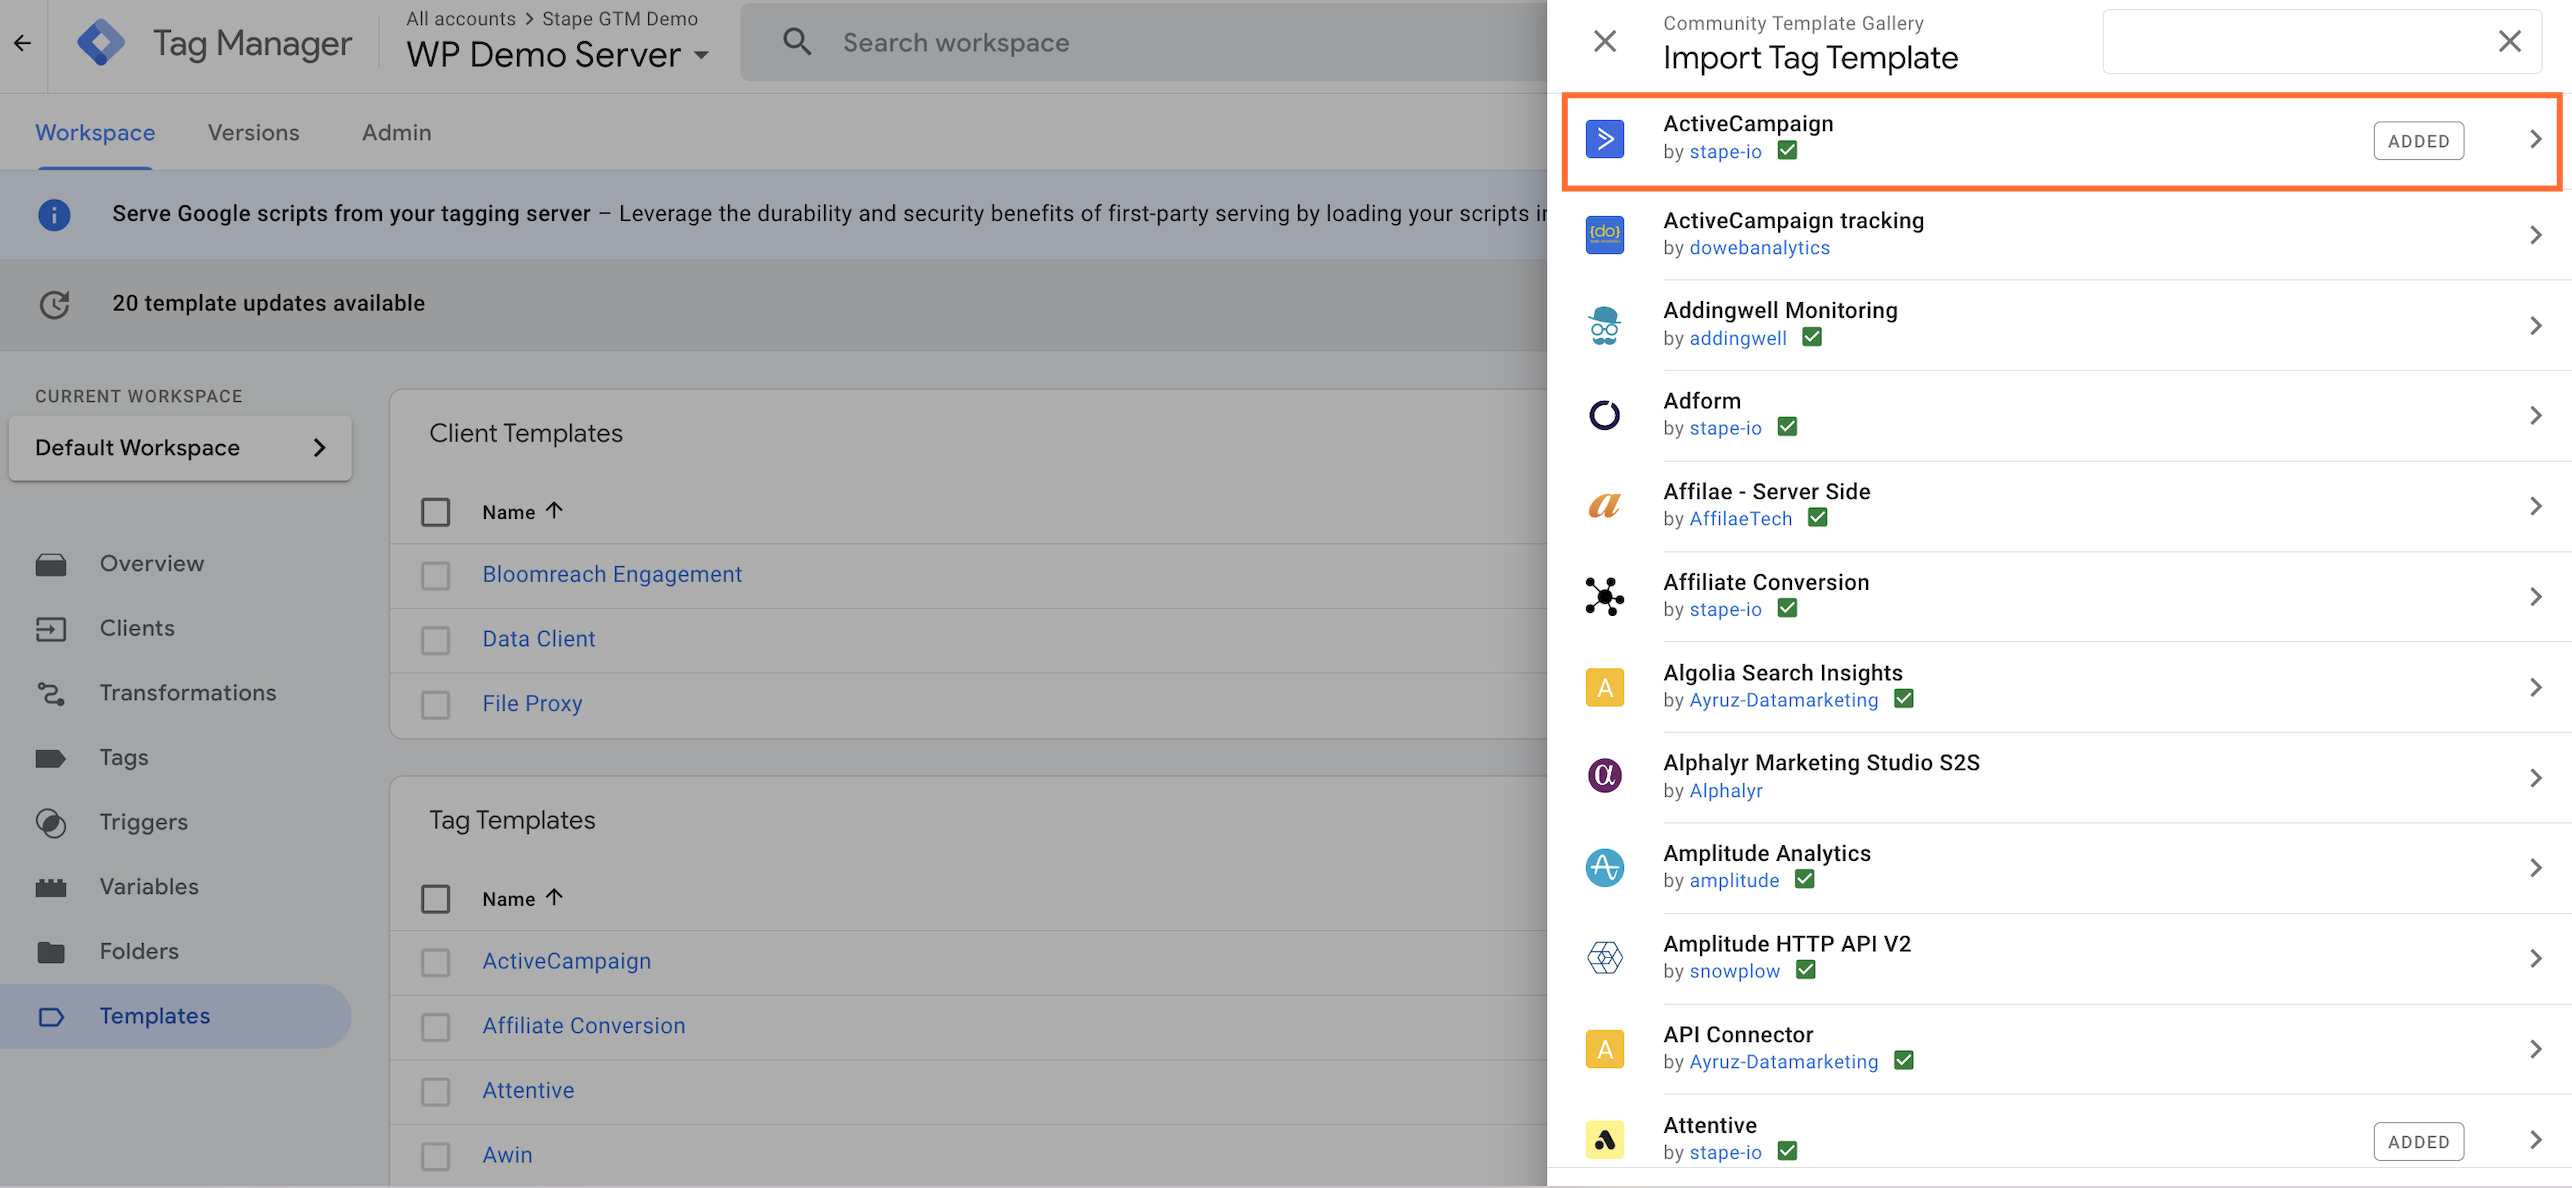
3. Go to server GTM → Tag Templates → add ActiveCampaign template.
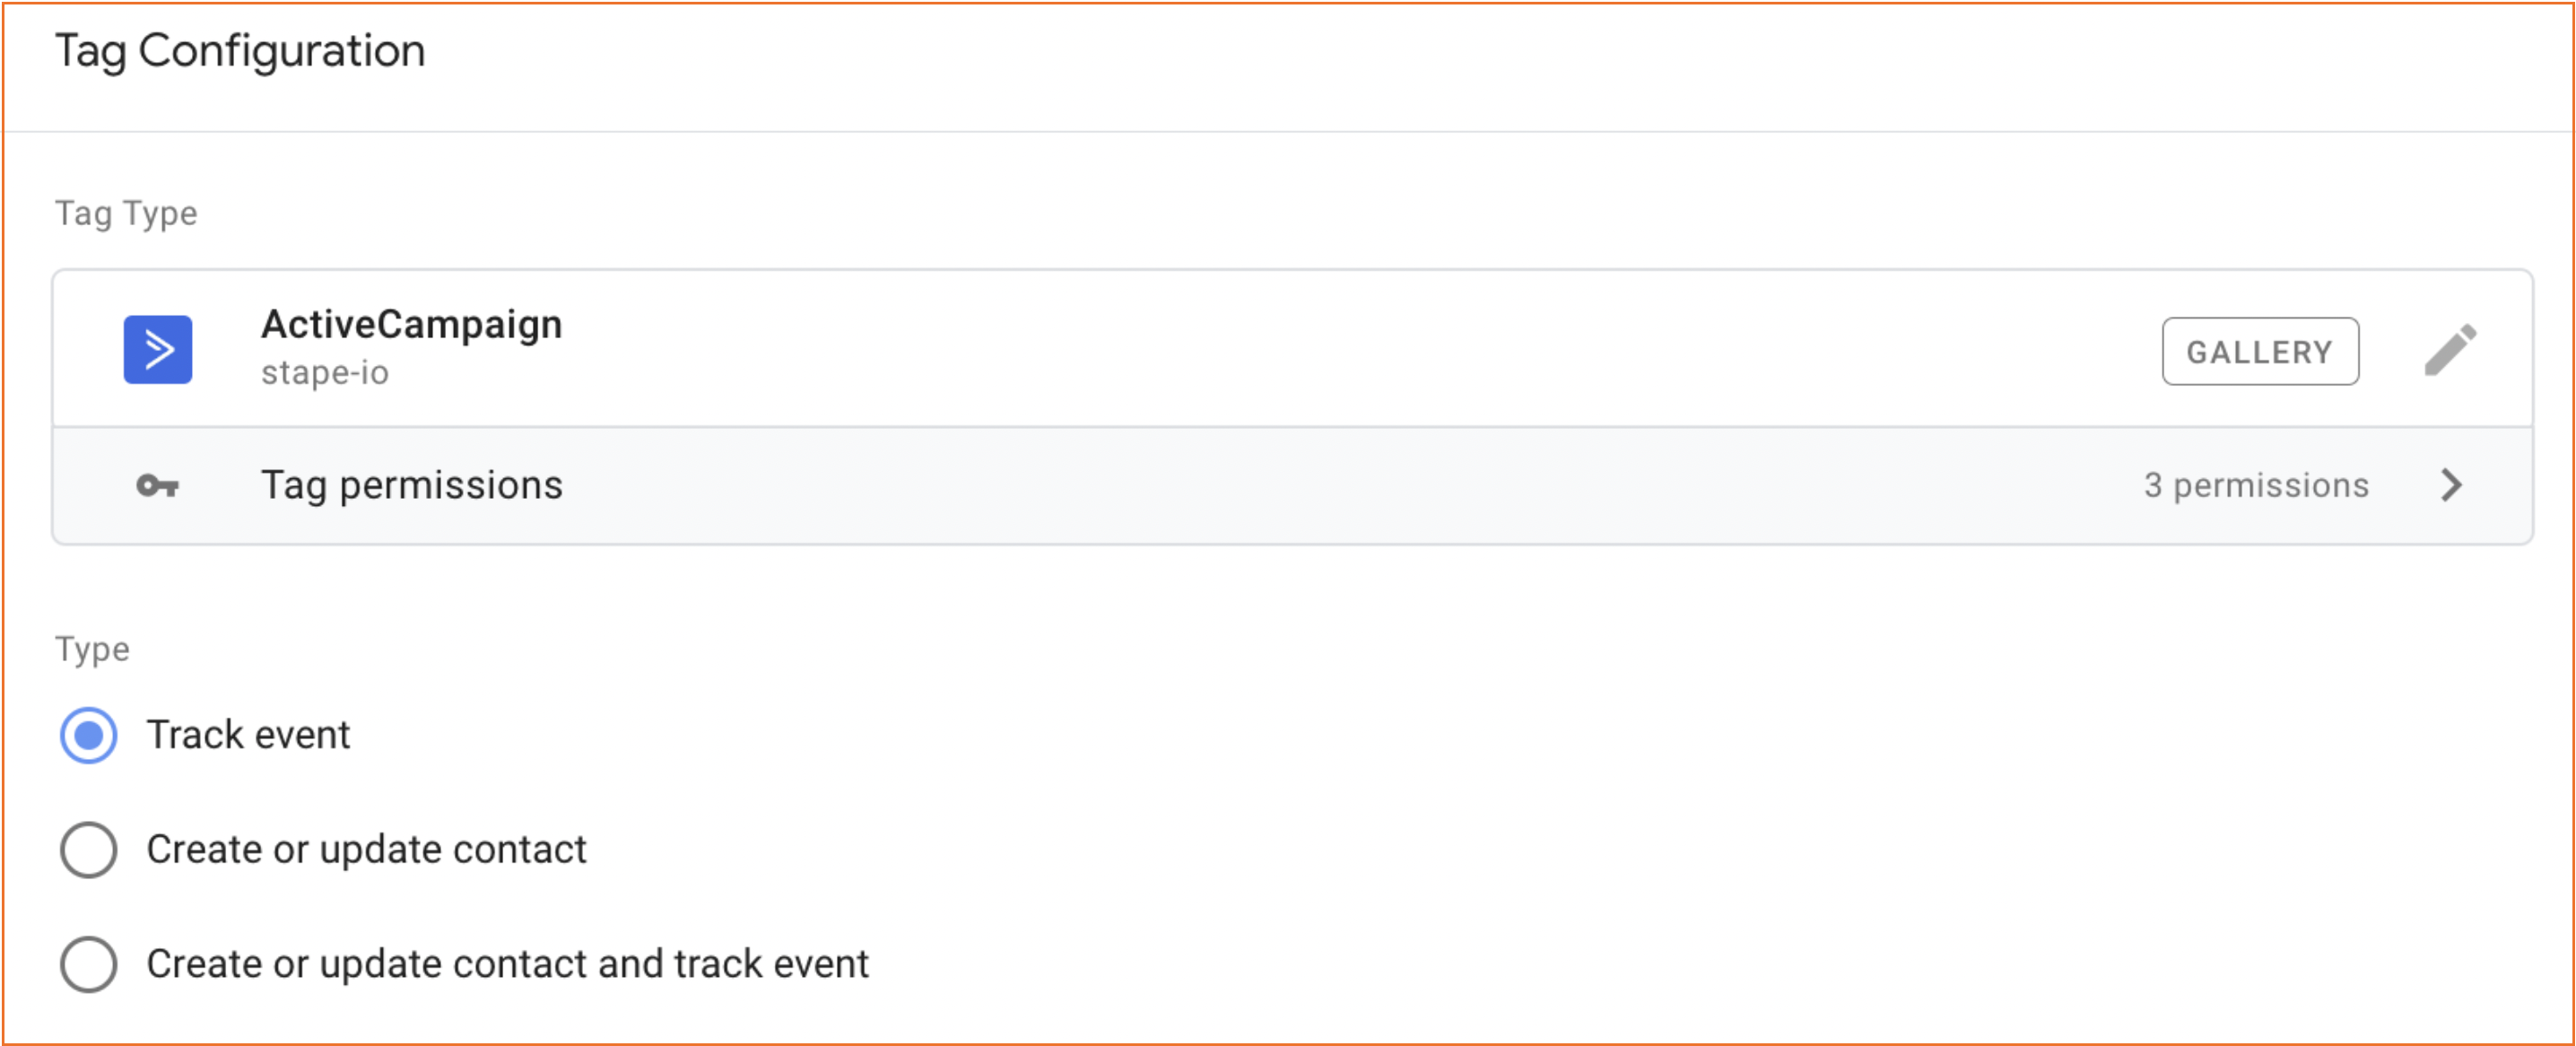
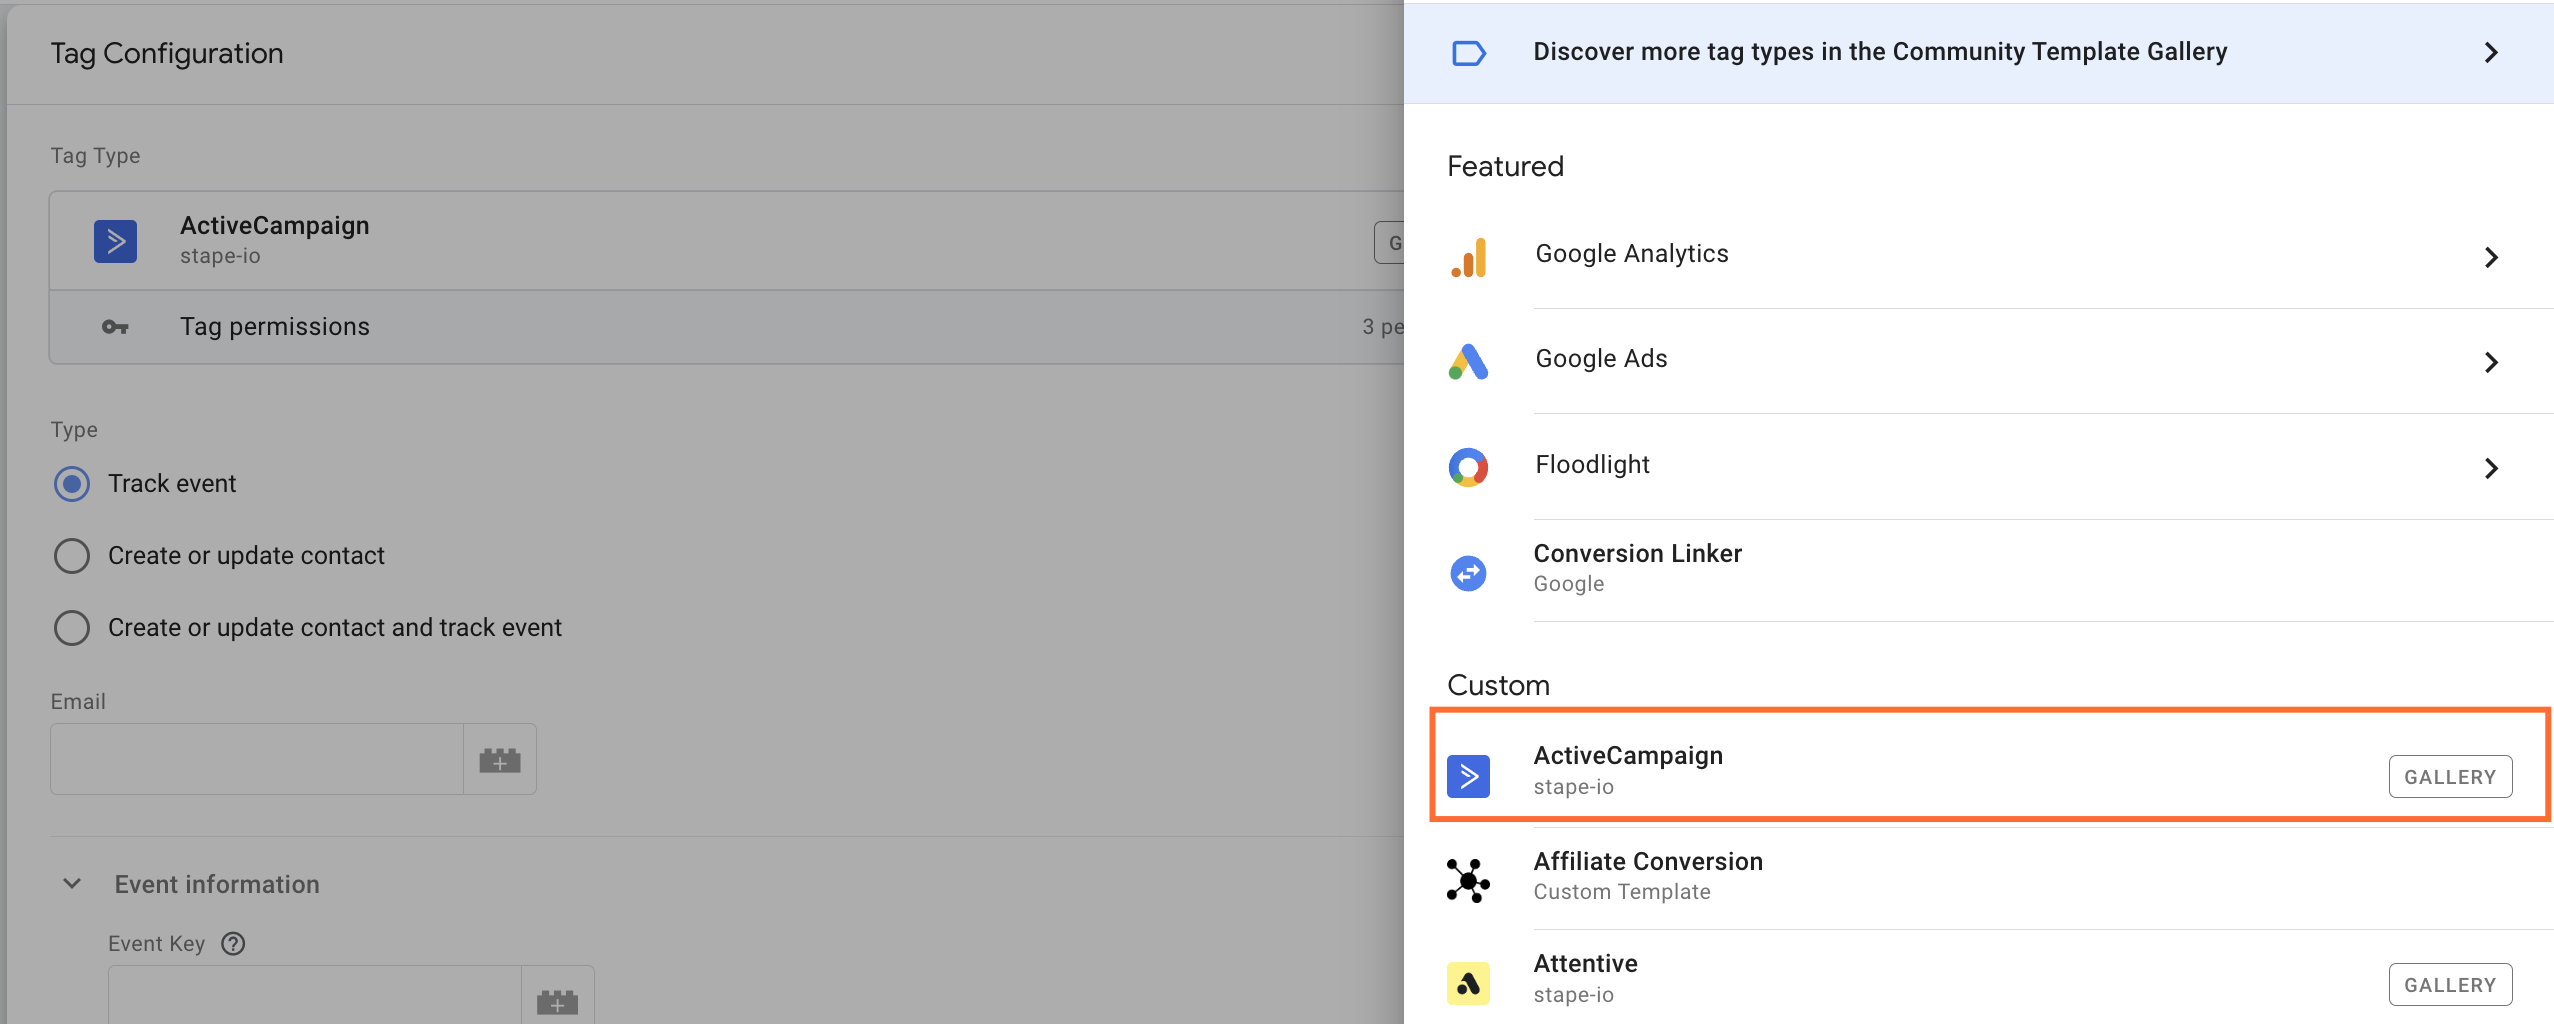
4. Go to the “Tags” section → click “New” → choose “ActiveCampaign” as tag configuration.
5. We will consider how to create a contact and add a purchase event as an example. To do it follow the steps below:
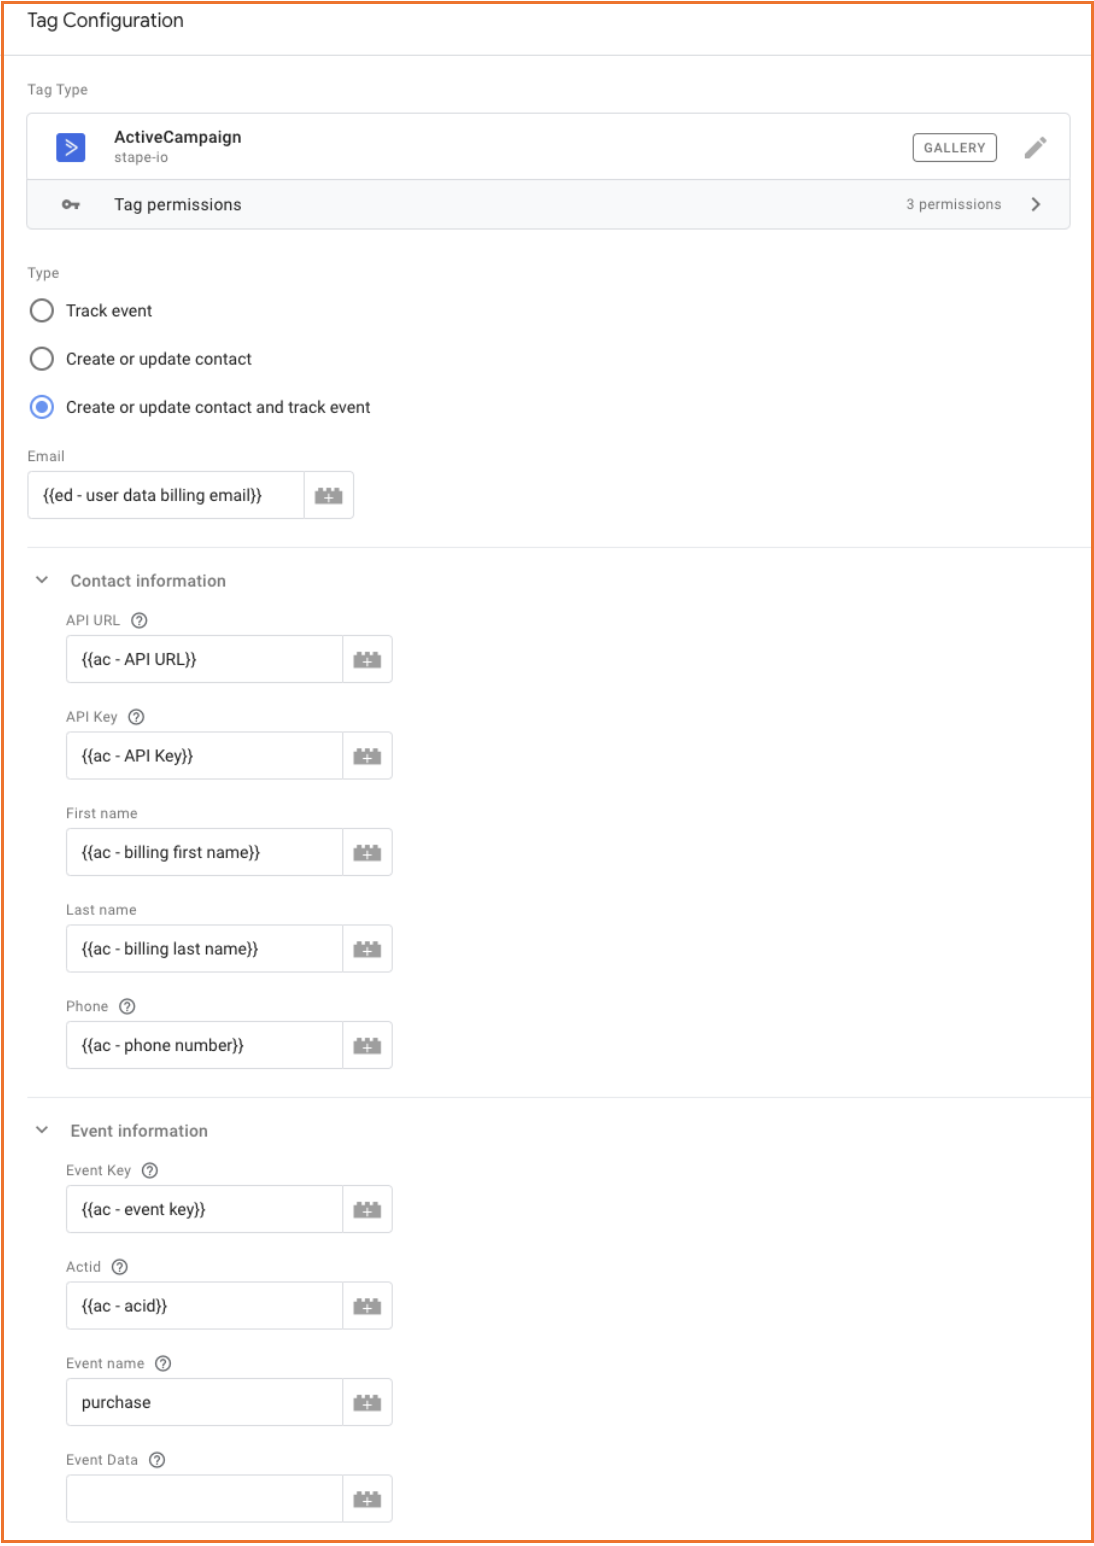
5.1 Choose the third option in the tag “Create or update contact and track event”.
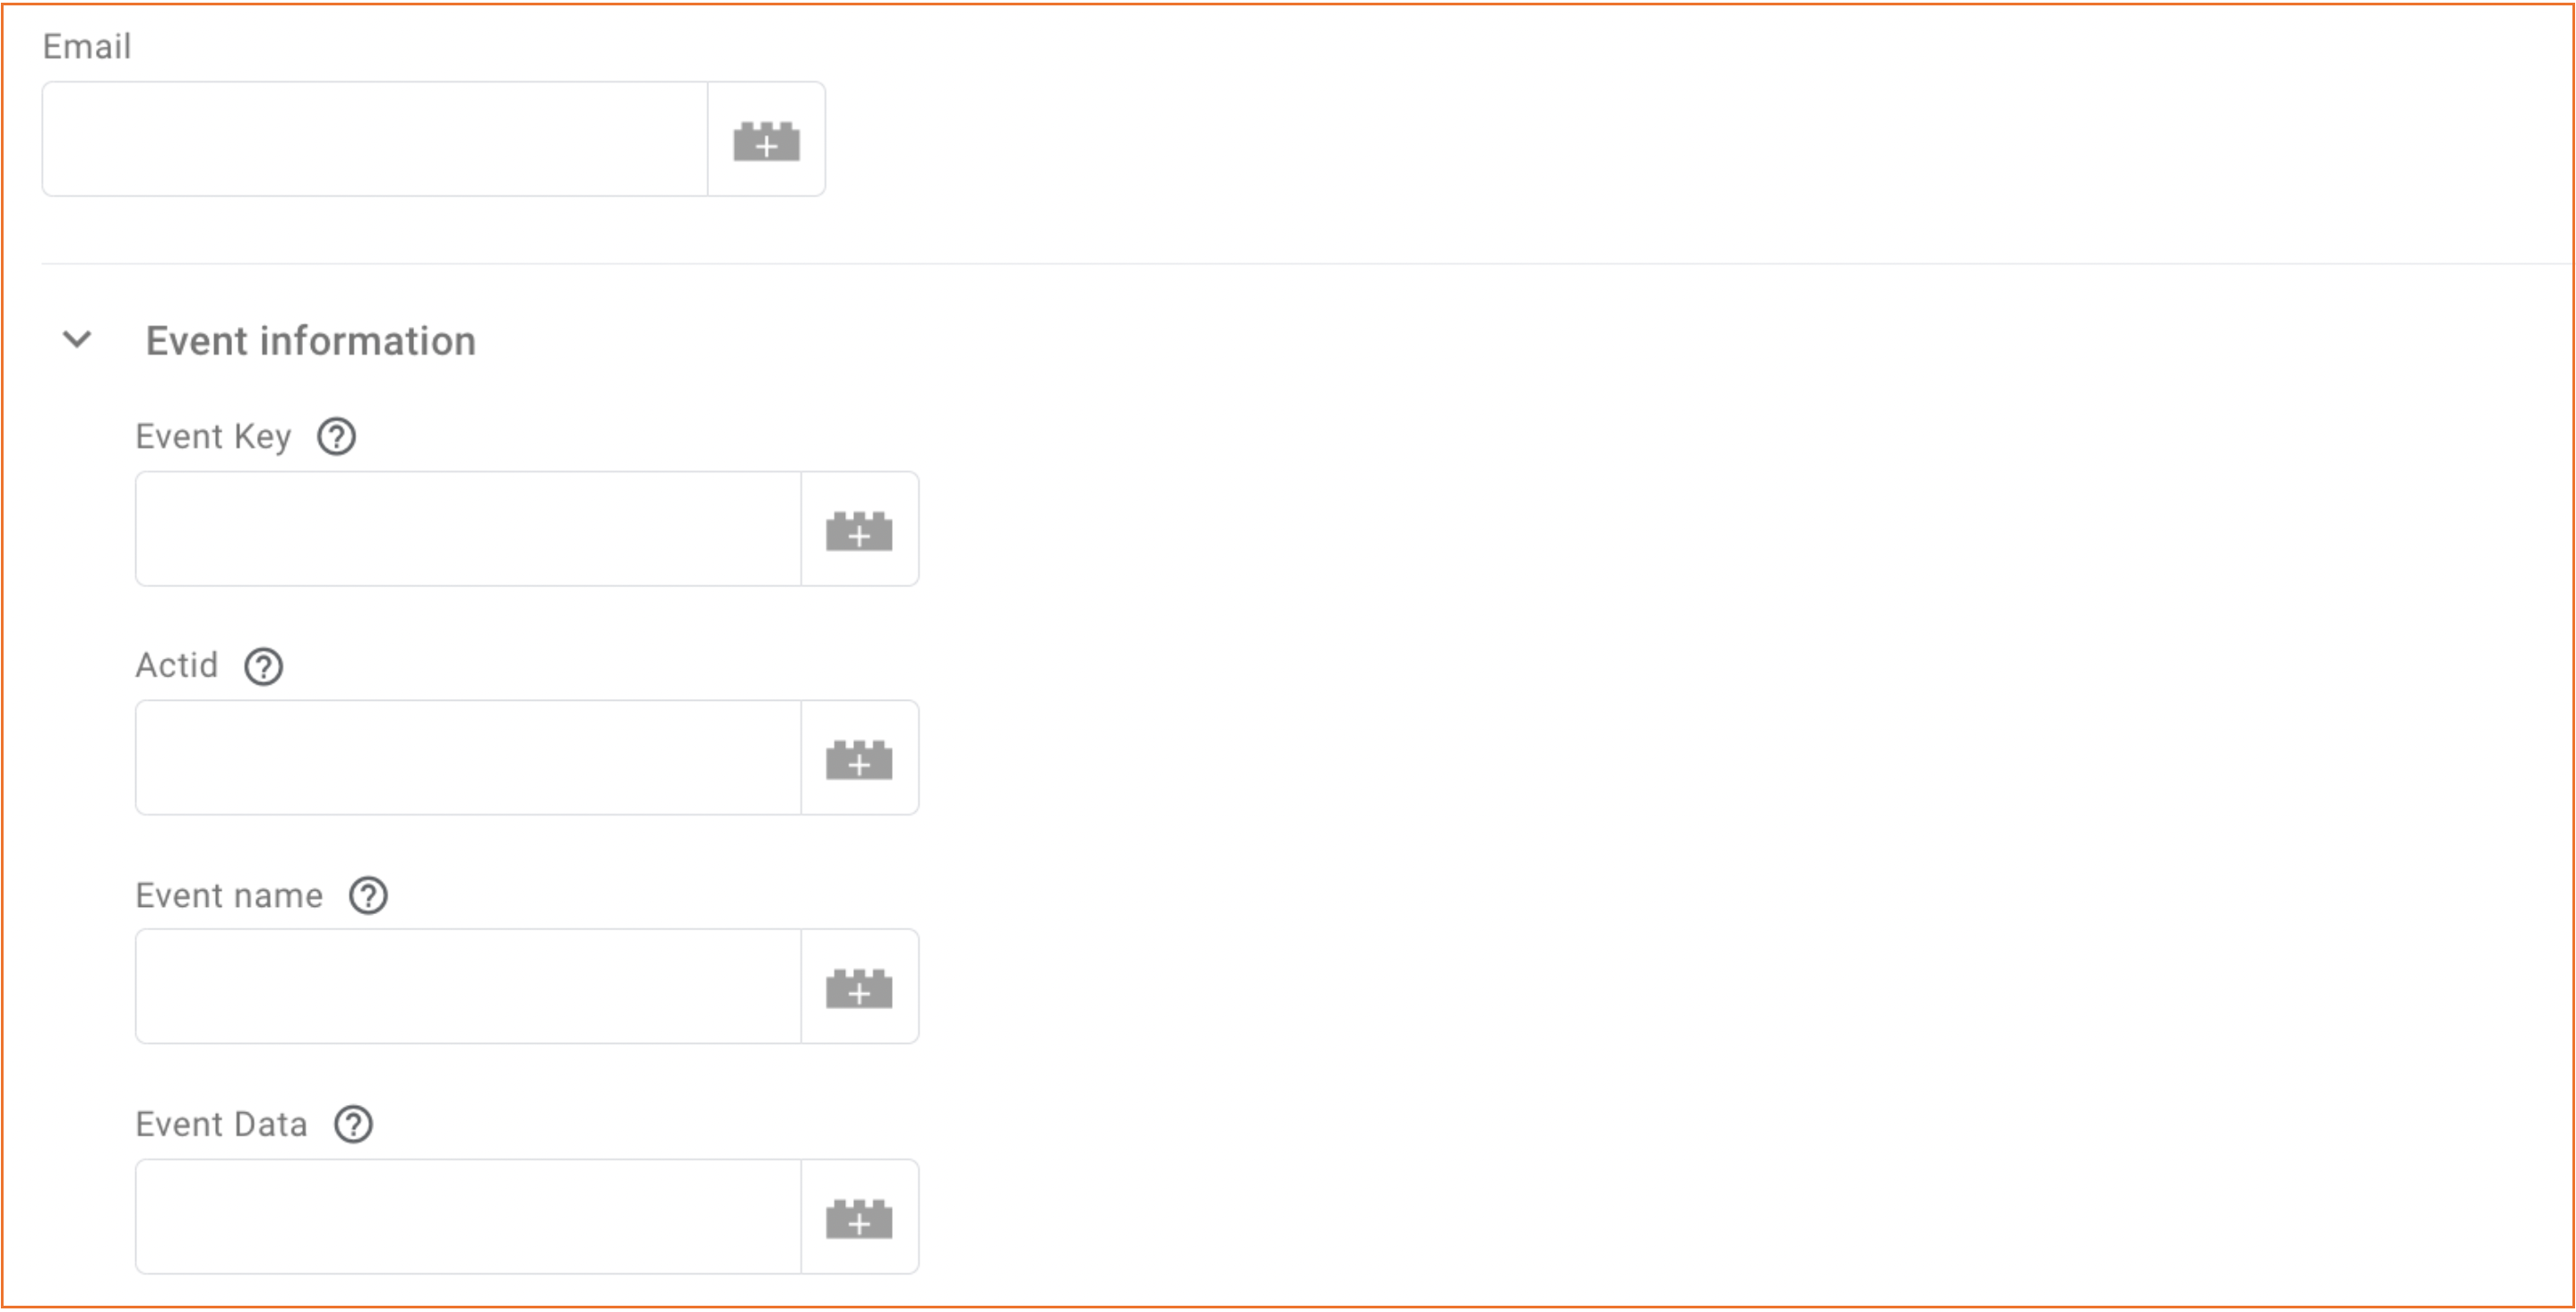
5.2 Add an email (we use the variable for this case).
5.3 Add API URL and API Key.
You can find it in your ActiveCampaign account (Settings → Developer → copy API URL and API Key).
5.4 Add the contact parameters - First Name, Last Name, Phone.
5.5 Add “Event key”.
To find it go to your ActiveCampaign account (Website → Site Tracking → Event Tracking)

5.6 Add “Acid”.
It can be found in the same section as “Event key”, just click on “Event tracking API” → copy “Acid” from the pop-up.
5.7 Add the name of the event. Use the same you created in ActiveCampaign. In our case it is “purchase”.
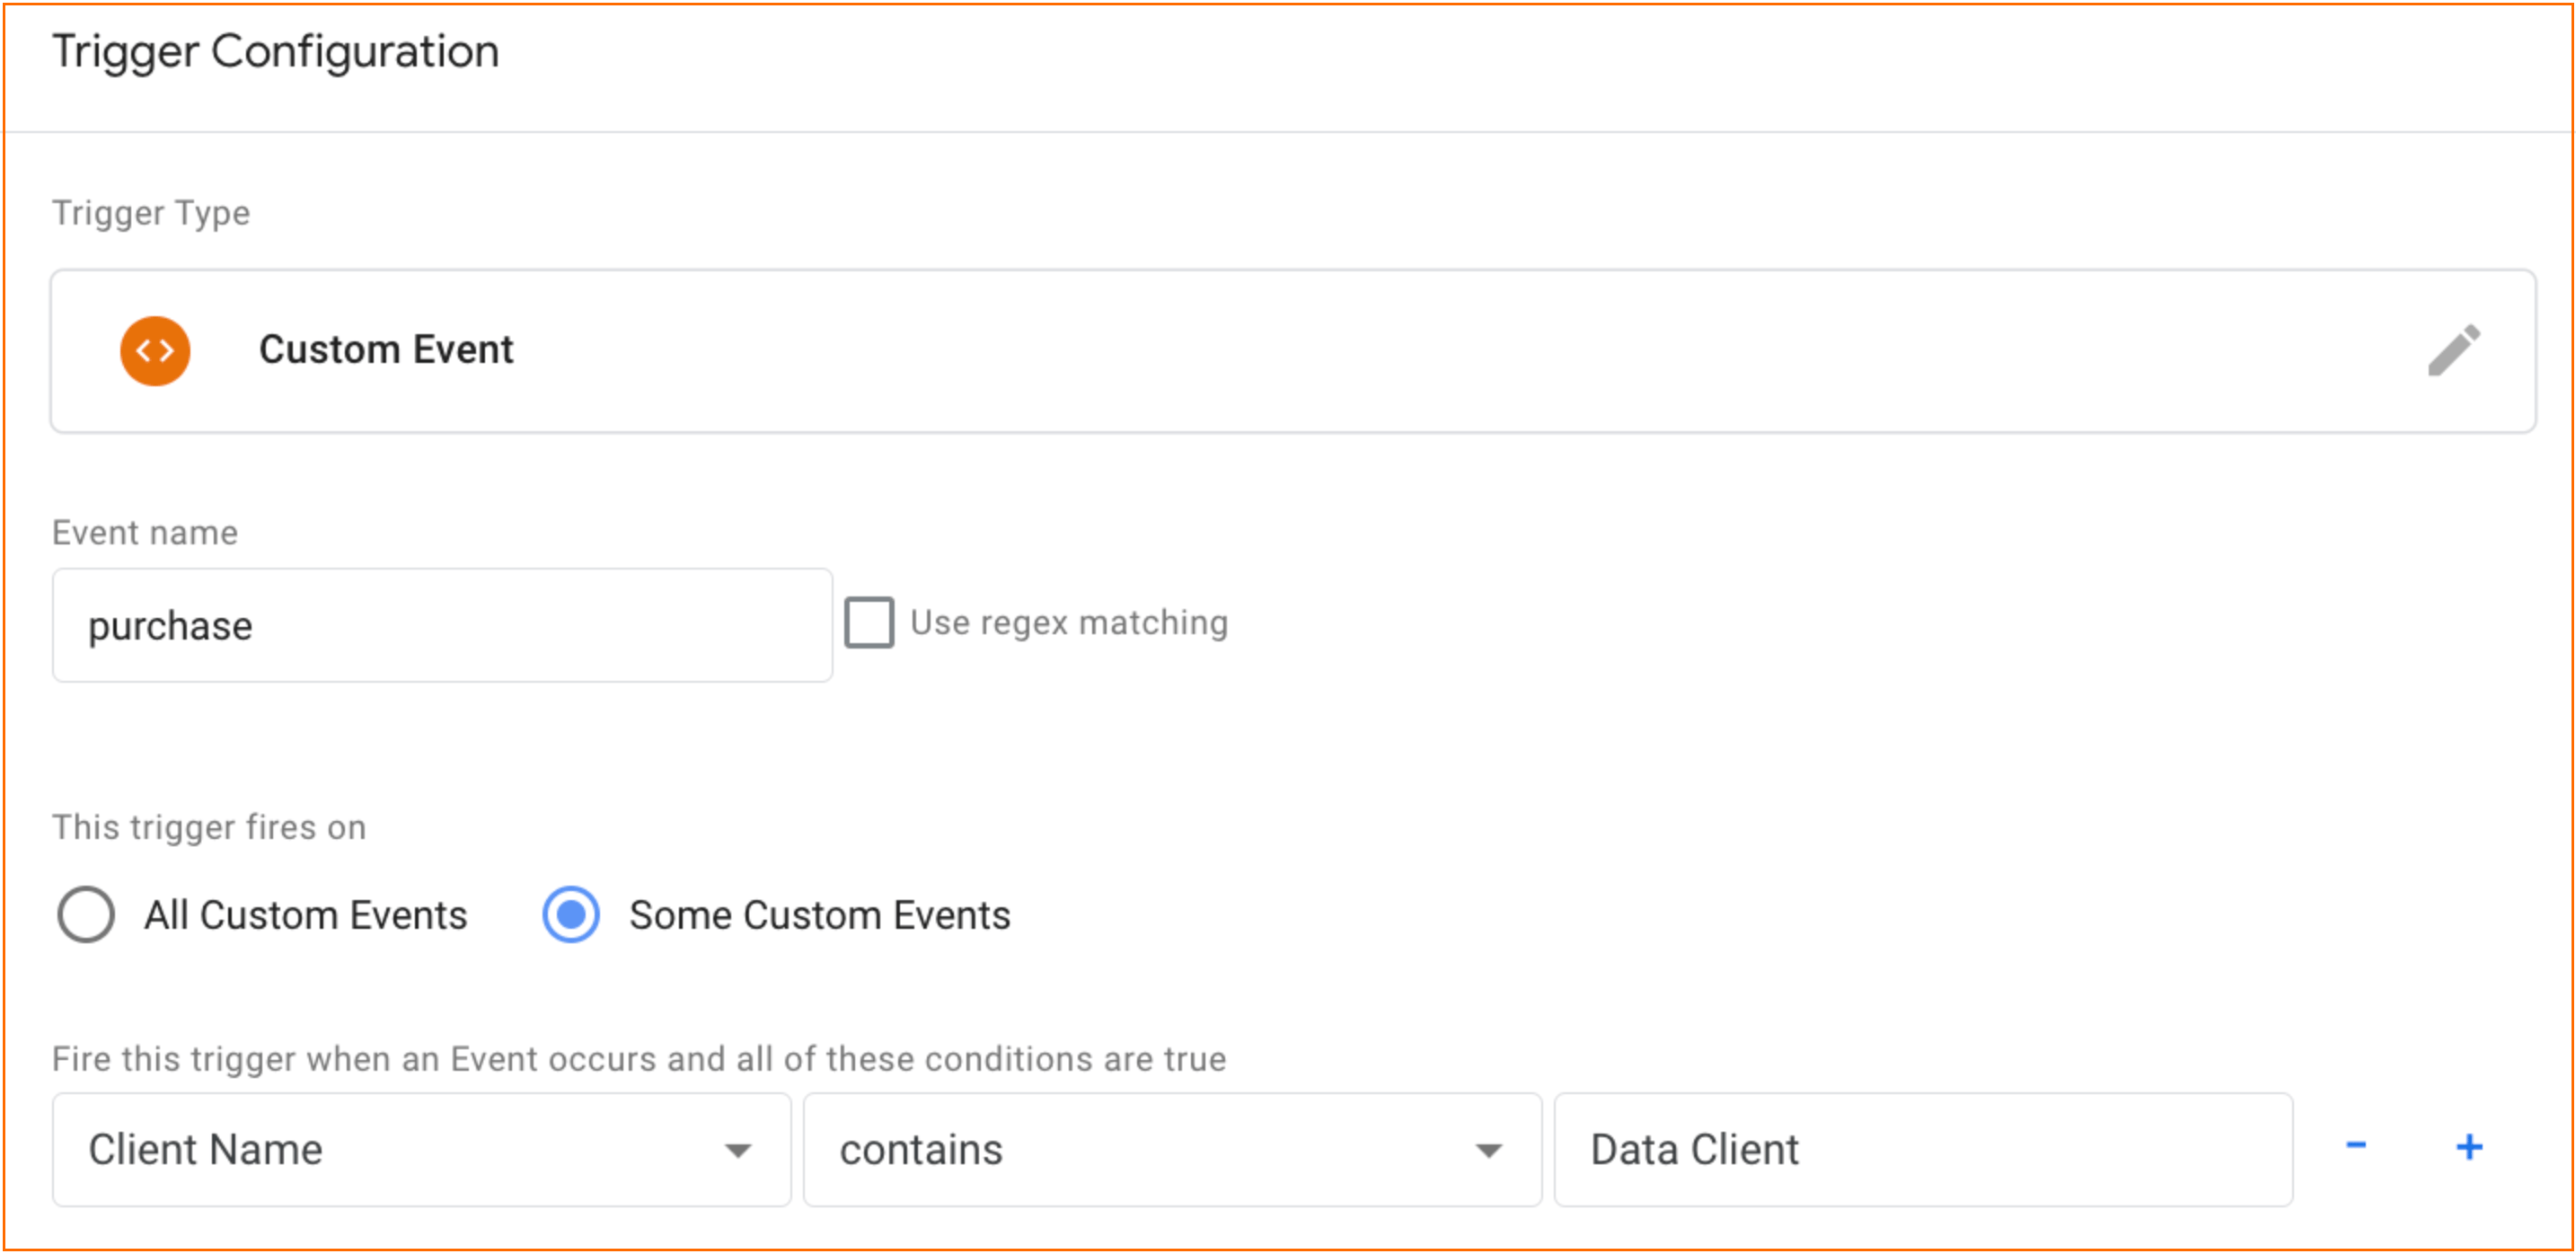
6. Add the trigger for the tag.
In our case, it is when the Client Name contains “Data Client”.
Click “Save”.
Test the setup
Using GTM Preview and Debug Mode
1. Click on “Preview” in server GTM.

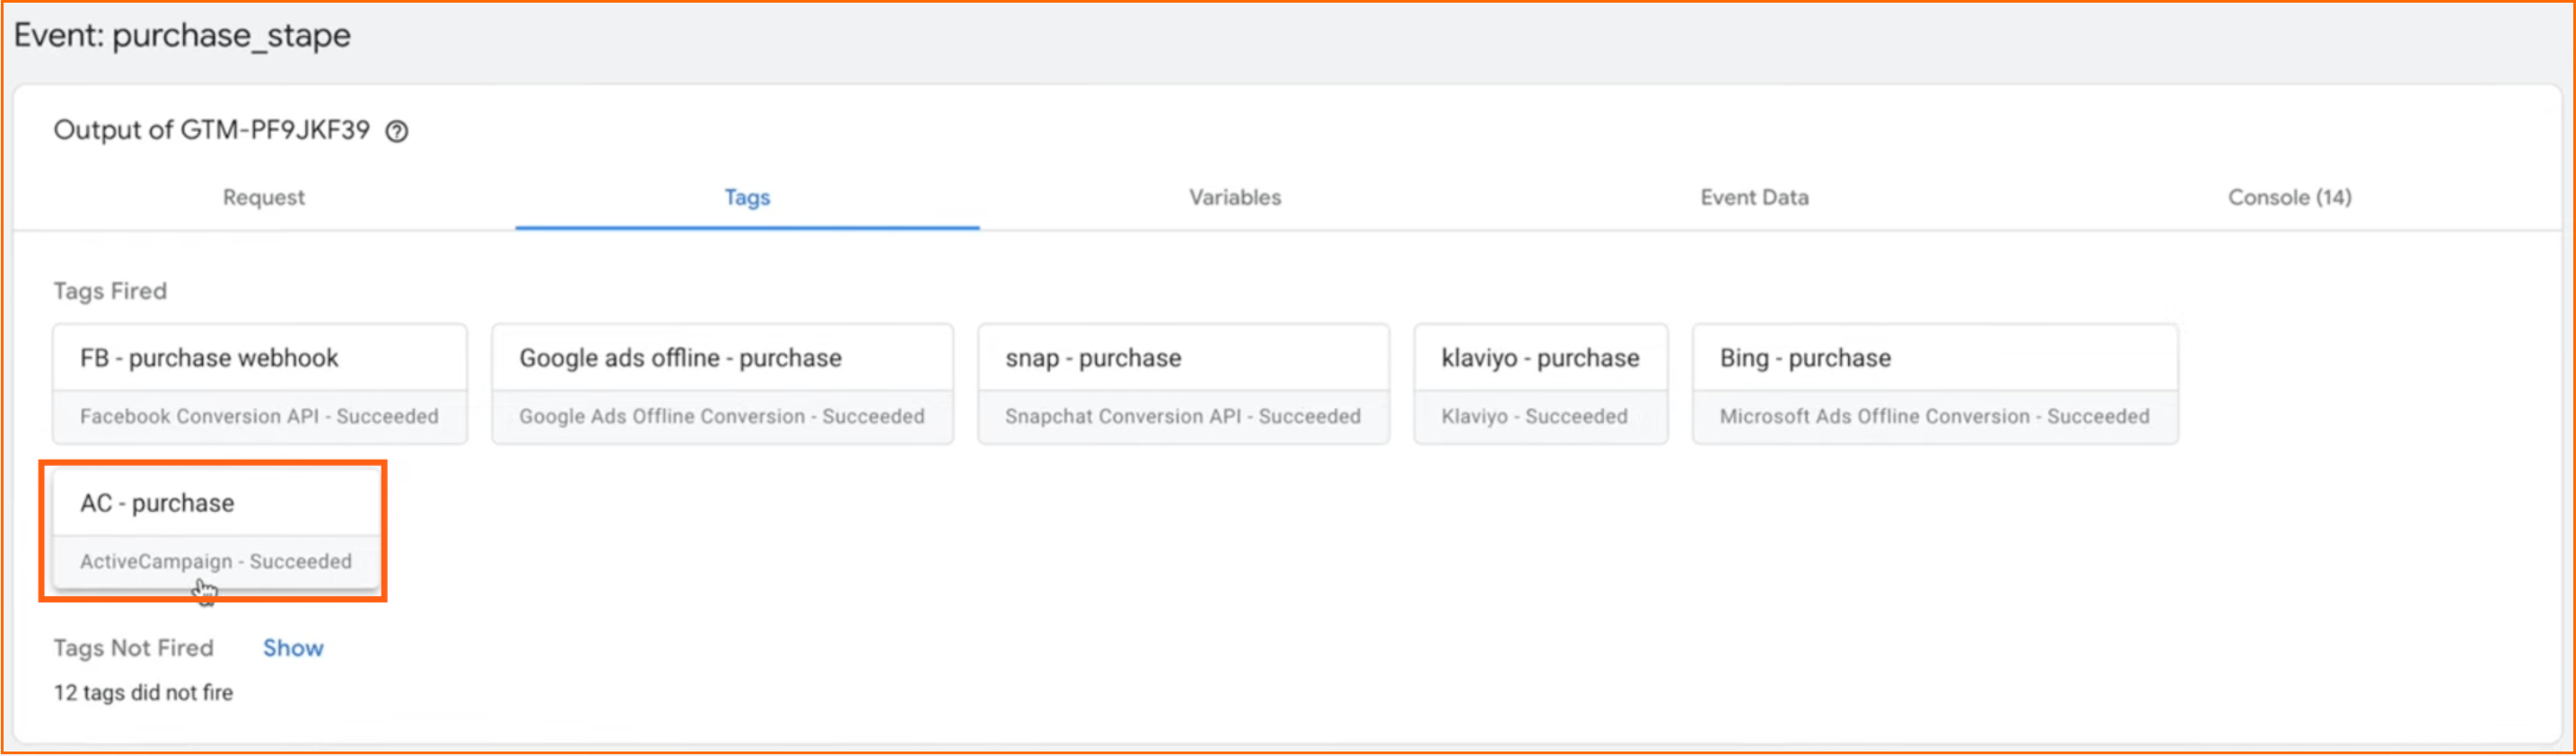
2. Once you have triggered the event, you should see that the tag has been fired.
Using ActiveCampaign
Go to the “Contacts” section and find the contact for which you triggered the event. You should see the event in the “Recent Activities” section.

Conclusion
I hope this guide helped you integrate ActiveCampaign with your website. Detailed description of the integration is a must-have for a successful email marketing campaign. It will help create personalized email campaigns, segment your contacts better, and create more detailed reports.
Using ActiveCampaign tag for the Google Tag Manager server container is one of the easiest ways to integrate your site with ActiveCampaign without the help of developers, especially since ActiveCampaign accepts data only from the server.
Got confused?
All it takes is a few simple questions. Click Get A Quote, fill up the form, and we will send you a quote.

Comments