Facebook Leads API for server Google Tag Manager
Ivanna Holubovska
AuthorMeta Conversions API can be used not only to upload server events related to your web traffic but also to send offline events from your customer relationship management (CRM) system. This setup is distinct from your web-based Conversions API integration because it involves different parameters and sources data from your CRM rather than your web servers.
Using your CRM and the Conversion Leads optimization goal could lead to higher quality leads that have a better chance of converting into sales. This optimization goal is specifically designed to work with Facebook/Instagram Lead Ads (Instant Forms).
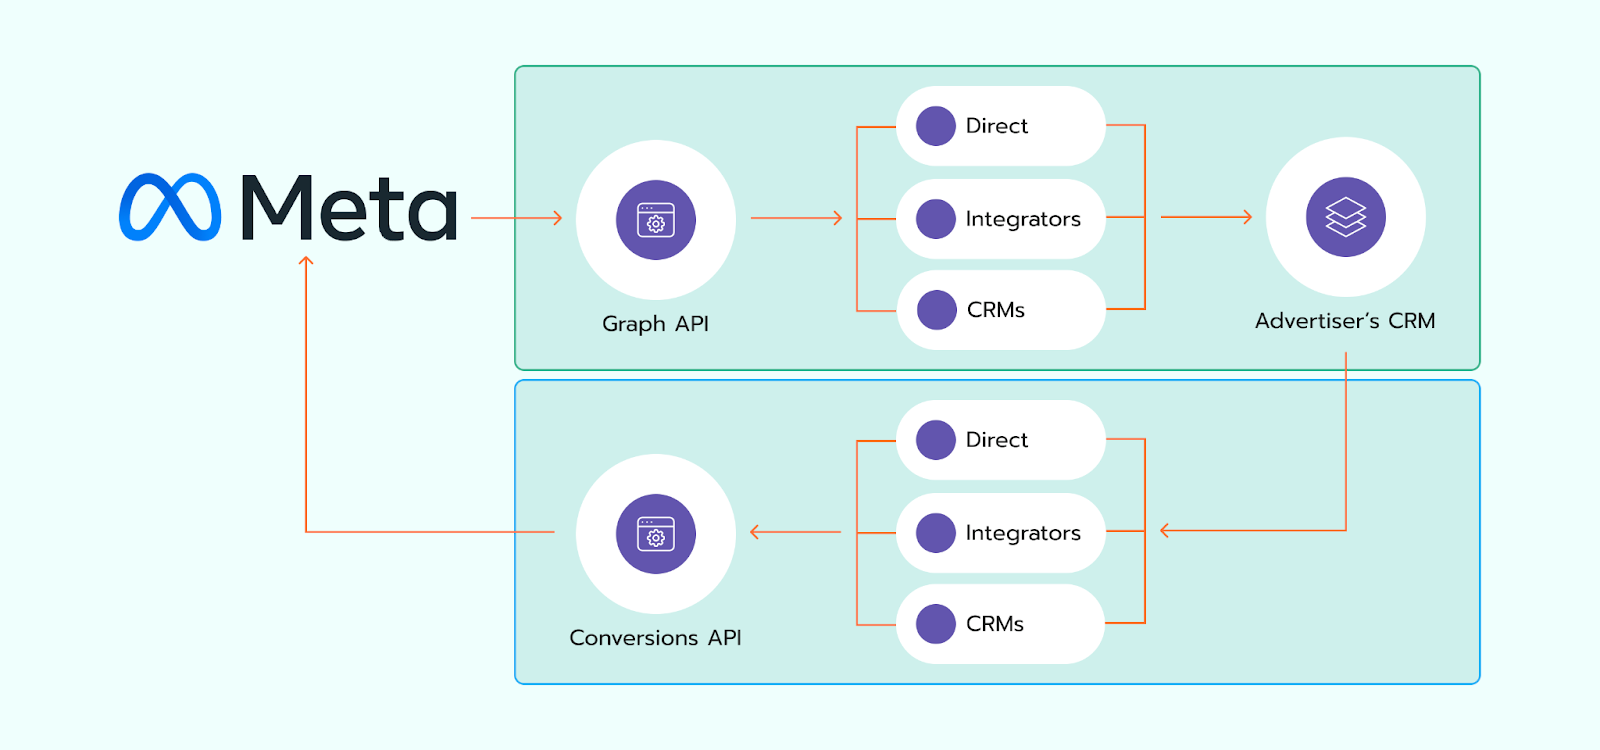
You should already have a system in place for transferring leads from Meta to your CRM (indicated in green in the diagram below). You need to send detailed event data from your CRM back to Meta, as indicated in blue in the diagram below.
This article will guide you through the necessary steps to successfully implement Facebook Leads API, starting with an overview of its advantages. From there, we'll explore the essential components and prerequisites needed for an easy setup, the mechanics of how the Facebook Leads API works.
What are the benefits of using Facebook Leads API
- direct integration between Facebook's advertising services and a company's CRM system.
- automatically collect and organize lead information.
- reduce manual data entry.
- ensure faster response times to leads.
- improve the tracking and optimization of marketing campaigns.
| For strategies on attracting the right leads in the first place, see our lead acquisition guide. |
What is needed for a successful setup
- Lead Ads campaign (optional)
- Meta CRM Pixel
For the official documentation and additional information, please visit Meta for Developers, Conversion Leads CRM Integration.
How does Facebook Leads API work

API Access Token - Set to your Facebook API Access Token.
Facebook Pixel ID - Set to a valid Facebook Pixel ID.
Lead ID - The 15 or 16 digit leadgen_id from your downloaded leads.
Lead Event Source - The name of the CRM where the events are coming from.
Event Name (Optional) - The event_name parameter should indicate a lead moving through the sales funnel in your CRM. Default: eventData.event_name
Event Time (Optional) - A Unix timestamp in seconds indicates when your CRM updates the lead stage update event.
Test ID - Provide a Test ID if you want to test server-side events in the Test Events feature of Events Manager.
How to set up Facebook Leads API
2. It's clear that using webhooks in sGTM can improve the accuracy of tracking conversions and conversion attribution. Let's explore in detail how to set up webhooks in sGTM and how to use this data for setting Facebook Leads API.
2.1. Check if your CRM or CMS has a built-in feature or plugin for webhooks, as many popular systems do. Once you find it, set up a webhook for the event you wish to track. In the webhook settings, enter your server-side tagging URL, making sure to include a path that uniquely identifies your webhook.
In our case:
https://ss.wp-demo.stape.io is server-side tagging URL
/order_created is a path that differentiates my webhook that sends data whenever an order is placed.

2.2. To accurately set up the tag, you need to view webhook data in the sGTM debugger, but it isn't visible by default. To make this data visible, use the Preview HTTP header feature in the sGTM debugger and Stape.
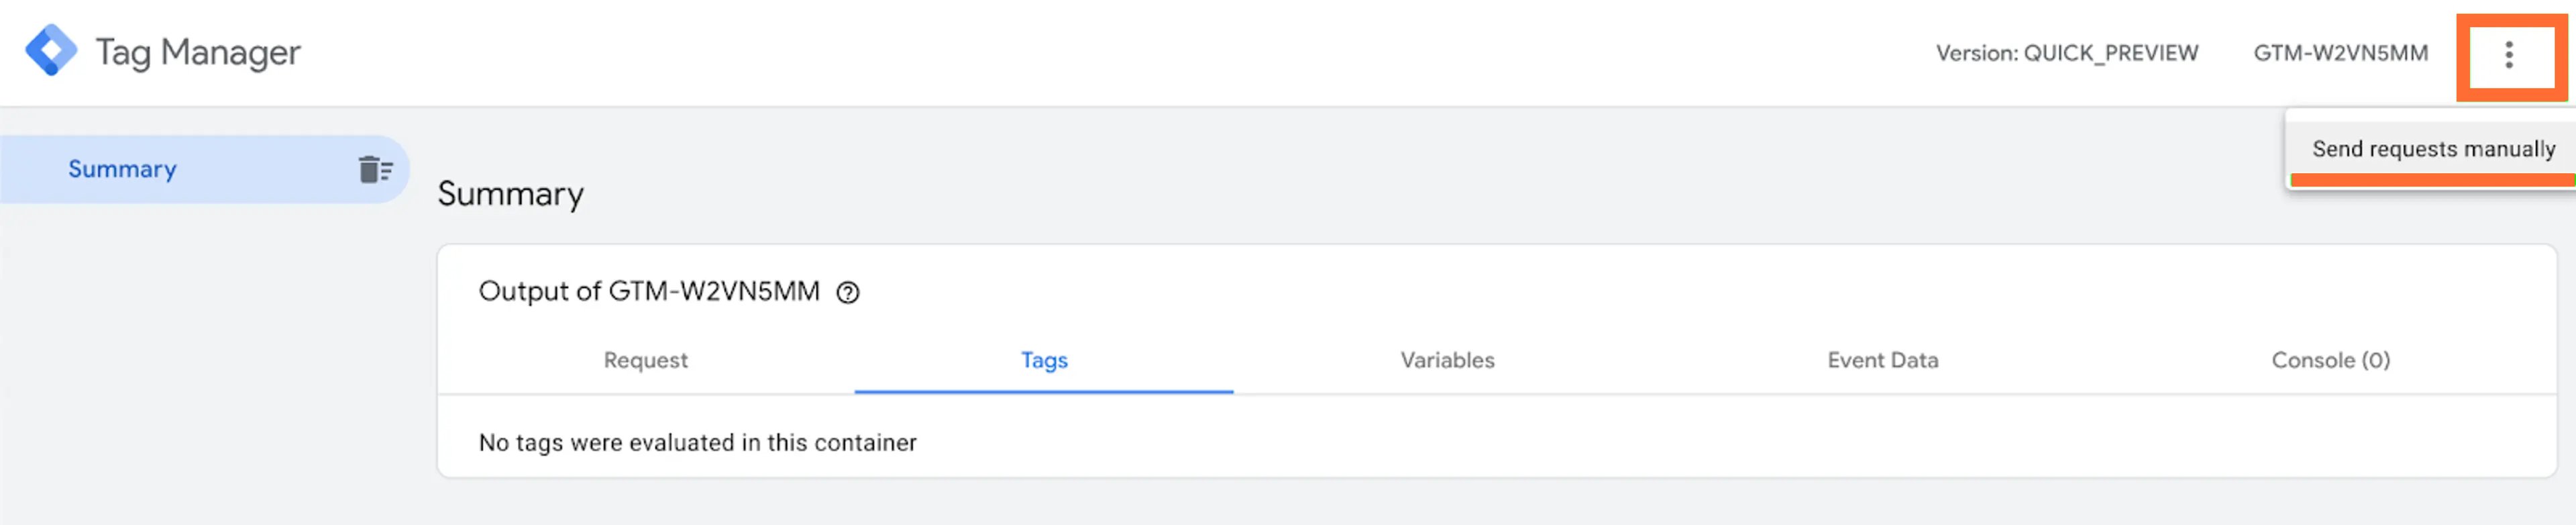
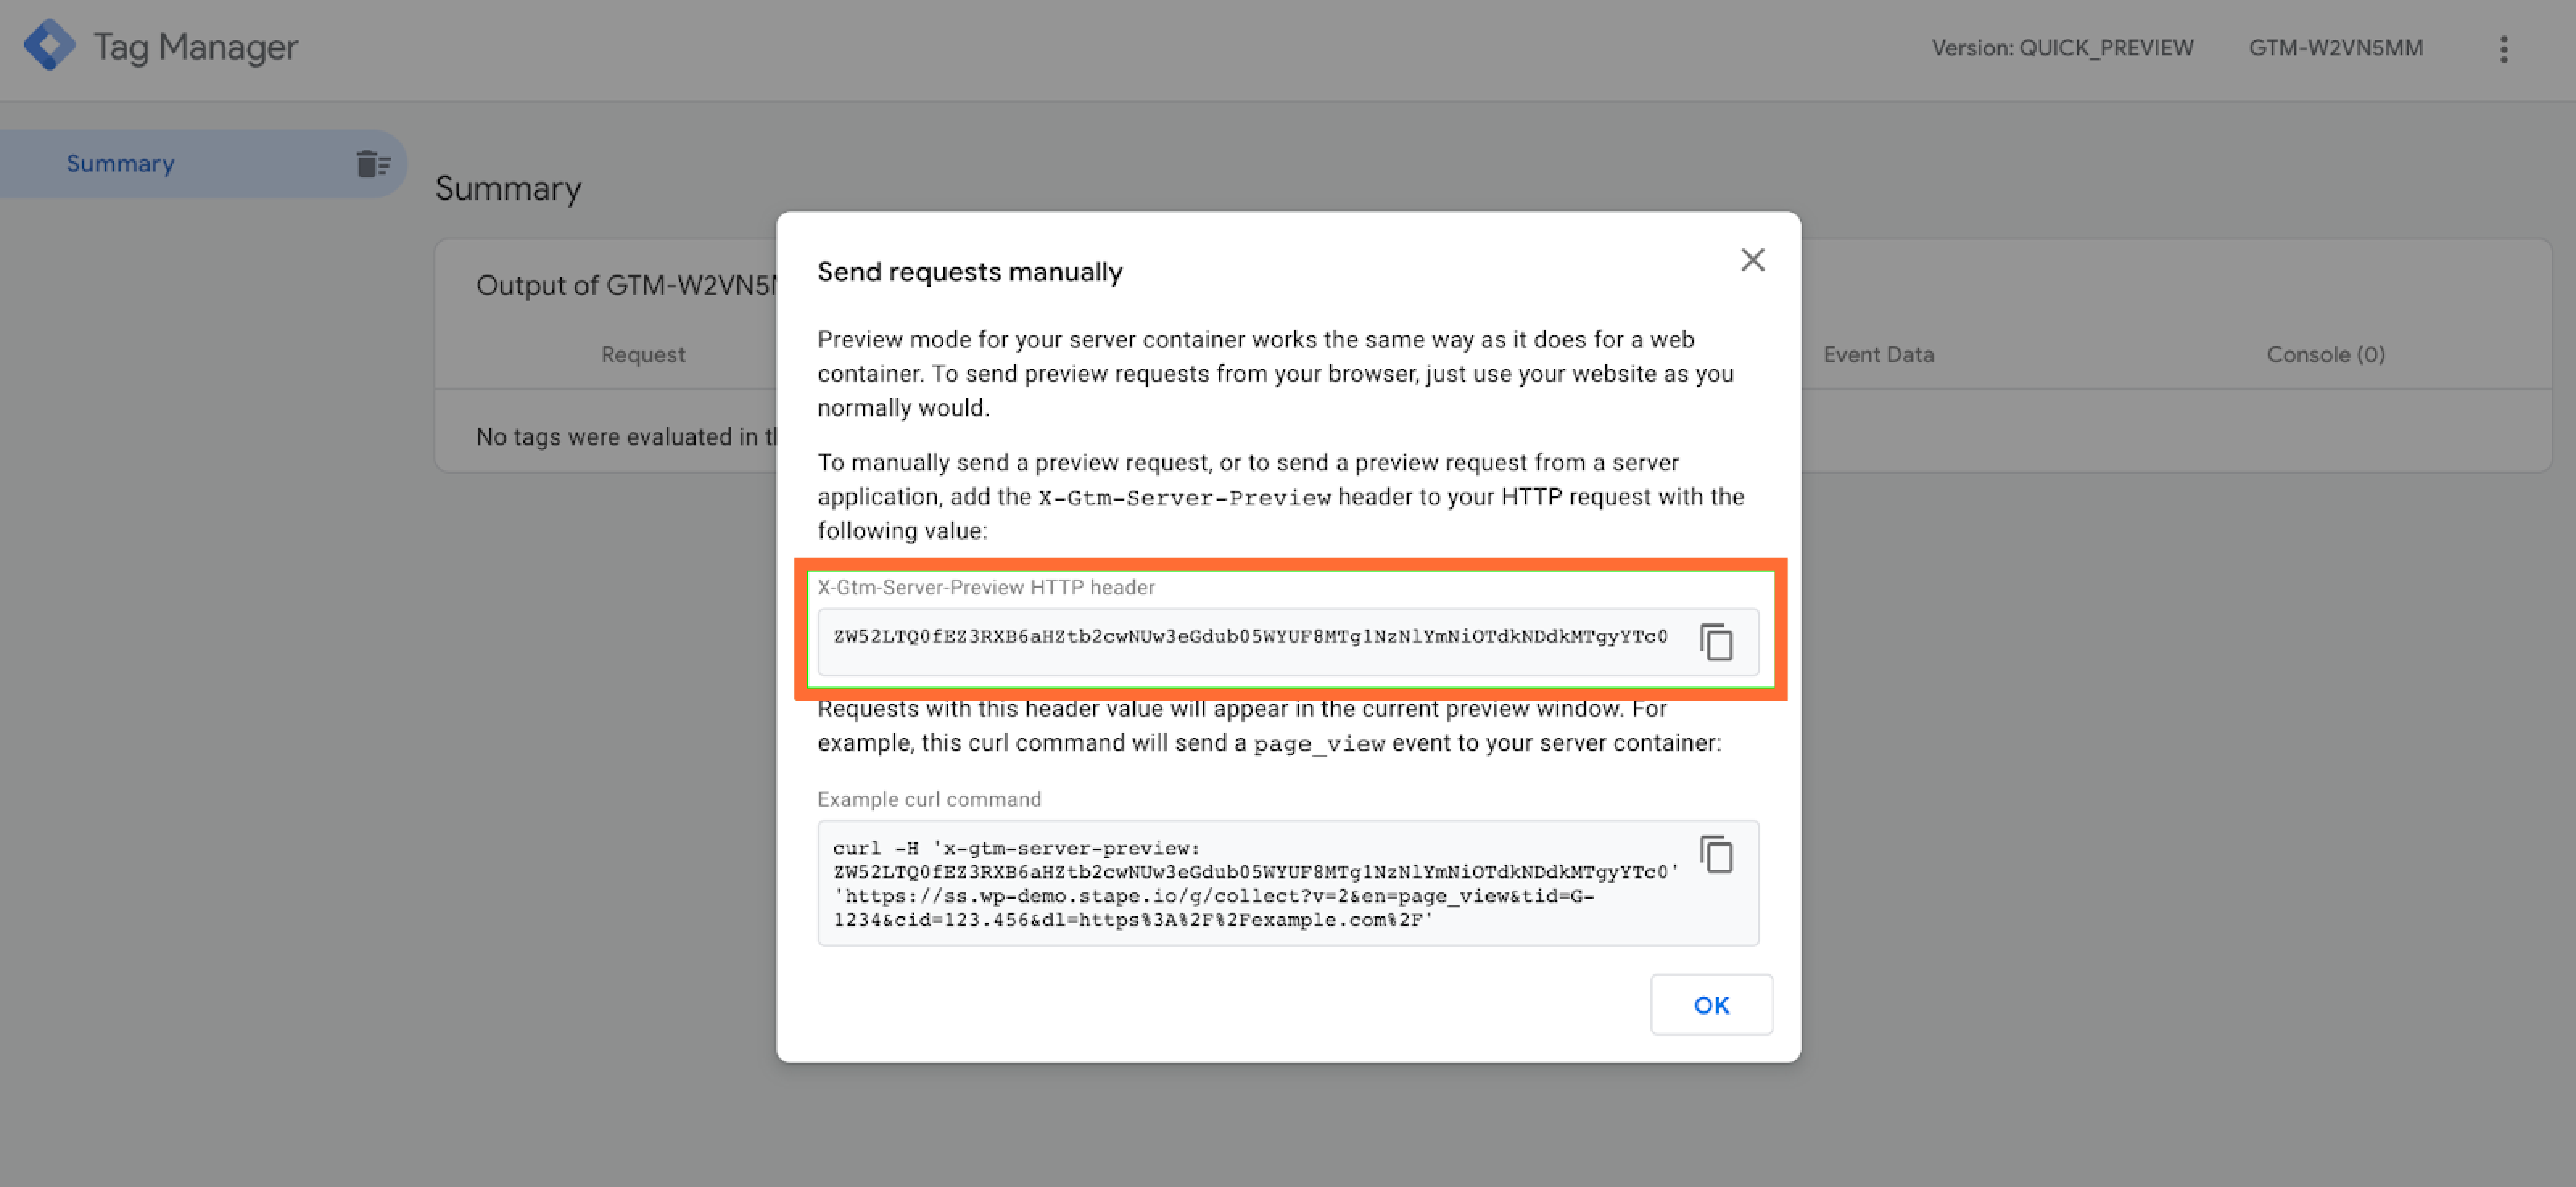
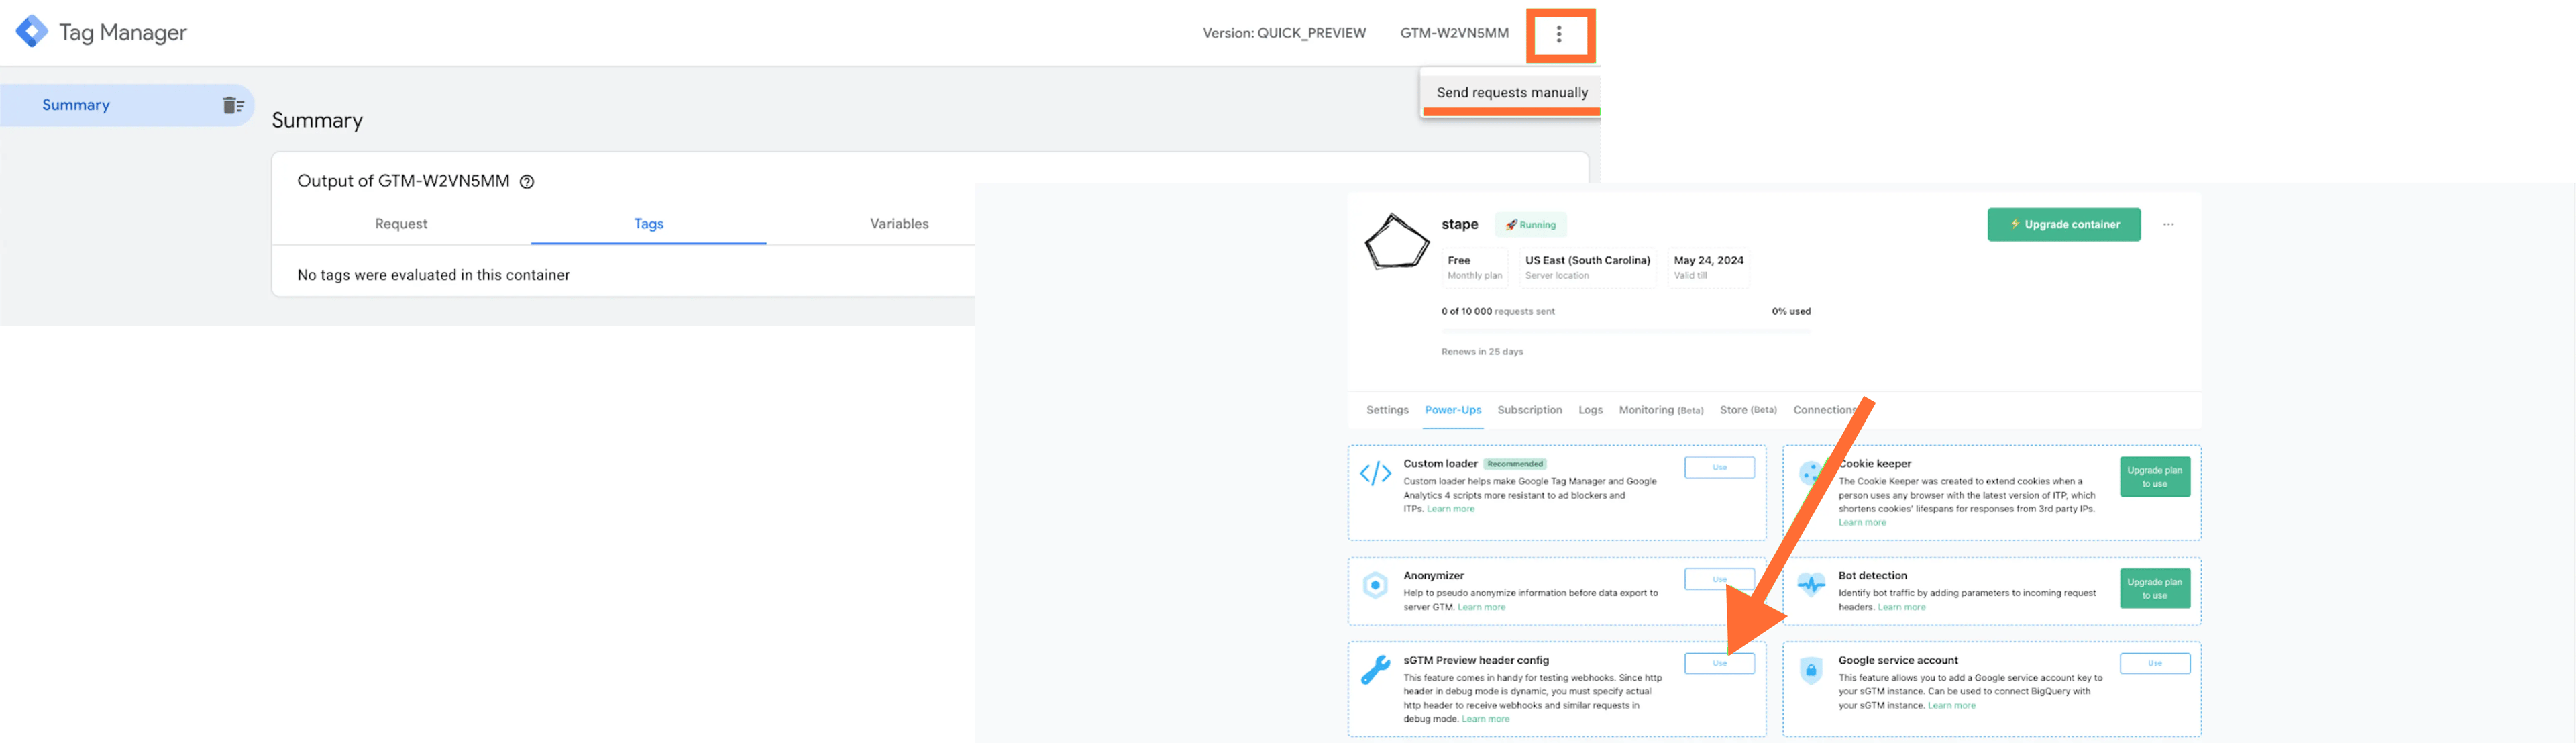
To activate the sGTM Preview Header, open your server Google Tag Manager container, click on Preview, then click the three dots in the top right corner. Select Send Requests Manually and copy the X-Gtm-Server-Preview HTTP header.
2.3. Log in to your Stape account, open the sGTM container, go to Power-Ups and click sGTM Preview header config.
Paste the Preview HTTP header you’ve copied from the server Google Tag Manager debugger and click Save.
This setup allows you to view webhook data in the server Google Tag Manager debugger. After completing the setup, remember to remove the Preview Header from Stape’s sGTM power-ups. Note that our system will automatically remove the Preview Header one hour after it has been activated.
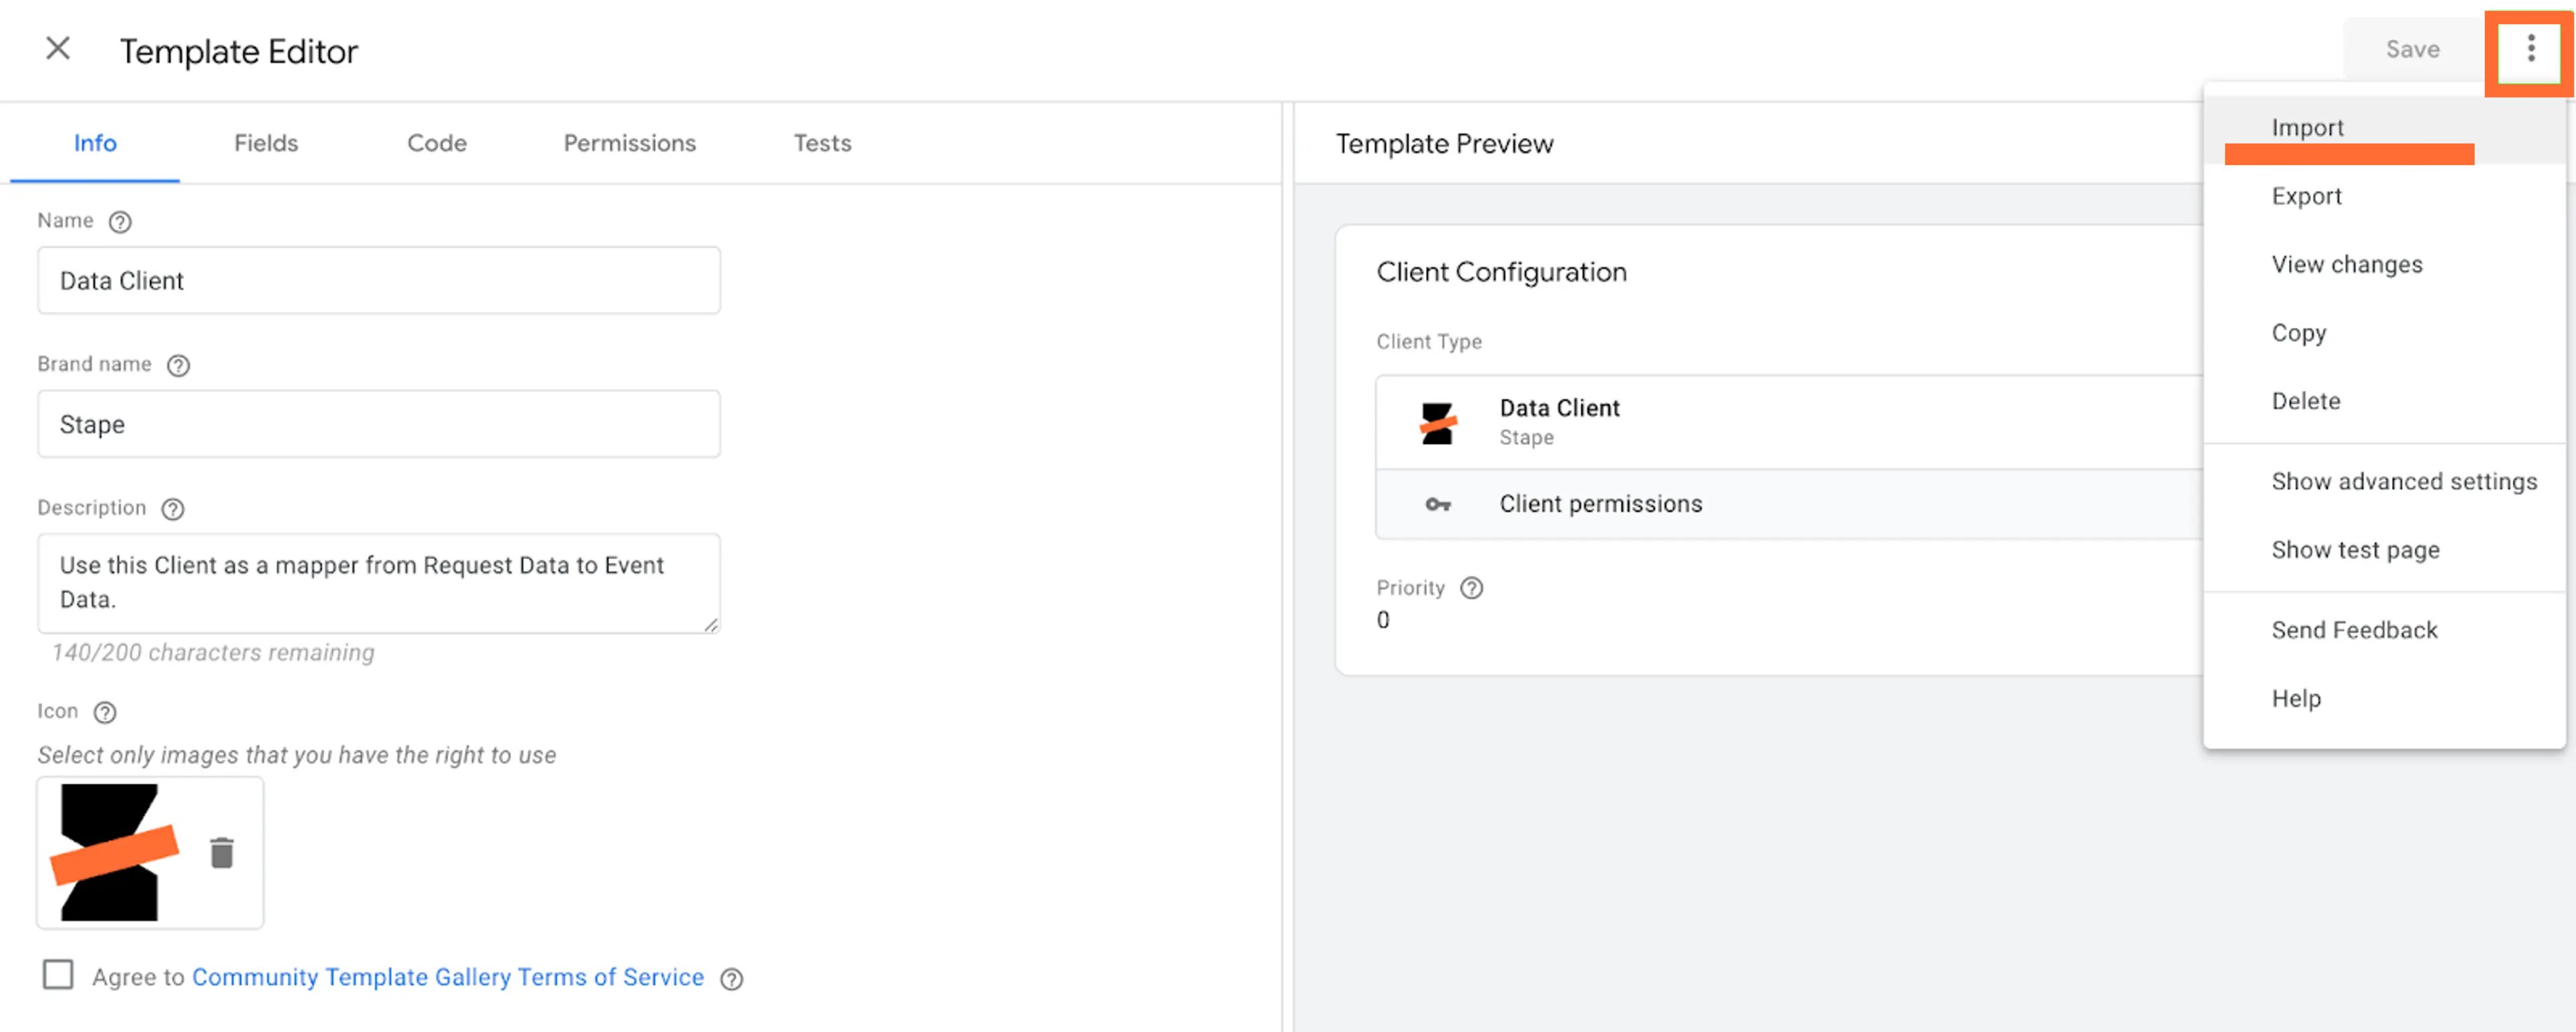
2.4. Process webhook data in server GTM with the help of Stape’s Data Client. Download Data Client from GitHub. Then, go to the sGTM container, open the Templates sections, and click New client.
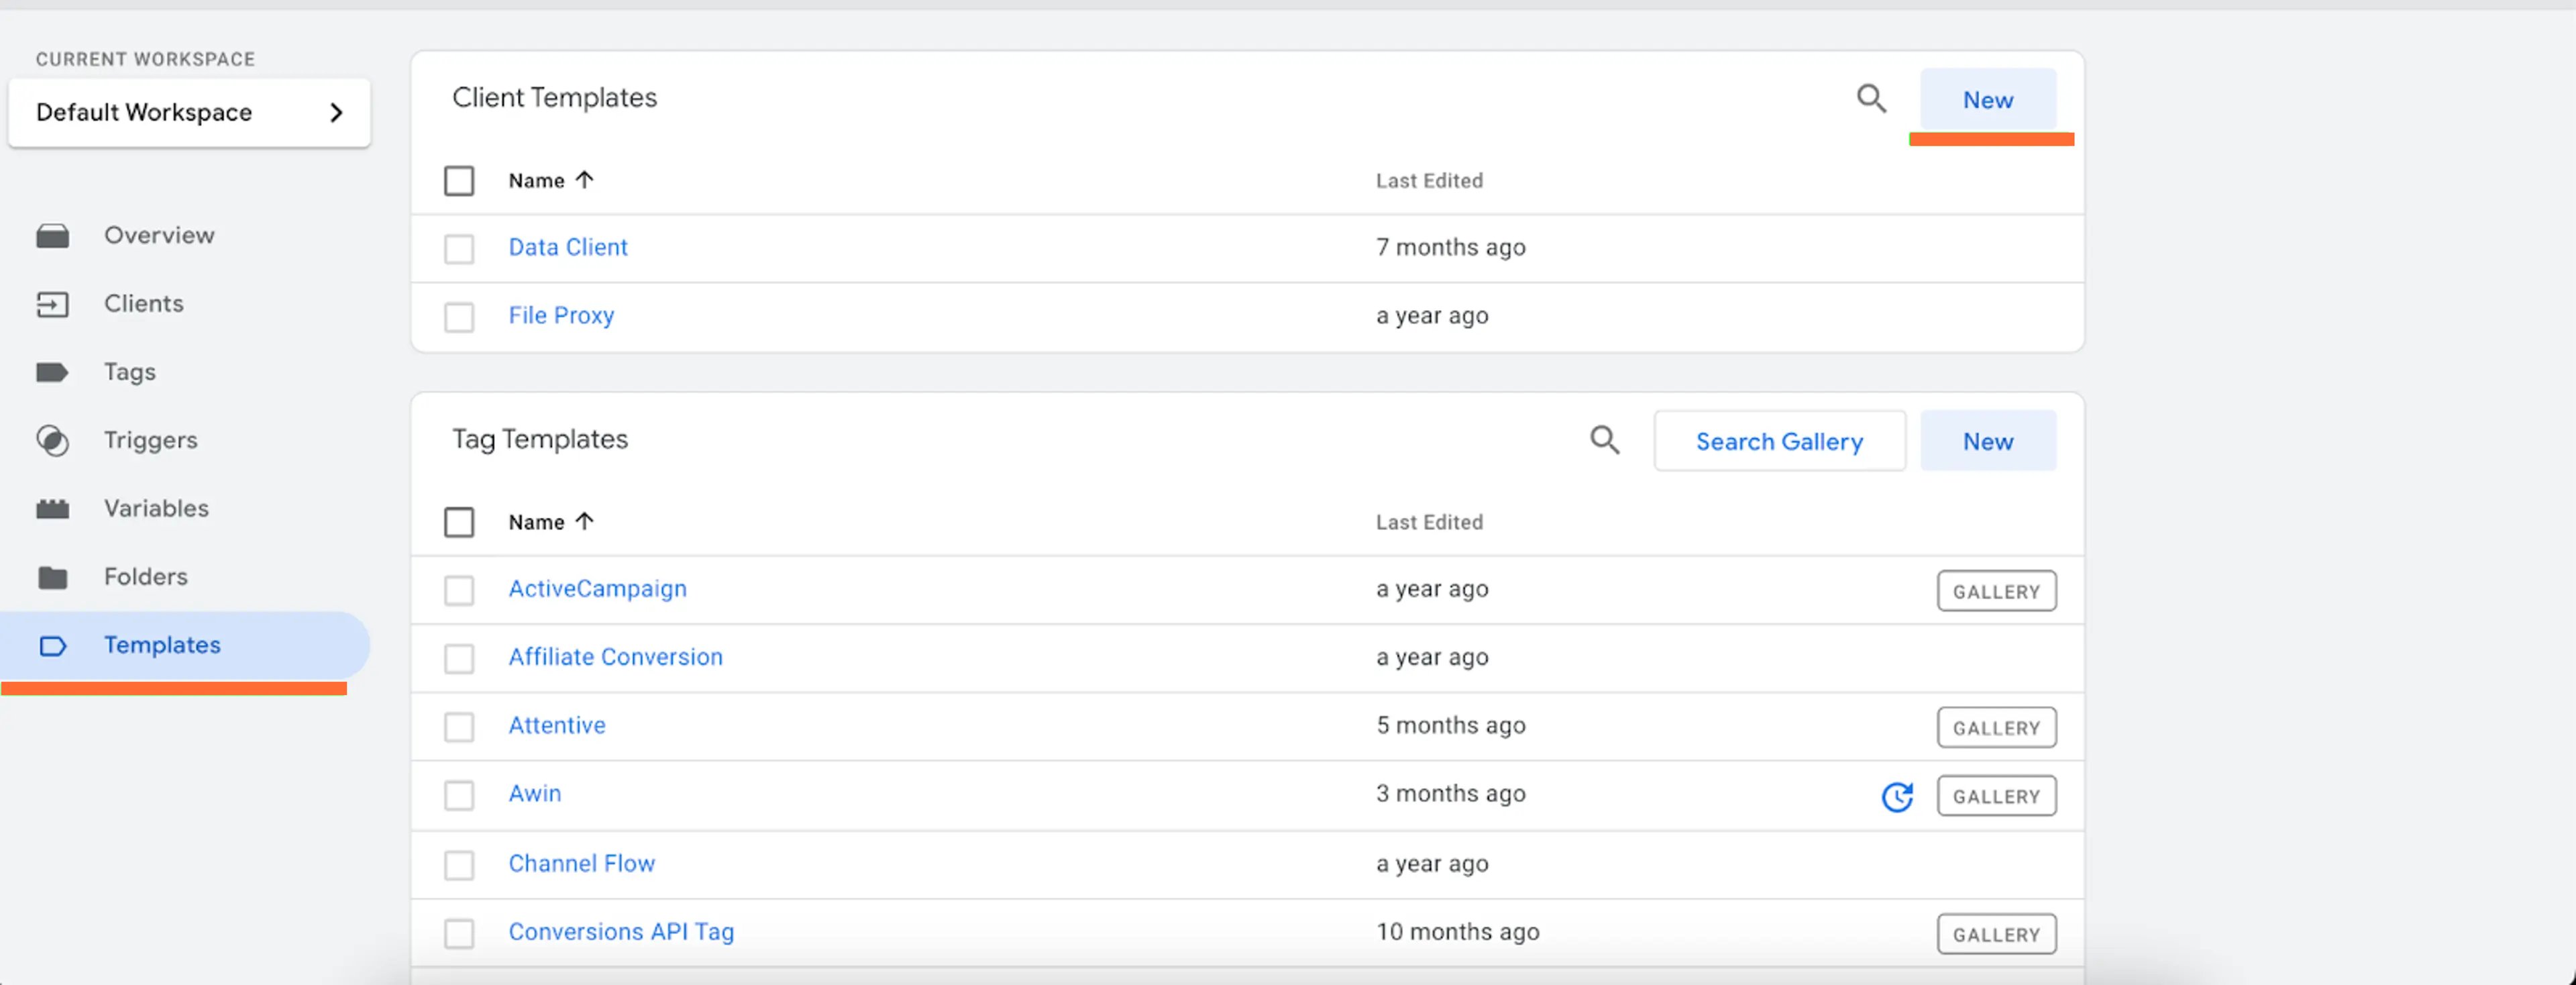
Click three dots and then Import. Next, select the Data Client template you downloaded from GitHub and save it.
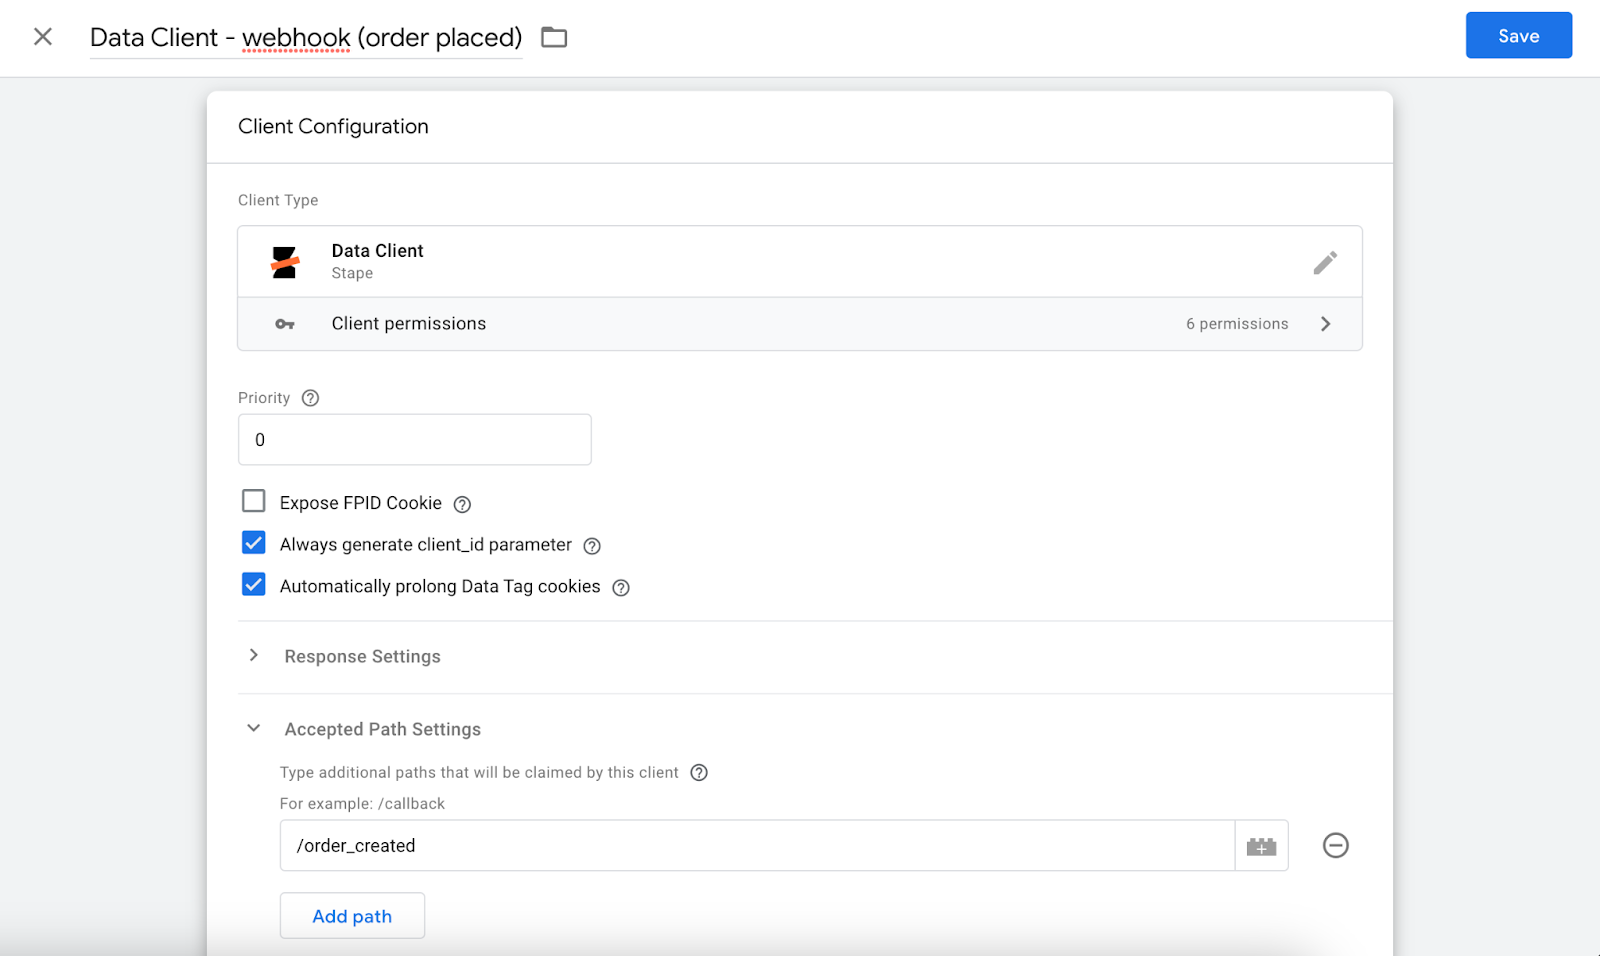
Go to the Clients tab and create a new Client. Select Client type - Data Client, add client name, and scroll to Accepted Path Settings. Add a path that differentiates your webhook. In my case, it’s /order_created and click Save.
To learn more about webhooks:
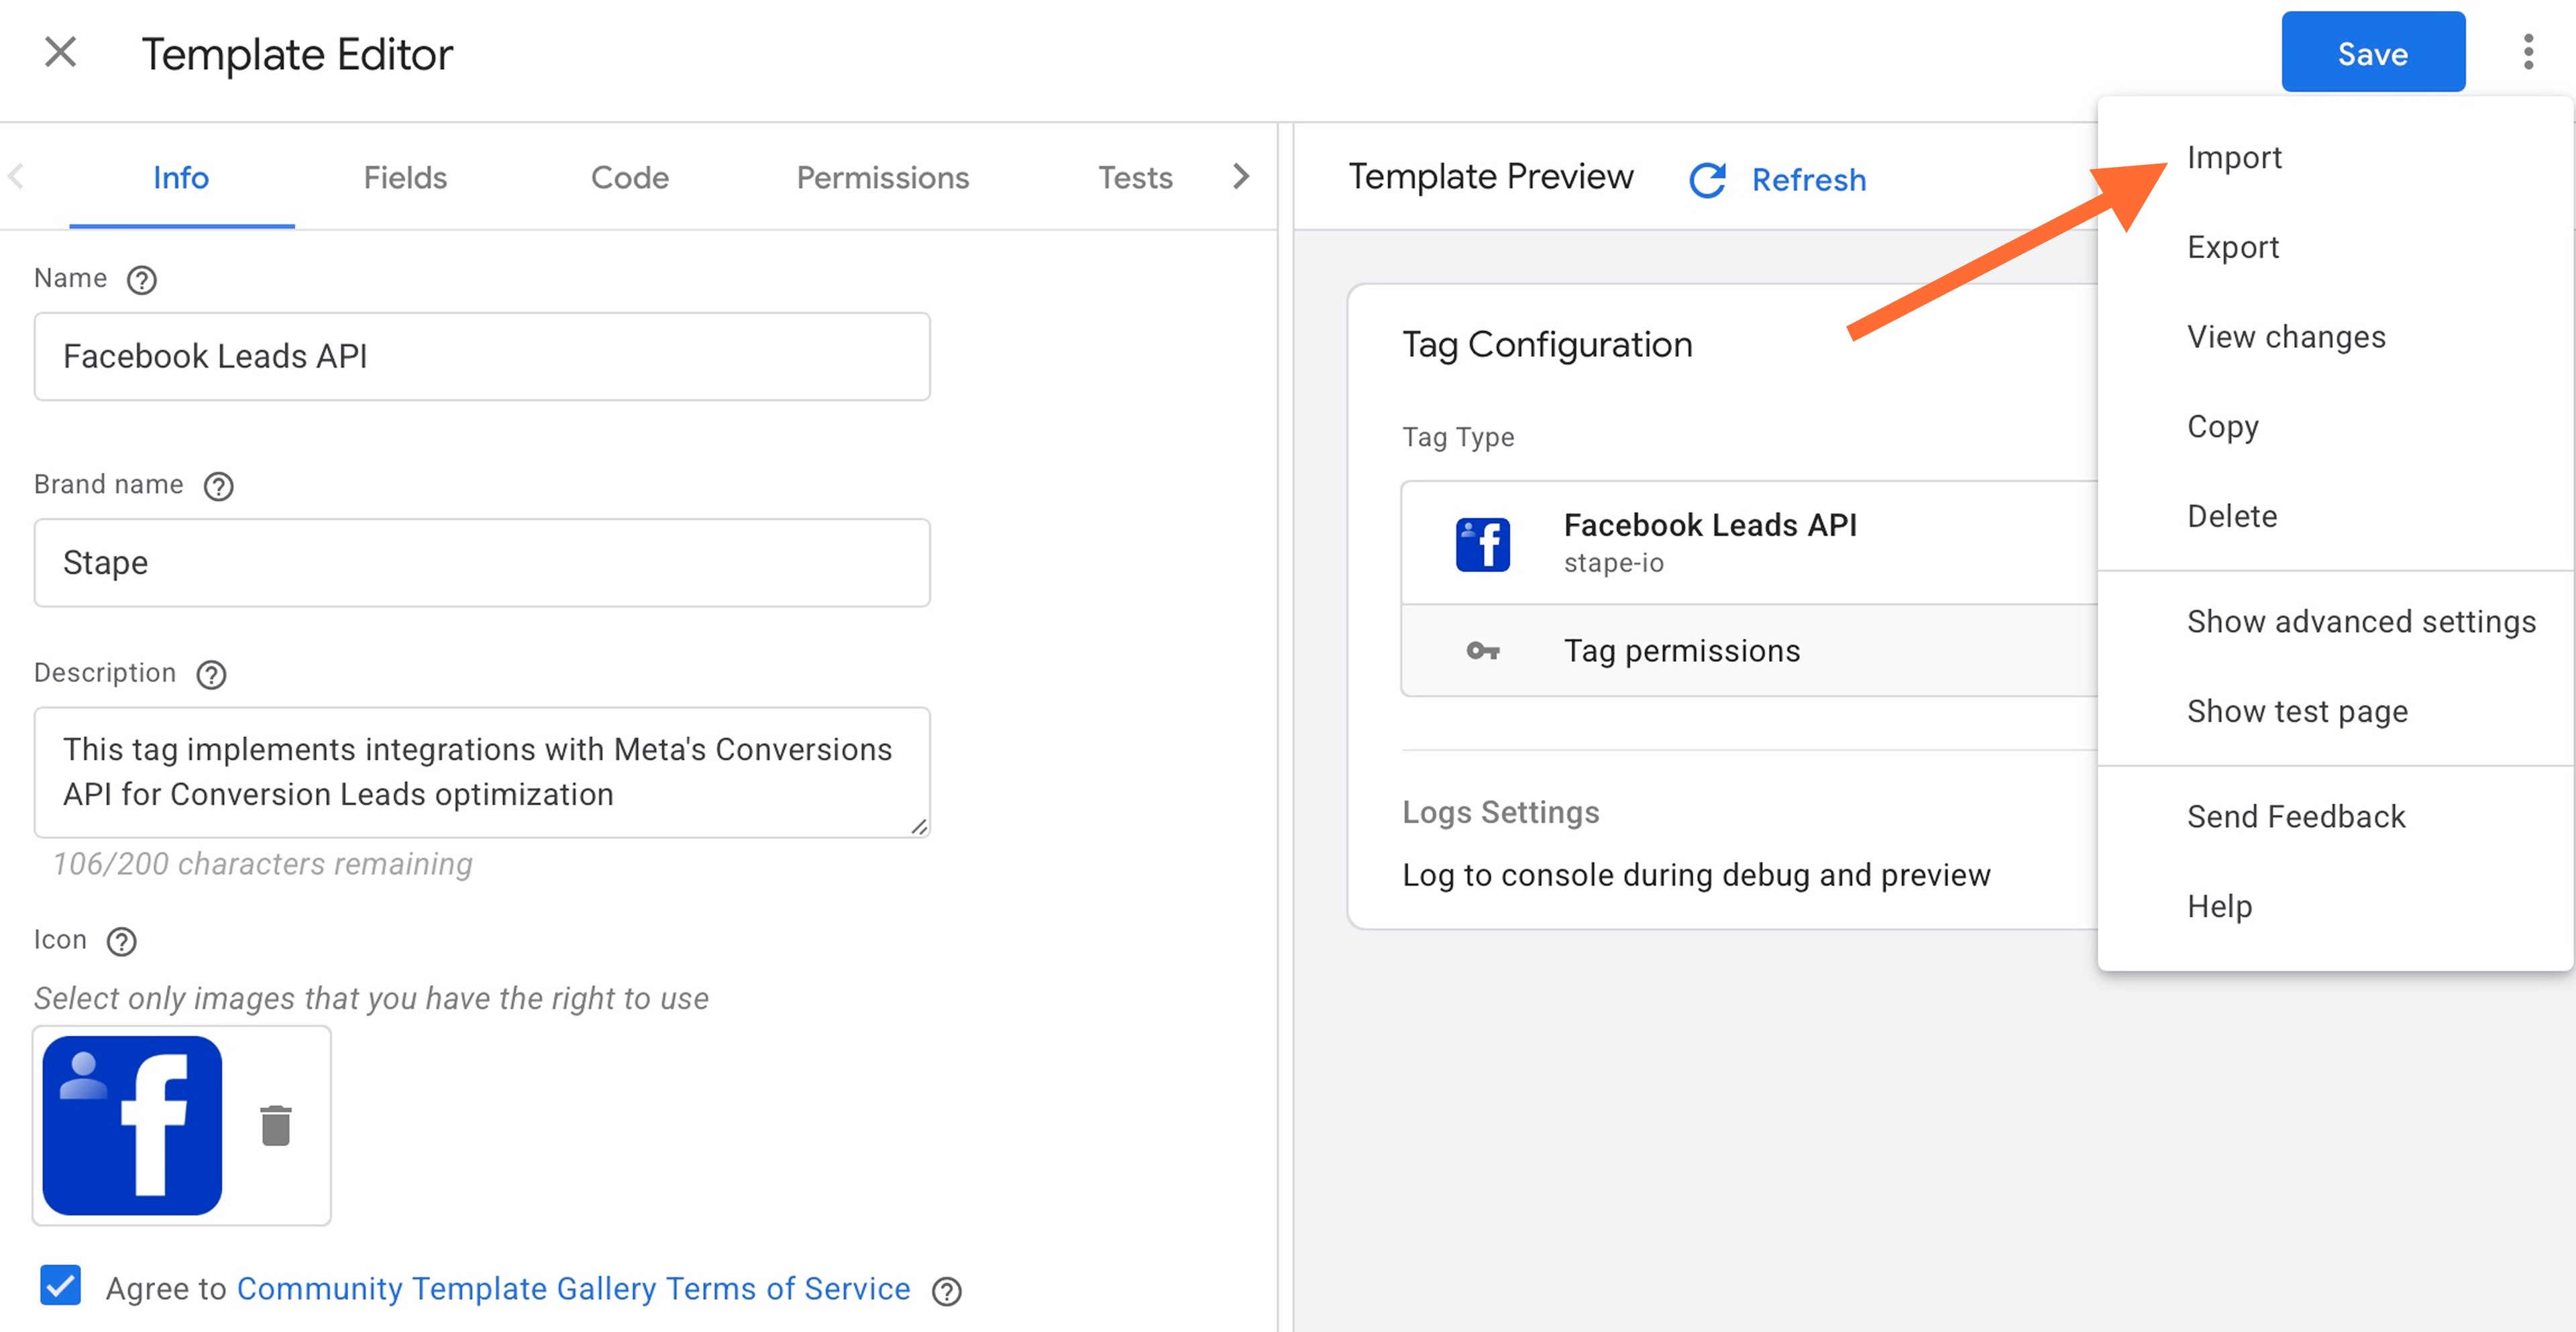
3. Download Facebook Leads API on GitHub or add it in Template Gallery → Open Templates sections in the server Google Tag Manager container → Click New.
4. Click three dots in the top right corner → Click Import → Select Facebook Leads API template you’ve recently downloaded from GitHub → Click Save.
5. Click Tags, then New → Select Facebook Leads API.
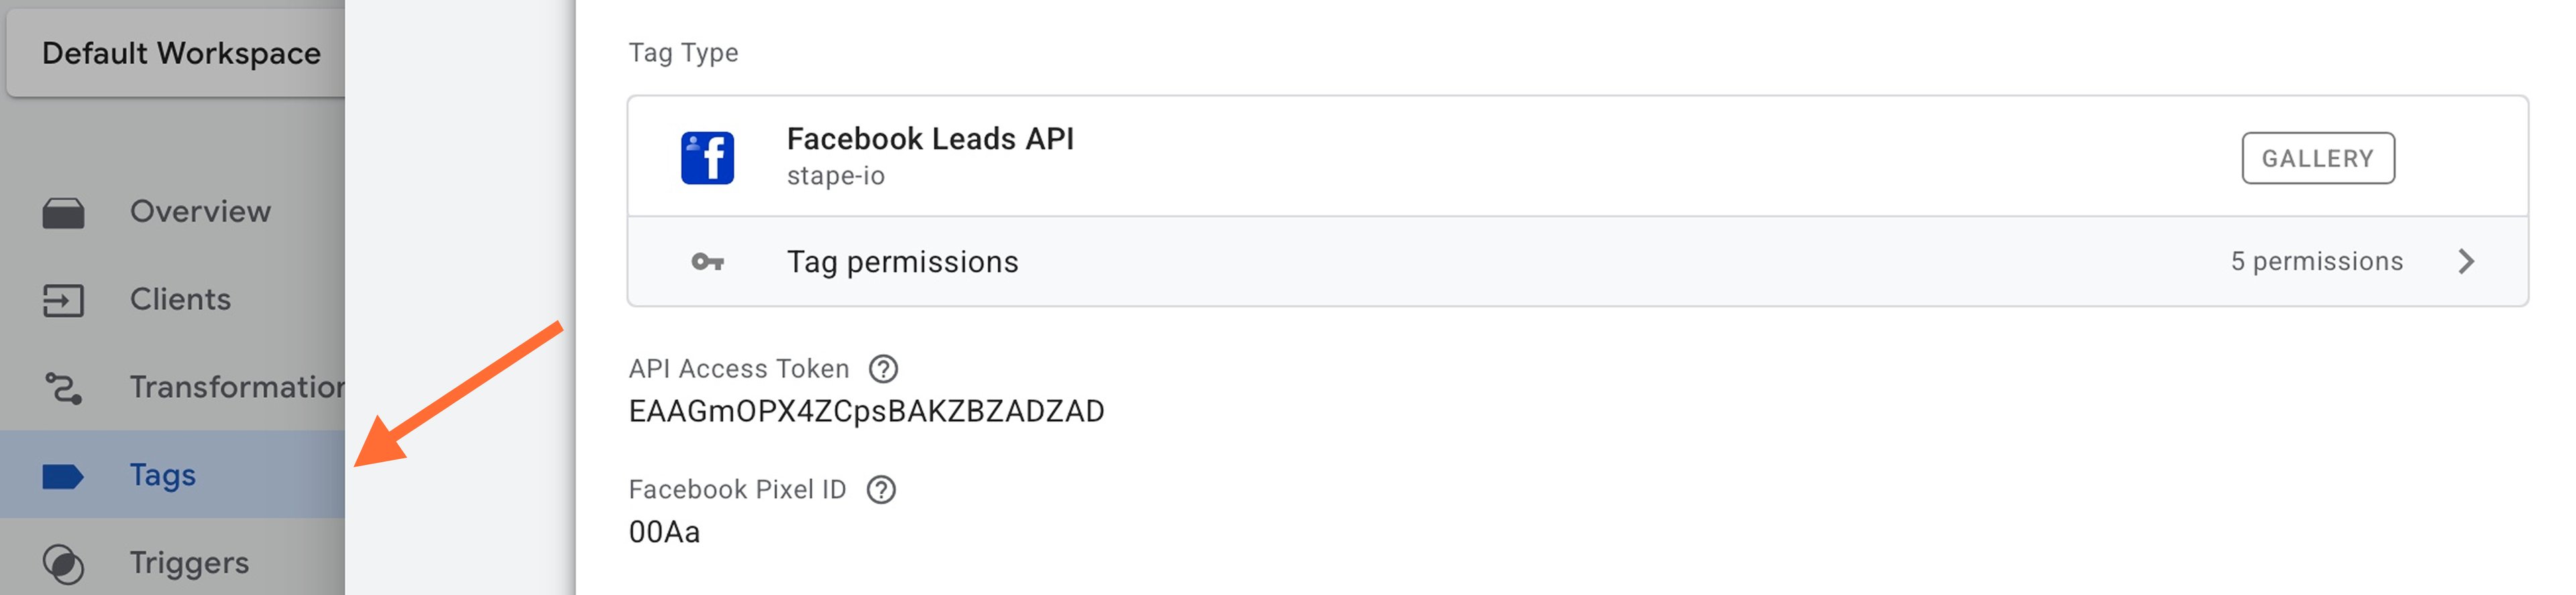
6. Fill in the fields the data required and don’t forget to click the Save button.

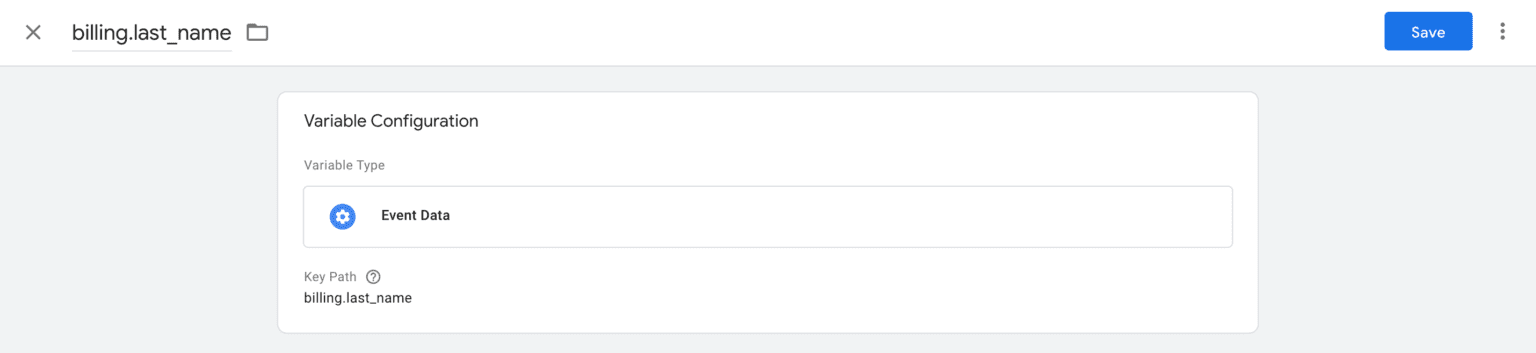
7. Create variables that will extract data from the webhook to use for Facebook Leads API. Open the Variables tab → New variable → Variable type Event Data → Set up event variables for each variable you want to use.
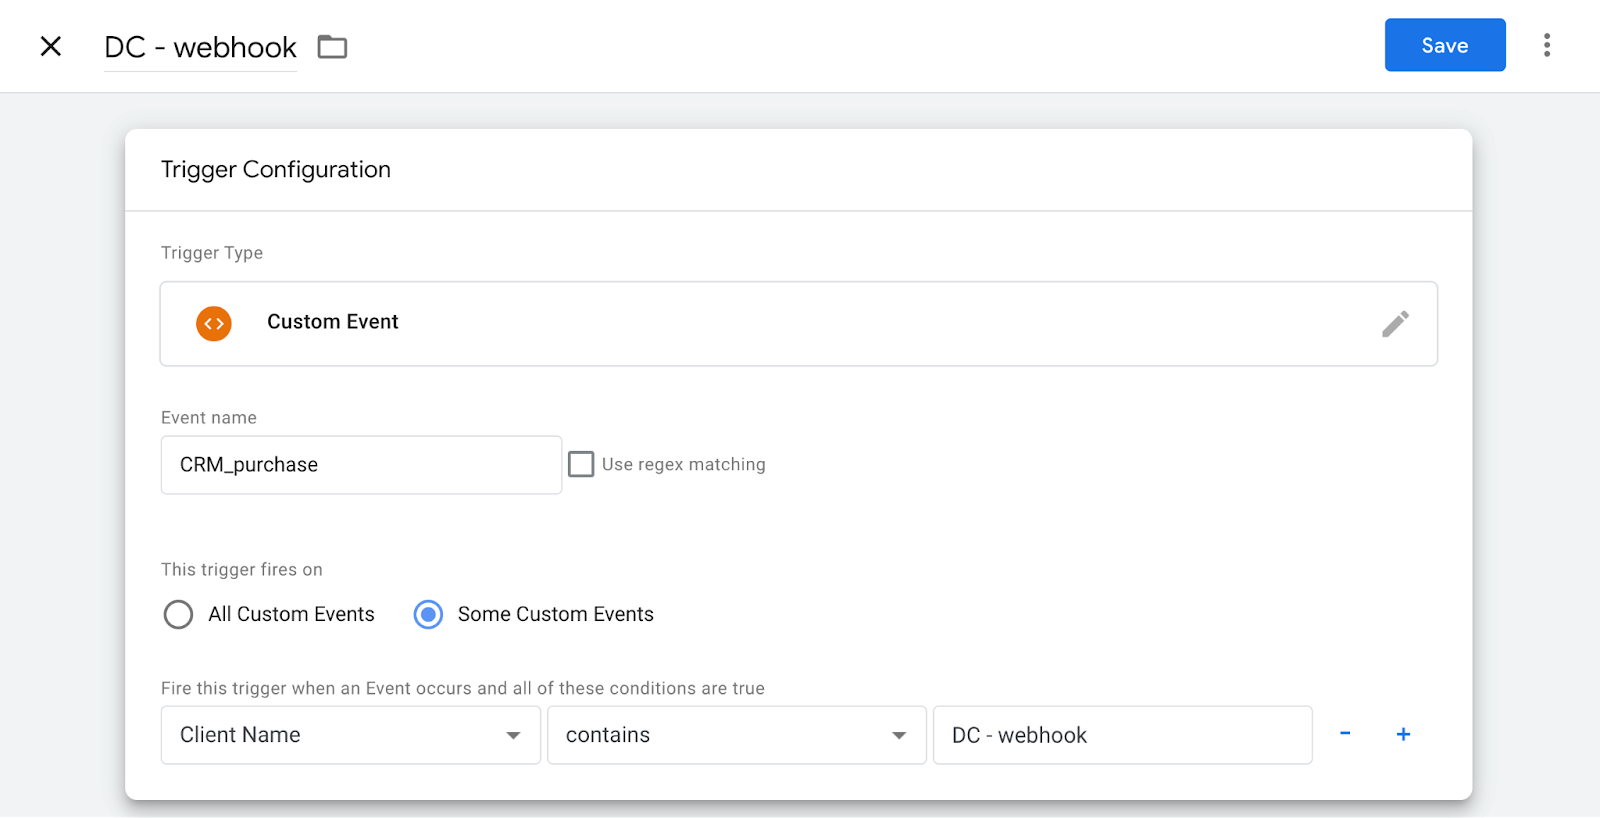
8. Create a trigger. The tag should fire when a Data Client claims a request sent to sGTM by the webhook from the CRM.
Conclusion
For any marketer looking to optimize lead management and CRM integration the Facebook Leads API is a must. With it, you will not only merely gather data, but can use it to create more targeted, effective interactions with your potential customers.
We hope you’ll like it and find it useful. If you have any questions, please feel free to leave a ticket, and our support team will be happy to assist you with detailed answers.
Need help with the setup?
Don't worry, we've got you covered! Click on Get A Quote and we will send you a free quote.

Comments