How to send all GA event data to your URL/Site/CRM
Ira Holubovska
AuthorA common issue for data analytics and sales managers is the accurate tracking of user behavior and conversions. And often, they might face a problem that seems to have no solution. Or alternatively, there are no developers who can do this, and the next update of the site is planned only for next month.
If you are familiar with the Google Tag Manager, you can send events to your CRM using Сustom HTML, but this is a very insecure method because anyone can see the requests data and where they are going. Also, you can’t use API keys for sending data to secure webhooks. Besides, it slows down your site performance because you add additional requests that the browser must handle.
So what is the correct solution?
Use GTM Server Side to securely send event/conversion data from any source (site, mobile, other services) to your CRM or any other URL.
We have many requests from our clients to send event data on conversion to their in-house CRM. And we started using the standard “HTTP Request Tag” for that purpose. After some time, we understood that in most cases, it is enough. That is if all data from the event can be sent in JSON Body to the desired URL. And that is why we created a JSON HTTP request tag.
JSON HTTP Request tag for GTM Server Side
It sends a POST request to your URL with a JSON body with all event data that came to the GTM client. We also implement the ability to add your custom request headers and data.
Where I can get it
You can find the tag on GitHub and of course, we submit it to the Community Template Gallery and expect that it will be shown on it after Google turns on Template Gallery for GTM Server Side.
How the request body will look like
For example, “pageview” event data that comes to the destination URL will look like this:
{
  "x_ga_protocol_version": "1",
  "x_ga_system_properties_v": "j86",
  "x_ga_system_properties_u": "YEBAAEABAAAAAC~",
  "x_ga_system_properties_gid": "958953488.1603993537",
  "x_ga_system_properties_r": "1",
  "x_ga_page_id": 618701935,
  "x_ga_request_count": 1,
  "page_location": "https://stape.io/",
  "language": "ua-ua",
  "page_encoding": "UTF-8",
  "page_title": "GTM Server Side - GTM Server",
  "x_ga_mp1_sd": "24-bit",
  "screen_resolution": "1920x1080",
  "x_ga_mp1_vp": "1920x866",
  "x_ga_mp1_je": "0",
  "x_ga_mp1_jid": "75289892",
  "x_ga_mp1_gjid": "2061012404",
  "client_id": "RQqpiKuM+uSEmRZWY8CJcMC0+90vEmBUdzTJRyMXlM=.1603993594",
  "x_ga_measurement_id": "UA-111147971-1",
  "x_ga_gtm_version": "2wgae3PDXX4BG",
  "x_ga_mp1_z": "2079427983",
  "event_name": "page_view",
  "ip_override": "1.2.3.4",
  "user_agent": "Mozilla/5.0 (Macintosh; Intel Mac OS X 10_15_7) AppleWebKit/537.36 (KHTML, like Gecko) Chrome/86.0.4240.111 Safari/537.36",
  "x_ga_path": "j",
  "x_ga_js_client_id": "796605102.1603993594"
It is important to know that the tag flattens all nested objects with “_” that came from the client. For example:
{
    'test': {
        'gtm': 'tag'
    }
}
Will send in a request like this:
{
    'test_gtm': 'tag'
}
Also, tag changes “-” symbol in keys to “_”.
That is done because many systems do not work with nested objects and our tag tries to work with all systems out of the box. These transformations apply only to event data that comes from the client. If you use the “Additional Options” setting of the tag, the keys that you fill in will be used without any modification.
How-to use JSON HTTP Request tag
1. Add custom tag template from the Server template gallery.
2. Choose the desired GTM Server Side Container and add it to the workspace.
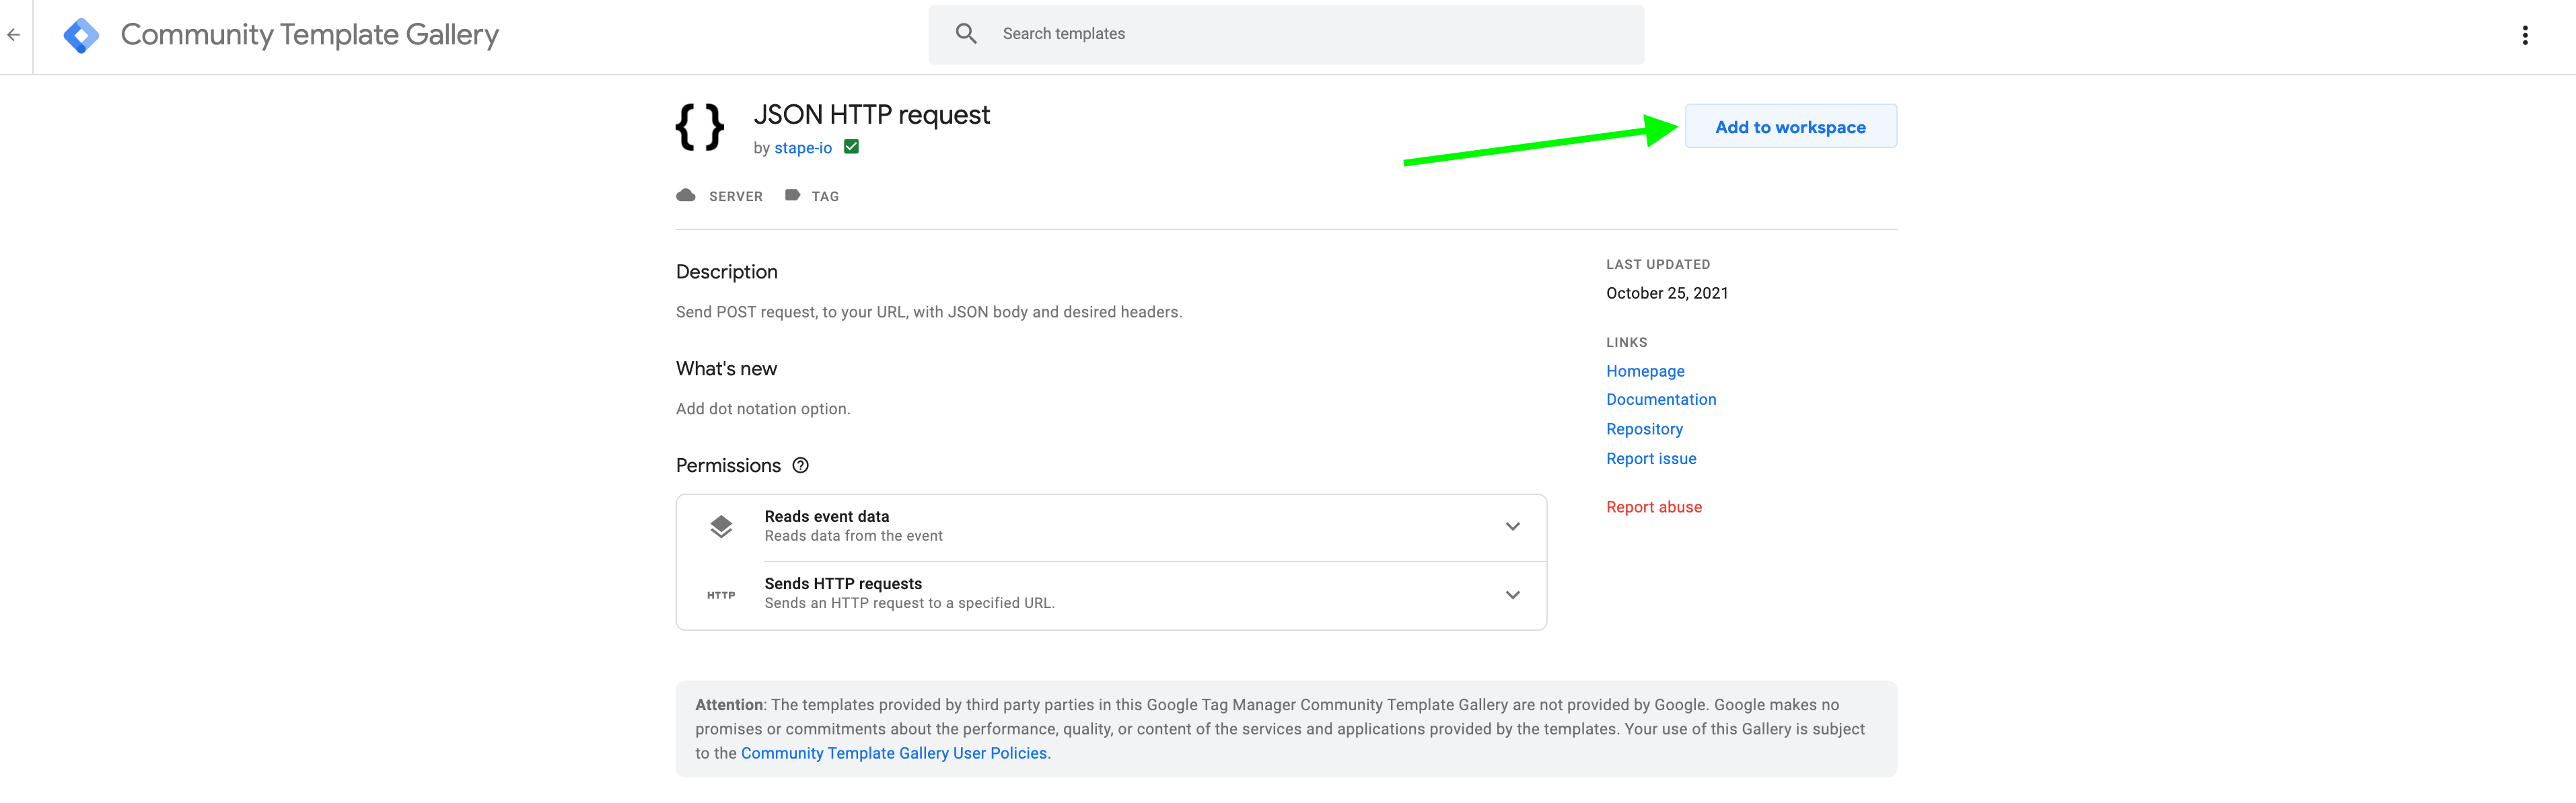
3. Another option is to click templates inside the server container -> Search Gallery -> addJSON HTTP request by stape.io.
4. After tag installation, create a new tag and choose “JSON HTTP request”
5. Choose a trigger for firing this tag (when you need to send a request). For example, you can choose the trigger that you use for firing the GA tag.
6. Fill “Destination URL” field in tag configuration with the URL your request will be sent to and save your newly created tag.
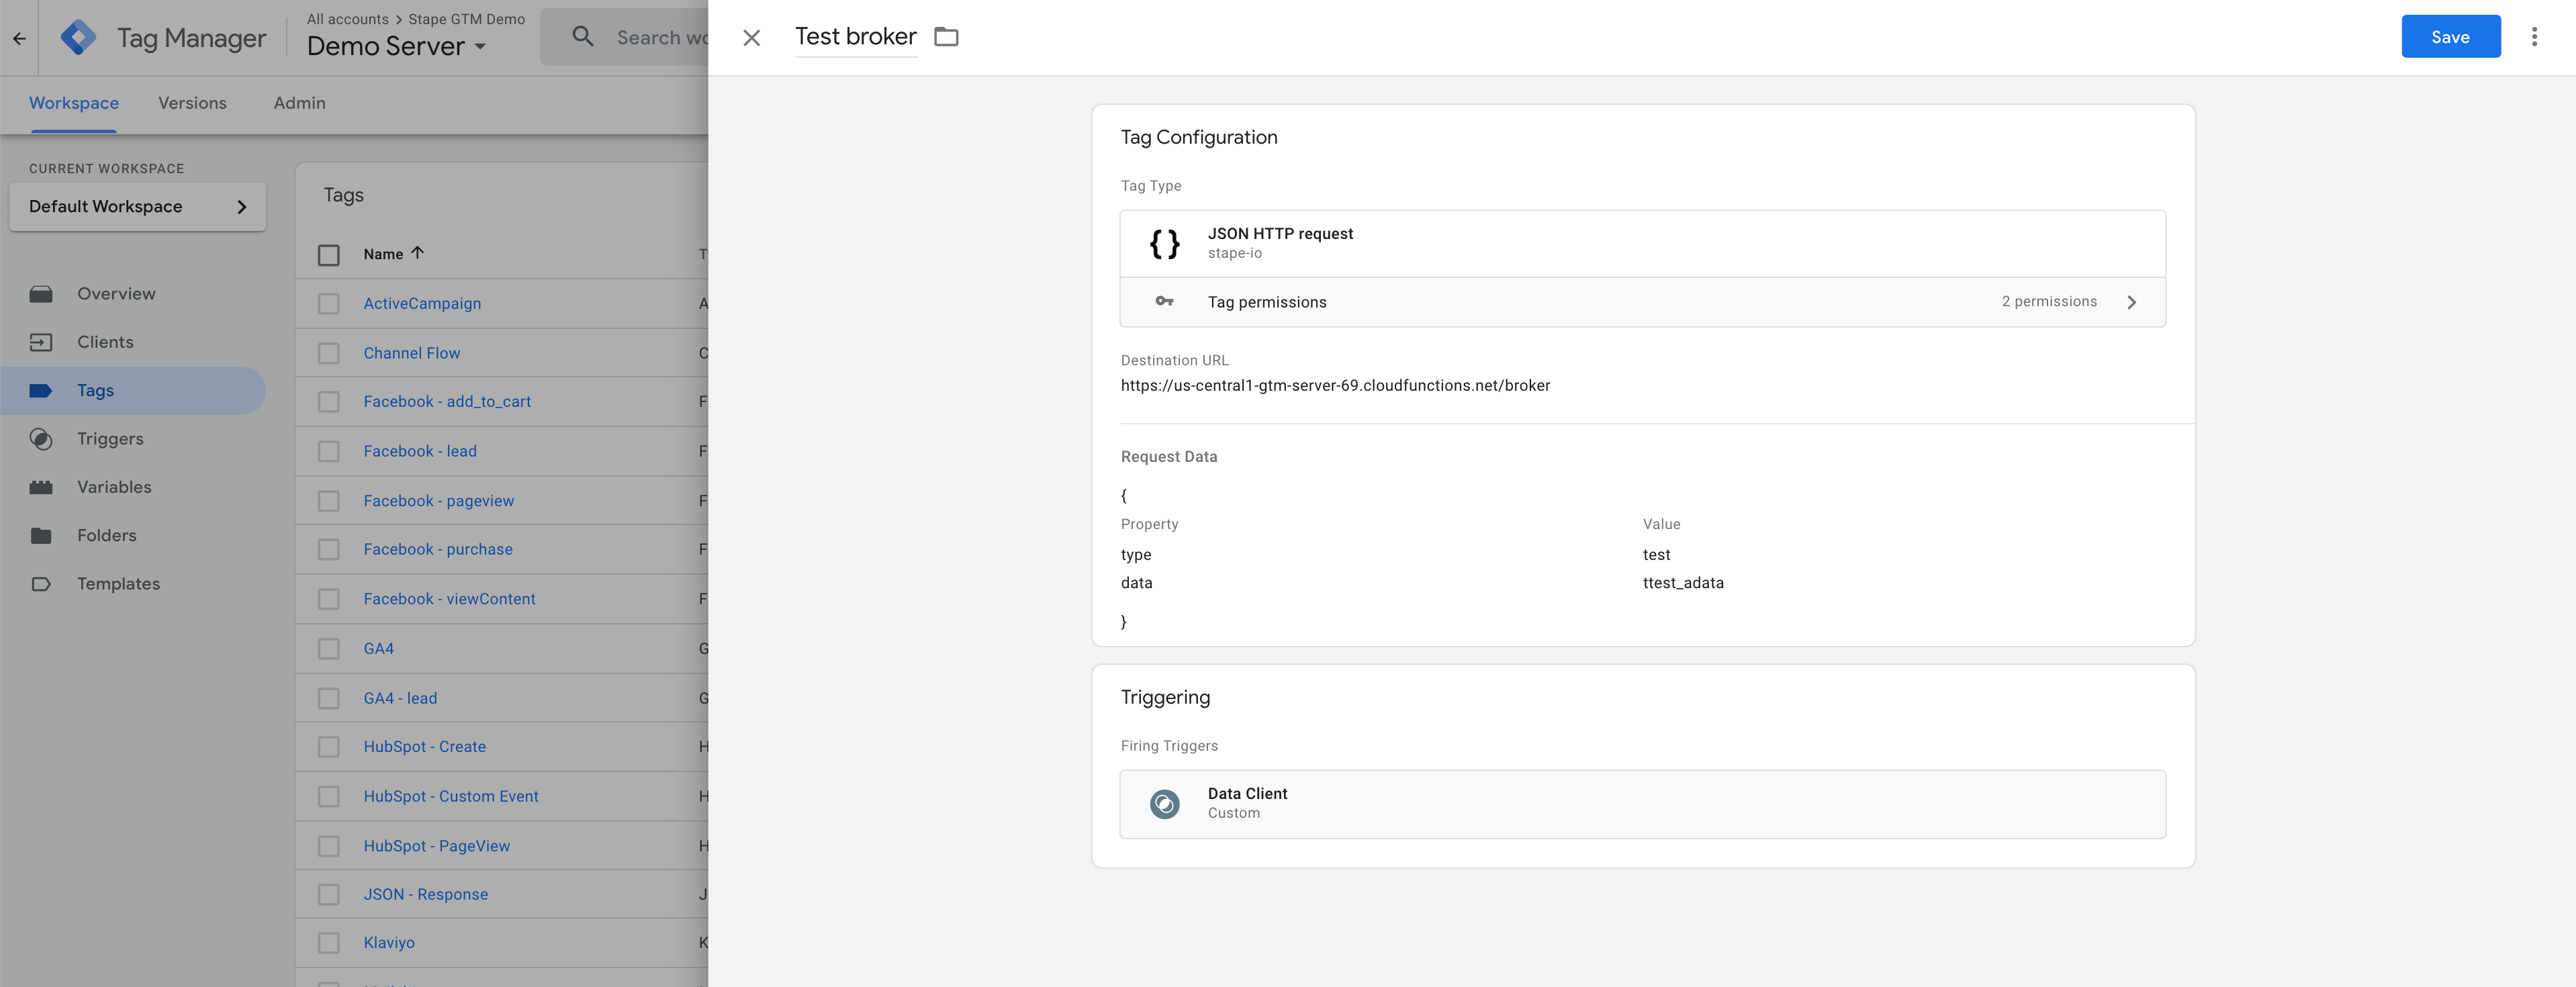
7. After publishing your tag, data will be sent to the URL you set, when the trigger applies.
Feel free to tell about the issues on GitHub or in the comments to this post with feature requests and questions.
Got confused?
Just tell us what the problem is. Click Get help, fill up the form, and we will send you a quote.

Comments