Connect your website to Mailchimp using Google Tag Manager server container
We created a Mailchimp tag for the Google Tag Manager server container to help you connect your site to Mailchimp. This tag allows you to utilize the Google Tag Manager server container to track events, create and update contacts or even do both simultaneously. The main benefit of using this tag is that you can add new users. Previously, it was only possible with the help of backend developers. It means that you can connect your site to Mailchimp using Google Tag Manager. No developers required.
What is Mailchimp
Mailchimp (formerly known as an email marketing service) is a popular marketing platform that’s available in 50 countries. Mailchimp web and mobile apps have integrated features such as scheduling and designing emails, audience dashboard, content studio, pre-built automation, marketing calendar, real-time analytics, and much more. Mailchimp is one of the most successful companies in the industry. Thousands of companies are using Mailchimp for their email marketing. That is why we created a tag for the Google Tag Manager server container that helps to connect your site to Mailchimp.
What are the ways of Mailchimp website integration
There are several ways to connect Mailchimp to your website:
- Embedded forms are the simplest option — you just paste a code snippet into your site. But they only work for basic email signups and don't support event tracking or contact updates.
- Direct API integration gives you full control, but you'll need backend developers to build and maintain it.
- Tools like Zapier or Make are good for simple automations. However, they quickly run out when you need to pass custom data or track specific user behavior.
- Client-side Google Tag Manager (Web GTM) lets you fire Mailchimp scripts based on user actions, but data sent from the browser can be blocked by ad blockers or browser restrictions.
- Server-side Google Tag Manager routes data through a server container, so ad blockers won't interfere. In sGTM, you can create and update contacts, track events, and add merge tags without developer assistance.
Server-side tagging for Mailchimp
It’s never been easier to integrate Mailchimp. All you need to do is set up the Google Tag Manager server container and configured events and parameters. If you’ve already set up Facebook Conversion API using GTM, chances are you already have all the required parameters and events inside the web and server container. You can set up Mailchimp integration in minutes without the input of developers.
Mailchimp tag for Google Tag Manager can help you build an integration quickly. This automation will scale your revenue and facilitate all the related processes. It will also help you decrease the hours of manual work. With the help of the Mailchimp tag for the Google Tag Manager server container, you can integrate Mailchimp easily and eliminate time-consuming tasks.
How Mailchimp tag for Google Tag Manager server container works
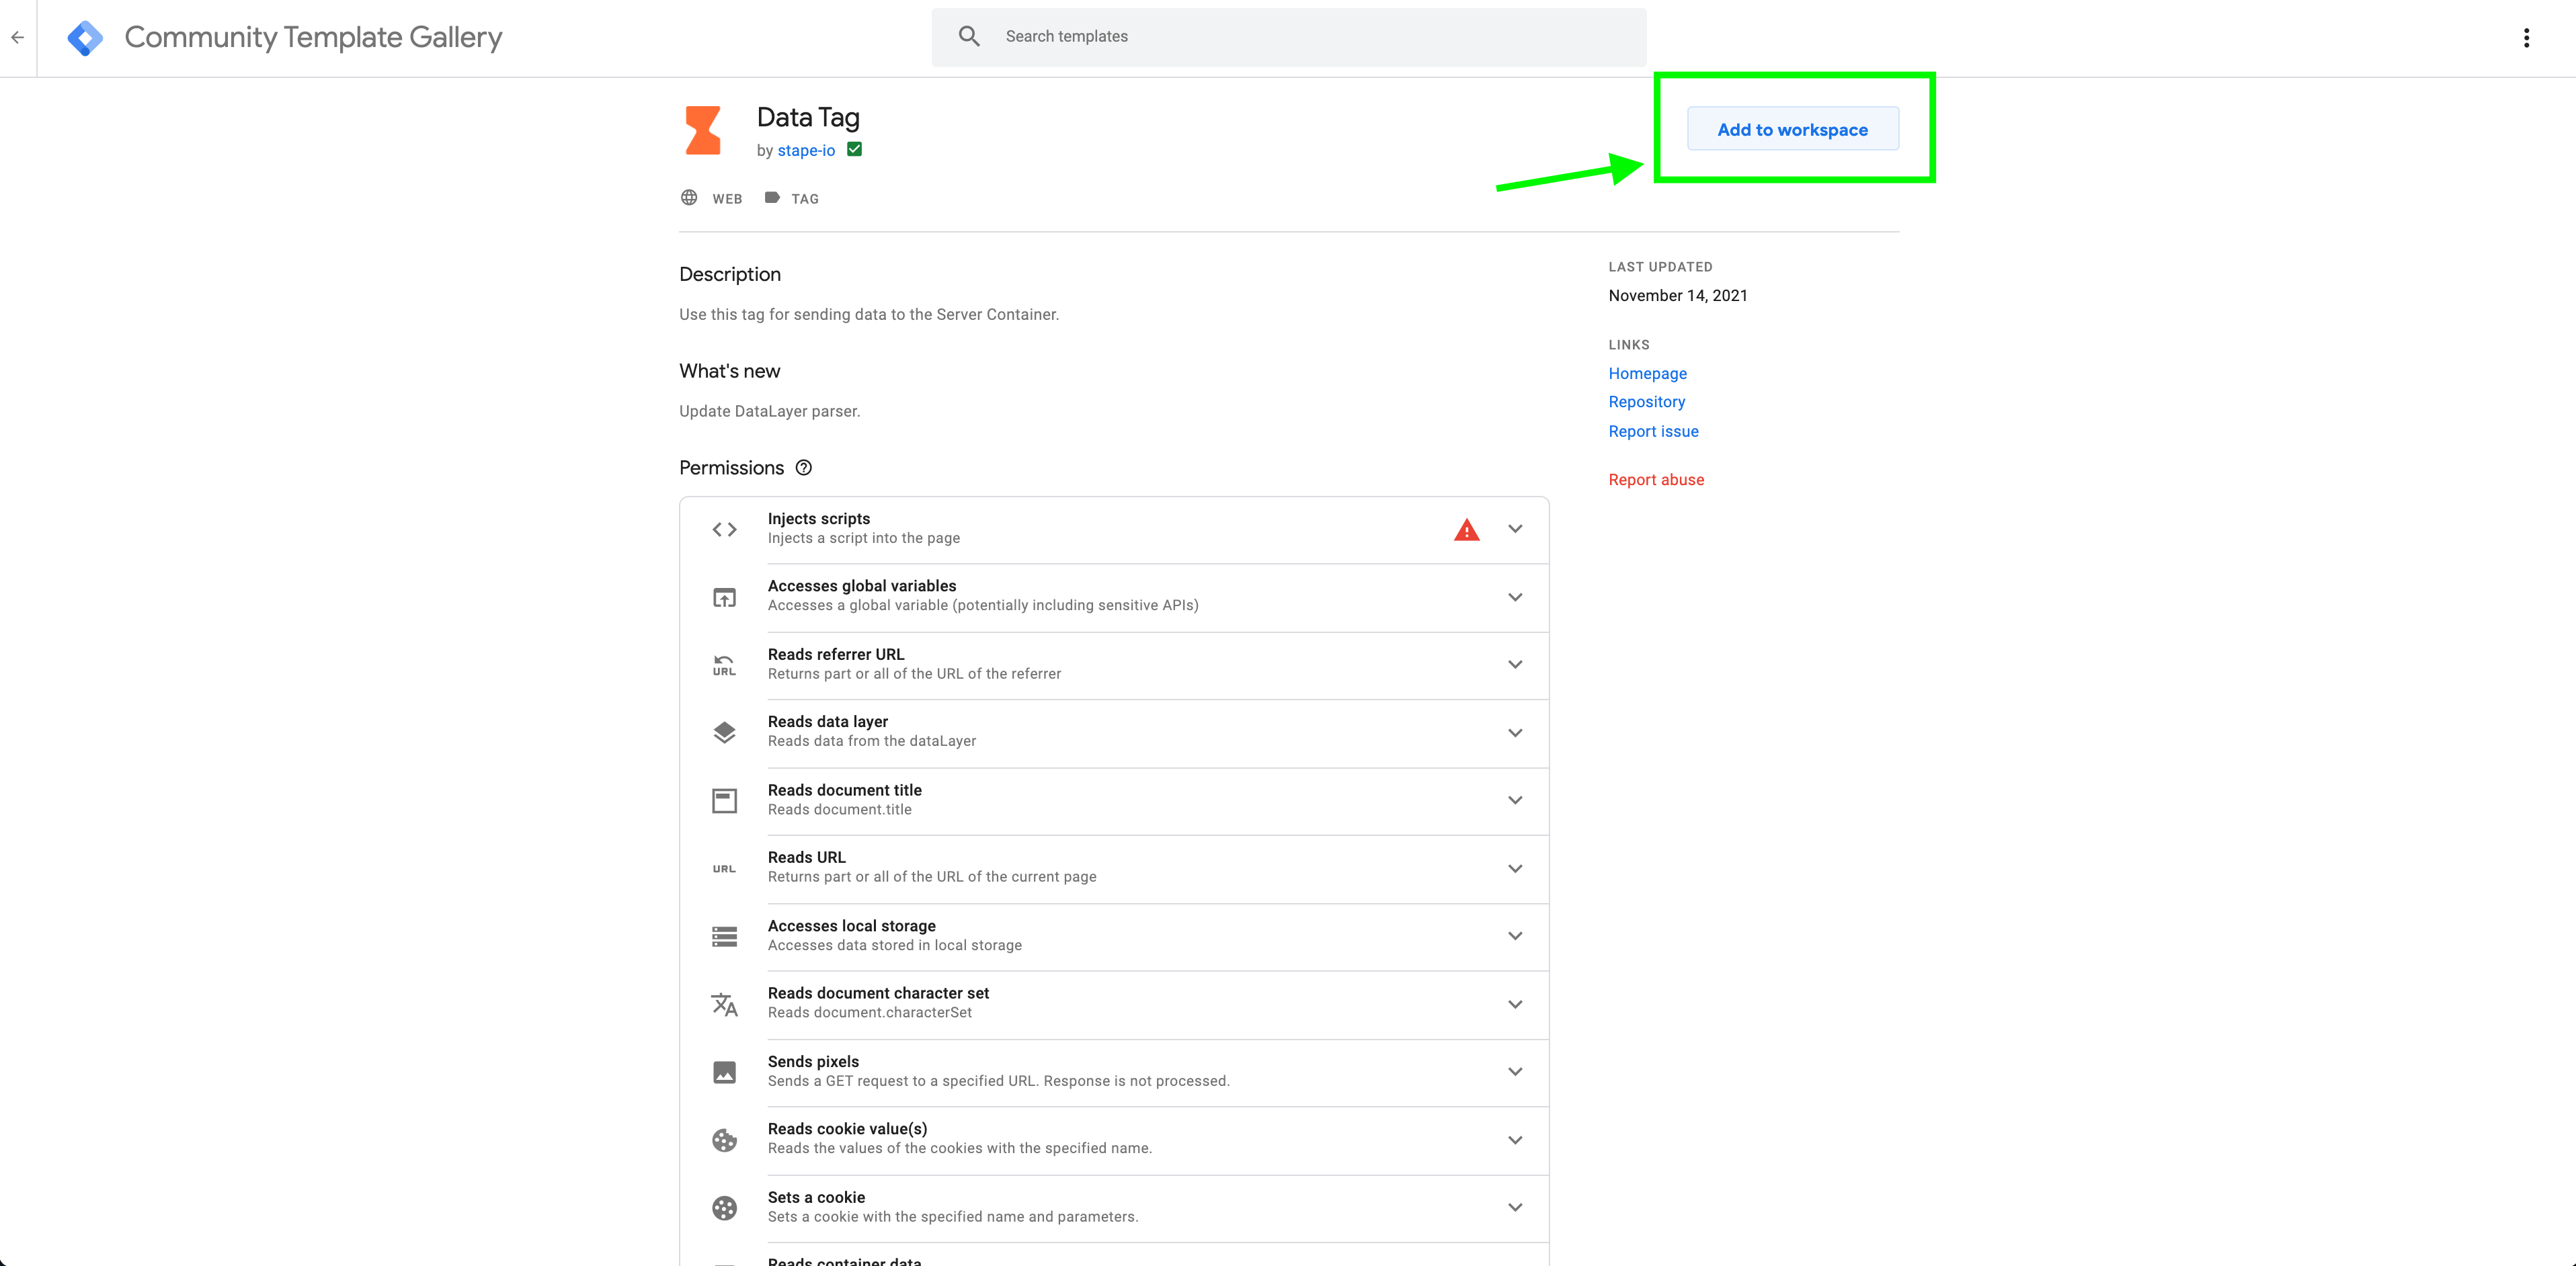
Let me first describe all fields and features of the Mailchimp tag. You can add the Mailchimp tag to your server container from the server template gallery or just by clicking this link.
Mailchimp tag for server container has the following features:
- Event tracking
- Creating or updating contact
- Creating or updating contact and tracking events
All these options require a user email that is hashed with MD5. Mailchimp Marketing API uses the MD5 hash of the lowercase version of the contact’s email address for API calls. You can use Data Tag and Data Client to send users an email that is hashed with MD5.
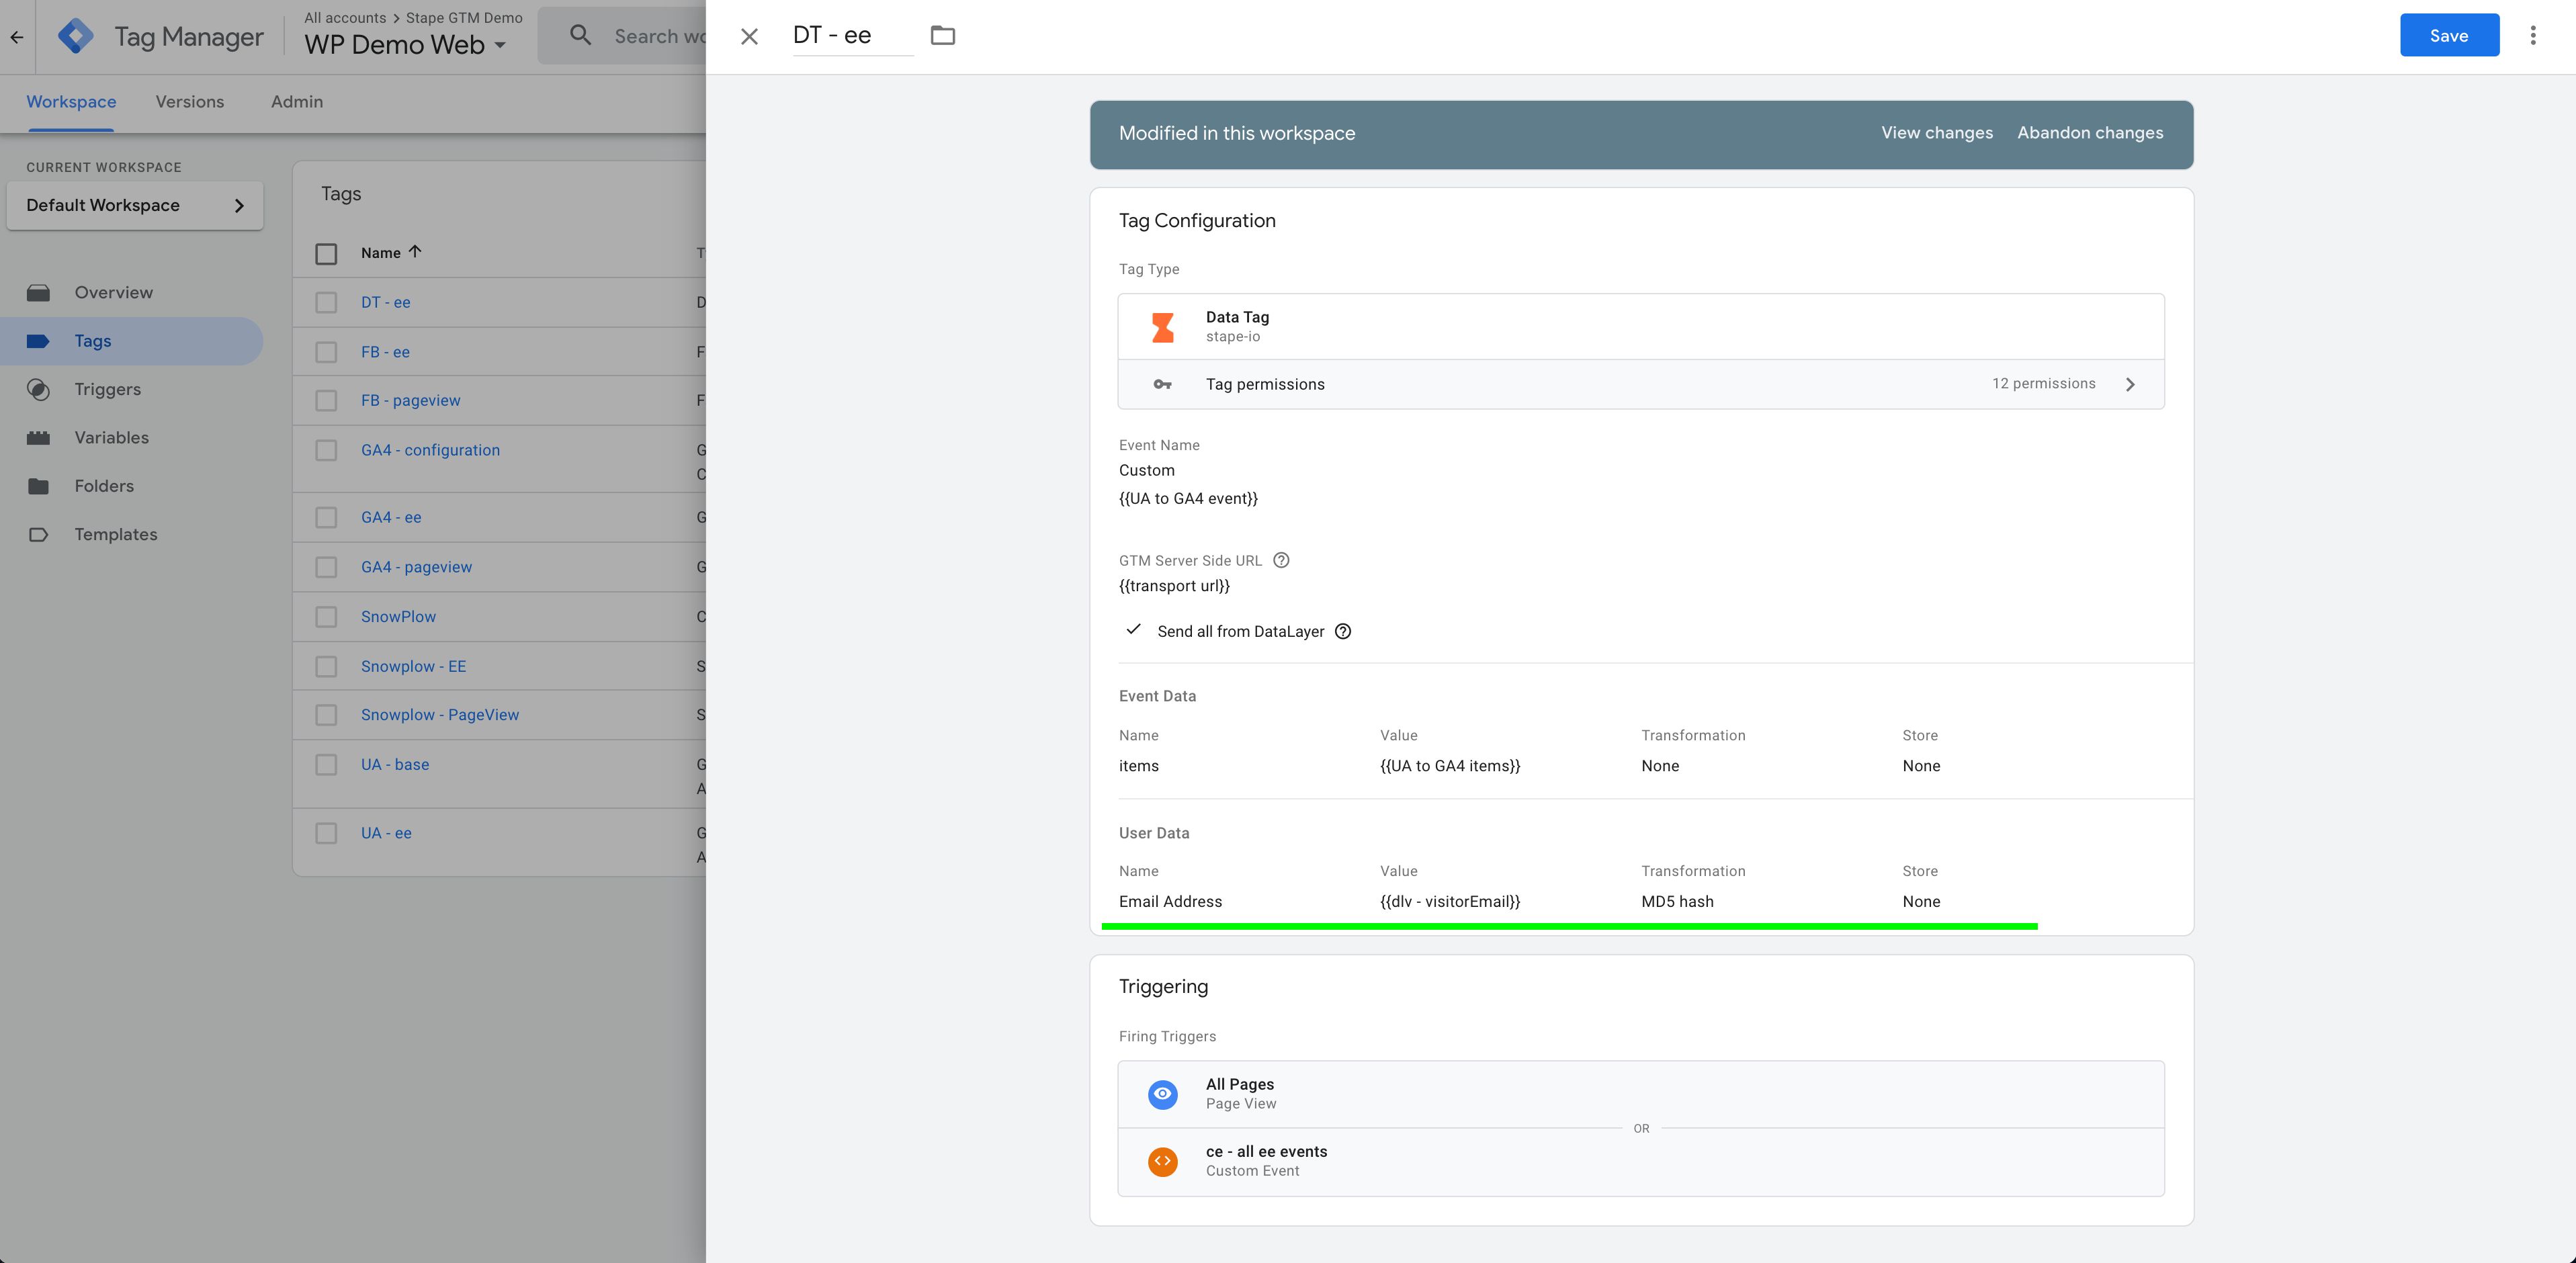
This tag also allows adding merge tags. You can use merge tags to send personalized emails to your audience. The merge tag looks like text wrapped in special characters: *|EXAMPLE|*. For example, you can use a merge tag to insert a user email dynamically. So when your customers open the email, they will see their name. You can also send a link to your site inside the merge tag and use it for abandoned cart emails. Such emails feature links to the products the users added to carts but ended up not purchasing.
The Mailchimp tag also allows sending events together with the event parameters. With the help of events and parameters, you can segment your audience or create triggers. For instance, you can send an event when the user subscribed to the newsletter and add the preferred newsletter types to the event parameters.
How to connect your website to Mailchimp using Google Tag Manager server container
To connect Mailchimp to your site, you will need a configured Google Tag Manager server container.
2. Add custom subdomain. This step is highly recommended but not necessary.
3. Define what events, event parameters, and user parameters you want to send to Mailchimp. I will show how to send these parameters from the web to the server container using Data Tag and Data Client in the following steps.
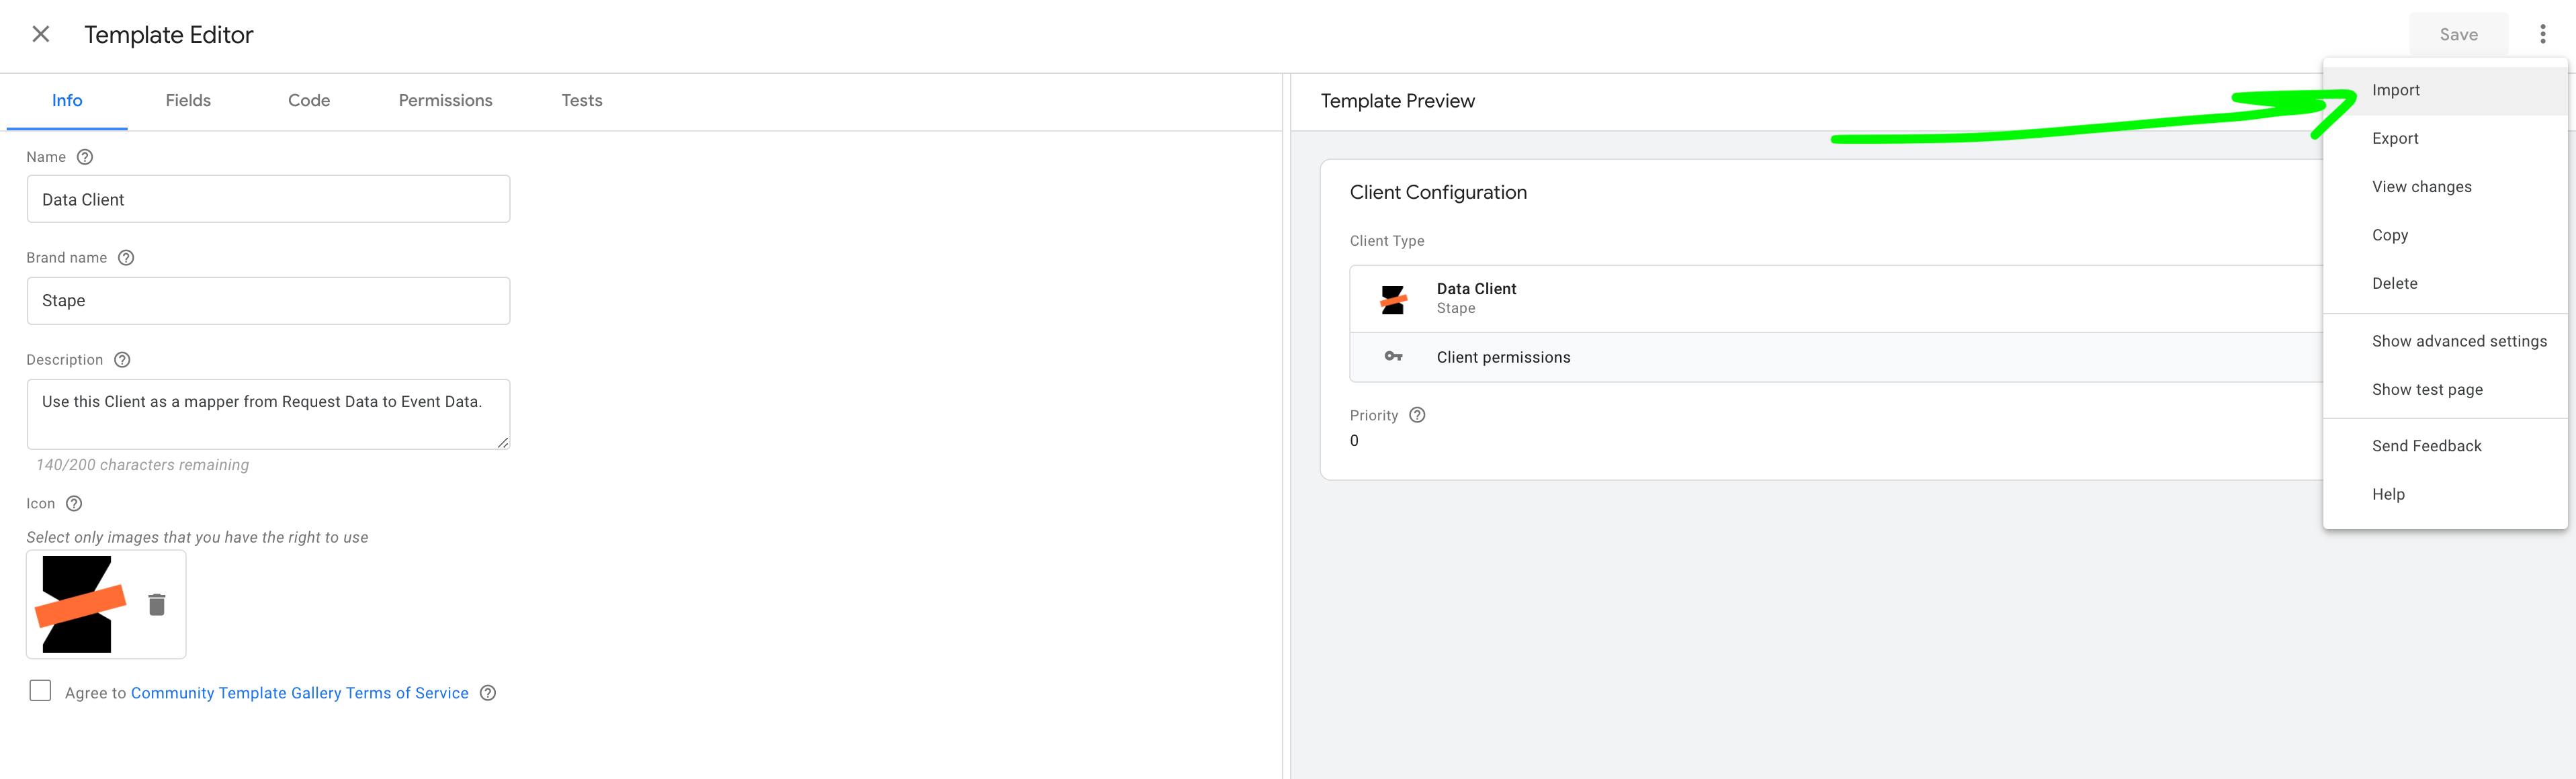
4. To add a Data Client, download a Zip file from GitHub -> Click on templates inside the Server container -> Click “New” on the Client Templates section -> Click on the three dots on the top right corner -> Click import.
5. Add Data Tag to the Web container.
6. This example will show you how to add a new user to the Mailchimp list after a purchase is finalized. This user will be added to the Mailchimp list together with the product information. You can use this information, for example, to create up-sell and cross-sell campaigns.
I have a data layer inside the Web Google Tag Manager container that sends purchase and user information. First of all, I need to create data layer variables that will capture the parameters I want to send to Mailchimp: user email, first name, last name, product name, ID, SKU, and category.
7. I will set up Data Tag inside the Web container to pass these variables to the Server container. Create new tag -> tag type Data to GTM Server Side -> select event type -> add GTM Server Side URL and GTM Server Preview HTTP header (you need it to see Data Tag requests inside the server container) -> add user and event parameters. Once done, click save, open Web and Server preview modes, and check that the Server container sees the information you’ve sent using Data Tag.
You should send the user email in two ways: one should be hashed with MD5, add it in the User Data, and the second one should be sent inside the Event Data without any transformation.
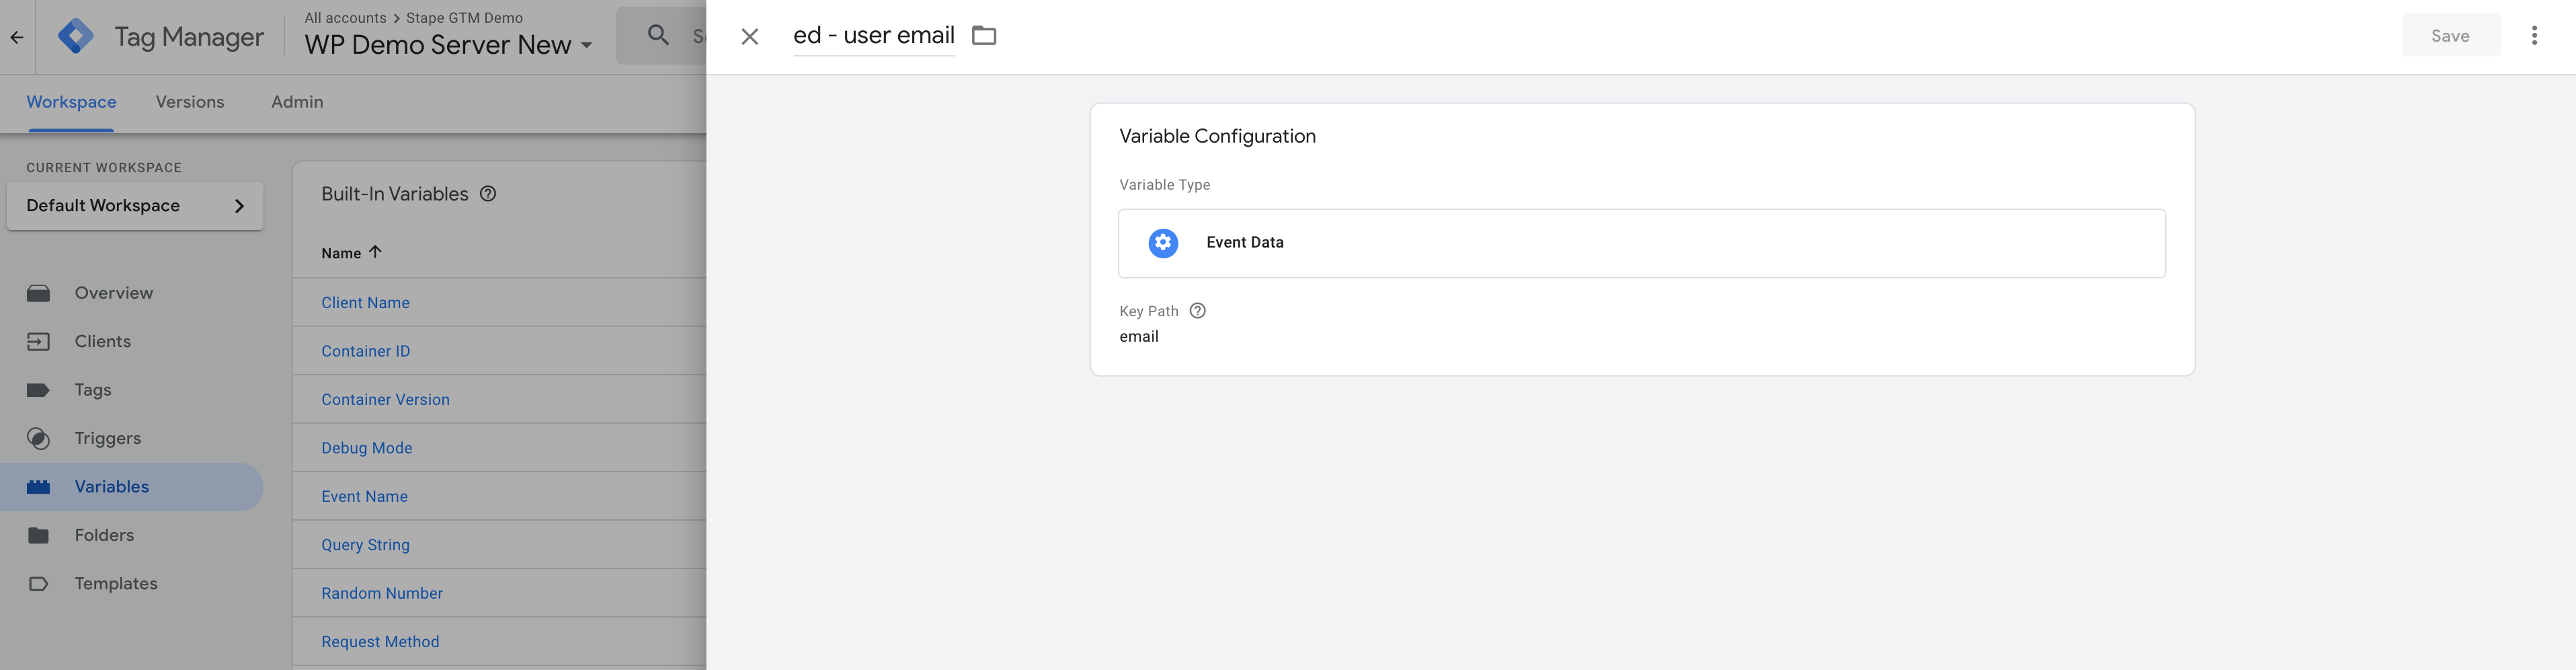
8. In this step, I will create variables inside the Server container to capture user and event parameters sent from the Web container using a Data Tag. Create new variables -> type Event Data -> add Key Path
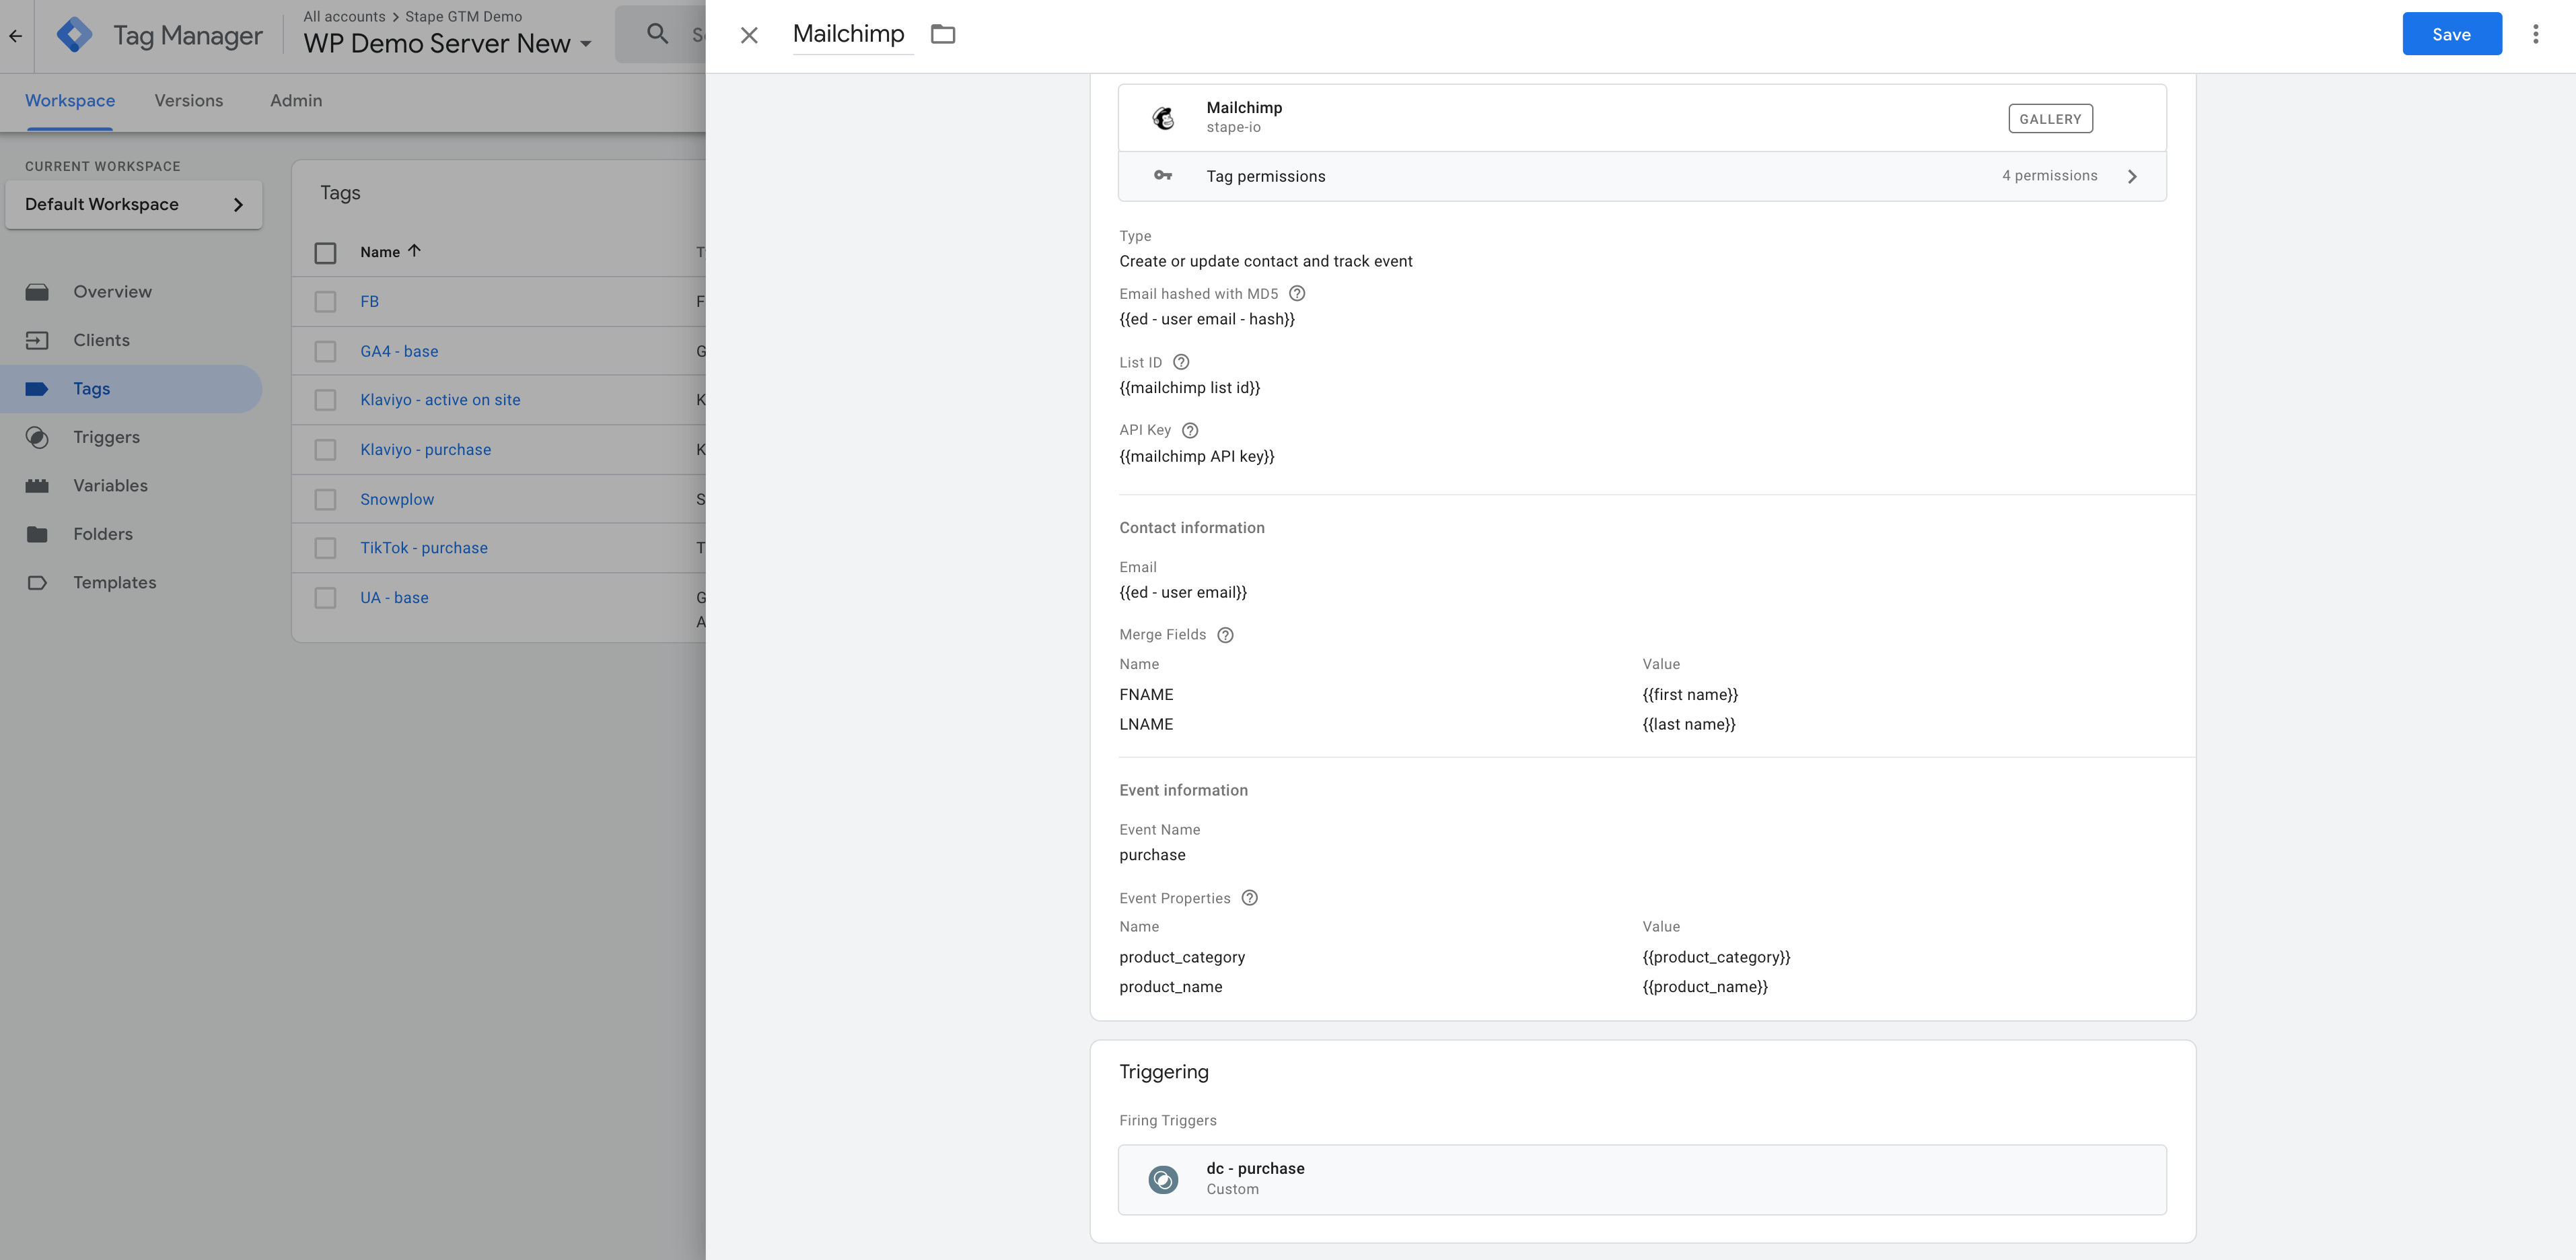
9. Create a new tag inside the Server container -> Add Mailchimp tag to the server container using this link to the server template gallery-> tag type Mailchimp -> select event type -> add list ID and Mailchimp API Key -> Add Contact information and Event information -> Click save. Once done, open Web and Server preview mode and check that the Mailchimp tag worked and contact was added to the Mailchimp list.
10. Publish web and server containers.
Conclusion
With the Mailchimp tag for the Google Tag Manager server container, you can add new users and track events for existing users. Ultimately, it will help you to grow your subscription list and boost sales. But above all, it allows setting up the integration without the help from developers – all done inside the Google Tag Manager web and server interface.
Want to connect your website to Mailchimp?
We can help you to do that! Click Get help, fill up the form, and we will send you a quote.

Comments