How to set up AdRoll tag using server GTM
Uliana Lesiv
AuthorIn this guide, we will show you how to set up AdRoll conversion tracking using a server GTM container. The configuration process includes the following steps:
- Creating a server GTM container.
- Adding AdRoll Pixel to the website.
- Sending data from the web to the server GTM container.
- Adding the AdRoll tag from the Template Gallery to the server GTM container.
- Configuring the tag to track events.
- Adding a trigger to the tag.
- Testing the setup.
What does the AdRoll tag do?
The AdRoll tag for the server GTM container allows you to build AdRoll Google Tag Manager integration. With its help, you can send site or app events and parameters directly to AdRoll. You can configure both standard and custom events and receive the list of server, app/device data, and/or custom data parameters along with the event.
Please note:
Benefits of AdRoll tag
AdRoll tag developed by Stape operates on the server GTM container, so it offers a list of benefits of server-side tracking, including:
- Accurate data collection and conversion tracking.
- High control allows easier compliance with data regulations.
- Data enrichment.
Before starting
Make sure you have the following things that are required for setting the AdRoll tag:
- Having installed AdRoll Pixel, you can find the detailed instructions on the setup process in AdRoll documentation.
- Data flows from the web to the server GTM container (e.g., by setting up server-side Google Analytics 4 or Data Tag/Data Client).
How to set up AdRoll conversion tracking via server GTM
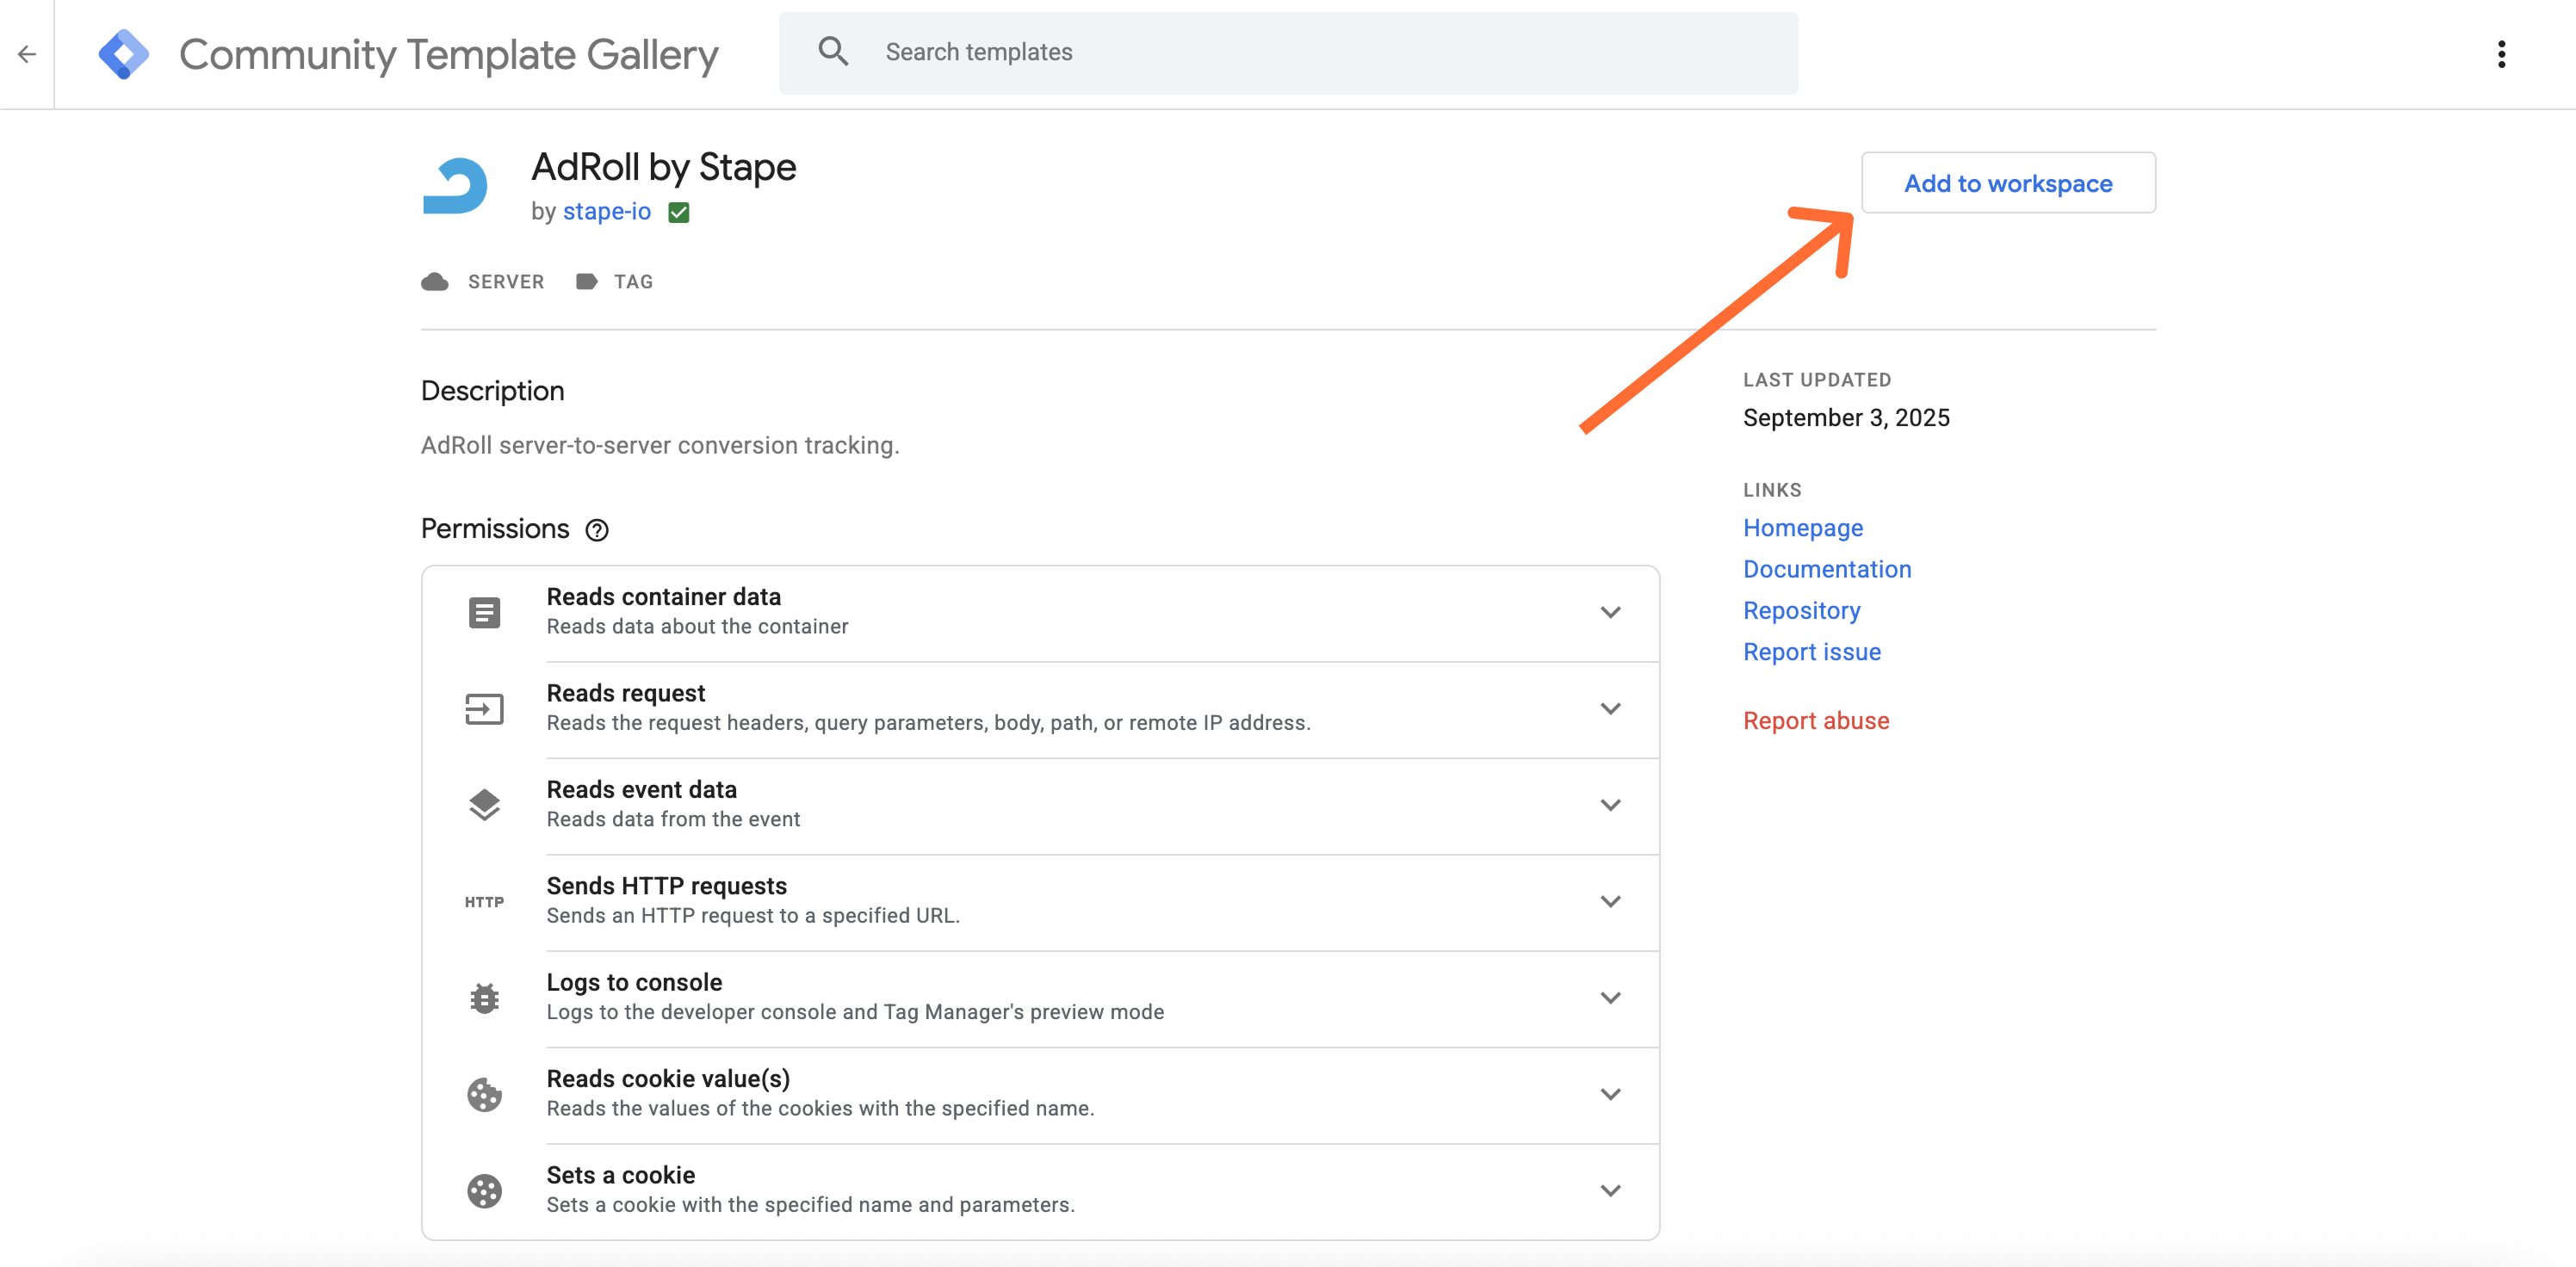
1. Add the AdRoll tag to your workspace. To do it, go to your server GTM container → Templates → in the "Tag Templates" section, click "Search Gallery" → find "AdRoll by Stape" → click "Add to workspace".
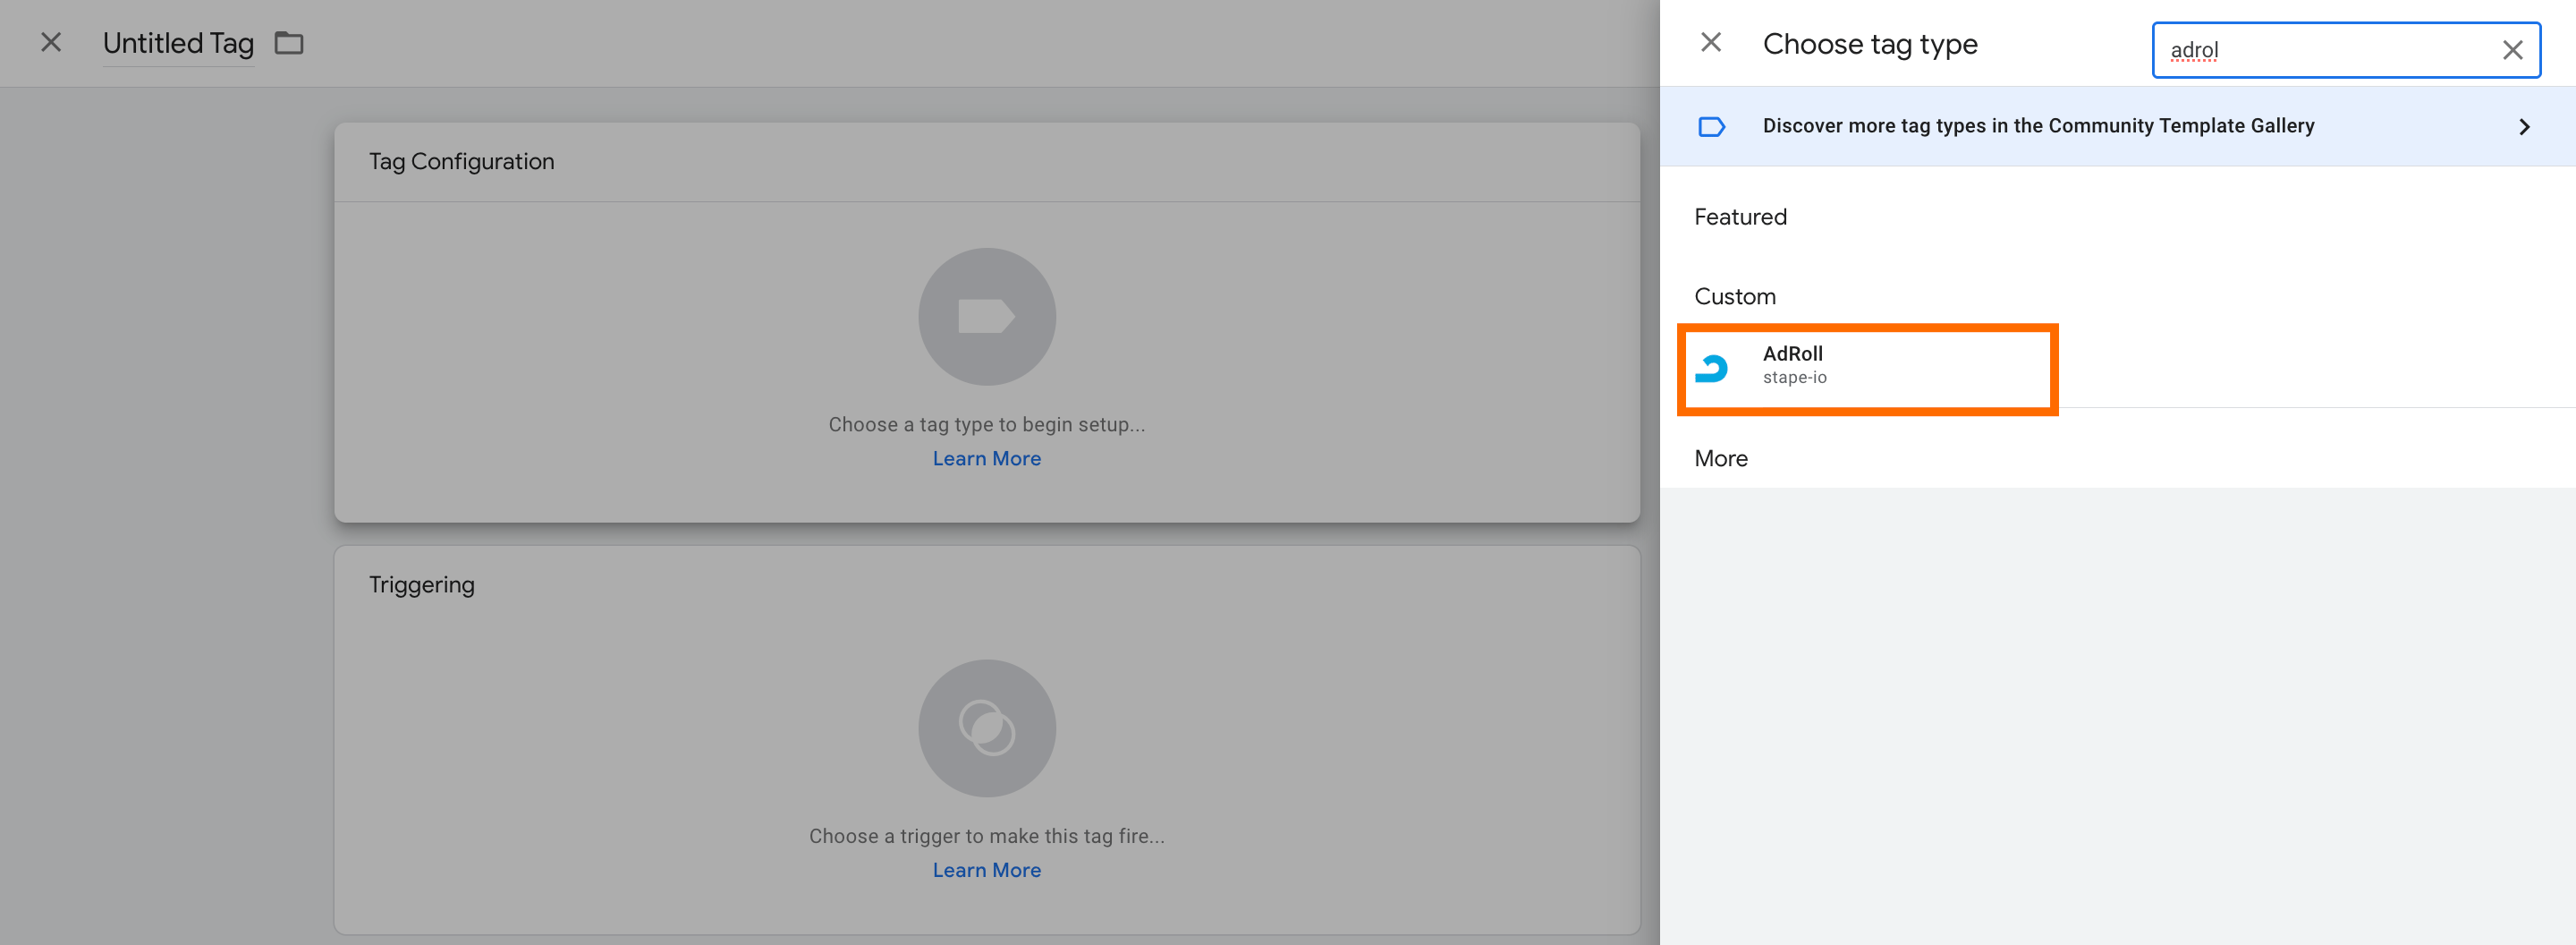
2. In the "Tags" section of the server GTM container, click "New" and choose "AdRoll" as the Tag Configuration.
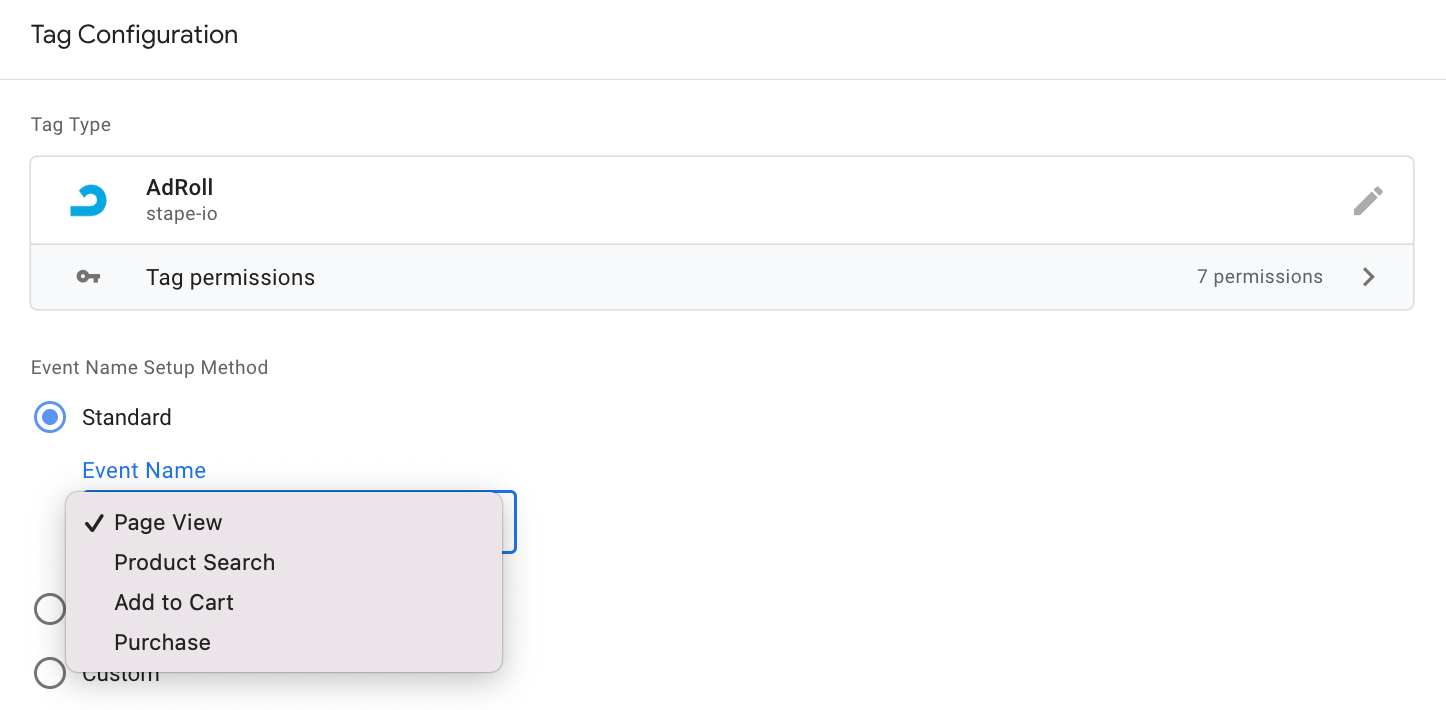
3. Choose Event Name Setup Method:
- Standard - you can select the needed event from the list (pageview, product search, add to cart, purchase).
- Inherit from the Client - the tag will automatically parse server GTM event names and align them with AdRoll standard events.
- Custom - define a unique event name of your choice.
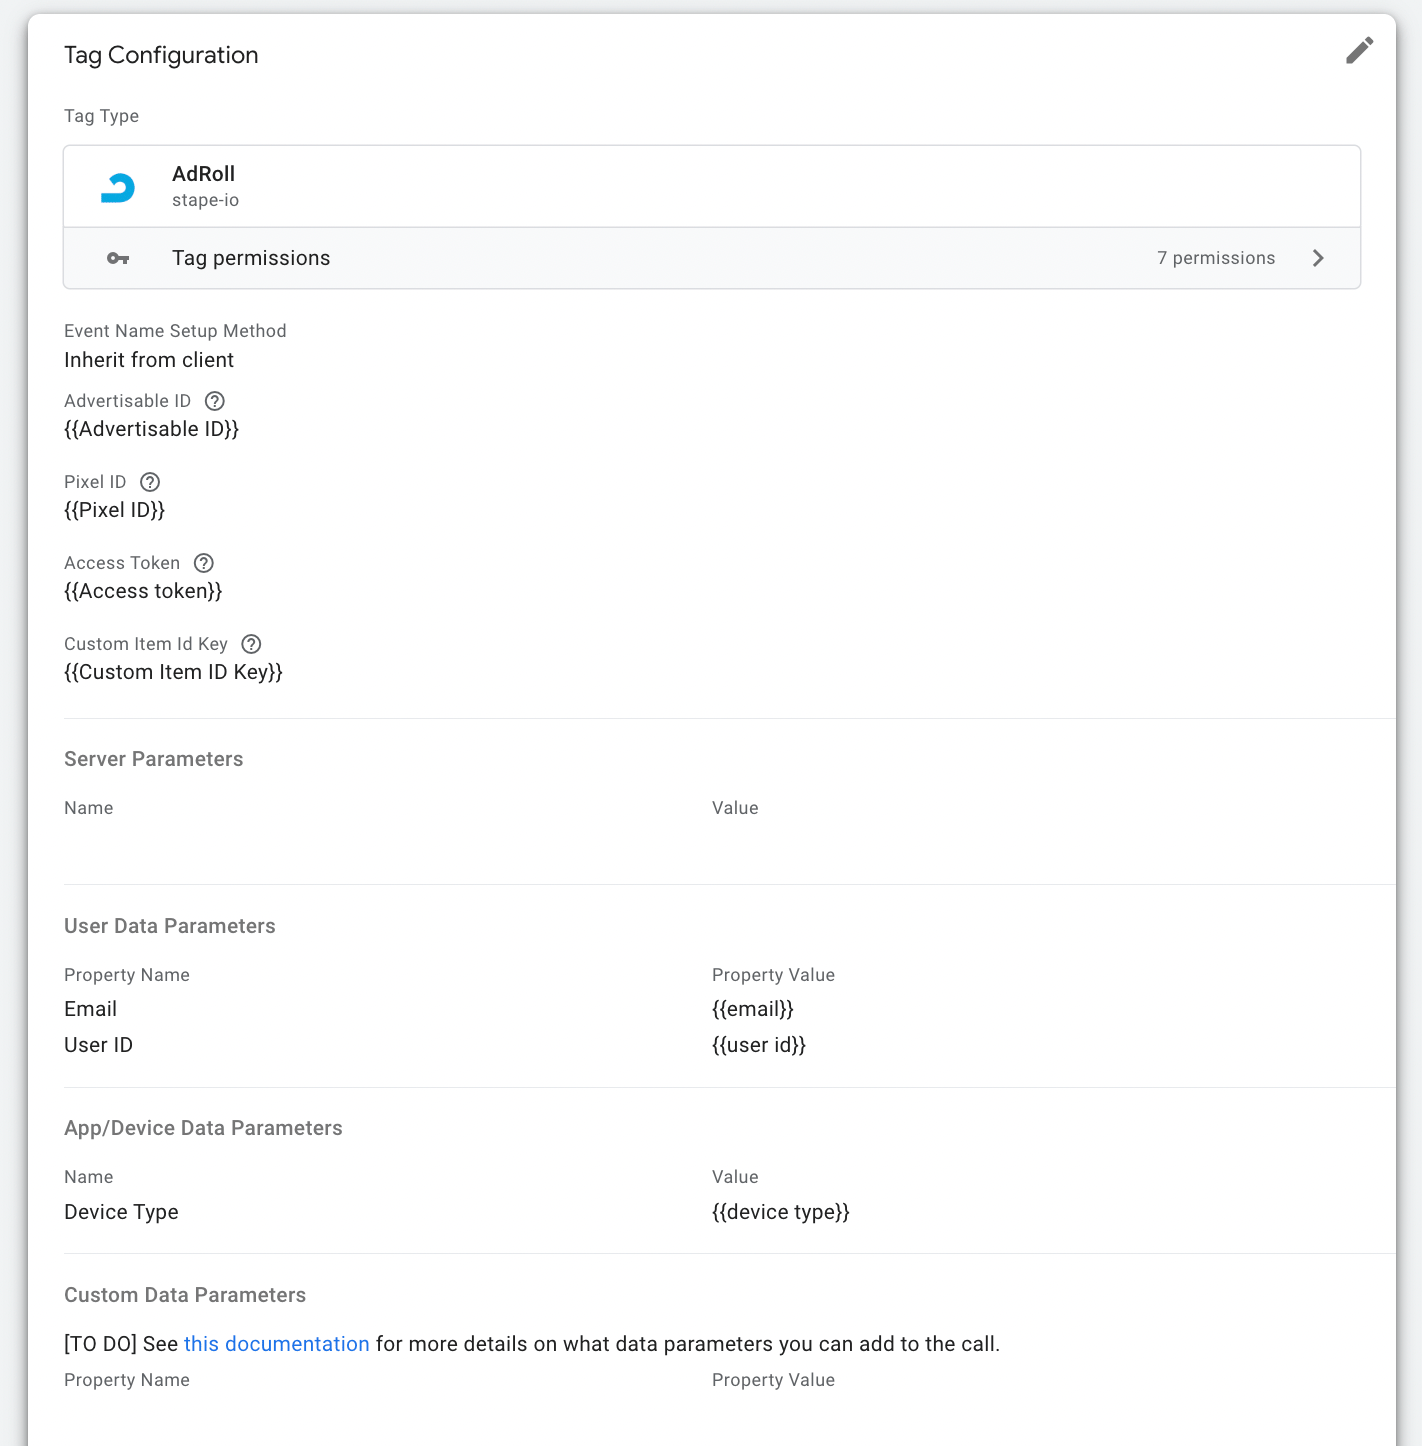
4. Configure the tag.
Despite the event type you've chosen, you will need to configure the following fields:
a. Advertisable ID - you can find it in the AdRoll account under AdRoll → Website → View Pixel → adroll_adv_id.
b. Pixel ID - go to AdRoll account and find it under AdRoll > Website > View Pixel > adroll_pix_id.
c. Access Token - you can get the token in the Personal Access Tokens section in account settings.
d. Custom Item ID Key - specify a custom key that will be used to set the content item ID. By default, item_id will be used. This may be useful if you are using WooCommerce extensions.
5. (Optional) Add Server, App/Device Data, and/or Custom Data Parameters that you want to receive when the event is triggered.
Here is an example of a configured AdRoll tag:
6. Add a trigger for a tag.
7. Test the tag setup in the web and server GTM container using GTM preview and debugging.
Conclusion
Integrating AdRoll with GTM allows effective management of conversion tracking. With its help, you can track standard events such as pageviews, adding to cart, purchases, and set up custom events tracking. Thanks to server-side tracking, you can start benefiting from precise data collection, high control over data, and more benefits that server-side tracking offers!
Want to start using server-side tags?
Stape has lots of tags for server GTM! Click on Try for free to register and check them all.

Comments