How to use Setup Assistant for custom websites
Updated Jun 15, 2026
The guide shows how to use the Setup Assistant tool for users who have CMS platforms that are not supported by the Stape CMS app.
What you need before you start
2. Ensure you have created a web container and a server container in Google Tag Manager.
3. Ensure your server container is hosted on Stape.
4. (Optional) Ensure you have configured a custom domain (even though it’s optional, but highly recommended for setting first-party cookies).
| Note: To set up a same-origin domain, indicate the full Same Origin Path as the Server Container URL in the Setup Assistant. For example, you would enter https://www.yourdomain.com/sgtm/ as your URL. |
5. As you have a custom website, you’ll need to collaborate with your developers to implement the Data layer events with the specific payloads you need. To create a Data layer, you can make a copy of our documentation, edit it according to your needs, and pass the doc to your developers. Please check our article on the Data layer for helpful guidelines on Data layer implementation.
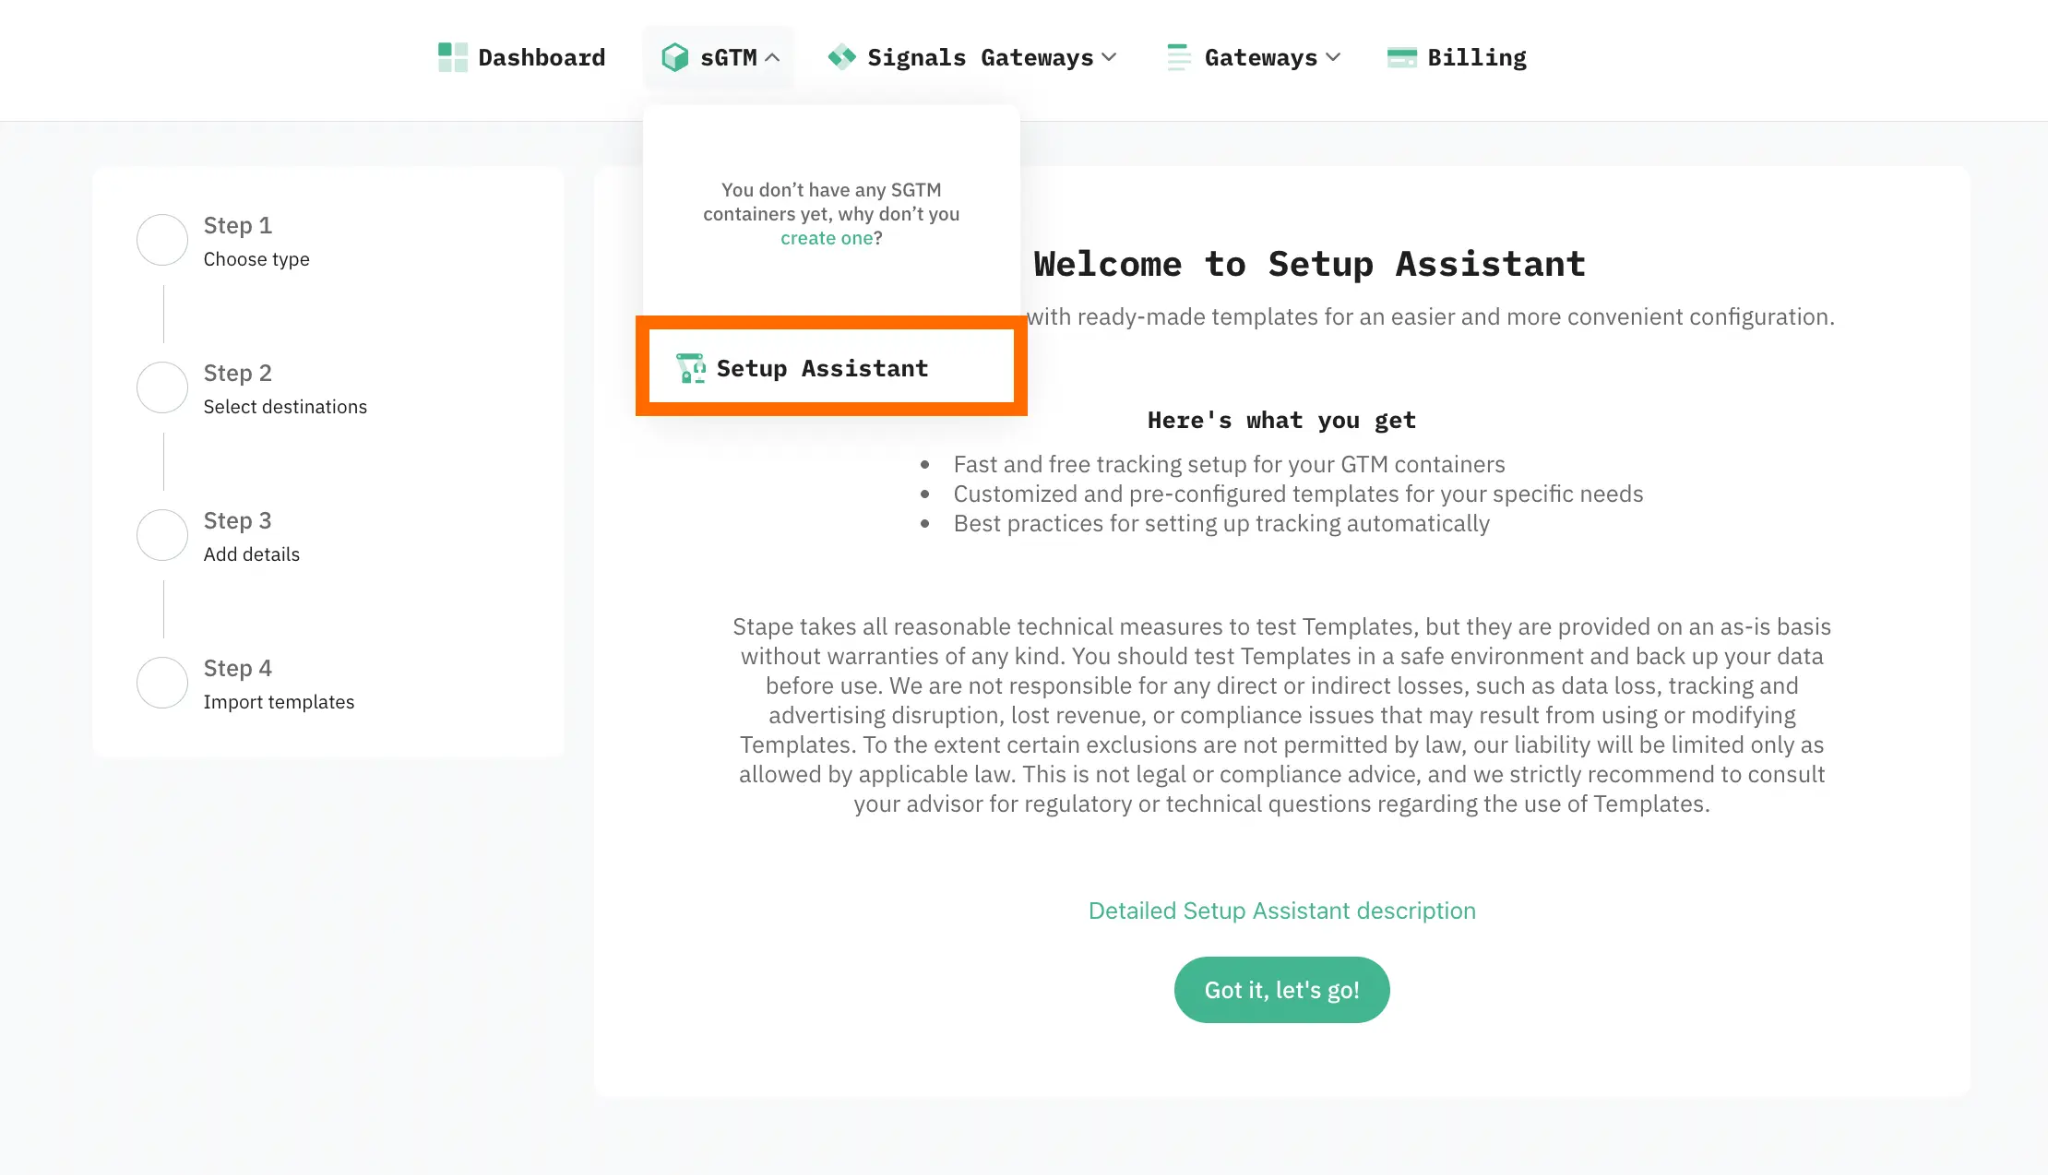
Where to find the Setup Assistant?
In the Stape admin, click on the sGTM section in the menu and locate Setup Assistant. Then, click on Got it, let's go! to start answering the questionnaire.
Step 1. Choose type
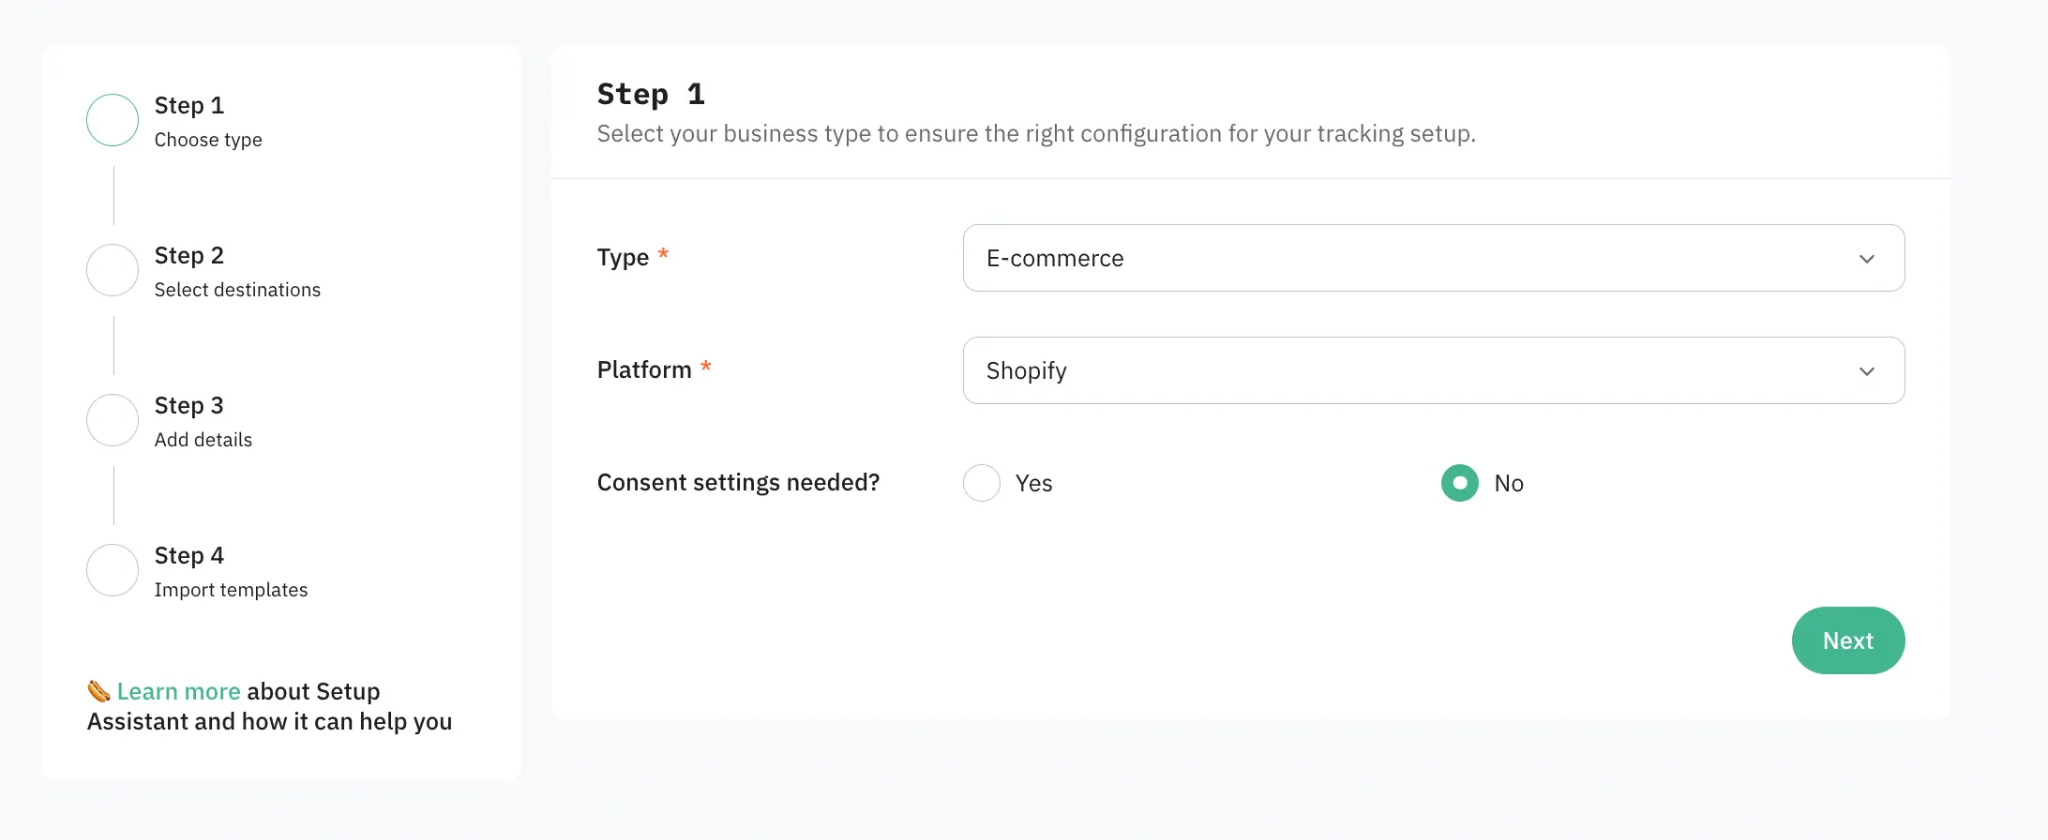
Type - indicate your setup type. eCommerce setups focus on product tracking, while Lead Generation setups focus on form submissions and conversions.
Platform (if you select eCommerce as a type) - specify the CMS platform you are using (e.g., Shopify, WordPress, etc.). Setup Assistant can provide the appropriate templates and settings for your site, ensuring that everything works seamlessly with your CMS. If your platform is not on the list, select Other.
Consent settings - check the box if you have a consent provider. Then, select one from the list.
Note:
If you choose Other as your consent provider, you need to specify an additional event in the dataLayer that signals a change in consent status. You can usually find this information from your consent provider or by checking the sdataLayer when the consent status changes.
Step 2. Select destinations
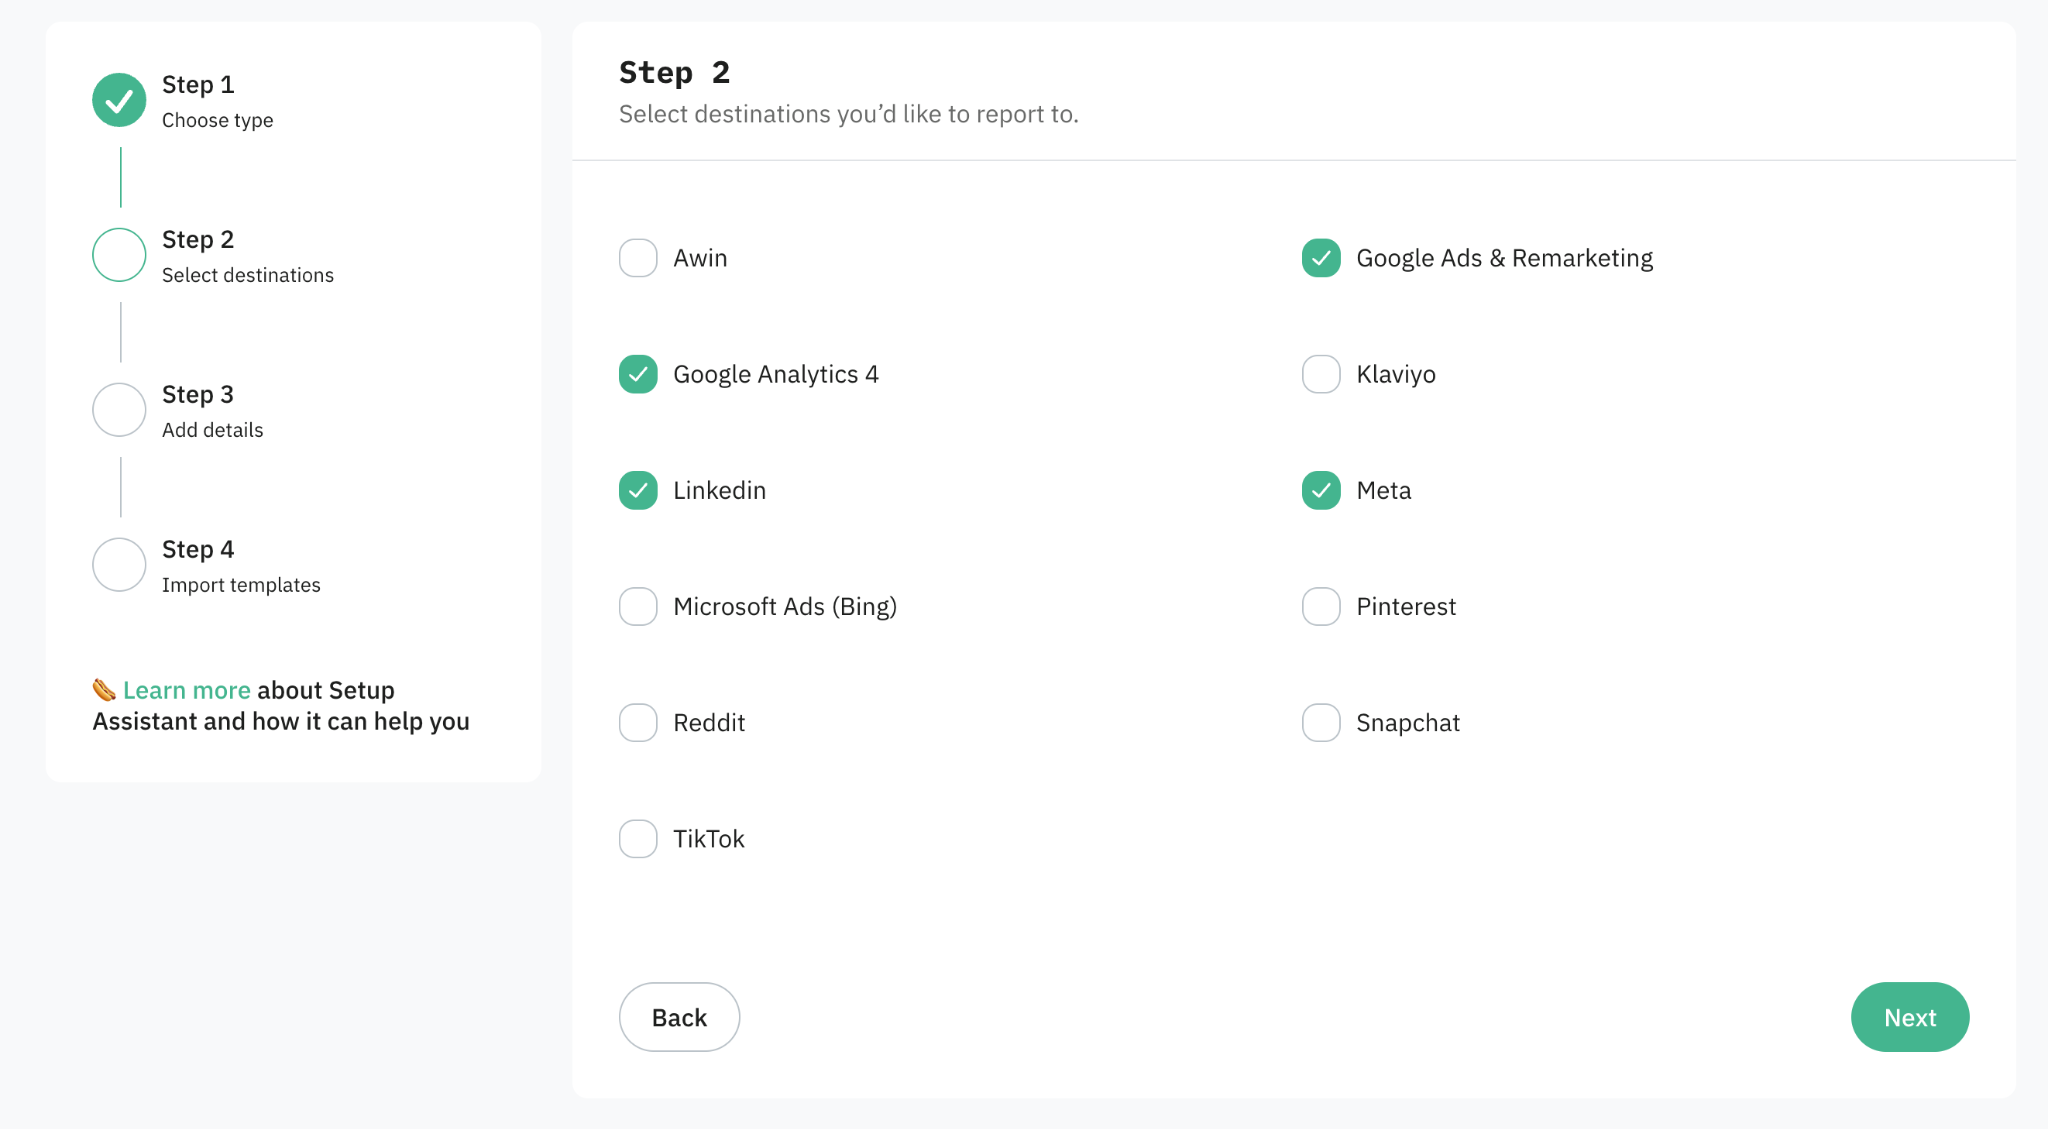
Select the advertising and analytics platforms you want to track (e.g., Google Ads, Meta, GA4, etc.).
Different platforms require specific tags and tracking settings. By selecting the platforms you want to track, the Setup Assistant customizes your GTM container with the necessary tags. This step ensures that your tracking setup aligns with the platforms you want to use.
Please note
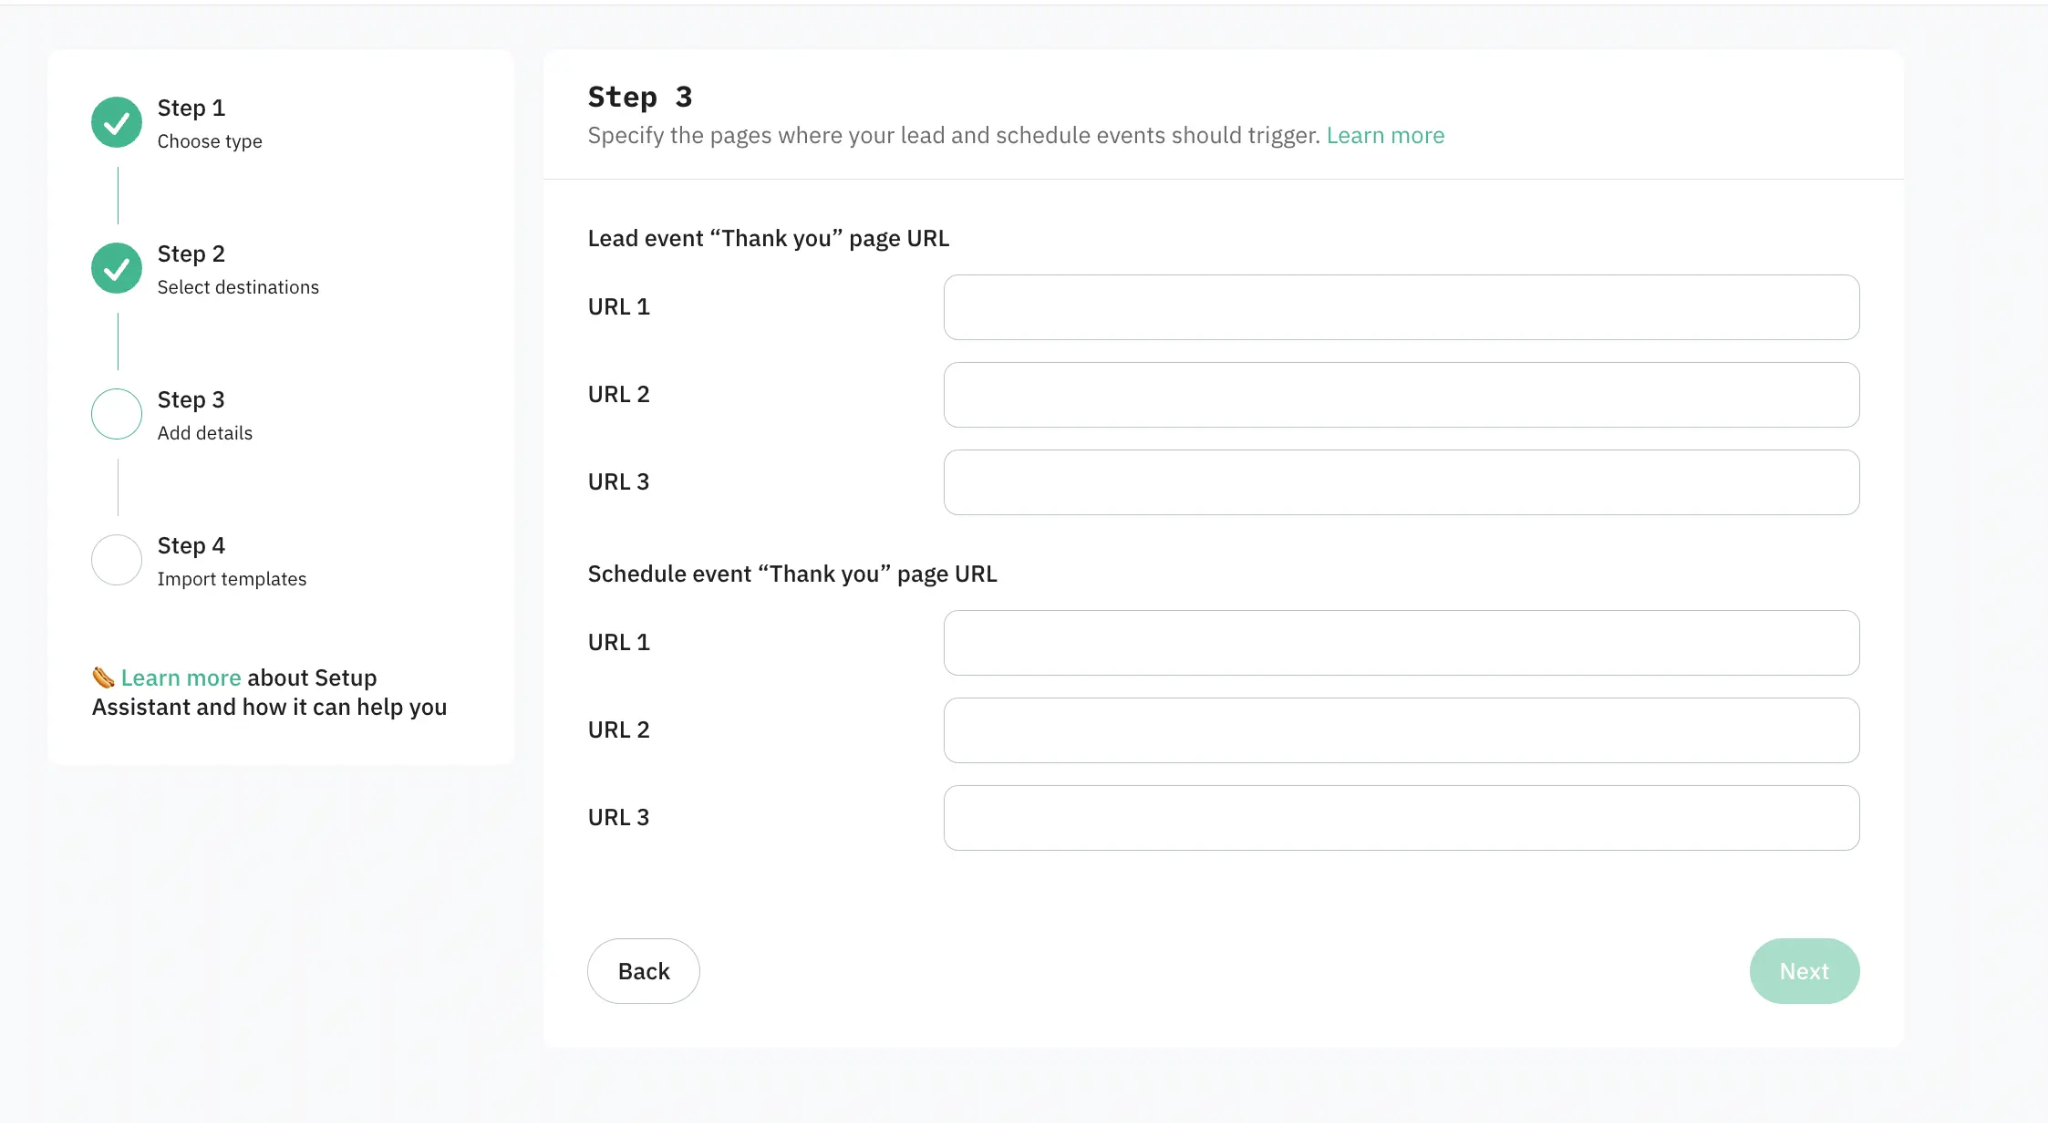
Step 3. Add IDs details
Lead and Schedule events (for lead generation only)
If you selected the Lead generation type, enter the URLs of the "thank you" pages that users reach after completing the lead form (Lead event "Thank you" page URL) and/or after scheduling a call (Schedule event "Thank you" page URL).
Use the following format:
https://yourdomain.com/thank-you-page
To proceed, you must configure at least one field.
Please contact your developers and request the creation of a separate thank-you page if you don’t have one yet.
IDs for platforms you want to configure
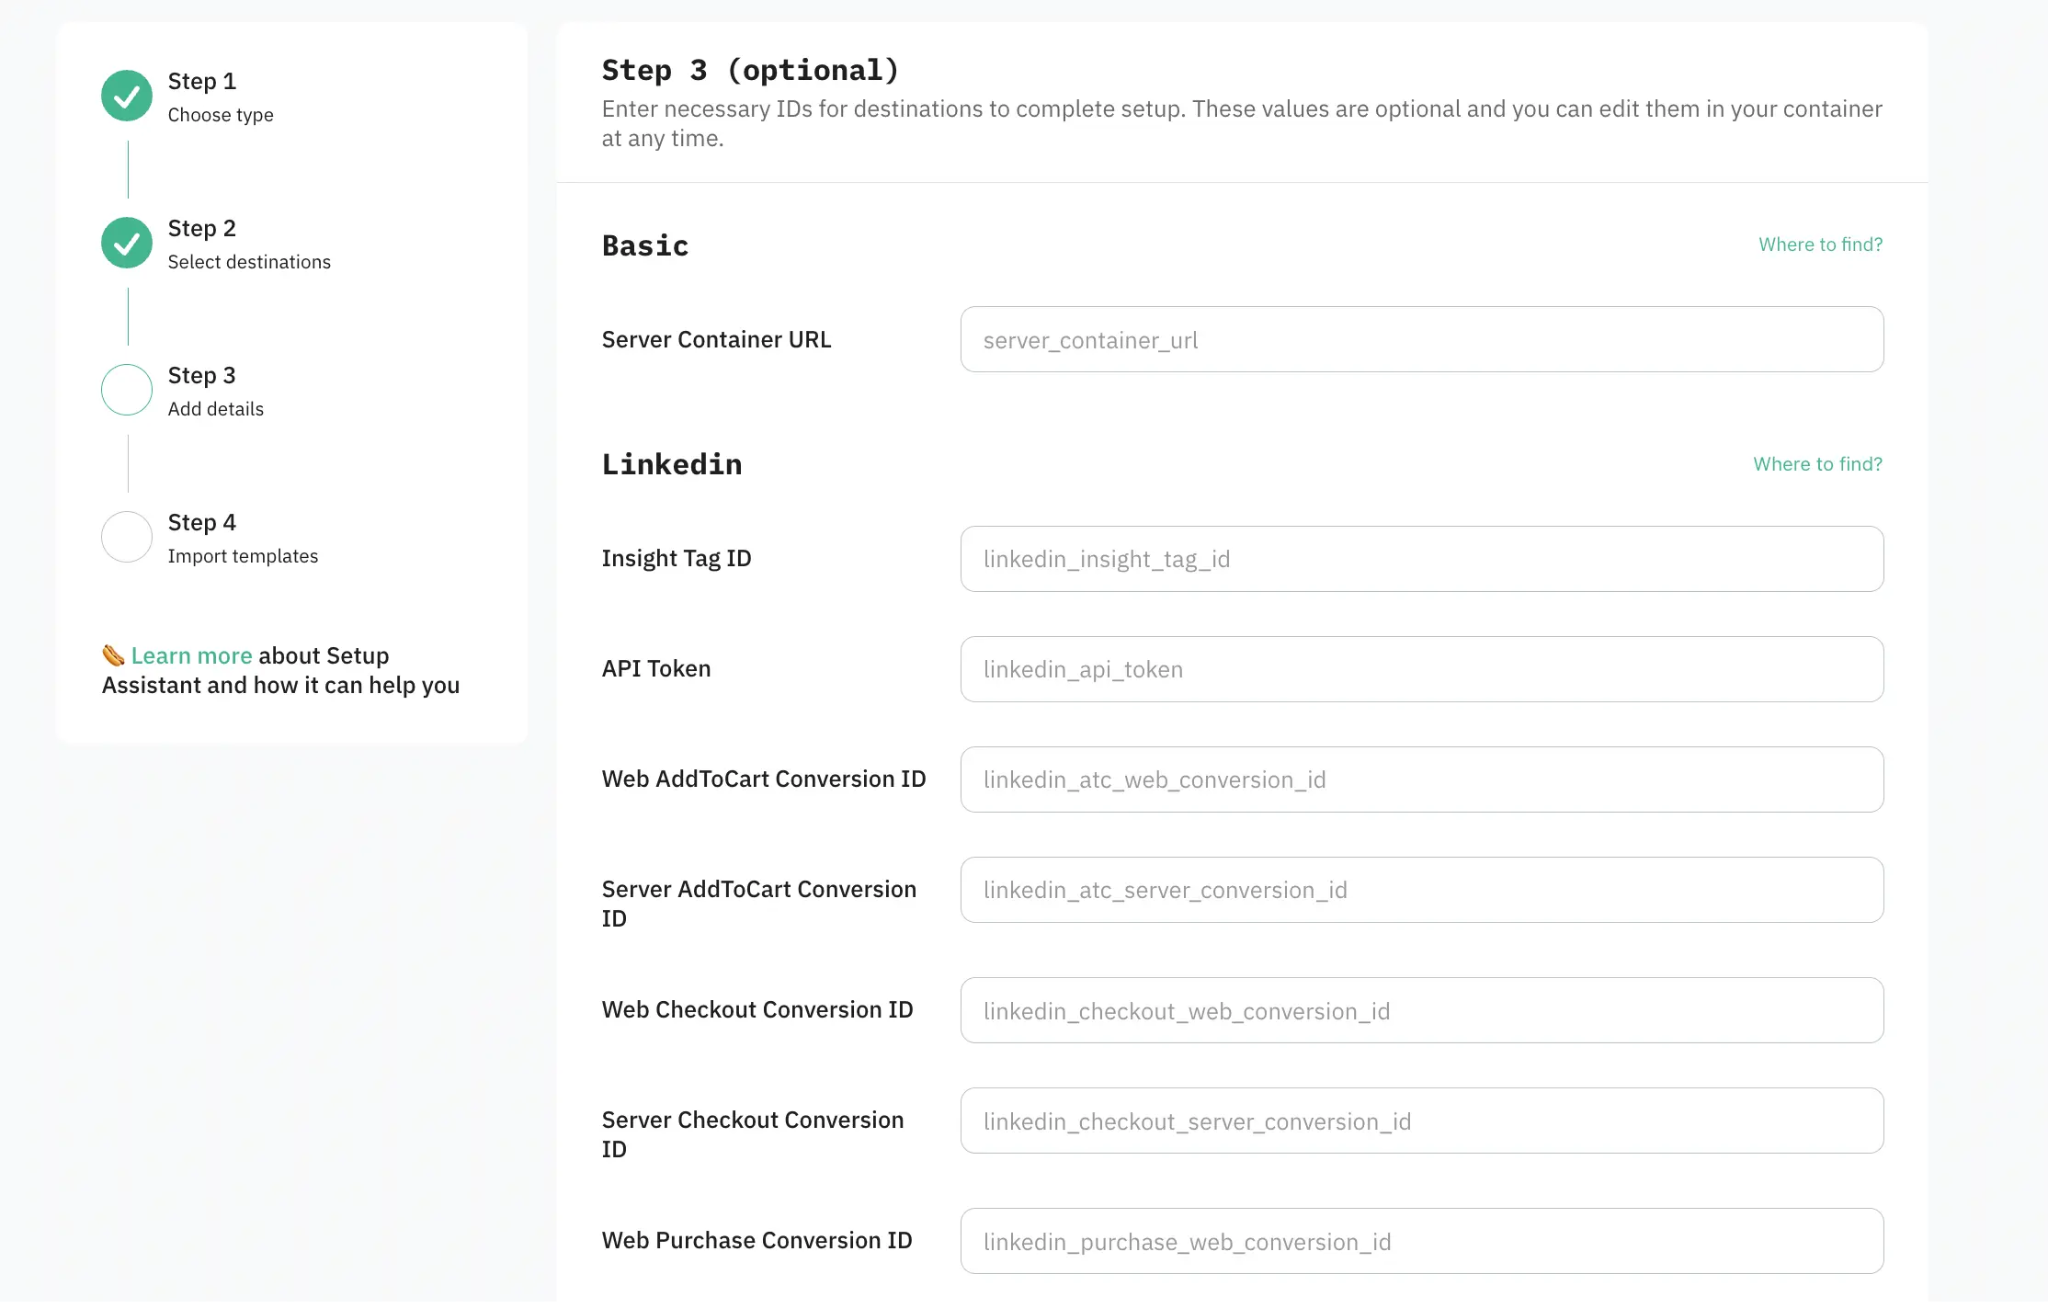
Enter the tracking details such as your Pixel ID, Analytics ID, or other required credentials.
This information is essential for the Setup Assistant to link your site to the respective platforms. It ensures that data is sent accurately from your website to the right destination and helps you to track conversions, user interactions, and more.
Without this step, the necessary data cannot be captured and sent to your platforms. Additionally, you can add IDs directly in your web and server containers at any time.
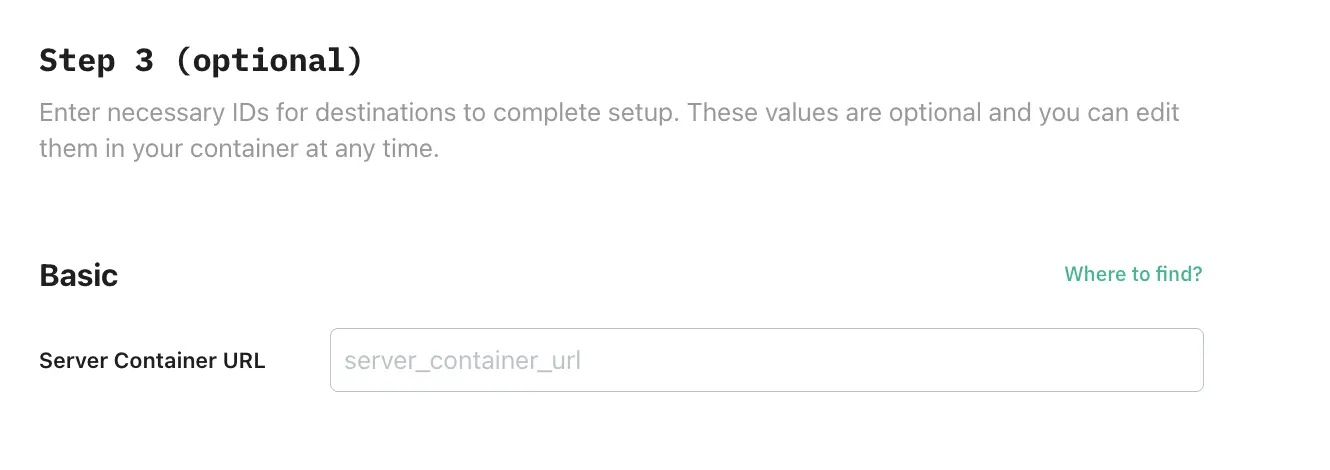
Regardless of the platform you need to configure, the Server Container URL field is required for all.
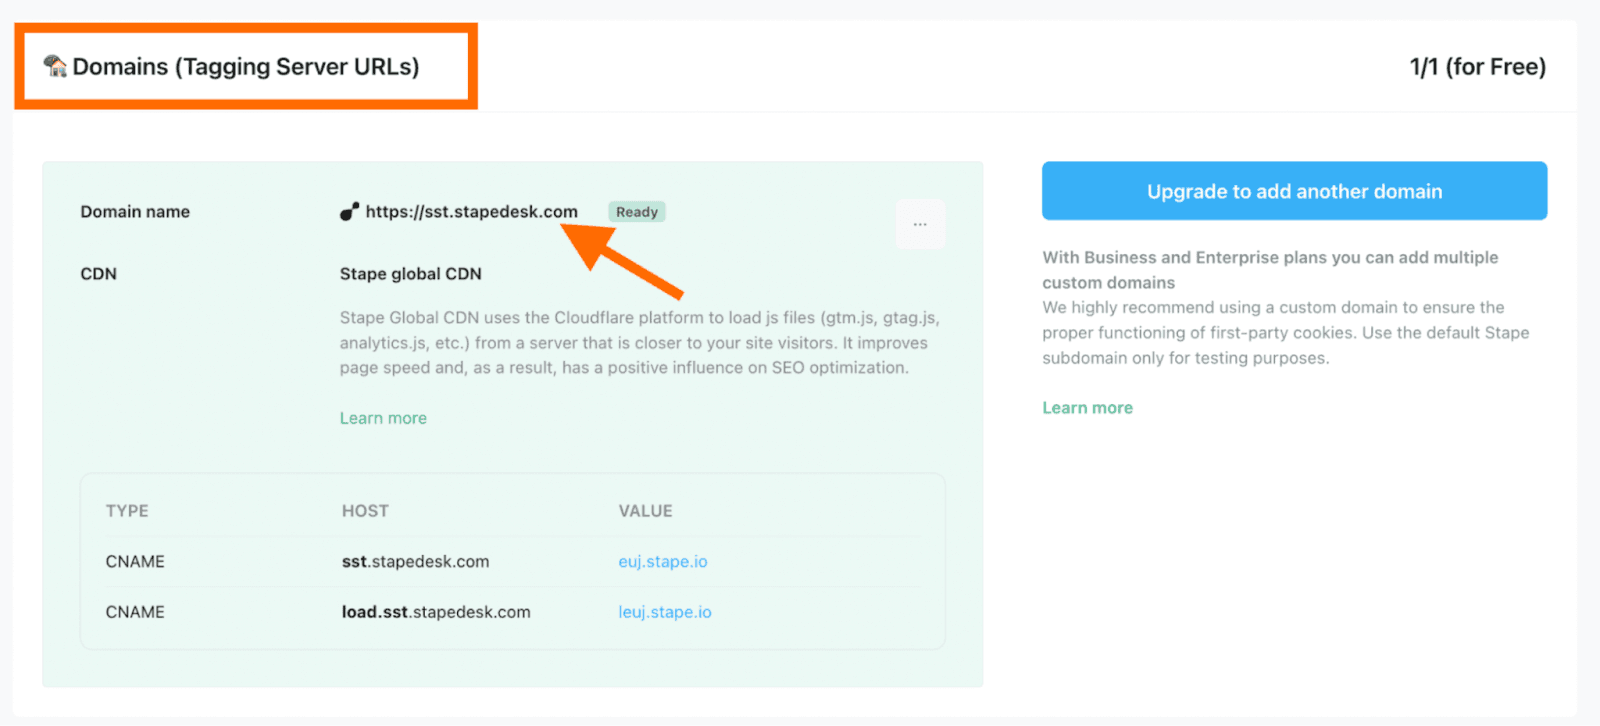
To find the Server GTM container URL, log in to your Stape account → navigate to the sGTM section of the menu → choose your container → Domains (Tagging Server URLs) → copy the domain name.
| We have prepared a quick guidance on how to find each necessary ID for destinations. Click on the collapse elements to see the instructions for each platform: |
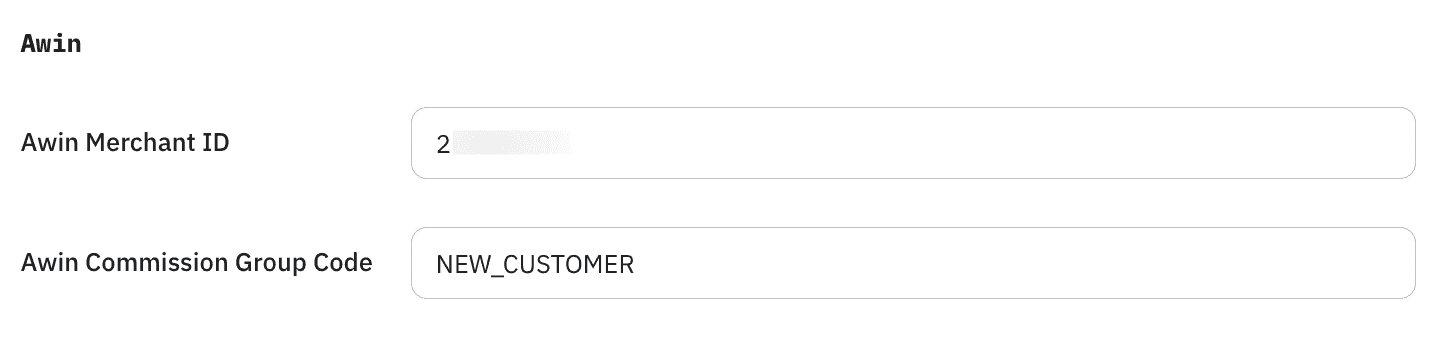
Awin
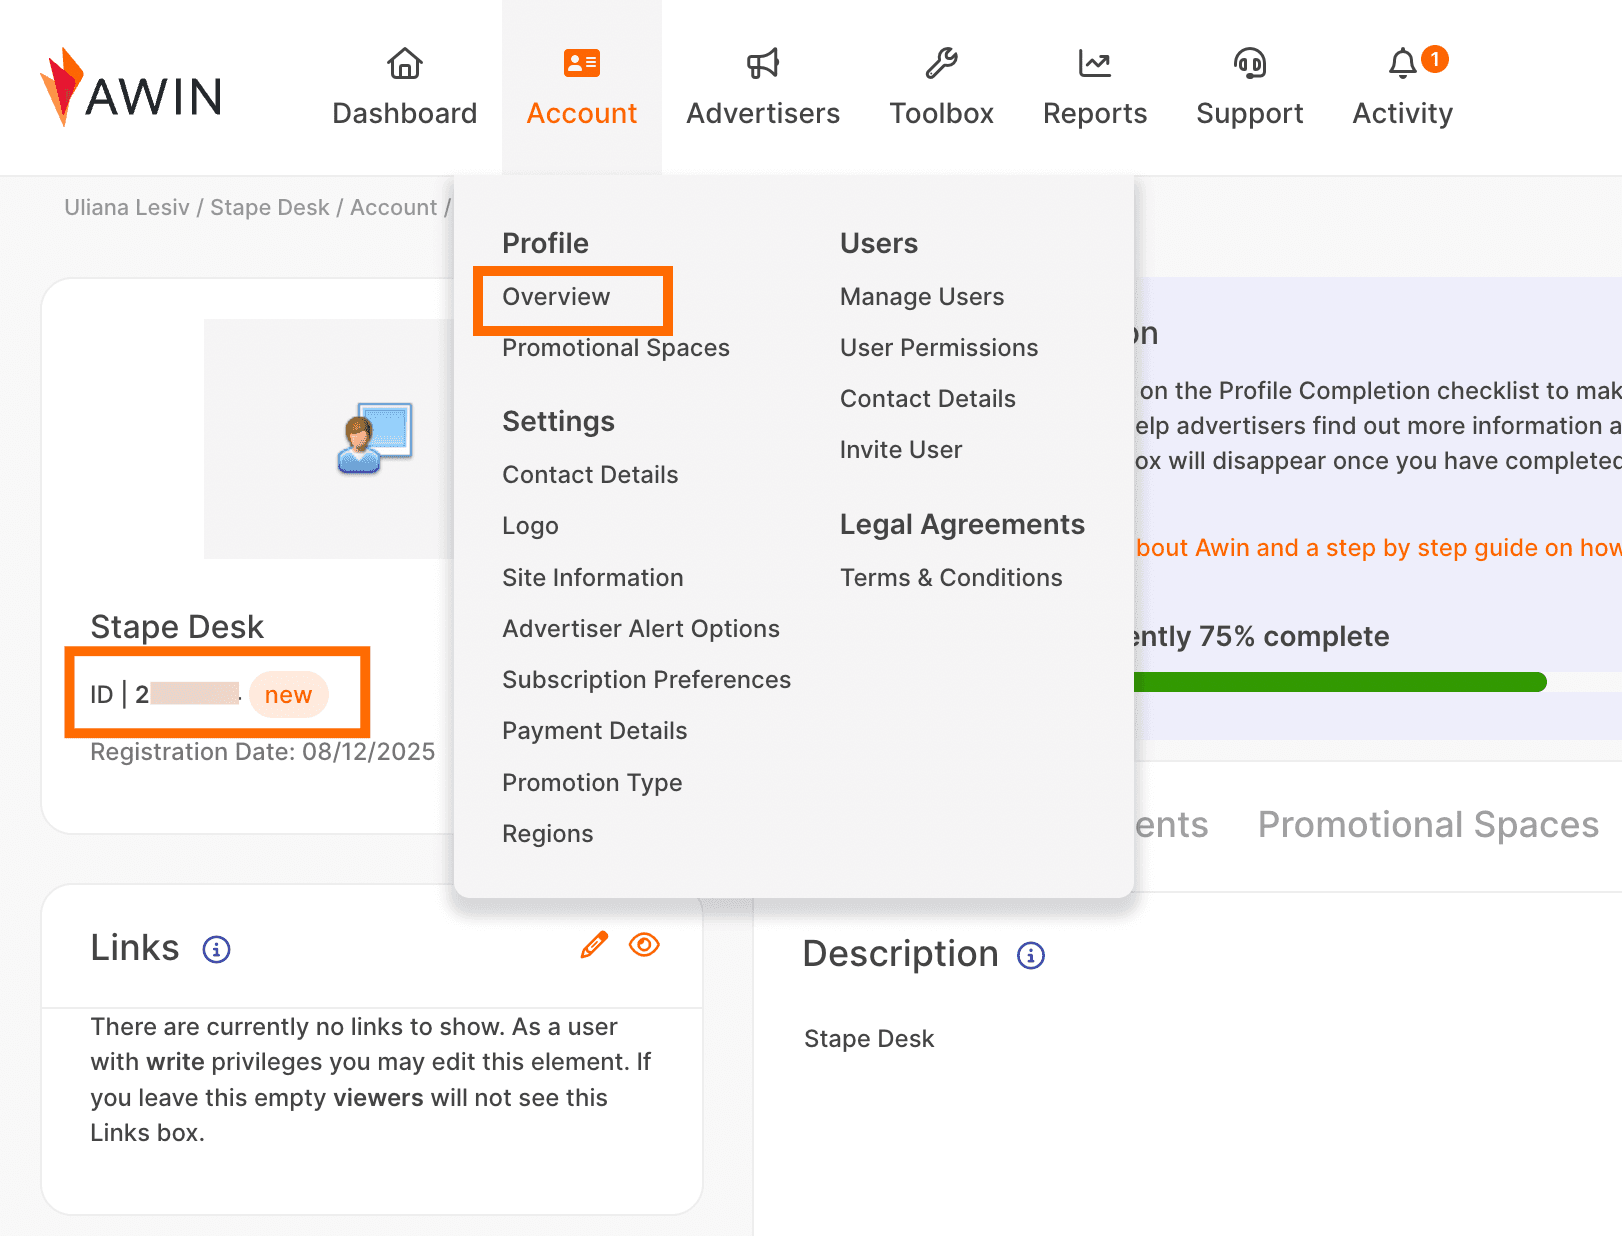
Awin Merchant ID - to get the ID, log in to your Awin account → click on Account → Overview → below your account name, you will see the ID.
- Awin Commission Group Code - to get the Commission Group Code, you need to log into your Advertiser account → navigate to Commission → Commission Manager → Commission Groups tab of the Commission Manager → in the column Commission Group Code, you will find the codes for all of your groups.
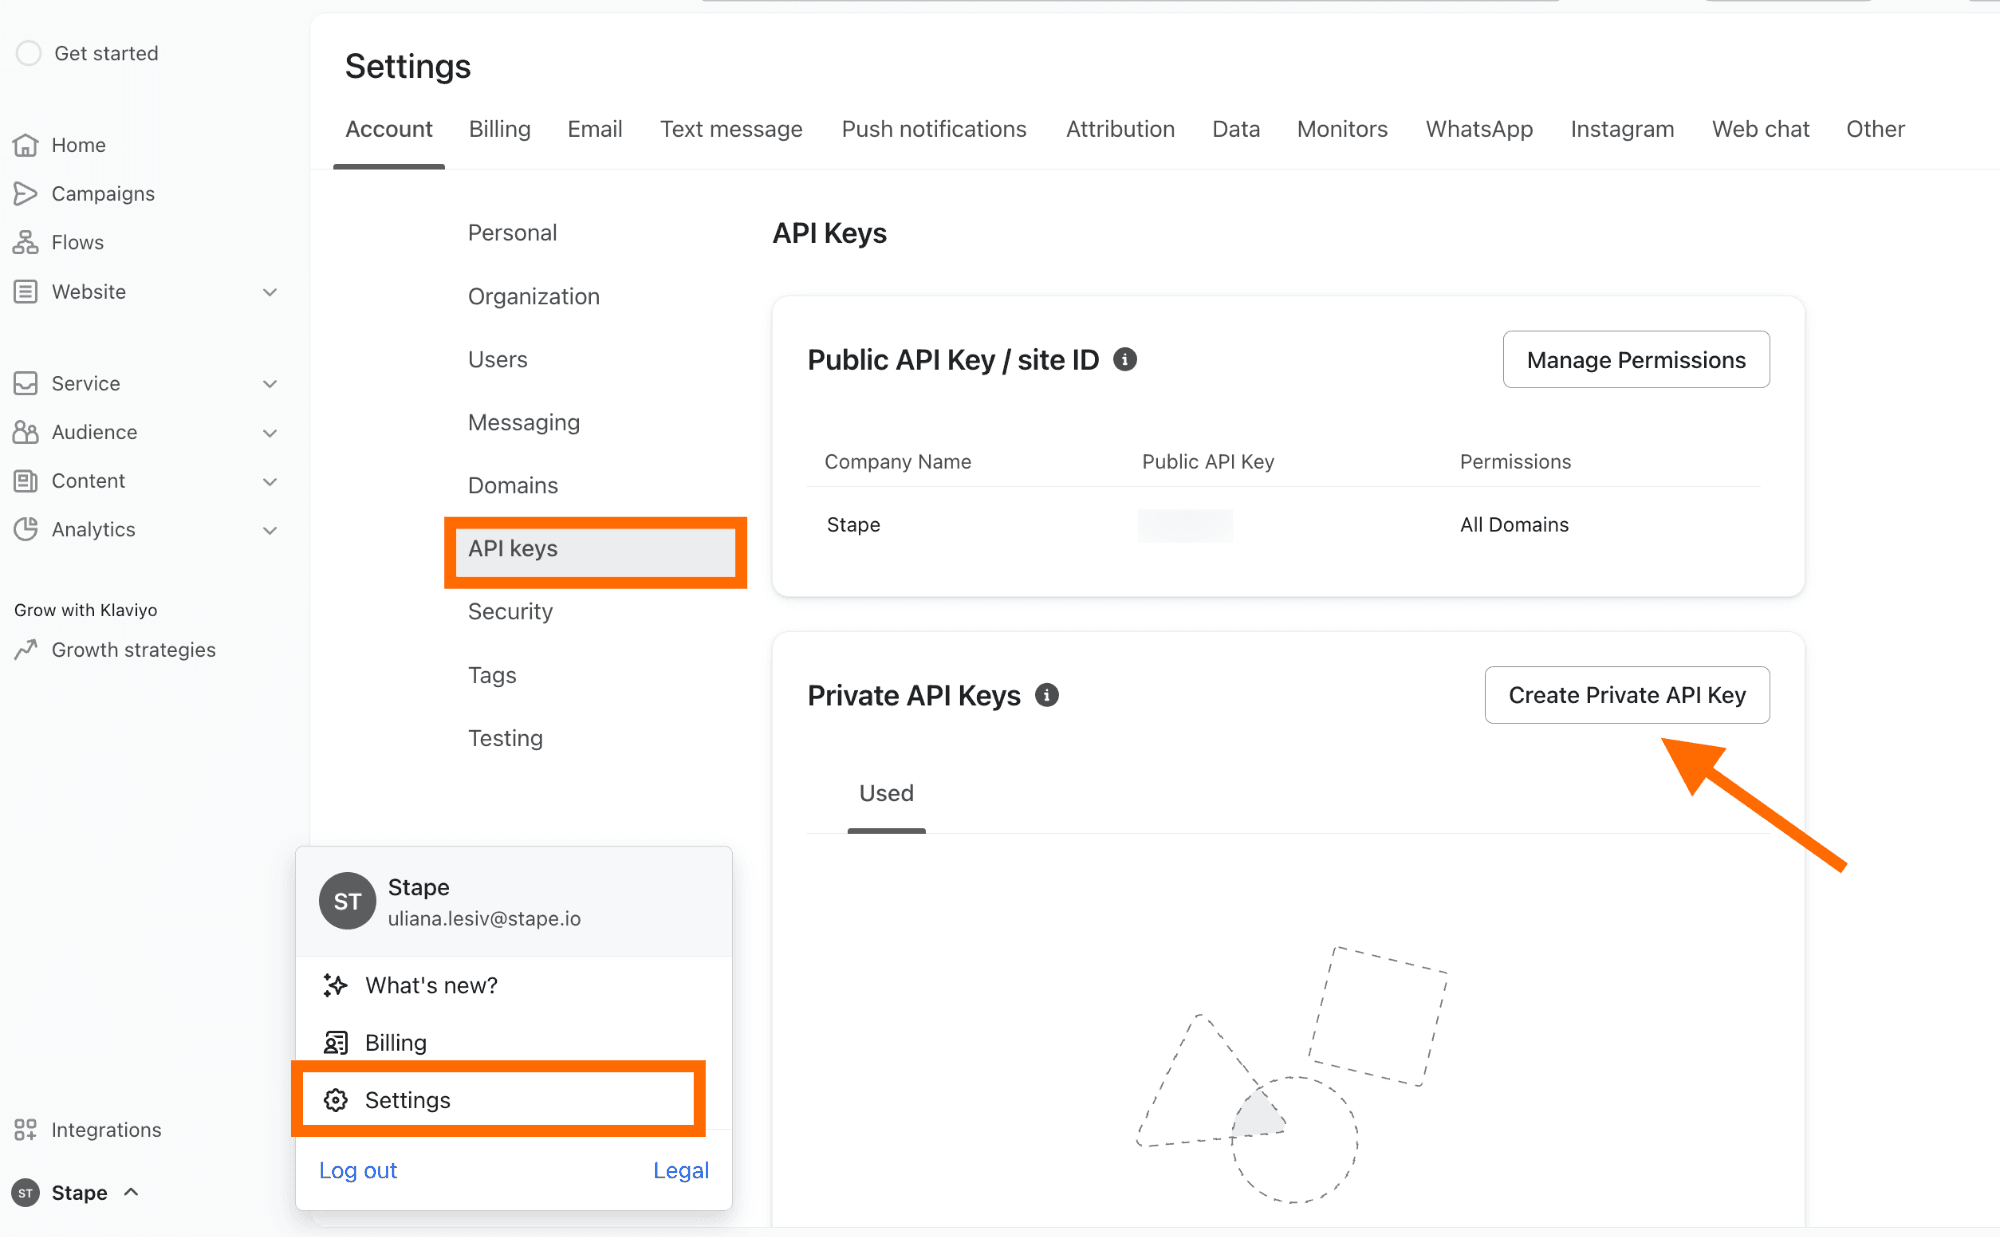
Klaviyo
- To create the Klaviyo Private Key, click on the organization name in the bottom left corner → click Settings → API keys → click Create Private API Key → name the key → choose the scope: Read-only, Full, or Custom → click Create.
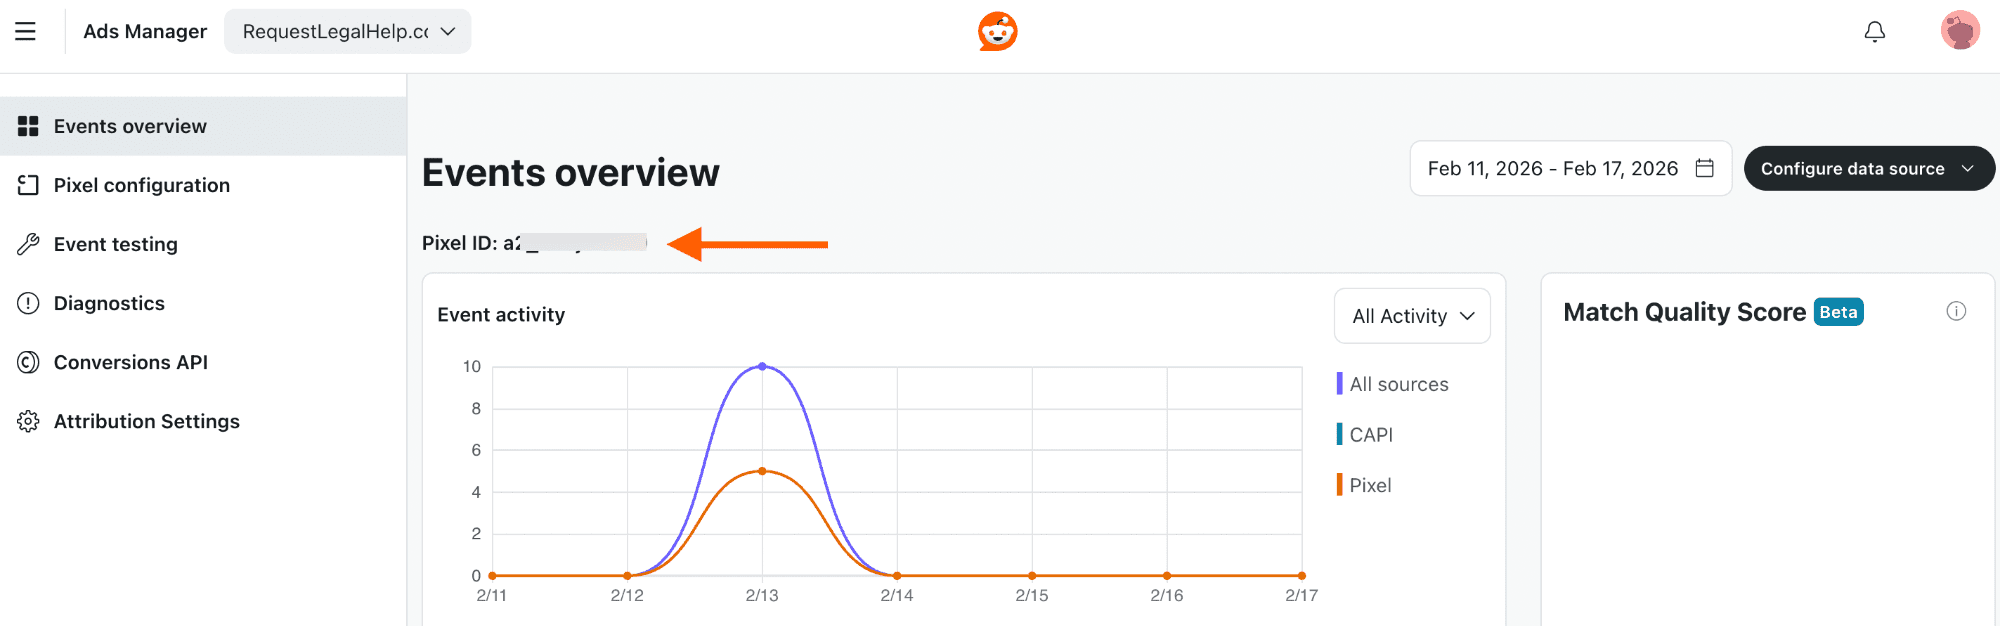
- Reddit Pixel ID - log in to your Reddit Ads account → on the left-hand menu, click Events Manager → below Events Overview, you will see the Pixel ID.
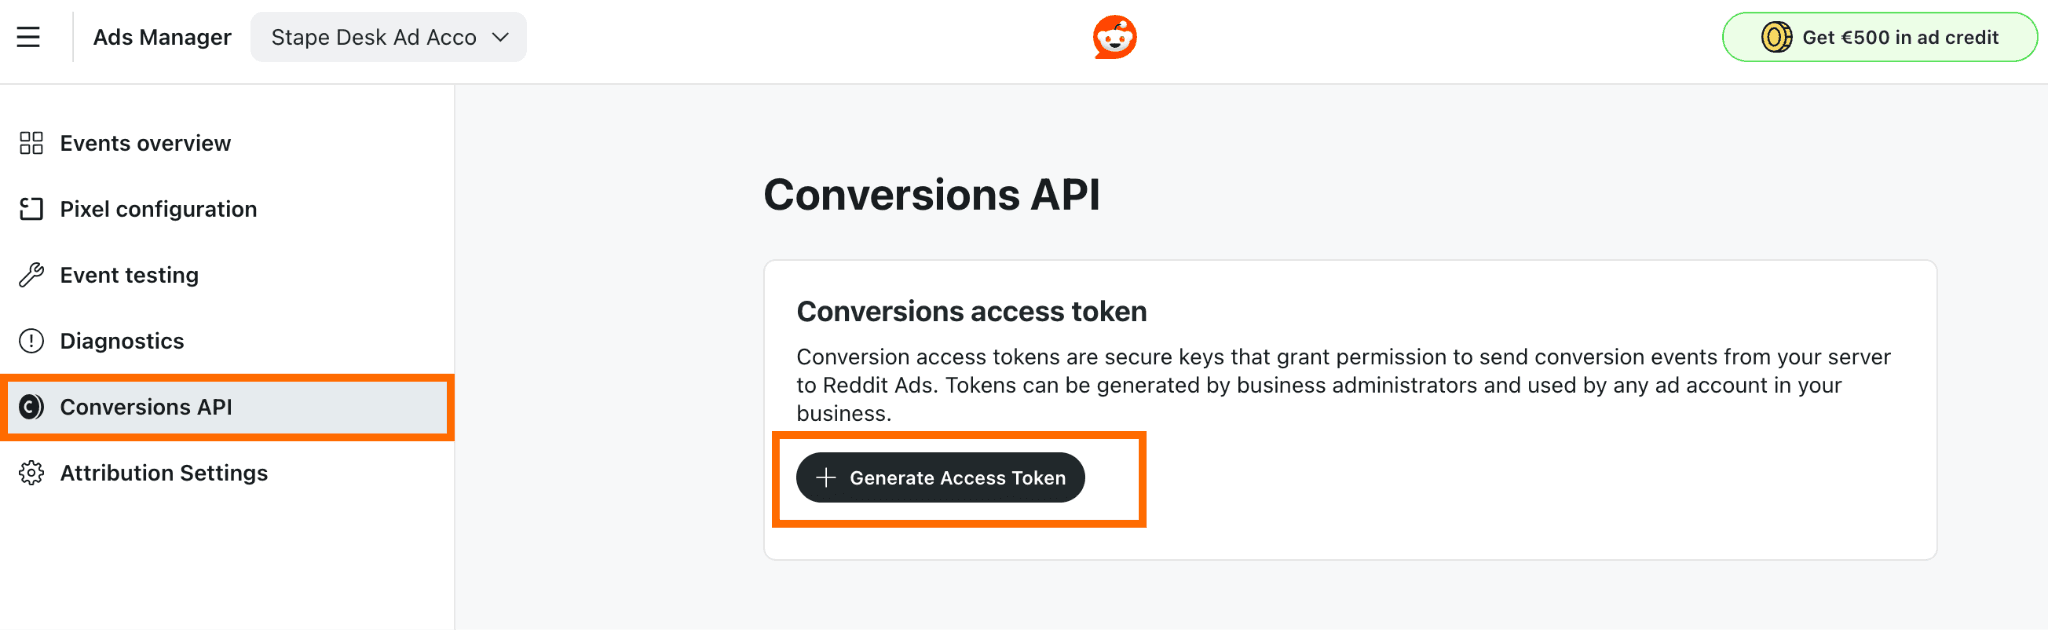
- Reddit API Token - go to the Reddit Events Manager → on the left-hand menu, click Conversions API → click Generate Access Token → add a name for the token → once generated, save the token in a secure place.
The configuration will slightly differ based on the type you’ve chosen (eCommerce or lead generation). Here, we show how to set up both.
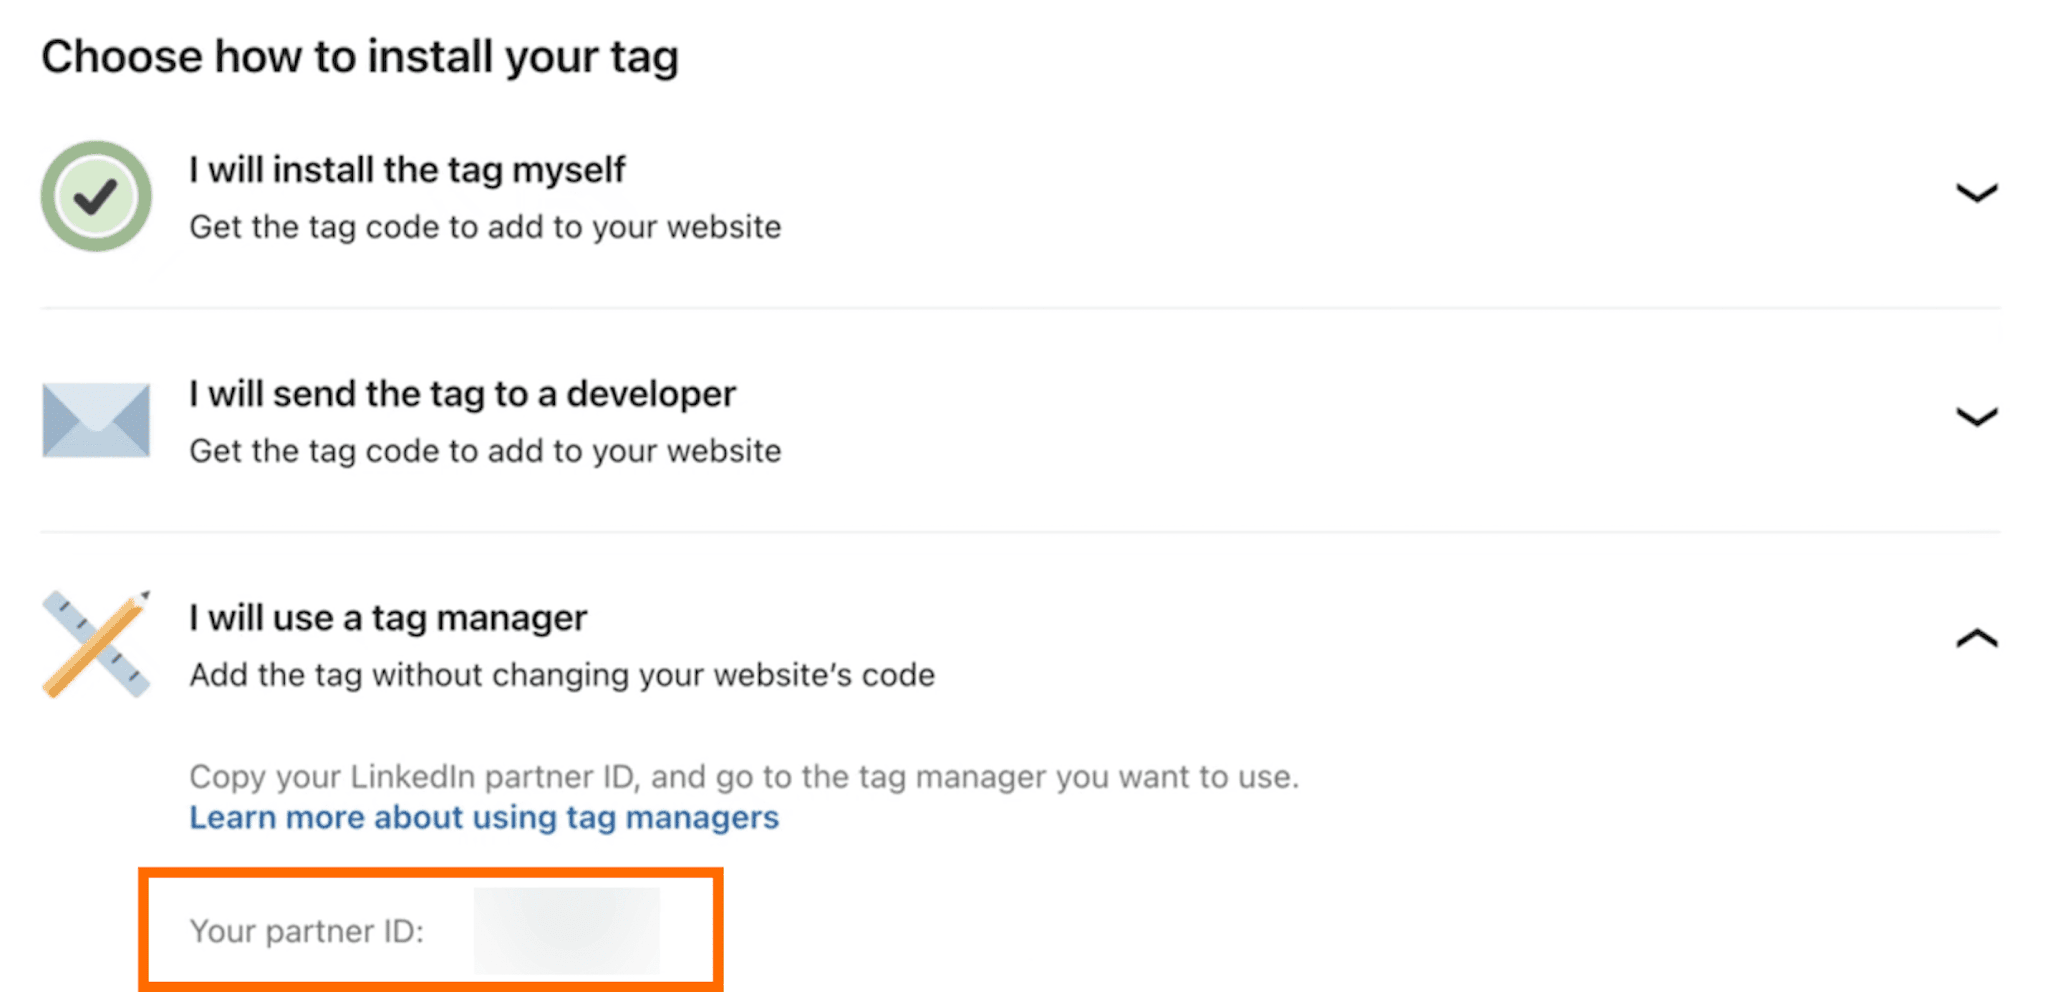
- Insight Tag ID - also called Partner ID is a 6-digit code that links your Ad Account and allows conversion tracking in tag managers. To get it, log in to LinkedIn Campaign Manager → Analyze → Signals manager → click on Insight Tag → Choose option: I will use a tag manager.
- API Token - in Campaign Manager, → click Data on the left menu → click Sources → Select Google Tag Manager → click Generate token.

- Server and web conversion IDs - each conversion ID can be found in Campaign Manager → Measurement on the left menu → click Conversion tracking → click on the name of the required conversion or create a new one.
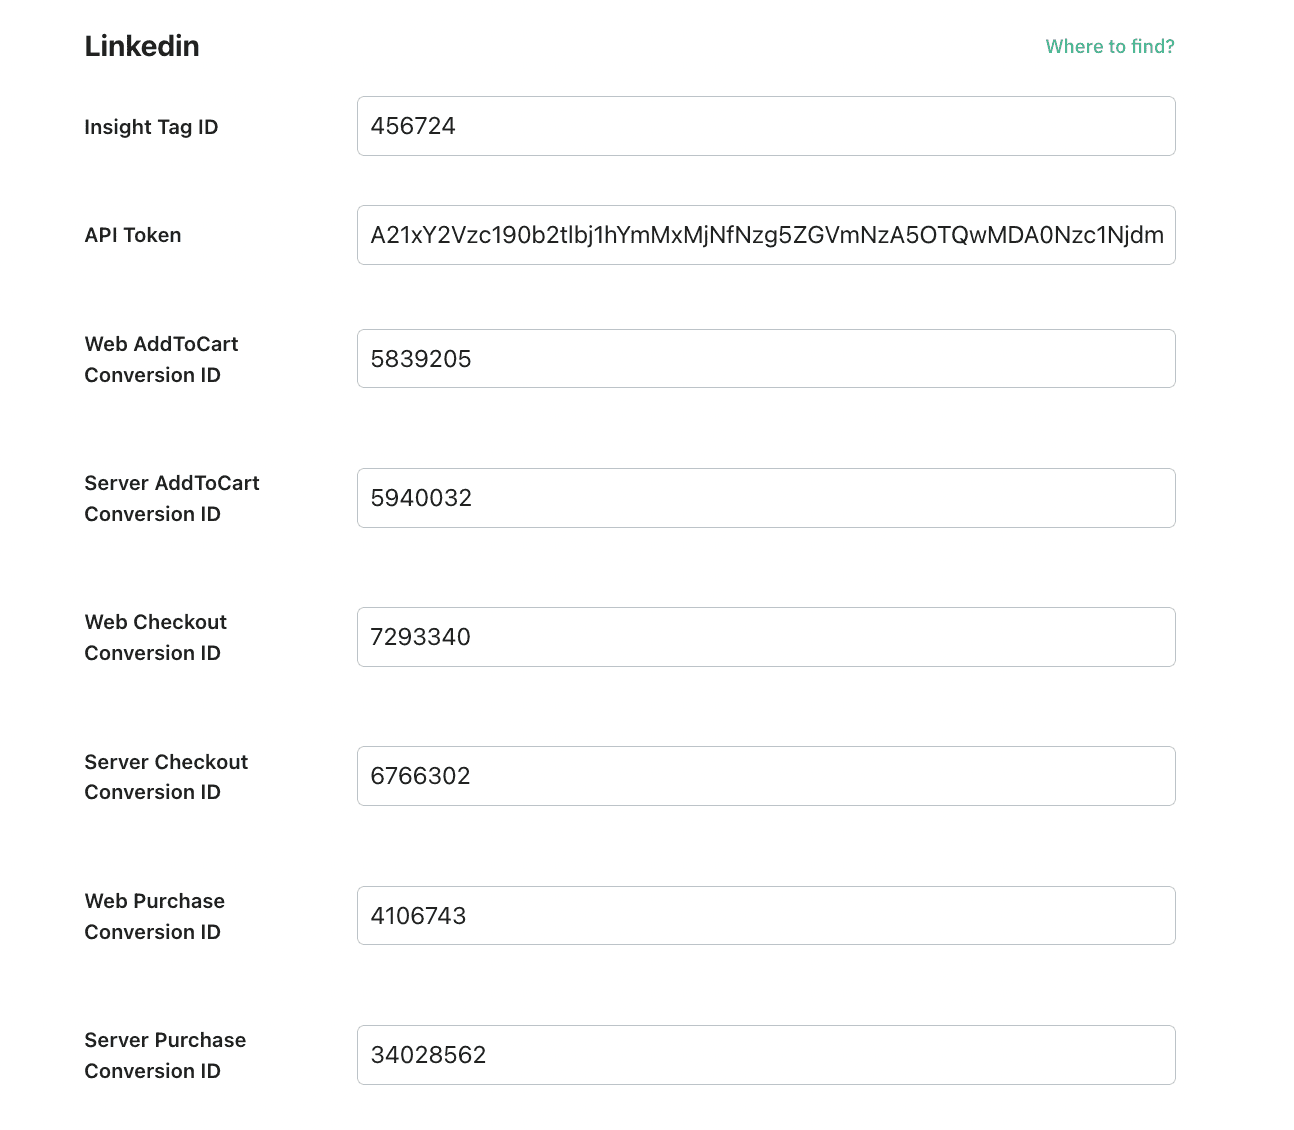
Here is an example of the fields configuration for the eCommerce type:
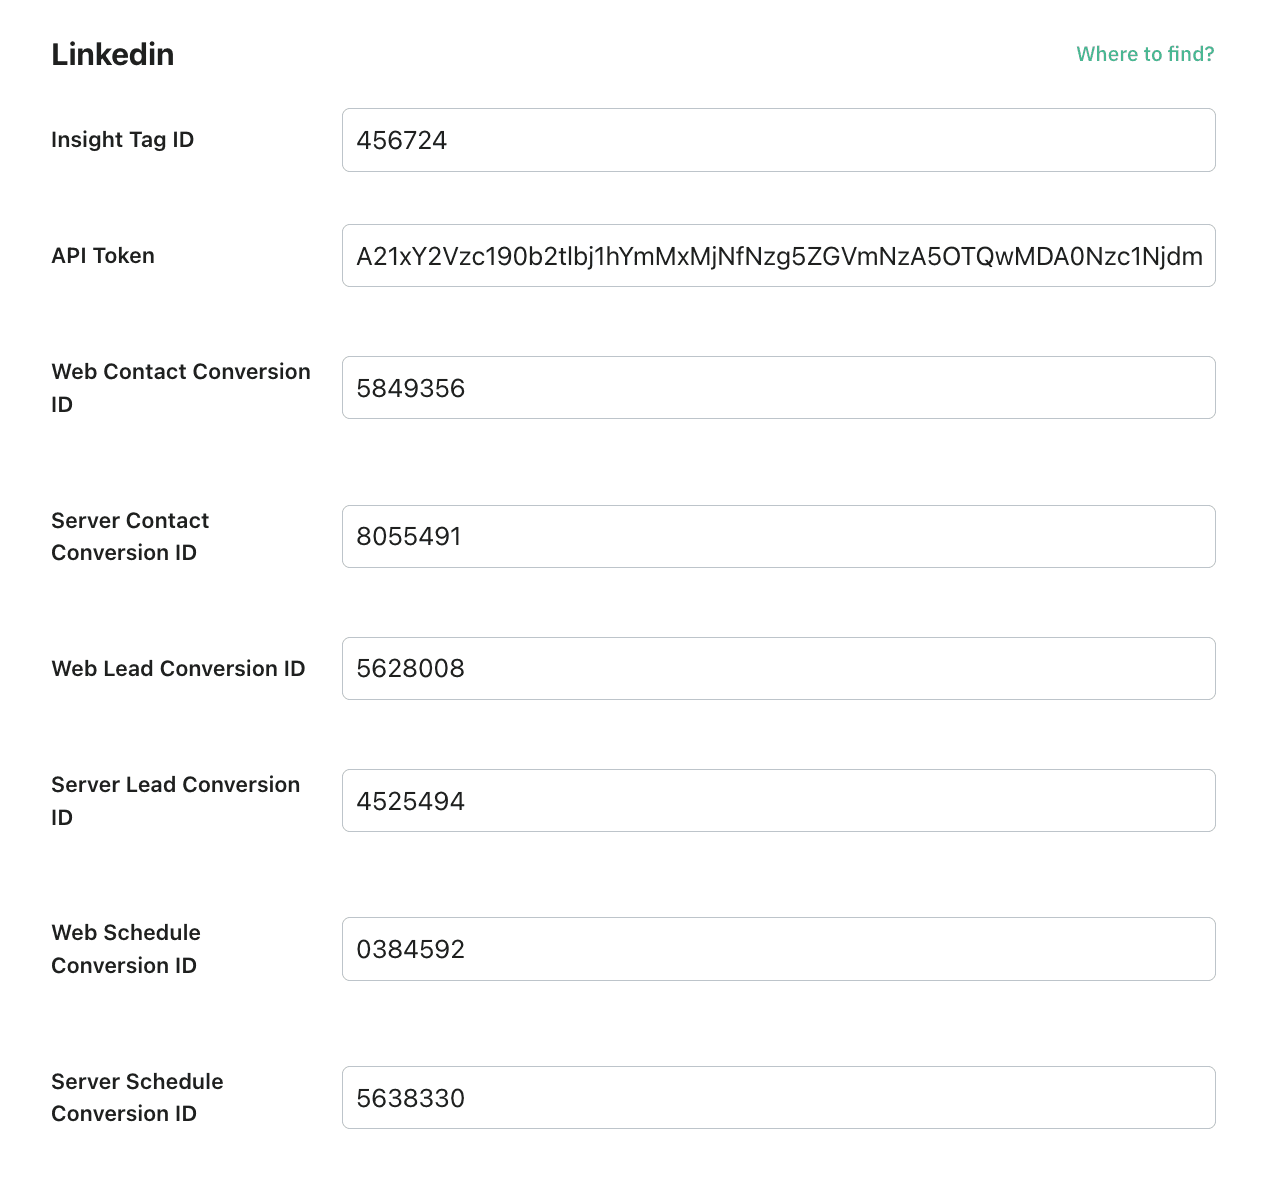
Here is an example of the fields configuration for lead generation type:
Snapchat
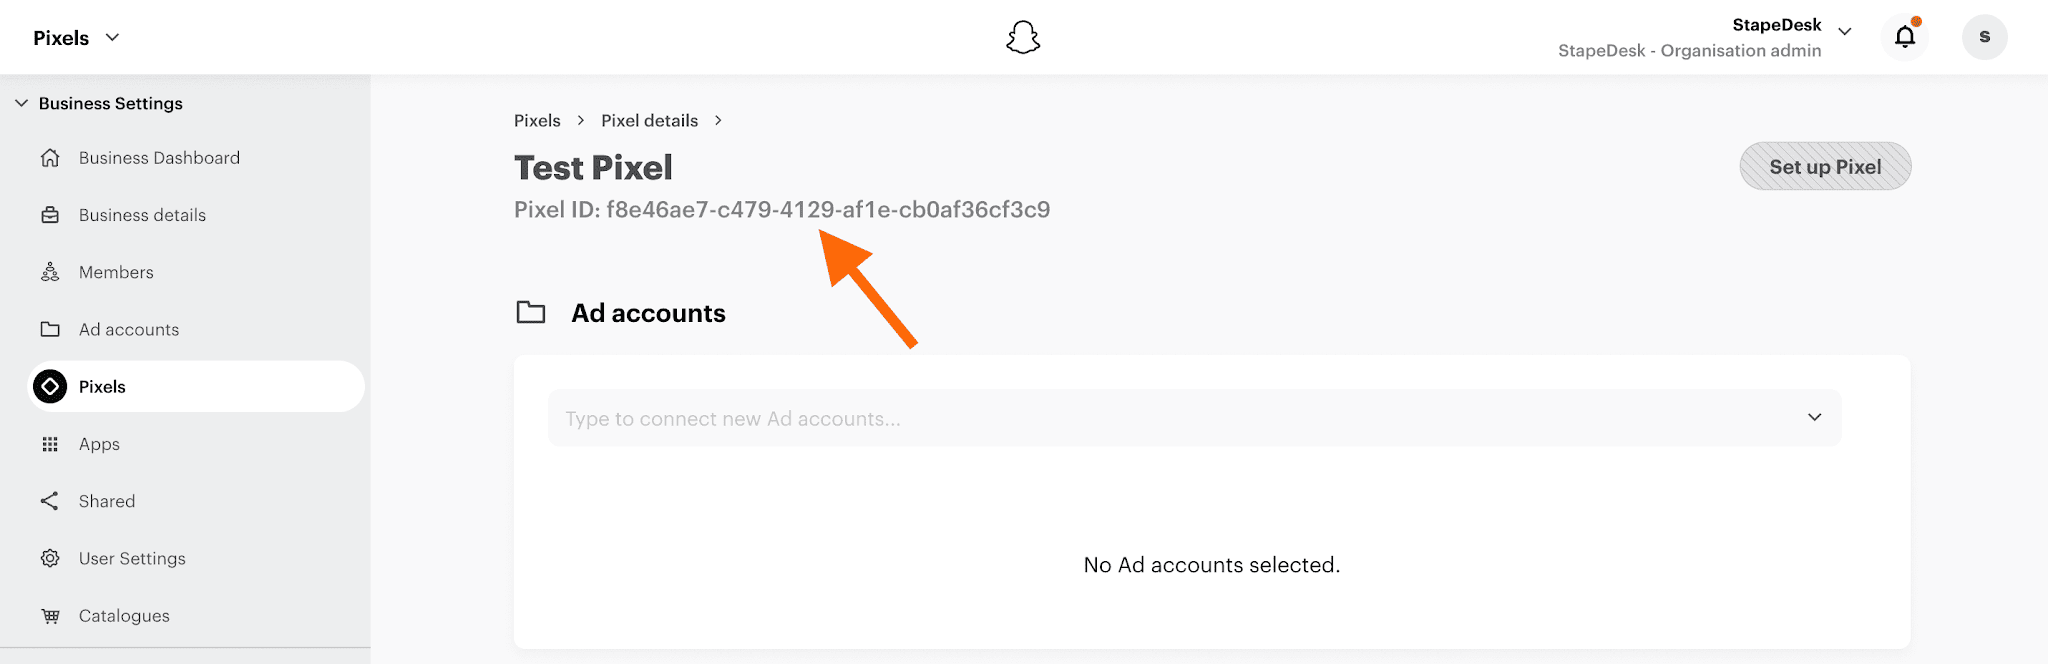
- Pixel ID - to get it, log in to Snapchat Business Manager → Assets → Pixels on the left-side menu → select the required pixel if you have several → copy Pixel ID.
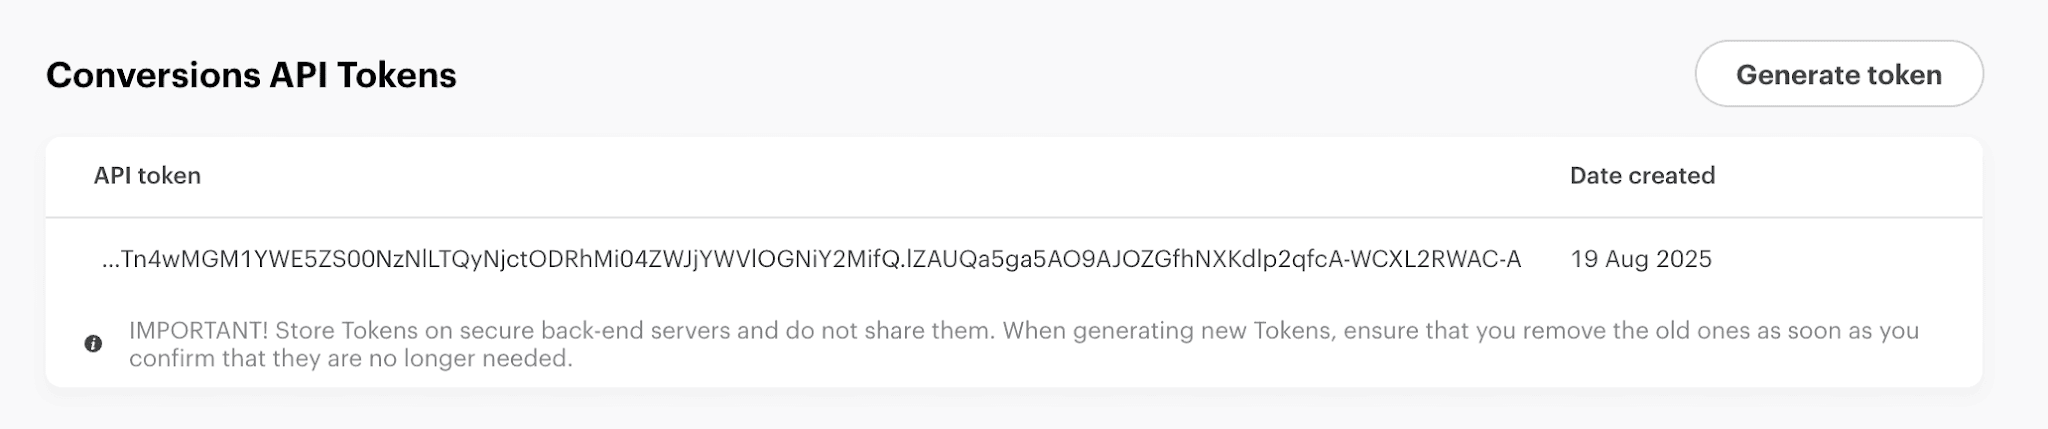
- API token - to find Conversions API Tokens, go to Business Details → Conversions API Tokens. Here you will find all API tokens; you can copy the existing or create a new one.
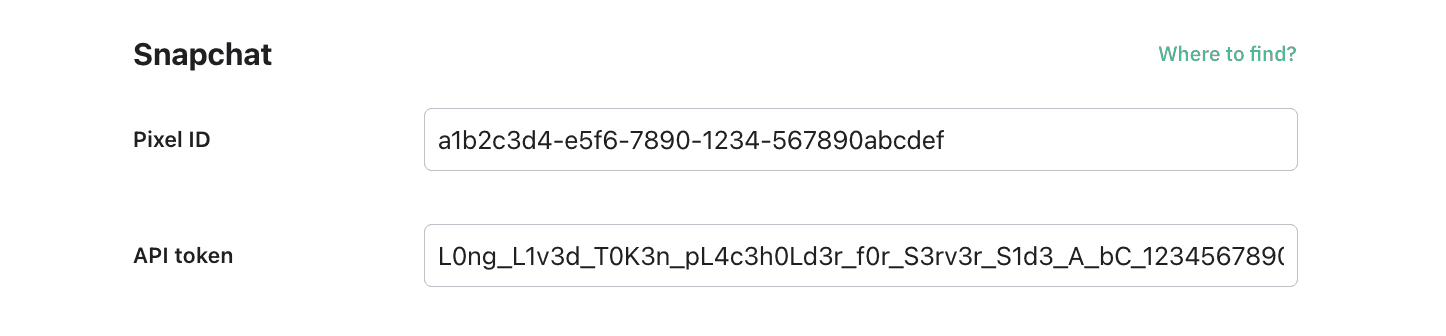
Here is an example of Snapchat fields configuration:
Google Analytics 4
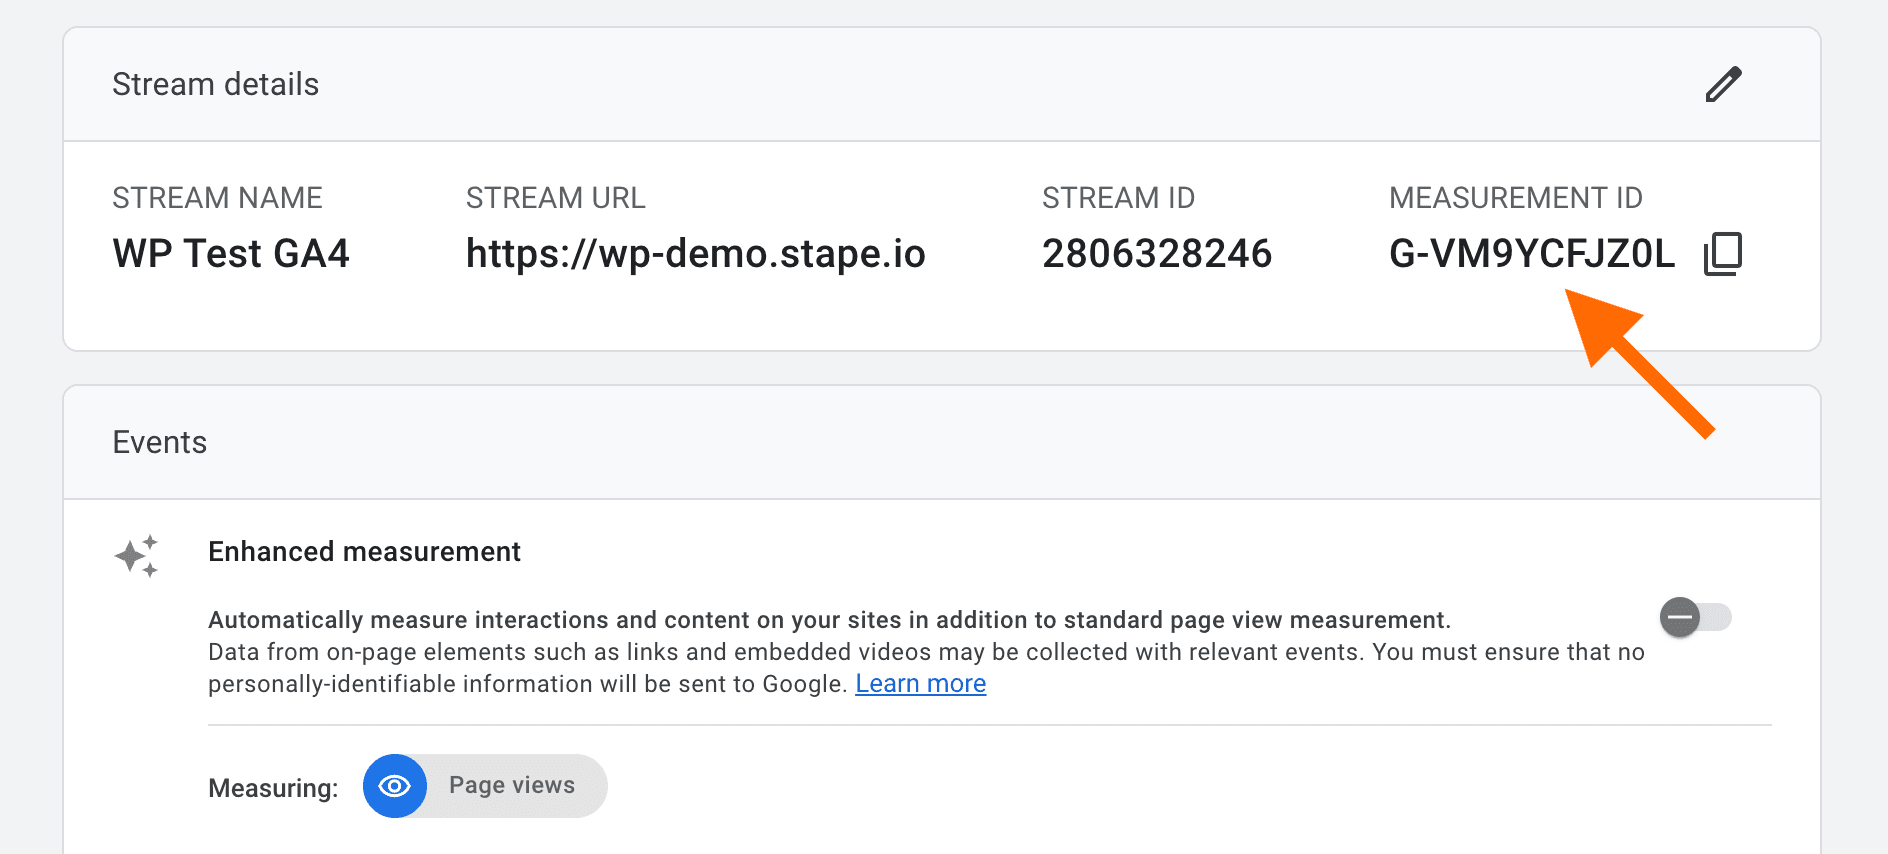
- Measurement ID - go to Data Streams → click on the Data Stream → copy Measurement ID.
TikTok
- Pixel ID - to find the Pixel ID, log in to TikTok Ads Manager → choose the Ads Manager account → Click Tools → Events → from the side bar select Data sources.
- eAPI Token - to get an access token, click Assets → Web Events → open pixel → click Settings → copy an existing token or click Generate Access Token.

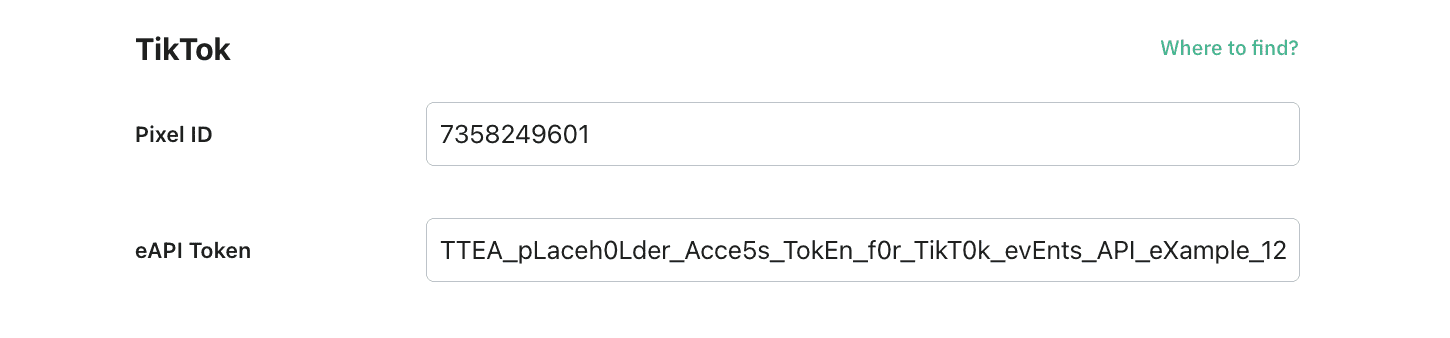
Here is an example of a field configuration for TikTok:
Facebook (Meta)
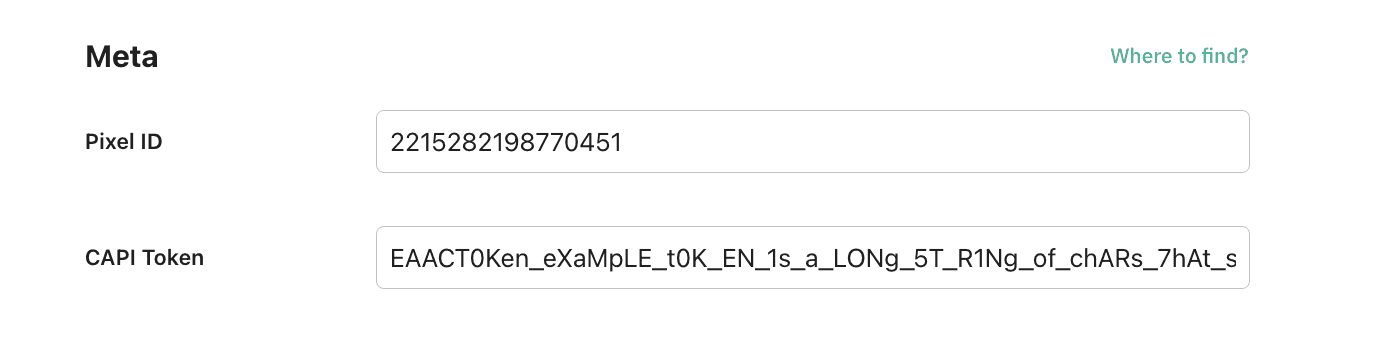
- Pixel ID - it can be found in your Meta Events Manager → Data Sources menu → see the string next to the Pixel’s name.
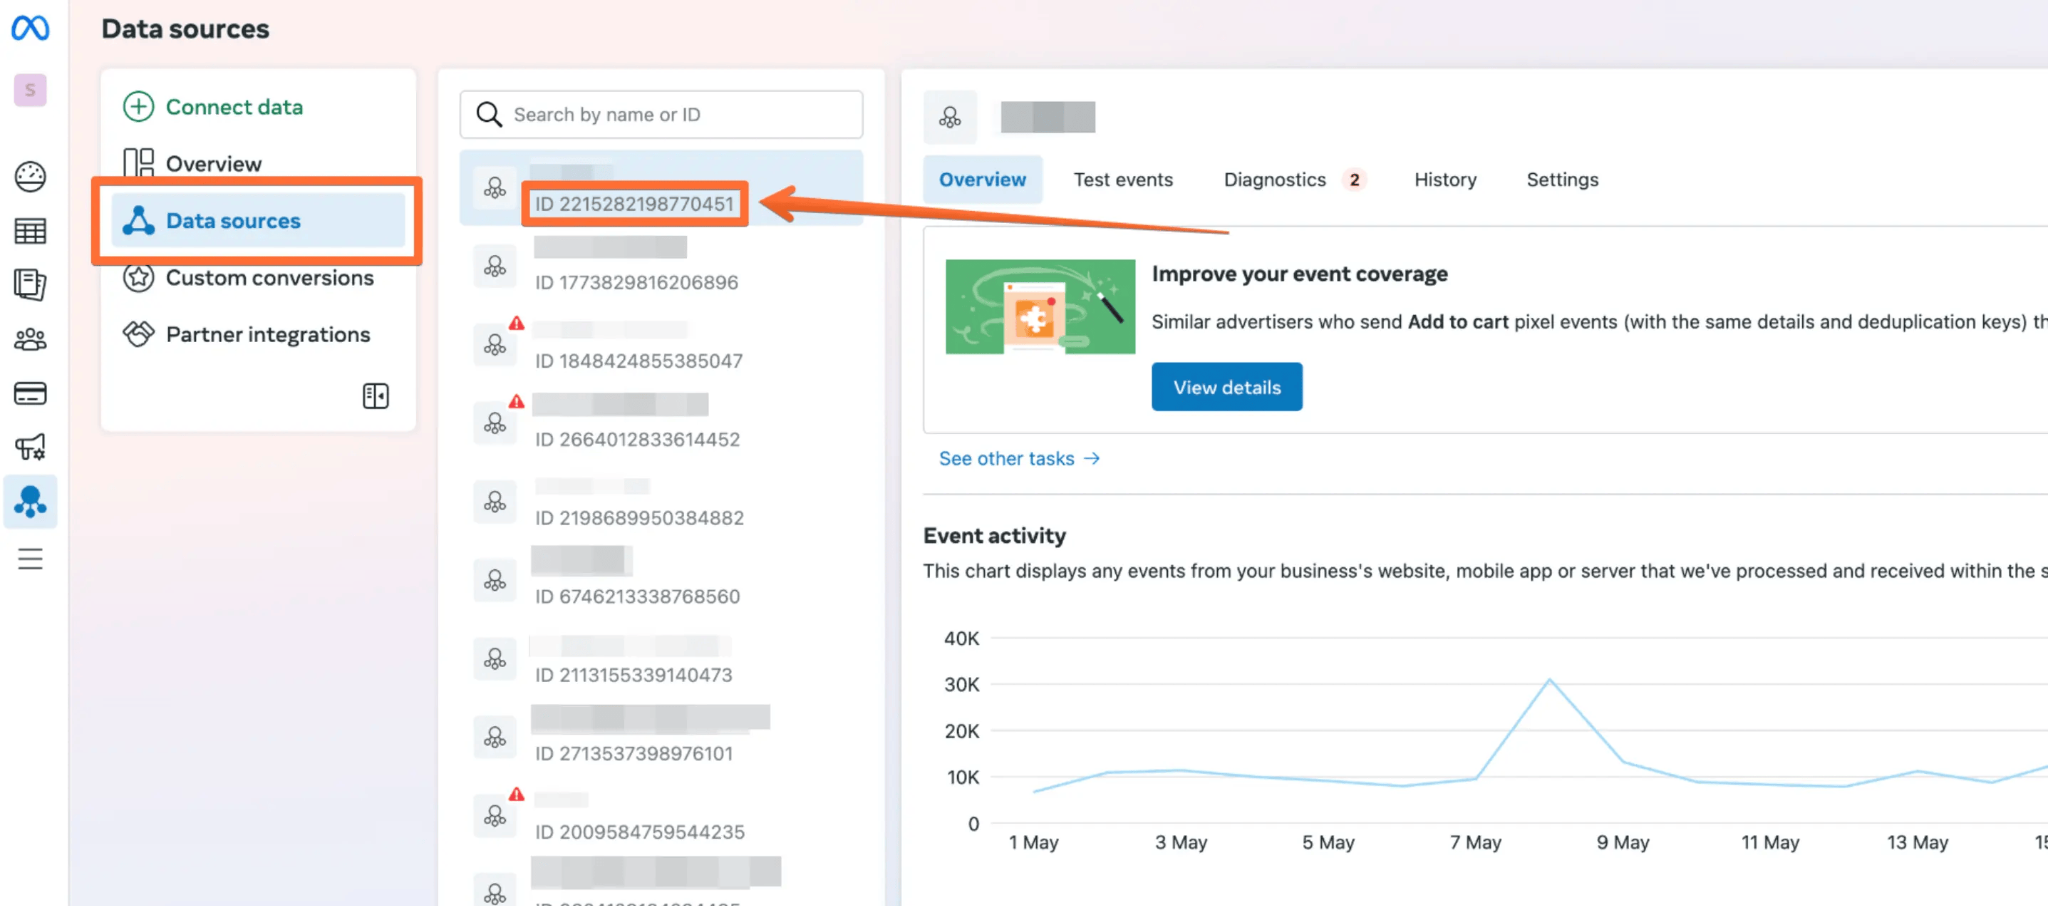
- CAPI Token - to get the value, choose the Pixel → Settings tab → find the Conversions API section → click on the Generate access token. For more details, check Meta’s documentation.
Google Ads & Remarketing
The configuration will differ based on the type you’ve chosen (eCommerce or lead generation). In this section, we show how to set up both, and we will start with the eCommerce fields.
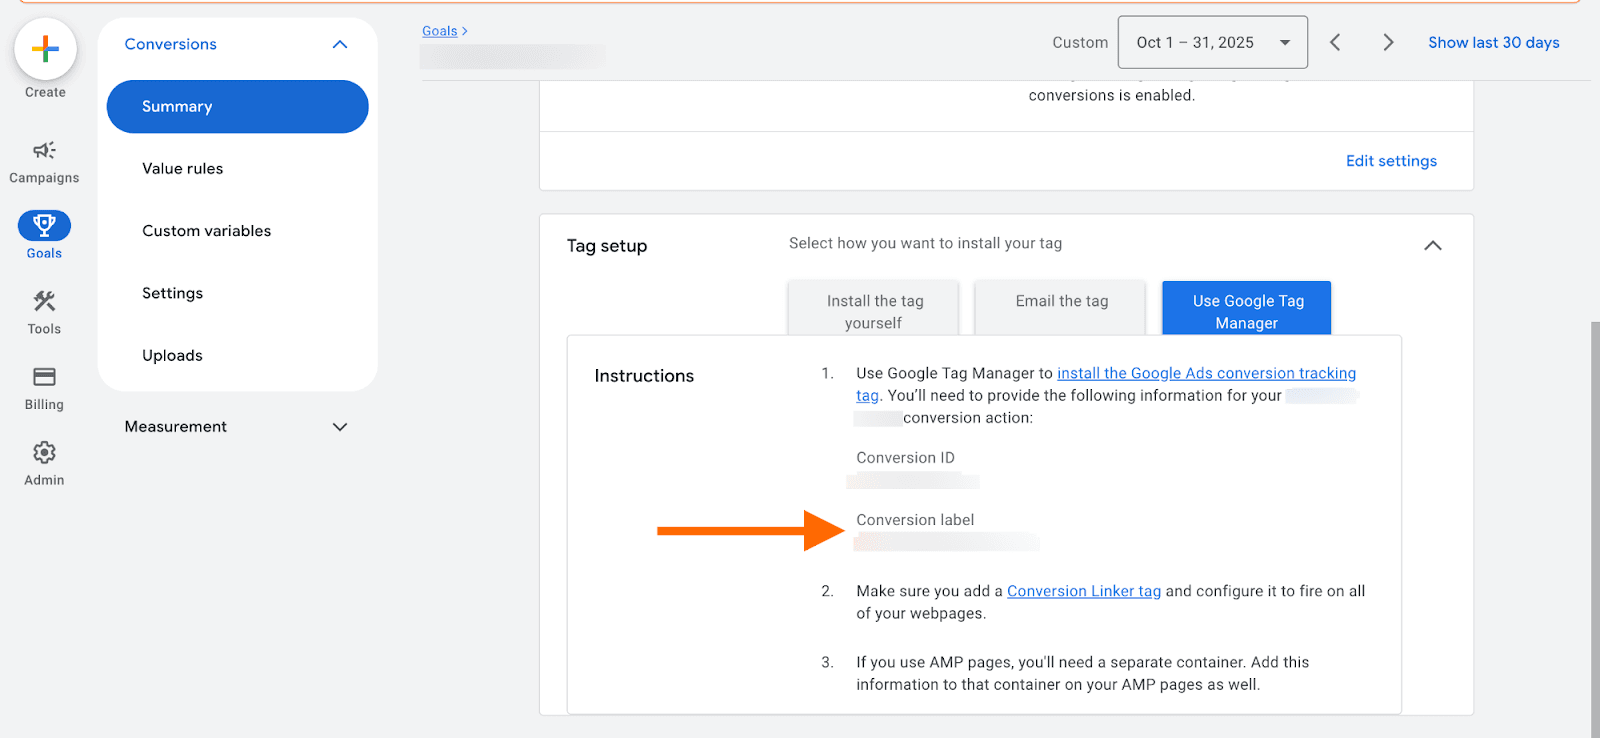
- Conversion ID - it can be found when creating/editing a conversion goal in Google Ads → choose Use Google Tag Manager → copy ID.
- Purchase conversion, BeginCheckout conversion, AddToCart conversion - here you should place conversion labels for corresponding conversion events. Conversion labels can be found in your Google Ads account → Goals → Conversions → choose the required conversion → expand Tag Setup → Select Use Google Tag Manager → copy Conversion label.
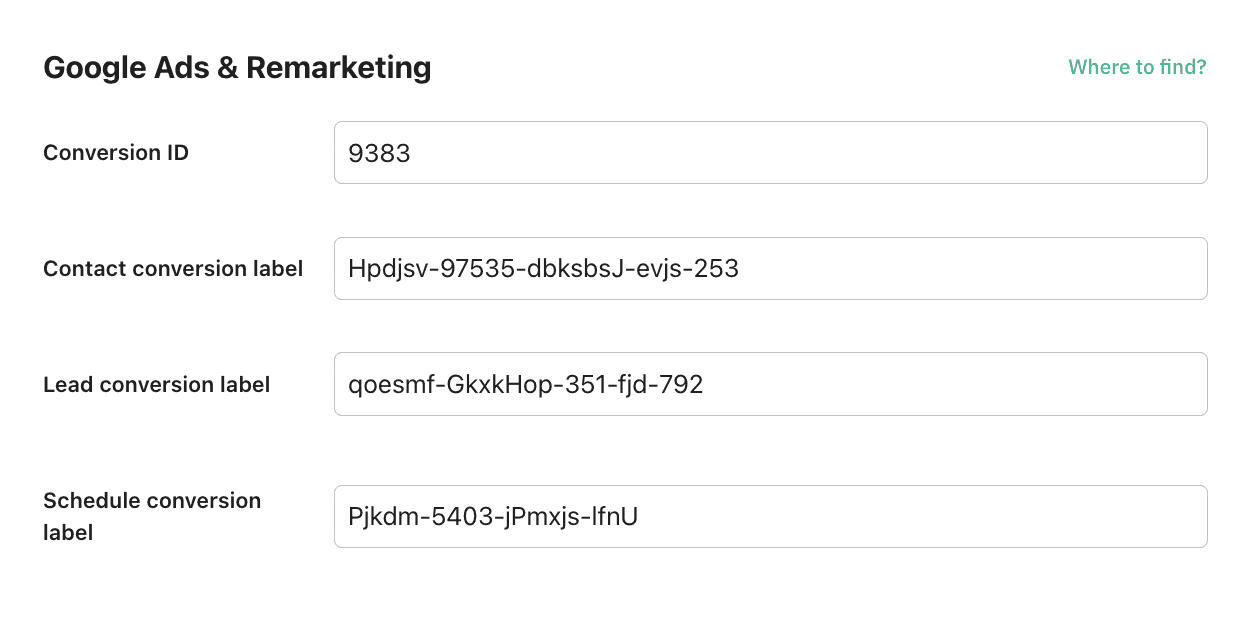
- Contact, lead & schedule conversion labels - the labels can be found, as well as the Conversion ID. Select/create the goal in Google Ads that corresponds to contact, lead, and/or schedule conversion tracking. When editing/creating a goal, choose Use Google Tag Manager → copy ID.
Here is an example of Google Ads fields configuration for the eCommerce type:

Here is an example of Google Ads fields configuration for lead generation type:
Microsoft Ads (Bing)
The configuration will slightly differ based on the type you’ve chosen (eCommerce or lead generation). Here, we show how to set up both. We will start with the eCommerce fields.
- Microsoft UET Tag ID - the value can be found in the Microsoft Ads account → Conversions → UET tag → Tag ID.

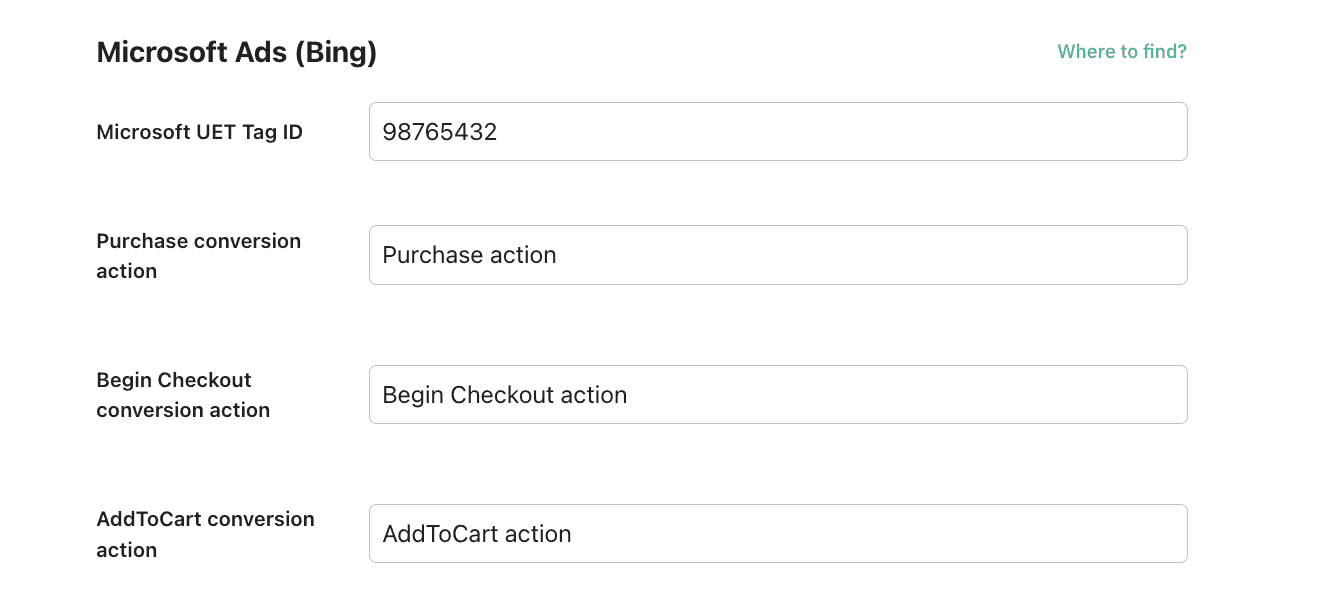
- Purchase conversion action, Begin Checkout conversion action, AddToCart conversion action - these fields are required for the eCommerce type. Specify the conversion action you’ve chosen when creating the conversion.
Here is an example of Microsoft fields configuration for the eCommerce type:
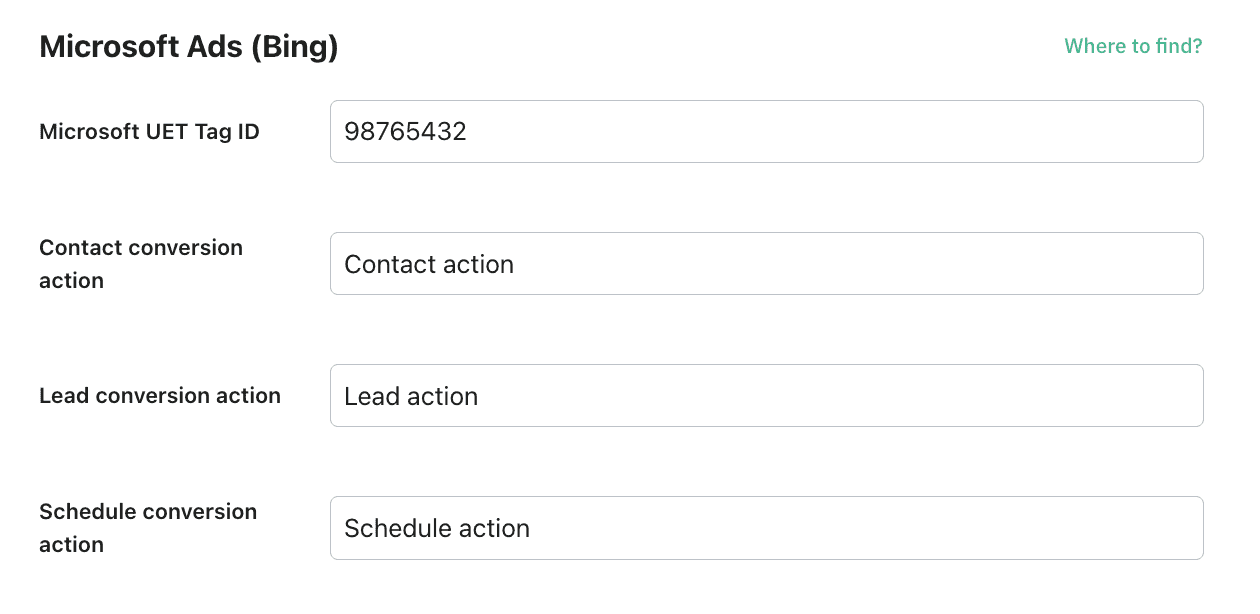
- Contact, lead & schedule conversion action - the fields for lead generation type. Specify the conversion action you’ve chosen when creating the conversion.
Here is an example of Microsoft fields configuration for lead generation type:
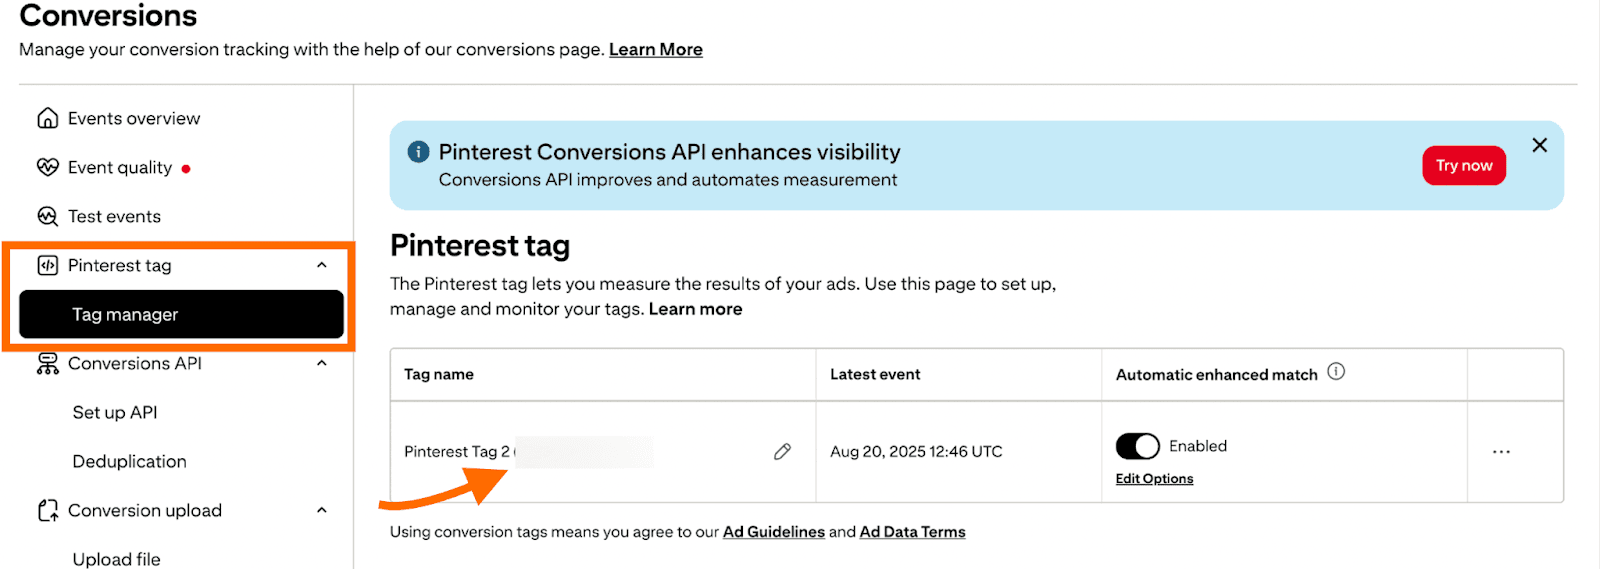
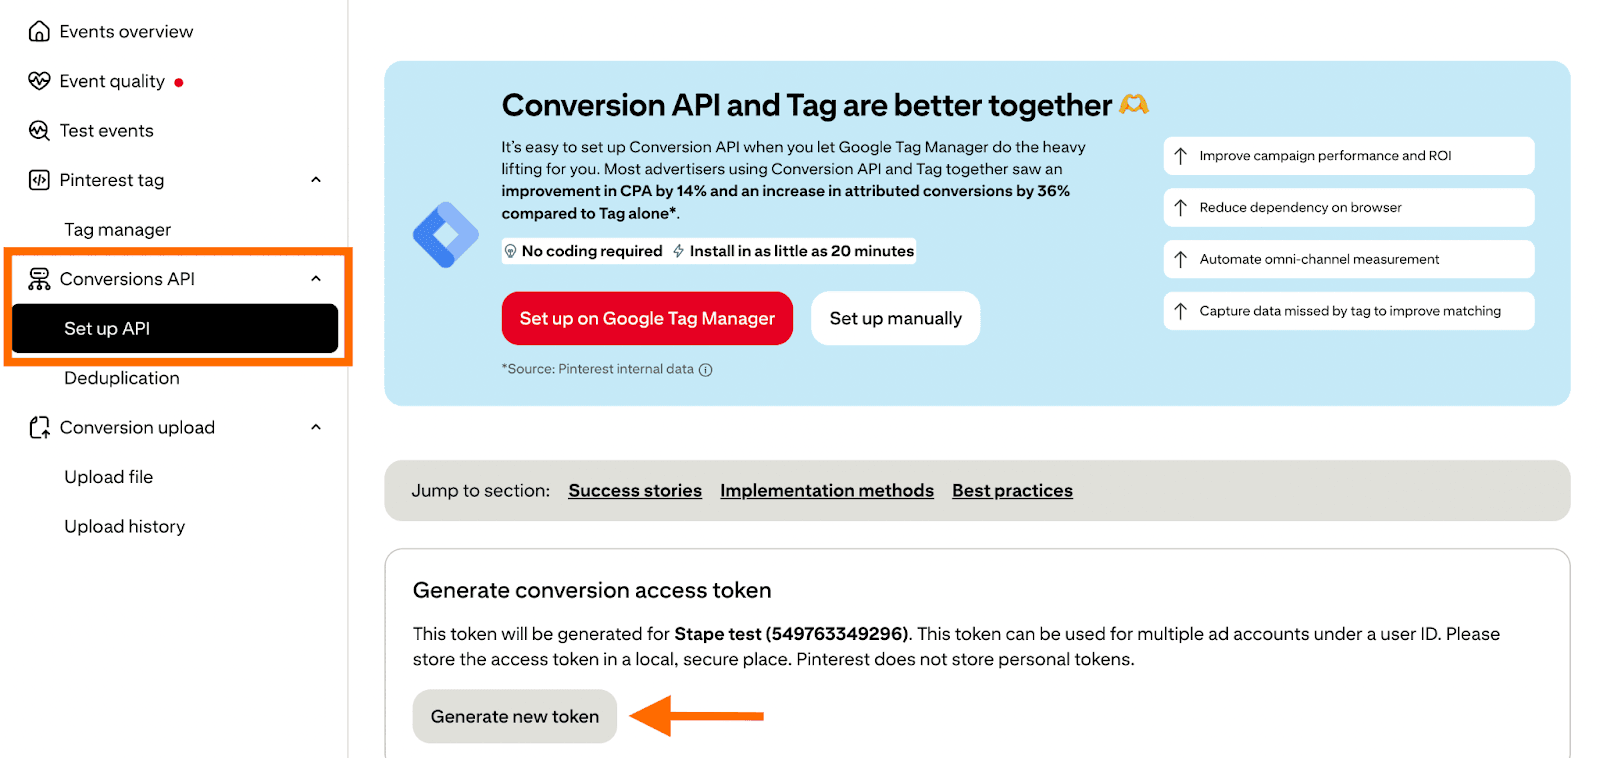
- Tag ID - to find the value, log in to your Pinterest Ads Manager → click on Conversions from the Manage Business section in the menu → on the left side menu, click on Pinterest tag → click on Tag Manager → copy ID.
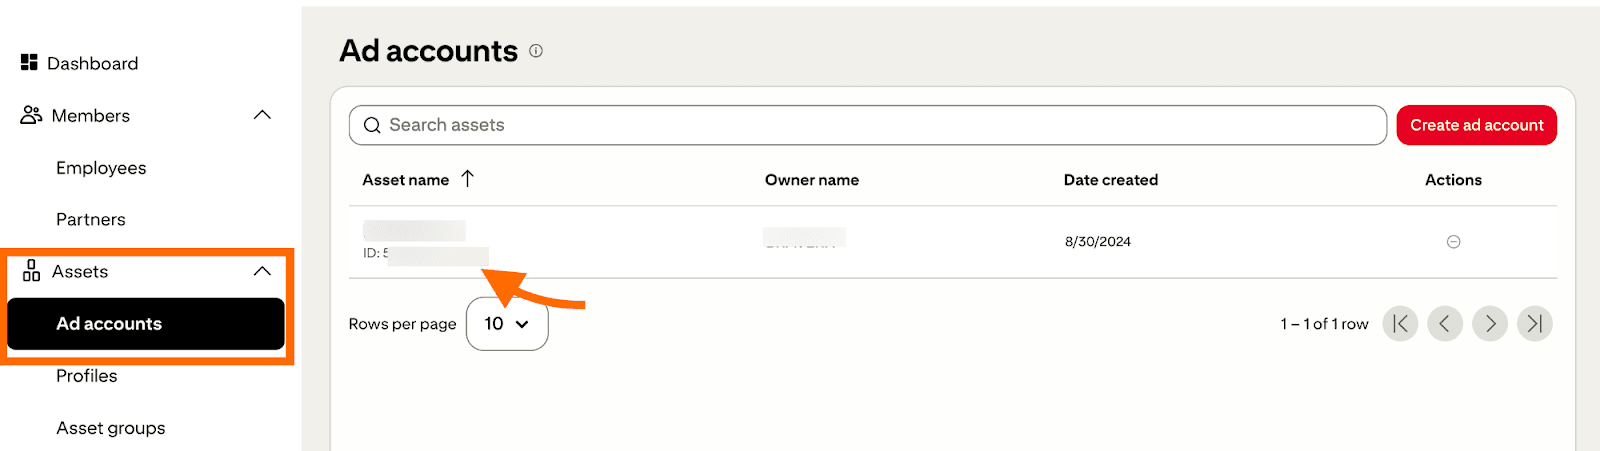
- Advertiser ID - to find this ID, log in to your Pinterest Ads Manager → click on Business manager from the Manage Business section in the menu → on the left side menu, click on Assets → click on Ad account → copy ID.
- API Token - to find the value, log in to your Pinterest Ads Manager → click on Conversions from the Manage Business section in the menu → on the left side menu, click on Conversions API → click on Set up API → Generate new token.
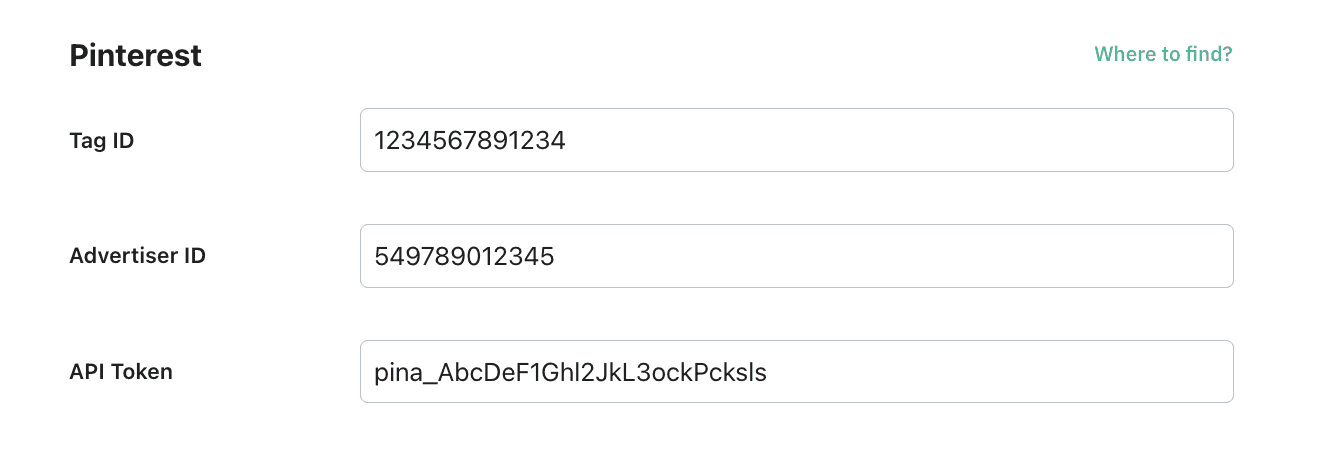
Here is an example of Pinterest fields configuration:
Step 4. Import templates
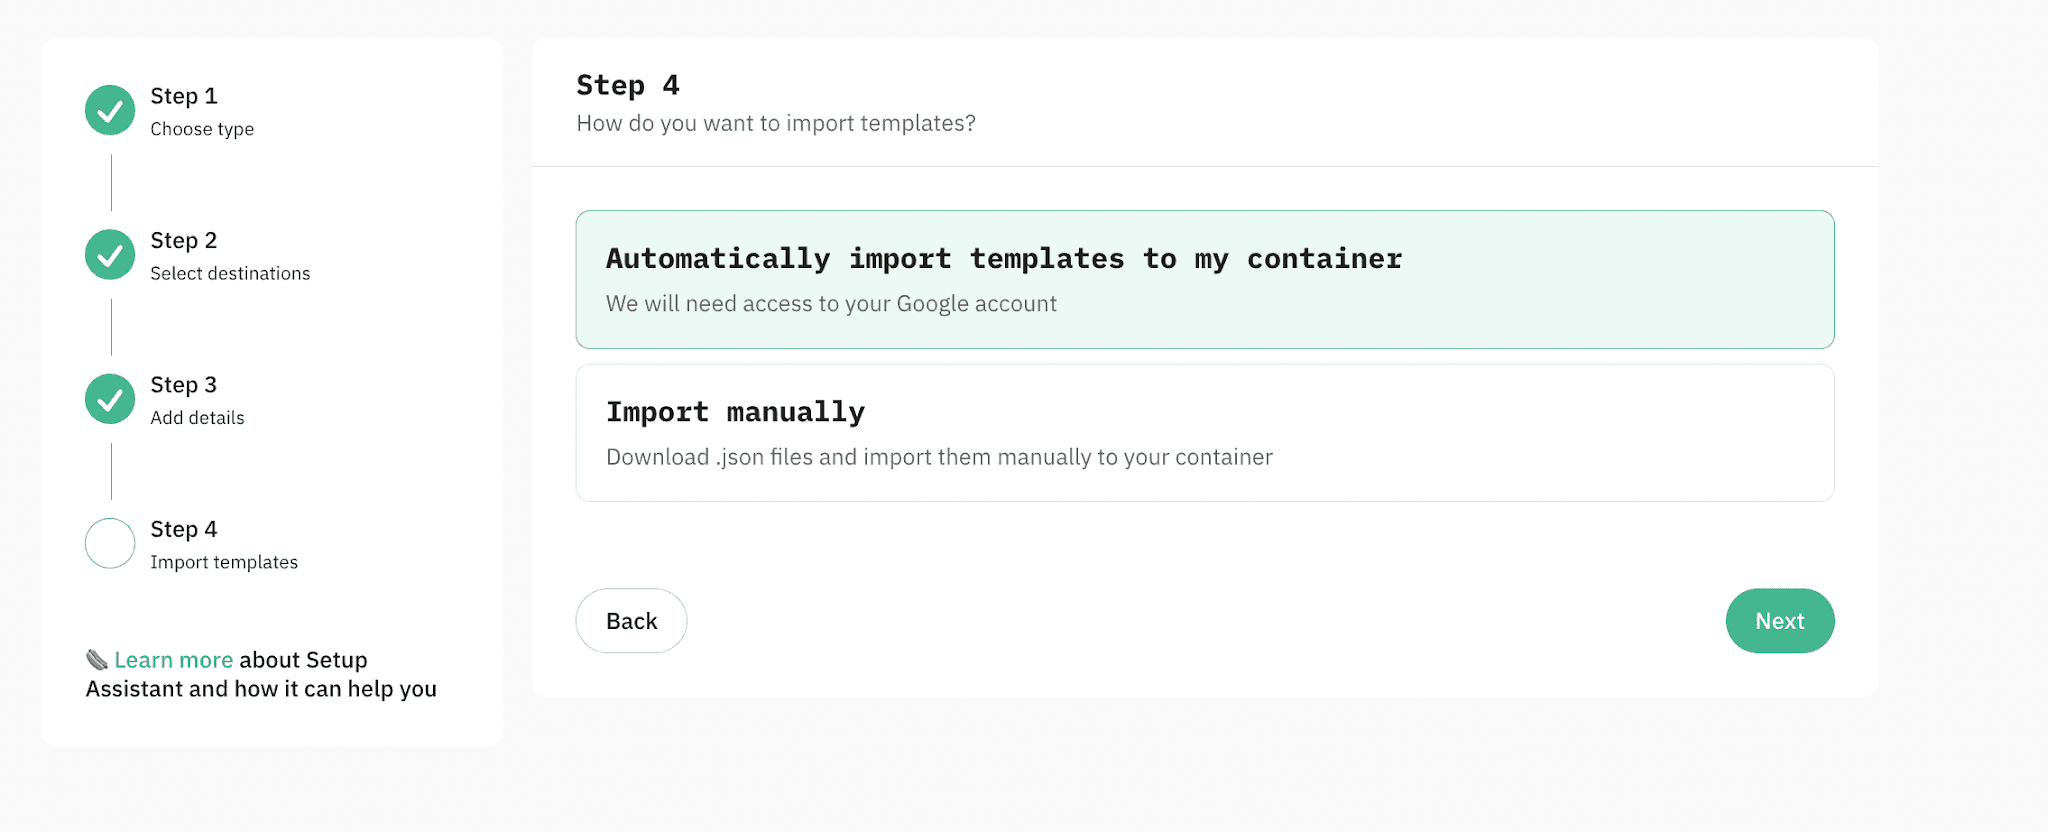
Choose how you want to import templates: automatically or manually. Click on Next.
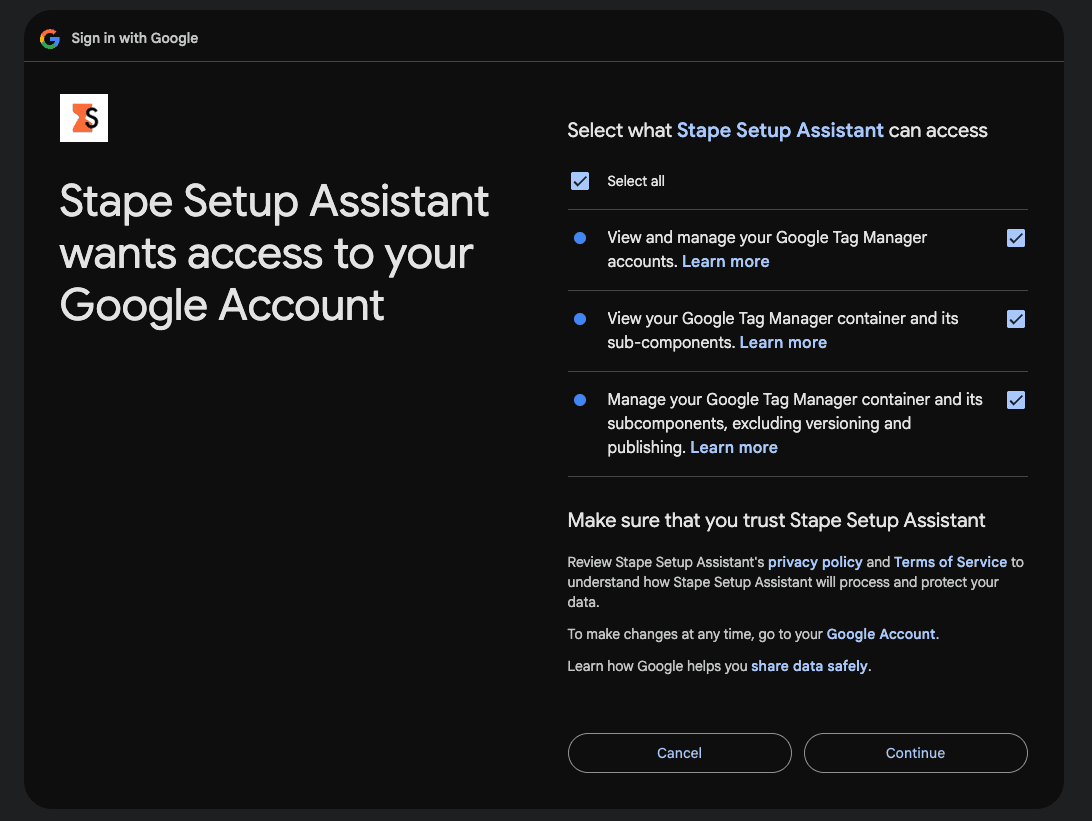
Automatically
1. Authorize with a Google account that has access to the GTM account you want to import templates into.
Please note
2. Select containers and corresponding workspaces into which you want to import templates and click Import templates.
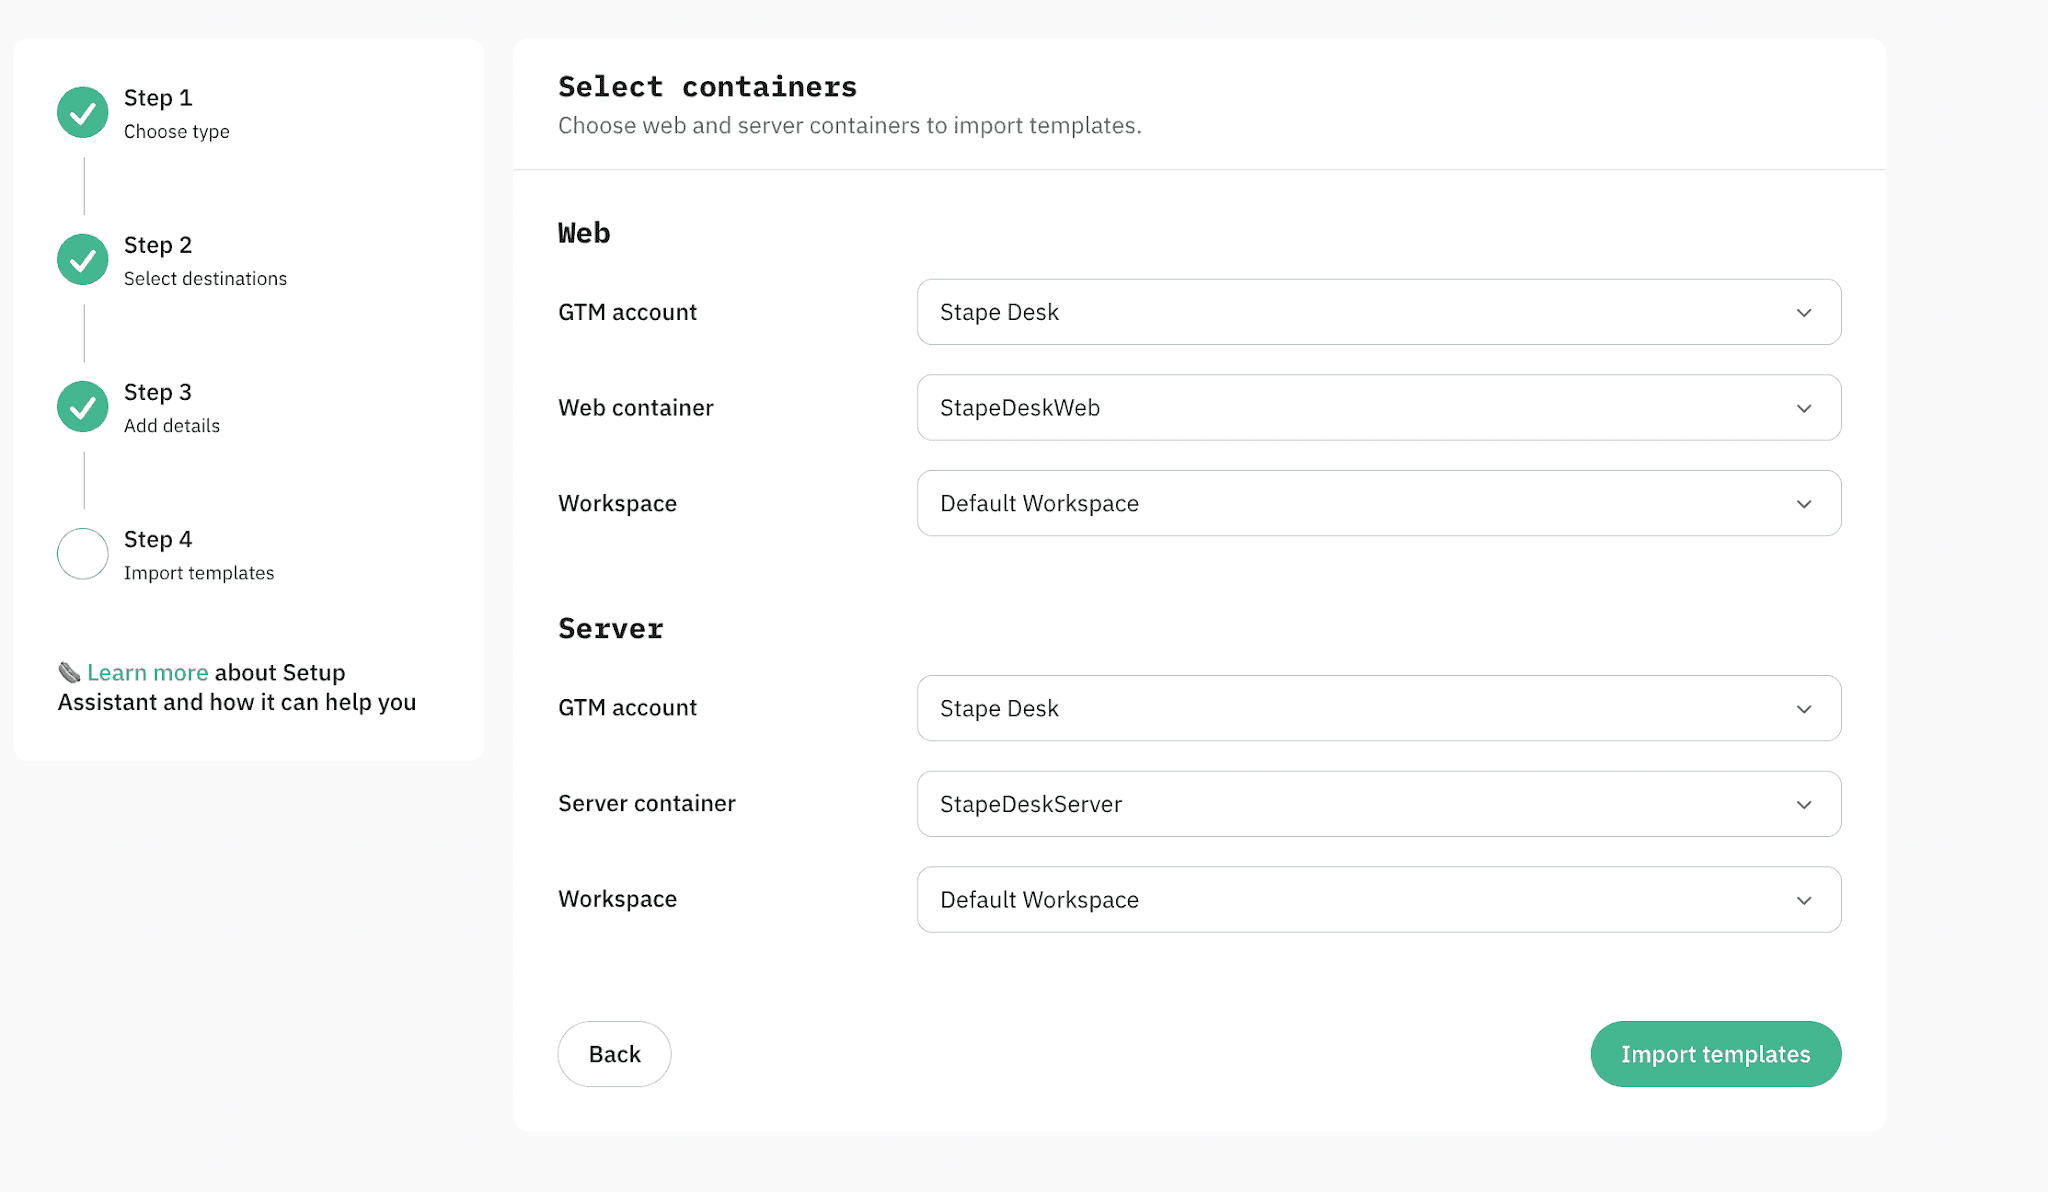
Please note
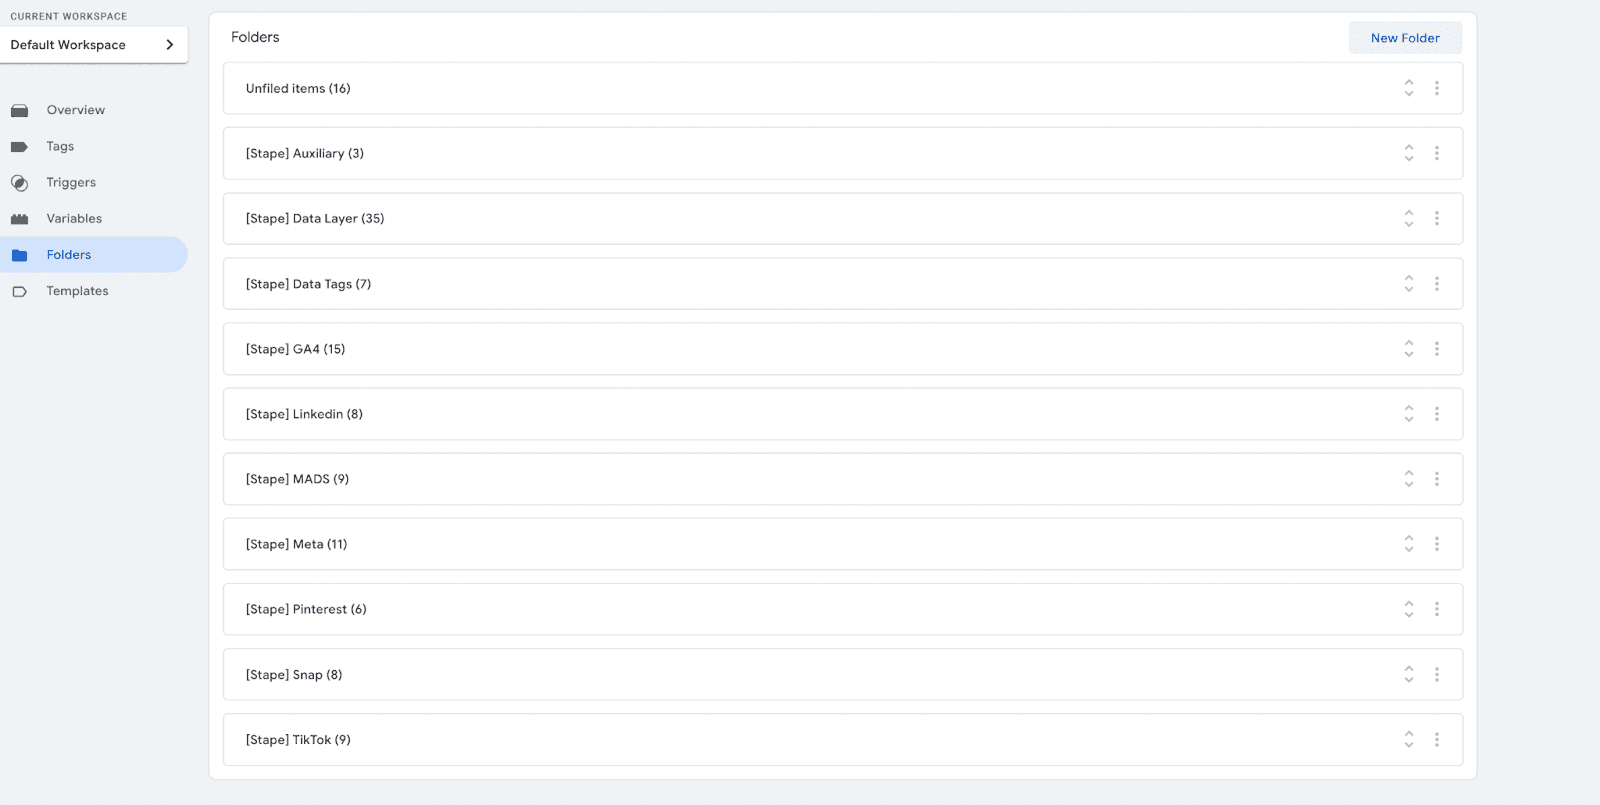
3. Make sure the templates are in your web and server GTM containers. The imported templates will be neatly organized into folders starting with [Stape].
If the templates weren't imported automatically, please try importing them manually by following the instructions.
Manually
1. Click on the green buttons to download the templates.
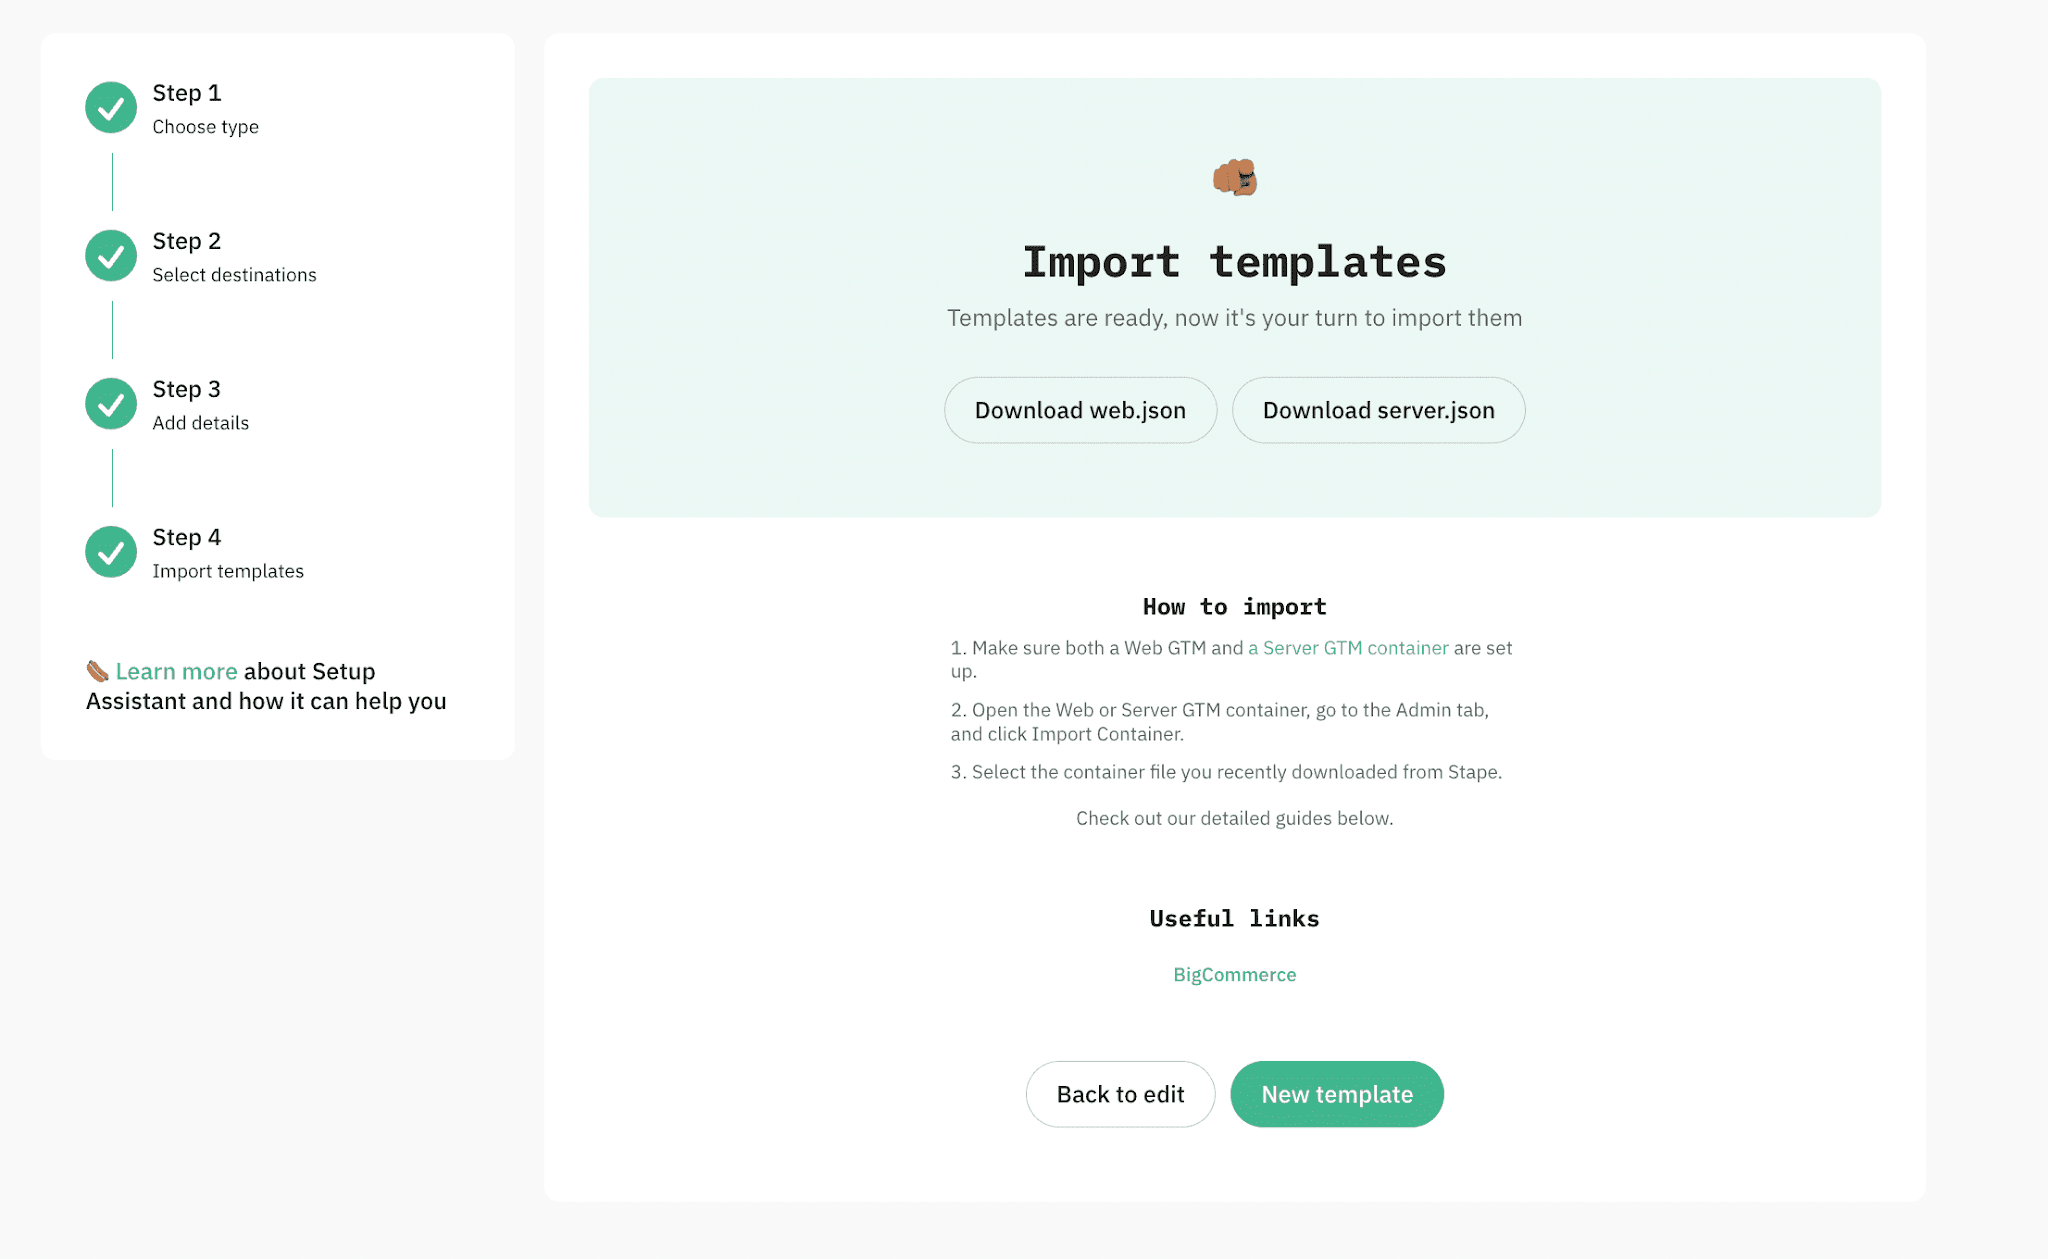
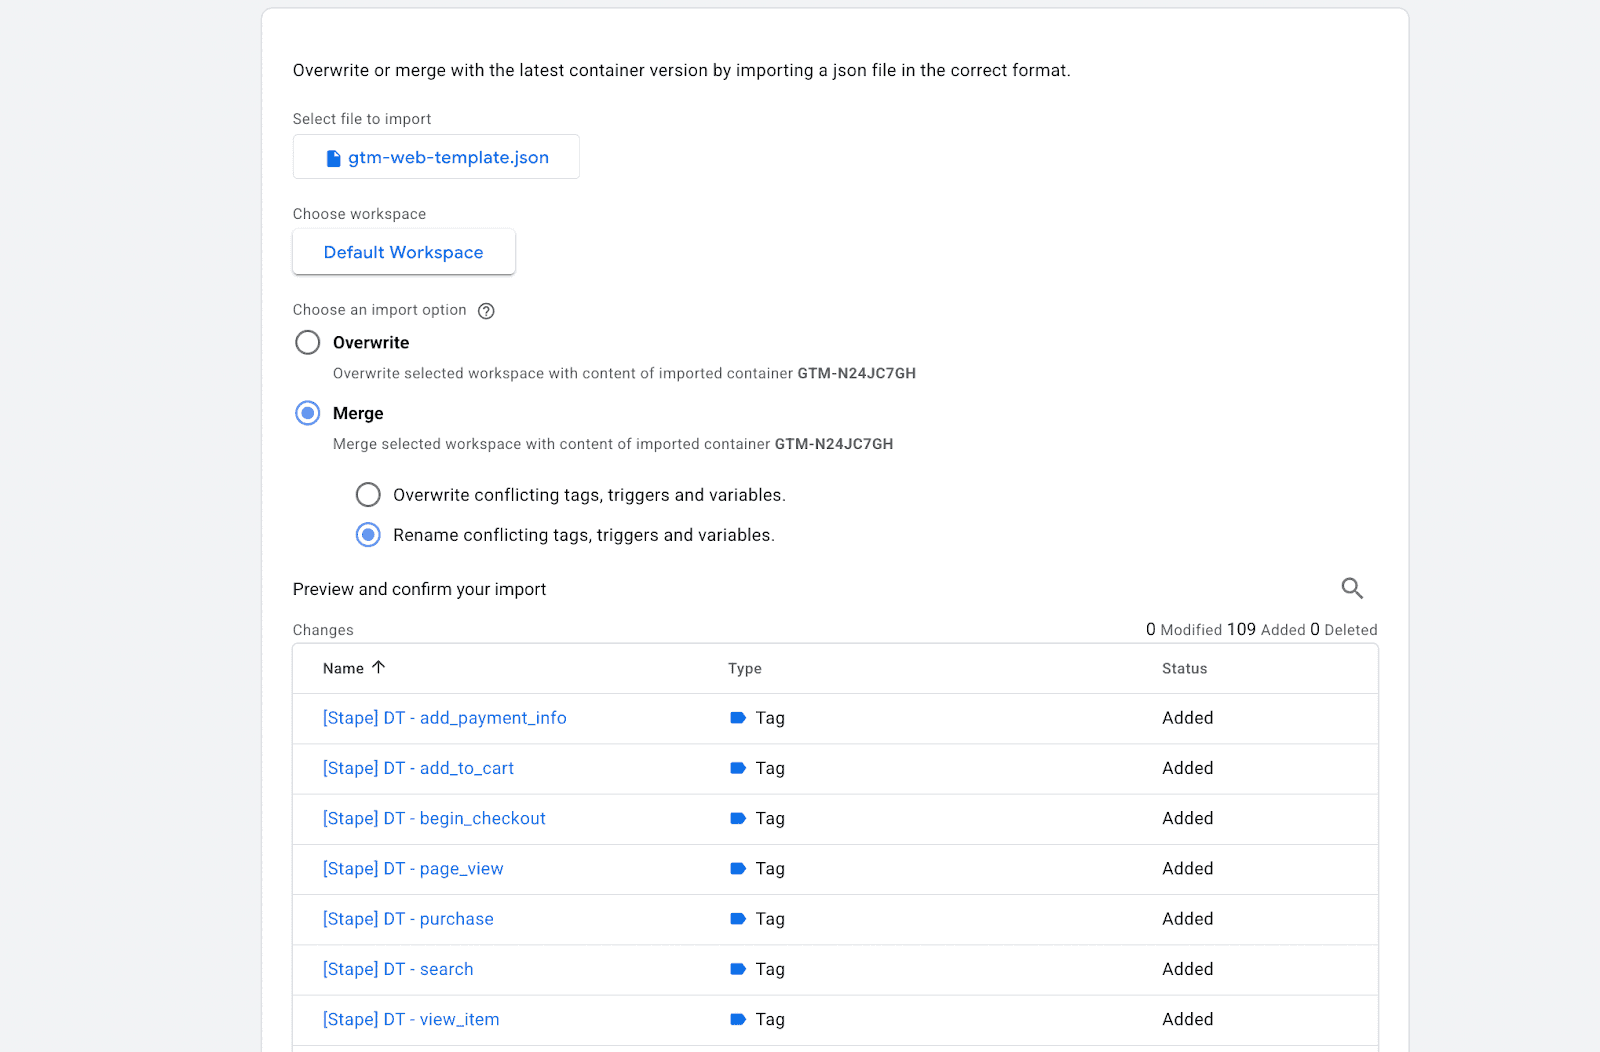
2. Open the Web or Server GTM container, go to the Admin tab, and click Import Container.
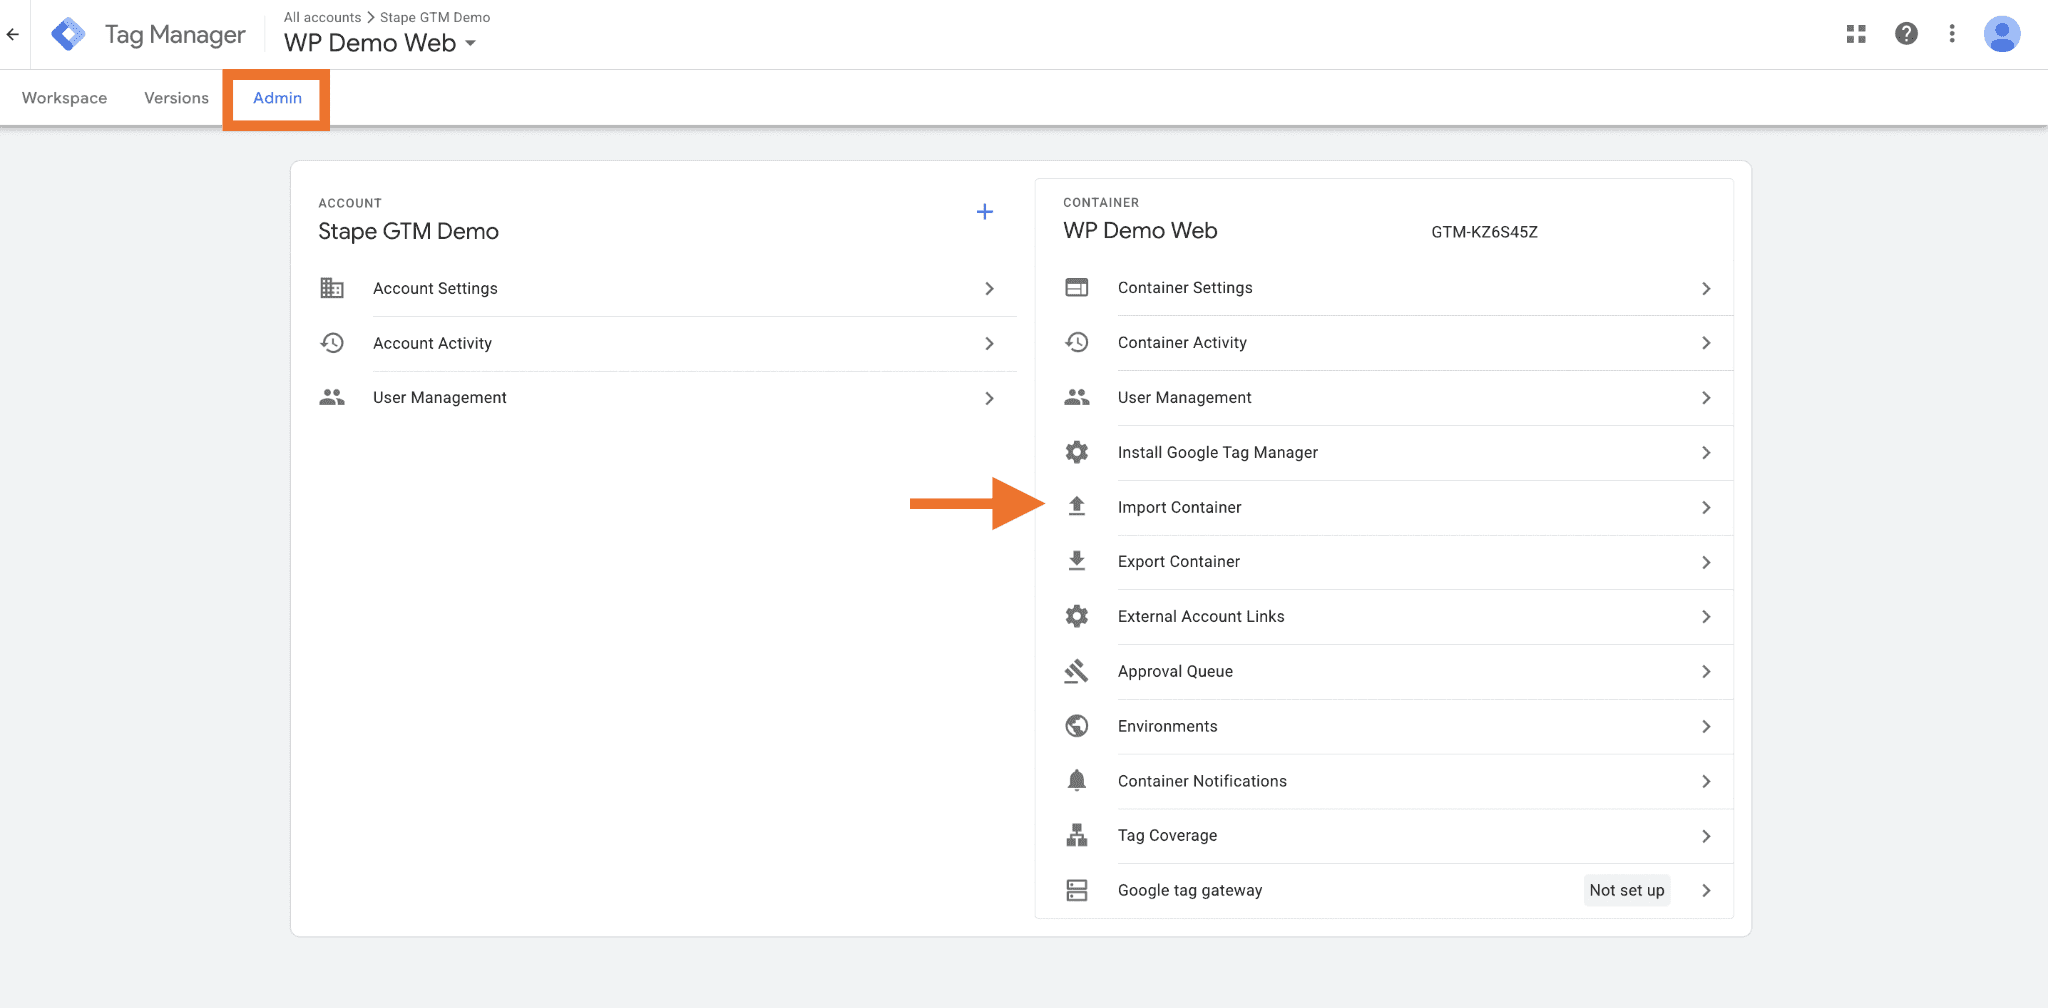
3. Select the file you recently downloaded from Stape.
For example, the JSON file gtm-web-template you downloaded (make sure you upload the correct file that matches the container type - web or server).
Select the workspace for this import - new or existing.
4. Select Overwrite or Merge.
The Overwrite option should only be used with a new or empty container. For this demo, we are using the Merge option with the Rename conflicting tags, triggers, and variables setting enabled. This ensures that GTM will simply rename the tags without altering existing entities in your container if any conflicts arise.
5. Click Add to workspace.
6. Do the same within the server GTM container, making sure you import the JSON file named gtm-server-template.
How to test Setup Assistant configuration
Simply open the tags to make sure they include all the necessary data and run Preview in both web and server GTM containers.
Trigger the events on your website and check whether tags work successfully. Once confirmed, publish the changes to activate the setup.

| For more details on debugging and monitoring your server-side tracking setup, refer to our guide. |
Prevent over-reporting from other integrations
Check whether you have any additional plugins or integrations that also send events to the same platforms that are currently configured in GTM. Sending the events will lead to over-reporting. For example, Shopify has Google and Meta apps that may have active integrations for sending events. If there are some integrations like this, disable this functionality in the apps.
Along the same lines, consider what you already may have in your GTM containers or site code-base, and make sure there are no conflicts or double-firing tags.
In case of any questions, feel free to ask in our Stape Community.
Was this article helpful?
Comments