How to set up Piwik Pro Tag using server Google Tag Manager
Uliana Lesiv
AuthorOver the last time, Google Analytics 4 alternatives have gained popularity. Among them is Piwik Pro, which helps effectively track data, analyze campaign performance, and make data-driven decisions. Besides, people choose it because of its high tool integration ability and data privacy.
However, setting up tools like Piwik Pro on server containers may seem challenging. With Piwik Pro Tag from Stape, you can do it easily in 6 simple steps.
Why choose Piwik Pro Tag for server-side tracking?
Server-side tracking with Piwik Pro Tag brings many crucial benefits for a data-driven approach for your business here are some of them.
Higher data accuracy
Unlike client-side tracking, server-side tracking is less vulnerable to different ad blockers and browser limitations, making gathering data about website visitors' behavior impossible. Server-side tracking uses first-party cookies to help eliminate these restrictions.
That’s a crucial point for analytics tools such as Piwik Pro. Accurate data helps to make better business decisions.
Enhanced data security
With server-side tracking, you can fully control what data is gathered from your website visitors and comes to the Piwik Pro interface. JavaScript code used for client-side tracking can be tricky and collect more data than required. Later, it can become problematic as it may harm data protection laws (such as GDPR).
Faster page load
Setting up analytics tools like Piwik Pro on client-side tracking requires adding JavaScript code to each page on your website. These codes can significantly decrease load speed.
Evidence shows that switching to server-side tracking can increase load speed up to 72%.
| These are just a few of the most important benefits you get from server-side tracking. Check out a blog post on the benefits of server-side tracking to see the full list. |
How to set up Piwik Pro Tag for server GTM
2. Download the Piwik Pro Tag from GitHub or choose easier way - add Piwik Pro Tag from the Template Gallery.
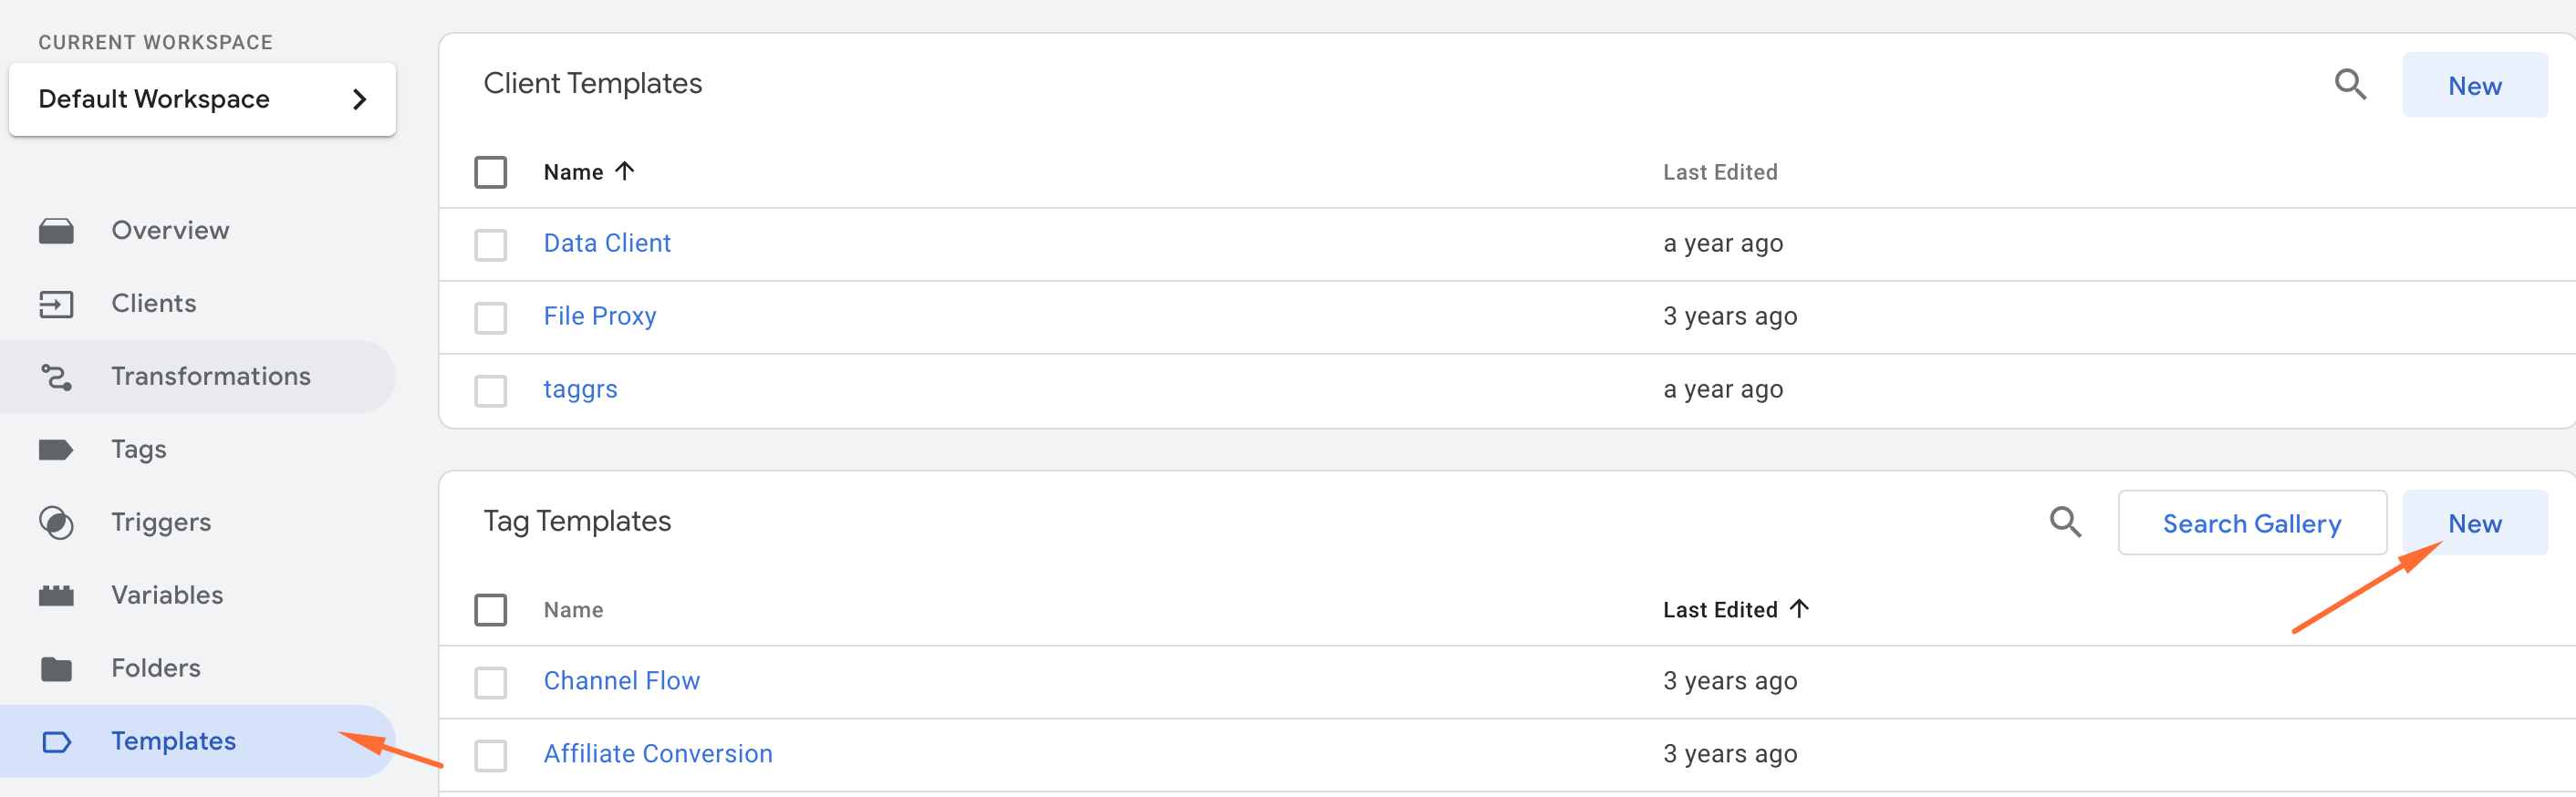
3. Go to your server Google Tag Manager container → Templates → “New”.
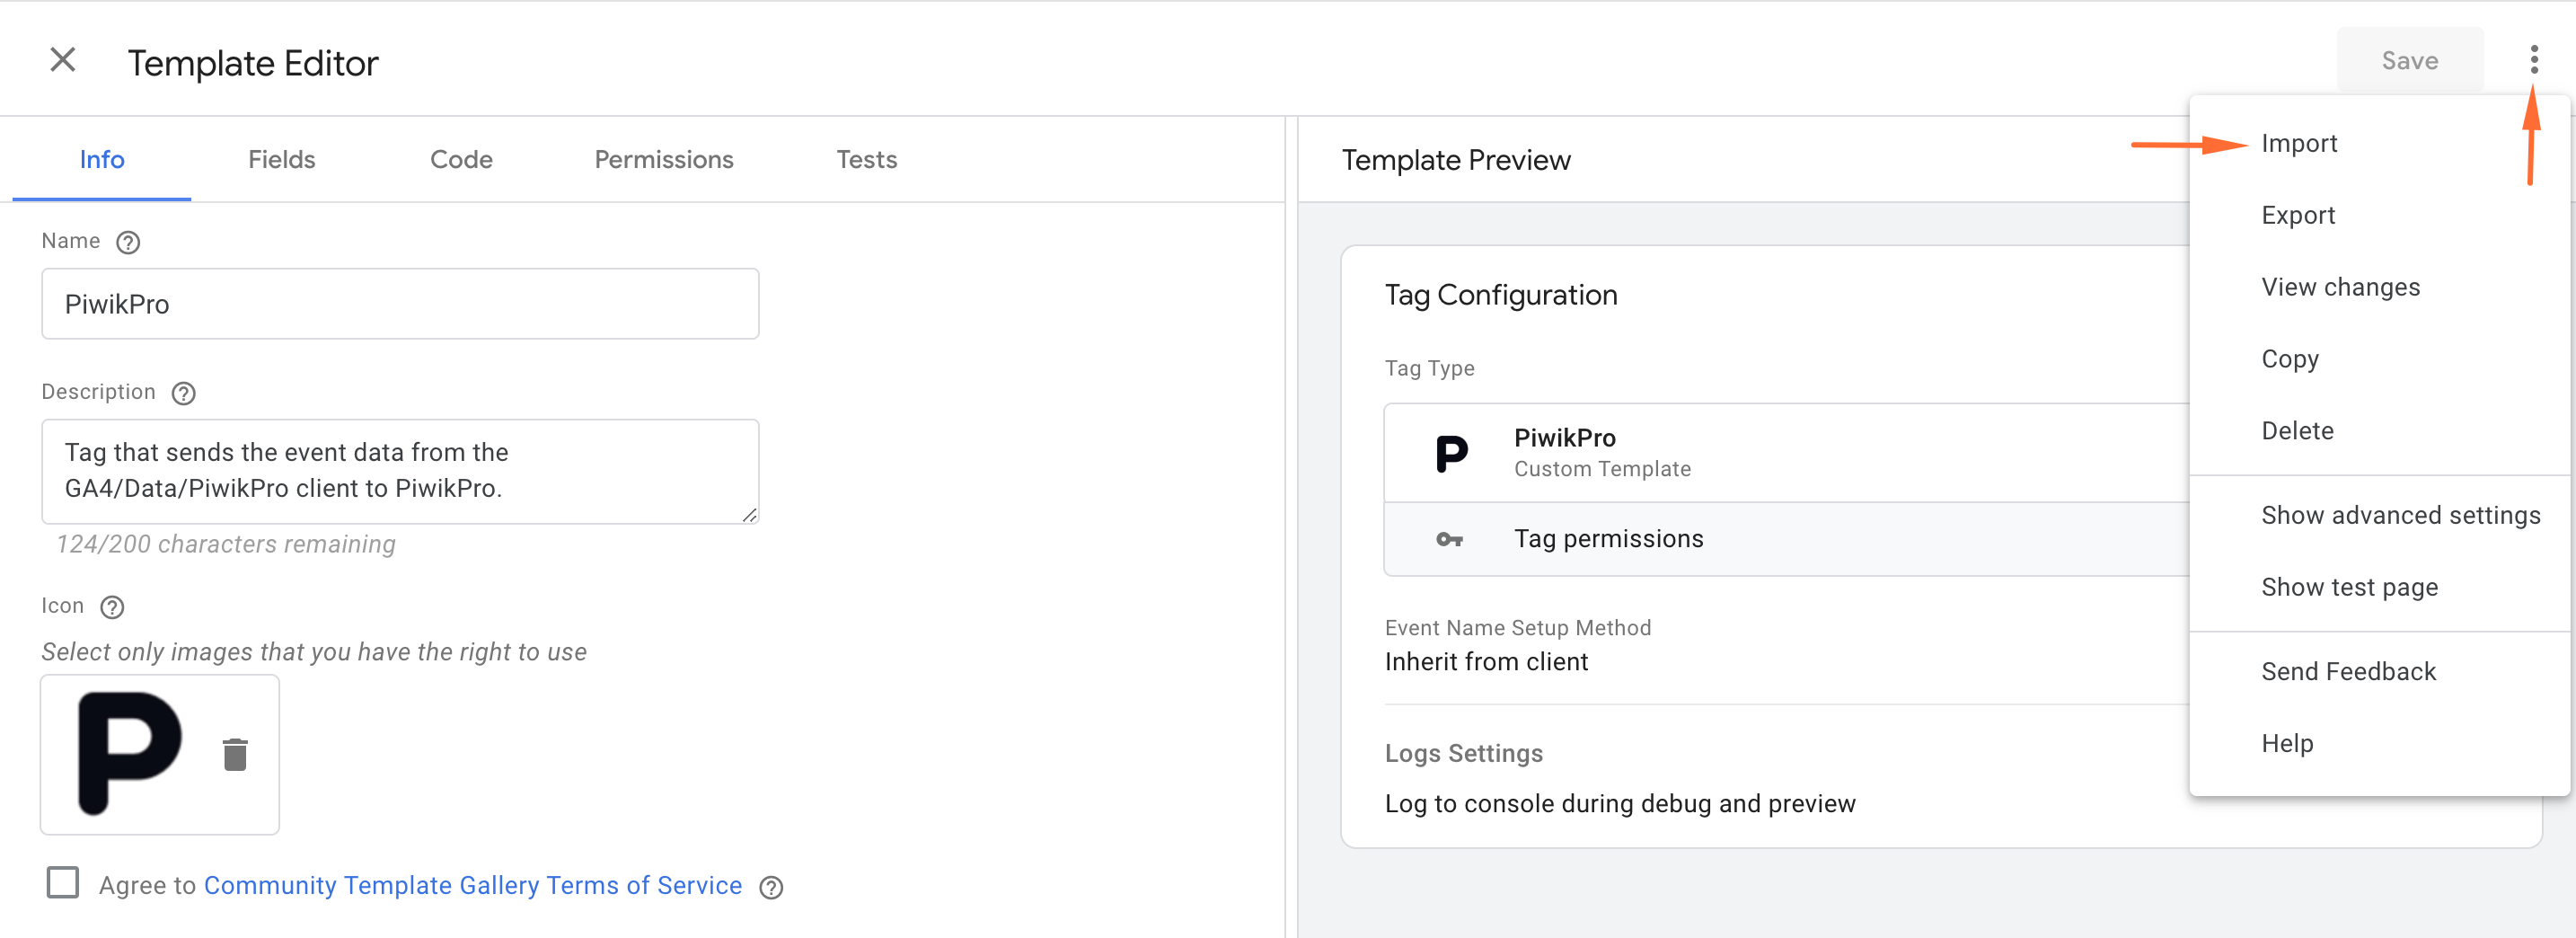
4. Click on the three dots in the upper right corner → Import and upload Piwik Pro Tag you downloaded from GitHub.
In case, you added template from gallery click New → choose Piwik Pro Tag.
Click "Save".
5. Now, you can configure the Piwik Pro Tag in the “Tag” section. Here, you can set up all the necessary parameters. The tag gives a choice between Inherit from client and Custom event set up.
Inherit from client - the tag will autonomously interpret event data and assign corresponding information.
Custom - with this option, you can track page views or create custom event tracking.
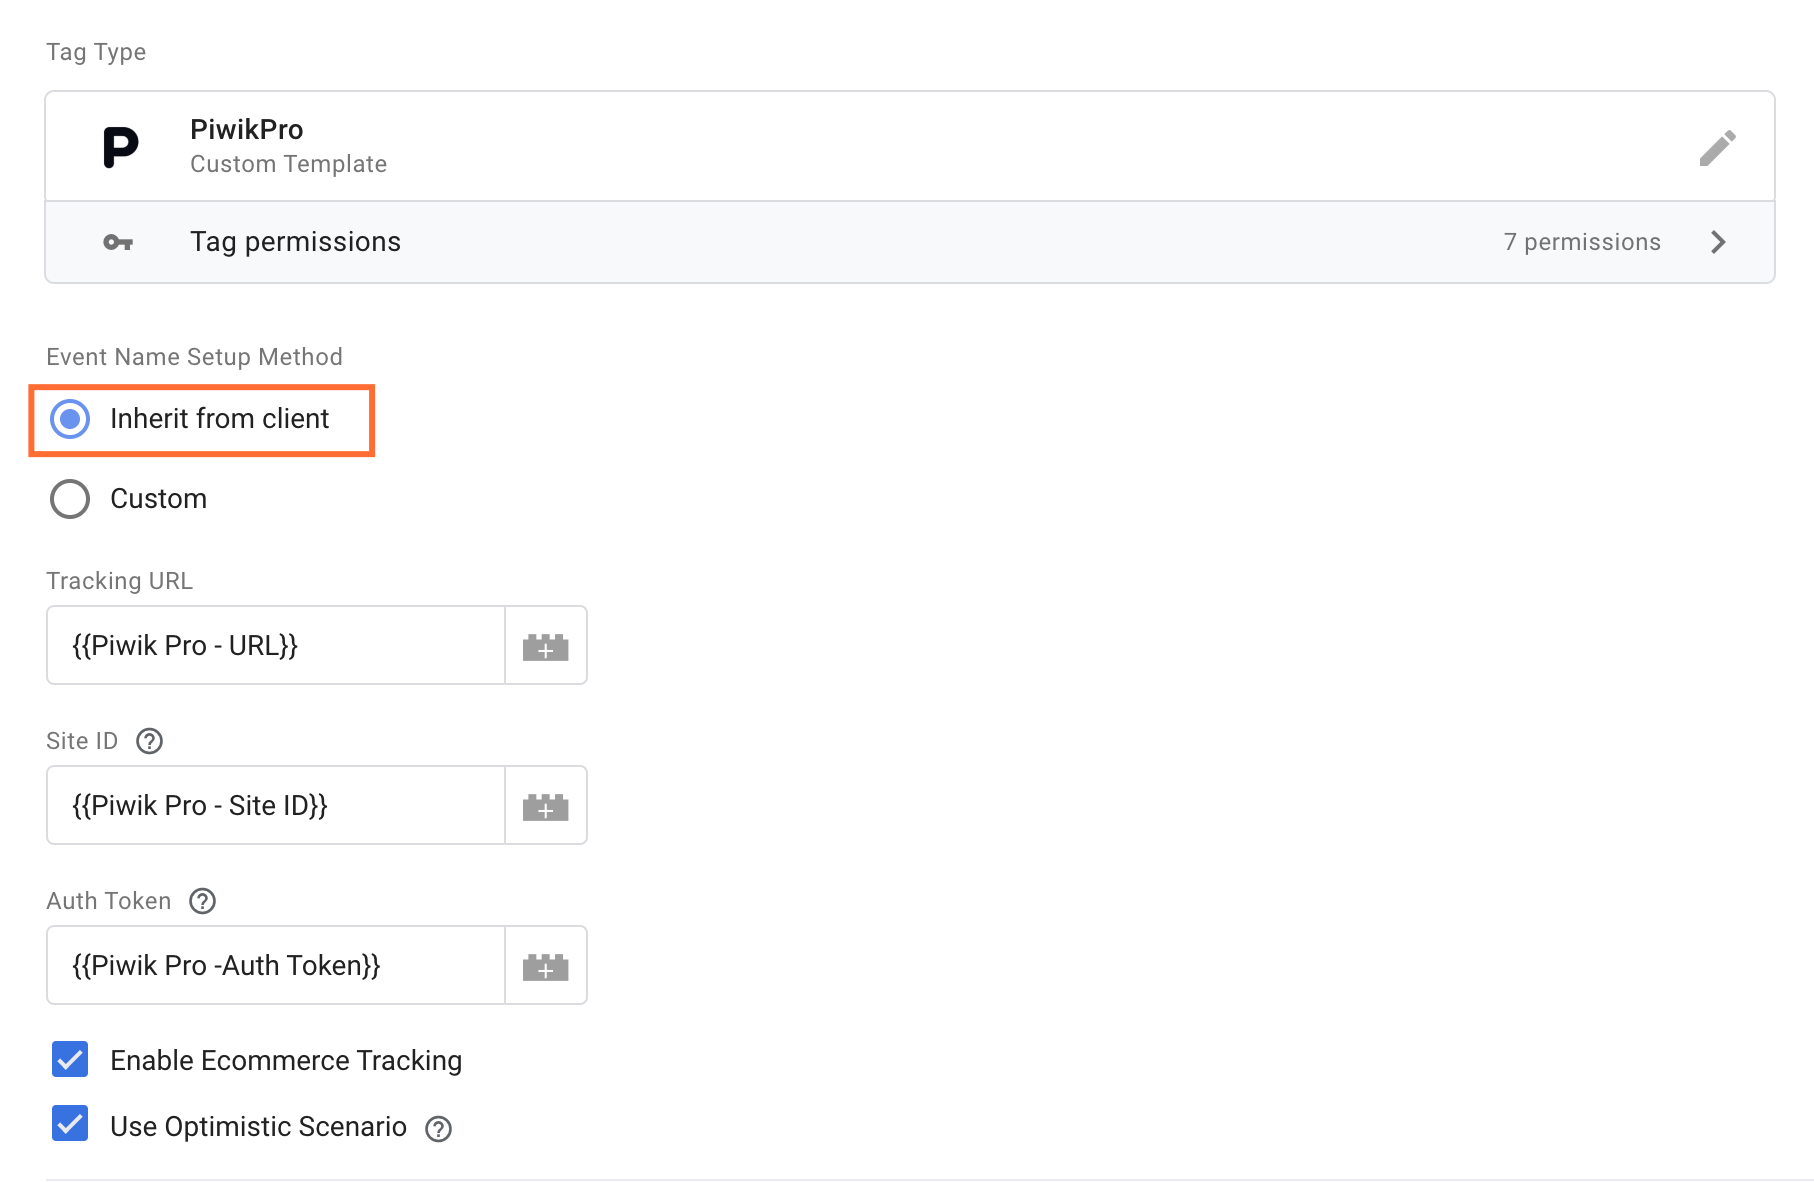
“Inherit from client” event set up
With this method, you see the following fields that need to be filled:
Tracking URL - enter here the tracking HTTP API endpoint (e.g. https://your-piwikpro-domain.example/piwikpro.php)
Site ID - that’s the ID of the site you want to track data for. You can find it in the Piwik Pro account → Menu → Administration → Sites & apps → on the left, select the website you want to get an ID of.
Auth Token - it is required to set up the correct IP address. You can find it in the Piwik Pro account → Administration → click API in the left menu.
Below, you can check boxes:
Enable Ecommerce Tracking - if you click on this box, the tag will assign ecommerce data.
Use Optimistic Scenario - with this, the tag will invoke gtmOnSuccess() immediately, without awaiting a response from the API.
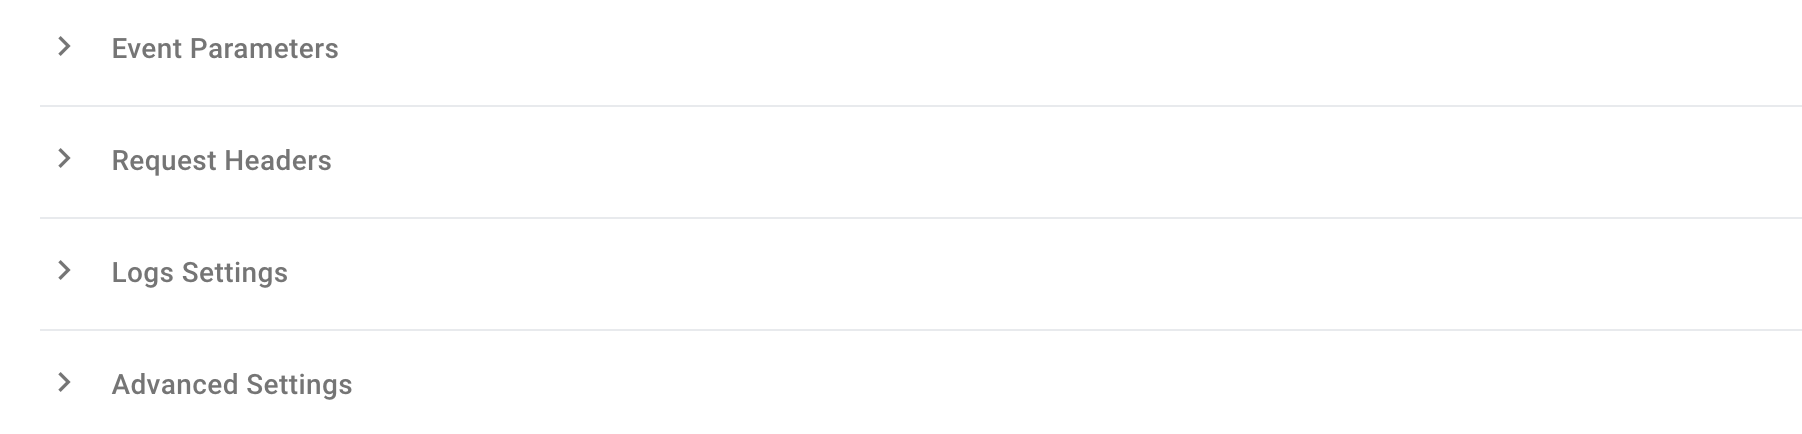
Then, you will see the following categories:
Event Parameters - list all the parameters you want to override.
Request Headers - here, you can add header names and values to the request.
Long Settings - choose whether the tag always logs to the console, logs during debug mode or doesn’t log at all.
Advanced Settings - section to add additional tag metadata to the event when the tag will fire.
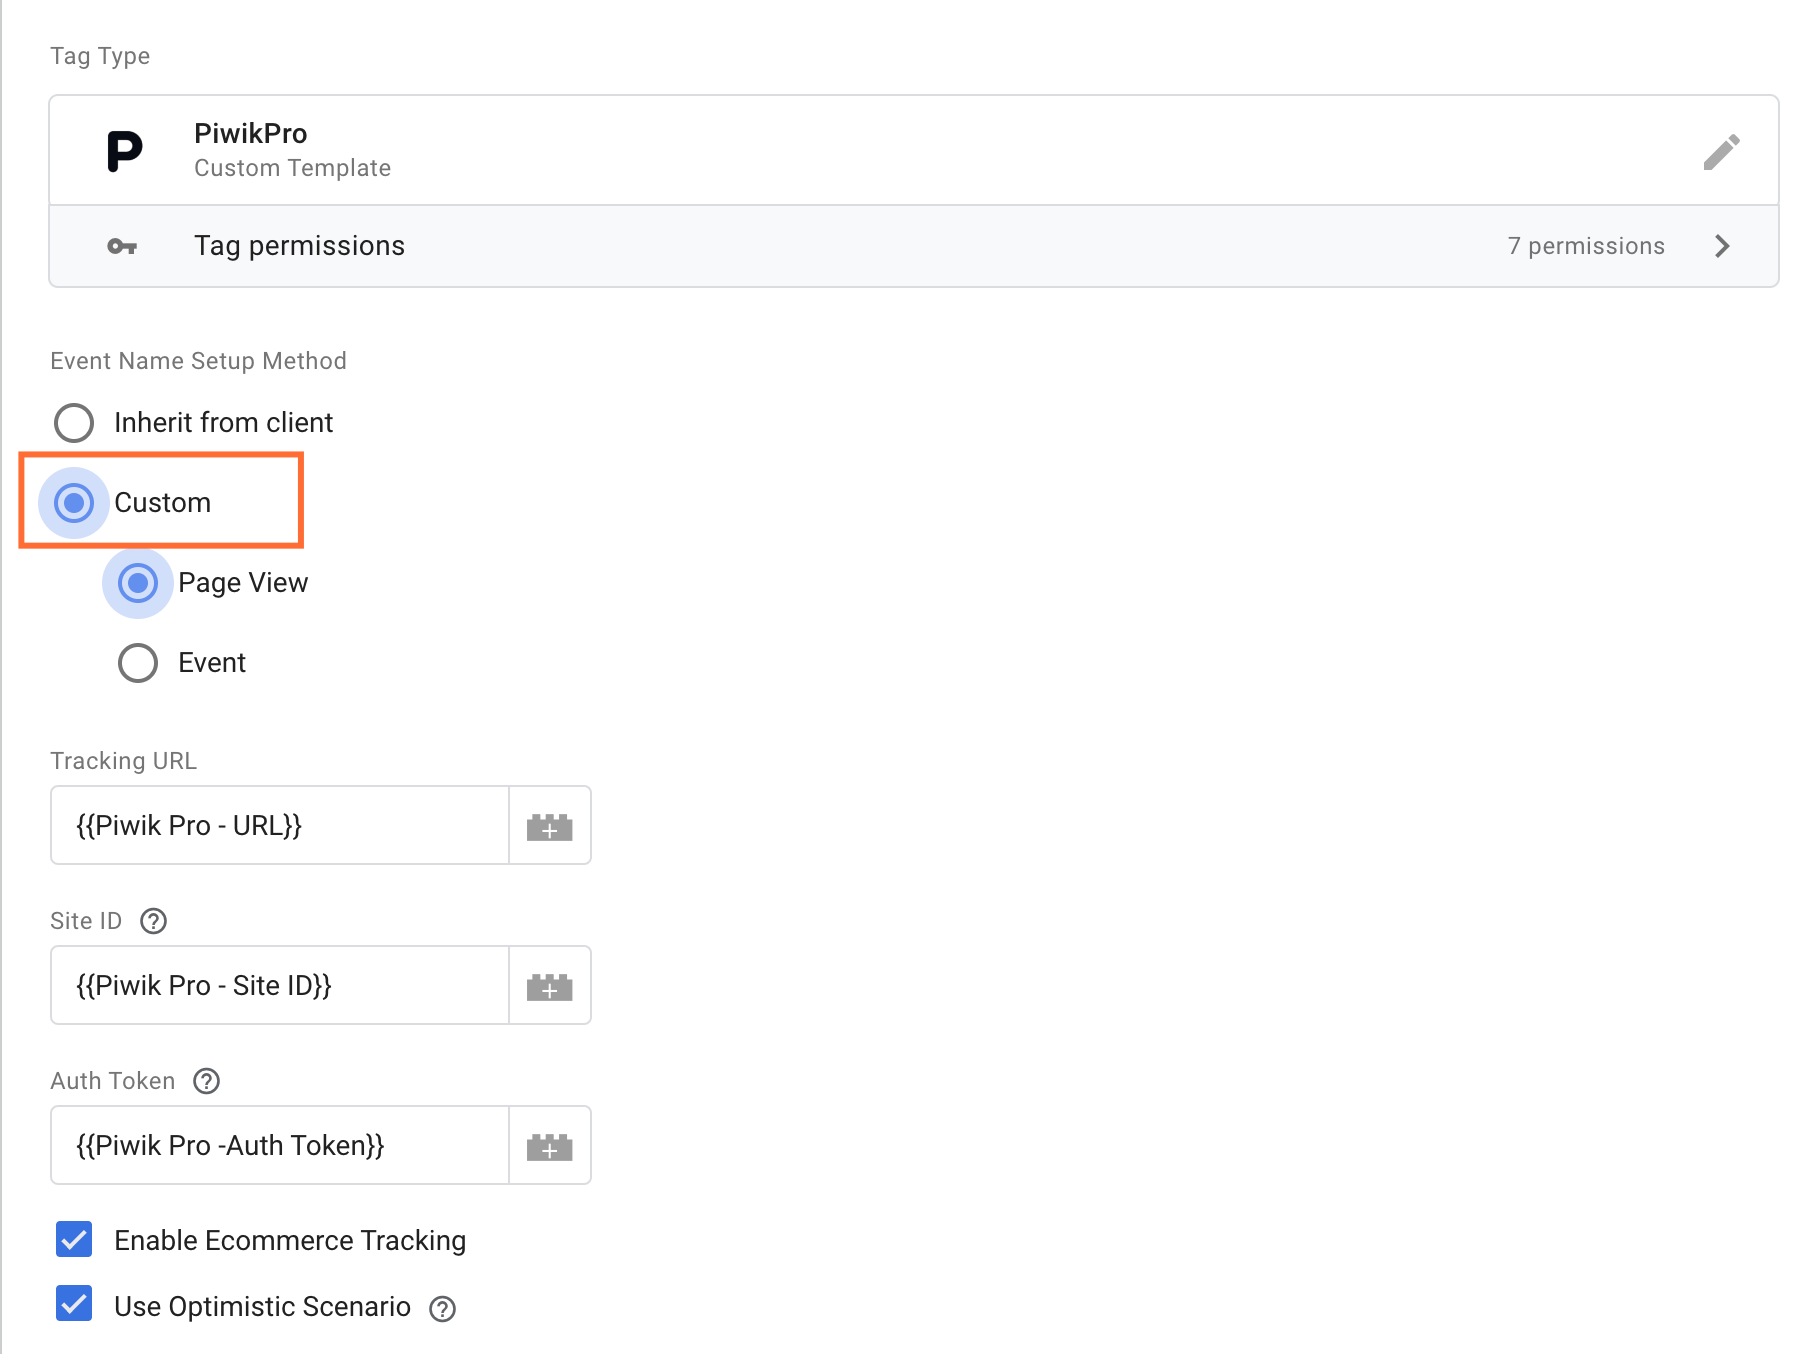
“Custom” event set up
Custom option includes all the fields as Inherit from client method, but with Custom, you can personalize settings and install “Page View” or “Event” tracking.
With “Event”, you have the option to add an Event Category, Event Action, and Event Name to help categorize the data in the analytics tool.
6. After configuring tag, add trigger and test if everything works as usual via GTM Preview and Debug mode. You can also check if the event is being tracked in Piwik Pro account - go to Menu → Analytics → Settings and in the left you will see Tracker debugger.
We have an extensive guide on how to debug and monitor server-side tracking configuration in our blog for your convenience.
Conclusion
Piwik Pro Tag for server container is a powerful solution for integrating Piwik Pro and benefiting from this analytical tool. The installation is quick and easy, and in just 10 minutes, you can use all the benefits of Piwik Pro Tag for server-side tracking.
If you have any issues with tag installation, feel free to contact Stape support.
Need help from the experts?
Don't worry, we've got you covered! Click on Get assistance and we will send you a free quote.

Comments