Adform tag for server-side Google Tag Manager
Written by
Ivanna Holubovska
Adform is a company specializing in digital advertising solutions. They offer a range of services including efficient workflows, omnichannel reach, and better optimization of working media. Adform focuses on maximizing the use of data for competitive advantage, preparing for a cookieless future, and providing solutions for sustainable trading.
We created the Adform tag to make the Adfrom integration process simpler. In this article, I'll show you how to set up this tag using server-side Google Tag Manager, how to pair it with the Adform Cookie Retrieval Script tag in the web container, and why that combination gives you complete attribution coverage.
How the Adform web and server tags work together
The Adform tag for sGTM captures the Adform cookie ID from URL parameters on ad clicks. When a user clicks an Adform ad, the landing page URL includes identifiers such as adfcookieid. The server tag stores that value in a first-party adfuid cookie and later uses it to attribute conversions.
View-through conversions work differently. The user sees an ad, doesn’t click, and later converts. There is no click, so the cookie ID never appears in the URL. The sGTM tag has nothing to store, and those conversions would be lost if you relied on URL parameters alone.
The Adform Cookie Retrieval Script tag in the web container closes that gap. It acts as a safeguard:
- 1.The tag checks the page URL (and referrer) for the cookie ID and, if present, saves it as a first-party
adfuidcookie. - 2.If the query parameter is absent, it checks whether the
adfuidcookie is already present in the browser. - 3.If that ID is absent as well, the tag falls back to Adform’s cookie serving script and retrieves the ID from Adform’s third-party cookies and stores the result as the first-party
adfuidcookie. - 4.From there, the sGTM Adform tag picks up the first-party cookie directly from the request headers. Click-through conversions continue to be tracked through the URL, while view-through conversions are captured by the sGTM tag. Working hand in hand, the two tags ensure complete attribution coverage for every conversion path.
Key advantages of using the Adform tags
Using the Adform tag inside server Google Tag Manager with the Adform Cookie Retrieval Script in the web container helps you track conversions with more accuracy and less hassle.
Here’s what you get when you move this setup to the server:
- Complete attribution. Click-through conversions are tied to
adfcookieidin the URL. View-through conversions are recovered by the web tag and stored as the same first-partyadfuidcookie. The sGTM tag reads that cookie from the request headers so both paths are attributed. - More durable identifiers. Saving the Adform cookie ID in a first-party cookie means conversions can still be matched later, even when the original click parameter is gone and third-party cookies are restricted.
- More complete conversion data. The TrackEvent tag lets you send custom values like order ID, revenue, and currency straight to Adform’s API without relying on what the browser collects.
- No code on your site. Tags run in the server container, not the browser, which means no extra scripts slowing down your site or risking being blocked by browser privacy tools.
- More control, less noise. You decide exactly what gets sent to Adform and when. No duplicates, no missing IDs, no guessing what worked.
This way, your campaign results reflect reality, not just what the browser felt like showing.
How to set up Adform tracking for sGTM
Before you begin
2. Send data to the server GTM container. The two most popular ways of sending data to sGTM are by setting server-side Google Analytic 4 and Data Tag/Data Client.
Testing
- 1.Open Preview mode in both the web and server containers and confirm the tags fire.
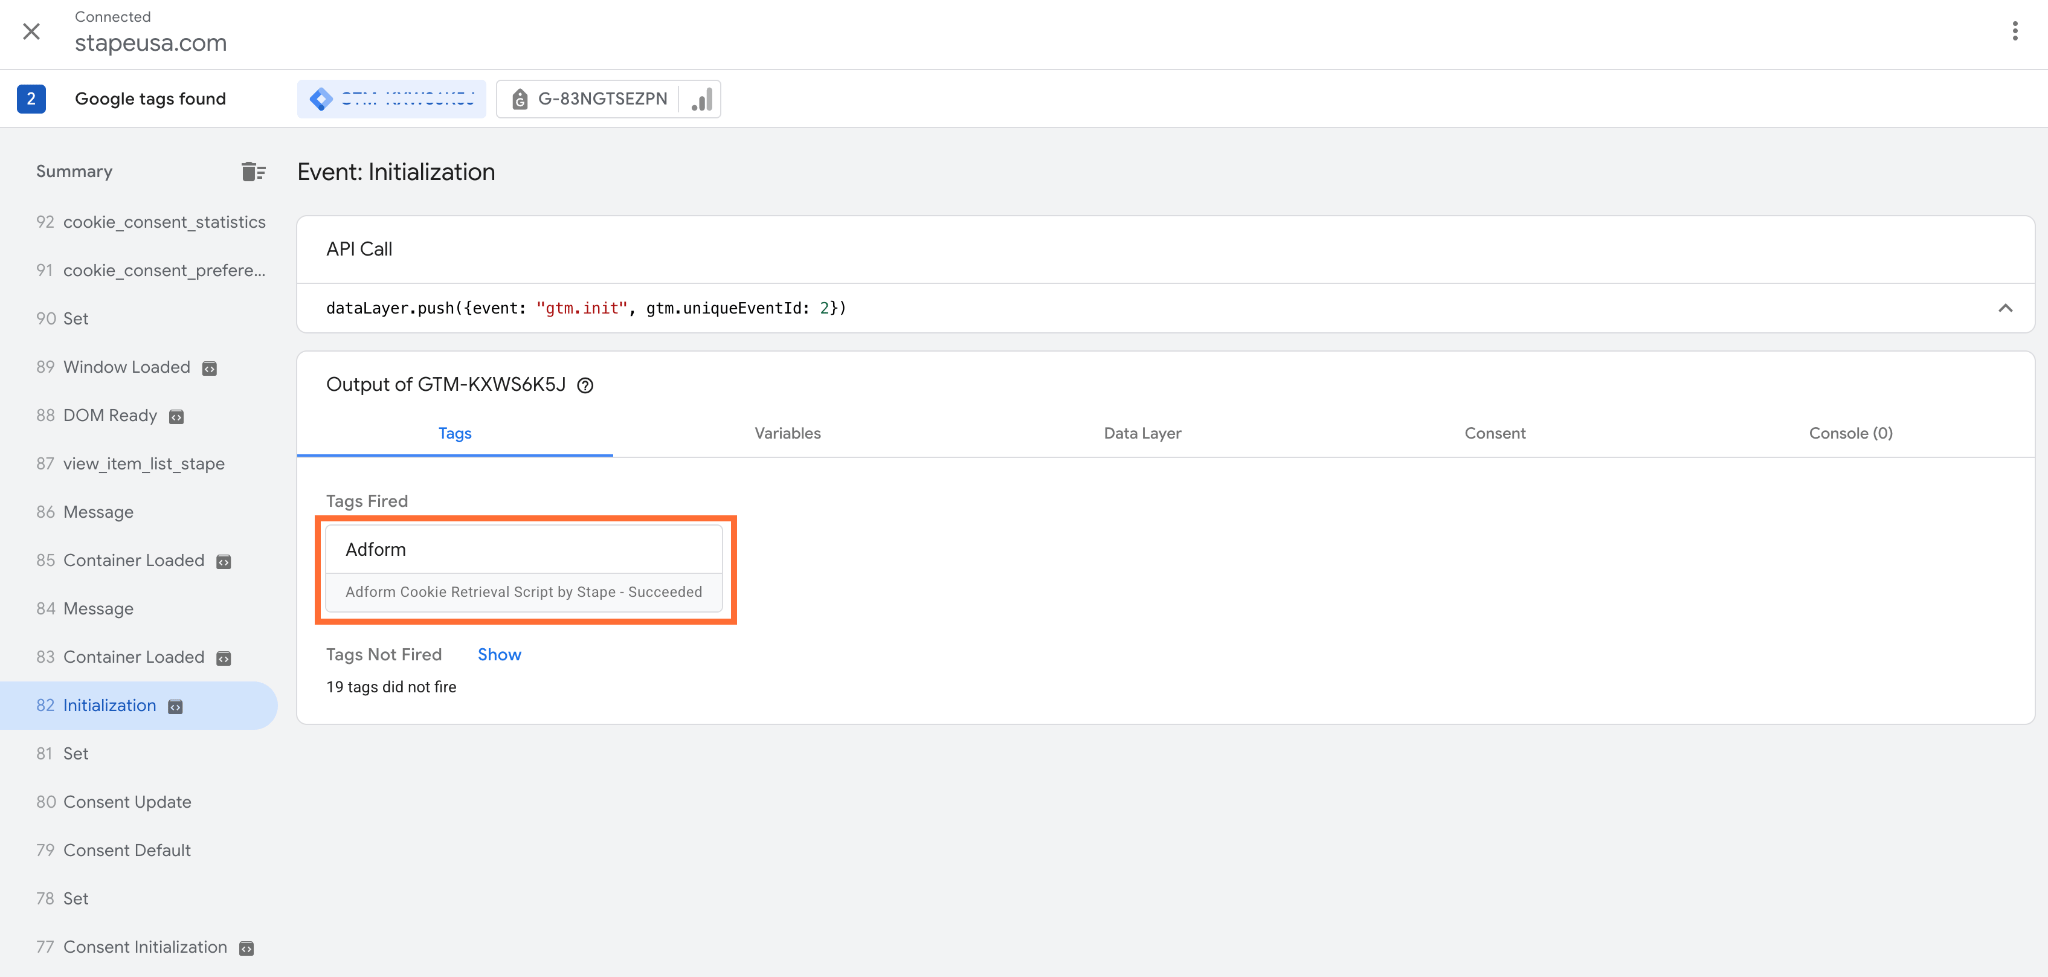
2. Open your test URL with valid Adform parameters attached. For example, https://example.com/?adfcookieid=123456789012345678&adfcd=123456.abcde.fghij In this case we’re simulating the scenario where the web tag checks the page URL for the cookie ID (adfcookieid) and, if present, saves it as a first-party adfuid cookie. After that the cookie value is passed to the server.
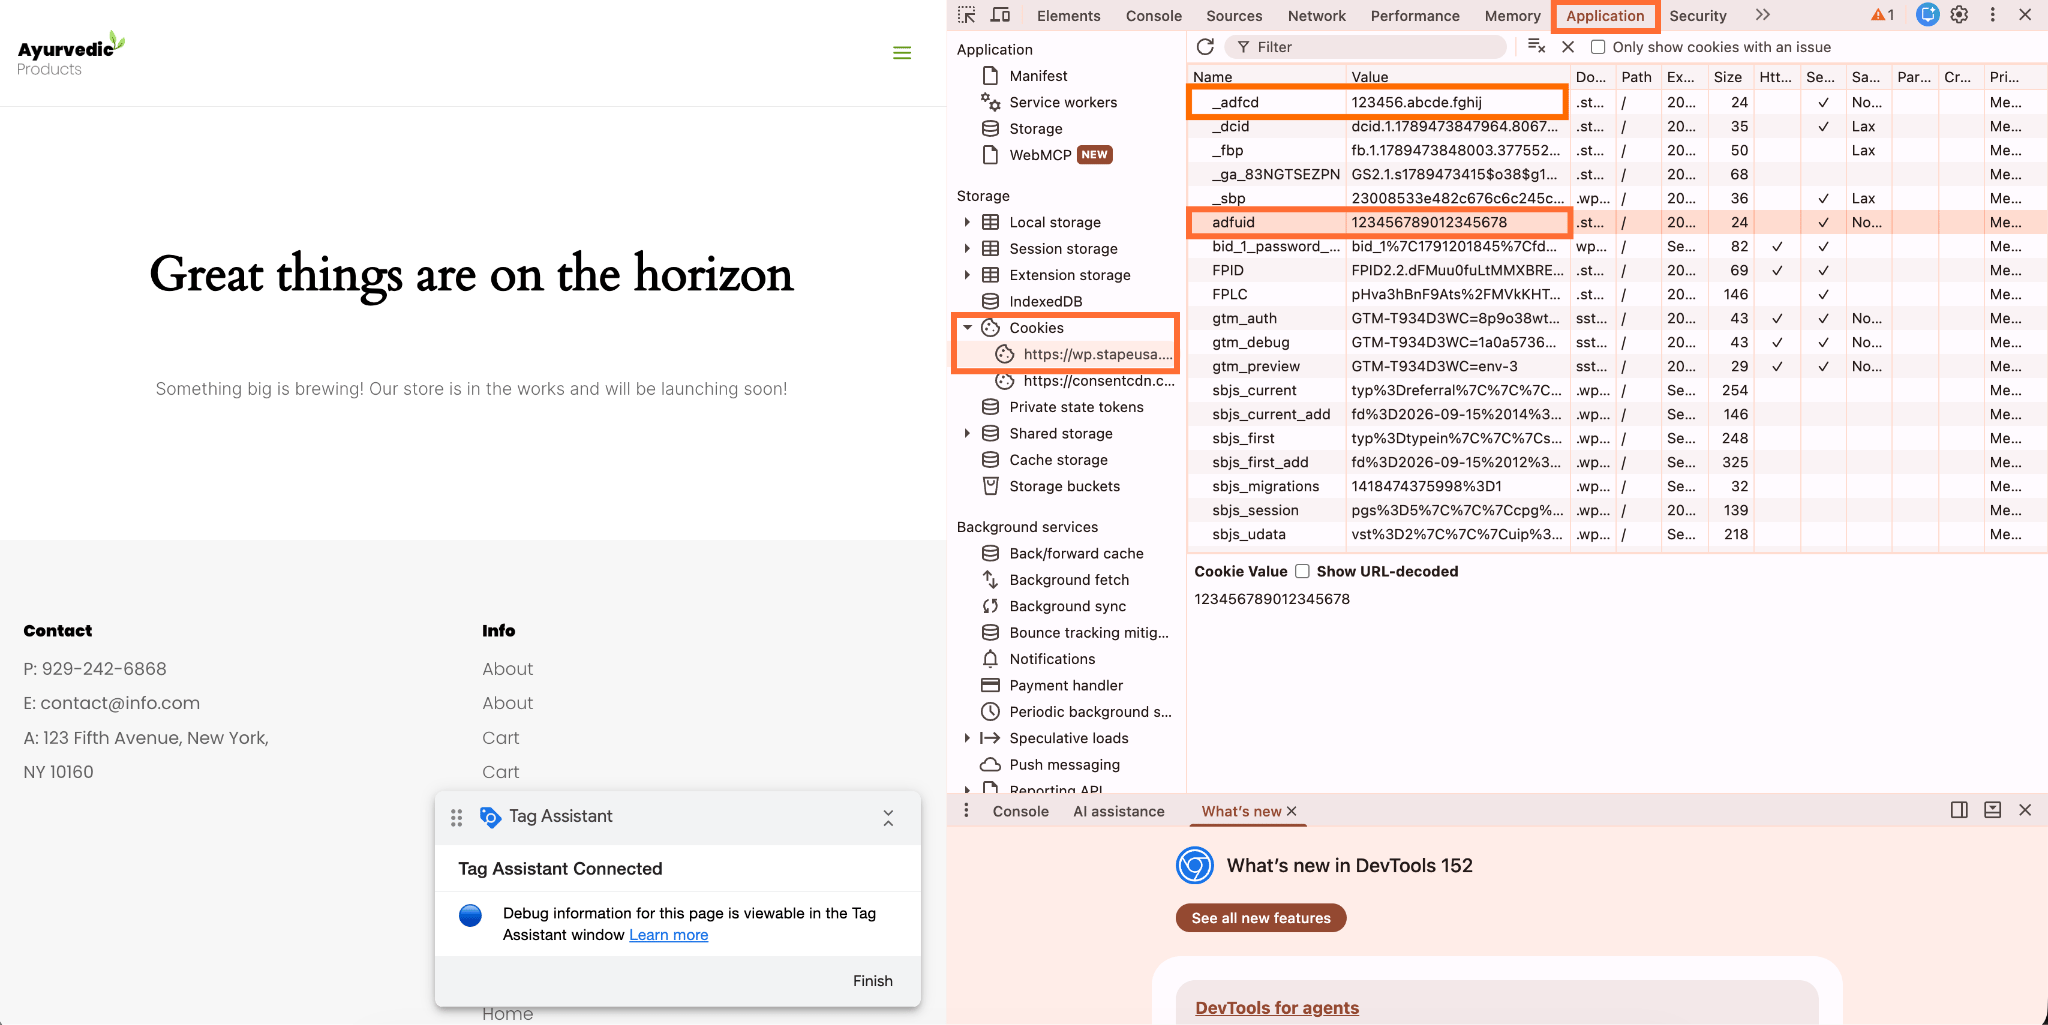
3. Go to Application → Storage → Cookies → your domain. Verify that the adfuid cookie is created with the value 123456789012345678. Verify that _adfcd is created with 123456.abcde.fghij.
4. Do some actions on the site to trigger the events.
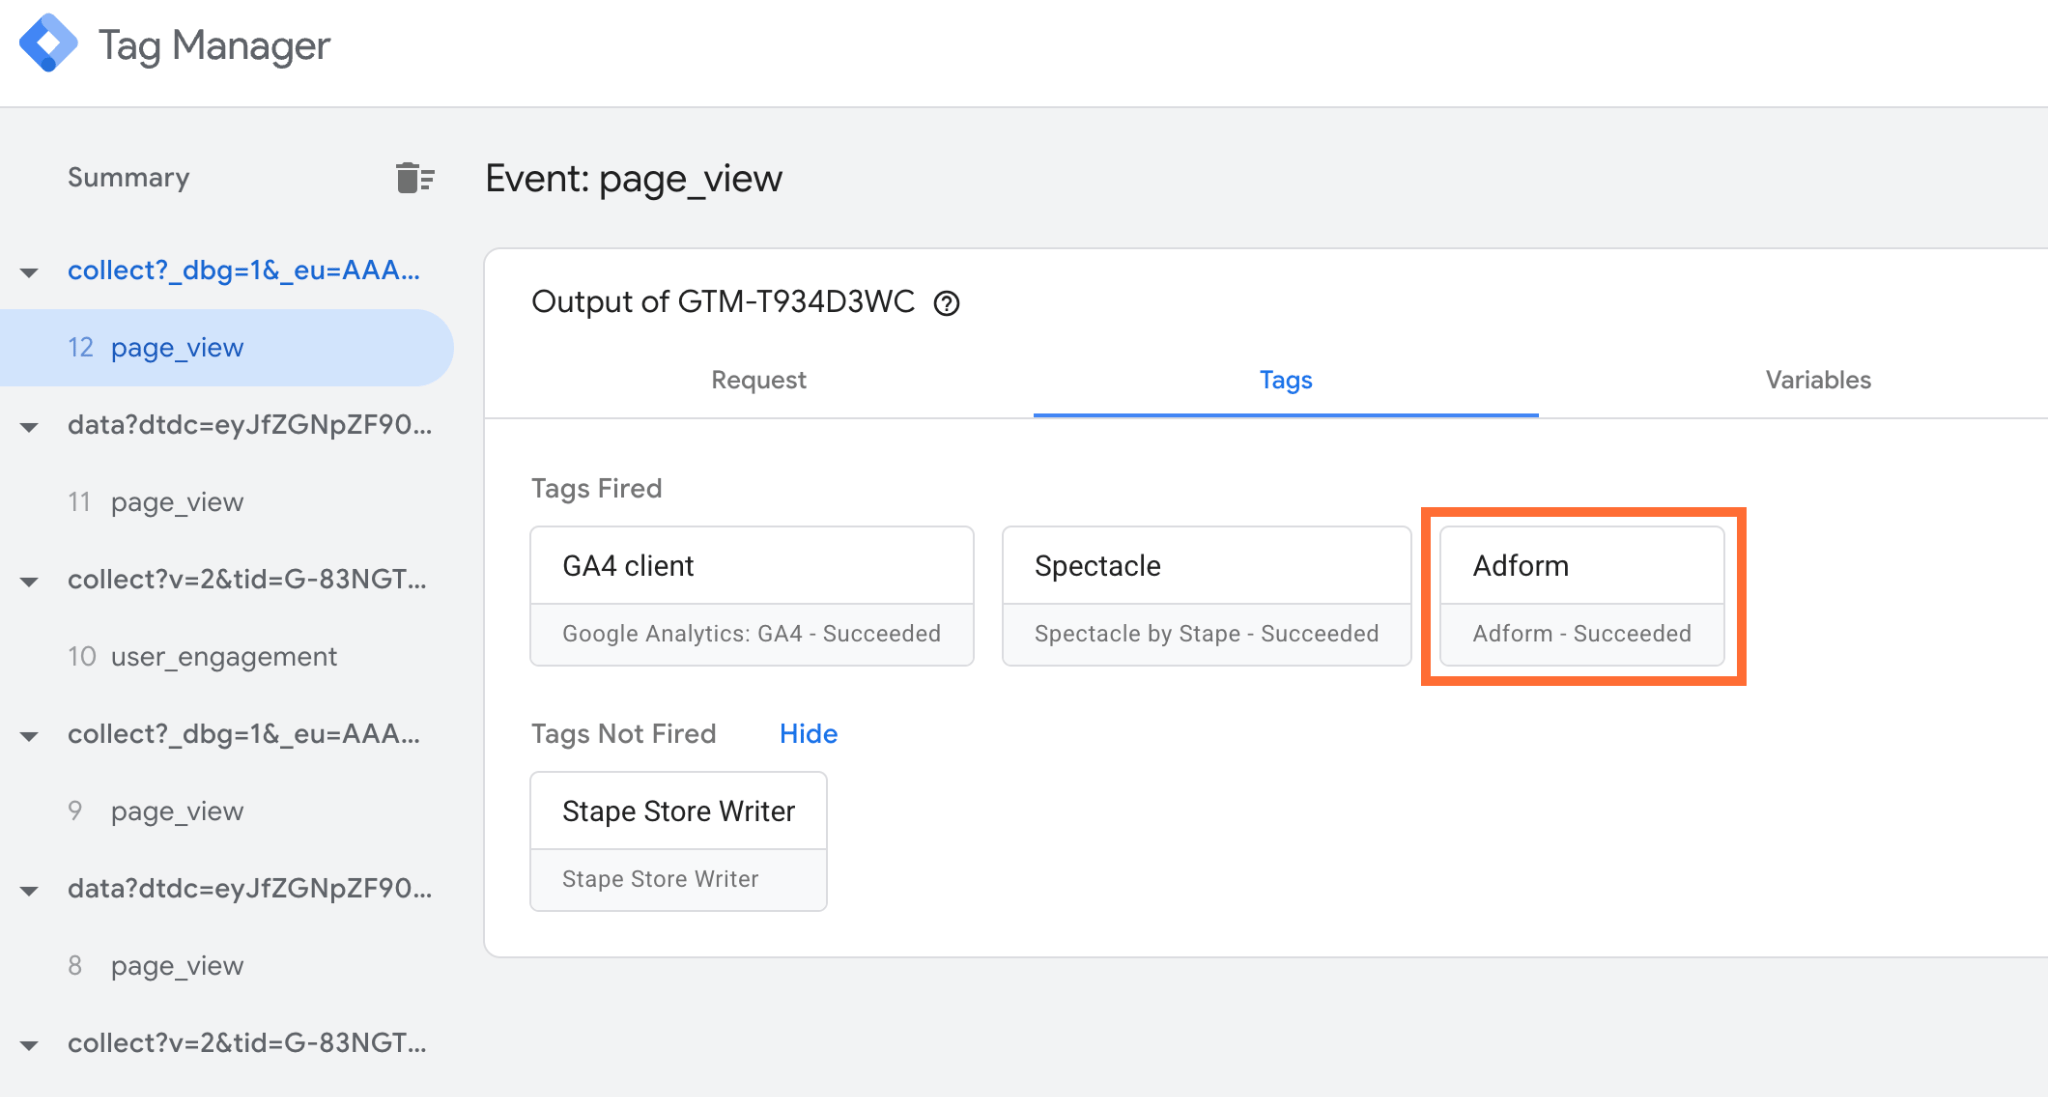
5. In sGTM preview, confirm the Adform tag fires successfully.
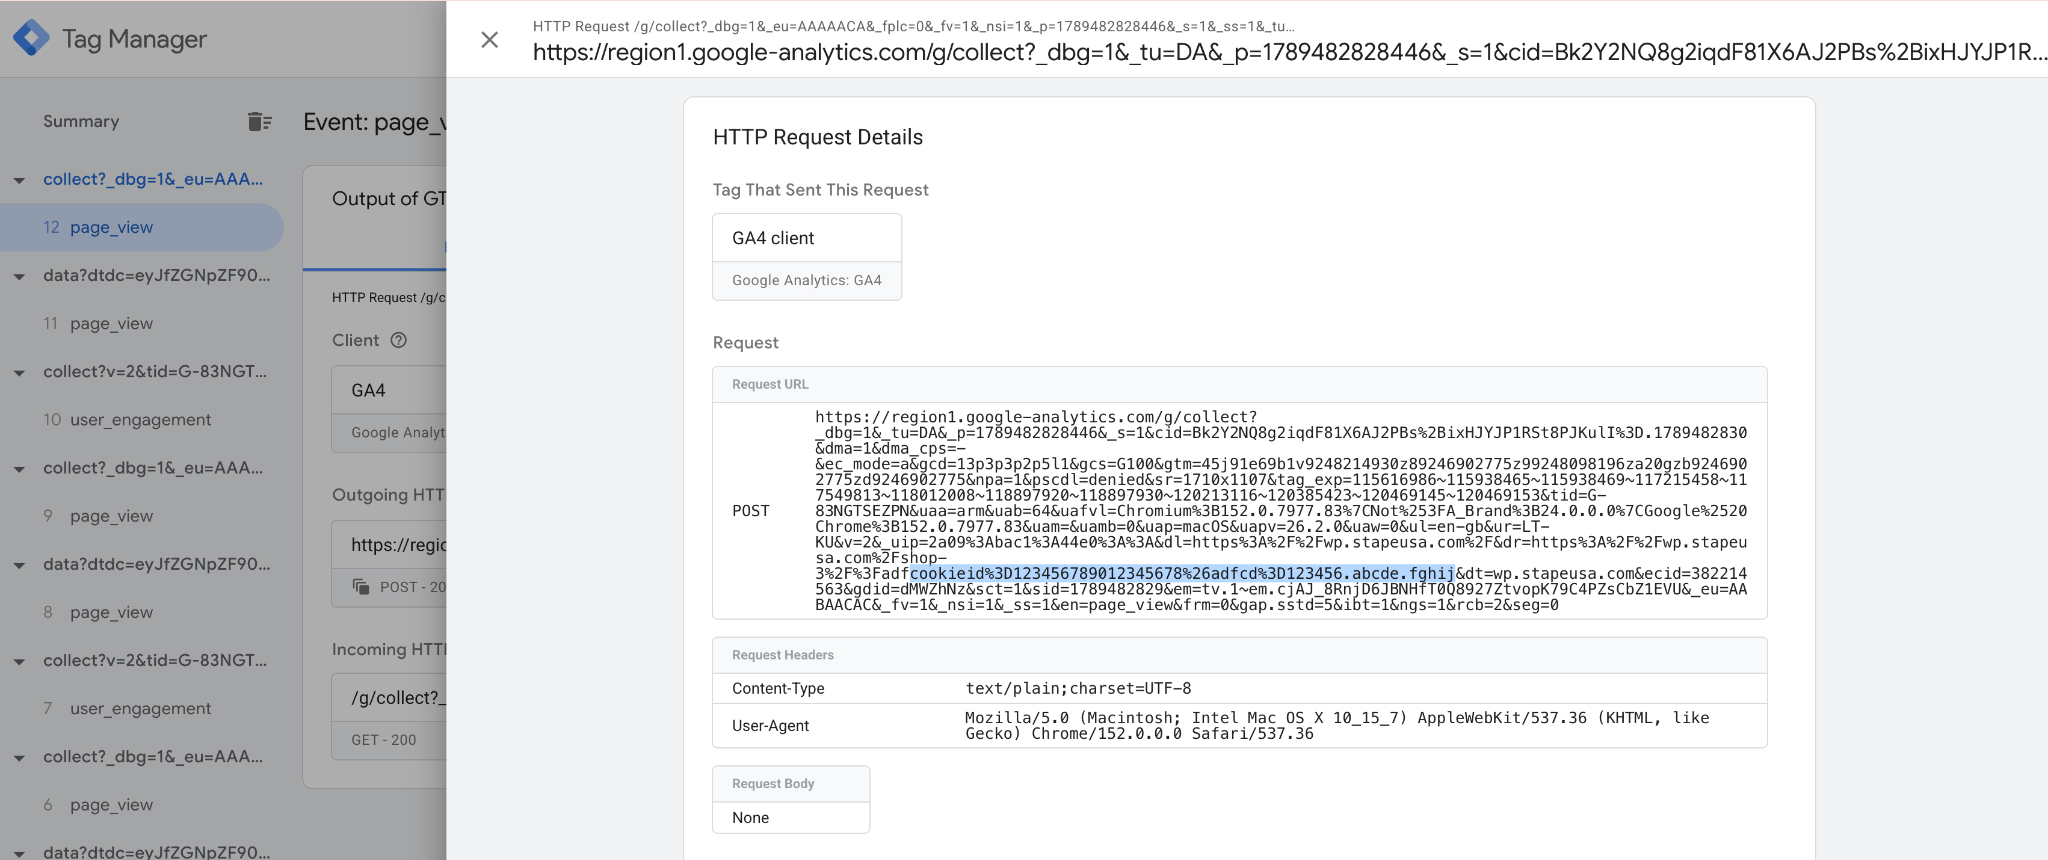
6. Open the Outgoing HTTP Requests tab and locate your forwarded cookie ID and click ID.
Conclusion
Moving your Adform tag to the server container is more than a technical change. This decision will make your conversion data cleaner and your tracking setup simpler.
The server tag captures Cookie IDs from ad clicks in the URL. The web Cookie Retrieval Script tag is the safeguard for everything the URL never contains: it stores a click ID when one is present, and otherwise retrieves the ID from Adform so view-through conversions can be attributed too. The sGTM tag reads the first-party adfuid cookie from the request headers in both cases, with no extra variable mapping in standard setups.
Instead of trying to fill the gaps caused by browser limits, you’re sending reliable signals directly from your cloud server – with a complete identifier, whether the user clicked the ad or only saw it.
If you use Adform in your ad strategy, this web + server setup gives you the precision and stability to get the most from it.
Want to start on the server side?
Try for freeRecommended for you
Jul 24, 2026
Blog
Guide to debugging and monitoring server-side tracking configuration
Learn how to debug server-side tracking with Stape’s tools, including sGTM Debugger, logs, and monitoring, to ensure accurate and efficient data tracking.
Aug 21, 2026

Comments