Matomo server-side tracking guide
Ivanna Holubovska
AuthorMatomo is an open-source web analytics platform for tracking and analyzing website traffic, user behavior, and conversions. It works much like Google Analytics, but with a stronger emphasis on data privacy, ownership, and compliance.
Matomo server-side tracking is a method of collecting website analytics by sending data directly from your server to Matomo, instead of relying solely on browser-based (client-side) tracking. This approach enhances data accuracy, improves tracking reliability, even when users block cookies or JavaScript, and offers greater control over what data is collected and stored.
It works by capturing user interaction data - such as pageviews, events, and conversions - on the backend (via your server or a tag manager like Google Tag Manager server container) and then sending it to Matomo’s tracking endpoint. This minimizes data loss caused by ad blockers and aligns better with privacy regulations, making it an ideal solution for businesses that prioritize secure and compliant analytics.
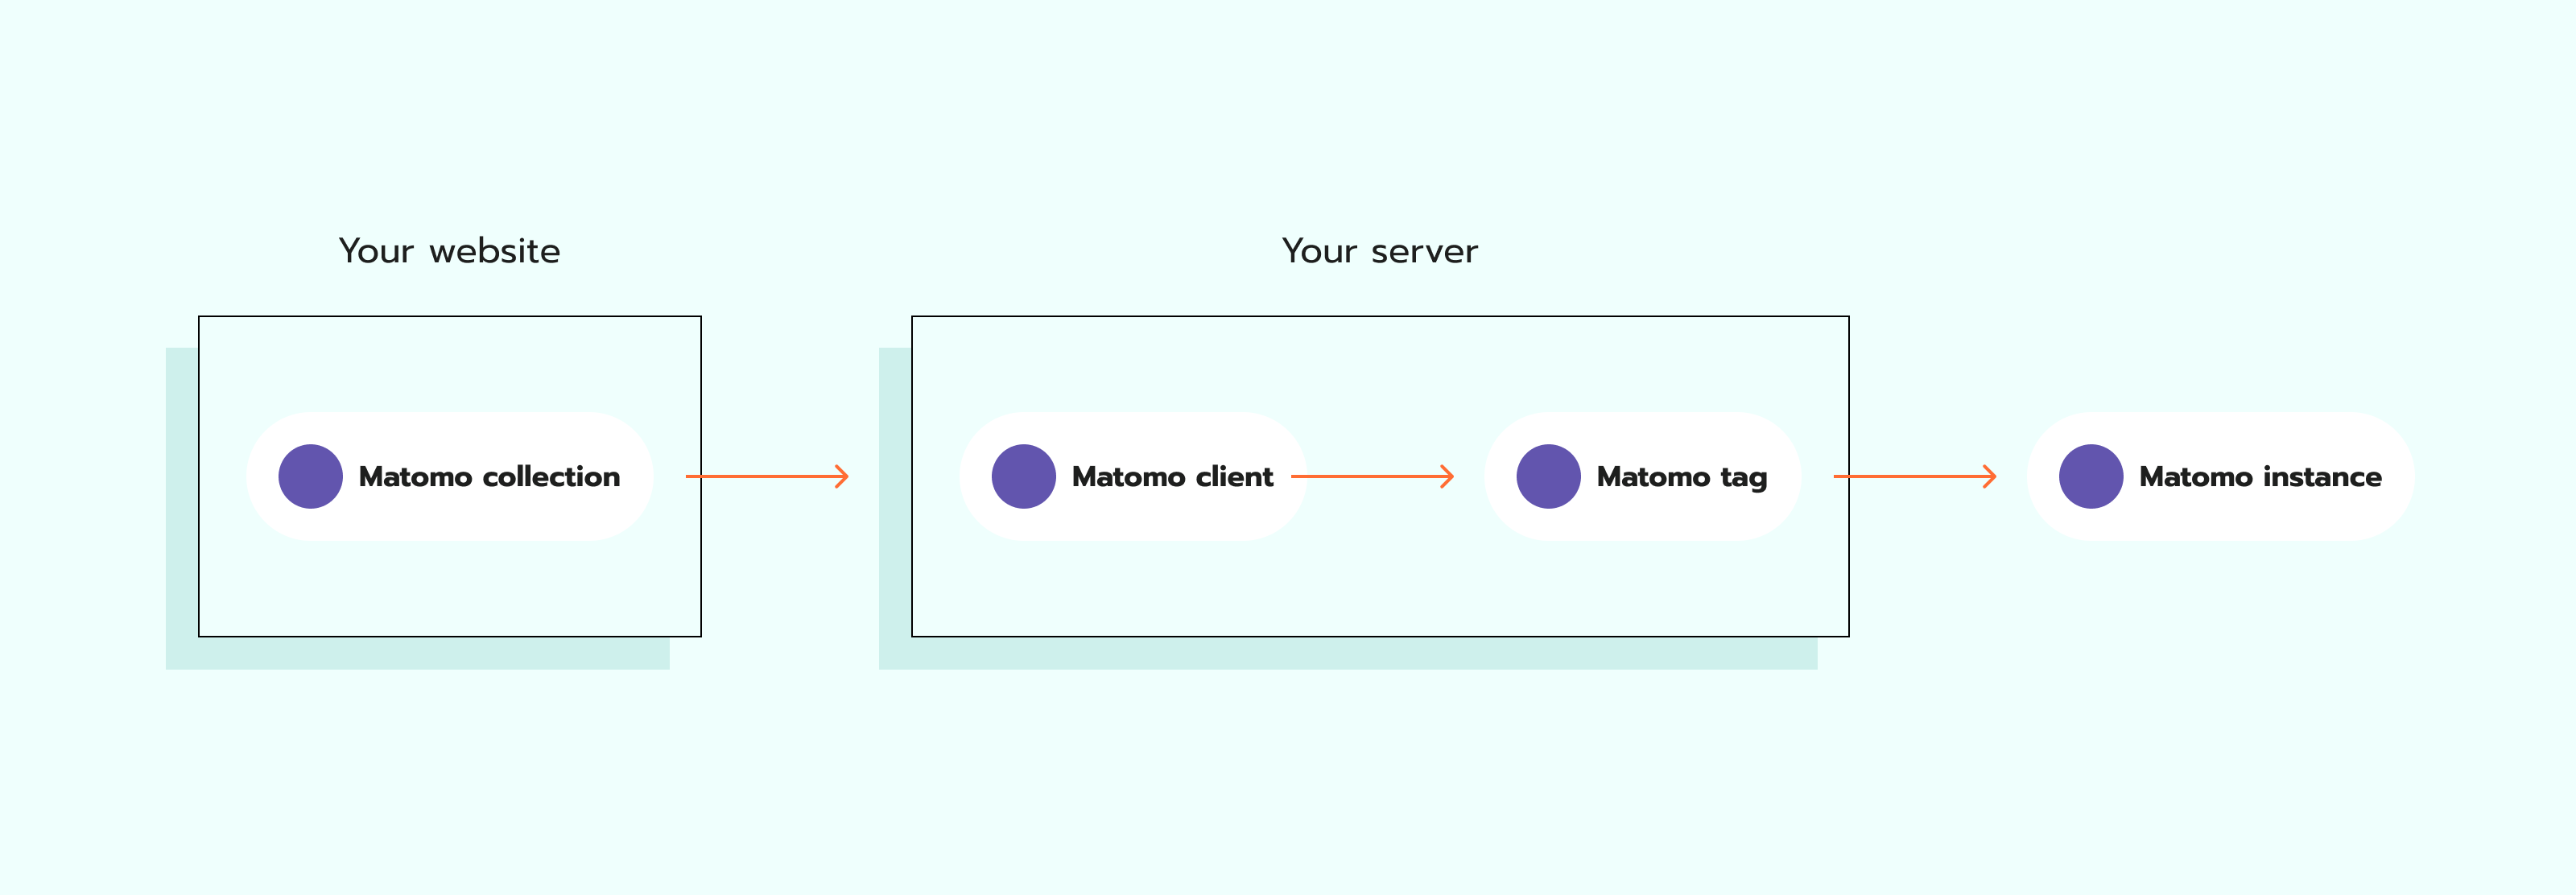
How Matomo server-side tag works
Using Matomo’s Tracking HTTP API, Stape’s Matomo tag sends HTTP requests to your Tracking URL with the data you've specified in the tag. Tag automatically parses event data in the server Google Tag Manager container and tries to map it to standard events or e-commerce tracking. If any event or other parameters are manually specified in the tag settings, the tag will prioritize these parameters.
Event set-up methods:
- Inherit from client. The tag will automatically parse event data and map available data.
- Custom. With the help of this method, you can track pageviews and other custom events by adding event category, event action, and event name.
Types of actions that server-side Matomo tag supports:
- pageview
- event tracking
- e-commerce tracking
Tracking URL - Tracking HTTP API endpoint, for example, https://your-matomo-domain.example/matomo.php
Matomo site ID - The ID of the website you want to set up tracking for. To find the tracking ID click on the gear button in the top right corner, click Websites, then manage and you will find the site ID in Manage Measurables table.
Auth token - AuthToken is used to set the correct IP Address. Available In Matomo under Settings > Personal > Security > Auth Token. Optional (if it isn't set, the IP & Region displayed in Matomo will be incorrect).
Enable E-commerce Tracking - tag will try to map ecommerce data.
Use Optimistic Scenario - The tag will call gtmOnSuccess() without waiting for a response from the API.
Event Parameters - here, you can specify which parameters you want to override.
Request Headers - add the request headers name and value you want to add to the Matomo requests.
Logs Settings - Specify whether the tag should write to the logs to stape.
Benefits of server-side tracking for Matomo
Here’s a list of the benefits of server-side tracking for Matomo:
- ✅ Improved data accuracy – reduces data loss caused by ad blockers, ITP, and JavaScript issues.
- ✅ Better privacy compliance – gives you full control over what data is collected and sent, making it easier to meet GDPR and other legal requirements.
- ✅ Full data ownership – ensures all analytics data remains on your server with no third-party involvement.
- ✅ Enhanced tracking reliability – server-side events are less likely to be blocked or missed, ensuring more consistent reporting.
- ✅ Faster website performance – reduces the amount of client-side scripts running on your site, improving page load times.
- ✅ Custom integration options – easier to tailor tracking to your exact business logic and infrastructure.
- ✅ Scalable and secure – suitable for high-traffic websites and sensitive industries where data control is critical.
Ways of setting up tracking for Matomo
While competitors often describe two different methods for Matomo server-side tracking, Stape experts recommend focusing on one superior approach: using server-side Google Tag Manager. This method ensures the best combination of accuracy, flexibility, and proper support for Consent Mode V2 - especially when working with GA4, Google Ads, or Floodlight tags.
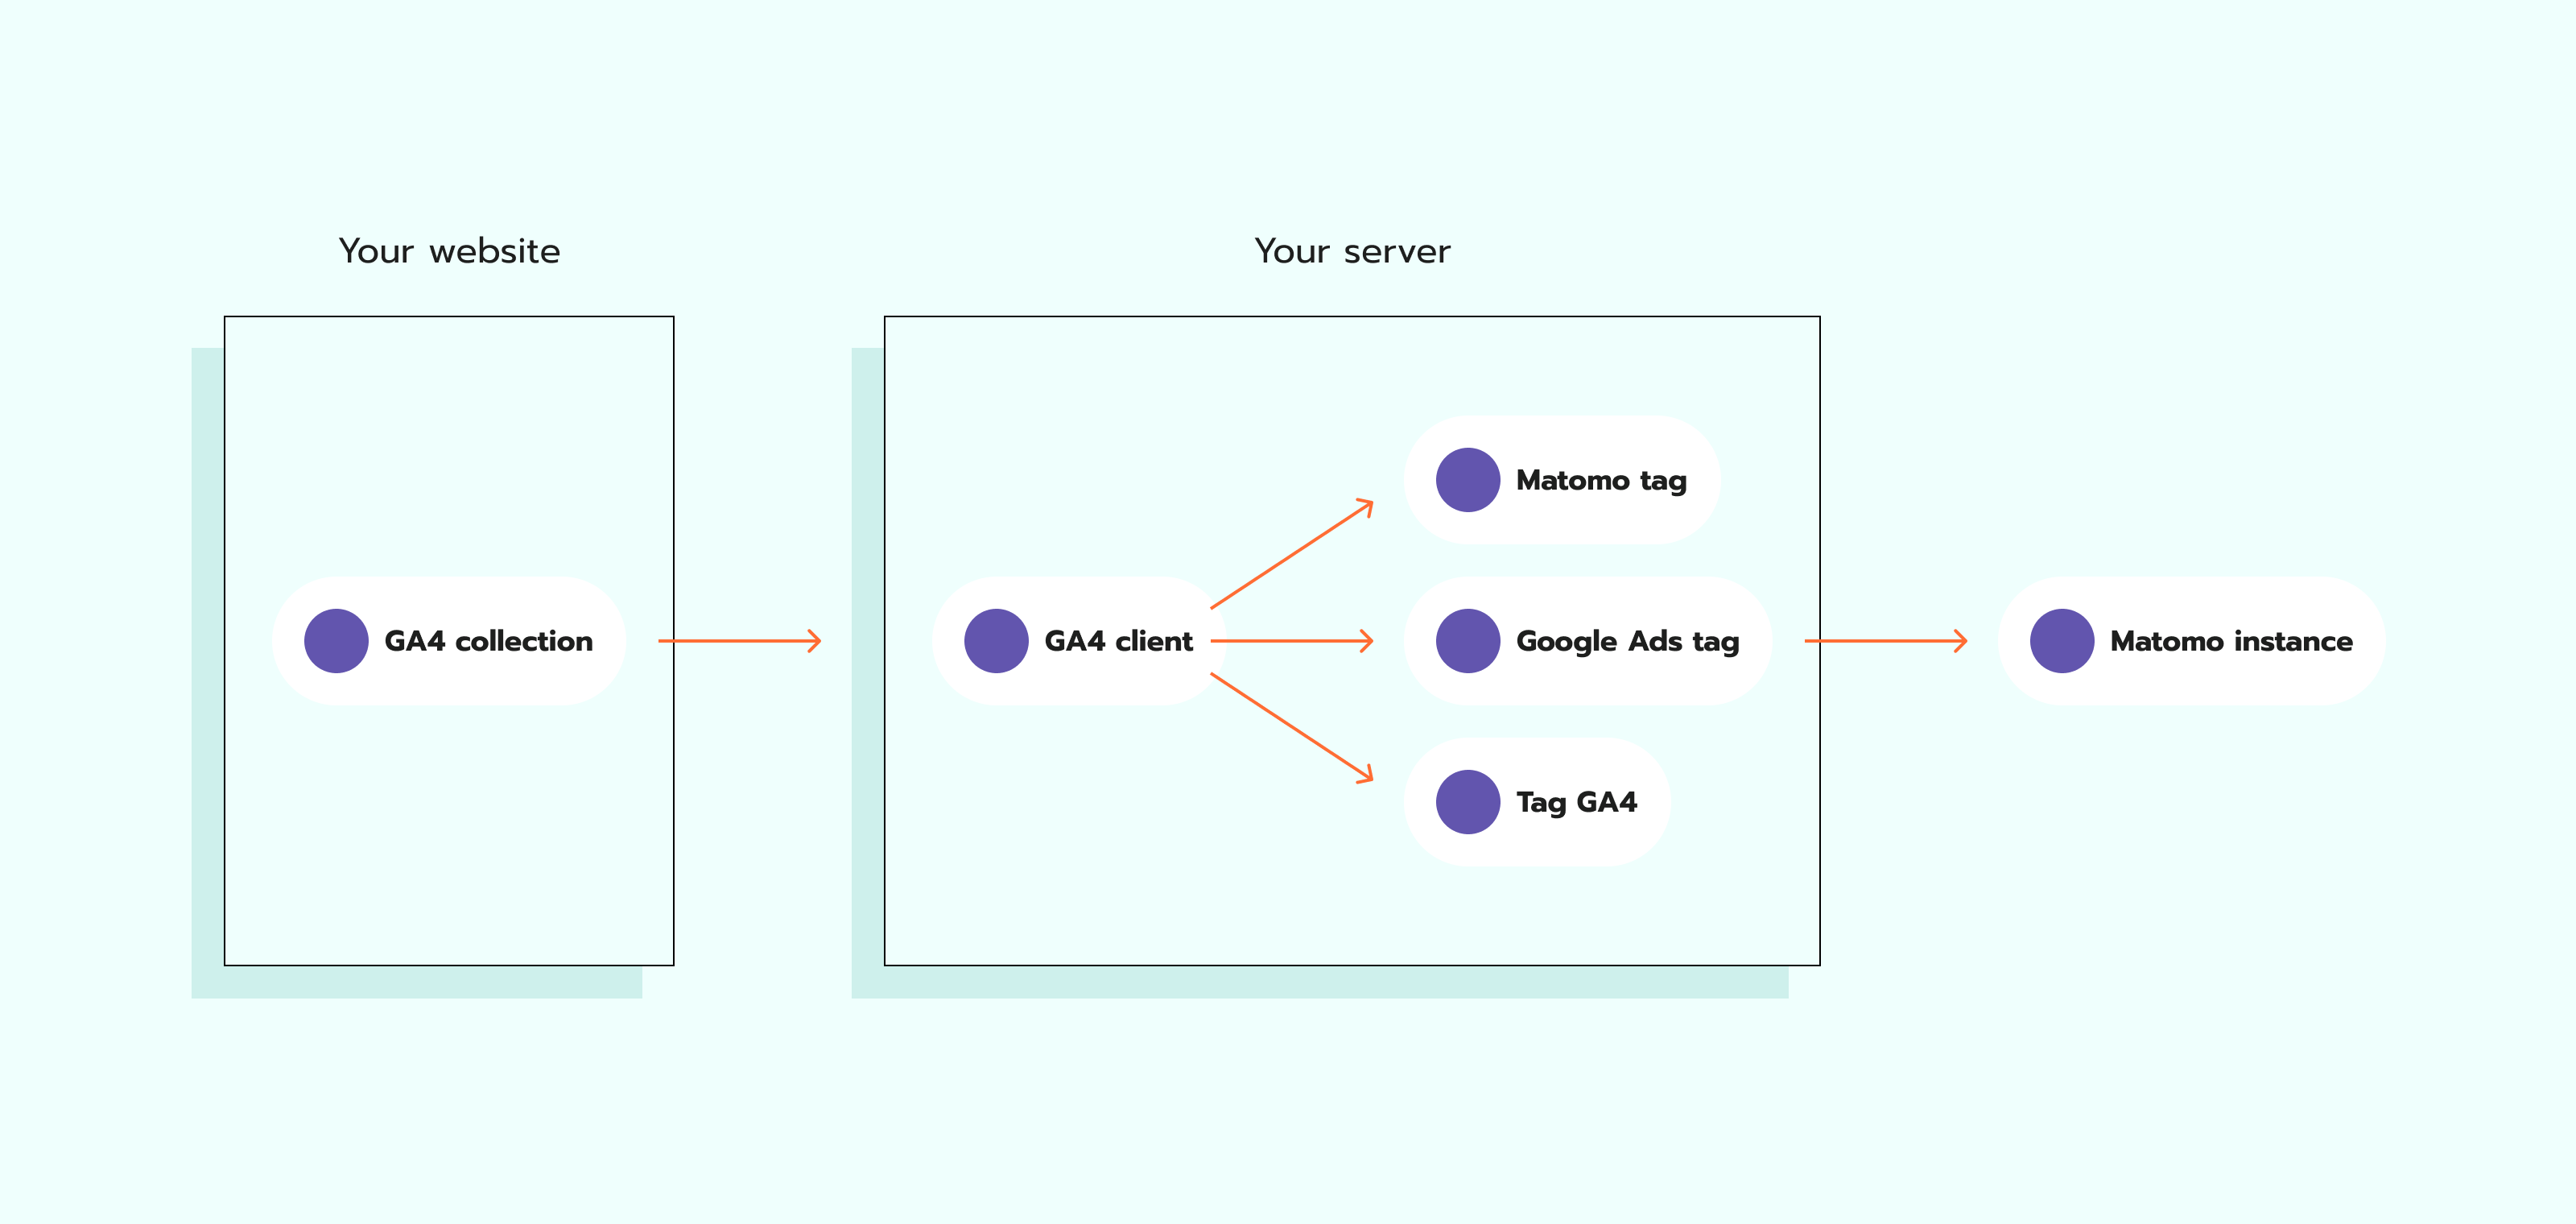
An alternative method, which involves sending data directly to Matomo without using Google tools, may suit simpler setups or those avoiding Google entirely. However, it lacks the robustness, integration capabilities, and consent management support that make the GTM-based solution the top choice for advanced and reliable tracking.
How to set up Matomo server-side tracking
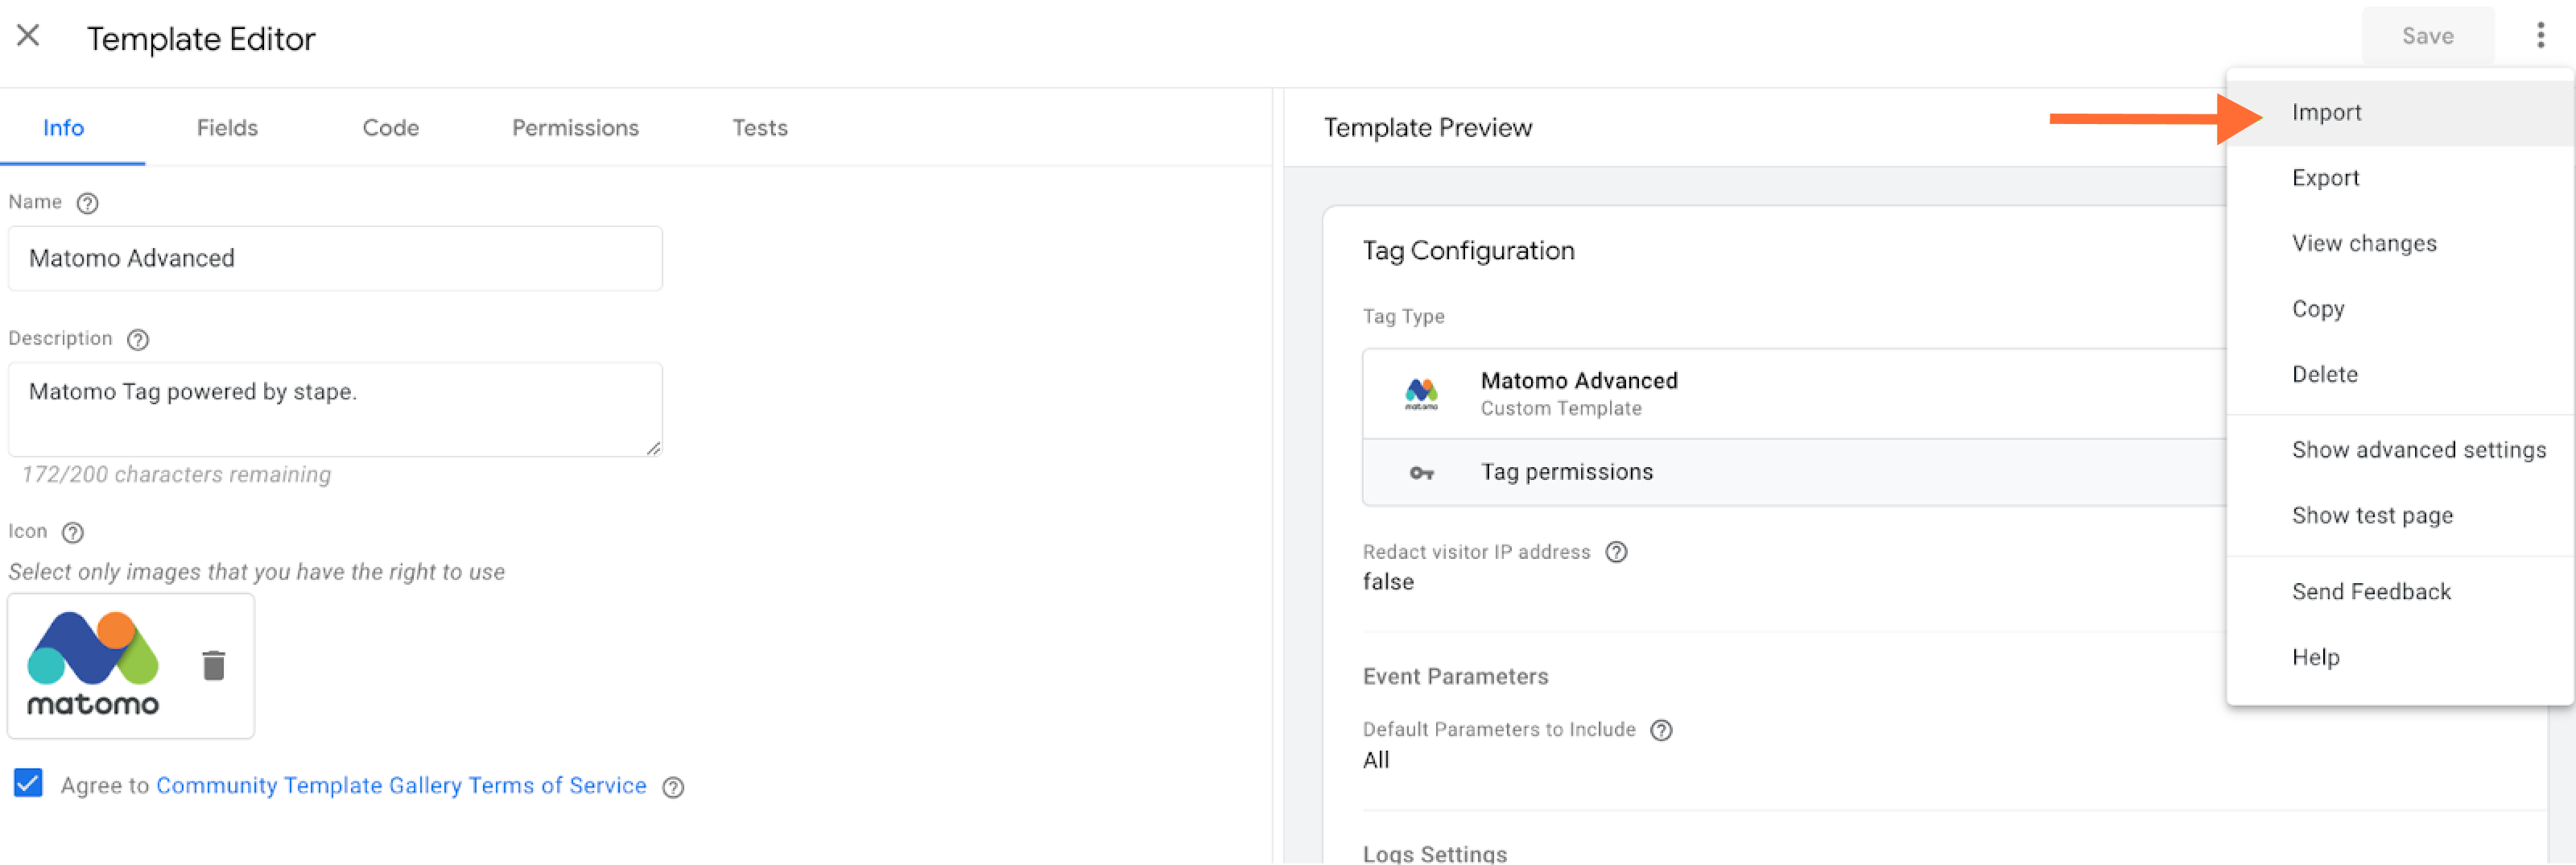
2. You can download it from GitHub or add it from the Template Gallery and add it to your server GTM container by opening the template tab, clicking new, clicking three dots in the top right corner, and clicking import.
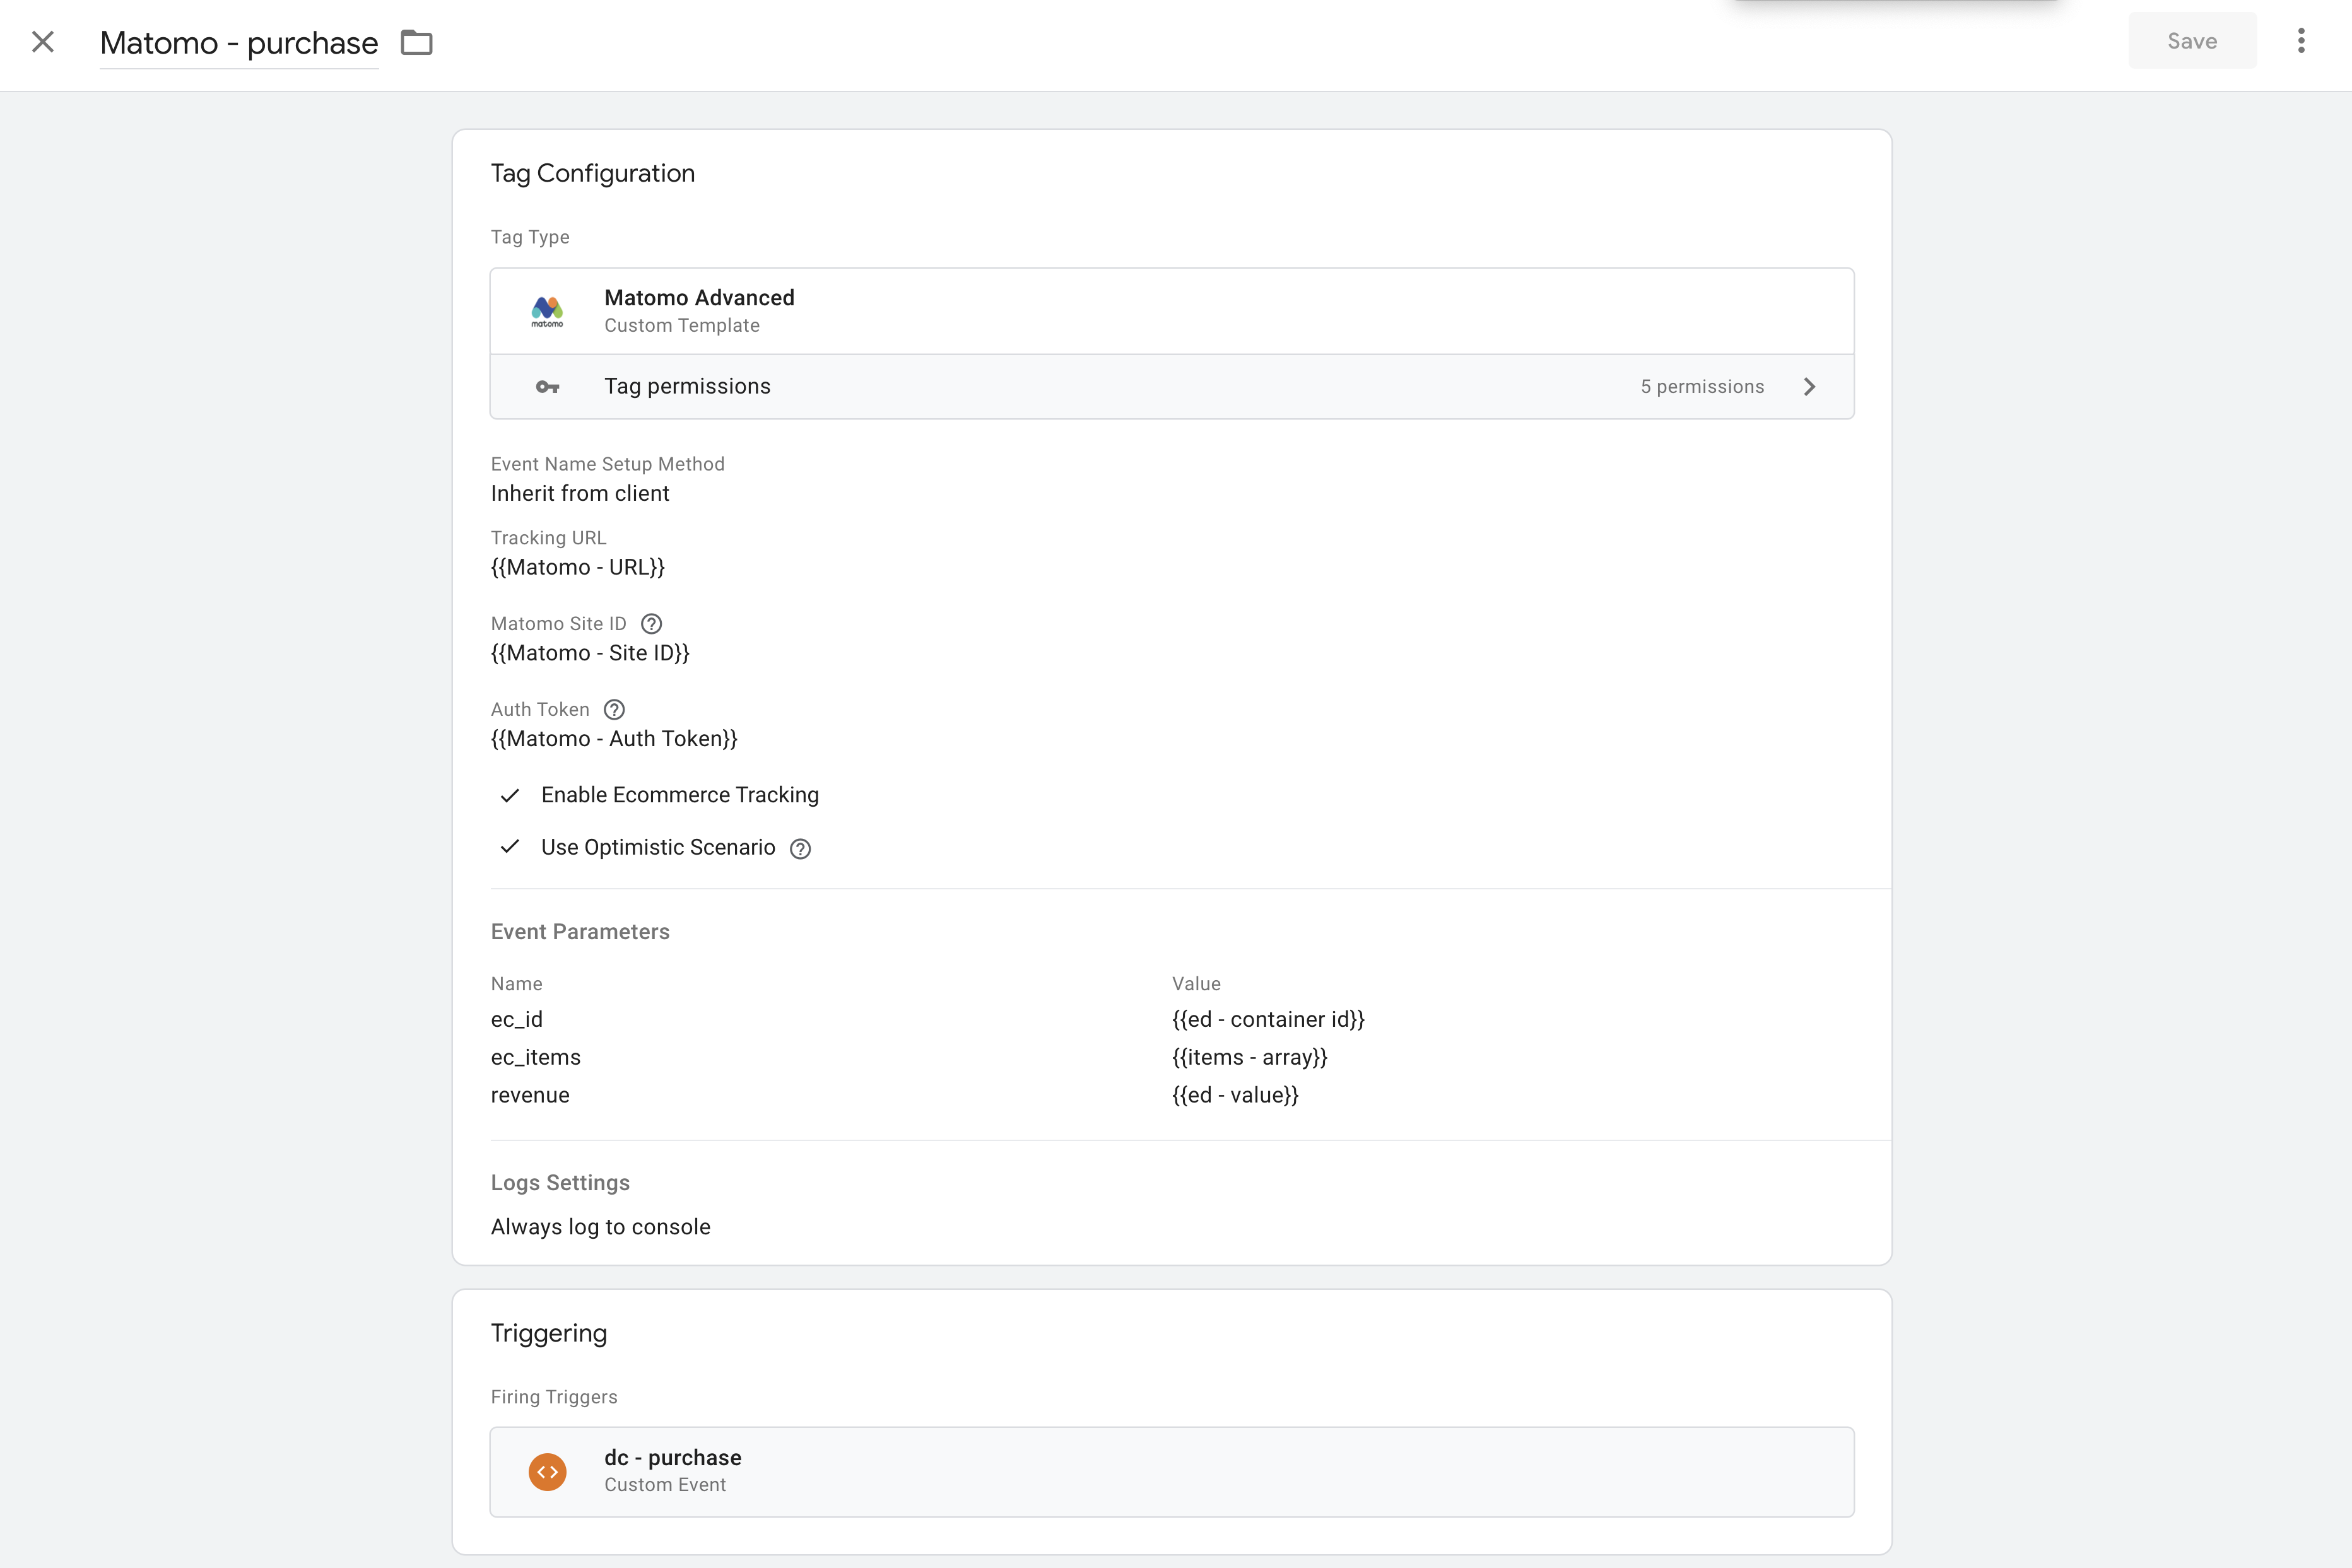
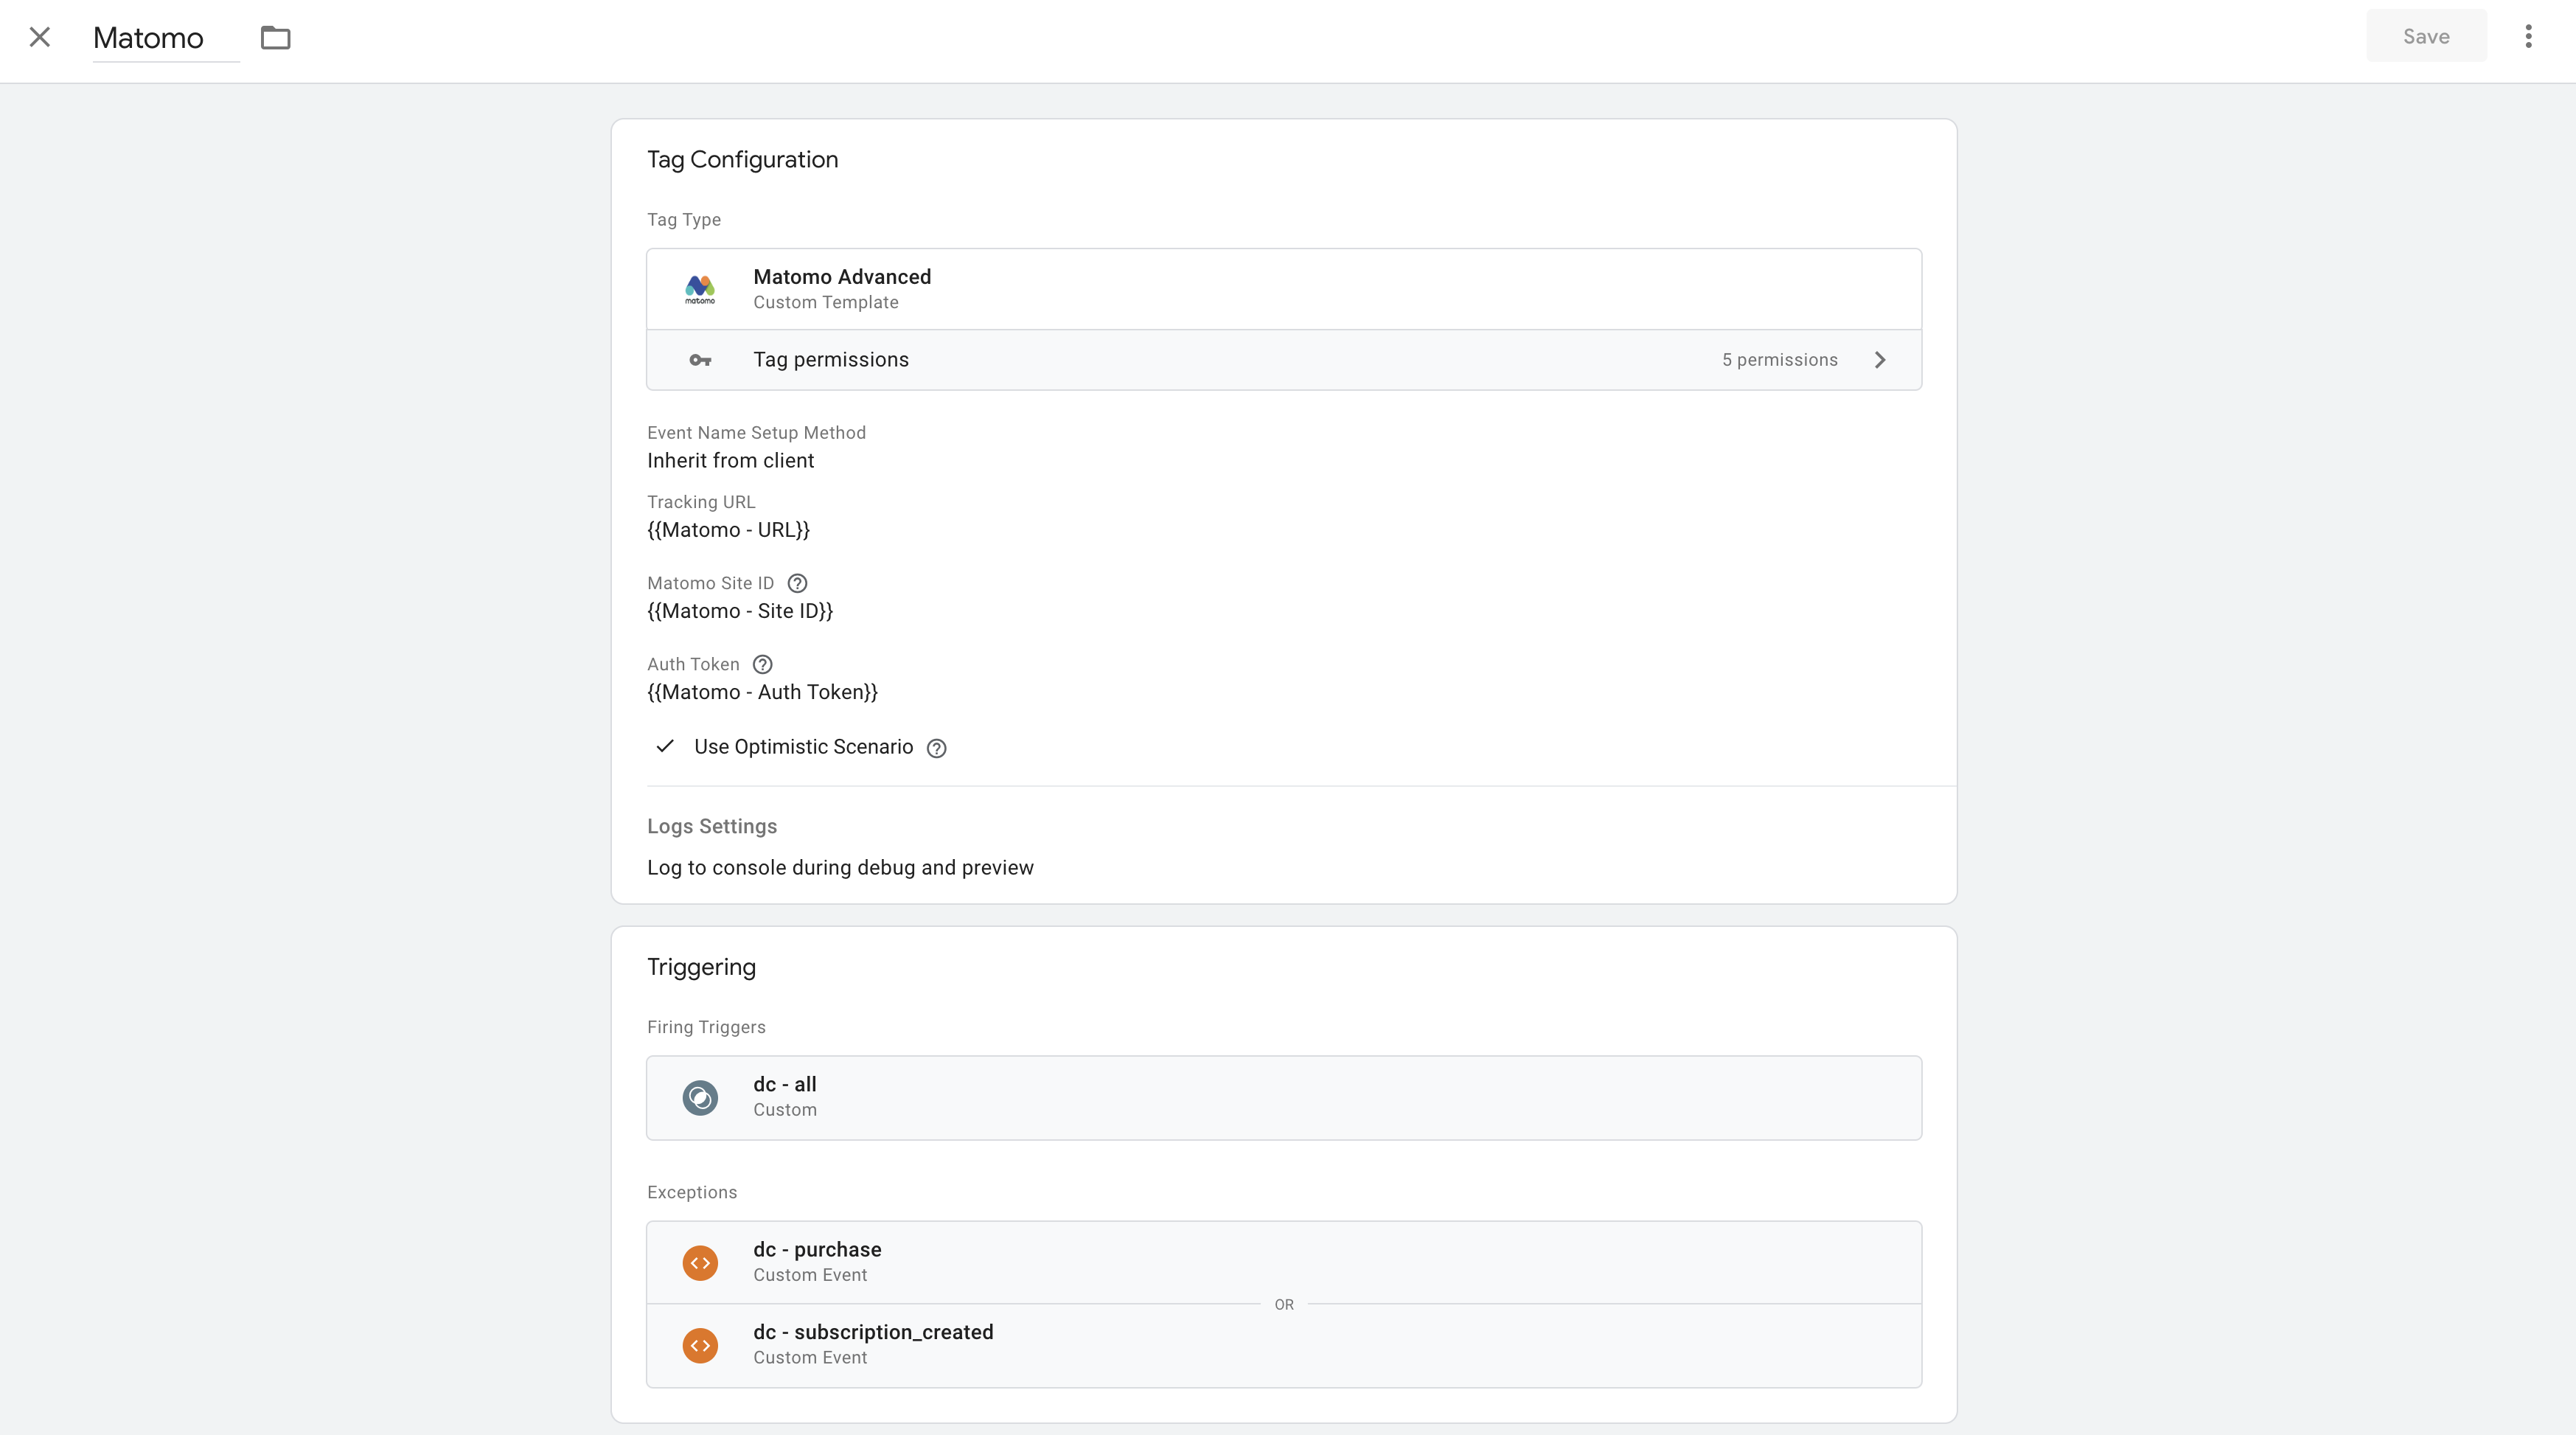
3. Create a Matomo tag and add the required fields: Tracking URL, Matomo site ID, and Auth token.
4. Add any parameter that you want to override. In my example, I want the Matomo tag automatically parse event data based on Data Client requests.
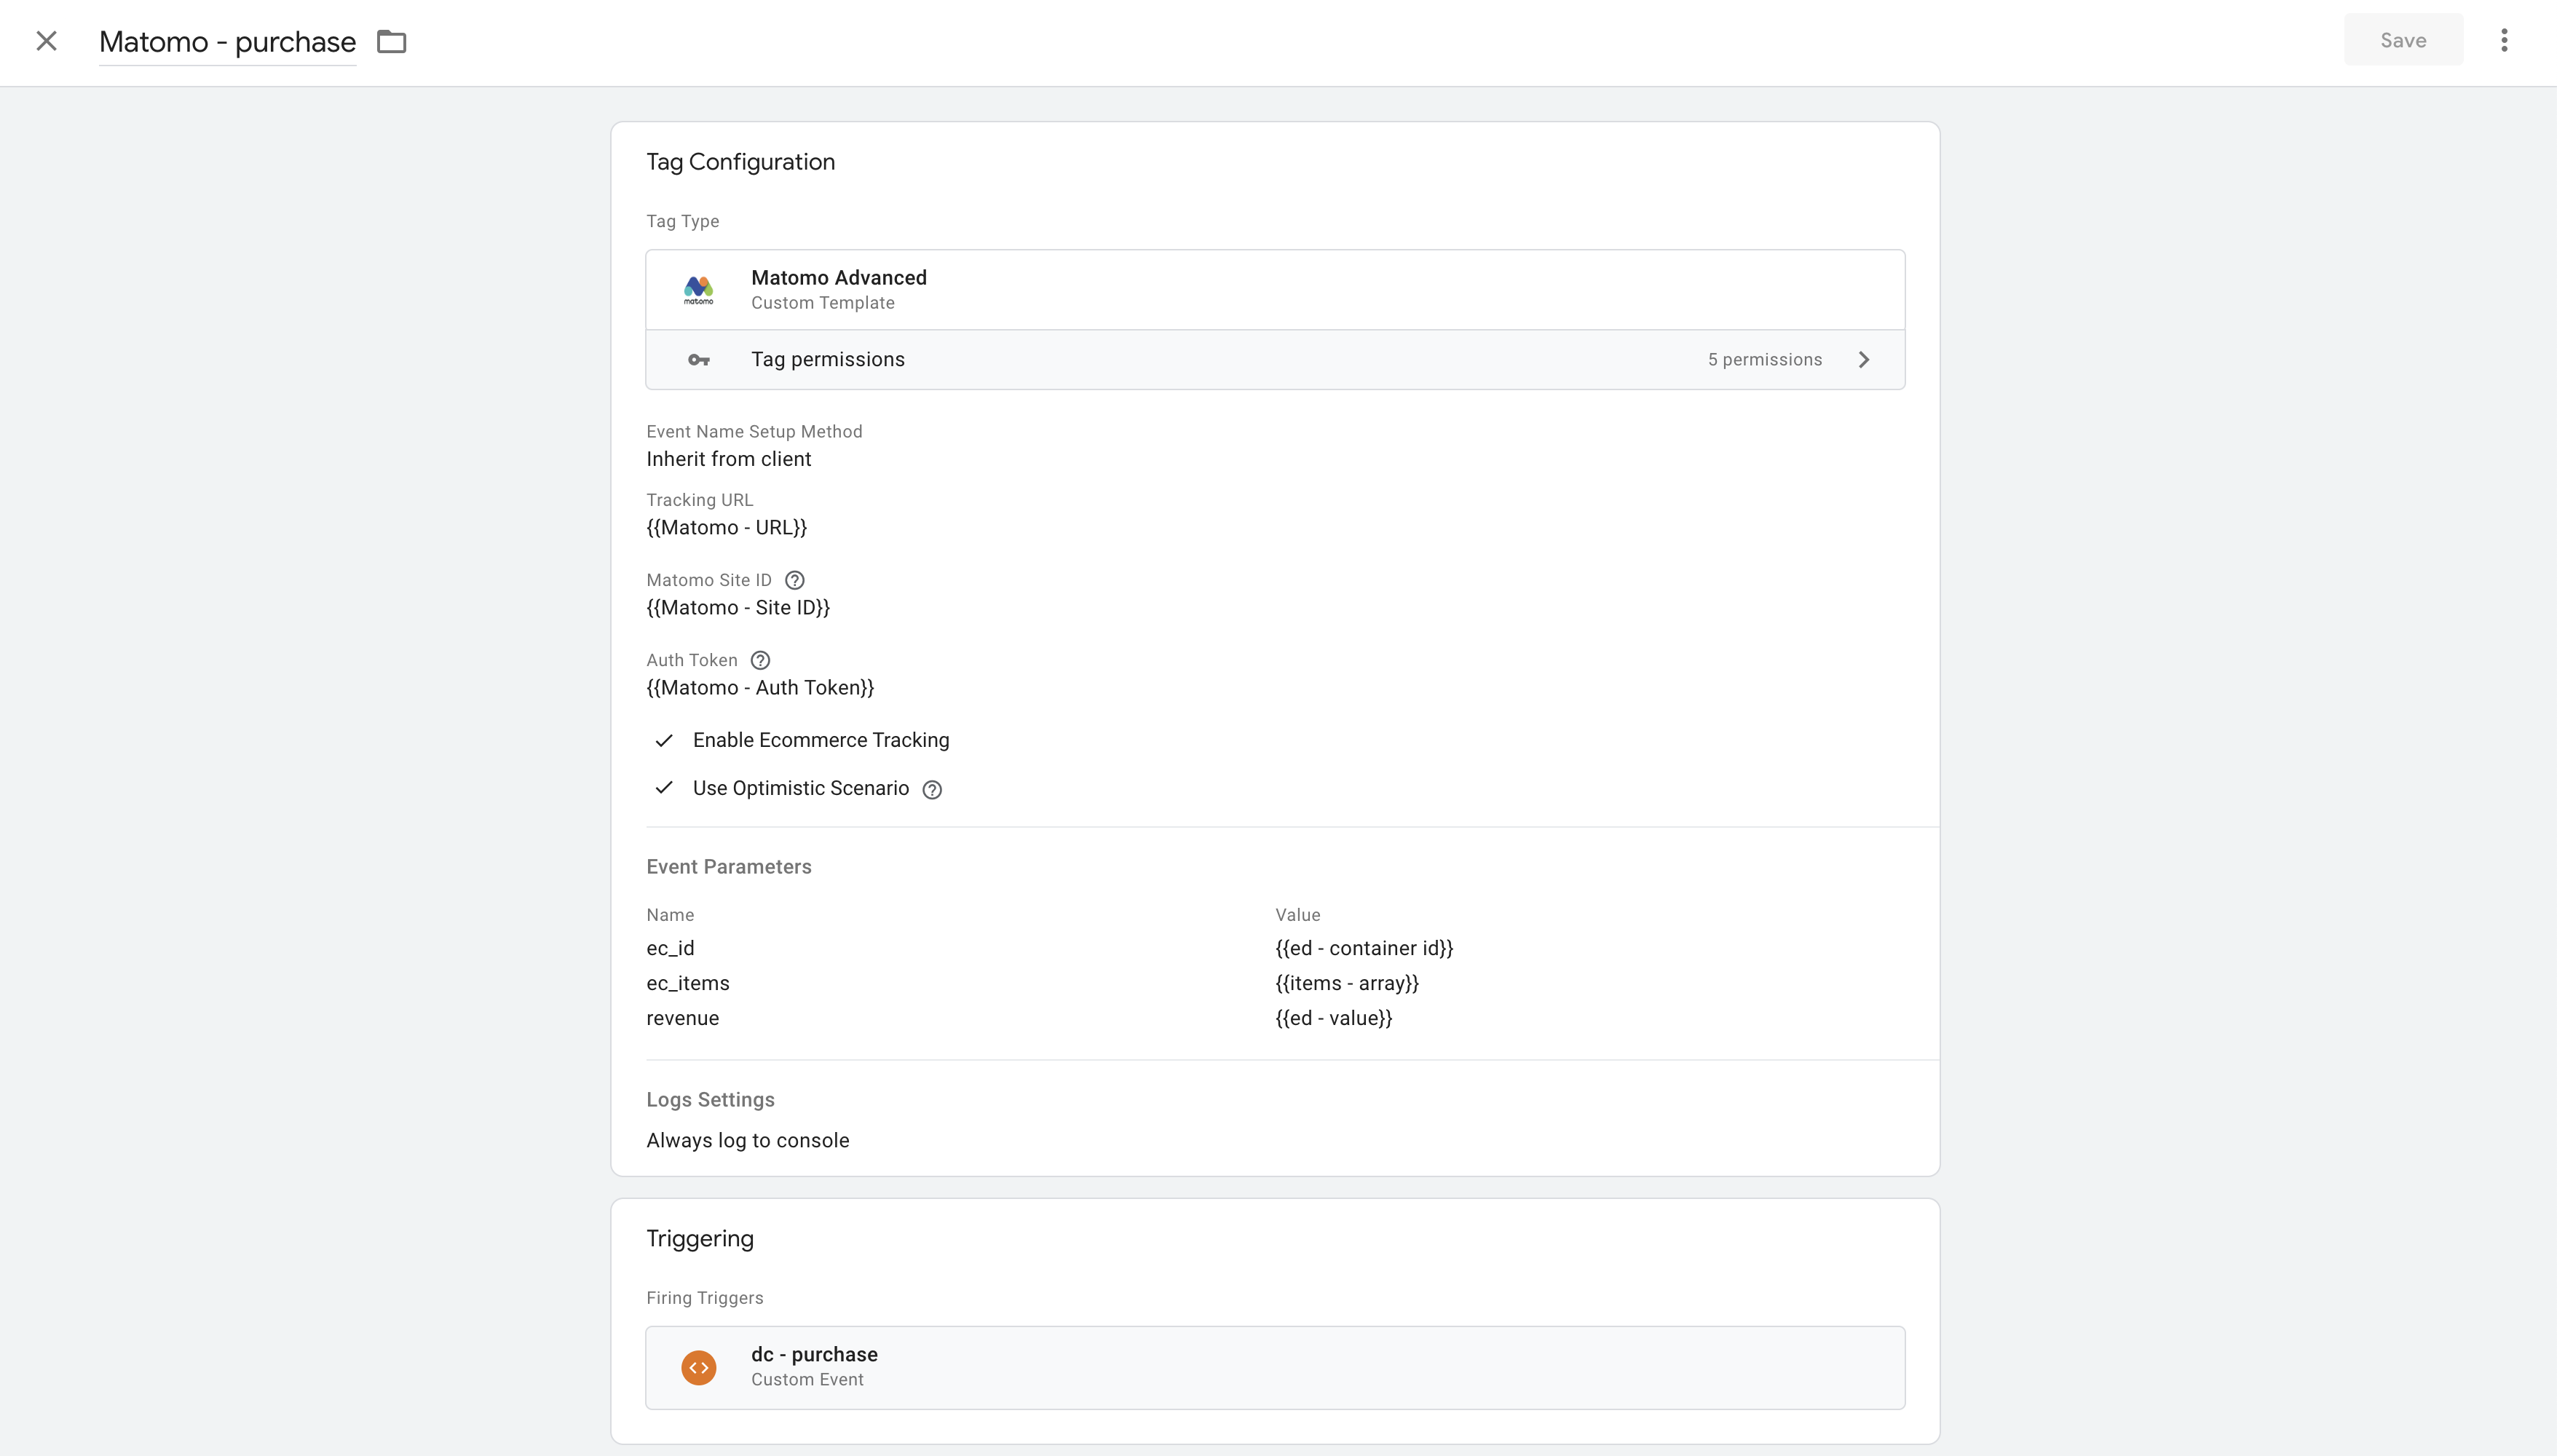
5. If you want to track e-commerce data using the Matomo tag, you will need to either turn on a checkbox "Enable e-commerce tracking" (in this case tag will try to parse event data and map it to Matomo e-commerce objects. Ensure that you have proper e-commerce data in the sGTM). Or you can manually set up e-commerce tracking by selecting the custom event setup method. Ensure to add required e-commerce parameters, which are &idgoal=0, transaction ID, items, revenue (idgoal, ec_id, ec_items, revenue). Pay attention to items parameter that should be in a format of a JSON-encoded array of items.
6. Add triggers to your tags and open debug mode in sGTM and Visits log (Visitors -> Visits Logs) in Matomo to verify the setup. You should see the tag triggered correctly in sGTM, and in the Visitors log, there should be records of any event or e-commerce order reported to server-side Matomo.


For now, there are two options to send performance settings in the request:
1. Make it available directly in eventData; the tag will automatically pass it.
2. You can override parameters by filling in the Event Parameters section of a tag.
Matomo server-side tracking: real Stape users’ problems solved
A user tested the advanced server-side Matomo template in Google Tag Manager and saw the tag fire in preview but fail with a 302 status code (full thread here). The cause wasn’t the GTM setup itself - it was a permissions issue in Matomo. The auth_token used belonged to a user with view-only access, which blocked server-side tracking requests. Once the user was given writepermissions, the 302 error disappeared and Matomo server-side tracking started working correctly.
Conclusion
In conclusion, integrating a Matomo Advanced tag into your server Google Tag Manager container facilitates enhanced analytics capabilities while preserving user privacy. This detailed walkthrough has demonstrated the ease of setup and the expansive features offered by the tag.
Implementing this setup allows for a seamless and efficient data collection process, eliminating the need for third-party data sharing and thus ensuring superior privacy compliance. If you have any questions, don’t hesitate to contact us!

Comments